The Pioneer Woman Tasty Kitchen
Profile photo of Erika (TK)

Meet Katie

Posted by in Meet the Member!

Tasty Kitchen Blog: Meet Katie of The Parsley Thief.

 
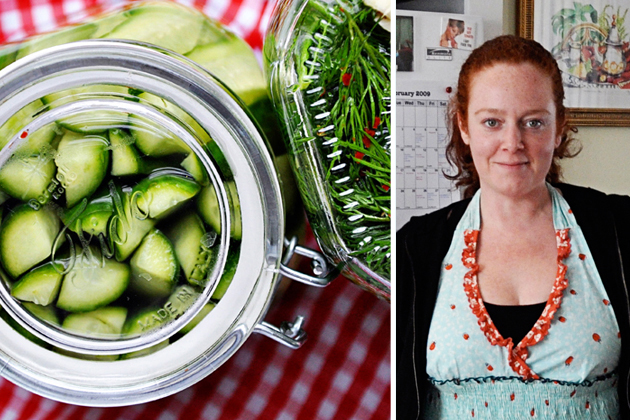
It’s time for a new post featuring one of our many wonderful members here at Tasty Kitchen, and today, we’ll get to know theparsleythief. Bet you didn’t know her concentration in college was glassblowing and glass design. (Intrigued? I know I was.) We’ll learn more interesting things about her today, so say hi to Katie, everyone!

Katie lives in South Norwalk, Connecticut with her two young boys, who she lovingly refers to as her “Bozos”—not because they have red noses or huge feet but because they’re wild and goofy. She grew up in Connecticut and lived in Brooklyn, New York when she was “single, attending art school, and ordering takeout.” Of course, as you can see below, she’s come a long way from that and now her recipe box is just chock full of good stuff.

Tasty Kitchen Blog: Meet Katie of The Parsley Thief.
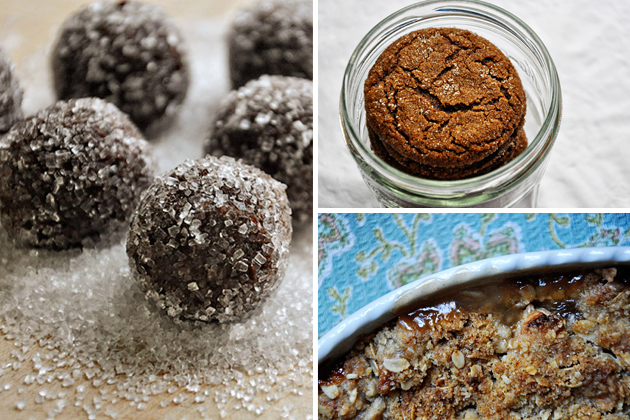
Clockwise from left: Rum Balls, Spice Sugar Cookies, and Apple Crisp.


Although the demands of raising a family meant that her art and her career fell to the wayside, she started blogging after being encouraged to do so by a friend who had also started one. Her blog, The Parsley Thief, gave her the creative outlet she needed. Finally, she was able to share recipes, food tips, and finally use some of her creative talents. Believe me, this lady is definitely creative in more ways than one.

Tasty Kitchen Blog: Meet Katie of The Parsley Thief.
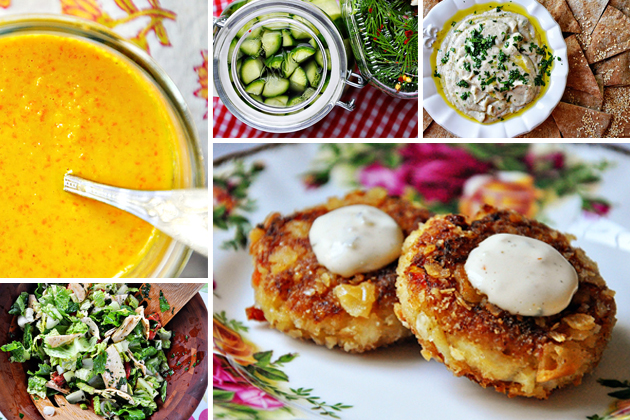
Clockwise from top left: Carrot Ginger Dressing, Dill Pickles, Grilled Baba Ghanoush, Mini Crab Cakes, and Fattoush.


Not surprisingly, Katie loves all kinds of fresh herbs, as the name of her blog suggests. “I love how a little sprinkle of green can transform something simple into something gourmet,” she explains. She’s right, too. I love how the fresh green herbs make some of the dishes below look extra vibrant.

Tasty Kitchen Blog: Meet Katie of The Parsley Thief.
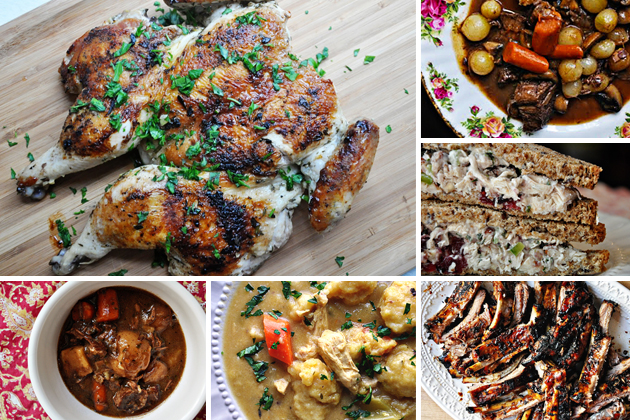
Clockwise from top left: Chicken al Mattone, Beef Bourguignon, Tarragon Chicken Salad with Pecans and Cranberries, Sticky Balsamic Ribs, Chicken and Dumplings, and Guinness Beef Stew.


Katie says that she isn’t a picky eater and that it takes a lot for her not to try something new. But she is a stickler for following a recipe to the letter the first time around—even when her instinct tells her that something just isn’t right. She always wants to know how the recipe developer intended for it to taste before making any adjustments. Her go-to meal is her Spaghetti and Meatballs, and believe me, she can do wonders with pasta.

Tasty Kitchen Blog: Meet Katie of The Parsley Thief.
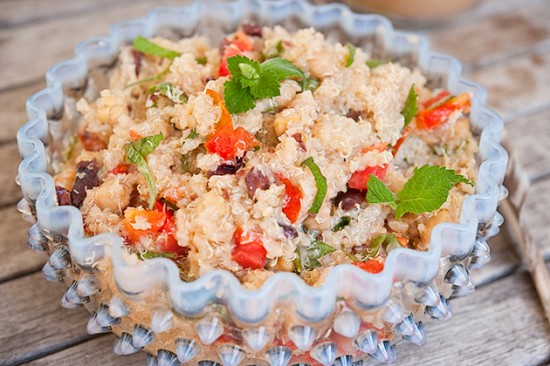
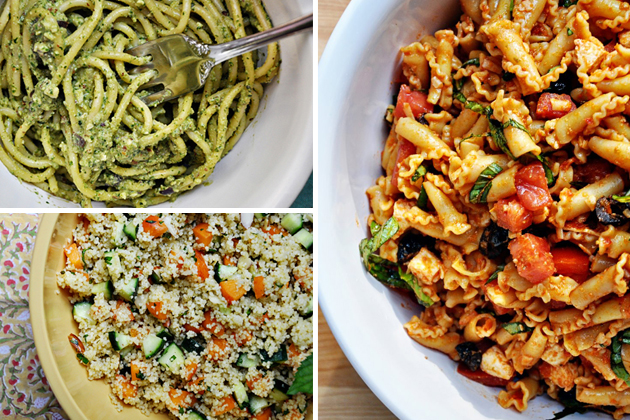
Clockwise from top left: Roasted Almond Ricotta Pesto with Olives, Pasta Salad with Fresh Mozzarella, Sun Dried Tomatoes and Olives, and Minted Apricot Couscous.

 
Don’t those look incredible?

Now it’s time to ask Katie some questions and let her do the talking. So let’s learn even more about this talented lady, including her current favorite quick snack or meal that kinda made my mouth water.


Q: What do you enjoy most about cooking?
A: I know for some people, cooking can be a chore. So it may seem strange to some but I love the process of cooking. I love cooking from scratch. Sometimes the things that are the most time consuming and involved are the most appealing to me. Now, don’t get me wrong. There are plenty of nights when I curse the very thought of getting dinner ready, even if it’s just mac n’ cheese from a box. But when I am in the mood to cook, I love it. I also love sharing food. I love entertaining.

 
Q: Any favorite chefs or food celebrities? Who inspires you?
A: My father is a good cook and I am definitely inspired by that. I remember making New England clam chowder with him as a kid. It took all day and it was really good! I was also extremely close to my grandmother growing up. She made the best Italian food. Her meatballs were the best I’ve ever had. She also made an incredible Eggplant Parmesan. My father comes very close to replicating her signature dishes. But unfortunately, no one can touch what she did.

 
Q: If you had to eat something right now and had only 3 minutes to get it ready, what would it be?
A: Lately, that would be toasted cranberry pecan bread from the SoNo Baking Co., smeared with some good blue cheese. I love bread and I love cheese. I love them together and could live on that the rest of my life. The only criteria is that it must be good bread and good cheese.

 
Q: What gives you the most trouble in the kitchen?
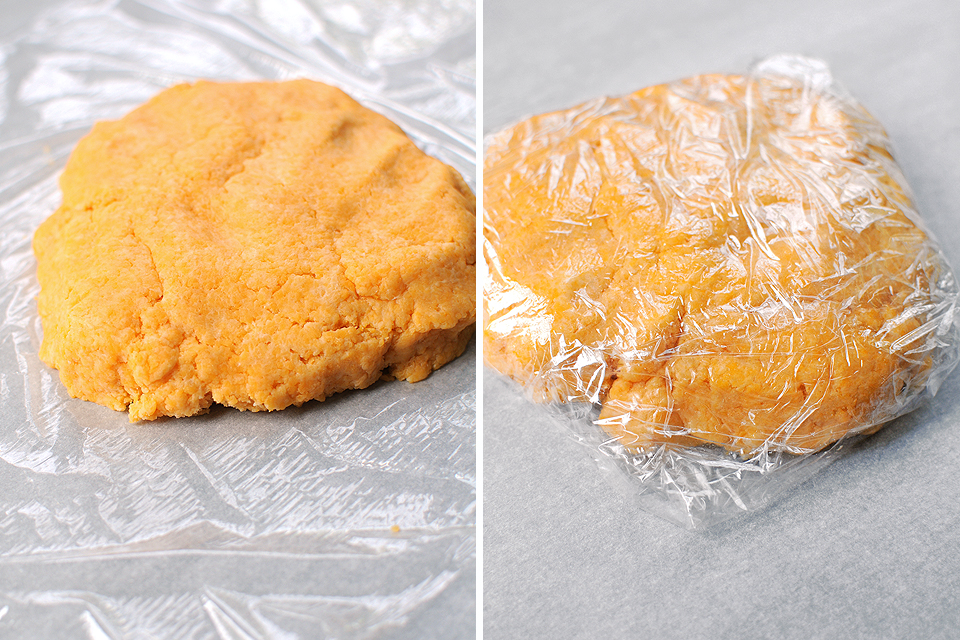
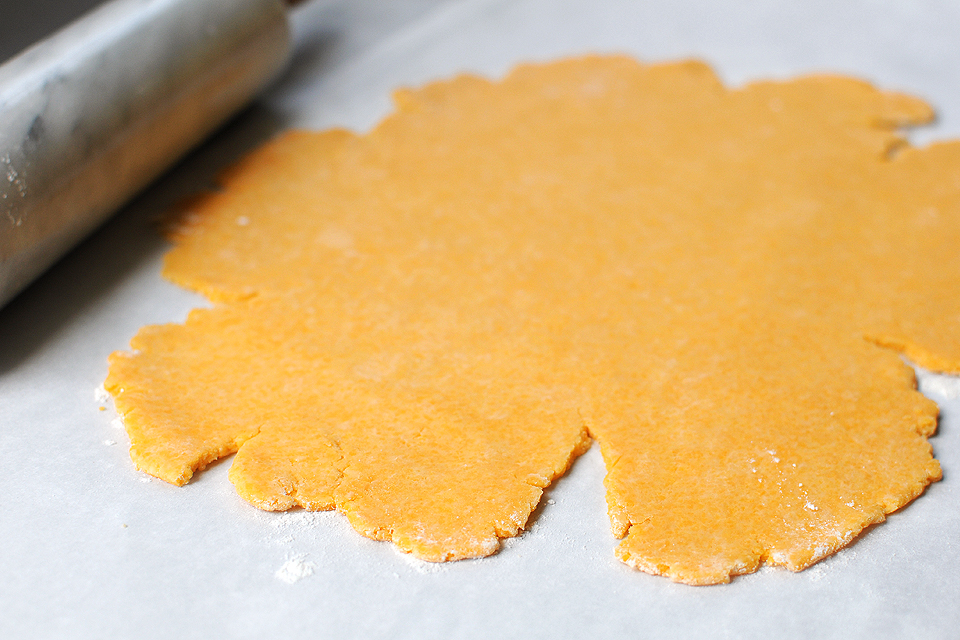
A: Rolling out pastry correctly gives me a lot of trouble. I find it nearly impossible to do without stretching the dough. Stretching pastry makes it shrink back in the pan while baking. So it’s not good to do.

 
Q: What is your favorite kitchen tool?
A: Goodness. How do I choose just one? If I had to, I would say I couldn’t live life without a sharp knife.

 
Q: Give us one of your favorite kitchen tips that you wish you’d always known.
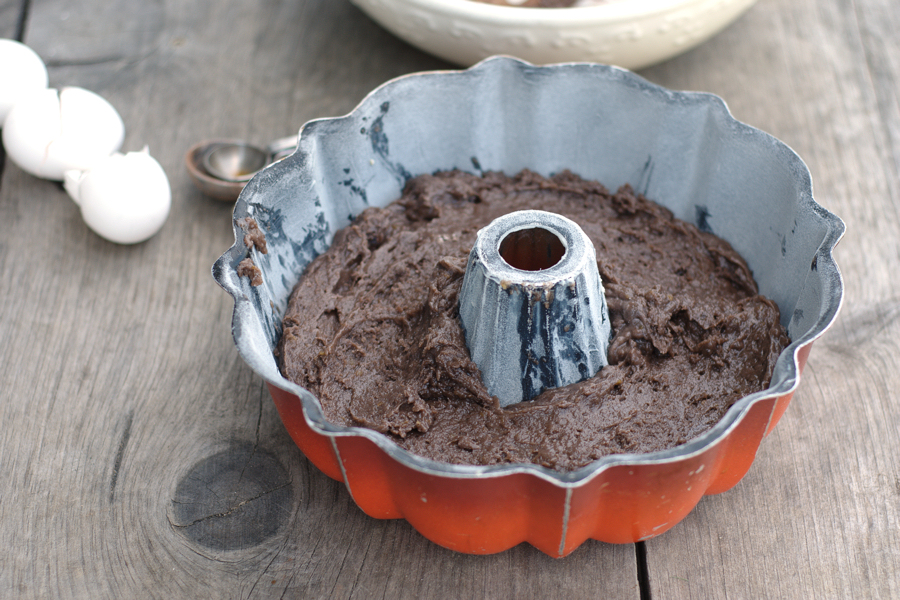
A: I am still a novice in many ways. So I am always learning something new. But off the top of my head, I would say I wish I had always known that old eggs were easier to peel than fresh ones.

_______________________________________

 
Thanks for answering our questions, Katie! Now I’m going to need some of that pecan bread and blue cheese. Yum.

 
Katie’s talents extend beyond the kitchen, so head over to her blog, The Parsley Thief, and find not just great recipes but posts about her children, photography (her background is in Art and Photography), gardening, products or designs that she loves. In other words, it’s all about the things that she enjoys and so generously shares with all of us.


Profile photo of HowSweetEats

General Tso’s Chicken

Posted by in Step-by-Step Recipes

Tasty Kitchen Blog: General Tso's Chicken. Guest post by Jessica Merchant of How Sweet It Is, recipe submitted by TK member Rebecca of Foodie with Family.

 
My husband has a “thing” for General Tso’s chicken. A relationship of sorts. On any given day when I’m in the mood for Chinese takeout, sit down Thai, or a Japanese steakhouse, he’s in the mood for … General Tso’s. He rarely goes outside the box and tries anything new because his love for the crispy, saucy chicken dish is so strong. If it’s on the menu, I can’t even sway him into sharing the beef and broccoli, pad thai, or dare I say it: sushi. When I spied Rebecca’s recipe for General Tso’s chicken, I couldn’t wait to make it for dinner knowing fully that he’d flip his lid. The only issue? I knew I’d be making it all the time!

I love making dishes like this at home because I know exactly what is going in them, as opposed to ordering greasy (albeit delicious) takeout in a box. This original recipe came from Food and Wine and it certainly did not disappoint! I have tried a few different versions of General Tso’s over the years and I must say that this ranks up there as my favorite. It’s as simple as can be and doesn’t require ingredients that I not only can’t spell, but can’t even find in my local grocery store. You likely have almost everything on hand!


Tasty Kitchen Blog: General Tso's Chicken. Guest post by Jessica Merchant of How Sweet It Is, recipe submitted by TK member Rebecca of Foodie with Family.

To start, you need raw sugar (I’m sure you can substitute some regular or brown sugar here), chicken stock, soy sauce, cornstarch, sesame oil, frying oil of your choice (I used canola), chili garlic sauce, ginger, garlic, an egg white, green onions, and chicken. Rebecca’s recipe called for chicken thighs, but I happened to have chicken breasts on hand and was eager to try the recipe with them. It was a success!


Tasty Kitchen Blog: General Tso's Chicken. Guest post by Jessica Merchant of How Sweet It Is, recipe submitted by TK member Rebecca of Foodie with Family.

Begin by adding the sesame oil, egg white and soy sauce in a bowl.


Tasty Kitchen Blog: General Tso's Chicken. Guest post by Jessica Merchant of How Sweet It Is, recipe submitted by TK member Rebecca of Foodie with Family.

Whisk in the corn starch. Don’t worry if it gets a little “goopy.” That is exactly what it’s supposed to do!


Tasty Kitchen Blog: General Tso's Chicken. Guest post by Jessica Merchant of How Sweet It Is, recipe submitted by TK member Rebecca of Foodie with Family.

Cut your chicken into pieces …


Tasty Kitchen Blog: General Tso's Chicken. Guest post by Jessica Merchant of How Sweet It Is, recipe submitted by TK member Rebecca of Foodie with Family.

Then toss it into the mixture until it’s thoroughly coated. At this time, cover the bowl lightly with plastic wrap and let it sit in a cool, dry place to marinate for about 20 minutes, tossing it once or twice. Now you can also begin to prepare any dishes that you want to serve with your chicken—brown rice and broccoli, in our case.


Tasty Kitchen Blog: General Tso's Chicken. Guest post by Jessica Merchant of How Sweet It Is, recipe submitted by TK member Rebecca of Foodie with Family.

While the chicken is getting flavorful, whisk together stock, soy sauce, cornstarch, chili garlic sauce and sugar in a bowl until combined. It’s time to make the sauce!


Tasty Kitchen Blog: General Tso's Chicken. Guest post by Jessica Merchant of How Sweet It Is, recipe submitted by TK member Rebecca of Foodie with Family.

Add the tablespoon of oil to a saucepan. Once it’s hot, add in your garlic and ginger. I actually grated both my garlic and ginger with a microplane as it was easiest for me. If you do this, only cook the garlic and ginger for a minute or so until it’s fragrant. Don’t let them burn!


Tasty Kitchen Blog: General Tso's Chicken. Guest post by Jessica Merchant of How Sweet It Is, recipe submitted by TK member Rebecca of Foodie with Family.

Add the sauce ingredients to the garlic and ginger, stirring until it becomes thick and shiny.


Tasty Kitchen Blog: General Tso's Chicken. Guest post by Jessica Merchant of How Sweet It Is, recipe submitted by TK member Rebecca of Foodie with Family.

Once the sauce thickens, lower the heat and keep the sauce partially covered to stay warm.


Tasty Kitchen Blog: General Tso's Chicken. Guest post by Jessica Merchant of How Sweet It Is, recipe submitted by TK member Rebecca of Foodie with Family.

To begin frying the chicken, heat about 1/2 inch of oil in a large skillet, preferably with higher sides since the oil may splatter a bit.


Tasty Kitchen Blog: General Tso's Chicken. Guest post by Jessica Merchant of How Sweet It Is, recipe submitted by TK member Rebecca of Foodie with Family.

Add the chicken to the oil one piece at a time, making sure not to crowd the chicken pieces.


Tasty Kitchen Blog: General Tso's Chicken. Guest post by Jessica Merchant of How Sweet It Is, recipe submitted by TK member Rebecca of Foodie with Family.

Cook until crispy and golden, about 4 minutes per side.


Tasty Kitchen Blog: General Tso's Chicken. Guest post by Jessica Merchant of How Sweet It Is, recipe submitted by TK member Rebecca of Foodie with Family.

Transfer the chicken to a paper towel-covered plate to drain and continue frying the remaining chicken.


Tasty Kitchen Blog: General Tso's Chicken. Guest post by Jessica Merchant of How Sweet It Is, recipe submitted by TK member Rebecca of Foodie with Family.

Once all the chicken is cooked and drained, add it directly into the sauce. You can also opt to drizzle or pour the sauce on top of each portion, but I found that adding the chicken to the sauce as the recipe calls for is perfect.

Stir, stir, stir! At this time, you can also add your broccoli or other side dish of choice to the sauce if you wish.


Tasty Kitchen Blog: General Tso's Chicken. Guest post by Jessica Merchant of How Sweet It Is, recipe submitted by TK member Rebecca of Foodie with Family.

Serve some to your drooling friends and family …


Tasty Kitchen Blog: General Tso's Chicken. Guest post by Jessica Merchant of How Sweet It Is, recipe submitted by TK member Rebecca of Foodie with Family.

Garnish with sliced green onions and dig in!

 
I can’t tell you enough how much we absolutely loved this meal. It is in the rotation and doesn’t appear to be leaving anytime soon. I highly recommend it for the General Tso’s Chicken lovers in your house. Thanks so much for the delicious dish Rebecca! Be sure to check out Rebecca’s incredible blog Foodie with Family where she shares all sorts of fabulous ideas from coffee milkshakes to mozzarella sticks. I’m hungry again!


Printable Recipe

General Tso’s Chicken

See post on Rebecca’s site!
4.23 Mitt(s) 26 Rating(s)26 votes, average: 4.23 out of 526 votes, average: 4.23 out of 526 votes, average: 4.23 out of 526 votes, average: 4.23 out of 526 votes, average: 4.23 out of 5

Prep Time:

Cook Time:

Difficulty: Intermediate

Servings: 4

4
x

Print Options

Page size Letter 3x5 4x6
Text Size Small Medium Large
Content Include description
Include prep time, etc.
Show image

Description

Sweet and hot, crispy and tender, garlicky, gingery General Tso’s chicken is a mainstay of Chinese buffets and restaurants, but you can make it better, fresher and healthier at home!

Ingredients

  • FOR THE CHICKEN:
  • 1-½ teaspoon Toasted Sesame Oil
  • 1 Tablespoon Soy Sauce
  • 1 whole Large Egg White
  • ¼ cups Plus 2 Tablespoons Cornstarch
  • 1 pound Boneless, Skinless Chicken Thighs
  • Canola, Peanut, Or Vegetable Oil For Frying
  • FOR THE SAUCE:
  • 1 Tablespoon Peanut, Canola Or Vegetable Oil
  • 2 cloves Garlic, Peeled And Minced
  • 2 Tablespoons Finely Chopped Fresh Ginger Root
  • 1 cup Chicken Broth Or Stock
  • ¼ cups Soy Sauce
  • 1 Tablespoon Cornstarch
  • 1 teaspoon Chinese Chile-garlic Sauce
  • 3 Tablespoons Raw (turbinado Or Demerara) Sugar
  • FOR SERVING:
  • 4 whole Scallions, Thinly Sliced
  • Steamed Rice
  • Steamed Broccoli

Preparation Instructions

Prep your chicken:
In a mixing bowl, stir together the sesame oil, soy sauce, egg white, and 1/4 cup plus 2 tablespoons of cornstarch until a thick slurry forms. It will look gummy but smooth.

Add the chicken pieces and stir until all are evenly coated. At first it may appear that it will not come together but it does!
Set chicken aside, covered lightly with plastic wrap, at room temperature for 20 minutes, stirring occasionally.

Begin the sauce:
Add the tablespoon of oil to a large, heavy-bottomed saucepan over high heat. Stir the garlic and ginger into the oil and cook, stirring constantly, until fragrant, about 1 minute.

In a separate bowl, whisk together the remaining sauce ingredients until smooth. Pour into the garlic and ginger, stirring, until the sauce becomes thick and shiny. Once the sauce thickens, lower heat and keep the saucepan over a low burner partially covered to stay warm.

To fry the chicken:
Heat 1/2-inches of oil in a heavy-bottomed, high-sided frying pan or skillet over high heat.

When the oil is shimmering, add one piece of chicken at a time, taking care not to crowd the pan. Cook chicken for 4 minutes on each side, or until deep golden brown and crisp on both sides**.

Transfer the fried chicken to a paper towel lined plate and repeat the process until you’ve cooked all the chicken.

Then slide all of the fried chicken into the prepared sauce and toss to coat. (If desired, add some steamed broccoli to coat with the sauce also.) Increase the heat to medium, stir and cook just until hot all the way through.

Sprinkle with sliced scallions and serve immediately over white rice.

**A note: Chicken is a safe food for me. I know that just about anything done to it is going to yield something that is, at the very least, edible. This is especially true of boneless skinless chicken thighs. It’s really hard to mess those up! They stay tender and juicy and it’s very hard indeed to cook them to the point of chicken jerky. Be sure to cook them through, you definitely want that crisp, deep-brown coating to hold up to the sauce!


_______________________________________

Jessica Merchant is a personal trainer turned food writer and blogger. Her blog, How Sweet Eats, is where she proclaims her love for all things sweet, all things bacon, and everything else in between. She works her magic in her Pittsburgh kitchen, which she shares with her husband of 2 years.


Profile photo of missamy

Homemade Goldfish Crackers

Posted by in Baking, Step-by-Step Recipes

Tasty Kitchen Blog: Homemade Goldfish Crackers. Guest post by Amy Johnson of She Wears Many Hats, recipe submitted by TK member Erin of Dinners, Dishes and Desserts.

 
There are amazing recipes all over the internets—impressive cakes and cookies, pies galore, delicious pasta dishes, fantastic dinner ideas, and so much more. But what has had me a little stumped were homemade crackers. Homemade crackers? Who in the world has time to make homemade crackers? They looked like they’d be difficult and totally something I wouldn’t be able to pull off. But when these Homemade Goldfish Crackers from Erin popped up here on Tasty Kitchen, I decided to try my hand at them.

Let me tell ya, they were pretty darn easy. And cheesy, too. The recipe was adapted from ReadyMade magazine and it’s totally a fun little cooking project to do with kids. My children are older now, but when they were younger this would have been a great rainy day project to have them join in on. There are only five ingredients with very little prep. The cutting takes a little more time but that’s where the fun for the kids comes in. Use itty bitty cookie cutters, icing tips or make your own cookie cutter shapes out of an aluminum can (see below). The crackers puff up to a chewy, cheesy bite.

Wanna see how?


Tasty Kitchen Blog: Homemade Goldfish Crackers. Guest post by Amy Johnson of She Wears Many Hats, recipe submitted by TK member Erin of Dinners, Dishes and Desserts.

Before getting started, decide on what shapes you’ll be cutting out. Using an aluminum can and tape, I cut a thin strip and formed my fishy, then taped the edges together with clear packing tape.


Tasty Kitchen Blog: Homemade Goldfish Crackers. Guest post by Amy Johnson of She Wears Many Hats, recipe submitted by TK member Erin of Dinners, Dishes and Desserts.

I had so much fun I couldn’t stop, and made a Pac-Man and a football. The ideas for shapes you could create are endless! Large icing tips and small cookie cutters work well, too.


Tasty Kitchen Blog: Homemade Goldfish Crackers. Guest post by Amy Johnson of She Wears Many Hats, recipe submitted by TK member Erin of Dinners, Dishes and Desserts.

You’ll need just a few simple ingredients: shredded cheese, butter, flour, salt and cold water. That’s it!


Tasty Kitchen Blog: Homemade Goldfish Crackers. Guest post by Amy Johnson of She Wears Many Hats, recipe submitted by TK member Erin of Dinners, Dishes and Desserts.

Begin combining everything, except the water, in a food processor until the dough looks like sand.


Tasty Kitchen Blog: Homemade Goldfish Crackers. Guest post by Amy Johnson of She Wears Many Hats, recipe submitted by TK member Erin of Dinners, Dishes and Desserts.

Next, pulse in the water, 1 tablespoon at a time, until combined.


Tasty Kitchen Blog: Homemade Goldfish Crackers. Guest post by Amy Johnson of She Wears Many Hats, recipe submitted by TK member Erin of Dinners, Dishes and Desserts.

Remove the dough from the processor and form into a small, tidy package. Wrap in plastic and chill for 20 minutes.


Tasty Kitchen Blog: Homemade Goldfish Crackers. Guest post by Amy Johnson of She Wears Many Hats, recipe submitted by TK member Erin of Dinners, Dishes and Desserts.

Once chilled, roll out the dough. I found the thinner the dough, the crispier the cracker.


Tasty Kitchen Blog: Homemade Goldfish Crackers. Guest post by Amy Johnson of She Wears Many Hats, recipe submitted by TK member Erin of Dinners, Dishes and Desserts.

Now, the cutting fun begins!


Tasty Kitchen Blog: Homemade Goldfish Crackers. Guest post by Amy Johnson of She Wears Many Hats, recipe submitted by TK member Erin of Dinners, Dishes and Desserts.

Place crackers on a lined cookie sheet and bake at 350°F for about 15 minutes. I began with little fishies.


Tasty Kitchen Blog: Homemade Goldfish Crackers. Guest post by Amy Johnson of She Wears Many Hats, recipe submitted by TK member Erin of Dinners, Dishes and Desserts.

Then moved on to the footballs and then the Pac-Man (or Mrs. Pac-Man).


Tasty Kitchen Blog: Homemade Goldfish Crackers. Guest post by Amy Johnson of She Wears Many Hats, recipe submitted by TK member Erin of Dinners, Dishes and Desserts.

Aren’t they cute? They puff up a tad, resulting in a chewy, cheesy cracker.


Tasty Kitchen Blog: Homemade Goldfish Crackers. Guest post by Amy Johnson of She Wears Many Hats, recipe submitted by TK member Erin of Dinners, Dishes and Desserts.

Look! Pac-Man is after a fish.


Tasty Kitchen Blog: Homemade Goldfish Crackers. Guest post by Amy Johnson of She Wears Many Hats, recipe submitted by TK member Erin of Dinners, Dishes and Desserts.

Have fun with this one y’all! I enjoyed making these and I think you will too. Get creative and let the kids join in!

Thanks Erin for submitting this darling recipe. I felt like a kid again! Be sure to check out Erin’s blog, Dinners, Dishes, and Desserts, for more of her recipes.


Printable Recipe

Homemade Goldfish Crackers

See post on Erin’s site!
5.00 Mitt(s) 14 Rating(s)14 votes, average: 5.00 out of 514 votes, average: 5.00 out of 514 votes, average: 5.00 out of 514 votes, average: 5.00 out of 514 votes, average: 5.00 out of 5

Prep Time:

Cook Time:

Difficulty: Easy

Servings: 7

7
x

Print Options

Page size Letter 3x5 4x6
Text Size Small Medium Large
Content Include description
Include prep time, etc.
Show image

Description

Your favorite fish cracker made at home – and it is SUPER easy.

Ingredients

  • 8 ounces, weight Sharp Cheddar Cheese, Shredded
  • 4 Tablespoons Butter, Cut Into Cubes
  • 1 cup Flour
  • ¾ teaspoons Salt
  • 2 Tablespoons Cold Water

Preparation Instructions

Pulse everything (except water) together in the food processor until the dough resembles coarse sand.

Pulse in water, 1 tablespoon at a time.

Remove dough from the processor, wrap in plastic, and chill for 20 minutes.

Roll out the dough and cut into desired shapes. You can use a toothpick to make the eyes and smile if desired. Place on a parchment paper lined cookie sheet.

Bake at 350 degrees F for about 15 minutes, or until crispy.

Makes approximately 7 dozen crackers.


_______________________________________

Amy Johnson is a blogger who writes about food, travel, the home (both inside and out), and various observations and random musings about anything and everything. Visit her blog She Wears Many Hats for a dose of deliciousness, practicality, hilarity, or just plain fun. She lives in South Carolina with her husband and two children.


Profile photo of Erica Lea

Red Wine Cake

Posted by in Baking, Step-by-Step Recipes

Tasty Kitchen Blog: Red Wine Cake. Guest post by Erica Kastner of Cooking for Seven, recipe submitted by TK member cyniczora.

Whenever I see a recipe that calls for wine, I must admit that I’m immediately drawn to it. It adds such a wonderfully distinct flavor that cannot adequately be replaced by fresh fruit juice. Just a splash can create depth in a quick pasta sauce.

Before making this cake, I had never used wine in baking. I was a bit apprehensive about how it would turn out, but I was quite pleased with the results. The red wine lends a different taste that is quite pleasant and makes you want to carefully observe the flavors. The bit of chocolate and cinnamon complement the wine perfectly.

Today’s recipe, brought to us by cyniczora, would be a wonderful end to a sophisticated or even a hearty meal. Add some ice cream or wine-infused whipped cream, and you have scrumptious dessert.


Tasty Kitchen Blog: Red Wine Cake. Guest post by Erica Kastner of Cooking for Seven, recipe submitted by TK member cyniczora.

Here’s what you’ll need: butter, sugar, eggs, vanilla, cocoa powder, cinnamon, baking powder, flour, red wine, and salt (the original recipe didn’t call for salt, but I decided to add a pinch for added flavor).


Tasty Kitchen Blog: Red Wine Cake. Guest post by Erica Kastner of Cooking for Seven, recipe submitted by TK member cyniczora.

Begin by buttering and flouring a bundt pan. Make sure you grease and coat with flour EVERY INCH of the pan. You’ll thank me later.


Tasty Kitchen Blog: Red Wine Cake. Guest post by Erica Kastner of Cooking for Seven, recipe submitted by TK member cyniczora.

Melt the butter.


Tasty Kitchen Blog: Red Wine Cake. Guest post by Erica Kastner of Cooking for Seven, recipe submitted by TK member cyniczora.

Pour the butter into a large bowl and add the eggs and sugar. Stir.


Tasty Kitchen Blog: Red Wine Cake. Guest post by Erica Kastner of Cooking for Seven, recipe submitted by TK member cyniczora.

Add the vanilla. (Only use pure vanilla, never imitation. Ahem.)


Tasty Kitchen Blog: Red Wine Cake. Guest post by Erica Kastner of Cooking for Seven, recipe submitted by TK member cyniczora.

Pour in the red wine. Stir to combine.


Tasty Kitchen Blog: Red Wine Cake. Guest post by Erica Kastner of Cooking for Seven, recipe submitted by TK member cyniczora.

In a separate bowl, whisk together the dry ingredients.


Tasty Kitchen Blog: Red Wine Cake. Guest post by Erica Kastner of Cooking for Seven, recipe submitted by TK member cyniczora.

Add the dry ingredients to the wet ingredients and stir to combine.


Tasty Kitchen Blog: Red Wine Cake. Guest post by Erica Kastner of Cooking for Seven, recipe submitted by TK member cyniczora.

Scrape into your prepared bundt pan. Bake in a preheated 350°F oven for 40-45 minutes. Remove from oven and let cool in pan on a rack for 10-15 minutes. Invert onto the rack to cool completely.


Tasty Kitchen Blog: Red Wine Cake. Guest post by Erica Kastner of Cooking for Seven, recipe submitted by TK member cyniczora.

Serve with good vanilla ice cream or homemade whipped cream. Enjoy!


Tasty Kitchen Blog: Red Wine Cake. Guest post by Erica Kastner of Cooking for Seven, recipe submitted by TK member cyniczora.

Notes:

1. As mentioned, the original recipe did not call for salt, but I added a pinch so it wouldn’t be too bland.
2. My only quarrel with this recipe is that the cake is a bit dense or heavy. Another time I would probably add more wine or decrease the amount of flour.
3. I made wine-infused whipped cream to serve with the cake by adding a bit of red wine to the cream before I whipped it. It nicely complemented the flavors in the cake.


Tasty Kitchen Blog: Red Wine Cake. Guest post by Erica Kastner of Cooking for Seven, recipe submitted by TK member cyniczora.

Thank you, cyniczora, for bringing us this awesome recipe.


Printable Recipe

Red Wine Cake

4.00 Mitt(s) 1 Rating(s)1 vote, average: 4.00 out of 51 vote, average: 4.00 out of 51 vote, average: 4.00 out of 51 vote, average: 4.00 out of 51 vote, average: 4.00 out of 5

Prep Time:

Cook Time:

Difficulty: Easy

Servings: 12

12
x

Print Options

Page size Letter 3x5 4x6
Text Size Small Medium Large
Content Include description
Include prep time, etc.
Show image

Description

I haven’t met anyone so far who didn’t like this cake.

Ingredients

  • ½ pounds, ⅞ ounces, weight Butter
  • ½ pounds, ⅞ ounces, weight Sugar
  • 3 whole Eggs
  • 1 teaspoon Vanilla
  • 2 Tablespoons Cocoa Powder, Unsweetened
  • 1 teaspoon Cinnamon, Ground
  • 1 teaspoon Baking Powder
  • ¾ pounds, 2-⅛ ounces, weight Flour
  • 8 tablespoons, 1 teaspoon, 5-⅞ pinches Red Wine

Preparation Instructions

Melt the butter in the microwave, then mix it with sugar and eggs. Add all the other ingredients. (It doesn’t really matter in what order.) Mix it all together.

Preheat the oven to 350 degrees F.

Put the batter in a greased bundt cake pan and bake it 40 – 45 minutes.

I live in high altitude and therefore use 150 milliliters red wine.


_______________________________________

Erica Berge shares her wonderful recipes and amazing food photography on her blog, Cooking for Seven. She also writes about crafts and posts more of her beautiful photography in her personal blog, EricaLea.com. There really isn’t much that this amazing young lady can’t do, and we’re thrilled she does some of it here.


Profile photo of georgiapellegrini

Quinoa Salad

Posted by in Step-by-Step Recipes

Quinoa has always been one of my favorite grains. I love the subtle crunch that it has when cooked and that it is so high in protein. It’s been slowly rising to stardom recently. It’s a grain-like crop grown for its edible seeds. It’s considered a “pseudocereal,” whatever that means—not a true cereal, not a […]

Profile photo of A Cozy Kitchen

Best Carrot Cake of All Time

Posted by in Baking, Step-by-Step Recipes

There’s plenty of reasons -to make this carrot cake. Like its appropriate title, this was in fact the best carrot cake I’ve had to date. Big-ups to TK member Katy and Christin (kpurwin) of Young and Hungry (who adapted it from Southern Living) for providing us with such an honest and delightful recipe.

Profile photo of Natalie | Perry's Plate

Ice Cream in a Bag

Posted by in Step-by-Step Recipes

  Really quick ice cream. Like, zero to sweet, frozen goodness in under 15 minutes. NOT too good to be true! When I saw Ice Cream in a Bag by Tasty Kitchen member whatthedogate (Donna) I wondered why I had never tried this before. I thought it might be a fun project to do with […]

Profile photo of whatsgabycooking

BLT Pizza

Posted by in Step-by-Step Recipes

BLT Pizza might just be my most recent favorite dinner. It’s super easy to prepare and only requires a handful of ingredients but leaves everyone at the dinner table satisfied and happy. I haven’t always been a big bacon fan (I know, something was obviously wrong with me) but recently I’ve decided it’s totally necessary in life. The idea of eating all these…