The Pioneer Woman Tasty Kitchen
Profile photo of Faith (An Edible Mosaic)

Cheese Brownies

Posted by in Baking, Step-by-Step Recipes

Tasty Kitchen Blog: Cheese Brownies. Guest post by Faith Gorsky of An Edible Mosaic, recipe submitted by TK member Monica (momx3girls).

 
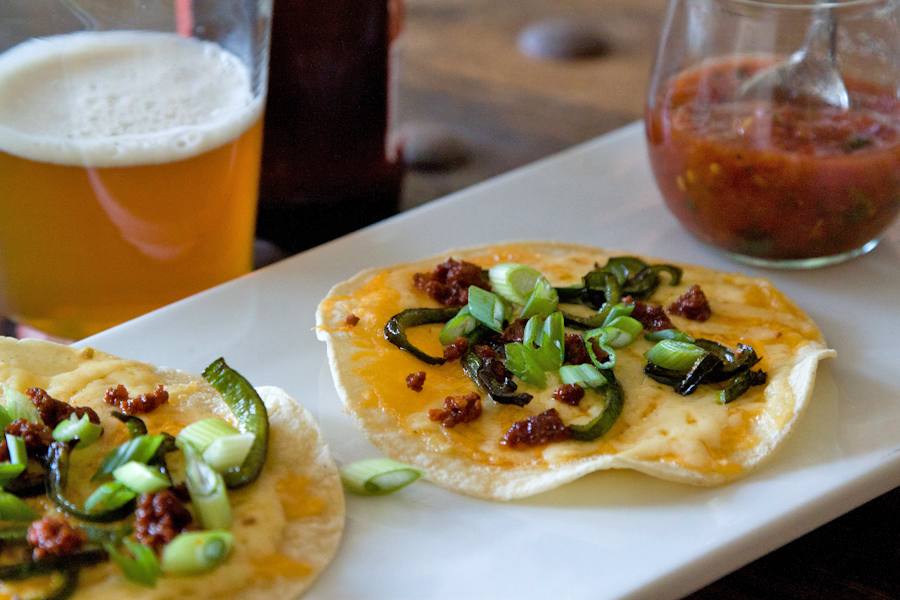
I don’t know about you, but I love making unique recipes. I think part of the fun for me is when I serve them to my family and everyone tries to guess what they are because no one has ever seen them before! After seeing the title for Monica’s recipe for Cheese Brownies I was so intrigued, I knew I had to make them even before I knew what they were. I had no idea what to expect: Are they sweet? Savory? Is there chocolate involved?

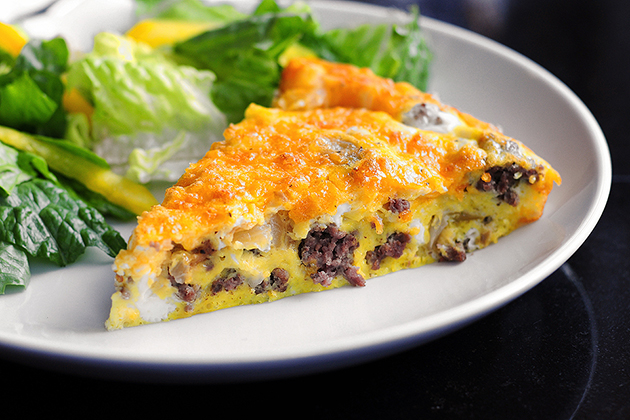
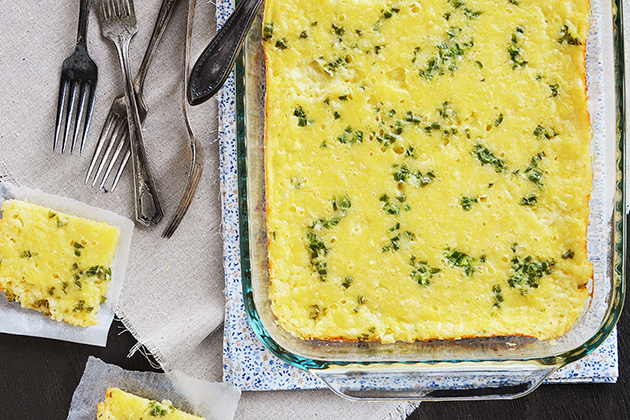
These brownies are savory. Cheese is the base ingredient, a very simple batter of milk, eggs, and flour is poured on top, and jalapeño adds fantastic flavor. These brownies remind me very much of poppers (jalapeño peppers that are stuffed with cheddar cheese, breaded, and deep-fried), but in casserole form. Swoon.

This dish reheats well (just cover with foil and bake at 350ºF until warm to reheat), and these brownies are wonderful along with a hearty meal like chili, but equally delicious served with a poached egg and fruit salad for breakfast. Of course they’d also be the perfect appetizer as part of a big spread.

And they’re so easy to make!


Tasty Kitchen Blog: Cheese Brownies. Guest post by Faith Gorsky of An Edible Mosaic, recipe submitted by TK member Monica (momx3girls).

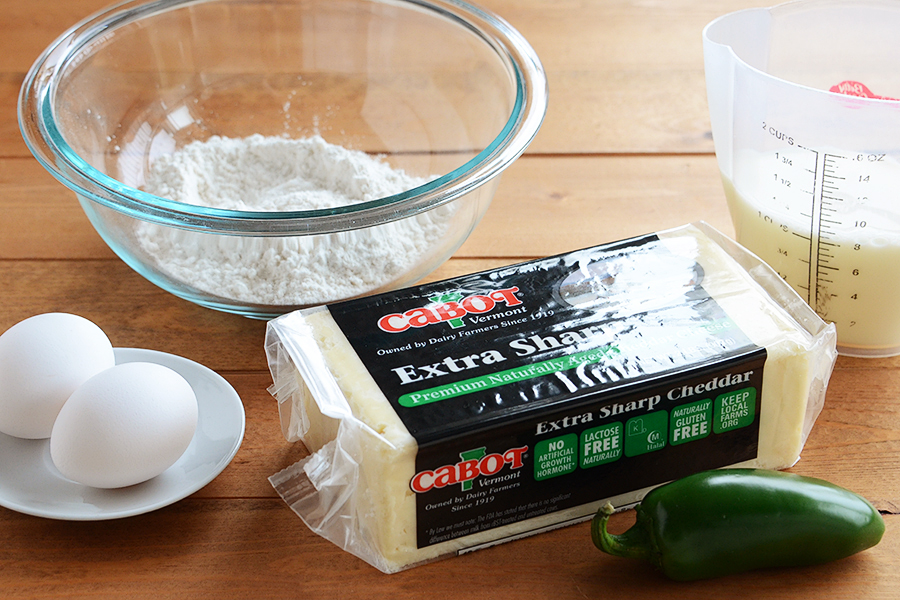
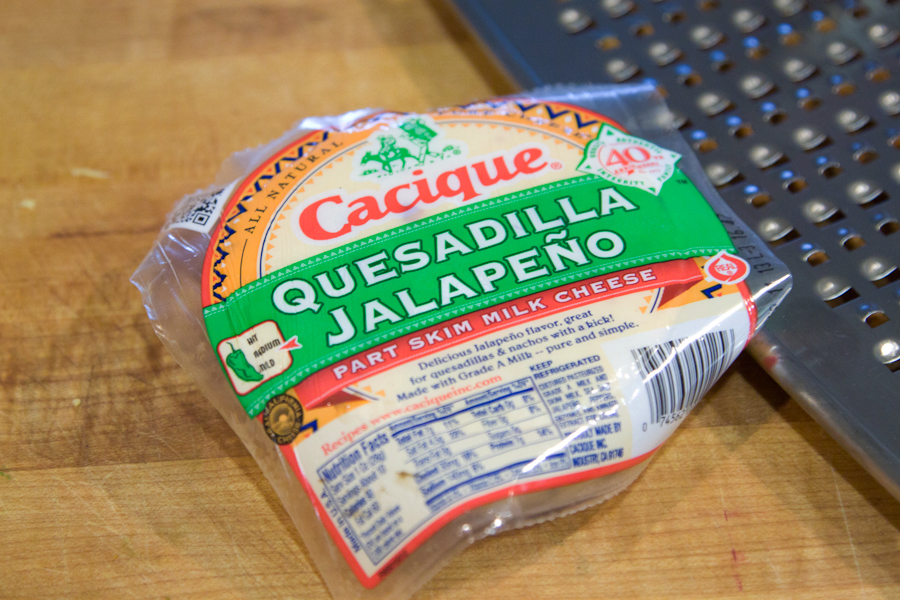
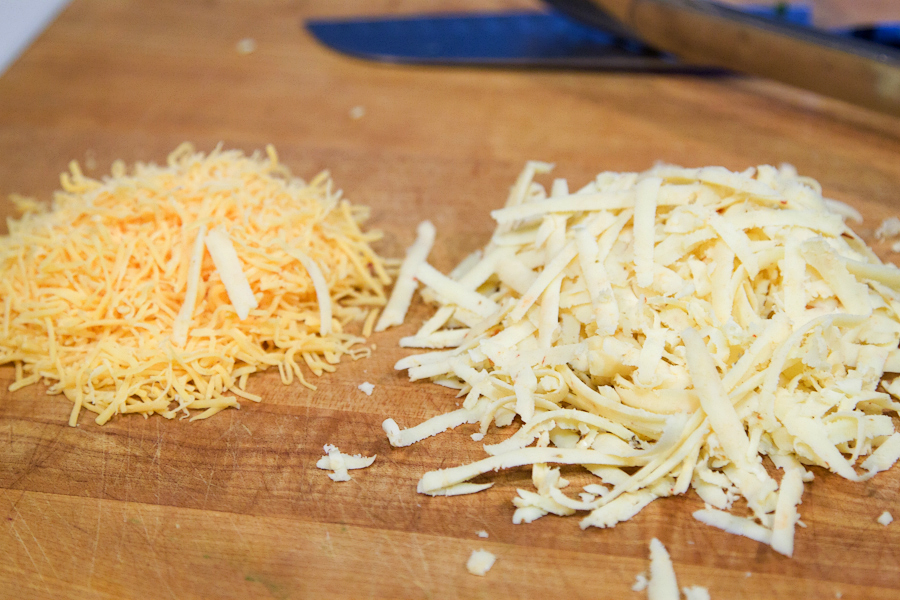
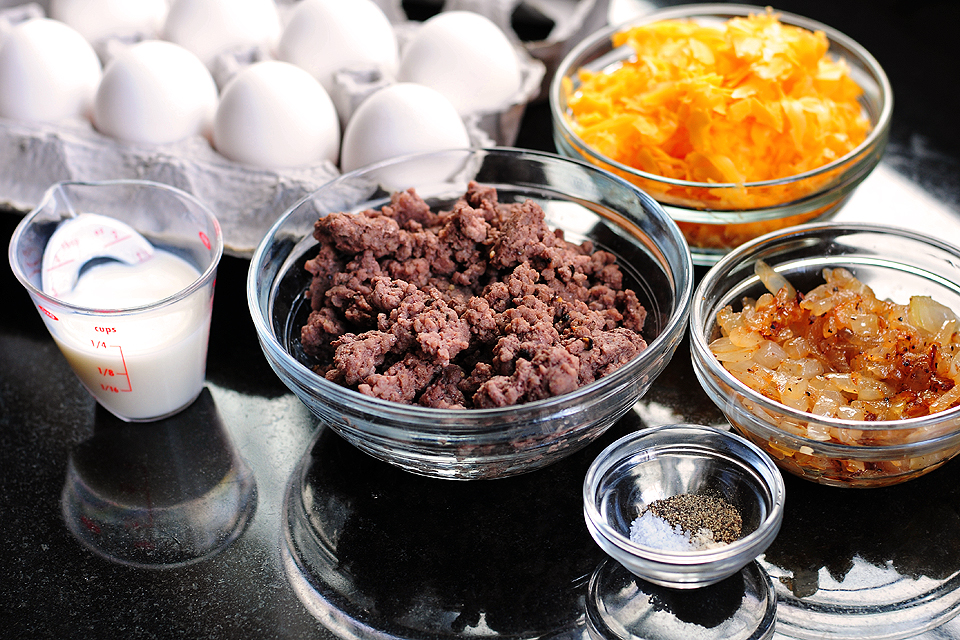
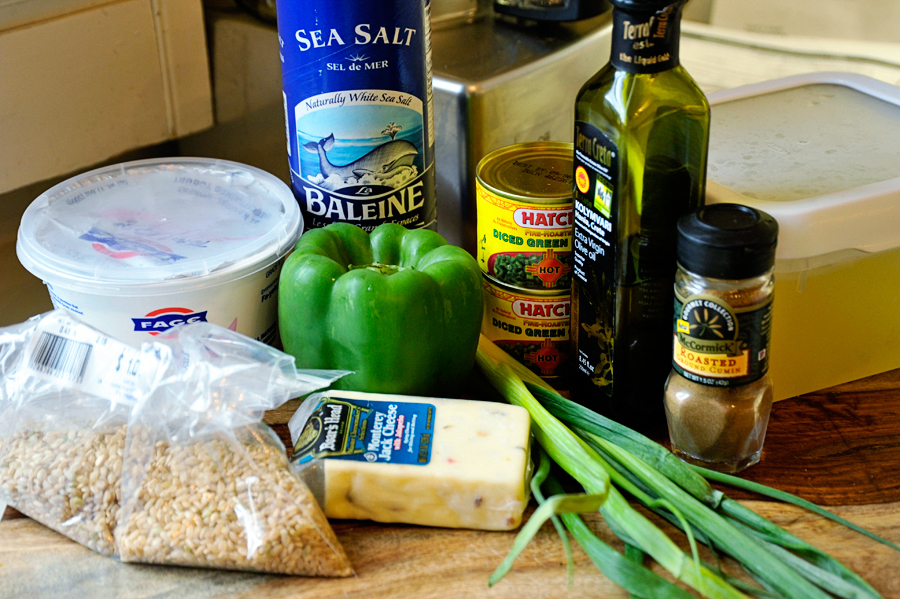
Love me a recipe that has only five ingredients! Note that the block of cheese in the picture is actually a 2-pound block and I only needed half of it for this recipe. And while we’re talking about the cheese, be sure to use something you really like, since these brownies are all about the cheese (I used sharp white cheddar). Oh, also note that I only used 1 jalapeño even though the recipe calls for 2. I was making this dish for some hot-food-averse (ahem, hi Mom!) and I wanted to make sure it wasn’t too spicy for them (more on that later though).


Tasty Kitchen Blog: Cheese Brownies. Guest post by Faith Gorsky of An Edible Mosaic, recipe submitted by TK member Monica (momx3girls).

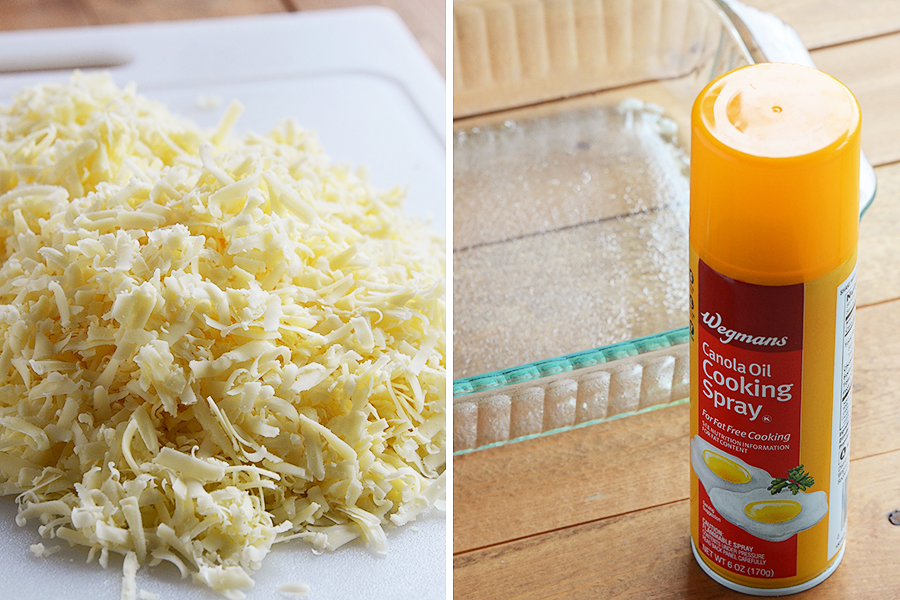
Shred your mountain of cheese, and then spray a 9 by 13-inch baking dish with cooking spray.


Tasty Kitchen Blog: Cheese Brownies. Guest post by Faith Gorsky of An Edible Mosaic, recipe submitted by TK member Monica (momx3girls).

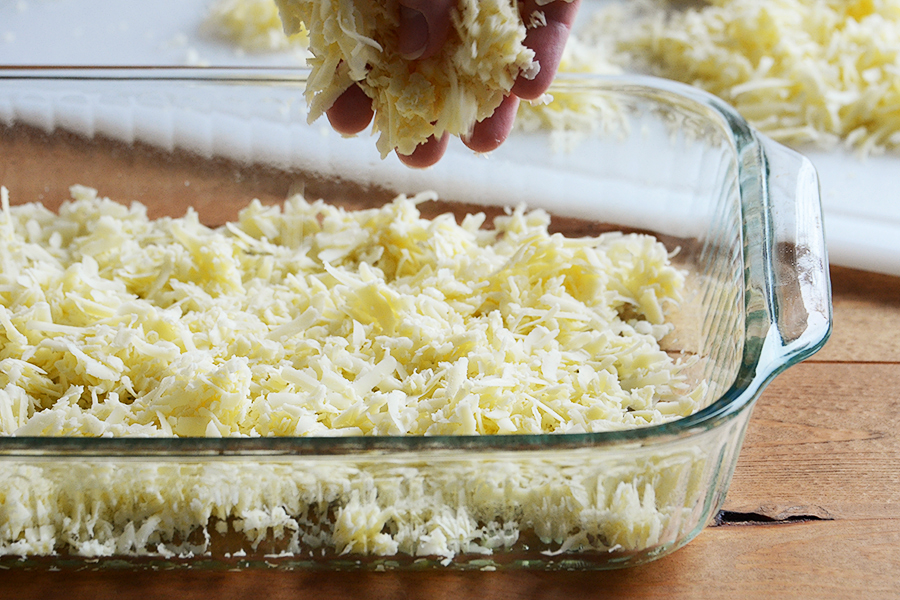
Spread the cheese out in the baking dish.


Tasty Kitchen Blog: Cheese Brownies. Guest post by Faith Gorsky of An Edible Mosaic, recipe submitted by TK member Monica (momx3girls).

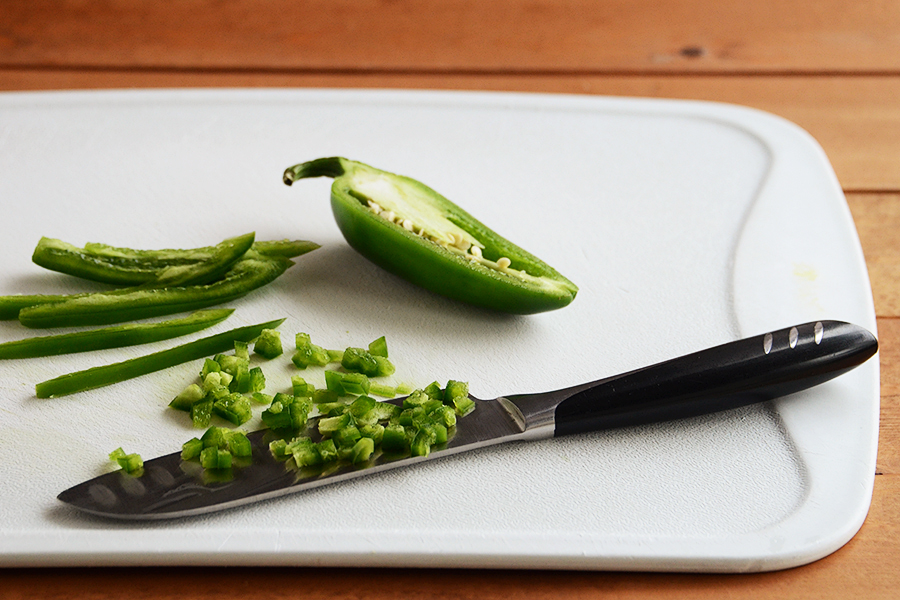
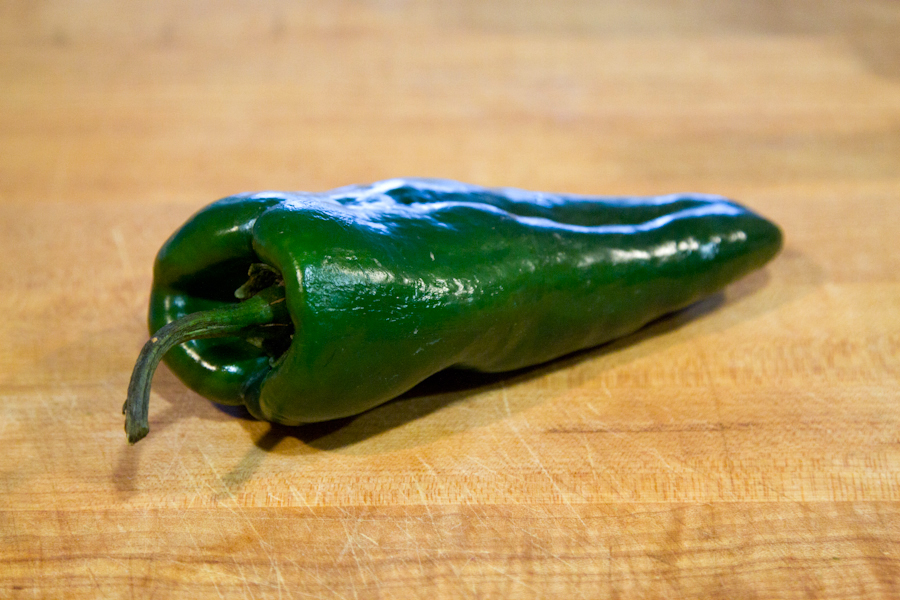
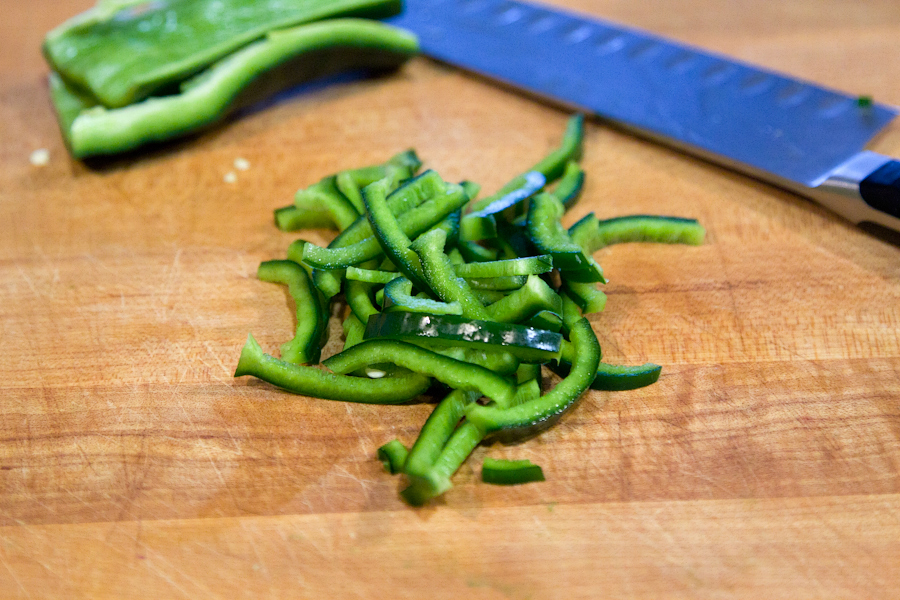
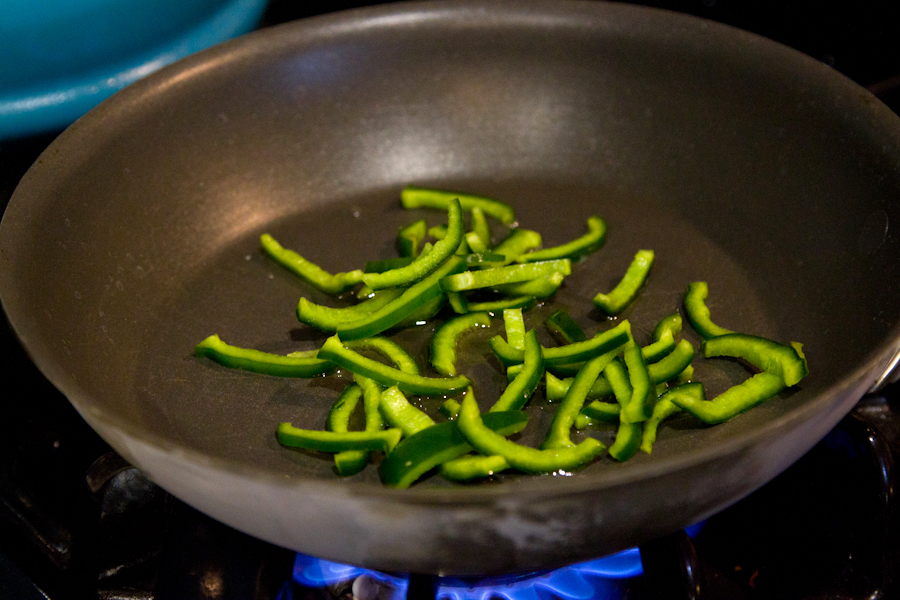
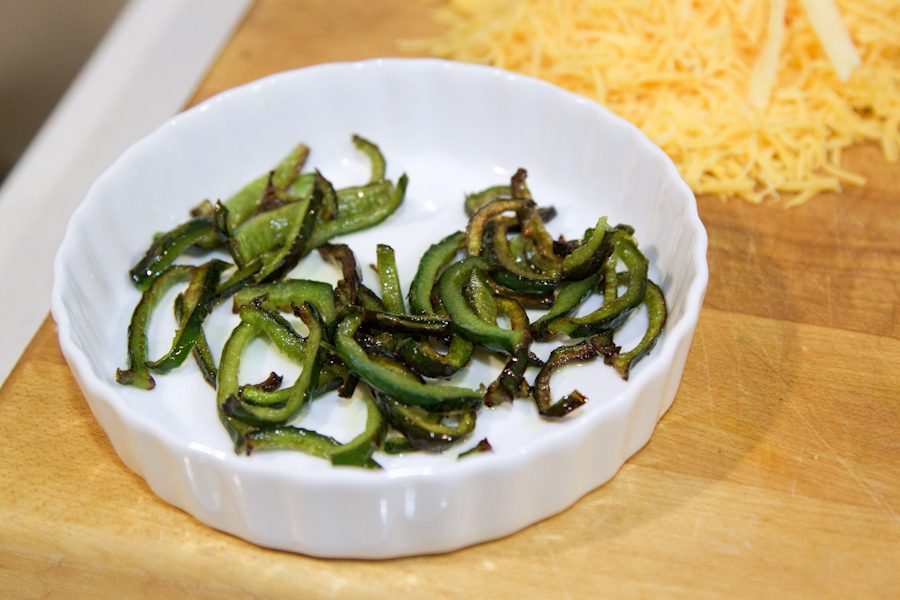
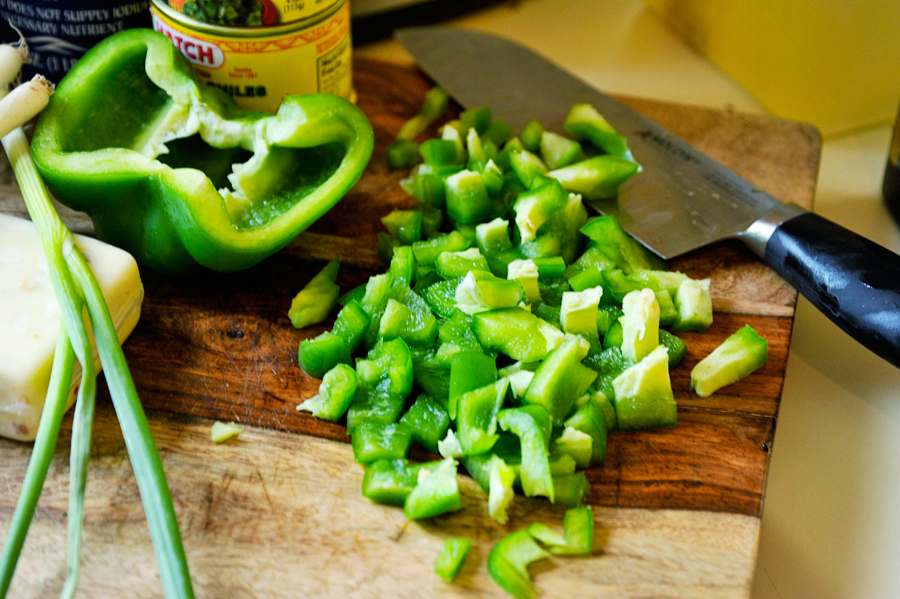
Cut your jalapeño in half, scrape out the seeds and ribs, and finely dice. Be sure to use gloves if you have sensitive skin (or paper cuts!). And even if you use gloves, be sure not to touch your eyes until after washing your hands. (Yes, I might be speaking from experience here.)


Tasty Kitchen Blog: Cheese Brownies. Guest post by Faith Gorsky of An Edible Mosaic, recipe submitted by TK member Monica (momx3girls).

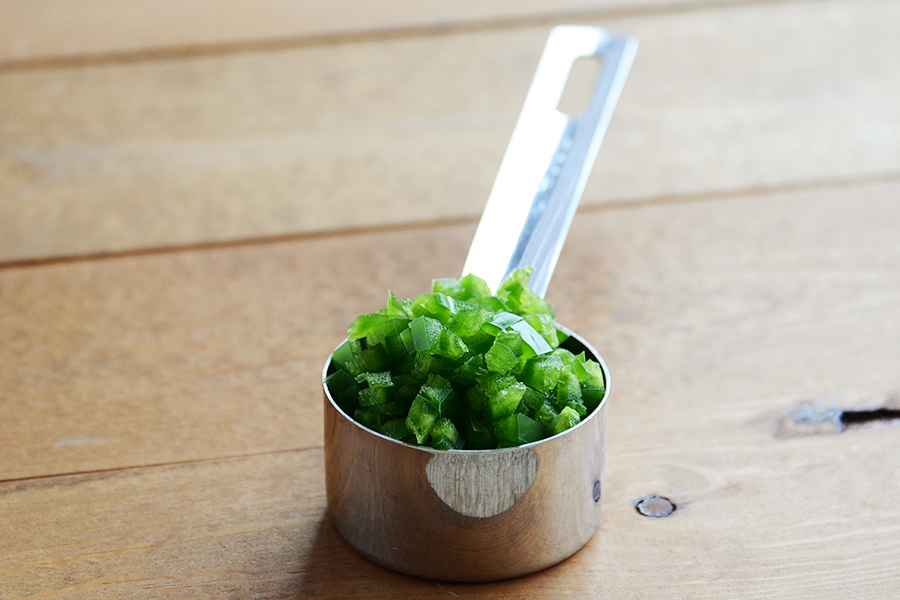
Ok, so remember how I said I only used 1 jalapeño instead of 2? It was a pretty big one—once chopped it was a heaping 1/4 cup. Everyone who tasted the brownies said they were delicious and not spicy at all (even the hot-food-averse!). I think next time I will be using 2 whole jalapeños, even if they are big (and if they’re normal-sized, I’ll be using 3). Just remember that not all jalapeños are created equal, so check the heat level of your peppers before deciding how much to add, just to be safe.


Tasty Kitchen Blog: Cheese Brownies. Guest post by Faith Gorsky of An Edible Mosaic, recipe submitted by TK member Monica (momx3girls).

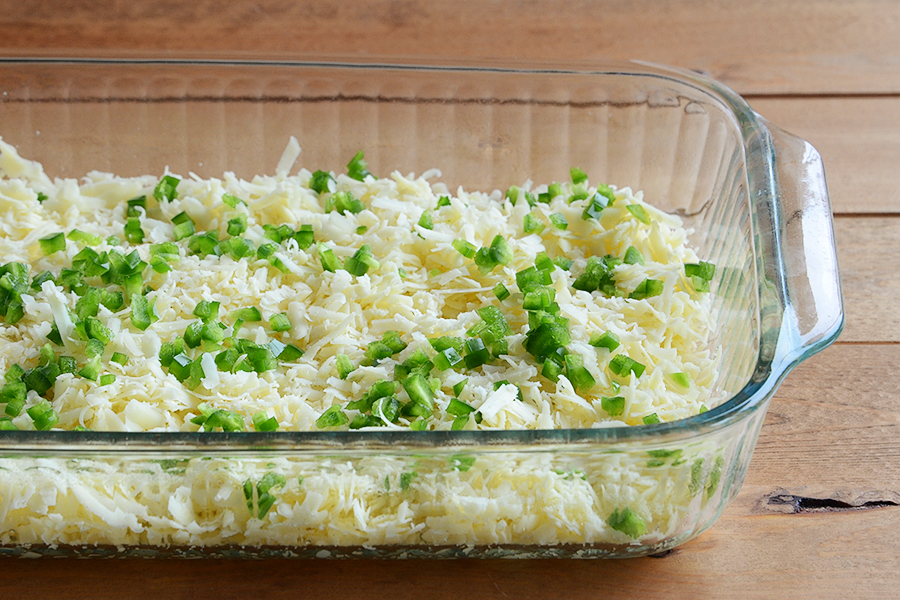
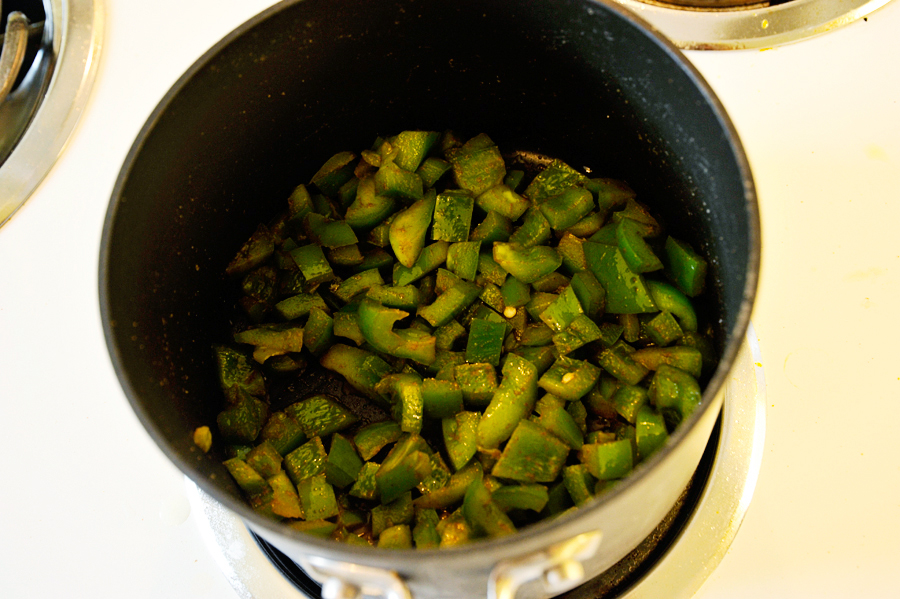
Sprinkle the chopped jalapeño onto the cheese.


Tasty Kitchen Blog: Cheese Brownies. Guest post by Faith Gorsky of An Edible Mosaic, recipe submitted by TK member Monica (momx3girls).

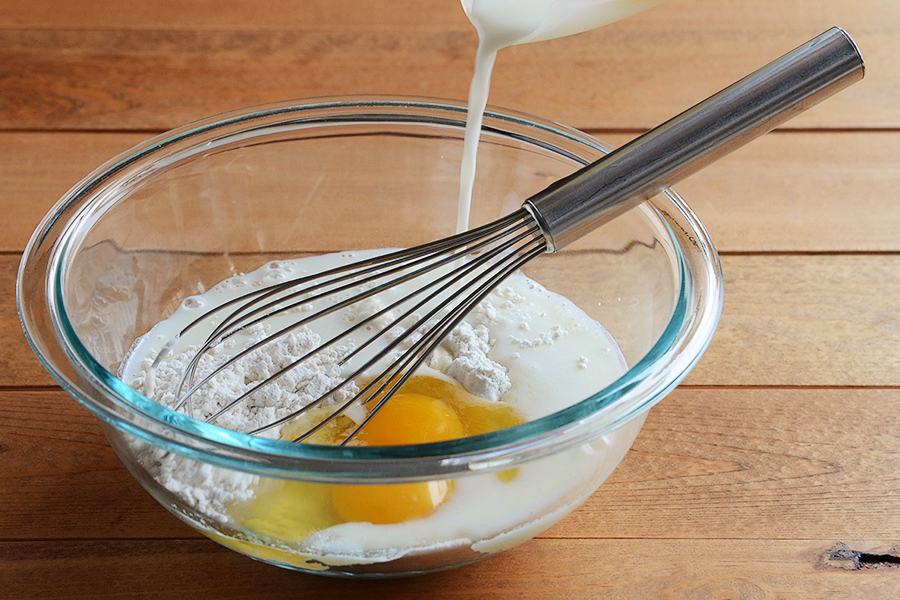
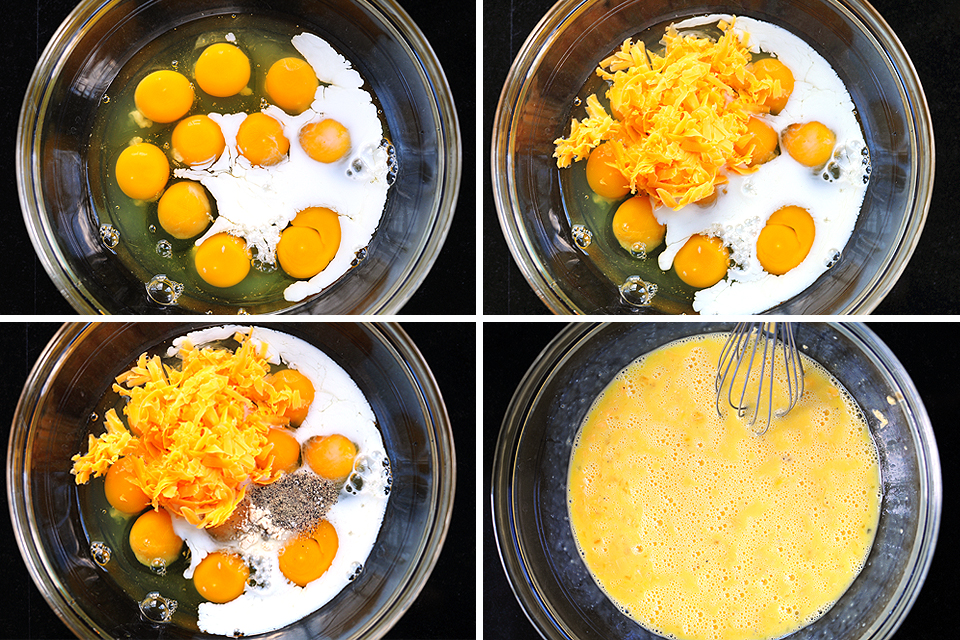
Whisk together the batter. It’s super simple, just milk, eggs, and flour!


Tasty Kitchen Blog: Cheese Brownies. Guest post by Faith Gorsky of An Edible Mosaic, recipe submitted by TK member Monica (momx3girls).

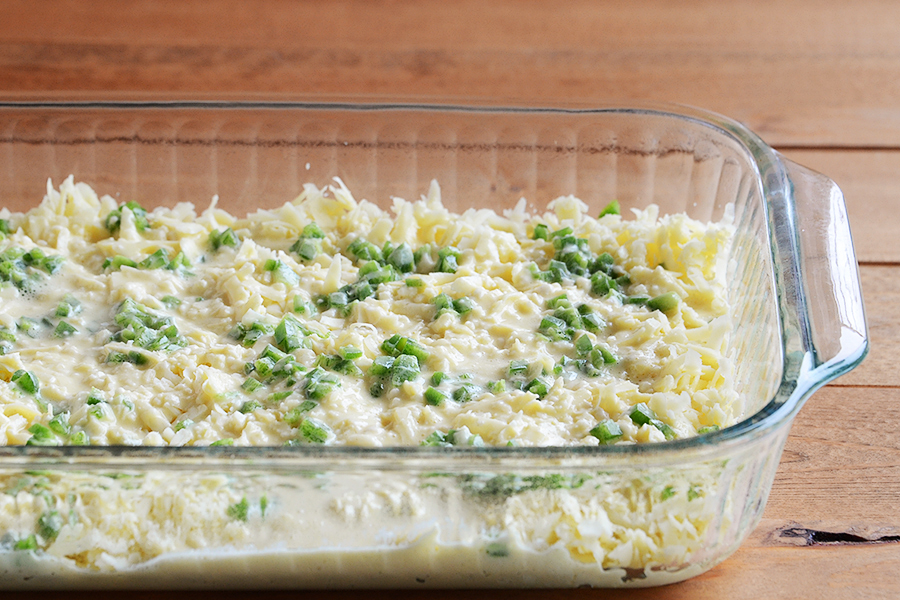
Pour the batter onto the cheese and jalapeño in the dish—but don’t stir!


Tasty Kitchen Blog: Cheese Brownies. Guest post by Faith Gorsky of An Edible Mosaic, recipe submitted by TK member Monica (momx3girls).

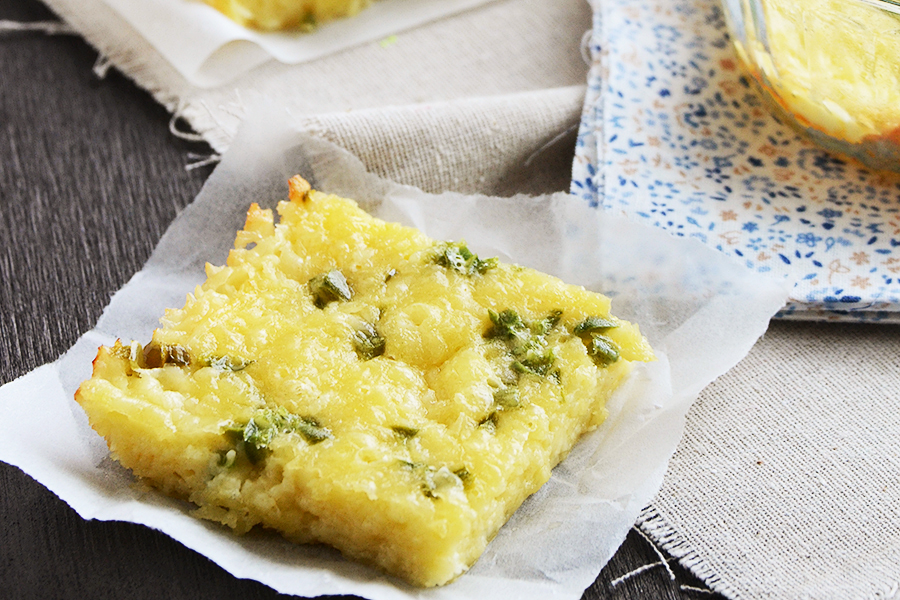
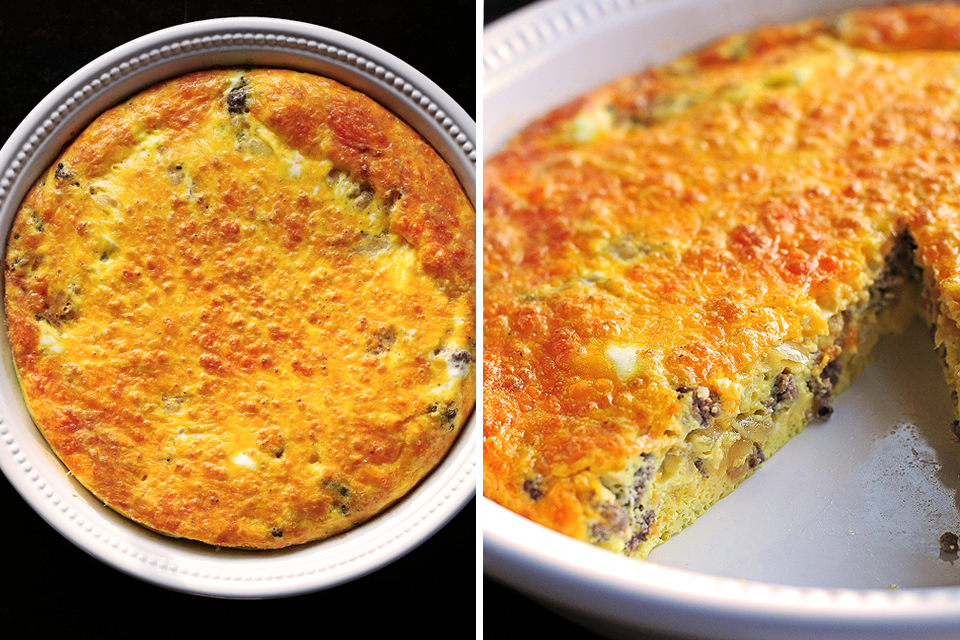
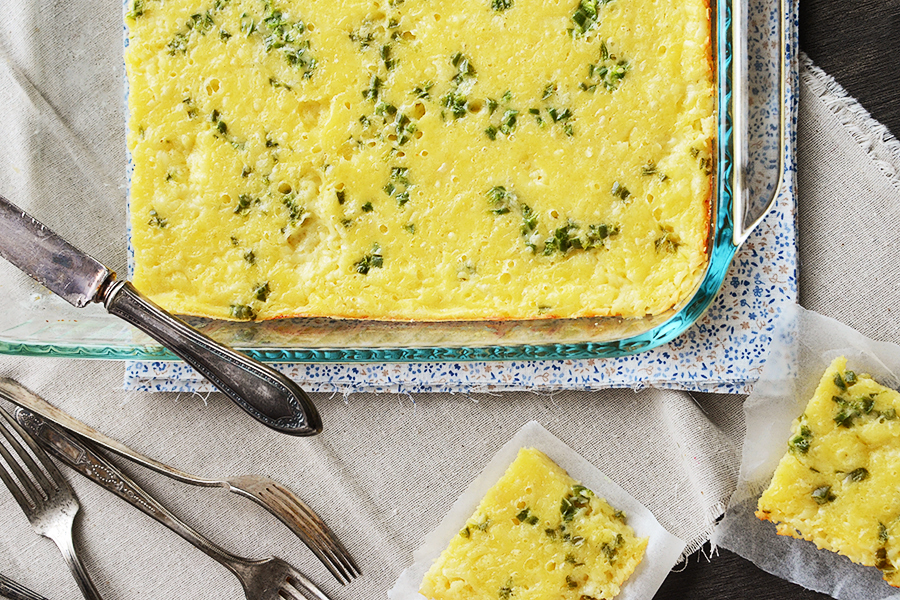
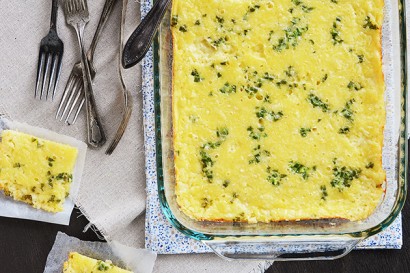
After baking for 30 minutes and letting them cool for 10 to 15 minutes, these little beauties are ready to go!


Tasty Kitchen Blog: Cheese Brownies. Guest post by Faith Gorsky of An Edible Mosaic, recipe submitted by TK member Monica (momx3girls).

And there you have it. This recipe couldn’t be easier and it is a huge crowd-pleaser. Thanks to Monica for a real winner. I know I will be making this again soon!


Printable Recipe

Cheese Brownies

4.38 Mitt(s) 8 Rating(s)8 votes, average: 4.38 out of 58 votes, average: 4.38 out of 58 votes, average: 4.38 out of 58 votes, average: 4.38 out of 58 votes, average: 4.38 out of 5

Prep Time:

Cook Time:

Difficulty: Easy

Servings: 12

12
x

Print Options

Page size Letter 3x5 4x6
Text Size Small Medium Large
Content Include description
Include prep time, etc.
Show image

Description

I received this recipe from my mother-in-law 20 years ago. She doesn’t remember where it came from and I’ve never seen it in any cookbooks. Hope you enjoy as much as we do!

Ingredients

  • 16 ounces, weight Colby Jack Or Cheddar Cheese, Shredded
  • 2 whole Jalapeño Peppers, Seeds And Ribs Removed, Chopped
  • 1 cup Milk
  • 1 cup All-purpose Flour
  • 2 whole Eggs

Preparation Instructions

Preheat the oven to 350ºF. Spray a 9×13 baking dish with nonstick cooking spray and place cheese evenly in the bottom of the dish. Sprinkle the chopped jalapeños over the cheese, do not stir.

In a bowl whisk together the milk, flour and eggs. Drizzle over the cheese and jalapeño as evenly as possible, still not stirring.

Bake for 30 minutes. Cool for 10–15 minutes and cut into squares. Enjoy!

Update July 5, 2016: I made these for our family 4th of July potluck and used a jalapeño cheddar cheese that I bought at the local farmers market and sprinkled the top with some very very mild jalapeños. Everyone thought they tasted great that way! If you like it spicy be sure and try a spicier cheese!


_______________________________________

Faith Gorsky is the writer, recipe developer, photographer, and food stylist behind the blog An Edible Mosaic. She lives in Upstate New York and loves to travel, especially to places steeped in rich culture and history. She also enjoys reading, vintage shopping, watching movies, and is enamored with ancient cultures. She just released her first cookbook, “An Edible Mosaic: Middle Eastern Fare with Extraordinary Flair” (Tuttle Publishing), a collection of authentic Middle Eastern recipes handed down to her from her husband’s family.


Profile photo of whatsgabycooking

Cheese Crisps

Posted by in Step-by-Step Recipes

Tasty Kitchen Blog: Cheese Crisps. Guest post and recipe from Gaby Dalkin of What's Gaby Cooking.

 
Two words: Cheese Crisps. I’m beyond obsessed. Can I tell you a story? Growing up in Arizona, we ate cheese crisps like it was our JOB. Literally. I was a professional cheese crisp crafter by the age of 8. I could throw them together in no time and I was proud. I started jazzing them up by the time I was 10, and now that I’m in my mid-20s, I still make them like it’s my job. Because, well, they are awesome.

Imagine a baked crisp flour tortilla smothered with 2 kinds of cheeses and topped with whatever kind of toppings you want. Ya, it’s doesn’t get much better than that.

Ready, set, go!


Tasty Kitchen Blog: Cheese Crisps. Guest post and recipe from Gaby Dalkin of What's Gaby Cooking.

Let’s start with a poblano pepper, shall we?


Tasty Kitchen Blog: Cheese Crisps. Guest post and recipe from Gaby Dalkin of What's Gaby Cooking.

Cut it in half, and then half again, remove the seeds and slice into thin strips.


Tasty Kitchen Blog: Cheese Crisps. Guest post and recipe from Gaby Dalkin of What's Gaby Cooking.

Put the poblano pepper and a touch of olive oil in a skillet and sauté.


Tasty Kitchen Blog: Cheese Crisps. Guest post and recipe from Gaby Dalkin of What's Gaby Cooking.

We are going to sauté these until the pepper just begins to turn golden brown.


Tasty Kitchen Blog: Cheese Crisps. Guest post and recipe from Gaby Dalkin of What's Gaby Cooking.

Meanwhile, arrange some tortillas on a baking sheet.


Tasty Kitchen Blog: Cheese Crisps. Guest post and recipe from Gaby Dalkin of What's Gaby Cooking.

Spread some butter on the tops of the tortillas. It’s the right thing to do.


Tasty Kitchen Blog: Cheese Crisps. Guest post and recipe from Gaby Dalkin of What's Gaby Cooking.

Gorgeous! Pop those babies into the oven for about 5-7 minutes until the edges begin to crisp up.


Tasty Kitchen Blog: Cheese Crisps. Guest post and recipe from Gaby Dalkin of What's Gaby Cooking.

Now let’s get some cheese ready. I like quesadilla cheese. It looks like this. But you can totally use Monterey Jack if that is more readily available.


Tasty Kitchen Blog: Cheese Crisps. Guest post and recipe from Gaby Dalkin of What's Gaby Cooking.

Grate the queso quesadilla and some cheddar cheese.


Tasty Kitchen Blog: Cheese Crisps. Guest post and recipe from Gaby Dalkin of What's Gaby Cooking.

By now you should probably take the poblano peppers off the heat, transfer them to a little bowl and set aside.


Tasty Kitchen Blog: Cheese Crisps. Guest post and recipe from Gaby Dalkin of What's Gaby Cooking.

In the same skillet that we did the peppers, we are going to add some pork chorizo.


Tasty Kitchen Blog: Cheese Crisps. Guest post and recipe from Gaby Dalkin of What's Gaby Cooking.

You’ll need to break it up with a wooden spoon and then let it sauté for a few minutes until golden brown and fully cooked.


Tasty Kitchen Blog: Cheese Crisps. Guest post and recipe from Gaby Dalkin of What's Gaby Cooking.

Right about now, your tortillas should start to crisp up. See how the edges curl up a bit? Remove the baking sheet from the oven when that happens.


Tasty Kitchen Blog: Cheese Crisps. Guest post and recipe from Gaby Dalkin of What's Gaby Cooking.

Evenly divide the cheeses amongst the tortillas and then pop them back into the oven.


Tasty Kitchen Blog: Cheese Crisps. Guest post and recipe from Gaby Dalkin of What's Gaby Cooking.

Don’t they look divine once the cheese has melted?


Tasty Kitchen Blog: Cheese Crisps. Guest post and recipe from Gaby Dalkin of What's Gaby Cooking.

Now, just pile on the toppings! Add some green onions for good measure and serve them up with a side of salsa and an ice cold brew, if that’s your style.

I can’t wait for you guys to be as obsessed with cheese crisps as I am. They are perfect for any football party. Well, really, they are perfect for just about anything!


Printable Recipe

Cheese Crisps

See post on whatsgabycooking’s site!
4.33 Mitt(s) 3 Rating(s)3 votes, average: 4.33 out of 53 votes, average: 4.33 out of 53 votes, average: 4.33 out of 53 votes, average: 4.33 out of 53 votes, average: 4.33 out of 5

Prep Time:

Cook Time:

Difficulty: Easy

Servings: 4

4
x

Print Options

Page size Letter 3x5 4x6
Text Size Small Medium Large
Content Include description
Include prep time, etc.
Show image

Description

A delicious and simple dish from Arizona that will literally rock your world! It’s so good!

Ingredients

  • 1 whole Poblano Pepper
  • 1 teaspoon Olive Oil
  • ½ cups Pork Chorizo
  • 4 whole Small Flour Tortillas
  • 4 teaspoons Butter
  • 1 cup Mexican Cheeses (I Used Cheddar, Queso Quesadilla And Oaxaca)
  • 2 whole Scallions, Thinly Sliced

Preparation Instructions

Preheat oven to 350 degrees F.

Slice the poblano pepper into thin strips.

Heat a skillet over medium high heat with olive oil. Add the sliced poblano and saute for 5 minutes until the skin of the poblano starts to blister. Remove from skillet and set aside.

In the same skillet, add the pork chorizo and saute until fully cooked and browned. Remove and set aside.

Place each of the small tortillas on a baking sheet. Spread 1 teaspoon of butter on each tortilla. Place the baking sheet into the oven and let the tortillas toast. It will take about 5-7 minutes but keep your eyes on them. Once the edges start to turn golden brown, remove from the oven.

Place 1/4 cup of cheese on each of the tortillas and place back into the oven for about 3 minutes until the cheese has melted. Remove from oven.

Top with scallions, poblano peppers and chorizo if desired.


_______________________________________

Gaby Dalkin is the young lady behind What’s Gaby Cooking, a food blog that’s bursting at the seams with incredible recipes and food photography. She’s a personal chef and professional recipe developer, and if you follow her on Twitter, you’ll soon discover her two-fold obsession: guacamole and cheese. She has small feet, a large heart, and a smile that can light up the whole building. We’re pretty stoked to have her here.


Profile photo of missamy

Cheeseburger Frittata

Posted by in Step-by-Step Recipes

Tasty Kitchen Blog: Cheeseburger Frittata. Guest post and recipe from Amy Johnson of She Wears Many Hats.

 
Trying to manage a balanced diet is difficult for me. One of the hardest things is to make sure I’m getting enough healthy protein. During a busy day, carbs are usually the quick go-to meal for me, but I’ve found when I focus on getting more good protein during the day I function much better, physically and mentally. I feel more even keel, if you know what I mean.

Enter the frittata. A frittata is a great meal option for breakfast, lunch, or dinner. It’s quick like an omelet, and much lighter than its cousin the quiche. And like an omelet or quiche, the frittata flavor combinations are endless. It’s the perfect “clean out the fridge” meal.

For this version I had cheeseburger on the brain, so a Cheeseburger Frittata it was. I added browned ground beef, cheddar, and sautéed onions, but like any burger, build it like you want. Add some bacon, substitute a different cheese, or maybe mushrooms? Yum, mushrooms would be mighty nice.

Also, while a frittata is usually made stovetop in a skillet then finished under the broiler, I baked this one in a pie pan for the whole cook time. I found it gave a lighter texture, and it was easier, no fuss.

Take a second to assess your fridge, see what you have on hand and let’s make a frittata. Let me show you how I made this one.


Tasty Kitchen Blog: Cheeseburger Frittata. Guest post and recipe from Amy Johnson of She Wears Many Hats.

You’ll need eggs, a little milk, cheese (I used cheddar), browned ground beef, sautéed onions, and seasonings. I used salt, pepper and garlic powder (our favorite hamburger addition). Pretty simple stuff.


Tasty Kitchen Blog: Cheeseburger Frittata. Guest post and recipe from Amy Johnson of She Wears Many Hats.

Begin by cracking the eggs into a large bowl.


Tasty Kitchen Blog: Cheeseburger Frittata. Guest post and recipe from Amy Johnson of She Wears Many Hats.

Next add the milk, half of the cheese, and 1/4 teaspoon of each of the seasonings. Beat all together until combined well.


Tasty Kitchen Blog: Cheeseburger Frittata. Guest post and recipe from Amy Johnson of She Wears Many Hats.

In a pie pan coated well with butter or cooking spray, layer the browned ground beef and sautéed onions. Note: I used a 10″ pie pan, but a 9″ deep dish pie pan would work nicely here and give you a thicker frittata, too. Remember to adjust cook time for different sized dishes.


Tasty Kitchen Blog: Cheeseburger Frittata. Guest post and recipe from Amy Johnson of She Wears Many Hats.

Pour the egg mixture over the ground beef and onions.


Tasty Kitchen Blog: Cheeseburger Frittata. Guest post and recipe from Amy Johnson of She Wears Many Hats.

Spread the remaining cheese evenly over the top.


Tasty Kitchen Blog: Cheeseburger Frittata. Guest post and recipe from Amy Johnson of She Wears Many Hats.

Bake in a 400°F oven for about 15-20 minutes until center is set. Oven temperatures vary so be careful and watch for overcooking.


Tasty Kitchen Blog: Cheeseburger Frittata. Guest post and recipe from Amy Johnson of She Wears Many Hats.

Slice a piece and serve with a side of fruit for breakfast, or with a salad and/or soup for lunch or dinner. Frittata is flexible like that. Enjoy!

If you have any other frittata combos, please share below in the comments. I’m in a frittata-making mode right now.


Printable Recipe

Cheeseburger Frittata

See post on missamy’s site!
4.25 Mitt(s) 8 Rating(s)8 votes, average: 4.25 out of 58 votes, average: 4.25 out of 58 votes, average: 4.25 out of 58 votes, average: 4.25 out of 58 votes, average: 4.25 out of 5

Prep Time:

Cook Time:

Difficulty: Easy

Servings: 8

8
x

Print Options

Page size Letter 3x5 4x6
Text Size Small Medium Large
Content Include description
Include prep time, etc.
Show image

Description

A simple Cheeseburger Frittata for a quick, low-carb cheeseburger meal.

Ingredients

  • 1 pound Ground Beef
  • ¼ teaspoons Plus Two Dashes Of Salt, Divided
  • ¼ teaspoons Plus Two Dashes Of Pepper, Divided
  • ¼ teaspoons Plus Two Dashes Of Garlic Powder, Divided
  • 1 Tablespoon Olive Oil
  • 1 whole Medium-large Onion, Chopped
  • 10 whole Large Eggs
  • 3 Tablespoons Milk
  • 4 ounces, weight Cheddar Cheese, Shredded, Divided
  • Optional Additions: Bacon, Sautéed Mushroom, Sliced/diced Tomatoes

Preparation Instructions

Preheat oven to 400 F.

I used a 10″ pie pan for this recipe, but a 9″ deep dish should work as well. Grease it with some butter or spray it with cooking spray.

Brown the beef in a skillet over medium heat with a dash of salt, pepper and garlic powder.

In another skillet, heat olive oil over medium heat and sauté onion with a dash of salt and pepper. Saute until onions are translucent.

Beat together eggs, milk, 1/2 of the shredded cheddar cheese and 1/4 teaspoon of salt pepper and garlic powder.

Evenly distribute the browned hamburger on the bottom of the pie pan then top it with the sautéed onions.

Pour the egg mixture over the top of the hamburger and onion. Top that with the remaining cheese.

Bake at 400 F for 15-20 minutes until set. (I used a 10″ pie pan, so adjust cooking time accordingly for a different size of pan.)


_______________________________________

Amy Johnson is a blogger who writes about food, travel, the home (both inside and out), and various observations and random musings about anything and everything. Visit her blog She Wears Many Hats for a dose of deliciousness, practicality, hilarity, or just plain fun. She lives in South Carolina with her husband and two children.


Profile photo of georgiapellegrini

Cheesy Baked Green Chile Rice

Posted by in Step-by-Step Recipes

Tasty Kitchen Blog: Cheesy Baked Green Chile Rice. Guest post by Georgia Pellegrini, recipe submitted by TK member Lindsay of FunnyLove.

 
This recipe for Cheesy Baked Green Chile Rice from TK member Lindsay made my house smell so amazing that those passing by begged for a bite. It is a wonderful combination of cheesy, spicy, crunchy deliciousness. And you can make it in small or large skillets or a baking dish and serve it tableside.


Tasty Kitchen Blog: Cheesy Baked Green Chile Rice. Guest post by Georgia Pellegrini, recipe submitted by TK member Lindsay of FunnyLove.

To make it you will need: brown or white rice, cheese, pepper, green onion, cumin, chicken stock, olive oil, green chiles, salt, and either sour cream and cream cheese. Or to make a lower calorie version, you could use Greek yogurt like I did.


Tasty Kitchen Blog: Cheesy Baked Green Chile Rice. Guest post by Georgia Pellegrini, recipe submitted by TK member Lindsay of FunnyLove.

Dice your pepper finely to start.


Tasty Kitchen Blog: Cheesy Baked Green Chile Rice. Guest post by Georgia Pellegrini, recipe submitted by TK member Lindsay of FunnyLove.

Then, in a pot, sauté the peppers in the oil until slightly softened.


Tasty Kitchen Blog: Cheesy Baked Green Chile Rice. Guest post by Georgia Pellegrini, recipe submitted by TK member Lindsay of FunnyLove.

Add your cumin and stir …


Tasty Kitchen Blog: Cheesy Baked Green Chile Rice. Guest post by Georgia Pellegrini, recipe submitted by TK member Lindsay of FunnyLove.

Then add your rice and stir for two minutes.


Tasty Kitchen Blog: Cheesy Baked Green Chile Rice. Guest post by Georgia Pellegrini, recipe submitted by TK member Lindsay of FunnyLove.

Once it is translucent …


Tasty Kitchen Blog: Cheesy Baked Green Chile Rice. Guest post by Georgia Pellegrini, recipe submitted by TK member Lindsay of FunnyLove.

Take the white and green of the onions …


Tasty Kitchen Blog: Cheesy Baked Green Chile Rice. Guest post by Georgia Pellegrini, recipe submitted by TK member Lindsay of FunnyLove.

And dice finely.


Tasty Kitchen Blog: Cheesy Baked Green Chile Rice. Guest post by Georgia Pellegrini, recipe submitted by TK member Lindsay of FunnyLove.

Add to the rice and then add the stock. Let simmer partly covered until cooked through.


Tasty Kitchen Blog: Cheesy Baked Green Chile Rice. Guest post by Georgia Pellegrini, recipe submitted by TK member Lindsay of FunnyLove.

Once soft, taste and adjust seasoning with salt as needed.


Tasty Kitchen Blog: Cheesy Baked Green Chile Rice. Guest post by Georgia Pellegrini, recipe submitted by TK member Lindsay of FunnyLove.

Add the green chiles …


Tasty Kitchen Blog: Cheesy Baked Green Chile Rice. Guest post by Georgia Pellegrini, recipe submitted by TK member Lindsay of FunnyLove.

And the Greek yogurt (or sour cream and cream cheese).


Tasty Kitchen Blog: Cheesy Baked Green Chile Rice. Guest post by Georgia Pellegrini, recipe submitted by TK member Lindsay of FunnyLove.

Add the cheese as well.


Tasty Kitchen Blog: Cheesy Baked Green Chile Rice. Guest post by Georgia Pellegrini, recipe submitted by TK member Lindsay of FunnyLove.

Stir it all together well and taste. Adjust the seasoning as needed.


Tasty Kitchen Blog: Cheesy Baked Green Chile Rice. Guest post by Georgia Pellegrini, recipe submitted by TK member Lindsay of FunnyLove.

Pile it into a skillet or baking dish of your choosing and sprinkle more grated cheese on top. Bake in the oven, finishing it under the broiler for the last few minutes to get a browned top.


Tasty Kitchen Blog: Cheesy Baked Green Chile Rice. Guest post by Georgia Pellegrini, recipe submitted by TK member Lindsay of FunnyLove.

It will have a golden crust which will give it the perfect crunch.


Tasty Kitchen Blog: Cheesy Baked Green Chile Rice. Guest post by Georgia Pellegrini, recipe submitted by TK member Lindsay of FunnyLove.

You will love, love, love the flavor and smell of this dish! It is the perfect side and even great at room temperature. Thank you to Lindsay for this delicious recipe! Visit her website FunnyLove for other delectable treats.


Printable Recipe

Cheesy Baked Green Chile Rice

See post on Lindsay @ My Therapist Cooks’s site!
5.00 Mitt(s) 8 Rating(s)8 votes, average: 5.00 out of 58 votes, average: 5.00 out of 58 votes, average: 5.00 out of 58 votes, average: 5.00 out of 58 votes, average: 5.00 out of 5

Prep Time:

Cook Time:

Difficulty: Easy

Servings: 4

4
x

Print Options

Page size Letter 3x5 4x6
Text Size Small Medium Large
Content Include description
Include prep time, etc.
Show image

Description

What IS it about canned green chilies?

Ingredients

  • 1 Tablespoon Olive Oil
  • 1 teaspoon Cumin
  • ½ whole Green Bell Pepper, Finely Chopped
  • 1 cup Rice
  • 1 whole Scallion, Thinly Sliced, White And Green Parts Separated
  • 2 cups Vegetable Or Chicken Stock, Or Enough To Cook The Rice To Package Directions
  • ¼ cups Sour Cream
  • 2 Tablespoons Cream Cheese
  • 8 ounces, fluid Canned Green Chilies In Their Juices
  • 1 cup Shredded Cheese, Your Choice, Divided
  • Salt To Taste

Preparation Instructions

Heat a pot to medium heat with a drizzle of olive oil. Add the cumin and green pepper. Cook for 3-5 minutes until slightly softened.

Add the rice. Stir for 2 minutes to coat the rice in the oil and lightly toast, then add the scallion whites and stock. Cover, reduce to a simmer, and cook the rice until done.

To the cooked rice, add the sour cream, cream cheese, canned chilies, and half the grated cheese. Stir, and taste. Add salt if you’d like.

Spread the rice mixture into a baking dish and top with the rest of the cheese.

To cook, broil the top (if the rice is still hot), or bake at 375ºF for 20-30 minutes until hot throughout and melty on top.

Note: Make this up to 3 days ahead and keep in the fridge. Bake whenever you’d like to eat it!


_______________________________________

There’s so much to say about Georgia, we don’t know where to start. Leaving Wall Street for the French Culinary Institute, followed by a stint at the Gramercy Tavern and La Chassagnette in France, her passion for food and food traditions are evident and inspiring. Visit her site at Georgia Pellegrini, where you’ll find more recipes, photos, learn all about her wonderful books Girl Hunter and Food Heroes, and enjoy her latest adventures.


Profile photo of Faith (An Edible Mosaic)

Chicken Alfredo Garlic Bread Pizza

Posted by in Step-by-Step Recipes

  Tasty Kitchen member Jennifer is the mastermind behind the brilliant idea that is Chicken Alfredo Garlic Bread Pizza. Did you hear that? Chicken Alfredo. Garlic Bread. Pizza. All rolled into one! Those are three pretty fantastic reasons to make this recipe. This is perfect as an appetizer, party finger food, or even a weeknight […]

Profile photo of Erica Lea

Chicken Cordon Bleu Casserole

Posted by in Step-by-Step Recipes

  Sometimes, you just need a warm, comforting supper; something that will fill your belly and keep you satisfied. This casserole (or, as I like to call it, hotdish) is admittedly not the most healthy on earth. But, trust me, Terri’s recipe is worth the extra calories. Let me show you how it goes together. […]

Profile photo of georgiapellegrini

Chicken in Coconut-Lime Peanut Sauce

Posted by in Step-by-Step Recipes

  I get such a craving for Asian food sometimes. I’m not very good at cooking it myself—there’s something about the flavor combinations that aren’t intuitive to me while cooking, but are so delicious when put in front of me at a dinner table. I noticed that Tasty Kitchen member Marla Meridith had a delicious-looking […]

Profile photo of EatLiveRun

Chicken Noodle Soup Casserole

Posted by in Step-by-Step Recipes

  When I stumbled upon 4littlefergusons’ comforting recipe for Chicken Noodle Soup Casserole I knew I had to make it, especially since I was nursing my boyfriend back to health after a ski accident-induced shoulder surgery. Nothing says “get well soon” like a big pot of chicken noodle soup, and this casserole piqued my interest […]