The Pioneer Woman Tasty Kitchen
Profile photo of Faith (An Edible Mosaic)

Two Quick Solutions for a Sudden Cookie Fix

Posted by in Baking, Step-by-Step Recipes

Have a cookie craving that just won’t go away? We’re bringing back this post featuring two quick 5-ingredient cookies! As a bonus, one of them is gluten-free. You know you want some. In fact, they’re so easy, why not make both? Time to get baking!

 
Tasty Kitchen Blog: Gluten Free Peanut Butter Cookies and Easy Nutella Cookies with Sea Salt

 
Let’s face it, some days you just need a quick cookie fix.

Maybe your kid is having a party at school, or maybe it’s a co-worker’s birthday at the office. Or maybe it’s just been a really long week, and you’re in the mood for a cookie or two without having to spend all day in the kitchen. Tasty Kitchen to the rescue!

I did a super quick search and found not one, but two delicious cookie recipes on Tasty Kitchen; each has just 5 ingredients and can be made in less than 30 minutes from start to finish. That’s what I call a fabulous quick cookie fix.

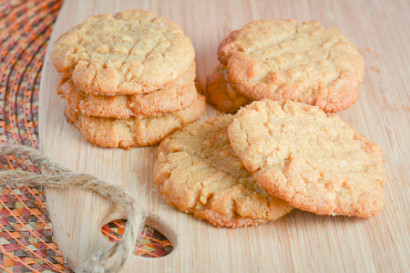
First up is Tasty Kitchen member Desserts by Juliette’s recipe for Gluten-Free Peanut Butter Cookies. There’s just something about a plate of peanut butter cookies and a tall glass of milk that is reminiscent of being a kid…maybe that’s why almost everyone I know is crazy about them! Juliette’s version is really lovely; it lets the flavor of peanut butter shine through, and a touch of sea salt finishes them perfectly.

Like I said, they couldn’t be easier to make, so let’s get started!


Tasty Kitchen Blog: Gluten Free Peanut Butter Cookies and Easy Nutella Cookies with Sea Salt

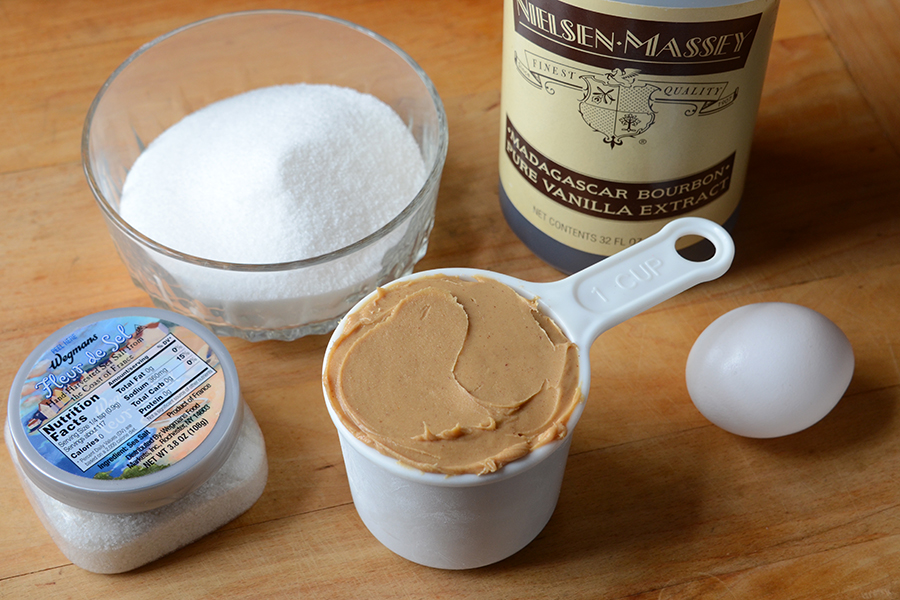
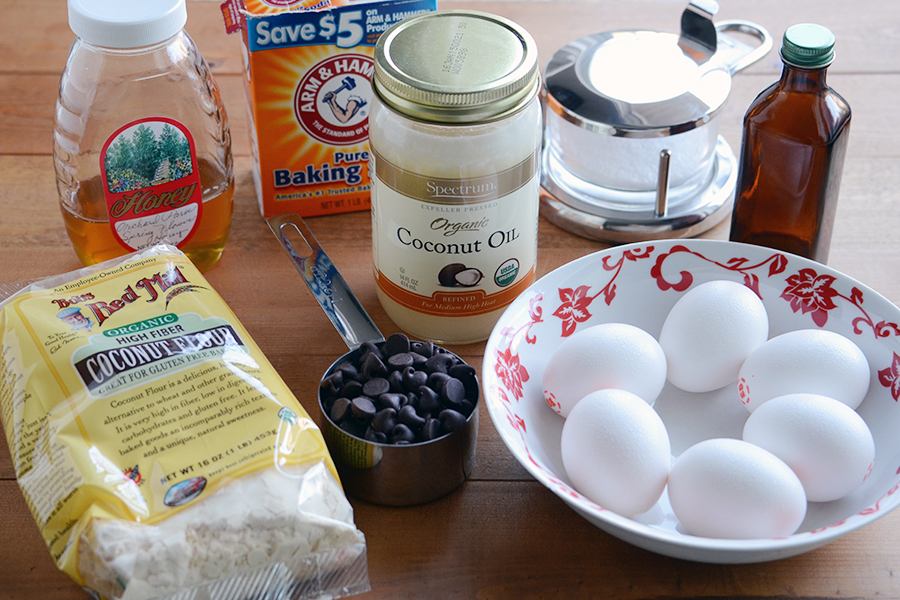
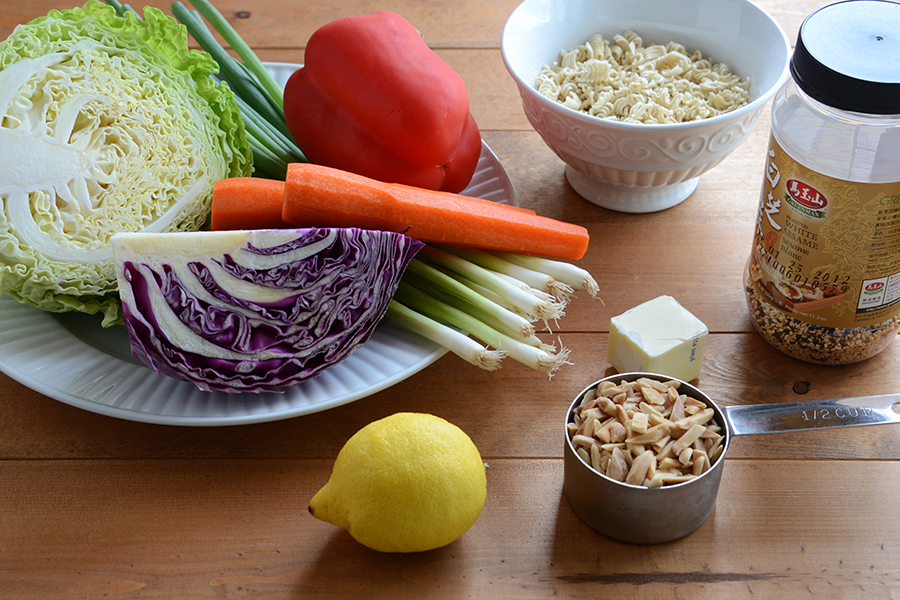
To make them, you’ll need: peanut butter, sugar, an egg, vanilla, and coarse sea salt. And yes, I know that is a crazy-big bottle of vanilla!

(Don’t forget to preheat your oven to 350F and line a baking sheet with parchment paper!)


Tasty Kitchen Blog: Gluten Free Peanut Butter Cookies and Easy Nutella Cookies with Sea Salt

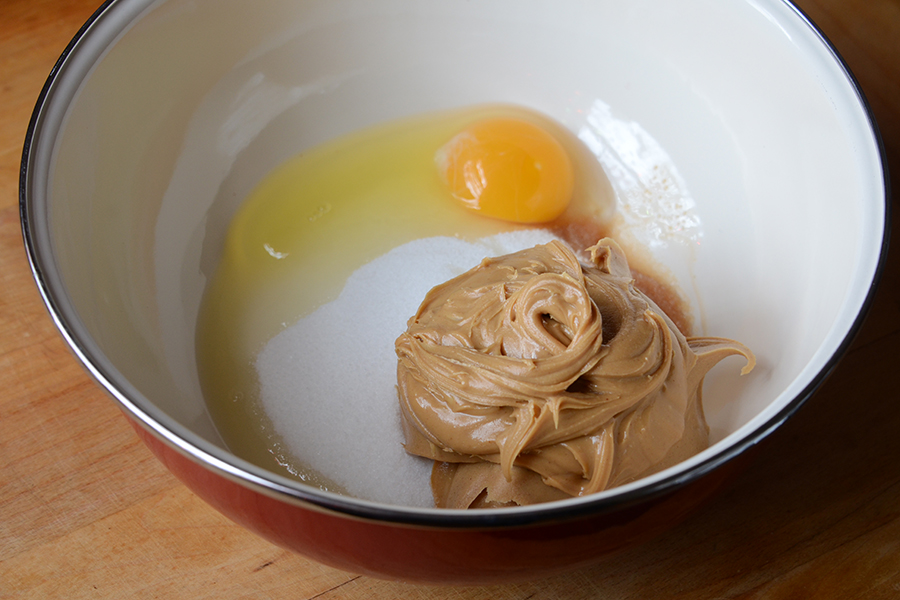
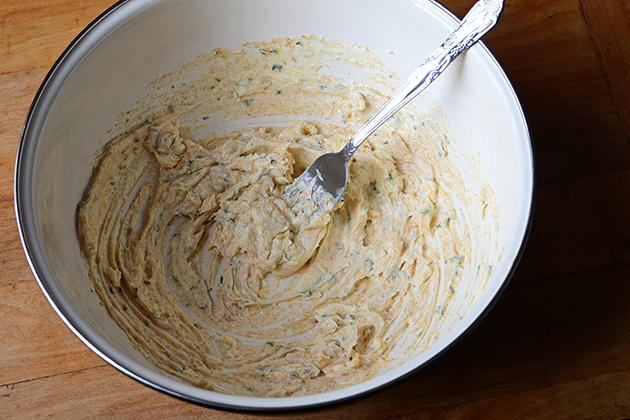
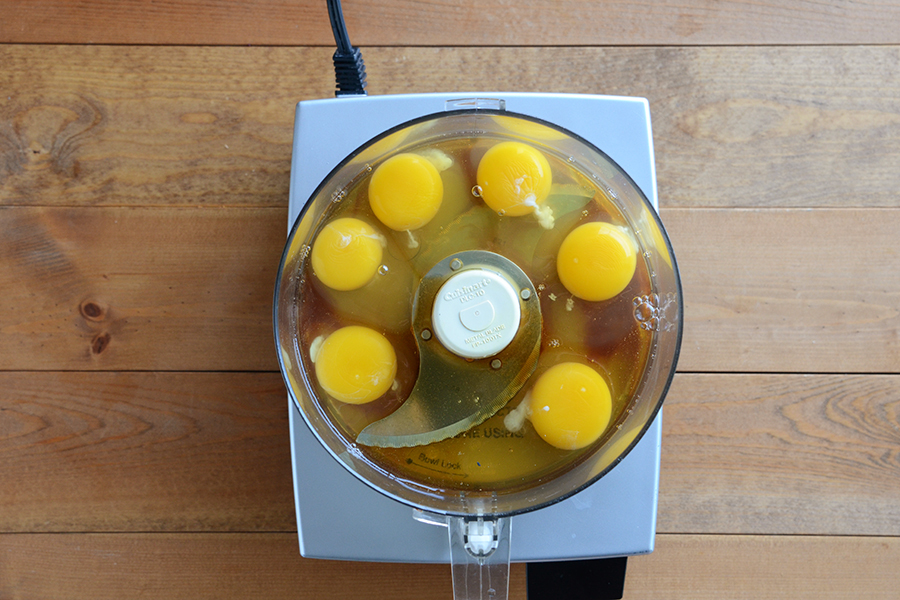
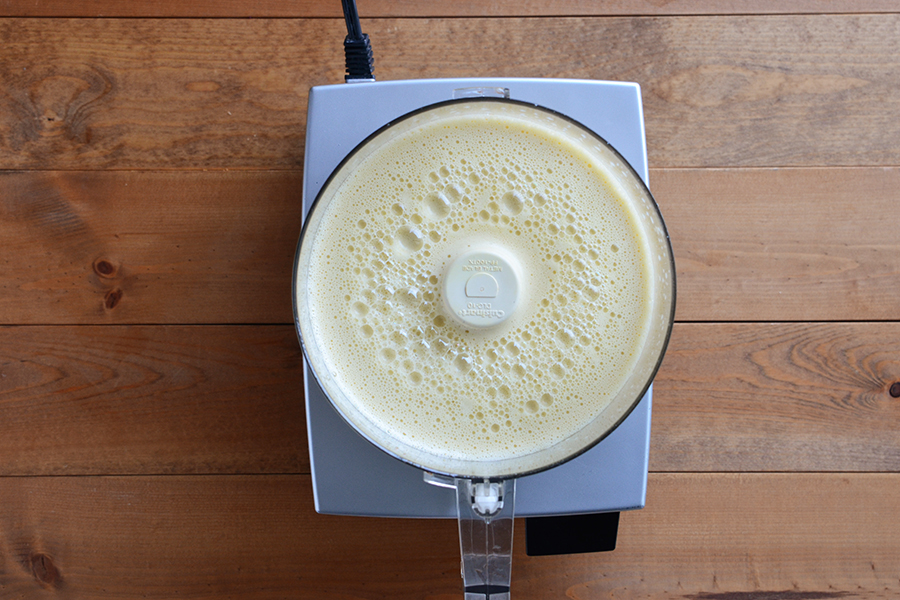
Ok, so dump everything into a bowl …


Tasty Kitchen Blog: Gluten Free Peanut Butter Cookies and Easy Nutella Cookies with Sea Salt

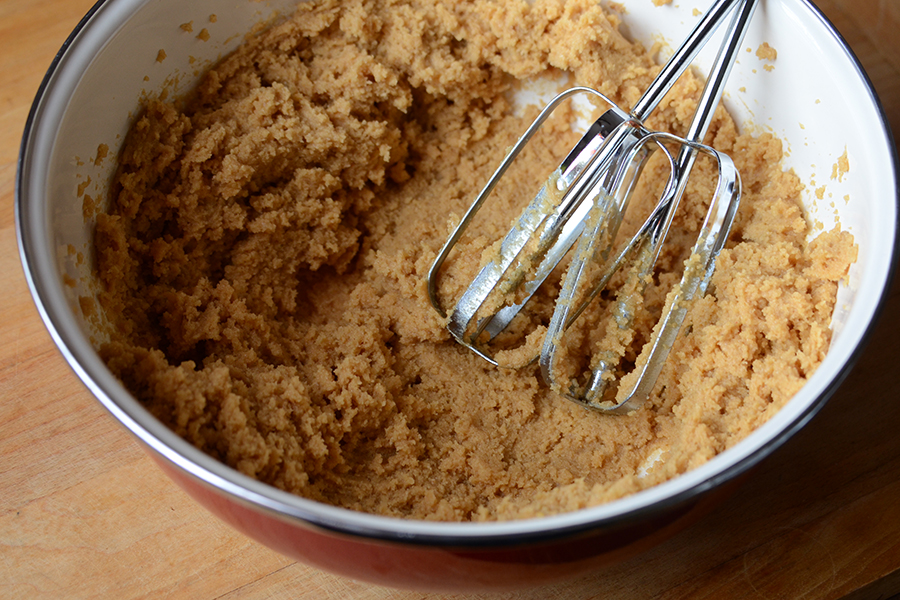
And beat it up! (I used a handheld electric mixer for this; no need to dirty a stand mixer.)


Tasty Kitchen Blog: Gluten Free Peanut Butter Cookies and Easy Nutella Cookies with Sea Salt

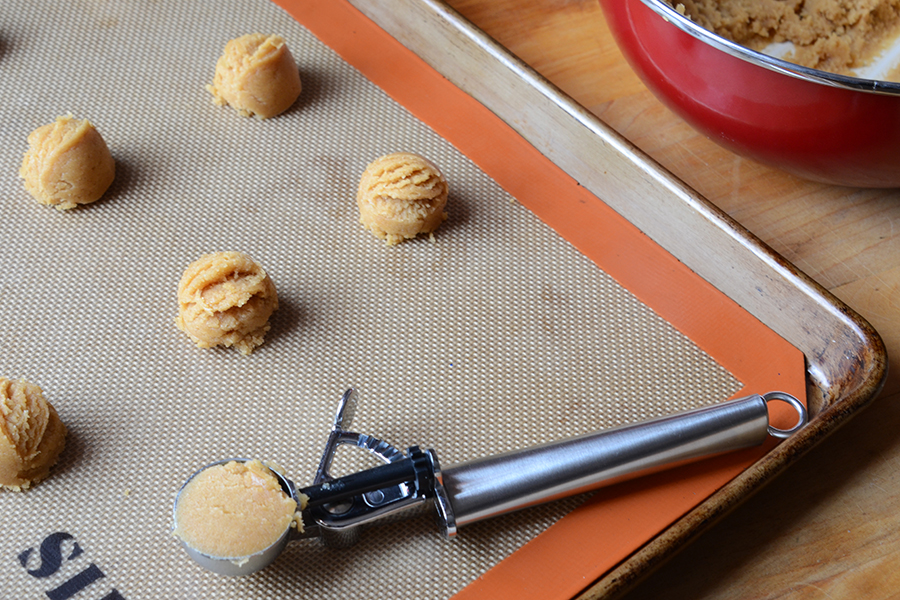
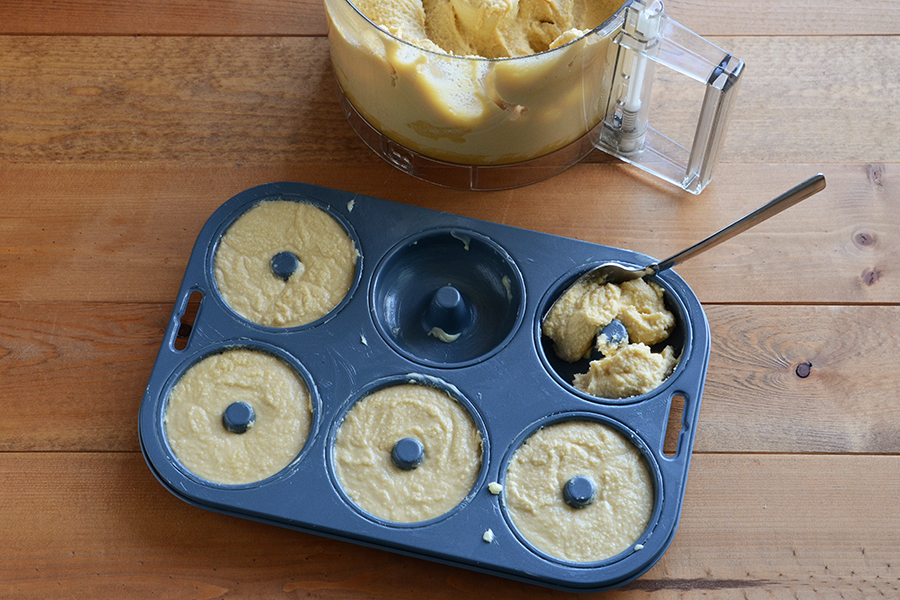
Spoon the dough by the tablespoon onto the prepared baking sheet, leaving about 2 inches between each (I got 12 cookies on 1 half-sheet pan). Oh, and I want to mention, I find that a 1-tablespoon-sized ice cream scoop is the easiest (and fastest!) way to scoop out the dough.


Tasty Kitchen Blog: Gluten Free Peanut Butter Cookies and Easy Nutella Cookies with Sea Salt

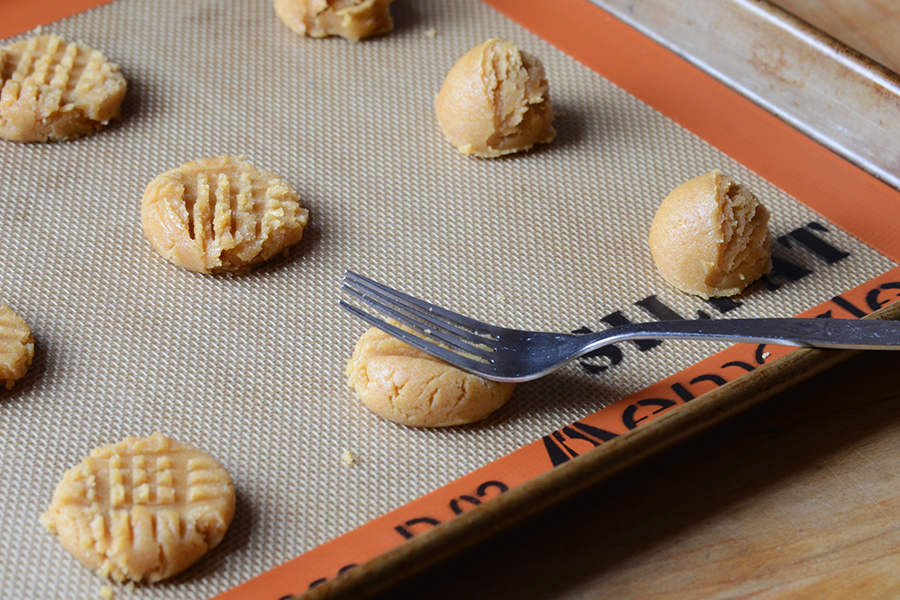
Flatten each dough ball slightly with a fork, making a cross-hatch pattern.


Tasty Kitchen Blog: Gluten Free Peanut Butter Cookies and Easy Nutella Cookies with Sea Salt

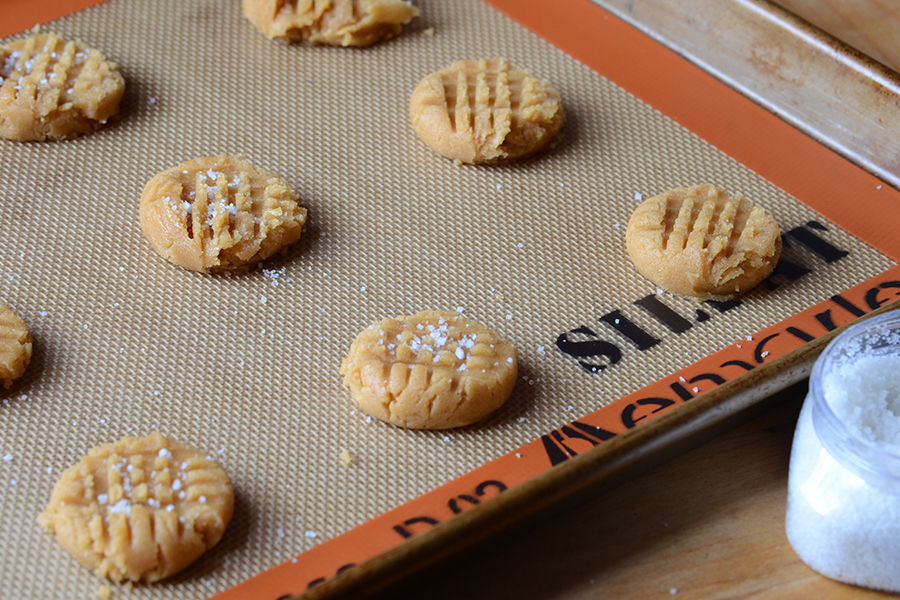
And then sprinkle the tops with sea salt. (They’re looking pretty good already, right?)


Tasty Kitchen Blog: Gluten Free Peanut Butter Cookies and Easy Nutella Cookies with Sea Salt

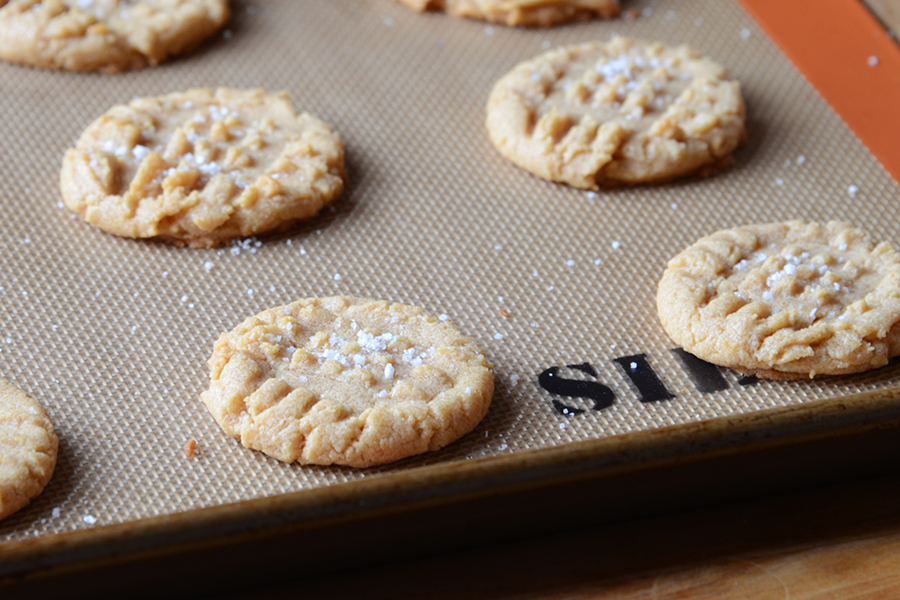
Bake until the cookies are golden brown on the bottom, set along the outside, and a touch doughy in the center, because they’ll harden as they cool. (This took about 8 to 9 minutes in my oven.) Cool the cookies slightly on the tray before removing. I got exactly 28 cookies out of this recipe.


Tasty Kitchen Blog: Gluten Free Peanut Butter Cookies and Easy Nutella Cookies with Sea Salt

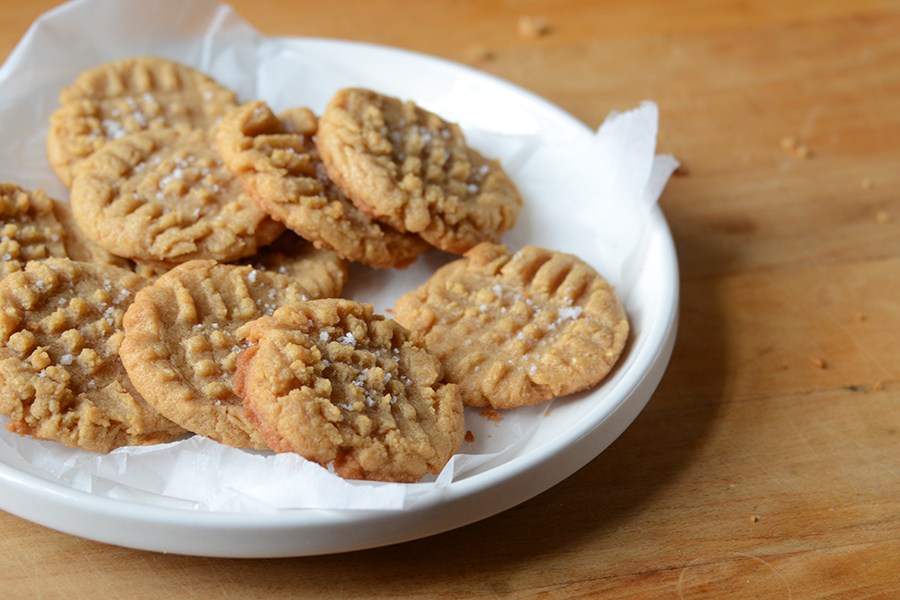
Such a delicious classic.

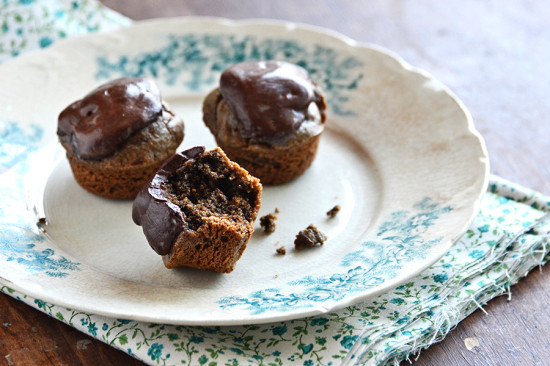
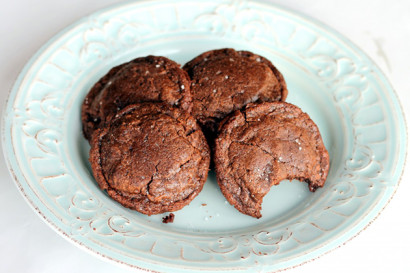
Those cookies come together so easily and you might just want to make another quick batch. If you do, Tasty Kitchen member Monique of Ambitious Kitchen has you covered with her recipe for Easy Nutella Cookies with Sea Salt. Nutella + sea salt = a very tasty combo indeed.


Tasty Kitchen Blog: Gluten Free Peanut Butter Cookies and Easy Nutella Cookies with Sea Salt

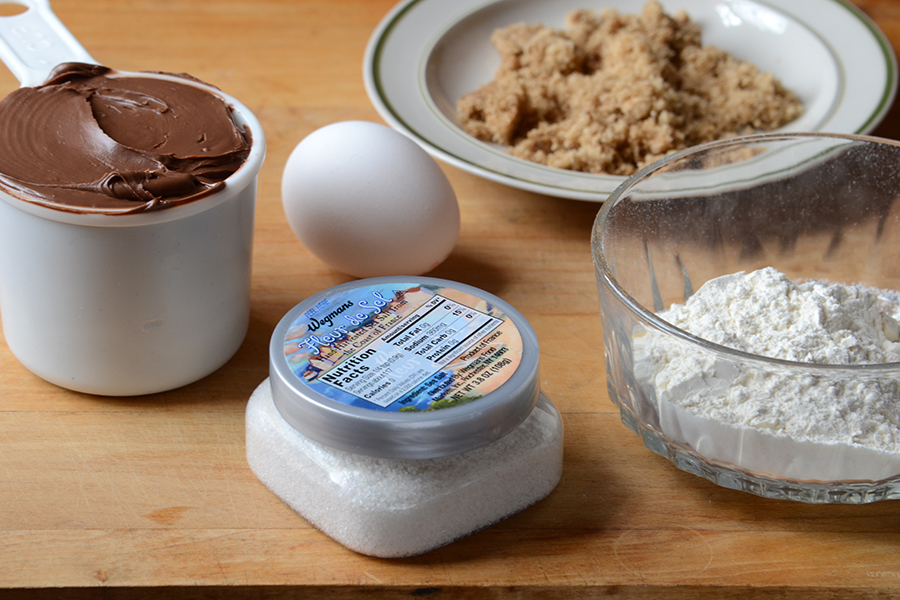
To whip them up, get out Nutella, flour, brown sugar, an egg, and coarse sea salt.

(Don’t forget to preheat your oven to 350F and line a baking sheet with parchment paper!)


Tasty Kitchen Blog: Gluten Free Peanut Butter Cookies and Easy Nutella Cookies with Sea Salt

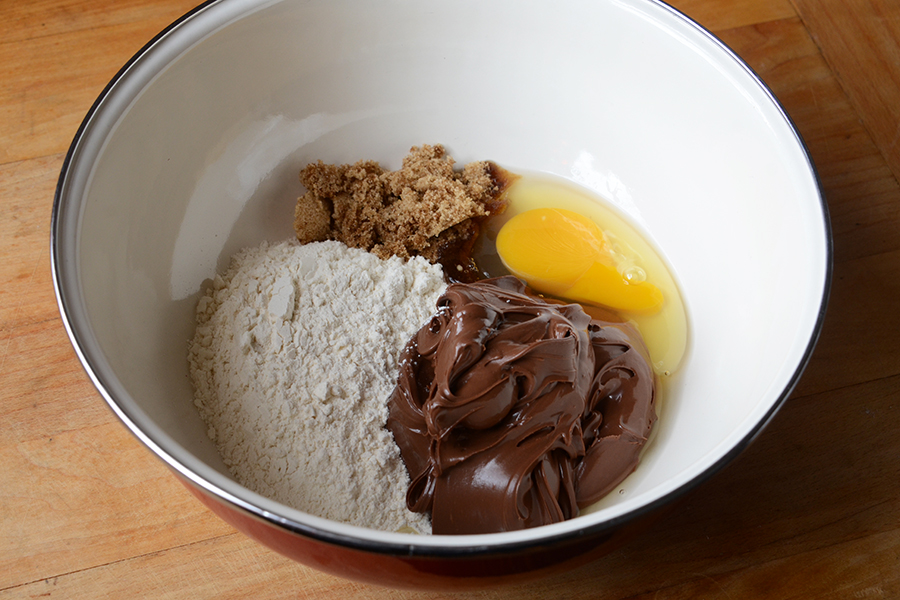
You know the drill: dump everything into a bowl …


Tasty Kitchen Blog: Gluten Free Peanut Butter Cookies and Easy Nutella Cookies with Sea Salt

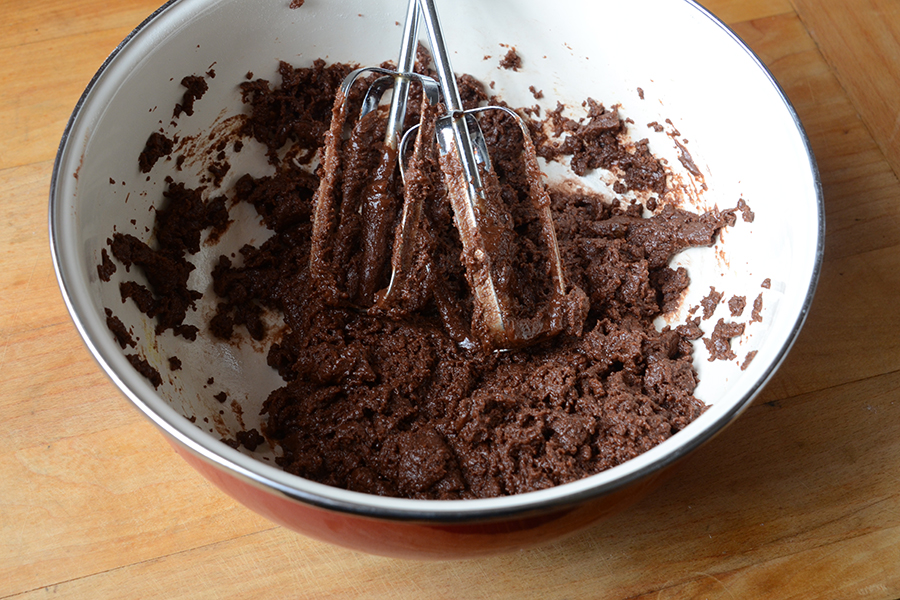
And again beat it with your handheld electric mixer. Once it’s mixed, cover the bowl and stick it in the freezer to chill for 10 minutes. Go brew a pot of coffee because in about 20 minutes, you’re going to be glad you did.


Tasty Kitchen Blog: Gluten Free Peanut Butter Cookies and Easy Nutella Cookies with Sea Salt

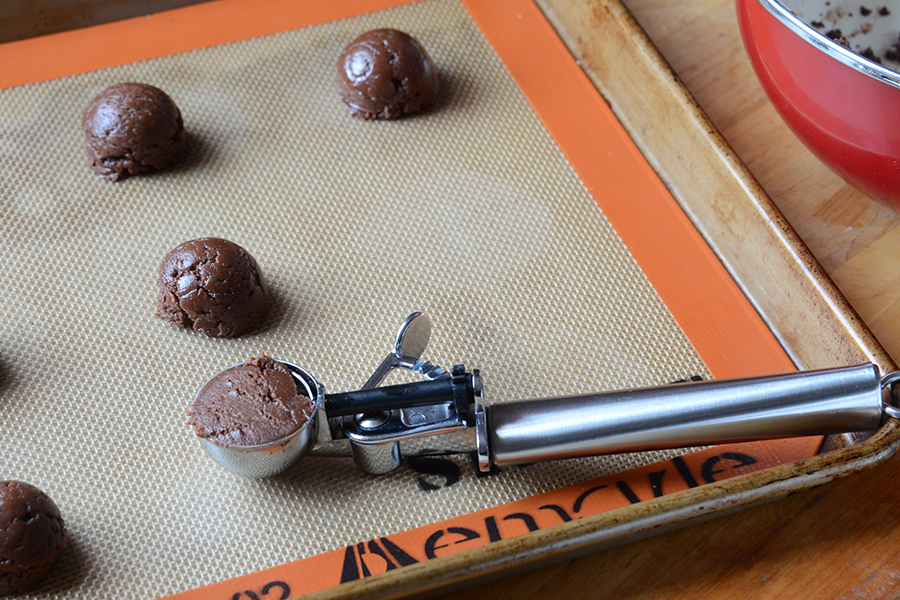
Roll the dough into 1-inch balls (I used my 1-tablespoon-sized ice cream scoop again), and line the balls up at least 2 inches apart on the prepared baking sheet.


Tasty Kitchen Blog: Gluten Free Peanut Butter Cookies and Easy Nutella Cookies with Sea Salt

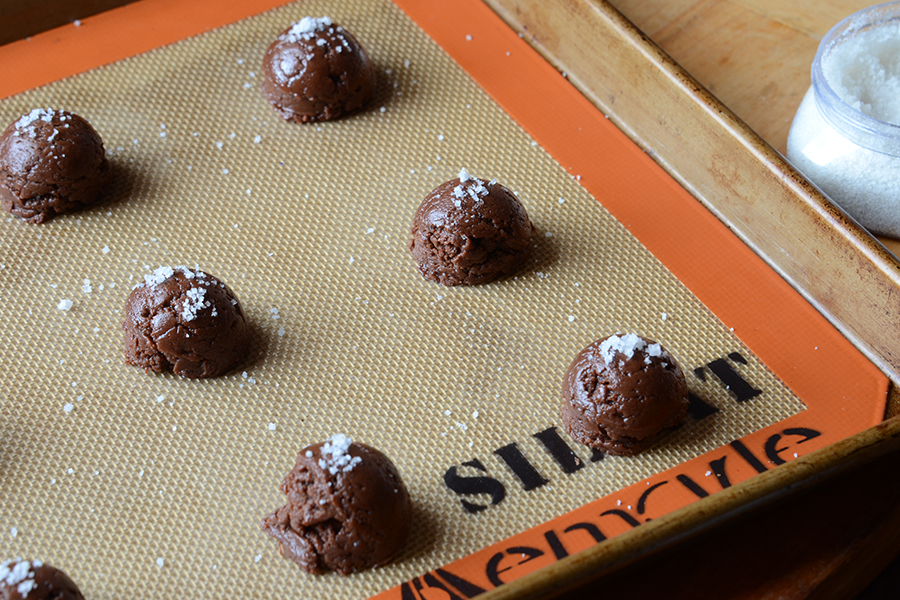
At this point I sprinkled on the sea salt, but you could wait to do it until after the cookies are baked.


Tasty Kitchen Blog: Gluten Free Peanut Butter Cookies and Easy Nutella Cookies with Sea Salt

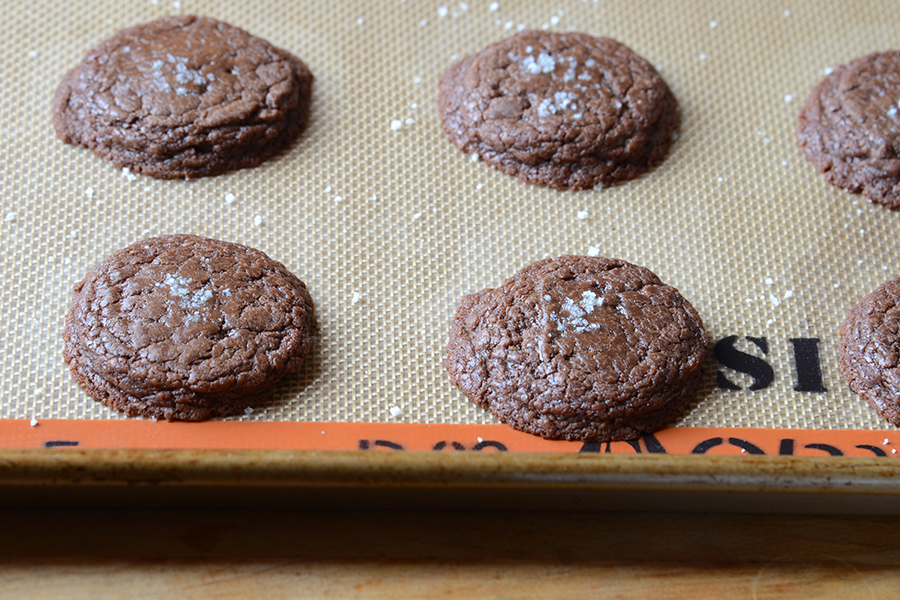
Pop the cookies into the oven and bake until they’re set along the outside and slightly doughy in the center (this took about 8 to 9 minutes in my oven). Remember to cool the cookies slightly on the tray before removing! I got exactly 22 cookies from this recipe.


Tasty Kitchen Blog: Gluten Free Peanut Butter Cookies and Easy Nutella Cookies with Sea Salt

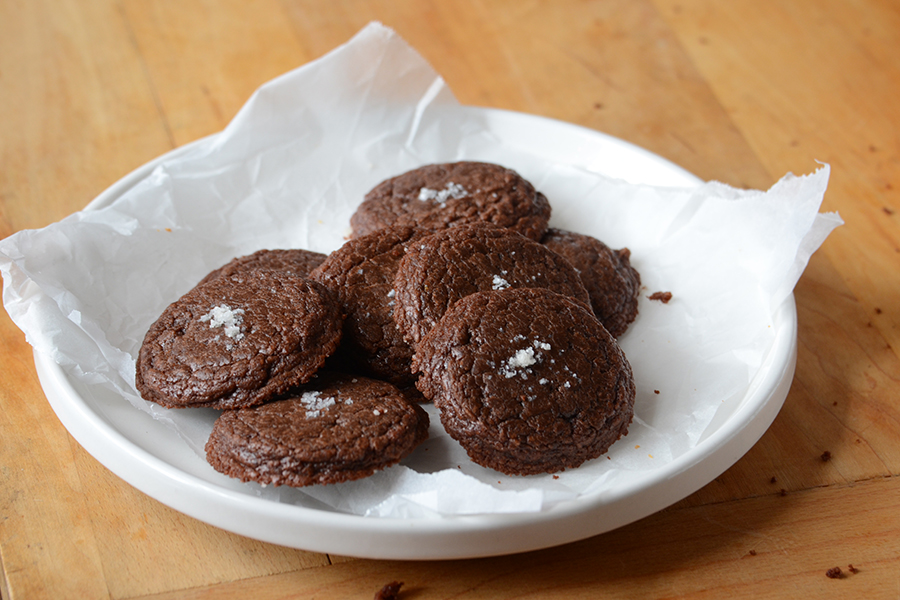
Now grab a hot cup of coffee (or a cold glass of milk) and enjoy a couple of those beauties.


Tasty Kitchen Blog: Gluten Free Peanut Butter Cookies and Easy Nutella Cookies with Sea Salt

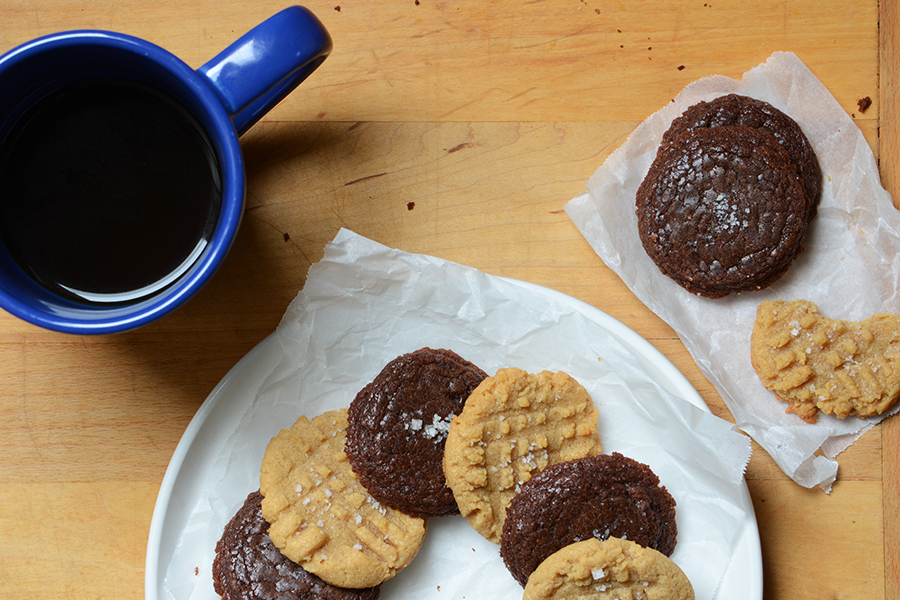
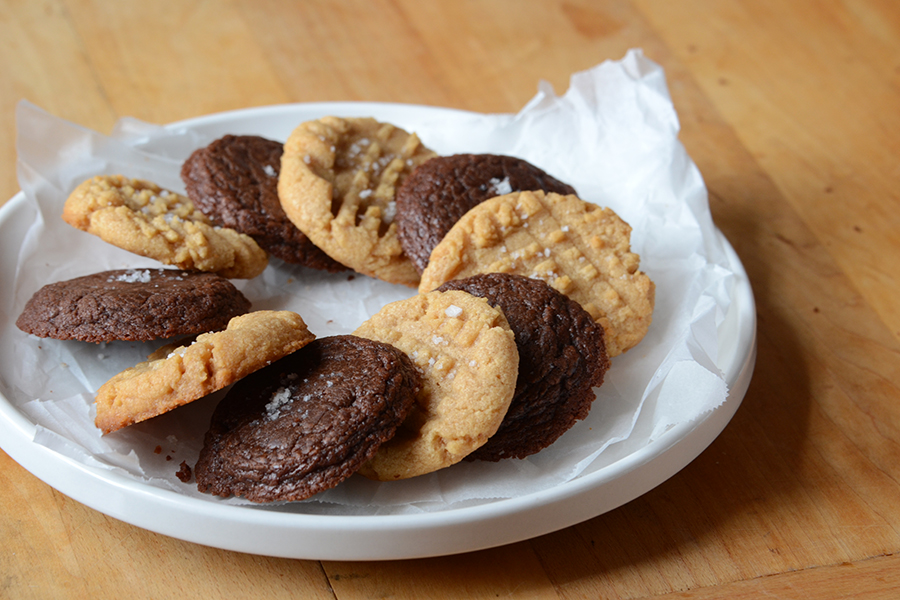
Or serve them up together! I think these two kinds of cookies complement each other in a fun, contrasting sort of way. Peanut butter and Nutella are delicious together (as anyone who has ever eaten a peanut butter and Nutella sandwich can attest to!). Plus the sea salt on both cookies pulls the two together.

But either kind of cookie is fabulous enough to stand alone if you just want to try one kind. The peanut butter cookies are perfect if you’re baking for a gluten-free crowd, and the Nutella cookies are great if you’re baking for people with peanut butter allergies! There is something for everyone.

How is that for a perfect quick cookie fix?

Now go ahead and grab that cup of coffee (or tall glass of milk). I’ll share a couple cookies with you.


Printable Recipe

Gluten Free Peanut Butter Cookies

See post on Desserts by Juliette’s site!
5.00 Mitt(s) 3 Rating(s)3 votes, average: 5.00 out of 53 votes, average: 5.00 out of 53 votes, average: 5.00 out of 53 votes, average: 5.00 out of 53 votes, average: 5.00 out of 5

Prep Time:

Cook Time:

Difficulty: Easy

Servings: 12

12
x

Print Options

Page size Letter 3x5 4x6
Text Size Small Medium Large
Content Include description
Include prep time, etc.
Show image

Description

These peanut butter cookies taste absolutely divine and you would never be able to guess that they are flourless and gluten-free. They are creamy and delicious, definitely worth trying out.

Ingredients

  • 1 cup Creamy Peanut Butter
  • 1 cup Granulated Sugar
  • 1  Egg
  • 1 teaspoon Vanilla Extract
  • Coarse Sea Salt

Preparation Instructions

1. Preheat oven to 350ºF. Line a baking sheet with parchment paper and set aside.
2. Beat peanut butter, sugar, egg, and vanilla until fully incorporated. Spoon 1 tablespoon of mixture 1 inch apart on the baking sheet. Flatten with fork, making a crosshatch pattern on the cookies. Sprinkle coarse salt over the top of the cookies
3. Bake for 10 minutes; they should still be soft to the touch when removed from oven. Let cool.


Printable Recipe

Easy Nutella Cookies with Sea Salt

See post on Monique of Ambitious Kitchen’s site!
4.80 Mitt(s) 5 Rating(s)5 votes, average: 4.80 out of 55 votes, average: 4.80 out of 55 votes, average: 4.80 out of 55 votes, average: 4.80 out of 55 votes, average: 4.80 out of 5

Prep Time:

Cook Time:

Difficulty: Easy

Servings: 12

12
x

Print Options

Page size Letter 3x5 4x6
Text Size Small Medium Large
Content Include description
Include prep time, etc.
Show image

Description

Easy, fudgy 5-ingredient Nutella Cookies with Sea Salt. In your belly in 25 minutes!

Ingredients

  • 1 cup Nutella
  • 2 Tablespoons Brown Sugar
  • 1  Egg
  • ½ cups Plus 1 Tablespoon Flour
  • Coarse Sea Salt, For Sprinkling

Preparation Instructions

Preheat oven to 350ºF.

Combine all ingredients except salt in a large bowl with electric mixer until well combined. Place dough in freezer for 10 minutes.

After 10 minutes, roll dough into approximately 1-inch balls, place on ungreased baking sheet at least 2 inches apart and bake for 8-10 minutes. Remove from oven and let cool for a few minutes until cookies are set, then very carefully transfer to a wire rack. Generously sprinkle with sea salt.


_______________________________________

Faith Gorsky is the writer, receipt developer, photographer, and food stylist behind the blog An Edible Mosaic, and the cookbook author of An Edible Mosaic: Middle Eastern Fare with Extraordinary Flair (Tuttle Publishing; November 2012). She was born, raised, and spent most of her life in Upstate New York, and she currently lives in Kuwait. When it comes to cooking, her favorite thing to do is go into the kitchen hungry, open the fridge, and start creating. She loves to travel, especially to places steeped in rich culture and history. She also enjoys reading (cookbooks mostly), vintage shopping (especially in old markets), watching movies (of all genres), and is enamored with ancient cultures (especially Rome and Egypt.


Profile photo of Faith (An Edible Mosaic)

Chicken Alfredo Garlic Bread Pizza

Posted by in Step-by-Step Recipes

Tasty Kitchen Blog: Chicken Alfredo Garlic Bread Pizza. Guest post by Faith Gorsky of An Edible Mosaic, recipe submitted by TK member Jennifer of Mother Thyme.

 
Tasty Kitchen member Jennifer is the mastermind behind the brilliant idea that is Chicken Alfredo Garlic Bread Pizza.

Did you hear that? Chicken Alfredo. Garlic Bread. Pizza. All rolled into one!

Those are three pretty fantastic reasons to make this recipe.

This is perfect as an appetizer, party finger food, or even a weeknight main dish along with a side salad. It literally has layer upon layer of flavor: buttery garlic bread spread, then chicken in a creamy Alfredo sauce, broccoli, and finally a layer of gooey cheese. It doesn’t get any more satisfying.

You know you want to make it!


Tasty Kitchen Blog: Chicken Alfredo Garlic Bread Pizza. Guest post by Faith Gorsky of An Edible Mosaic, recipe submitted by TK member Jennifer of Mother Thyme.

The recipe starts off by shredding a couple different kinds of cheese. First, some Parmesan for making the Alfredo sauce …


Tasty Kitchen Blog: Chicken Alfredo Garlic Bread Pizza. Guest post by Faith Gorsky of An Edible Mosaic, recipe submitted by TK member Jennifer of Mother Thyme.

And mozzarella for topping. Mmm, cheese.


Tasty Kitchen Blog: Chicken Alfredo Garlic Bread Pizza. Guest post by Faith Gorsky of An Edible Mosaic, recipe submitted by TK member Jennifer of Mother Thyme.

The ingredient list is fairly short for something so delicious! You’ll need cooked, shredded chicken, steamed broccoli, butter, half and half, mozzarella cheese, Parmesan cheese, parsley flakes, garlic powder, salt, pepper, a loaf of Italian bread, and a clove of garlic (which I think was hiding behind my bread in the photo above!).


Tasty Kitchen Blog: Chicken Alfredo Garlic Bread Pizza. Guest post by Faith Gorsky of An Edible Mosaic, recipe submitted by TK member Jennifer of Mother Thyme.

Press or mince the garlic.


Tasty Kitchen Blog: Chicken Alfredo Garlic Bread Pizza. Guest post by Faith Gorsky of An Edible Mosaic, recipe submitted by TK member Jennifer of Mother Thyme.

Melt the butter.


Tasty Kitchen Blog: Chicken Alfredo Garlic Bread Pizza. Guest post by Faith Gorsky of An Edible Mosaic, recipe submitted by TK member Jennifer of Mother Thyme.

Add the garlic and cook for a minute.

Slowly stir in the half-and-half. I had a little bit of a half-and-half mishap while trying to simultaneously stir, slowly pour, and shoot a picture. I won’t get into it but suffice to say, you’ll have to use your imagination to visualize the adding of the half-and-half.


Tasty Kitchen Blog: Chicken Alfredo Garlic Bread Pizza. Guest post by Faith Gorsky of An Edible Mosaic, recipe submitted by TK member Jennifer of Mother Thyme.

Add the Parmesan cheese.


Tasty Kitchen Blog: Chicken Alfredo Garlic Bread Pizza. Guest post by Faith Gorsky of An Edible Mosaic, recipe submitted by TK member Jennifer of Mother Thyme.

Give it a stir, cooking a couple minutes until thickened.


Tasty Kitchen Blog: Chicken Alfredo Garlic Bread Pizza. Guest post by Faith Gorsky of An Edible Mosaic, recipe submitted by TK member Jennifer of Mother Thyme.

Take the Alfredo sauce off the heat and add parsley flakes, salt, and pepper. Try not to eat it with a spoon.


Tasty Kitchen Blog: Chicken Alfredo Garlic Bread Pizza. Guest post by Faith Gorsky of An Edible Mosaic, recipe submitted by TK member Jennifer of Mother Thyme.

For the garlic bread, blend together more butter, garlic powder, and more parsley flakes in a bowl.

In another bowl, stir together the chicken and Alfredo sauce.

Preheat the oven to 375ºF. Line a large baking sheet with foil or a Silpat liner. (I was out of foil.)


Tasty Kitchen Blog: Chicken Alfredo Garlic Bread Pizza. Guest post by Faith Gorsky of An Edible Mosaic, recipe submitted by TK member Jennifer of Mother Thyme.

Slice the loaf of bread in half lengthwise and place it on the prepared baking sheet.


Tasty Kitchen Blog: Chicken Alfredo Garlic Bread Pizza. Guest post by Faith Gorsky of An Edible Mosaic, recipe submitted by TK member Jennifer of Mother Thyme.

Top with the butter spread.


Tasty Kitchen Blog: Chicken Alfredo Garlic Bread Pizza. Guest post by Faith Gorsky of An Edible Mosaic, recipe submitted by TK member Jennifer of Mother Thyme.

Then the chicken-Alfredo mixture.


Tasty Kitchen Blog: Chicken Alfredo Garlic Bread Pizza. Guest post by Faith Gorsky of An Edible Mosaic, recipe submitted by TK member Jennifer of Mother Thyme.

And the broccoli …


Tasty Kitchen Blog: Chicken Alfredo Garlic Bread Pizza. Guest post by Faith Gorsky of An Edible Mosaic, recipe submitted by TK member Jennifer of Mother Thyme.

And then finally that beautiful mountain of mozzarella.


Tasty Kitchen Blog: Chicken Alfredo Garlic Bread Pizza. Guest post by Faith Gorsky of An Edible Mosaic, recipe submitted by TK member Jennifer of Mother Thyme.

Bake until the cheese is melted, about 15 to 18 minutes. I wanted my pizza browned a bit in places, so I briefly ran it under the broiler after the cheese was melted (after about 15 minutes). Stay with it if you decide to broil though—it can go from perfect to burned in a matter of seconds!


Tasty Kitchen Blog: Chicken Alfredo Garlic Bread Pizza. Guest post by Faith Gorsky of An Edible Mosaic, recipe submitted by TK member Jennifer of Mother Thyme.

Slice it up and serve.


Tasty Kitchen Blog: Chicken Alfredo Garlic Bread Pizza. Guest post by Faith Gorsky of An Edible Mosaic, recipe submitted by TK member Jennifer of Mother Thyme.

Just try to resist a slice! Give it a try and I’m sure you’ll have found a new favorite way to enjoy garlic bread, chicken Alfredo, and pizza. Thank you to Jennifer for the delicious inspiration. Be sure to check out the great recipes on her lovely blog Mother Thyme!


Printable Recipe

Chicken Alfredo Garlic Bread Pizza

See post on Jennifer | Mother Thyme’s site!
5.00 Mitt(s) 1 Rating(s)1 vote, average: 5.00 out of 51 vote, average: 5.00 out of 51 vote, average: 5.00 out of 51 vote, average: 5.00 out of 51 vote, average: 5.00 out of 5

Prep Time:

Cook Time:

Difficulty: Easy

Servings: 8

8
x

Print Options

Page size Letter 3x5 4x6
Text Size Small Medium Large
Content Include description
Include prep time, etc.
Show image

Description

Crusty Italian bread smothered with garlic butter and topped with Alfredo sauce, chicken and cheese for one tasty pizza.

Ingredients

  • FOR THE ALFREDO SAUCE:
  • 2 Tablespoons Butter
  • 1 clove Garlic, Minced
  • ½ cups Half And Half, Regular Or Fat Free
  • 1 cup Grated Parmesan Cheese
  • 1 pinch Parsley Flakes
  • 1 pinch Freshly Cracked Black Pepper
  • Salt To Taste
  • FOR THE PIZZA ASSEMBLY:
  • 1 loaf Italian Bread
  • ½ cups Butter, Room Temperature
  • 2 teaspoons Garlic Powder
  • ½ teaspoons Parsley Flakes
  • 1-½ cup Cooked Chicken Shredded
  • 2 cups Cooked Broccoli Florets (a Steamable Bag Works Great)
  • 3 cups Shredded Mozzarella Cheese

Preparation Instructions

For the Alfredo sauce:
Melt butter in a medium saucepan over medium heat. Then add garlic and cook for about one minute longer. Gradually stir in half-and-half followed by Parmesan cheese and continue stirring until blended and sauce thickens.

Reduce heat to a simmer, stirring occasionally until heated through.
Remove from heat. Stir in parsley flakes, pepper and salt.

For the pizza:
Preheat oven to 375 F. Line a large baking sheet with aluminum foil and set aside. Slice Italian bread in half lengthwise. Put the bread halves onto the sheet, cut side up.

In a medium bowl mix butter, garlic powder and parsley flakes until blended. Generously spread over bread.

In a medium bowl toss chicken with prepared Alfredo sauce. Spread evenly over the Italian bread slices. Top with broccoli then sprinkle with cheese.

Bake for 15-18 minutes until cheese is melted. Cut into desired slices and serve.

Note: Leftover chicken, store bought rotisserie chicken works great for this recipe.


_______________________________________

Faith Gorsky is the writer, receipt developer, photographer, and food stylist behind the blog An Edible Mosaic, and the cookbook author of An Edible Mosaic: Middle Eastern Fare with Extraordinary Flair (Tuttle Publishing; November 2012). She was born, raised, and spent most of her life in Upstate New York, and she currently lives in Kuwait. When it comes to cooking, her favorite thing to do is go into the kitchen hungry, open the fridge, and start creating. She loves to travel, especially to places steeped in rich culture and history. She also enjoys reading (cookbooks mostly), vintage shopping (especially in old markets), watching movies (of all genres), and is enamored with ancient cultures (especially Rome and Egypt.


Profile photo of Faith (An Edible Mosaic)

(Coconut Flour) Cake Donuts

Posted by in Baking, Step-by-Step Recipes

Tasty Kitchen Blog: (Coconut Flour) Cake Donuts. Guest post by Faith Gorsky of An Edible Mosaic, recipe submitted by TK member Traci of LottaMadness.

 
I’ve been dabbling with paleo for about a year now, and one of my favorite things to do is re-make not-so-healthy desserts into healthier paleo versions. Any time I see a paleo treat, I can’t help but take a closer look. When I saw Tasty Kitchen member Traci’s recipe for (Coconut Flour) Cake Donuts, I was immediately interested.

Even if you’re just paleo-curious or getting your feet wet, it doesn’t hurt to try a paleo treat. Let’s start with donuts!


Tasty Kitchen Blog: (Coconut Flour) Cake Donuts. Guest post by Faith Gorsky of An Edible Mosaic, recipe submitted by TK member Traci of LottaMadness.

For these donuts you’ll need: coconut flour, honey, baking soda, coconut oil, chocolate chips, eggs, salt, and vanilla.


Tasty Kitchen Blog: (Coconut Flour) Cake Donuts. Guest post by Faith Gorsky of An Edible Mosaic, recipe submitted by TK member Traci of LottaMadness.

Here’s the coconut oil, pre-melt. (If you’re making these donuts on a hot day, yours might already be melted.)


Tasty Kitchen Blog: (Coconut Flour) Cake Donuts. Guest post by Faith Gorsky of An Edible Mosaic, recipe submitted by TK member Traci of LottaMadness.

And here it is after melting for a few seconds in the microwave.


Tasty Kitchen Blog: (Coconut Flour) Cake Donuts. Guest post by Faith Gorsky of An Edible Mosaic, recipe submitted by TK member Traci of LottaMadness.

My honey was already in liquid form; if yours isn’t, go ahead and melt it.


Tasty Kitchen Blog: (Coconut Flour) Cake Donuts. Guest post by Faith Gorsky of An Edible Mosaic, recipe submitted by TK member Traci of LottaMadness.

Add the honey and the eggs to a food processor (or blender like I used), and blend them together.


Tasty Kitchen Blog: (Coconut Flour) Cake Donuts. Guest post by Faith Gorsky of An Edible Mosaic, recipe submitted by TK member Traci of LottaMadness.

Then process in the melted coconut oil and vanilla. The mixture will be foamy!


Tasty Kitchen Blog: (Coconut Flour) Cake Donuts. Guest post by Faith Gorsky of An Edible Mosaic, recipe submitted by TK member Traci of LottaMadness.

Sift in the coconut flour, baking soda, and salt. I sifted the dry ingredients right into the food processor with the wet ingredients because unlike flours containing gluten, coconut flour can handle the extra mixing.


Tasty Kitchen Blog: (Coconut Flour) Cake Donuts. Guest post by Faith Gorsky of An Edible Mosaic, recipe submitted by TK member Traci of LottaMadness.

Whiz it all together in the blender or food processor until smooth.

Here’s where a little bit of finesse comes in because coconut flour can be a finicky thing. Coconut flour absorbs quite a bit more moisture than all-purpose flour, so you might be surprised by that if it’s your first time working with coconut flour. Also, coconut flour can vary quite a bit by brand, so depending on the brand you’re using, you might need to add a bit more liquid or flour. Don’t be afraid to play with the batter a little until you get a consistency that works. The batter should be fairly stiff, but still spoonable. And the batter should be able to spread out when you fill the donut tray and tap it on the counter a couple times.


Tasty Kitchen Blog: (Coconut Flour) Cake Donuts. Guest post by Faith Gorsky of An Edible Mosaic, recipe submitted by TK member Traci of LottaMadness.

Generously grease 2 donut pans.


Tasty Kitchen Blog: (Coconut Flour) Cake Donuts. Guest post by Faith Gorsky of An Edible Mosaic, recipe submitted by TK member Traci of LottaMadness.

Spoon the batter into the wells and tap the pans on the counter a couple times to even them out.


Tasty Kitchen Blog: (Coconut Flour) Cake Donuts. Guest post by Faith Gorsky of An Edible Mosaic, recipe submitted by TK member Traci of LottaMadness.

Bake until they’re golden and a toothpick inserted inside comes out clean, about 15 minutes. Let them cool completely in the pan before removing.


Tasty Kitchen Blog: (Coconut Flour) Cake Donuts. Guest post by Faith Gorsky of An Edible Mosaic, recipe submitted by TK member Traci of LottaMadness.

Melt the chocolate chips and 1 tablespoon coconut oil together in a microwave or double boiler. Dip each donut into the chocolate and place it on a wire rack or parchment-lined tray.


Tasty Kitchen Blog: (Coconut Flour) Cake Donuts. Guest post by Faith Gorsky of An Edible Mosaic, recipe submitted by TK member Traci of LottaMadness.

Refrigerate the donuts so the chocolate can harden, and serve!


Tasty Kitchen Blog: (Coconut Flour) Cake Donuts. Guest post by Faith Gorsky of An Edible Mosaic, recipe submitted by TK member Traci of LottaMadness.

These donuts were absolutely delicious, and of course perfect with a cup of coffee. Texture-wise, they aren’t the same as regular donuts, but given the fact that they’re much healthier, they’re completely worth it. One tip I have is to leave these in the fridge until you’re ready to eat them because the chocolate topping will start to condense and then melt on hot days. The good thing is, they lasted and were completely fine for me for 3 days in the fridge!

Thanks to Traci for her delicious recipe! Head over to her fun blog LottaMaddness for more recipe ideas, as well as life, DIY, travel, and culture tidbits!


Printable Recipe

(Coconut Flour) Cake Donuts

See post on LottaMadness’s site!
5.00 Mitt(s) 1 Rating(s)1 vote, average: 5.00 out of 51 vote, average: 5.00 out of 51 vote, average: 5.00 out of 51 vote, average: 5.00 out of 51 vote, average: 5.00 out of 5

Prep Time:

Cook Time:

Difficulty: Easy

Servings: 12

12
x

Print Options

Page size Letter 3x5 4x6
Text Size Small Medium Large
Content Include description
Include prep time, etc.
Show image

Description

Who says you can’t have your donut and eat it too when you’re on a Paleo diet?

Ingredients

  • ½ cups Coconut Oil
  • ½ cups Raw Honey
  • 6 whole Eggs
  • 1 teaspoon Vanilla Extract
  • ¾ cups Coconut Flour
  • ¾ teaspoons Baking Soda
  • 1 teaspoon Salt
  • FOR THE TOPPING:
  • ½ cups Chocolate Chips (I Used Enjoy)
  • 1 Tablespoon Coconut Oil

Preparation Instructions

Preheat the oven to 350ºF. Melt the coconut oil in the microwave for a few seconds until liquid form. Heat the honey in the microwave for 20 seconds until it’s in liquid form.

Blend the eggs and honey together in a blender. Add the melted coconut oil and vanilla extract.

Sift the coconut flour, baking soda and salt into the egg mixture and mix until well blended.

Using a dessert spoon, spoon the batter into the circles of a well-greased donut pan. (I used 2 6-circle donut pans.) Bake for 15 minutes or until a toothpick comes out clean. Once cooled, remove donuts from the donut pan.

For the topping, melt the chocolate chips and coconut oil together. Dip each donut into the chocolate and set onto a tray lined with parchment paper. Place donuts into the fridge for the chocolate to harden. Enjoy!


_______________________________________

Faith Gorsky is the writer, recipe developer, photographer, and food stylist behind the blog An Edible Mosaic. She lives in Upstate New York and loves to travel, especially to places steeped in rich culture and history. She also enjoys reading, vintage shopping, watching movies, and is enamored with ancient cultures. She just released her first cookbook, “An Edible Mosaic: Middle Eastern Fare with Extraordinary Flair” (Tuttle Publishing), a collection of authentic Middle Eastern recipes handed down to her from her husband’s family.


Profile photo of Faith (An Edible Mosaic)

Crunchy Asian Slaw

Posted by in Step-by-Step Recipes

Tasty Kitchen Blog: Crunchy Asian Slaw. Guest post by Faith Gorsky of An Edible Mosaic, recipe submitted by TK member Andrea of Recipes for Divine Living.

 
Summer is synonymous with potlucks, picnics, and BBQs. Starting with Memorial Day and ending with Labor Day, and of course not forgetting Independence Day and regular backyard get-togethers, it seems like there’s something going on every week! Where I live, summer is a short and sweet affair so we have to make the most of it.

I know a lot of people who have a signature dish they make for summer parties. We usually ask everyone to choose a course and bring a dish to pass instead of planning the entire menu, but based on who is coming, we know exactly what we’ll be having for dinner. If my mom is coming, she’s bringing a side dish and it’s one of two things: her homemade taco salad or her homemade baked beans. I have a friend who is known for her killer chocolate chip cookies, and another friend who makes what I think is the best fruit salad in the world (I need to get her recipe—I have no idea why hers is so much better!).

I don’t really have a signature summer party dish. If there’s a type of dish that hasn’t been claimed, such as a side, meat, or dessert, I’ll just bring that. But then I saw Tasty Kitchen member Andrea’s recipe for this irresistible-looking Crunchy Asian Slaw, and this salad makes me want to claim it as my signature for future summer picnics! It’s fresh with bold flavors and a great nutty crunch factor. It’s the perfect summer party food.

Give it a try!


Tasty Kitchen Blog: Crunchy Asian Slaw. Guest post by Faith Gorsky of An Edible Mosaic, recipe submitted by TK member Andrea of Recipes for Divine Living.

Whip up the dressing first. You’ll need garlic, Fresno peppers, ginger, tamari or soy sauce, rice vinegar, honey, sesame oil, lime (my last one), olive oil, and salt and pepper.

I couldn’t find Fresno peppers so instead I used 1/2 teaspoon crushed red pepper flakes in place of each Fresno pepper (or you could use a jalapeño pepper for each Fresno pepper). Also, for the life of me I couldn’t find fresh ginger (which I usually never have trouble finding!), so I used 1 teaspoon fresh ginger in the squeeze tube. And I used Liquid Aminos instead of tamari or soy sauce because that’s what I had on hand. That’s the beauty of cooking (as opposed to baking)—recipes are usually quite forgiving!


Tasty Kitchen Blog: Crunchy Asian Slaw. Guest post by Faith Gorsky of An Edible Mosaic, recipe submitted by TK member Andrea of Recipes for Divine Living.

Mince the garlic or grate it on a microplane.

Whisk together all the dressing ingredients except the olive oil, salt, and pepper. Then gradually stream in the olive oil as you whisk.


Tasty Kitchen Blog: Crunchy Asian Slaw. Guest post by Faith Gorsky of An Edible Mosaic, recipe submitted by TK member Andrea of Recipes for Divine Living.

I’m normally a one-woman show, but I was lucky enough to make this on a day when my husband was home, so he is my hand model.

Once it’s whisked up, give the dressing a taste and add salt and pepper if desired.


Tasty Kitchen Blog: Crunchy Asian Slaw. Guest post by Faith Gorsky of An Edible Mosaic, recipe submitted by TK member Andrea of Recipes for Divine Living.

Here’s how the dressing looks finished. Set it aside for now and move on to the veggies.


Tasty Kitchen Blog: Crunchy Asian Slaw. Guest post by Faith Gorsky of An Edible Mosaic, recipe submitted by TK member Andrea of Recipes for Divine Living.

For the slaw you’ll need: Napa cabbage, red cabbage, carrot (I used 2 small-medium carrots instead of 1 large), red pepper, green onion, butter, crushed ramen noodles, sesame seeds, slivered almonds, and lime (I was out of lime, so I grabbed a lemon instead).

A quick tip: I’ve found that the easiest way to crush ramen noodles is while they’re still in the package. You can do it with your hand or using a heavy object (like a rolling pin) but don’t be too rough or the package will explode open!


Tasty Kitchen Blog: Crunchy Asian Slaw. Guest post by Faith Gorsky of An Edible Mosaic, recipe submitted by TK member Andrea of Recipes for Divine Living.

Thinly slice the Napa cabbage …


Tasty Kitchen Blog: Crunchy Asian Slaw. Guest post by Faith Gorsky of An Edible Mosaic, recipe submitted by TK member Andrea of Recipes for Divine Living.

And the purple cabbage (note that there is more cabbage pictured than what you need in this salad; I was also chopping it for something else).


Tasty Kitchen Blog: Crunchy Asian Slaw. Guest post by Faith Gorsky of An Edible Mosaic, recipe submitted by TK member Andrea of Recipes for Divine Living.

Shred the carrot.


Tasty Kitchen Blog: Crunchy Asian Slaw. Guest post by Faith Gorsky of An Edible Mosaic, recipe submitted by TK member Andrea of Recipes for Divine Living.

Chop the red pepper.


Tasty Kitchen Blog: Crunchy Asian Slaw. Guest post by Faith Gorsky of An Edible Mosaic, recipe submitted by TK member Andrea of Recipes for Divine Living.

Slice the scallion.

Add the cabbages, carrot, red pepper, and 3 of the scallions into a large bowl. Now it’s time to toast the ramen and up the crunch factor even more.


Tasty Kitchen Blog: Crunchy Asian Slaw. Guest post by Faith Gorsky of An Edible Mosaic, recipe submitted by TK member Andrea of Recipes for Divine Living.

Melt the butter in a medium skillet over medium heat.


Tasty Kitchen Blog: Crunchy Asian Slaw. Guest post by Faith Gorsky of An Edible Mosaic, recipe submitted by TK member Andrea of Recipes for Divine Living.

Add the crushed ramen, slivered almonds, and sesame seeds and cook until browned, about 4 to 5 minutes, stirring frequently. It will smell amazingly nutty and delicious. Let this mixture cool for a few minutes.


Tasty Kitchen Blog: Crunchy Asian Slaw. Guest post by Faith Gorsky of An Edible Mosaic, recipe submitted by TK member Andrea of Recipes for Divine Living.

Add the dressing and ramen mixture to the bowl of veggies.


Tasty Kitchen Blog: Crunchy Asian Slaw. Guest post by Faith Gorsky of An Edible Mosaic, recipe submitted by TK member Andrea of Recipes for Divine Living.

Give it a good toss. Sprinkle the remaining 2 sliced scallions on top along with additional sesame seeds if you want.


Tasty Kitchen Blog: Crunchy Asian Slaw. Guest post by Faith Gorsky of An Edible Mosaic, recipe submitted by TK member Andrea of Recipes for Divine Living.

Then serve up this gorgeous slaw! Instead of squeezing the extra lime on top and tossing it together, I like to serve the slaw with lime wedges on the side so people can add more if they want.

It goes well with just about anything you can whip up on the grill: BBQ chicken, burgers, steak, or even seafood. Signature dish, anyone?


Tasty Kitchen Blog: Crunchy Asian Slaw. Guest post by Faith Gorsky of An Edible Mosaic, recipe submitted by TK member Andrea of Recipes for Divine Living.

A big thank you to Andrea for sharing her delicious recipe on Tasty Kitchen! Be sure to check out her beautiful blog Recipes for Divine Living for more inspiration.


Printable Recipe

Crunchy Asian Slaw

See post on Andrea’s site!
0.00 Mitt(s) 0 Rating(s)0 votes, average: 0.00 out of 50 votes, average: 0.00 out of 50 votes, average: 0.00 out of 50 votes, average: 0.00 out of 50 votes, average: 0.00 out of 5

Prep Time:

Cook Time:

Difficulty: Easy

Servings: 4

4
x

Print Options

Page size Letter 3x5 4x6
Text Size Small Medium Large
Content Include description
Include prep time, etc.
Show image

Description

This salad is fast and easy to make and has great crunch. Awesome dressing!

Ingredients

  • FOR THE SALAD:
  • 3 cups Napa Cabbage, Thinly Sliced
  • 2 cups Green Or Purple Cabbage, Thinly Sliced
  • 1  Large Carrot, Shredded
  • ½  Red Pepper, Chopped
  • 5  Green Onions, Chopped (use 2 Of Them For Garnish)
  • 2 Tablespoons Butter
  • 1 package Ramen Noodles, Noodles Only, 3 Ounce Package
  • 1 Tablespoon Sesame Seeds + More For Garnish
  • ½ cups Slivered Almonds
  • 1 whole Lime, Juiced
  • FOR THE DRESSING:
  • 1 clove Garlic, Minced
  • 2  Fresno Peppers, Seeded And Minced
  • 1 teaspoon Ginger, Freshly Microplane Grated
  • 1 Tablespoon Tamari (regular Soy Sauce Will Work)
  • 1 Tablespoon Rice Vinegar, Preferably Seasoned
  • 1 Tablespoon Honey
  • 1 Tablespoon Sesame Oil
  • 1 whole Lime, Juiced
  • ¼ cups Olive Oil
  • 1 pinch Salt And Pepper, If Needed

Preparation Instructions

Prepare dressing by combining all of the listed ingredients (except olive oil and salt/pepper) in a medium-sized bowl. While whisking everything together, slowly stream in oil as you continue whisking. Taste and add salt and pepper if needed. Set aside.

In a large bowl combine cabbages, carrot, red pepper and 3 of the chopped green onions. Set aside.

Melt butter in a skillet over medium heat. Crunch up the ramen noodles and add them into the melted butter. Add sesame seeds and slivered almonds as well and brown everything, stirring often. Once it’s nicely browned, remove the skillet from the heat.

Add the noodle mixture to the cabbage mixture along with dressing. Toss to combine. Juice the lime over the top of the salad. Add remaining 2 green onions and more sesame seeds, if desired. Toss to combine, then serve.


_______________________________________

Faith Gorsky is the writer, recipe developer, photographer, and food stylist behind the blog An Edible Mosaic. She lives in Upstate New York and loves to travel, especially to places steeped in rich culture and history. She also enjoys reading, vintage shopping, watching movies, and is enamored with ancient cultures. She just released her first cookbook, “An Edible Mosaic: Middle Eastern Fare with Extraordinary Flair” (Tuttle Publishing), a collection of authentic Middle Eastern recipes handed down to her from her husband’s family.


Profile photo of Faith (An Edible Mosaic)

Banana Split Cake Cups

Posted by in Step-by-Step Recipes

  Everyone I know is a fan of banana splits. Literally everyone, no matter how picky an eater they are. (Editor’s note: Hear that, Ree? Hmm?) And I’ve sort-of found that banana splits have magic properties. Take someone who’s having a bad day, put a banana split in front of them, and watch their face […]

Profile photo of Faith (An Edible Mosaic)

Middle Eastern Date-Filled Cookies (Ma’amoul)

Posted by in Baking, Step-by-Step Recipes

  I am absolutely thrilled to be sharing this recipe with you today. Not only because these cookies are delicious and sure to impress whoever you share them with but also because for me, they hold a deeper, much more special meaning: I learned how to make them from my Syrian mother-in-law Sahar in her […]

Profile photo of Faith (An Edible Mosaic)

Lamb Meatballs in a Spicy Curry

Posted by in Step-by-Step Recipes

  Lamb lovers, you will love me for this one. Ok, actually, you will love Tasty Kitchen members (and sisters!) Vanessa and Ingrid for this one. Their recipe for Lamb Meatballs in a Spicy Curry might seem like an ordinary meatball recipe, but the secret is in the sauce. Truthfully, these are no ordinary meatballs. […]

Profile photo of Faith (An Edible Mosaic)

Espresso Mini Muffins with Chocolate Ganache

Posted by in Baking, Step-by-Step Recipes

  Some days a girl just needs a little something chocolaty. And most days a girl needs coffee. Put the two together into one sweet treat like this and now you’re really talking. The fact that this treat is pretty healthy just sweetens the deal (pun intended). When I saw Tasty Kitchen member Michelle’s recipe […]