The Pioneer Woman Tasty Kitchen
Profile photo of EatLiveRun

Chocolate Zucchini Cookies

Posted by in Step-by-Step Recipes

It’s back-to-school season, and zucchini season too! Take care of both with this blast from the past: chocolate zucchini cookies. They’re a hit with kids, and adults will love you for them too.

 
Tasty Kitchen Blog: Chocolate Zucchini Cookies. Guest post by Jenna Weber of Eat, Live, Run; recipe submmitted by TK member Julia of The Roasted Root.

 
Are you looking for a delicious way to use up the rest of your zucchini harvest? Or do you just like sticking vegetables in cookies so that you can call them “healthy” and, thus, eat them for breakfast? I fall into the latter group.

These rich Chocolate Zucchini Cookies are both perfectly fudgy and fluffy, with lots of added chocolate chips and walnuts. You’ll never believe the secret ingredient is grated zucchini! Neither will your kids … or your husband … or any other picky cookie eaters that you serve these to—I promise! The recipe comes to us from Julia of The Roasted Root and I think you’re going to love it as much as I love it!


Tasty Kitchen Blog: Chocolate Zucchini Cookies. Guest post by Jenna Weber of Eat, Live, Run; recipe submmitted by TK member Julia of The Roasted Root.

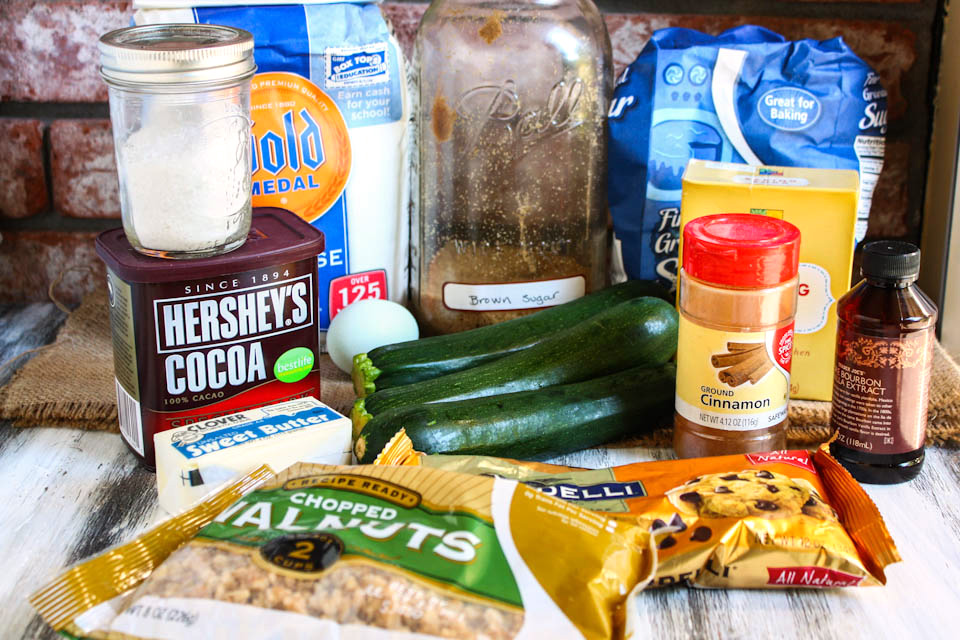
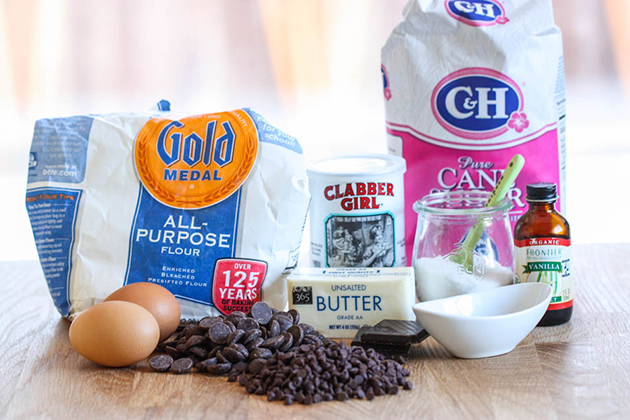
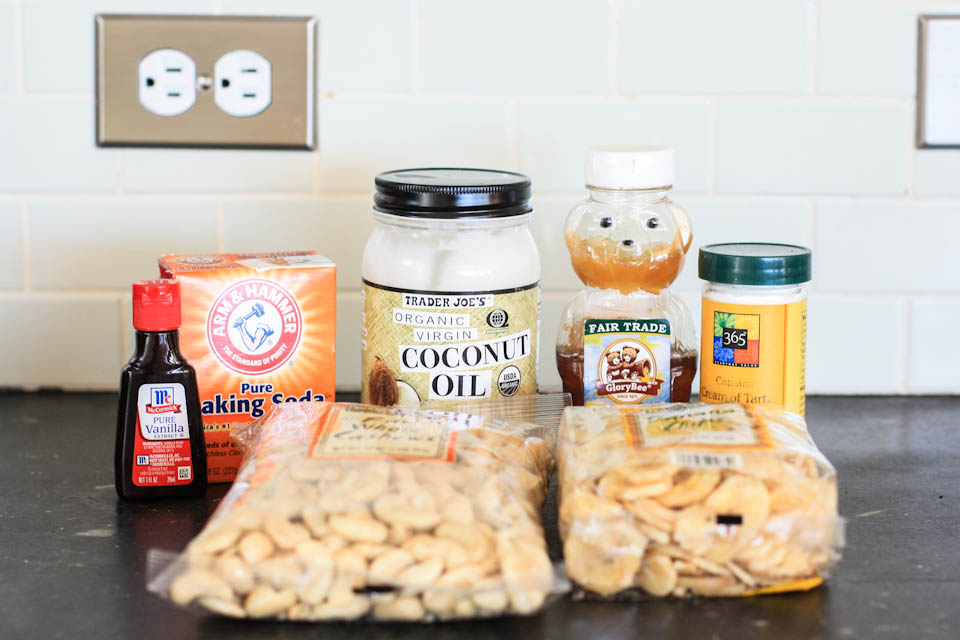
To start, you’ll need to grab flour, baking soda, white sugar, brown sugar, vanilla extract, butter, salt, cinnamon, cocoa, zucchini (I used two, grated!), chocolate chips, walnuts and an egg.


Tasty Kitchen Blog: Chocolate Zucchini Cookies. Guest post by Jenna Weber of Eat, Live, Run; recipe submmitted by TK member Julia of The Roasted Root.

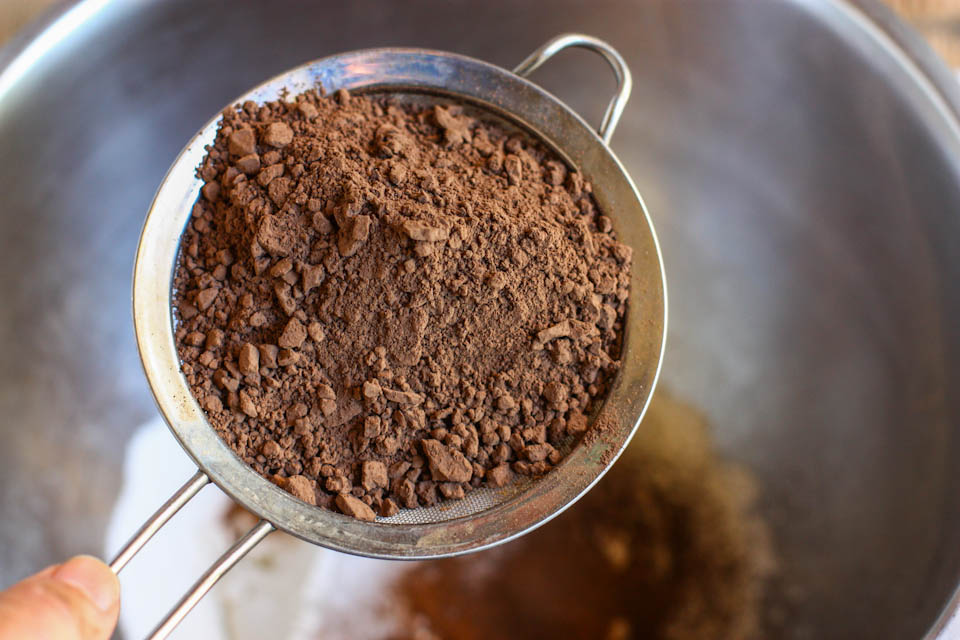
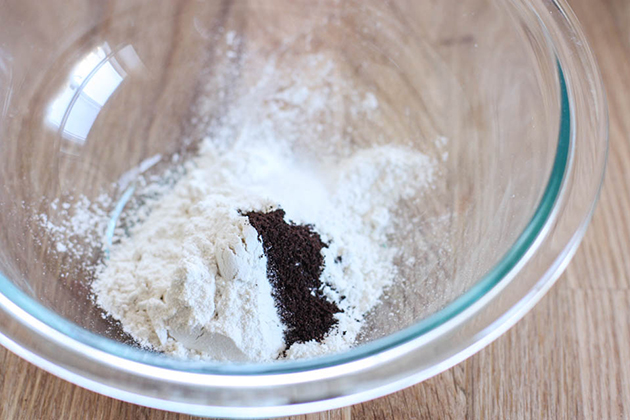
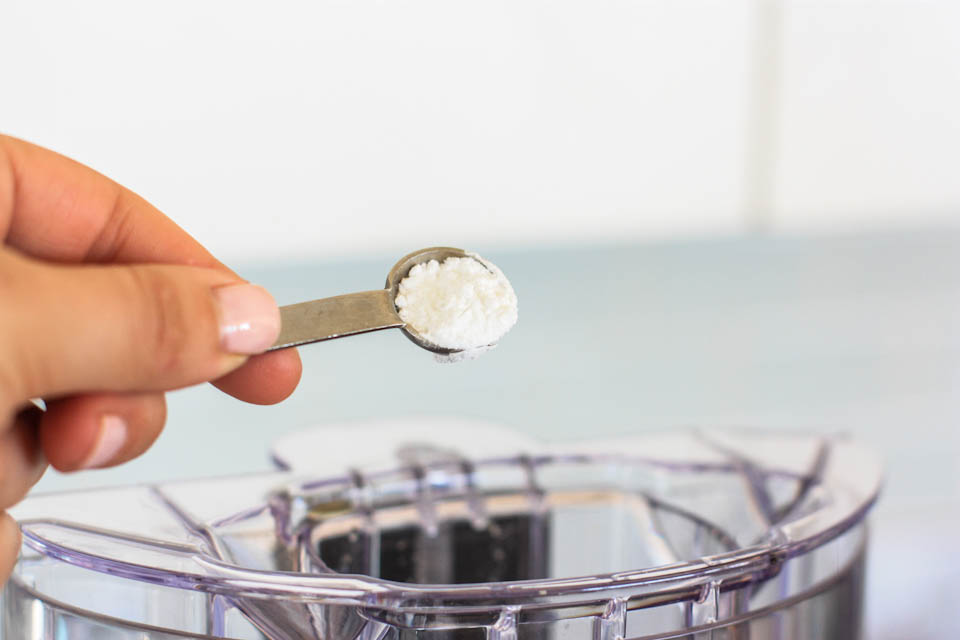
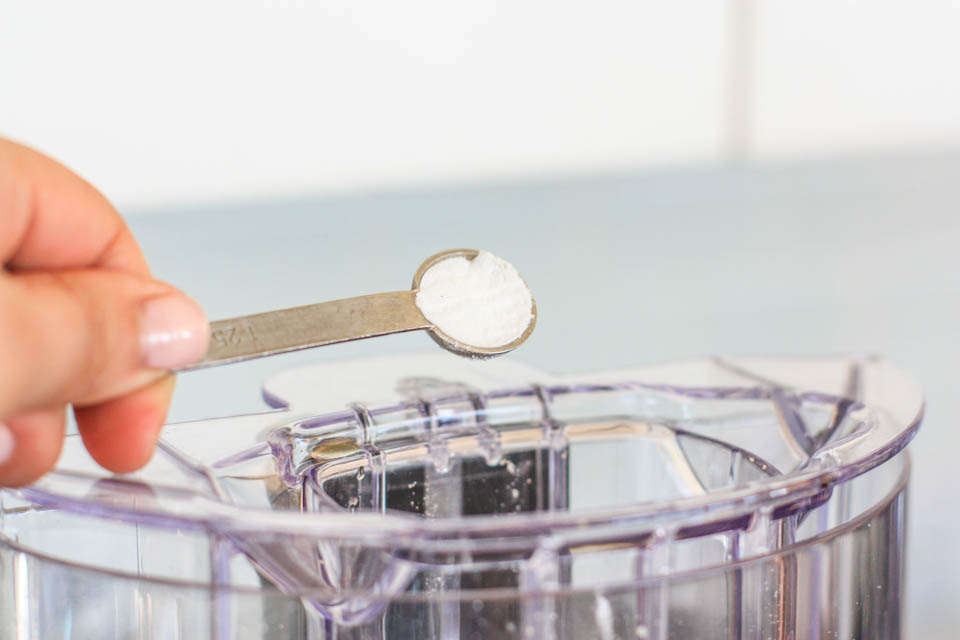
Begin by mixing together your dry ingredients: flour, baking soda, salt, cinnamon and cocoa powder. I always like to sift my cocoa powder before using so it’s not as clumpy!


Tasty Kitchen Blog: Chocolate Zucchini Cookies. Guest post by Jenna Weber of Eat, Live, Run; recipe submmitted by TK member Julia of The Roasted Root.

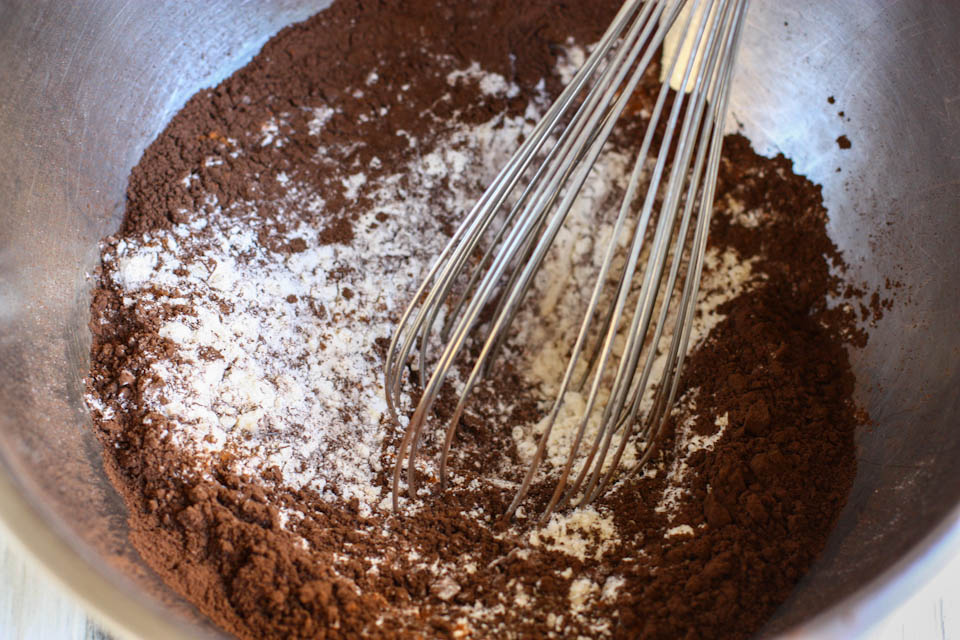
Whisk dry ingredients together well, getting rid of all cocoa and baking soda clumps. Set aside.


Tasty Kitchen Blog: Chocolate Zucchini Cookies. Guest post by Jenna Weber of Eat, Live, Run; recipe submmitted by TK member Julia of The Roasted Root.

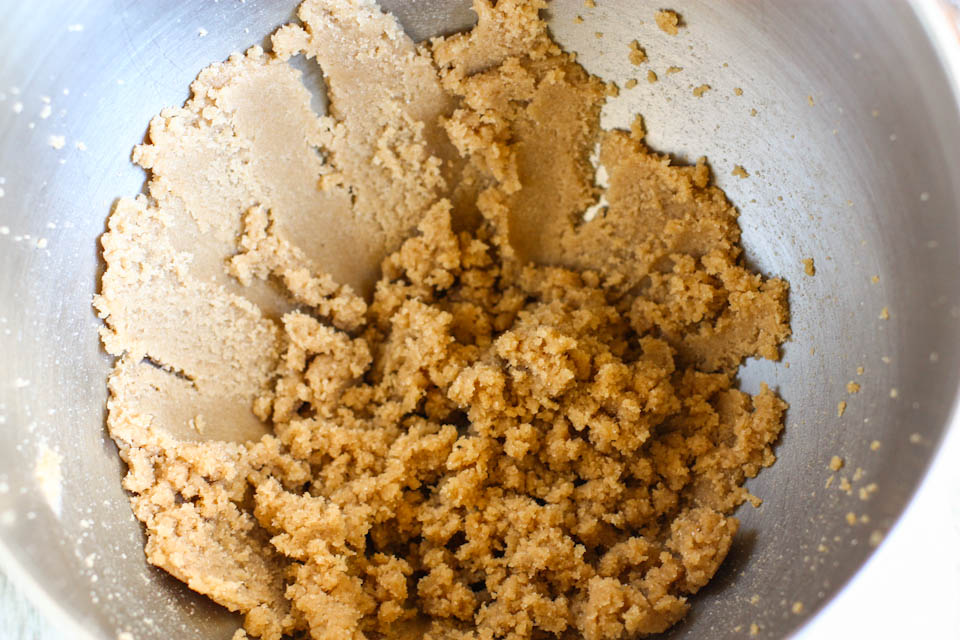
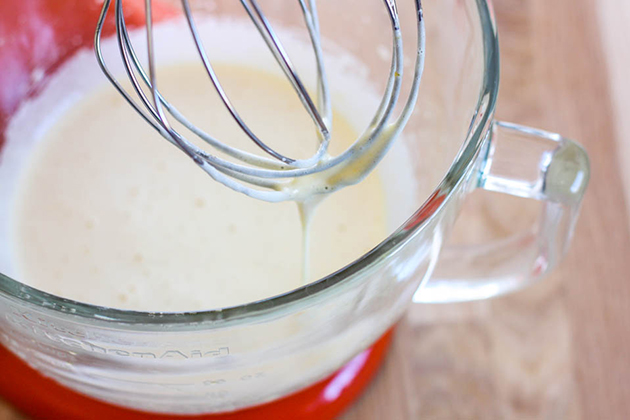
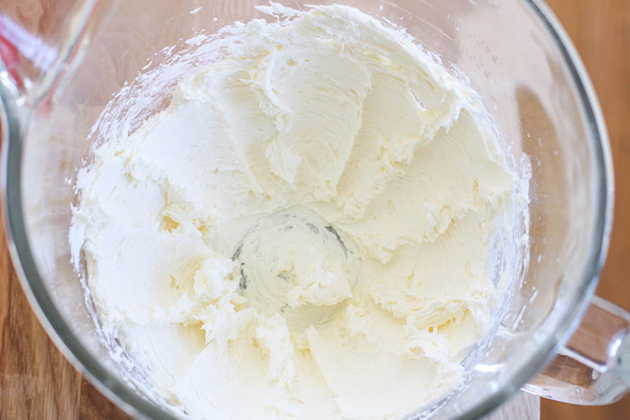
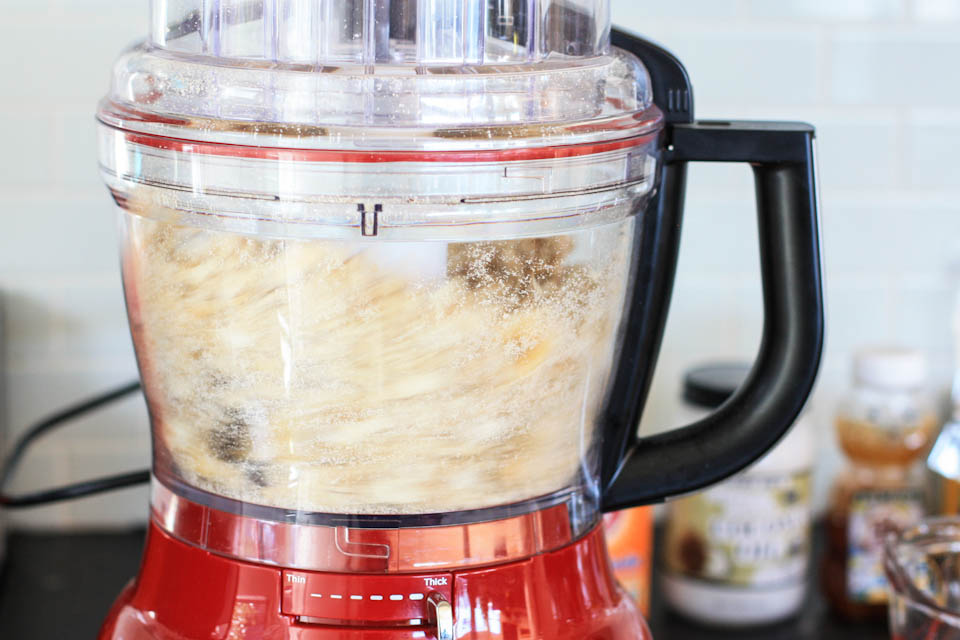
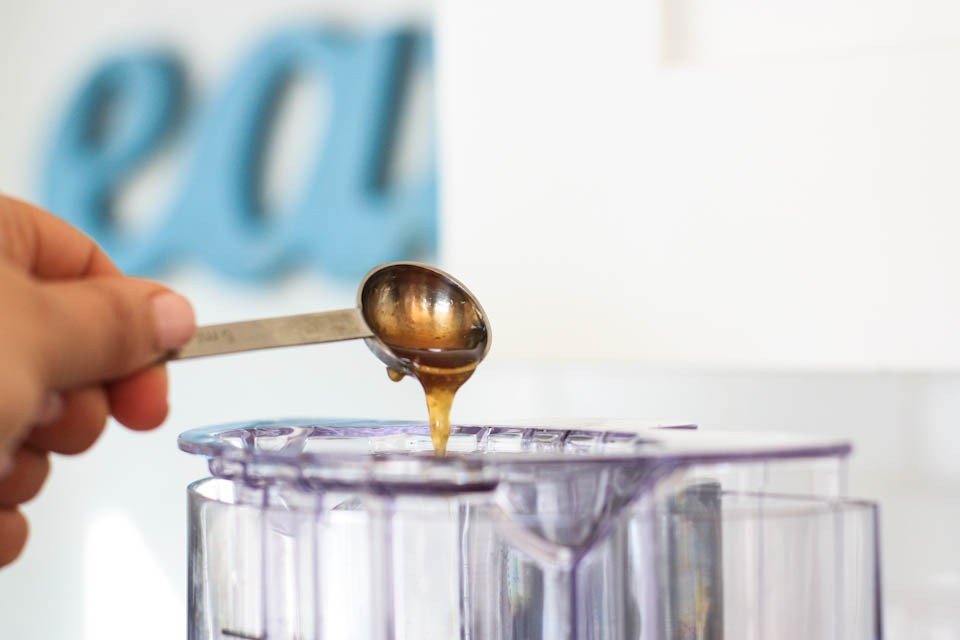
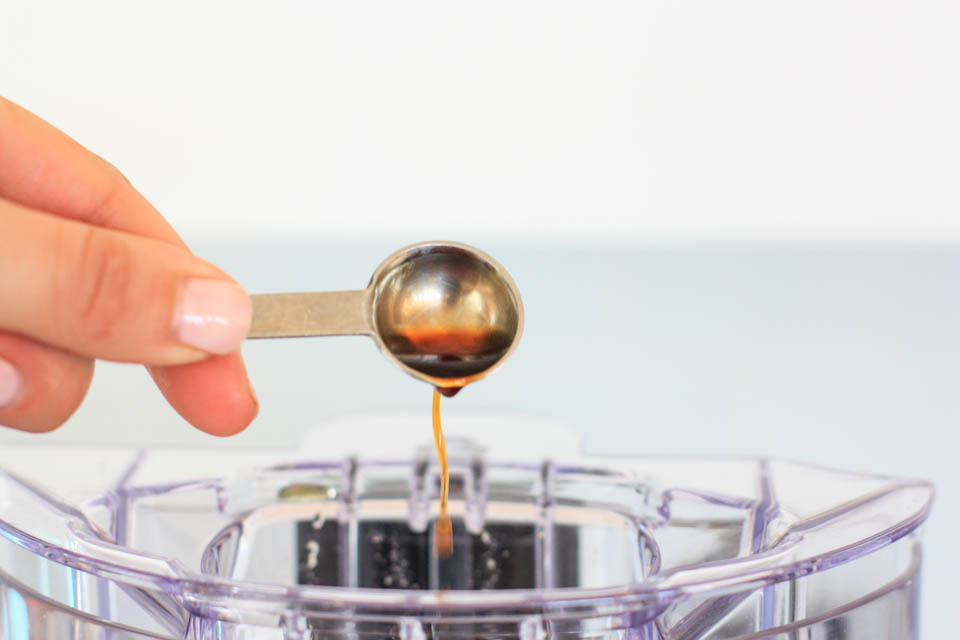
In another bowl, beat your butter, white sugar, brown sugar and vanilla together until creamy. I used my stand mixer for this, but you could also work your arm muscles by beating with a wooden spoon!


Tasty Kitchen Blog: Chocolate Zucchini Cookies. Guest post by Jenna Weber of Eat, Live, Run; recipe submmitted by TK member Julia of The Roasted Root.

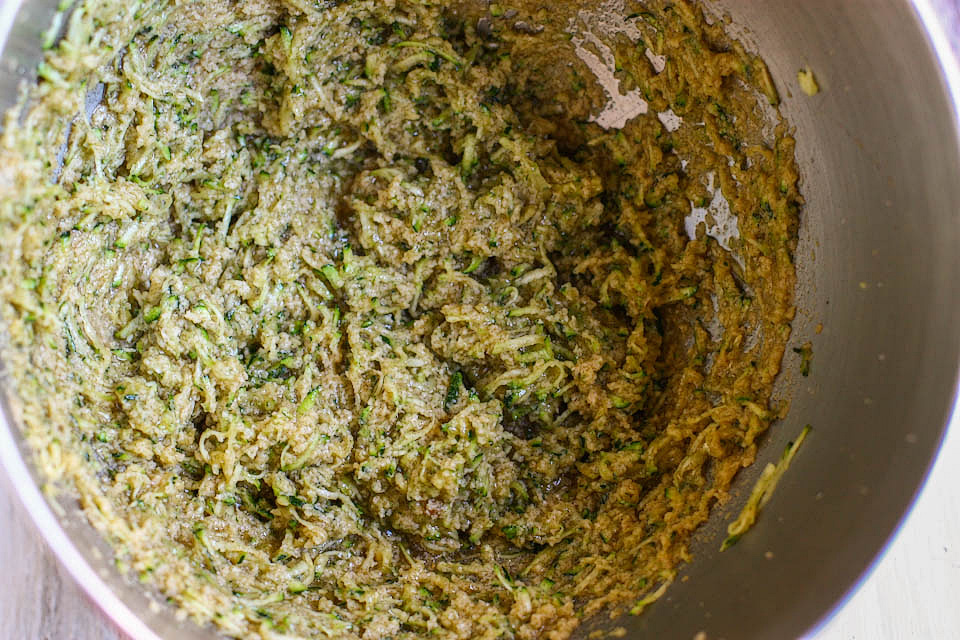
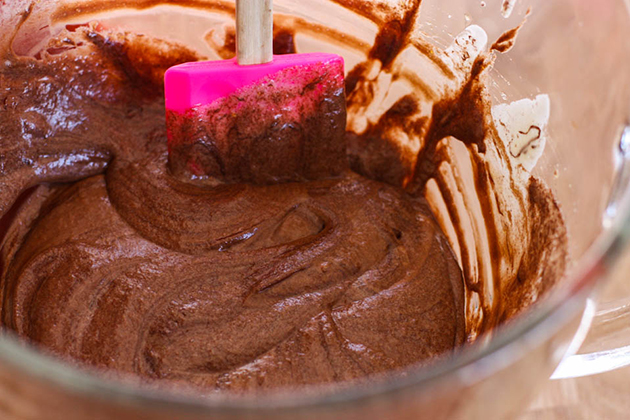
Add the egg and grated zucchini to the wet ingredients and beat until just incorporated.


Tasty Kitchen Blog: Chocolate Zucchini Cookies. Guest post by Jenna Weber of Eat, Live, Run; recipe submmitted by TK member Julia of The Roasted Root.

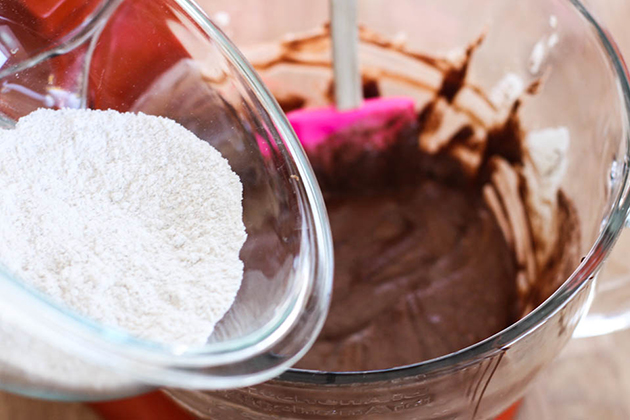
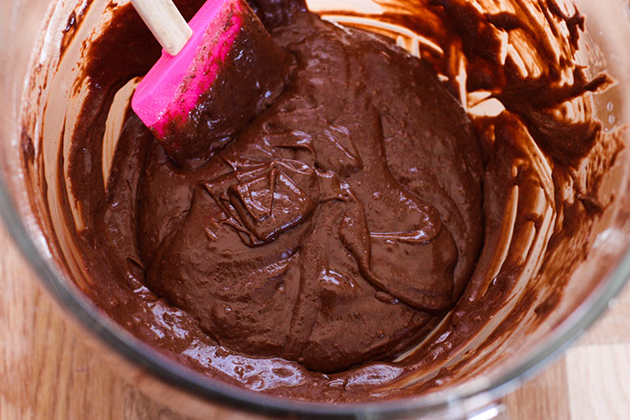
Now, carefully add the dry ingredients to the wet ingredients and mix. You can do this a little bit at a time, but be careful not to over-mix.


Tasty Kitchen Blog: Chocolate Zucchini Cookies. Guest post by Jenna Weber of Eat, Live, Run; recipe submmitted by TK member Julia of The Roasted Root.

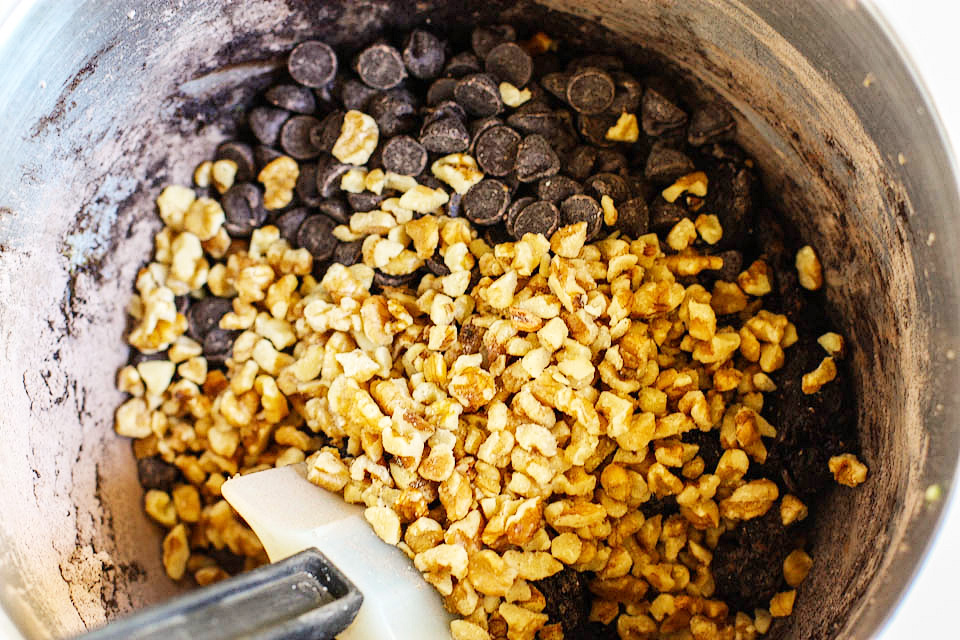
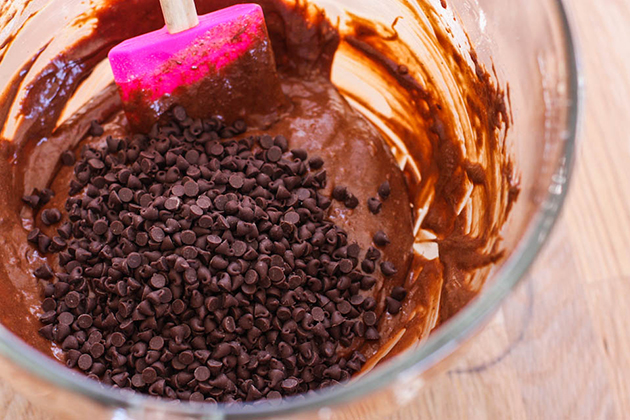
Dump in the chocolate chips and walnuts and mix again! The dough should be pretty wet and sticky.

Go ahead now and preheat your oven to 350ºF and get a couple baking sheets ready with either parchment paper or Silpats.


Tasty Kitchen Blog: Chocolate Zucchini Cookies. Guest post by Jenna Weber of Eat, Live, Run; recipe submmitted by TK member Julia of The Roasted Root.

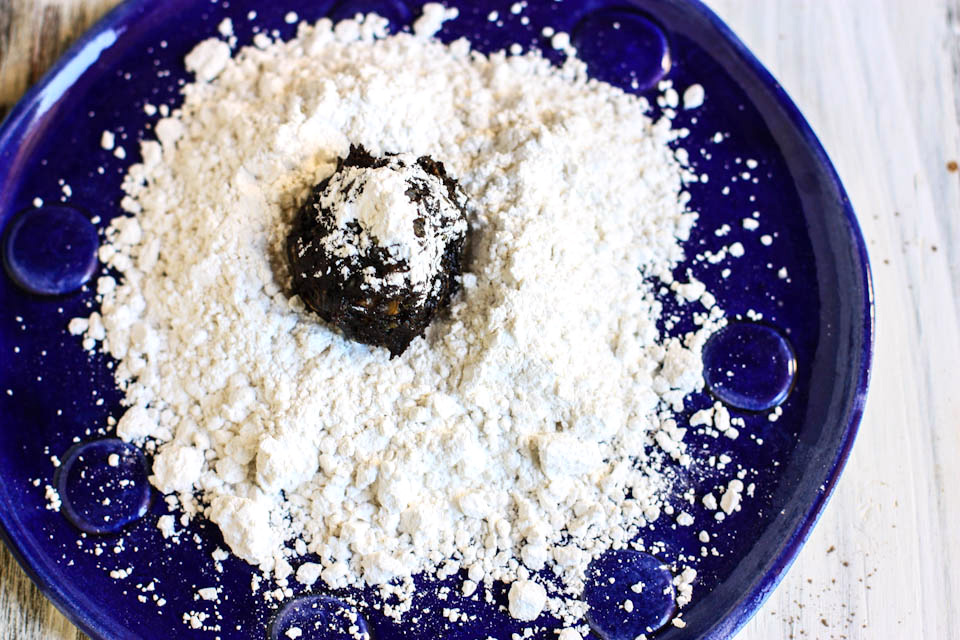
The recipe says you can roll the dough in powdered sugar before baking, so that’s what I did! I’m a sucker for anything rolled in powdered sugar.


Tasty Kitchen Blog: Chocolate Zucchini Cookies. Guest post by Jenna Weber of Eat, Live, Run; recipe submmitted by TK member Julia of The Roasted Root.

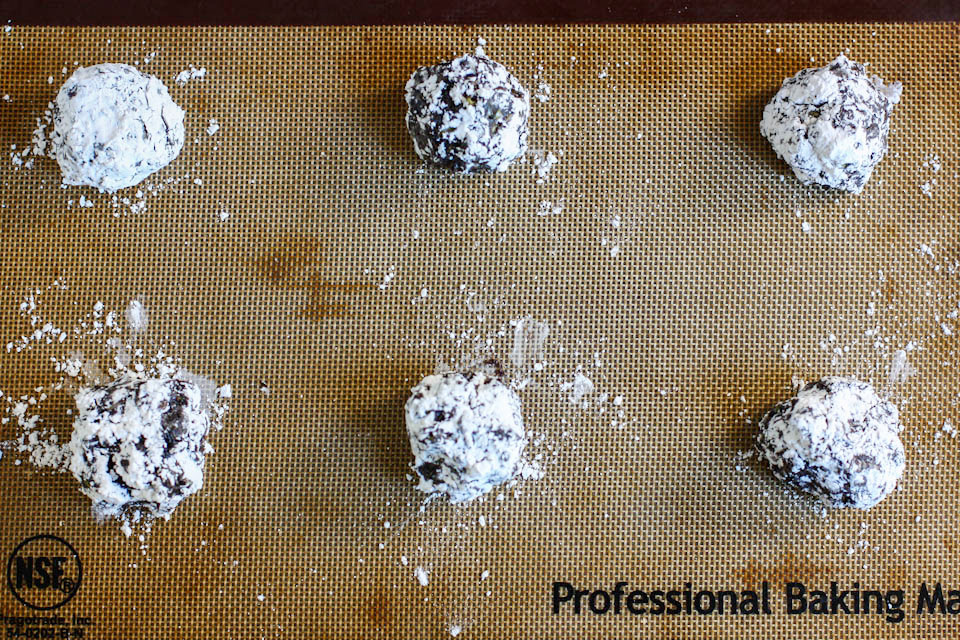
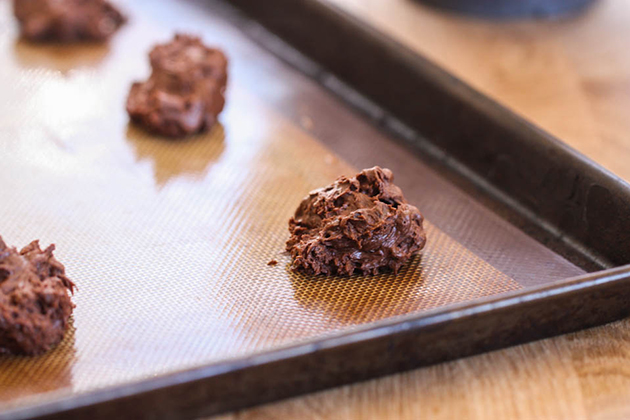
Stick your little powdered sugar-covered cookie dough balls on your lined sheet tray and bake for 15 minutes.


Tasty Kitchen Blog: Chocolate Zucchini Cookies. Guest post by Jenna Weber of Eat, Live, Run; recipe submmitted by TK member Julia of The Roasted Root.

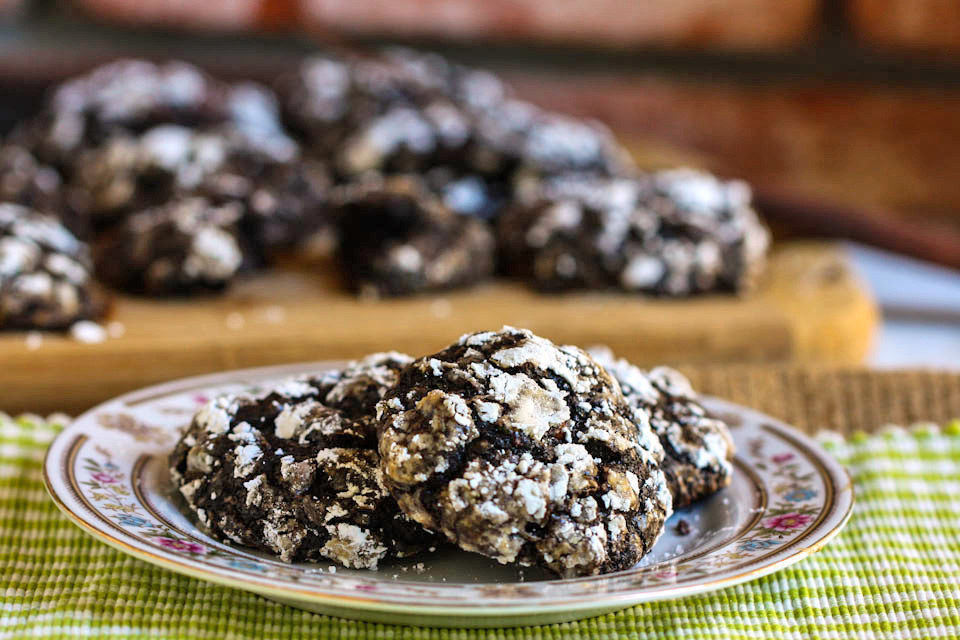
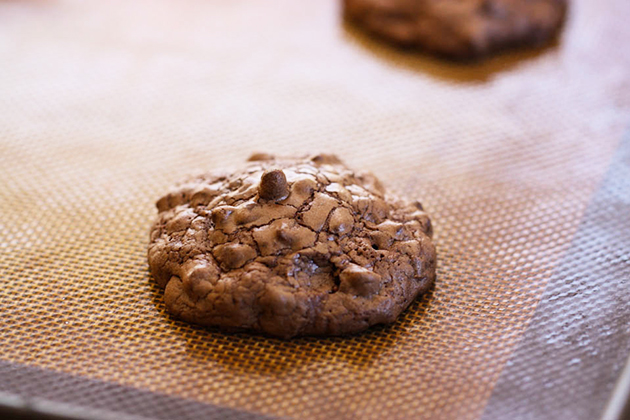
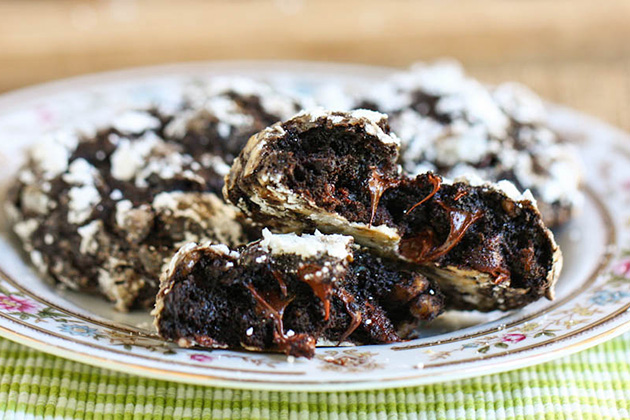
When they’re done, they’ll be all puffy and the tops will be crackly from the powdered sugar. Yum!


Tasty Kitchen Blog: Chocolate Zucchini Cookies. Guest post by Jenna Weber of Eat, Live, Run; recipe submmitted by TK member Julia of The Roasted Root.

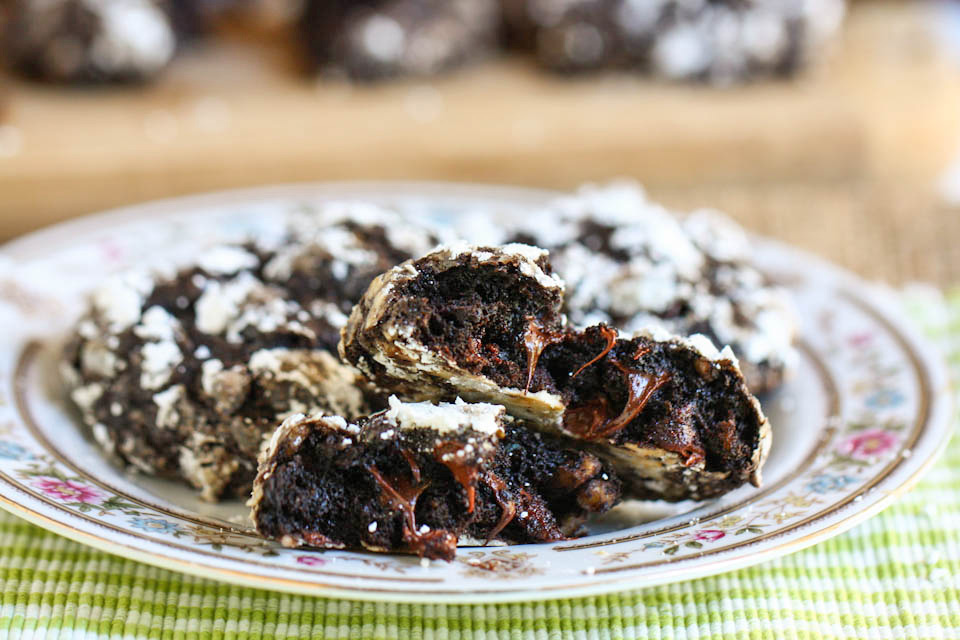
Here’s an inside peak at a cookie just out of my oven to tempt you a little more. They appear fudgy from all the chocolate, but they are quite light and puffy! Like I said earlier, the perfect balance between fudgy and fluffy. And you can’t even almost taste the zucchini in them.

Have you seen Julia’s blog The Roasted Root? She has an awesome tagline: “Eat well, eat often.” Thank you, Julia, for this delicious recipe! Cookies for breakfast!


Printable Recipe

Chocolate Zucchini Cookies

See post on Julia {The Roasted Root}’s site!
4.80 Mitt(s) 5 Rating(s)5 votes, average: 4.80 out of 55 votes, average: 4.80 out of 55 votes, average: 4.80 out of 55 votes, average: 4.80 out of 55 votes, average: 4.80 out of 5

Prep Time:

Cook Time:

Difficulty: Easy

Servings: 24

24
x

Print Options

Page size Letter 3x5 4x6
Text Size Small Medium Large
Content Include description
Include prep time, etc.
Show image

Description

Double chocolate cookies with zucchini and a whole lot of deliciousness!

Ingredients

  • 1-¼ cup Whole Wheat Flour Or All Purpose Flour
  • 1 teaspoon Baking Soda
  • 1 teaspoon Salt
  • 2 teaspoons Cinnamon
  • ½ cups Unsweetened Cocoa Powder
  • 5 Tablespoons Unsalted Butter, Softened
  • 1 teaspoon Vanilla Extract
  • ½ cups Brown Sugar
  • ½ cups White Cane Sugar
  • 1 whole Egg
  • 1 cup Shredded Zucchini
  • ½ cups Walnuts, Chopped
  • 1 cup Semi-sweet (or Dark!) Chocolate Chips
  • ⅓ cups Confectioners Sugar, For Rolling The Dough In (optional)

Preparation Instructions

Preheat the oven to 350 F.

In a bowl, combine flour, baking soda, salt, cinnamon and cocoa powder and whisk or sift to combine. Set aside.

In a large mixing bowl combine the butter, vanilla extract and sugars. Use a stand or hand mixer to mix until creamy. Add the egg and shredded zucchini and mix just until combined. Pour in the flour mixture (I typically do this in thirds) and mix just until combined. Add the chopped walnuts and chocolate chips, mix to integrate into dough.

If desired, sprinkle confectioner’s (powdered) sugar on a plate so you can roll the balls of cookie dough in the sugar. Roll the dough into balls and roll them in the sugar if desired. Space cookie dough evenly on a parchment-lined or lightly oiled cookie sheet. Bake for 13 to 15 minutes.


_______________________________________

Jenna is a food writer who has worked as a pastry chef and bread baker. Her blog Eat, Live, Run has great recipes, travel stories, and the perfect slogan: “Celebrating life, one crumb at a time.”


Profile photo of EatLiveRun

Tiramisu Sandwich Cookies

Posted by in Baking

Tasty Kitchen Blog: Tiramisu Sandwich Cookies. Guest post by Jenna Beaugh of Eat, Live, Run, recipe submitted by TK member Tanya Schroeder of Lemons for Lulu.

Tiramisu is our favorite dessert to order out at a restaurant. Whenever we see it on a menu, we always have to get it! No self-control there. I rarely make it at home because it’s pretty time consuming and, let’s be honest, a little complicated. That being said, when I saw these mouth-watering Tiramisu Sandwich Cookies from Tanya, I knew I had to make them as soon as possible. What a fun treat! Two super fudgy double chocolate cookies sandwiched with creamy tiramisu filling? Sign me up.

I was so happy with the way these sandwich cookies turned out and know I’ll make them over and over again for special occasions. The cookies were soft and cake-like and the filling was just sweet enough, with a hint of Kahlua. My husband went absolutely crazy over them and already requested that I make them again so he can share with his office. I took that to be a very good sign!


Tasty Kitchen Blog: Tiramisu Sandwich Cookies. Guest post by Jenna Beaugh of Eat, Live, Run, recipe submitted by TK member Tanya Schroeder of Lemons for Lulu.

Here’s what you need to get started! These are just the ingredients for the cookies. As you can see, lots of chocolate goes into these bad boys! Not that I’m complaining! We’ve got semisweet, unsweetened and mini chocolate chips. Amen to that.


Tasty Kitchen Blog: Tiramisu Sandwich Cookies. Guest post by Jenna Beaugh of Eat, Live, Run, recipe submitted by TK member Tanya Schroeder of Lemons for Lulu.

And here are the ingredients for the creamy tiramisu filling. All the good stuff right here. Marscapone cheese, cream cheese, powdered sugar, vanilla, and let’s not forget the Kahlua. It really puts these over the edge!


Tasty Kitchen Blog: Tiramisu Sandwich Cookies. Guest post by Jenna Beaugh of Eat, Live, Run, recipe submitted by TK member Tanya Schroeder of Lemons for Lulu.

First things first: let’s melt that chocolate. Combine the semisweet chocolate, the unsweetened chocolate and the butter in a small saucepan over low heat. Be sure to keep stirring this once it starts to melt so that the chocolate doesn’t burn. Is there anything better than the scent of chocolate melting on your stove? I think not, friends. I think not.


Tasty Kitchen Blog: Tiramisu Sandwich Cookies. Guest post by Jenna Beaugh of Eat, Live, Run, recipe submitted by TK member Tanya Schroeder of Lemons for Lulu.

After about six minutes, you’ll have something that looks like this. Make sure there are no little lumps remaining! Just smooth, creamy melted chocolate. Heavens.


Tasty Kitchen Blog: Tiramisu Sandwich Cookies. Guest post by Jenna Beaugh of Eat, Live, Run, recipe submitted by TK member Tanya Schroeder of Lemons for Lulu.

Now is the time to prep the rest of your ingredients. In a small bowl, whisk together the flour, baking powder, salt and instant espresso. Set this aside.


Tasty Kitchen Blog: Tiramisu Sandwich Cookies. Guest post by Jenna Beaugh of Eat, Live, Run, recipe submitted by TK member Tanya Schroeder of Lemons for Lulu.

Beat the eggs with the sugar and vanilla until thick and pale in color. I used an electric mixer for this but you don’t have to—a good old fashioned wooden spoon would be just fine here. Keep beating or mixing until the mixture is pretty thick. When you pull up the spoon or whisk attachment, “ribbons” of batter should fall back into the bowl.


Tasty Kitchen Blog: Tiramisu Sandwich Cookies. Guest post by Jenna Beaugh of Eat, Live, Run, recipe submitted by TK member Tanya Schroeder of Lemons for Lulu.

Once you’ve got that going, drizzle in the melted chocolate from before.


Tasty Kitchen Blog: Tiramisu Sandwich Cookies. Guest post by Jenna Beaugh of Eat, Live, Run, recipe submitted by TK member Tanya Schroeder of Lemons for Lulu.

I like to use a rubber spatula here to really get everything from the bottom of the bowl. Plus, a rubber spatula makes it easy to fold the batter as opposed to mixing it, which results in flatter cookies. No one likes flat cookies!


Tasty Kitchen Blog: Tiramisu Sandwich Cookies. Guest post by Jenna Beaugh of Eat, Live, Run, recipe submitted by TK member Tanya Schroeder of Lemons for Lulu.

You can add the dry ingredients now.


Tasty Kitchen Blog: Tiramisu Sandwich Cookies. Guest post by Jenna Beaugh of Eat, Live, Run, recipe submitted by TK member Tanya Schroeder of Lemons for Lulu.

Fold them in like we just talked about. The batter will thicken up a lot!


Tasty Kitchen Blog: Tiramisu Sandwich Cookies. Guest post by Jenna Beaugh of Eat, Live, Run, recipe submitted by TK member Tanya Schroeder of Lemons for Lulu.

Finally, my favorite part: the mini chocolate chips. Yum. Just look at how cute they are! Fold those in as well then let the batter sit for about 10 minutes while you preheat the oven and prep your cookie sheets with either a Silpat or parchment paper.


Tasty Kitchen Blog: Tiramisu Sandwich Cookies. Guest post by Jenna Beaugh of Eat, Live, Run, recipe submitted by TK member Tanya Schroeder of Lemons for Lulu.

Drop big ol’ spoonfuls of cookie dough onto your prepared sheets about two inches apart. Resist the urge to lick the spoon here!


Tasty Kitchen Blog: Tiramisu Sandwich Cookies. Guest post by Jenna Beaugh of Eat, Live, Run, recipe submitted by TK member Tanya Schroeder of Lemons for Lulu.

Bake the cookies at 375ºF for just eight minutes. When done, the center of the cookies should still feel slightly soft but the edges should be set. Let ‘em cool while you make the yummy filling!


Tasty Kitchen Blog: Tiramisu Sandwich Cookies. Guest post by Jenna Beaugh of Eat, Live, Run, recipe submitted by TK member Tanya Schroeder of Lemons for Lulu.

To make the filling, beat together the marscapone cheese and the cream cheese. Then, add the powdered sugar and keep beating until smooth. Sort of like cream cheese frosting without the butter!


Tasty Kitchen Blog: Tiramisu Sandwich Cookies. Guest post by Jenna Beaugh of Eat, Live, Run, recipe submitted by TK member Tanya Schroeder of Lemons for Lulu.

Then, add the special ingredient. Just two tablespoons of the good stuff. It goes a long way. Also add the vanilla extract here and continue beating until smooth. Drool.


Tasty Kitchen Blog: Tiramisu Sandwich Cookies. Guest post by Jenna Beaugh of Eat, Live, Run, recipe submitted by TK member Tanya Schroeder of Lemons for Lulu.

Sandwich the cooled cookies together with the filling and voila! You’re done. These are great freshly made, but I found that I liked them even better after a few hours in the fridge—if you can wait that long, that is. Seriously delicious!

Thank you Tanya for providing the recipe for this treat! We thoroughly enjoyed every last crumb and I can’t wait to make them again soon. Visit her blog Lemons for Lulu for more of her creations!


Printable Recipe

Tiramisu Sandwich Cookies

See post on Tanya Schroeder @lemonsforlulu’s site!
0.00 Mitt(s) 0 Rating(s)0 votes, average: 0.00 out of 50 votes, average: 0.00 out of 50 votes, average: 0.00 out of 50 votes, average: 0.00 out of 50 votes, average: 0.00 out of 5

Prep Time:

Cook Time:

Difficulty: Easy

Servings: 12

12
x

Print Options

Page size Letter 3x5 4x6
Text Size Small Medium Large
Content Include description
Include prep time, etc.
Show image

Description

Espresso chocolate cookies hugging a creamy Kahlua and mascarpone filling.

Ingredients

  • FOR THE COOKIES:
  • 5 ounces, weight Semi-sweet Chocolate, Chopped
  • 2 ounces, weight Unsweetened Chocolate, Chopped
  • 2 Tablespoons Butter
  • ¼ cups Flour
  • ¼ teaspoons Baking Powder
  • ¼ teaspoons Salt
  • ¼ teaspoons Espresso Powder
  • 2 whole Eggs
  • ⅔ cups Sugar
  • 1 teaspoon Vanilla
  • ¾ cups Mini Chocolate Chips
  • FOR THE FILLING:
  • 8 ounces, weight Mascarpone Cheese Softened
  • 2 ounces, weight Cream Cheese, Softened
  • ¼ cups Powdered Sugar
  • ½ teaspoons Vanilla
  • 2 Tablespoons Kahlua Liqueur

Preparation Instructions

For the cookies:
In a small saucepan, combine chocolates and butter. Heat over low heat until both have melted. Stir until smooth then remove from heat and set aside.

In a small bowl, combine flour, baking powder, salt and espresso powder. Set aside.

In a mixing bowl, beat together eggs, sugar and vanilla until mixture begins to thicken. Stir in cooled chocolate mixture followed by flour mixture. Beat until combined. Fold in chocolate chips. Let batter stand for 10 minutes in order to thicken up.

Preheat oven to 375 F. Drop dough by the tablespoon full onto a parchment paper- or Silpat-lined baking sheet, keeping each cookie about 2 inches apart.

Bake for 8 minutes or until edges are set and cookies are slightly cracked. Remove pan from oven and set it on a rack. Let cookies cool for 1 minute before removing them from the pan to a cooling rack.

For the filling:
In a medium sized bowl beat together mascarpone and cream cheese. Add in powdered sugar, vanilla and liqueur and mix until combined.

Spread a healthy tablespoon of filling on the flat side of one cookie then top with another cookie. Repeat until you’ve used all of the cookies.

Makes 12 sandwich cookies. Store assembled cookies in an airtight container.

Recipe adapted from Better Homes and Gardens.


_______________________________________

Jenna is a food writer who has worked as a pastry chef and bread baker. Her blog Eat, Live, Run has great recipes, travel stories, and the perfect slogan: “Celebrating life, one crumb at a time.”


Profile photo of EatLiveRun

Sugar Cookie Butter (Gluten-Free!)

Posted by in Step-by-Step Recipes

Tasty Kitchen Blog: Sugar Cookie Butter. Guest post by Jenna Weber of Eat, Live, Run; recipe submitted by TK member Rachel of Studio Cuisine.

 
This yummy (and surprisingly healthy!) homemade cookie butter combines the two great loves of my life: cookie dough and nut butter.

I’ll be honest and tell you guys that whenever I bake cookies, which is quite often given my job, I never wash my bowl out until after I’ve swiped my finger through it at least half a dozen times. Sometimes more, depending on the day. Don’t act like you have no idea what I’m talking about!

So when I found Rachel’s recipe for a spreadable cookie dough that contains no raw eggs, I leapt for joy! As a bonus, it’s even gluten-free. This incredibly addicting Sugar Cookie Butter tastes just like sugar cookie dough and is simple to make, as long as you have a food processor or high speed blender.

Let’s get started!


Tasty Kitchen Blog: Sugar Cookie Butter. Guest post by Jenna Weber of Eat, Live, Run; recipe submitted by TK member Rachel of Studio Cuisine.

Here’s all the ingredients you need: raw cashews, banana chips, baking soda, cream of tartar, vanilla extract, honey and coconut oil.


Tasty Kitchen Blog: Sugar Cookie Butter. Guest post by Jenna Weber of Eat, Live, Run; recipe submitted by TK member Rachel of Studio Cuisine.

First, combine the cashews and banana chips in your food processor and process until a crumbly nut butter consistency is reached. For me, this took almost eight minutes and I stopped the food processor a few times to scrape down the bowl with a rubber spatula (and taste test!).


Tasty Kitchen Blog: Sugar Cookie Butter. Guest post by Jenna Weber of Eat, Live, Run; recipe submitted by TK member Rachel of Studio Cuisine.

If you’re not sure, keep going! It’s impossible to over-process this.


Tasty Kitchen Blog: Sugar Cookie Butter. Guest post by Jenna Weber of Eat, Live, Run; recipe submitted by TK member Rachel of Studio Cuisine.

After your banana chips and cashews are combined and relatively smooth, add your honey.

Note that I added double the amount of honey that was listed in the original recipe. What can I say? I like my cookie butter sweet.


Tasty Kitchen Blog: Sugar Cookie Butter. Guest post by Jenna Weber of Eat, Live, Run; recipe submitted by TK member Rachel of Studio Cuisine.

After adding the honey, add the vanilla extract with the motor running …


Tasty Kitchen Blog: Sugar Cookie Butter. Guest post by Jenna Weber of Eat, Live, Run; recipe submitted by TK member Rachel of Studio Cuisine.

Followed by the cream of tartar …


Tasty Kitchen Blog: Sugar Cookie Butter. Guest post by Jenna Weber of Eat, Live, Run; recipe submitted by TK member Rachel of Studio Cuisine.

And the baking soda! Scrape down the sides of your bowl and run the motor on low until all ingredients are completely combined.


Tasty Kitchen Blog: Sugar Cookie Butter. Guest post by Jenna Weber of Eat, Live, Run; recipe submitted by TK member Rachel of Studio Cuisine.

The last ingredient to add is the coconut oil. Mine was extra soft because it had been sitting on my counter in the sunshine for a little while. I added four teaspoons of this.


Tasty Kitchen Blog: Sugar Cookie Butter. Guest post by Jenna Weber of Eat, Live, Run; recipe submitted by TK member Rachel of Studio Cuisine.

Give it another whirl and then taste. I think it tastes just like cookie dough with a hint of banana. I couldn’t get enough!


Tasty Kitchen Blog: Sugar Cookie Butter. Guest post by Jenna Weber of Eat, Live, Run; recipe submitted by TK member Rachel of Studio Cuisine.

I like to serve my cookie butter spread on (what else?) cookies! Cookies on cookies on cookies. It’s my dream come true. I also thought the rainbow sprinkles made for a pretty touch.

This would be a great afternoon snack for little ones. The cookie butter would also be delicious on top of oatmeal or with sliced apples. You really can’t go wrong; it’s so good!

Thanks, Rachel, for the recipe. Go visit her blog Studio Cuisine for more of her incredible creations!


Printable Recipe

Sugar Cookie Butter

See post on Rachel {Studio Cuisine}’s site!
5.00 Mitt(s) 1 Rating(s)1 vote, average: 5.00 out of 51 vote, average: 5.00 out of 51 vote, average: 5.00 out of 51 vote, average: 5.00 out of 51 vote, average: 5.00 out of 5

Prep Time:

Cook Time:

Difficulty: Easy

Servings: 6

6
x

Print Options

Page size Letter 3x5 4x6
Text Size Small Medium Large
Content Include description
Include prep time, etc.
Show image

Description

A creamy cashew butter that tastes just like sugar cookie dough! You won’t believe it’s healthy!

Ingredients

  • 1-½ cup Raw, Unsalted Cashews
  • ⅓ cups Banana Chips
  • 1 teaspoon Honey
  • ⅓ teaspoons Vanilla Extract
  • ¼ teaspoons Cream Of Tartar
  • ¼ teaspoons Baking Soda
  • 4 teaspoons Coconut Oil

Preparation Instructions

Combine cashews and banana chips in food processor for 8-10 minutes until nut butter consistency is reached, scraping down the sides as necessary.

Add in honey, vanilla extract, cream of tartar, and baking soda and process until combined.

Add in coconut oil, 1 teaspoon at a time, until desired consistency is reached. I added in about 4 teaspoons. This amount got me a thicker nut butter that had a cookie dough-like consistency, but feel free to add more.

Yields about a cup of sugar cookie butter. Lasts for up to 1 week at room temperature in an airtight container.


_______________________________________

Jenna is a food writer who has worked as a pastry chef and bread baker. Her blog Eat, Live, Run has great recipes, travel stories, and the perfect slogan: “Celebrating life, one crumb at a time.”


Profile photo of EatLiveRun

Linguine and Clam Sauce

Posted by in Step-by-Step Recipes

Tasty Kitchen Blog: Linguine and Clam Sauce. Guest post and recipe submitted by Jenna Weber of Eat, Live, Run.

 
Hello friends! I’m here today to share a recipe out of my new book, White Jacket Required. It feels a bit odd to say “my new book”, as if I ever had an old book (I did not!). I’m still getting used to this whole author thing — so far, it’s pretty cool! The book is a memoir about my time at culinary school, and it includes about thirty of my very favorite family recipes. I’m really excited to share one of them with y’all today, and that is Linguine and Clam Sauce.

I LOVE linguine and clam sauce. It’s been my absolute favorite meal since about the time I was six years old (what six year old loves clams?) and it’s the one I most often request when I go home to visit my parents. My mom can make a mean clam sauce! My version is very simple … and very delicious! I hope you enjoy it as much as I do.


Tasty Kitchen Blog: Linguine and Clam Sauce. Guest post and recipe submitted by Jenna Weber of Eat, Live, Run.

Here are all the ingredients you’ll need, minus extra virgin olive oil and parsley for serving. So grab your linguine, lemon, red pepper flakes, three cans of clams, shallot and Parmesan cheese. No need to get fancy clams from the seafood counter at the store—I actually prefer using canned clams here!


Tasty Kitchen Blog: Linguine and Clam Sauce. Guest post and recipe submitted by Jenna Weber of Eat, Live, Run.

First, you’ll want to drain your clams and reserve about a half cup of clam juice for the sauce. I usually just toss all my drained clams in a small bowl for easy access later.


Tasty Kitchen Blog: Linguine and Clam Sauce. Guest post and recipe submitted by Jenna Weber of Eat, Live, Run.

Now, mince your shallot. (I almost chopped my finger off thirty seconds before taking this photo. Don’t follow my lead! Pay attention to what you’re doing; your fingers depend on it.)


Tasty Kitchen Blog: Linguine and Clam Sauce. Guest post and recipe submitted by Jenna Weber of Eat, Live, Run.

Heat up a tablespoon of olive oil in a large skillet and add your minced shallots.

I absolutely love using my shiny red Le Creuset cast iron skillet for this—and anything, for that matter! It was a gift when I was going through culinary school and the first “nice” piece of cookware I ever owned. I love it so.


Tasty Kitchen Blog: Linguine and Clam Sauce. Guest post and recipe submitted by Jenna Weber of Eat, Live, Run.

Sauté the shallots for about five minutes till soft, then add the clams. Continue cooking for another couple minutes here.


Tasty Kitchen Blog: Linguine and Clam Sauce. Guest post and recipe submitted by Jenna Weber of Eat, Live, Run.

Then, pour in the reserved clam juice …


Tasty Kitchen Blog: Linguine and Clam Sauce. Guest post and recipe submitted by Jenna Weber of Eat, Live, Run.

Add a squeeze of lemon …


Tasty Kitchen Blog: Linguine and Clam Sauce. Guest post and recipe submitted by Jenna Weber of Eat, Live, Run.

And, finally, a sprinkle of red pepper flakes. You can adjust the amount of red pepper flakes according to how spicy you’d like your sauce to be. Personally, I’m a huge fan of spice so I love to add more hot pepper flakes here!


Tasty Kitchen Blog: Linguine and Clam Sauce. Guest post and recipe submitted by Jenna Weber of Eat, Live, Run.

Bring sauce to a boil, then reduce heat and simmer for three minutes. Then, add your hot cooked linguine to the pan and toss well.


Tasty Kitchen Blog: Linguine and Clam Sauce. Guest post and recipe submitted by Jenna Weber of Eat, Live, Run.

Divide linguine and clam sauce amongst four plates and top with the freshly grated Parmesan cheese and minced parsley. The parsley is optional but oh so pretty!


Tasty Kitchen Blog: Linguine and Clam Sauce. Guest post and recipe submitted by Jenna Weber of Eat, Live, Run.

Enjoy! I entered the recipe in my Tasty Kitchen recipe box so you can print it out and enjoy your own delicious linguine and clam sauce at home soon. And speaking of making it at home, check back here tomorrow for a chance to win little special something that’ll help you do just that. I promise I won’t reveal more than that.

P.S. It’s red. (Sorry, I couldn’t help myself.)


Printable Recipe

Linguine and Clam Sauce

0.00 Mitt(s) 0 Rating(s)0 votes, average: 0.00 out of 50 votes, average: 0.00 out of 50 votes, average: 0.00 out of 50 votes, average: 0.00 out of 50 votes, average: 0.00 out of 5

Prep Time:

Cook Time:

Difficulty: Easy

Servings: 4

4
x

Print Options

Page size Letter 3x5 4x6
Text Size Small Medium Large
Content Include description
Include prep time, etc.
Show image

Description

Delicious and nutritious linguine and clams!

Ingredients

  • 8 ounces, weight Dry Linguine Pasta
  • 1 Tablespoon Extra Virgin Olive Oil
  • 1 whole Large Shallot, Minced
  • 3 cans (6.5 Oz. Size) Clams, Drained With 1/2 Cup Juice Reserved
  • 1 whole Lemon, Juiced
  • ¼ teaspoons Red Pepper Flakes
  • ½ cups Freshly Grated Parmesan Cheese
  • Minced Parsley, For Garnish

Preparation Instructions

Cook the pasta according to package directions. Drain and set aside.

In a skillet, heat the olive oil over medium heat. When hot, add the minced shallots and saute for about 5 minutes, until very soft. Add the drained clams and continue cooking for another 4-5 minutes.

Add the 1/2 cup reserved clam juice, lemon juice and red pepper flakes to the skillet. Bring mixture to a boil, then simmer for 3 minutes.

Add hot cooked linguine to the pan and toss well with the sauce. Divide amongst plates and top each dish with Parmesan cheese and minced parsley (optional).


_______________________________________

Jenna is a food writer who has worked as a pastry chef and bread baker. Her blog Eat, Live, Run has great recipes, travel stories, and the perfect slogan: “Celebrating life, one crumb at a time.”


Profile photo of EatLiveRun

English Muffin Toastable Bread

Posted by in Baking, Step-by-Step Recipes

  I don’t know about you but I love English muffins in the morning. My favorite way to eat them is toasted with butter and raspberry jam. They are the perfect accompaniment to scrambled eggs. I’m getting hungry just thinking about it! 
When I found this recipe for English Muffin Toastable Bread by my friend […]

Profile photo of EatLiveRun

Tomato, Roasted Pepper and Arugula Pasta

Posted by in Step-by-Step Recipes

  I love a good pasta dish, and this Smoky Tomato, Roasted Red Pepper and Arugula Pasta by Cassie (Tasty Kitchen member BakeYourDay) is just perfect for a delicious late-summer meal! It contains pretty much all my favorite things (besides chocolate). I seriously cannot get enough of this pasta! After you try it, you too, […]

Profile photo of EatLiveRun

Apricot Strudel

Posted by in Baking, Step-by-Step Recipes

  Holy strudel! The moment I saw Heather Christo’s mouth-watering recipe for Apricot Strudel, I knew I had to make it as soon as possible. Apricots are in season now, and these sweet little gems are just flooding the farmers market. I hadn’t made a strudel in years (and never an apricot one!), and was […]

Profile photo of EatLiveRun

Fresh Ginger Dressing

Posted by in Step-by-Step Recipes

  I love homemade salad dressing, but for some odd reason, never make it! Then, after having dinner at a friend’s house a few weeks ago where I tasted the most delicious homemade dressing that she just whipped up a few minutes before the meal, I got inspired. I was ready. Good salad dressing really […]