The Pioneer Woman Tasty Kitchen
Profile photo of twopeasandtheirpod

Lemon Cream Bars

Posted by in Baking, Step-by-Step Recipes

Tasty Kitchen Blog: Lemon Cream Bars. Guest post by Maria Lichty of Two Peas and Their Pod, recipe submitted by TK member Muriel of Cook, Bake and Decorate.

 
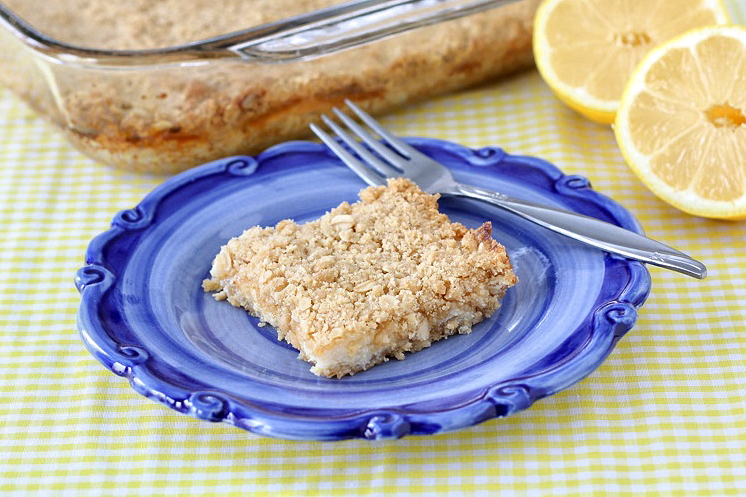
Our friends gave us a huge bag of lemons from Arizona. The lemons are beautiful and the size of oranges. I didn’t want them to go to waste so I started looking for lemon recipes on Tasty Kitchen. I found a recipe for Lemon Cream Bars from Tasty Kitchen member CookBakeandDecorate (Muriel). Lemon bars are one of my favorite treats. I love that these bars are creamy with an oat streusel crust and topping. Plus, they are incredibly easy to make. I had all of the ingredients, so I got started.


Tasty Kitchen Blog: Lemon Cream Bars. Guest post by Maria Lichty of Two Peas and Their Pod, recipe submitted by TK member Muriel of Cook, Bake and Decorate.

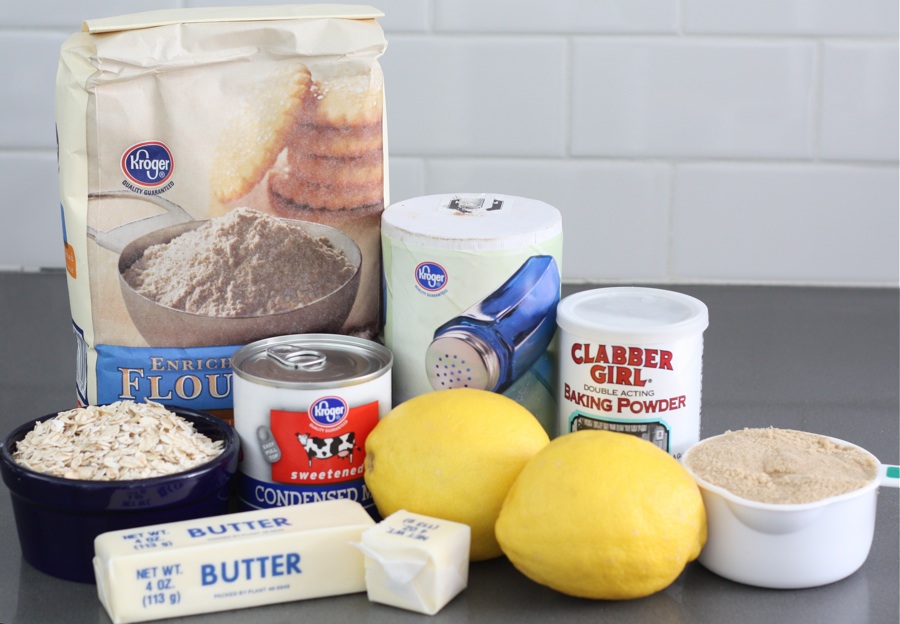
To make the lemon cream bars, you will need: sweetened condensed milk, fresh lemon juice, flour, oatmeal, brown sugar, butter, baking powder, and salt.


Tasty Kitchen Blog: Lemon Cream Bars. Guest post by Maria Lichty of Two Peas and Their Pod, recipe submitted by TK member Muriel of Cook, Bake and Decorate.

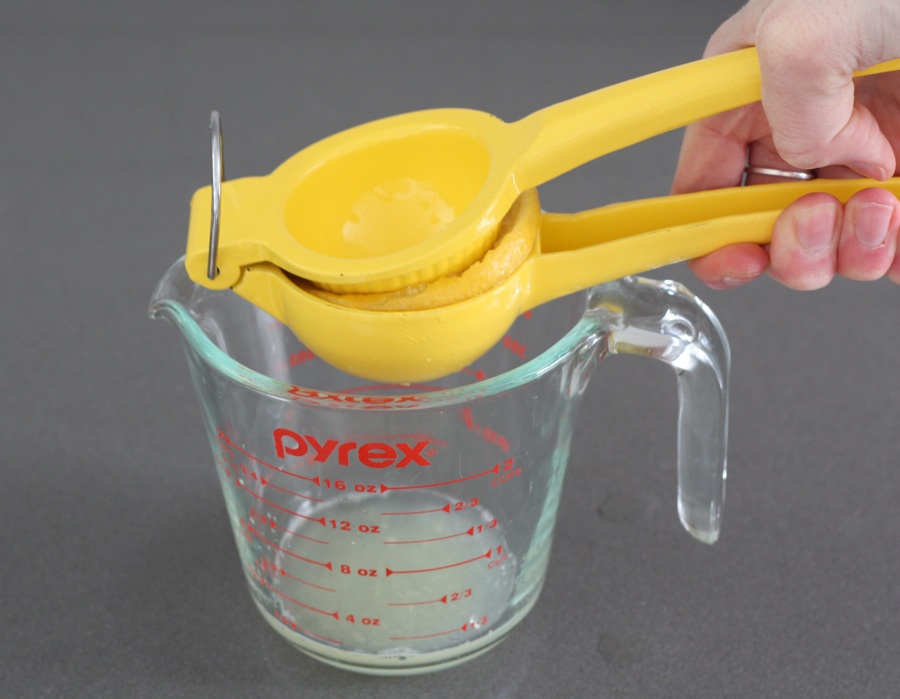
Juice the lemons. You will need 1/2 cup of lemon juice. I used two large lemons.


Tasty Kitchen Blog: Lemon Cream Bars. Guest post by Maria Lichty of Two Peas and Their Pod, recipe submitted by TK member Muriel of Cook, Bake and Decorate.

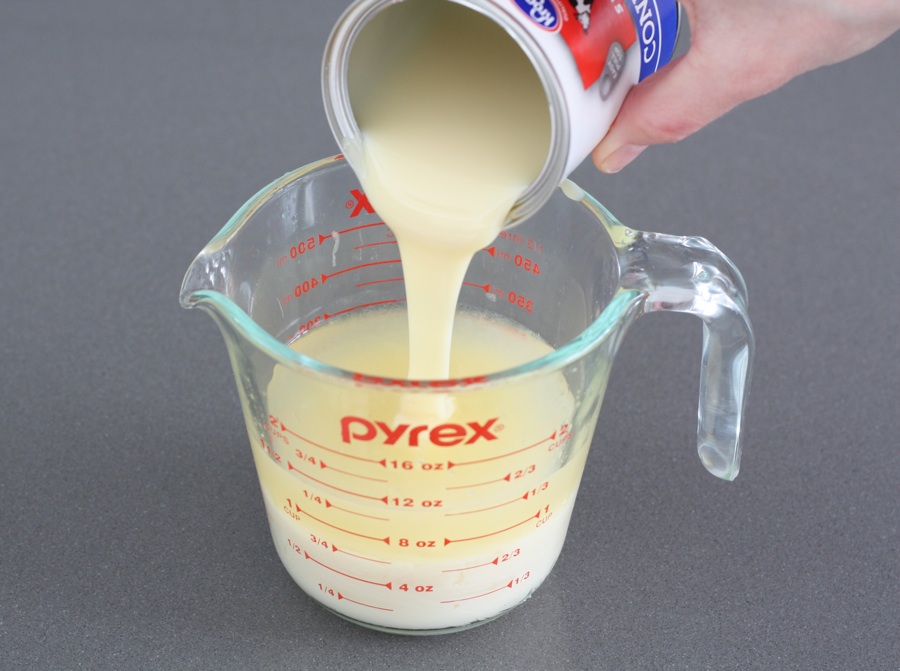
Combine the lemon juice and the sweetened condensed milk. Mix well and set aside.


Tasty Kitchen Blog: Lemon Cream Bars. Guest post by Maria Lichty of Two Peas and Their Pod, recipe submitted by TK member Muriel of Cook, Bake and Decorate.

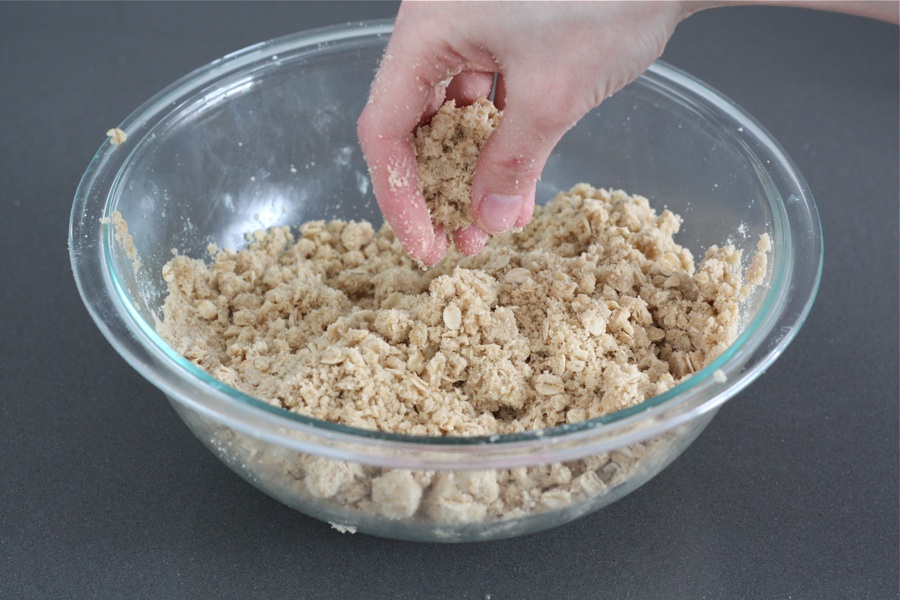
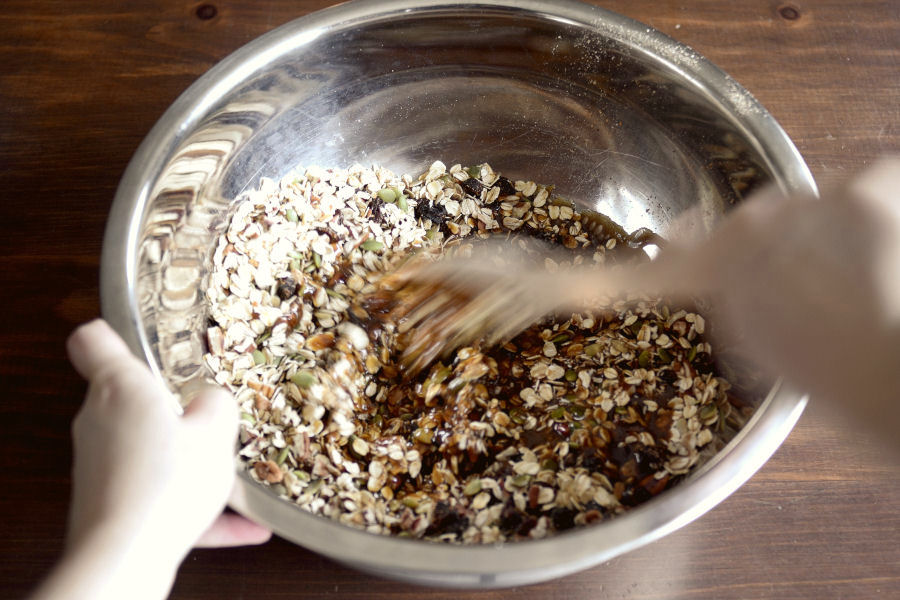
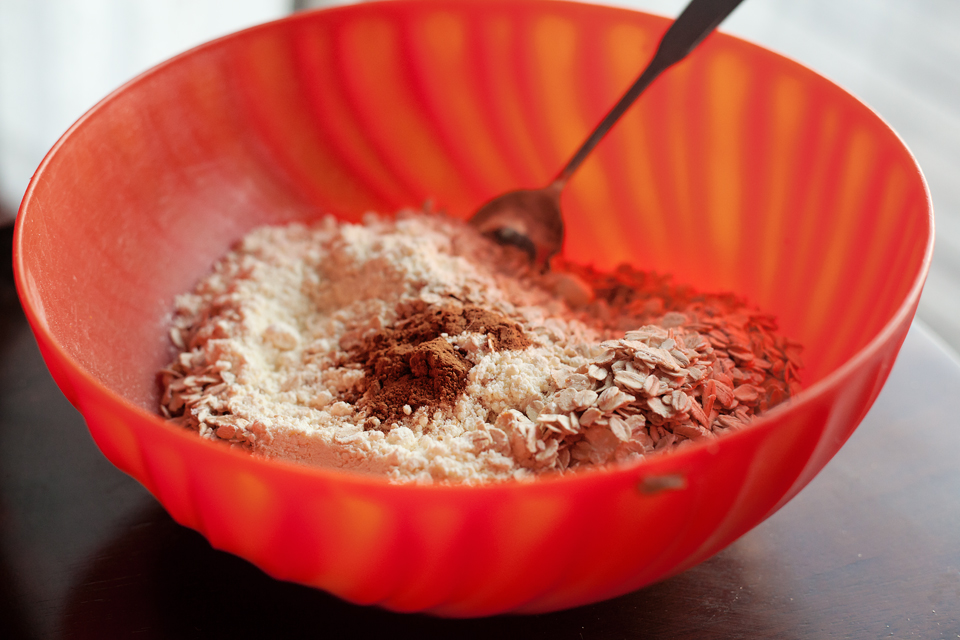
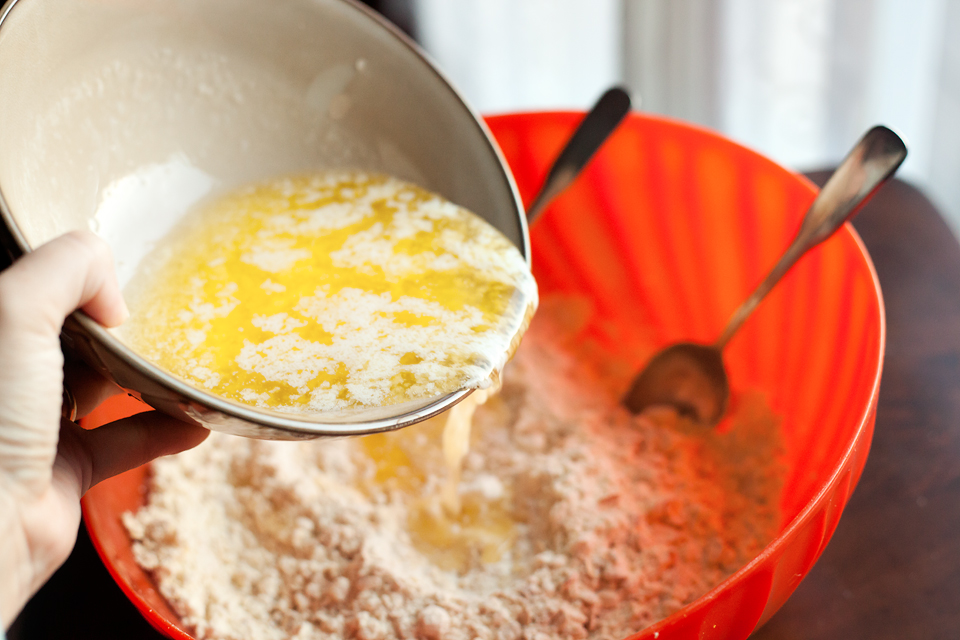
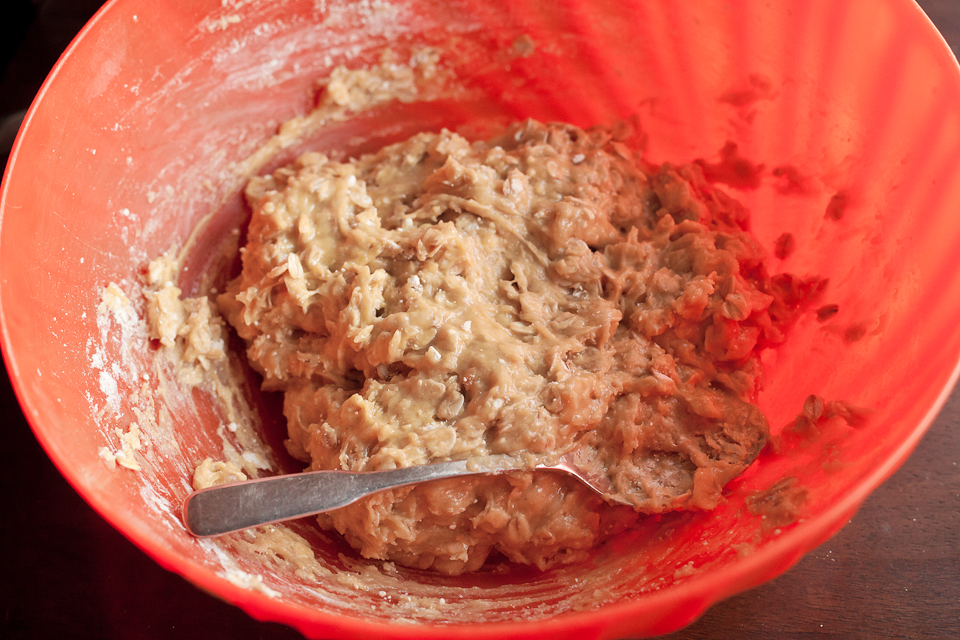
In a large bowl, mix remaining ingredients together until crumbly.


Tasty Kitchen Blog: Lemon Cream Bars. Guest post by Maria Lichty of Two Peas and Their Pod, recipe submitted by TK member Muriel of Cook, Bake and Decorate.

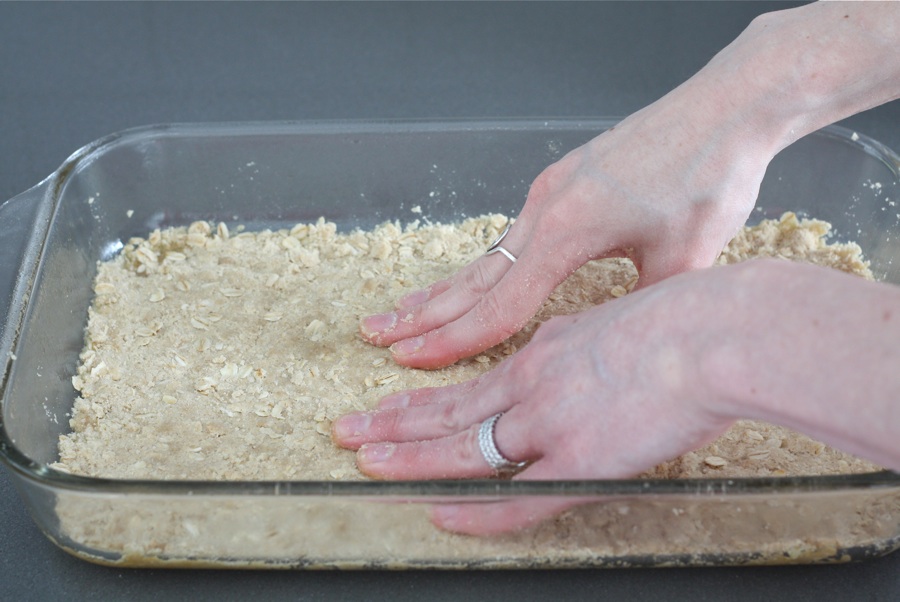
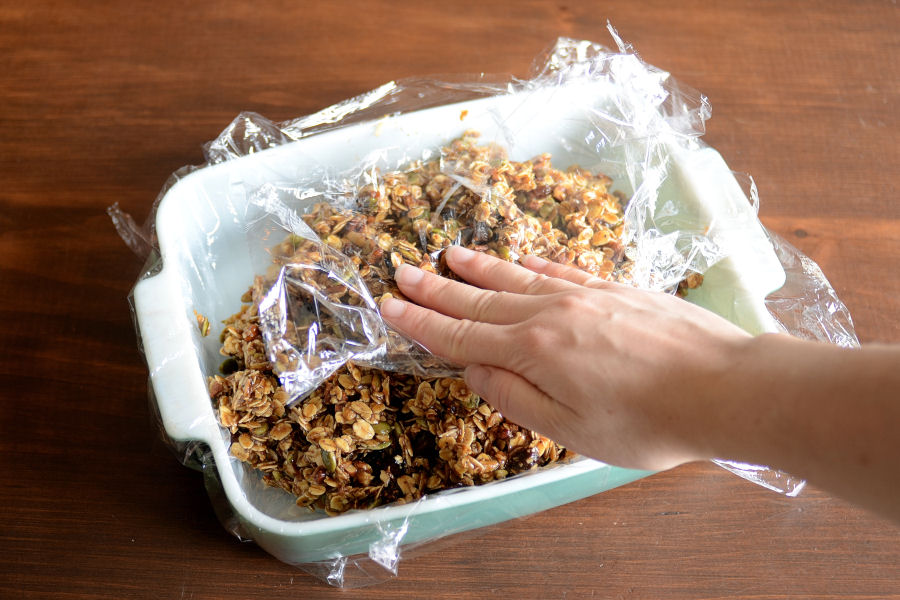
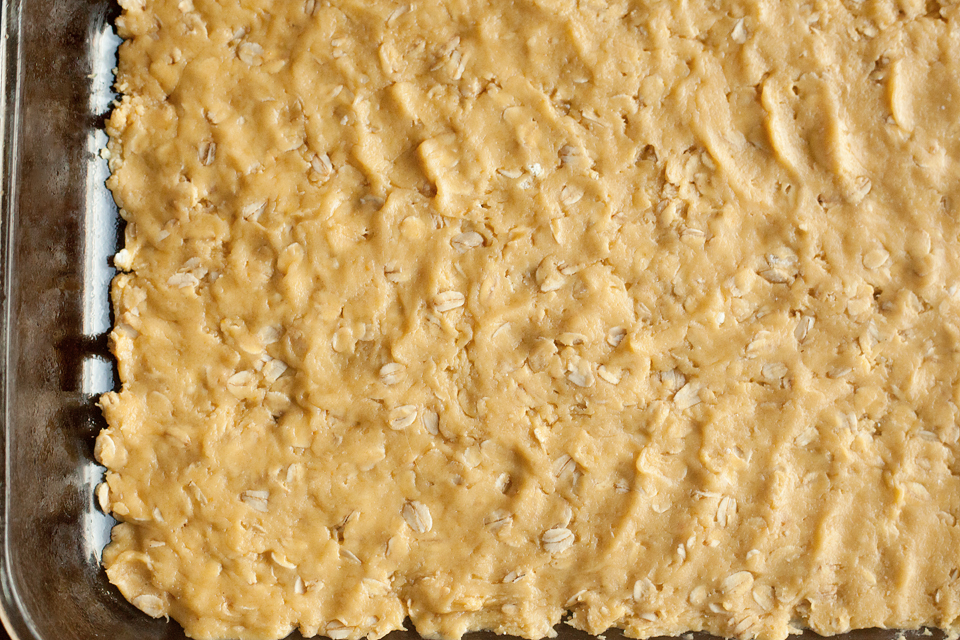
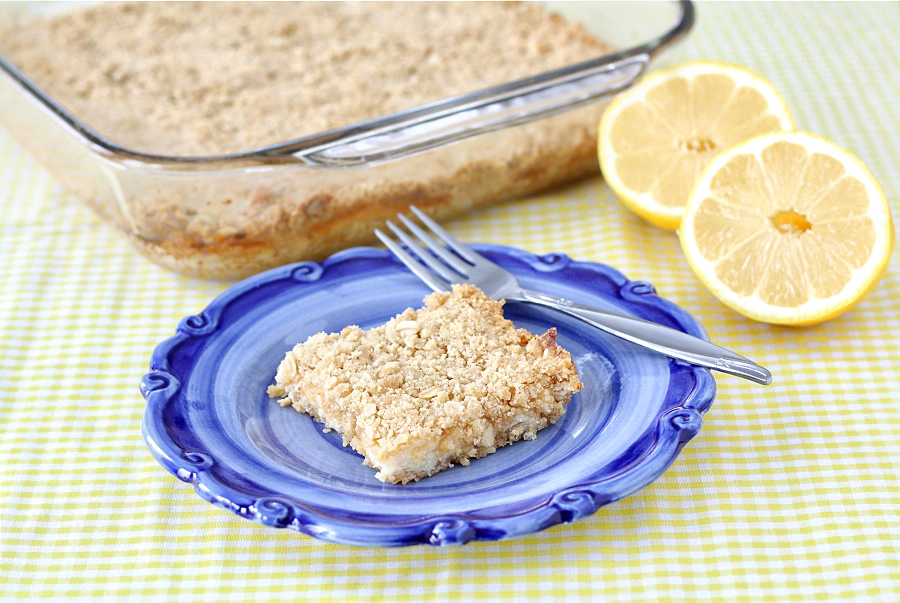
Press half of the streusel mixture into a greased 9 by 13 baking dish.


Tasty Kitchen Blog: Lemon Cream Bars. Guest post by Maria Lichty of Two Peas and Their Pod, recipe submitted by TK member Muriel of Cook, Bake and Decorate.

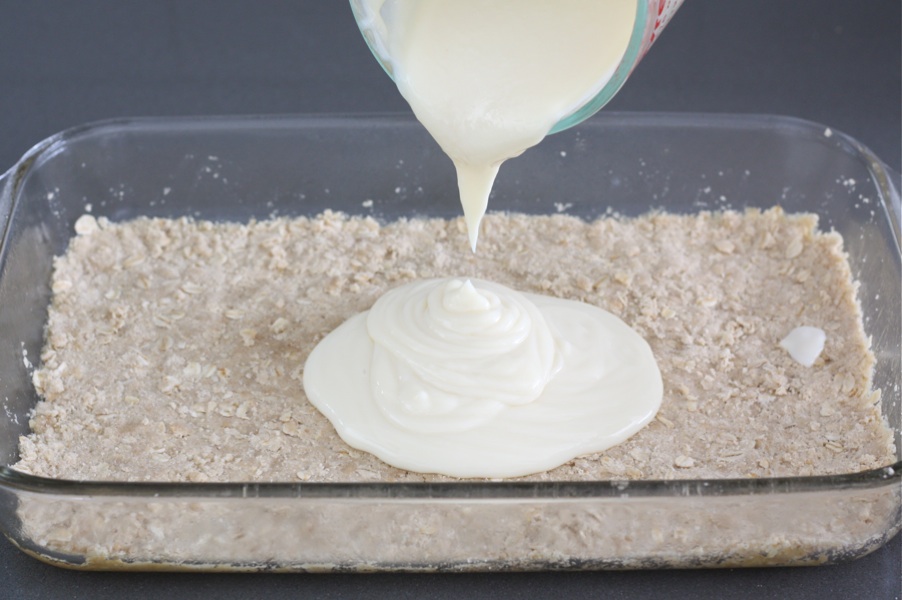
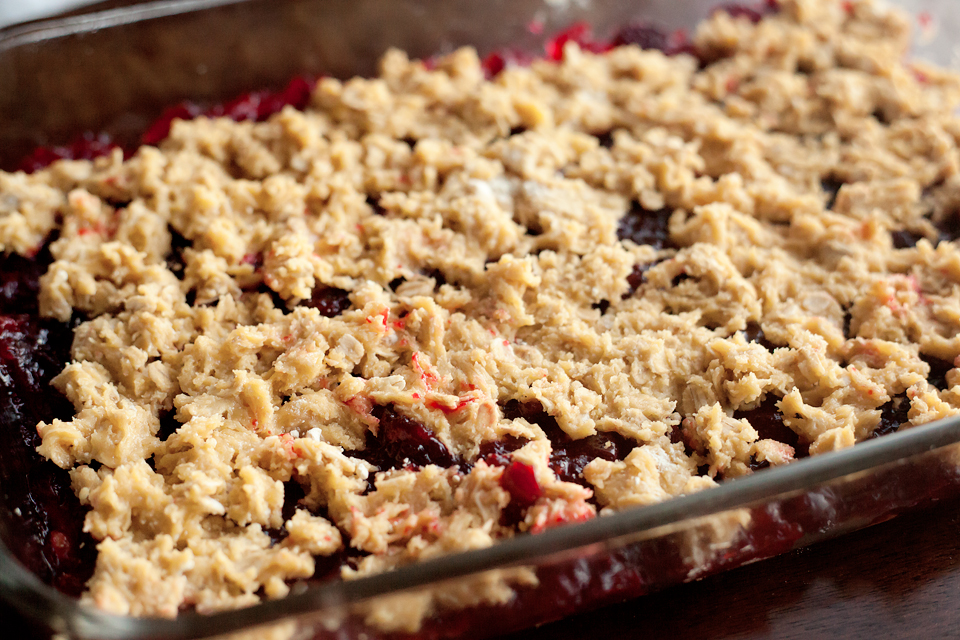
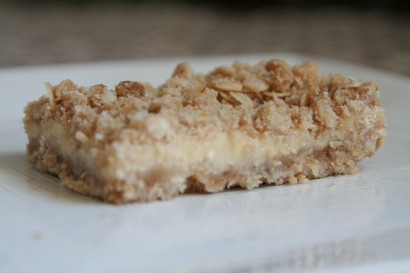
Pour the lemon mixture over the streusel crust.


Tasty Kitchen Blog: Lemon Cream Bars. Guest post by Maria Lichty of Two Peas and Their Pod, recipe submitted by TK member Muriel of Cook, Bake and Decorate.

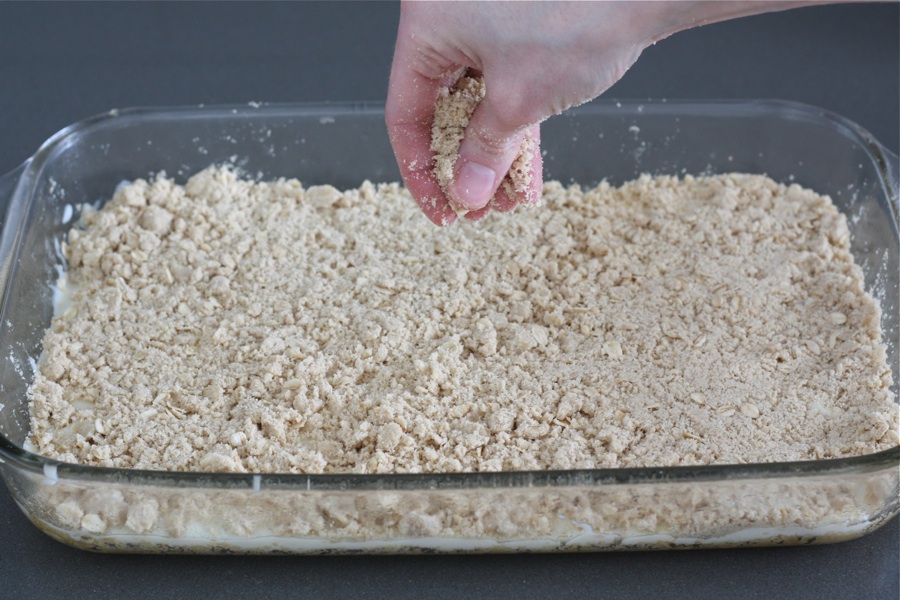
Sprinkle remaining streusel over the top of the lemon bars. Pat gently.


Tasty Kitchen Blog: Lemon Cream Bars. Guest post by Maria Lichty of Two Peas and Their Pod, recipe submitted by TK member Muriel of Cook, Bake and Decorate.

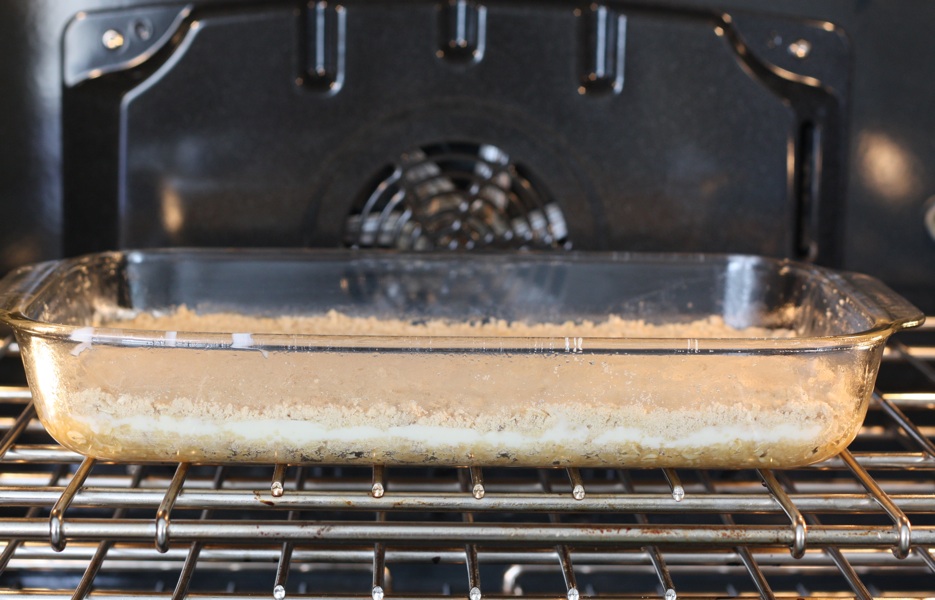
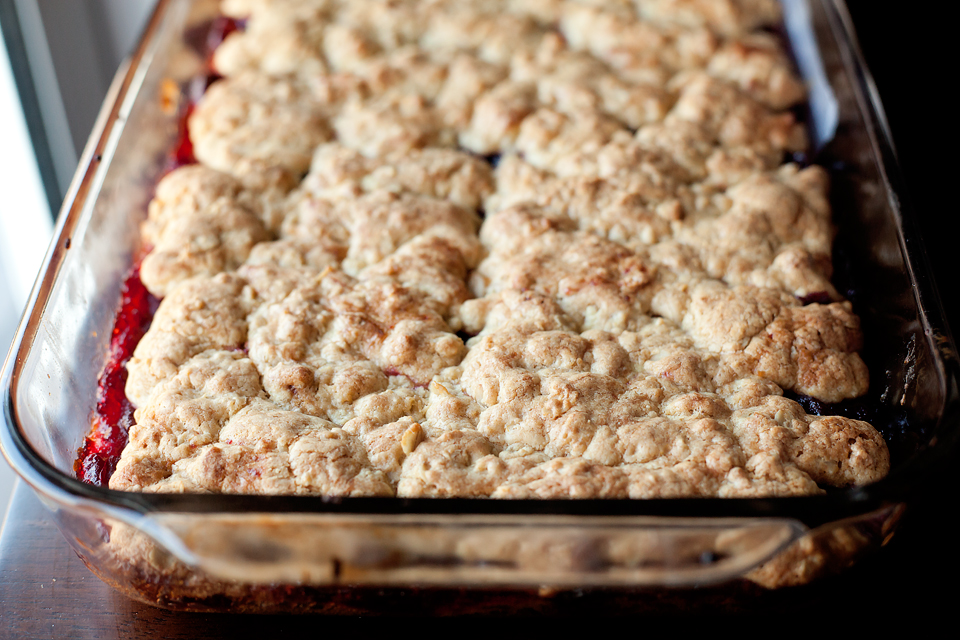
Bake for 20–25 minutes at 350 degrees F.


Tasty Kitchen Blog: Lemon Cream Bars. Guest post by Maria Lichty of Two Peas and Their Pod, recipe submitted by TK member Muriel of Cook, Bake and Decorate.

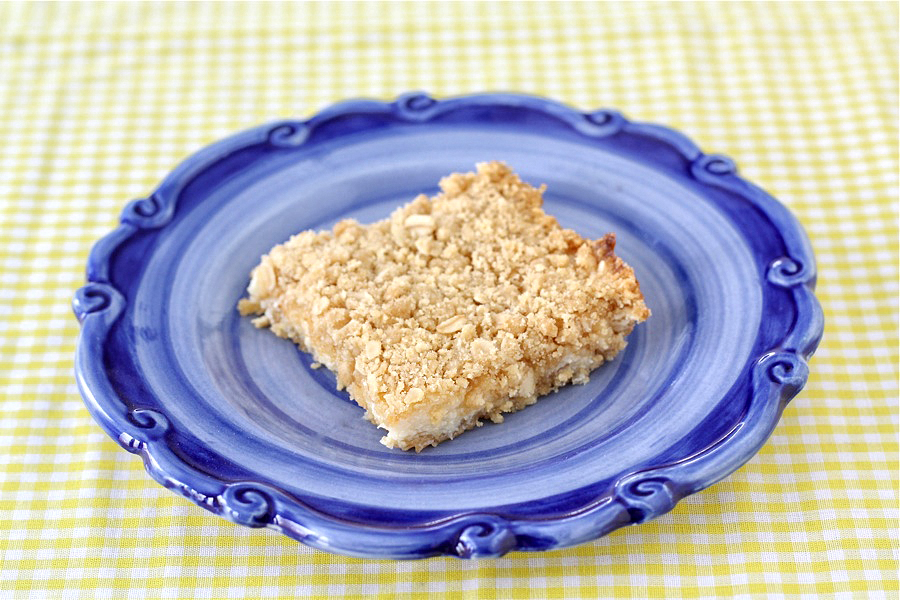
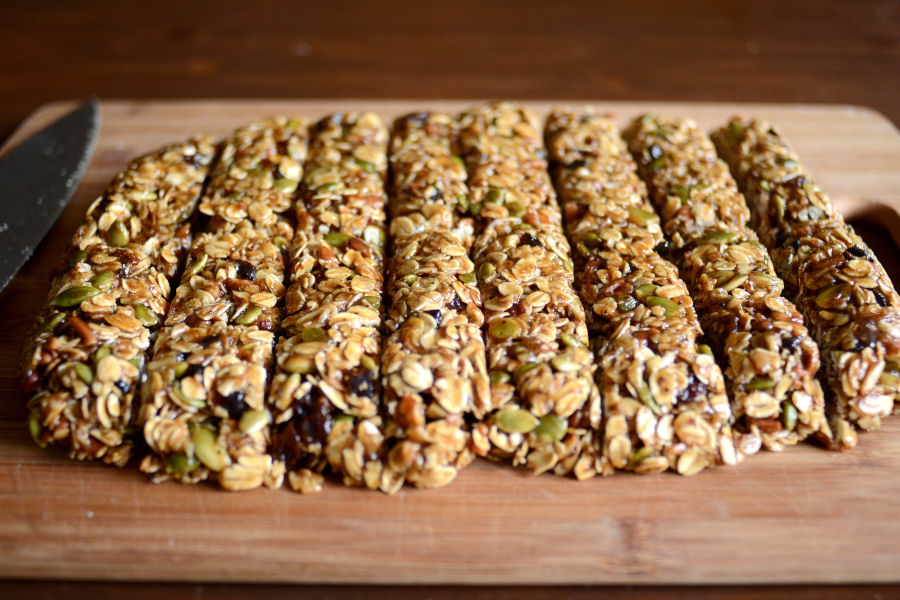
Let cool completely and enjoy! Store bars in the refrigerator.


Tasty Kitchen Blog: Lemon Cream Bars. Guest post by Maria Lichty of Two Peas and Their Pod, recipe submitted by TK member Muriel of Cook, Bake and Decorate.

If you are a lemon lover, make Lemon Cream Bars. They are creamy, dreamy, and the perfect sweet treat for spring. We enjoyed them right out of the oven and chilled from the refrigerator. They are delicious both ways. Thanks, Muriel, for a fantastic recipe! Check out the Cook, Bake and Decorate blog for other delicious recipes.


Printable Recipe

Lemon Cream Bars

4.80 Mitt(s) 25 Rating(s)25 votes, average: 4.80 out of 525 votes, average: 4.80 out of 525 votes, average: 4.80 out of 525 votes, average: 4.80 out of 525 votes, average: 4.80 out of 5

Prep Time:

Cook Time:

Difficulty: Easy

Servings: 15

15
x

Print Options

Page size Letter 3x5 4x6
Text Size Small Medium Large
Content Include description
Include prep time, etc.
Show image

Description

To be honest, I can’t quite remember where I got this recipe and I feel horrible that I can’t personally thank this person because these bars are just divine! Now, I love me some good ole lemon bars and these are lemon bars taken up a notch! These bars have a delicious streusel bottom with a lemon cream filling, then more delicious streusel on top. Seriously, you can’t go wrong with these little babies!

Ingredients

  • 1 can Sweetened, Condensed Milk - 14-ounce Can
  • ½ cups Lemon Juice
  • 1-½ cup Flour
  • 1 cup Oatmeal
  • 1 cup Brown Sugar
  • ⅔ cups Butter, Melted
  • 1 teaspoon Baking Powder
  • 1 pinch Salt

Preparation Instructions

Preheat the oven to 350F.

Combine milk and lemon juice. Mix well and set aside for a moment.

Mix remaining ingredients until crumbly.

Press half of the streusel (dry) mixture into a lightly greased 9×13 baking dish. Pour the lemon mixture over top. Finish by sprinkling remaining streusel over the top of the lemon filling. Bake for 25-30 minutes. Cool completely then store in the refrigerator.


_______________________________________

Maria and her husband Josh (who she affectionately refers to as her “dough boy”) blog at Two Peas and Their Pod. They’ve been featured on Saveur, Eatocracy, Gourmet Live, Glamour, and the Los Angeles Times, to name just a few. We’re so glad to have them here!


Profile photo of Erika (TK)

Last-Minute Thanksgiving Ideas

Posted by in Holidays, The Theme Is...

Tasty Kitchen Blog: Last-Minute Thanksgiving Ideas

 
We’ve been doing this here Tasty Kitchen Blog for a few years now, and in that time, I’ve seen a steady stream of dishes pass through our cyber doors, each as tempting as the one before it, all of them wreaking havoc on my daily routine of promising myself, “Today will be a light eating day, to atone for yesterday’s sin of gluttony.”

It’s a futile attempt, I know. But I like to kid myself every morning.

One great perk of having read all the posts here is that, when I need inspiration fast and when that inspiration works best accompanied by instructions and visual aids, I have a wealth of reference material. Tasty Kitchen Blog has saved me many times I needed a last-minute side dish, or even just a quick but new dressing to update a favorite salad. So just in case you’re looking for something new for tomorrow’s meal (maybe your guest list suddenly multiplied, or perhaps you just learned one of your guests has a new dietary restriction), maybe we can help.


Tasty Kitchen Blog: Outrageous Garlic Soup. Guest post and photo by Erica Kastner of Cooking for Seven, recipe submitted by TK member n8tivenyer).

How about this Outrageous Garlic Soup for a starter? It’s warm and creamy and comforting, especially for those who just spent hours traveling. The garlic isn’t overpowering, and besides, everyone’s family, right?


Tasty Kitchen Blog: Brazilian Cheesebread. Guest post and photo by Georgia Pellegrini, recipe submitted by Jill Wilkins of The Pink Cowgirl.

This Brazilian Cheesebread also works well as a starter or a side, and it’s naturally gluten-free!


Tasty Kitchen Blog: Pumpkin Cornbread. Guest post and photo by Maria Lichty of Two Peas and Their Pod, recipe submitted by TK member Tracy of Sugarcrafter.

Speaking of bread, take a look at this Pumpkin Cornbread. That’s right, pumpkin cornbread.


Tasty Kitchen Blog: Potatoes Romanoff. Guest post and photo by Gaby Dalkin of What's Gaby Cooking, recipe submitted by TK member Duane Puitman of Cottage in the Oaks.

Tasty Kitchen Blog: Scalloped Hasselback Potatoes. Guest post and photo by Adrianna Adarme of A Cozy Kitchen, recipe submitted by TK member Shelbi Keith of Look Who's Cooking Now.

Want something new and potato-ey for the table? These Potatoes Romanoff and Scalloped Hasselback Potatoes may just upstage the bird. (Sorry, bird.)


Tasty Kitchen Blog: Stuffed Acorn Squash with Cranberry Cornbread Stuffing. Guest post and photo by Natalie Perry of Perry's Plate, recipe submitted by TK member Katie (kvmolen).

If it’s the stuffing you want to update, why not serve it in cute little edible bowls like these Stuffed Acorn Squash with Cranberry Cornbread Stuffing? They’re adorable and delicious. Just like me! If I looked like acorn squash, that is. (Which I don’t. So never mind.)


Tasty Kitchen Blog: Perfect Pumpkin Cheesecake. Guest post and photo by Dara Michalski of Cookin' Canuck, recipe submitted by TK member Brenda of A Farmgirl's Dabbles.

Tasty Kitchen Blog: Nutella Cheesecake Pumpkin Muffins. Guest post and photo by Laurie McNamara of Simply Scratch, recipe submitted by TK member Amy of My Name is Snickerdoodle.

Tasty Kitchen Blog: Ozark Apple Pudding. Guest post and photo by Amber Potter of Sprinkled with Flour, recipe submitted by TK member novakgirls.

And of course, there’s dessert. Glorious dessert. After all, it’s dessert that makes the world go ’round, right? You can whip up a Perfect Pumpkin Cheesecake (which really is perfect in so many ways), or make these Nutella Cheesecake Pumpkin Muffins and sneak in some Nutella (because Nutella also makes the world go ’round). Or maybe you already have a pumpkin dessert and want to do something with apples instead. Have you tried this Ozark Apple Pudding? It’s rustic and full of apples and walnuts and served with a cinnamon-infused whipped cream. With desserts like these, who needs a main course? (Oops. Sorry again, bird.)


Tasty Kitchen Blog: Pie Crust Tutorial. Guest post and photo by Calli Taylor of Make It Do.

Or maybe you want to go the traditional way and make pie. I don’t blame you. I think pie makes the world go … whoa, I just had a deja vu moment there. Where was I? Oh yes, pie. You know what pies need? They need crust. I’ve made pies, and every time, I say a silent prayer for my crust and hope it cooperates. If you’re the same way, then maybe you’ll love this Pie Crust Tutorial as much as I do.


Tasty Kitchen Blog: Homemade Hot Chocolate. Guest post and photo by Erica Kastner of Cooking for Seven.

Want something extra special for the kids? (Because adults are easy. All you need is a trip to the store. Wine? Check. Beer? Check. Bourbon? Check. Alka-Seltzer? Check.) Give the kids something to rave about: Homemade Hot Chocolate. You’ll be their hero, they’ll tell their friends about it in school the following week, and their parents will curse thank you for having ruined them for all forms of instant hot chocolate packets.


Tasty Kitchen Blog: Streusel-Topped Pumpkin Bread. Guest post and photo by Alice Currah of Savory Sweet Life, recipe submitted by TK member Shaina Olmanson of Food for My Family.

Tasty Kitchen Blog: Pumpkin Coffee Cake with Brown Sugar Glaze. Guest post and photo by Jessica Merchant of How Sweet It Is, recipe submitted by Tk member Heather of Heather's Dish.

Got overnight guests? Brew a pot of coffee (and more hot chocolate for the kids) and keep spoiling them with a Streusel-Topped Pumpkin Bread or Pumpkin Coffee Cake with Brown Sugar Glaze. They may never want to leave. (Uhm … sorry?)


Tasty Kitchen Blog: Rosemary Turkey Pockets. Guest post and photo by Amy Johnson of She Wears Many Hats, recipe submitted by TK member punkrebelmama.

And hey, if you’ve got enough of that bird left over, we even have a way to use it up. Wrap them up and make these pretty little Rosemary Turkey Pockets! So easy and simple, and perfect for brunch the next day or to pack for your guests for their trip back.

Whew. That’s a lot of last-minute ideas. And now, I must walk away from my monitor and reaffirm my commitment to eating light today. This time, it won’t be to atone for yesterday’s gluttony—it will be to prepare for tomorrow’s gorging. If you wish me well, I might have a chance of succeeding.

Enjoy the holiday, everyone! We here at Tasty Kitchen hope you have fun cooking and even more fun eating. Thank you to our contributors for all that you do, and thank you to all our members for being here and sharing your recipes. You’ve helped us create such a wonderful cooking community and you keep bringing all kinds to deliciousness into our world.


Profile photo of Erica Lea

No-Bake Granola Bars

Posted by in Step-by-Step Recipes

Here’s a great idea for a grab-and-go breakfast, school snack, or after-school treat. It’s no-bake too, perfect for those of you still battling summer heat. Enjoy this post from our archives!

 
Tasty Kitchen Blog: No-Bake Granola Bars. Guest post by Erica Kastner of Cooking for Seven, recipe submitted by TK member Cheri of Kitchen Simplicity.

 
I’m the type of person that, when I get hungry, I need to eat something immediately. Perhaps it’s just my imagination, but if I go too long without eating I start to feel sick. And cranky. So it helps if I stuff handy snacks into my purse to ensure I’m never in an emergency food situation.

These No-Bake Granola Bars, brought to us by Cheri, are a wonderful power snack for on-the-go. They’re filled with nutritious oats, nuts, dried fruit and honey. Plus they’re pretty tasty little treats.

Let me show you how to make them!


Tasty Kitchen Blog: No-Bake Granola Bars. Guest post by Erica Kastner of Cooking for Seven, recipe submitted by TK member Cheri of Kitchen Simplicity.

Here’s the ingredients you’ll need: rolled oats, nuts (I used pecans and pumpkin seeds), shredded coconut, dried fruit (I used raisins and figs), butter, brown sugar, cinnamon, honey and molasses.


Tasty Kitchen Blog: No-Bake Granola Bars. Guest post by Erica Kastner of Cooking for Seven, recipe submitted by TK member Cheri of Kitchen Simplicity.

Begin by chopping your nuts. The pumpkin seeds are nice and small so I didn’t chop them.


Tasty Kitchen Blog: No-Bake Granola Bars. Guest post by Erica Kastner of Cooking for Seven, recipe submitted by TK member Cheri of Kitchen Simplicity.

In a large skillet set over medium-high heat, toast the oats, nuts and coconut until fragrant. Make sure to stir often so it doesn’t burn!


Tasty Kitchen Blog: No-Bake Granola Bars. Guest post by Erica Kastner of Cooking for Seven, recipe submitted by TK member Cheri of Kitchen Simplicity.

Pour the toasted oat mixture into a large bowl.


Tasty Kitchen Blog: No-Bake Granola Bars. Guest post by Erica Kastner of Cooking for Seven, recipe submitted by TK member Cheri of Kitchen Simplicity.

If you’re using larger dried fruit you’ll want to chop it up as well.


Tasty Kitchen Blog: No-Bake Granola Bars. Guest post by Erica Kastner of Cooking for Seven, recipe submitted by TK member Cheri of Kitchen Simplicity.

Add the dried fruit to the oat mixture.


Tasty Kitchen Blog: No-Bake Granola Bars. Guest post by Erica Kastner of Cooking for Seven, recipe submitted by TK member Cheri of Kitchen Simplicity.

Stir to combine.


Tasty Kitchen Blog: No-Bake Granola Bars. Guest post by Erica Kastner of Cooking for Seven, recipe submitted by TK member Cheri of Kitchen Simplicity.

Place the butter, brown sugar, cinnamon, honey and molasses in a small saucepan.


Tasty Kitchen Blog: No-Bake Granola Bars. Guest post by Erica Kastner of Cooking for Seven, recipe submitted by TK member Cheri of Kitchen Simplicity.

Bring to a boil over medium heat, stirring occasionally.


Tasty Kitchen Blog: No-Bake Granola Bars. Guest post by Erica Kastner of Cooking for Seven, recipe submitted by TK member Cheri of Kitchen Simplicity.

Pour the butter mixture over the oat mixture.


Tasty Kitchen Blog: No-Bake Granola Bars. Guest post by Erica Kastner of Cooking for Seven, recipe submitted by TK member Cheri of Kitchen Simplicity.

Stir until the oat mixture is evenly coated with the butter mixture. Set aside to cool a little.


Tasty Kitchen Blog: No-Bake Granola Bars. Guest post by Erica Kastner of Cooking for Seven, recipe submitted by TK member Cheri of Kitchen Simplicity.

Line a dish with plastic wrap. Spoon mixture into pan and press down to compact. I used an extra piece of plastic wrap to keep my hands clean.


Tasty Kitchen Blog: No-Bake Granola Bars. Guest post by Erica Kastner of Cooking for Seven, recipe submitted by TK member Cheri of Kitchen Simplicity.

Place in the refrigerator to firm up, about 30 minutes.


Tasty Kitchen Blog: No-Bake Granola Bars. Guest post by Erica Kastner of Cooking for Seven, recipe submitted by TK member Cheri of Kitchen Simplicity.

Once firmed, turn out onto a cutting board and cut into bars.


Tasty Kitchen Blog: No-Bake Granola Bars. Guest post by Erica Kastner of Cooking for Seven, recipe submitted by TK member Cheri of Kitchen Simplicity.

Wrap the bars individually with plastic wrap, parchment paper or wax paper. Now they’re grab-and-go ready!


Tasty Kitchen Blog: No-Bake Granola Bars. Guest post by Erica Kastner of Cooking for Seven, recipe submitted by TK member Cheri of Kitchen Simplicity.

Recipe notes:

1. These bars are just a hair too sweet for my taste. I cut the amount of sugar down to 3/4 cup, so next time I’ll try going down to 1/2 cup and using a full stick of butter. If you like your treats nice and sweet, this shouldn’t be an issue for you.

2. I might add a pinch of salt next time as well.

3. I love how customizable these are. You could come up with so many different flavor combinations by switching up the nuts and fruits you use.


Tasty Kitchen Blog: No-Bake Granola Bars. Guest post by Erica Kastner of Cooking for Seven, recipe submitted by TK member Cheri of Kitchen Simplicity.

Thanks so much to Cheri for sharing her recipe with us! Make sure to check out her blog, Kitchen Simplicity, where she writes many more delicious recipes. I may have to make her Quick & Cheesy Chicken Pot Pie for supper sometime.


Printable Recipe

No-Bake Granola Bars

See post on Cheri | Kitchen Simplicity’s site!
4.50 Mitt(s) 6 Rating(s)6 votes, average: 4.50 out of 56 votes, average: 4.50 out of 56 votes, average: 4.50 out of 56 votes, average: 4.50 out of 56 votes, average: 4.50 out of 5

Prep Time:

Cook Time:

Difficulty: Easy

Servings: 16

16
x

Print Options

Page size Letter 3x5 4x6
Text Size Small Medium Large
Content Include description
Include prep time, etc.
Show image

Description

Chewy No-Bake Granola Bars that are perfect to make with the kiddos. Prepare to never buy store-bought granola bars again.

Ingredients

  • 2-½ cups Rolled Oats
  • 1-½ cup Nuts, Chopped, I Used Walnuts And Pecans
  • ¼ cups Shredded Coconut
  • ½ cups Raisins
  • 6 Tablespoons Salted Butter
  • 1 cup Brown Sugar
  • 1-½ teaspoon Ground Cinnamon
  • 6 Tablespoons Liquid Honey
  • 2 Tablespoons Molasses

Preparation Instructions

1. Toast oats, nuts and coconut in a large skillet over medium-high heat until fragrant, stirring often. Remove to a large bowl and toss with raisins.

2. Place butter, sugar, cinnamon, honey and molasses in a small saucepan. Cook over medium heat, stirring occasionally, until it comes to a boil. Remove from heat and stir into oat mixture until evenly coated. Let sit just until cool enough to handle.

3. In the meantime, line a 7×11 inch pan with plastic wrap. Spoon mixture into pan, pressing down to compact. Place in the fridge for 30 minutes to firm up. Once firmed, remove from pan, peel away plastic wrap and slice into 16 bars (half lengthwise and then into 8). Wrap individually in plastic wrap or parchment paper, if desired. Store covered at room temperature.


_______________________________________

Newly-married Erica Kastner shares her wonderful recipes and amazing food photography on her blog, Cooking for Seven. She also writes about crafts and posts more of her beautiful photography in her personal blog, EricaLea.com. There really isn’t much that this amazing young lady can’t do, and we’re thrilled she does some of it here.


Profile photo of Amber {Sprinkled With Flour}

Cranberry Orange Bars

Posted by in Baking, Step-by-Step Recipes

Tasty Kitchen Blog: Cranberry Orange Bars, guest post by Amber Potter of Sprinkled with Flour, recipe submitted by Stephanie of Eat. Drink. Love.

 
I love simple desserts. I especially love simple desserts that taste great, and it’s these type of recipes that I like to have on hand during the busy holiday season. When you’re trying to orchestrate a culinary feast—one that includes a giant turkey the size of a small child, along with an endless list of sides—sometimes you need an easy dessert.

These Cranberry Orange Bars, shared by Stephanie, fit the bill perfectly. I love cranberry sauce, and these bars are the perfect combination of a sweetly tart cranberry sauce, sandwiched between a tasty cobbler-type crust and topping. Using just a few easy ingredients, you can have these bars whipped up in no time. 

This is a great way to use up any leftover cranberry sauce from your Thanksgiving meal too!


Tasty Kitchen Blog: Cranberry Orange Bars, guest post by Amber Potter of Sprinkled with Flour, recipe submitted by Stephanie of Eat. Drink. Love.

You’ll need: water, sugar, fresh squeezed orange juice and orange zest, fresh cranberries, yellow cake mix, oats, cinnamon, butter, and eggs.


Tasty Kitchen Blog: Cranberry Orange Bars, guest post by Amber Potter of Sprinkled with Flour, recipe submitted by Stephanie of Eat. Drink. Love.

Rinse your cranberries so they’re nice and clean.


Tasty Kitchen Blog: Cranberry Orange Bars, guest post by Amber Potter of Sprinkled with Flour, recipe submitted by Stephanie of Eat. Drink. Love.

Remove the zest from an orange, and squeeze out all of the juicy goodness. Set aside.


Tasty Kitchen Blog: Cranberry Orange Bars, guest post by Amber Potter of Sprinkled with Flour, recipe submitted by Stephanie of Eat. Drink. Love.

In a saucepan, add the water and sugar. Stir until the sugar is absorbed. 


Tasty Kitchen Blog: Cranberry Orange Bars, guest post by Amber Potter of Sprinkled with Flour, recipe submitted by Stephanie of Eat. Drink. Love.

Add the rinsed cranberries …


Tasty Kitchen Blog: Cranberry Orange Bars, guest post by Amber Potter of Sprinkled with Flour, recipe submitted by Stephanie of Eat. Drink. Love.

Along with the orange juice …


Tasty Kitchen Blog: Cranberry Orange Bars, guest post by Amber Potter of Sprinkled with Flour, recipe submitted by Stephanie of Eat. Drink. Love.

And the zest. Simmer over medium heat for about 10-15 minutes until the cranberries pop and the mixture begins to thicken.


Tasty Kitchen Blog: Cranberry Orange Bars, guest post by Amber Potter of Sprinkled with Flour, recipe submitted by Stephanie of Eat. Drink. Love.

Pour into a bowl and let cool completely (at least 1 hour).


Tasty Kitchen Blog: Cranberry Orange Bars, guest post by Amber Potter of Sprinkled with Flour, recipe submitted by Stephanie of Eat. Drink. Love.

Preheat the oven to 375ºF. In a large bowl, combine the cake mix, oats, and cinnamon.


Tasty Kitchen Blog: Cranberry Orange Bars, guest post by Amber Potter of Sprinkled with Flour, recipe submitted by Stephanie of Eat. Drink. Love.

Add the melted butter and the eggs.


Tasty Kitchen Blog: Cranberry Orange Bars, guest post by Amber Potter of Sprinkled with Flour, recipe submitted by Stephanie of Eat. Drink. Love.

Mix until everything is well-combined. Set aside about 1 1/2 cups of the mixture.


Tasty Kitchen Blog: Cranberry Orange Bars, guest post by Amber Potter of Sprinkled with Flour, recipe submitted by Stephanie of Eat. Drink. Love.

Spray a 9×13 baking dish with nonstick spray. Spread the remaining batter and push down into the pan, forming a crust.


Tasty Kitchen Blog: Cranberry Orange Bars, guest post by Amber Potter of Sprinkled with Flour, recipe submitted by Stephanie of Eat. Drink. Love.

Spread the cooled cranberry sauce evenly over the crust. 


Tasty Kitchen Blog: Cranberry Orange Bars, guest post by Amber Potter of Sprinkled with Flour, recipe submitted by Stephanie of Eat. Drink. Love.

Then drop the reserved 1 1/2 cups of batter by the spoonful evenly over the mixture. With a fork or spoon, gently try to push down and spread some of each spoonful so it’s not as thick. You do not need to cover all of the cranberries; try to avoid pushing the batter down into the cranberry sauce.


Tasty Kitchen Blog: Cranberry Orange Bars, guest post by Amber Potter of Sprinkled with Flour, recipe submitted by Stephanie of Eat. Drink. Love.

Bake for approximately 30-35 minutes or until the top is golden brown. Allow to cool for at least 2 hours before cutting into bars.

Recipe note: You may not need to bake these for the full 35 minutes, depending on your oven. Start checking them at about 25-30 minutes.


Tasty Kitchen Blog: Cranberry Orange Bars, guest post by Amber Potter of Sprinkled with Flour, recipe submitted by Stephanie of Eat. Drink. Love.

These are delicious on their own, and just as tasty with a dollop of whipped cream or ice cream! Perfect to go with any holiday meal.


Tasty Kitchen Blog: Cranberry Orange Bars, guest post by Amber Potter of Sprinkled with Flour, recipe submitted by Stephanie of Eat. Drink. Love.

Thank you Stephanie for sharing these goodies with us! You can check out more of her delicious looking recipes on her blog Eat. Drink. Love.


Printable Recipe

Cranberry Orange Bars

See post on Stephanie { Eat. Drink. Love.}’s site!
5.00 Mitt(s) 1 Rating(s)1 vote, average: 5.00 out of 51 vote, average: 5.00 out of 51 vote, average: 5.00 out of 51 vote, average: 5.00 out of 51 vote, average: 5.00 out of 5

Prep Time:

Cook Time:

Difficulty: Easy

Servings: 24

24
x

Print Options

Page size Letter 3x5 4x6
Text Size Small Medium Large
Content Include description
Include prep time, etc.
Show image

Description

Cranberry Orange Bars—a perfect blend of sweet and tangy! Perfect for the holidays!

Ingredients

  • ¾ cups Water
  • 1 cup Sugar
  • 1 bag (12 Oz. Size) Fresh Cranberries
  • 1 whole Orange, Zest And Juice
  • 1 box (18.25 Oz. Size) Yellow Cake Mix
  • 1 cup Rolled Oats
  • ¾ cups Butter, Melted
  • 2 whole Eggs
  • 1 teaspoon Cinnamon

Preparation Instructions

1. You’re basically going to start off by making cranberry sauce! In a saucepan, add the water and sugar. Stir until the sugar is absorbed. Add the rinsed cranberries, along with the orange juice and zest. Simmer for about 10-15 minutes until the cranberries pop and the mixture begins to thicken. Pour into a bowl and let cool completely (at least 1 hour).

2. Preheat the oven to 375ºF. In a large bowl, add the cake mix, oats, melted butter, eggs, and cinnamon. Mix until everything is well-combined. Set aside about 1 1/2 cups of the mixture. In a 9×13 baking dish, spray with nonstick spray. With the remaining batter, spread and push down into the pan, forming a crust.

3. Spread the cooled cranberry sauce evenly over the “crust”. Then, with the 1 1/2 cups of batter you reserved, drop it by the spoonful evenly over the mixture. Then, with a knife or spoon, gently try to push down and spread some of each spoonful so it’s not as thick. You do not need to cover all of the cranberries, and try to avoid pushing the batter down into the cranberry sauce. Bake for approximately 35 minutes or until the top is golden brown. Let the bars cool for at least 2 hours before cutting into bars (trust me on that one!)!


_______________________________________

Amber is a stay at home mom who lives in the heart of the Missouri Ozarks. It’s a long way from where she grew up, in Wales (yes, way over in the U.K.). The recipes in her blog Sprinkled with Flour include her original creations as well as her family recipes. Go check them out!


Profile photo of HowSweetEats

Cheddar Tailgating Bread

Posted by in Baking, Step-by-Step Recipes

I hope you’re in the mood for something fantastically warm, gooey, comforting, and most of all, fun. We’re right in the heart of football season and who doesn’t love to bring the snack to the party that everyone can’t stop talking about? That’s exactly what this bread is. And more. I never need to be sold when cheese and bread are involved, so the…

Profile photo of twopeasandtheirpod

Brown Butter Snickerdoodle Cookies

Posted by in Baking, Step-by-Step Recipes

I always like to try a few new cookie recipes every season. I was looking for a festive holiday cookie recipe on Tasty Kitchen and stumbled upon Monique's recipe for Brown Butter Snickerdoodle Cookies. My…

Profile photo of Faith (An Edible Mosaic)

Cauliflower Buffalo Wings

Posted by in Step-by-Step Recipes

Growing up in a suburb of Buffalo and working in a pizzeria during high school means I’m a wing-lover from way back. This is why when I saw Tasty Kitchen member Shelbi Keith’s recipe for Cauliflower…

Profile photo of Natalie | Perry's Plate

Gingered Butternut Squash Soup with Beet Slaw

Posted by in Step-by-Step Recipes

Friends, this may be the most beautiful soup I've ever made. Or photographed. Or eaten. The lovely TK member Julia at The Roasted Root definitely has an eye for color and a wonderful sense for taste. This soup was one of those…