The Pioneer Woman Tasty Kitchen
Profile photo of Laurie - Simply Scratch

Nutella Pecan Pie

Posted by in Baking, Step-by-Step Recipes

Tasty Kitchen Blog: Nutella Pecan Pie. Guest post by Laurie McNamara of Simply Scratch, recipe submitted by TK member Megan of Wanna Be A Country Cleaver.

 
It’s pie season. (Then again, when is it ever NOT pie season?) And this, my friends, is one extremely special pecan pie.

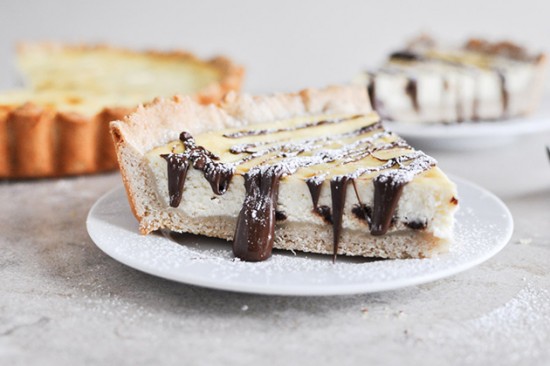
Thanks to Megan for sharing her recipe for Nutella Pecan Pie, because I have officially died and gone to heaven. Get this: Nutella is spread on the bottom of a homemade, pre-baked pie crust before adding in the gooey pecan filling and then baking it to perfection. It’s an absolutely brilliant idea, if you ask me.

I’ve had my eye on this recipe since she posted it last year around Thanksgiving. However, this pie doesn’t need a holiday in order to be made. Make it for a friend, or because it’s Saturday, or because you just need to eat a really good pie. I promise you won’t be disappointed.


Tasty Kitchen Blog: Nutella Pecan Pie. Guest post by Laurie McNamara of Simply Scratch, recipe submitted by TK member Megan of Wanna Be A Country Cleaver.

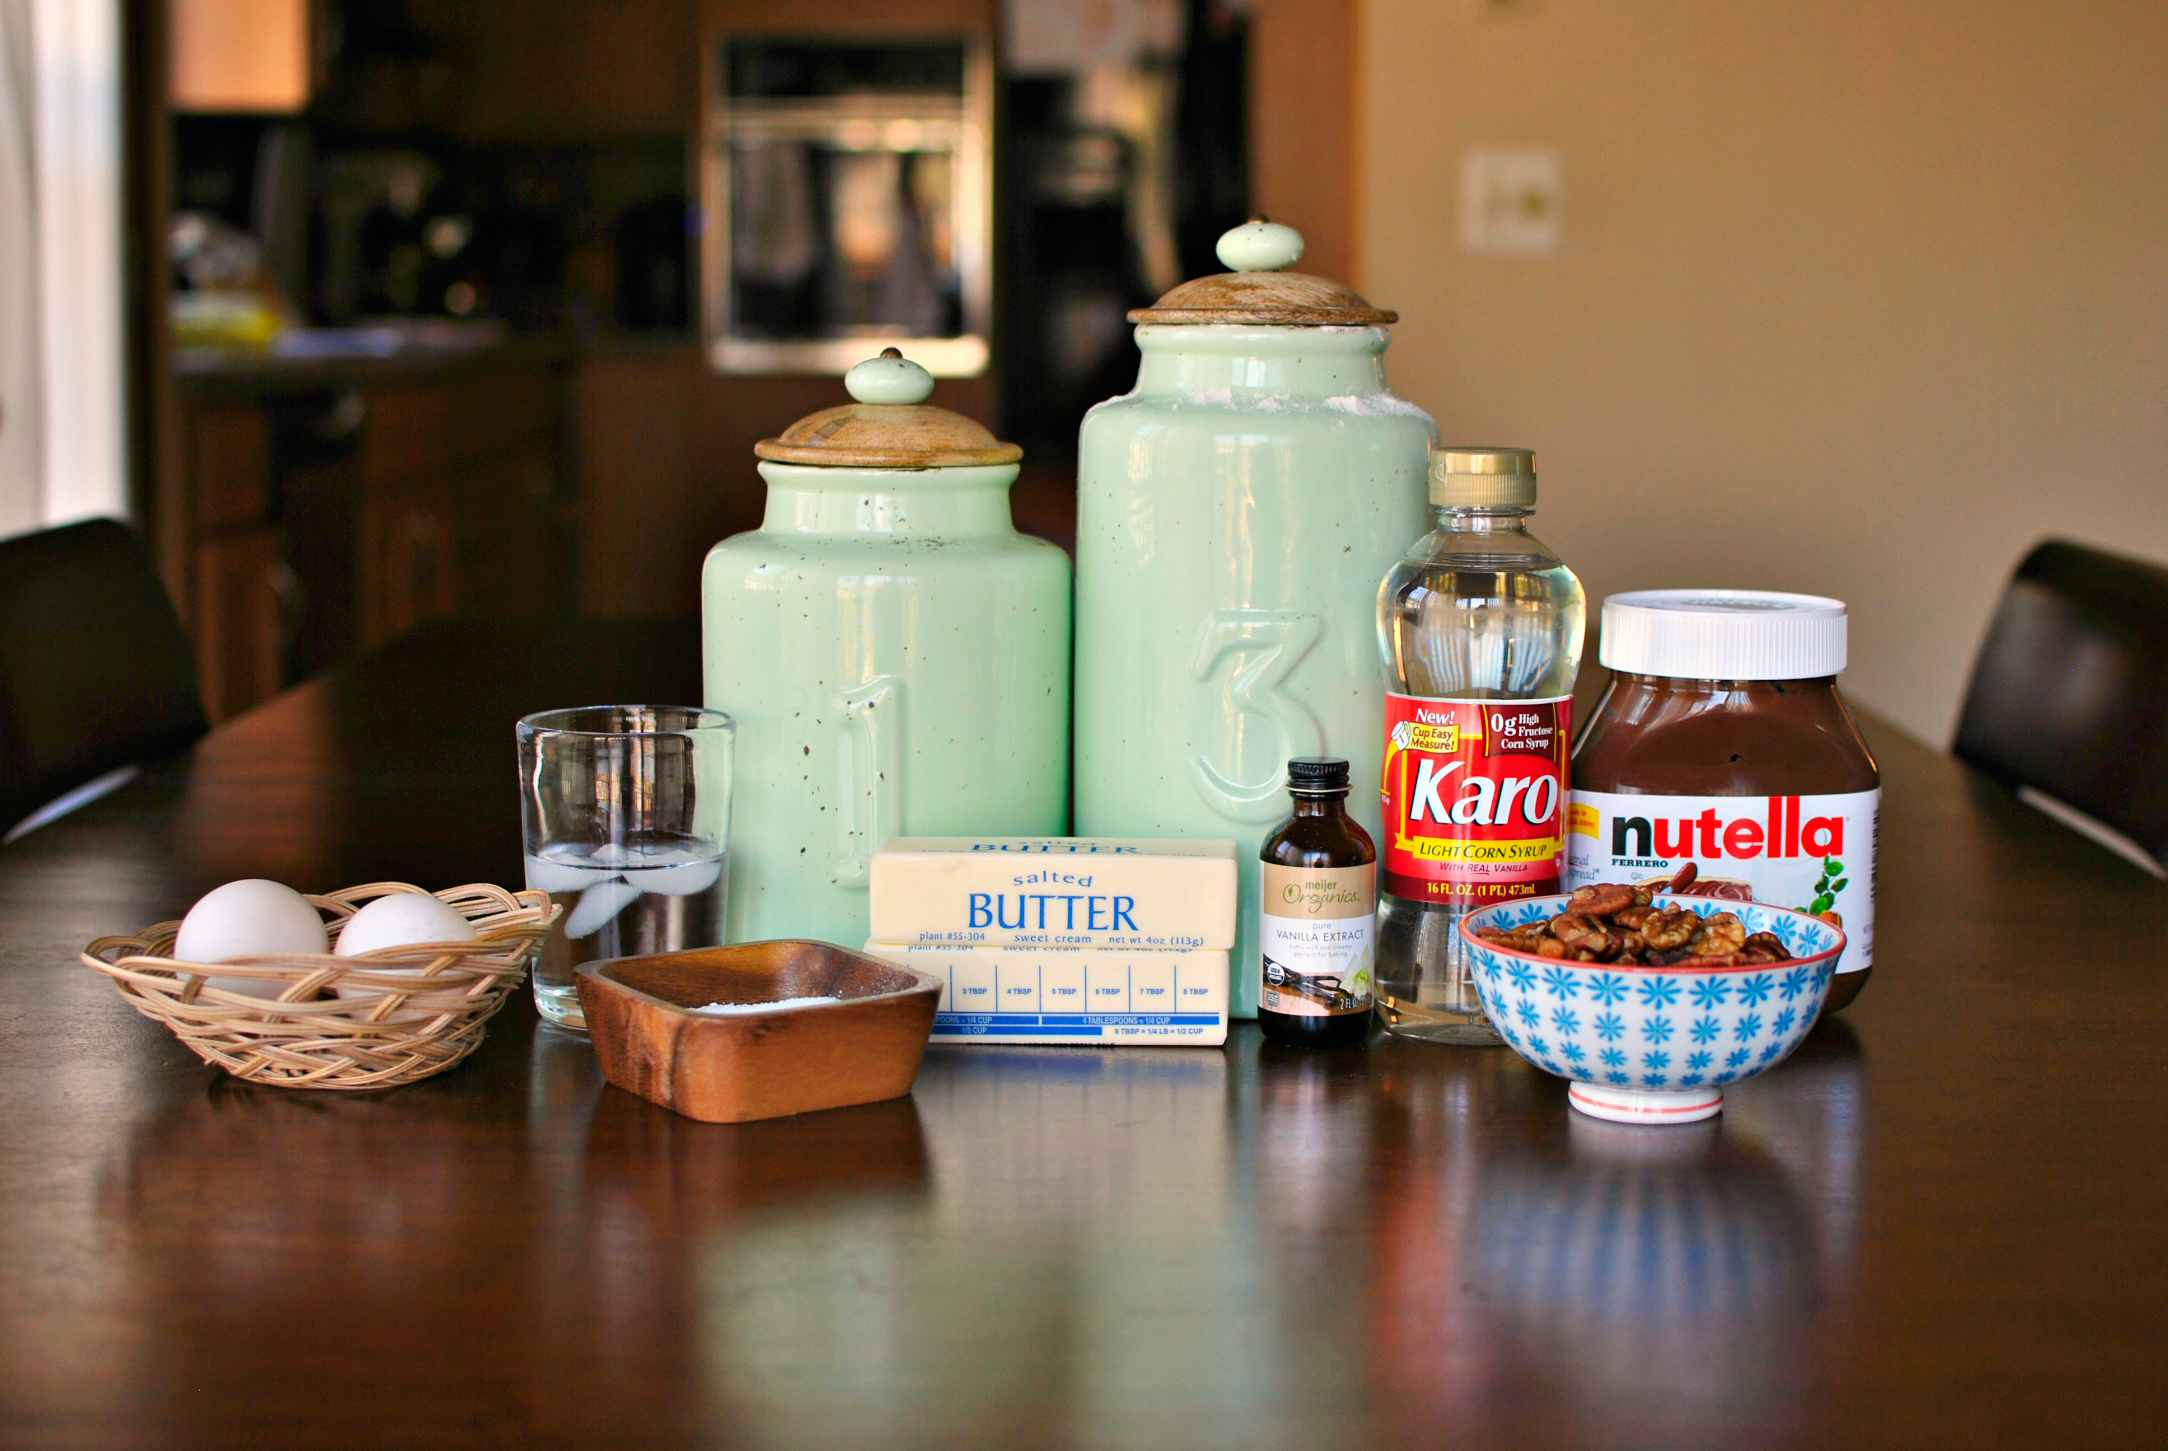
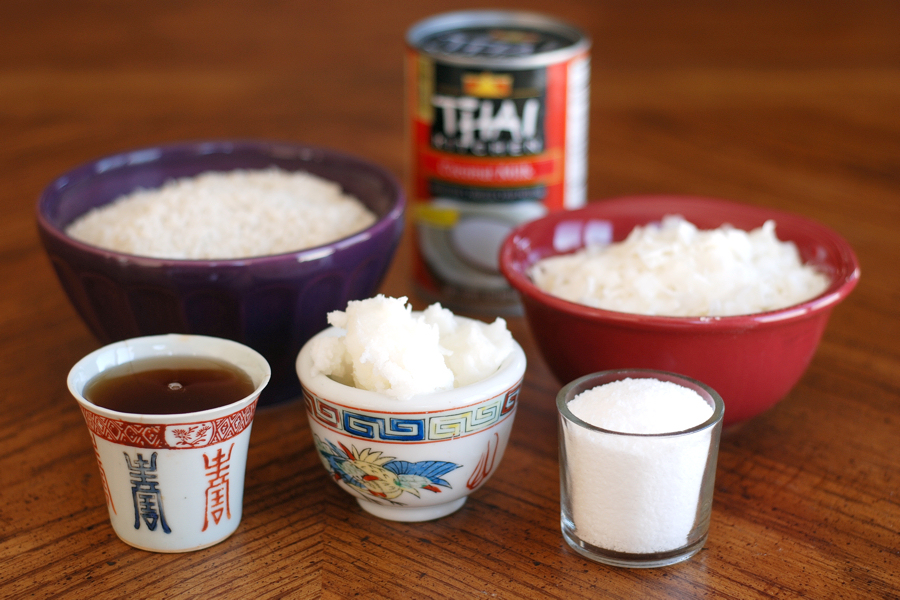
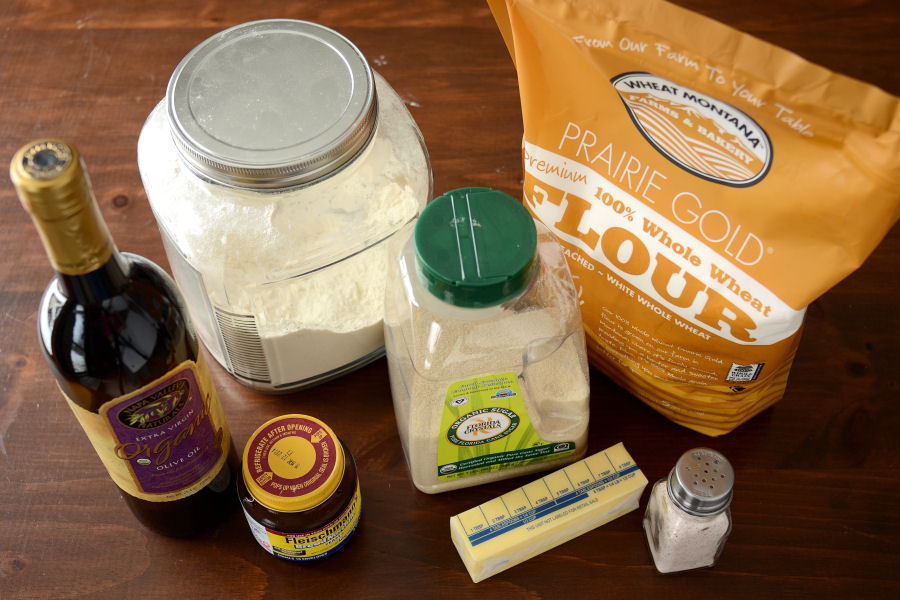
The ingredient list isn’t too long either, which I like.


Tasty Kitchen Blog: Nutella Pecan Pie. Guest post by Laurie McNamara of Simply Scratch, recipe submitted by TK member Megan of Wanna Be A Country Cleaver.

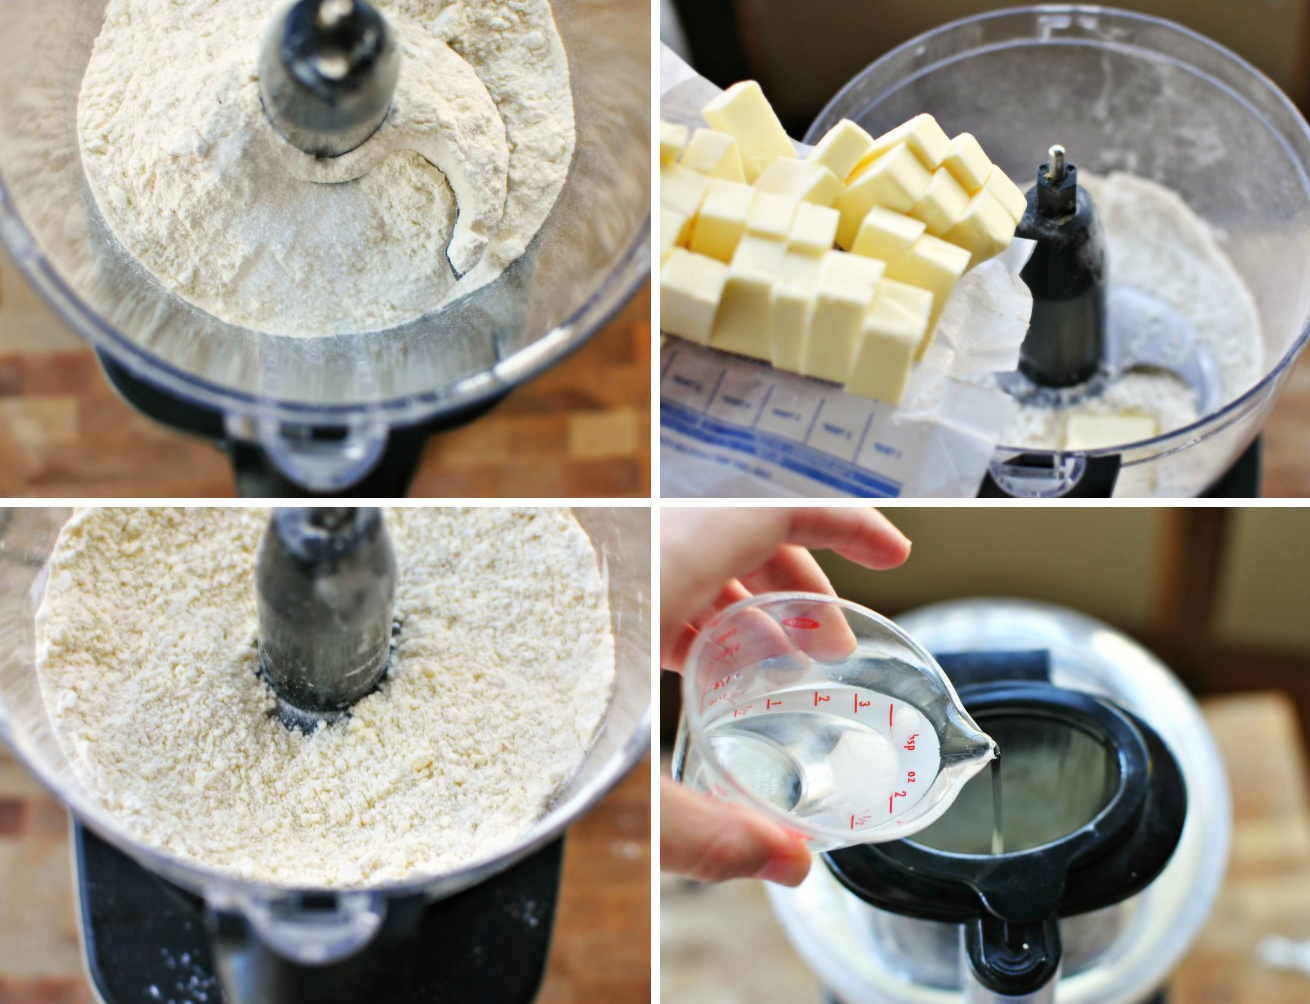
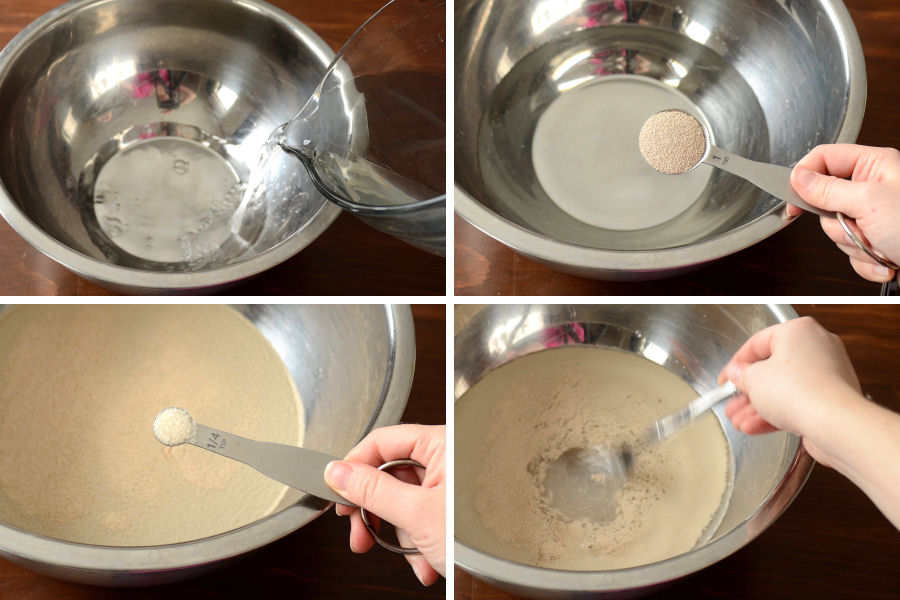
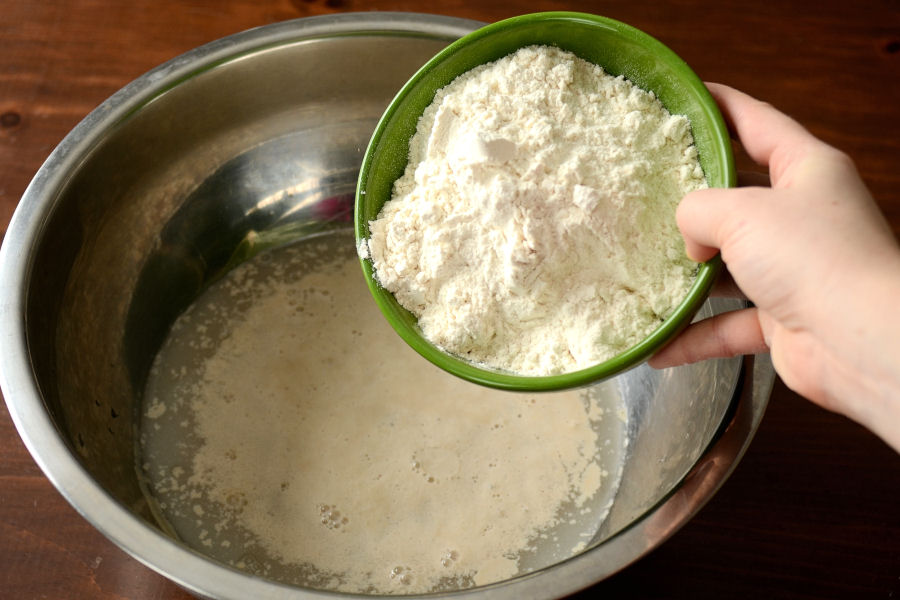
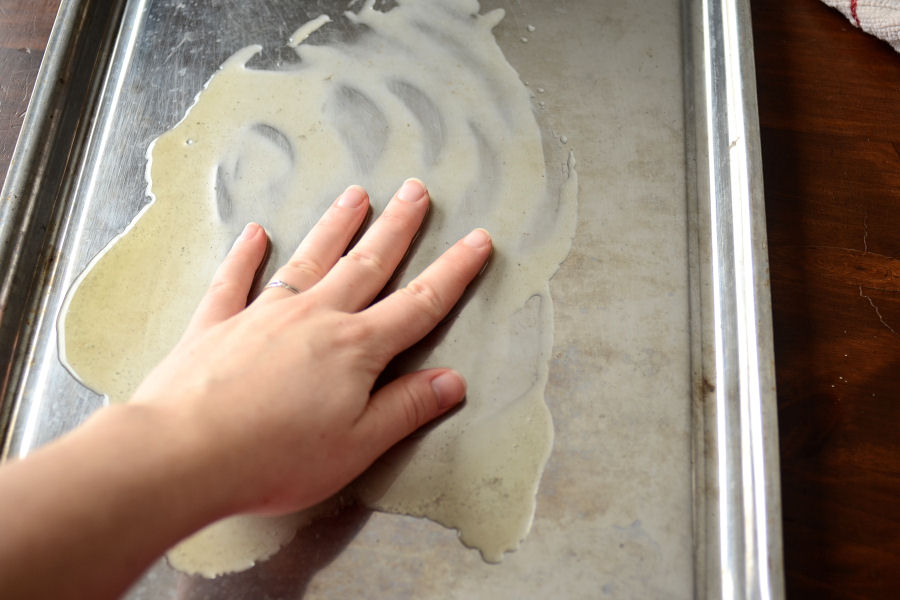
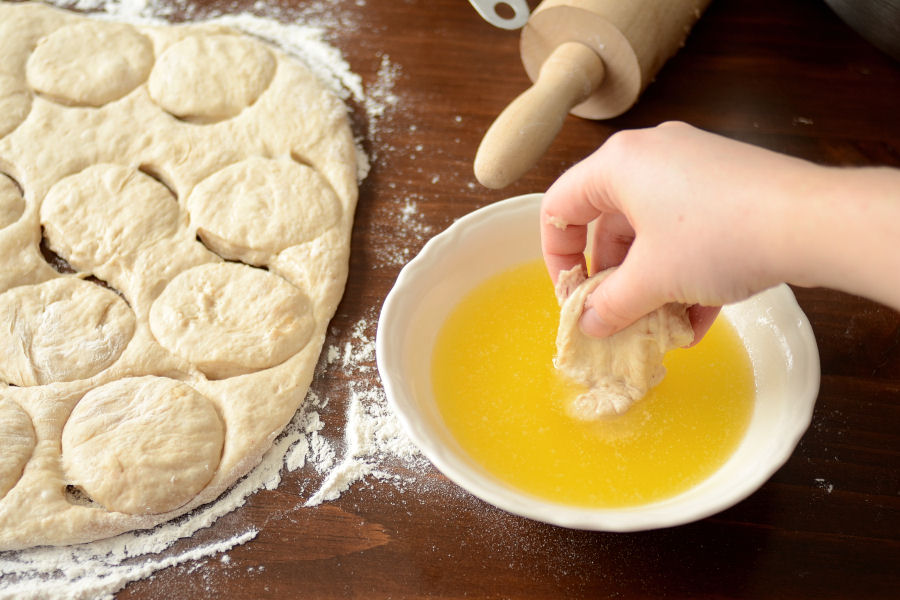
Start with the pie crust. Add the flour and salt into the bowl (fitted with the blade) of a food processor. Give it a quick pulse to combine the ingredients. Then add in the chilled butter and pulse it some more until you see little beads of floury-butter. Then with the food processor on high, slowly drizzle in ice cold water.

For me, I only need three tablespoons of water and not the four.


Tasty Kitchen Blog: Nutella Pecan Pie. Guest post by Laurie McNamara of Simply Scratch, recipe submitted by TK member Megan of Wanna Be A Country Cleaver.

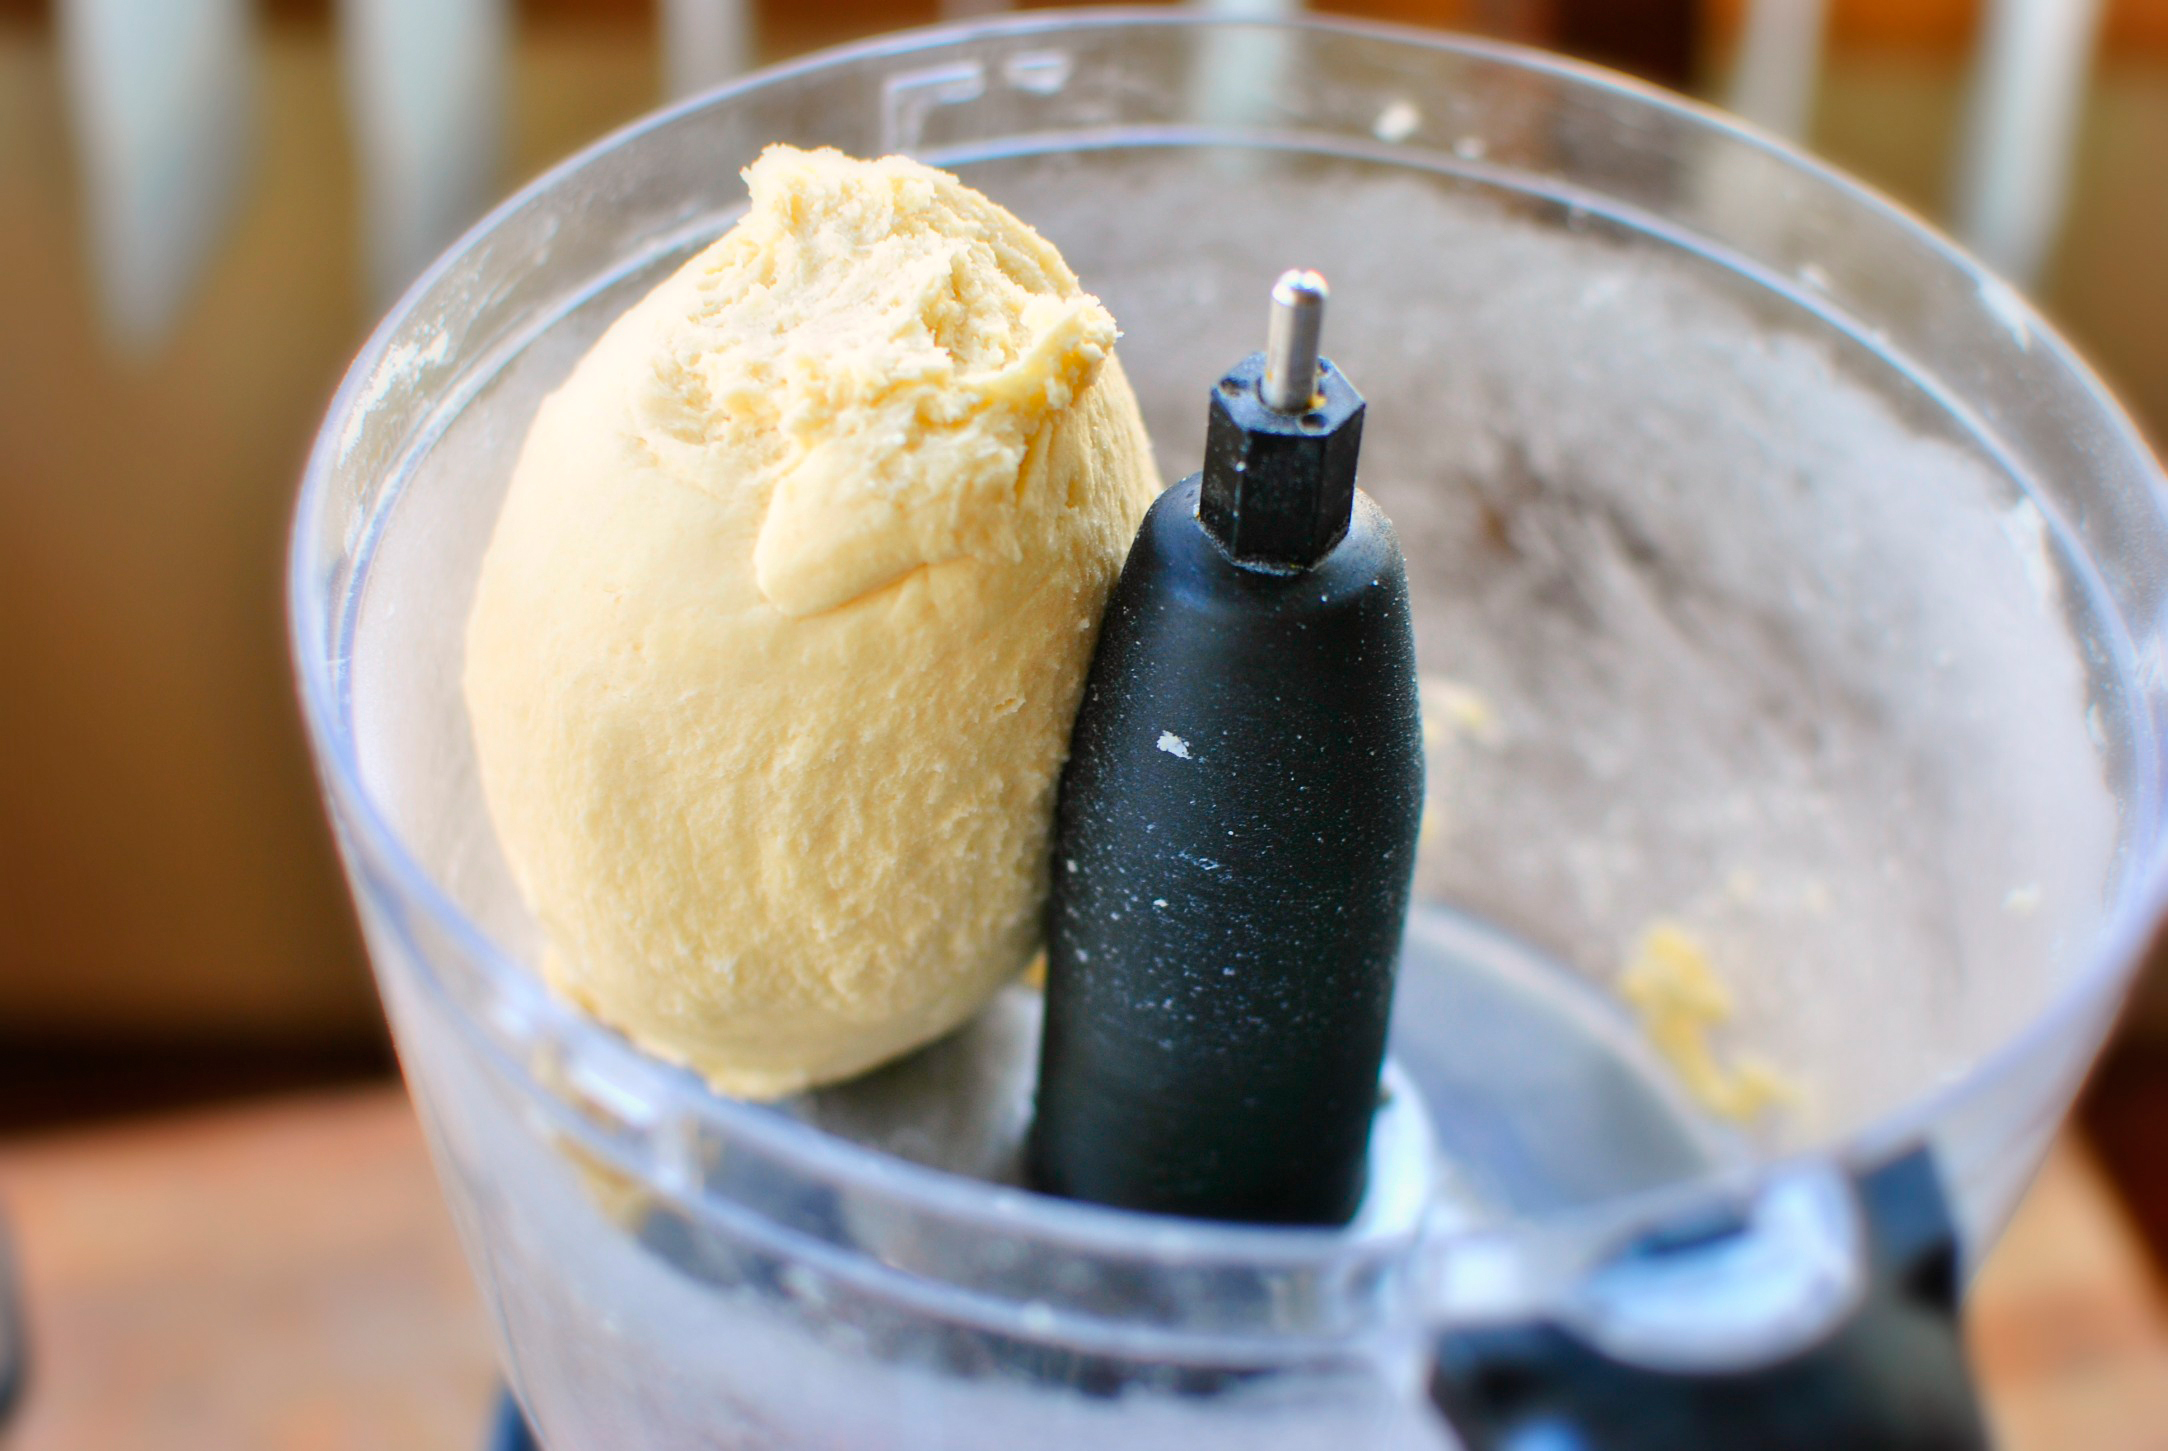
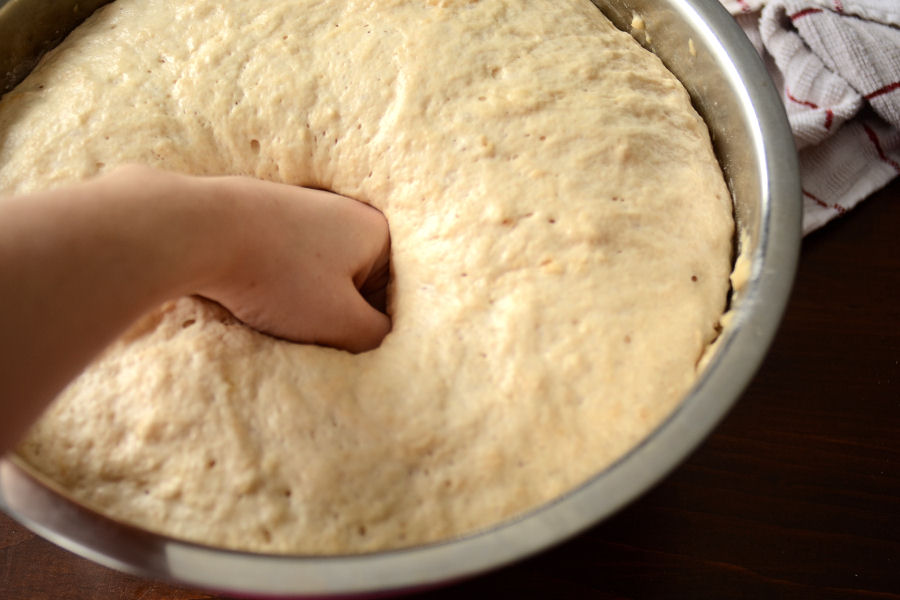
Stop immediately once the big ball of dough forms.


Tasty Kitchen Blog: Nutella Pecan Pie. Guest post by Laurie McNamara of Simply Scratch, recipe submitted by TK member Megan of Wanna Be A Country Cleaver.

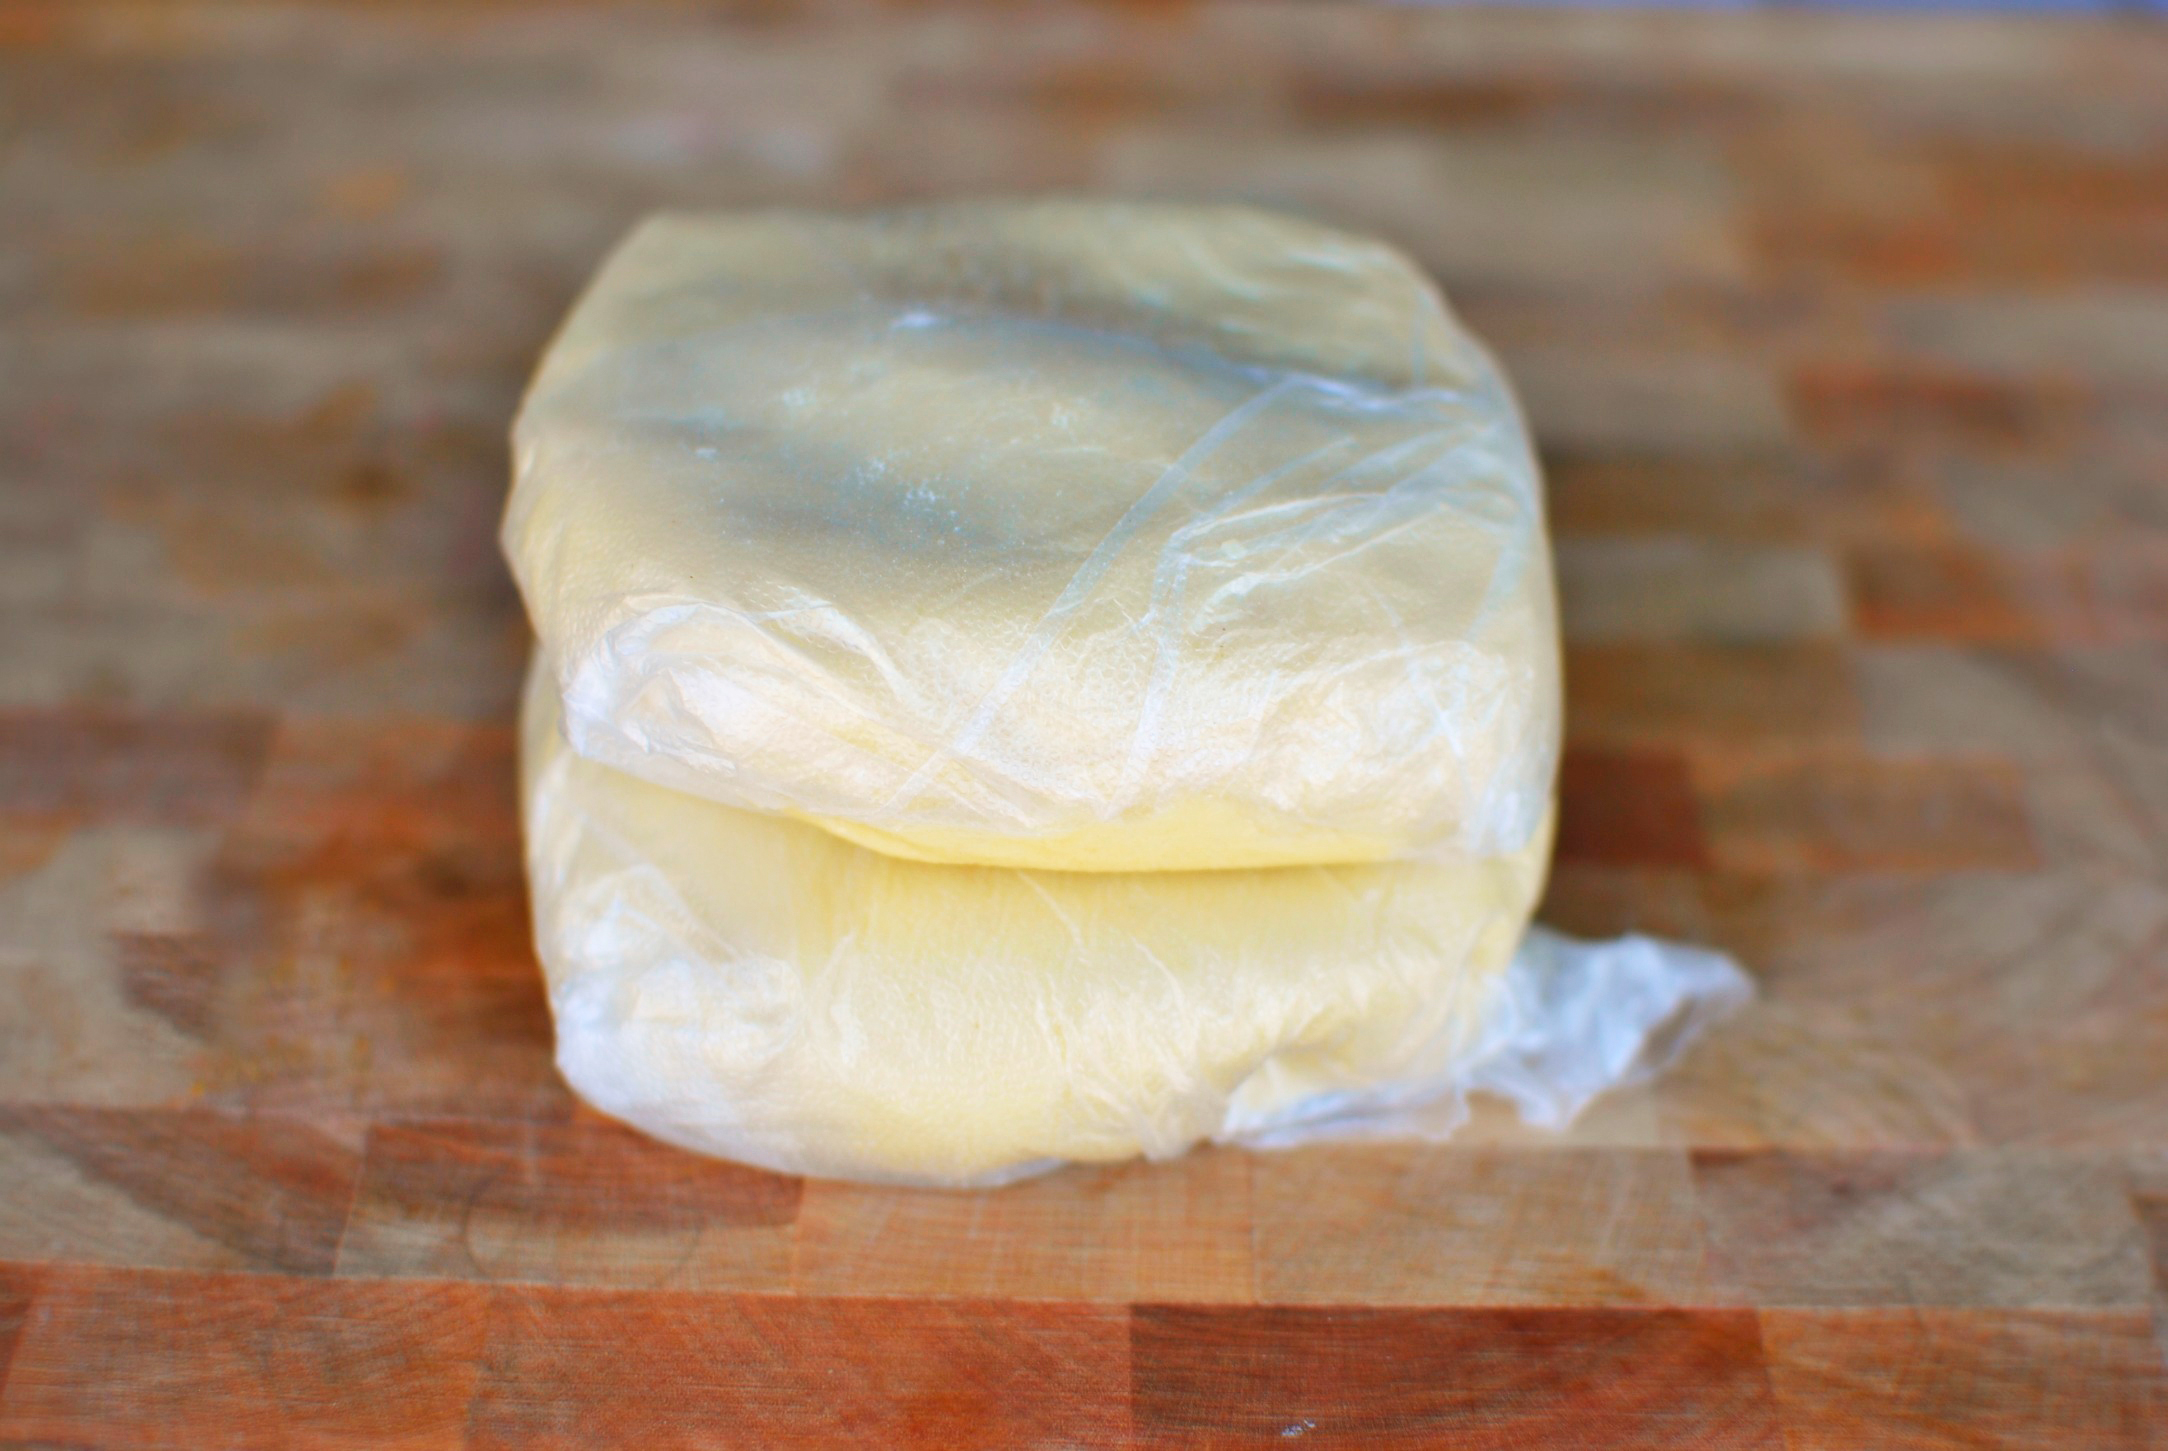
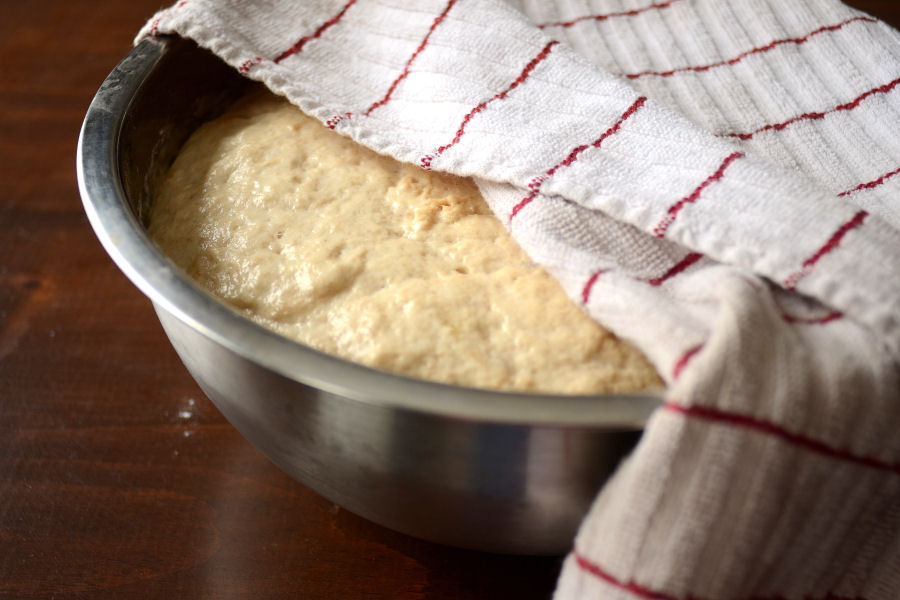
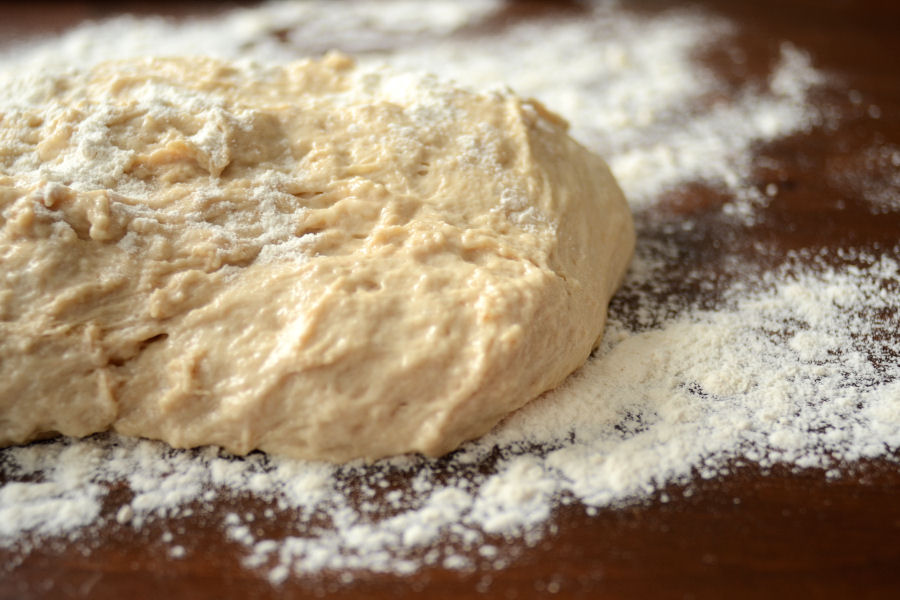
Then divide the dough in half, wrap it in plastic wrap and pop them into the fridge to chill for 30 minutes. You’ll only need one of these discs, so freezing the other half for another recipe down the road is a good idea.


Tasty Kitchen Blog: Nutella Pecan Pie. Guest post by Laurie McNamara of Simply Scratch, recipe submitted by TK member Megan of Wanna Be A Country Cleaver.

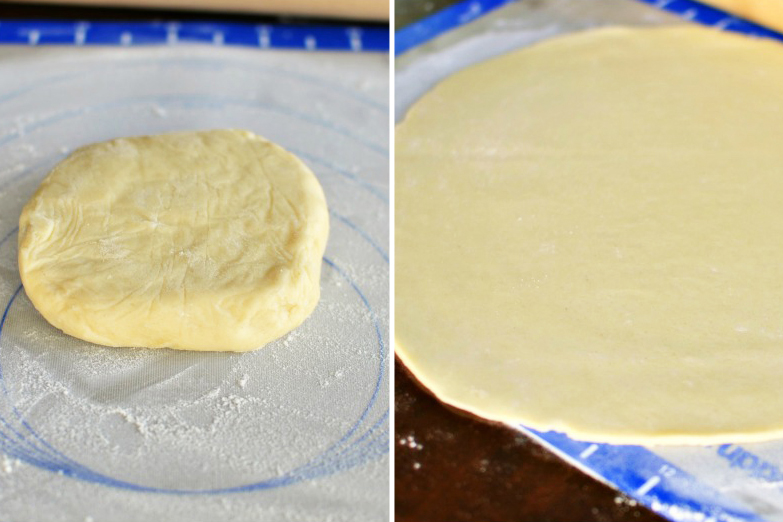
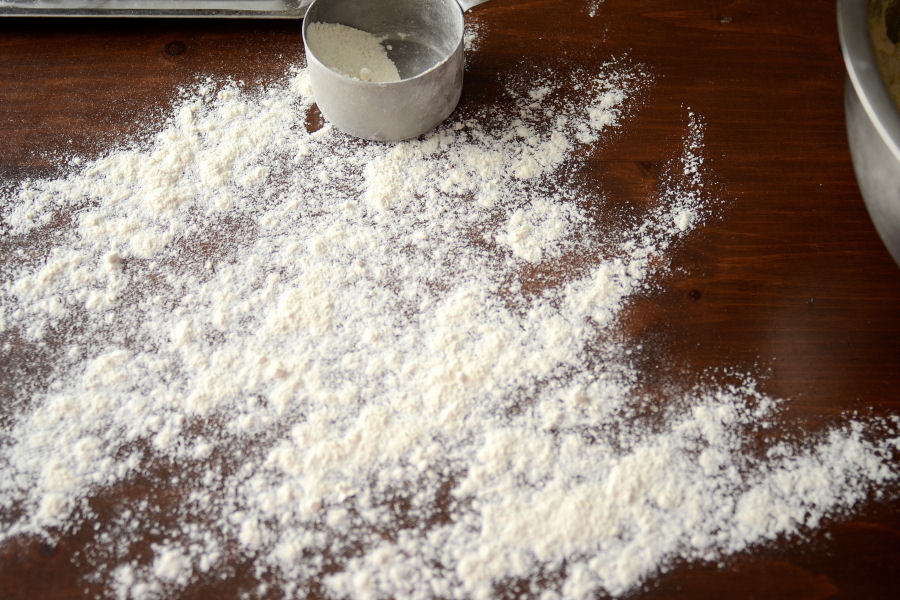
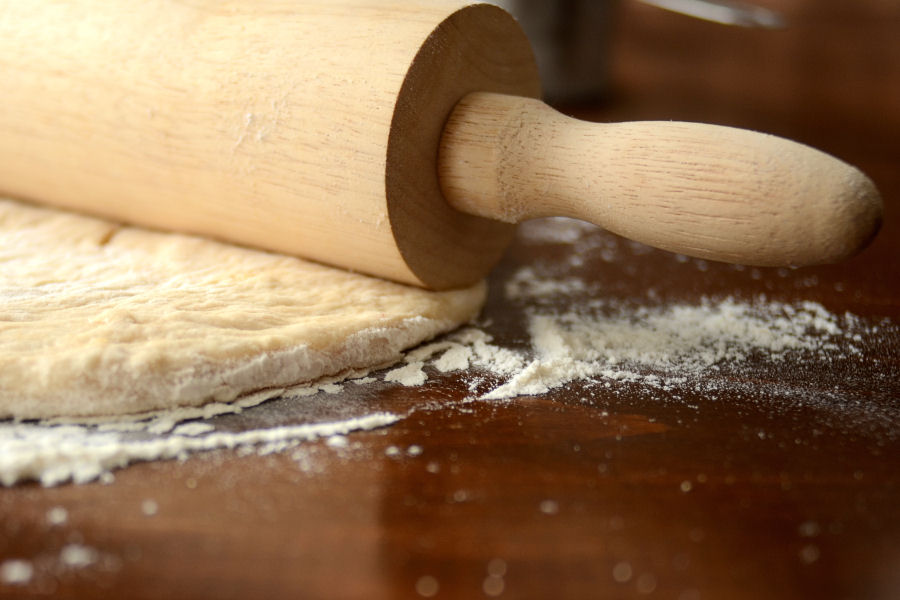
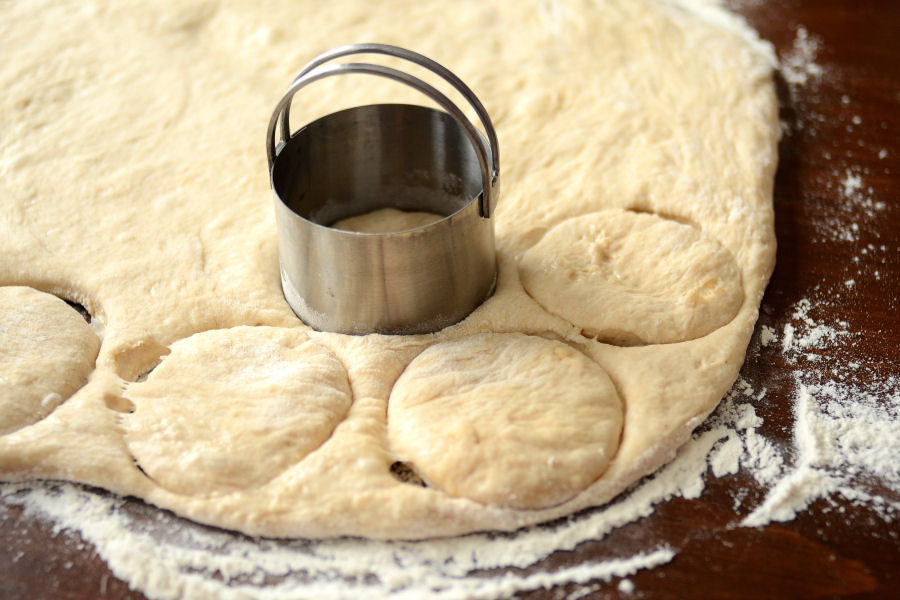
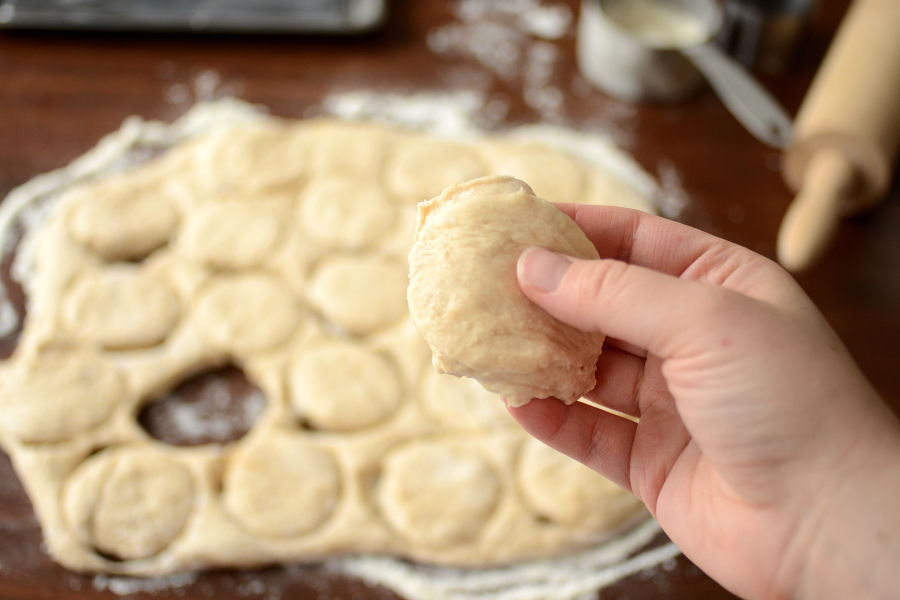
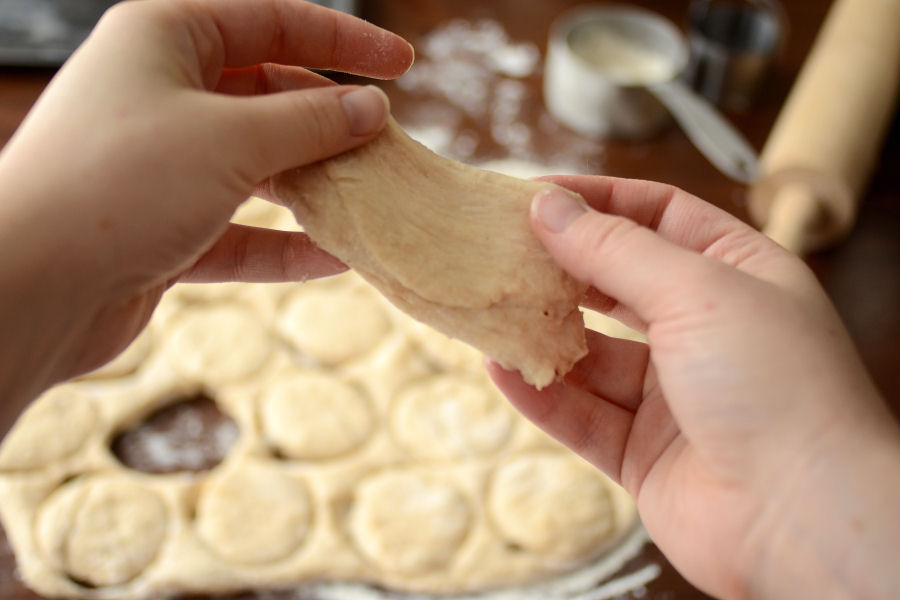
Then, on a lightly floured surface, roll it out so it is large enough to fit a 9-inch pie plate.


Tasty Kitchen Blog: Nutella Pecan Pie. Guest post by Laurie McNamara of Simply Scratch, recipe submitted by TK member Megan of Wanna Be A Country Cleaver.

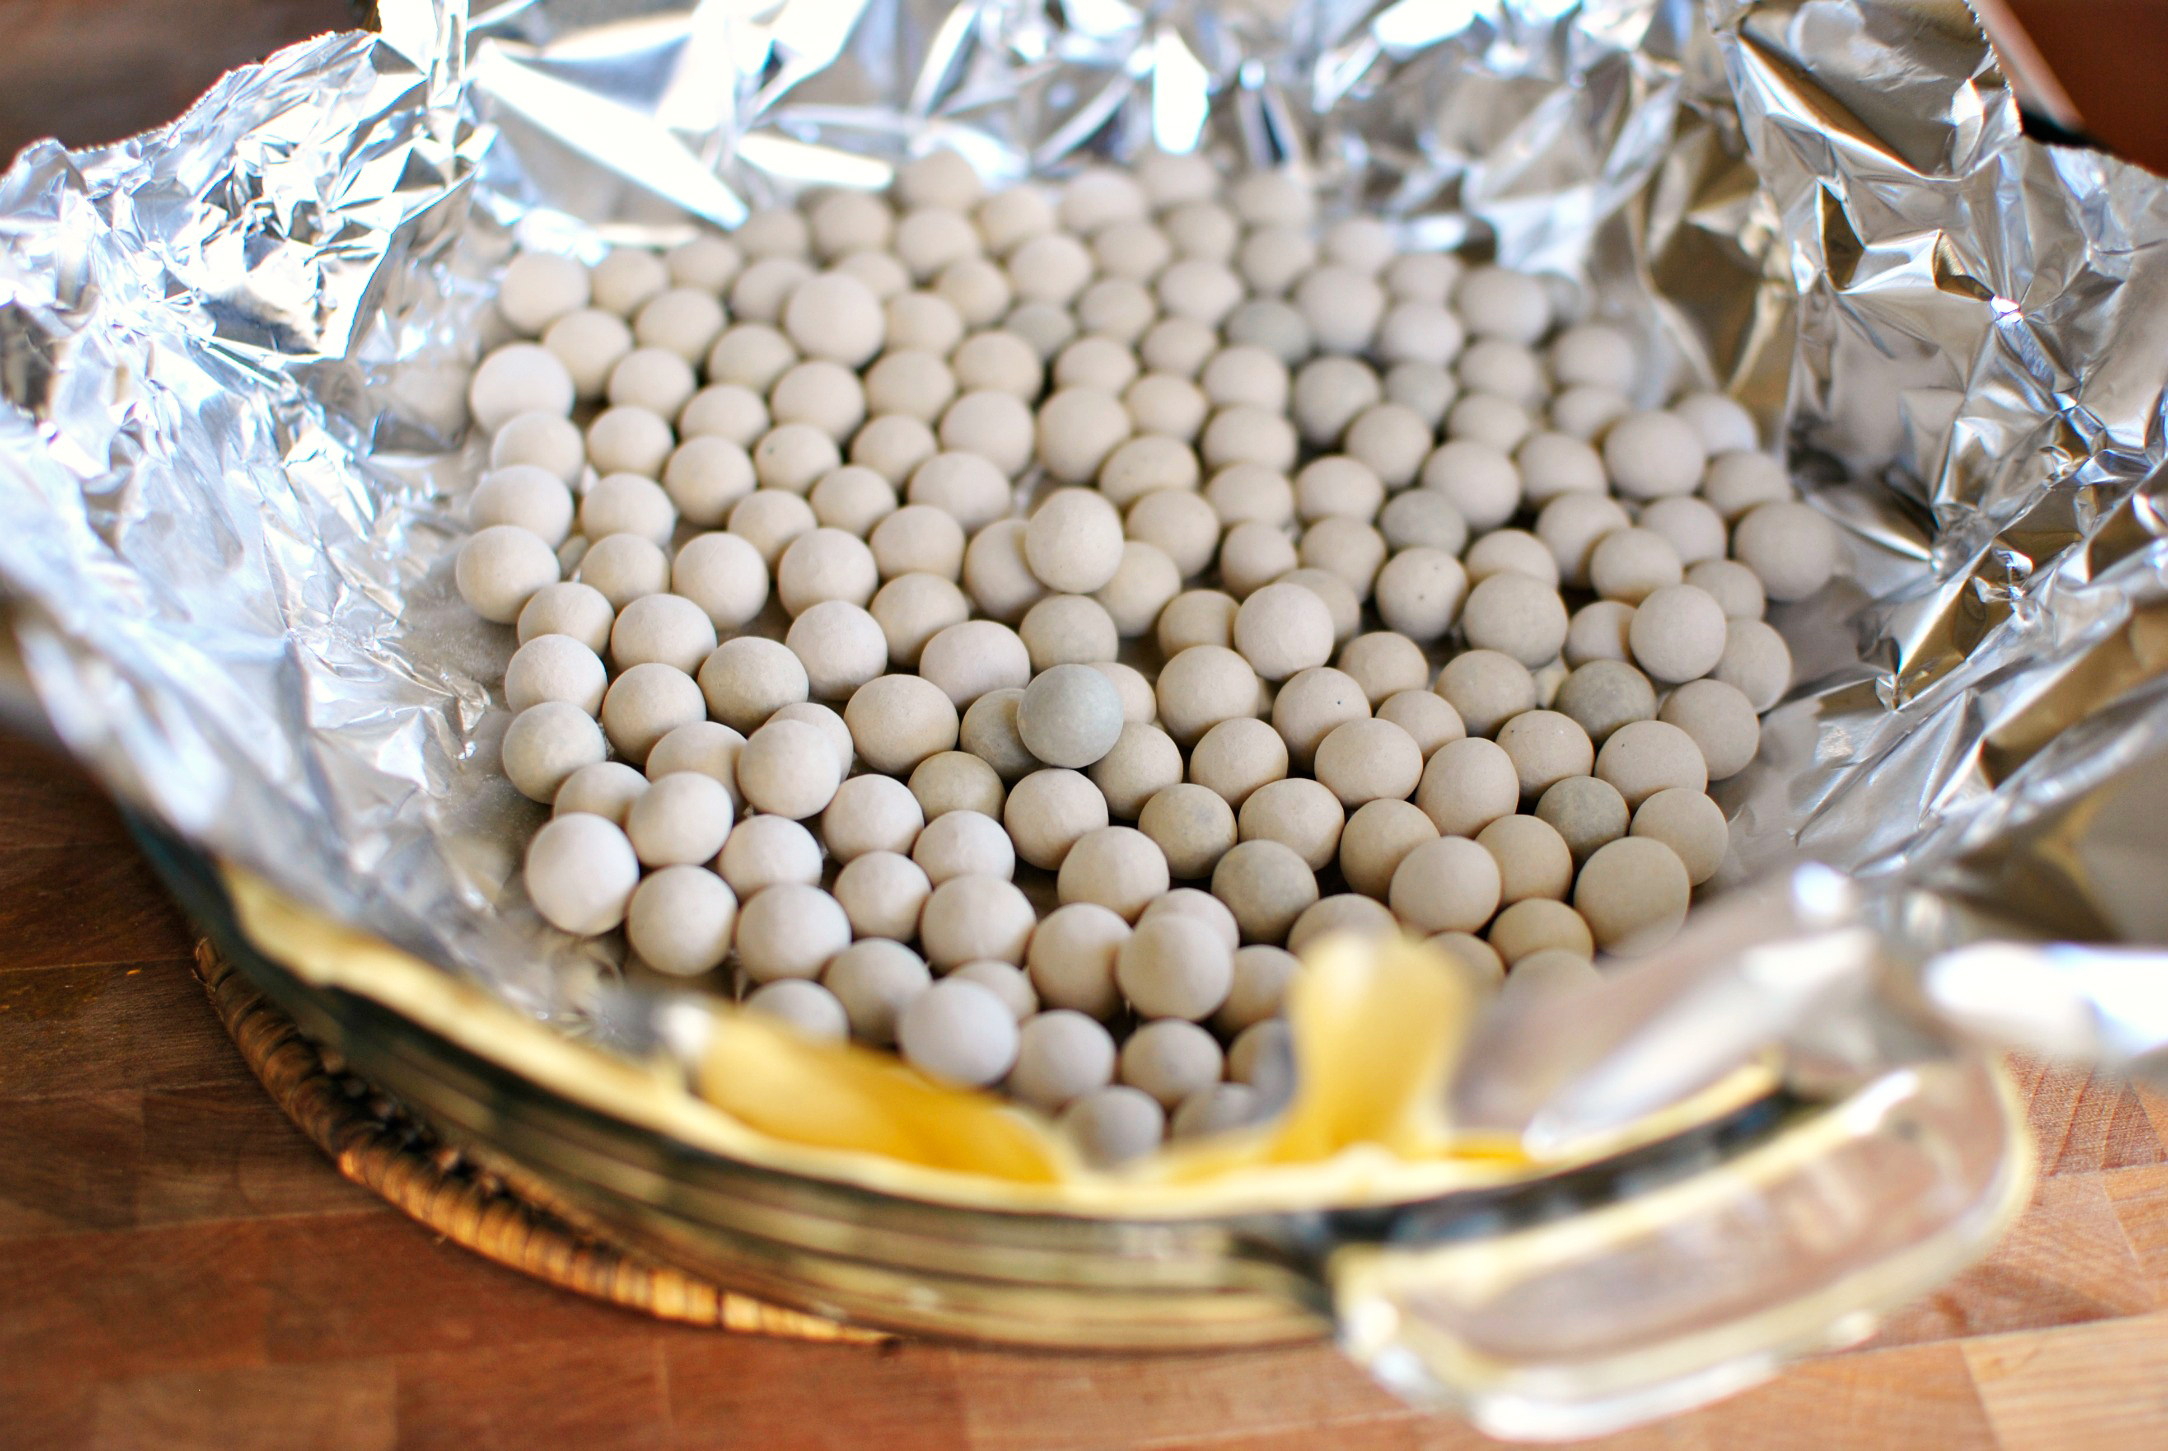
Drape the dough over the pie plate, gently pressing it into the sides. Then cover the dough with tin foil and fill the foil with pie weights (dried beans work well here too!).

Chill the pie crust again for 20 more minutes before sliding the pie crust into a preheated 375ºF oven for 25 minutes. When the time is up, immediately remove the crust and decrease the oven temperature to 275ºF.


Tasty Kitchen Blog: Nutella Pecan Pie. Guest post by Laurie McNamara of Simply Scratch, recipe submitted by TK member Megan of Wanna Be A Country Cleaver.

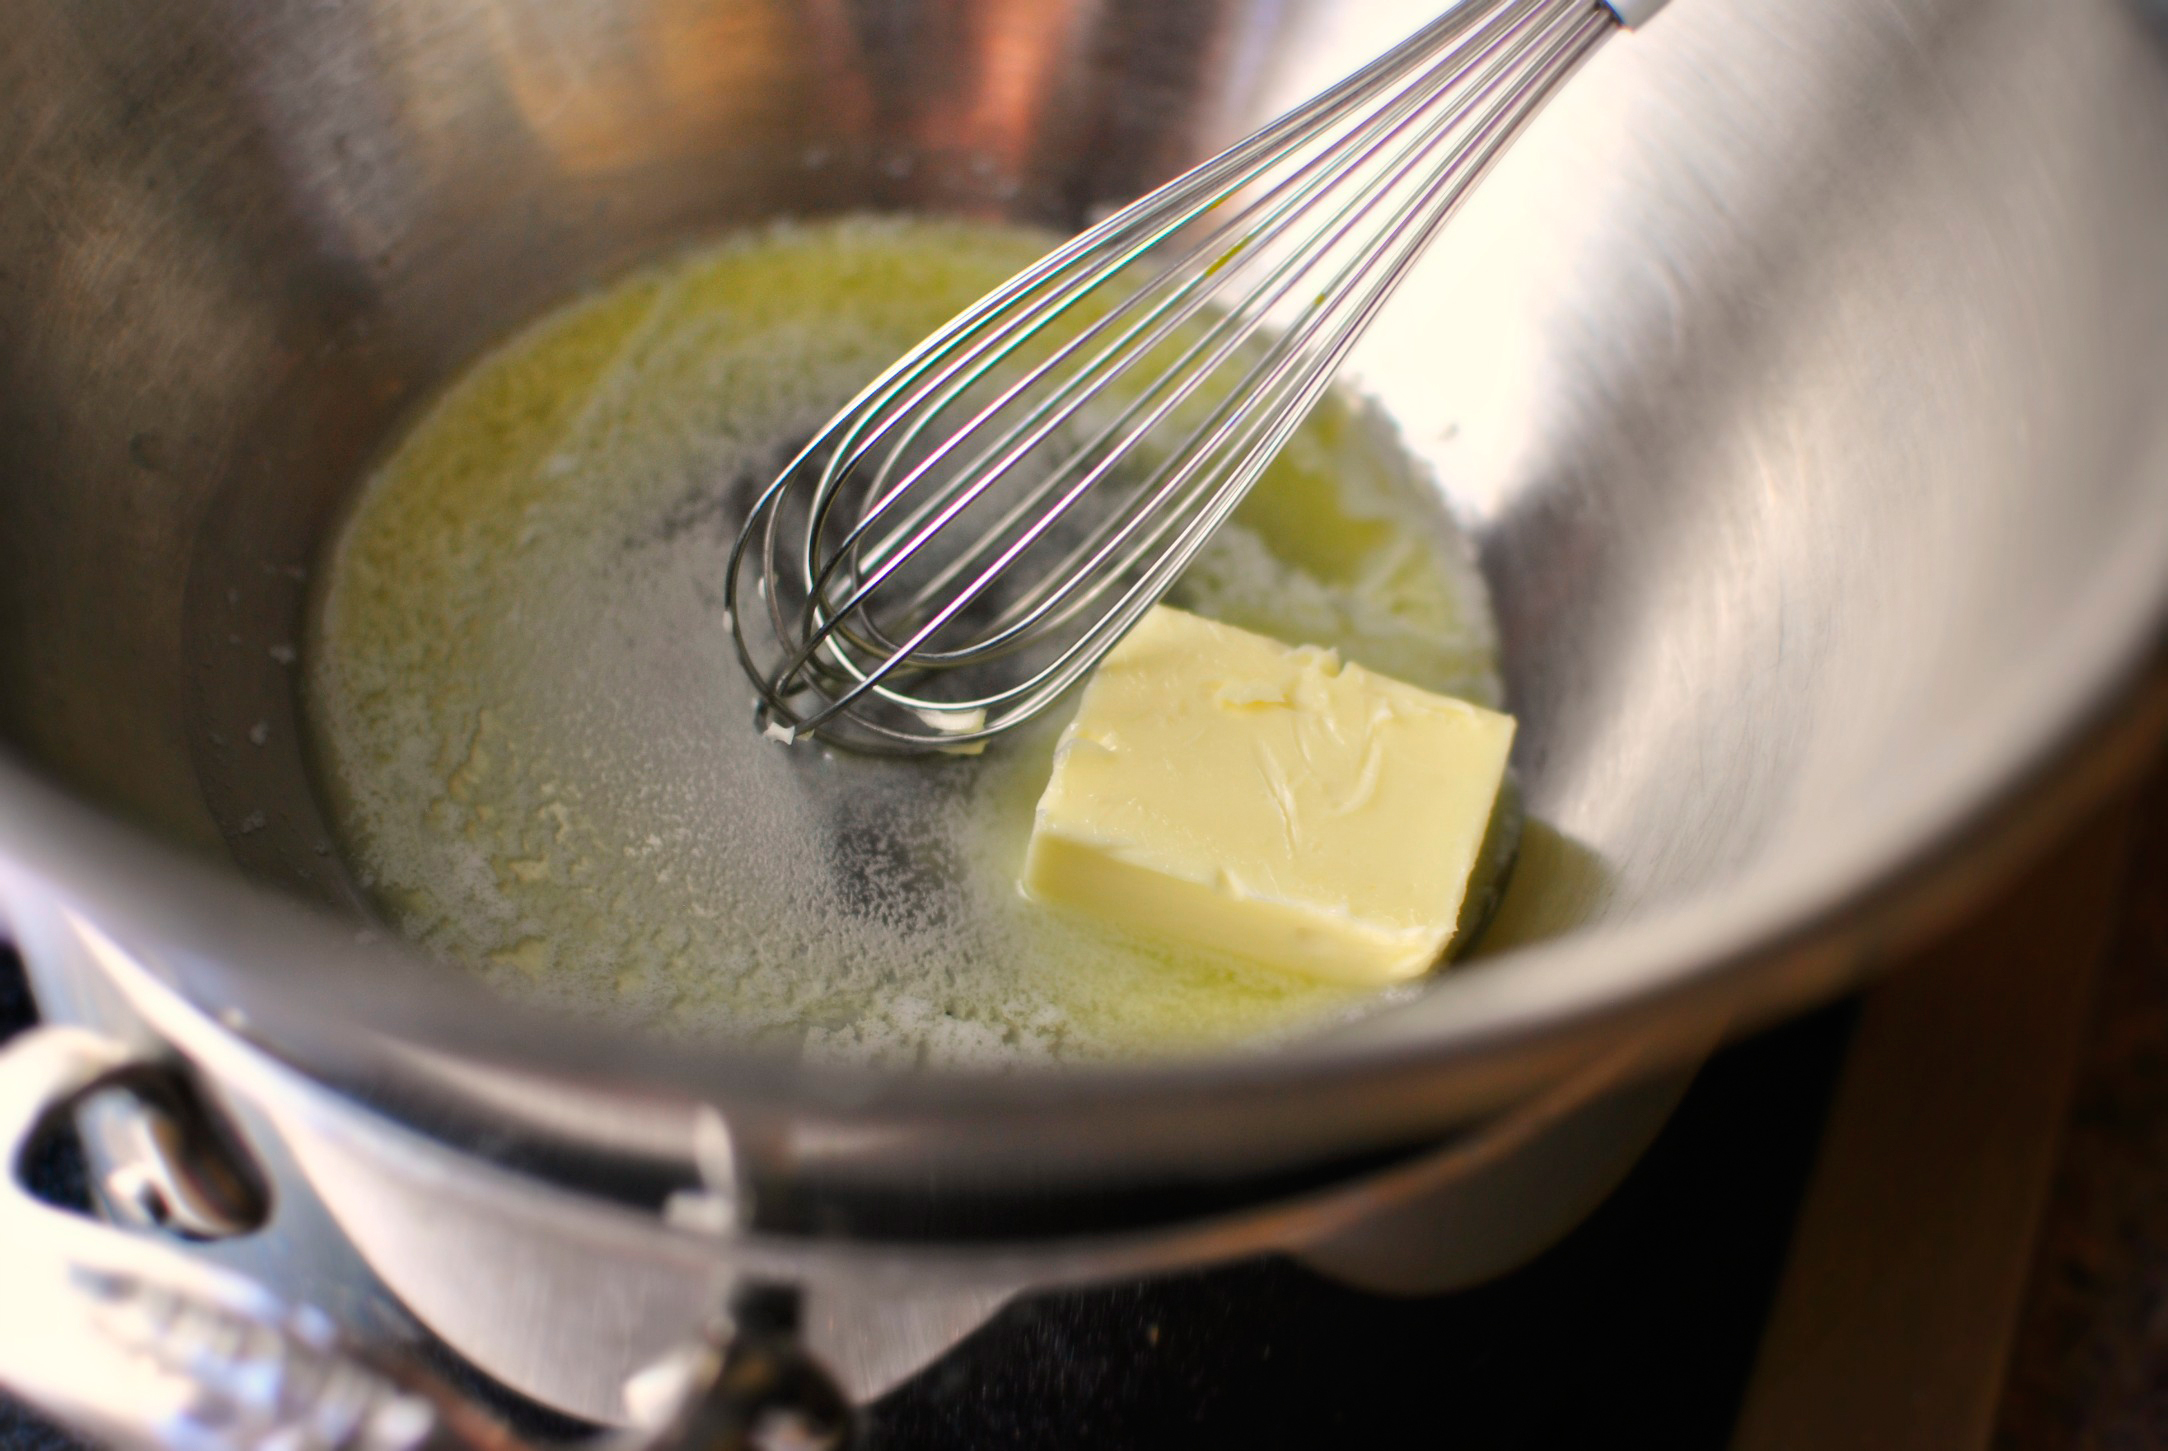
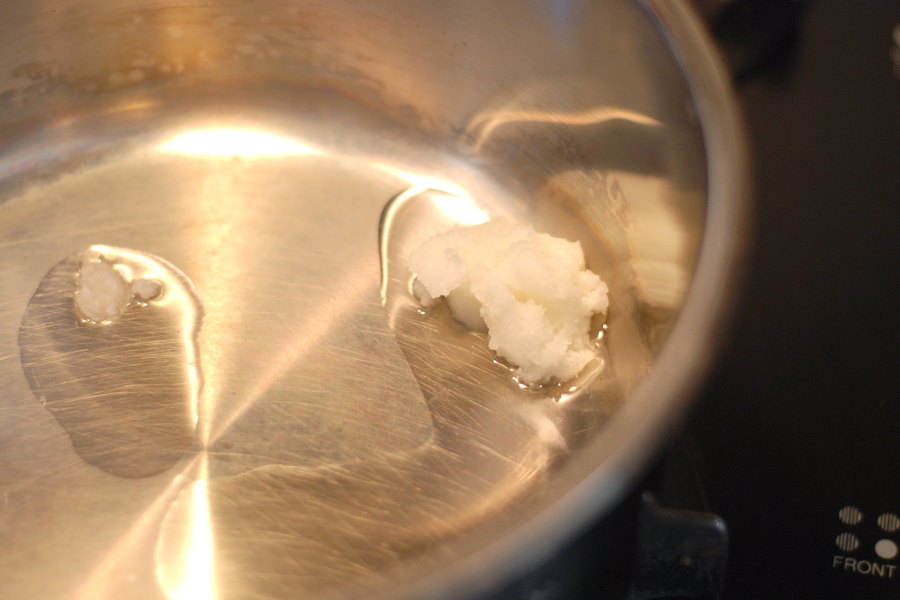
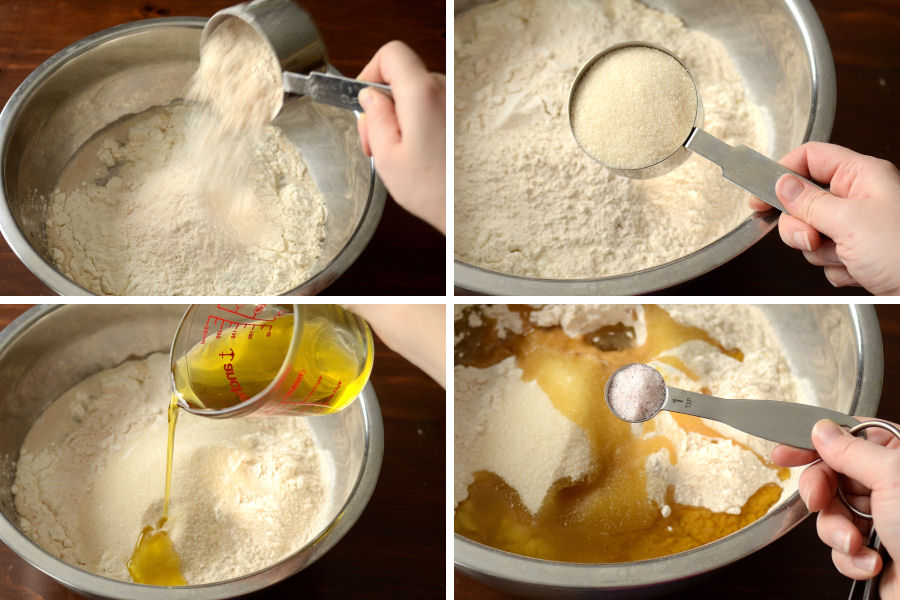
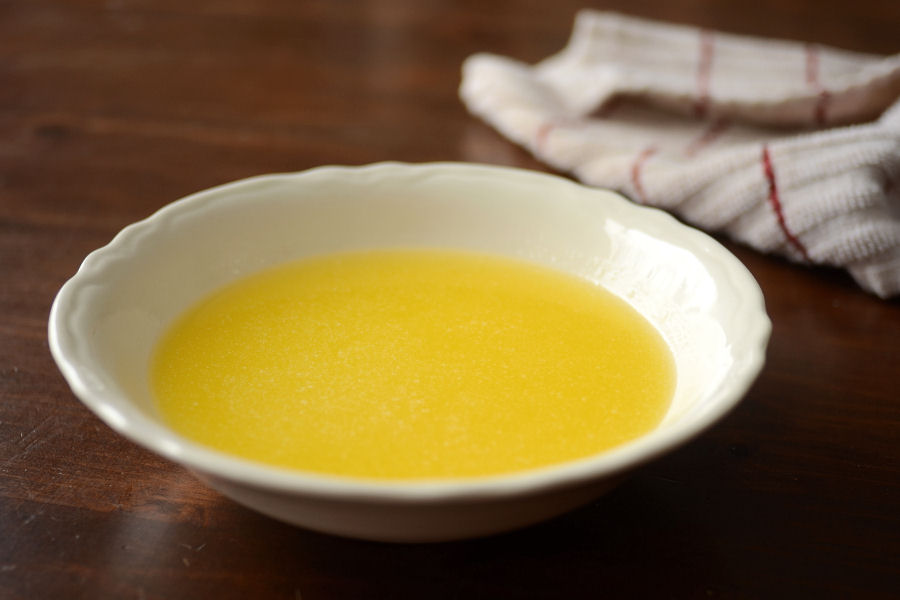
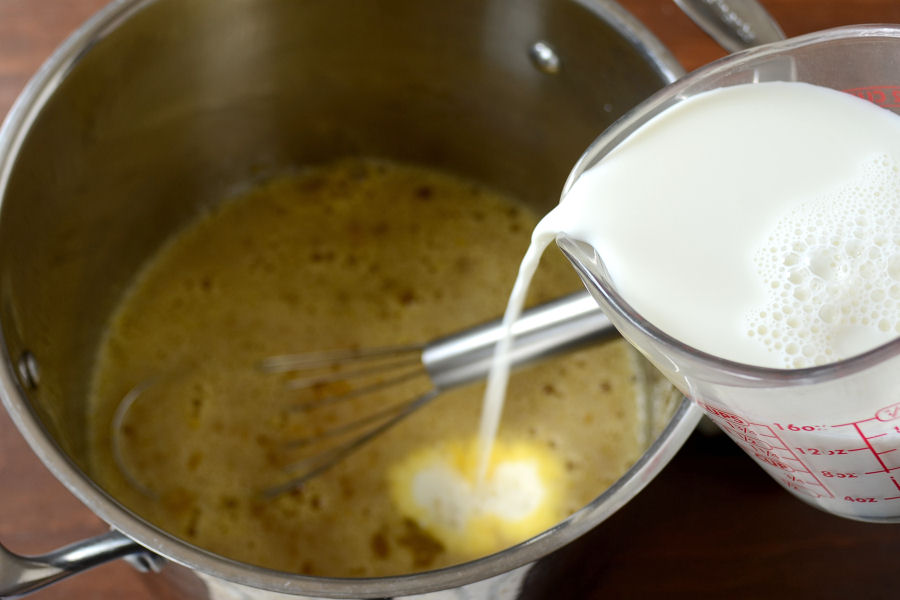
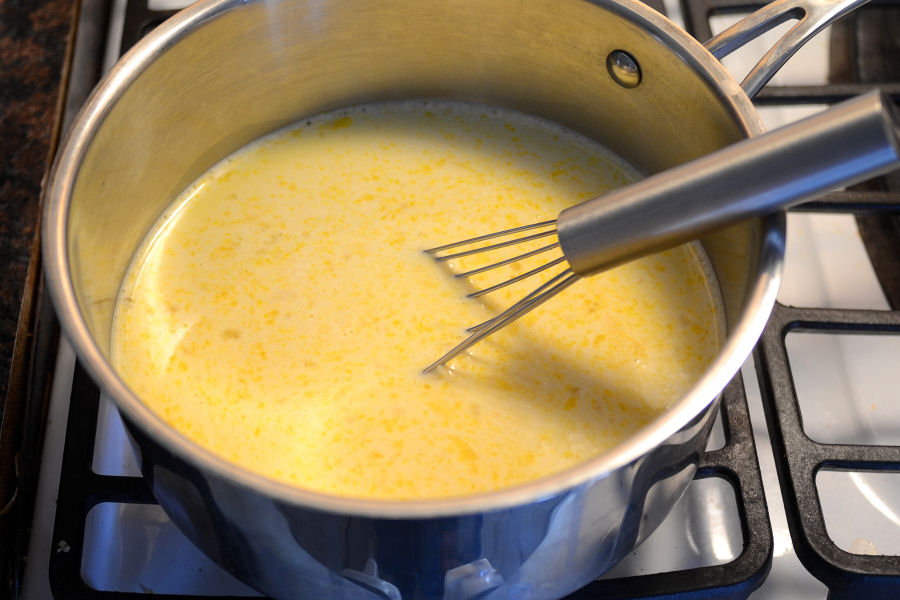
With the pie shell still warm on the counter, make the pecan filling. Start by bringing a sauce pan halfway filled with water to a simmer. Place a metal bowl over the simmering water and add the three tablespoons of butter and wait for the butter to melt.


Tasty Kitchen Blog: Nutella Pecan Pie. Guest post by Laurie McNamara of Simply Scratch, recipe submitted by TK member Megan of Wanna Be A Country Cleaver.

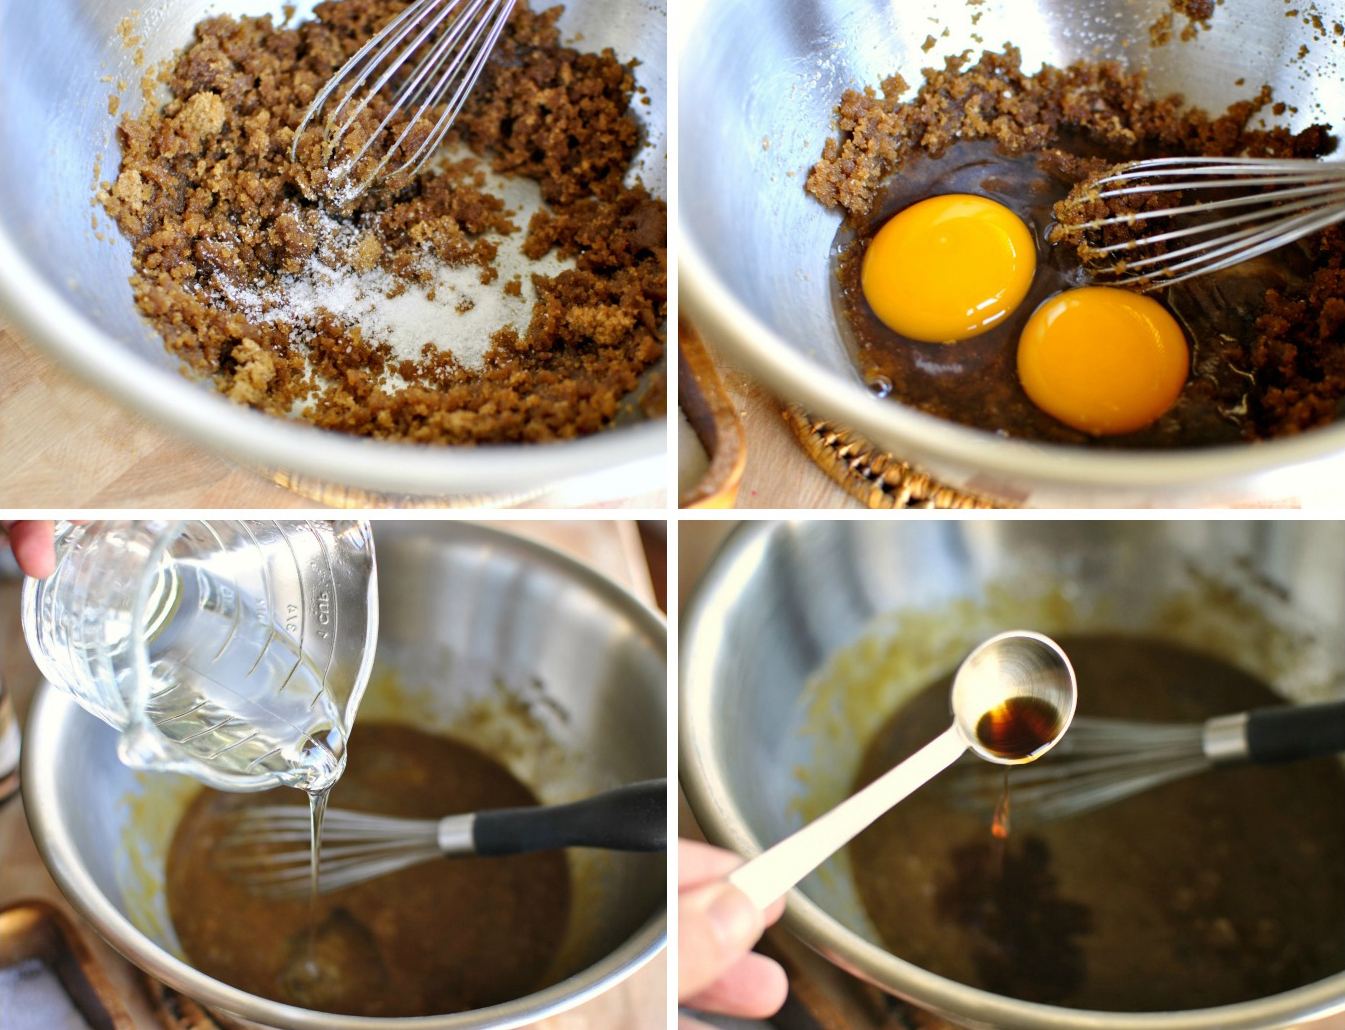
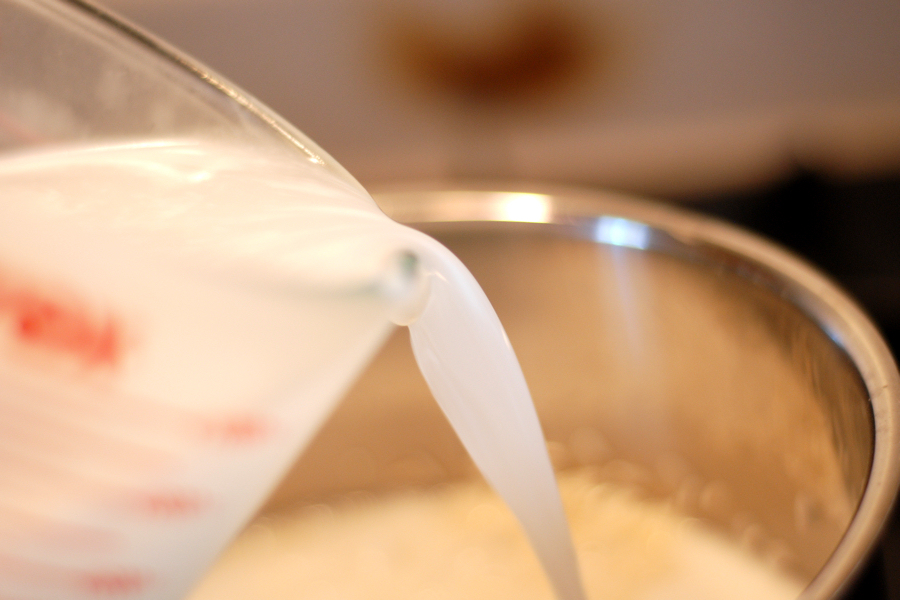
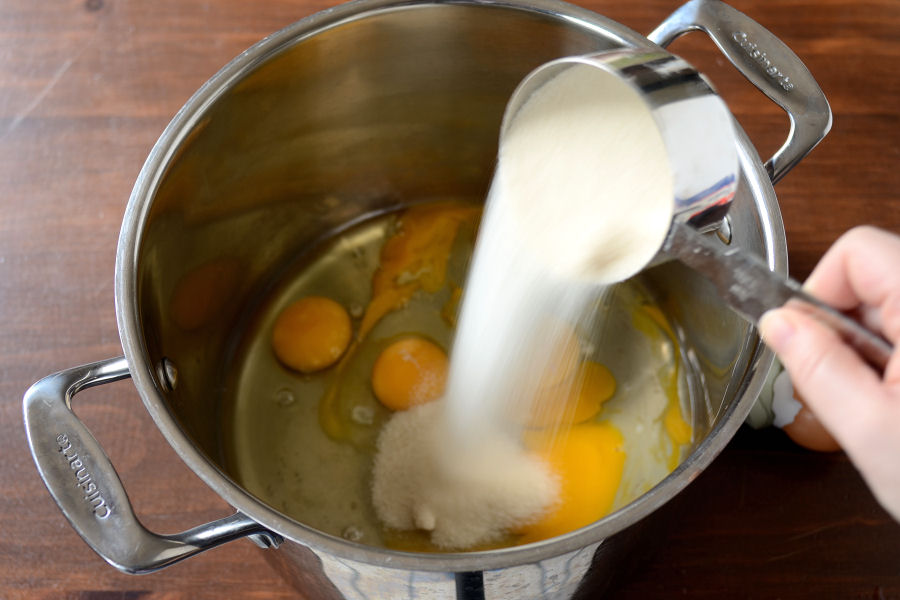
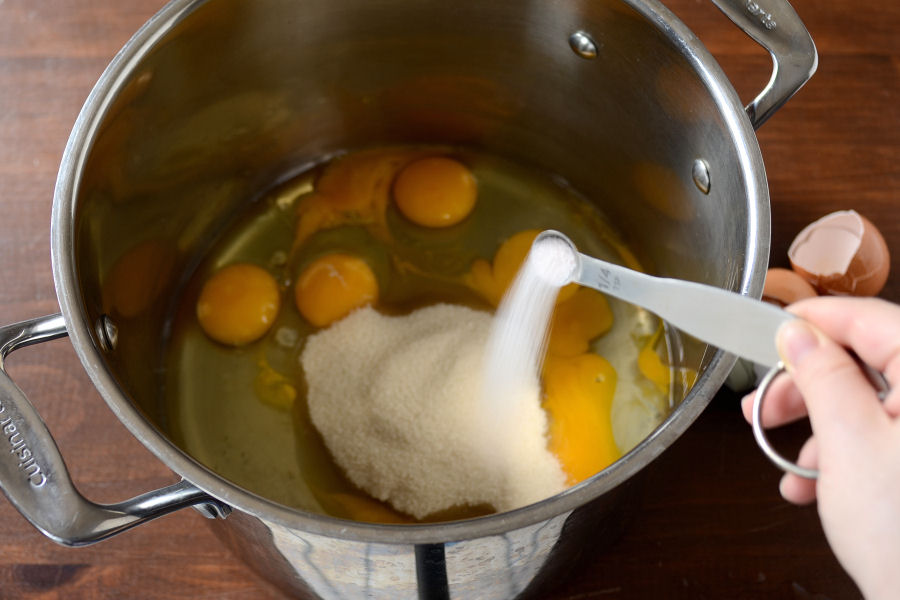
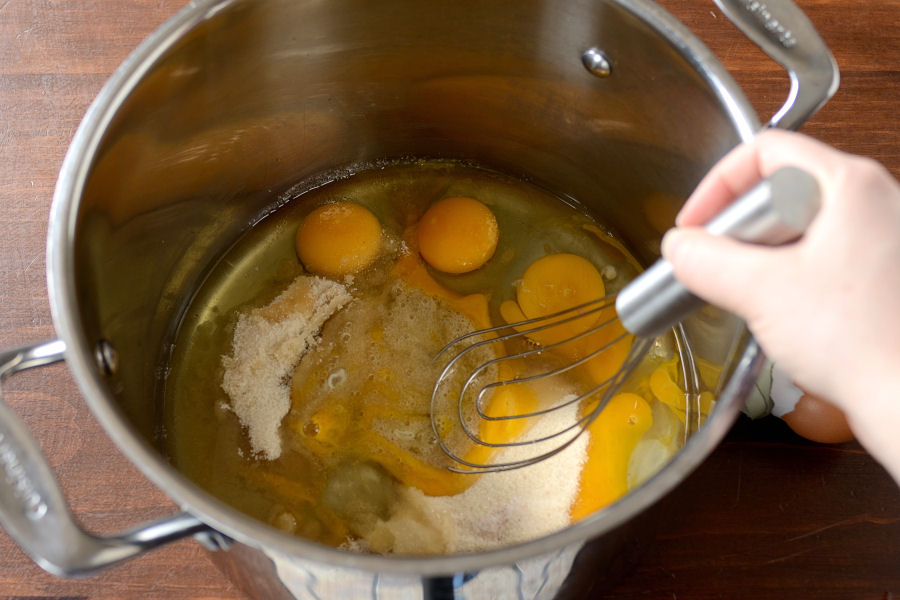
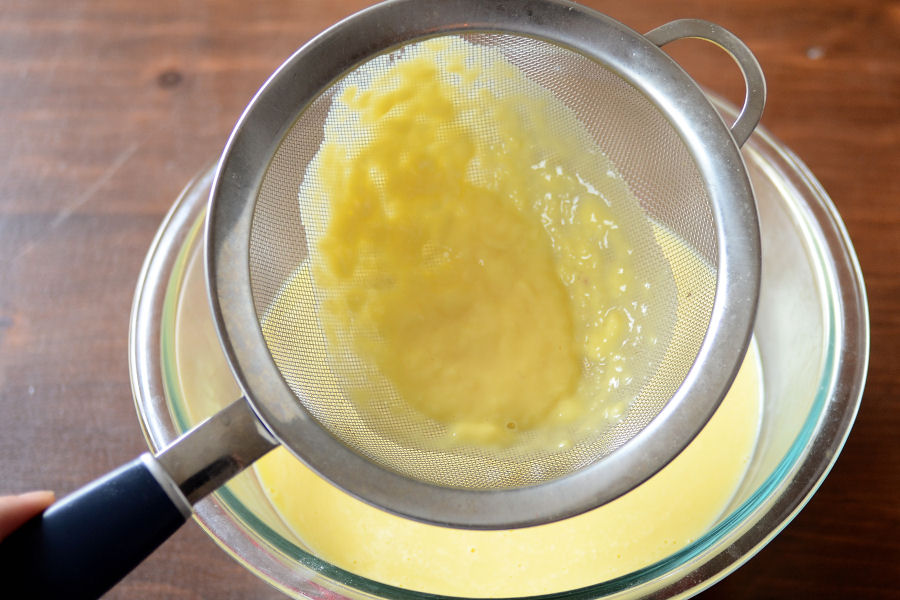
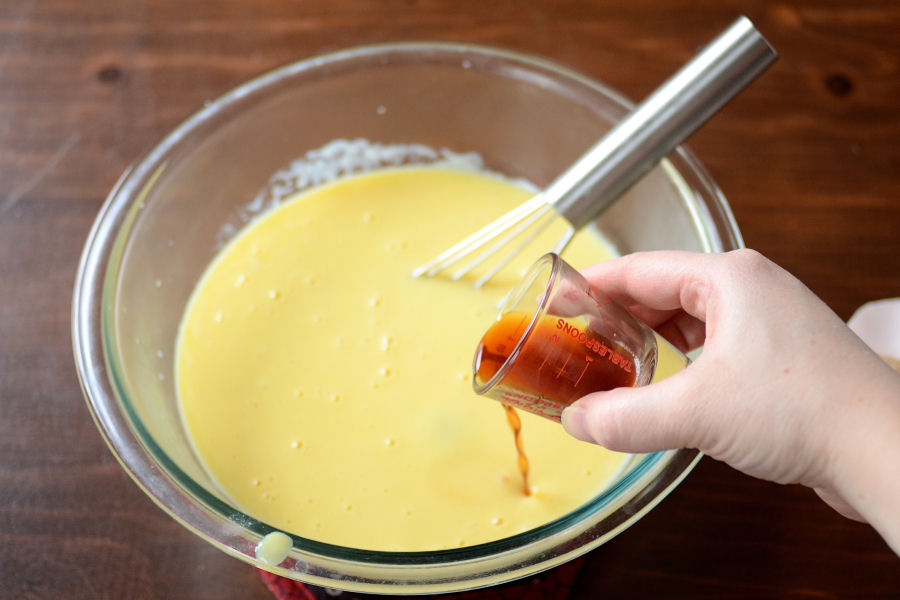
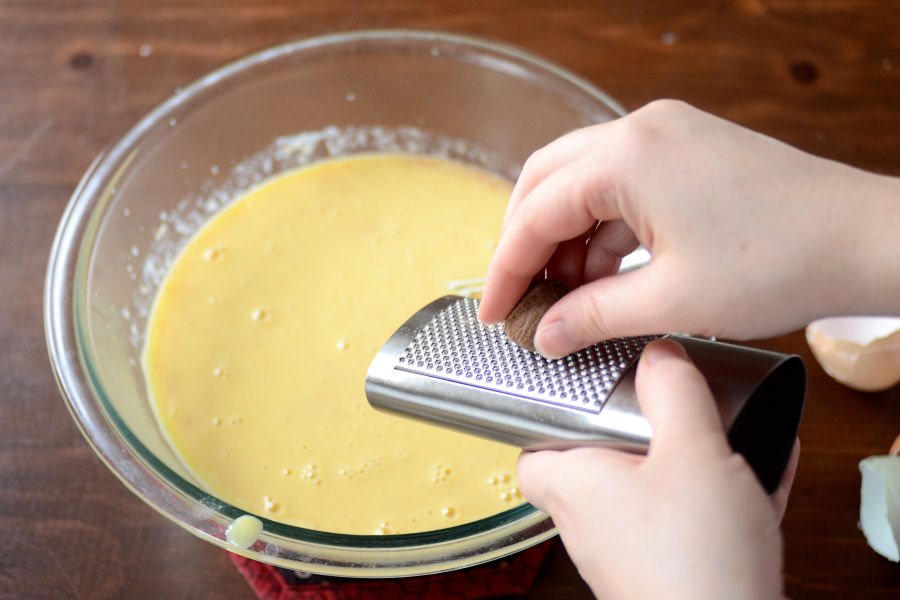
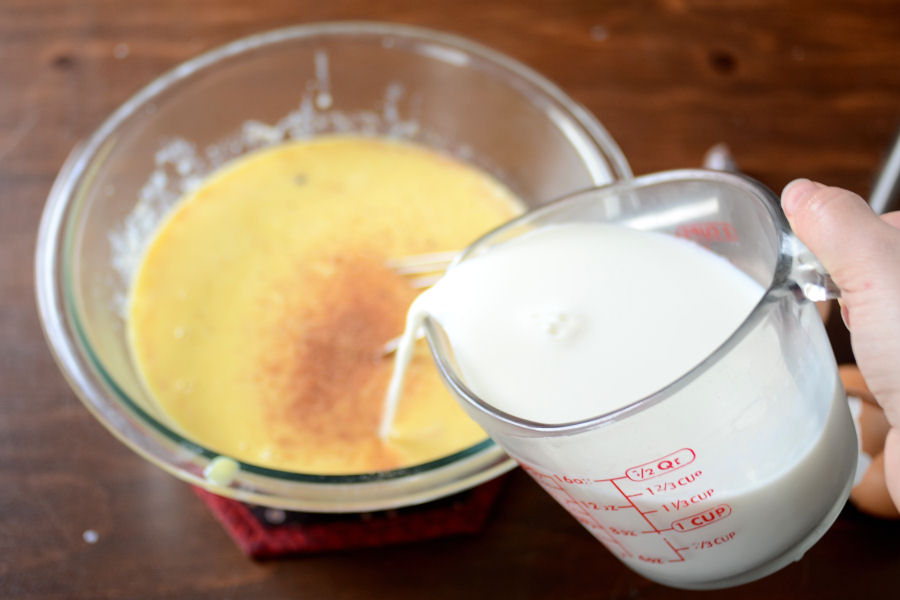
Then remove the bowl from the simmering water and whisk in the brown sugar, salt, eggs, corn syrup and vanilla.


Tasty Kitchen Blog: Nutella Pecan Pie. Guest post by Laurie McNamara of Simply Scratch, recipe submitted by TK member Megan of Wanna Be A Country Cleaver.

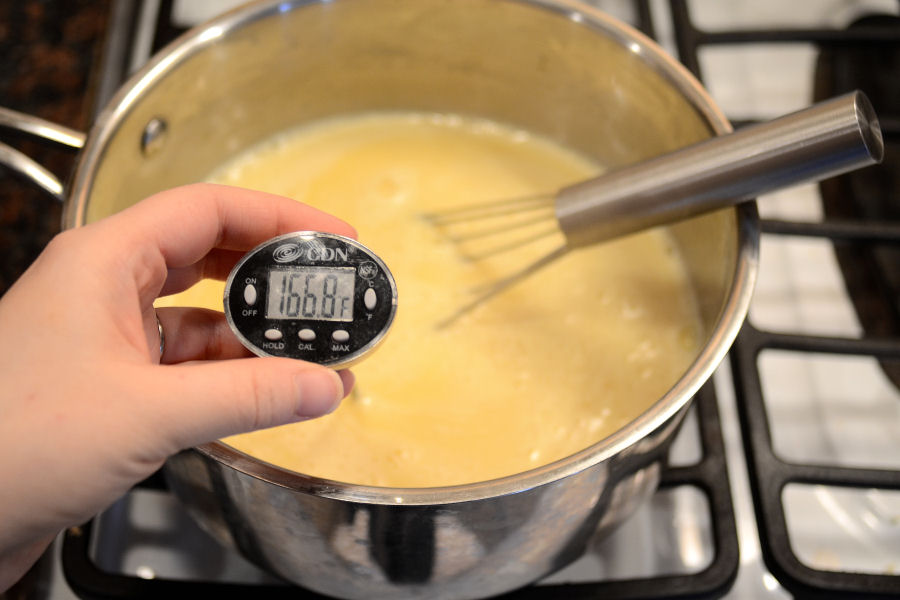
Then place the bowl back over the water and, using an instant-read thermometer, heat the filling up to 130ºF.


Tasty Kitchen Blog: Nutella Pecan Pie. Guest post by Laurie McNamara of Simply Scratch, recipe submitted by TK member Megan of Wanna Be A Country Cleaver.

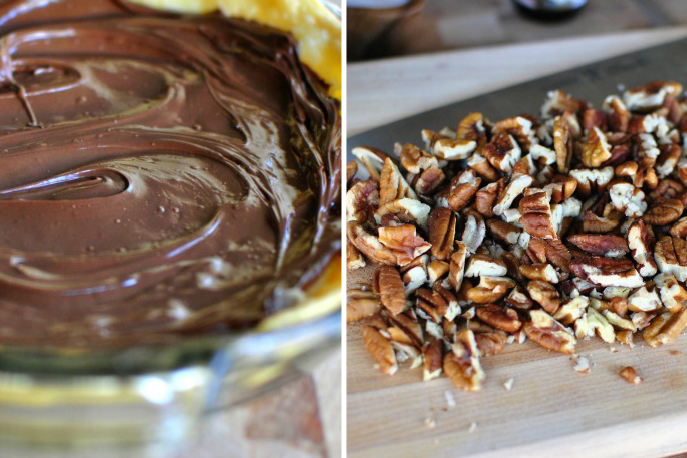
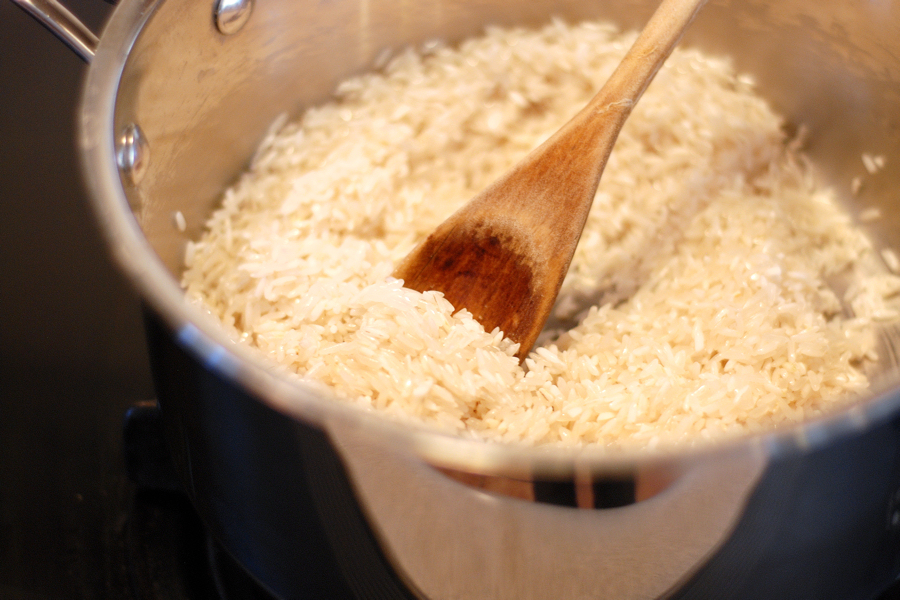
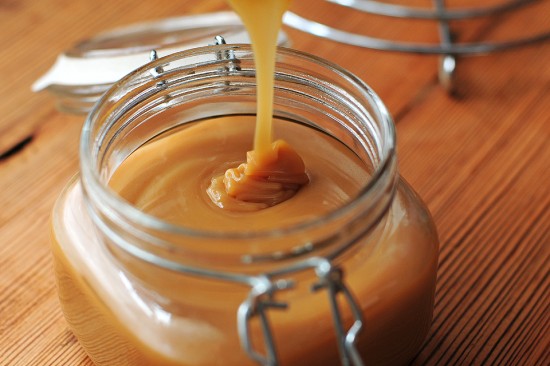
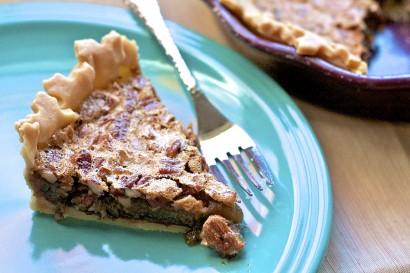
While that’s going on, spread the half cup of Nutella on the bottom of the pie shell and roughly chopped up the pecans.


Tasty Kitchen Blog: Nutella Pecan Pie. Guest post by Laurie McNamara of Simply Scratch, recipe submitted by TK member Megan of Wanna Be A Country Cleaver.

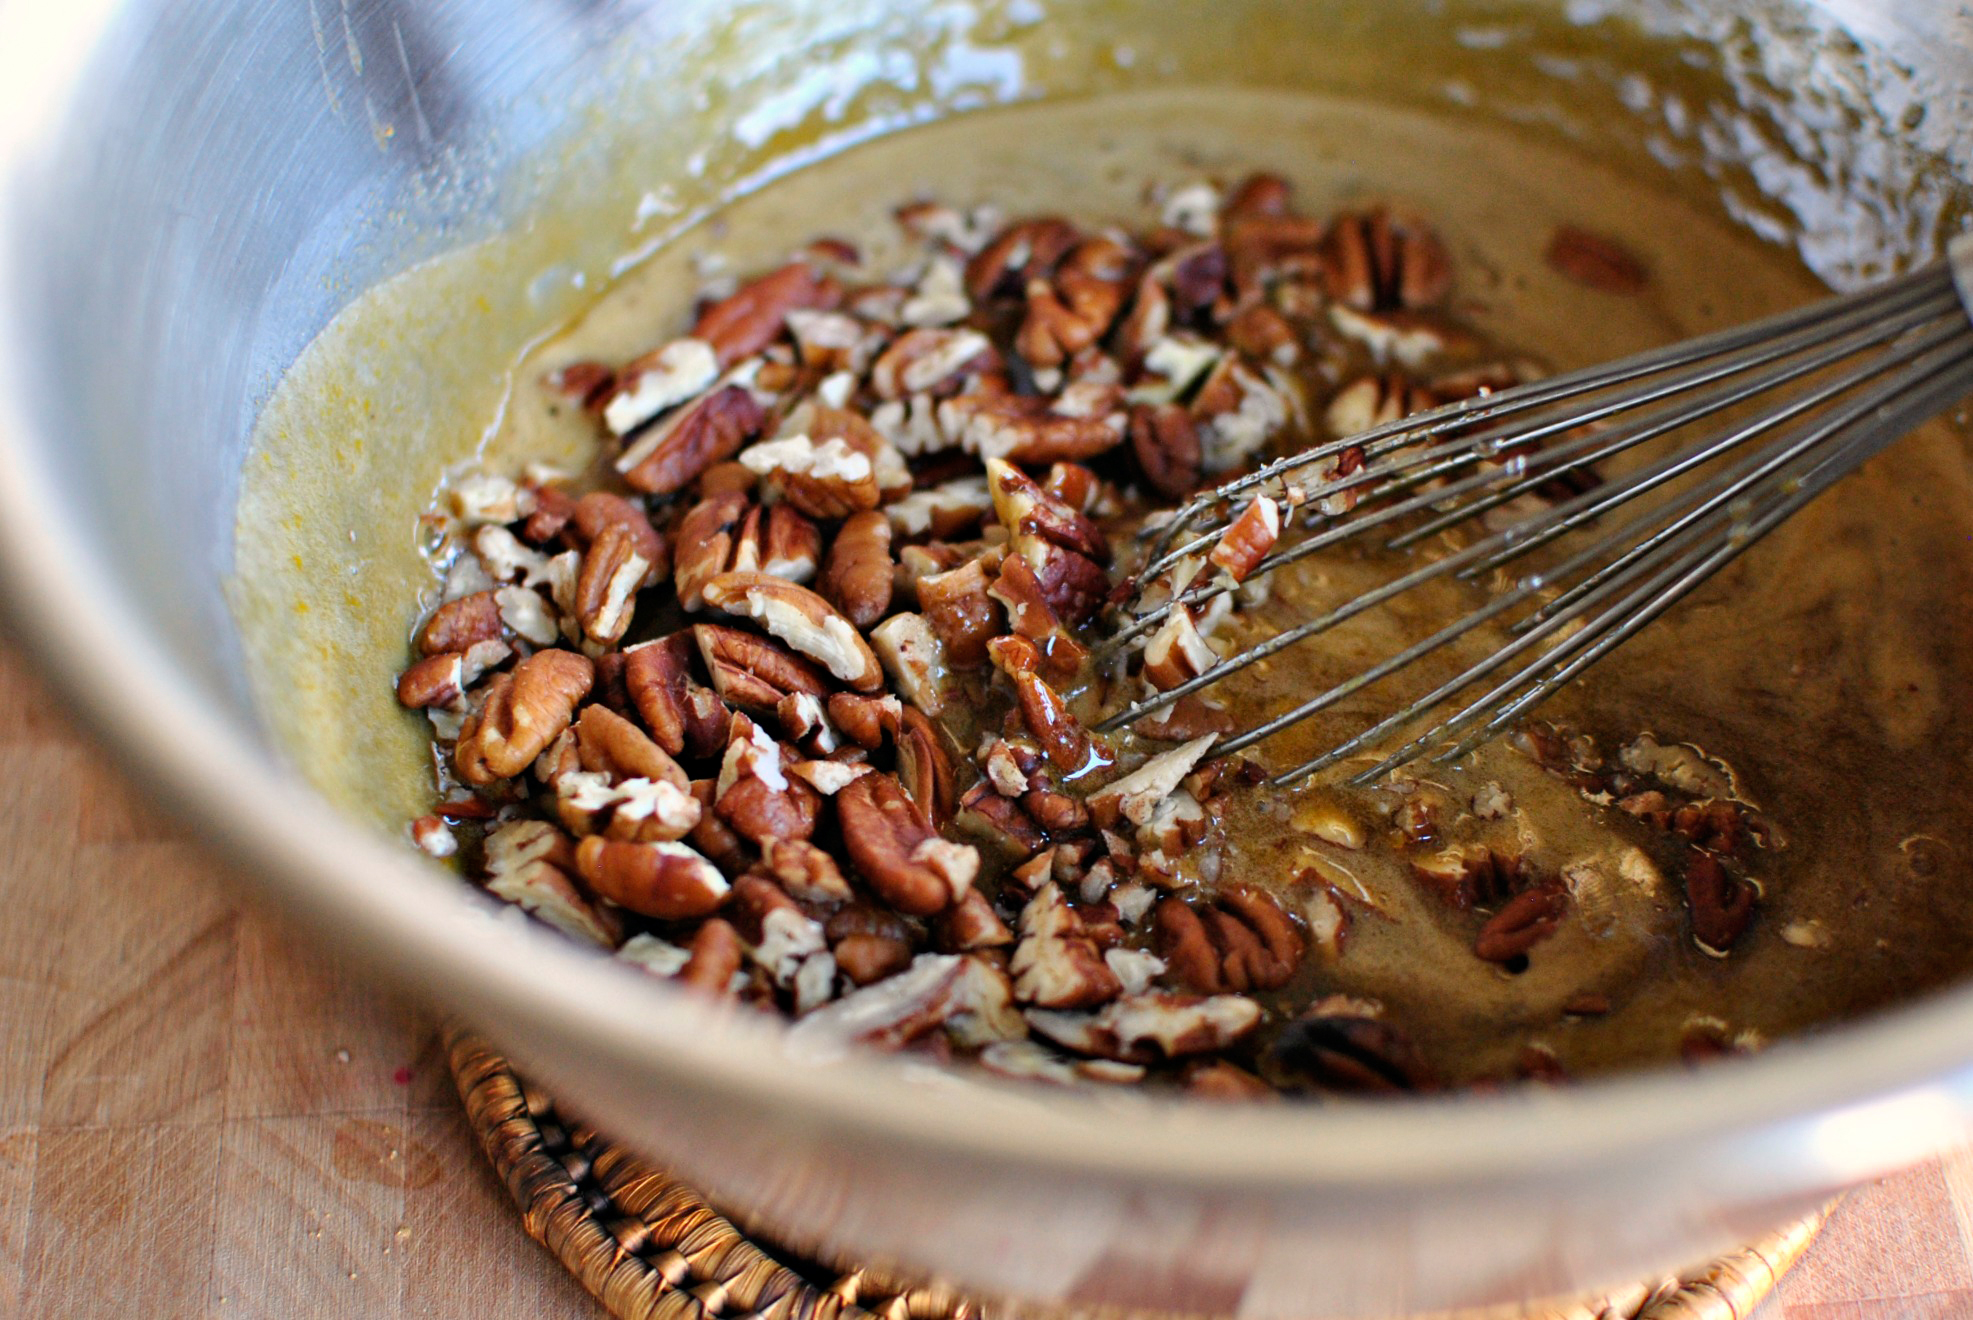
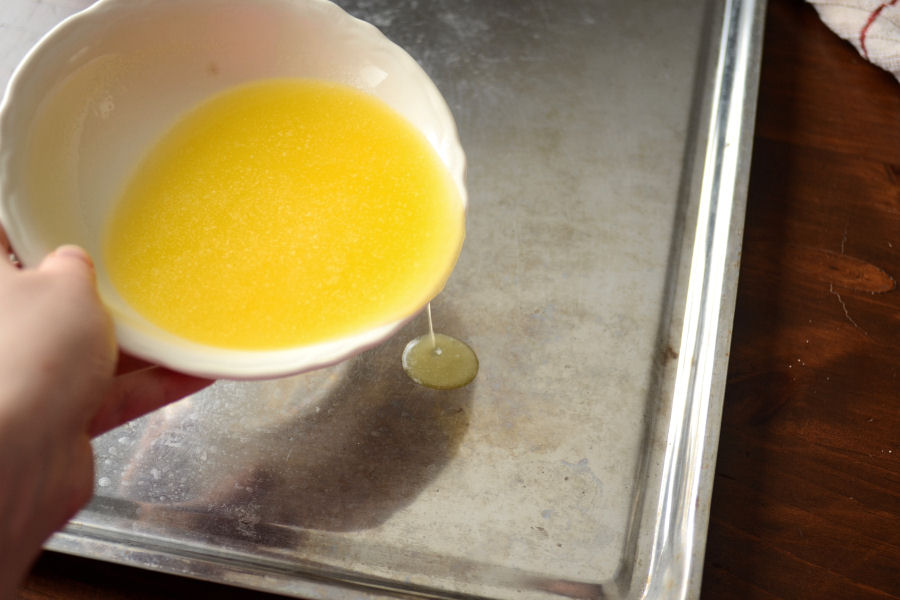
Once the filling is at the 130ºF mark, add in the cup of chopped pecans.


Tasty Kitchen Blog: Nutella Pecan Pie. Guest post by Laurie McNamara of Simply Scratch, recipe submitted by TK member Megan of Wanna Be A Country Cleaver.

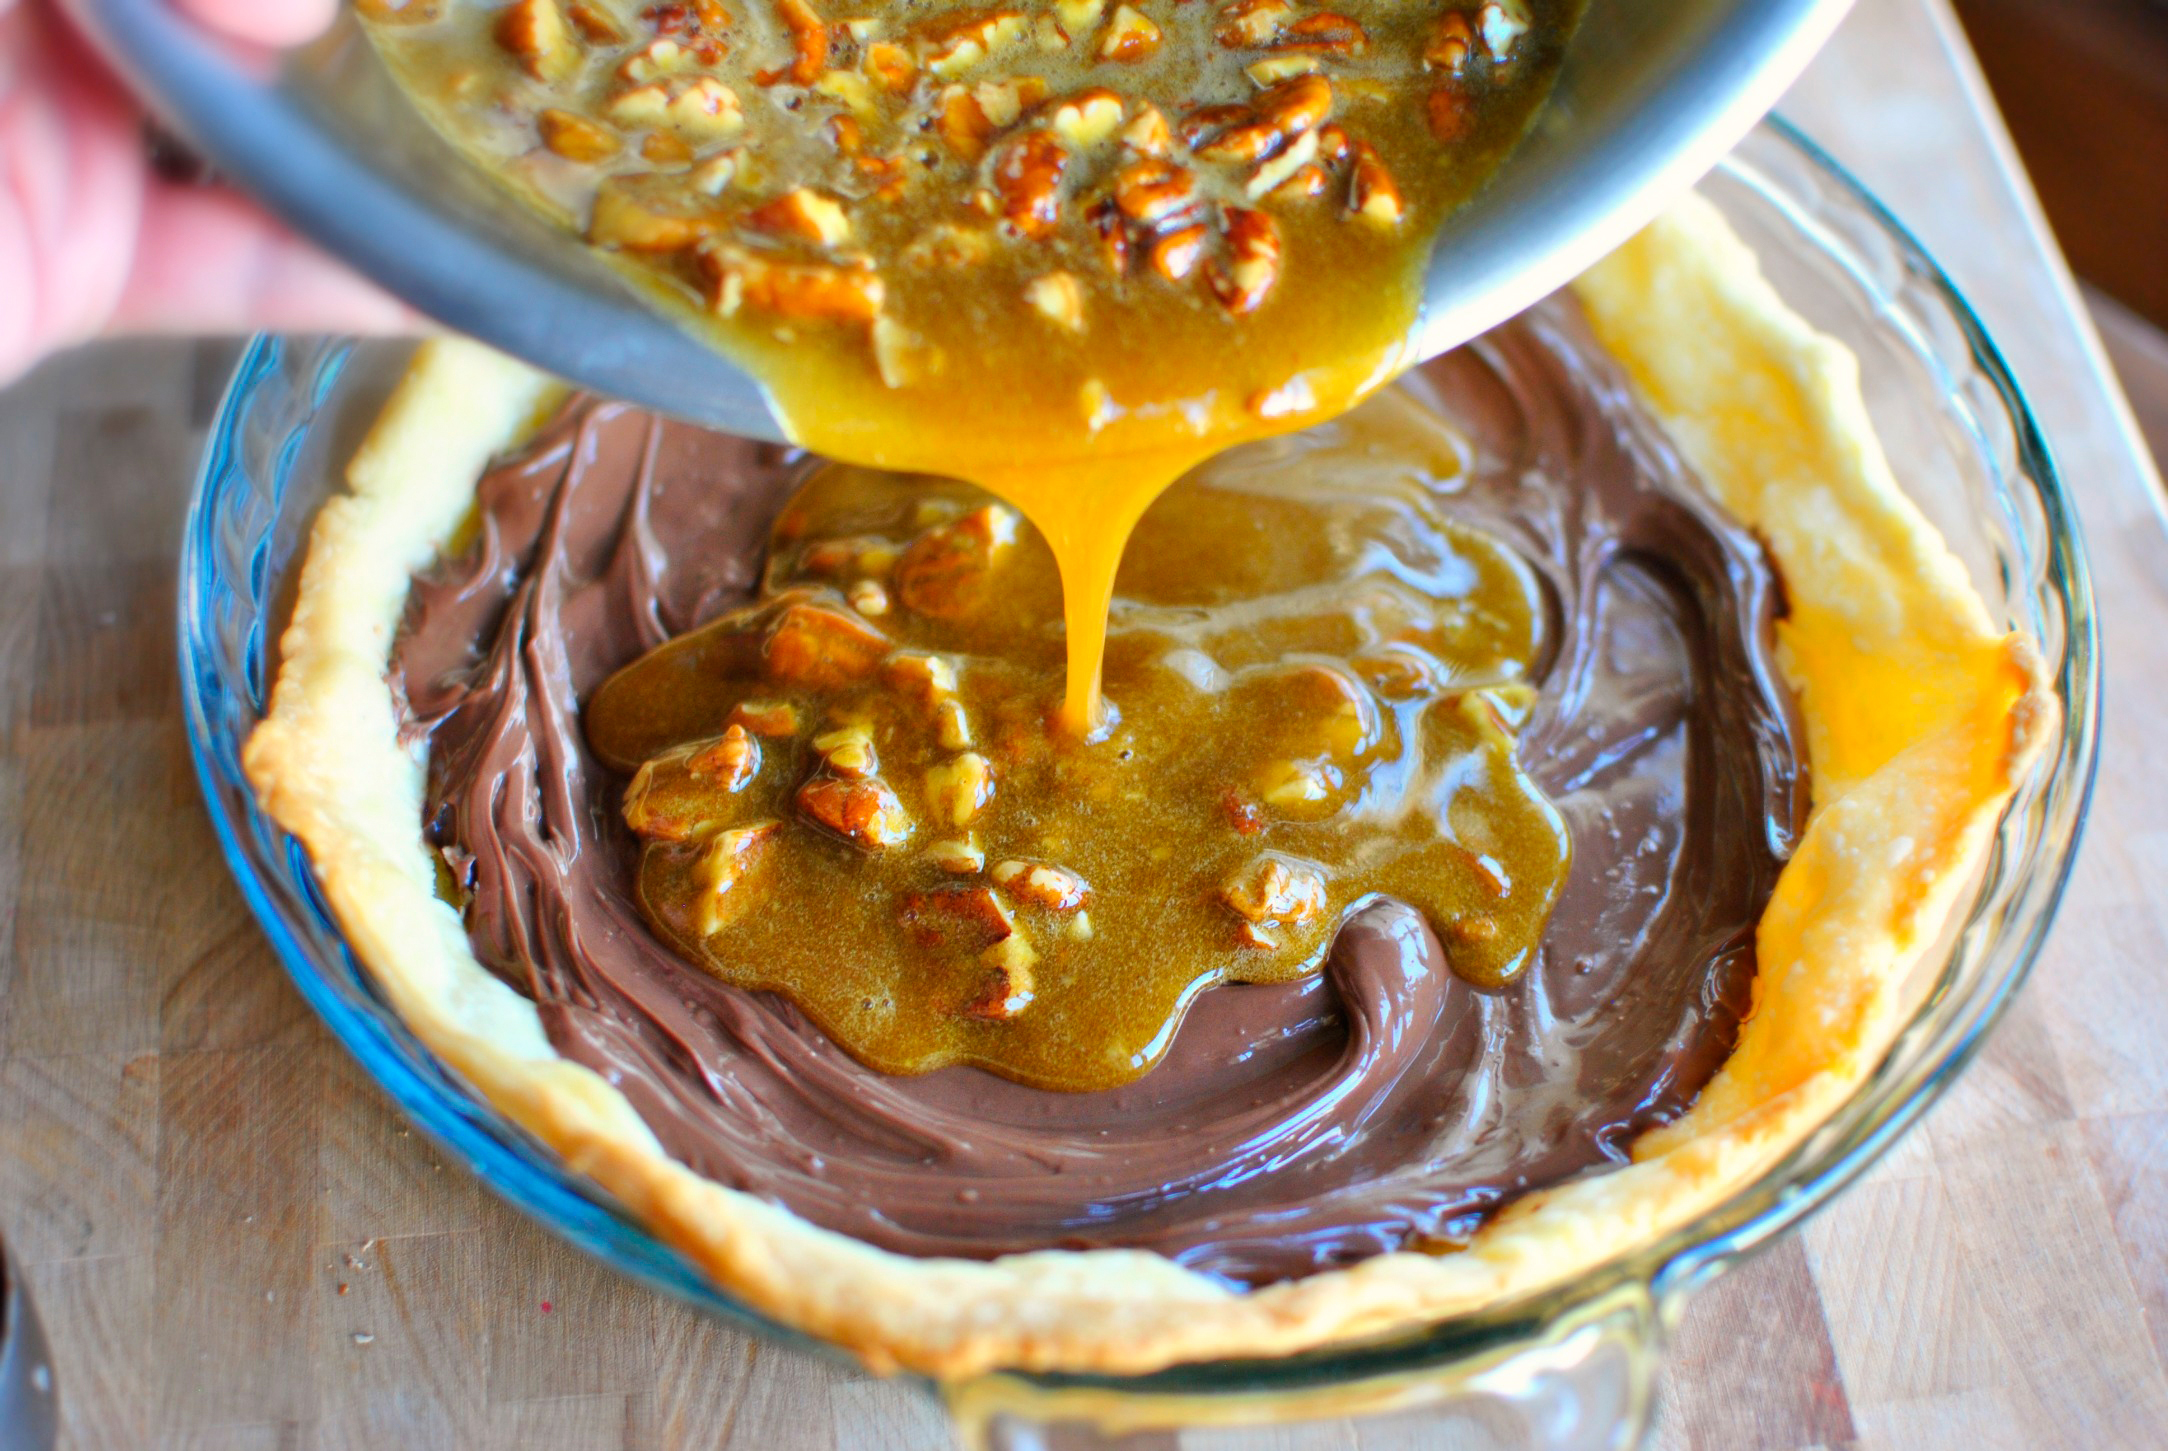
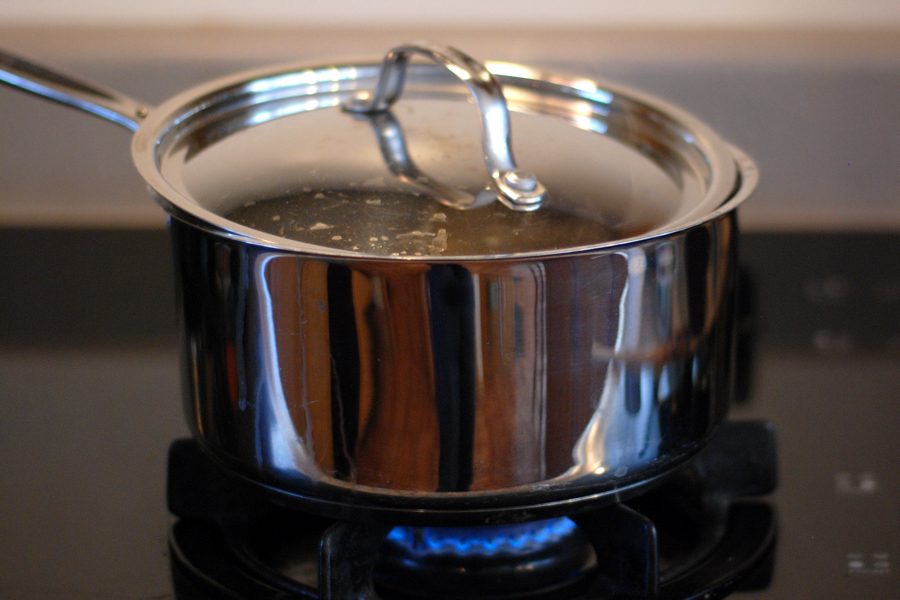
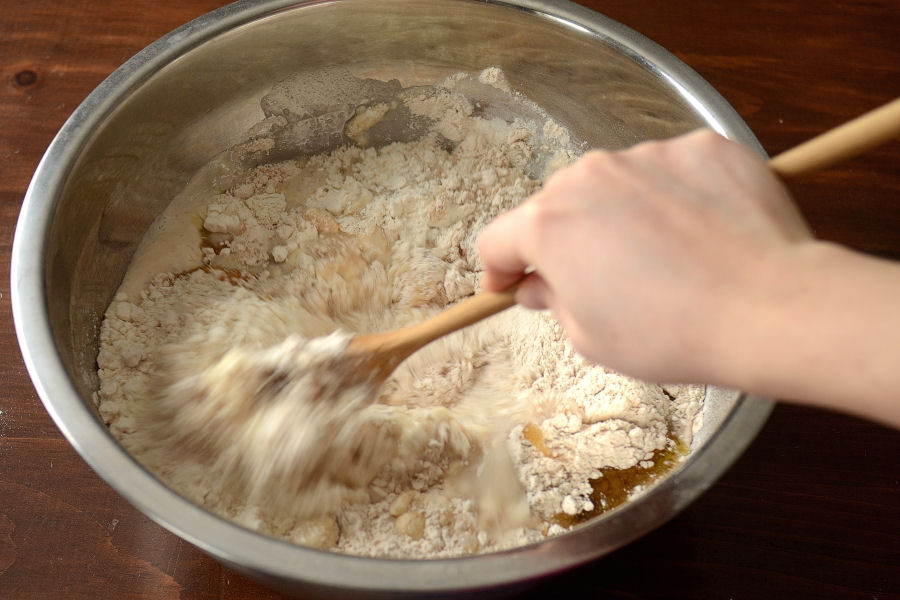
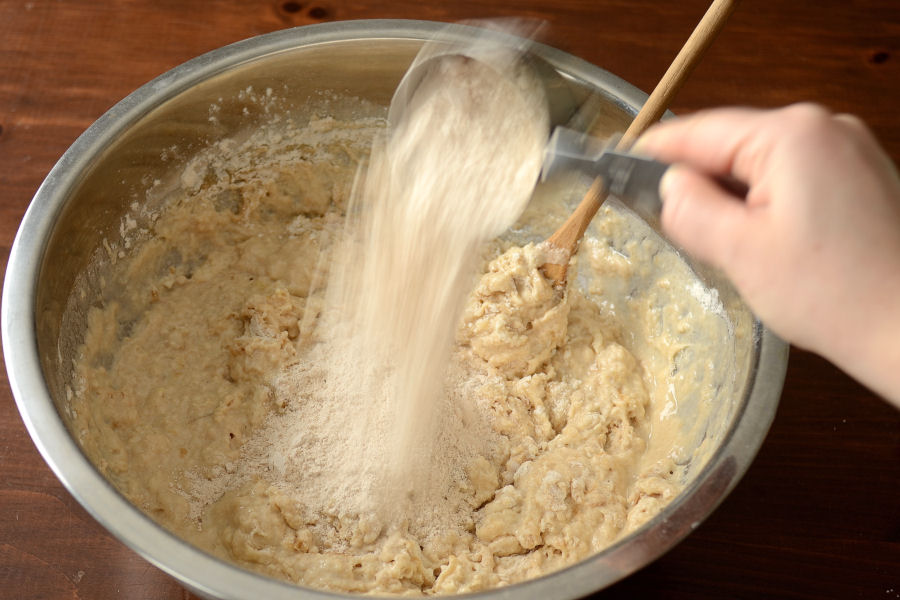
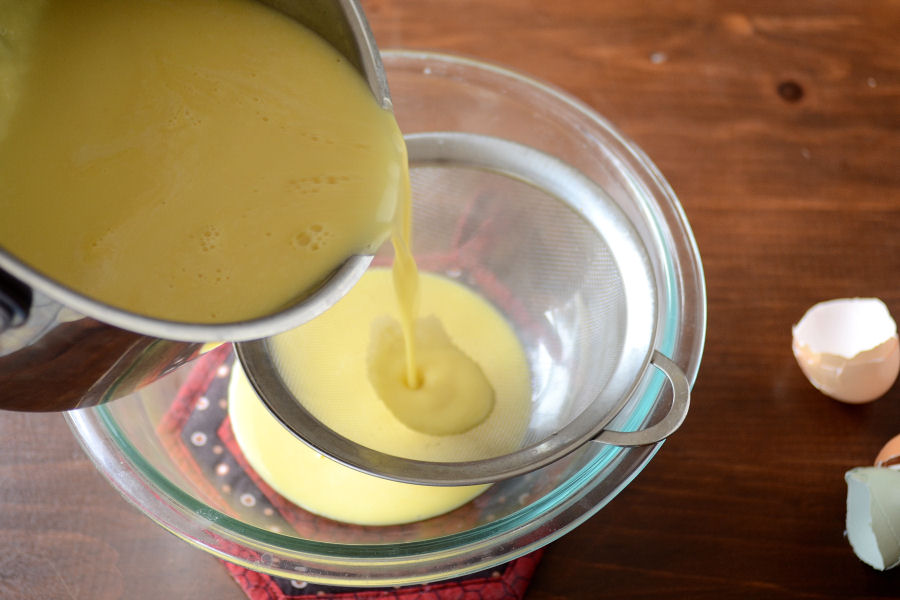
And then pour all that goodness into the Nutella-lined pie crust and carefully slide it into the oven. Bake for 55 minutes.


Tasty Kitchen Blog: Nutella Pecan Pie. Guest post by Laurie McNamara of Simply Scratch, recipe submitted by TK member Megan of Wanna Be A Country Cleaver.

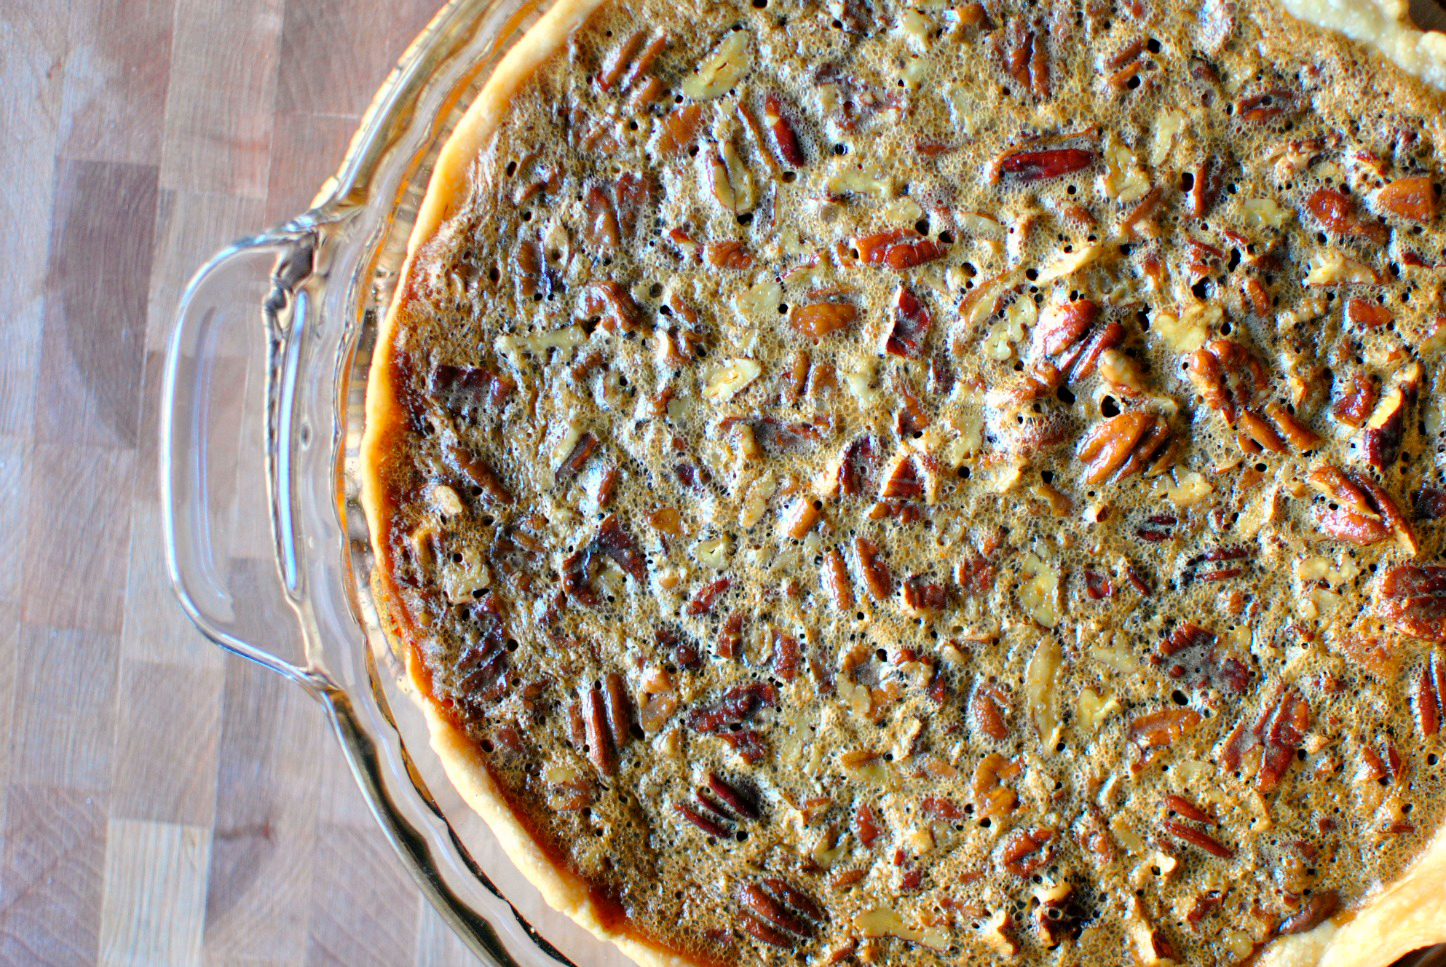
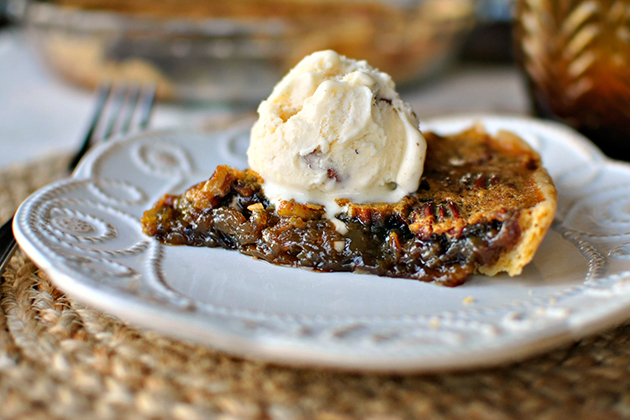
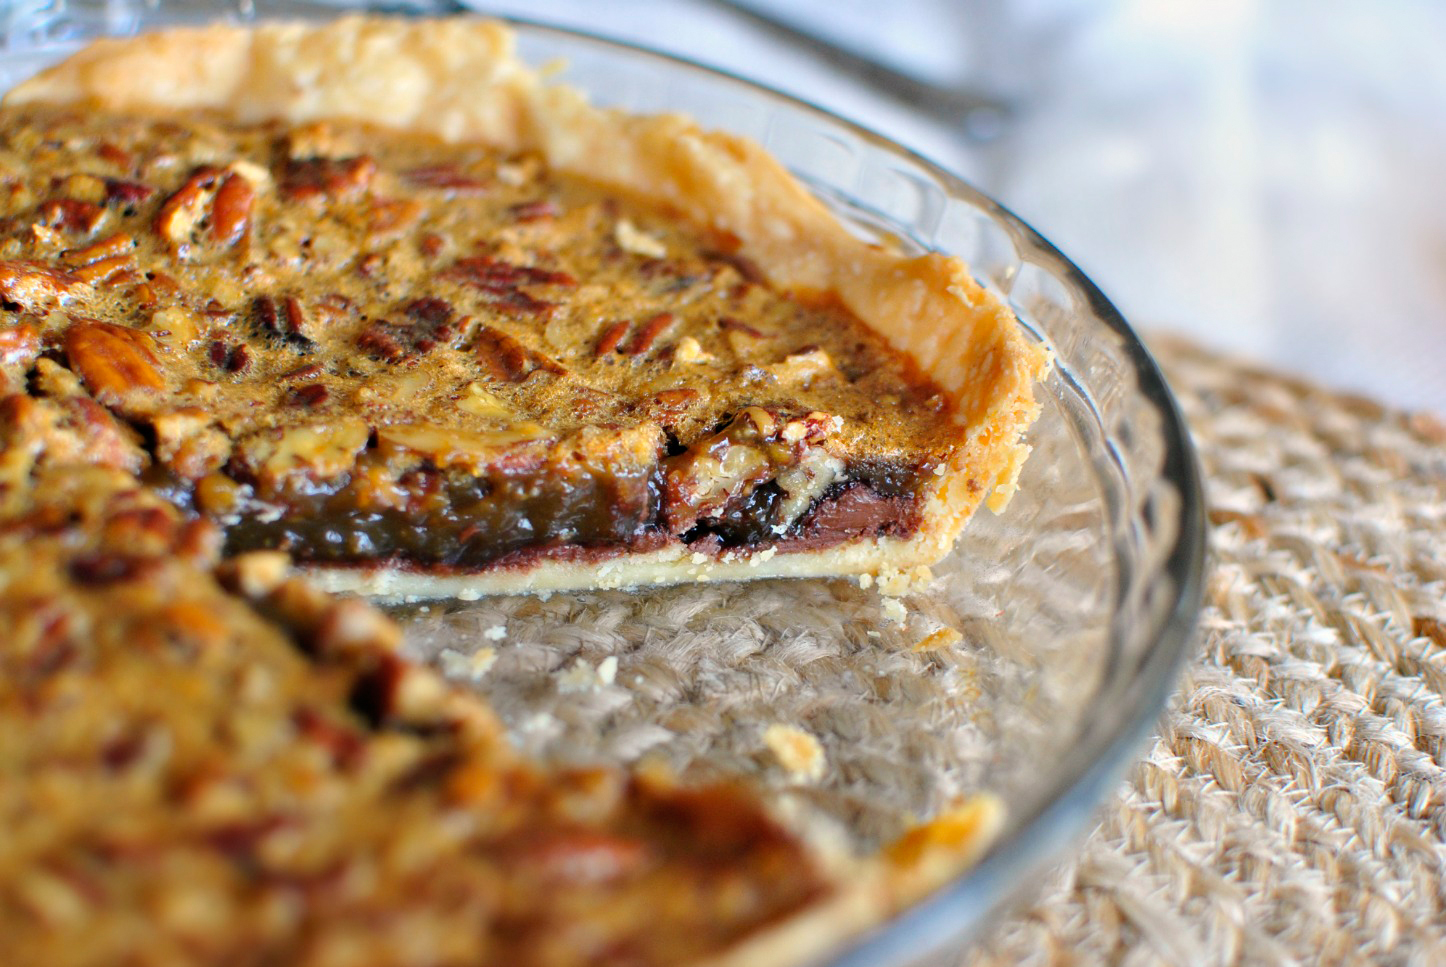
After the pie is finished baking, painstakingly wait for the pie to cool before slicing. (It’s hard to wait, I know.)


Tasty Kitchen Blog: Nutella Pecan Pie. Guest post by Laurie McNamara of Simply Scratch, recipe submitted by TK member Megan of Wanna Be A Country Cleaver.

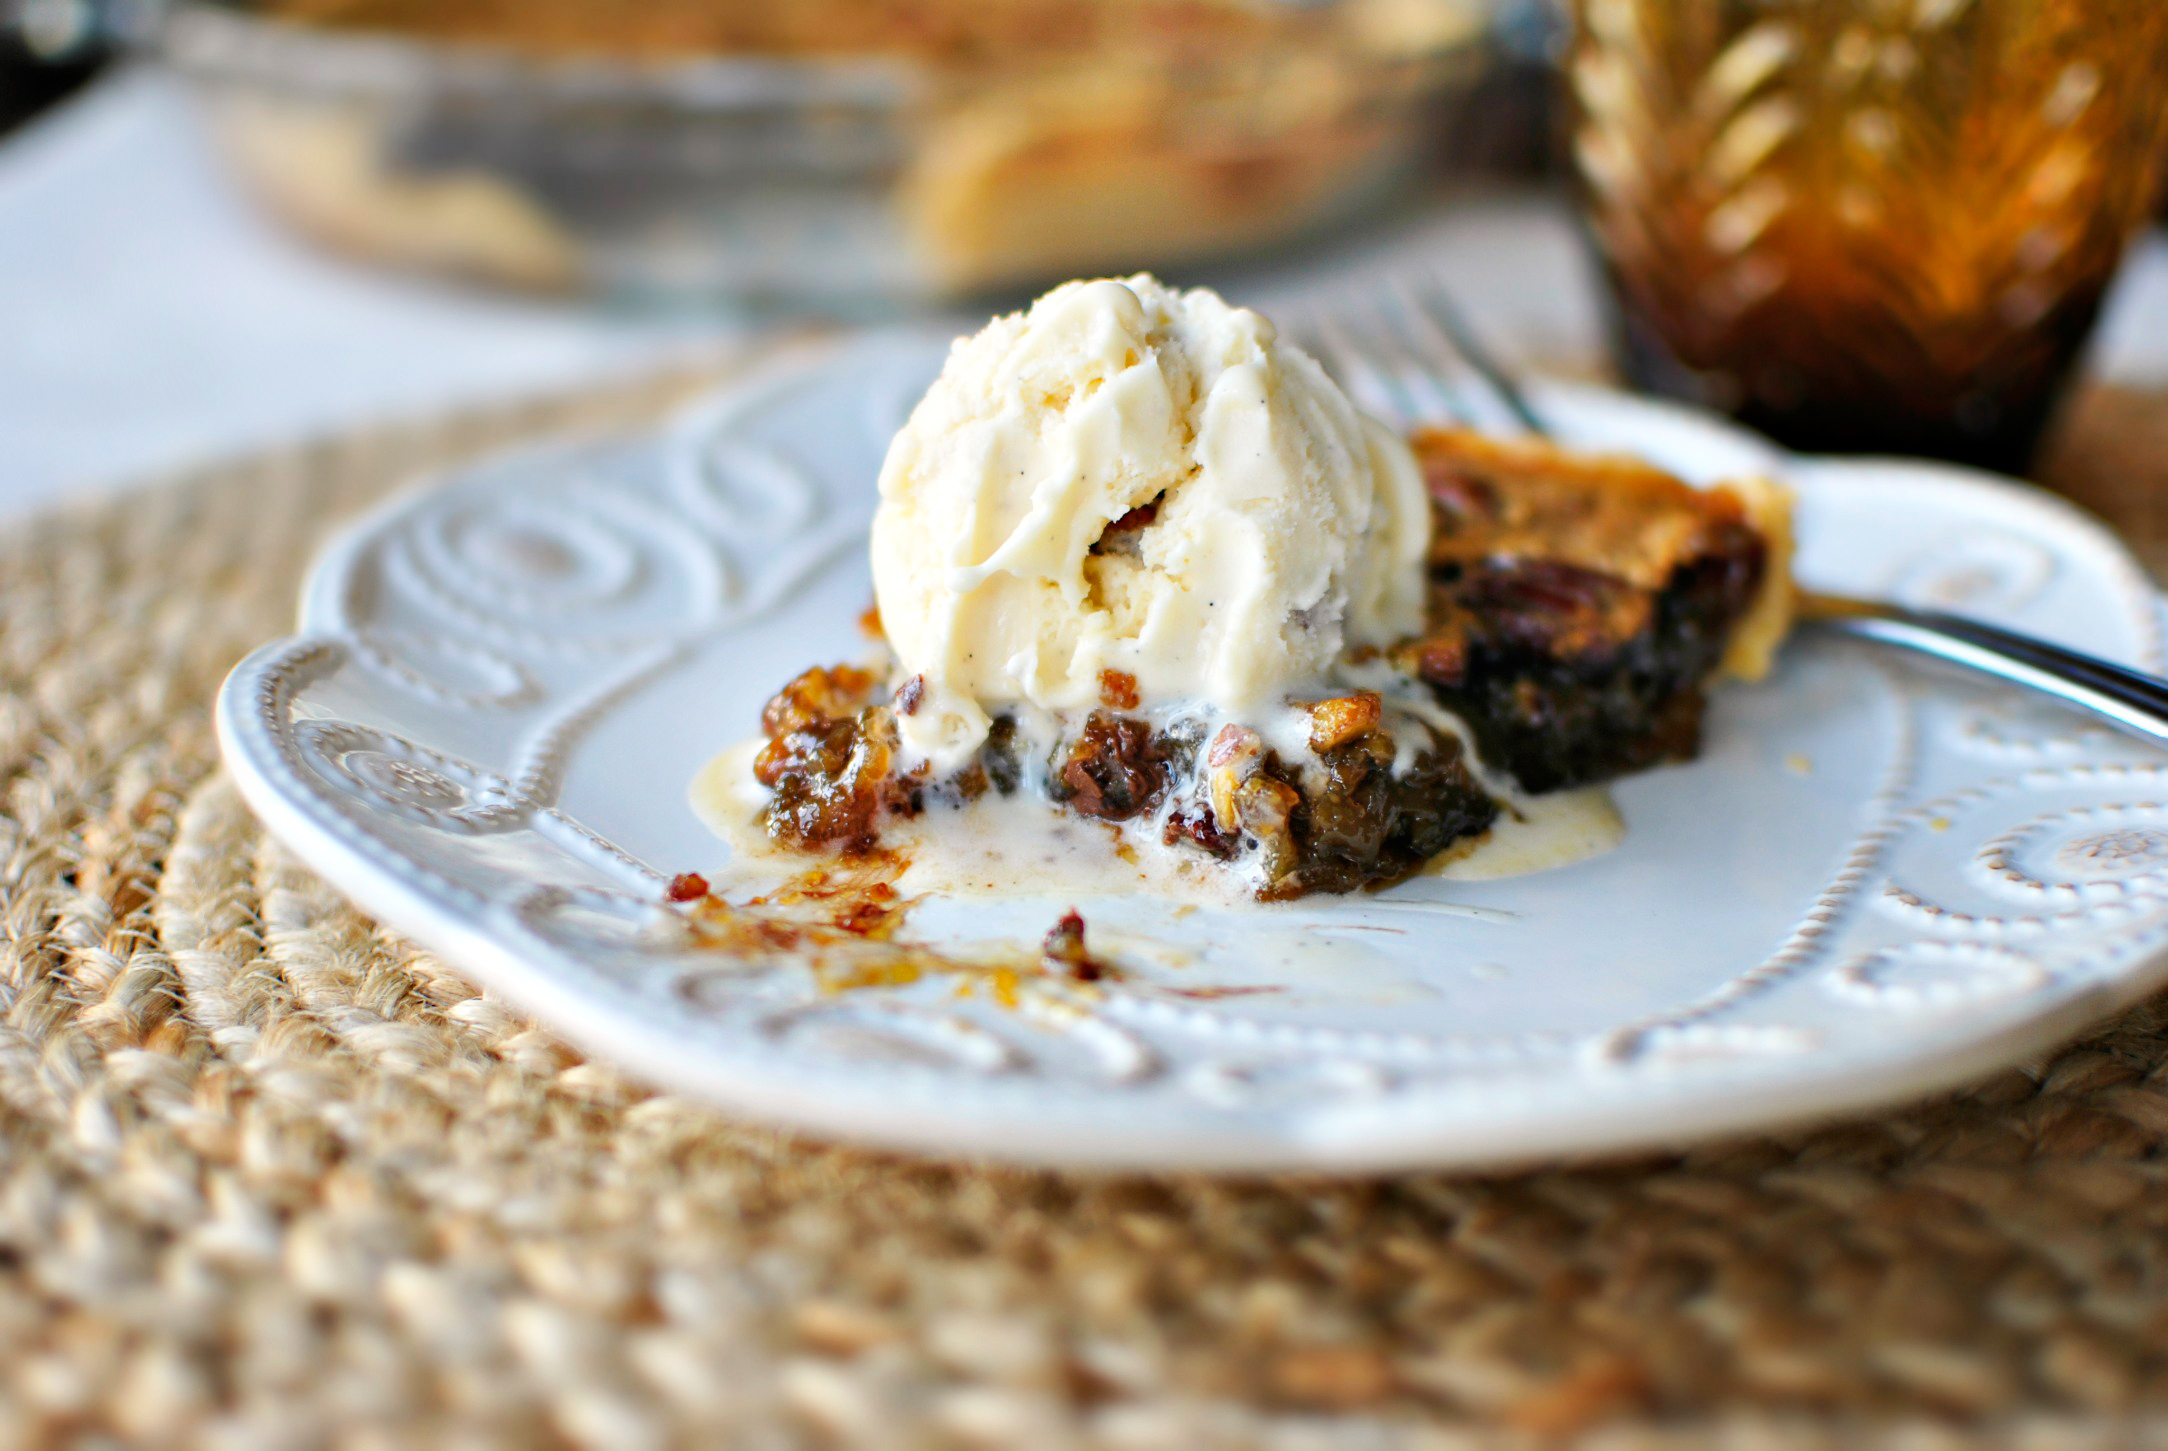
I had no qualms about serving myself a generous slice nor about topping it with a scoop of butter pecan ice cream. It was outrageously delicious.


Tasty Kitchen Blog: Nutella Pecan Pie. Guest post by Laurie McNamara of Simply Scratch, recipe submitted by TK member Megan of Wanna Be A Country Cleaver.

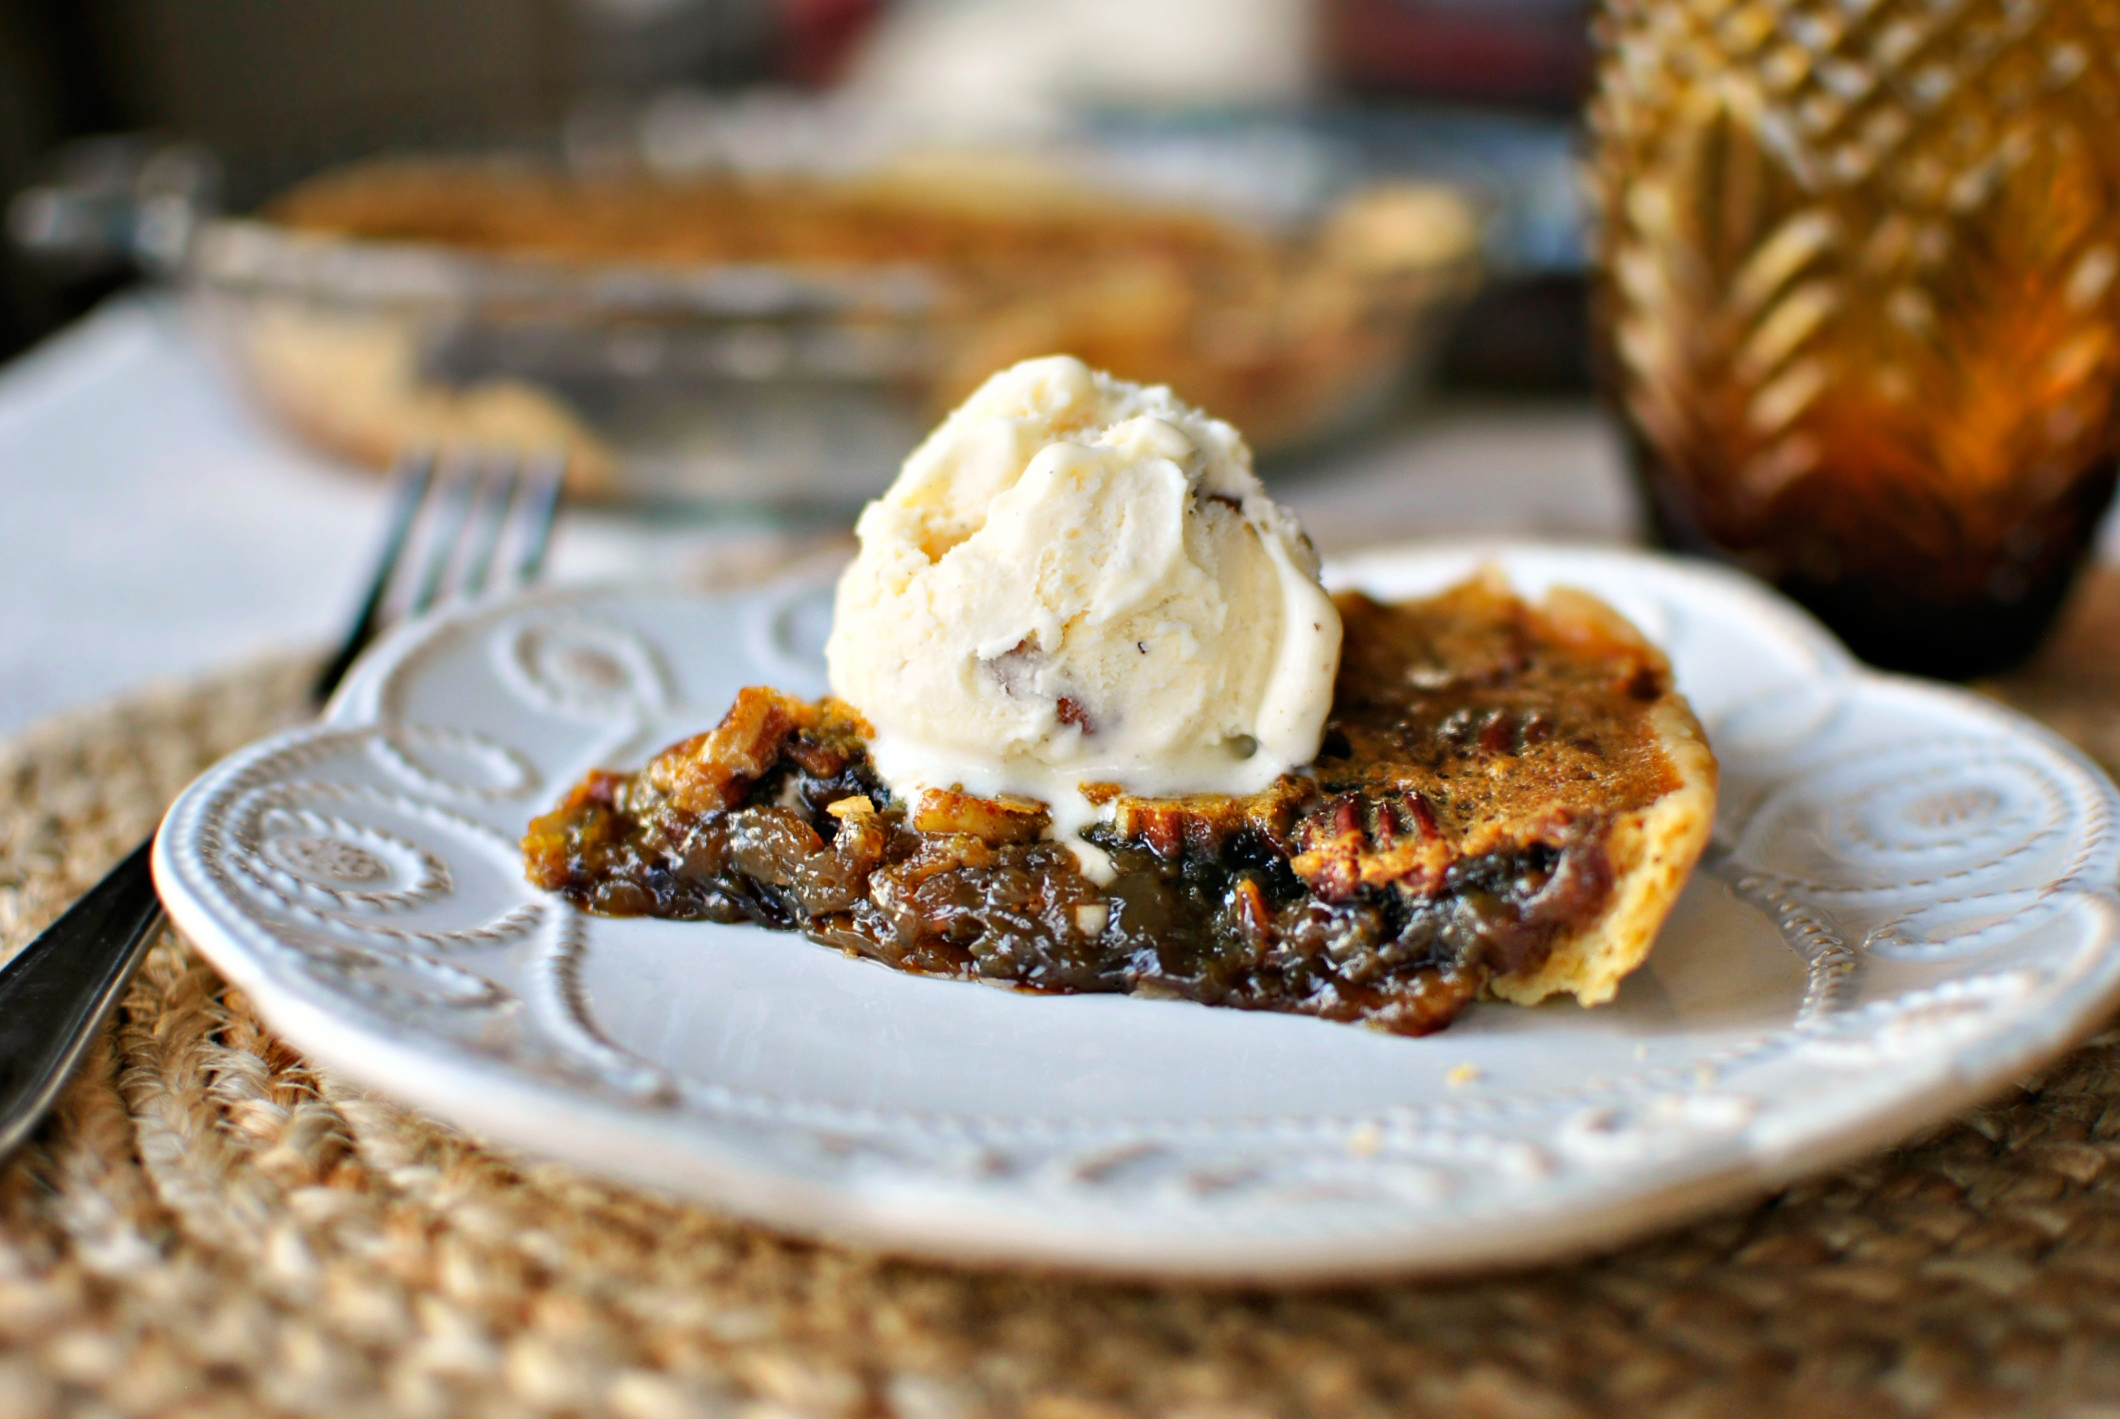
This pie is truly amazing. The pie filling tastes like a traditional pecan pie and then you taste the Nutella and it’s a sensory overload, but in a good way.


Tasty Kitchen Blog: Nutella Pecan Pie. Guest post by Laurie McNamara of Simply Scratch, recipe submitted by TK member Megan of Wanna Be A Country Cleaver.

Thanks to Megan, I have a new pie recipe in my pie rotation. And I can bet you guys will love this pie as well!

Please take the time to make Megan’s delicious Nutella Pecan Pie, and while you’re eating it, stop by her blog, Wanna Be A Country Cleaver, for more incredible recipes and a lot of great laughs. You also can find her recipes right here on Tasty Kitchen in her recipe box.

Thanks again for another great recipe, Megan!


Printable Recipe

Nutella Pecan Pie

See post on Megan {Country Cleaver}’s site!
4.50 Mitt(s) 2 Rating(s)2 votes, average: 4.50 out of 52 votes, average: 4.50 out of 52 votes, average: 4.50 out of 52 votes, average: 4.50 out of 52 votes, average: 4.50 out of 5

Prep Time:

Cook Time:

Difficulty: Intermediate

Servings: 10

10
x

Print Options

Page size Letter 3x5 4x6
Text Size Small Medium Large
Content Include description
Include prep time, etc.
Show image

Description

A chocolately and sinful twist on a classic!

Ingredients

  • FOR THE CRUST:
  • 1-½ cup All-purpose Flour
  • ½ teaspoons Salt
  • ¾ cups Butter, Cubed And Frozen
  • 4 Tablespoons Water, Cold
  • FOR THE FILLING:
  • 3 Tablespoons Butter
  • ¾ cups Brown Sugar
  • ½ teaspoons Salt
  • 2 whole Eggs
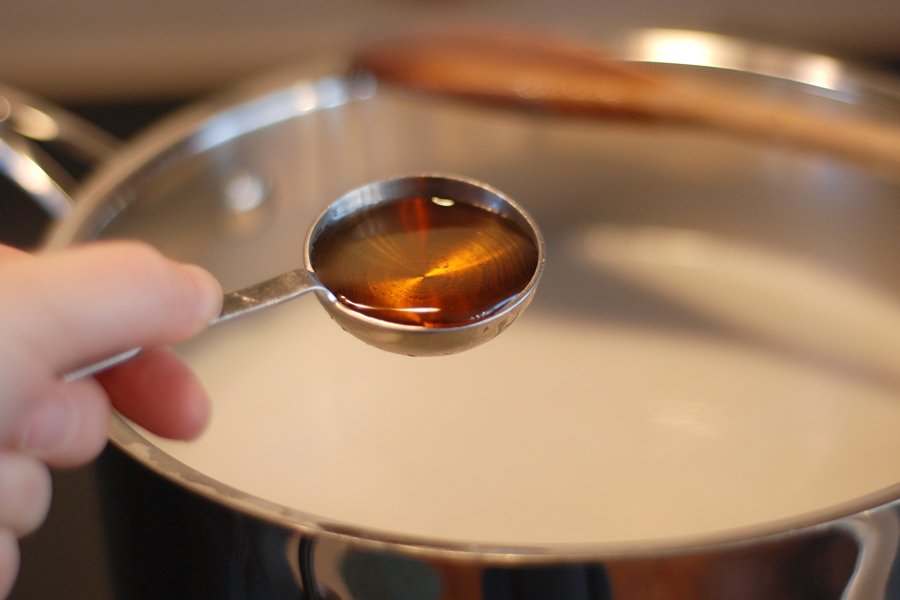
  • ½ cups Light Corn Syrup
  • 1 teaspoon Vanilla Extract
  • 1 cup Pecans, Chopped
  • ½ cups Chocolate Hazelnut Spread, Such As Nutella

Preparation Instructions

For the pie crust (recipe yields two 9-inch crusts):

In a food processor, pulse together salt and flour until combined. Add in butter and pulse until small beads form. On high, add in cold water until dough starts to ball. Wrap in plastic wrap and chill for 30 minutes before rolling out. Split the dough into two and wrap both halves in plastic wrap. Place one in the fridge to chill before rolling out and reserve the other one for a later date by freezing. Once the one in the fridge has chilled for a half hour, roll out on counter covered with flour large enough that it fits your pie pan. Place the dough into the pan.

For the pie:
Preheat oven to 375F.

With 1 pie crust in pie pan, chill the crust for 20 minutes. Then place a layer of foil into pan over crust and fill with pie weights. Bake for 25 minutes. This will help begin to cook the crust before the filling goes in.

After your pre-baking is done, remove the crust from the oven and turn oven temperature down to 275 degrees F. Make sure that the pie crust is kept warm by sitting it on top of your stove while you prepare the filling for the pie.

For the filling: Melt butter in a metal bowl set in a skillet of water that is just below a simmer (or use a double boiler). Remove the bowl and from the water when butter is melted, whisk in sugar and salt. Whisk in eggs, corn syrup and vanilla. Place bowl back into the water and whisk until hot and the temperature of the mixture registers 130 degrees F on an instant-read thermometer. Remove from the heat and whisk in pecan pieces.

Into the bottom of the pre-baked pie crust, smear the ½ cup of Nutella over the bottom evenly. Pour in the pecan mixture. Bake entire pie at 275F for 55 minutes. Cool on a wire rack for at least two hours or devour at room temperature.


_______________________________________

Laurie is the force behind Simply Scratch, a blog that documents her efforts to find and create recipes that are made simply from scratch. (We think it’s sweet that her mother-in-law helped her set up her blog and get started.) We love her recipes; they’re not just tried and true, but they look gorgeous as well. Check out her blog and you’ll become a fan too.


Profile photo of Erica Lea

Thai Coconut Rice

Posted by in Step-by-Step Recipes

Tasty Kitchen Blog: Thai Coconut Rice. Guest post and recipe from Erica Kastner of Cooking for Seven.

 
Soft, slightly sweet rice, infused with the flavor of coconut. The perfect accompaniment to any curry. It is also delicious all by itself, topped with a bit of crunchy toasted coconut. Add a bit of butter and cream, and you have a scrumptious dessert.

This recipe is hardly more difficult than cooking regular rice. It simply has a few more steps and ingredients:


Tasty Kitchen Blog: Thai Coconut Rice. Guest post and recipe from Erica Kastner of Cooking for Seven.

Here’s what you’ll need to make coconut rice: medium-grain rice, a can of coconut milk (Please use full fat. Thank you!), coconut oil, maple syrup (or sweetener of choice), Kosher salt, and large flaked coconut (optional but very good).


Tasty Kitchen Blog: Thai Coconut Rice. Guest post and recipe from Erica Kastner of Cooking for Seven.

Open the can of coconut milk and dump the contents into a measuring cup.


Tasty Kitchen Blog: Thai Coconut Rice. Guest post and recipe from Erica Kastner of Cooking for Seven.

Add enough water to make 4 cups total liquid.


Tasty Kitchen Blog: Thai Coconut Rice. Guest post and recipe from Erica Kastner of Cooking for Seven.

Melt the coconut oil over medium heat.


Tasty Kitchen Blog: Thai Coconut Rice. Guest post and recipe from Erica Kastner of Cooking for Seven.

Add 2 cups rice and cook, stirring occasionally, for about 2 minutes. This will give the rice some nice flavor.


Tasty Kitchen Blog: Thai Coconut Rice. Guest post and recipe from Erica Kastner of Cooking for Seven.

Add the coconut milk …


Tasty Kitchen Blog: Thai Coconut Rice. Guest post and recipe from Erica Kastner of Cooking for Seven.

Salt …


Tasty Kitchen Blog: Thai Coconut Rice. Guest post and recipe from Erica Kastner of Cooking for Seven.

And maple syrup or sweetener of choice. You could also add a bit of coconut flavoring if desired.


Tasty Kitchen Blog: Thai Coconut Rice. Guest post and recipe from Erica Kastner of Cooking for Seven.

Bring to a boil, reduce heat, and place the lid askew on the pot to allow some of the steam to escape. Please don’t mind the water spots on my lid. Thank you!


Tasty Kitchen Blog: Thai Coconut Rice. Guest post and recipe from Erica Kastner of Cooking for Seven.

Cook until the rice has absorbed all (or nearly all) of the coconut milk/water, about 15-20 minutes.


Tasty Kitchen Blog: Thai Coconut Rice. Guest post and recipe from Erica Kastner of Cooking for Seven.

Turn off the heat. Cover the pot tightly and allow to rest for about 5-10 minutes.


Tasty Kitchen Blog: Thai Coconut Rice. Guest post and recipe from Erica Kastner of Cooking for Seven.

When you’re ready to serve, fluff the rice with a fork.


Tasty Kitchen Blog: Thai Coconut Rice. Guest post and recipe from Erica Kastner of Cooking for Seven.

If desired, toast up a bit of coconut flakes.


Tasty Kitchen Blog: Thai Coconut Rice. Guest post and recipe from Erica Kastner of Cooking for Seven.

Serve the rice warm, topped with toasted coconut.


Tasty Kitchen Blog: Thai Coconut Rice. Guest post and recipe from Erica Kastner of Cooking for Seven.

This recipe turns an old curry standby into a special meal. It’s wonderful as a side dish for an Asian-themed meal as well. My sisters and I also enjoy it with a bit of extra maple syrup and butter as an after-dinner treat.


Printable Recipe

Thai Coconut Rice

See post on Erica Lea’s site!
5.00 Mitt(s) 2 Rating(s)2 votes, average: 5.00 out of 52 votes, average: 5.00 out of 52 votes, average: 5.00 out of 52 votes, average: 5.00 out of 52 votes, average: 5.00 out of 5

Prep Time:

Cook Time:

Difficulty: Easy

Servings: 6

6
x

Print Options

Page size Letter 3x5 4x6
Text Size Small Medium Large
Content Include description
Include prep time, etc.
Show image

Description

Coconut flavored rice, the perfect accompaniment to curry.

Ingredients

  • 2 cups Medium Grain Rice
  • 2 cups Regular Coconut Milk
  • 2 cups Water
  • ½ teaspoons Kosher Or Sea Salt
  • 1 Tablespoon Coconut Oil
  • 2 Tablespoons Maple Syrup, Sucanat, Brown Sugar, Or Sweetener Of Choice
  • ½ teaspoons Coconut Flavoring (optional)
  • 2 Tablespoons Tasted Coconut, Optional

Preparation Instructions

1. In a large, deep-sided pot, melt the coconut oil over medium heat. Add the rice and cook, stirring occasionally, for about 2 minutes.

2. Add the coconut milk, water, salt, sweetener, and flavoring if using. Stir well. Bring the rice to a boil, stirring occasionally to prevent the rice from burning.

3. When it comes to a boil, reduce the heat to medium-low. Place the lid askew on the pot, allowing some of the steam to escape. Cook for 15-20 minutes, or until the rice has absorbed all (or nearly all) of the coconut-water.

4. Turn off the heat. Cover the pot tightly with the lid and allow to rest for 5-10 minutes, or until you are ready to serve. When you are ready to serve, fluff the rice with a fork or chopsticks. Top with toasted coconut if desired.


_______________________________________

Erica Berge shares her wonderful recipes and amazing food photography on her blog, Cooking for Seven. She also writes about crafts and posts more of her beautiful photography in her personal blog, EricaLea.com. There really isn’t much that this amazing young lady can’t do, and we’re thrilled she does some of it here.


Profile photo of Erica Lea

No-Knead Dinner Rolls

Posted by in Baking, Step-by-Step Recipes

Tasty Kitchen Blog: No-Knead Dinner Rolls. Guest post by Erica Kastner, recipe submitted by TK member Terri of That's Some Good Cookin'.

 
Let’s face it. There’s just nothing like fresh, homemade bread. Sure, you can get some wonderful, artisan breads at local shops, but they can’t come close to magic of the smell and taste of home-baked bread pulled from the oven and spread with butter and jam (or honey).

But here’s the problem: With busy lives, especially around the holidays, there’s precious little time to spend agonizing over kneading and rise times. And so homemade bread is often neglected.

This recipe, brought to us by Terri, is about as low-fuss as yeast bread gets. All you have to do is mix everything in a large bowl, let it rise, form into buns, and bake once they’re puffy. Still skeptical about no-knead bread? Let me assure you, it is good. Like, really good: fluffy and flavorful and soft. Let me show you!


Tasty Kitchen Blog: No-Knead Dinner Rolls. Guest post by Erica Kastner, recipe submitted by TK member Terri of That's Some Good Cookin'.

To begin, grab the few ingredients you’ll need: yeast, sugar, oil (I used olive, but if you don’t like the flavor, you could use melted butter or vegetable oil), salt, flour (I used part white, part wheat), butter, and water.


Tasty Kitchen Blog: No-Knead Dinner Rolls. Guest post by Erica Kastner, recipe submitted by TK member Terri of That's Some Good Cookin'.

Pour some warm water into a large mixing bowl and sprinkle in the yeast and 1/4 teaspoon of sugar. You can gently stir it with a fork if you wish.


Tasty Kitchen Blog: No-Knead Dinner Rolls. Guest post by Erica Kastner, recipe submitted by TK member Terri of That's Some Good Cookin'.

Let the yeast “activate” in the water (about 5 minutes). Then add the flour …


Tasty Kitchen Blog: No-Knead Dinner Rolls. Guest post by Erica Kastner, recipe submitted by TK member Terri of That's Some Good Cookin'.

… wheat flour (if using), sugar, oil and salt.


Tasty Kitchen Blog: No-Knead Dinner Rolls. Guest post by Erica Kastner, recipe submitted by TK member Terri of That's Some Good Cookin'.

Stir it all together.


Tasty Kitchen Blog: No-Knead Dinner Rolls. Guest post by Erica Kastner, recipe submitted by TK member Terri of That's Some Good Cookin'.

If the dough is too wet, you can add more flour. The right texture is soft and sticky, but not soupy.


Tasty Kitchen Blog: No-Knead Dinner Rolls. Guest post by Erica Kastner, recipe submitted by TK member Terri of That's Some Good Cookin'.

See that? That’s how it should look. Don’t stir too much! After all, these are no-knead.


Tasty Kitchen Blog: No-Knead Dinner Rolls. Guest post by Erica Kastner, recipe submitted by TK member Terri of That's Some Good Cookin'.

Cover the dough and set aside to rise until doubled. This only took about and hour for me, but it all depends on how warm your house is.


Tasty Kitchen Blog: No-Knead Dinner Rolls. Guest post by Erica Kastner, recipe submitted by TK member Terri of That's Some Good Cookin'.

Now, give that dough a punch!


Tasty Kitchen Blog: No-Knead Dinner Rolls. Guest post by Erica Kastner, recipe submitted by TK member Terri of That's Some Good Cookin'.

Ahhh … melted butter. 


Tasty Kitchen Blog: No-Knead Dinner Rolls. Guest post by Erica Kastner, recipe submitted by TK member Terri of That's Some Good Cookin'.

Pour a little onto a rimmed baking sheet.


Tasty Kitchen Blog: No-Knead Dinner Rolls. Guest post by Erica Kastner, recipe submitted by TK member Terri of That's Some Good Cookin'.

Get your hands in it and smear it around.


Tasty Kitchen Blog: No-Knead Dinner Rolls. Guest post by Erica Kastner, recipe submitted by TK member Terri of That's Some Good Cookin'.

Now it’s time to make a mess! Sprinkle your work surface generously with flour.


Tasty Kitchen Blog: No-Knead Dinner Rolls. Guest post by Erica Kastner, recipe submitted by TK member Terri of That's Some Good Cookin'.

Scoop your risen dough out onto your counter/table and sprinkle with some more flour.


Tasty Kitchen Blog: No-Knead Dinner Rolls. Guest post by Erica Kastner, recipe submitted by TK member Terri of That's Some Good Cookin'.

Roll the dough out to about a 1/2-inch thickness.


Tasty Kitchen Blog: No-Knead Dinner Rolls. Guest post by Erica Kastner, recipe submitted by TK member Terri of That's Some Good Cookin'.

Take a round cookie/biscuit cutter and stamp out circles of dough. You could get your circles closer together than mine.


Tasty Kitchen Blog: No-Knead Dinner Rolls. Guest post by Erica Kastner, recipe submitted by TK member Terri of That's Some Good Cookin'.

Grab a circle of dough …


Tasty Kitchen Blog: No-Knead Dinner Rolls. Guest post by Erica Kastner, recipe submitted by TK member Terri of That's Some Good Cookin'.

And stretch it out a bit.


Tasty Kitchen Blog: No-Knead Dinner Rolls. Guest post by Erica Kastner, recipe submitted by TK member Terri of That's Some Good Cookin'.

Dunk half of it into the melted butter …


Tasty Kitchen Blog: No-Knead Dinner Rolls. Guest post by Erica Kastner, recipe submitted by TK member Terri of That's Some Good Cookin'.

And fold it in half with the butter side up. Now you have a lovely little Parker House roll.


Tasty Kitchen Blog: No-Knead Dinner Rolls. Guest post by Erica Kastner, recipe submitted by TK member Terri of That's Some Good Cookin'.

Place on your buttered baking sheet (buttered side up). Repeat with remaining dough, placing the buns close together.


Tasty Kitchen Blog: No-Knead Dinner Rolls. Guest post by Erica Kastner, recipe submitted by TK member Terri of That's Some Good Cookin'.

Gather up your scraps and go again!


Tasty Kitchen Blog: No-Knead Dinner Rolls. Guest post by Erica Kastner, recipe submitted by TK member Terri of That's Some Good Cookin'.

Cover the buns and let rise until nice and puffy. Aren’t they beautiful?


Tasty Kitchen Blog: No-Knead Dinner Rolls. Guest post by Erica Kastner, recipe submitted by TK member Terri of That's Some Good Cookin'.

Bake at 375°F until lovely and golden brown. You can brush the tops of the buns with extra butter, if you wish.


Tasty Kitchen Blog: No-Knead Dinner Rolls. Guest post by Erica Kastner, recipe submitted by TK member Terri of That's Some Good Cookin'.

Just look at how pillowy soft they are!


Tasty Kitchen Blog: No-Knead Dinner Rolls. Guest post by Erica Kastner, recipe submitted by TK member Terri of That's Some Good Cookin'.

Recipe notes:

1. This dough can be refrigerated for up to a week. You can mix up a big batch and just pull off pieces of dough and bake them for fresh bread throughout the week!
2. You don’t have to make Parker House rolls from the dough. Terri suggests cinnamon rolls, pull-aparts and breadsticks.
3. These rolls reheat very well. Just pop them in a 350°F oven for 10 minutes.


Tasty Kitchen Blog: No-Knead Dinner Rolls. Guest post by Erica Kastner, recipe submitted by TK member Terri of That's Some Good Cookin'.

Thanks so much to Terri for sharing these buttery rolls with us. She blogs over at That’s Some Good Cookin’, where she posts many more lip-smackin’ recipes.


Printable Recipe

No Knead Dinner Rolls

See post on Terri @ that's some good cookin'’s site!
4.00 Mitt(s) 7 Rating(s)7 votes, average: 4.00 out of 57 votes, average: 4.00 out of 57 votes, average: 4.00 out of 57 votes, average: 4.00 out of 57 votes, average: 4.00 out of 5

Prep Time:

Cook Time:

Difficulty: Easy

Servings: 24

24
x

Print Options

Page size Letter 3x5 4x6
Text Size Small Medium Large
Content Include description
Include prep time, etc.
Show image

Description

I have no idea why these easy rolls work so well time after delicious time.

Ingredients

  • 3 cups Warm Water
  • 2 Tablespoons Yeast
  • ½ cups Sugar
  • ½ cups Vegetable Oil (canola Works Best)
  • 2 teaspoons Salt
  • 6 cups To 7 Cups White Flour
  • 1 stick Butter

Preparation Instructions

In a large mixing bowl dissolve yeast in warm water with 1/4 teaspoon sugar.

When the yeast has activated, add all other ingredients (except butter) and stir well with a wooden spoon until all ingredients are incorporated. Avoid over mixing and do not knead the dough. Just stir it. The dough is soft and will be somewhat sticky, not drier like other roll doughs that you may be used to using.

Cover bowl and let dough rise until doubled in bulk. Punch dough down and let it rest for a few minutes.

Melt the butter in a small bowl. Prepare a baking pan by greasing the pan with some of the melted butter.

To shape a Parker House style roll, divide the dough in half and roll out one half of the dough on a well floured counter top until about 1/2-inch thick. Using a round biscuit cutter, cut out circles of dough. Stretch the dough just a little lengthwise and dip one half into melted butter. Fold dough over in half and place on the pan. Place the rolls close to each other in rows. Repeat with remaining half of dough. Work the left-over dough from the two dough halves together to finish making your rolls. You should be able to get 32 rolls on a large baking sheet (4 rolls across and 8 rolls down).

Cover rolls and let rise again until almost doubled in size. Bake at 375ºF for 20 minutes or until the rolls are golden brown. Brush hot rolls with additional butter if desired.

Note: This dough can be kept in the refrigerator for at least a week and the dough just pulled off as you wish to use it to make cinnamon rolls, scones, pull-aparts, hot rolls or bread sticks during the week.


_______________________________________

Newly-married Erica Kastner shares her wonderful recipes and amazing food photography on her blog, Cooking for Seven. She also writes about crafts and posts more of her beautiful photography in her personal blog, EricaLea.com. There really isn’t much that this amazing young lady can’t do, and we’re thrilled she does some of it here.


Profile photo of Erica Lea

Homemade Eggnog

Posted by in Holidays, Step-by-Step Recipes

Tasty Kitchen Blog: Homemade Eggnog. Guest post and recipe submitted by Erica Kastner of Cooking for Seven.

 
To me, eggnog is the iconic Christmas drink. When we were little, around Christmastime, Mom would carefully pour out mini glasses of the thick, wonderfully flavored beverage and cut it with a bit of milk. We savored what little we got from the small carton.

Now that I’ve learned to make it at home, I can enjoy it in much larger quantities. Which is a good thing, right? Right?!

“I would ask you to make eggnog more often, but then we would get fat,” Reuben informed me.

Let me show you how to make this scrumptious drink for yourself!


Tasty Kitchen Blog: Homemade Eggnog. Guest post and recipe submitted by Erica Kastner of Cooking for Seven.

Here are the ingredients you’ll need: eggs (of course), sweetener of choice, salt, whole milk, vanilla extract, freshly grated nutmeg and heavy whipping cream.

Note: I made a half batch since it’s only the two of us.


Tasty Kitchen Blog: Homemade Eggnog. Guest post and recipe submitted by Erica Kastner of Cooking for Seven.

Crack your eggs into a pot.


Tasty Kitchen Blog: Homemade Eggnog. Guest post and recipe submitted by Erica Kastner of Cooking for Seven.

Add the sugar …


Tasty Kitchen Blog: Homemade Eggnog. Guest post and recipe submitted by Erica Kastner of Cooking for Seven.

And salt …


Tasty Kitchen Blog: Homemade Eggnog. Guest post and recipe submitted by Erica Kastner of Cooking for Seven.

And whisk it all up.


Tasty Kitchen Blog: Homemade Eggnog. Guest post and recipe submitted by Erica Kastner of Cooking for Seven.

Sloooowly whisk in half of the milk.


Tasty Kitchen Blog: Homemade Eggnog. Guest post and recipe submitted by Erica Kastner of Cooking for Seven.

I switched to a smaller pan so it’d be easier to stir.

Cook over low heat, stirring constantly, until the mixture coats the back of a wooden spoon, about 25 minutes.


Tasty Kitchen Blog: Homemade Eggnog. Guest post and recipe submitted by Erica Kastner of Cooking for Seven.

Now’s a good time to listen to music, flip through a favorite magazine, or fiddle with your smart device.


Tasty Kitchen Blog: Homemade Eggnog. Guest post and recipe submitted by Erica Kastner of Cooking for Seven.

You can also check to see if the eggnog is finished cooking with an instant-read thermometer. It should be between 170 and 175° F. Do NOT boil.


Tasty Kitchen Blog: Homemade Eggnog. Guest post and recipe submitted by Erica Kastner of Cooking for Seven.

Once it’s finished cooking, pour the eggnog into a heat-proof bowl through a fine-mesh strainer.


Tasty Kitchen Blog: Homemade Eggnog. Guest post and recipe submitted by Erica Kastner of Cooking for Seven.

See all the thumpies the strainer saved me from?


Tasty Kitchen Blog: Homemade Eggnog. Guest post and recipe submitted by Erica Kastner of Cooking for Seven.

Whisk in the vanilla extract …


Tasty Kitchen Blog: Homemade Eggnog. Guest post and recipe submitted by Erica Kastner of Cooking for Seven.

Freshly grated nutmeg (I’ll forgive you if you don’t use fresh) …


Tasty Kitchen Blog: Homemade Eggnog. Guest post and recipe submitted by Erica Kastner of Cooking for Seven.

And the remaining milk. Cover and let chill in the refrigerator until completely cool, about 3 hours.


Tasty Kitchen Blog: Homemade Eggnog. Guest post and recipe submitted by Erica Kastner of Cooking for Seven.

Just before serving, beat the cream until soft peaks form. Beautiful, soft cream …


Tasty Kitchen Blog: Homemade Eggnog. Guest post and recipe submitted by Erica Kastner of Cooking for Seven.

Gently fold the whipped cream into the eggnog with a wire whisk.


Tasty Kitchen Blog: Homemade Eggnog. Guest post and recipe submitted by Erica Kastner of Cooking for Seven.

Serve with extra whipped cream, if desired, and a sprinkling of freshly grated nutmeg.


Tasty Kitchen Blog: Homemade Eggnog. Guest post and recipe submitted by Erica Kastner of Cooking for Seven.

Recipe notes:

1. You can use whatever sweetener (within reason) you like to sweeten this drink. I have used maple syrup, granulated sugar and evaporated cane juice with good success.
2. If you like the flavor of rum in your eggnog, you can add a bit of rum extract (or real rum, if you don’t mind the alcohol).
3. I highly recommend using an instant read thermometer to gauge when your eggnog is done cooking. Just make sure you have it set to Fahrenheit—I once made scrambled eggnog because I accidentally switched the thermometer to Celsius.


Tasty Kitchen Blog: Homemade Eggnog. Guest post and recipe submitted by Erica Kastner of Cooking for Seven.


Printable Recipe

Homemade Eggnog

See post on Erica Lea’s site!
5.00 Mitt(s) 4 Rating(s)4 votes, average: 5.00 out of 54 votes, average: 5.00 out of 54 votes, average: 5.00 out of 54 votes, average: 5.00 out of 54 votes, average: 5.00 out of 5

Prep Time:

Cook Time:

Difficulty: Intermediate

Servings: 32

32
x

Print Options

Page size Letter 3x5 4x6
Text Size Small Medium Large
Content Include description
Include prep time, etc.
Show image

Description

An easy recipe for eggnog that does not include alcohol or uncooked eggs.

Ingredients

  • 12 whole Large Eggs
  • 1-½ cup Maple Syrup (or Granulated Sugar)
  • ½ teaspoons Salt
  • 2 quarts (8 Cups) Whole Milk
  • 2 Tablespoons Vanilla Extract
  • 1 teaspoon Freshly Grated Nutmeg + More For Garnish
  • 2 cups Heavy Whipping Cream + More For Garnish

Preparation Instructions

1) In a heavy 4 quart saucepan, with the heat off, whisk the eggs, maple syrup, and salt until well blended. Gradually stir in half of the milk.

2) Cook over low heat, stirring constantly, until mixture thickens and coats the back of a spoon, about 25 minutes. (Mixture should be about 170 – 175 degrees F). Do not boil.

3) Pour custard into a large bowl. Stir in vanilla extract, 1 teaspoon of ground nutmeg and the remaining milk. Cover and refrigerate until well chilled, about 3 hours.

4) Just before serving, in a medium bowl, beat whipping cream until soft peaks form. With wire whisk, gently fold whipped cream into custard mixture. Serve with extra whipped cream on top and a sprinkle of freshly grated nutmeg.

Store in the refrigerator up to 3 days.


_______________________________________

Newly-married Erica Kastner shares her wonderful recipes and amazing food photography on her blog, Cooking for Seven. She also writes about crafts and posts more of her beautiful photography in her personal blog, EricaLea.com. There really isn’t much that this amazing young lady can’t do, and we’re thrilled she does some of it here.


Profile photo of Laurie - Simply Scratch

Eggnog Pancakes

Posted by in Step-by-Step Recipes

What made me fall head first in love with TK member Kita’s recipe for Eggnog Pancakes was that not only did she spike her pancakes with eggnog, but she also spiked the maple syrup with eggnog! So if…

Profile photo of HowSweetEats

Cannoli Tart

Posted by in Baking, Step-by-Step Recipes

Oh my goodness. You know when you have one of those desserts that completely knocks your socks off? This is it. And it’s simple, too. It’s like the new Holy Grail of treats! After seeing this Cannoli Tart from The Seaside…

Profile photo of Ree | The Pioneer Woman

That’s the Best Frosting I’ve Ever Had

Posted by in Baking, Step-by-Step Recipes

I’ve been intrigued with this frosting recipe for months, not just because of its alluring title, but also because if its ingredients. Five tablespoons of flour? In frosting? Let’s just say my interest was piqued. I finally got around to making it yesterday evening; Marlboro Man’s grandmother has some old friends staying at The Lodge […]

Profile photo of missamy

Honey Caramel Sauce

Posted by in Step-by-Step Recipes

  Lately I’ve been doing a little reading about honey. It truly is an amazing food, straight from the hive, with no added ingredients or preservatives. There’s a slew of possible health benefits from eating honey, but I just enjoy the taste, one that you just can’t find with other sweeteners. And depending on the […]