The Pioneer Woman Tasty Kitchen
Profile photo of Megan {Country Cleaver}

Bourbon and Biscoff Milkshakes

Posted by in Step-by-Step Recipes

We’re so thrilled to welcome Megan, also known as Country Cleaver—the mastermind behind many scrumptious recipes seen on Tasty Kitchen. She’s as talented as she is sweet and charming. Megan starts our week off with this simple yet deadly treat from Tasty Kitchen member Erika of Southern Souffle. Welcome, Megan and thank you for the recipe, Erika!

 
Tasty Kitchen Blog: Biscoff and Bourbon Milkshake. Guest post by Megan Keno of Country Cleaver, recipe submitted by TK member Erika of Southern Souffle.

Chilly days always leave me wanting ice cream. Weird, I know. And there isn’t a time that I don’t crave Biscoff, so when I spotted this recipe for Biscoff & Bourbon Milkshakes from Tasty Kitchen member Erika of Southern Souffle, I knew I had to have it at once! This milkshake is divine, it’s spicy like a molasses cookie, and will warm you up from the inside out with a stiff pour of bourbon. Try this out immediately!


Tasty Kitchen Blog: Biscoff and Bourbon Milkshake. Guest post by Megan Keno of Country Cleaver, recipe submitted by TK member Erika of Southern Souffle.

The only bourbon I had on hand when I made these was a bottle of Maple Crown Royal. The husband didn’t want me using his bottle of “the good stuff” for a milkshake but this was by far the best substitution I could have ever asked for! The maple flavor complemented the Biscoff perfectly.


Tasty Kitchen Blog: Biscoff and Bourbon Milkshake. Guest post by Megan Keno of Country Cleaver, recipe submitted by TK member Erika of Southern Souffle.

Into the blender, combine pour in the milk and bourbon. If you like thicker milkshakes, use less milk.


Tasty Kitchen Blog: Biscoff and Bourbon Milkshake. Guest post by Megan Keno of Country Cleaver, recipe submitted by TK member Erika of Southern Souffle.

Don’t forget to add in your Biscoff spread! I used creamy Biscoff spread for this recipe but the crunchy version would be fun, too.


Tasty Kitchen Blog: Biscoff and Bourbon Milkshake. Guest post by Megan Keno of Country Cleaver, recipe submitted by TK member Erika of Southern Souffle.

Next, add in the vanilla ice cream. Add a lid and blend until the mixture is smooth.


Tasty Kitchen Blog: Biscoff and Bourbon Milkshake. Guest post by Megan Keno of Country Cleaver, recipe submitted by TK member Erika of Southern Souffle.

Pour into two glasses and top with whipped cream. Naturally. Sip slowly as these are potent! And if a boozy milkshake isn’t up your alley, feel free to omit it.

Be sure to check out Erika’s Tasty Kitchen recipe box and her site Southern Souffle for more Southern soul food inspiration.


Printable Recipe

Biscoff & Bourbon Milkshake

See post on Erika @ Southern Souffle’s site!
0.00 Mitt(s) 0 Rating(s)0 votes, average: 0.00 out of 50 votes, average: 0.00 out of 50 votes, average: 0.00 out of 50 votes, average: 0.00 out of 50 votes, average: 0.00 out of 5

Prep Time:

Cook Time:

Difficulty: Easy

Servings: 2

2
x

Print Options

Page size Letter 3x5 4x6
Text Size Small Medium Large
Content Include description
Include prep time, etc.
Show image

Description

Biscoff & Bourbon Milkshake.

Ingredients

  • 1 cup Whole Milk
  • ⅓ cups Biscoff Spread
  • 1 cup Bourbon
  • 4  Large Scoops Of Vanilla Ice Cream

Preparation Instructions

Using a blender, mix all ingredients together until well blended and smooth. This made two 8-ounce milkshakes. Garnish with homemade whipping cream (or Reddi-whip, which is much easier if you have been drinking these as you made them, like I did).

Optional: Crush up some Biscoff cookies and sprinkle on the top.


_______________________________________

Megan Keno is the writer and photographer of Country Cleaver, a food blog fueled by Nutella and images of June Cleaver—if June wore cowboy boots and flannel, that is. A self-proclaimed country bum, Megan creates from-scratch recipes that range from simple to sublime and how-to’s to build your cooking repertoire. But she couldn’t do it without the help of her trusty—and furry—sous chef, Huckleberry. He’s a world class floor cleaner.


Profile photo of callimakesdo

Bow Tie Pasta with Oven Dried Tomatoes

Posted by in Step-by-Step Recipes

Tasty Kitchen Blog: Bowtie Pasta with Oven Dried Tomatoes Asparagus and Boursin. Guest post by Calli Taylor of Make It Do, recipe submitted by TK member Dorothy of Belle of the Kitchen.

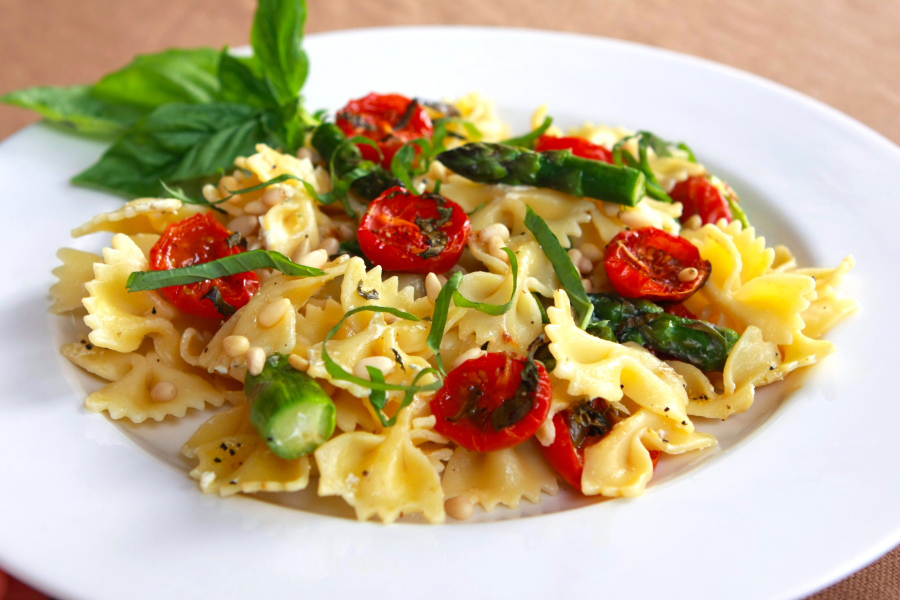
Ask my nine-year-old daughter what she wants for dinner and nine times out of ten the answer will be, “Bow Tie Pasta.” What can I say, she is a very reliable girl.

As a mom, I find myself cooking foods that appeal to my husband and me, and I don’t cater to the kids a whole lot. I hope that doesn’t make me a bad parent. Luckily, my kids are pretty good eaters (maybe from necessity). But that doesn’t mean I don’t look out for the foods I know they love, especially when it’s something we all can agree is delicious.

Because of my daughter’s little obsession, I usually check out Bow Tie Pasta recipes when they catch my eye. When I saw the recipe for Bow Tie Pasta with Oven Dried Tomatoes, Asparagus, and Boursin from Tasty Kitchen member barefootbelle, I knew I had to give it a try.

Asparagus, oven dried tomatoes, pine nuts and Boursin … hold the phone, did you it just say Boursin?


Tasty Kitchen Blog: Bowtie Pasta with Oven Dried Tomatoes Asparagus and Boursin. Guest post by Calli Taylor of Make It Do, recipe submitted by TK member Dorothy of Belle of the Kitchen.

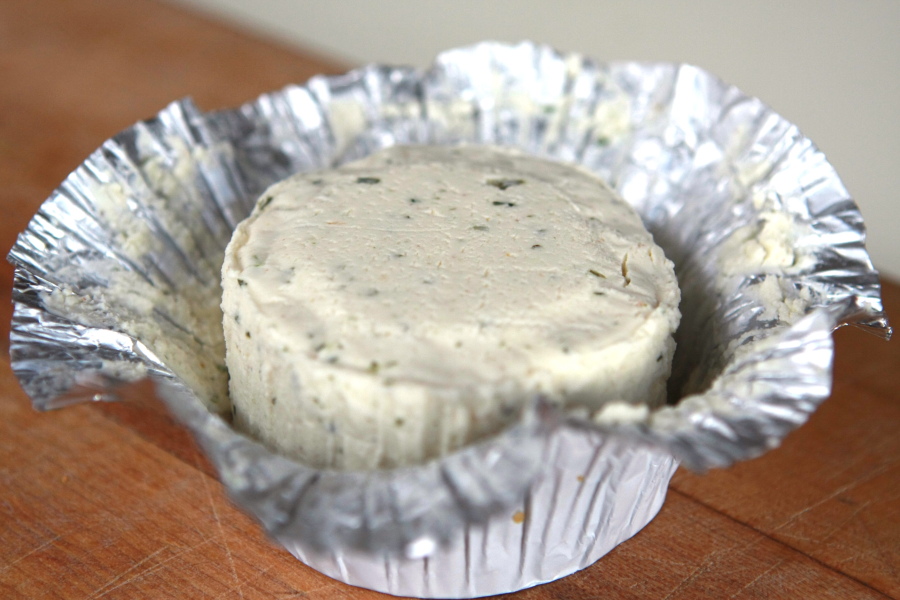
Oh me, oh my. How I love Boursin.

“Yes sweetie, I’d be happy to make Bow Tie Pasta for dinner tonight.”

This is an easy recipe, but not one you can throw together at the last minute. The oven dried tomatoes take 3 1/2 hours. So you’ll need to plan ahead. Despite the time involved, it’s the oven dried tomatoes that totally stole the show for me. They have such a lovely sweetness and concentration of flavors.

Here’s how I made barefootbelle’s lovely Bow Tie Pasta:


Tasty Kitchen Blog: Bowtie Pasta with Oven Dried Tomatoes Asparagus and Boursin. Guest post by Calli Taylor of Make It Do, recipe submitted by TK member Dorothy of Belle of the Kitchen.

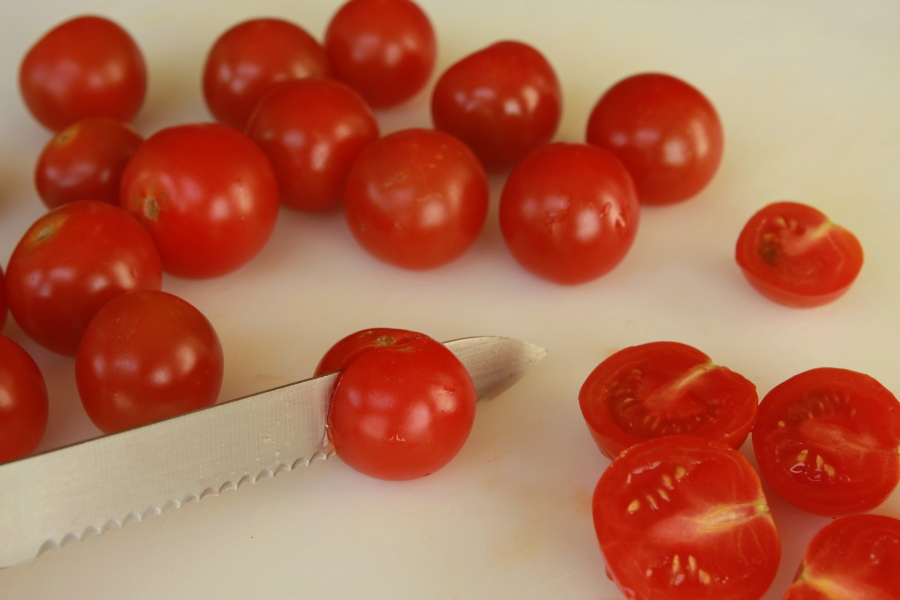
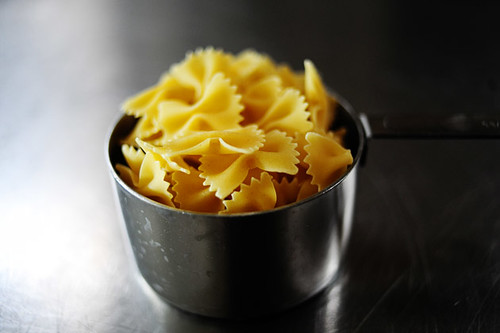
Start with cherry tomatoes. I think grape tomatoes would be delicious, too. Do yourself favor and make more than the recipe calls for. They are so yummy you’ll want some for a crostini or for crackers with cheese (Boursin anyone?), or even eaten straight off the pan.


Tasty Kitchen Blog: Bowtie Pasta with Oven Dried Tomatoes Asparagus and Boursin. Guest post by Calli Taylor of Make It Do, recipe submitted by TK member Dorothy of Belle of the Kitchen.

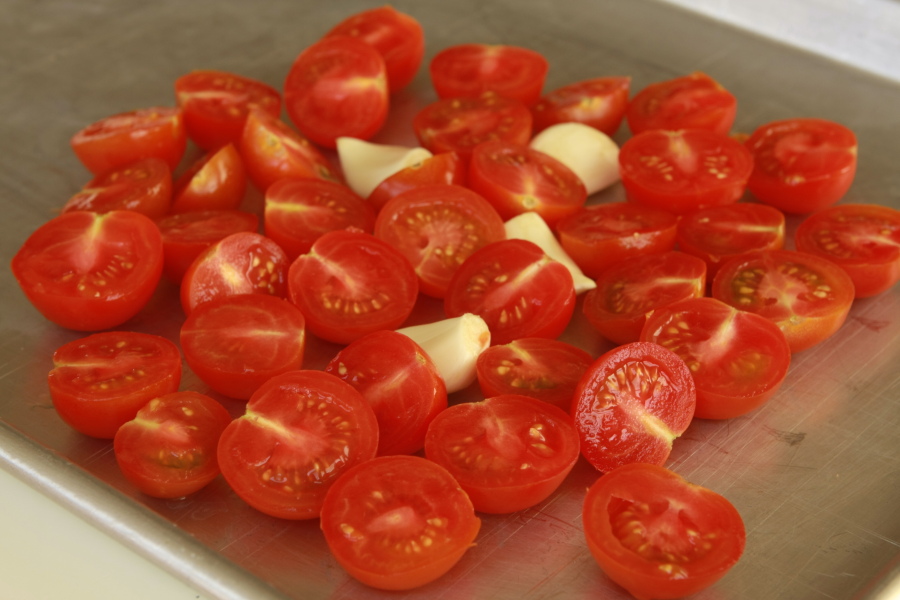
Halve the tomatoes and place them on your baking sheet facing up and tuck in the whole cloves of garlic. They slow cook until their flavor is mild, creamy and delicious.

Drizzle them with oil, pepper, a pinch of salt, and a pinch of sugar.


Tasty Kitchen Blog: Bowtie Pasta with Oven Dried Tomatoes Asparagus and Boursin. Guest post by Calli Taylor of Make It Do, recipe submitted by TK member Dorothy of Belle of the Kitchen.

Sprinkle on some fresh chopped basil.

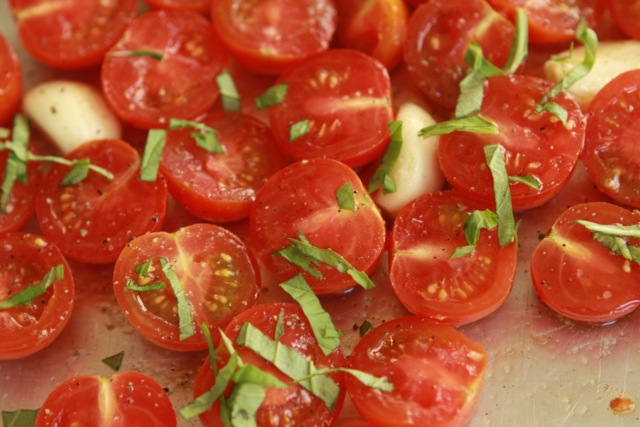
Throw the whole thing in the oven for 3 1/2 hours. It’s a long time, but there is an upside: your kitchen will smell like a great Italian restaurant all afternoon.


Tasty Kitchen Blog: Bowtie Pasta with Oven Dried Tomatoes Asparagus and Boursin. Guest post by Calli Taylor of Make It Do, recipe submitted by TK member Dorothy of Belle of the Kitchen.

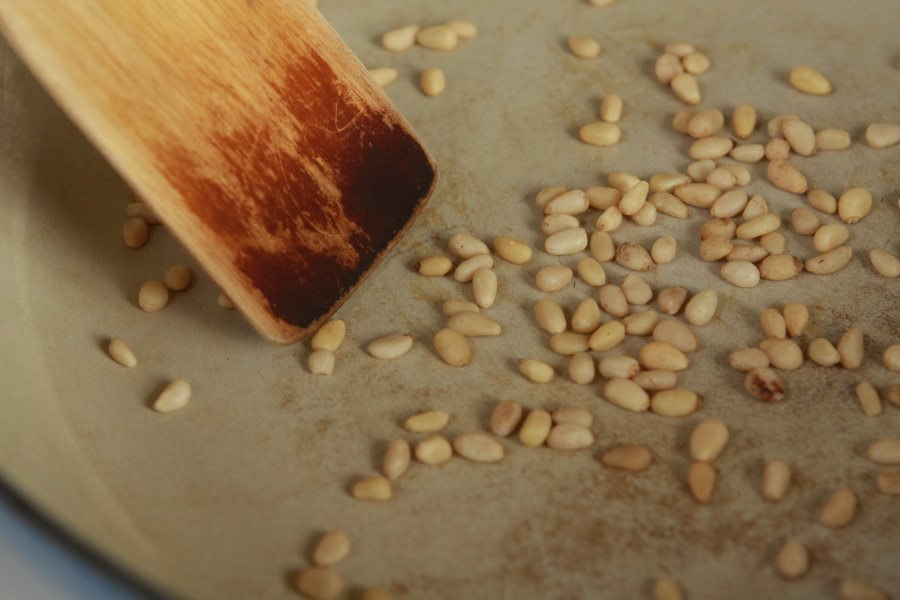
In a hot pan, toast the pine nuts until fragrant. That’s my rule of thumb with any nuts. Cook ‘em until they smell nice.


Tasty Kitchen Blog: Bowtie Pasta with Oven Dried Tomatoes Asparagus and Boursin. Guest post by Calli Taylor of Make It Do, recipe submitted by TK member Dorothy of Belle of the Kitchen.

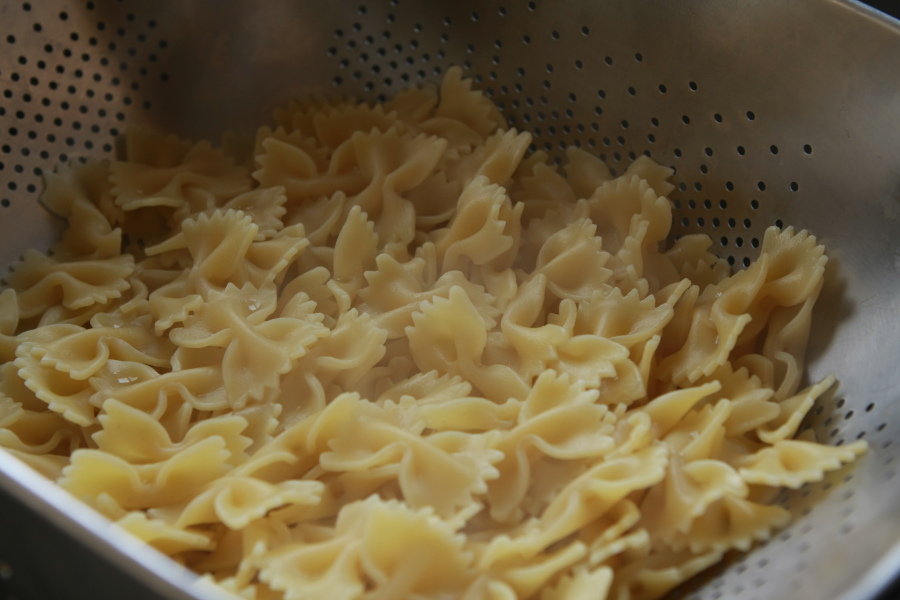
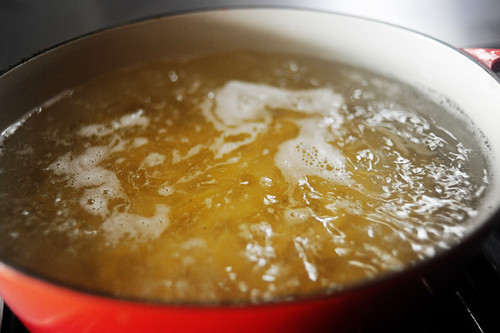
Cook your pasta in well-salted water. Since my husband doesn’t like pasta cooked TOO al dente, I cooked my pasta according to the package instructions, and not the eight minutes recommended on the recipe. I think good Italian pasta takes a little longer anyway. Even after heating everything in the pan at the end, the pasta tasted perfectly cooked and not mushy. Be sure to reserve 2/3 cup of the pasta water before you strain it all away.


Tasty Kitchen Blog: Bowtie Pasta with Oven Dried Tomatoes Asparagus and Boursin. Guest post by Calli Taylor of Make It Do, recipe submitted by TK member Dorothy of Belle of the Kitchen.

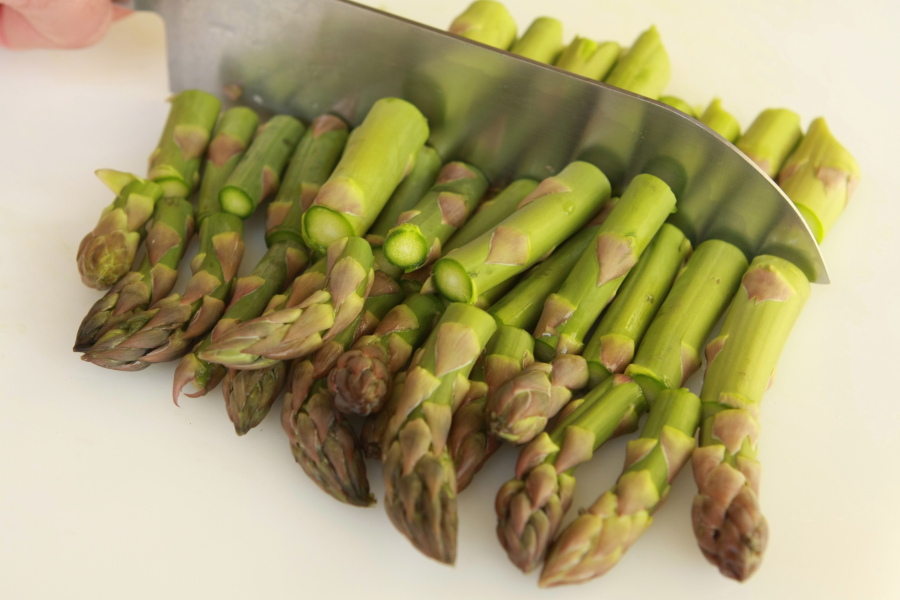
Here’s where I departed a bit from the text. The recipe calls for the asparagus to be cooked in the last two minutes, boiled with the pasta. While I’m sure that would work just great, I love the flavor of roasted asparagus, so I chopped up my asparagus into bite-sized pieces …


Tasty Kitchen Blog: Bowtie Pasta with Oven Dried Tomatoes Asparagus and Boursin. Guest post by Calli Taylor of Make It Do, recipe submitted by TK member Dorothy of Belle of the Kitchen.

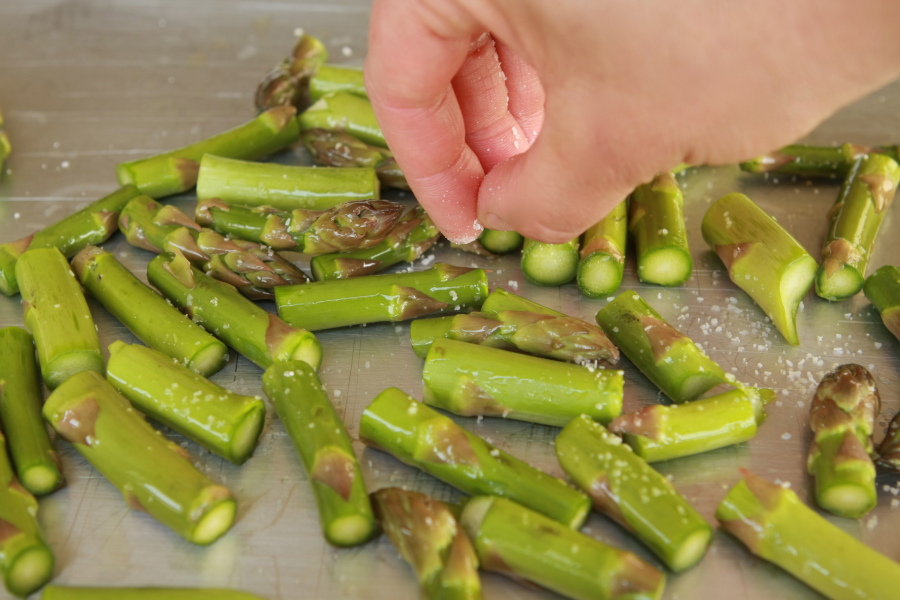
And I tossed them on a baking sheet, drizzled with olive oil, salt and pepper, then roasted at 400ºF until tender crisp, about 8 minutes depending on the size of your spears.


Tasty Kitchen Blog: Bowtie Pasta with Oven Dried Tomatoes Asparagus and Boursin. Guest post by Calli Taylor of Make It Do, recipe submitted by TK member Dorothy of Belle of the Kitchen.

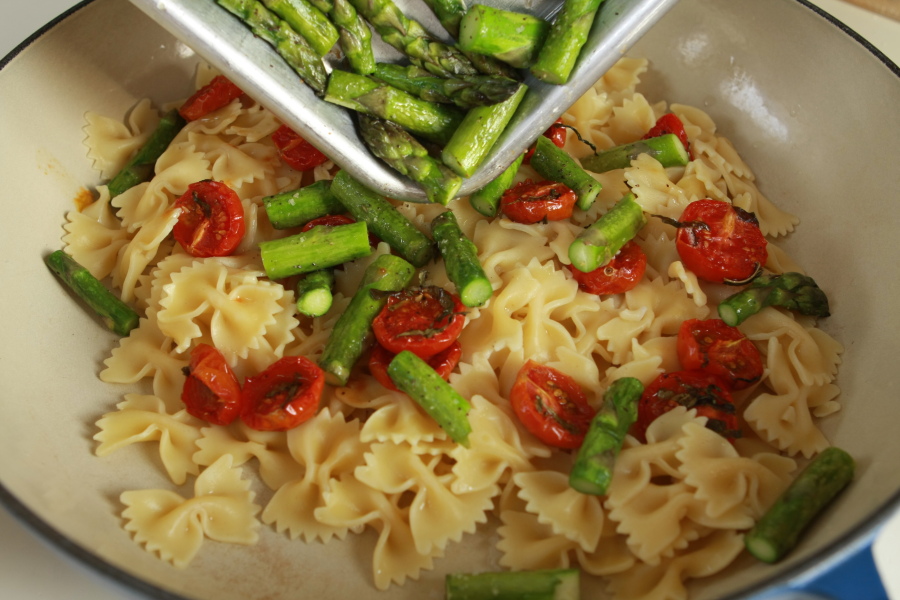
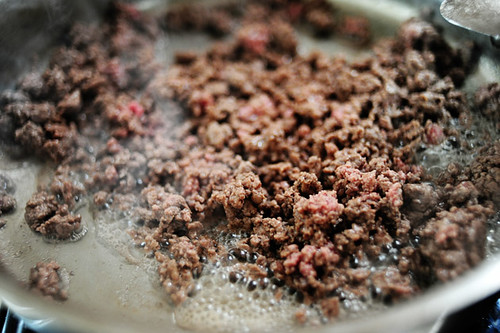
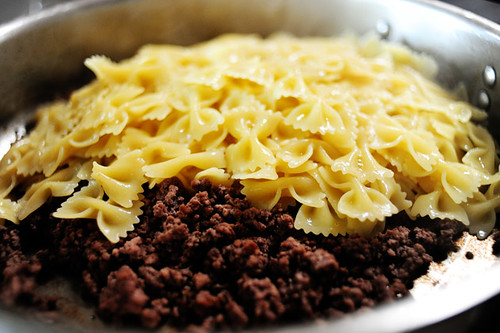
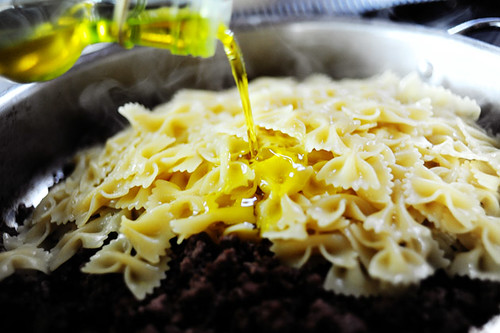
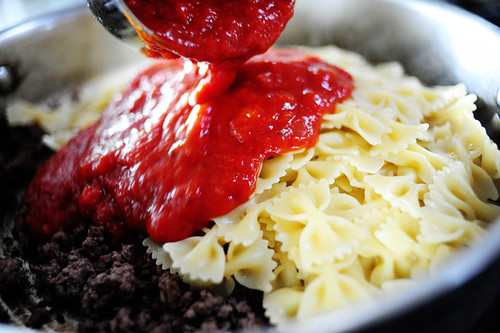
Now it’s time to toss it all together. In a large pan, heat the olive oil over medium heat. Add the garlic. The recipe doesn’t mention it, but I minced mine. Add the tomatoes to warm them. Add the pasta, asparagus and the reserved water. Toss to combine.


Tasty Kitchen Blog: Bowtie Pasta with Oven Dried Tomatoes Asparagus and Boursin. Guest post by Calli Taylor of Make It Do, recipe submitted by TK member Dorothy of Belle of the Kitchen.

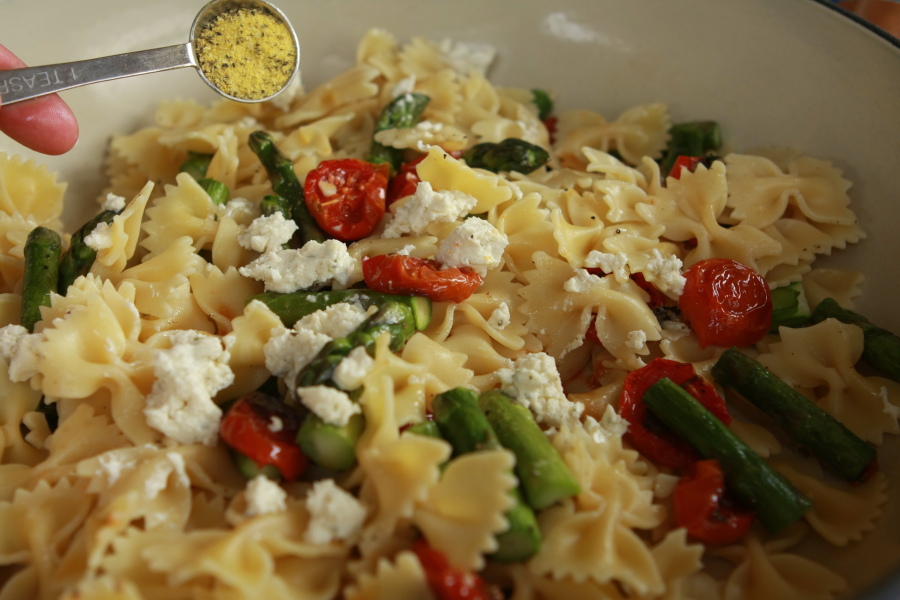
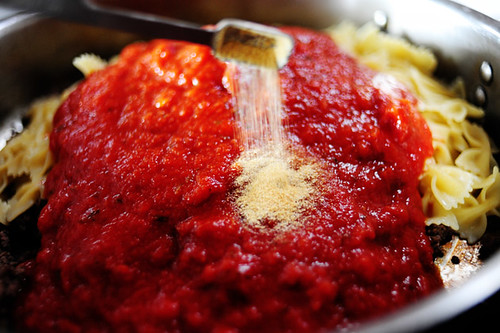
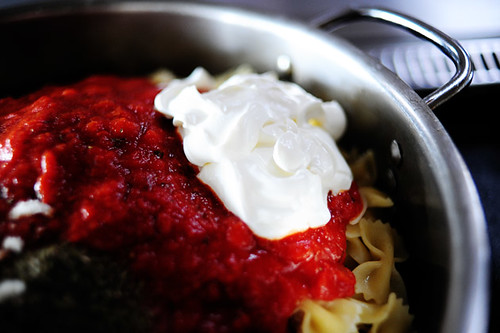
Pinch and drop the Boursin into the pan. Add the lemon pepper and pine nuts.


Tasty Kitchen Blog: Bowtie Pasta with Oven Dried Tomatoes Asparagus and Boursin. Guest post by Calli Taylor of Make It Do, recipe submitted by TK member Dorothy of Belle of the Kitchen.

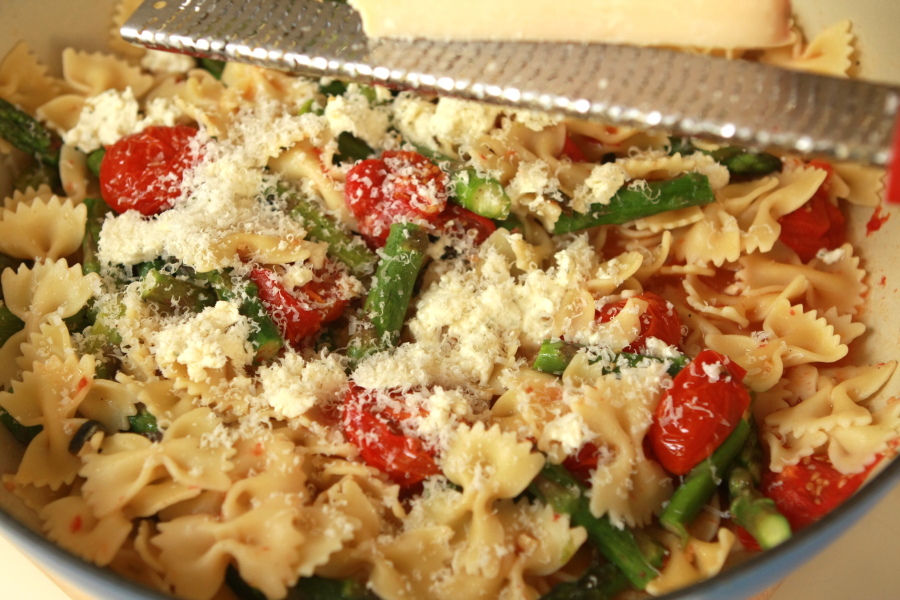
Sprinkle in the Parmesan cheese. Then season with salt and pepper to taste.


Tasty Kitchen Blog: Bowtie Pasta with Oven Dried Tomatoes Asparagus and Boursin. Guest post by Calli Taylor of Make It Do, recipe submitted by TK member Dorothy of Belle of the Kitchen.

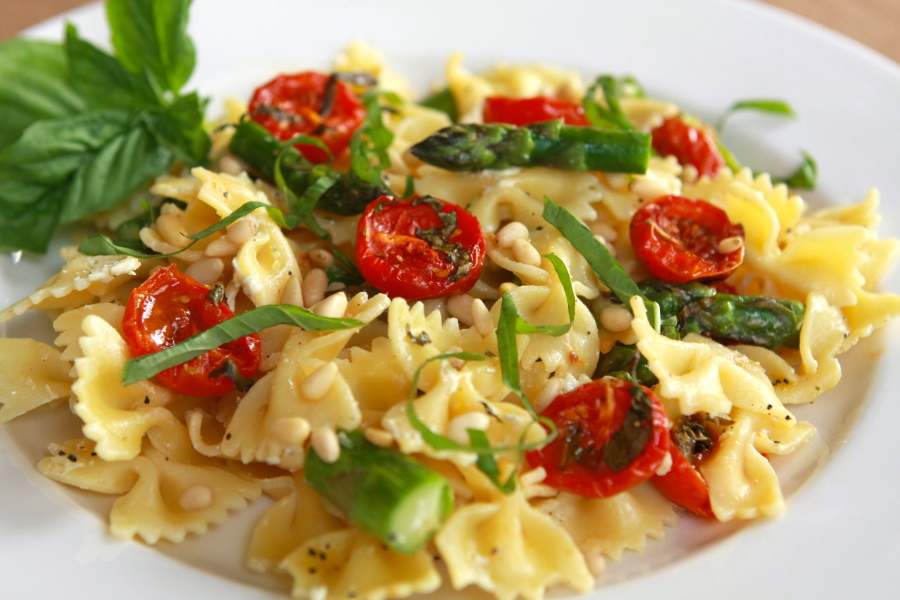
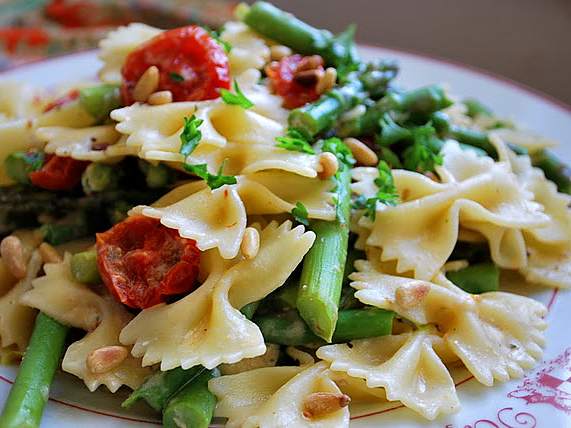
Enjoy! The pasta is great combination of flavors, and feels fresh and springy. I think I mentioned that I loved the oven dried tomatoes; they are amazing. I also love what the lemon pepper does to give the pasta a lighter zip. This is a meal that makes me and my girl very happy.

Thank you Dorothy for sharing all of your wonderful recipes! Be sure to check out Dorothy’s wonderful TK recipe box and her blog Belle of the Kitchen. And have you read her Tasty Kitchen feature yet? You’ll fall in love with her even more.


Printable Recipe

Bow Tie Pasta with Oven Dried Tomatoes, Asparagus, and Boursin

See post on barefootbelle’s site!
4.80 Mitt(s) 10 Rating(s)10 votes, average: 4.80 out of 510 votes, average: 4.80 out of 510 votes, average: 4.80 out of 510 votes, average: 4.80 out of 510 votes, average: 4.80 out of 5

Prep Time:

Cook Time:

Difficulty: Easy

Servings: 4

4
x

Print Options

Page size Letter 3x5 4x6
Text Size Small Medium Large
Content Include description
Include prep time, etc.
Show image

Description

This fresh dish hits the spot for a springtime dinner.

Ingredients

  • FOR THE OVEN DRIED TOMATOES:
  • 12 whole Cherry Tomatoes, Halved
  • 3 cloves Garlic
  • 1 teaspoon To 2 Teaspoons Olive Oil
  • 1 pinch Sugar
  • 1 pinch Kosher Salt
  • Freshly Ground Pepper
  • 4 leaves Basil, Julienned
  • _____
  • FOR THE PASTA:
  • ⅓ cups Pine Nuts
  • 8 ounces, weight Bow Tie Pasta
  • 1 bunch Asparagus, Ends Trimmed And Cut Into 2-3 Inch Pieces
  • 1 Tablespoon Olive Oil
  • 3 cloves Roasted Garlic (from The Above List), Chopped
  • 12 whole Oven Roasted Cherry Tomatoes (from The Above List)
  • 1 Tablespoon Fresh Basil, Julienned
  • ¼ cups Grated Parmesan Cheese
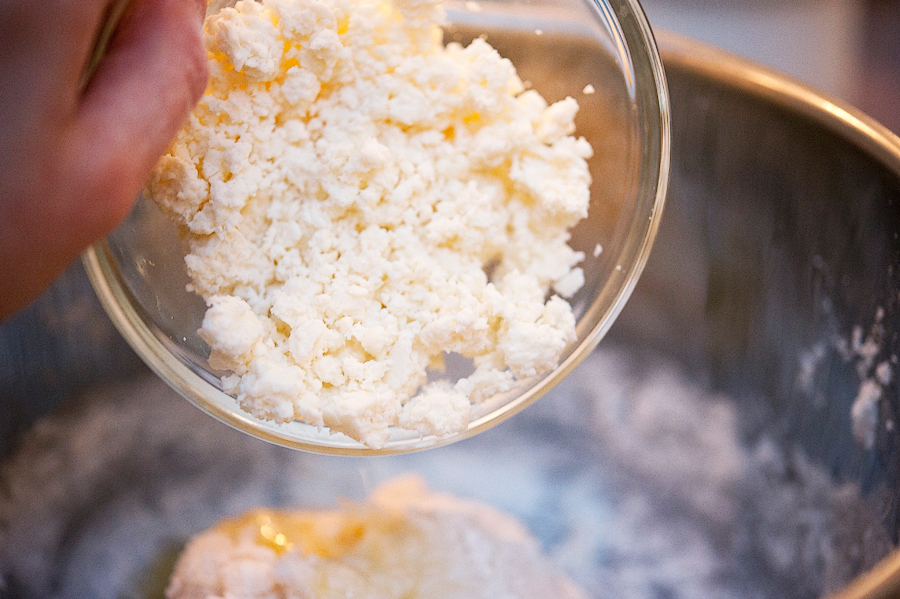
  • ¼ cups Garlic And Herb Boursin Cheese, Crumbled (a Good Herbed Goat Cheese Will Work, Too)
  • ¾ teaspoons Lemon Pepper
  • Kosher Salt And Pepper

Preparation Instructions

For the oven-dried tomatoes:

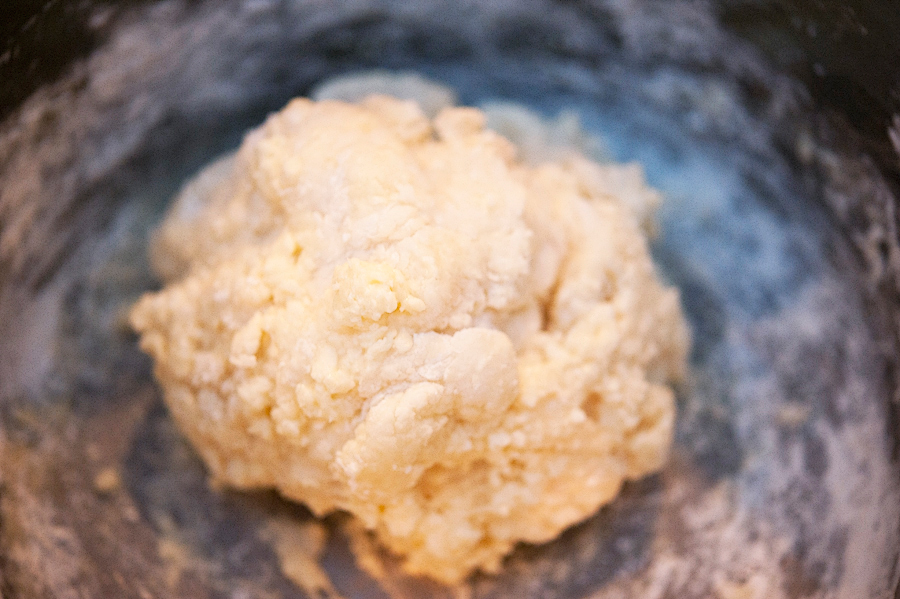
Preheat the oven to 225 degrees. In a small baking pan (I used a round cake pan), place the cherry tomato halves, cut side up. Drizzle with olive oil, sprinkle with sugar, salt and pepper. Sprinkle with basil. Tuck the garlic cloves in between the tomatoes. Bake for 3 1/2 hours. The tomatoes should be shriveled, but still have some moisture. Refrigerate the tomatoes and garlic until ready to use.

For the pasta:

Place a medium saucepan over medium heat. Cook the pine nuts in the dry skillet, shaking or stirring the pan constantly, until the pine nuts are slightly brown on all sides. Remove to a bowl.

In the same saucepan, bring six cups of well-salted water to a boil. Add the pasta and cook for 8 minutes. Add the asparagus and cook for two more minutes. Reserve 2/3 cups pasta water and drain the pasta and asparagus in a colander.

In the same saucepan, heat the olive oil over medium heat. Add the roasted garlic and cook for 30 seconds, then add the roasted tomatoes to warm through. Add the pasta, asparagus and reserved water, tossing to combine. Add the basil, cheeses, lemon pepper, and pine nuts. Toss everything together and taste for salt and pepper.


_______________________________________

Calli is truly a woman of many talents, from cooking, sewing, crafts, beautiful photography and gardening. Her blog, Make it Do is a treasure trove of recipes, household tips, crafts projects, sewing patterns … you name it. It’s also peppered with photos of her beautiful kids. Go visit her site, and visit it often. There’s always something new to learn there!


Profile photo of Ree | The Pioneer Woman

Bowtie Lasagna

Posted by in Step-by-Step Recipes

This Tasty Kitchen recipe, submitted in May by Rozanie, fit perfectly into the 16-Minute Meal theme I have going on in my house this week. As I explained on The Pioneer Woman Cooks yesterday, my girls are gone all week, which means I have a houseful of only boys. They’re so delightfully male—the more brown and plentiful the food is, the better. And wonderfully so, they tend to like the dishes that take the least amount of time to make.

Sold!

This could not have been easier. When the boys and I returned from our Family Soccer Game, I threw it together and had dinner on the table in less than twenty minutes. It was heaven, and I was able to be in front of the TV in time to watch Real Housewives of New Jersey.

Wait. Did I just say that out loud?


TPW_5153

Begin by boiling 5 cups of bowtie pasta noodles. (This amounts roughly to a 12-ounce bag.)


TPW_5154

Cook it till al dente!


TPW_5152

Brown some ground chuck in a skillet. (Regular ground beef would be just fine.)


TPW_5159

Drain the pasta and dump it over the top of the browned meat.


TPW_5164

Drizzle olive oil over the top of the noodles…


TPW_5146

Then grab a jar of marinara or other pasta sauce. *Note that the submitter of this recipe correctly points out that you definitely want to use a sauce you really like here!


TPW_5171

Dump it right over the noodles.


TPW_5180

Add garlic powder…


TPW_5185

And Italian Seasoning. You can substitute fresh garlic and herbs if you have them handy. Basil would be yummy! And be sure to add salt—about a teaspoon or so.


TPW_5189

Next, add grated mozzarella. I had some fresh stuff in my fridge, but you can use any form of mozzarella you’d like.


TPW_5192

Also dump in a little sour cream. This adds a really nice consistency to the whole dish. Even if you’re not a sour cream fan, don’t be afraid! You won’t even taste it.


TPW_5196

Finally, stir it all together over low heat until it’s just combined. Yum!


TPW_5208

I also stirred in some grated Parmesan for a little extra kick. And that’s it, baby!


TPW_5219

I served this with an Iceberg/ranch salad and a hunk of warm, crust bread. The three men in my house absolutely loved it.

OPTIONS: This is such an easy meal, it would be a cinch to add in whatever extras you’d like. I think I’ll do chopped black olives next time, and probably a combination of fresh herbs. You can also play with the cheeses—add some Romano, Asiago…have at it!

Verdict: I’ll definitely make this again. Another 16-minute meal for my repertoire. Thanks, Rozanie!

TPW_5149

Here’s the printable recipe: Bowtie Lasagna by Rozanie

Profile photo of georgiapellegrini

Brazilian Cheesebread (Naturally Gluten-free!)

Posted by in Baking, Step-by-Step Recipes

Tasty Kitchen Blog Brazilian Cheesebread. Guest post by Georgia Pellegrini, recipe submitted by TK member Jill Wilkins of The Pink Cowgirl.

 
Brazilian Cheese Bread or Pao de Queijo was one of the most interesting recipes I’ve made in a while. First, it’s naturally gluten-free. And second, it didn’t require any kneading or rising time. And it was very cheesy and chewy, a fun take on the dinner roll! When I saw this recipe by Jill Wilkins, I thought I should foray into unchartered cooking territory. I’m glad I did!


Tasty Kitchen Blog Brazilian Cheesebread. Guest post by Georgia Pellegrini, recipe submitted by TK member Jill Wilkins of The Pink Cowgirl.

You will need: whole milk, water, oil (I would try olive oil, or grape seed oil, too, which has a better flavor than canola), salt, tapioca flour (also known as tapioca starch), eggs, and cotija cheese (feta will also work well).


Tasty Kitchen Blog Brazilian Cheesebread. Guest post by Georgia Pellegrini, recipe submitted by TK member Jill Wilkins of The Pink Cowgirl.

Begin by setting out a saucepot and pouring in the milk…


Tasty Kitchen Blog Brazilian Cheesebread. Guest post by Georgia Pellegrini, recipe submitted by TK member Jill Wilkins of The Pink Cowgirl.

Then the water…


Tasty Kitchen Blog Brazilian Cheesebread. Guest post by Georgia Pellegrini, recipe submitted by TK member Jill Wilkins of The Pink Cowgirl.

And the oil. (I would experiment with various oils here!)


Tasty Kitchen Blog Brazilian Cheesebread. Guest post by Georgia Pellegrini, recipe submitted by TK member Jill Wilkins of The Pink Cowgirl.

Let it come to a simmer and sprinkle in the salt. Turn off the heat and let cool slightly.


Tasty Kitchen Blog Brazilian Cheesebread. Guest post by Georgia Pellegrini, recipe submitted by TK member Jill Wilkins of The Pink Cowgirl.

When warm but not hot, slowly whisk in the tapioca flour a little at a time.


Tasty Kitchen Blog Brazilian Cheesebread. Guest post by Georgia Pellegrini, recipe submitted by TK member Jill Wilkins of The Pink Cowgirl.

The mixture will become very thick and form into a dough.


Tasty Kitchen Blog Brazilian Cheesebread. Guest post by Georgia Pellegrini, recipe submitted by TK member Jill Wilkins of The Pink Cowgirl.

Work the warm dough into a ball.


Tasty Kitchen Blog Brazilian Cheesebread. Guest post by Georgia Pellegrini, recipe submitted by TK member Jill Wilkins of The Pink Cowgirl.

Add the egg and work it in some more with your hands or a spoon.


Tasty Kitchen Blog Brazilian Cheesebread. Guest post by Georgia Pellegrini, recipe submitted by TK member Jill Wilkins of The Pink Cowgirl.

Then sprinkle in the cheese and work that in some more.


Tasty Kitchen Blog Brazilian Cheesebread. Guest post by Georgia Pellegrini, recipe submitted by TK member Jill Wilkins of The Pink Cowgirl.

Form a large cheesy ball and grease a baking sheet.


Tasty Kitchen Blog Brazilian Cheesebread. Guest post by Georgia Pellegrini, recipe submitted by TK member Jill Wilkins of The Pink Cowgirl.

Form 1-inch balls from the dough and place them on the baking sheet.


Tasty Kitchen Blog Brazilian Cheesebread. Guest post by Georgia Pellegrini, recipe submitted by TK member Jill Wilkins of The Pink Cowgirl.

Sprinkle more cheese on top for good measure and place them in the oven.


Tasty Kitchen Blog Brazilian Cheesebread. Guest post by Georgia Pellegrini, recipe submitted by TK member Jill Wilkins of The Pink Cowgirl.

You will cook them until they are golden brown and the inside has fully cooked.


Tasty Kitchen Blog Brazilian Cheesebread. Guest post by Georgia Pellegrini, recipe submitted by TK member Jill Wilkins of The Pink Cowgirl.

They look like little soft pillows of cheesy goodness. Give these a try! And thanks to Jill Wilkins for encouraging me to try an unusual recipe. Mosey on to her blog, The Pink Cowgirl, for more of her corn-free and gluten-free recipes.


Printable Recipe

Pao de Queijo (Brazilian Cheesebread)

See post on Jill Wilkins’s site!
5.00 Mitt(s) 2 Rating(s)2 votes, average: 5.00 out of 52 votes, average: 5.00 out of 52 votes, average: 5.00 out of 52 votes, average: 5.00 out of 52 votes, average: 5.00 out of 5

Prep Time:

Cook Time:

Difficulty: Easy

Servings: 20

20
x

Print Options

Page size Letter 3x5 4x6
Text Size Small Medium Large
Content Include description
Include prep time, etc.
Show image

Description

Wonderful little scrumptious bites. Easier than you think and deceptively delish and naturally gluten free.

Ingredients

  • ½ cups Whole Milk
  • ½ cups Water
  • ¼ cups Canola Oil
  • ¼ teaspoons Salt (heaping)
  • 2-½ cups Tapioca Flour, Or A Little More As Needed
  • 1-½ whole Egg, Beaten
  • 4 ounces, weight Granulated Cojita Cheese, Plus Extra For Topping Cheese Breads

Preparation Instructions

Preheat oven to 350ºF and grease 2 baking sheets. In a saucepan bring the milk, water, oil, and salt to a boil. Remove the pan from heat and set aside. Add the flour in increments, stirring constantly until the dough becomes pliable and can be kneaded with hands. Be patient, the more you stir the more solid the dough will become. Only add enough flour until dough reaches desired consistency. Stir in the beaten eggs then the cojita cheese. Stir until dough becomes thick and can be molded. Add additional tapioca flour if needed. Roll dough into 1″ balls and dip the tops into the extra cheese. Place on the greased baking sheets and bake for 20-25 minutes or until cheese becomes golden brown.

Note: You can also use granulated parmesan cheese (Kraft) for this recipe.


_______________________________________

There’s so much to say about Georgia, we don’t know where to start. Leaving Wall Street for the French Culinary Institute, followed by a stint at the Gramercy Tavern and La Chassagnette in France, her passion for food and food traditions are evident and inspiring. Visit her site at Georgia Pellegrini, where you’ll find more recipes, photos, learn all about her wonderful books Girl Hunter and Food Heroes, and enjoy her latest adventures.


Profile photo of Laurie - Simply Scratch

Breakfast BLT

Posted by in Step-by-Step Recipes

  I love a breakfast/lunch crossover recipe: waffles flecked with bacon and cheddar, spicy chorizo breakfast burritos, and now I’m currently crushing on Riley’s recipe for a Breakfast BLT. When I first saw her recipe, I was completely and utterly smitten. BLT sandwiches are the ace in my back pocket when I need to make a […]

Profile photo of Erika (TK)

Breakfast Eggs in 20 Minutes or Less

Posted by in The Theme Is...

  ‘Tis the season for heading back to school, and you know what that means: waking up early, taking turns in the bathroom, and last-minute “Mom, where are my shoes? I’ll be late!” panicked pleas. The last thing you want to do is spend too much time making the kind of breakfast that’ll see them […]

Profile photo of Natalie | Perry's Plate

Breakfast Salad

Posted by in Step-by-Step Recipes

  Salad. For breakfast. Sounds a little weird, but we’ve been making breakfast salads in the Perry house for over a year now. If anyone had told me five years ago that I’d be eating salads for breakfast and keeping things like flaxseed and giant containers of coconut oil in my pantry, I would have […]

Profile photo of A Cozy Kitchen

Breakfast Taco Cups

Posted by in Step-by-Step Recipes

  Breakfast, hands down, is my favorite meal. I can’t think of a better day than one that starts with a stack of pancakes, and I’ve been known to put an egg on any dish to make it more “breakfast-y.” When I came across this Breakfast Taco Cups recipe from Bev Weidner, I knew it would […]