The Pioneer Woman Tasty Kitchen
Profile photo of callimakesdo

Easy Flaky Buttery Biscuits

Posted by in Baking, Step-by-Step Recipes

Tasty Kitchen Blog: Easy Flaky Buttery Biscuits. Guest post by Calli Taylor of Make It Do, recipe submitted by TK member ranchinmom2five.

 
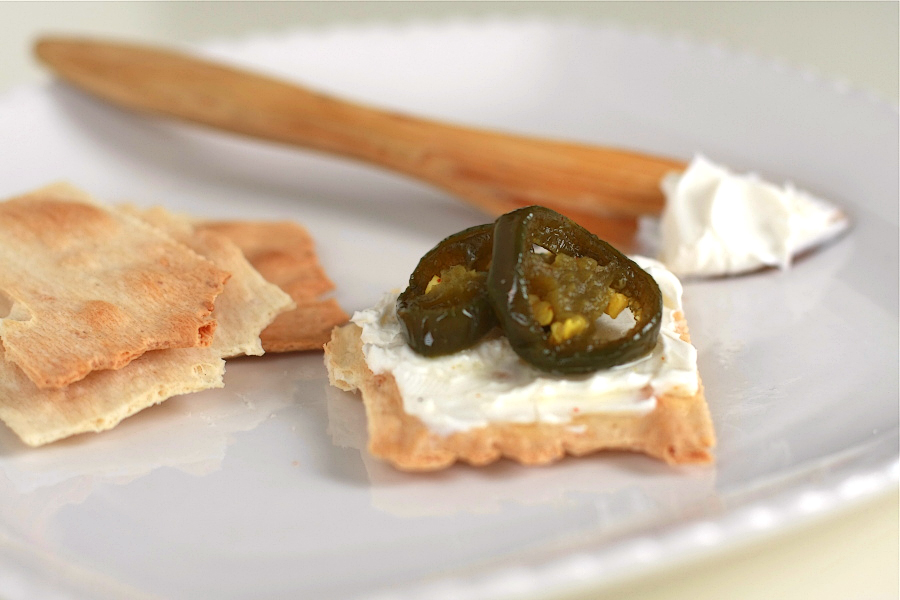
A warm biscuit is comfort food, plain and simple.

Being from the Mountain West, biscuits aren’t exactly a staple at our dinner table. (My mom did make homemade buttermilk biscuits occasionally, to accompany cabbage rolls—one of my favorite childhood dinners.)

But my husband is half Southern; his mother’s family is from Tennessee, and some things must be in the blood. He loves a good biscuit.

Happy to oblige his craving, I was supremely confident the first time I ever attempted biscuits. I loved mixing and rolling them and especially cutting them out with my brand new biscuit cutter.

But when my biscuits came out of the oven, they looked alarmingly flat. To my dismay (and shock), my biscuits tasted more like hockey pucks than the light, buttery biscuits I’d expected.

I’m not the sort to give up easily, so I tried several different recipes … and got varying degrees of the same result.

Biscuits are my nemesis, I decided, and I’d be better off with biscuits from a pop can, if I ever made them again.

But my failure niggled at me. It’s just a biscuit after all, made from simple ingredients and simple tools. So when I spotted the recipe for Easy, Flaky, Buttery Biscuits from ranchinmom2five on Tasty Kitchen, I thought I’d attempt to make my husband happy and conquer my biscuit challenge.

The “easy” in the recipe sounded encouraging. So did the great reviews.

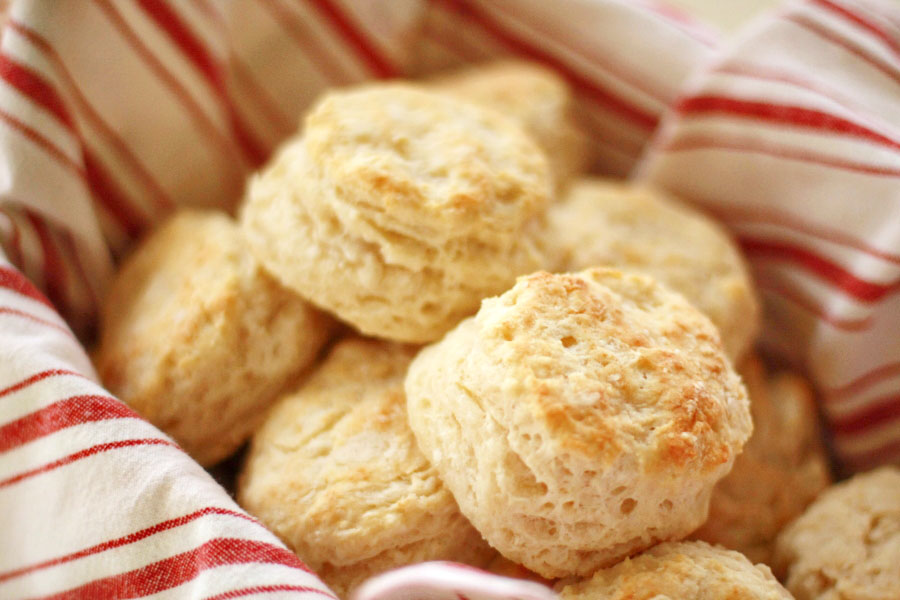
Here’s how I finally made a biscuit worthy of serving to my family instead of the garbage pail.


Tasty Kitchen Blog: Easy Flaky Buttery Biscuits. Guest post by Calli Taylor of Make It Do, recipe submitted by TK member ranchinmom2five.

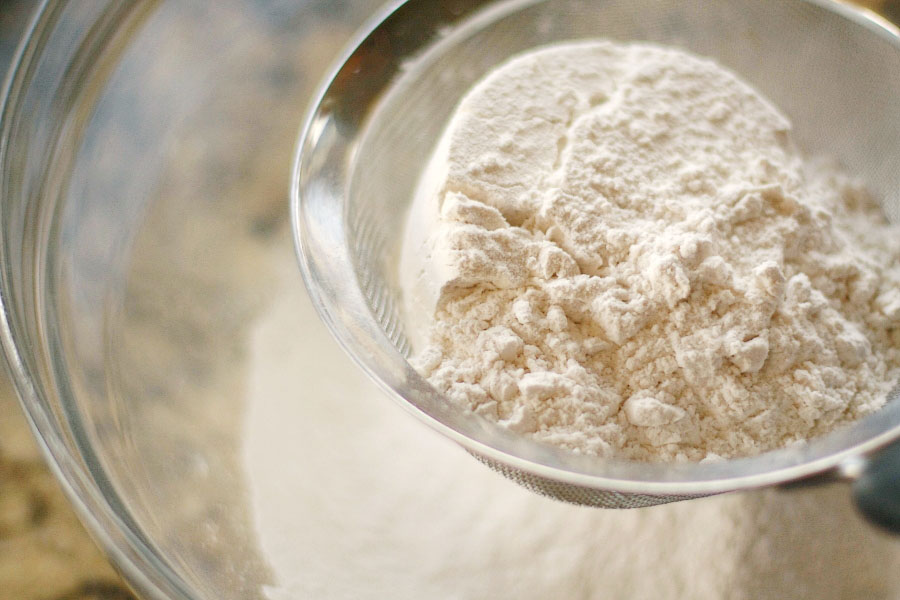
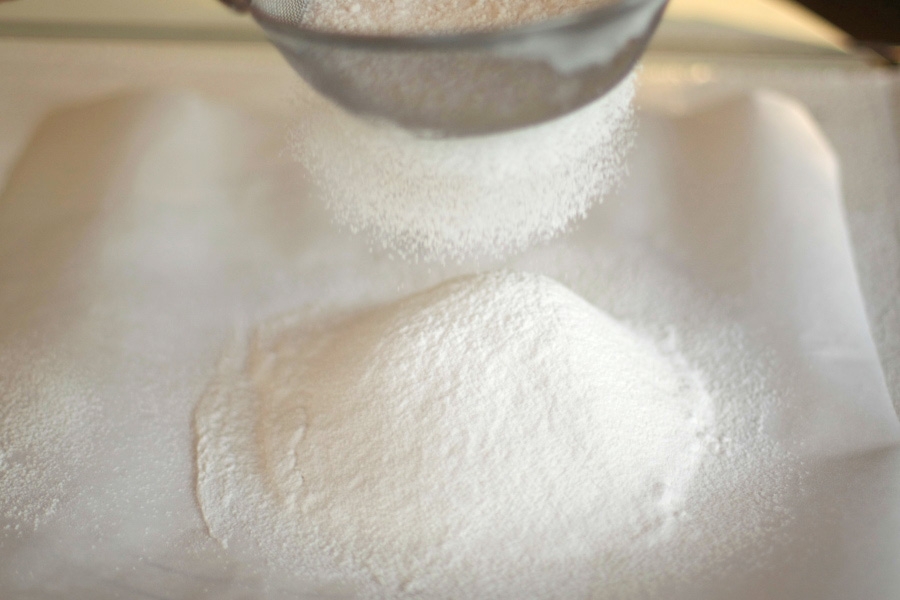
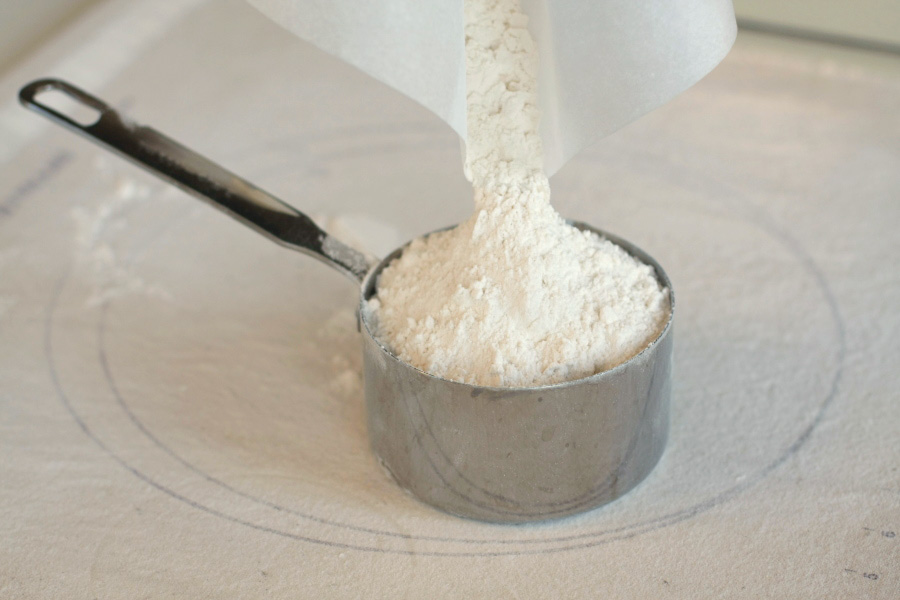
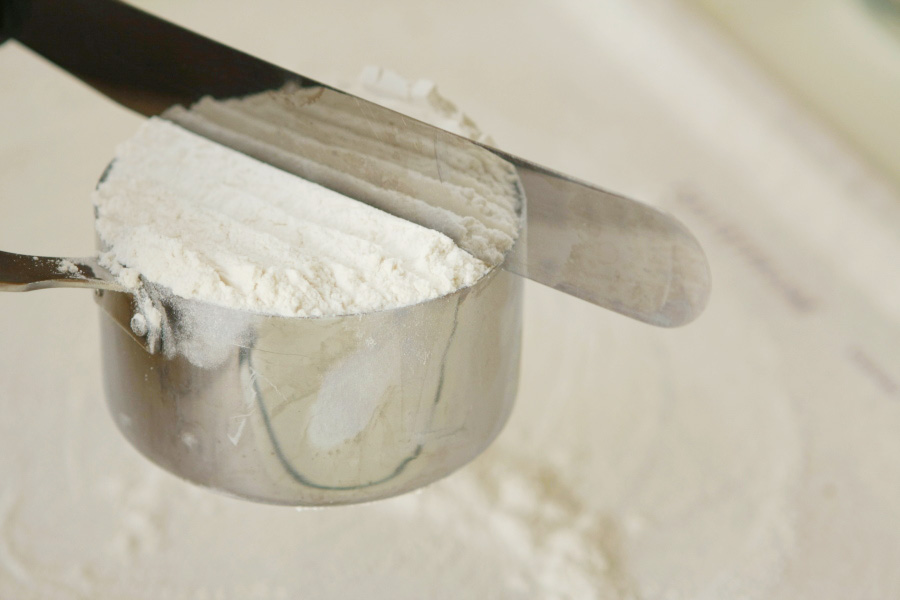
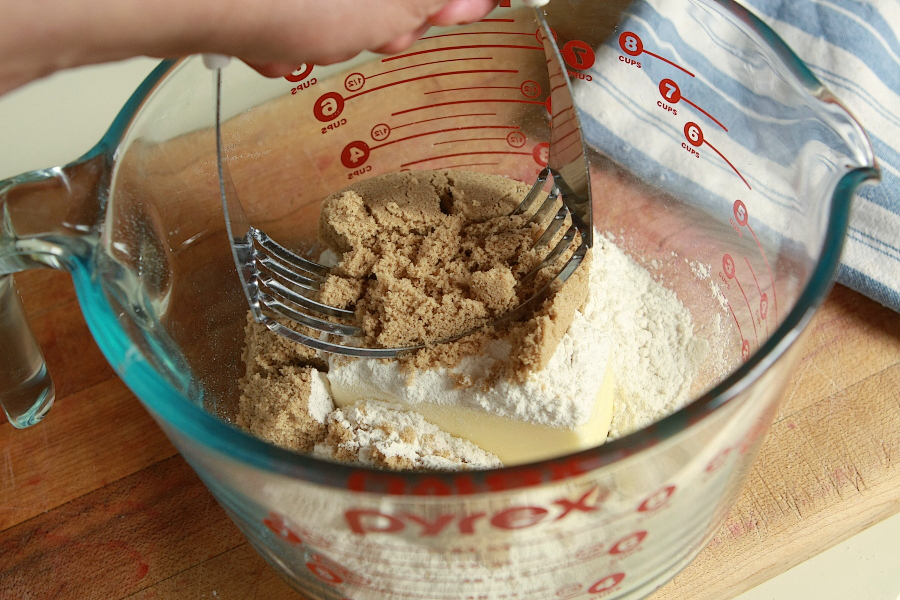
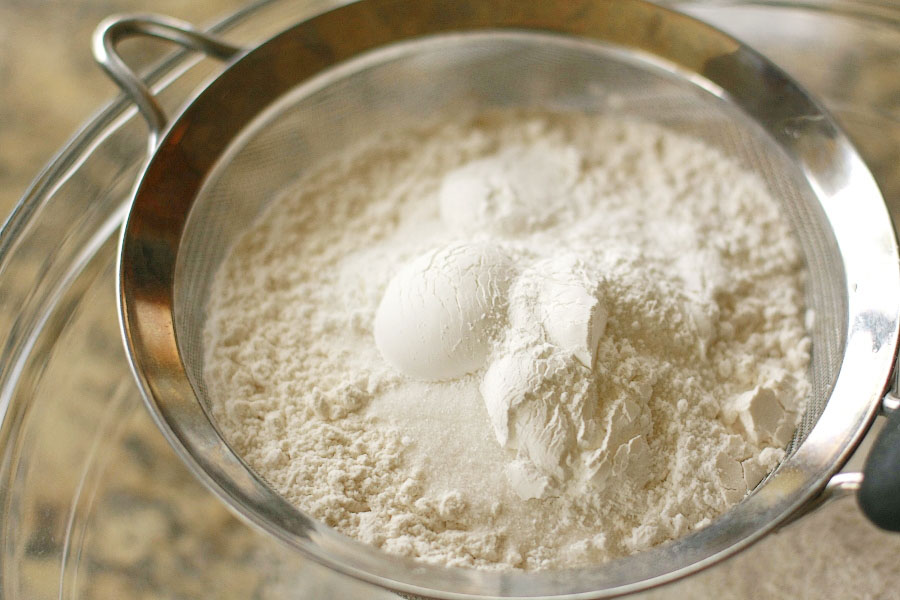
Start with all-purpose flour. The recipe does not specify sifting, but sifted flour is lighter, and I was aiming to avoid my infamous hockey pucks.


Tasty Kitchen Blog: Easy Flaky Buttery Biscuits. Guest post by Calli Taylor of Make It Do, recipe submitted by TK member ranchinmom2five.

Add baking powder, sugar, cream of tartar and salt.


Tasty Kitchen Blog: Easy Flaky Buttery Biscuits. Guest post by Calli Taylor of Make It Do, recipe submitted by TK member ranchinmom2five.

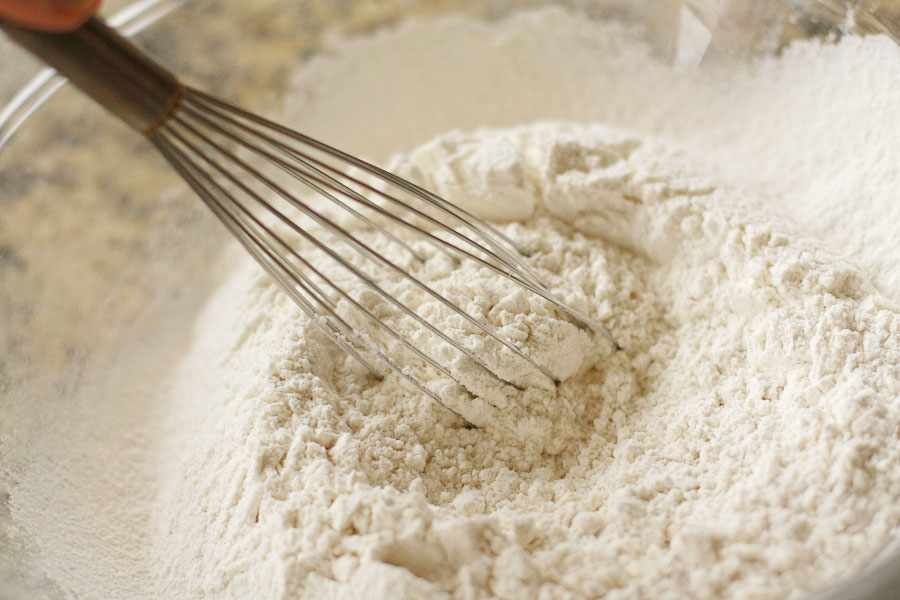
Give the mixture a good stir to make sure the ingredients are well incorporated.


Tasty Kitchen Blog: Easy Flaky Buttery Biscuits. Guest post by Calli Taylor of Make It Do, recipe submitted by TK member ranchinmom2five.

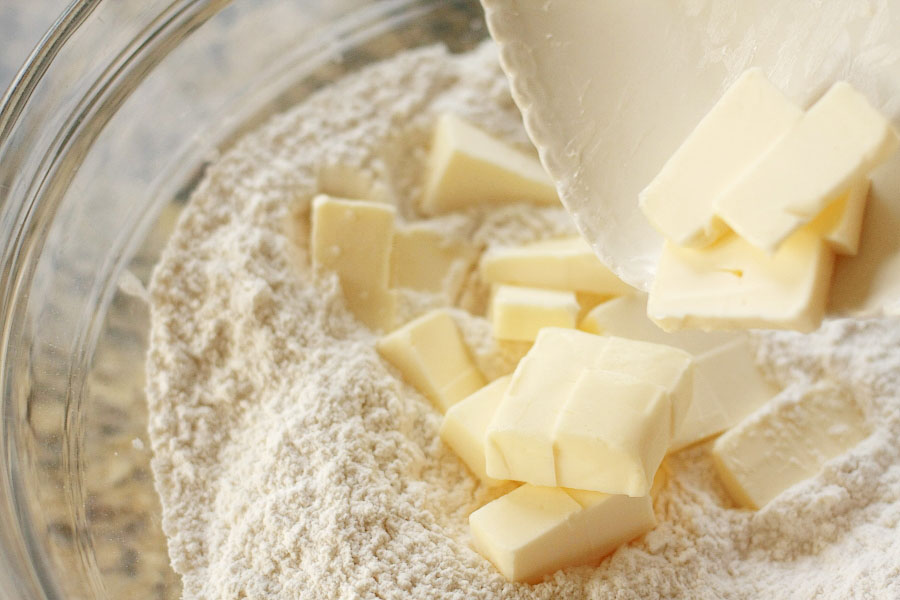
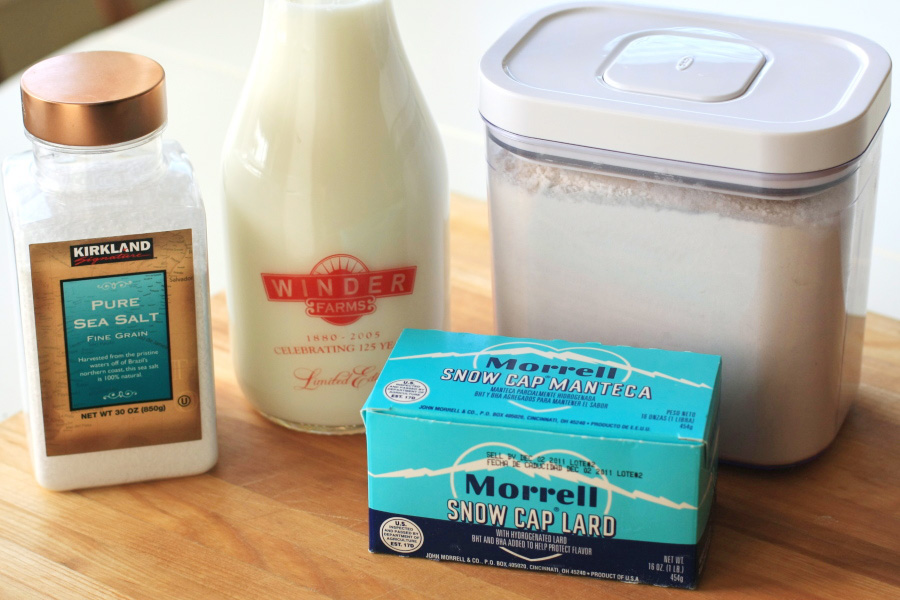
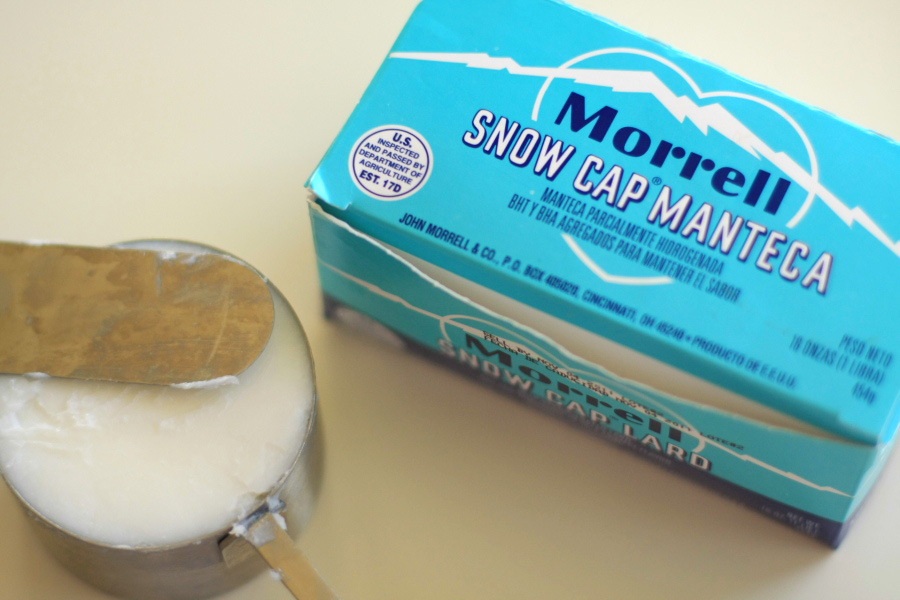
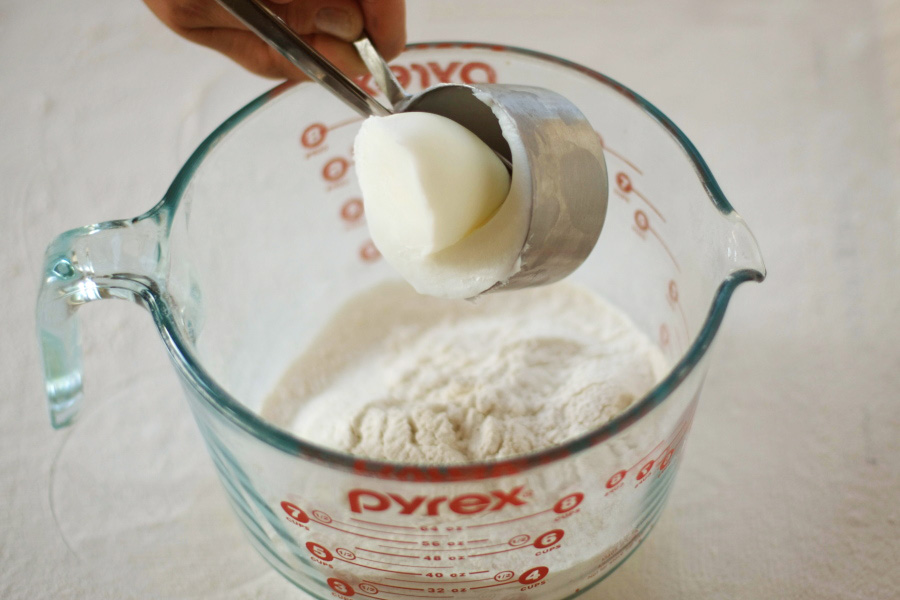
The recipe calls for cold butter. I like to cube it to make the cutting in easier. I’ve made this recipe several times and the last time, I substituted half of the butter for lard. It made a great recipe even better. They were my lightest, tallest, flakiest biscuits ever. If you have lard on hand, give it a try.


Tasty Kitchen Blog: Easy Flaky Buttery Biscuits. Guest post by Calli Taylor of Make It Do, recipe submitted by TK member ranchinmom2five.

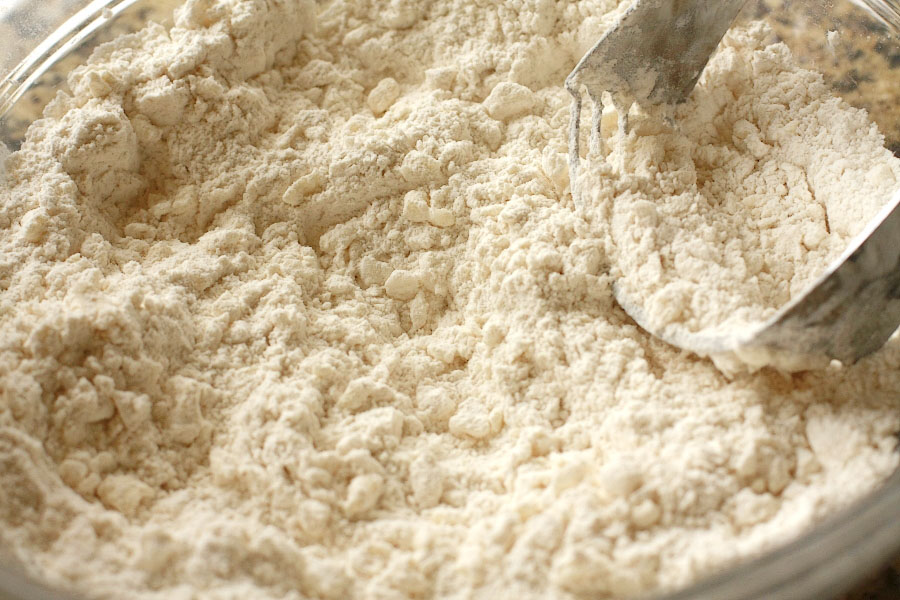
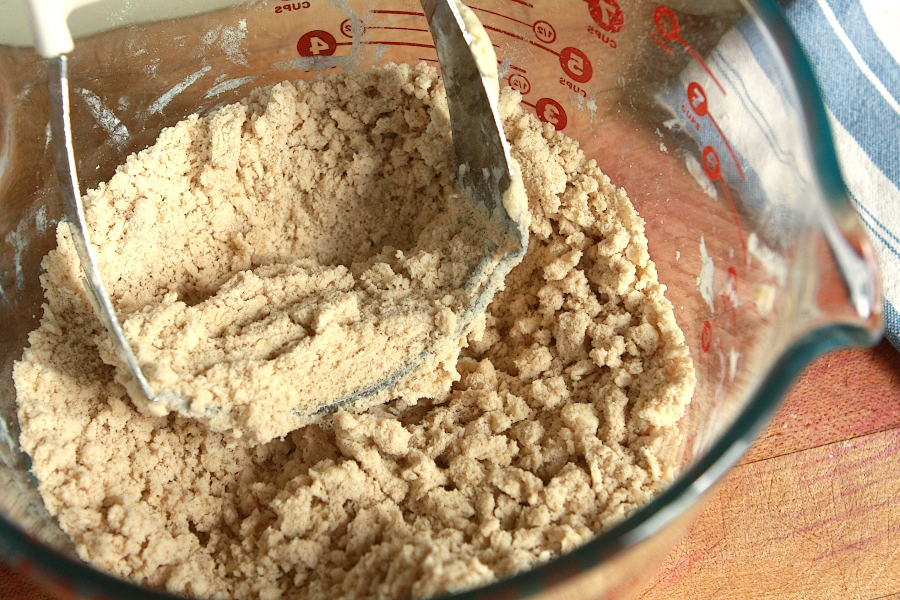
Using a pastry cutter or your hand, cut the butter into the flour until pea-sized pieces of butter remain. Don’t overwork the cutting in. Just like with pie dough, this is the key to a flaky biscuit.


Tasty Kitchen Blog: Easy Flaky Buttery Biscuits. Guest post by Calli Taylor of Make It Do, recipe submitted by TK member ranchinmom2five.

The recipe calls for milk, but I love the flavor of buttermilk. So, I substituted 1-1/4 cup buttermilk (since buttermilk is thicker than milk) for the milk.

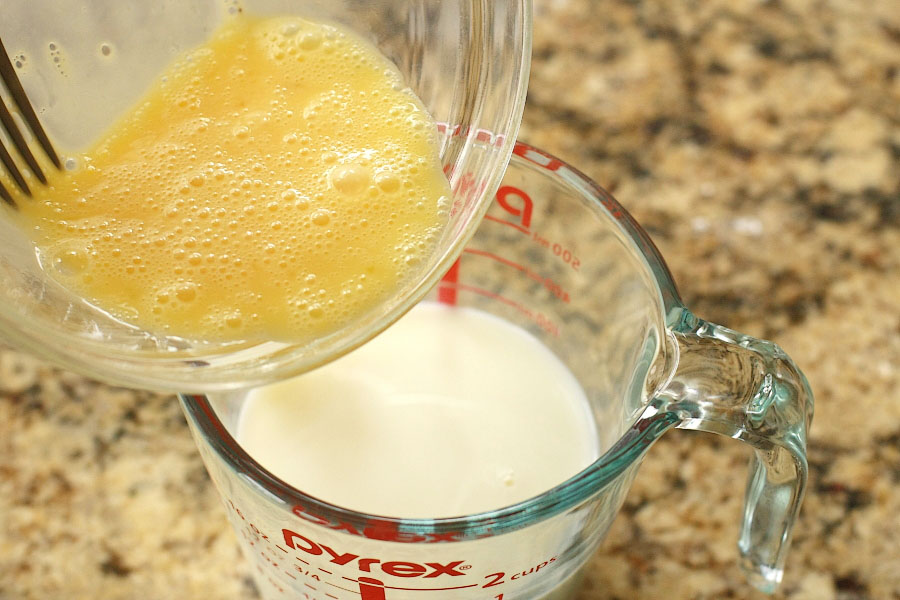
In a small separate bowl, whisk the egg into the milk.


Tasty Kitchen Blog: Easy Flaky Buttery Biscuits. Guest post by Calli Taylor of Make It Do, recipe submitted by TK member ranchinmom2five.

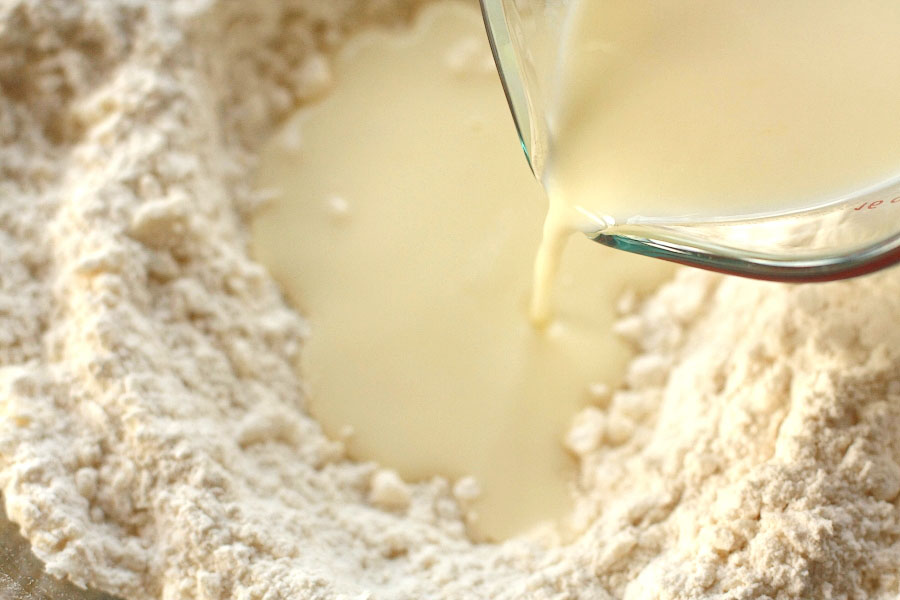
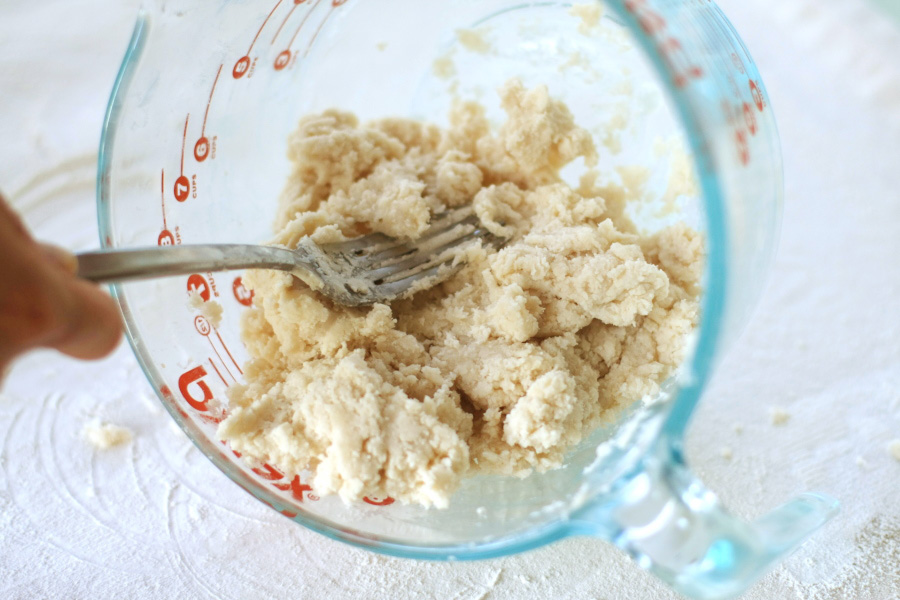
Pour the milk into the flour mixture.


Tasty Kitchen Blog: Easy Flaky Buttery Biscuits. Guest post by Calli Taylor of Make It Do, recipe submitted by TK member ranchinmom2five.

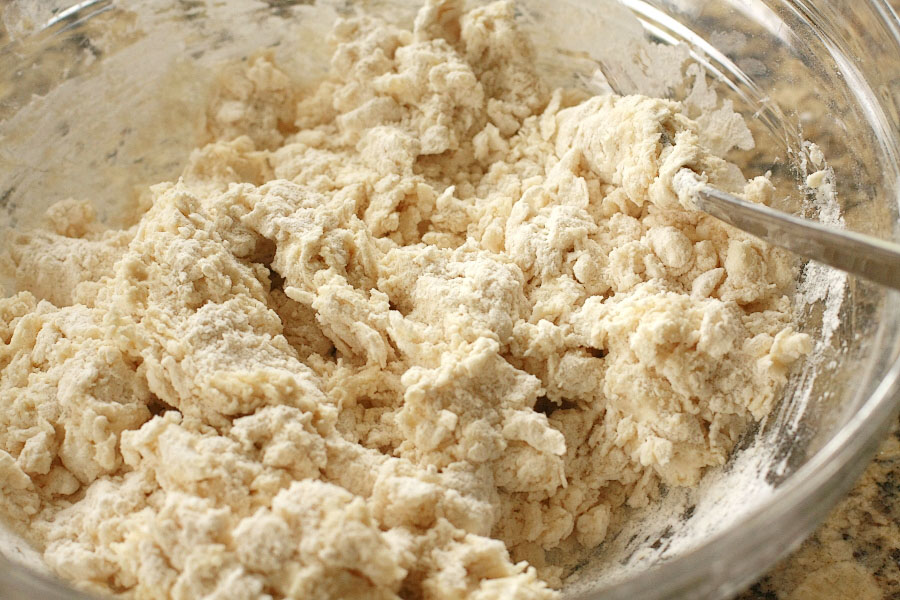
Stir together with a fork just until the mixture forms a loose ball. Again, don’t over stir here. It’s okay if all the flour isn’t incorporated, it’s going to be messy.


Tasty Kitchen Blog: Easy Flaky Buttery Biscuits. Guest post by Calli Taylor of Make It Do, recipe submitted by TK member ranchinmom2five.

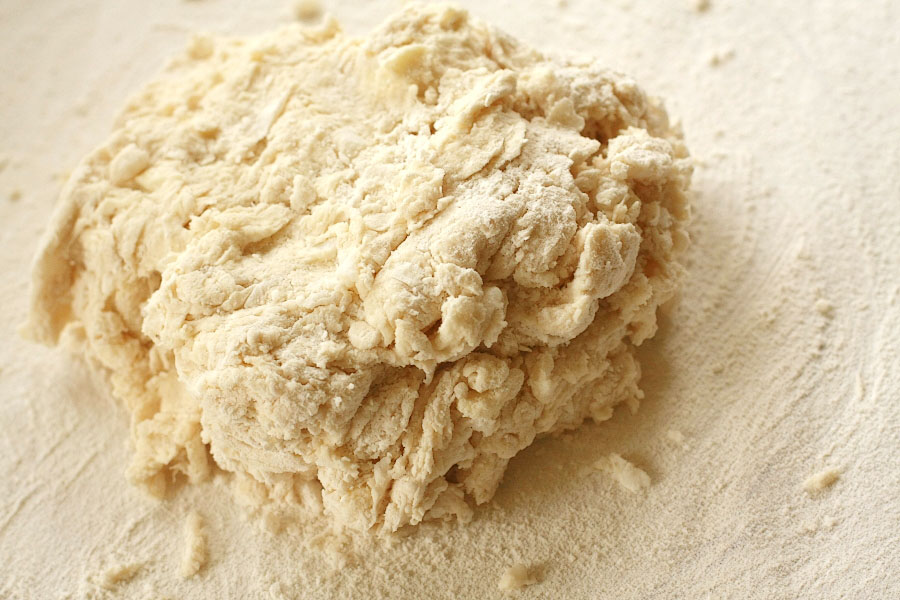
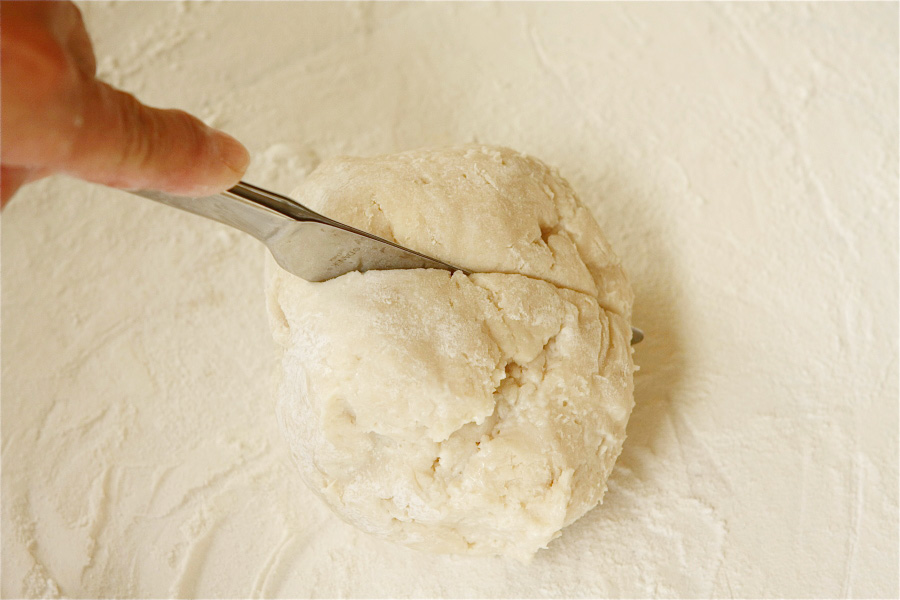
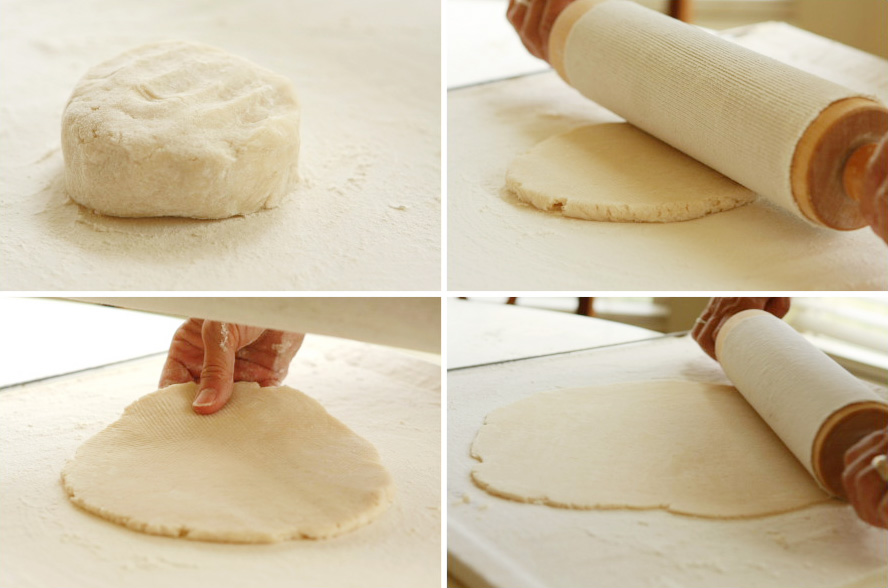
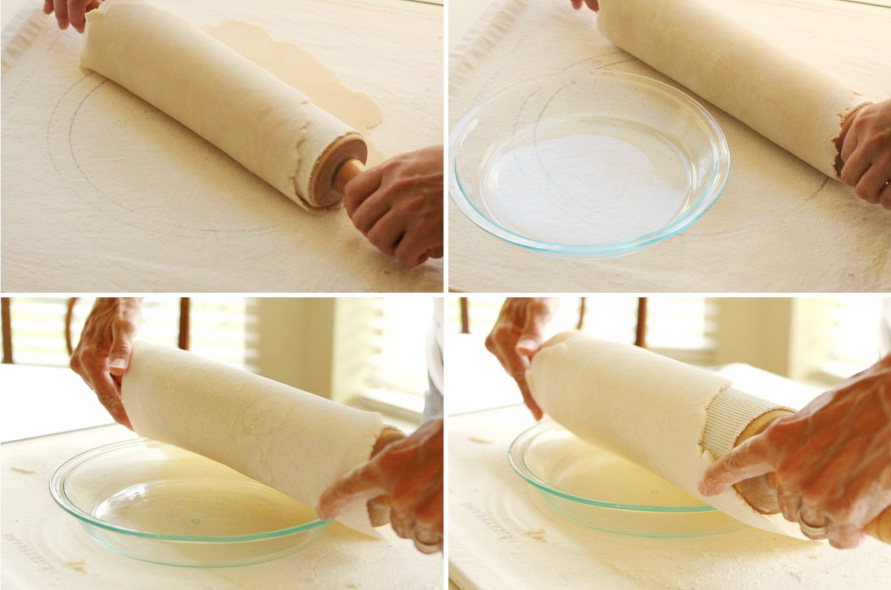
Turn your dough onto a floured counter. I’m using my favorite pastry frame instead of the counter. Knead lightly just a couple of times to form a round.


Tasty Kitchen Blog: Easy Flaky Buttery Biscuits. Guest post by Calli Taylor of Make It Do, recipe submitted by TK member ranchinmom2five.

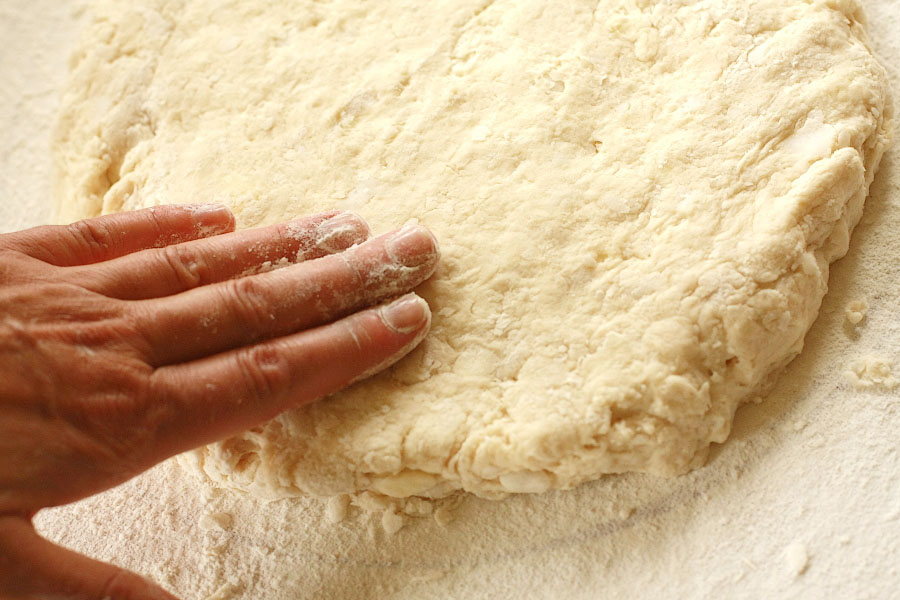
Pat down till the dough is 3/4″ thick. The recipe advises against using a rolling pin, since the biscuits will be less flaky.


Tasty Kitchen Blog: Easy Flaky Buttery Biscuits. Guest post by Calli Taylor of Make It Do, recipe submitted by TK member ranchinmom2five.

Using a biscuit cutter, cut rounds out. Here’s a tip: As hard as it is to resist, don’t twist the cutter when cutting your rounds. Pressing straight down without twisting helps your biscuit rise easier in the oven and keeps them light.


Tasty Kitchen Blog: Easy Flaky Buttery Biscuits. Guest post by Calli Taylor of Make It Do, recipe submitted by TK member ranchinmom2five.

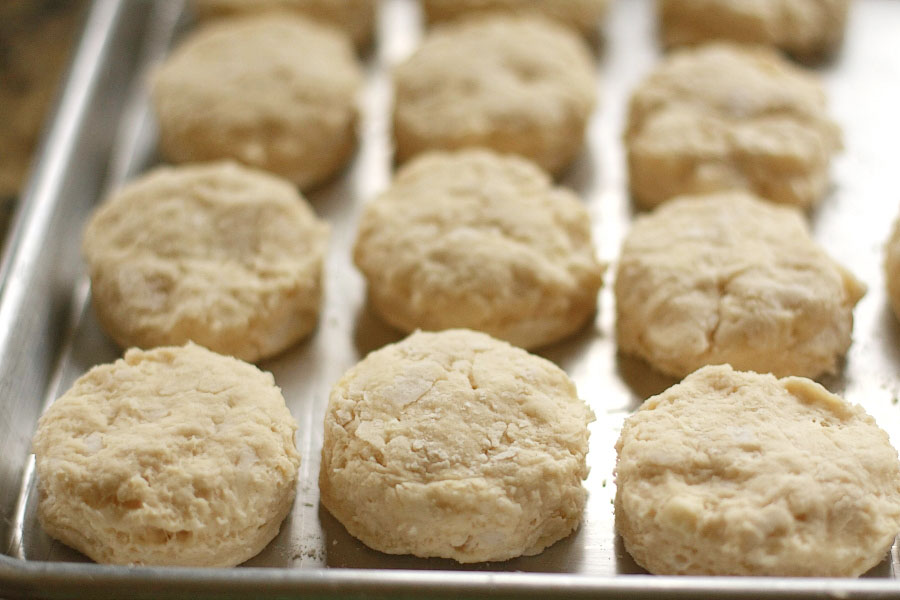
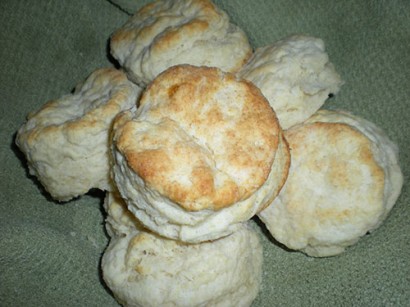
Place on an ungreased cookie sheet. The other trick I’ve found, after making this recipe a few times, is to crowd them a bit when placing them on the pan. They spread more when they are spaced out and are taller when more crowded.


Tasty Kitchen Blog: Easy Flaky Buttery Biscuits. Guest post by Calli Taylor of Make It Do, recipe submitted by TK member ranchinmom2five.

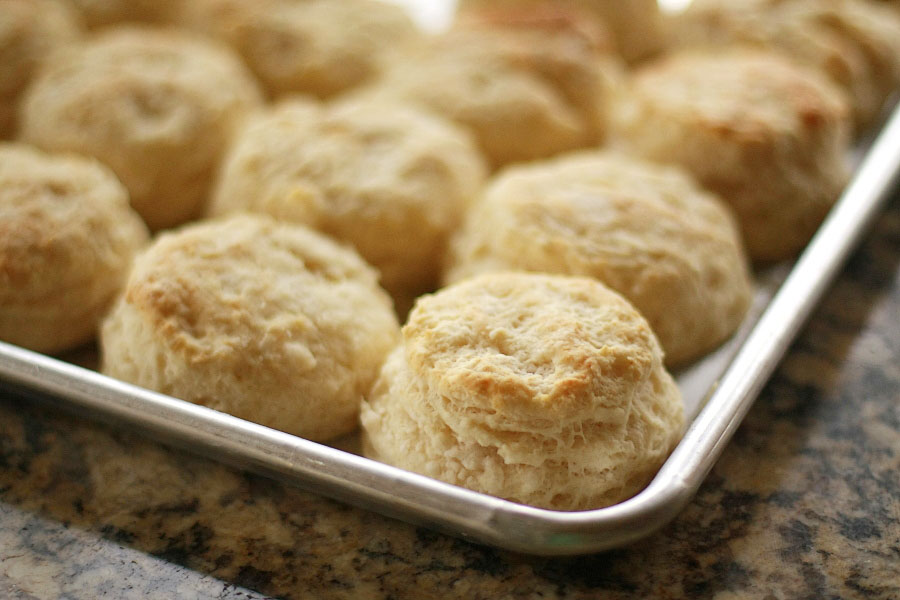
Bake at 450ºF. The recipe says for 10 -14 minutes. I cooked them for 15 -16 minutes in my oven, until they were golden brown. Rub the tops with a little butter if you are feeling sassy.


Tasty Kitchen Blog: Easy Flaky Buttery Biscuits. Guest post by Calli Taylor of Make It Do, recipe submitted by TK member ranchinmom2five.

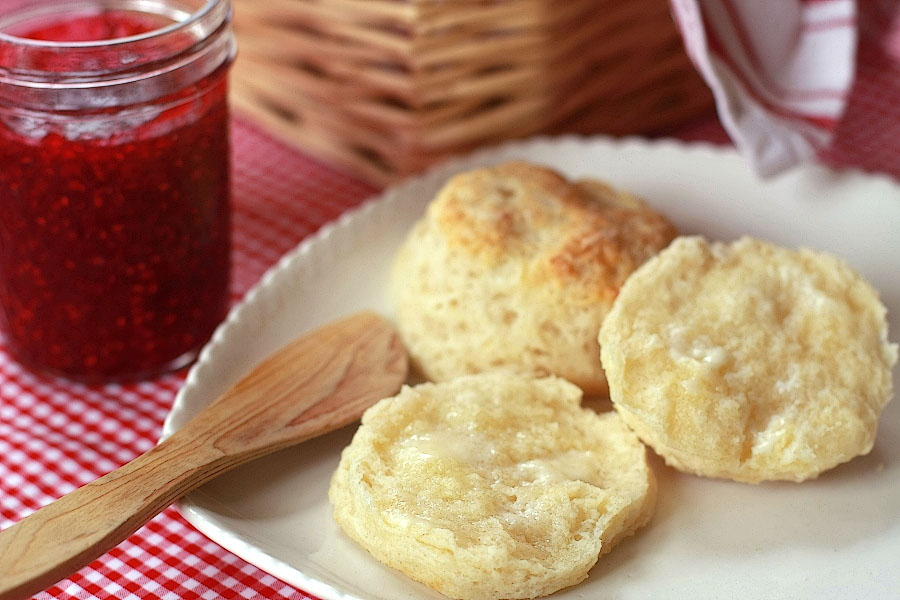
Finally I have a recipe for biscuits that I can be proud to serve! They are everything the name promises: light, buttery, flaky, EASY and good.


Tasty Kitchen Blog: Easy Flaky Buttery Biscuits. Guest post by Calli Taylor of Make It Do, recipe submitted by TK member ranchinmom2five.

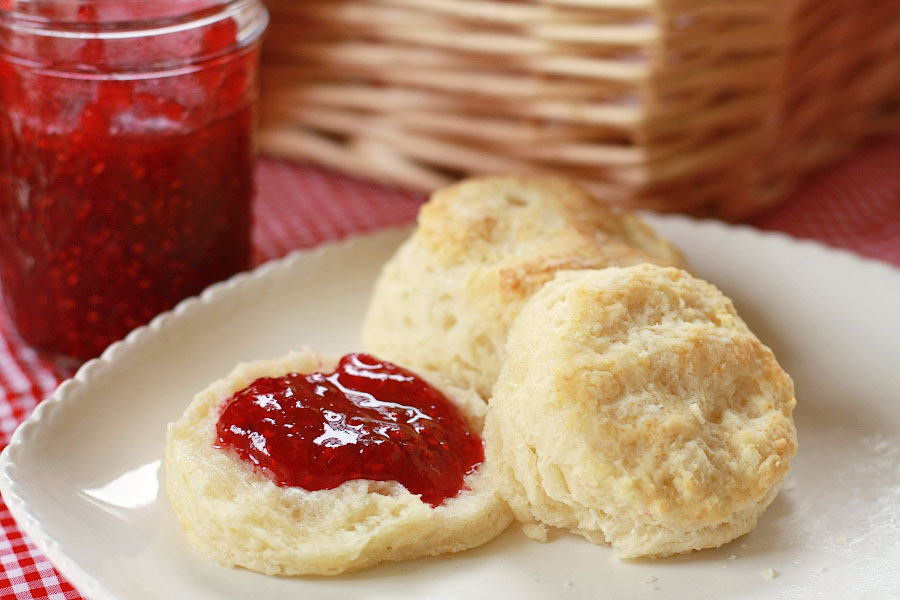
Biscuits are so quick and easy, you can whip them up in no time. They are perfect for breakfast with gravy or with butter and homemade jam. They are so fast, you can even whip them up on a weeknight.

Thank you ranchinmom2five for rescuing my baking reputation and sharing this wonderful recipe with us.


Printable Recipe

Easy, Flaky, Buttery Biscuits

4.96 Mitt(s) 45 Rating(s)45 votes, average: 4.96 out of 545 votes, average: 4.96 out of 545 votes, average: 4.96 out of 545 votes, average: 4.96 out of 545 votes, average: 4.96 out of 5

Prep Time:

Cook Time:

Difficulty: Easy

Servings: 6

6
x

Print Options

Page size Letter 3x5 4x6
Text Size Small Medium Large
Content Include description
Include prep time, etc.
Show image

Description

These super easy biscuits are sure to please any picky crowd. Great without any toppings, or the perfect sausage gravy in the morning, or just some fresh, homemade jam!

Ingredients

  • 3 cups Flour
  • 4-½ teaspoons Baking Powder
  • 2 Tablespoons Sugar
  • ¾ teaspoons Cream Of Tartar
  • ½ teaspoons Salt
  • ¾ cups Butter, Cold
  • 1 whole Egg, Slightly Beaten
  • 1 cup Milk

Preparation Instructions

Preheat oven to 450 F.

Mix dry ingredients together in a large bowl. Cut in cold butter, until it is pea-sized. Mix egg and milk in a small bowl then pour into the dry mix. Stir together with a fork. Combine all the dry mix with the wet mixture until it forms a soft ball.

Turn out onto a floured counter. Pat down until it’s about 3/4″ thick (rolling will keep it from being flaky so use your hands). Using a biscuit cutter (or whatever you have handy), cut biscuits out and place on an ungreased pan.

Bake for 10-12 minutes until golden and beautiful. Perfect for soups, breakfast, or just a yummy snack! Enjoy!

Please note: we live at 8500 feet, so I do add a little more flour—just enough for a soft dough—than the recipe calls for, and bake these closer to 14 minutes.


_______________________________________

Calli is truly a woman of many talents, from cooking, sewing, crafts, beautiful photography and gardening. Her blog, Make it Do is a treasure trove of recipes, household tips, crafts projects, sewing patterns … you name it. It’s also peppered with photos of her beautiful kids. Go visit her site, and visit it often. There’s always something new to learn there!


Profile photo of callimakesdo

Candied Jalapeños (Cowboy Candy)

Posted by in Step-by-Step Recipes

Tasty Kitchen Blog: Candied Jalapenos Cowboy Candy. Guest post by Calli Taylor of Make It Do, recipe submitted by TK member Rebecca of Foodie with Family.

 
Every year my spice-lovin’ husband plants WAY too many hot peppers in our vegetable garden. He can’t help himself, I suppose, but our family can only eat so much salsa and Chile Verde.

This year, rather than letting our delicious crop of jalapeños go to waste, I searched Tasty Kitchen for new recipes and could hardly believe my luck when I came across a recipe for Candied Jalapeños (Cowboy Candy) from TK member Rebecca.

Canned jalapeños? Yes please! What could be better than enjoying the fruit of our summer labor on a cold day in February?

After making a batch of Rebecca’s Candied Jalapeños, I know one thing for sure: there is no way I’ve canned enough jars to make it till February.

You may be wondering what Candied Jalapeños taste like. It’s a wonderful mix of sweet and heat. I made my first batch with the seeds and membranes included and it was SPICY! The tangy, savory sweet flavor of the syrup knocked my socks off. In short, Cowboy Candy is delicious and totally addicting.

I’ll be making another batch for my family this week, and one to give as gifts for the holidays. This time around I’ll remove the seeds and membranes (which is where most of the spicy heat is found), so the rest of my family can enjoy their treat without watery eyes and runny noses.

Here’s how to make Cowboy Candy.


Tasty Kitchen Blog: Candied Jalapenos Cowboy Candy. Guest post by Calli Taylor of Make It Do, recipe submitted by TK member Rebecca of Foodie with Family.

Start with fresh, firm jalapeños. As with any canning recipe, the quality of your vegetable (or fruit) is very important.


Tasty Kitchen Blog: Candied Jalapenos Cowboy Candy. Guest post by Calli Taylor of Make It Do, recipe submitted by TK member Rebecca of Foodie with Family.

Remove the stems from your peppers. Yes, I’m wearing gloves, which might seem a bit cautious. But try inadvertently rubbing your eye after chopping a quantity of spicy peppers, and you’ll opt for gloves too.

This would be a good time to core out the seeds and membrane if you like a milder flavor.


Tasty Kitchen Blog: Candied Jalapenos Cowboy Candy. Guest post by Calli Taylor of Make It Do, recipe submitted by TK member Rebecca of Foodie with Family.

Slice the peppers into 1/8 to 1/4 inch slices.


Tasty Kitchen Blog: Candied Jalapenos Cowboy Candy. Guest post by Calli Taylor of Make It Do, recipe submitted by TK member Rebecca of Foodie with Family.

Beyond the obvious jalapeños, the ingredients are sugar, cider vinegar, turmeric, celery seed, ground cayenne pepper and granulated garlic. I live in a smaller community and couldn’t find granulated garlic. I chose powdered garlic at half the measurement (1-1/2 teaspoons) as a substitute, since powered is much finer than granulated. Powdered garlic was easy and worked great for me. After reading the comments on Rebecca’s blog, I discovered that she recommends one clove of garlic per 1/4 teaspoon of granulated, if you have trouble finding granulated like I did.


Tasty Kitchen Blog: Candied Jalapenos Cowboy Candy. Guest post by Calli Taylor of Make It Do, recipe submitted by TK member Rebecca of Foodie with Family.

Pour 6 cups of white granulated sugar into a large pot.


Tasty Kitchen Blog: Candied Jalapenos Cowboy Candy. Guest post by Calli Taylor of Make It Do, recipe submitted by TK member Rebecca of Foodie with Family.

Add the vinegar and spices.


Tasty Kitchen Blog: Candied Jalapenos Cowboy Candy. Guest post by Calli Taylor of Make It Do, recipe submitted by TK member Rebecca of Foodie with Family.

Bring to a boil. Reduce the heat and simmer for 5 minutes.


Tasty Kitchen Blog: Candied Jalapenos Cowboy Candy. Guest post by Calli Taylor of Make It Do, recipe submitted by TK member Rebecca of Foodie with Family.

Add the peppers and simmer for exactly 4 minutes. Remove from the heat. Some of the slices looked more cooked than others, but that’s okay.


Tasty Kitchen Blog: Candied Jalapenos Cowboy Candy. Guest post by Calli Taylor of Make It Do, recipe submitted by TK member Rebecca of Foodie with Family.

Using a slotted spoon or mesh skimmer, transfer the peppers into clean, sterile, hot canning jars. Fill to within 1/4 inch from the rim of the jar. You can use half pint or if you have big eaters, go for pint jars. Knowing my husband, I opted for pints and yielded 4 jars.


Tasty Kitchen Blog: Candied Jalapenos Cowboy Candy. Guest post by Calli Taylor of Make It Do, recipe submitted by TK member Rebecca of Foodie with Family.

Return the syrup to the stove, turn up the heat and bring back to a full rolling boil. Boil hard for 6 minutes.

Use a ladle to pour the boiling syrup over the jalapeños.


Tasty Kitchen Blog: Candied Jalapenos Cowboy Candy. Guest post by Calli Taylor of Make It Do, recipe submitted by TK member Rebecca of Foodie with Family.

Insert a clean, sterile chopstick to the bottom of the jar several times to release any trapped air. Add or remove syrup if necessary to leave 1/4 inch head space.


Tasty Kitchen Blog: Candied Jalapenos Cowboy Candy. Guest post by Calli Taylor of Make It Do, recipe submitted by TK member Rebecca of Foodie with Family.

Wipe the rims of the jars using a clean, damp paper towel to remove any stickiness. A clean rim is important for a good seal.


Tasty Kitchen Blog: Candied Jalapenos Cowboy Candy. Guest post by Calli Taylor of Make It Do, recipe submitted by TK member Rebecca of Foodie with Family.

Fix on new two-piece lids to fingertip tightness.

Rebecca included recommended canning times on the recipe: 10 minutes for 1/2 pint and 15 minutes for pint jars. However, I live in the Rocky Mountains at almost 5000 feet, so I made a quick call to my local State Extension service for canning times at my altitude. The canning times vary depending on where you live, so I highly recommend making the same phone call to find the right time for you. I processed my pint jars for 25 minutes.

Add your cans to your canner with two inches of water over the tops of the lid. Start timing only after your water has come to a full boil.


Tasty Kitchen Blog: Candied Jalapenos Cowboy Candy. Guest post by Calli Taylor of Make It Do, recipe submitted by TK member Rebecca of Foodie with Family.

Rebecca recommends waiting about 2 weeks before eating your jalapenos, for best flavor. This turned out to be a tall order for our house and my husband broke into a jar in less than a week.

Already we’ve enjoyed them on burgers with jack cheese and on turkey sandwiches.


Tasty Kitchen Blog: Candied Jalapenos Cowboy Candy. Guest post by Calli Taylor of Make It Do, recipe submitted by TK member Rebecca of Foodie with Family.

We’ve also loved them as an appetizer on crackers with cream cheese. I get the feeling we’ve just begun finding ways to enjoy this spicy treat.

Just be sure to spoon some of the syrup onto whatever you are eating! It is the star of the show.

Thank you Rebecca for sharing Cowboy Candy with us. You are truly a genius in the kitchen.

Be sure to check out Rebecca’s Tasty Kitchen recipe box for more of her delicious recipes. You’ll also love her blog Foodie with Family.


Printable Recipe

Candied Jalapenos (Cowboy Candy)

See post on Rebecca’s site!
4.97 Mitt(s) 34 Rating(s)34 votes, average: 4.97 out of 534 votes, average: 4.97 out of 534 votes, average: 4.97 out of 534 votes, average: 4.97 out of 534 votes, average: 4.97 out of 5

Prep Time:

Cook Time:

Difficulty: Intermediate

Servings: 36

36
x

Print Options

Page size Letter 3x5 4x6
Text Size Small Medium Large
Content Include description
Include prep time, etc.
Show image

Description

These little beauties are so addictive: sweet, spicy, and tangy. Once you start eating these, you’ll find all sorts of places to stash them—sandwiches, potato salad, grilled meat, and pasta, just to name a few.

Ingredients

  • 3 pounds Firm, Fresh Jalapeno Peppers, Washed
  • 2 cups Cider Vinegar
  • 6 cups White Granulated Sugar
  • ½ teaspoons Turmeric
  • ½ teaspoons Celery Seed
  • 3 teaspoons Granulated Garlic
  • 1 teaspoon Ground Cayenne Pepper

Preparation Instructions

Wearing gloves, remove the stems from all of the jalapeno peppers. The easiest way to do this is to slice a small disc off of the stem-end along with the stem. Discard the stems.

Slice the peppers into uniform 1/8-1/4 inch rounds. Set aside.

In a large pot, bring cider vinegar, white sugar, turmeric, celery seed, granulated garlic and cayenne pepper to a boil. Reduce heat and simmer for 5 minutes. Add the pepper slices and simmer for exactly 4 minutes. Use a slotted spoon to transfer the peppers, loading into clean, sterile canning jars to within 1/4 inch of the upper rim of the jar. Turn heat up under the pot with the syrup and bring to a full rolling boil. Boil hard for 6 minutes.

Use a ladle to pour the boiling syrup into the jars over the jalapeno slices. Insert a cooking chopstick to the bottom of the jar two or three times to release any trapped pockets of air. Adjust the level of the syrup if necessary. Wipe the rims of the jars with a clean, damp paper towel and fix on new, two-piece lids to finger-tip tightness.

If you do not want to can these to the point of shelf stable, you can simply put the jars in your refrigerator and store them there. I prefer to keep the fridge space free so I can them. If you wish to can them, follow the instructions below.

Note: If you have leftover syrup, and it is likely that you will, you may can it in half-pint or pint jars, too. It’s wonderful brushed on meat on the grill or added to potato salad or, or, or … in short, don’t toss it out!

To can, place jars in a canner and cover with water by 2-inches. Bring the water to a full rolling boil. When it reaches a full rolling boil, set the timer for 10 minutes for half-pints or 15 minutes for pints. When timer goes off, use canning tongs to transfer the jars to a cooling rack. Leave them to cool, undisturbed, for 24 hours. When fully cooled, wipe them with a clean, damp washcloth, then label.

Allow to mellow for at least two weeks, but preferably a month before eating. Or don’t. I won’t tell!


_______________________________________

Calli is truly a woman of many talents, from cooking, sewing, crafts, beautiful photography and gardening. Her blog, Make it Do is a treasure trove of recipes, household tips, crafts projects, sewing patterns … you name it. It’s also peppered with photos of her beautiful kids. Go visit her site, and visit it often. There’s always something new to learn there!


Profile photo of callimakesdo

Pie Crust Tutorial

Posted by in Baking, Kitchen Talk, Step-by-Step Recipes

Tasty Kitchen Blog Pie Crust Tutorial. Guest post and recipe from Calli Taylor of Make It Do.

 
A few weeks ago, I invited my mom to join me in my kitchen for a day of pie making. She’s made hundreds of pies over the years and is known for her tender, flaky crusts. Working beside her brought back memories of making pie with her as a child. I love to watch her hands at work, her touch on the dough is so light and sure. We had a lovely day together and delicious pies to show for our work.

As we worked, my mom and I talked about pie. I told her I know many great cooks who are daunted by pie crust. Her answer was simple: if you want to be good at making pie, practice.

There are lots of tips you can use to improve your crust—how much to cut the fat, how wet the dough should be, and how to roll out and handle your dough. But in the end, there is no substitute for doing.


Tasty Kitchen Blog Pie Crust Tutorial. Guest post and recipe from Calli Taylor of Make It Do.

You don’t need fancy tools to make a good pie crust. The essentials are a mixing bowl, measuring cups and spoons, a pastry cutter, a rolling pin and a pie plate.

I use one more tool that’s not a necessity but is my favorite pie secret, and that’s a pastry frame. A pastry frame is canvas stretched tight over a wood and metal frame. It can be used for pies, pastries and even rolls. They are inexpensive (I paid about $15 for mine) and they roll up compactly to store. They make it incredibly easy to roll out your dough without sticking, and thanks to the canvas, your dough absorbs less flour, making your crust lighter and more tender. My frame even has guides so you know exactly how large to roll your dough.


Tasty Kitchen Blog Pie Crust Tutorial. Guest post and recipe from Calli Taylor of Make It Do.

The ingredients for pie are simple too, no matter which recipe you use. Each recipe has dry ingredients, usually all-purpose flour, salt, sometimes sugar, a liquid (ice water, milk or even vodka), and a fat.

There is great debate in the pie world about which fat is best: butter, shortening, lard, or a combination of those fats. The two best pie makers I’ve known, my mom and my husband’s late grandmother, both use(d) lard. Their crusts speak for themselves—flaky, delicious, out of this world. So lard is what I use, too. Whatever fat you choose, it must be cold, cold, cold. Cold fat makes for flaky crust.

So let’s get baking.


Tasty Kitchen Blog Pie Crust Tutorial. Guest post and recipe from Calli Taylor of Make It Do.

Before anything else, measure the lard and put it in the freezer to get it extra cold. Then prepare the rest of the ingredients.


Tasty Kitchen Blog Pie Crust Tutorial. Guest post and recipe from Calli Taylor of Make It Do.

Measure 2 cups of flour and sift onto a piece of parchment or wax paper.


Tasty Kitchen Blog Pie Crust Tutorial. Guest post and recipe from Calli Taylor of Make It Do.

Re-measure the 2 cups of sifted flour. My mom lifts the parchment like a funnel and pours it back into the measuring cup. She also re-measures over the surface where she will be rolling out the dough. The overspill helps to flour the surface. My mom is all about economy of action.


Tasty Kitchen Blog Pie Crust Tutorial. Guest post and recipe from Calli Taylor of Make It Do.

Tap across and level with a knife.


Tasty Kitchen Blog Pie Crust Tutorial. Guest post and recipe from Calli Taylor of Make It Do.

Add the salt to the flour and sift again, this time into your mixing bowl. Then add the cold lard. Using a pastry cutter, cut the lard into the flour. Some pie makers turn this step over to their food processor. Resist the temptation! It’s too easy to overwork the flour and end up with a tough crust. The pastry cutter, on the other hand, will give you a nice workout. I like to think I’m burning off a few bites of pie.


Tasty Kitchen Blog Pie Crust Tutorial. Guest post and recipe from Calli Taylor of Make It Do.

The motion with the cutter is down and twist your wrist one quarter turn, Daniel-san. Down and twist. Continue this motion until the flour has been worked into the lard and your dough resembles small peas. Don’t overwork the dough at this point.


Tasty Kitchen Blog Pie Crust Tutorial. Guest post and recipe from Calli Taylor of Make It Do.

Next add liquid. My mom uses very cold milk. Grandma Eva used ice water. Both work equally well. Start by adding about half the liquid, which for my mom’s crust recipe is 2 tablespoons. Then slowly add one to two tablespoons more, using a fork until the dough pulls together into a ball. Stop before the dough gets too wet but is nicely pulled together.


Tasty Kitchen Blog Pie Crust Tutorial. Guest post and recipe from Calli Taylor of Make It Do.

Cut your ball in half and lightly work into two disks. Wrap them individually in plastic wrap and put in the refrigerator for half an hour or up to a day.


Tasty Kitchen Blog Pie Crust Tutorial. Guest post and recipe from Calli Taylor of Make It Do.

Remove one ball from the refrigerator at a time and turn onto your nicely floured work surface. Don’t be shy about the flour if you are rolling out on a counter or cutting board. It’s not fun to have your dough stick. This is why I love my pastry frame—the dough never sticks, even with a moderate amount of flour.

Work the dough with your rolling pin, applying gentle pressure. Roll away from you, then turn the dough a half turn and roll away from you again. As you turn the dough, make sure to add more flour underneath as needed.

Continue this until your dough is too large to turn. Roll until your dough is about a 12″ circle for a 9-inch pie plate and about 1/8 inch thick.


Tasty Kitchen Blog Pie Crust Tutorial. Guest post and recipe from Calli Taylor of Make It Do.

Many pie makers will tell you to fold your dough in quarters then gently lift it into your plate. Our method is much simpler and works like a charm. Gently roll the dough over the top of your rolling pin, slip the plate under, center and roll the dough into the plate.

When it comes to pie plates, my mom and I agree: a simple style glass Pyrex is best. It does a wonderful job of evenly cooking your pie crust. We even prefer Pyrex over more expensive ceramic plates.


Tasty Kitchen Blog Pie Crust Tutorial. Guest post and recipe from Calli Taylor of Make It Do.

The next step is important. Working around the pie, lift the edges of the dough and make sure the dough is snugged into the corners of the pie plate without stretching the dough. This will keep your dough from slipping down when baking.

If you are making a double crust pie, roll out the top at this point. I like to cut my vents while my dough is still on the pastry frame and the surface is firm. That way I can use a cute little cookie cutter to cut a small shape in the center of the crust.

Fill the pie with your filling. Wet the edge of the dough in the plate with a little water. Roll the top over the rolling pin, carefully center it over the pie, and roll into place. Trim around the pie using kitchen scissors or a knife, leaving about a 1/2-inch overhang.


Tasty Kitchen Blog Pie Crust Tutorial. Guest post and recipe from Calli Taylor of Make It Do.

If you are making a single crust, trim around the pie, leaving about 1/2 inch overhang.


Tasty Kitchen Blog Pie Crust Tutorial. Guest post and recipe from Calli Taylor of Make It Do.

My mom and I both flute the edge of the pie by using a thumb and two index fingers, folding the edge, crimping and fluting as you go. Follow the same process for a double crust pie.

Finish your double crust pie by brushing the top with milk or egg wash and sprinkling the surface with sugar to make a lovely crisp sheen on your crust. If you didn’t before, make sure to cut vents for steam.

For a single crust pie where the filling needs to be baked in the pie, fill and bake according to your recipe. Trust me on this one: once you fill your pie, bake it immediately.


Tasty Kitchen Blog Pie Crust Tutorial. Guest post and recipe from Calli Taylor of Make It Do.

For a pie requiring a precooked crust, use a fork to pierce evenly around your pie crust. Bake in a 400ºF oven for about 15 minutes until your crust is golden brown.

You may wonder why I don’t mention pie weights. The need for them depends on your recipe. My mom and I have never had trouble with our crusts slipping into the pan, and have never needed or used weights. If you feel you need them, line your pie crust with parchment or foil and use dry beans or rice to fill the pie.


Tasty Kitchen Blog Pie Crust Tutorial. Guest post and recipe from Calli Taylor of Make It Do.

We never throw away our leftover pie scraps. Cinnamon pie scraps are a favorite treat. Place your scraps on a cookie sheet cut in bite-sized pieces. Sprinkle with cinnamon sugar and cook at 400ºF for 8 to 10 minutes or until golden brown.


Tasty Kitchen Blog Pie Crust Tutorial. Guest post and recipe from Calli Taylor of Make It Do.

Just look at that crust, so light and flaky.


Tasty Kitchen Blog Pie Crust Tutorial. Guest post and recipe from Calli Taylor of Make It Do.

The pre-baked pie crust can be made several days ahead until it is ready to be filled with coconut or banana cream …


Tasty Kitchen Blog Pie Crust Tutorial. Guest post and recipe from Calli Taylor of Make It Do.

Or one of my favorites: fresh peaches. That’s the pie we made today. While peaches are in season, it’s a treat not to be missed.

The first few pie crusts I made tasted good but weren’t very pretty. I’ve even had a few epic failures, like the time I filled an apple pie and put it in the refrigerator overnight so I could cook it fresh on Thanksgiving morning. It came out of the oven gorgeous and golden. But when I served the pie, the bottom crust had turned to goo. So awful! I’ve lived and learned and gotten better with every crust. It’s a skill worth working at, and one your family and friends will love you for.

There are many ways to make a great pie crust, this is simply one method. But it’s a good one. It creates a flaky, tender, delicious pie crust every time. This tutorial is mostly about technique and could be applied to other recipes.

You can also find the printable recipe for my Mom’s Fresh Peach Pie here on Tasty Kitchen and a step by step tutorial on my blog. And thanks, Mom, for sharing your skill and wisdom.


Printable Recipe

Perfect Pie Crust

See post on callimakesdo’s site!
5.00 Mitt(s) 1 Rating(s)1 vote, average: 5.00 out of 51 vote, average: 5.00 out of 51 vote, average: 5.00 out of 51 vote, average: 5.00 out of 51 vote, average: 5.00 out of 5

Prep Time:

Cook Time:

Difficulty: Intermediate

Servings: 16

16
x

Print Options

Page size Letter 3x5 4x6
Text Size Small Medium Large
Content Include description
Include prep time, etc.
Show image

Description

This crust is simple, yet tender, flaky and delicious. It works for sweet or savory pie fillings. Makes 2 single or 1 double pie crust.

Ingredients

  • ⅔ cups Cold Lard
  • 2 cups Sifted All-Purpose Flour
  • ½ teaspoons Salt
  • 4 Tablespoons Cold Milk

Preparation Instructions

Measure lard and place in the freezer. Sift flour onto a piece of parchment or wax paper. Re-measure flour and sift again with salt into a mixing bowl. Using a pastry cutter, cut cold lard into the flour mixture until the dough resembles small peas. Do not overwork. Add 2 tablespoons milk and work into the dough using a fork. Add one or two more tablespoons of milk, working with a fork until the dough pulls together into a nice ball. Divide into two equal pieces and lightly work into disks. Wrap disks individually in plastic wrap and refrigerate for 1/2 hour or up to one day. On a floured work surface, roll out into a 12-inch disk about 1/8 inch thick and place into a pie plate.

Fill and bake according to your pie recipe. If a recipe calls for a pre-baked pie crust, pierce evenly around the crust with a fork and bake in a 400ºF oven for about 15 minutes or until golden brown. Makes one double crust or 2 single crusts.


_______________________________________

Calli is truly a woman of many talents, from cooking, sewing, crafts, beautiful photography and gardening. Her blog, Make it Do is a treasure trove of recipes, household tips, crafts projects, sewing patterns … you name it. It’s also peppered with photos of her beautiful kids. Go visit her site, and visit it often. There’s always something new to learn there!


Profile photo of callimakesdo

Strawberry Rhubarb Pie with Streusel Topping

Posted by in Baking, Step-by-Step Recipes

Tasty Kitchen Blog: Strawberry Rhubarb Pie with Streusel Topping. Guest post by Calli Taylor of Make It Do, recipe submitted by TK member Mel of Mel's Kitchen Cafe.

Growing up, I had a next-door neighbor named Laverne. She was a grandmother, a wonderful cook, and kept a large backyard garden. Every year in late spring, Laverne would call over the fence and invite me for a slice of her fresh baked rhubarb pie, topped with melting vanilla ice cream.

The rhubarb was fresh from her garden; the crust was made from scratch. I’m not sure who was more delighted, me with my slice of pie, or Laverne, knowing how much I loved it.

Despite my early love affair, I had never tried to make rhubarb pie, until I saw the recipe for Strawberry Rhubarb Pie with Streusel Topping from Melanie of Mel’s Kitchen Cafe on Tasty Kitchen. Seeing the recipe evoked warm memories of Laverne’s kitchen and the lovely sweet tartness of her pie. As soon as I could find fresh rhubarb this spring, I made Melanie’s pie.

Was it good? Did it live up to my fond memories? Good doesn’t begin to describe it. This pie is heavenly! It’s right up there among my favorite pies of all time.

It’s also easy. Easy as pie, really. So if you love the combination of sweet and tart, here’s how to make Melanie’s pie:


Tasty Kitchen Blog: Strawberry Rhubarb Pie with Streusel Topping. Guest post by Calli Taylor of Make It Do, recipe submitted by TK member Mel of Mel's Kitchen Cafe.

Start with your favorite uncooked 9″ to 9.5″ pie crust. You can pick one up in the freezer section at the store, or better yet, make your own from scratch. It’s not hard once you’ve had a little practice. My homemade crust never looks perfect, but store bought just can’t match the flaky goodness of homemade.

Once you’ve rolled out your crust, pop it in the refrigerator until you’re ready to fill and bake.


Tasty Kitchen Blog: Strawberry Rhubarb Pie with Streusel Topping. Guest post by Calli Taylor of Make It Do, recipe submitted by TK member Mel of Mel's Kitchen Cafe.

Chop up your rhubarb, just like celery.


Tasty Kitchen Blog: Strawberry Rhubarb Pie with Streusel Topping. Guest post by Calli Taylor of Make It Do, recipe submitted by TK member Mel of Mel's Kitchen Cafe.

Slice your strawberries.


Tasty Kitchen Blog: Strawberry Rhubarb Pie with Streusel Topping. Guest post by Calli Taylor of Make It Do, recipe submitted by TK member Mel of Mel's Kitchen Cafe.

Add the rhubarb and strawberries into a mixing bowl, along with sugar and cornstarch. The cornstarch is the reason this pie is so pretty when cut and served. Many delicious pie recipes taste amazing, but are messy to serve. Not this pie; it holds together nicely.

Stir together until it looks thick and syrupy. The sauce that forms is a lovely shade of pink.


Tasty Kitchen Blog: Strawberry Rhubarb Pie with Streusel Topping. Guest post by Calli Taylor of Make It Do, recipe submitted by TK member Mel of Mel's Kitchen Cafe.

Pour the fruit mixture evenly into your unbaked pie shell.


Tasty Kitchen Blog: Strawberry Rhubarb Pie with Streusel Topping. Guest post by Calli Taylor of Make It Do, recipe submitted by TK member Mel of Mel's Kitchen Cafe.

For the streusel top, add one cube of butter, flour and brown sugar into a mixing bowl. Why does everything I love have a cube of butter?

Cut the butter into the flour and sugar using a pastry cutter. You could make do with two knives. But do yourself a little favor and pick up a pastry cutter at the grocery store for a few dollars. It’ll be worth its weight in pie.


Tasty Kitchen Blog: Strawberry Rhubarb Pie with Streusel Topping. Guest post by Calli Taylor of Make It Do, recipe submitted by TK member Mel of Mel's Kitchen Cafe.

Cut in the butter until it has the consistency of coarse crumbs.


Tasty Kitchen Blog: Strawberry Rhubarb Pie with Streusel Topping. Guest post by Calli Taylor of Make It Do, recipe submitted by TK member Mel of Mel's Kitchen Cafe.

Sprinkle the streusel evenly over the top of the pie.

I took Melanie’s advice and cooked my pie on a baking sheet with a rolled edge. (I’ve cleaned burnt fruit from the bottom of my oven before—not fun!)


Tasty Kitchen Blog: Strawberry Rhubarb Pie with Streusel Topping. Guest post by Calli Taylor of Make It Do, recipe submitted by TK member Mel of Mel's Kitchen Cafe.

Halfway through cooking, wrap the edge of your crust with foil to keep it from over browning.


Tasty Kitchen Blog: Strawberry Rhubarb Pie with Streusel Topping. Guest post by Calli Taylor of Make It Do, recipe submitted by TK member Mel of Mel's Kitchen Cafe.

It’s a hard thing to do, but let your pie cool before serving. A watched pot never boils and a watched pie never seems to cool. Especially when you can hardly wait for a bite.


Tasty Kitchen Blog: Strawberry Rhubarb Pie with Streusel Topping. Guest post by Calli Taylor of Make It Do, recipe submitted by TK member Mel of Mel's Kitchen Cafe.

We served our pie with whipped cream like Melanie suggested. Next time we’ll give vanilla ice cream a try, in homage to Laverne.

Thank you Melanie for sharing this treasured pie recipe. It was a lovely stroll down memory lane and I know it will be one of our favorites for years to come. Be sure to check out Melanie’s blog Mel’s Kitchen Cafe. She makes the kind of food I love to cook—on the healthy side, not super fussy, fresh and made from scratch. And she has four of the cutest sous chefs you’ll ever see.


Printable Recipe

Strawberry Rhubarb Pie with Streusel Topping

See post on Melanie - Mel's Kitchen Cafe’s site!
4.92 Mitt(s) 25 Rating(s)25 votes, average: 4.92 out of 525 votes, average: 4.92 out of 525 votes, average: 4.92 out of 525 votes, average: 4.92 out of 525 votes, average: 4.92 out of 5

Prep Time:

Cook Time:

Difficulty: Easy

Servings: 8

8
x

Print Options

Page size Letter 3x5 4x6
Text Size Small Medium Large
Content Include description
Include prep time, etc.
Show image

Description

This pie is filled to brimming with juicy, sweet strawberries, tart rhubarb and a healthy amount of sugar to help lessen the rhubarb’s puckery flavor. Topped with a delicious and buttery streusel topping, this pie is worth the wait for fresh rhubarb.

Ingredients

  • FOR THE FILLING:
  • 2-¾ cups Sliced Fresh Rhubarb, About 5-6 Medium Stalks
  • 2 cups Sliced Strawberries
  • ⅔ cups Sugar
  • 3 Tablespoons Cornstarch
  • _____
  • FOR THE STREUSEL TOPPING:
  • 1 cup Flour
  • ½ cups Brown Sugar
  • ½ cups Butter (1 Stick), Cold And Cut Into Small Pieces
  • 1 Unbaked Single Pie Crust (store Bought Or Your Favorite Recipe)

Preparation Instructions

In a medium-large bowl, combine the rhubarb, strawberries, sugar and cornstarch. Mix well. The mixture should be thick and syrupy after being stirred well.

Roll out pie crust according to recipe or package instructions and place in a 9- or 9.5-inch pie plate. Pour the strawberry/rhubarb mixture into the crust, using a large spoon to fill evenly.

For the topping: In a small bowl, combine the flour and brown sugar. Cut the butter into pieces and using a pastry cutter or two knives, cut the butter into the flour/sugar mixture until it has the consistency of coarse crumbs. Sprinkle the streusel topping evenly over the top of the pie.

Place the pie on a rimmed baking sheet and bake at 400 degrees for 50-55 minutes, covering the pie crust edges with foil halfway through in order to prevent over-browning.

Let the pie cool completely before cutting into pieces. Serve with a dollop of freshly whipped cream, if desired.


_______________________________________

Calli is truly a woman of many talents, from cooking, sewing, crafts, beautiful photography and gardening. Her blog, Make it Do is a treasure trove of recipes, household tips, crafts projects, sewing patterns … you name it. It’s also peppered with photos of her beautiful kids. Go visit her site, and visit it often. There’s always something new to learn there!


Profile photo of callimakesdo

Essential Buttermilk Syrup

Posted by in Step-by-Step Recipes

Do you ever wonder what recipes you’ll be known for? When I saw the recipe for Essential Buttermilk Syrup from TK member lizaskitchen, I couldn’t help but think of my mom. She makes the most amazing Scones served with Homemade Buttermilk Syrup. You might think scones and syrup are an odd combination. But here in […]

Profile photo of callimakesdo

Bow Tie Pasta with Oven Dried Tomatoes

Posted by in Step-by-Step Recipes

Ask my nine-year-old daughter what she wants for dinner and nine times out of ten the answer will be, “Bow Tie Pasta.” What can I say, she is a very reliable girl. As a mom, I find myself cooking foods that appeal to my husband and me, and I don’t cater to the kids a […]

Profile photo of callimakesdo

Spicy Grilled Fish Tacos

Posted by in Step-by-Step Recipes

  My husband and I LOVE fish tacos. We order them every chance we get. But since we live in a small community roughly 700 miles from the nearest ocean, a great fish taco is hard to come by. When Patio Daddio’s Spicy Grilled Fish Tacos recipe popped up on Tasty Kitchen, I knew it […]

Profile photo of callimakesdo

Grilled Salad with Strawberry Balsamic Reduction

Posted by in Step-by-Step Recipes

We’re so happy to welcome Calli to the Tasty Kitchen Blog. We love her and her blog Make it Do. It’s pretty, it’s yummy, and it has so many handy tips for making things around the house a little bit easier. (I’m waiting for her to invent automated laundry.) And what a gorgeous salad to […]