The Pioneer Woman Tasty Kitchen
Profile photo of Laurie - Simply Scratch

Bacon Jam (Ooh Mommy!)

Posted by in Step-by-Step Recipes

Did someone say International Bacon Day? You mean that’s just one special day and not every single pork-loving day? Celebrate with this blast from the past: Bacon Jam. It’s spreadable bacon, friends. Yes. We know. You’re welcome.

 
Tasty Kitchen Blog: Bacon Jam. Guest post by Laurie McNamara of Simply Scratch, recipe submitted by TK member Rebecca of Foodie with Family.

 
From the very second my eyes laid upon Rebecca’s recipe for Bacon Jam aka “Ooh Mommy” Jam, I was extremely curious and extremely hungry. Over a few days I found myself always coming back to her recipe wondering what it could possibly taste like. Is it an overly sweet jam with chunks of chewy bacon? Is a savory jam that would work slathered on cornbread or smeared on toast with a fried egg on top?

So I told myself to get on with it and make it already, and I’m so glad I did. In Rebecca’s recipe, bacon is slowly cooked with onions and garlic in a delicious concoction of coffee, maple syrup and brown sugar with some tang from cider vinegar until the sauce is thick and the bacon and onions melt in your mouth (just be careful not to burn your tongue when taste testing). After it’s quickly blitzed in a food processor, it’s ready to be served or spread!


Tasty Kitchen Blog: Bacon Jam. Guest post by Laurie McNamara of Simply Scratch, recipe submitted by TK member Rebecca of Foodie with Family.

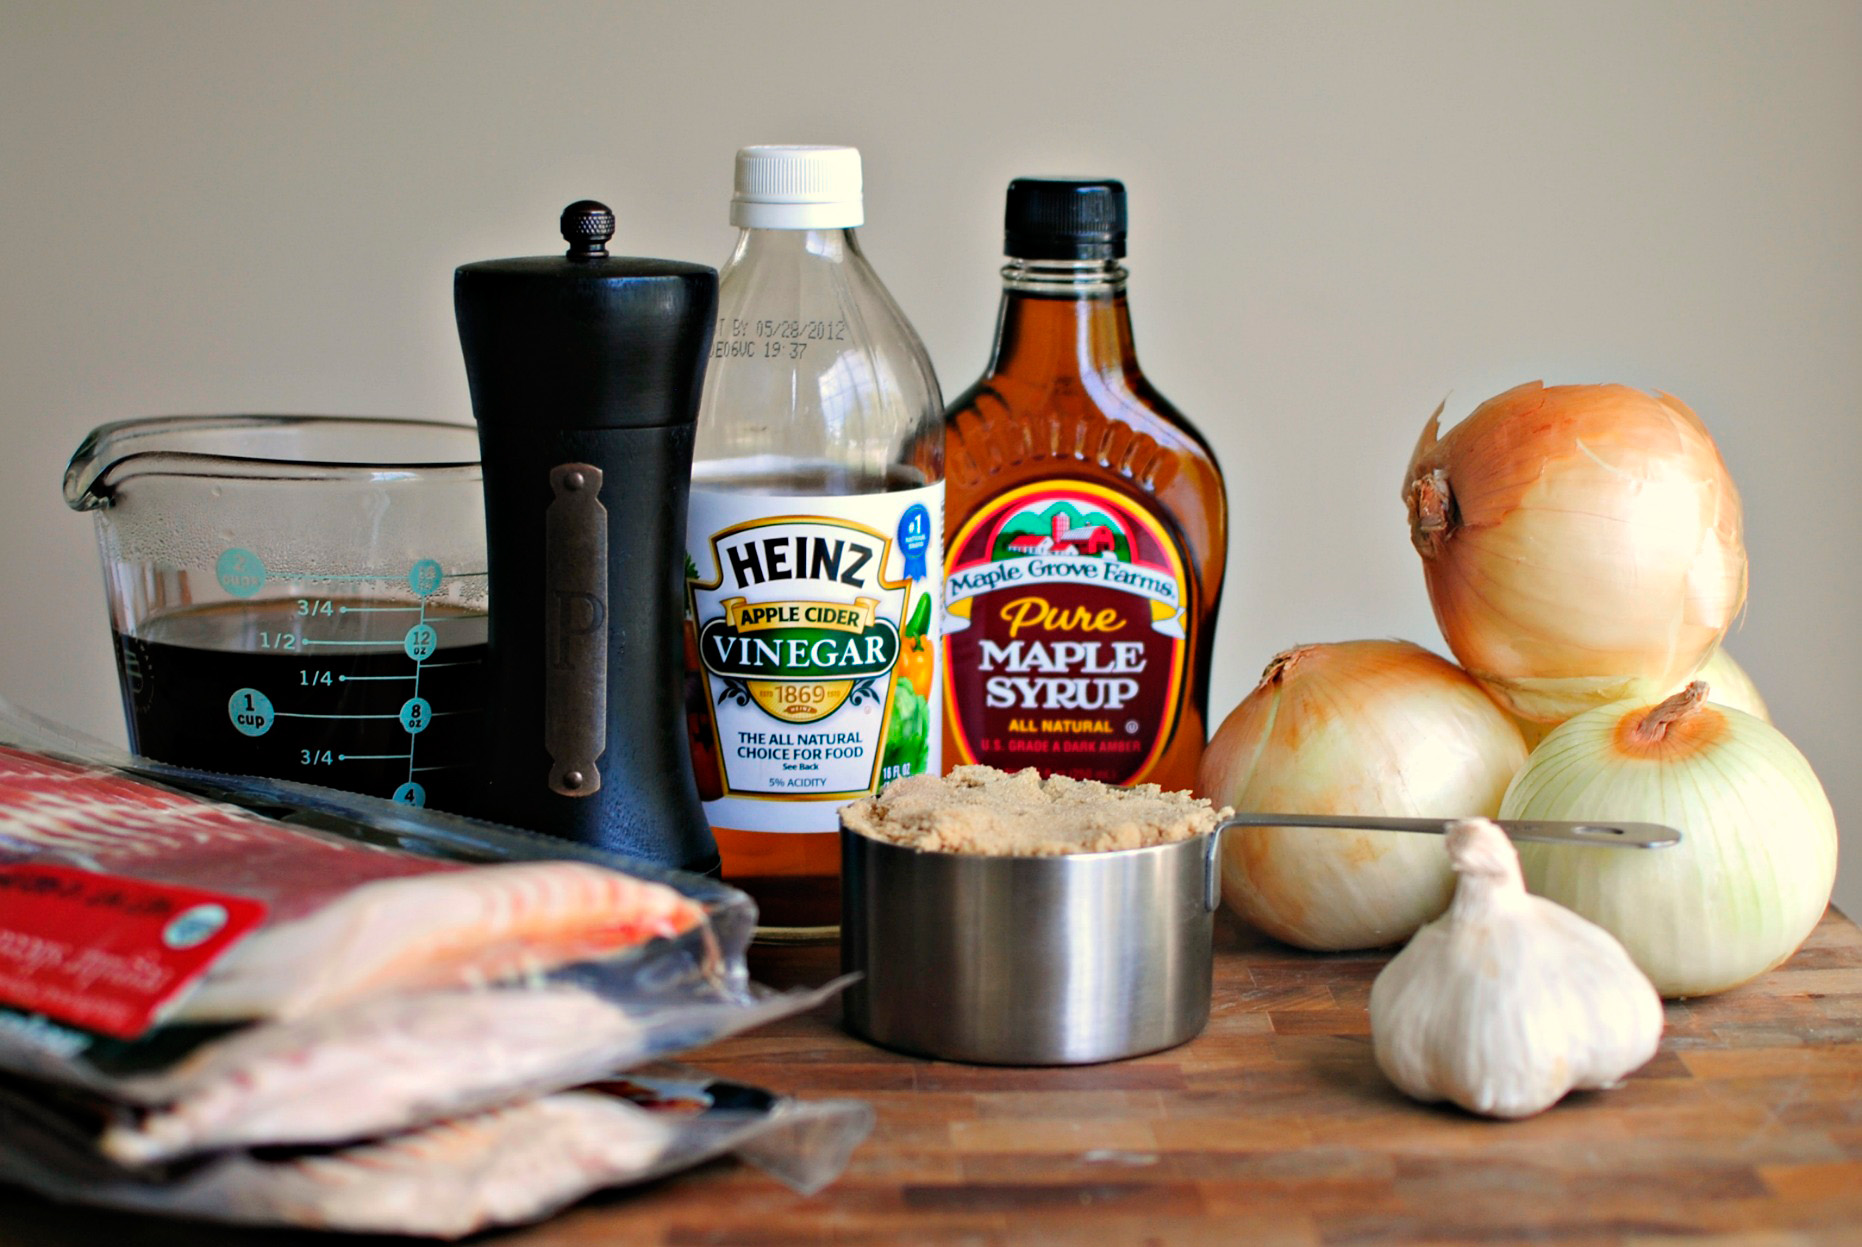
The recipe calls for onions, garlic, brown sugar, maple syrup, cider vinegar, pepper, some strong coffee, and of course, bacon. Three whopping pounds of bacon will be needed. It sounds like a lot but this makes a lot of jam!


Tasty Kitchen Blog: Bacon Jam. Guest post by Laurie McNamara of Simply Scratch, recipe submitted by TK member Rebecca of Foodie with Family.

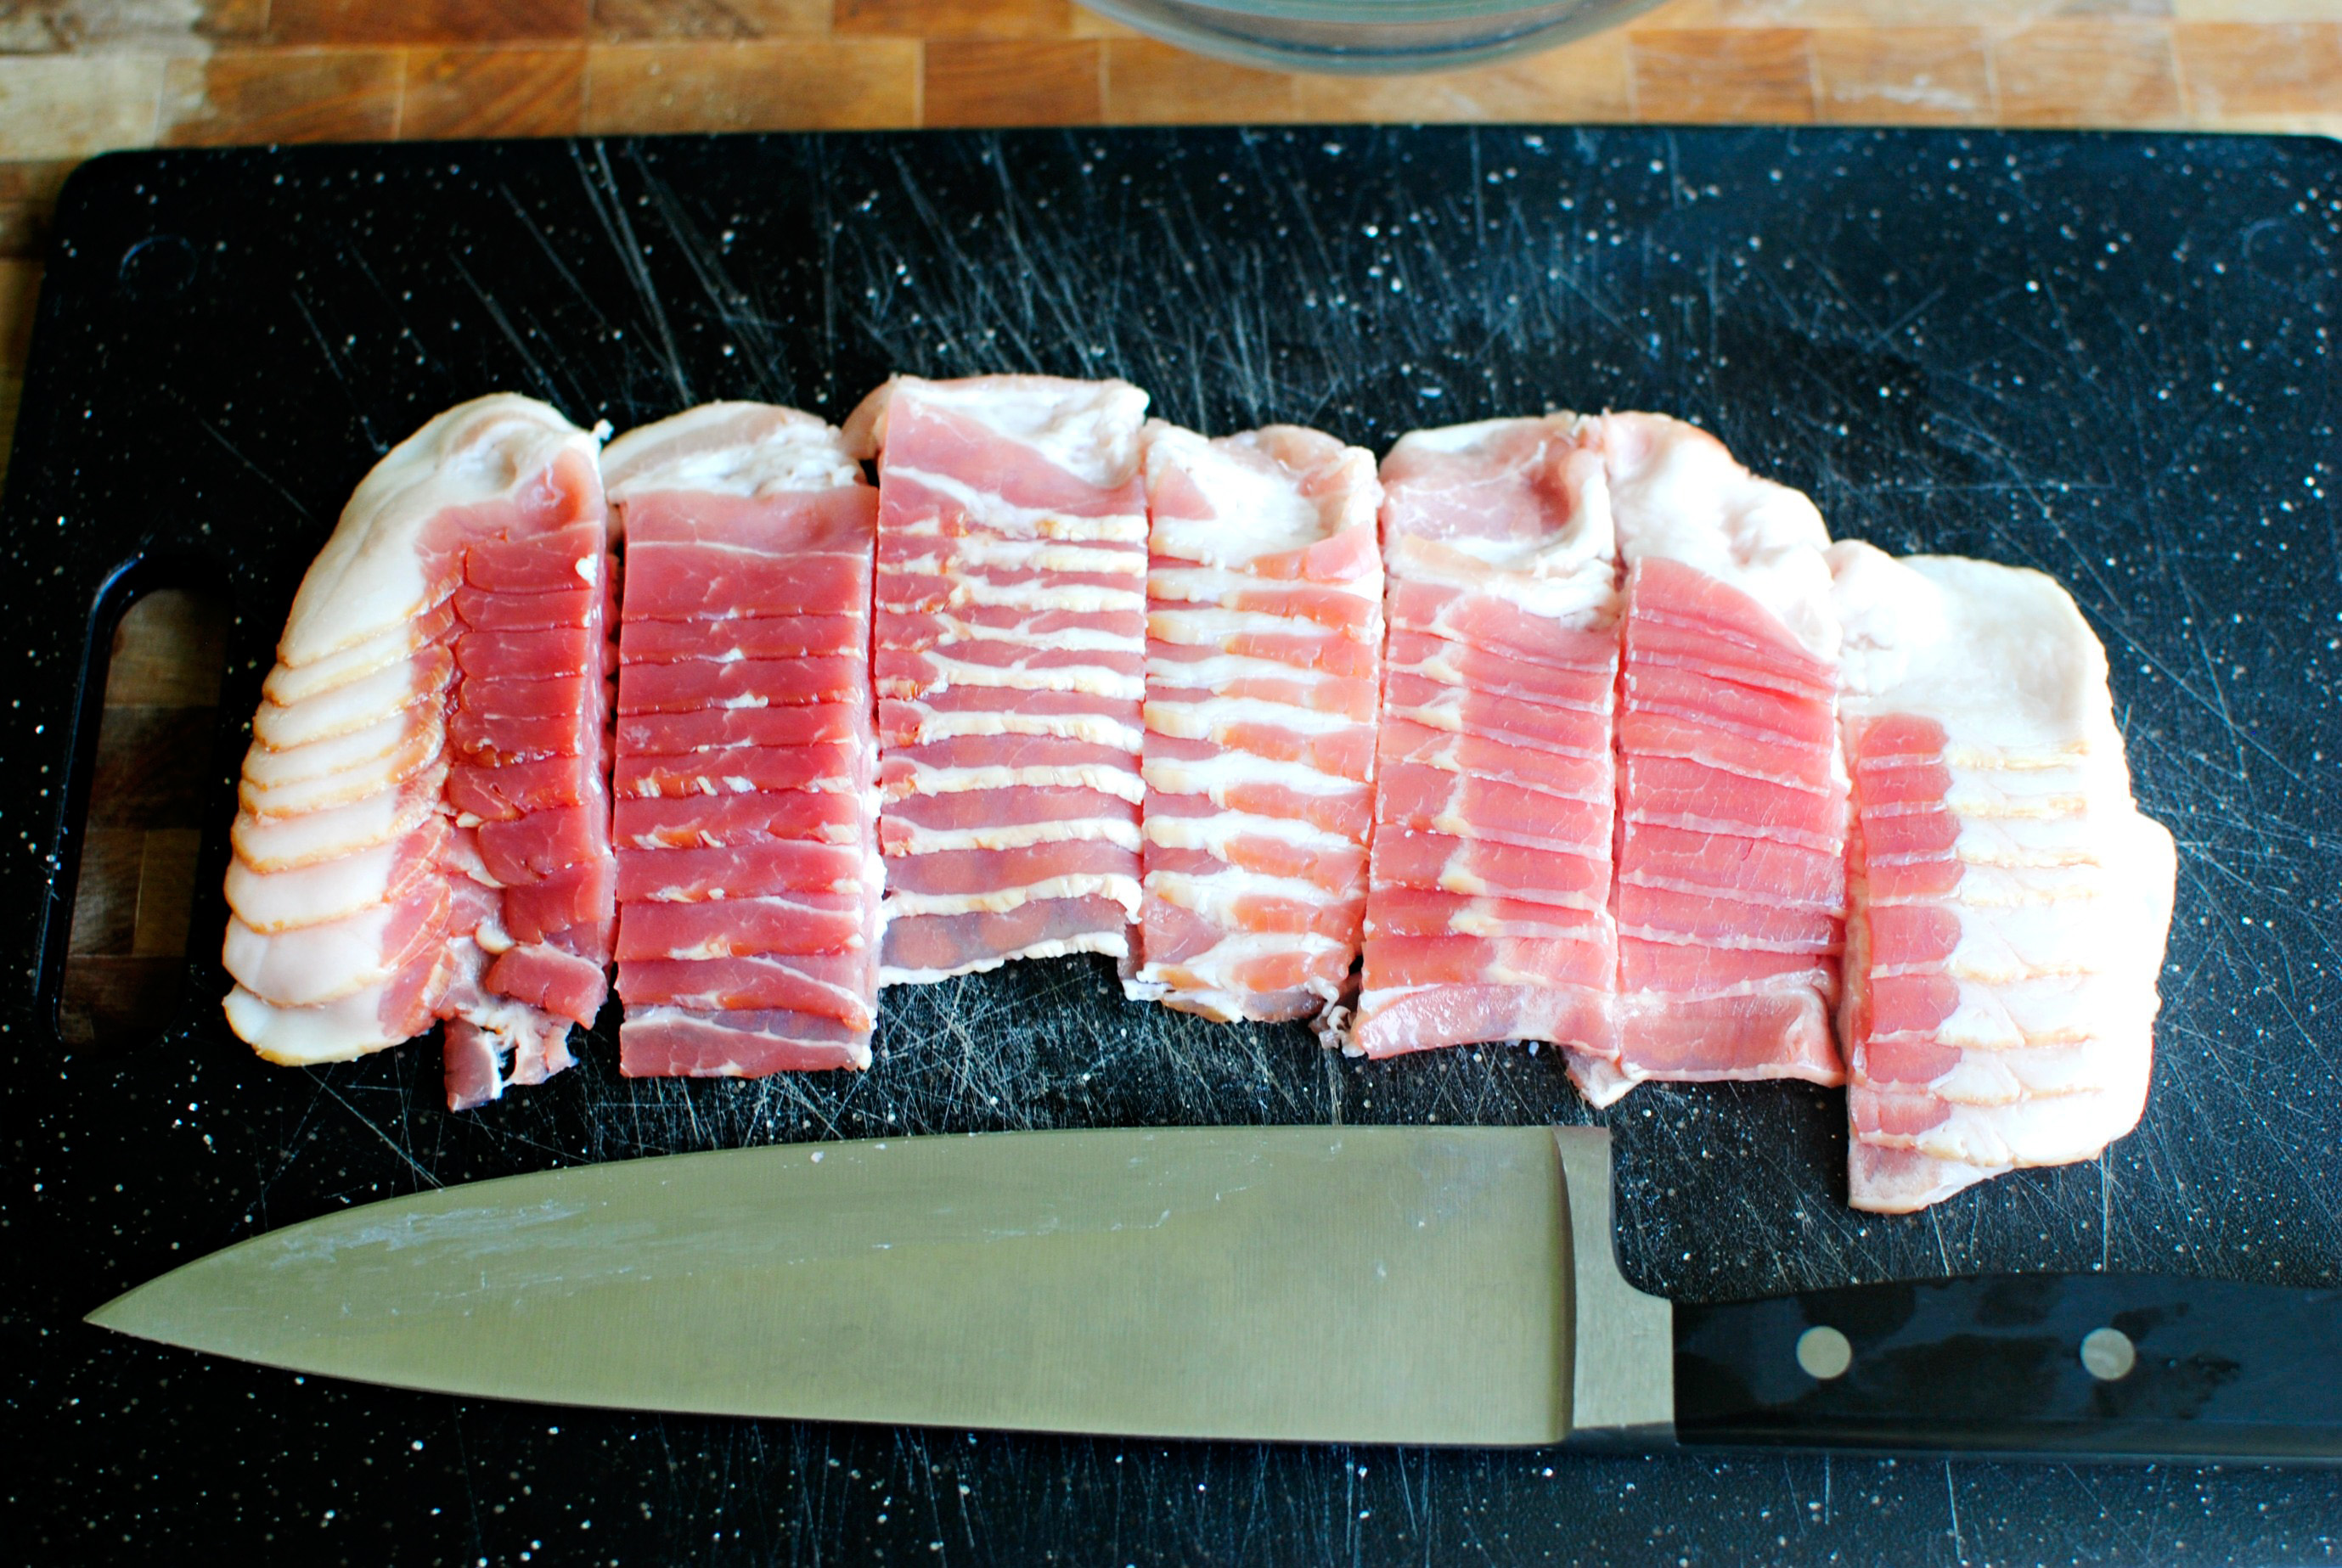
With a sharp knife, slice the bacon into one-inch pieces.


Tasty Kitchen Blog: Bacon Jam. Guest post by Laurie McNamara of Simply Scratch, recipe submitted by TK member Rebecca of Foodie with Family.

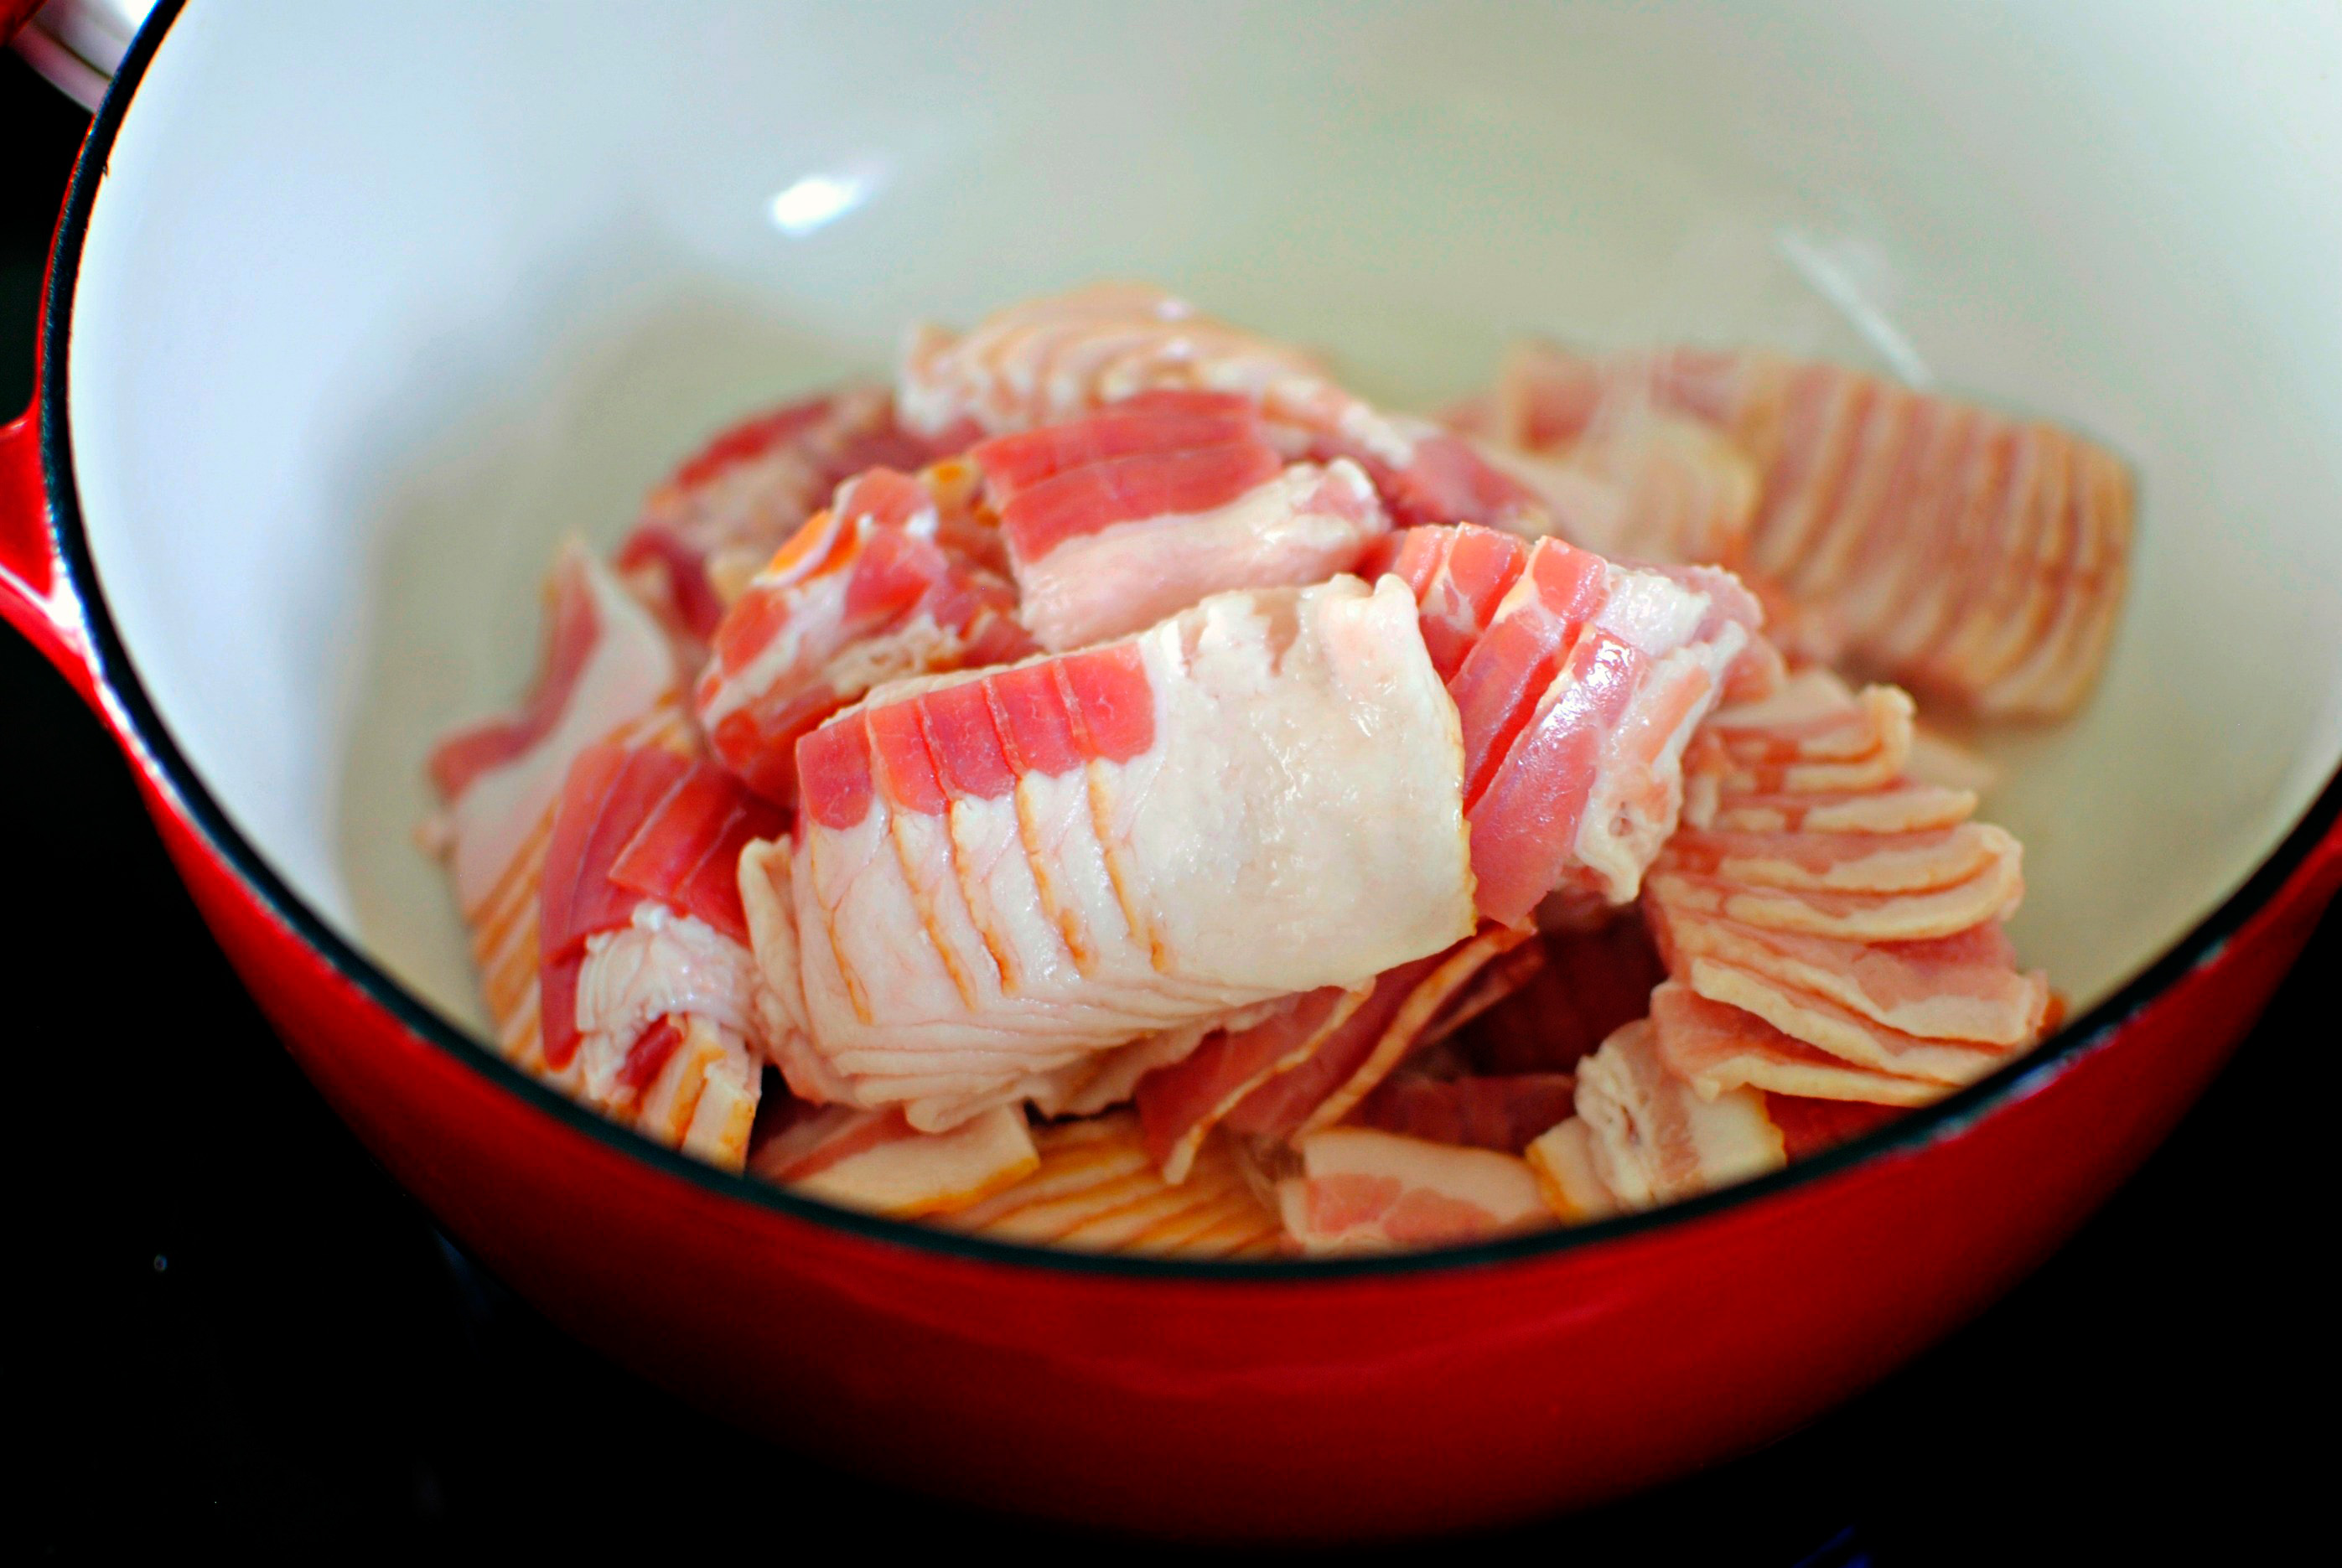
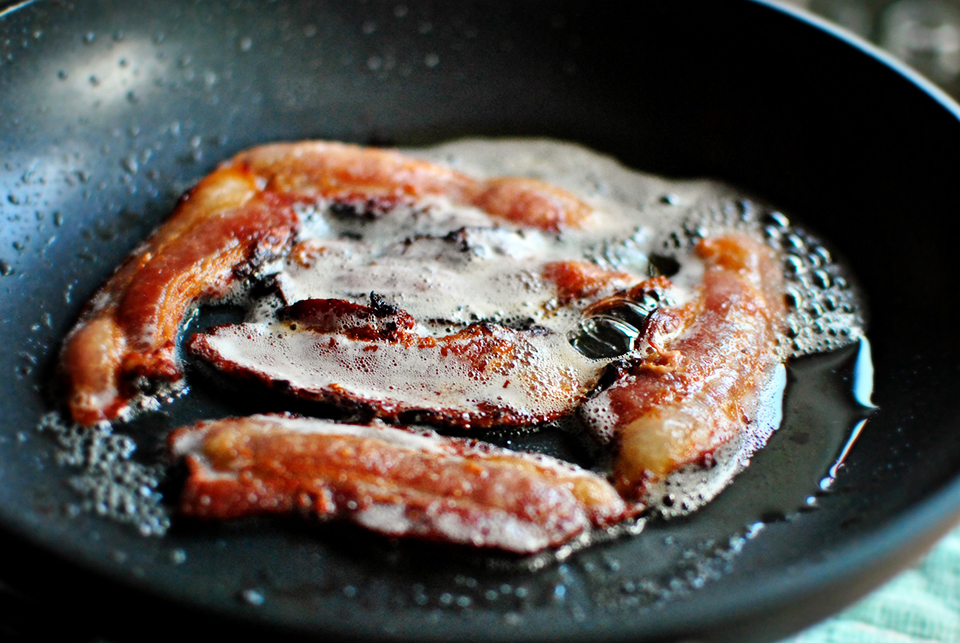
In a large pot or Dutch oven, cook the bacon in its own drippings until crispy and fully cooked.


Tasty Kitchen Blog: Bacon Jam. Guest post by Laurie McNamara of Simply Scratch, recipe submitted by TK member Rebecca of Foodie with Family.

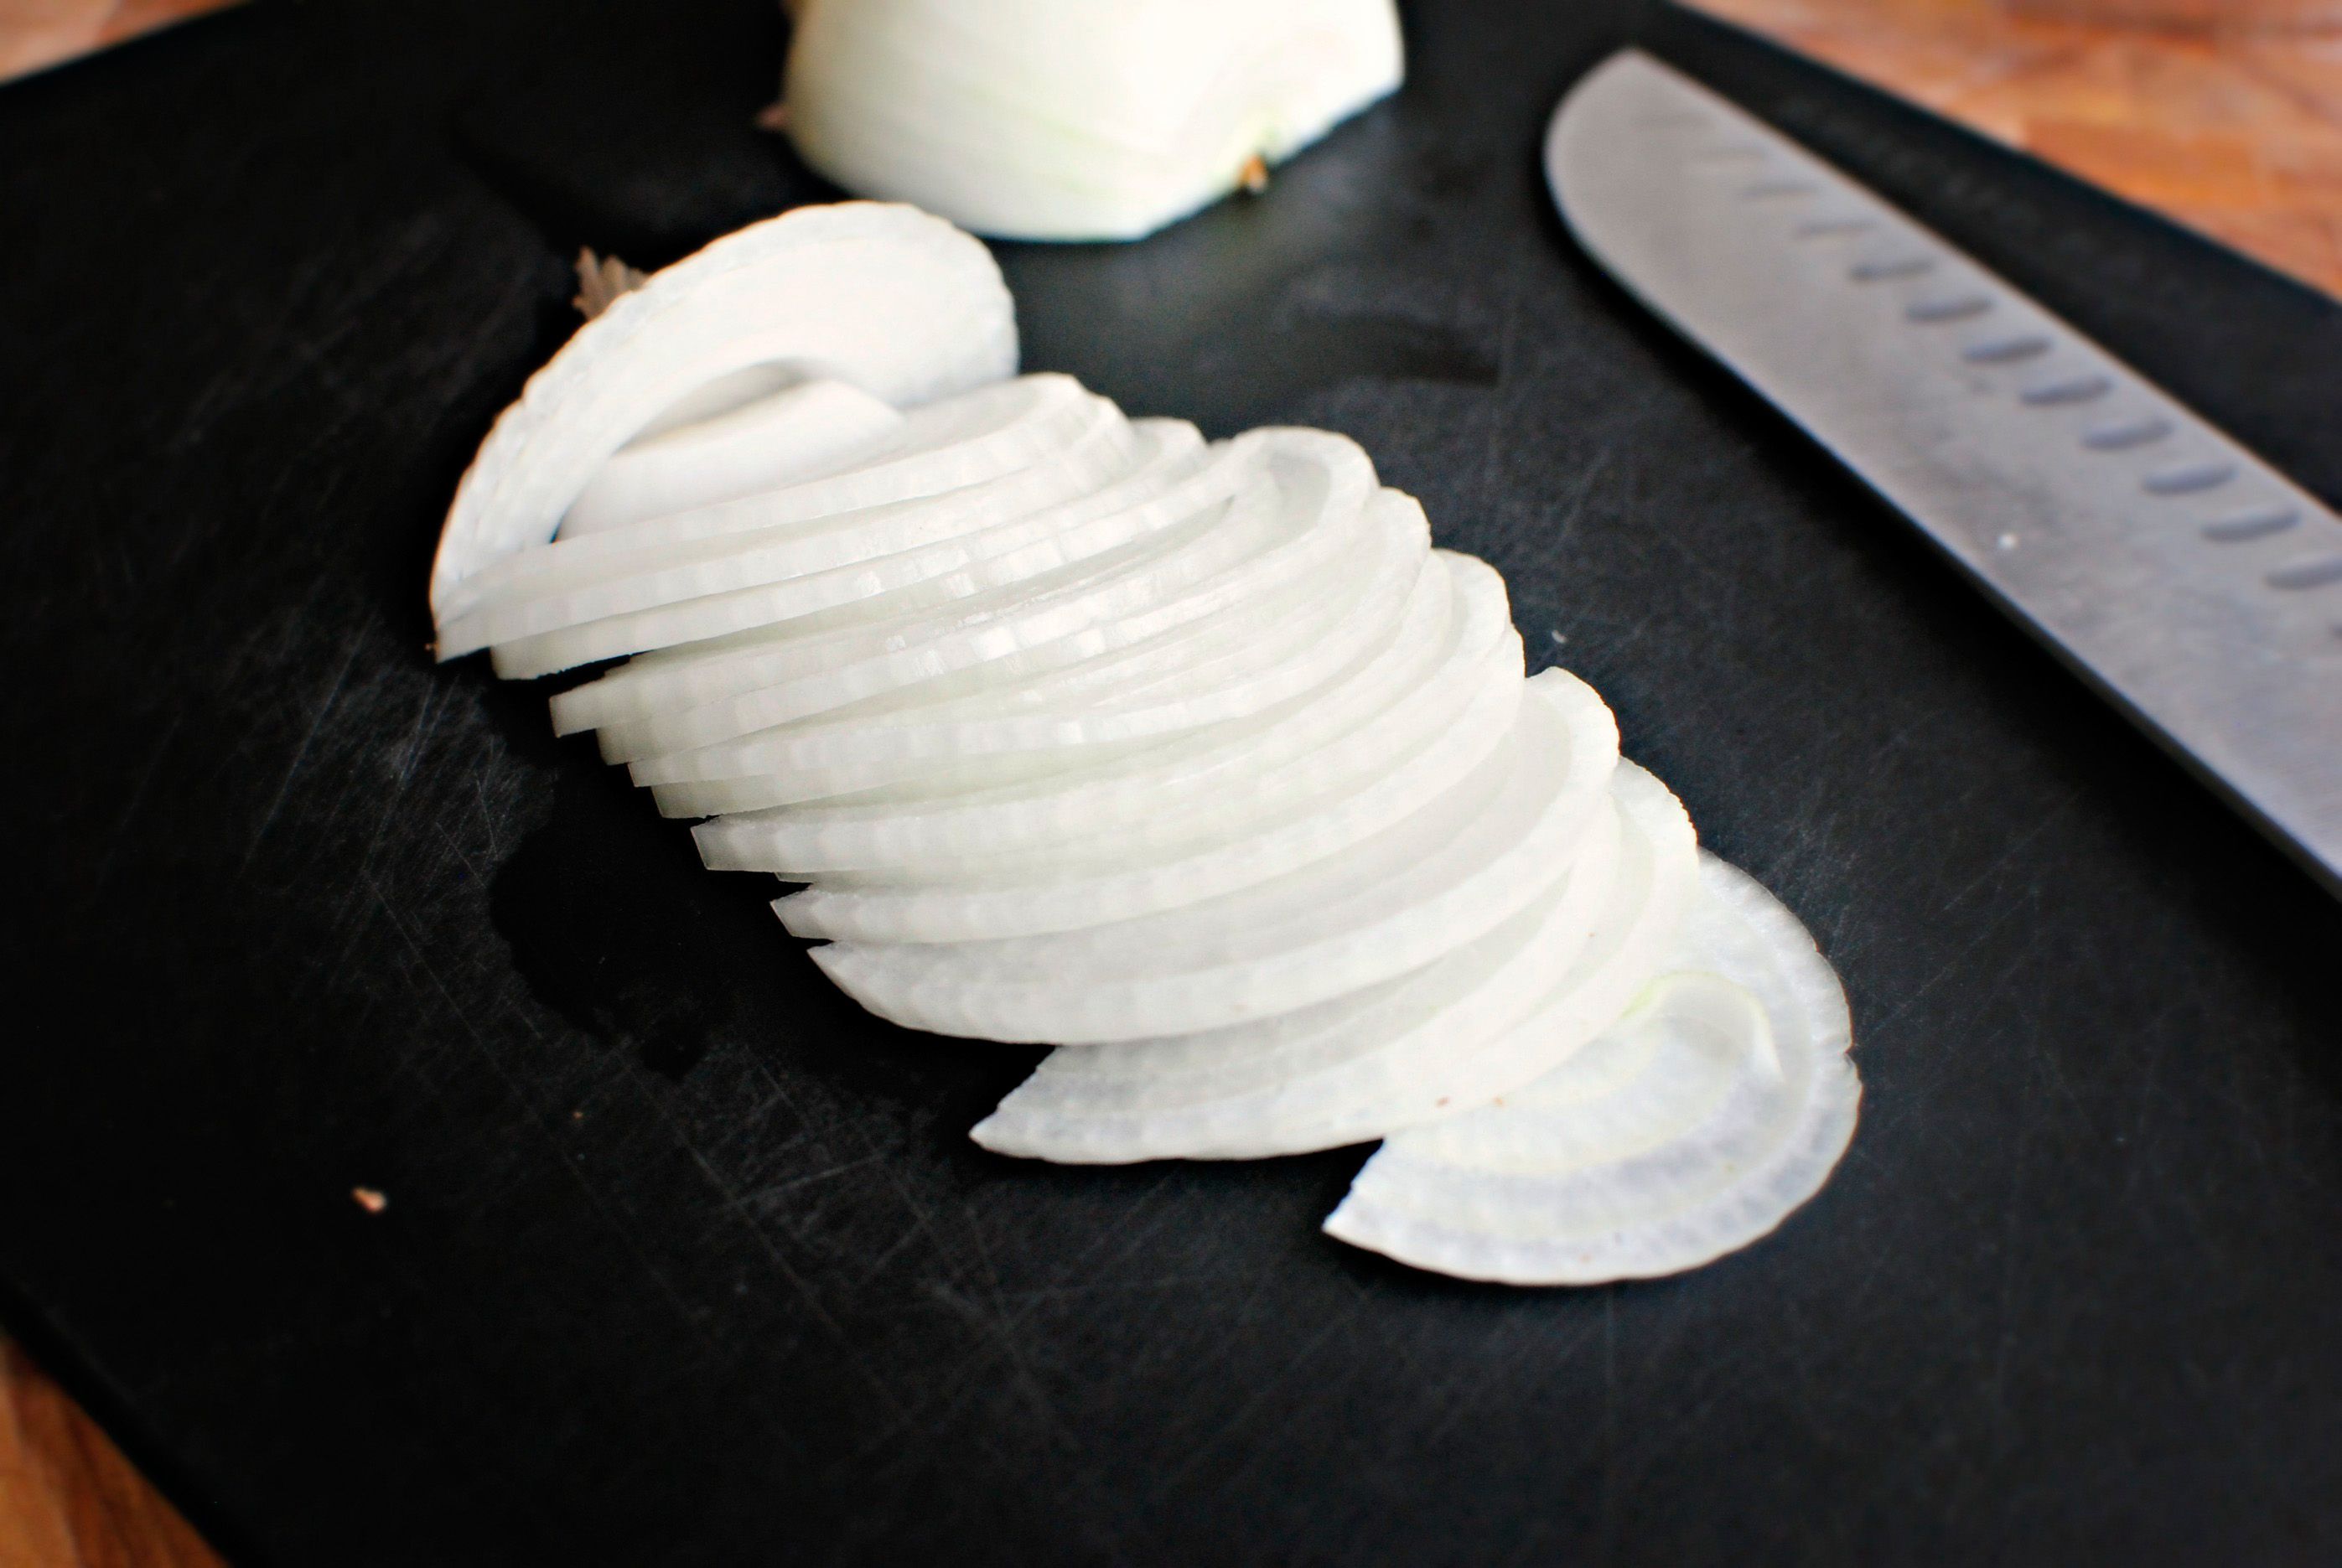
In the meantime, thinly slice up the four onions. Rebecca’s recipe calls for yellow onions, but I had a big sack of sweet onions so I used those instead. But either type of onions will work in this recipe.


Tasty Kitchen Blog: Bacon Jam. Guest post by Laurie McNamara of Simply Scratch, recipe submitted by TK member Rebecca of Foodie with Family.

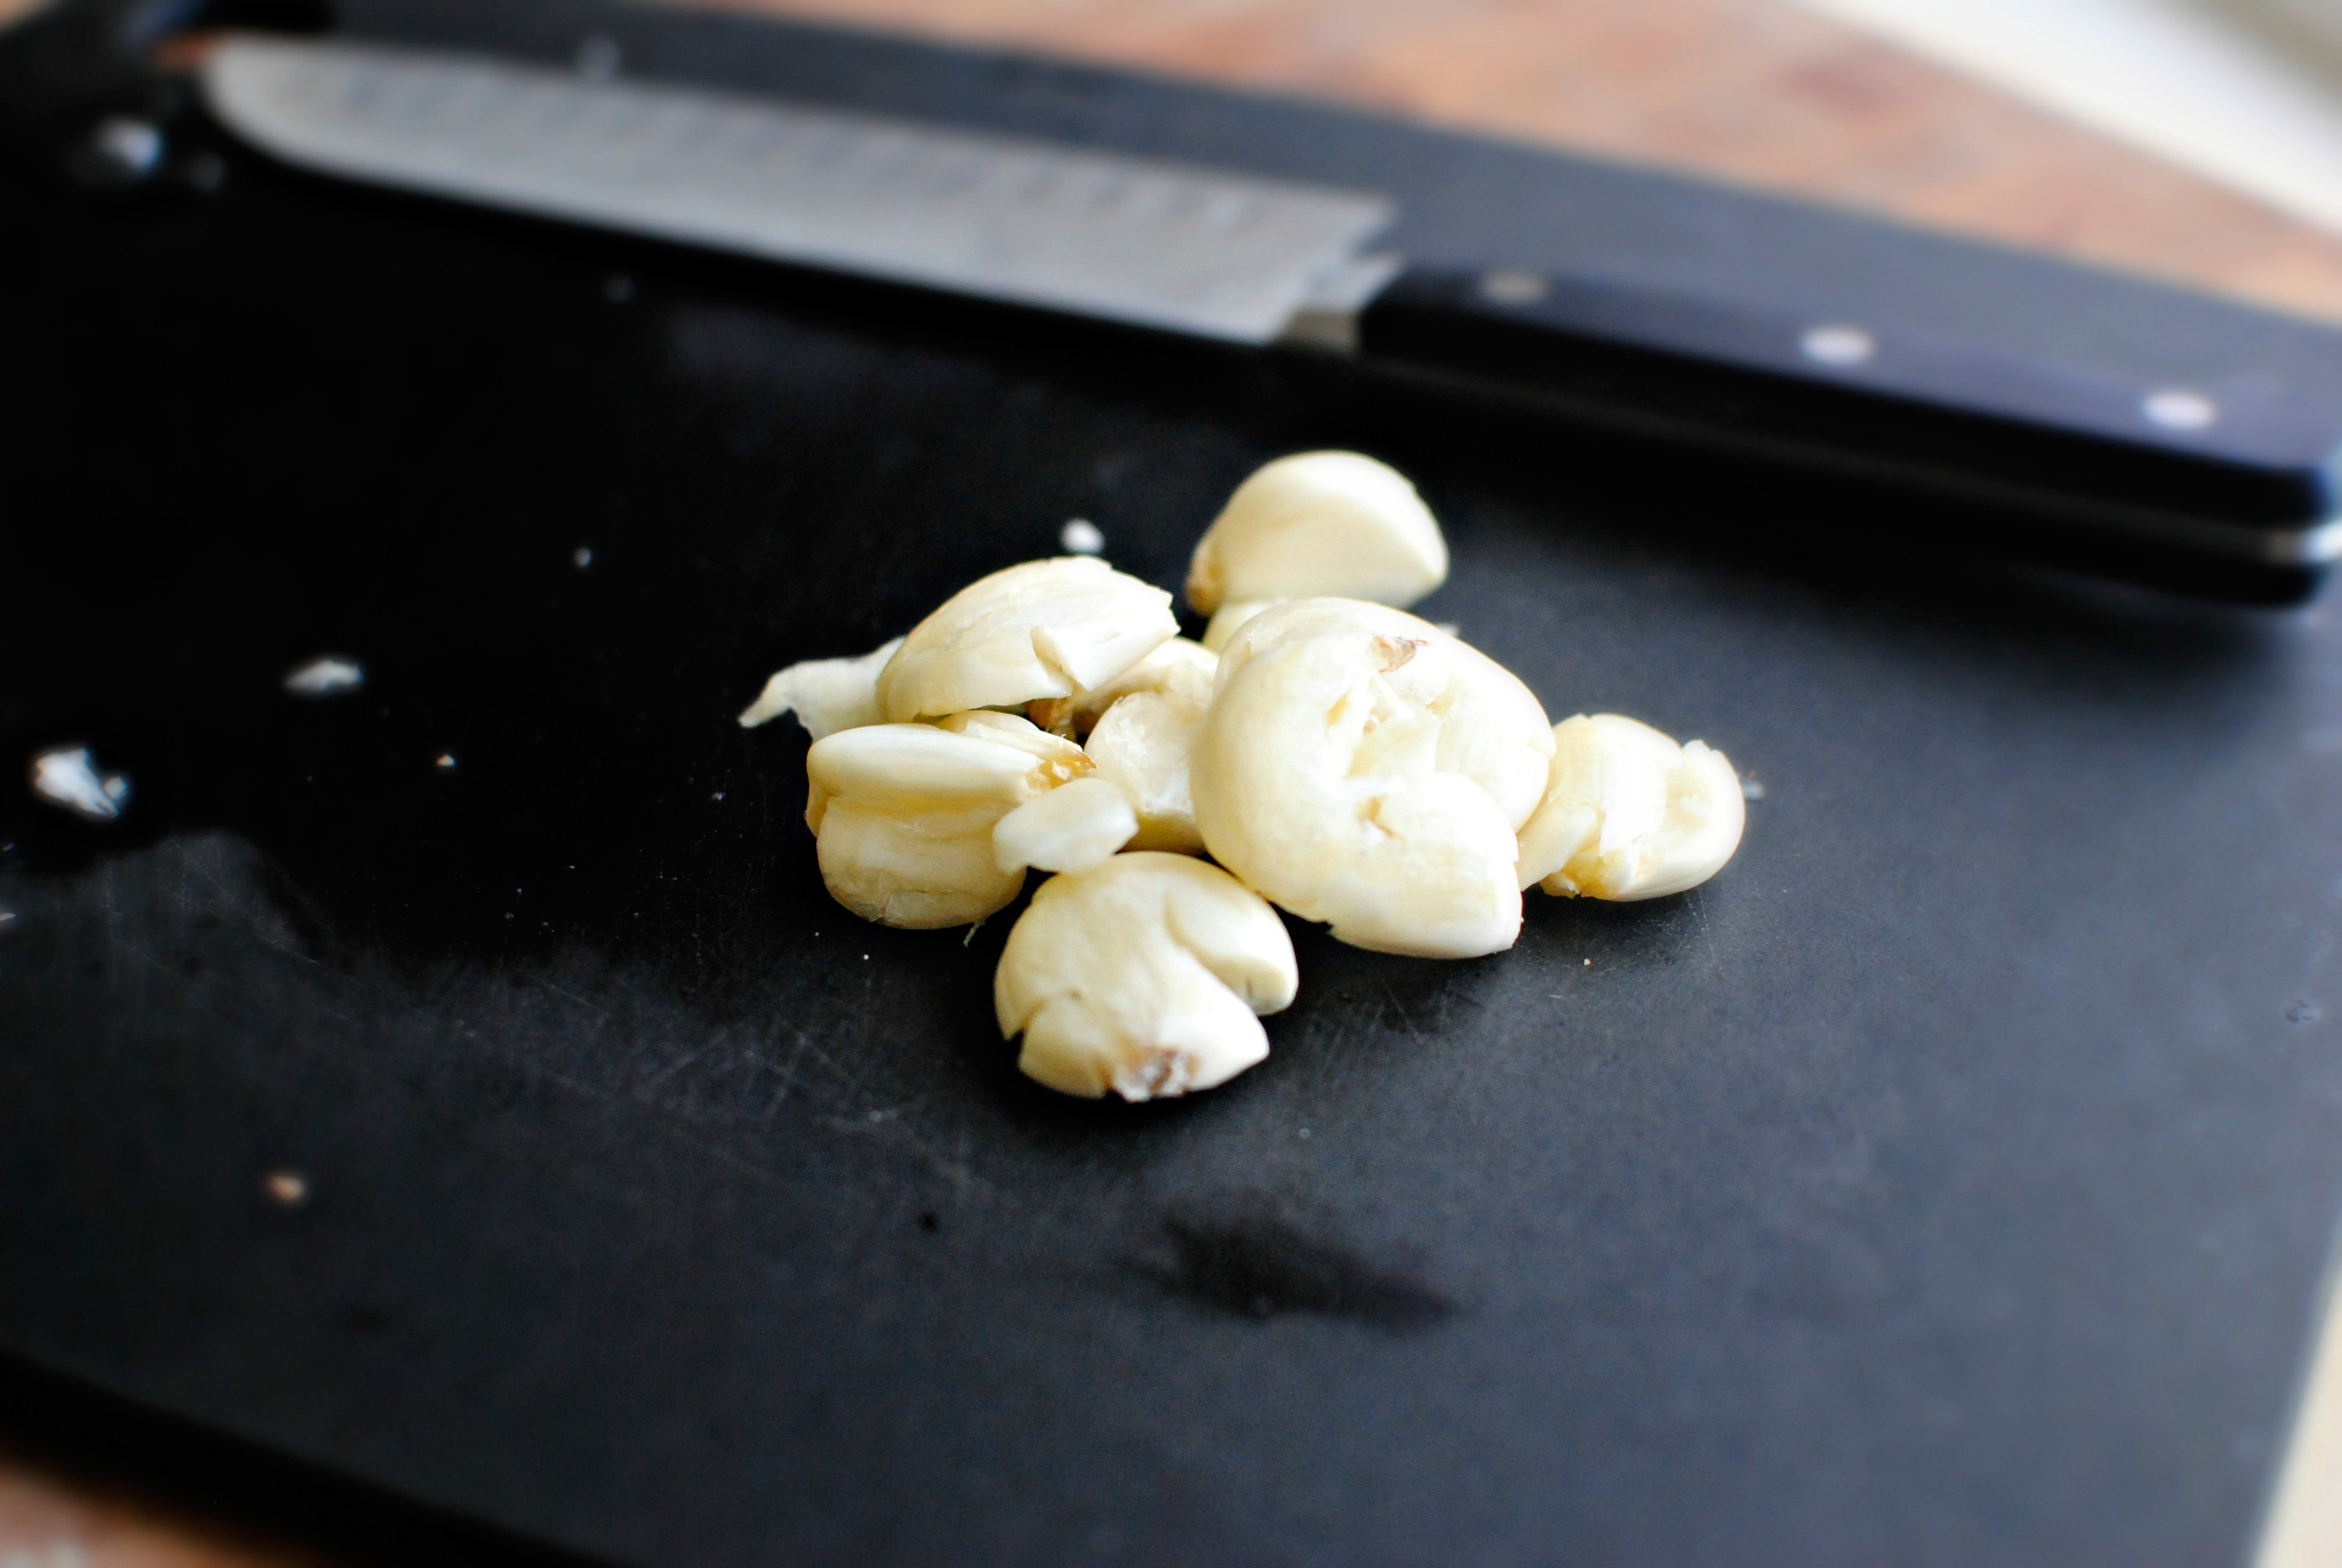
Smash and peel eight cloves and garlic. Lots of garlic equals lots of flavor!


Tasty Kitchen Blog: Bacon Jam. Guest post by Laurie McNamara of Simply Scratch, recipe submitted by TK member Rebecca of Foodie with Family.

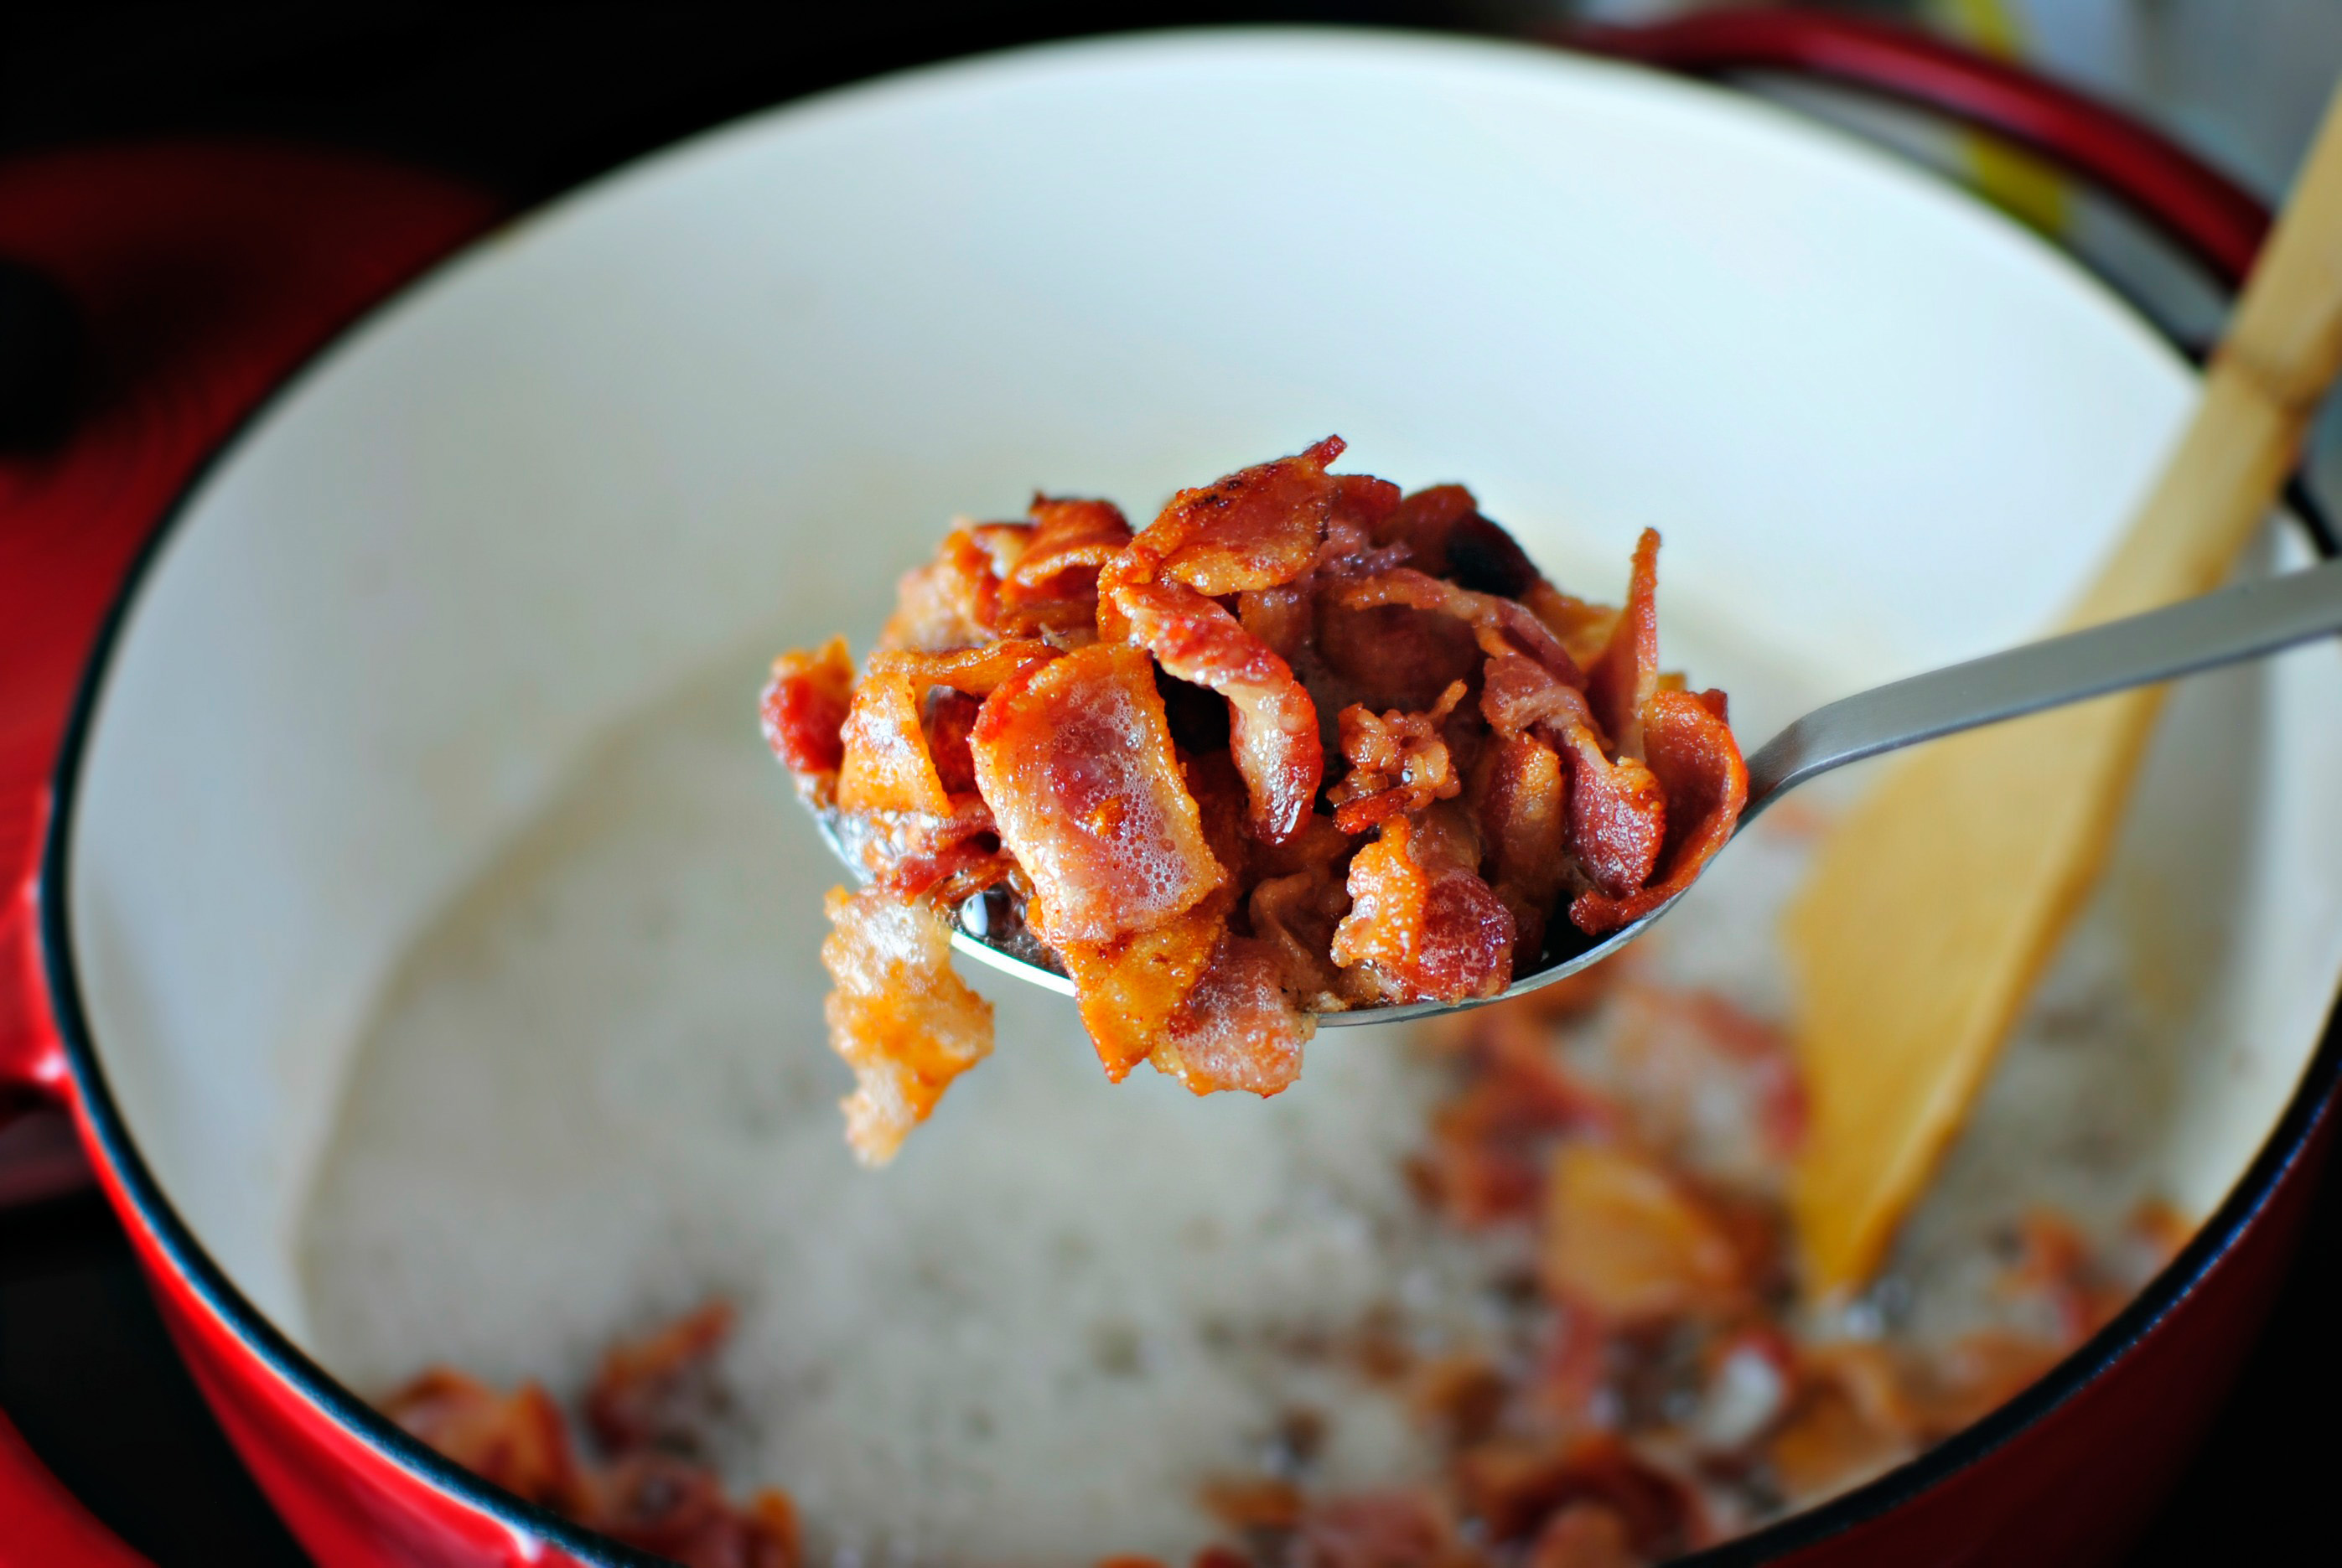
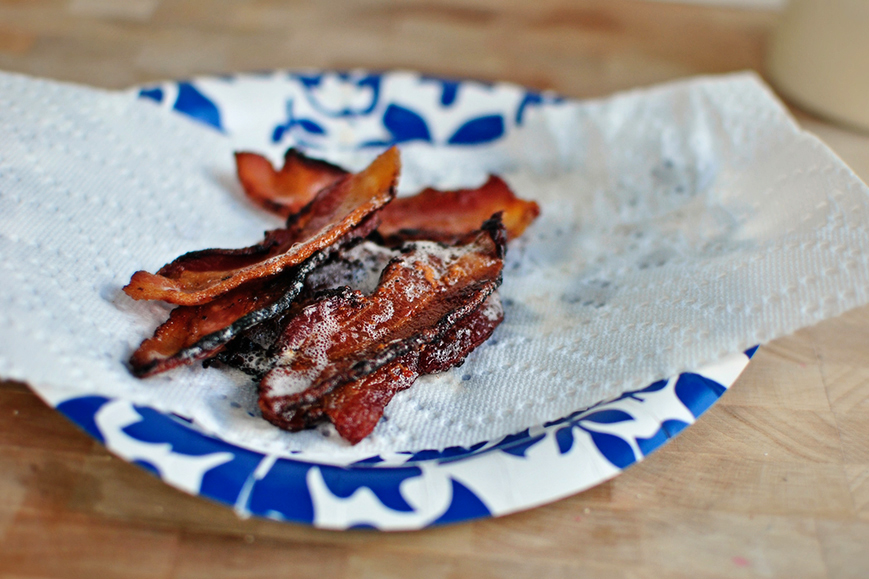
Remove the bacon with a slotted spoon once it’s golden.


Tasty Kitchen Blog: Bacon Jam. Guest post by Laurie McNamara of Simply Scratch, recipe submitted by TK member Rebecca of Foodie with Family.

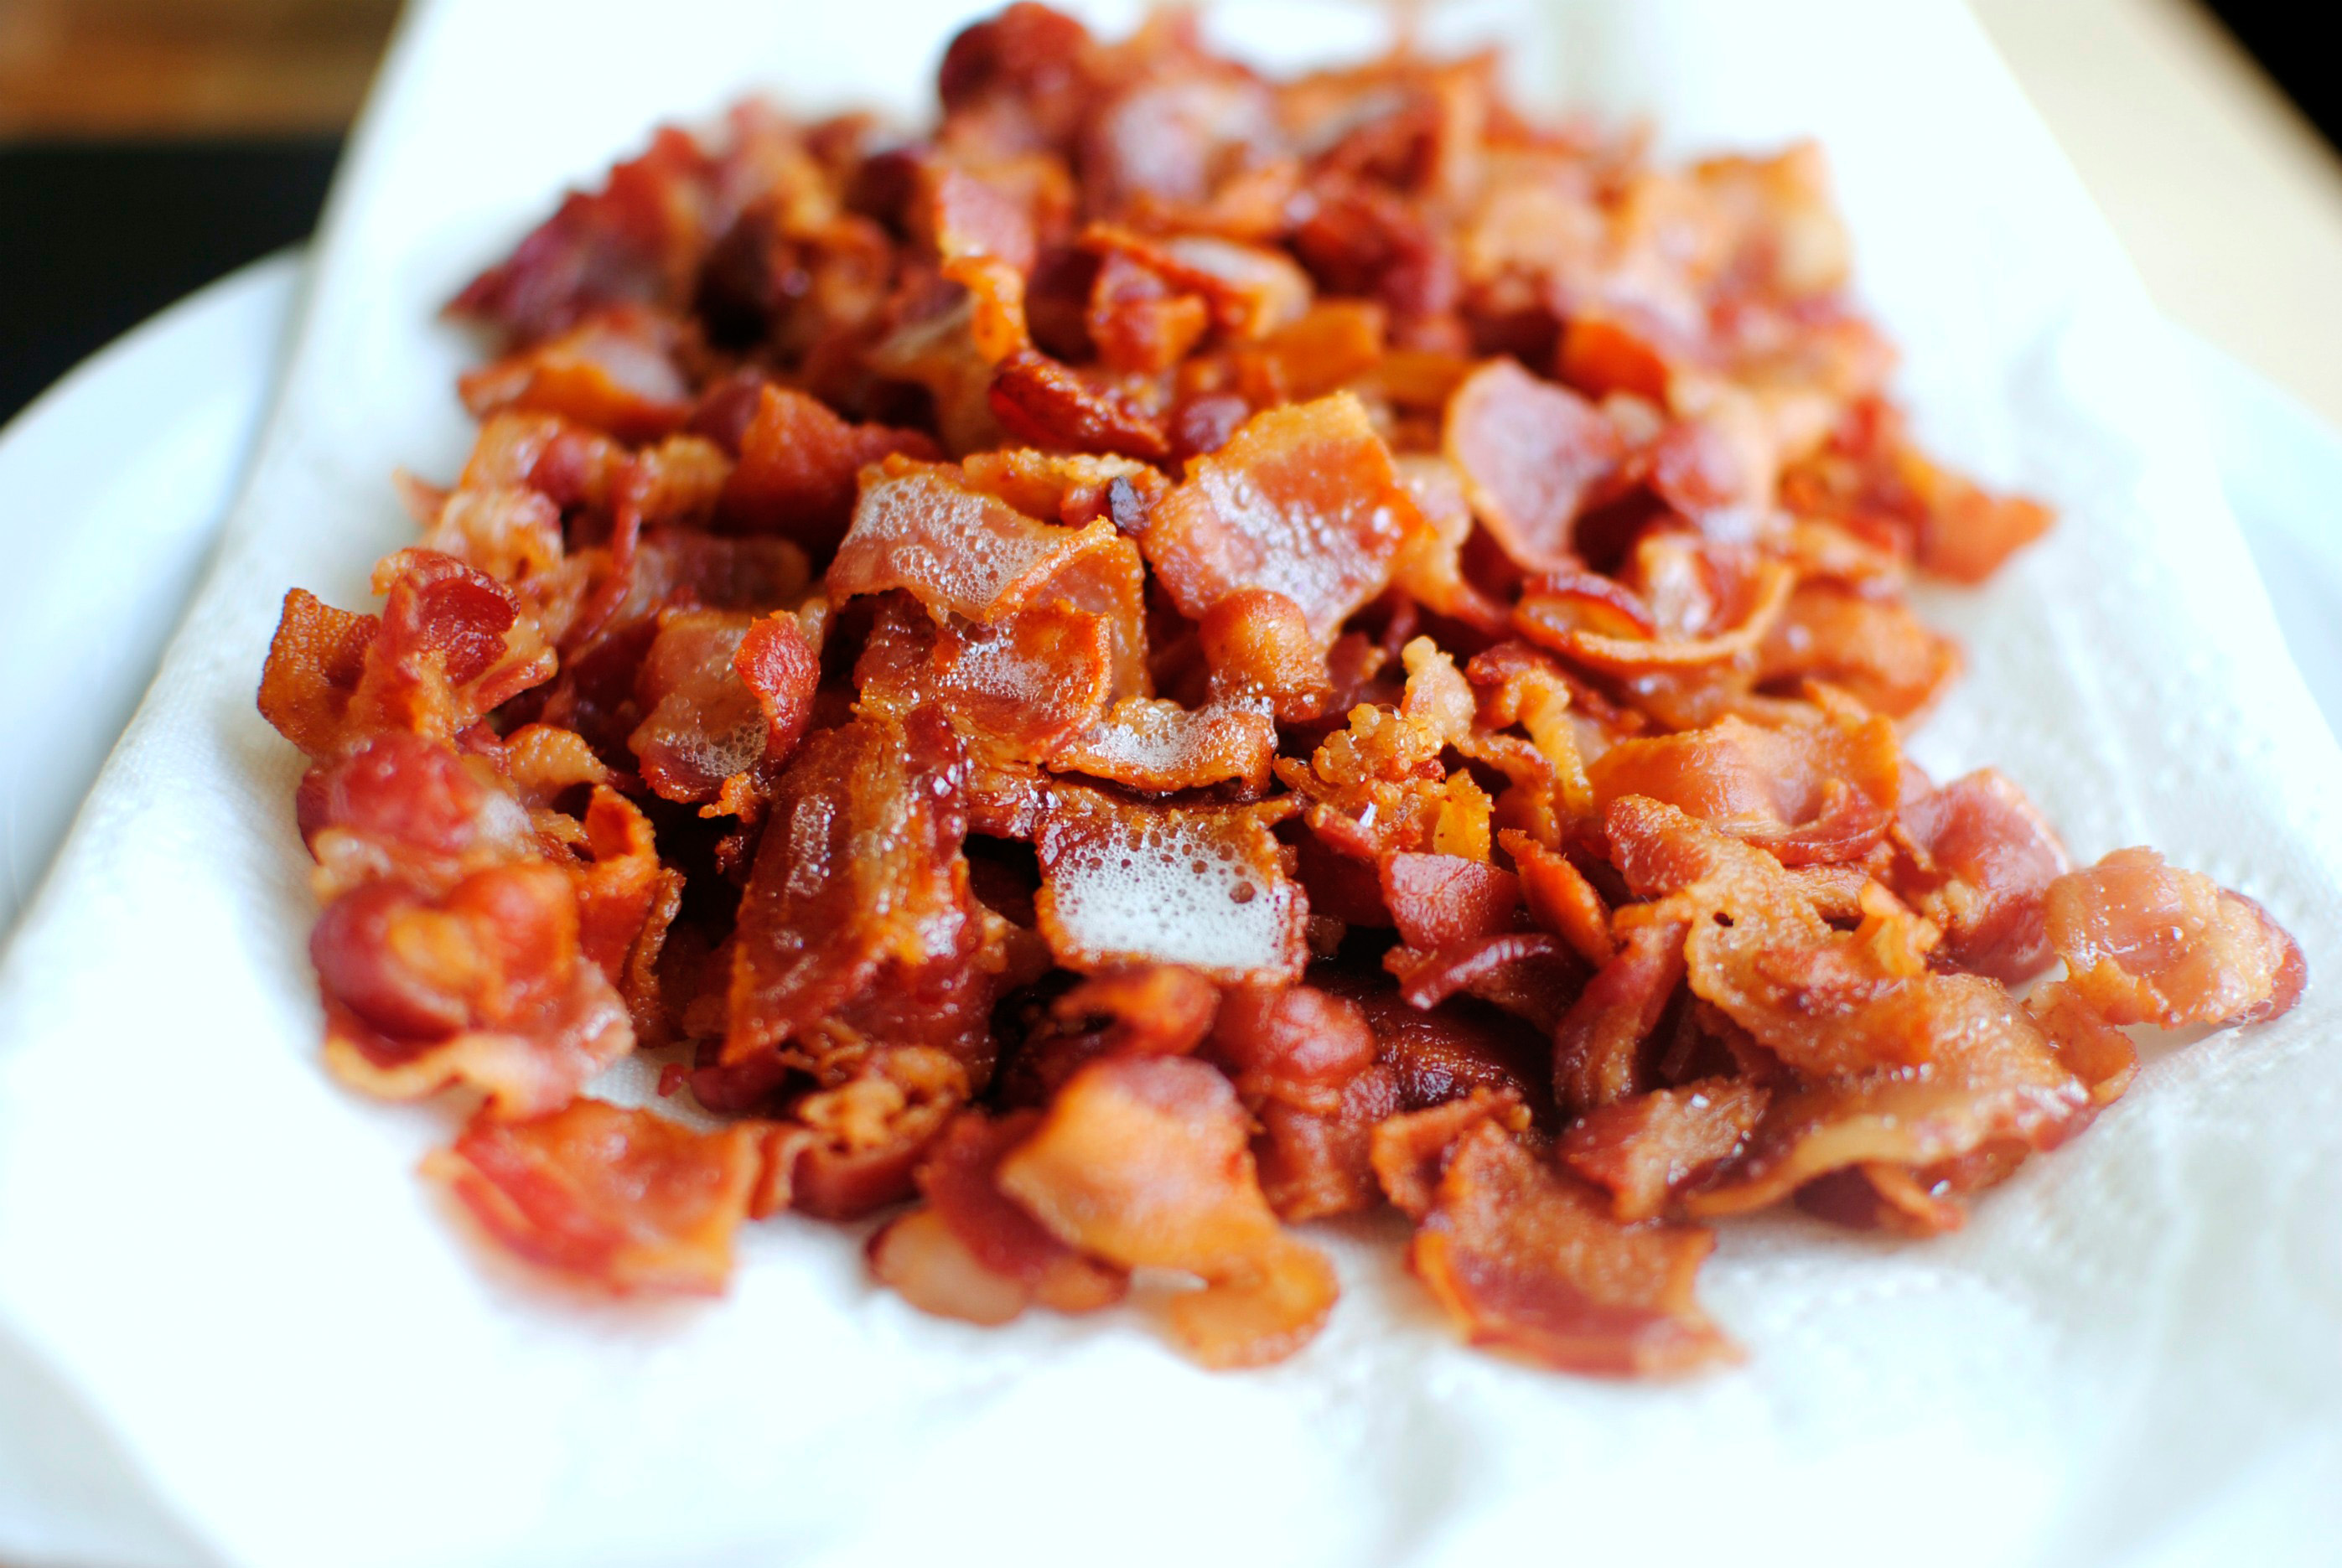
Drain it on a plate lined with paper towel.


Tasty Kitchen Blog: Bacon Jam. Guest post by Laurie McNamara of Simply Scratch, recipe submitted by TK member Rebecca of Foodie with Family.

Spoon most of the bacon fat into a heat-safe container with a tight-fitting lid and once the drippings have cooled, store it in the fridge. To quote Rebecca, “That’s too much flavor to trash!” Agreed!


Tasty Kitchen Blog: Bacon Jam. Guest post by Laurie McNamara of Simply Scratch, recipe submitted by TK member Rebecca of Foodie with Family.

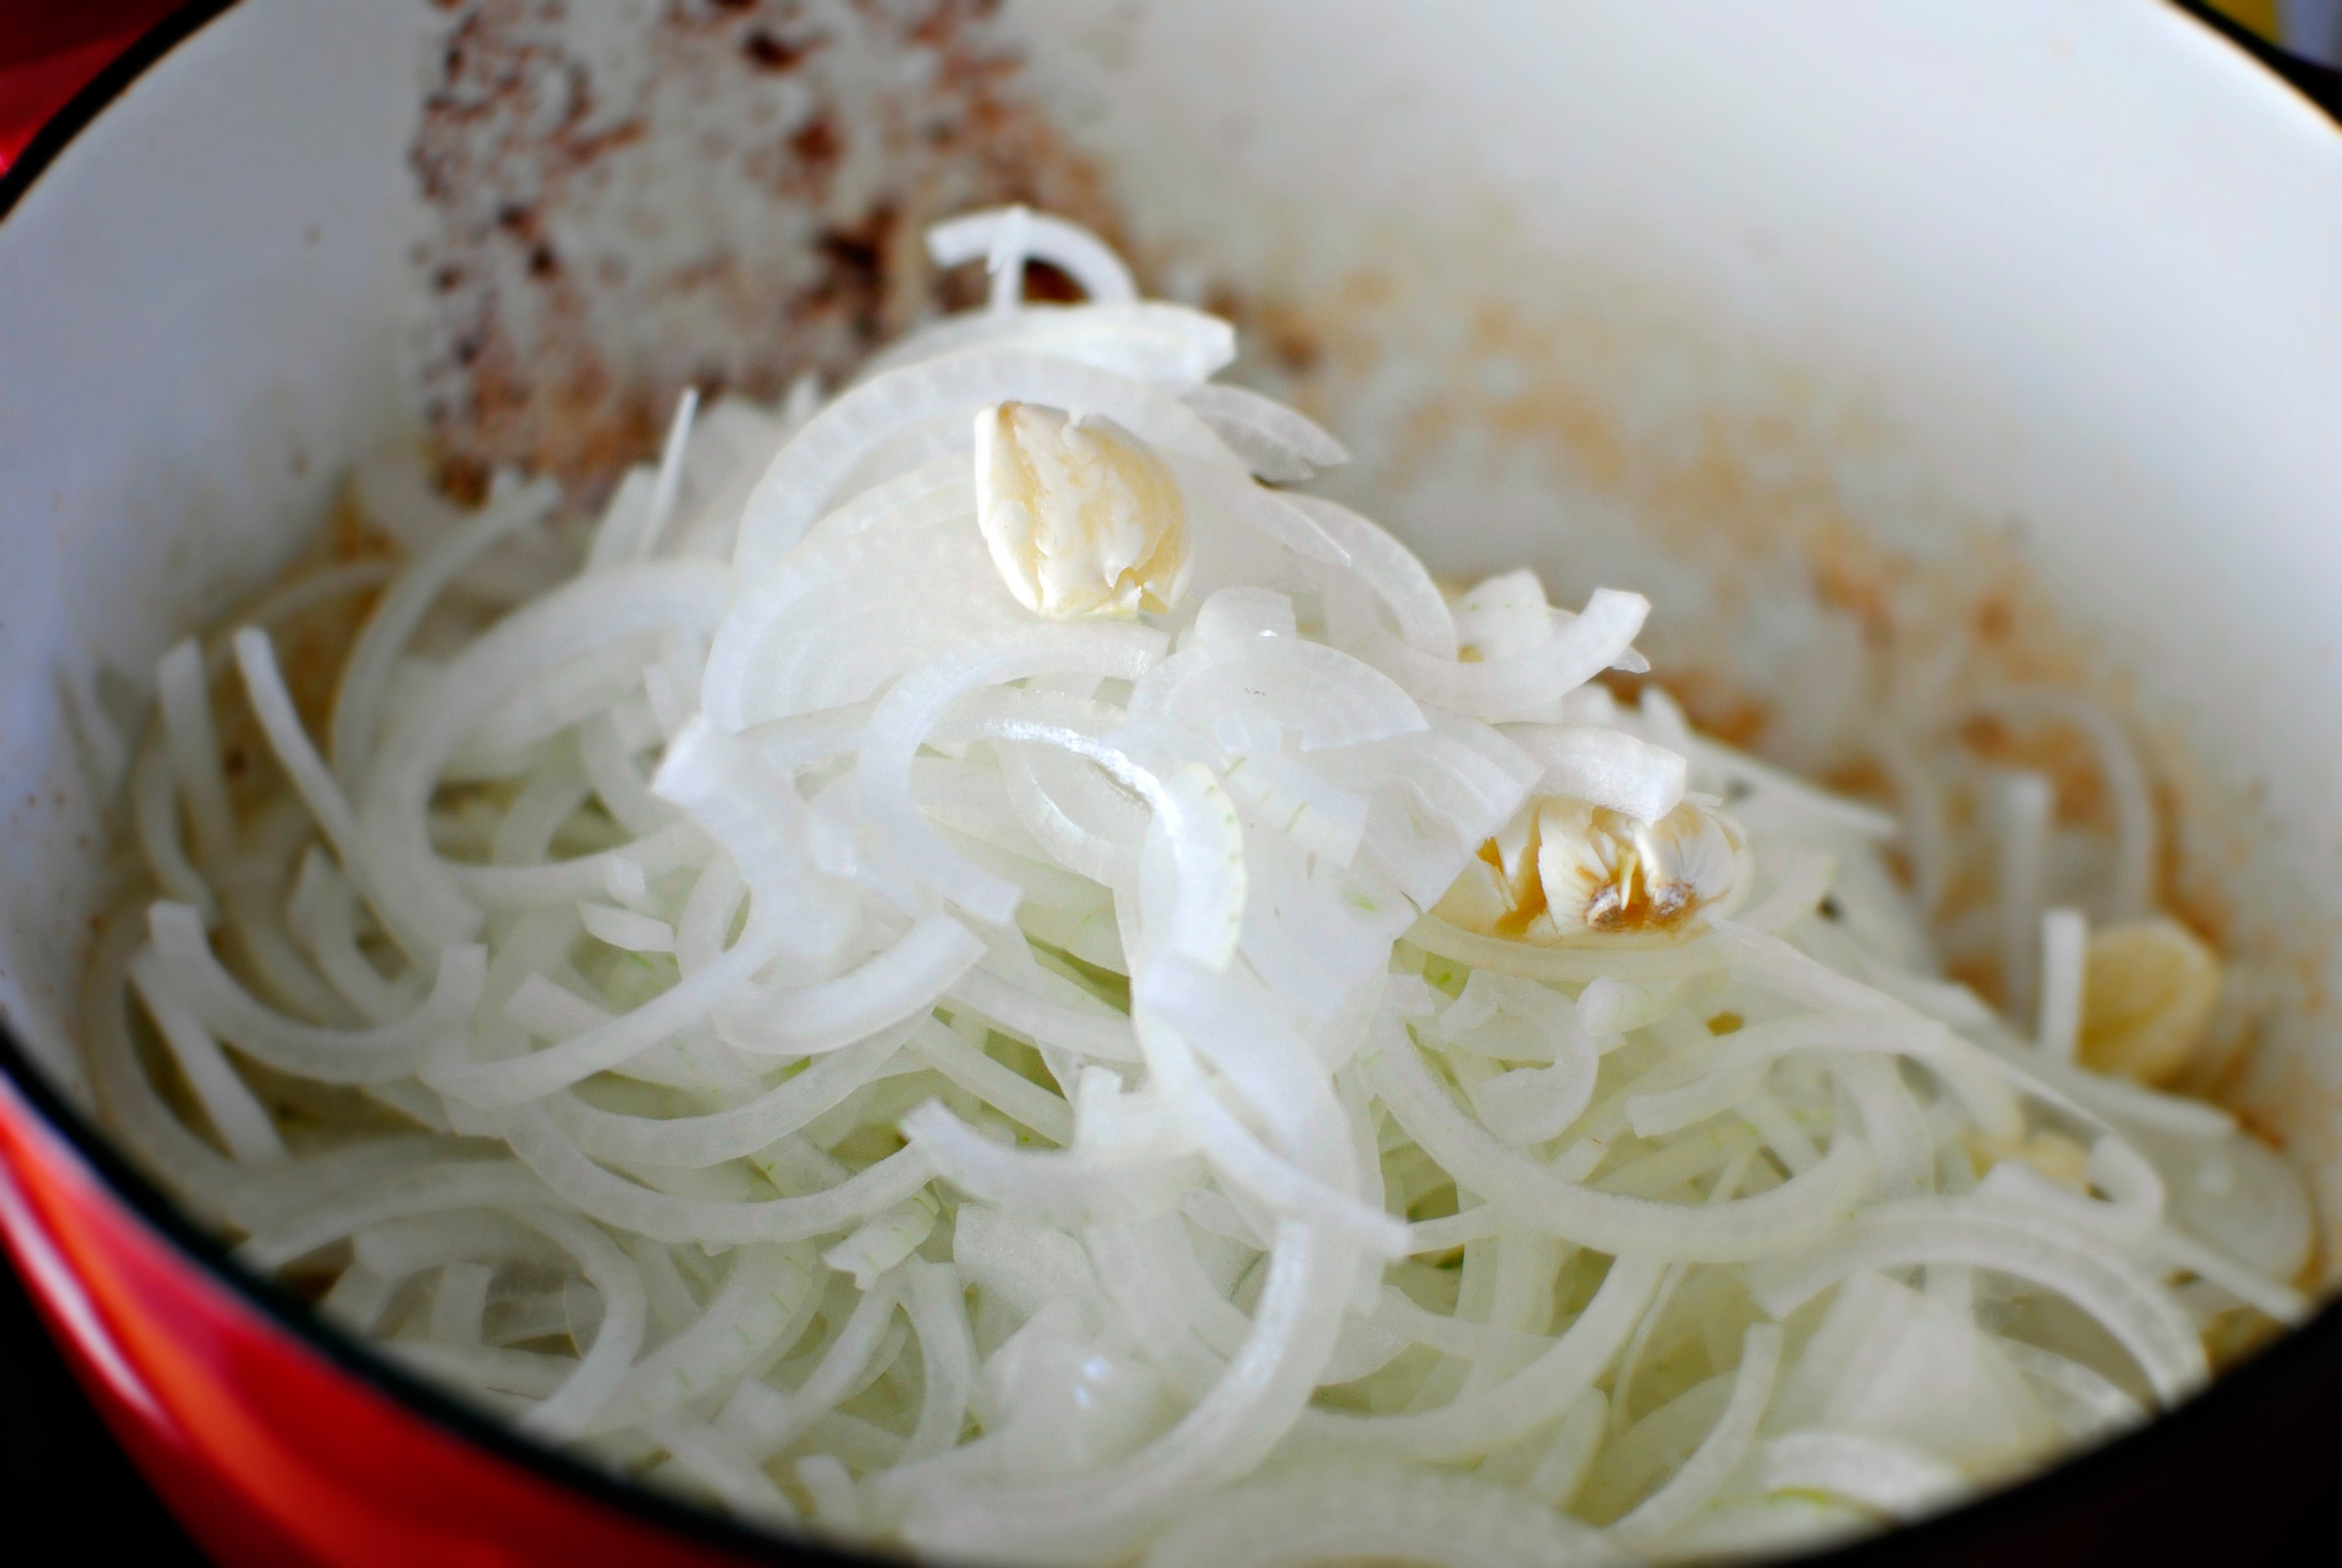
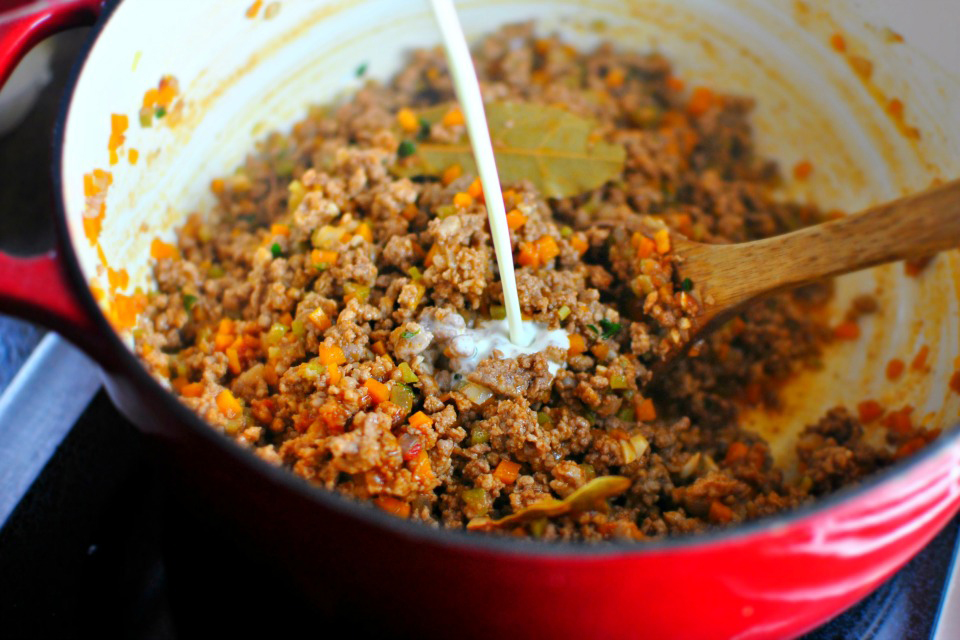
After most of the bacon fat has been removed, place the Dutch oven back over medium-high heat and add in the sliced onions and smashed garlic. Reduce the heat to medium and continue to cook low and slow, stirring occasionally.


Tasty Kitchen Blog: Bacon Jam. Guest post by Laurie McNamara of Simply Scratch, recipe submitted by TK member Rebecca of Foodie with Family.

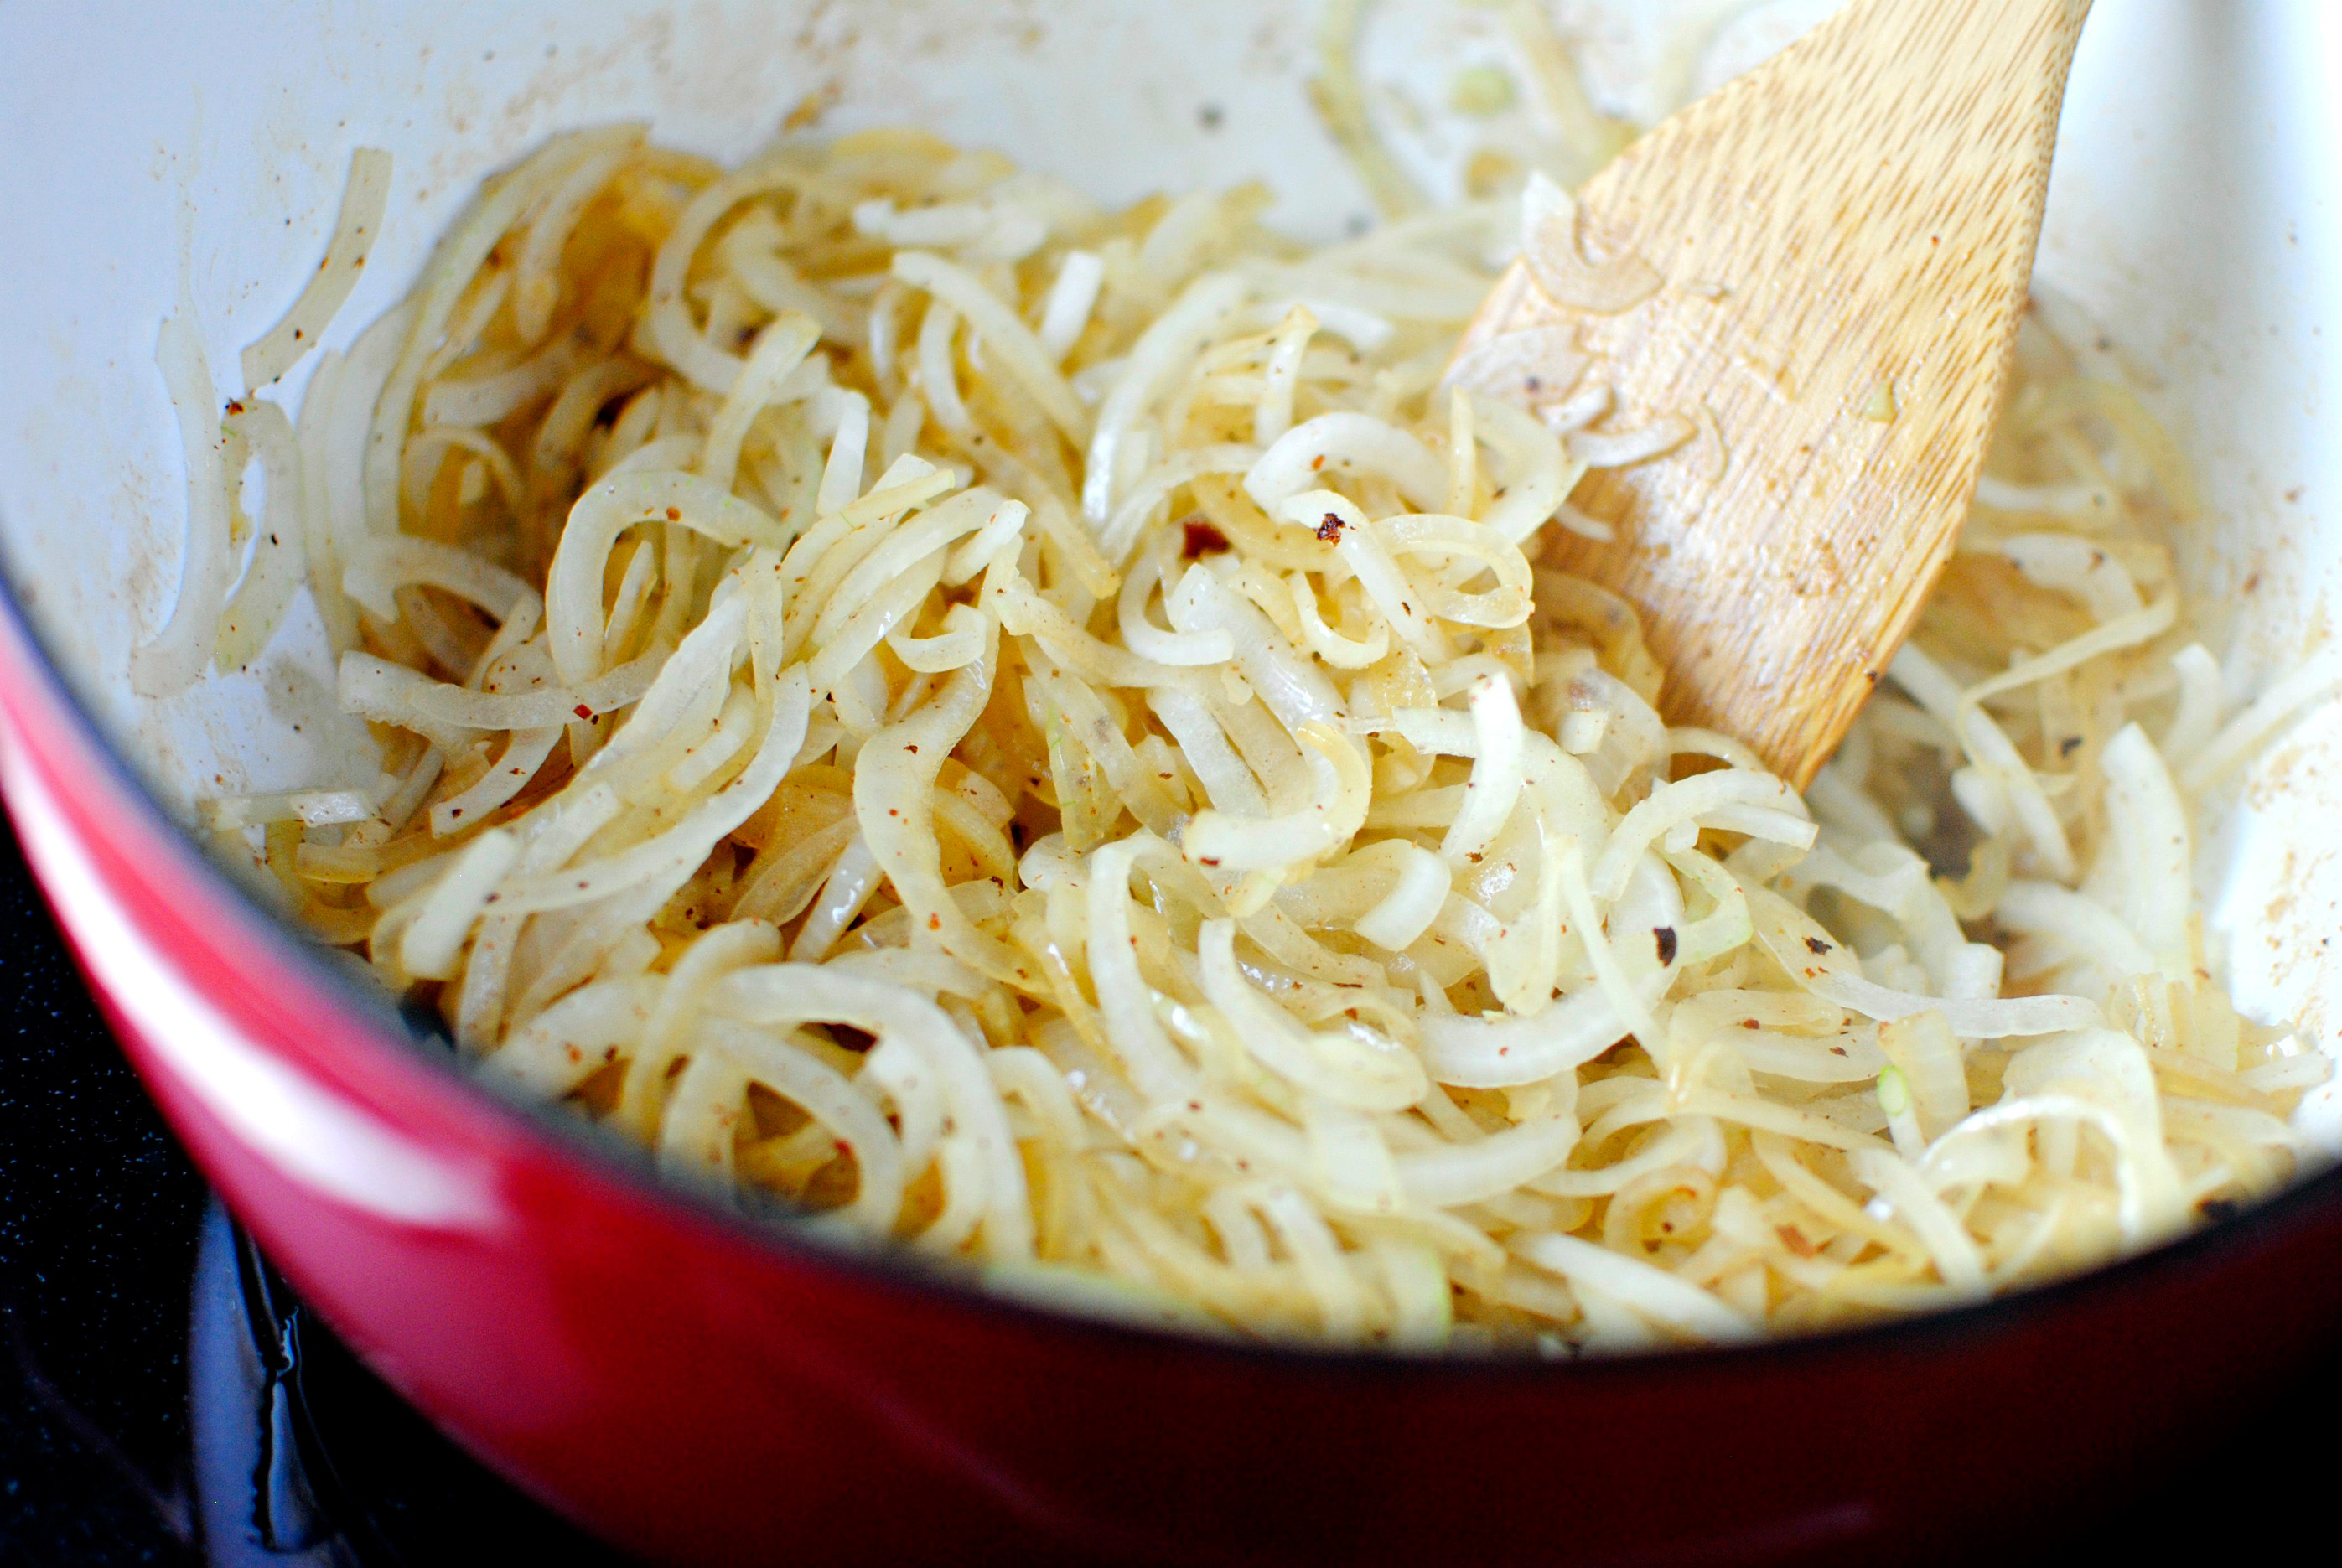
You’ll want to continue to cook the onions down until they are pretty translucent and soft. While that was going on, I made the glorious cooking liquids.


Tasty Kitchen Blog: Bacon Jam. Guest post by Laurie McNamara of Simply Scratch, recipe submitted by TK member Rebecca of Foodie with Family.

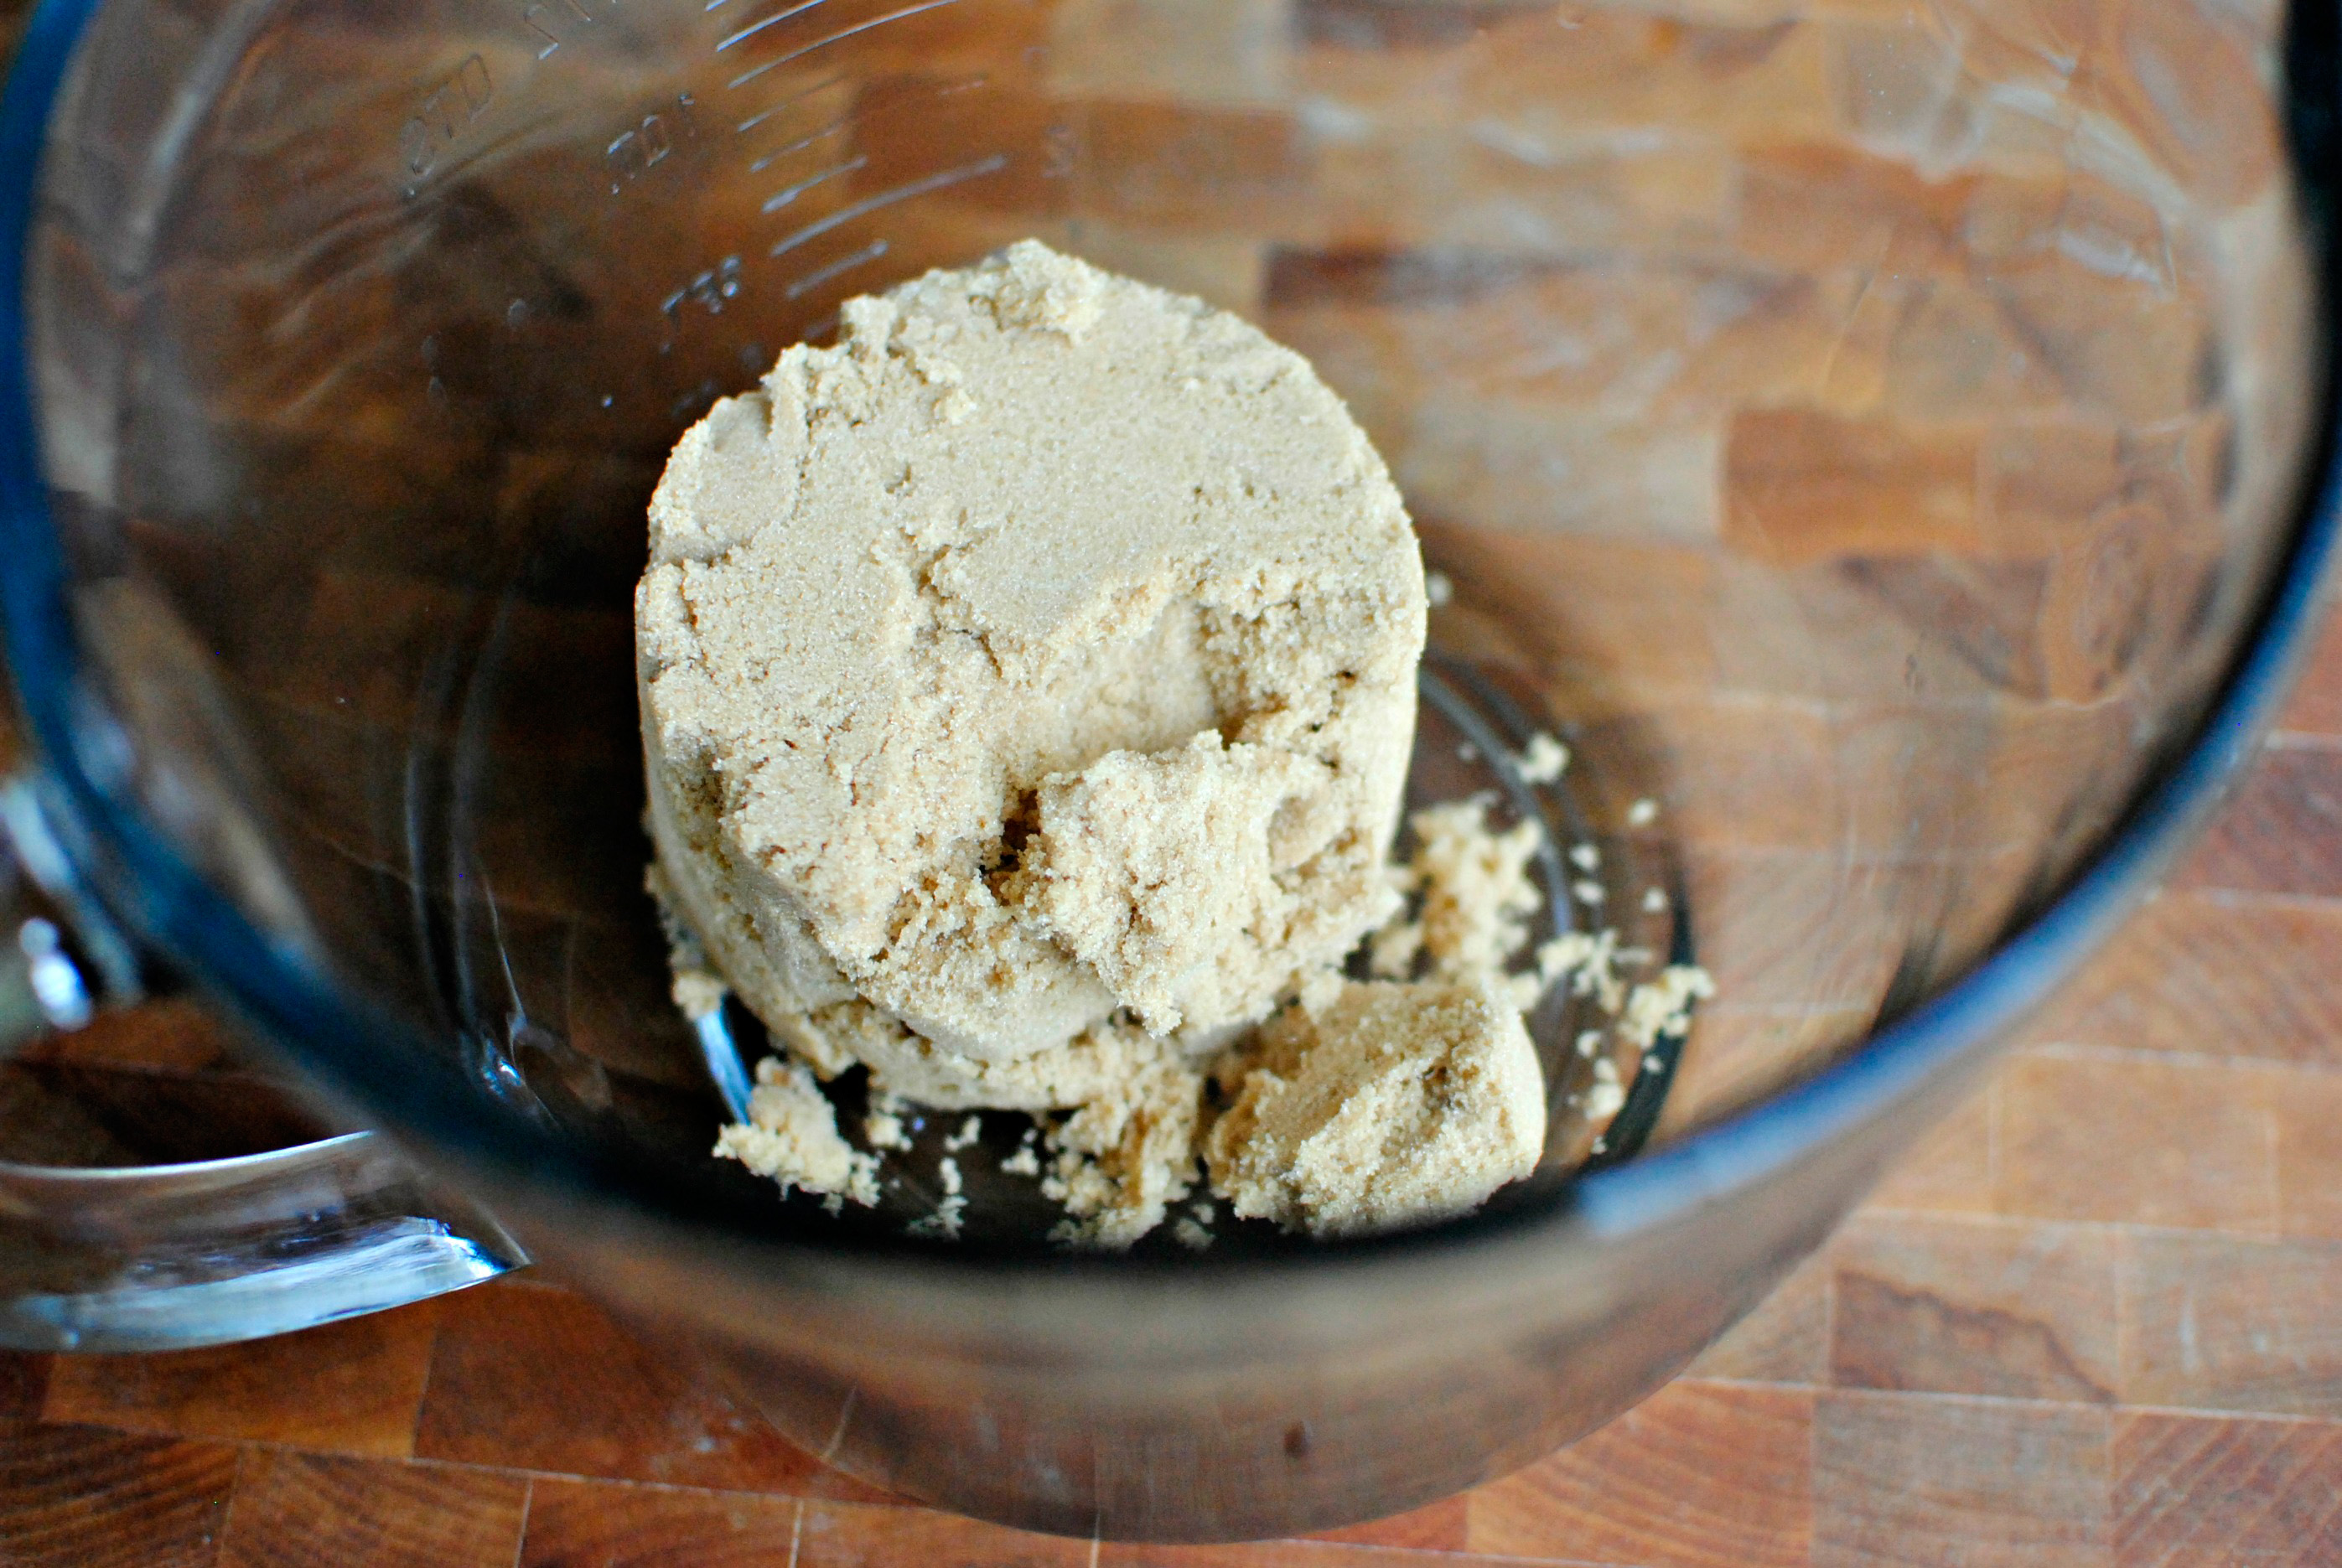
In a large bowl measure and add in the cup of brown sugar.


Tasty Kitchen Blog: Bacon Jam. Guest post by Laurie McNamara of Simply Scratch, recipe submitted by TK member Rebecca of Foodie with Family.

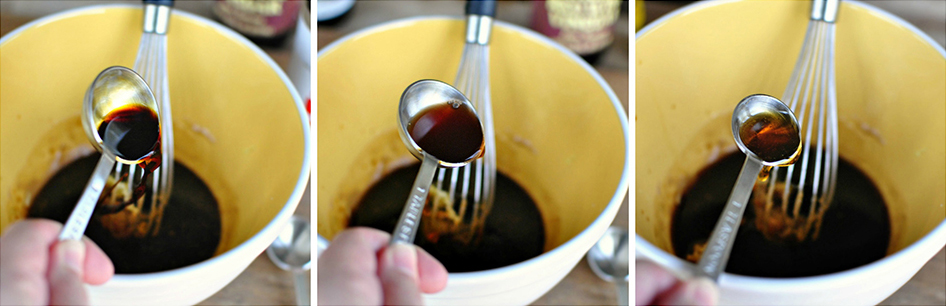
Pour in a cup and a half of strong coffee.


Tasty Kitchen Blog: Bacon Jam. Guest post by Laurie McNamara of Simply Scratch, recipe submitted by TK member Rebecca of Foodie with Family.

Then the cup of cider vinegar.


Tasty Kitchen Blog: Bacon Jam. Guest post by Laurie McNamara of Simply Scratch, recipe submitted by TK member Rebecca of Foodie with Family.

Measure and add in the 1/2 cup of pure maple syrup. This is the real-deal PURE maple syrup kind, so please none of that artificial stuff!


Tasty Kitchen Blog: Bacon Jam. Guest post by Laurie McNamara of Simply Scratch, recipe submitted by TK member Rebecca of Foodie with Family.

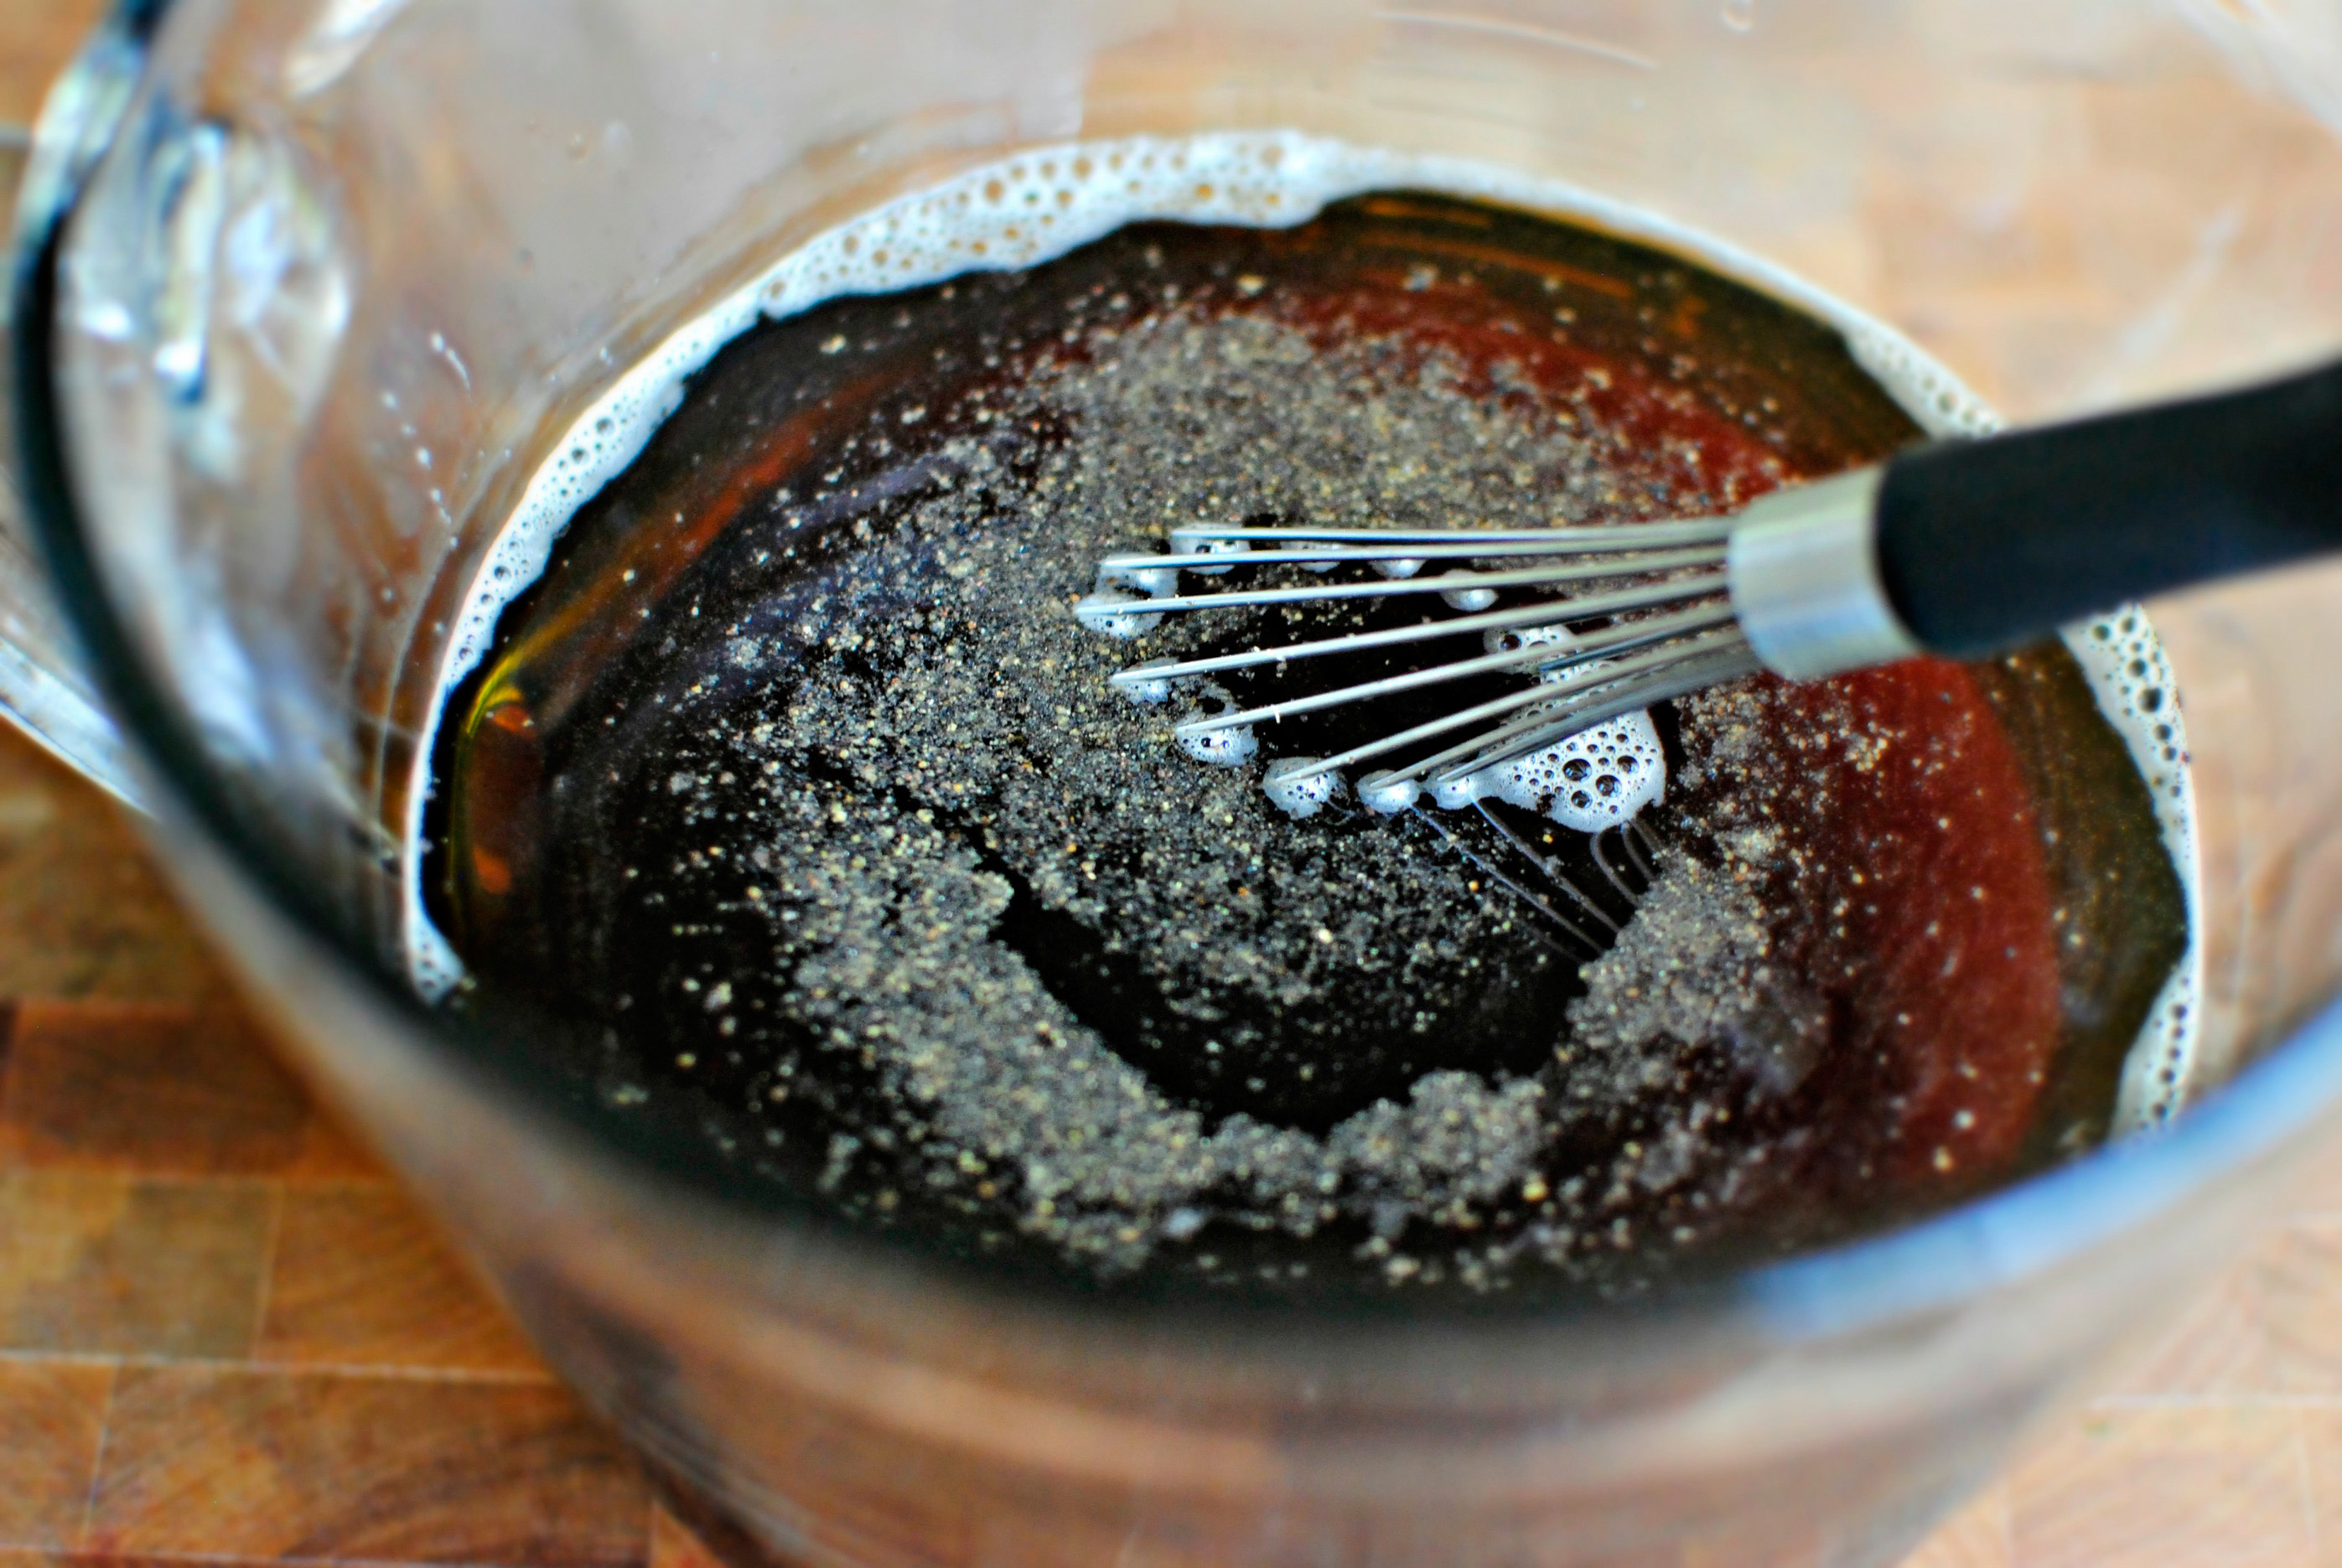
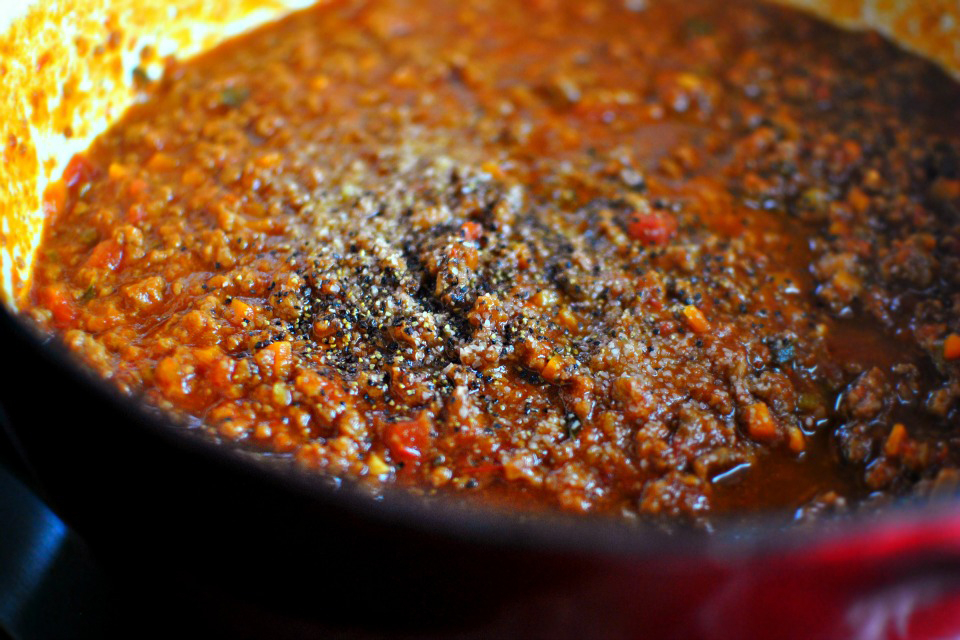
Season with a teaspoon of black pepper. And that’s it!


Tasty Kitchen Blog: Bacon Jam. Guest post by Laurie McNamara of Simply Scratch, recipe submitted by TK member Rebecca of Foodie with Family.

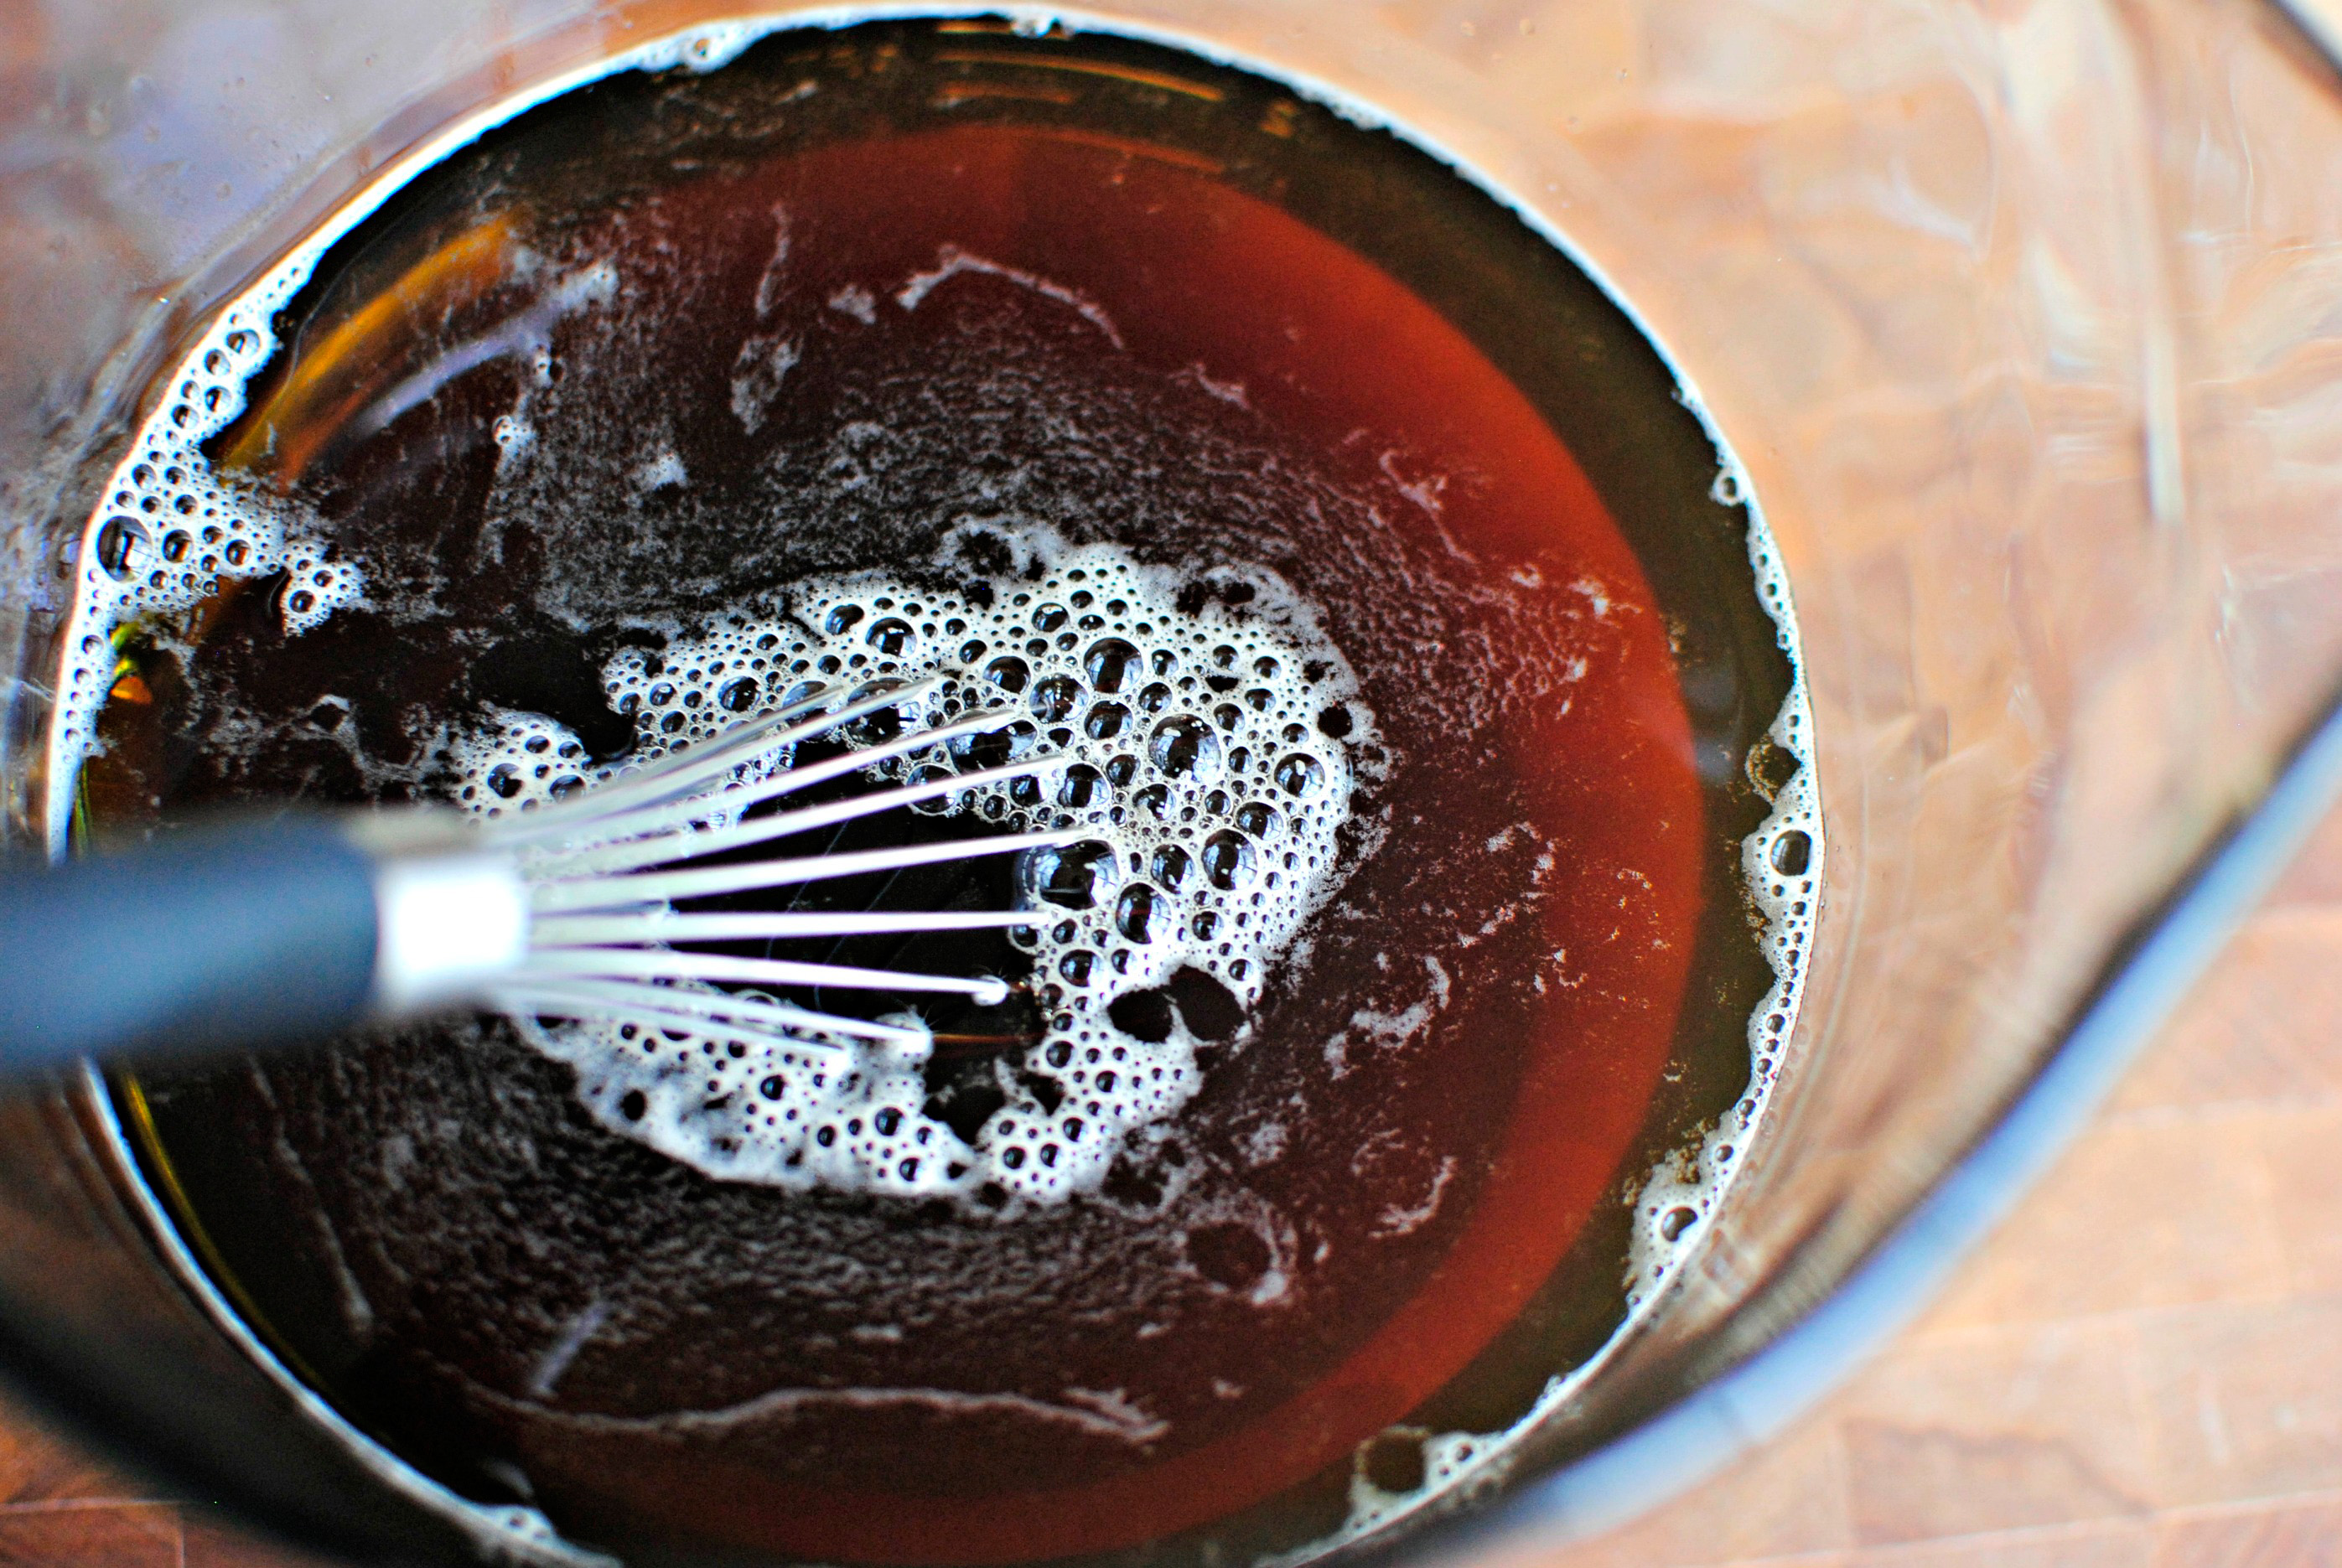
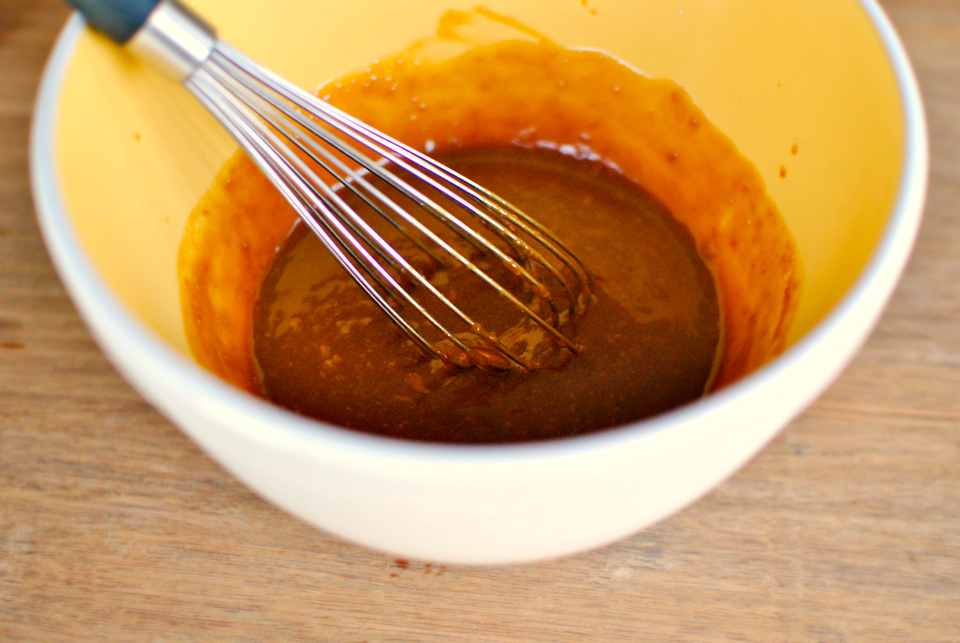
Give it a good stir to get the maple syrup and brown sugar mixed well together.


Tasty Kitchen Blog: Bacon Jam. Guest post by Laurie McNamara of Simply Scratch, recipe submitted by TK member Rebecca of Foodie with Family.

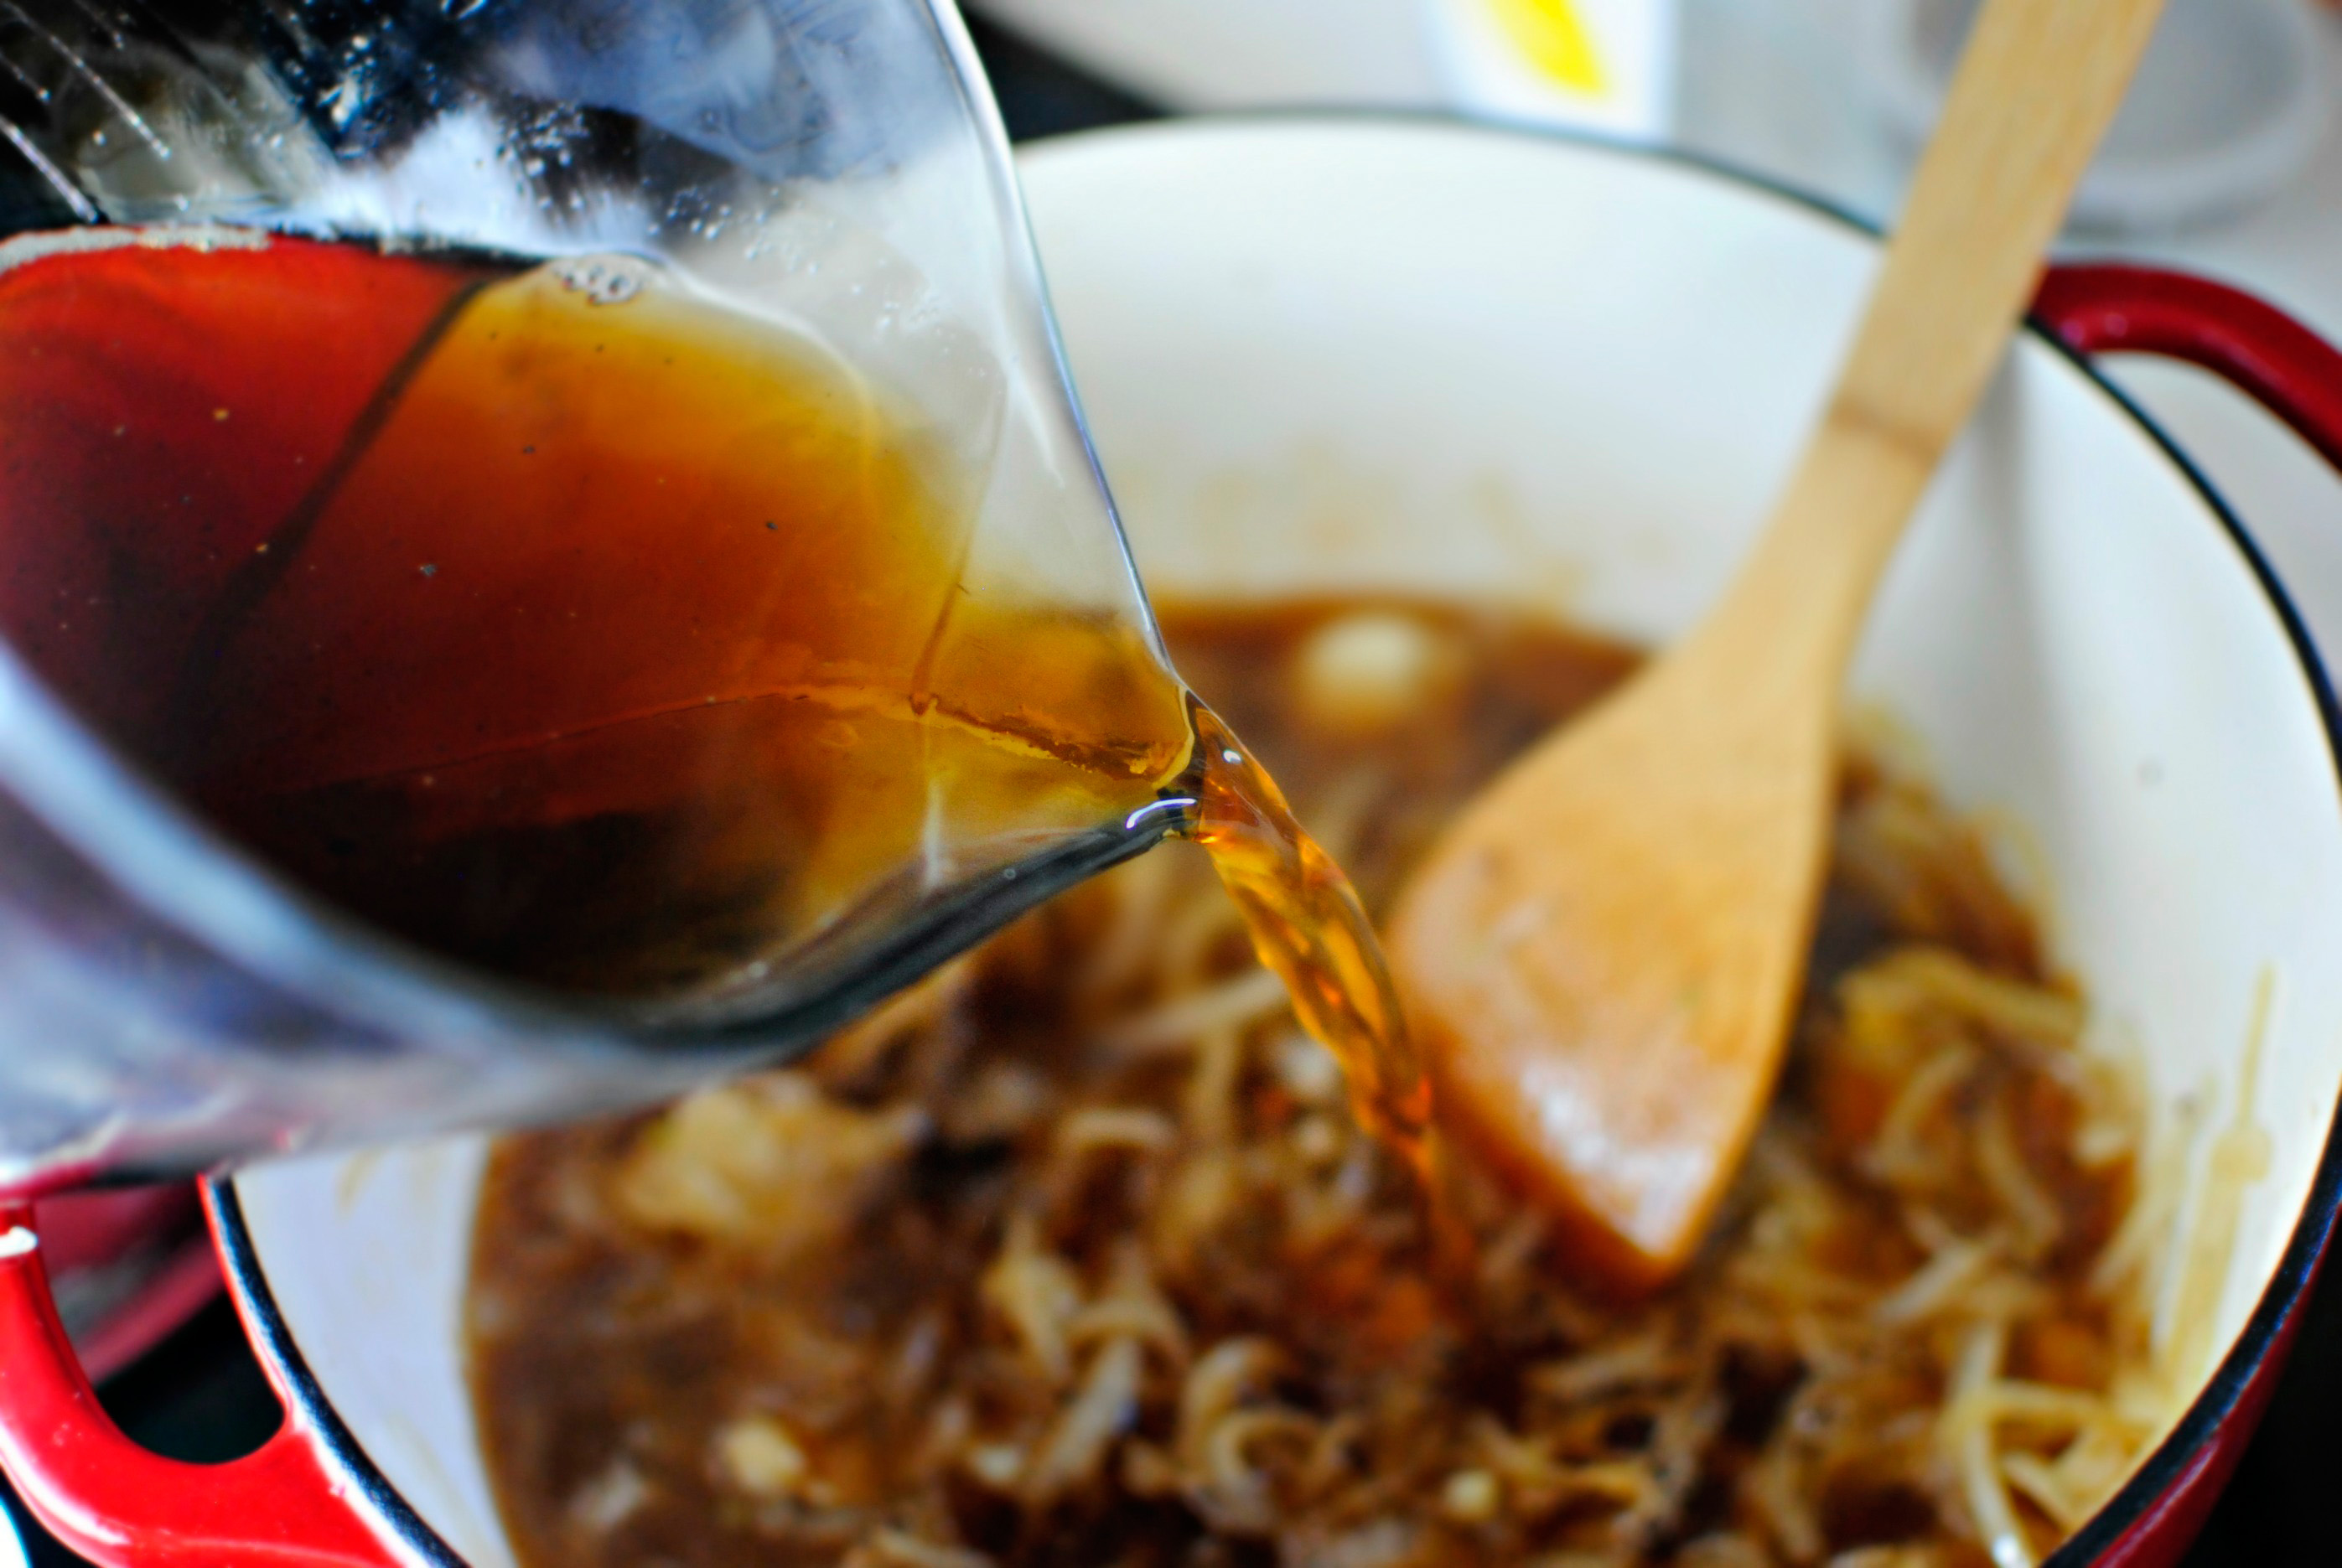
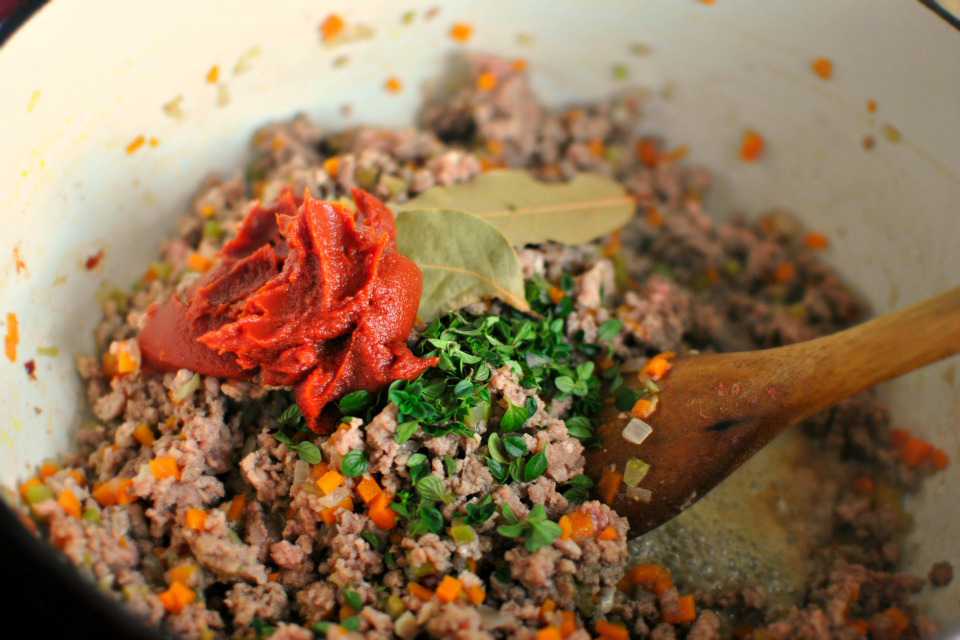
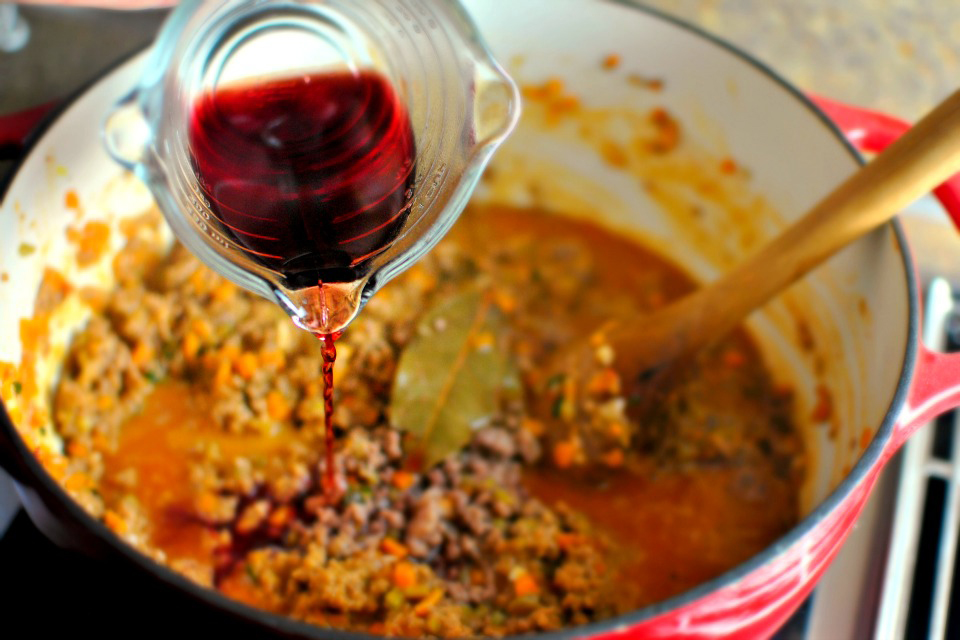
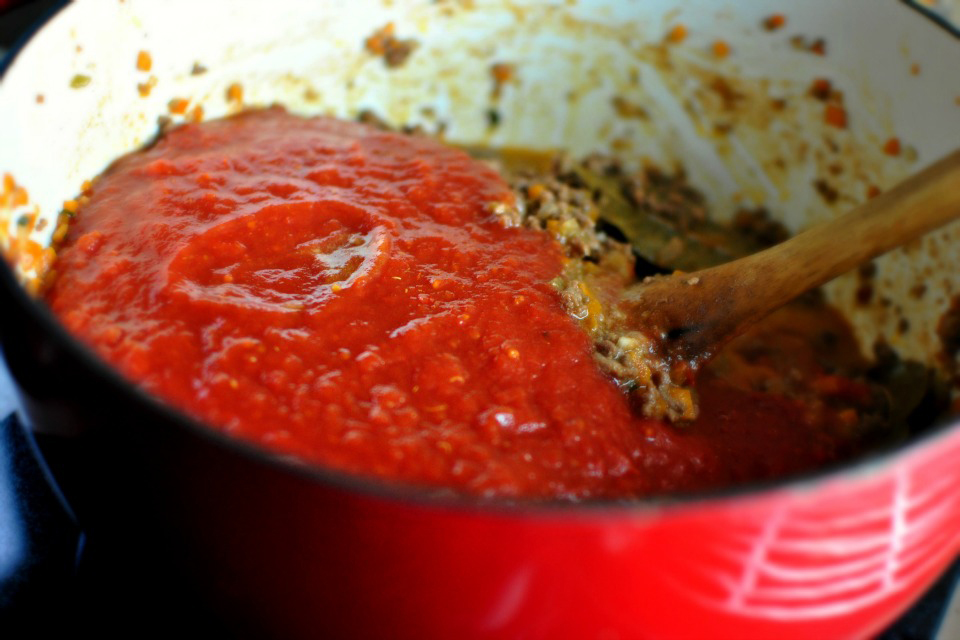
And then just pour it over the onions and garlic and give it a good stir as well.


Tasty Kitchen Blog: Bacon Jam. Guest post by Laurie McNamara of Simply Scratch, recipe submitted by TK member Rebecca of Foodie with Family.

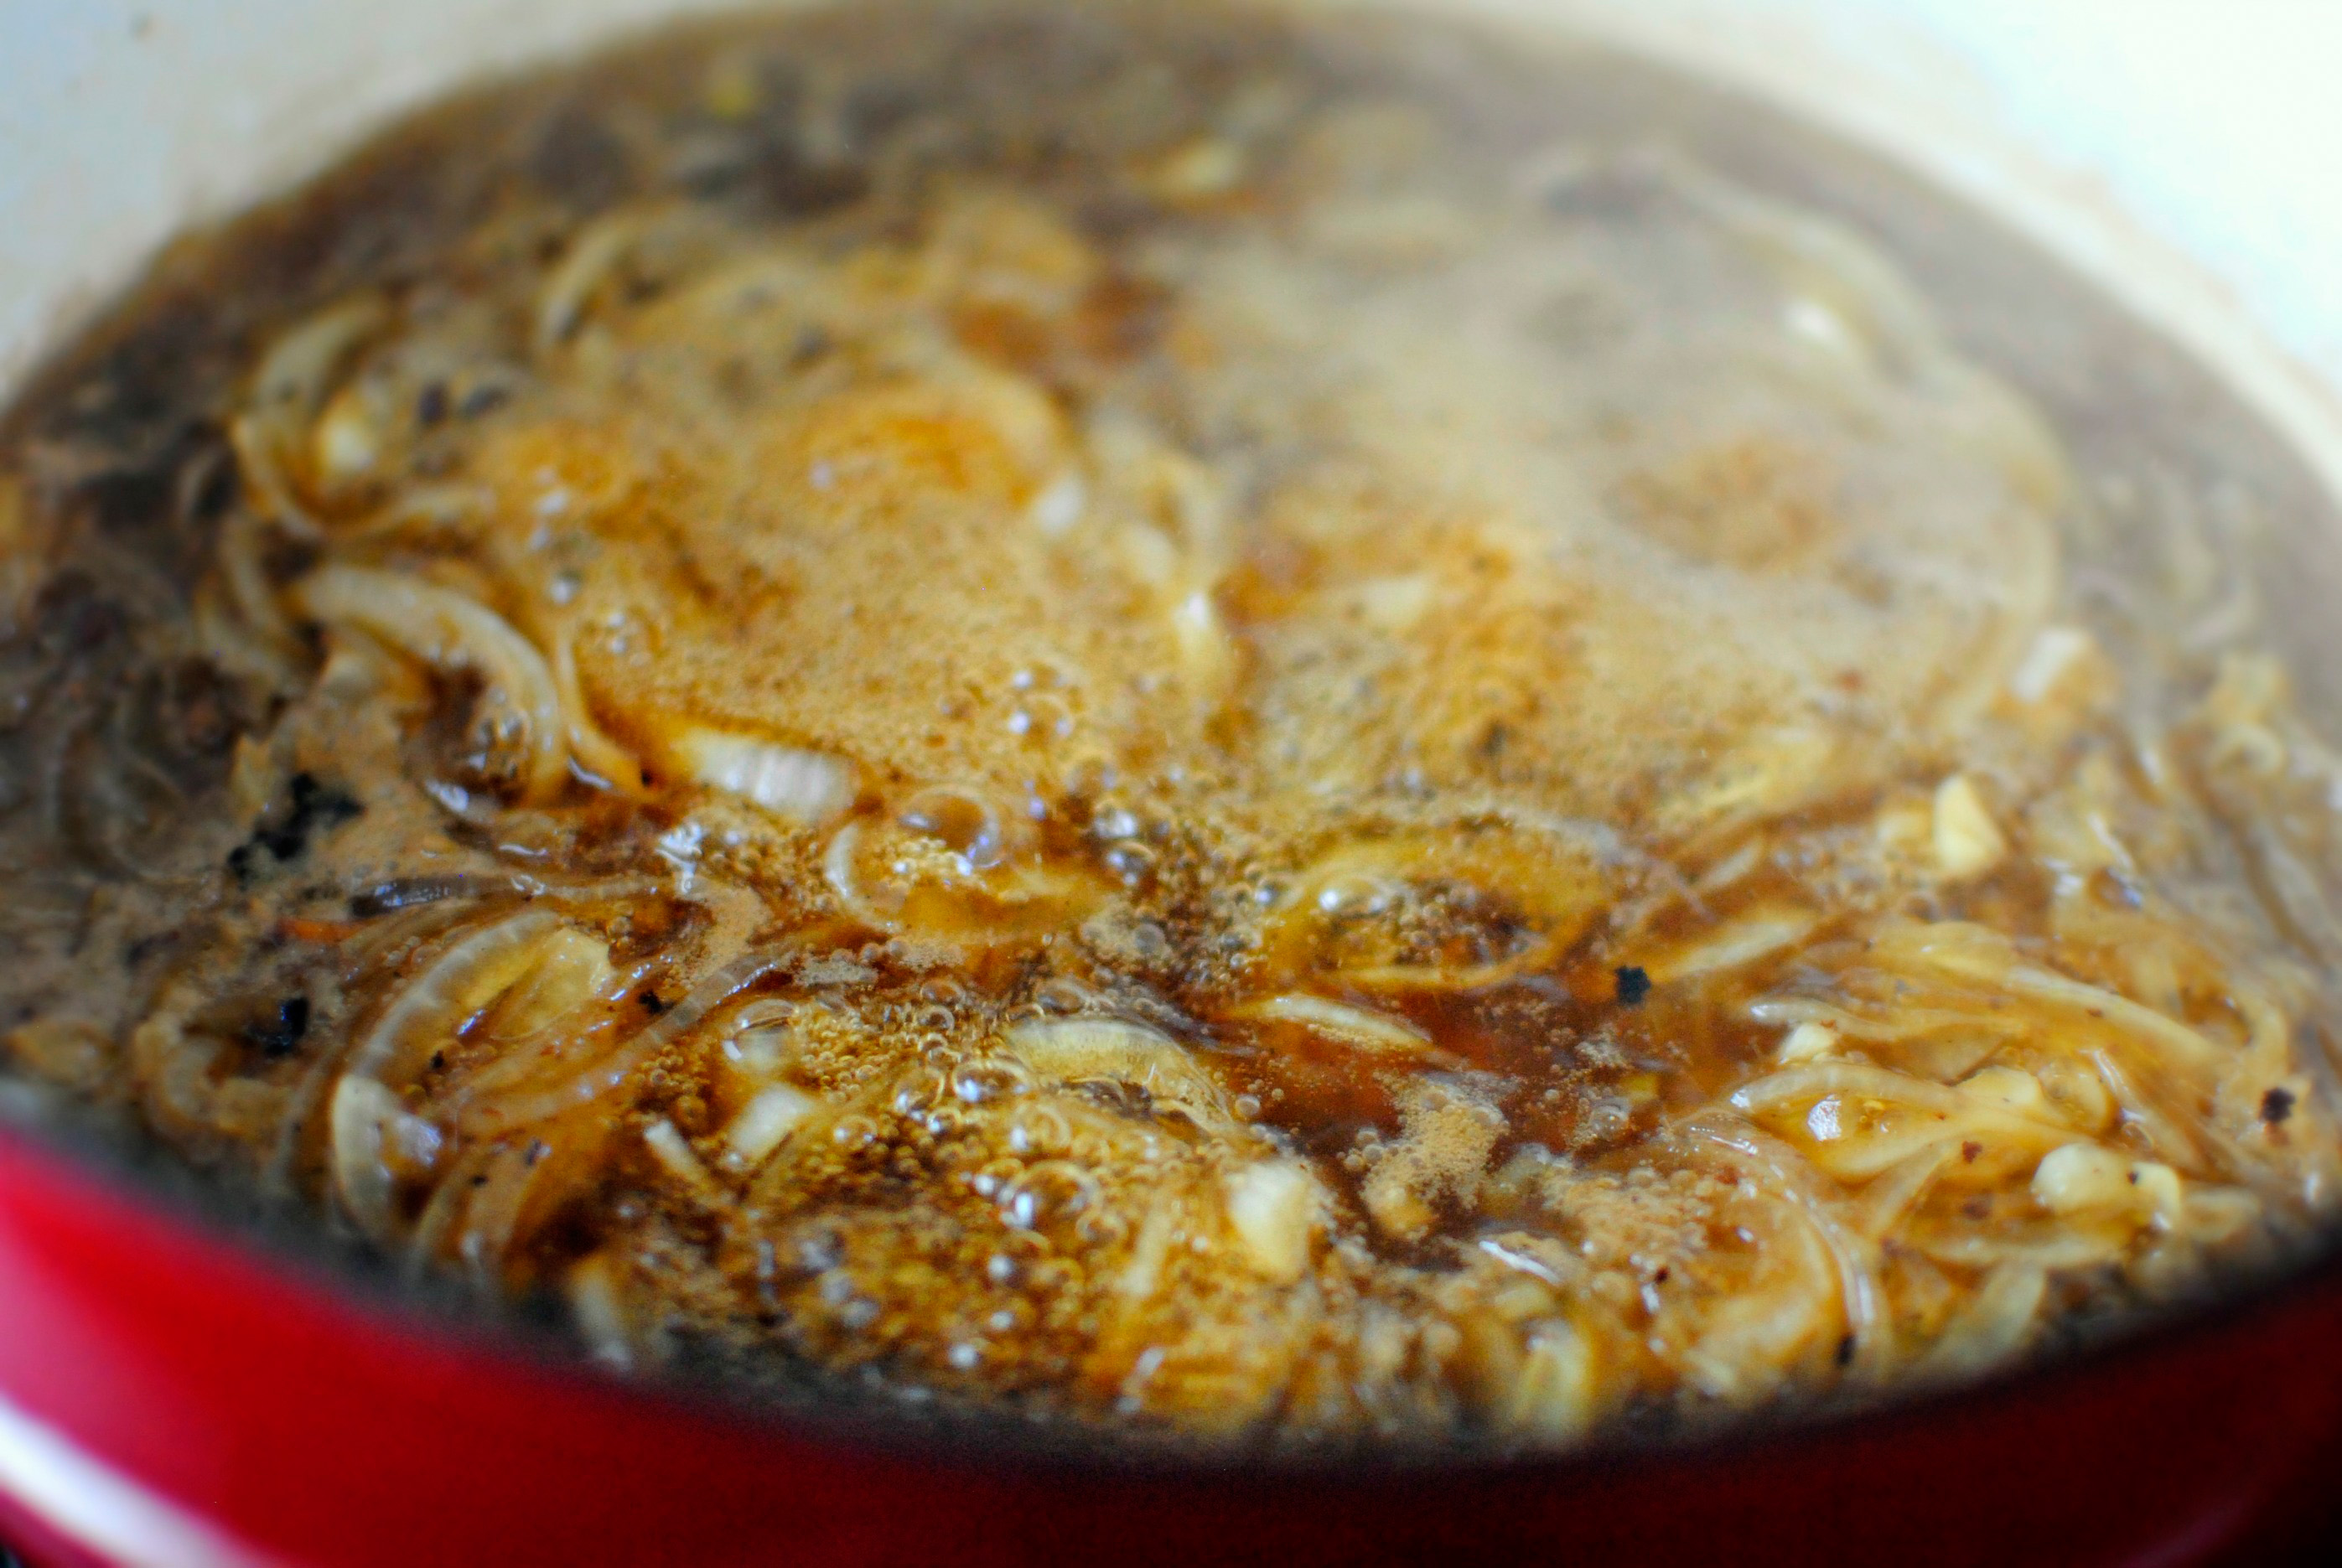
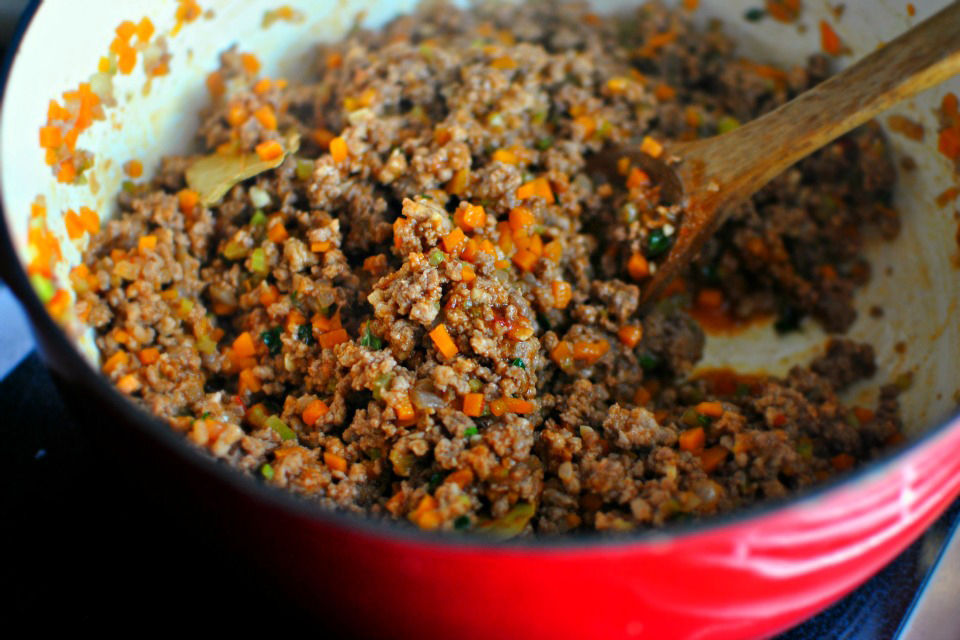
Then I just brought the mixture up to a hard boil for about two to four minutes before adding in the bacon.


Tasty Kitchen Blog: Bacon Jam. Guest post by Laurie McNamara of Simply Scratch, recipe submitted by TK member Rebecca of Foodie with Family.

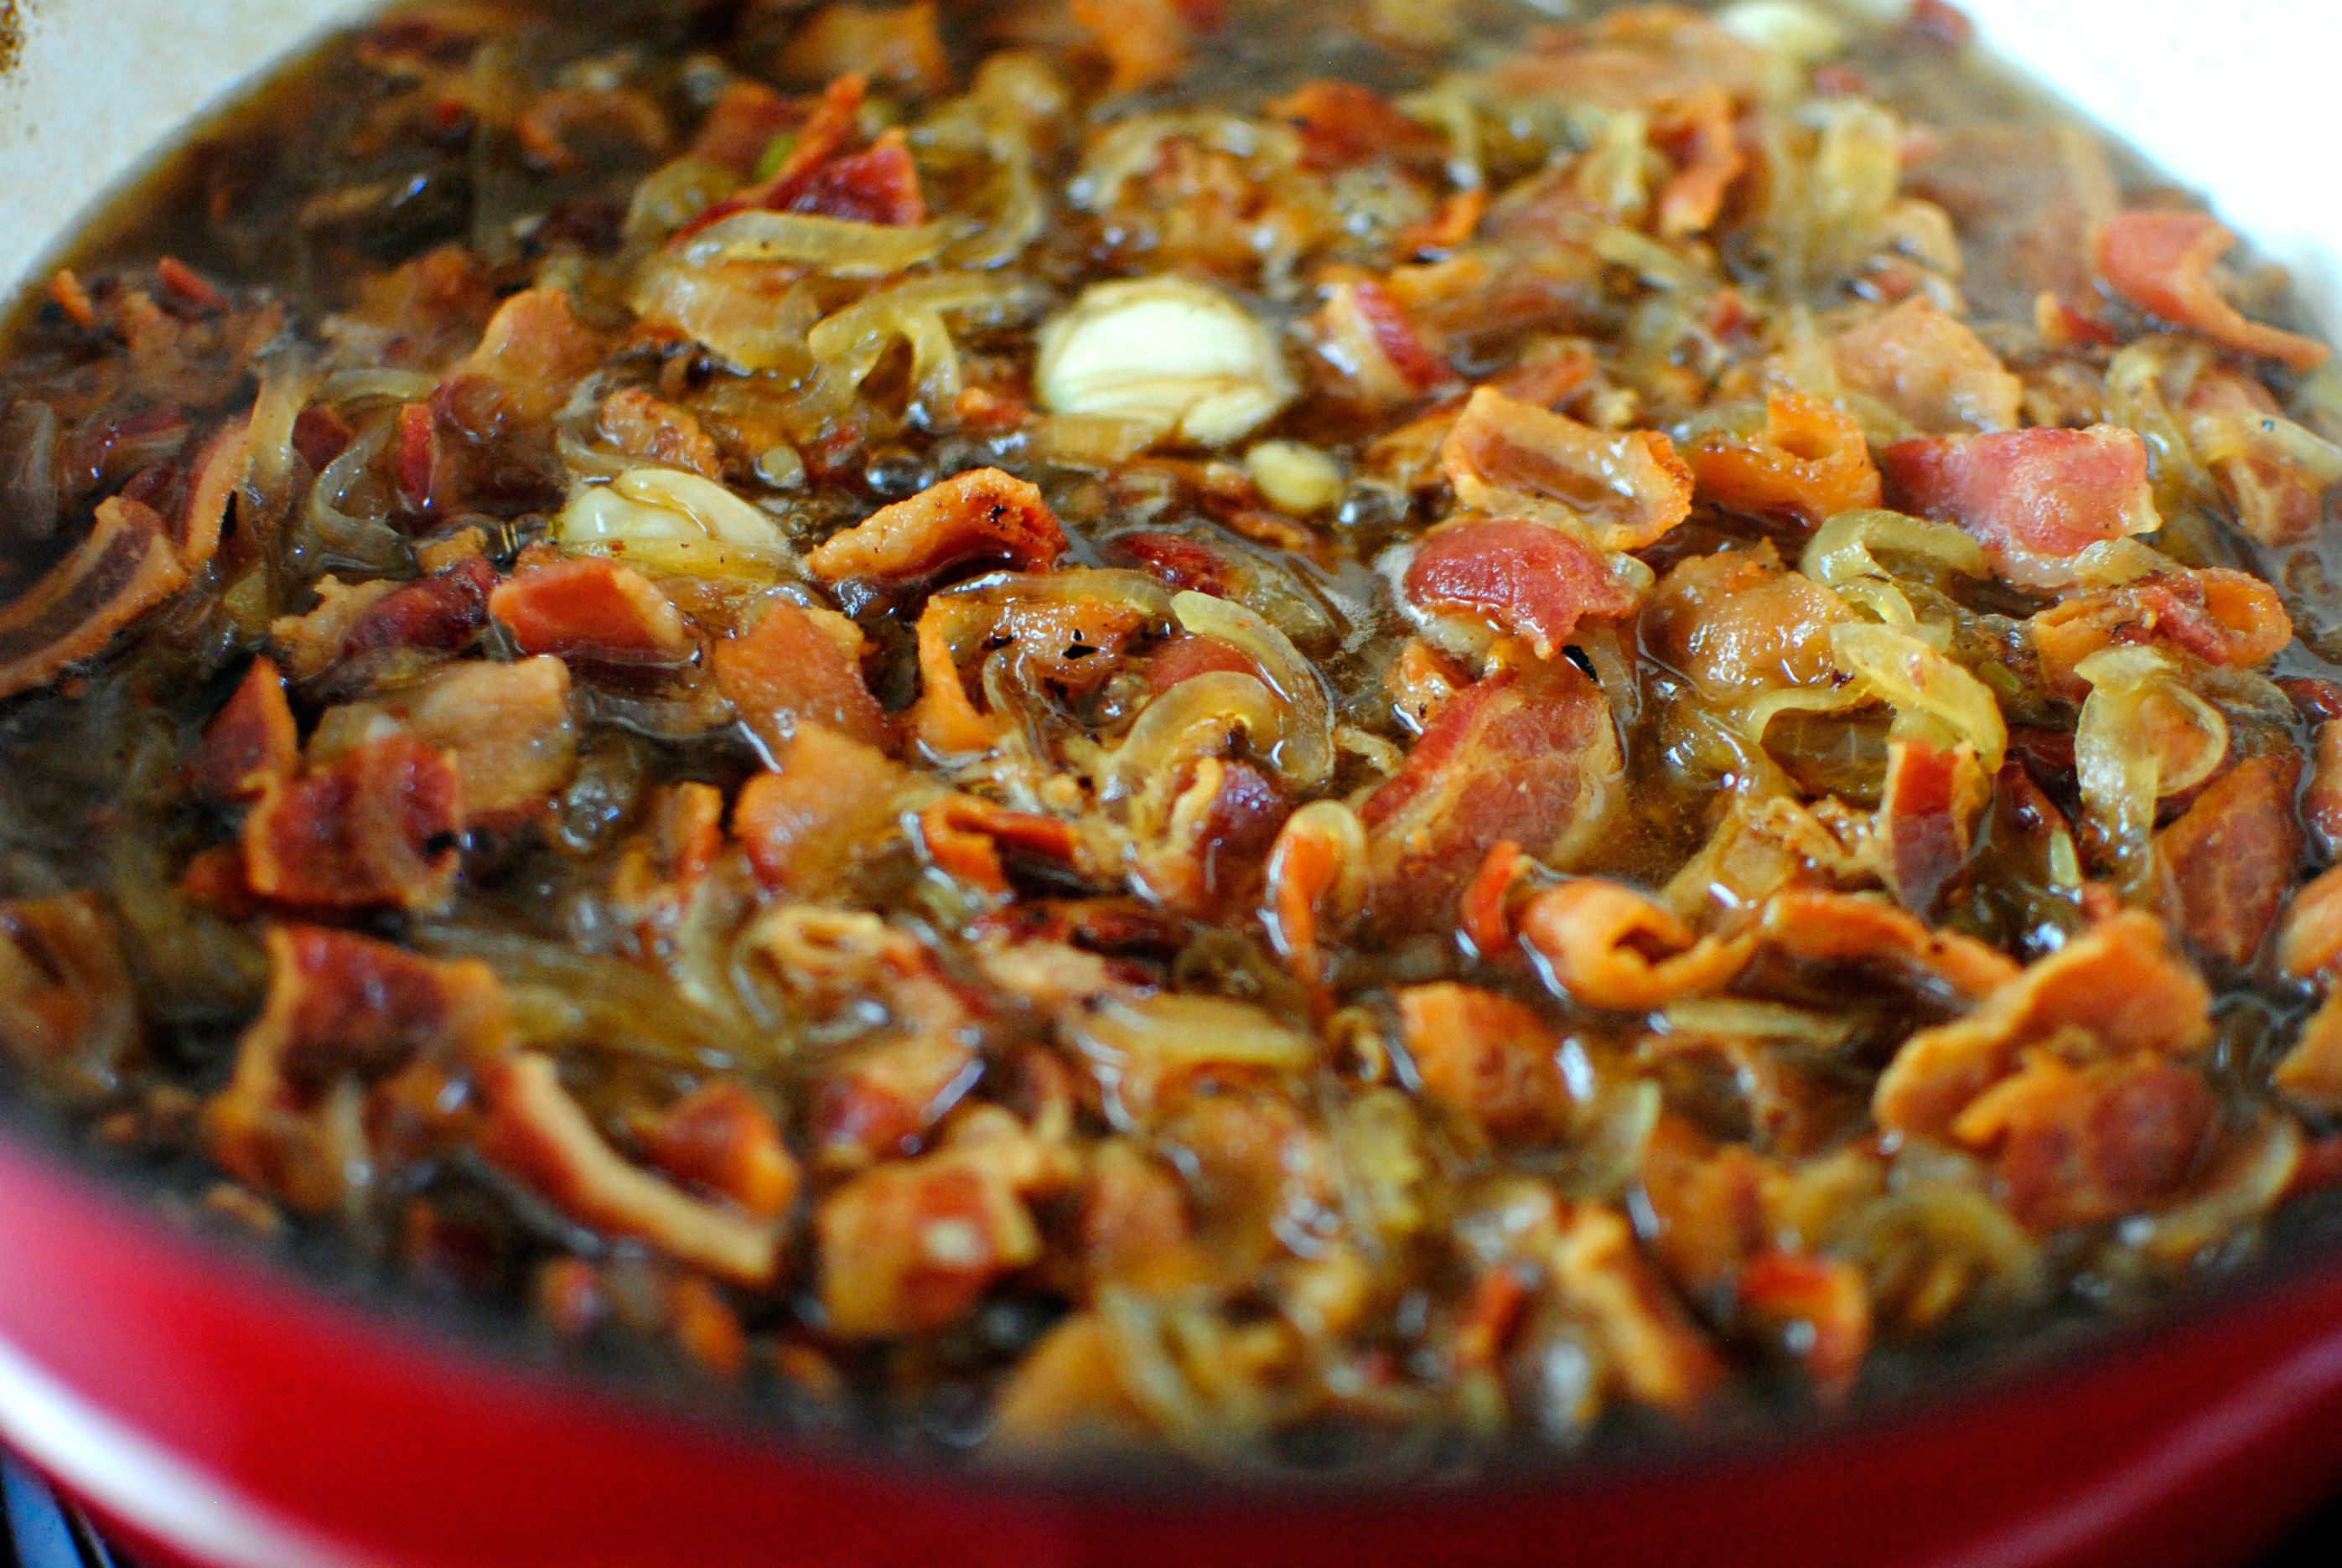
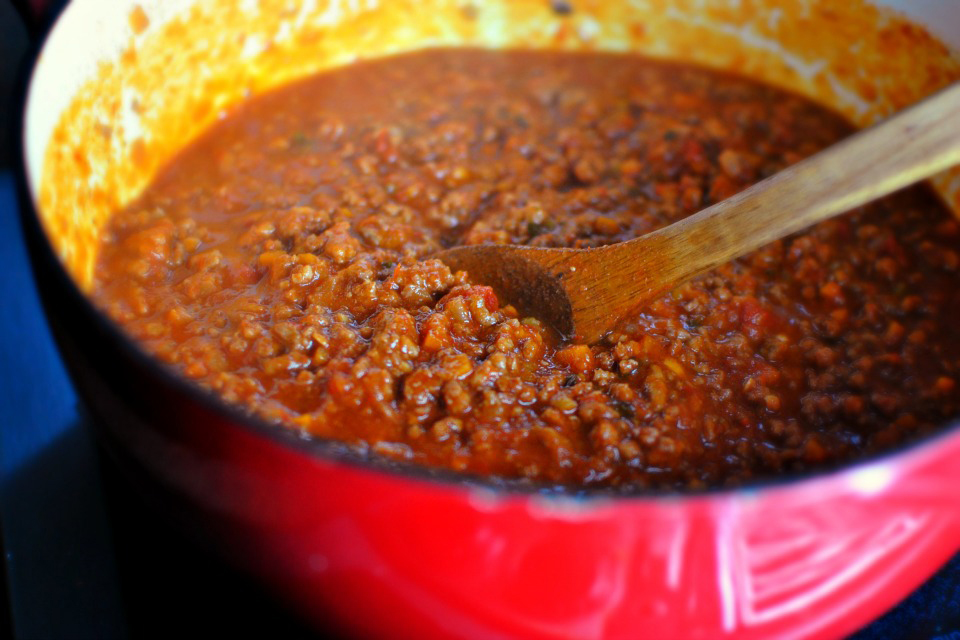
Then I reduced the heat down to low to simmer, with the lid off, until the sauce was thick and the onions started melting. It takes a good hour to an hour and a half for this all to happen. But my house filled with a smell I can only describe as a bacon-y barbecue smell which I hope heaven will smell like.


Tasty Kitchen Blog: Bacon Jam. Guest post by Laurie McNamara of Simply Scratch, recipe submitted by TK member Rebecca of Foodie with Family.

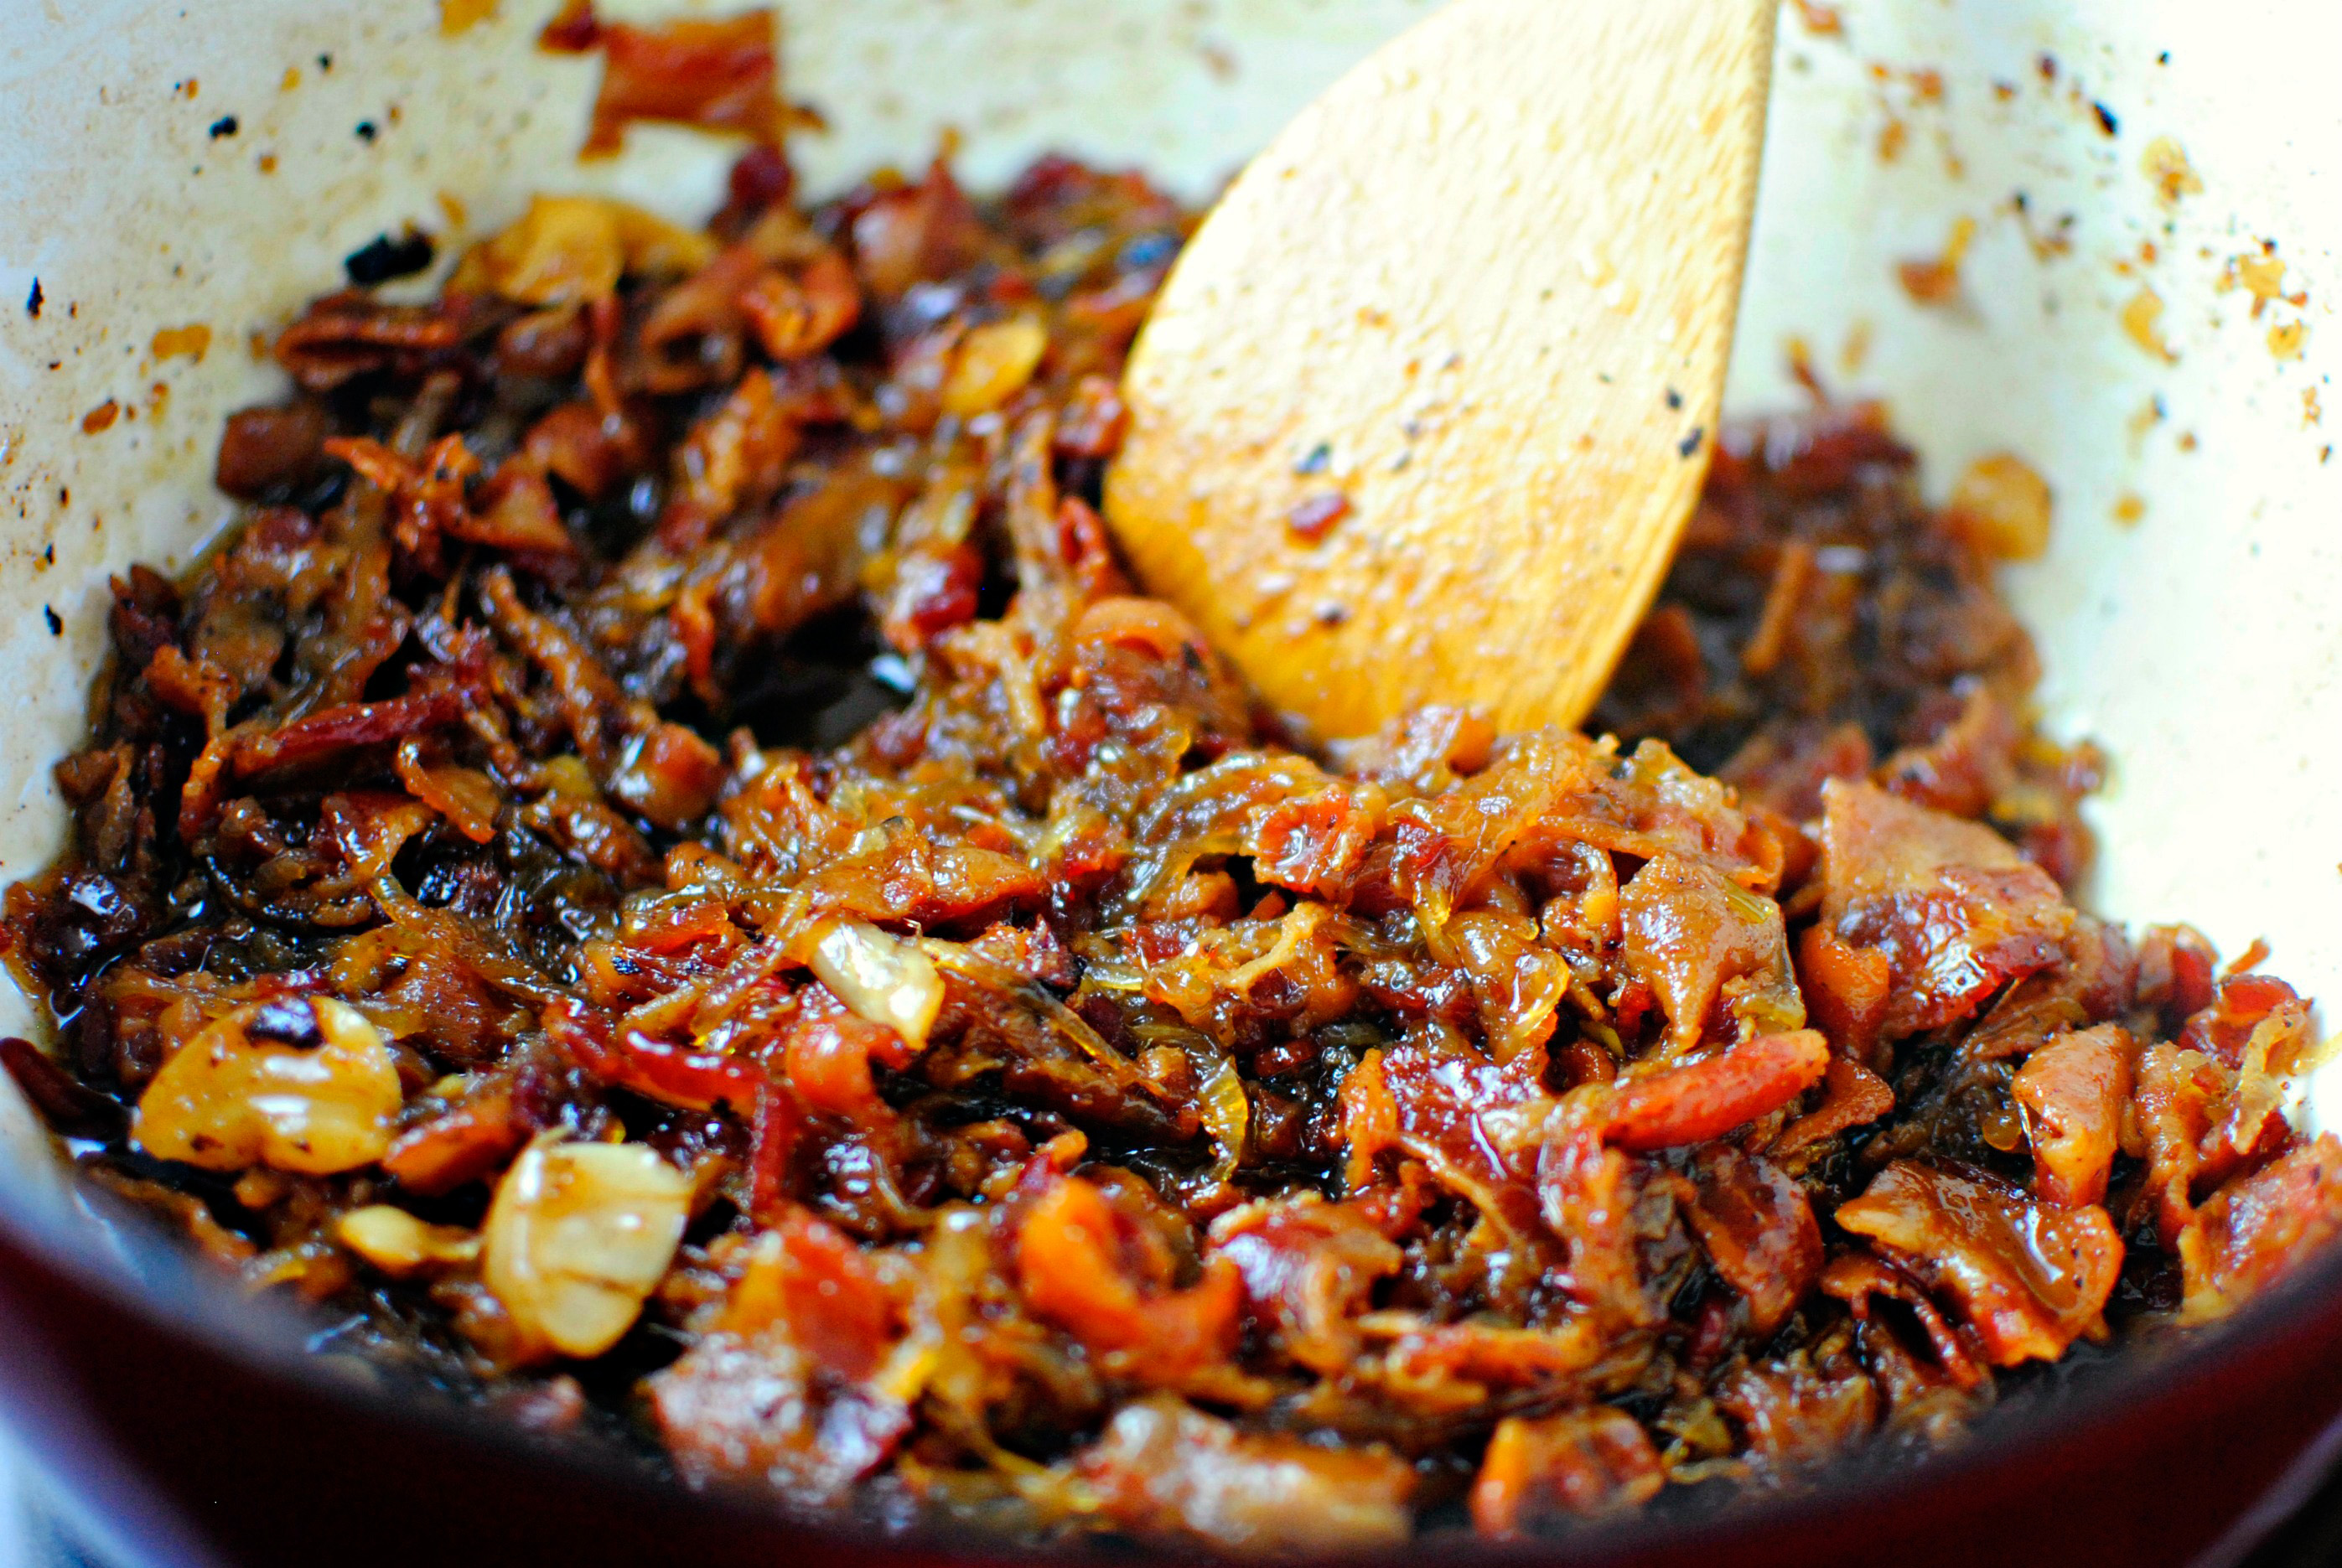
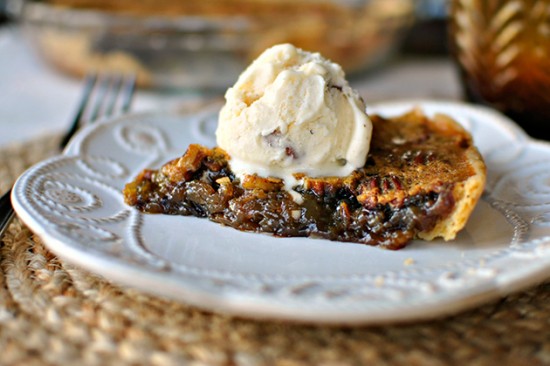
When all is said and done and the liquid has reduced, this is what it should look like. Fabulous! I could’ve stopped here and ate it all by spoonful.


Tasty Kitchen Blog: Bacon Jam. Guest post by Laurie McNamara of Simply Scratch, recipe submitted by TK member Rebecca of Foodie with Family.

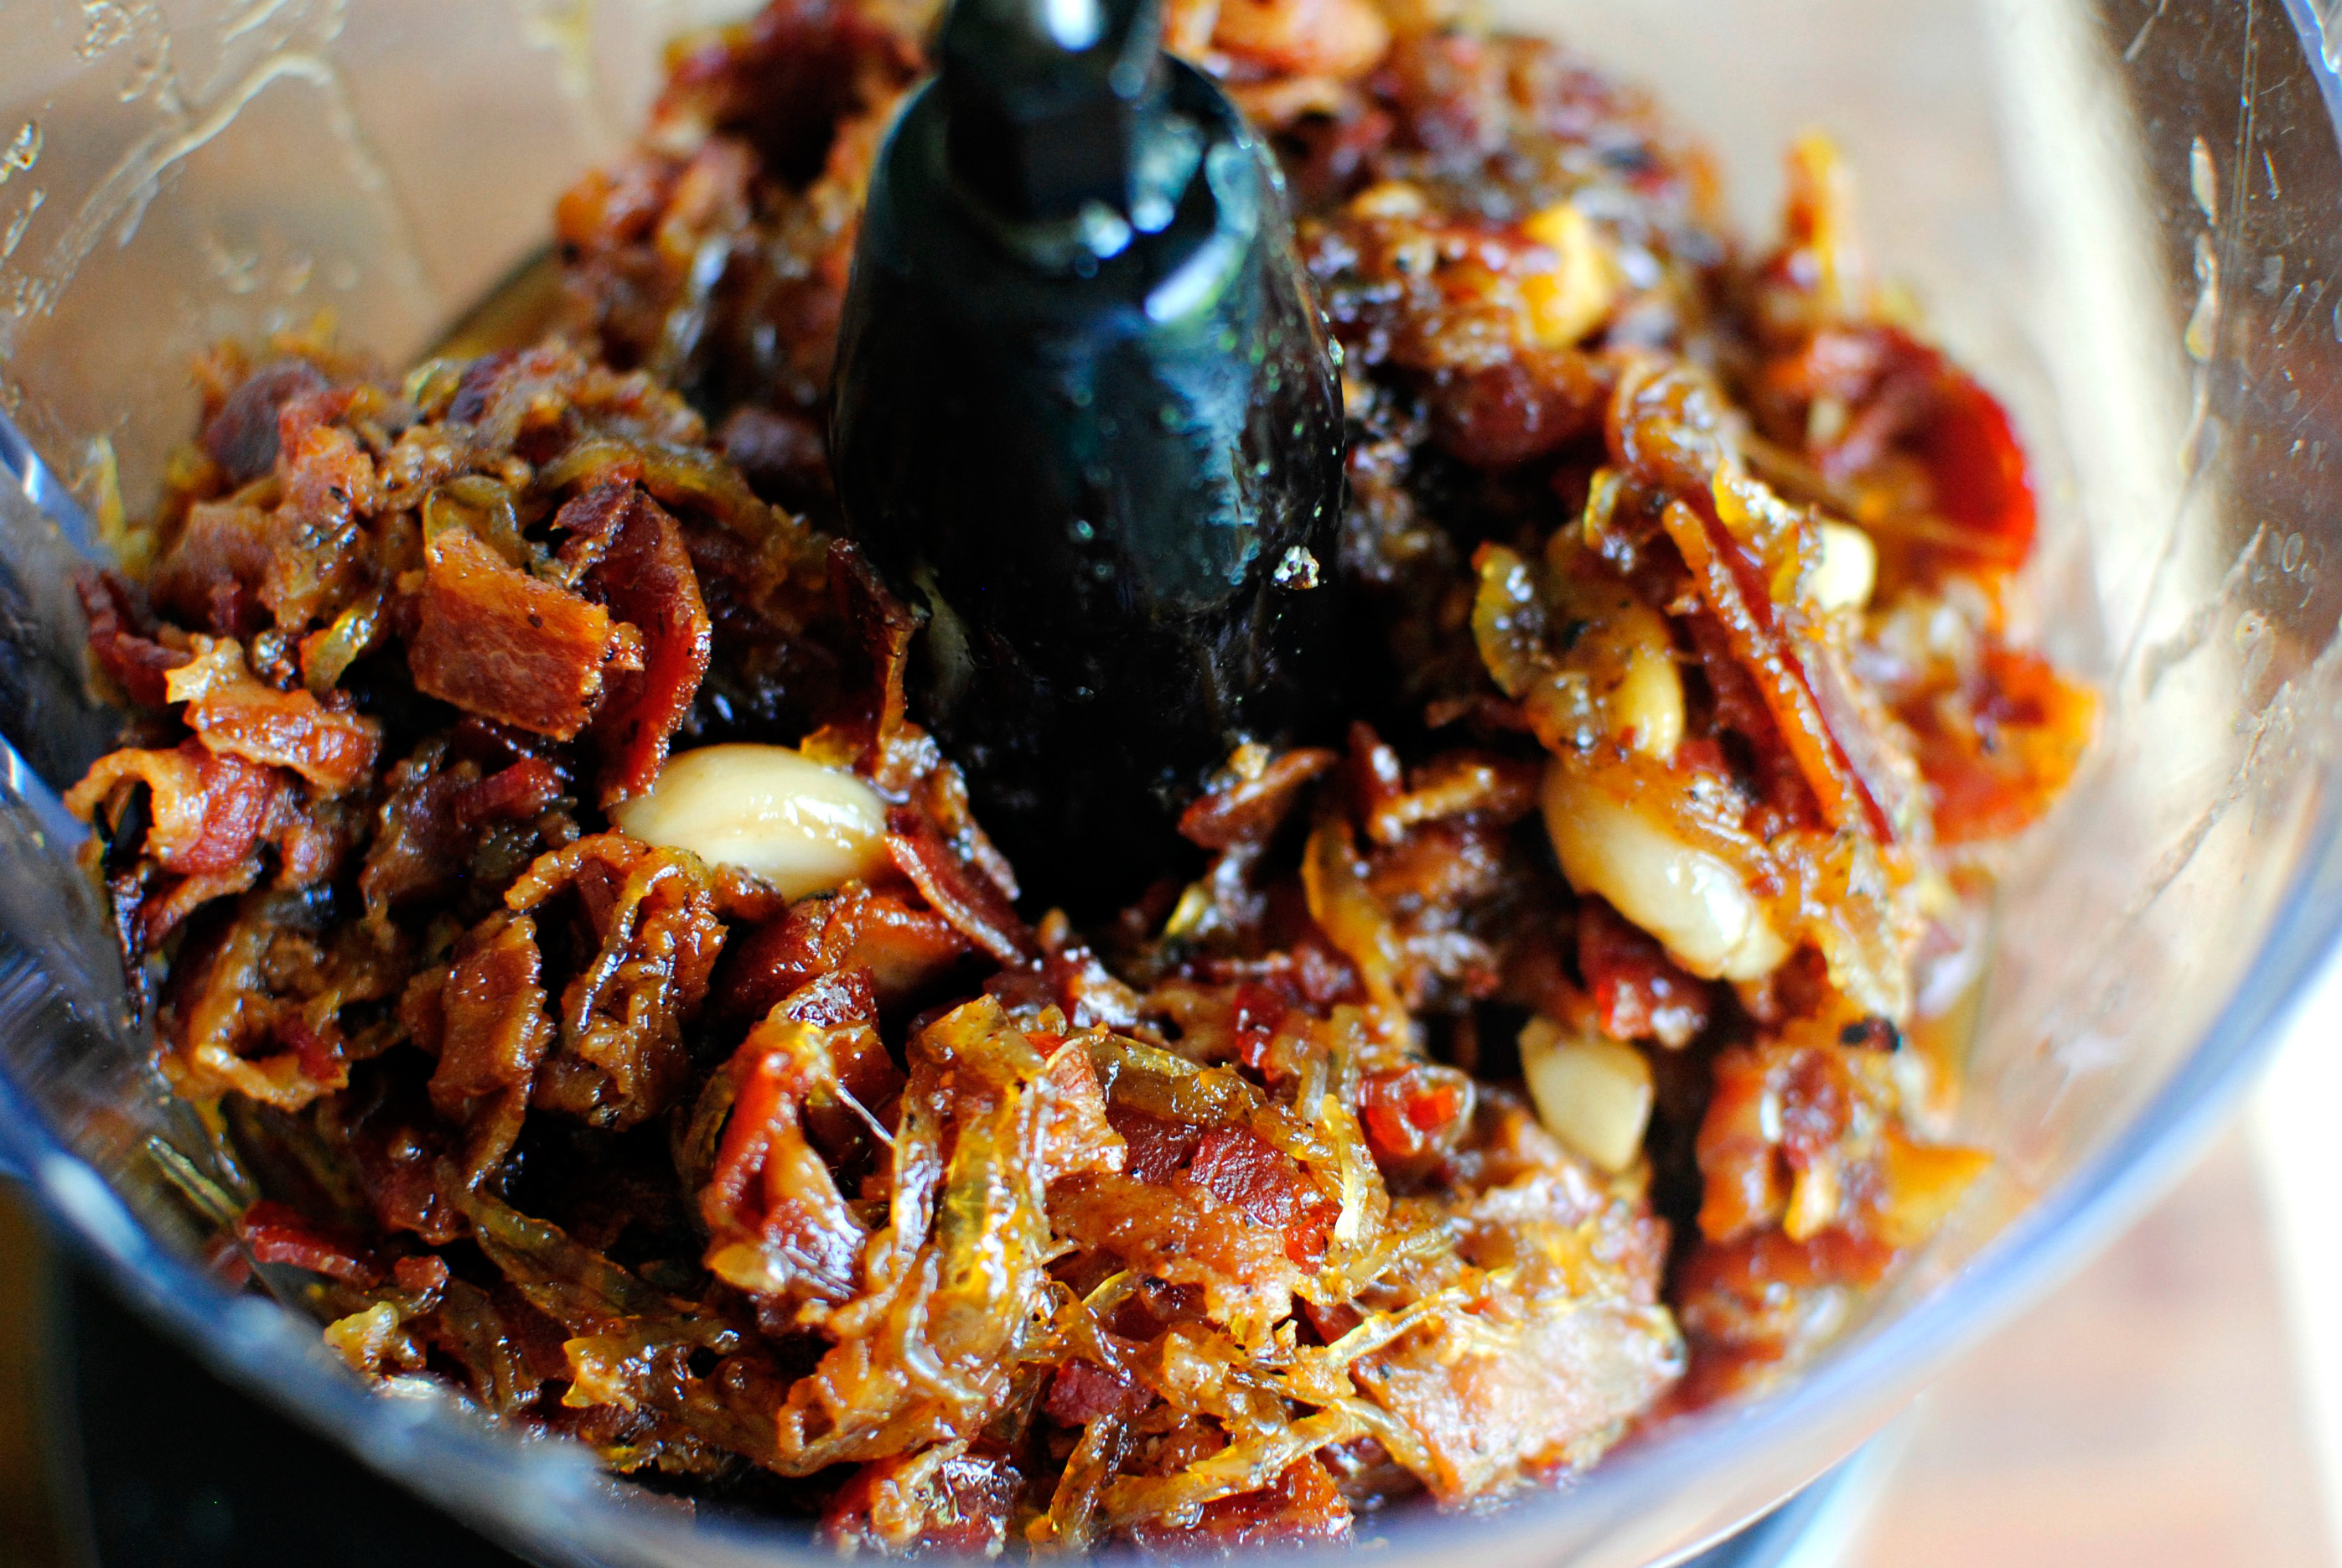
But instead I added it all into my food processor, placed the lid on tight, and pulsed it until it resembled jam.


Tasty Kitchen Blog: Bacon Jam. Guest post by Laurie McNamara of Simply Scratch, recipe submitted by TK member Rebecca of Foodie with Family.

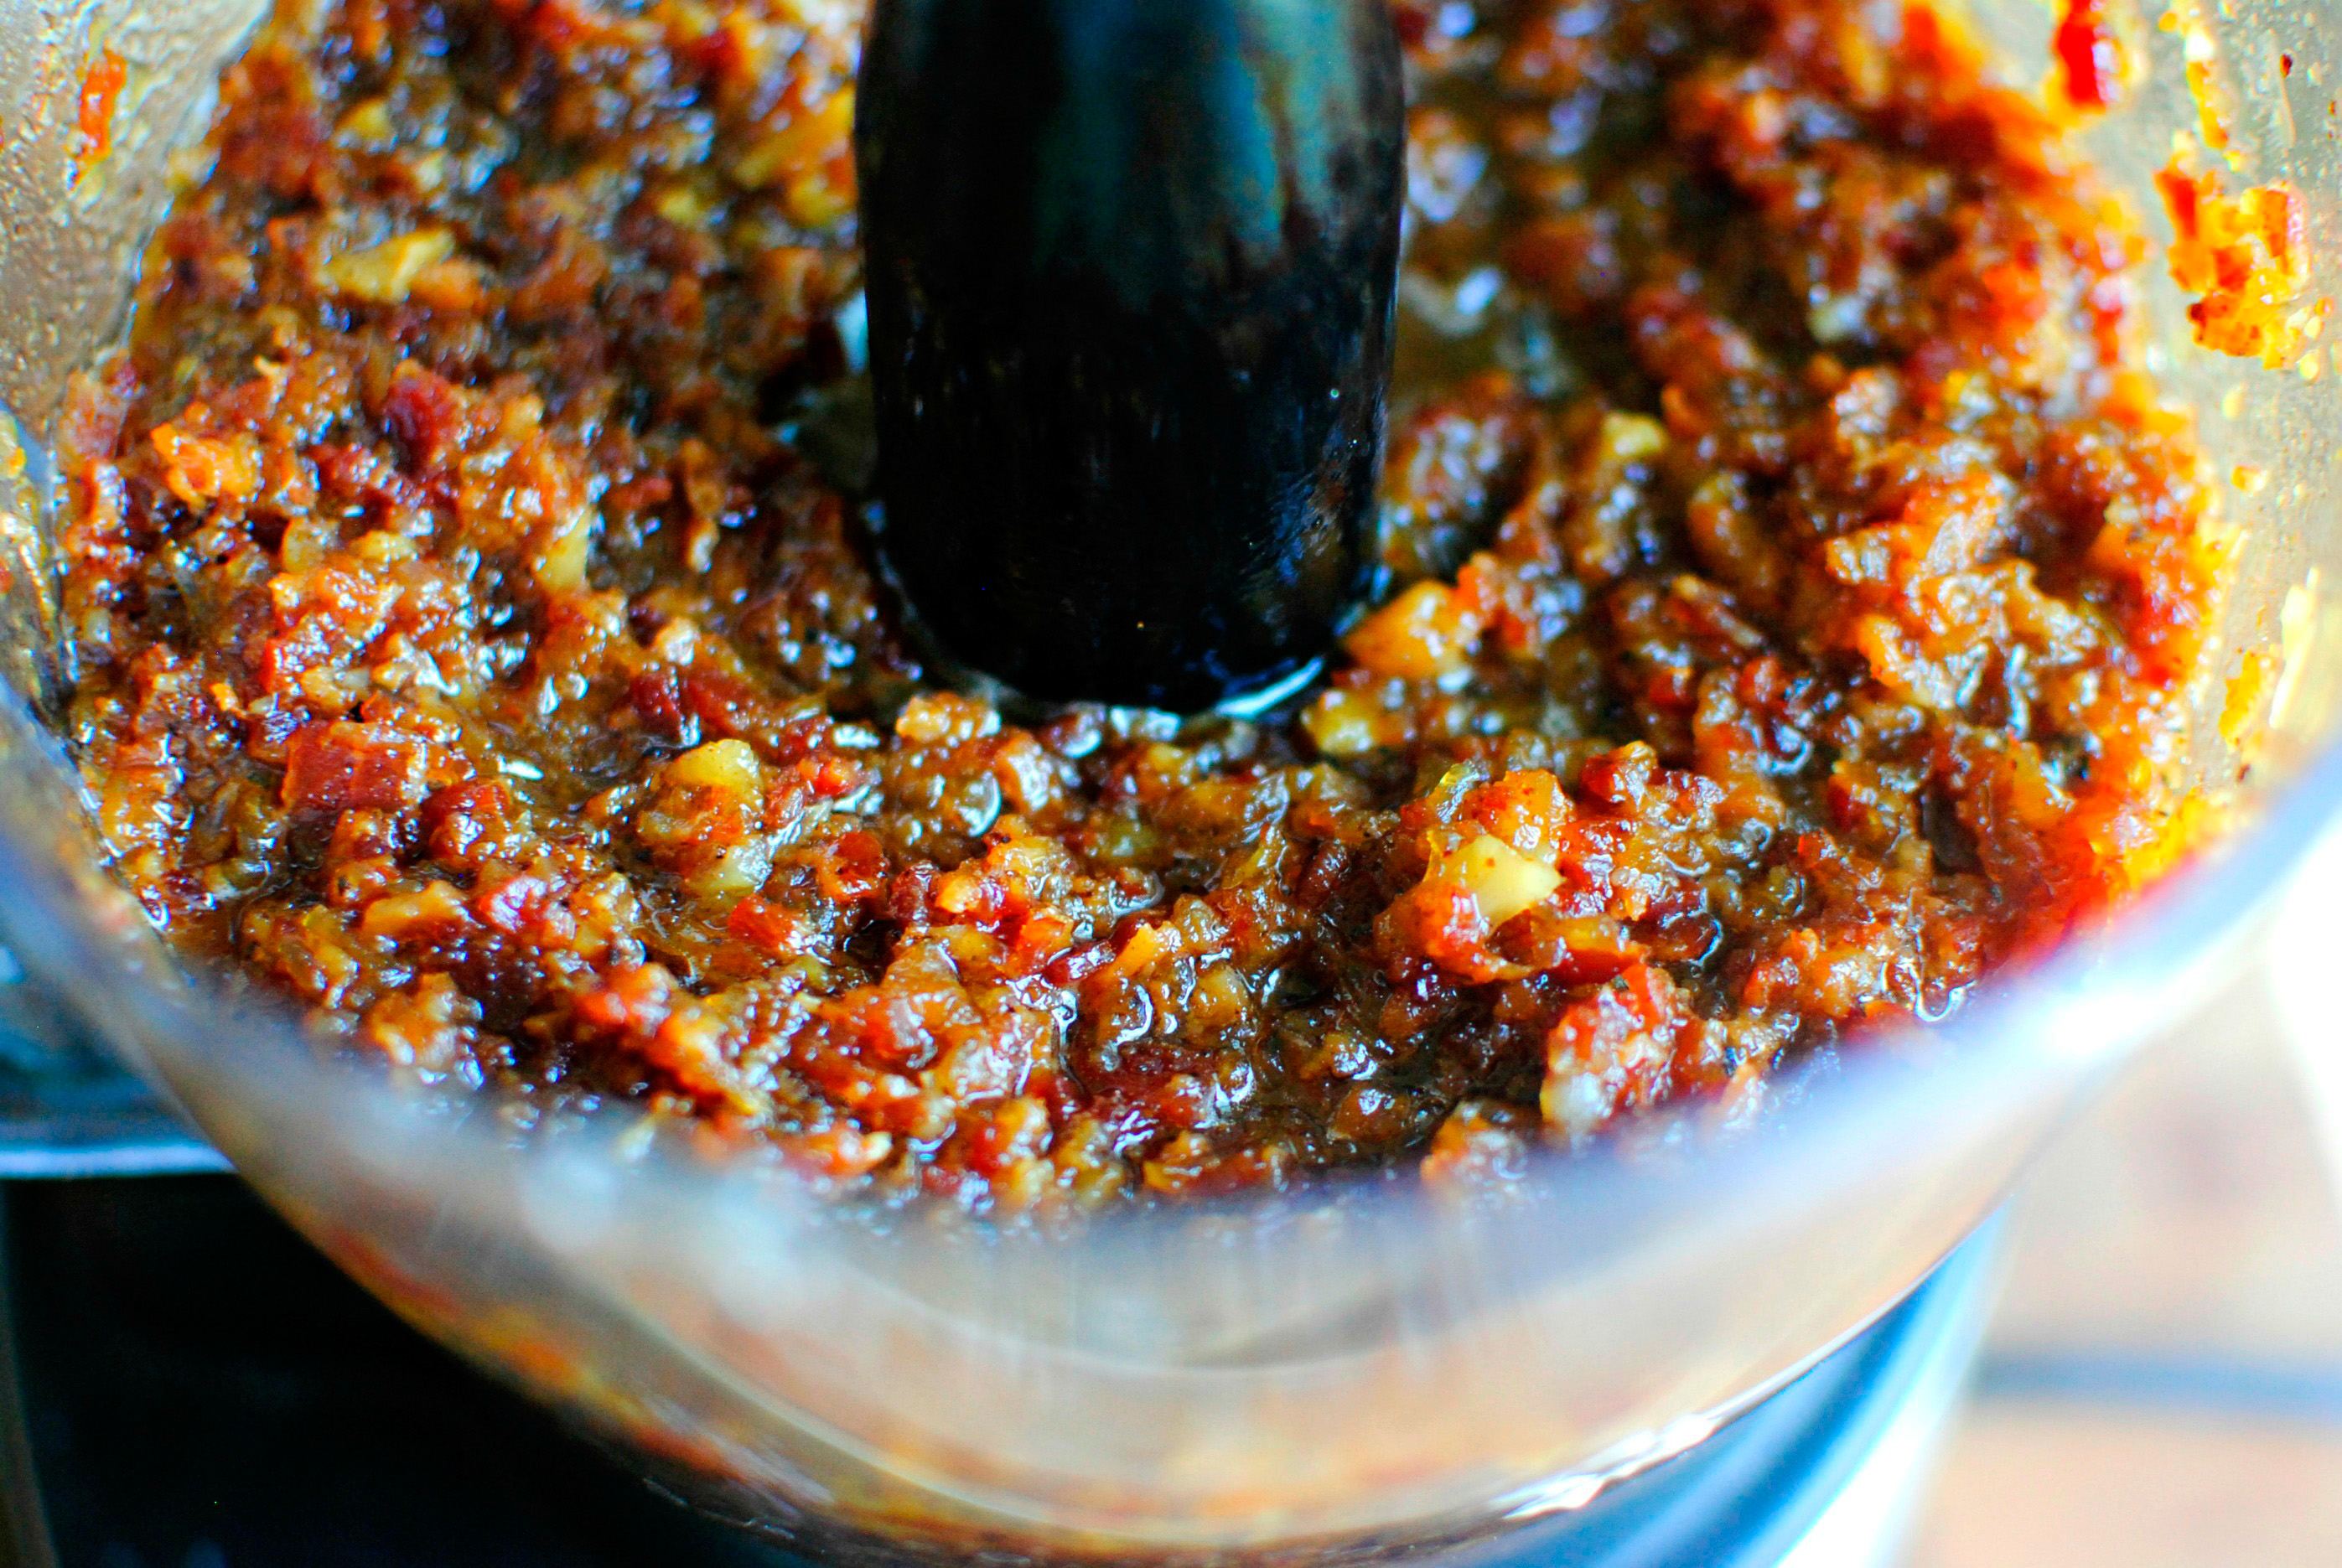
You could keep going for a smoother consistency but I like texture. So I stopped right here.


Tasty Kitchen Blog: Bacon Jam. Guest post by Laurie McNamara of Simply Scratch, recipe submitted by TK member Rebecca of Foodie with Family.

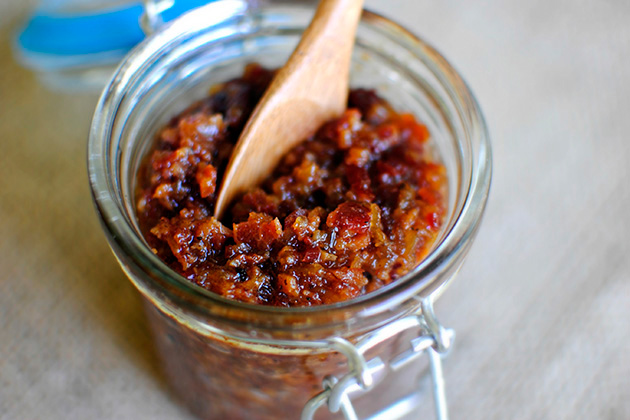
After it cooled, I stored it in jars in my fridge.


Tasty Kitchen Blog: Bacon Jam. Guest post by Laurie McNamara of Simply Scratch, recipe submitted by TK member Rebecca of Foodie with Family.

And sometimes I sneak and take a spoonful out at night. But that’s our secret, k?


Tasty Kitchen Blog: Bacon Jam. Guest post by Laurie McNamara of Simply Scratch, recipe submitted by TK member Rebecca of Foodie with Family.

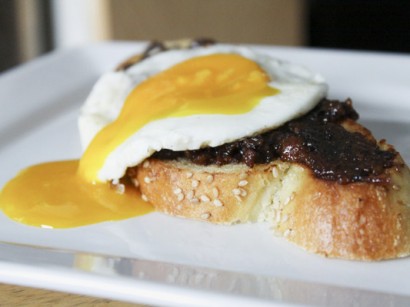
My favorite way to eat bacon jam (besides by the spoonful) is to heat a little up and spread it over whole grain toast with a fried egg (over medium) on top. Oh, it’s to die for! Really, my life is forever changed!

A big ‘Thank you’ to Rebecca for sharing this recipe with all of us here on Tasty Kitchen. With over a hundred recipes on TK alone, Rebecca has even more amazing stuff on her blog Foodie with Family. So be sure to stop by her TK recipe box and her website to check it all out! I promise you won’t be disappointed.

This jam also makes for an excellent gift, so go on and share the deliciousness!

Also check out these versions of bacon jam, like Beer & Bacon Jam by Jackie Dodd or, for a spicy version, try Dax Phillip’s Bacon Jam! You can also check out cookincanuck’s TK Blog post where she makes fellow contributor patiodaddio’s amazing Onion and Bacon Marmalade. All of these are on my list to try as well!


Printable Recipe

Bacon Jam (a.k.a. Ooh Mommy! Jam)

See post on Rebecca’s site!
4.46 Mitt(s) 13 Rating(s)13 votes, average: 4.46 out of 513 votes, average: 4.46 out of 513 votes, average: 4.46 out of 513 votes, average: 4.46 out of 513 votes, average: 4.46 out of 5

Prep Time:

Cook Time:

Difficulty: Easy

Servings: 30

30
x

Print Options

Page size Letter 3x5 4x6
Text Size Small Medium Large
Content Include description
Include prep time, etc.
Show image

Description

Salty, sweet, meaty, and pure umami (or “Ooh Mommy!”), this is going to make you rethink breakfast. Smoky with bacon flavor, tinged with coffee and maple syrup, this spread transforms toast or sandwiches with very little effort.

Ingredients

  • 3 pounds Bacon
  • 4 whole Large Yellow Onions, Peeled And Thinly Sliced
  • 8 cloves Garlic, Smashed And Peeled
  • 1 cup Cider Vinegar
  • 1 cup Packed Light Brown Sugar
  • 1-½ cup Very Strong Brewed Black Coffee
  • ½ cups Pure Maple Syrup
  • 1 teaspoon Freshly Ground Black Pepper

Preparation Instructions

Cut the bacon slices into 1-inch strips. Add the bacon to a Dutch oven over medium-high heat. Cook the bacon, stirring frequently, until the bacon is browned. Use a slotted spoon to transfer the bacon to a paper-towel lined plate. Drain all but 2 tablespoons of the bacon drippings into a heat-proof jar with a tight-fitting lid. (Save the bacon drippings in the refrigerator. That’s too much flavor to trash!)

Place the Dutch oven back over the medium-high heat and add the onions and garlic. Stir well and reduce heat to medium. Continue to cook for about 8 minutes, or until the onions are mostly translucent. Add the remaining ingredients, stir well, and drop heat again, this time to low.

Bring to a boil, stirring frequently, and boil hard for 2 minutes. After 2 minutes, stir the browned bacon into the onions and liquid.

Simmer uncovered, stirring occasionally to make sure things aren’t sticking, adding 1/4 cup of water if it seems to be drying out. When the onions are meltingly soft and the liquid is thick and syrupy, remove the Dutch oven from the heat and let stand for 5 minutes.

Transfer the contents of the Dutch oven to the work bowl of a food processor that has been fitted with a blade. Fit the lid in place and pulse several times or until the bacon jam is a spreadable consistency. Scrape into a jar (or jars) or a container with a tight fitting lid. Store in the refrigerator for up to one month.

Can be served cold, room temperature or warmed.


_______________________________________

Laurie is the force behind Simply Scratch, a blog that documents her efforts to find and create recipes that are made simply from scratch. (We think it’s sweet that her mother-in-law helped her set up her blog and get started.) We love her recipes; they’re not just tried and true, but they look gorgeous as well. Check out her blog and you’ll become a fan too.


Profile photo of Laurie - Simply Scratch

Orecchiette Bolognese

Posted by in Step-by-Step Recipes

Tasty Kitchen Blog: Orecchiette Bolognese. Guest post by Laurie McNamara of Simply Scratch, recipe submitted by TK member Nam of The Culinary Chronicles.

 
Chilly evenings, to me, call for a big pot of Bolognese bubbling away on the stove.

As soon as the cold weather sets in, there isn’t anything I crave more than this Orecchiette Bolognese. Maybe it’s the different meats and spices, maybe it’s the wine, or all of the above? I’m not quite sure but I’m pretty certain I give a little sigh after each and every bite I take.

Fact: This is the fourth time I’ve made Nam’s recipe. Yes, fourth! Nam posted this recipe a while back and it has been in my recipe repertoire ever since. And after the third time of making this amazing sauce it dawned on me that maybe I should share it with all of you here on the Tasty Kitchen Blog because honestly, it’s way too good not to!


Tasty Kitchen Blog: Orecchiette Bolognese. Guest post by Laurie McNamara of Simply Scratch, recipe submitted by TK member Nam of The Culinary Chronicles.

The base to any Bolognese is the mirepoix or the combination of celery, onions and carrots. And from thereon out you build and layer ingredients, simmer and layer some more to create the magnificent flavors of this Bolognese sauce. Then the sauce simmers until your nostrils can no longer stand the fabulous aroma and you simply need to have a big bowl of pasta ASAP.


Tasty Kitchen Blog: Orecchiette Bolognese. Guest post by Laurie McNamara of Simply Scratch, recipe submitted by TK member Nam of The Culinary Chronicles.

So grab your celery, carrots, onion and garlic. Use a sharp knife to dice them pretty fine.


Tasty Kitchen Blog: Orecchiette Bolognese. Guest post by Laurie McNamara of Simply Scratch, recipe submitted by TK member Nam of The Culinary Chronicles.

Add a little olive oil to a 4 to 5-quart Dutch oven and add the minced vegetables and garlic to the pot.


Tasty Kitchen Blog: Orecchiette Bolognese. Guest post by Laurie McNamara of Simply Scratch, recipe submitted by TK member Nam of The Culinary Chronicles.

Sauté until the vegetables are soft, stirring occasionally. Measure and add in the red pepper flakes and continue to cook for an additional minute.


Tasty Kitchen Blog: Orecchiette Bolognese. Guest post by Laurie McNamara of Simply Scratch, recipe submitted by TK member Nam of The Culinary Chronicles.

Now add in both the ground beef and veal and use a wooden spoon to break up the meat into small pieces.


Tasty Kitchen Blog: Orecchiette Bolognese. Guest post by Laurie McNamara of Simply Scratch, recipe submitted by TK member Nam of The Culinary Chronicles.

Once the meat is fully cooked, add in the fresh thyme, bay leaf and tomato paste.


Tasty Kitchen Blog: Orecchiette Bolognese. Guest post by Laurie McNamara of Simply Scratch, recipe submitted by TK member Nam of The Culinary Chronicles.

Stir to combine and cook for 2-3 minutes.


Tasty Kitchen Blog: Orecchiette Bolognese. Guest post by Laurie McNamara of Simply Scratch, recipe submitted by TK member Nam of The Culinary Chronicles.

Now add in the heavy cream (or whole milk) and let it simmer until the cream has evaporated, about 10 minutes.


Tasty Kitchen Blog: Orecchiette Bolognese. Guest post by Laurie McNamara of Simply Scratch, recipe submitted by TK member Nam of The Culinary Chronicles.

Once that is done, add in the wine. Just like the heavy cream, let it simmer until evaporated, about 10 more minutes.


Tasty Kitchen Blog: Orecchiette Bolognese. Guest post by Laurie McNamara of Simply Scratch, recipe submitted by TK member Nam of The Culinary Chronicles.

Next add in the crushed tomatoes and their juices.


Tasty Kitchen Blog: Orecchiette Bolognese. Guest post by Laurie McNamara of Simply Scratch, recipe submitted by TK member Nam of The Culinary Chronicles.

Stir and bring the sauce to a boil, then reduce to the lowest setting and simmer for 2-1/2 hours, stirring every 20 minutes or so. In the last half hour is when I like to bring a large pot of water to a boil, season with kosher salt and make the pasta as directed on the package. My rule of thumb: the sauce can always wait for the pasta and not the other way around. So I make sure the pasta sauce is pretty much done before starting on the orecchiette.


Tasty Kitchen Blog: Orecchiette Bolognese. Guest post by Laurie McNamara of Simply Scratch, recipe submitted by TK member Nam of The Culinary Chronicles.

I quickly check the Bolognese sauce and season with kosher salt and fresh ground black pepper to taste.


Tasty Kitchen Blog: Orecchiette Bolognese. Guest post by Laurie McNamara of Simply Scratch, recipe submitted by TK member Nam of The Culinary Chronicles.

Remove the bay leaves before combining the sauce with the cooked and drained orecchiette.


Tasty Kitchen Blog: Orecchiette Bolognese. Guest post by Laurie McNamara of Simply Scratch, recipe submitted by TK member Nam of The Culinary Chronicles.

Simply serve with minced parsley and, in my case, lots of fresh grated Parmesan cheese!

I’m so excited to feature this recipe on the Tasty Kitchen Blog. It’s my go-to Bolognese because it’s so simple and straight-forward. Oh, and it’s pretty darn delicious, too! This also freezes beautifully so you can definitely make a double batch and freeze it for a quick and cozy dinner on a busy weeknight. The wine is subtle, but the sauce has so many flavors going on and will have you licking your bowl. Trust me on this.


Tasty Kitchen Blog: Orecchiette Bolognese. Guest post by Laurie McNamara of Simply Scratch, recipe submitted by TK member Nam of The Culinary Chronicles.

Be sure you check out Nam’s blog The Culinary Chronicles and browse through her well-established TK recipe box. She’s has a plethora of delicious recipes to choose from!

Thank you Nam for this gem of a recipe. It definitely is a much-loved recipe in our home—and many others, I’m sure!


Printable Recipe

Orecchiette Bolognese

See post on Nam | The Culinary Chronicles’s site!
5.00 Mitt(s) 6 Rating(s)6 votes, average: 5.00 out of 56 votes, average: 5.00 out of 56 votes, average: 5.00 out of 56 votes, average: 5.00 out of 56 votes, average: 5.00 out of 5

Prep Time:

Cook Time:

Difficulty: Easy

Servings: 6

6
x

Print Options

Page size Letter 3x5 4x6
Text Size Small Medium Large
Content Include description
Include prep time, etc.
Show image

Description

Orecchiette Bolognese, rich and meaty and deliciously tummy-warming.

Ingredients

  • 3 Tablespoons Olive Oil
  • 1 cup White Onion, Finely Minced
  • 1 cup Carrots, Finely Minced
  • 1 cup Celery, Finely Minced
  • 1 Tablespoon Fresh Garlic, Finely Minced
  • ½ teaspoons Dried Red Chili Flakes (or Less Depending On Your Heat Preference)
  • 1 pound Ground Beef
  • ½ pounds Ground Veal
  • 1 Tablespoon Fresh Thyme Leaves
  • 2 whole Bay Leaves
  • 2 Tablespoons Tomato Paste
  • 1 cup Milk Or Cream
  • 1 cup Dry Red Wine
  • 1 can (28 Oz. Size) Crushed Tomatoes
  • Kosher Salt And Black Pepper To Taste
  • 1 pound Orecchiette Pasta, Cooked Al Dente
  • Grated Parmesan Cheese
  • Fresh Italian Parsley, Chopped

Preparation Instructions

Heat olive oil in a large heavy pot. Add onions, carrots, celery, and garlic. Saute until softened but not browned. Add chili flakes and sauté for an additional minute. Add beef, veal, and ½ teaspoon of kosher salt. Use a wooden spoon to crumble the meat and break into small pieces. Once the meat is no longer pink, add thyme and bay leaves. Add tomato paste and cook for an additional 2-3 minutes.

Add the milk and bring to a simmer. Continue simmering until all the milk has evaporated and only clear juices remain, about 10 minutes. Add the wine and bring to a simmer. Continue simmering until all the wine has evaporated, about 10 minutes.

Add tomatoes with their juices and bring to a boil, then place the heat at the lowest setting. Continue on this very low simmer for 2 – 2 ½ hours, stirring every 20 minutes until you get a rich, thick meaty sauce. Check for seasonings and add kosher salt and pepper accordingly.

Toss the cooked orecchiette in the bolognese sauce and serve topped with parmesan cheese. Garnish with Italian parsley and enjoy!


_______________________________________

Laurie is the force behind Simply Scratch, a blog that documents her efforts to find and create recipes that are made simply from scratch. (We think it’s sweet that her mother-in-law helped her set up her blog and get started.) We love her recipes; they’re not just tried and true, but they look gorgeous as well. Check out her blog and you’ll become a fan too.


Profile photo of Laurie - Simply Scratch

Breakfast BLT

Posted by in Step-by-Step Recipes

Tasty Kitchen Blog: Breakfast BLT. Guest post by Guest post by Laurie McNamara of Simply Scratch, recipe submitted by TK member Riley of My Daily Morsel.

 
I love a breakfast/lunch crossover recipe: waffles flecked with bacon and cheddar, spicy chorizo breakfast burritos, and now I’m currently crushing on Riley’s recipe for a Breakfast BLT. When I first saw her recipe, I was completely and utterly smitten.

BLT sandwiches are the ace in my back pocket when I need to make a meal and fast. And to have my beloved go-to, quickie-dish for breakfast? Who would’ve thought? Not this girl.


Tasty Kitchen Blog: Breakfast BLT. Guest post by Guest post by Laurie McNamara of Simply Scratch, recipe submitted by TK member Riley of My Daily Morsel.

The ingredients are pretty unassuming. But you just wait and see, these stack up to be a mighty splendid breakfast.


Tasty Kitchen Blog: Breakfast BLT. Guest post by Guest post by Laurie McNamara of Simply Scratch, recipe submitted by TK member Riley of My Daily Morsel.

Start by slicing the tomatoes in half and drizzling them with some olive oil.


Tasty Kitchen Blog: Breakfast BLT. Guest post by Guest post by Laurie McNamara of Simply Scratch, recipe submitted by TK member Riley of My Daily Morsel.

Sprinkle with some kosher salt and black pepper. Strip the leaves off of a few sprigs of fresh thyme and sprinkle the thyme leaves over the tomatoes.


Tasty Kitchen Blog: Breakfast BLT. Guest post by Guest post by Laurie McNamara of Simply Scratch, recipe submitted by TK member Riley of My Daily Morsel.

Roast in a preheated 400ºF oven for 25-30 minutes. The aroma of these roasting tomatoes is like no other smell. Amazing.


Tasty Kitchen Blog: Breakfast BLT. Guest post by Guest post by Laurie McNamara of Simply Scratch, recipe submitted by TK member Riley of My Daily Morsel.

While the tomatoes were roasting, I started crisping up a few strips of thick cut bacon. I prefer applewood bacon, but if you can get your mitts on pecanwood, do it!


Tasty Kitchen Blog: Breakfast BLT. Guest post by Guest post by Laurie McNamara of Simply Scratch, recipe submitted by TK member Riley of My Daily Morsel.

Remove and drain the crispy bacon on a paper-towel-lined plate.


Tasty Kitchen Blog: Breakfast BLT. Guest post by Guest post by Laurie McNamara of Simply Scratch, recipe submitted by TK member Riley of My Daily Morsel.

Toast your English muffins.


Tasty Kitchen Blog: Breakfast BLT. Guest post by Guest post by Laurie McNamara of Simply Scratch, recipe submitted by TK member Riley of My Daily Morsel.

Lastly, fry the eggs. I fried my eggs right in the same pan with the leftover bacon renderings. Cook the eggs how you prefer them; I like my yolk on the runny side but you do what you like. Season with salt and pepper or your favorite season salt.


Tasty Kitchen Blog: Breakfast BLT. Guest post by Guest post by Laurie McNamara of Simply Scratch, recipe submitted by TK member Riley of My Daily Morsel.

Now it’s time to start stacking. Pile some of the peppery arugula on a toasted English muffin half. The arugula is the ‘L’ in this BLT, and I totally dig it.


Tasty Kitchen Blog: Breakfast BLT. Guest post by Guest post by Laurie McNamara of Simply Scratch, recipe submitted by TK member Riley of My Daily Morsel.

Top with a few strips of crispy bacon.


Tasty Kitchen Blog: Breakfast BLT. Guest post by Guest post by Laurie McNamara of Simply Scratch, recipe submitted by TK member Riley of My Daily Morsel.

And then lay down the oven-roasted tomato. In Riley’s recipe, she stacks two tomatoes, but mine were pretty thick so I just used one.


Tasty Kitchen Blog: Breakfast BLT. Guest post by Guest post by Laurie McNamara of Simply Scratch, recipe submitted by TK member Riley of My Daily Morsel.

Top with the fried egg. You totally see where this is going, right?


Tasty Kitchen Blog: Breakfast BLT. Guest post by Guest post by Laurie McNamara of Simply Scratch, recipe submitted by TK member Riley of My Daily Morsel.

Sprinkle with a little chopped fresh parsley leaves, grab your fork and knife, and dig in. The flavors work so well with one another. The peppery arugula mixed with the sweet roasted tomato and the creamy, buttery egg yolk that beautifully cascades down the whole majestic breakfast stack as you cut into it … it’s absolutely delectable.

Can you tell I love this? It’s a stick-to-your-ribs kind of breakfast and you will no doubt want to lick your plate afterwards. I may or may not have. I’ll never tell.


Tasty Kitchen Blog: Breakfast BLT. Guest post by Guest post by Laurie McNamara of Simply Scratch, recipe submitted by TK member Riley of My Daily Morsel.

Thank you Riley for this simple, rustic and hearty breakfast. This recipe is a definitely a keeper and will no doubt be a staple in our home.

You guys go on now—roast those tomatoes and start cooking some bacon because I see breakfast BLTs in your future! While you’re at it, stop by Riley’s blog, My Daily Morsel and feast your eyes on all the deliciousness she’s serving up. FYI: I spotted fried cherry pies!


Printable Recipe

Breakfast BLT

See post on Riley - My Daily Morsel’s site!
0.00 Mitt(s) 0 Rating(s)0 votes, average: 0.00 out of 50 votes, average: 0.00 out of 50 votes, average: 0.00 out of 50 votes, average: 0.00 out of 50 votes, average: 0.00 out of 5

Prep Time:

Cook Time:

Difficulty: Easy

Servings: 4

4
x

Print Options

Page size Letter 3x5 4x6
Text Size Small Medium Large
Content Include description
Include prep time, etc.
Show image

Description

Toasty English muffins topped with oven-roasted tomatoes, bacon and a fried egg.

Ingredients

  • 4 whole Roma Tomatoes, Cut In Half Lengthwise
  • 1 Tablespoon Olive Oil
  • 1 teaspoon Chopped Thyme Leaves
  • 1 teaspoon Kosher Salt
  • ½ teaspoons Freshly Ground Black Pepper
  • 6 slices Thick-cut Bacon, Cut In Half Crosswise
  • 4 whole Eggs
  • 2 whole English Muffins, Split And Toasted
  • 1 cup Baby Arugula Leaves
  • 2 Tablespoons Chopped Flat Leaf Parsley

Preparation Instructions

1. Preheat the oven to 400°F. Arrange the tomatoes, cut side up, on a large rimmed baking sheet. Drizzle with the olive oil, sprinkle with the thyme, and season with 1/2 teaspoon of salt and 1/4 teaspoon of pepper. Roast for 25 to 30 minutes, until the tomatoes are very tender and shrunken. Remove pan from oven and set aside.

2. Place a medium skillet over medium-high heat. Add the bacon and cook for about 6 minutes, until golden brown and crispy on both sides. Transfer the bacon to paper towels to drain, reserving the bacon grease.

3. Heat 2 teaspoons of bacon grease in a medium skillet over medium heat. Crack 2 of the eggs into the pan, season with salt and pepper, and cook to desired doneness, anywhere from 2 to 5 minutes. Remove cooked egg to a plate. Cook the remaining eggs in another 2 teaspoons of bacon grease.

4. To assemble, place a half of a toasted English muffin on 4 plates. Top each with some arugula, three slices of bacon, two pieces of roasted tomato and a fried egg. Sprinkle the parsley over the top and serve.


_______________________________________

Laurie is the force behind Simply Scratch, a blog that documents her efforts to find and create recipes that are made simply from scratch. (We think it’s sweet that her mother-in-law helped her set up her blog and get started.) We love her recipes; they’re not just tried and true, but they look gorgeous as well. Check out her blog and you’ll become a fan too.


Profile photo of Laurie - Simply Scratch

Crunchy Cashew Thai Quinoa Salad with Ginger Peanut Dressing

Posted by in Step-by-Step Recipes

Tasty Kitchen Blog: Crunchy Cashew Thai Quinoa Salad with Ginger Peanut Dressing. Guest post by Laurie McNamara of Simply Scratch, recipe submitted by TK member Monique of Ambitious Kitchen.

 
This salad is many things. It’s colorful, it’s healthy and it has one of my favorite ingredients: quinoa. For me, quinoa is a lot like brown rice in taste and texture, so it works splendidly in this salad and especially with soaking up all those amazing Thai flavors.

When Monique posted this recipe for Crunchy Cashew Thai Quinoa Salad with Ginger Peanut Dressing on Tasty Kitchen, I found myself drooling all over my keyboard. With that said, I knew right away I was going to make it and it was going to be all kinds of amazing. A salad that can be served as wholesome vegetarian main dish or as a side to jazz up any main course is more than alright in my book. So if you’re like me and always on a hunt for a good quinoa recipe, you better stop and try this recipe. I promise you’ll be glad you did.


Tasty Kitchen Blog: Crunchy Cashew Thai Quinoa Salad with Ginger Peanut Dressing. Guest post by Laurie McNamara of Simply Scratch, recipe submitted by TK member Monique of Ambitious Kitchen.

I just love when a recipe contains a rainbow of vegetables. It truly makes for a colorful and enticing salad, no? This salad is loaded with red bell peppers, purple cabbage, carrots and green onions just to name a few, and the ginger peanut dressing is as amazing as it sounds.


Tasty Kitchen Blog: Crunchy Cashew Thai Quinoa Salad with Ginger Peanut Dressing. Guest post by Laurie McNamara of Simply Scratch, recipe submitted by TK member Monique of Ambitious Kitchen.

To make the quinoa, start by bringing 1 1/2 cups of water to a boil in a sauce pan.


Tasty Kitchen Blog: Crunchy Cashew Thai Quinoa Salad with Ginger Peanut Dressing. Guest post by Laurie McNamara of Simply Scratch, recipe submitted by TK member Monique of Ambitious Kitchen.

While you’re waiting for that to happen, rinse and drain 3/4 cup of uncooked quinoa.


Tasty Kitchen Blog: Crunchy Cashew Thai Quinoa Salad with Ginger Peanut Dressing. Guest post by Laurie McNamara of Simply Scratch, recipe submitted by TK member Monique of Ambitious Kitchen.

Add the rinsed quinoa to the boiling water, cover and reduce the heat to low and let simmer for 15 minutes or until the quinoa has absorbed every last drop of water.


Tasty Kitchen Blog: Crunchy Cashew Thai Quinoa Salad with Ginger Peanut Dressing. Guest post by Laurie McNamara of Simply Scratch, recipe submitted by TK member Monique of Ambitious Kitchen.

While the quinoa is cooking away on the stove, it’s a great idea to get started on the dressing. Start by combining 1/4 cup of peanut butter with a tablespoon of honey. Pop it into the microwave for about 20 seconds to warm it slightly so it’s easier to stir.


Tasty Kitchen Blog: Crunchy Cashew Thai Quinoa Salad with Ginger Peanut Dressing. Guest post by Laurie McNamara of Simply Scratch, recipe submitted by TK member Monique of Ambitious Kitchen.

Measure and add in the 3 tablespoons of soy (I used gluten-free tamari), 1 tablespoon of red wine vinegar and a teaspoon of sesame oil.


Tasty Kitchen Blog: Crunchy Cashew Thai Quinoa Salad with Ginger Peanut Dressing. Guest post by Laurie McNamara of Simply Scratch, recipe submitted by TK member Monique of Ambitious Kitchen.

Grate in 2 teaspoons of peeled fresh ginger root into the bowl with the peanut butter and honey.


Tasty Kitchen Blog: Crunchy Cashew Thai Quinoa Salad with Ginger Peanut Dressing. Guest post by Laurie McNamara of Simply Scratch, recipe submitted by TK member Monique of Ambitious Kitchen.

Lastly, add in a teaspoon of olive oil.


Tasty Kitchen Blog: Crunchy Cashew Thai Quinoa Salad with Ginger Peanut Dressing. Guest post by Laurie McNamara of Simply Scratch, recipe submitted by TK member Monique of Ambitious Kitchen.

Give it a good stir to incorporate all those flavorful ingredients and set it off to the side for a quick second.


Tasty Kitchen Blog: Crunchy Cashew Thai Quinoa Salad with Ginger Peanut Dressing. Guest post by Laurie McNamara of Simply Scratch, recipe submitted by TK member Monique of Ambitious Kitchen.

Once the quinoa is cooked, fluff with a fork and transfer it to a large bowl.


Tasty Kitchen Blog: Crunchy Cashew Thai Quinoa Salad with Ginger Peanut Dressing. Guest post by Laurie McNamara of Simply Scratch, recipe submitted by TK member Monique of Ambitious Kitchen.

Pour in the ginger peanut dressing.


Tasty Kitchen Blog: Crunchy Cashew Thai Quinoa Salad with Ginger Peanut Dressing. Guest post by Laurie McNamara of Simply Scratch, recipe submitted by TK member Monique of Ambitious Kitchen.

Add in the chopped red bell pepper, red onion, purple cabbage and cilantro.


Tasty Kitchen Blog: Crunchy Cashew Thai Quinoa Salad with Ginger Peanut Dressing. Guest post by Laurie McNamara of Simply Scratch, recipe submitted by TK member Monique of Ambitious Kitchen.

Toss all those together until coated with dressing.


Tasty Kitchen Blog: Crunchy Cashew Thai Quinoa Salad with Ginger Peanut Dressing. Guest post by Laurie McNamara of Simply Scratch, recipe submitted by TK member Monique of Ambitious Kitchen.

Simply garnish with a few cashew halves (peanuts work too!), then scatter a few green onions over top and a squeeze or two of fresh lime.


Tasty Kitchen Blog: Crunchy Cashew Thai Quinoa Salad with Ginger Peanut Dressing. Guest post by Laurie McNamara of Simply Scratch, recipe submitted by TK member Monique of Ambitious Kitchen.

This salad is fresh, light and has so much textural deliciousness. I could really just live on this salad alone and be quite alright with it. I loved it, and I know you’ll love it—it’s a total win-win situation!


Tasty Kitchen Blog: Crunchy Cashew Thai Quinoa Salad with Ginger Peanut Dressing. Guest post by Laurie McNamara of Simply Scratch, recipe submitted by TK member Monique of Ambitious Kitchen.

There’s more where this came from, so please be sure to check out Monique’s recipe box here on Tasty Kitchen—and visit Monique’s blog Ambitious Kitchen, where she cooks and bakes up just about anything your heart (and stomach) could ever want, like whole wheat coconut banana waffles with chocolate chips and roasted almonds. And she captures all of it with beautiful photography. 

Thank you Monique for sharing this healthy and flavor-packed salad!


Printable Recipe

See post on Monique of Ambitious Kitchen’s site!
4.96 Mitt(s) 23 Rating(s)23 votes, average: 4.96 out of 523 votes, average: 4.96 out of 523 votes, average: 4.96 out of 523 votes, average: 4.96 out of 523 votes, average: 4.96 out of 5

Prep Time:

Cook Time:

Difficulty: Easy

Servings: 6

6
x

Print Options

Page size Letter 3x5 4x6
Text Size Small Medium Large
Content Include description
Include prep time, etc.
Show image

Description

Delicious vegan (and easily made gluten free) salad with Thai flavors and a perfect crunch. It’s even better the next day!

Ingredients

  • FOR THE SALAD:
  • 1-½ cup Water
  • ¾ cups Uncooked Quinoa
  • 1  Red Bell Pepper, Stem And Seeds Removed, Then Diced
  • ½  Red Onion, Diced
  • 1 cup Shredded Red Cabbage
  • 1 cup Shredded Carrots
  • ½ cups Chopped Cilantro
  • ½ cups Cashew Halves Or Peanuts, (honey Roasted Is Good)
  • ¼ cups Diced Green Onions
  • Fresh Lime, For A Bit Of Tang
  • FOR THE DRESSING:
  • ¼ cups All Natural Peanut Butter
  • 1 Tablespoon Honey (use Agave If Vegan)
  • 2 teaspoons Freshly Grated Ginger
  • 3 Tablespoons Soy Sauce, Gluten-free If Desired
  • 1 Tablespoon Red Wine Vinegar
  • 1 teaspoon Sesame Oil
  • 1 teaspoon Olive Oil
  • Water To Thin, If Necessary

Preparation Instructions

To cook quinoa: Rinse quinoa with cold water in a mesh strainer. In a medium saucepan, bring the water to a boil. Add in quinoa and bring mixture to a boil. Cover the pan, reduce heat to low and let it simmer for 15 minutes or until quinoa has absorbed all of the water.

Remove pan from heat and fluff quinoa with fork. Place in a large bowl and set aside to cool for about 10 minutes. You should have a little over 2 cups of quinoa.

To make dressing: Add peanut butter and honey or agave into a medium-sized microwave safe bowl. Heat in the microwave for 20 seconds. Add in ginger, soy sauce, vinegar, and both sesame and olive oil and stir until mixture is smooth and creamy. If you want a thinner dressing, simply stir in a teaspoon or two of water or olive oil.

Add as much or as little dressing as you’d like to the quinoa. I always start out with a little bit of dressing and usually add more to suit my taste preferences. Alternatively you can save the dressing for later and add when you are ready to eat; however the flavors of the dressing usually soak into the salad so I love adding it to the quinoa first.

Next fold the red pepper, onion, cabbage, carrots, and cilantro into the quinoa. Garnish with cashews and green onions. Serve chilled or at room temperature with lime wedges if desired.


_______________________________________

Laurie is the force behind Simply Scratch, a blog that documents her efforts to find and create recipes that are made simply from scratch. (We think it’s sweet that her mother-in-law helped her set up her blog and get started.) We love her recipes; they’re not just tried and true, but they look gorgeous as well. Check out her blog and you’ll become a fan too.

Profile photo of Laurie - Simply Scratch

Brown Butter Chocolate Chip Blondies

Posted by in Baking, Step-by-Step Recipes

   So what if I told you this was my first go at blondies? It’s true! Not a day in my thirty-something years on earth have I ever had a blondie until the other day. Truly it was only a matter of time, and when my eyes locked on Sharon’s recipe for Brown Butter Chocolate […]

Profile photo of Laurie - Simply Scratch

White Cheese and Chicken Lasagna

Posted by in Step-by-Step Recipes

  I’m a complete and utterly in love with all forms of lasagna. There’s just something about those layers of cheese, noodles and sauce that I can’t help but get weak in the knees over. So you probably can understand why I was instantly intrigued when I found Anna and Chelsea’s recipe for a White Cheese […]

Profile photo of Laurie - Simply Scratch

Eggnog Pancakes

Posted by in Step-by-Step Recipes

What made me fall head first in love with TK member Kita’s recipe for Eggnog Pancakes was that not only did she spike her pancakes with eggnog, but she also spiked the maple syrup with eggnog! So if…

Profile photo of Laurie - Simply Scratch

Nutella Pecan Pie

Posted by in Baking, Step-by-Step Recipes

Thanks to Megan for sharing her recipe for Nutella Pecan Pie, because I have officially died and gone to heaven. Get this: Nutella is spread on the bottom of a homemade, pre-baked pie crust before adding in the gooey pecan…