The Pioneer Woman Tasty Kitchen
Profile photo of georgiapellegrini

Greek Roasted Shrimp with Olives and Feta

Posted by in Step-by-Step Recipes

Tasty Kitchen Blog: Greek Roasted Shrimp with Olives and Feta. Guest post by Georgia Pellegrini, recipe submitted by TK member Marie of Little Kitchie.

 
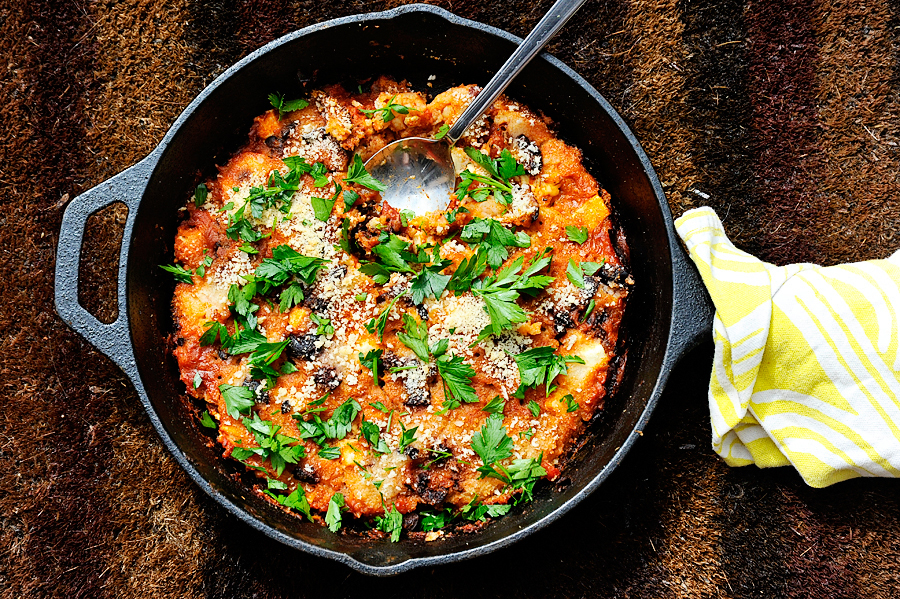
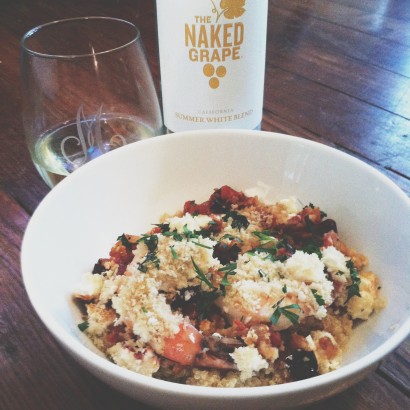
I love a good one dish meal—so many fewer dishes to clean! Plus there is something lovely about making something in a skillet and casserole and serving is tableside. This Greek Roasted Shrimp with Olives and Feta from TK member Marie was to die for. The tomatoes became richer and sweeter as they cooked slowly and the saltiness from the feta and olives was the perfect balance. It was even delicious room temperature the next day.


Tasty Kitchen Blog: Greek Roasted Shrimp with Olives and Feta. Guest post by Georgia Pellegrini, recipe submitted by TK member Marie of Little Kitchie.

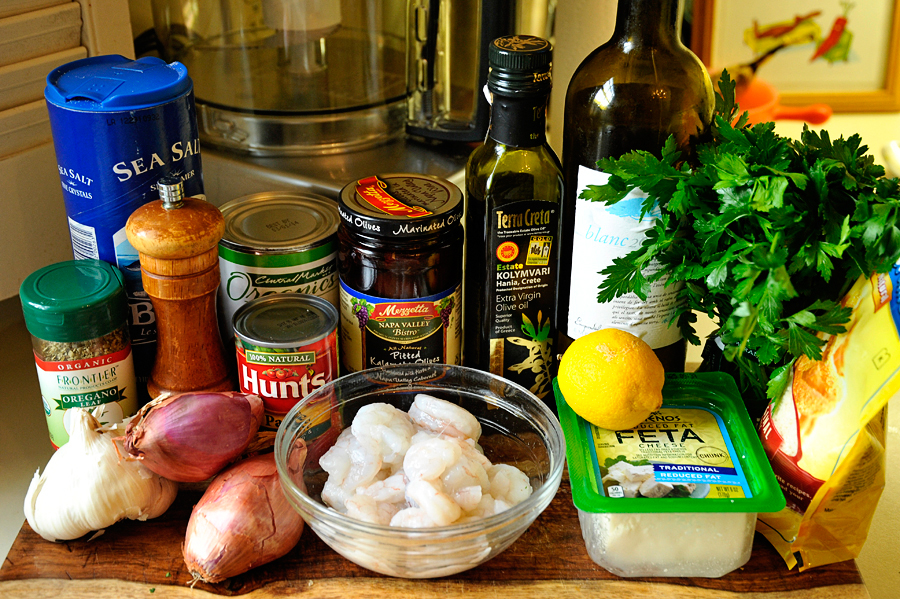
To make it you will need: olive oil, shallots, garlic, white wine, canned diced tomatoes, tomato paste, dried oregano, lemon zest, salt, pepper, peeled and deveined shrimp, Kalamata olives, feta cheese, bread crumbs, and Italian parsley.


Tasty Kitchen Blog: Greek Roasted Shrimp with Olives and Feta. Guest post by Georgia Pellegrini, recipe submitted by TK member Marie of Little Kitchie.

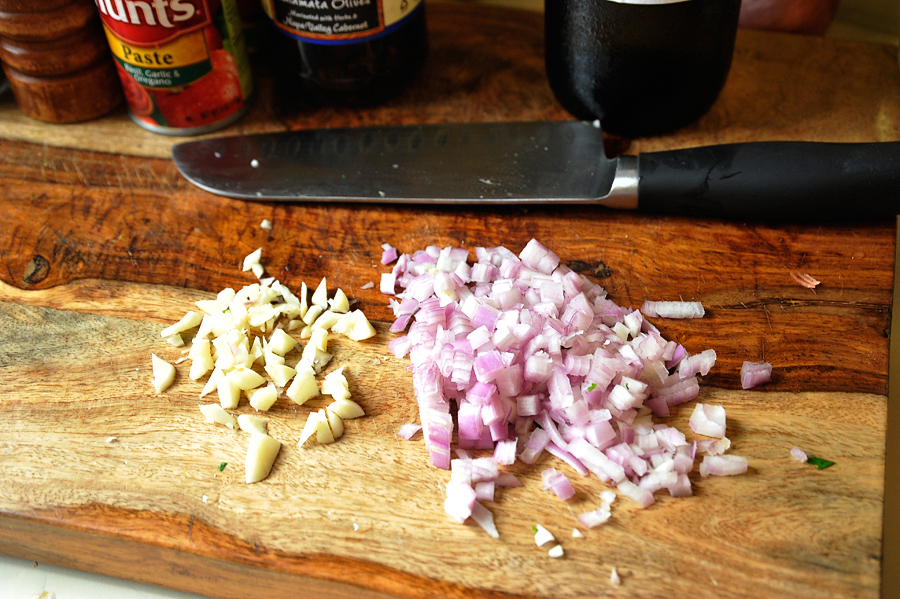
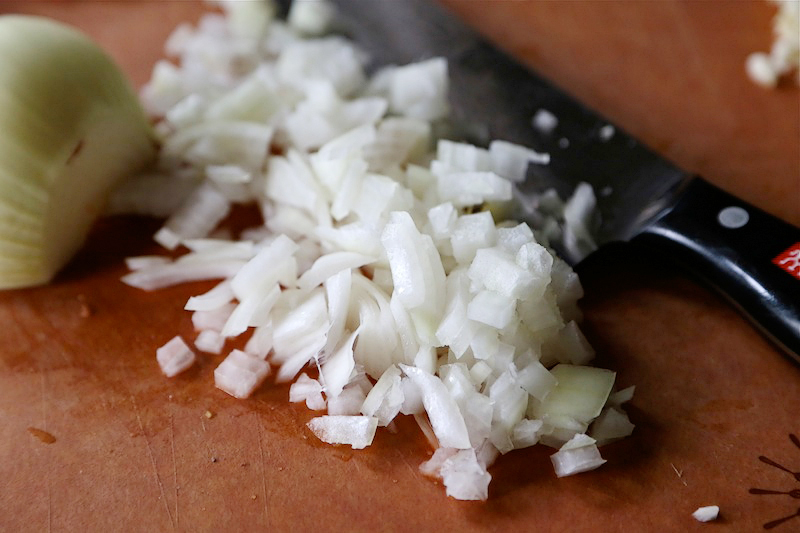
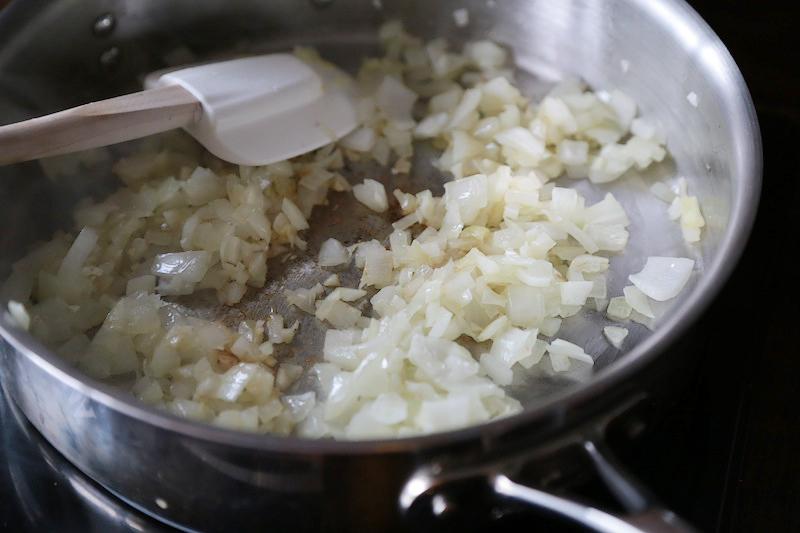
Finely dice the shallots and garlic.


Tasty Kitchen Blog: Greek Roasted Shrimp with Olives and Feta. Guest post by Georgia Pellegrini, recipe submitted by TK member Marie of Little Kitchie.

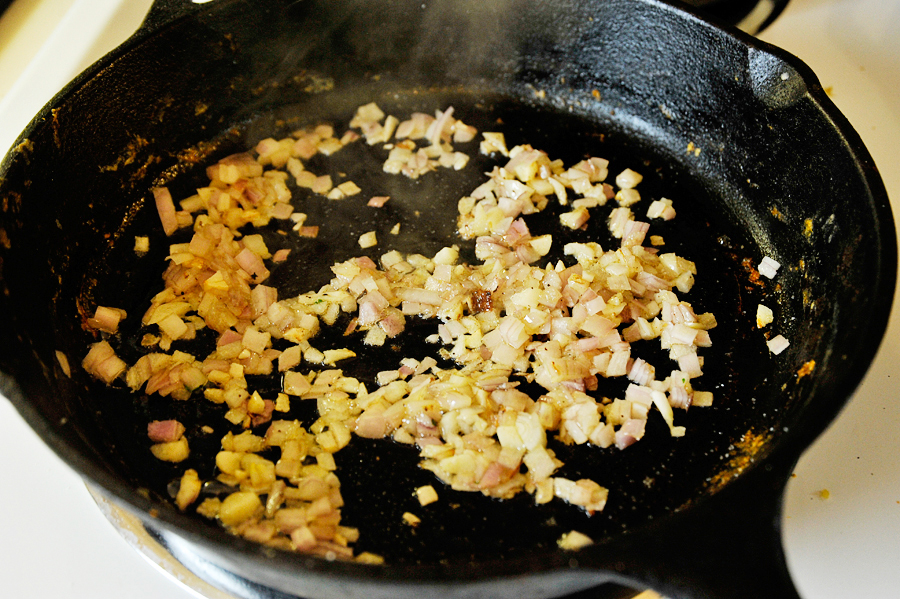
Heat two tablespoons of olive oil in a cast iron skillet and sweat them until soft and translucent.


Tasty Kitchen Blog: Greek Roasted Shrimp with Olives and Feta. Guest post by Georgia Pellegrini, recipe submitted by TK member Marie of Little Kitchie.

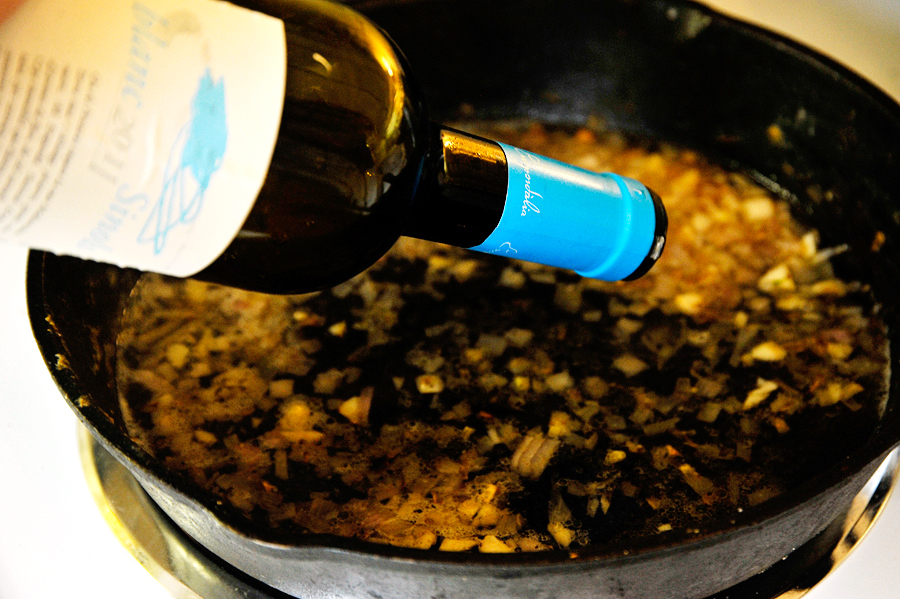
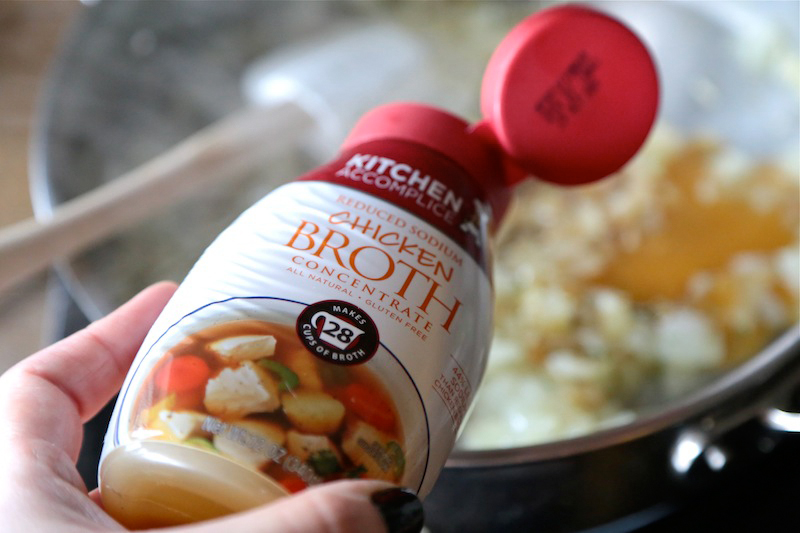
Deglaze the pan with white wine and let it reduce to about half.


Tasty Kitchen Blog: Greek Roasted Shrimp with Olives and Feta. Guest post by Georgia Pellegrini, recipe submitted by TK member Marie of Little Kitchie.

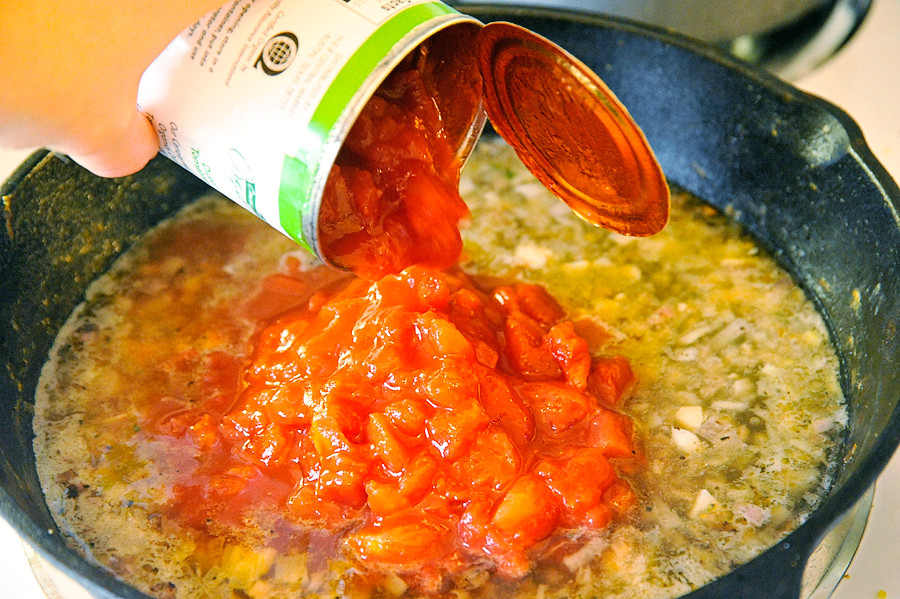
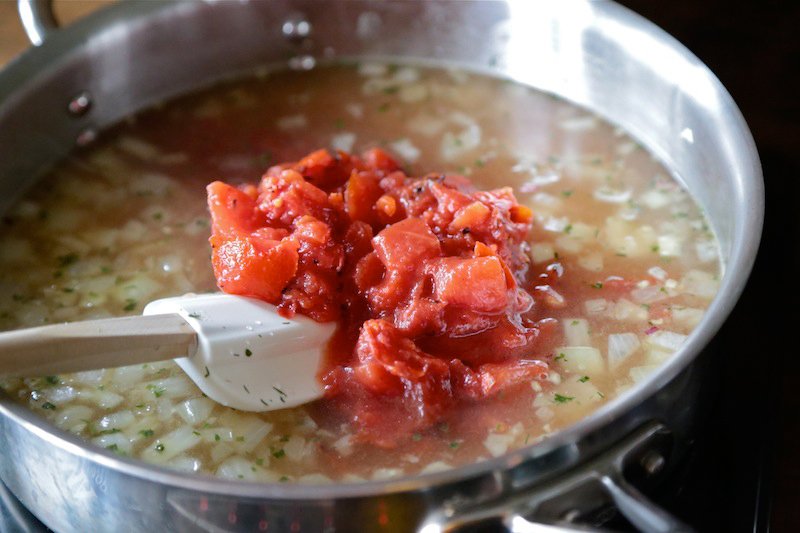
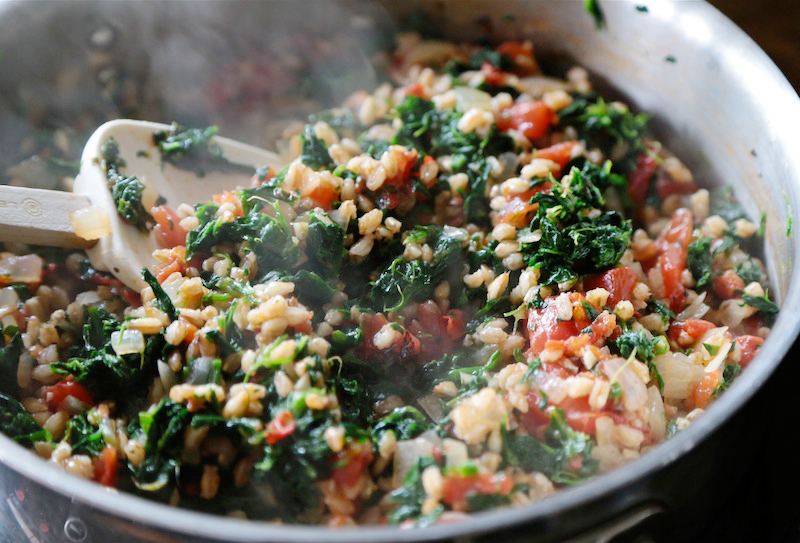
Add the crushed tomatoes …


Tasty Kitchen Blog: Greek Roasted Shrimp with Olives and Feta. Guest post by Georgia Pellegrini, recipe submitted by TK member Marie of Little Kitchie.

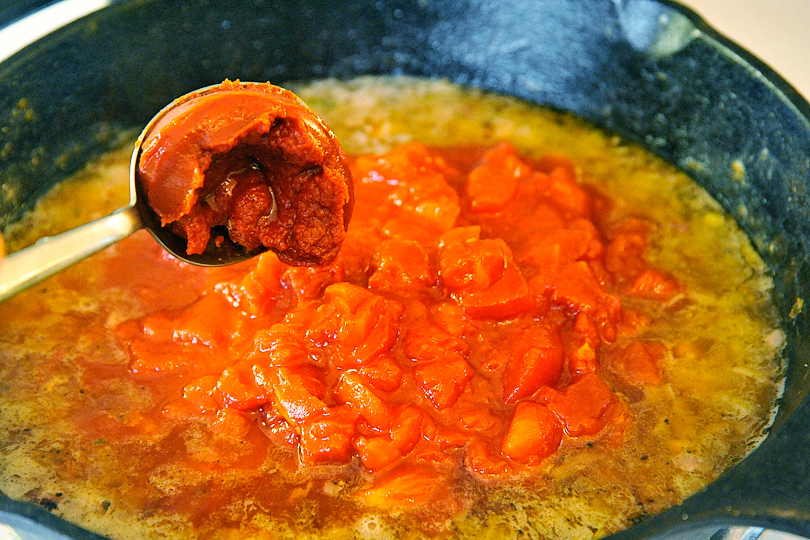
And the tomato paste and give it a stir.


Tasty Kitchen Blog: Greek Roasted Shrimp with Olives and Feta. Guest post by Georgia Pellegrini, recipe submitted by TK member Marie of Little Kitchie.

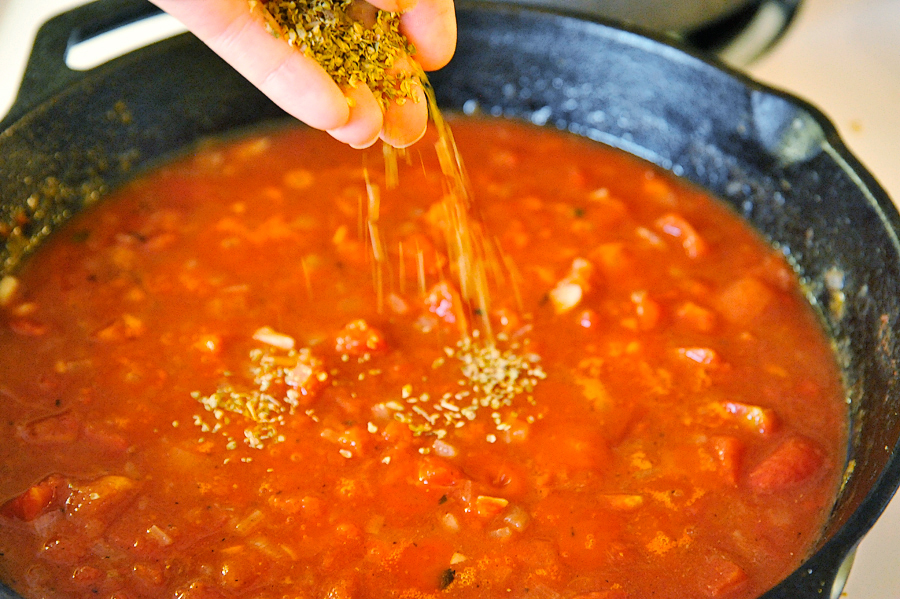
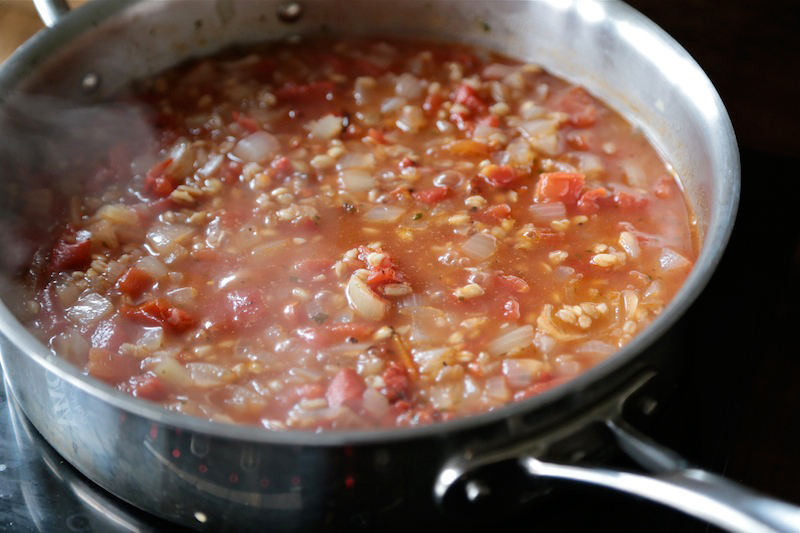
Let it reduce and sprinkle in the oregano …


Tasty Kitchen Blog: Greek Roasted Shrimp with Olives and Feta. Guest post by Georgia Pellegrini, recipe submitted by TK member Marie of Little Kitchie.

And the lemon zest. Simmer for 10 minutes over medium-low heat and then remove the skillet from the burner.


Tasty Kitchen Blog: Greek Roasted Shrimp with Olives and Feta. Guest post by Georgia Pellegrini, recipe submitted by TK member Marie of Little Kitchie.

Place the shrimp in one layer in the tomato sauce.


Tasty Kitchen Blog: Greek Roasted Shrimp with Olives and Feta. Guest post by Georgia Pellegrini, recipe submitted by TK member Marie of Little Kitchie.

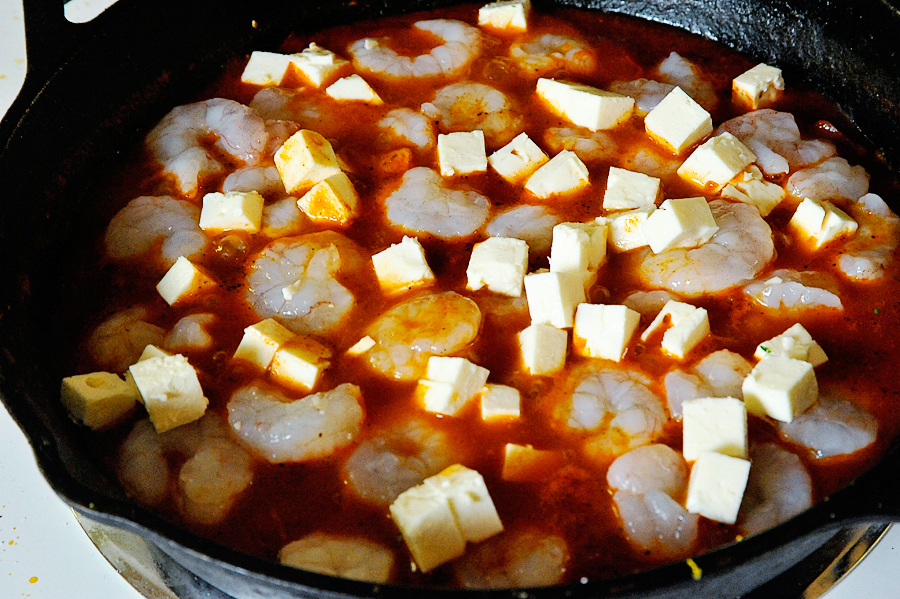
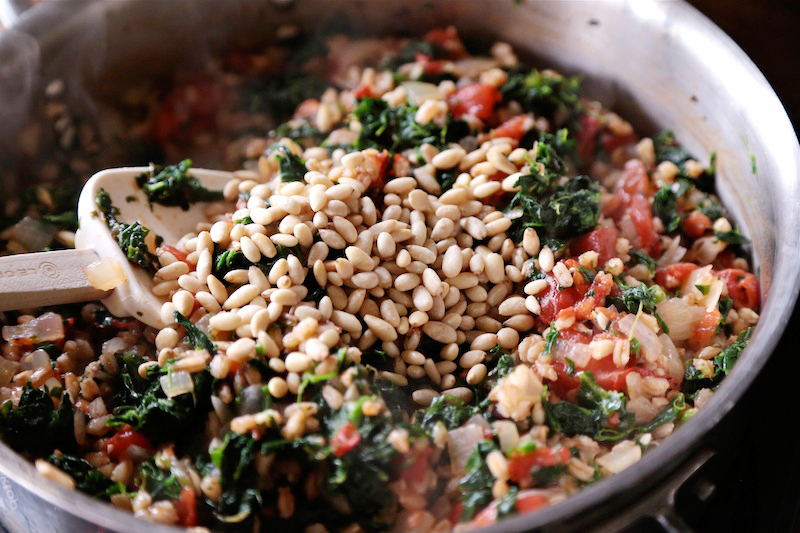
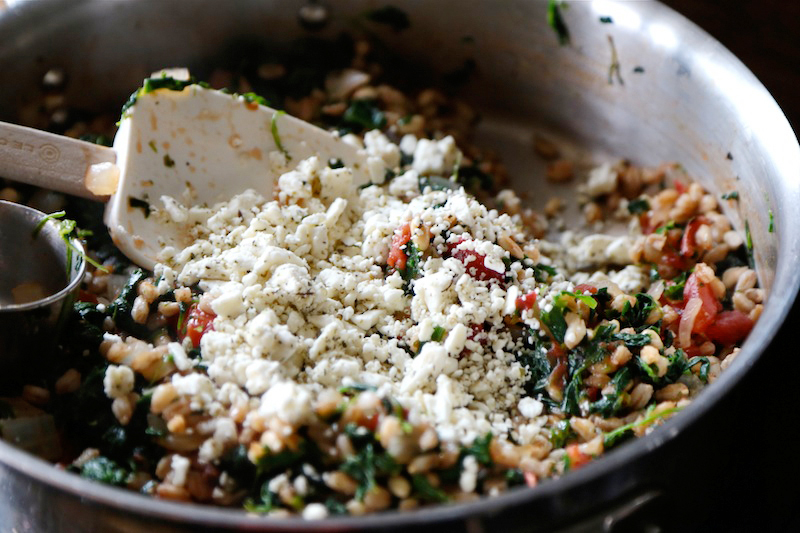
Sprinkle in the feta …
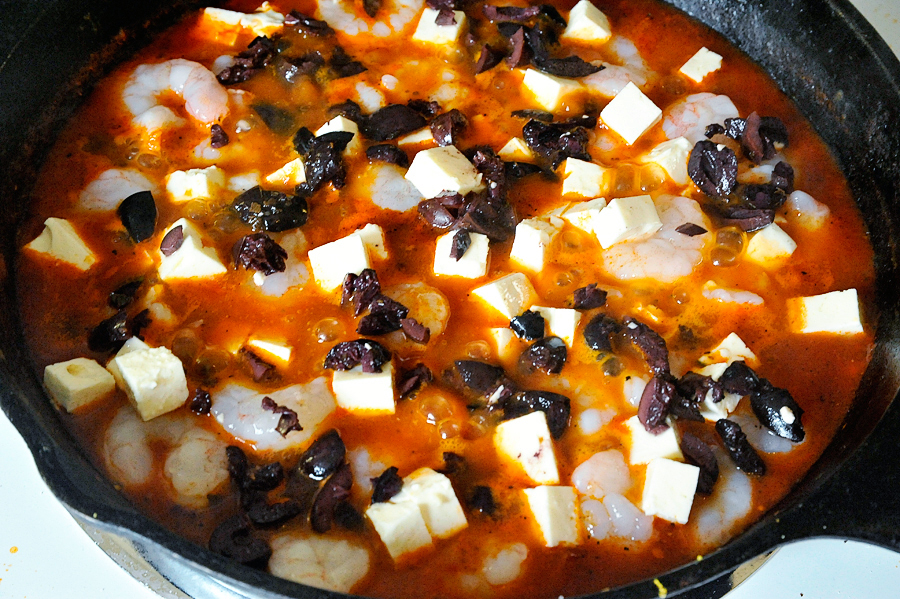


Tasty Kitchen Blog: Greek Roasted Shrimp with Olives and Feta. Guest post by Georgia Pellegrini, recipe submitted by TK member Marie of Little Kitchie.

The olives …


Tasty Kitchen Blog: Greek Roasted Shrimp with Olives and Feta. Guest post by Georgia Pellegrini, recipe submitted by TK member Marie of Little Kitchie.

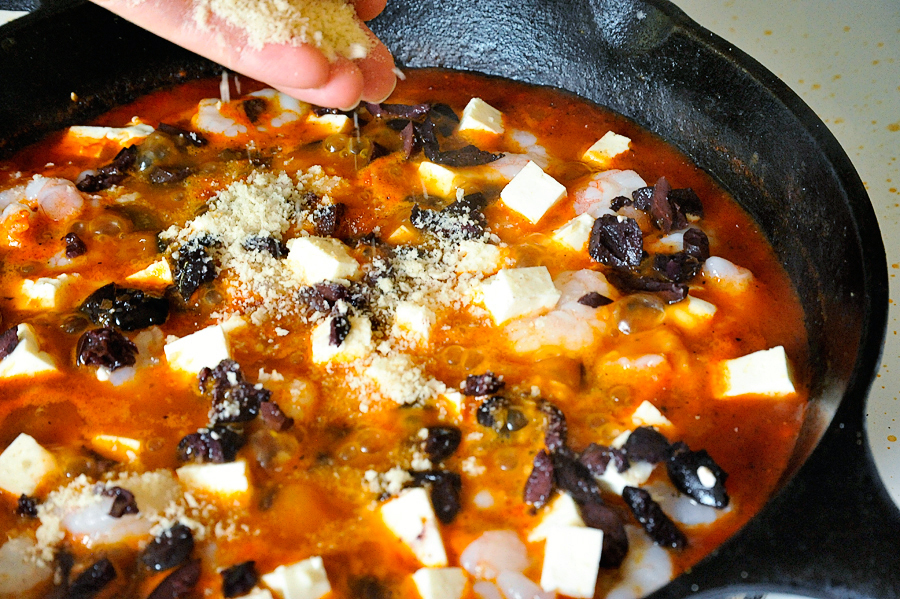
And the breadcrumbs.


Tasty Kitchen Blog: Greek Roasted Shrimp with Olives and Feta. Guest post by Georgia Pellegrini, recipe submitted by TK member Marie of Little Kitchie.

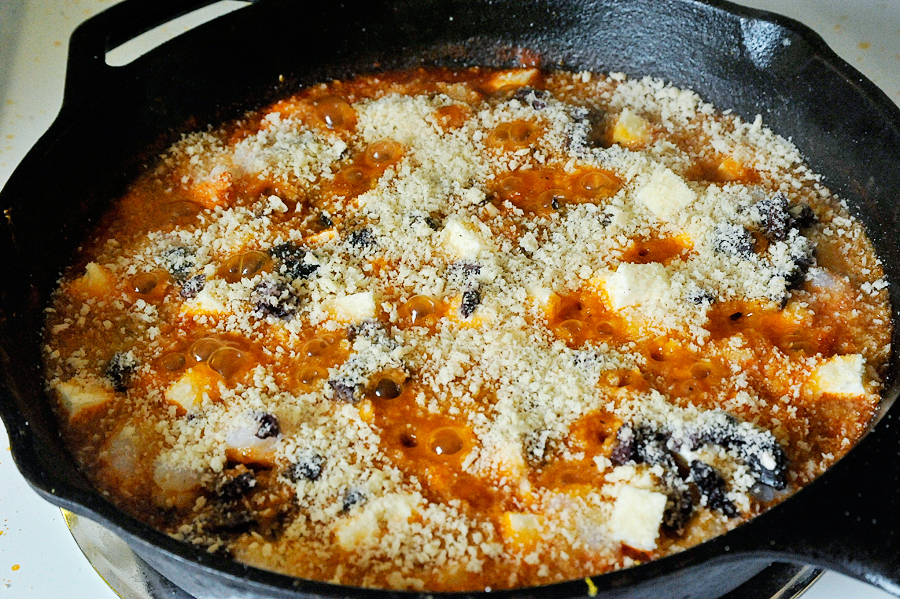
Transfer the skillet to the oven and bake for 15 minutes until it is bubbling and much more dense.


Tasty Kitchen Blog: Greek Roasted Shrimp with Olives and Feta. Guest post by Georgia Pellegrini, recipe submitted by TK member Marie of Little Kitchie.

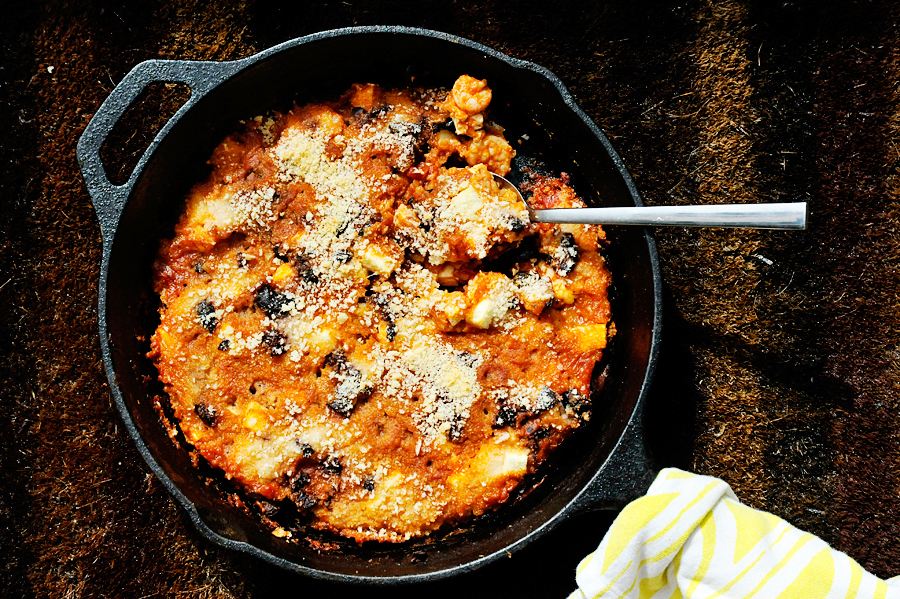
Remove from the oven and squeeze the lemon juice from the zested lemon over the top.


Tasty Kitchen Blog: Greek Roasted Shrimp with Olives and Feta. Guest post by Georgia Pellegrini, recipe submitted by TK member Marie of Little Kitchie.

Then sprinkle with a good dose of chopped parsley.

You’ll want to scoop this right out of the skillet and eat it. Or get some crusty bread and use that as your spoon, it is absolutely delightful. Visit Marie’s lovely website Little Kitchie for other wonderful recipes!


Printable Recipe

Greek Roasted Shrimp with Olives and Feta

See post on Marie @ Little Kitchie’s site!
0.00 Mitt(s) 0 Rating(s)0 votes, average: 0.00 out of 50 votes, average: 0.00 out of 50 votes, average: 0.00 out of 50 votes, average: 0.00 out of 50 votes, average: 0.00 out of 5

Prep Time:

Cook Time:

Difficulty: Easy

Servings: 3

3
x

Print Options

Page size Letter 3x5 4x6
Text Size Small Medium Large
Content Include description
Include prep time, etc.
Show image

Description

Tomatoes, olives, oregano and feta provide a zesty sauce for gorgeous roasted shrimp!

Ingredients

  • 4 Tablespoons Olive Oil, Divided
  • 2 whole Shallots, Diced
  • 4 cloves Garlic, Minced
  • ⅓ cups White Wine
  • 14-½ ounces, weight Canned Diced Tomatoes
  • 2 teaspoons Tomato Paste
  • 1 teaspoon Oregano, Minced
  • 1 whole Lemon, Zest And Juice
  • 1 teaspoon Kosher Salt
  • 1 teaspoon Freshly Ground Black Pepper
  • ¾ pounds Shrimp, Peeled And Deveined
  • ⅓ cups Kalamata Olives, Halved
  • 5 ounces, weight Feta Cheese, Crumbled
  • ¾ cups Panko Bread Crumbs
  • 3 Tablespoons Italian Parsley (minced)

Preparation Instructions

Preheat the oven to 400ºF.

Heat 2 tablespoons olive oil in a cast iron skillet over medium heat. Add the shallots and cook until soft, about 5 minutes. Add the garlic and cook for 1 more minute. Add the wine and bring to a boil, scraping the pan. Cook for about 3 minutes, until the wine has reduced about halfway. Add diced tomatoes, tomato paste, oregano, lemon zest, salt, and pepper to the skillet. Reduce heat to medium-low and simmer for 10 minutes.

Remove skillet from the heat and place the shrimp in one layer over the mixture in the skillet. Sprinkle the olives and feta over the entire thing. In a small bowl, mix the bread crumbs with the remaining 2 tablespoons of olive oil, then sprinkle over shrimp-feta-tomato mixture.

Transfer skillet to oven and bake for 15 minutes. Remove from oven, squeeze the lemon juice over the top, and sprinkle with parsley. Enjoy over quinoa, rice, or pasta, or simply serve from the skillet with a good hearty bread.


_______________________________________

There’s so much to say about Georgia, we don’t know where to start. Leaving Wall Street for the French Culinary Institute, followed by a stint at the Gramercy Tavern and La Chassagnette in France, her passion for food and food traditions are evident and inspiring. Visit her site at Georgia Pellegrini, where you’ll find more recipes, photos, learn all about her wonderful books Girl Hunter and Food Heroes, and enjoy her latest adventures.


Profile photo of Megan {Country Cleaver}

Greek Stuffed Peppers with Feta and Spinach

Posted by in Step-by-Step Recipes

Tasty Kitchen Blog: Greek Stuffed Peppers with Feta & Spinach. Guest post by Megan Keno of Wanna Be a Country Cleaver, recipe submitted by TK member Jen of The Scrumptious Pumpkin.

If you’re like me and want to feed your family fun, new dishes worth raving about, you come here to Tasty Kitchen for inspiration. And even more so when you’re trying to find recipes that are healthy! I’ve found so many wonderful, healthy creations to make in my own kitchen. This one from Jen for Greek Stuffed Peppers with Feta & Spinach was perfection. It’s packed with whole grains, vegetables, and even a little cheese so you don’t feel like you’re left wanting. So if you are looking for a Meatless Monday meal, or just to incorporate more vegetables into your routine, these are a sure-fire hit.


Tasty Kitchen Blog: Greek Stuffed Peppers with Feta & Spinach. Guest post by Megan Keno of Wanna Be a Country Cleaver, recipe submitted by TK member Jen of The Scrumptious Pumpkin.

Stuffed peppers are always great for weeknight meals. For these, round up bell peppers, farro (or its cousin barley), onion, canned tomatoes, olive oil, garlic, vegetable or chicken broth, spinach, and crumbled feta cheese.


Tasty Kitchen Blog: Greek Stuffed Peppers with Feta & Spinach. Guest post by Megan Keno of Wanna Be a Country Cleaver, recipe submitted by TK member Jen of The Scrumptious Pumpkin.

And whoops, don’t forget the spinach! I used a package of frozen chopped spinach and thawed it in my microwave according to the package directions. After the spinach is thawed, be sure to squeeze it out well to get rid of any extra water. The extra water will just make the pepper filling soggy, and no one wants that!


Tasty Kitchen Blog: Greek Stuffed Peppers with Feta & Spinach. Guest post by Megan Keno of Wanna Be a Country Cleaver, recipe submitted by TK member Jen of The Scrumptious Pumpkin.

Preheat your oven to 350ºF. Next, prepare your bell peppers. Slice the peppers in half and remove the inner seeds and the white pith. Place them on a baking sheet and brush with a little olive oil.

Place them into the oven and bake until fork-tender, about 20 minutes.


Tasty Kitchen Blog: Greek Stuffed Peppers with Feta & Spinach. Guest post by Megan Keno of Wanna Be a Country Cleaver, recipe submitted by TK member Jen of The Scrumptious Pumpkin.

While the peppers are in the oven, move on to chopping the onion. Chop it into fine pieces.


Tasty Kitchen Blog: Greek Stuffed Peppers with Feta & Spinach. Guest post by Megan Keno of Wanna Be a Country Cleaver, recipe submitted by TK member Jen of The Scrumptious Pumpkin.

In a sauté pan over medium heat, add in a little olive oil and heat until glistening. Saute the onions until they are soft and just starting to turn translucent. Then add in the garlic and sauté until just fragrant, about 1 minute.


Tasty Kitchen Blog: Greek Stuffed Peppers with Feta & Spinach. Guest post by Megan Keno of Wanna Be a Country Cleaver, recipe submitted by TK member Jen of The Scrumptious Pumpkin.

Next, add the broth. I used chicken broth because that it what I had on hand. But to make this truly vegetarian, be sure to use vegetable broth.

This concentrated chicken broth bottle was a neato find at my grocery store. It only requires 2 teaspoons of concentrate, and 2 cups of water to make chicken broth. It’s handy so I don’t have lots of half-opened containers of broth in my fridge. My husband is very thankful for this discovery!


Tasty Kitchen Blog: Greek Stuffed Peppers with Feta & Spinach. Guest post by Megan Keno of Wanna Be a Country Cleaver, recipe submitted by TK member Jen of The Scrumptious Pumpkin.

Once the broth is added in, the tomatoes are next.


Tasty Kitchen Blog: Greek Stuffed Peppers with Feta & Spinach. Guest post by Megan Keno of Wanna Be a Country Cleaver, recipe submitted by TK member Jen of The Scrumptious Pumpkin.

Along with the farro! Farro and barley are whole grain cousins, so use either one for this recipe.


Tasty Kitchen Blog: Greek Stuffed Peppers with Feta & Spinach. Guest post by Megan Keno of Wanna Be a Country Cleaver, recipe submitted by TK member Jen of The Scrumptious Pumpkin.

Add in the remaining spices and bring the whole mixture up to a simmer. Cover and let it do its thing until the moisture is absorbed and the farro is soft.


Tasty Kitchen Blog: Greek Stuffed Peppers with Feta & Spinach. Guest post by Megan Keno of Wanna Be a Country Cleaver, recipe submitted by TK member Jen of The Scrumptious Pumpkin.

Once the farro is done, it’s time to add in the spinach. Fold it in until it’s mixed evenly.


Tasty Kitchen Blog: Greek Stuffed Peppers with Feta & Spinach. Guest post by Megan Keno of Wanna Be a Country Cleaver, recipe submitted by TK member Jen of The Scrumptious Pumpkin.

Then it’s time for the pine nuts!


Tasty Kitchen Blog: Greek Stuffed Peppers with Feta & Spinach. Guest post by Megan Keno of Wanna Be a Country Cleaver, recipe submitted by TK member Jen of The Scrumptious Pumpkin.

For the finishing touch, add in half of the crumbled feta and fold in to combine.


Tasty Kitchen Blog: Greek Stuffed Peppers with Feta & Spinach. Guest post by Megan Keno of Wanna Be a Country Cleaver, recipe submitted by TK member Jen of The Scrumptious Pumpkin.

Fill each roasted bell pepper with a healthy dollop of the farro vegetable mixture and crumble the remaining feta on top. Serve immediately.

I had so many of these left over that I ended up eating them for lunch the next day and they tasted incredible. Take them to lunch for a twist on a cold salad. If you need more healthy inspiration, check out these Coconut Vegan Pancakes!

Thanks for sharing your recipe, Jen! Be sure to stop by Jen’s blog, The Scrumptious Pumpkin, and her TK recipe box for more delicious creations.

Do you incorporate a meatless meal into your weekly routine? What is your favorite meatless meal? Leave a link to your favorite or shout it out in the comments for me and your Tasty Kitchen friends to find!


Printable Recipe

Greek Stuffed Peppers with Feta & Spinach

See post on The Scrumptious Pumpkin’s site!
0.00 Mitt(s) 0 Rating(s)0 votes, average: 0.00 out of 50 votes, average: 0.00 out of 50 votes, average: 0.00 out of 50 votes, average: 0.00 out of 50 votes, average: 0.00 out of 5

Prep Time:

Cook Time:

Difficulty: Easy

Servings: 6

6
x

Print Options

Page size Letter 3x5 4x6
Text Size Small Medium Large
Content Include description
Include prep time, etc.
Show image

Description

A healthy meatless meal idea! Greek-inspired stuffed peppers, richly flavored with spinach, tomatoes, pine nuts and feta!

Ingredients

  • 3 Tablespoons Olive Oil
  • 2 cloves Garlic, Minced
  • 1  Small Onion, Diced
  • 13 ounces, weight Chopped Tomatoes (or Diced Tomatoes)
  • 2-½ cups Vegetable Broth
  • 2-½ teaspoons Dried Oregano
  • 1 cup Farro
  • ¼ cups Pine Nuts
  • 3  Large Orange Or Yellow Bell Peppers, Halved Stem-to-base, Seeds Removed
  • 1-½ cup Frozen Chopped Spinach
  • ⅔ cups Crumbled Feta Cheese
  • Salt And Freshly Ground Black Pepper

Preparation Instructions

Preheat oven to 350 F.

Heat 2 tablespoons olive oil in a large, deep sauté pan over medium heat. Add the garlic and onion and cook until softened, about 4-5 minutes. Add the tomatoes, broth, oregano, and farro. Bring to a boil, then reduce heat to a light simmer. Cook, partially covered, until farro is tender, about 30 minutes.

Meanwhile, as farro cooks, arrange pine nuts on a parchment-lined baking sheet and toast in the oven for about 5-7 minutes, or until lightly golden. Watch carefully because they burn quickly! Set toasted pine nuts aside.

Increase oven heat to 400 F.

Arrange pepper halves on a baking sheet and brush with 1 tablespoon olive oil. Season with salt and pepper. Bake in the oven until tender, about 20-25 minutes.

Meanwhile, measure out the frozen chopped spinach and place it in a heat-safe container. Microwave for 30 seconds at a time until thawed. When cool enough to handle, transfer thawed spinach to a fine mesh strainer. Arrange the strainer over a large mixing bowl and squeeze spinach, wringing it dry, until all excess water is drained from the spinach.

When farro is fully cooked and tender and all of the broth is absorbed, add the toasted pine nuts and chopped spinach. Add feta and stir until well combined. Season to taste with salt and pepper.

Stuff cooked bell pepper halves with heaping spoonfuls of farro mixture. Serve.


_______________________________________

Megan Keno is the writer and photographer of Country Cleaver, a food blog fueled by Nutella and images of June Cleaver—if June wore cowboy boots and flannel, that is. A self-proclaimed country bum, Megan creates from-scratch recipes that range from simple to sublime and how-to’s to build your cooking repertoire. But she couldn’t do it without the help of her trusty—and furry—sous chef, Huckleberry. He’s a world class floor cleaner.


Profile photo of steamykitchen

Greekin’ Up Spaghetti!

Posted by in Step-by-Step Recipes

Tasty Kitchen Blog: Greekin' Up Spaghetti! Guest post by Jaden Hair of Steamy Kitchen.

 
Italian spaghetti and meatballs is as classic as classic can get, and here I go changing it up! The truth is, I get bored and restless, and either I vent out my creativity by repainting my whole house or I head to the kitchen to Greek up a recipe.

I know for sure that my husband is dang happy that I chose the kitchen instead of the paint can!

The recipe for the Greek-fied meatballs comes from morphing a recipe from one of my favorite cookbooks that I acquired this year, How To Roast a Lamb: New Greek Classic Cooking by Michael Psilakis. The original recipe was for Greek-Style Hamburgers (you must make!) but it’s just as good rolled into meatballs.

Ground cumin and coriander are subbed for the normal Italian oregano. Feta cheese and fresh parsley stand in for parmesan.

The secret to this recipe is slowly sautéing the onions until soft ‘n sweet. Then mince!

Tasty Kitchen Blog: Greekin' Up Spaghetti! Guest post by Jaden Hair of Steamy Kitchen.


You’ve got to mince them finely as they’ll need to be blended into the meat. See the difference between the right (chopped) and left (minced)?

Tasty Kitchen Blog: Greekin' Up Spaghetti! Guest post by Jaden Hair of Steamy Kitchen.


To any type of meat that you want—ground chicken, turkey, beef, lamb or pork—add in the minced onion, salt, garlic, cumin, pepper, mustard, coriander and parsley. (Though if you only added the onion, garlic, salt and pepper, it’s just as good).

Tasty Kitchen Blog: Greekin' Up Spaghetti! Guest post by Jaden Hair of Steamy Kitchen.


Roll ‘em into 1 1/2-inch meatballs. Try to keep them all even in size.

Tasty Kitchen Blog: Greekin' Up Spaghetti! Guest post by Jaden Hair of Steamy Kitchen.


Brown them in a pan …

Tasty Kitchen Blog: Greekin' Up Spaghetti! Guest post by Jaden Hair of Steamy Kitchen.


On all sides …

Tasty Kitchen Blog: Greekin' Up Spaghetti! Guest post by Jaden Hair of Steamy Kitchen.


Then pour in your favorite tomato sauce. Your favorite marinara sauce from a jar will do just fine.

Tasty Kitchen Blog: Greekin' Up Spaghetti! Guest post by Jaden Hair of Steamy Kitchen.


I’d love to know: how would you change up the regular ol’ spaghetti dish? Would you make it Moroccan? Swedish? Tex-Mex? Or would ya keep it as is—a classic untouchable!


—–
Spaghetti ‘n Greek Meatballs
Recipe adapted from How To Roast a Lamb: New Greek Classic Cooking by Michael Psilakis
Serves 4

 
1 pound dried pasta
2 tablespoons olive oil, divided
1 sweet onion, sliced
1/2 teaspoon kosher salt
freshly ground black pepper
1 1/2 pound ground meat (choice of ground turkey, chicken, pork, beef or lamb)
1 tablespoon Dijon mustard
1/2 teaspoon ground coriander
3 tablespoons finely chopped fresh parsley
1 garlic clove, finely minced
1/2 teaspoon ground cumin
4 cups your favorite marinara sauce
1/2 cup crumbled feta cheese

 
1. Cook pasta according package instructions. Drain and set aside.

2. Heat a large saute pan over medium heat. When hot, swirl in just 1 tablespoon of the olive oil. Add the onions and cook until browned, soft and tender. The longer you cook, the sweeter the onion will taste. Remove from pan to a cutting board and finely mince the onions.

3. In a large bowl, combine the minced onions, salt, pepper, ground meat, Dijon mustard, coriander, garlic, cumin and 1 tablespoon of the parsley. Use your hands to mix thoroughly.

4. To form the meatballs, put a good handful of the meat onto the palm of your hand and shape into a tight ball. Try to keep all the meatballs 1 1/2 inches in diameter to make sure they cook evenly.

5. Heat a large saute pan over medium-high heat. When hot, swirl in the remaining olive oil. Add the meatballs (not touching) and cook for 2 minutes. Roll the meatballs and fry the other sides for 2 minutes each. When all sides are browned, pour the tomato sauce over the meatballs and bring to a simmer. Cook for an additional 5 minutes until the meatballs are cooked through.

6. Serve over pasta topped with feta cheese and the remaining chopped parsley.

 
Tasty Kitchen Blog: Greekin' Up Spaghetti! Guest post by Jaden Hair of Steamy Kitchen.


_______________________________________

Jaden Hair is a food writer, television personality, and food photographer based in Tampa Bay, Florida. Find more of her recipes in her blog, Steamy Kitchen, where you can also read more about Jaden’s new book, The Steamy Kitchen Cookbook, and the rave reviews it’s received!


Profile photo of HowSweetEats

Grilled Breakfast Pizza

Posted by in Step-by-Step Recipes

Tasty Kitchen Blog: Grilled Breakfast Pizza. Guest post by Jessica Merchant of How Sweet It Is, recipe submitted by TK member Adrianna Adarme of A Cozy Kitchen.

Grilling pizza has been on my bucket list, right smack in between eating baklava on a beach in Greece and owning more shoes than Imelda Marcos. It’s been intimidating, perhaps because I’m often afraid of lighting up the grill on my own and sending my immediate surroundings into flames. But then I spied this Grilled Breakfast Pizza from A Cozy Kitchen and my mouth started to water. It seemed easy … and delicious … and not scary … and cheesy … and delicious. Cheese was bought. Bacon was fried. Dough was made. Scallions were sliced. It’s quite possible I may never be able to eat pizza again without the signature char marks of a great grilling experience. Fabulous doesn’t even begin to describe it.

To begin, I made a batch of whole wheat pizza dough from Sunshine Mom. You can use any pizza dough —make your own or buy it at the store, just make sure you love it.


Tasty Kitchen Blog: Grilled Breakfast Pizza. Guest post by Jessica Merchant of How Sweet It Is, recipe submitted by TK member Adrianna Adarme of A Cozy Kitchen.

Along with your pizza dough, you need mozzarella cheese, parmesan cheese, fried bacon, eggs, scallions, fresh parsley, chives, olive, kosher salt and black pepper. The perfect breakfast ingredients, right?


Tasty Kitchen Blog: Grilled Breakfast Pizza. Guest post by Jessica Merchant of How Sweet It Is, recipe submitted by TK member Adrianna Adarme of A Cozy Kitchen.

To make it easy on yourself, begin by slicing you greenery and bacon. Set it aside. Make sure to fry an extra piece of bacon because you will easily eat too much. Or maybe that’s just me?


Tasty Kitchen Blog: Grilled Breakfast Pizza. Guest post by Jessica Merchant of How Sweet It Is, recipe submitted by TK member Adrianna Adarme of A Cozy Kitchen.

Also grate your cheese. I recommend buying the cheese in the brick and grating it yourself. It is so much better. And you get an arm workout. Makes up for the extra slice of bacon.


Tasty Kitchen Blog: Grilled Breakfast Pizza. Guest post by Jessica Merchant of How Sweet It Is, recipe submitted by TK member Adrianna Adarme of A Cozy Kitchen.

Lay your pizza dough on a floured surface and grab your rolling pin. If you don’t have a pin, a great bottle of wine works too.


Tasty Kitchen Blog: Grilled Breakfast Pizza. Guest post by Jessica Merchant of How Sweet It Is, recipe submitted by TK member Adrianna Adarme of A Cozy Kitchen.

Roll it out to 1/4-inch thickness. This is important! If it is too thick, it won’t cook properly.


Tasty Kitchen Blog: Grilled Breakfast Pizza. Guest post by Jessica Merchant of How Sweet It Is, recipe submitted by TK member Adrianna Adarme of A Cozy Kitchen.

Drizzle it with olive oil …


Tasty Kitchen Blog: Grilled Breakfast Pizza. Guest post by Jessica Merchant of How Sweet It Is, recipe submitted by TK member Adrianna Adarme of A Cozy Kitchen.

And brush it all around.


Tasty Kitchen Blog: Grilled Breakfast Pizza. Guest post by Jessica Merchant of How Sweet It Is, recipe submitted by TK member Adrianna Adarme of A Cozy Kitchen.

Preheat your grill to the highest setting.


Tasty Kitchen Blog: Grilled Breakfast Pizza. Guest post by Jessica Merchant of How Sweet It Is, recipe submitted by TK member Adrianna Adarme of A Cozy Kitchen.

Lay your pizza dough on a large round pizza sheet (I found this easier than a plate) and carry your ingredients to the grill.


Tasty Kitchen Blog: Grilled Breakfast Pizza. Guest post by Jessica Merchant of How Sweet It Is, recipe submitted by TK member Adrianna Adarme of A Cozy Kitchen.

Using a pair of kitchen tongs, place your dough directly over the heat. I found using a large spatula in conjunction with the tongs helped.


Tasty Kitchen Blog: Grilled Breakfast Pizza. Guest post by Jessica Merchant of How Sweet It Is, recipe submitted by TK member Adrianna Adarme of A Cozy Kitchen.

Grill the dough for about 30 seconds, just until char marks appear.


Tasty Kitchen Blog: Grilled Breakfast Pizza. Guest post by Jessica Merchant of How Sweet It Is, recipe submitted by TK member Adrianna Adarme of A Cozy Kitchen.

Then flip it over and place it on a side of the grill without direct heat.


Tasty Kitchen Blog: Grilled Breakfast Pizza. Guest post by Jessica Merchant of How Sweet It Is, recipe submitted by TK member Adrianna Adarme of A Cozy Kitchen.

Crack your eggs into a bowl to make sure no shells get mixed in and gently drop each egg onto the dough. Before doing this, make sure that your grill is on a level surface! I may have had 4 eggs take a ride on the slip and slide pizza dough and drop inside the grill. Oops.


Tasty Kitchen Blog: Grilled Breakfast Pizza. Guest post by Jessica Merchant of How Sweet It Is, recipe submitted by TK member Adrianna Adarme of A Cozy Kitchen.

After cracking the eggs, close the lid and cook for 5-6 minutes, or just until the eggs are almost set.


Tasty Kitchen Blog: Grilled Breakfast Pizza. Guest post by Jessica Merchant of How Sweet It Is, recipe submitted by TK member Adrianna Adarme of A Cozy Kitchen.

Once set, cover the pizza with cheese.


Tasty Kitchen Blog: Grilled Breakfast Pizza. Guest post by Jessica Merchant of How Sweet It Is, recipe submitted by TK member Adrianna Adarme of A Cozy Kitchen.

Then add your bacon and close the lid for another 2-3 minutes.


Tasty Kitchen Blog: Grilled Breakfast Pizza. Guest post by Jessica Merchant of How Sweet It Is, recipe submitted by TK member Adrianna Adarme of A Cozy Kitchen.

By this point the crust should be crispy and the pizza is done. Gently lift it again with a pair of kitchen tongs and a spatula and place it back on the pizza sheet. Top it with your greenery: chives, scallions and parsley!


Tasty Kitchen Blog: Grilled Breakfast Pizza. Guest post by Jessica Merchant of How Sweet It Is, recipe submitted by TK member Adrianna Adarme of A Cozy Kitchen.

Cut yourself a big ole’ slice. I love a little runny egg, but if that’s not your thing, just let the pizza cook a big longer right after you crack the eggs.


Tasty Kitchen Blog: Grilled Breakfast Pizza. Guest post by Jessica Merchant of How Sweet It Is, recipe submitted by TK member Adrianna Adarme of A Cozy Kitchen.

Breakfast is served!

This was a fabulous way to spice up our weekend breakfast. It was a nice change of pace and kept us full for hours. You can experiment with your own toppings and different cheeses. And who says this is only for breakfast? I think it makes for a fantastic dinner, too. Thanks so much Adrianna and Caroline for the recipe—it was definitely a winner. Be sure to check out the girls’ blog A Cozy Kitchen for more delicious recipes. My favorites are their fabulous cocktails. I wonder if I could pass one of those off for breakfast?


Printable Recipe

Grilled Breakfast Pizza

See post on A Cozy Kitchen’s site!
5.00 Mitt(s) 4 Rating(s)4 votes, average: 5.00 out of 54 votes, average: 5.00 out of 54 votes, average: 5.00 out of 54 votes, average: 5.00 out of 54 votes, average: 5.00 out of 5

Prep Time:

Cook Time:

Difficulty: Intermediate

Servings: 2

2
x

Print Options

Page size Letter 3x5 4x6
Text Size Small Medium Large
Content Include description
Include prep time, etc.
Show image

Description

Grill some pizza dough, crack three eggs on top, add some bacon and cheese and voila! Grilled Breakfast Pizza. (Check the related blog post for step-by-step pictures.)

Ingredients

  • 12 ounces, weight Prepared Pizza Dough
  • Olive Oil, For Drizzling On Pizza Dough
  • 3 whole Eggs
  • 3 strips Cooked Bacon, Cut Up In Pieces
  • 1 cup Grated Mozzarella
  • ¼ cups Grated Parmesan
  • 1 pinch Kosher Salt
  • 1 pinch Freshly Cracked Pepper
  • 1 Tablespoon Minced Flat-leaf Parsley
  • 1 Tablespoon Minced Chives
  • 1 whole Scallion, Trimmed And Thinly Sliced

Preparation Instructions

Adapted from The Big Sur Bakery Cookbook.

Generously dust the surface of your kitchen counter with flour and roll pizza dough to a 1/4-inch thickness. Drizzle both sides of dough with olive oil and set aside on a plate. Gather all the toppings and dough and move outside next to the grill.

Once your grill is nice and hot, place the pizza dough on the hottest part of the grill, making sure to check it every 30 seconds or so to ensure proper cooking. Once grill marks appear, flip it and move the dough to a place on the grill that does not have direct heat. Crack the three eggs onto the dough and cover for 2-3 minutes. Once the eggs are just about set, sprinkle the cheeses, bacon and salt and pepper. Cover for an additional 1-2 minutes, or until cheese is melted. Move promptly to a plate and sprinkle with parsley, chives and scallions.

Note: If you’re not in the mood to spark up the grill, then here’s the way to cook it in the oven. My advice is to get yourself a “pizza stone” from Lowes or Home Depot. Simply pre-heat your oven to 450F, roll out the dough, crack the eggs on top, sprinkle with mozzarella and parmesan cheese, then add the pieces of bacon and salt and pepper. Cook in the oven for 8 to 12 minutes, checking on it after 5 minutes and rotating it if necessary. When the crust is golden, the cheese is melted and the eggs yolks are cooked to medium, remove from the oven.


_______________________________________

Jessica Merchant is a personal trainer turned food writer and blogger. Her blog, How Sweet Eats, is where she proclaims her love for all things sweet, all things bacon, and everything else in between. She works her magic in her Pittsburgh kitchen, which she shares with her husband of 2 years.


Profile photo of Natalie | Perry's Plate

Grilled Brie with Grilled Corn and Mango Salsa

Posted by in Step-by-Step Recipes

It never occurred to me to grill brie. Or pair it with a salsa. Or put bacon in mango salsa. The whole thing almost made my head explode---in the best way possible. It's brilliant. And it was like summertime on a platter. Luckily it's not hard, either. Here, I'll show you!

Profile photo of cookincanuck

Grilled Buffalo Chicken Quesadillas

Posted by in Step-by-Step Recipes

Whether you are tail-gating, hosting a party or planning an easy weeknight dinner, you can never go wrong with Buffalo chicken. This recipe for Grilled Buffalo Chicken Quesadillas by Tasty Kitchen member

Profile photo of georgiapellegrini

Grilled Corn with Bacon Butter and Cotija Cheese

Posted by in Step-by-Step Recipes

  I’ve been trying all summer to grow corn. I planted the seeds in two long rows and waited patiently. Out of one hundred or so seeds, about six sprouted. Then a woodchuck came along and helped himself to about half of those. So I went to the gardening store and bought some corn in […]

Profile photo of whatsgabycooking

Grilled Guacamole

Posted by in Step-by-Step Recipes

  Hi. My name is Gaby and I have a serious avocado addiction. It’s actually not really an addiction—it’s more like an obsession. Is that the same thing? Well, it doesn’t really matter to me because I just flat out love avocados. Being an Arizona girl, I grew up eating avocados every single day. After […]