The Pioneer Woman Tasty Kitchen
Profile photo of Erika (TK)

Got Leftovers?

Posted by in The Theme Is...

Tasty Kitchen Blog: Thanksgiving Leftovers

 
Did you survive the foodfest yesterday? Manage to escape the usual embarrassing questions? Get your much-anticipated annual replay of Uncle Lester’s "pull my finger" trick? Attempt to watch football over the buzz saw snoring of Cousin Earl, who managed to launch into a spirited commentary of the car insurance commercial before abruptly dozing off on the couch?

Has the waistband of your yoga pants asked to be put in the witness protection program?

However you spent your day, we hope it was a good one. And if you had the traditional banquet full of dishes that filled up ever available space on the dining table, chances are you’ve got more leftovers than available fridge space. But don’t worry! Just for you (well, a little bit for us, too), we’re featuring a few great recipes that can transform your leftovers into yet another special dish. In fact, they’re so good that you just might start cooking more so you can make these.

If you want to go light, we’ve got a few turkey salad dishes that won’t scare your yoga pants. Or maybe the chilly weather is calling for a hearty soup to warm you up. We’ve got that too.
 

Tasty Kitchen Blog: Thanksgiving Leftovers (Soup and Salad)
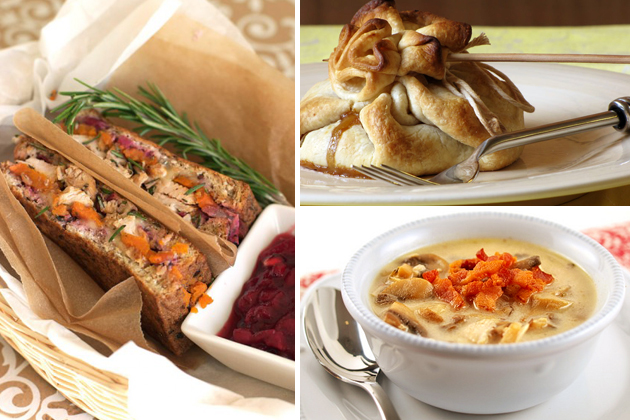
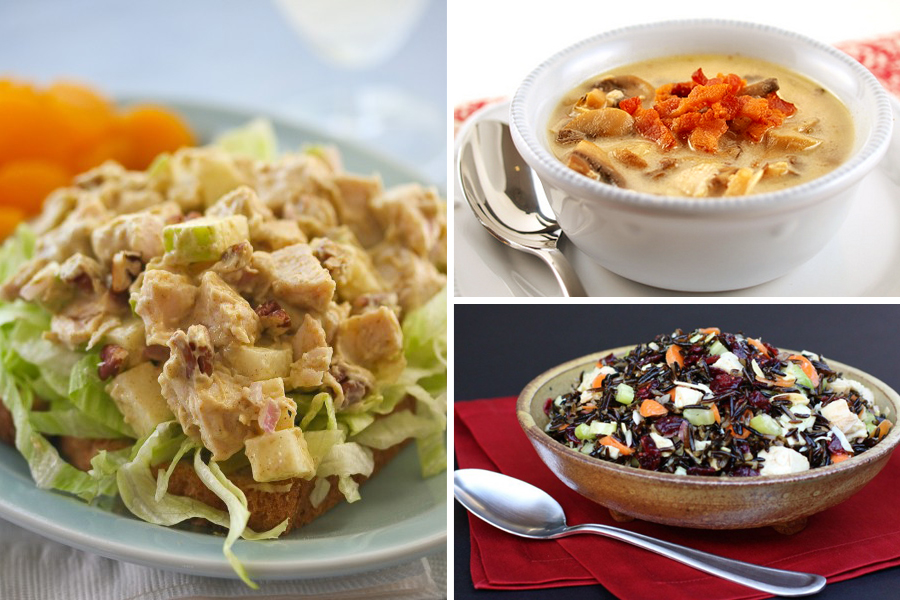
Clockwise from top left: steamykitchen’s Curry Apple and Leftover Turkey Salad Sandwich (which you can pile onto lettuce cups so you can skip the bread), Turkey and Mushroom Soup from Kelly @ EvilShenanigans, and Turkey & Wild Rice Curry Salad from afarmgirlsdabbles.


A sandwich is another quick and light meal, and many of you love making sandwiches with all that good turkey. Here are some that caught our eye:
 

Tasty Kitchen Blog: Thanksgiving Leftovers (Sandwiches)
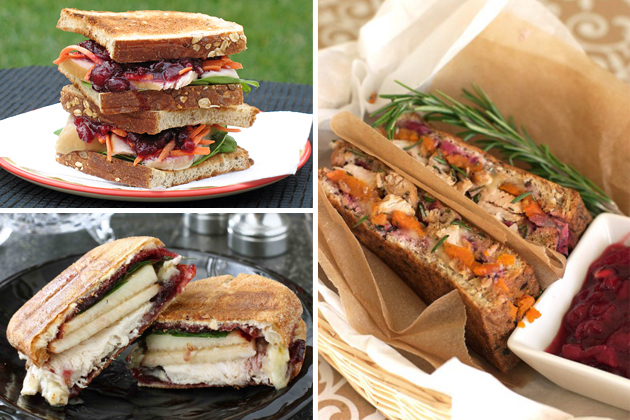
Clockwise from top left: Turkey Cranberry Sandwich from Very Culinary, Thanksgiving Monte Cristo Sandwich from familyfreshcooking, and Turkey, Brie, Pear & Cherry Chipotle Panini from cookincanuck.


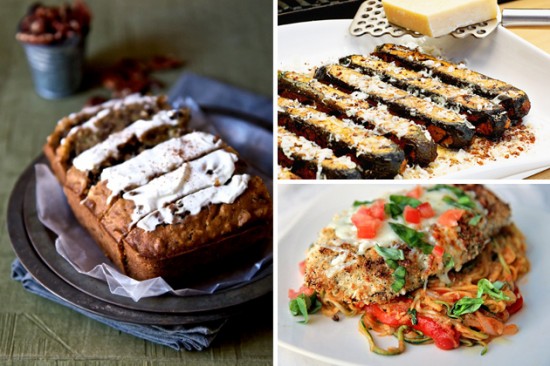
Another favorite way to use up leftovers is the classic pot pie. From the usual crust topping to puff pastry or a biscuit topping, there’s just something incredibly comforting about a warm and creamy savory filling topped with pastry.
 

Tasty Kitchen Blog: Thanksgiving Leftovers (Pot Pies)Clockwise from top left: Roasted Chicken Pot Pie from Natalie (Perrys’ Plate), “Enlighten” Autum Chicken Pot Pie from The Noshery, Hobo Bags from Cooking Ventures, and Chicken Puff Pot Pie from TootSweet.


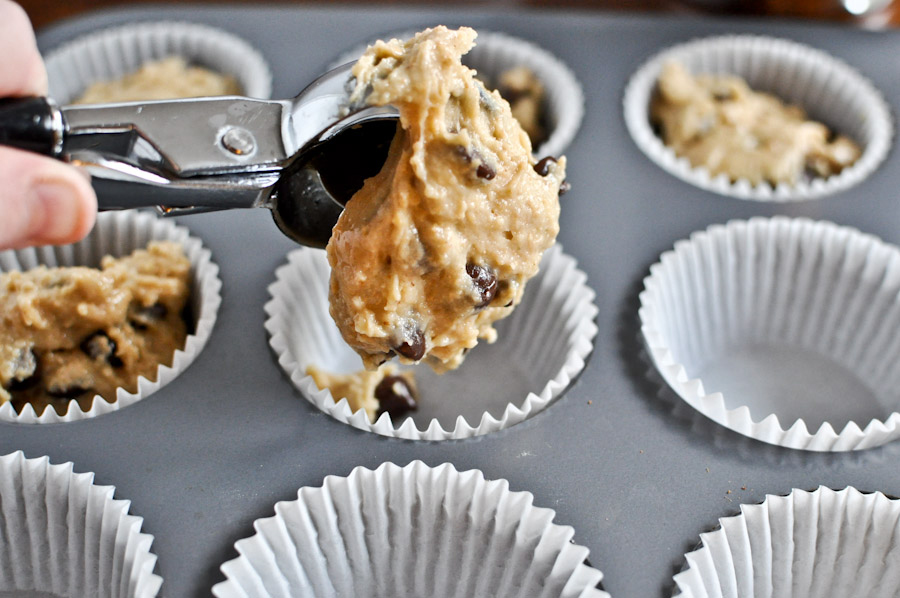
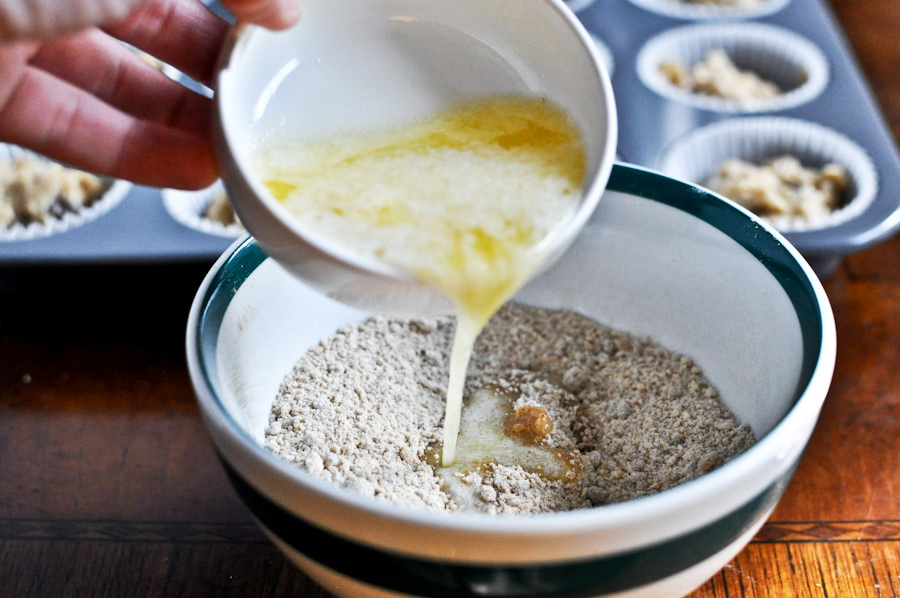
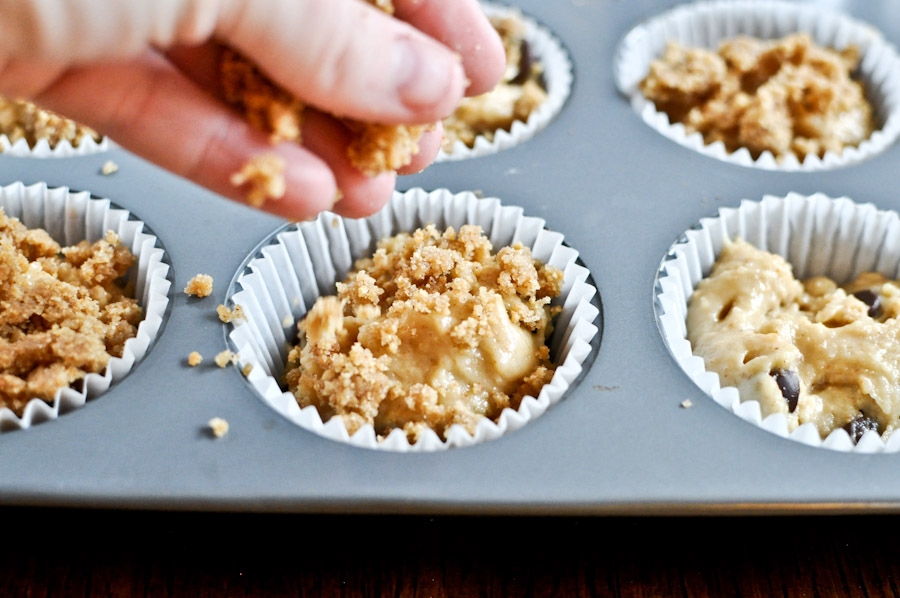
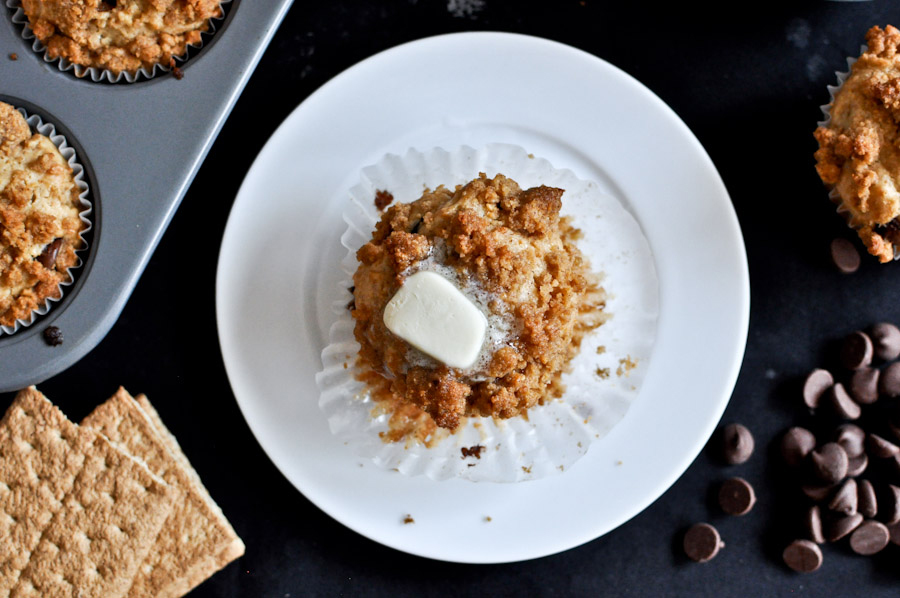
Of course, turkey isn’t the only thing you might have in excess. Got leftover butternut squash? Turn them into pancakes. Extra sweet potatoes, carrots, and other veggies? Try a nice pureed soup with a hint of coconut and curry. Leftover stuffing? Make some amazing stuffing balls. Got leftover pie? Have it for breakfast.
 

Tasty Kitchen Blog: Thanksgiving Leftovers (Others)Clockwise from top left: Whole Wheat Butternut Squash Pancakes from EatLiveRun, Roasted Sweet Potato & Carrot Soup with Pumpkin Seeds from Eating for England, and Thanksgiving Stuffing Balls from patiodaddio.


And there you have it! A post-holiday roundup of recipes for your leftovers. I’m telling you, leftovers never looked better. Do you have a favorite way to re-purpose the remnants of your holiday feast? Come share them with us!

Happy eating! May your table always be full and may your yoga pants never leave you.


Profile photo of HowSweetEats

Graham Cracker Chocolate Chip Muffins

Posted by in Baking, Step-by-Step Recipes

Tasty Kitchen Blog: Graham Cracker Chocolate Chip Muffins. Guest post by Jessica Merchant of How Sweet It Is, recipe submitted by TK member Michelle of Michelle's Tasty Creations.

 
If there is anything I love, it’s a warm muffin topped with butter. If there is anything I love more than that, it’s a warm muffin topped with butter and studded with melty chocolate chips. And if there is anything I love even more than THAT? It’s a muffin, with the butter and the chocolate chips, that tastes like a cookie. And that’s what we have here.

I have a very odd and fascinating obsession with all things graham crackers. Most likely because I adore all things s’mores related, but even more so because I totally freak out over graham cracker crusts. You know, tightly packed crumbs with butter and a bit of sugar? So good when it hits your lips. I could eat an entire graham cracker pie crust without any filling and be satisfied. And probably sick, but whatever. Totally worth it! And don’t tell anyone, but sometimes as an easy dessert I melt butter in a bowl inside the microwave, then mash in graham cracker crumbs with a fork. And eat it. Just when you thought you knew it all …

So when this recipe for Graham Cracker Chocolate Chip Muffins from Michelle popped up on my screen, I knew it had to be made. So it was! Let’s do this.


Tasty Kitchen Blog: Graham Cracker Chocolate Chip Muffins. Guest post by Jessica Merchant of How Sweet It Is, recipe submitted by TK member Michelle of Michelle's Tasty Creations.

Here’s what you’ll need. Looks promising already, doesn’t it?


Tasty Kitchen Blog: Graham Cracker Chocolate Chip Muffins. Guest post by Jessica Merchant of How Sweet It Is, recipe submitted by TK member Michelle of Michelle's Tasty Creations.

To begin, combine the flour, graham crumbs, granulated sugar, baking powder and salt in bowl and whisk it together. Set that aside.


Tasty Kitchen Blog: Graham Cracker Chocolate Chip Muffins. Guest post by Jessica Merchant of How Sweet It Is, recipe submitted by TK member Michelle of Michelle's Tasty Creations.

In the bowl of your electric mixer, add oil, egg, vanilla extract and whole milk. Mix it all up, then with the mixer on low speed, add in the dry ingredients slowly.


Tasty Kitchen Blog: Graham Cracker Chocolate Chip Muffins. Guest post by Jessica Merchant of How Sweet It Is, recipe submitted by TK member Michelle of Michelle's Tasty Creations.

Once the batter has come together, fold in some chocolate chips. It’s gettin’ good.


Tasty Kitchen Blog: Graham Cracker Chocolate Chip Muffins. Guest post by Jessica Merchant of How Sweet It Is, recipe submitted by TK member Michelle of Michelle's Tasty Creations.

Fill each muffin cup a little over halfway. Eat a little batter if you want.


Tasty Kitchen Blog: Graham Cracker Chocolate Chip Muffins. Guest post by Jessica Merchant of How Sweet It Is, recipe submitted by TK member Michelle of Michelle's Tasty Creations.

In a small bowl, stir together flour, brown sugar, cinnamon and graham cracker crumbs. Then pour butter over top. Instead of eating this with a spoon, mix it together until it resembles wet sand. It’s difficult, I know.


Tasty Kitchen Blog: Graham Cracker Chocolate Chip Muffins. Guest post by Jessica Merchant of How Sweet It Is, recipe submitted by TK member Michelle of Michelle's Tasty Creations.

To each muffin with the graham streusel, then place them in the oven to bake right up.


Tasty Kitchen Blog: Graham Cracker Chocolate Chip Muffins. Guest post by Jessica Merchant of How Sweet It Is, recipe submitted by TK member Michelle of Michelle's Tasty Creations.

And about 15 minutes later, you have a pan full of this. Oh yes.


Tasty Kitchen Blog: Graham Cracker Chocolate Chip Muffins. Guest post by Jessica Merchant of How Sweet It Is, recipe submitted by TK member Michelle of Michelle's Tasty Creations.

Serve the muffins immediately, with a large pat of butter on top.


Tasty Kitchen Blog: Graham Cracker Chocolate Chip Muffins. Guest post by Jessica Merchant of How Sweet It Is, recipe submitted by TK member Michelle of Michelle's Tasty Creations.

Seriously, is there anything better in this world that a warm, steaming muffin with a butter river running through it? I think not.

Thanks so much for the recipe Michelle! Be sure to check out her blog for more tasty creations as well as creative crafts! And definitely make these muffins.


Printable Recipe

Graham Cracker Chocolate Chip Muffins

See post on Michelle Day’s site!
3.60 Mitt(s) 5 Rating(s)5 votes, average: 3.60 out of 55 votes, average: 3.60 out of 55 votes, average: 3.60 out of 55 votes, average: 3.60 out of 55 votes, average: 3.60 out of 5

Prep Time:

Cook Time:

Difficulty: Easy

Servings: 15

15
x

Print Options

Page size Letter 3x5 4x6
Text Size Small Medium Large
Content Include description
Include prep time, etc.
Show image

Description

Moist delicious muffins that taste like a warm cookie right out of the oven.

Ingredients

  • FOR THE MUFFINS:
  • 2 cups Flour, All Purpose
  • 1 Tablespoon Baking Powder
  • ½ teaspoons Kosher Salt
  • ½ cups Sugar
  • 1 cup Graham Cracker Crumbs, They Can Have Small Bits In Them
  • 1 cup Whole Milk
  • ⅓ cups Canola Or Vegetable Oil
  • 1 whole Large Egg
  • 2 teaspoons Vanilla Extract
  • ¾ cups Milk Chocolate Chips
  • FOR THE TOPPING:
  • ¼ cups Flour, All Purpose
  • ¼ cups Light Brown Sugar, Packed
  • ¼ cups Graham Cracker Crumbs
  • ½ teaspoons Cinnamon
  • 3 Tablespoons Butter, Melted

Preparation Instructions

Preheat oven to 400ºF. Line muffin tins with liners or spray well with cooking spray and set aside.

For the muffins, in a medium bowl whisk the flour, baking powder, salt, sugar, and graham cracker crumbs until blended. Set aside.

In the bowl of a stand mixer, combine the milk, oil, egg, and vanilla and beat until incorporated. Add the dry ingredients and mix until just combined. Add the chocolate chips and stir in by hand.

Using an ice cream size scoop, fill each muffin liner or tin with 1 scoop, about 2/3 full.

For the topping, in a bowl mix the flour, brown sugar, graham cracker crumbs, cinnamon and stir to combine all the dry ingredients well. Add the melted butter and mix well until crumbly and looking like wet sand.

Top each muffin with 1 heaping tablespoon of crumb topping.

Bake for 16-19 minutes or until a toothpick inserted into the middle comes out clean.

Moist, delicious muffins that taste kind of like a warm cookie. Makes 15 muffins.

Enjoy!

Recipe adapted from Dwell on Joy.


_______________________________________

Jessica Merchant is a personal trainer turned food writer and blogger. Her blog, How Sweet Eats, is where she proclaims her love for all things sweet, all things bacon, and everything else in between. She works her magic in her Pittsburgh kitchen, which she shares with her husband of 2 years.


Profile photo of cookincanuck

Graham Cracker Cookie Bars

Posted by in Baking, Step-by-Step Recipes

Tasty Kitchen Blog: Graham Cracker Cookie Bars. Guest post by Dara Michalski of Cookin' Canuck, recipe submitted by TK member margaretha.

 
Every year at this time, I grapple with the decision of what holiday treat to give my neighbors. The first year we were married—you know, when I was young, ambitious, and naïve—I made a loaf of our favorite zucchini bread for every neighbor. About ten hours into the process and pounds of zucchini later, my holiday spirit was sucked dry and the joyful Christmas carols I had been singing were replaced by depressing 80s pop songs (think “Everybody Hurts” by REM). It was a scene straight out of The Grinch. My heart was at least four sizes too small.

The candy cane-striped lining of this dark snow cloud was that I learned that it is truly the thought that counts. Plus, simplicity is key. Every year since then, I have sought out recipes that take little time and effort, and do not cost a fortune to make. That is where these treats by marathea come in. Drenched in rich caramel and a layer of chocolate, these Graham Cracker Cookie Bars come together in a flash, and are filled with all the flavors of the holidays. I am happy to report that my heart grew five sizes once I tasted these.


Tasty Kitchen Blog: Graham Cracker Cookie Bars. Guest post by Dara Michalski of Cookin' Canuck, recipe submitted by TK member margaretha.

In the recipe posted on Tasty Kitchen, marathea tops these treats with slivered almonds. I decided to experiment with candy cane pieces as well. Really, the possibilities are endless. You could try hazelnuts, pistachios, pretzel bits (for that salty-sweet combo), or even dried fruit. Whatever you try, I guarantee that you will not be disappointed.


Tasty Kitchen Blog: Graham Cracker Cookie Bars. Guest post by Dara Michalski of Cookin' Canuck, recipe submitted by TK member margaretha.

Preheat oven to 350 degrees F.

Line a 11- by 15-inch cookie sheet with graham crackers. There will be a little bit of space left at the end of the pan. That space will later be filled with runaway caramel, which you can peel off and eat in privacy. Or is that just me?


Tasty Kitchen Blog: Graham Cracker Cookie Bars. Guest post by Dara Michalski of Cookin' Canuck, recipe submitted by TK member margaretha.

In a medium saucepan set over medium-low heat, combine brown sugar and butter.


Tasty Kitchen Blog: Graham Cracker Cookie Bars. Guest post by Dara Michalski of Cookin' Canuck, recipe submitted by TK member margaretha.

Melt, stirring constantly, and bring to a gentle boil. Turn the heat to low and cook for 5 minutes, stirring constantly. If bubbles are not coming to the surface, increase the heat slightly.

Oh yeah, now that’s what holiday baking is all about.


Tasty Kitchen Blog: Graham Cracker Cookie Bars. Guest post by Dara Michalski of Cookin' Canuck, recipe submitted by TK member margaretha.

Pour the mixture over the graham crackers. Be careful—this is hot caramel and, believe me, pouring it on any part of your skin will ruin your holiday spirit faster than you can say, “Humbug.”


Tasty Kitchen Blog: Graham Cracker Cookie Bars. Guest post by Dara Michalski of Cookin' Canuck, recipe submitted by TK member margaretha.

Spread the mixture evenly over the graham crackers.

Bake for 7 minutes. Don’t worry if the mixture is bubbling up while baking. That just means you are developing a richer caramel flavor. That is all good.


Tasty Kitchen Blog: Graham Cracker Cookie Bars. Guest post by Dara Michalski of Cookin' Canuck, recipe submitted by TK member margaretha.

While the graham crackers are baking, put 4 mini candy canes in a small resealable plastic bag and smash with a mallet or rolling pin. Get out all of that aggression so you can avoid the holiday road rage later. Your family will thank you.


Tasty Kitchen Blog: Graham Cracker Cookie Bars. Guest post by Dara Michalski of Cookin' Canuck, recipe submitted by TK member margaretha.

Sprinkle chocolate chips over the hot caramel and let sit for 1 minute to allow the chocolate chips to melt slightly.


Tasty Kitchen Blog: Graham Cracker Cookie Bars. Guest post by Dara Michalski of Cookin' Canuck, recipe submitted by TK member margaretha.

Using an offset or rubber spatula, spread the soft chocolate chips over the caramel layer.


Tasty Kitchen Blog: Graham Cracker Cookie Bars. Guest post by Dara Michalski of Cookin' Canuck, recipe submitted by TK member margaretha.

Sprinkle nuts or candy canes over the chocolate. Or you could do half and half. Or you could sprinkle pretzels over top. The possibilities are endless.

Place the cookie sheet in the fridge and cool for about 20 minutes. If the cookie sheet is still hot, place it on a rack in the fridge. Break into pieces and serve or store in an airtight container.


Tasty Kitchen Blog: Graham Cracker Cookie Bars. Guest post by Dara Michalski of Cookin' Canuck, recipe submitted by TK member margaretha.

Thank you to margaretha for this wonderful holiday treat.


Printable Recipe

Graham Cracker Cookie Bars

4.42 Mitt(s) 7 Rating(s)7 votes, average: 4.42 out of 57 votes, average: 4.42 out of 57 votes, average: 4.42 out of 57 votes, average: 4.42 out of 57 votes, average: 4.42 out of 5

Prep Time:

Cook Time:

Difficulty: Easy

Servings: 8

8
x

Print Options

Page size Letter 3x5 4x6
Text Size Small Medium Large
Content Include description
Include prep time, etc.
Show image

Description

Super easy, super yummy bars. Perfect to wrap up in a cellophane bundle and hand out as little treats. Great with a cup of coffee. And so quick to make.

Ingredients

  • 1 package (10 To 12 Pieces In A Package) Graham Crackers
  • 2 sticks Butter
  • 1 cup Brown Sugar
  • 1 cup Chocolate Chips
  • ½ cups Slivered Or Sliced Almonds

Preparation Instructions

Line an 11×15 inch cookie sheet with whole crackers. It will fill up pretty much the whole space. Use as many whole crackers as you need to fill the space.

Mix butter and brown sugar in a pan to boil. Stir for 5 minutes while boiling on low.

Spread the butter/sugar mixture over the crackers and bake at 350 degrees for 7 minutes. Sprinkle with chocolate chips and nuts when it comes out of the oven. Cool for 10-20 minutes in the fridge.

Break into pieces.

Alternative: After sprinkling with chocolate chips, let the chocolate melt for a minute, then spread it out over the caramel, then sprinkle the nuts. This is what I did on the ones photographed.


_______________________________________

Dara Michalski is a doll and a sweetheart who clearly knows her way around the kitchen. She blogs at Cookin’ Canuck, where she shares her flavor-packed recipes and fun, engaging writing. The photography’s pretty incredible, too.


Profile photo of Natalie | Perry's Plate

Grandma Inez’s Pineapple Pie

Posted by in Baking, Step-by-Step Recipes

Tasty Kitchen Blog: Pineapple Pie. Guest post and recipe from Natalie Perry of Perry's Plate.

 
I’m excited to share a recipe from my own box today because it’s one that’s close to my heart. I have a southern grandmother who cooks the best desserts. (I’m guessing many of you are nodding your heads and smiling. You know what I’m talking about, right?) Grandma Inez’s Pineapple Pie is my most favorite pie in the whole world and one of my favorites in her repertoire.

When I tell people my favorite pie is pineapple, I always wonder what kind of images their mind conjures up. A flaky pie crust filled with steaming pineapple rings? Ugh. No wonder they make faces at me. No steaming pineapple rings here. Think of this pie as a pineapple version of lemon meringue. Better now?

Let’s get started!


Tasty Kitchen Blog: Pineapple Pie. Guest post and recipe from Natalie Perry of Perry's Plate.

One of the things I love about this pie is that the ingredients are simple and the technique isn’t fussy. You’ll need eggs, sugar, butter, vanilla, salt, cream of tartar, corn starch, water, a can of crushed pineapple, and pre-baked pie crust. A pie crust from scratch is best, especially if it looks like it was made by a three-year-old. (Grandma, don’t look at my crust, please.)


Tasty Kitchen Blog: Pineapple Pie. Guest post and recipe from Natalie Perry of Perry's Plate.

Get a medium saucepan and dump in 3/4 cup sugar …


Tasty Kitchen Blog: Pineapple Pie. Guest post and recipe from Natalie Perry of Perry's Plate.

And the butter. Two tablespoons? I know. Pretty weak for a southern recipe, but I’m not going to argue with my grandma.


Tasty Kitchen Blog: Pineapple Pie. Guest post and recipe from Natalie Perry of Perry's Plate.

At this point you’ll need to separate the eggs if you haven’t already. Reserve the whites in a small bowl and set aside.


Tasty Kitchen Blog: Pineapple Pie. Guest post and recipe from Natalie Perry of Perry's Plate.

Place the yolks in the saucepan with the sugar and butter.


Tasty Kitchen Blog: Pineapple Pie. Guest post and recipe from Natalie Perry of Perry's Plate.

Get out your electric hand-held mixer and beat until everything’s mixed up nicely.


Tasty Kitchen Blog: Pineapple Pie. Guest post and recipe from Natalie Perry of Perry's Plate.

Add the cornstarch and vanilla.


Tasty Kitchen Blog: Pineapple Pie. Guest post and recipe from Natalie Perry of Perry's Plate.

Give it another mix.


Tasty Kitchen Blog: Pineapple Pie. Guest post and recipe from Natalie Perry of Perry's Plate.

Then add the water and the crushed pineapple, juice and all.


Tasty Kitchen Blog: Pineapple Pie. Guest post and recipe from Natalie Perry of Perry's Plate.

Mix it again. (You could even use a spoon if you want.)


Tasty Kitchen Blog: Pineapple Pie. Guest post and recipe from Natalie Perry of Perry's Plate.

Move the saucepan over to the stove and place it over medium heat. You want it to heat up, but don’t let it boil. If it starts to bubble a lot, turn the heat down. Stir constantly for a few minutes until it starts to thicken.


Tasty Kitchen Blog: Pineapple Pie. Guest post and recipe from Natalie Perry of Perry's Plate.

It’ll seem like nothing is happening, and then BAM it’ll thicken up really quickly. When it starts to get clumpy like this, remove it from the heat. Keep stirring.


Tasty Kitchen Blog: Pineapple Pie. Guest post and recipe from Natalie Perry of Perry's Plate.

The filling should be really thick. Like this.


Tasty Kitchen Blog: Pineapple Pie. Guest post and recipe from Natalie Perry of Perry's Plate.

Bring out your perfectly fluted pie crust and dump all of the pineapple filling into it.


Tasty Kitchen Blog: Pineapple Pie. Guest post and recipe from Natalie Perry of Perry's Plate.

Spread it around evenly and set it aside. If you’re not going to make the meringue right away, you’ll need to cover this with some plastic wrap and put it in the refrigerator.


Tasty Kitchen Blog: Pineapple Pie. Guest post and recipe from Natalie Perry of Perry's Plate.

Preheat your oven to 400 degrees F.

Now for the meringue. Grab a clean, medium-sized mixing bowl and add the egg whites.


Tasty Kitchen Blog: Pineapple Pie. Guest post and recipe from Natalie Perry of Perry's Plate.

Okay, y’all, I have a confession to make. (I like saying “y’all”. And I like people who say “y’all”. But that’s not my confession.)

When I made this meringue for this blog post, I was following my recipe card that I copied from my grandma. She says to put all the meringue ingredients into the bowl at once and beat them. Other meringue recipes will tell you to beat the egg whites for a minute or two before adding in anything else, which is how I wrote the directions when I submitted this recipe to Tasty Kitchen.

Is there a difference? I think so. I think it takes a lot longer for the whites to whip up if you add everything at the beginning. I swore I’d lost my meringue mojo while I was standing there whipping this. It took FOREVER (forever = about 7 minutes) and there were a few times I was tempted to toss the whole thing and start over.

But …


Tasty Kitchen Blog: Pineapple Pie. Guest post and recipe from Natalie Perry of Perry's Plate.

It worked anyway.


Tasty Kitchen Blog: Pineapple Pie. Guest post and recipe from Natalie Perry of Perry's Plate.

And I ended up with smooth, fluffy, glossy meringue. You can whip this until it reaches stiff peaks (peaks standing straight up), but I like it when they sort of flop over. I think it’s cute.


Tasty Kitchen Blog: Pineapple Pie. Guest post and recipe from Natalie Perry of Perry's Plate.

Spread all the meringue over the pineapple filling.


Tasty Kitchen Blog: Pineapple Pie. Guest post and recipe from Natalie Perry of Perry's Plate.

If you want to, make a few little peaks to give the pie some texture. Then put it in your preheated oven for 5-8 minutes or so until it’s golden brown. Keep an eye on it so it doesn’t burn!


Tasty Kitchen Blog: Pineapple Pie. Guest post and recipe from Natalie Perry of Perry's Plate.

See why I like to make little swirlies on the top? How gorgeous is that?


Tasty Kitchen Blog: Pineapple Pie. Guest post and recipe from Natalie Perry of Perry's Plate.

My favorite was this little guy right here. My three-year-old called dibs on him when I was slicing it up.


Tasty Kitchen Blog: Pineapple Pie. Guest post and recipe from Natalie Perry of Perry's Plate.

 
And that, my friends, is a pineapple pie. It’s delicious when it’s still a bit warm from the oven. Or when it’s ice cold. Or when it’s 4 AM. The recipe easily doubles, and making more than one is definitely a good idea. I hope you enjoy this as much as I do!

(And thanks, Grandma! This pie rules.)


Printable Recipe

Grandma Inez’s Pineapple Pie

See post on Natalie | Perry's Plate’s site!
4.75 Mitt(s) 20 Rating(s)20 votes, average: 4.75 out of 520 votes, average: 4.75 out of 520 votes, average: 4.75 out of 520 votes, average: 4.75 out of 520 votes, average: 4.75 out of 5

Prep Time:

Cook Time:

Difficulty: Easy

Servings: 6

6
x

Print Options

Page size Letter 3x5 4x6
Text Size Small Medium Large
Content Include description
Include prep time, etc.
Show image

Description

Similar to lemon meringue, this unique pie features a creamy pineapple filling. It’s also my favorite pie in the whole world. My grandma quit asking me what dessert I want her to make when we visit. She just makes one of these. Sometimes two. One for me and my grandpa and the other one for everyone else.

Ingredients

  • FOR THE PIE:
  • ¾ cups Sugar
  • 2 Tablespoons Butter
  • 2 whole Eggs, Separated
  • ⅓ cups Cornstarch
  • ½ teaspoons Vanilla Extract
  • ½ cups Plus 2 Tablespoons Of Water
  • 8 ounces, weight Canned Crushed Pineapple
  • 1 whole 9-inch Pre-baked Pie Crust
  • _____
  • FOR THE MERINGUE:
  • 2 whole Egg Whites (From Separated Eggs Above)
  • ⅛ teaspoons Salt
  • ¼ teaspoons Cream Of Tartar
  • 6 Tablespoons Sugar
  • 1 teaspoon Vanilla

Preparation Instructions

For the pie, cream sugar, butter, and egg yolks in a saucepan. Add cornstarch and vanilla. Add water and crushed pineapple. Cook over medium heat, stirring constantly until thick. Pour into a 9″ baked pastry.

For the meringue, whip egg whites until they begin to get foamy. Add the remaining ingredients and continue to whip until the meringue has reached soft peak stage and is smooth and glossy. Place the meringue over the cooled pie. Brown at 400ºF for just a few minutes. Store in the fridge until ready to serve. Tastes great warm or cold.


_______________________________________

Be sure to check out Natalie’s own beautiful food blog, Perrys’ Plate, where you can see her growing collection of lovely recipes. There’s always something new to see there. Go visit now!


Profile photo of Amber {Sprinkled With Flour}

Grandma’s Sugar Cream Pie

Posted by in Step-by-Step Recipes

Join us in welcoming Amber of Sprinkled with Flour to the TK Blog. We’re thrilled to have her! She picked a mighty fine Sugar Cream Pie recipe to share with us today, courtesy of Tasty Kitchen member sturgismama68. My goodness, does that look good. Take it away, Amber! _______________________________________     There are certain things […]

Profile photo of Erika (TK)

Great Zukes!

Posted by in The Theme Is...

  Are you one of those fortunate souls with great-yielding gardens and have you found yourself wondering what to do with all that zucchini growing in your backyard? Or perhaps you’ve noticed the copious amounts of fresh-looking inexpensive zucchini in your grocery store and wished you could figure out new ways to use them in […]

Profile photo of Megan {Country Cleaver}

Greek Lamb Naan Pizzas

Posted by in Step-by-Step Recipes

Even if we can’t fly out to new and exotic places, we can experience all the flavors these exotic places offer through cooking! Marie has a great twist on pizza with these Greek Lamb Naan Pizzas with…

Profile photo of twopeasandtheirpod

Greek Pizza

Posted by in Step-by-Step Recipes

  We love making homemade pizza. My husband Josh’s favorite pizza is his famous BBQ chicken deluxe pizza. He also likes sausage and pepperoni. He would eat the same three pizzas for the rest of his life, if I let him. I like to mix things up though. Pizza night shouldn’t be boring. A few of […]