The Pioneer Woman Tasty Kitchen
Profile photo of whatsgabycooking

Fiery Roasted Garlic and Tomato Soup

Posted by in Step-by-Step Recipes

Tasty Kitchen Blog: Fiery Roasted Garlic and Tomato Soup. Guest post by Gaby Dalkin of What's Gaby Cooking, recipe submitted by TK member Ingrid Beer of The Cozy Apron.

 
Tomato soup is something that is near and dear to my soul. I grew up eating it with the classic grilled cheese sandwich. Oh, what am I talking about, I still make tomato soup and eat it with a grilled cheese sandwich! Is there really anything better? Well, this recipe has me thinking that I can skip the grilled cheese, make this amazing soup and cheese crusted crouton (kind of a fancy grilled cheese) and call it a day!

This fabulous recipe was submitted The Cozy Apron. Here’s how to do it.


Tasty Kitchen Blog: Fiery Roasted Garlic and Tomato Soup. Guest post by Gaby Dalkin of What's Gaby Cooking, recipe submitted by TK member Ingrid Beer of The Cozy Apron.

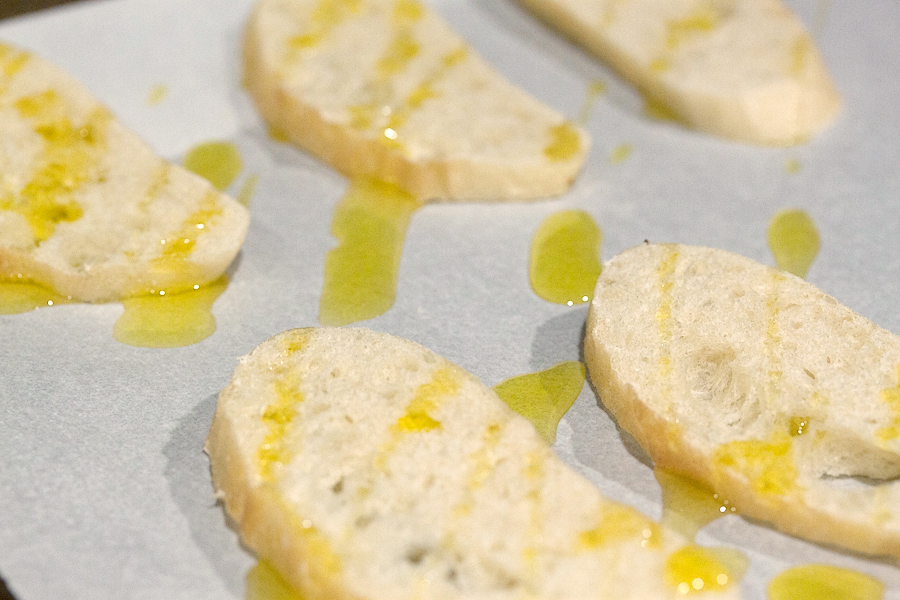
First you’re going to start with some thinly sliced bread. Give it a drizzle of olive oil and then pop it into the oven for a few minutes until it turns golden brown.


Tasty Kitchen Blog: Fiery Roasted Garlic and Tomato Soup. Guest post by Gaby Dalkin of What's Gaby Cooking, recipe submitted by TK member Ingrid Beer of The Cozy Apron.

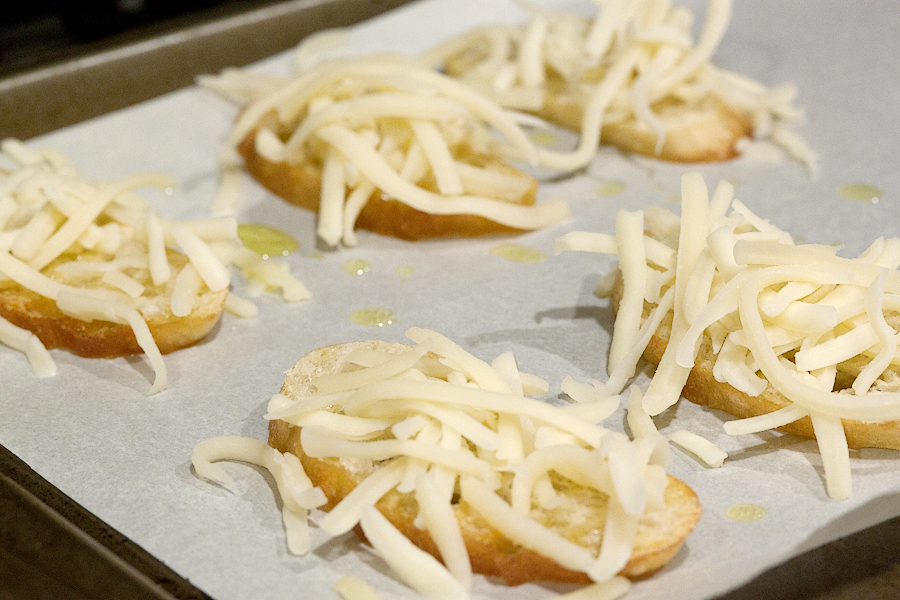
Once the slices of bread have toasted, sprinkle them with some cheese. Don’t be shy with the cheese—the more the merrier! Then pop the bread back into the oven.


Tasty Kitchen Blog: Fiery Roasted Garlic and Tomato Soup. Guest post by Gaby Dalkin of What's Gaby Cooking, recipe submitted by TK member Ingrid Beer of The Cozy Apron.

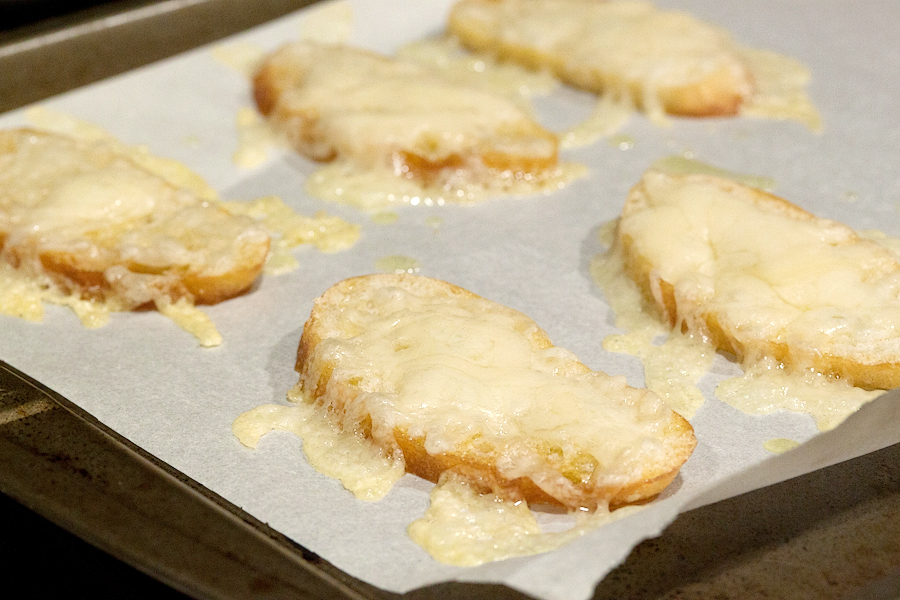
Once the cheese has melted, remove the baking sheet from the oven and set it aside.


Tasty Kitchen Blog: Fiery Roasted Garlic and Tomato Soup. Guest post by Gaby Dalkin of What's Gaby Cooking, recipe submitted by TK member Ingrid Beer of The Cozy Apron.

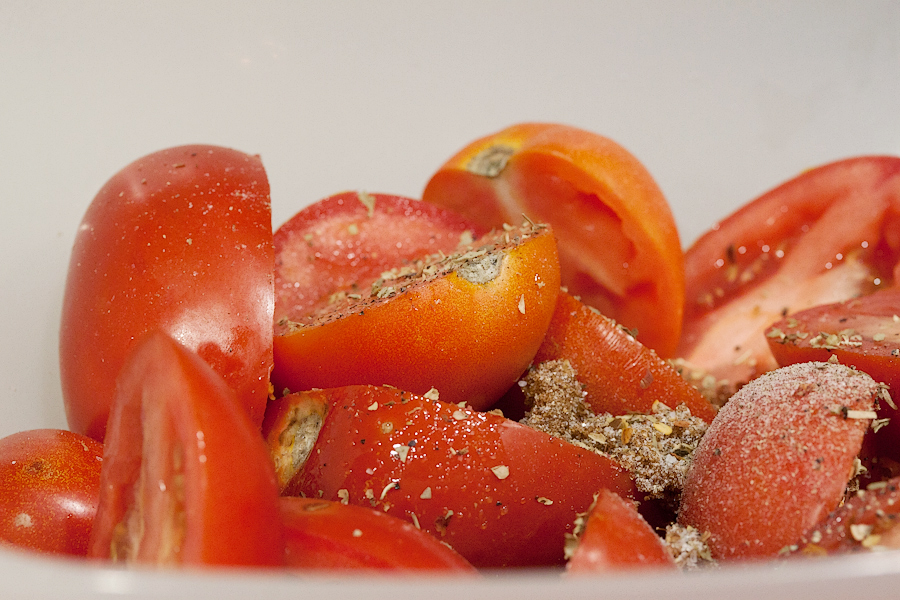
Next you’re going to place some halved tomatoes in a large bowl. Give them a drizzle of olive oil, a sprinkle of brown sugar, then throw in the balsamic vinegar, salt, pepper, red chili flakes and Italian seasoning. Give the tomatoes a good toss so that the seasoning is evenly distributed.


Tasty Kitchen Blog: Fiery Roasted Garlic and Tomato Soup. Guest post by Gaby Dalkin of What's Gaby Cooking, recipe submitted by TK member Ingrid Beer of The Cozy Apron.

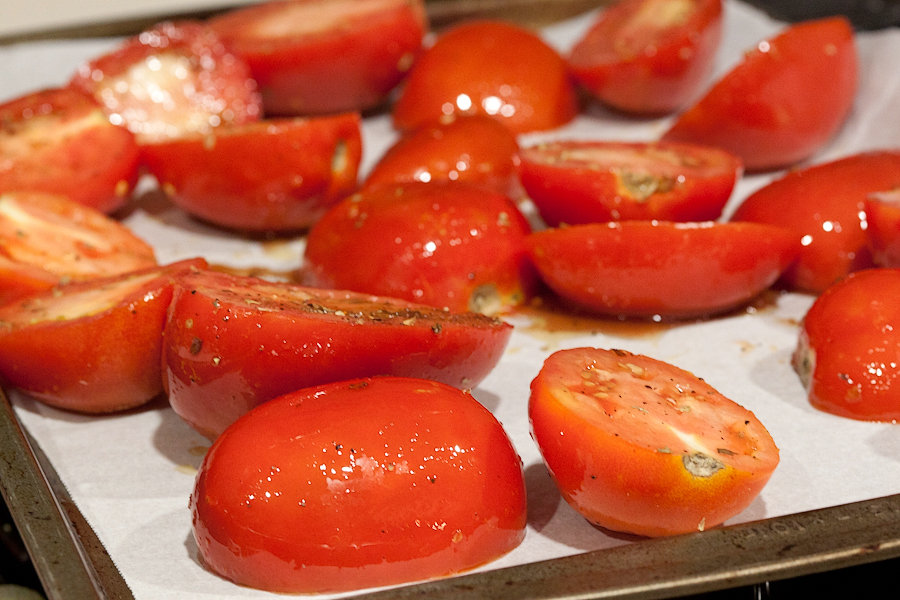
Place the tomatoes on a parchment-lined baking sheet and pop them into the oven for 45 minutes.


Tasty Kitchen Blog: Fiery Roasted Garlic and Tomato Soup. Guest post by Gaby Dalkin of What's Gaby Cooking, recipe submitted by TK member Ingrid Beer of The Cozy Apron.

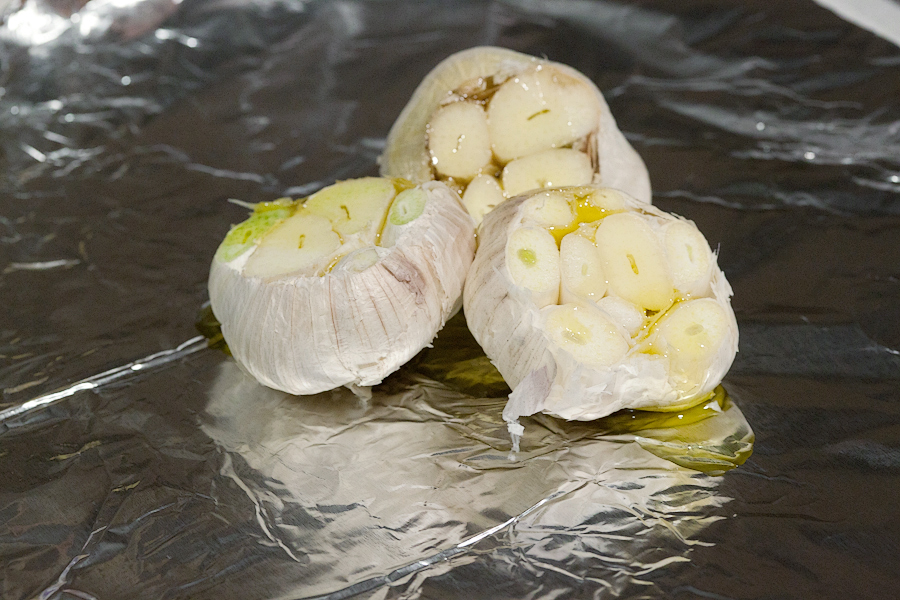
Cut the tops off of a few heads of garlic and drizzle some olive oil over the garlic.


Tasty Kitchen Blog: Fiery Roasted Garlic and Tomato Soup. Guest post by Gaby Dalkin of What's Gaby Cooking, recipe submitted by TK member Ingrid Beer of The Cozy Apron.

And then wrap it up in some foil. Pop it into the oven next to the tomatoes and let it bake for about 40 minutes. Now sit back, relax, perhaps watch some Real Housewives of Beverly Hills, and wait for the tomatoes and garlic to finish up in the oven.


Tasty Kitchen Blog: Fiery Roasted Garlic and Tomato Soup. Guest post by Gaby Dalkin of What's Gaby Cooking, recipe submitted by TK member Ingrid Beer of The Cozy Apron.

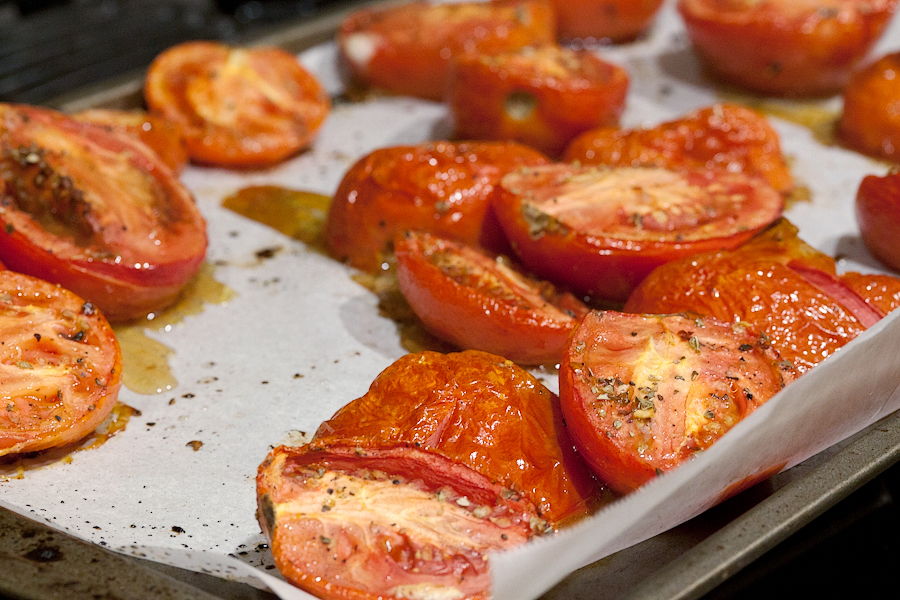
Once the tomatoes are done, they will look like this. Just let them hang out in their juices for a bit and set them aside.


Tasty Kitchen Blog: Fiery Roasted Garlic and Tomato Soup. Guest post by Gaby Dalkin of What's Gaby Cooking, recipe submitted by TK member Ingrid Beer of The Cozy Apron.

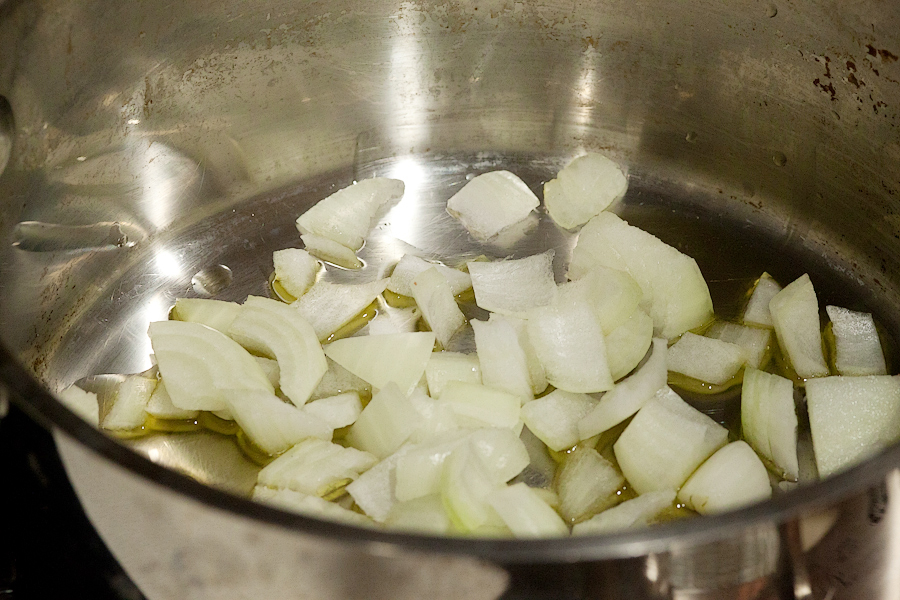
Meanwhile, in a large pot, sauté some onions.


Tasty Kitchen Blog: Fiery Roasted Garlic and Tomato Soup. Guest post by Gaby Dalkin of What's Gaby Cooking, recipe submitted by TK member Ingrid Beer of The Cozy Apron.

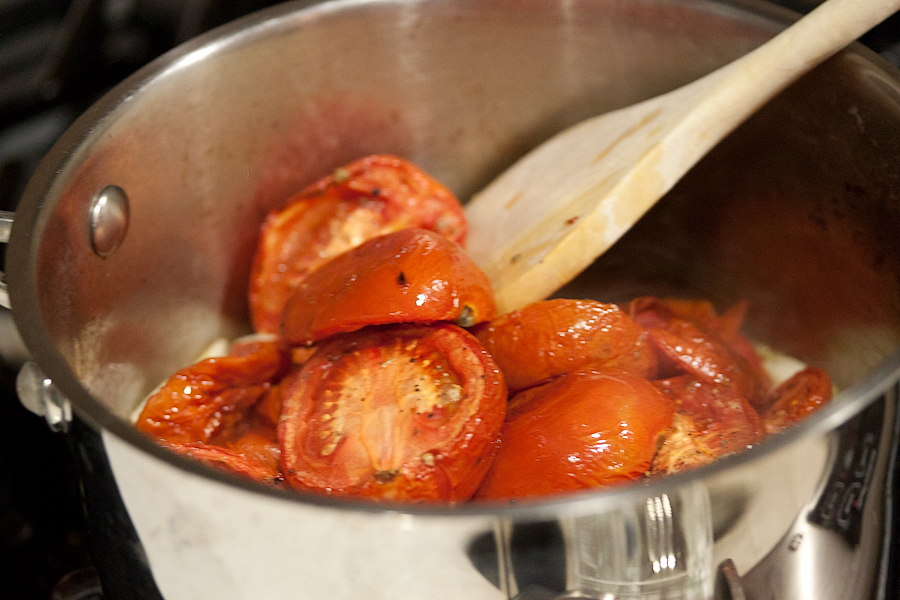
Add the roasted tomatoes along with all of their juices.


Tasty Kitchen Blog: Fiery Roasted Garlic and Tomato Soup. Guest post by Gaby Dalkin of What's Gaby Cooking, recipe submitted by TK member Ingrid Beer of The Cozy Apron.

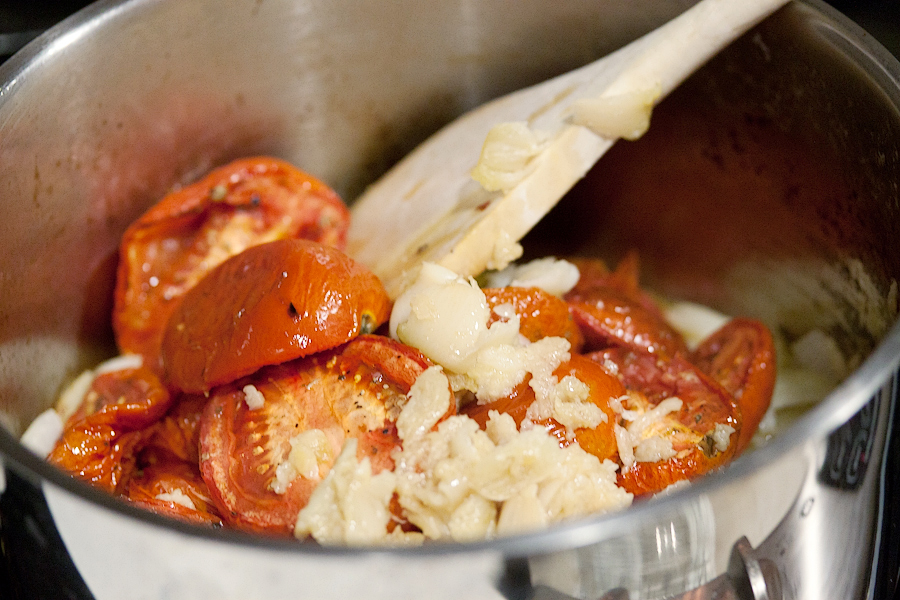
Next, squeeze out all the garlic from the paper and add it into the pot.


Tasty Kitchen Blog: Fiery Roasted Garlic and Tomato Soup. Guest post by Gaby Dalkin of What's Gaby Cooking, recipe submitted by TK member Ingrid Beer of The Cozy Apron.

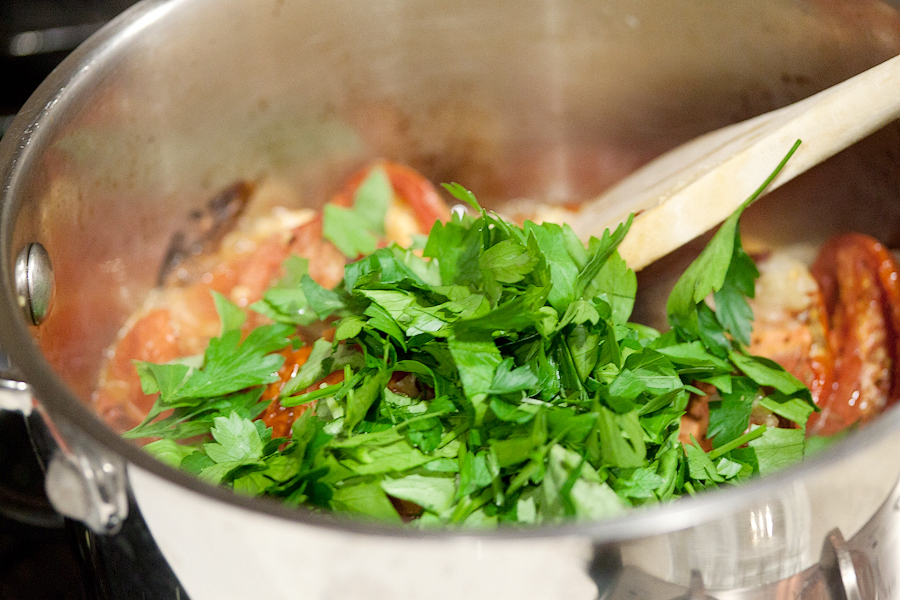
Throw in the basil, and then the parsley.


Tasty Kitchen Blog: Fiery Roasted Garlic and Tomato Soup. Guest post by Gaby Dalkin of What's Gaby Cooking, recipe submitted by TK member Ingrid Beer of The Cozy Apron.

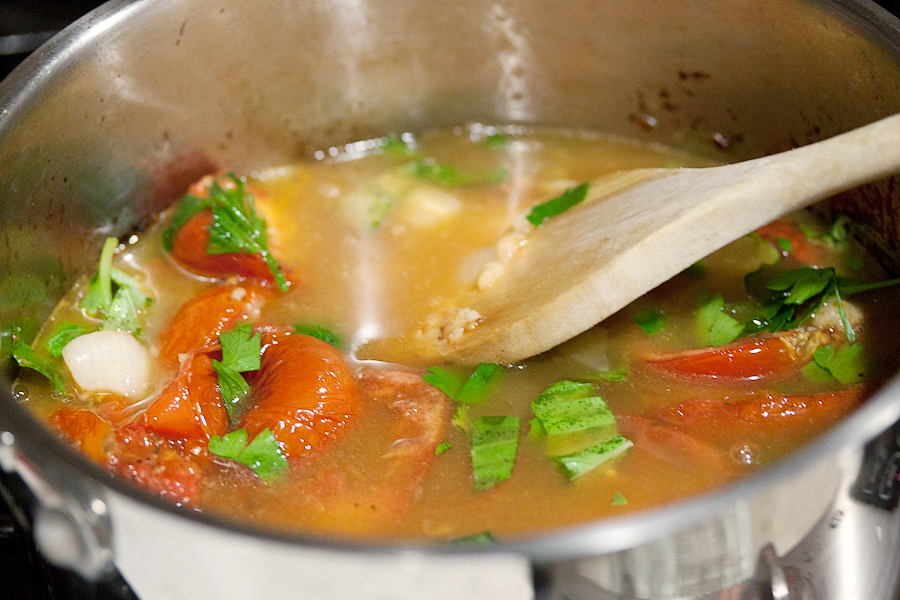
Next goes the chicken stock.


Tasty Kitchen Blog: Fiery Roasted Garlic and Tomato Soup. Guest post by Gaby Dalkin of What's Gaby Cooking, recipe submitted by TK member Ingrid Beer of The Cozy Apron.

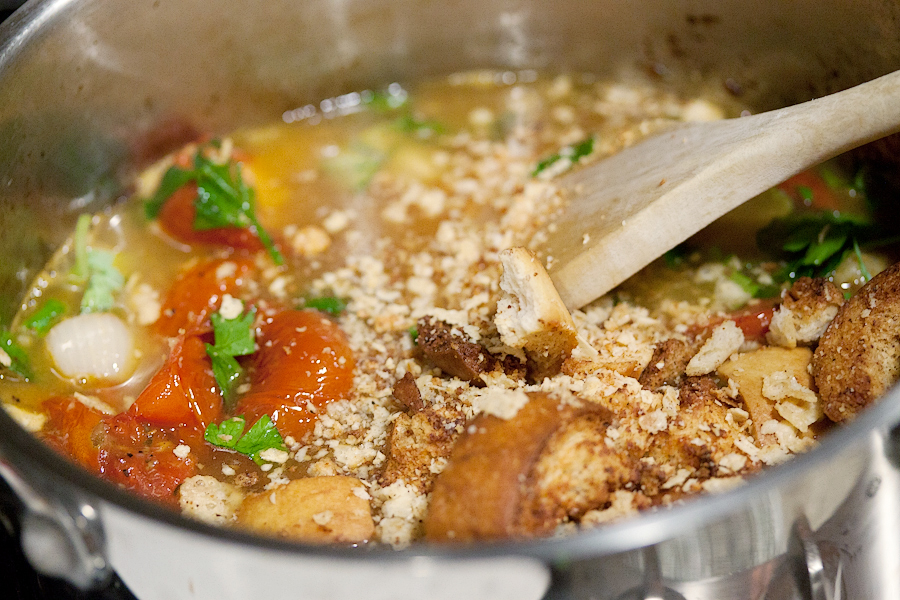
And then some croutons. (I know, sounds a little odd, right? Trust me, it’ll blow you away!) Let this boil for a little bit.


Tasty Kitchen Blog: Fiery Roasted Garlic and Tomato Soup. Guest post by Gaby Dalkin of What's Gaby Cooking, recipe submitted by TK member Ingrid Beer of The Cozy Apron.

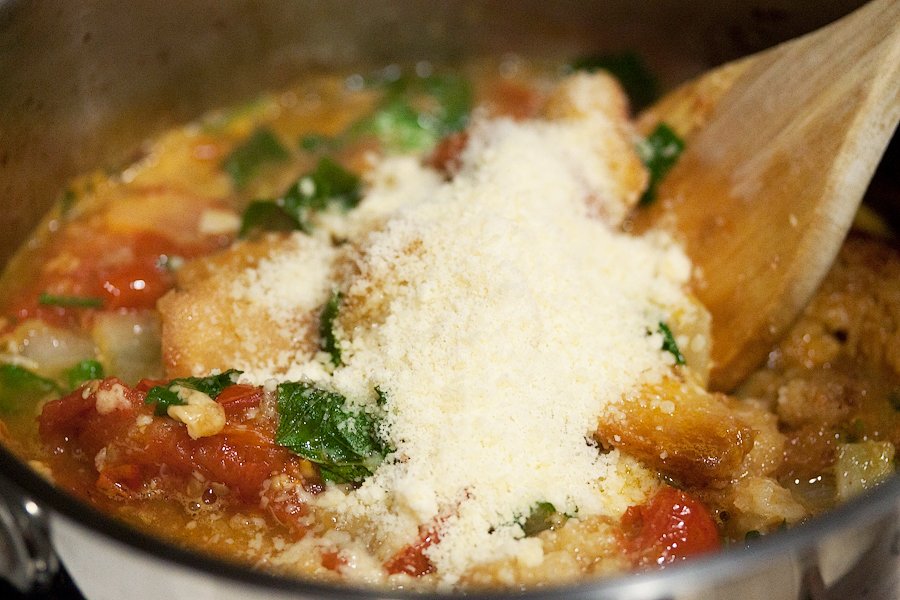
Then add some Parmesan cheese.


Tasty Kitchen Blog: Fiery Roasted Garlic and Tomato Soup. Guest post by Gaby Dalkin of What's Gaby Cooking, recipe submitted by TK member Ingrid Beer of The Cozy Apron.

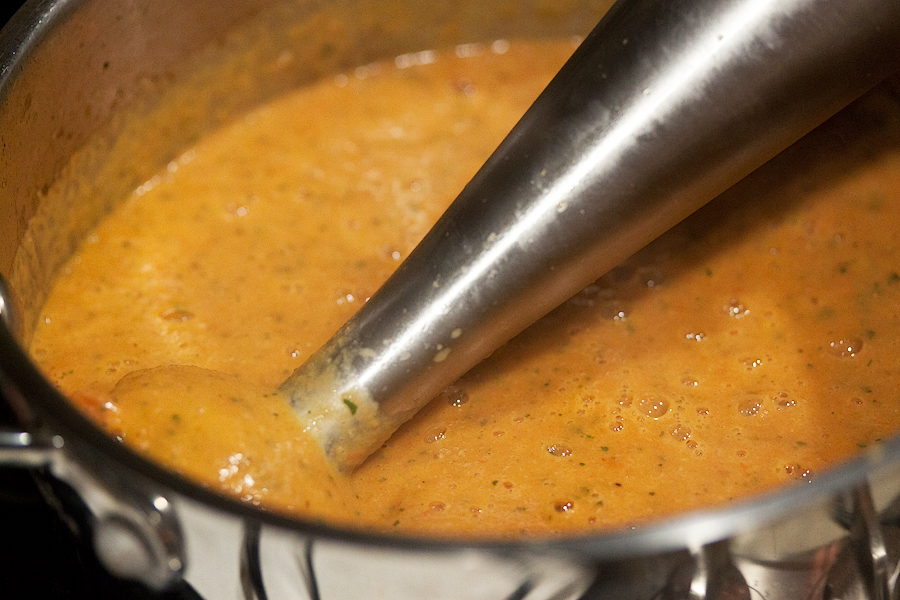
Give the mixture a blend with an immersion blender until it’s nice and smooth.


Tasty Kitchen Blog: Fiery Roasted Garlic and Tomato Soup. Guest post by Gaby Dalkin of What's Gaby Cooking, recipe submitted by TK member Ingrid Beer of The Cozy Apron.

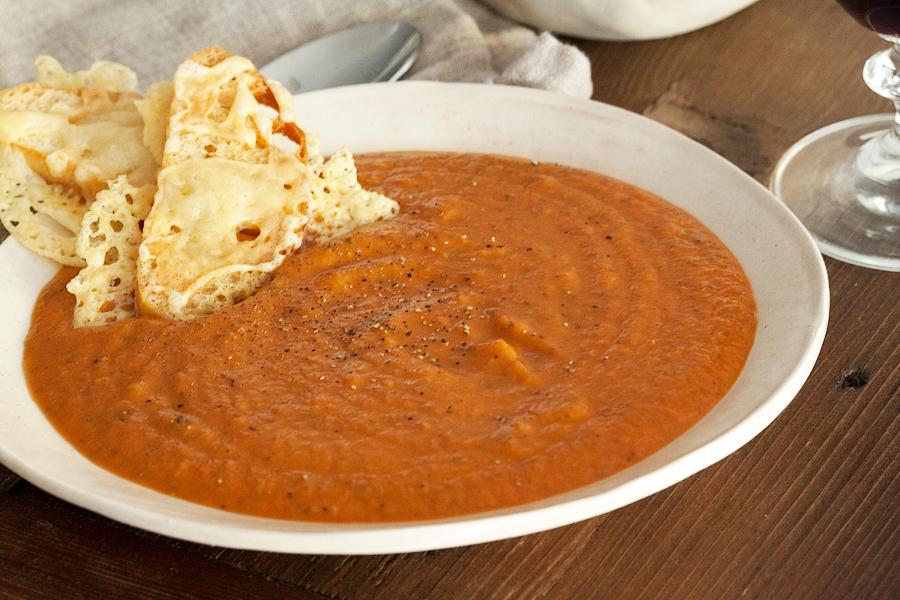
Serve the soup immediately with some of the cheesy garlic toasts!

A big thank you to Ingrid for creating the best tomato soup recipe I’ve ever tasted! I’ll be making this one for years to come. Visit her blog, The Cozy Apron, for more of her recipes and beautiful food photography!


Printable Recipe

Fiery Roasted Garlic & Tomato Soup

See post on The Cozy Apron’s site!
5.00 Mitt(s) 7 Rating(s)7 votes, average: 5.00 out of 57 votes, average: 5.00 out of 57 votes, average: 5.00 out of 57 votes, average: 5.00 out of 57 votes, average: 5.00 out of 5

Prep Time:

Cook Time:

Difficulty: Easy

Servings: 6

6
x

Print Options

Page size Letter 3x5 4x6
Text Size Small Medium Large
Content Include description
Include prep time, etc.
Show image

Description

If spicy foods tickle your tongue, then this warming and rich soup is sure to please. Roasted garlic and Roma tomatoes are the sweet, deep base for this soup, while fresh herbs and parmesan round out the heat. Cozy up with a big bowl of this soup to melt away the cold!

Ingredients

  • 1 loaf Ciabatta Bread
  • 7 Tablespoons Olive Oil, Divided
  • 6 Tablespoons Gruyere Cheese, Shredded, Divided Use
  • 15 whole Roma Tomatoes
  • 1-½ Tablespoon Balsamic Vinegar
  • 3 Tablespoons Brown Sugar
  • 1 Tablespoon Salt
  • 1 teaspoon Fresh Cracked Black Pepper
  • 1 Tablespoon Red Chili Pepper Flakes
  • 2 teaspoons Italian Seasoning
  • 3 whole Heads Of Garlic (Peels Left On) Plus 2 Cloves, Chopped, Divided Use
  • 1 whole Onion, Chopped
  • 1 bunch Lemon Basil (or Regular Basil), Stems Removed And Chopped
  • ¼ cups Flat-leaf Parsley, Chopped
  • 3 cups Chicken Stock
  • 1 cup Croutons (packaged)
  • ½ cups Grated Parmesan Cheese

Preparation Instructions

Preheat oven to 400 degrees F and line 2 baking sheets with foil.

1. Cut the ciabatta bread into six 1/2″ slices, drizzle with 1 Tablespoon of olive oil, and place on baking sheet; toast until golden. Remove bread from oven, top each with 1 Tablespoon of the gruyere cheese and place in oven once again, just until cheese is melted. Remove bread from oven, cut each slice on the bias (making 12 pieces), and keep warm.
2. Cut the Roma tomatoes in half and place in a large bowl; add the 2 Tablespoons of olive oil as well as the balsamic vinegar and other ingredients down through the Italian seasoning to the tomatoes, and toss to coat. Add this to the second baking sheet and roast in the preheated oven for 45 minutes.
3. Cut the tops off of the 3 heads of garlic and add 2 Tablespoons of the olive oil. Wrap the heads tightly in foil; place them next to the tomatoes to roast for 40 minutes.
4. Once tomatoes and garlic are roasted, set aside to cool slightly, until they can be handled. Squeeze the roasted garlic cloves out of their papers, discard papers and set aside the roasted garlic aside.
5. In the meantime, in a large pot over medium heat, add the remaining 2 Tablespoons of olive oil, the chopped onion and 2 fresh, chopped garlic cloves. Allow them to become aromatic and translucent. Then add the roasted tomatoes (and all of their juice from the baking sheet), and the roasted garlic. Add the lemon basil and parsley and stir to combine. Add the hot chicken stock and the croutons, and allow to simmer without lid, for about 20 minutes.
6. Add the grated parmesan cheese, and stir. Using a hand immersion blender, puree the soup until smooth and all tomatoes are completely pureed (if using a blender, work in small batches to puree. Be careful to not overfill the blender, as hot soup can splatter). Check the salt/pepper, and adjust to taste, if necessary.
7. Ladle into serving bowls, and garnish with 2 pieces of the ciabatta cheese toasts. Enjoy!


_______________________________________

Gaby Dalkin is the young lady behind What’s Gaby Cooking, a food blog that’s bursting at the seams with incredible recipes and food photography. She’s a personal chef and professional recipe developer, and if you follow her on Twitter, you’ll soon discover her two-fold obsession: guacamole and cheese. She has small feet, a large heart, and a smile that can light up the whole building. We’re pretty stoked to have her here.


Profile photo of Erica Lea

Figgy Piggy Pizza

Posted by in Step-by-Step Recipes

Tasty Kitchen Blog: Figgy Piggy Pizza. Guest post by Erica Kastner of Buttered Side Up, recipe submitted by TK member Christina of Dessert for Two.

First of all, the name of this recipe (brought to us by the lovely Christina) is just ridiculously fun to say. I have to admit that it influenced my decision to make this pizza. It also involves bacon, so I was basically obliged to cook it.

I loved the mix of flavors: the savory bacon, the tangy feta, and the sweet figs to balance it all out.

This little pizza would make a fantastic (fancy) appetizer for a dinner party. Granted, it will take some time and create a bit of a mess. But it IS surprisingly easy to make, and the list of (just ten) ingredients is actually quite reasonable:


Tasty Kitchen Blog: Figgy Piggy Pizza. Guest post by Erica Kastner of Buttered Side Up, recipe submitted by TK member Christina of Dessert for Two.

Water (not shown), sugar, yeast, flour, salt, olive oil, cornmeal, bacon, feta cheese, and dried mission figs.


Tasty Kitchen Blog: Figgy Piggy Pizza. Guest post by Erica Kastner of Buttered Side Up, recipe submitted by TK member Christina of Dessert for Two.

Place five tablespoons of water in a measuring cup.


Tasty Kitchen Blog: Figgy Piggy Pizza. Guest post by Erica Kastner of Buttered Side Up, recipe submitted by TK member Christina of Dessert for Two.

Add the yeast and sugar. Give it a gentle stir and allow it to sit for a few minutes.


Tasty Kitchen Blog: Figgy Piggy Pizza. Guest post by Erica Kastner of Buttered Side Up, recipe submitted by TK member Christina of Dessert for Two.

Once it starts to get foamy, you’re good to go. This could take anywhere from 5 to 15 minutes, depending on the temperature of your kitchen.


Tasty Kitchen Blog: Figgy Piggy Pizza. Guest post by Erica Kastner of Buttered Side Up, recipe submitted by TK member Christina of Dessert for Two.

Now add your flour.


Tasty Kitchen Blog: Figgy Piggy Pizza. Guest post by Erica Kastner of Buttered Side Up, recipe submitted by TK member Christina of Dessert for Two.

Give it a good stir.


Tasty Kitchen Blog: Figgy Piggy Pizza. Guest post by Erica Kastner of Buttered Side Up, recipe submitted by TK member Christina of Dessert for Two.

Dump in the salt …


Tasty Kitchen Blog: Figgy Piggy Pizza. Guest post by Erica Kastner of Buttered Side Up, recipe submitted by TK member Christina of Dessert for Two.

… and the olive oil.


Tasty Kitchen Blog: Figgy Piggy Pizza. Guest post by Erica Kastner of Buttered Side Up, recipe submitted by TK member Christina of Dessert for Two.

Stir it all together until you have a shaggy dough. It will seem somewhat sticky.


Tasty Kitchen Blog: Figgy Piggy Pizza. Guest post by Erica Kastner of Buttered Side Up, recipe submitted by TK member Christina of Dessert for Two.

Now place the dough on a floured surface and knead for about a minute.


Tasty Kitchen Blog: Figgy Piggy Pizza. Guest post by Erica Kastner of Buttered Side Up, recipe submitted by TK member Christina of Dessert for Two.

What you have now is a ball of dough that’s no longer sticky.


Tasty Kitchen Blog: Figgy Piggy Pizza. Guest post by Erica Kastner of Buttered Side Up, recipe submitted by TK member Christina of Dessert for Two.

Rub your measuring cup with some olive oil and plop the dough inside. Flip it so it’s coated with the oil. Leave in a warm spot of your kitchen until it has doubled in size, about 1 hour.


Tasty Kitchen Blog: Figgy Piggy Pizza. Guest post by Erica Kastner of Buttered Side Up, recipe submitted by TK member Christina of Dessert for Two.

Now it’s time to prep your topping ingredients. Chop up the bacon and thinly slice the figs.


Tasty Kitchen Blog: Figgy Piggy Pizza. Guest post by Erica Kastner of Buttered Side Up, recipe submitted by TK member Christina of Dessert for Two.

Cook the bacon in a skillet until it’s not quite as crispy as you’d like. It will cook longer in the oven on the pizza. Make sure you reserve the bacon grease!


Tasty Kitchen Blog: Figgy Piggy Pizza. Guest post by Erica Kastner of Buttered Side Up, recipe submitted by TK member Christina of Dessert for Two.

Once your dough has risen, turn it out onto your work surface a knead if for another minute.


Tasty Kitchen Blog: Figgy Piggy Pizza. Guest post by Erica Kastner of Buttered Side Up, recipe submitted by TK member Christina of Dessert for Two.

Shape the dough (I used a combination of letting it drape over my fists and patting it out) and place it on a cornmeal-dusted piece of parchment paper. You can also just put it on a cornmeal-dusted pizza peel or cookie sheet, but I find it’s much easier to transfer the pizza to the oven if it’s on top of parchment.


Tasty Kitchen Blog: Figgy Piggy Pizza. Guest post by Erica Kastner of Buttered Side Up, recipe submitted by TK member Christina of Dessert for Two.

Brush the pizza crust with some of the bacon grease you saved earlier.


Tasty Kitchen Blog: Figgy Piggy Pizza. Guest post by Erica Kastner of Buttered Side Up, recipe submitted by TK member Christina of Dessert for Two.

Add the bacon.


Tasty Kitchen Blog: Figgy Piggy Pizza. Guest post by Erica Kastner of Buttered Side Up, recipe submitted by TK member Christina of Dessert for Two.

Sprinkle on the feta cheese and pop that baby into a (very) hot oven until the crust turns golden brown.


Tasty Kitchen Blog: Figgy Piggy Pizza. Guest post by Erica Kastner of Buttered Side Up, recipe submitted by TK member Christina of Dessert for Two.

Once the pizza is cooked to your liking, add the fig slices.


Tasty Kitchen Blog: Figgy Piggy Pizza. Guest post by Erica Kastner of Buttered Side Up, recipe submitted by TK member Christina of Dessert for Two.

Pour any leftover bacon grease all over the pizza. Serve immediately.


Tasty Kitchen Blog: Figgy Piggy Pizza. Guest post by Erica Kastner of Buttered Side Up, recipe submitted by TK member Christina of Dessert for Two.

Notes: 

1. I held back on the feta because I thought it would be overpowering. We ended up adding more once the pizza was done. I would recommend being liberal with the cheese.

2. My husband was thinking of this as a traditional pizza, not an appetizer. So he thought that, while there were some awesome flavors going on, it was a tad dry. I think a drizzle of olive oil or balsamic reduction would be awesome.

3. If you really want to make this a speedy appetizer, you could make the dough beforehand, have the bacon cooked up and the figs sliced. Then you can slide it into the oven at the last minute and serve it piping hot to your guests.


Tasty Kitchen Blog: Figgy Piggy Pizza. Guest post by Erica Kastner of Buttered Side Up, recipe submitted by TK member Christina of Dessert for Two.

Many thanks to fellow TKB contributor Christina for submitting this pizza. You’ve probably heard of her lovely blog, Dessert for Two. If you haven’t, make sure to check it out! She has lots of delicious-looking recipes.


Printable Recipe

Figgy Piggy Pizza

See post on DessertForTwo’s site!
4.00 Mitt(s) 1 Rating(s)1 vote, average: 4.00 out of 51 vote, average: 4.00 out of 51 vote, average: 4.00 out of 51 vote, average: 4.00 out of 51 vote, average: 4.00 out of 5

Prep Time:

Cook Time:

Difficulty: Easy

Servings: 2

2
x

Print Options

Page size Letter 3x5 4x6
Text Size Small Medium Large
Content Include description
Include prep time, etc.
Show image

Description

Homemade pizza for two topped with bacon, figs, and feta!

Ingredients

  • FOR THE DOUGH:
  • 5 Tablespoons Warm Water (105-110 Degrees F)
  • ½ teaspoons Sugar
  • ½ teaspoons Dry Active Yeast
  • ¾ cups Flour
  • ¼ teaspoons Salt
  • 1 Tablespoon Olive Oil, Plus More For Bowl
  • Cornmeal For The Baking Sheet
  • FOR THE PIZZA:
  • 2 slices Thick Cut Bacon
  • 3 Tablespoons Crumbled Feta Cheese
  • 4 whole Dried Mission Figs, Sliced

Preparation Instructions

First, make the dough: In a 2-cup measuring cup, combine the warm water, sugar and yeast. Stir to dissolve. Let it sit for 5 minutes, or until foamy. If the yeast does not foam, it’s dead and you’ll need to start over.

Next, add the flour and stir. Then, add the salt and olive oil. Stir with a fork until a shaggy dough forms. Remove the dough from the cup and knead it a few times on a floured surface. As soon as you start kneading, the dough will come together and lose all the stickiness. Knead for about 1 minute. The dough should be easy to work with, pliable, and not sticky. Grease the measuring cup with a bit of extra oil, and plop the dough back in it. Turn the dough over once to coat it in oil, then let it rise in a warm place until doubled in bulk, about 1 hour.

Meanwhile, slice the bacon into lardons and fry in a dry skillet over medium heat until almost crispy. Don’t let it crisp all the way, because it will continue cooking in the oven. Drain the bacon on a paper towel. Reserve the bacon grease!

Preheat the oven to 400 F and place a pizza stone in the oven (if you have one). Alternatively, you could use a baking sheet coated lightly with cornmeal.

Flour your hands, and remove the dough from the measuring cup. Lightly flour the counter and knead the dough for 1 minute. Then, pat the dough out into a circle. Pick up the dough (just like you see them do in pizzerias) and let it drape over your two fists. Slowly start stretching the dough out in a circular motion around the edges to a diameter of 6″. You could also make an oblong shape, like I did for the photos.

Next, sprinkle cornmeal on a pizza stone or baking sheet. Place the dough on top of the cornmeal. Brush some of the leftover bacon grease on the top of the pizza, then top with the cooked bacon and feta.

Bake for 10 minutes, until the dough starts to brown. Cooking time will vary if you’re using a baking sheet versus pizza stone. Keep an eye on it. When it’s ready remove pizza from the oven. Top the cooked pizza with the fig slices, drizzle with a smidge more bacon grease, and serve immediately.


_______________________________________

Erica Kastner has always been one of our most cherished members of the Tasty Kitchen community. She shares her wonderful recipes and amazing food photography on her blog, Buttered Side Up, and she also writes about crafts and posts more of her beautiful photography in her personal blog, Simple Days. There really isn’t much that this amazing young wife and mother can’t do, and we’re thrilled she does some of it here.

Profile photo of steamykitchen

Fill ‘em Up!

Posted by in Looks Delicious!

Tasty Kitchen Blog: Fill 'em Up! Guest post by Jaden Hair of Steamy Kitchen.

 
The best way to get my kids to eat something is to fill it in a dumpling or wrap ‘em in a tortilla. I could stuff wontons with pickled pigs feet and the boys would chomp it all up! Who can resist a cute little two-bite package? Especially if it looked like little fishies!

Rubber Slippers in Italy made these cute Chinese Goldfish Dumplings made these steamed dumplings that are very popular in Hong Kong dim sum restaurants. She even made the wrappers by hand (oh that woman’s got talent!)

Tasty Kitchen Blog: Fill 'em Up! (Goldfish Dumplings, from Rubber Slippers in Italy)


But not all dumplings are Chinese. Let’s take tour around the world and start right here in our backyard (well, my backyard I mean) and head over the For the Love of Cooking’s classic American Chicken and Basil Dumplings. Technically, these babies aren’t filled dumplings, but rather a dough mixture dropped by the spoonful into good chicken broth. Best part of this recipe is that it’s from Cooking Light Magazine (read: I can eat 2 servings and still feel great!).

Tasty Kitchen Blog: Fill 'em Up! (Chicken and Basil Dumplings from For the Love of Cooking, recipe from Cooking Light Magazine)


This gorgeous photo is from Asha of Fork Spoon Knife blog (love the contrasting colors!) and she made Meat Ravioli with Puttanesca Sauce. Instead of making her own pasta sheets for ravioli, she used Chinese dumpling wrappers to make the job easier. Just beautiful. Plus, I just love saying puttanesca. I feel so naughty!

Tasty Kitchen Blog: Fill 'em Up! (Meat Ravioli with Puttanesca Sauce, from Asha of Fork Spoon Knife)


Susan wins the creative healthy award with these Samosa Wraps. Instead of the traditional Indian deep-fried samosa dumplings, Susan wrapped the curried vegan filling in whole-grain tortillas. This would make a perfect lunch. Or breakfast. Or dinner. Or snack. Or midnight munchies. Oh wait. It’s supposed to be healthy, which means no midnight munchies for me.

Tasty Kitchen Blog: Fill 'em Up! (Samosa Wraps, from Susan of Fat Free Vegan)


Mehan of Mehan’s Kitchen shows us what Afgan dumplings are in this Aushak recipe. I haven’t really much explored the food of Afghanistan, and darn it, I think it’s about time! Mehan also took a shortcut with the dumpling dough and used Chinese dumpling wrappers. Her recipe is from Ruth Reichl’s Garlic and Sapphires book (by the way, I highly recommend any of Ruth’s books in audio form, telling her stories in her own voice).

Tasty Kitchen Blog: Fill 'em Up! (Aushak, from Mehan's Kitchen, recipe from Ruth Reichl)


Lastly, I cannot talk about dumplings without mentioning one of my close friends. Bee of Rasa Malaysia makes Japanese Gyoza, which are pan-fried dumplings. The gyoza are first browned with a bit of cooking oil, then steamed by adding water or broth to the same pan and quickly covering. With a little spicy soy sauce dip, this is one of my favorites.

Tasty Kitchen Blog: Fill 'em Up! (Gyoza, from Rasa Malaysia)


Tell me, what’s your favorite type of dumpling or dumpling filling?


_______________________________________

Jaden Hair is a food writer, television personality, and food photographer based in Tampa Bay, Florida. Find more of her recipes in her blog, Steamy Kitchen, where you can also read more about Jaden’s new book, The Steamy Kitchen Cookbook, and the rave reviews it’s received!


Profile photo of whatsgabycooking

Fish Tacos with Avocado Cabbage Slaw

Posted by in Step-by-Step Recipes

Tasty Kitchen Blog: Fish Tacos with Avocado Cabbage Slaw. Guest post by Gaby Dalkin of What's Gaby Cooking, recipe submitted by TK member Nam of The Culinary Chronicles

 
Who doesn’t like fish tacos? They are the best meal for those gorgeous sunny spring and summer days. Add in some cabbage slaw doused with an avocado crema and some salsa and I seriously don’t think you can go wrong. If you’re into having a cerveza, then pour one and call it a day!

These flaky Fish Tacos with Avocado Cabbage Slaw from TK member The Culinary Chronicles are totally to die for. I made them twice this week and both times they were excellent!


Tasty Kitchen Blog: Fish Tacos with Avocado Cabbage Slaw. Guest post by Gaby Dalkin of What's Gaby Cooking, recipe submitted by TK member Nam of The Culinary Chronicles

Okay, here’s what to do. First we are going to torch some tortillas, which means you need to turn on your burner.


Tasty Kitchen Blog: Fish Tacos with Avocado Cabbage Slaw. Guest post by Gaby Dalkin of What's Gaby Cooking, recipe submitted by TK member Nam of The Culinary Chronicles

Place a small corn tortilla over the open flame for a few seconds


Tasty Kitchen Blog: Fish Tacos with Avocado Cabbage Slaw. Guest post by Gaby Dalkin of What's Gaby Cooking, recipe submitted by TK member Nam of The Culinary Chronicles

And then give it a flip to toast the other side for a few seconds more. Repeat this process with all the tortillas and then wrap them in a clean kitchen towel and set them aside.


Tasty Kitchen Blog: Fish Tacos with Avocado Cabbage Slaw. Guest post by Gaby Dalkin of What's Gaby Cooking, recipe submitted by TK member Nam of The Culinary Chronicles

Next we’re going to put some avocado in a blender …


Tasty Kitchen Blog: Fish Tacos with Avocado Cabbage Slaw. Guest post by Gaby Dalkin of What's Gaby Cooking, recipe submitted by TK member Nam of The Culinary Chronicles

Followed by some crema or sour cream. I only had sour cream on hand and let me tell you, it’s pure perfection.


Tasty Kitchen Blog: Fish Tacos with Avocado Cabbage Slaw. Guest post by Gaby Dalkin of What's Gaby Cooking, recipe submitted by TK member Nam of The Culinary Chronicles

Throw in some fresh cilantro and jalapeño pepper …


Tasty Kitchen Blog: Fish Tacos with Avocado Cabbage Slaw. Guest post by Gaby Dalkin of What's Gaby Cooking, recipe submitted by TK member Nam of The Culinary Chronicles

Followed by some agave nectar just to give it a hint of sweetness.


Tasty Kitchen Blog: Fish Tacos with Avocado Cabbage Slaw. Guest post by Gaby Dalkin of What's Gaby Cooking, recipe submitted by TK member Nam of The Culinary Chronicles

Blend it until everything is smooth and then remove the avocado crema to a bowl.


Tasty Kitchen Blog: Fish Tacos with Avocado Cabbage Slaw. Guest post by Gaby Dalkin of What's Gaby Cooking, recipe submitted by TK member Nam of The Culinary Chronicles

I just used some pre-shredded cabbage from Trader Joe’s, but if you shred your own, just go ahead and shred it and place it into a big bowl.


Tasty Kitchen Blog: Fish Tacos with Avocado Cabbage Slaw. Guest post by Gaby Dalkin of What's Gaby Cooking, recipe submitted by TK member Nam of The Culinary Chronicles

Add in a few spoonfuls of the avocado crema. Reserve some crema for later but be sure to add enough to give all the cabbage a good coating.


Tasty Kitchen Blog: Fish Tacos with Avocado Cabbage Slaw. Guest post by Gaby Dalkin of What's Gaby Cooking, recipe submitted by TK member Nam of The Culinary Chronicles

Toss it all together and season it with salt and pepper as needed.


Tasty Kitchen Blog: Fish Tacos with Avocado Cabbage Slaw. Guest post by Gaby Dalkin of What's Gaby Cooking, recipe submitted by TK member Nam of The Culinary Chronicles

Alright let’s move onto the fish. Season some white fish of your choice with some lime zest.


Tasty Kitchen Blog: Fish Tacos with Avocado Cabbage Slaw. Guest post by Gaby Dalkin of What's Gaby Cooking, recipe submitted by TK member Nam of The Culinary Chronicles

Then add in some red pepper flakes, followed by ground cumin and some garlic powder. You could use fresh garlic too, but I was concerned about the garlic burning when I broiled the fish so I opted for the powder.


Tasty Kitchen Blog: Fish Tacos with Avocado Cabbage Slaw. Guest post by Gaby Dalkin of What's Gaby Cooking, recipe submitted by TK member Nam of The Culinary Chronicles

Lastly, let’s add on some chopped cilantro.


Tasty Kitchen Blog: Fish Tacos with Avocado Cabbage Slaw. Guest post by Gaby Dalkin of What's Gaby Cooking, recipe submitted by TK member Nam of The Culinary Chronicles

Throw the fish in the fridge to marinate for a few minutes and then transfer it to a parchment-lined baking sheet and season it with salt and pepper. I used the juice of 1 lime to juice on top of the fish and then drizzled a touch of olive oil on top. Into the oven it goes on broil for a few minutes on each side until the fish can easily be flaked apart.


Tasty Kitchen Blog: Fish Tacos with Avocado Cabbage Slaw. Guest post by Gaby Dalkin of What's Gaby Cooking, recipe submitted by TK member Nam of The Culinary Chronicles

And now you’re in the home stretch. Just assemble the tacos with the cabbage slaw, flaked fish, extra avocado crema and some salsa! Serve it up and enjoy.

A big giant avocado-filled thank you to Nam of the amazing blog The Culinary Chronicles for giving us another amazing recipe featuring avocado! These tacos are a winner and you will totally dig them!


Printable Recipe

Fish Tacos with Avocado-Cabbage Slaw

See post on Nam | The Culinary Chronicles’s site!
5.00 Mitt(s) 1 Rating(s)1 vote, average: 5.00 out of 51 vote, average: 5.00 out of 51 vote, average: 5.00 out of 51 vote, average: 5.00 out of 51 vote, average: 5.00 out of 5

Prep Time:

Cook Time:

Difficulty: Easy

Servings: 2

2
x

Print Options

Page size Letter 3x5 4x6
Text Size Small Medium Large
Content Include description
Include prep time, etc.
Show image

Description

Fish tacos with a creamy avocado-cabbage slaw.

Ingredients

  • ½ pounds Firm White Fish Fillets, Such As Cod Or Tilapia
  • 2 cloves Garlic, Finely Minced
  • 1 teaspoon Lime Zest
  • 2 Tablespoons Chopped Cilantro, Plus More For Garnish
  • ¼ teaspoons Red Pepper Flakes
  • 2 pinches Ground Cumin
  • 2 Tablespoons Vegetable Oil
  • Kosher Salt And Pepper To Taste
  • 4 whole Corn Or Flour Tortillas
  • 1 cup Chunky Salsa
  • Lime Wedges
  • FOR THE SLAW:
  • 1 cup Ripe Avocado, Diced
  • ¼ cups Mexican Crema, Or Sour Cream
  • ¼ cups Fresh Cilantro, Chopped
  • ½ whole Jalapeno Pepper, Finely Diced And Seeded
  • 1 Tablespoon Lime Juice
  • ½ Tablespoons Agave Or Honey
  • Kosher Salt And Pepper To Taste
  • 2 cups Shredded Cabbage

Preparation Instructions

In a shallow dish, coat the fish with garlic, lime zest, cilantro, red pepper flakes, cumin, and oil. Season with kosher salt and pepper. Allow to marinate for 20 minutes in the refrigerator.

For the slaw, in a blender, puree the avocado, crema, cilantro, jalapeno pepper, lime juice and agave until smooth. Season with salt and pepper. In a large bowl, toss the cabbage with a few spoonfuls of the avocado puree until lightly coated. Cover the bowl with plastic wrap and refrigerate.

Preheat the oven broiler and arrange the marinated fish on a baking sheet. Place the baking sheet a few inches away from the broiler, and broil the fish for 2-3 minutes on each side or until the fish becomes opaque and flakes easily with a fork.

Warm the tortillas. Divide the fish, salsa and slaw amongst the tortillas. Sprinkle each taco with the extra chopped cilantro and serve warm with lime wedges on the side.


_______________________________________

Gaby Dalkin is the young lady behind What’s Gaby Cooking, a food blog that’s bursting at the seams with incredible recipes and food photography. She’s a personal chef and professional recipe developer, and if you follow her on Twitter, you’ll soon discover her two-fold obsession: guacamole and cheese. She has small feet, a large heart, and a smile that can light up the whole building. We’re pretty stoked to have her here.


Profile photo of steamykitchen

Flag Day!

Posted by in Holidays, Looks Delicious!

  You might think I’m a little early for 4th of July, but there’s another holiday in between Memorial Day and the Fourth of July. Yes, it’s Flag Day! As if I needed an excuse, June 14th is another day to celebrate with food, though no chicken, pork chops or steak—just delicious desserts. I figured […]

Profile photo of Amber {Sprinkled With Flour}

Flourless Chocolate, Almond and Coconut Cookies

Posted by in Baking, Step-by-Step Recipes

  How you do judge a cookie’s success? Mine get tested and approved by a very persnickety five-year-old, who likes to throw around words like “bestest”, and “goodest”, and “totally awesome.” A new one got thrown into the mix today when I tried these Flourless Chocolate, Almond and Coconut Cookies shared by Courtney. A…

Profile photo of missamy

Flourless Chocolate Brownie with Warm Dark Chocolate Sauce

Posted by in Baking, Step-by-Step Recipes

  I don’t think I’ve ever met a brownie that I didn’t like, but I have to say that I was wondering how this flourless chocolate brownie was going to turn out. Since I found the original recipe in Nigella’s Nigella Express, I was a little more confident to try it out. That girl knows […]

Profile photo of georgiapellegrini

Flourless Chocolate Chip Zucchini Oat Brownies

Posted by in Baking, Step-by-Step Recipes

  Monique is nothing short of genius. These Flourless Chocolate Chip Zucchini Oat Brownies are sure to be a crowd-pleaser, whether you are on a gluten-free diet or just crave a chocolate treat that’s healthy without compromising incredibly rich flavor.       You will need: gluten-free oats, all-natural peanut butter, unsweetened natural…