The Pioneer Woman Tasty Kitchen
Profile photo of DessertForTwo

Chocolate Chip Oatmeal Pie

Posted by in Baking

Tasty Kitchen Blog: Chocolate Chip Oatmeal Pie. Guest post by Christina of Dessert for Two, recipe submitted by TK member Heather of Heather's Dish.

I love oatmeal. I love a warm bowl of it in the morning topped with dried figs and honey. I love a cinnamon oatmeal applesauce muffin as a snack in the afternoon. And do I even have to talk about how much I love oatmeal cookies? We all love oatmeal cookies. So, when I saw Heather’s recipe for Chocolate Chip Oatmeal Pie, I was immediately intrigued. I had never heard of such a concoction. But I trusted Heather’s Texas roots, so I jumped right in.


Tasty Kitchen Blog: Chocolate Chip Oatmeal Pie. Guest post by Christina of Dessert for Two, recipe submitted by TK member Heather of Heather's Dish.

Even after reading the ingredient list, I still couldn’t wrap my mind around what type of pie this would be. It was big mystery to me, one I tried to unravel as I whisked the ingredients together, anxiously anticipating my first bite of pie.

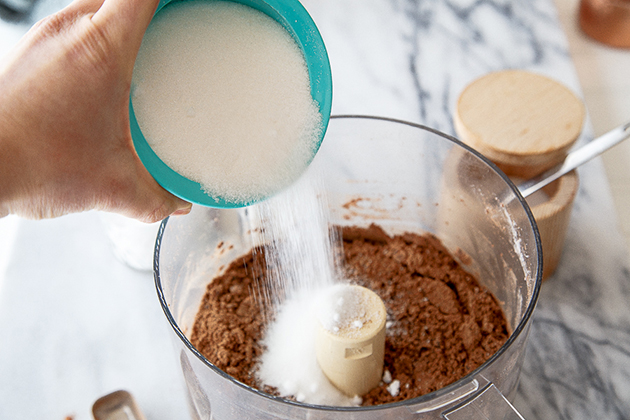
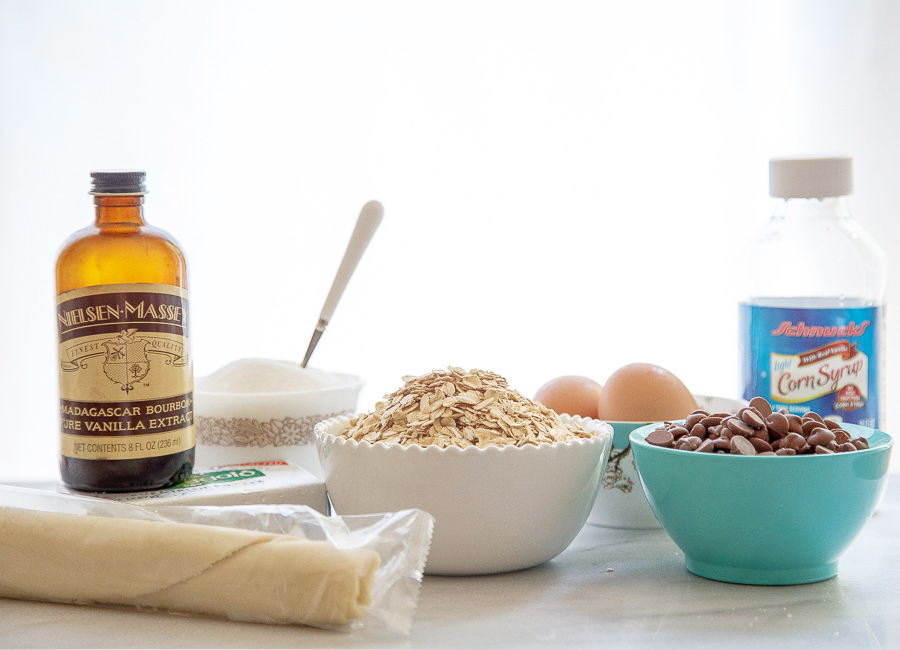
Oatmeal pie doesn’t have many ingredients. It’s simply made of pie crust, rolled oats, sugar, eggs, vanilla, butter, chocolate chips and corn syrup. So simple. I had everything in my pantry to make this pie.


Tasty Kitchen Blog: Chocolate Chip Oatmeal Pie. Guest post by Christina of Dessert for Two, recipe submitted by TK member Heather of Heather's Dish.

First, I unrolled the pie crust. I used a store-bought pie crust, like Heather’s recipe calls for. Then, I spent a good 15 minutes wondering why I have been forcing myself to make pie crust all these years. Store-bought crusts are great! Plus, all I had to do was unwrap, unroll and bake. I was even closer to pie time than I thought!


Tasty Kitchen Blog: Chocolate Chip Oatmeal Pie. Guest post by Christina of Dessert for Two, recipe submitted by TK member Heather of Heather's Dish.

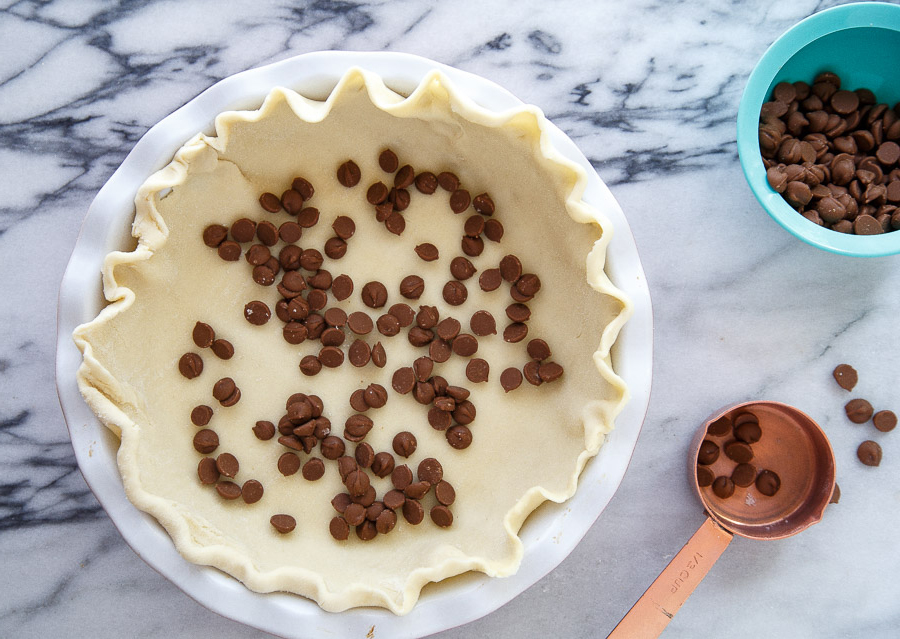
I sprinkled 1/3 cup of chocolate chips on top of the pie crust. I used milk chocolate chips, because they’re sweeter than semisweet or dark chocolate chips. I’m just waiting for milk chocolate to make its big comeback.


Tasty Kitchen Blog: Chocolate Chip Oatmeal Pie. Guest post by Christina of Dessert for Two, recipe submitted by TK member Heather of Heather's Dish.

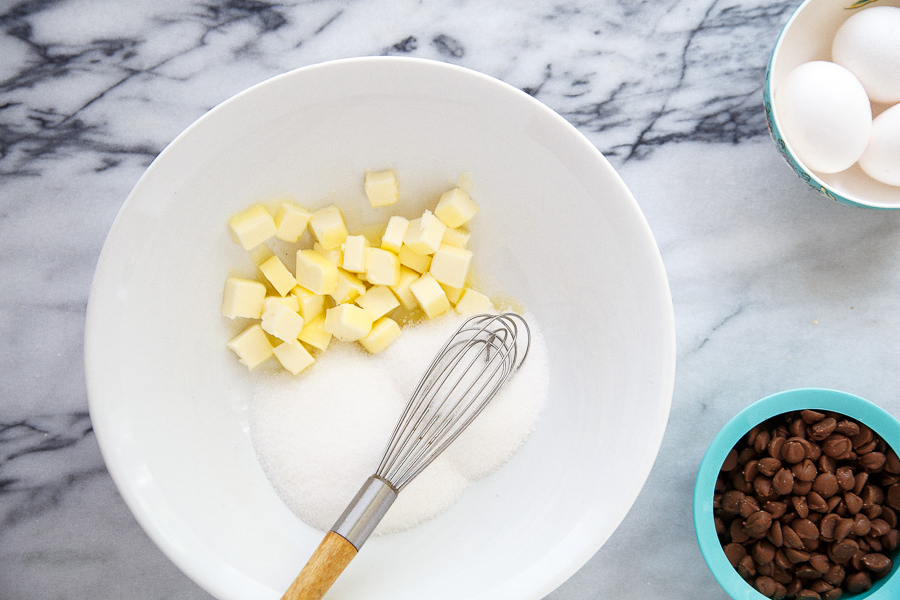
Then, I got to work on the pie filling. I whisked the butter and sugar together. I actually had a hard time with this step, so I melted it in the microwave. The recipe calls for softened butter, not melted, but it worked better for me to melt it.


Tasty Kitchen Blog: Chocolate Chip Oatmeal Pie. Guest post by Christina of Dessert for Two, recipe submitted by TK member Heather of Heather's Dish.

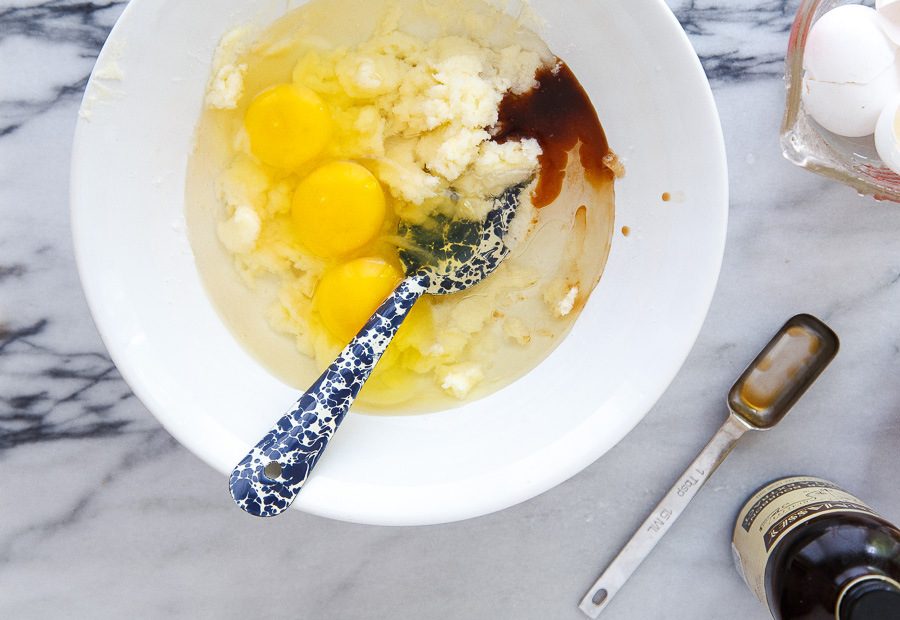
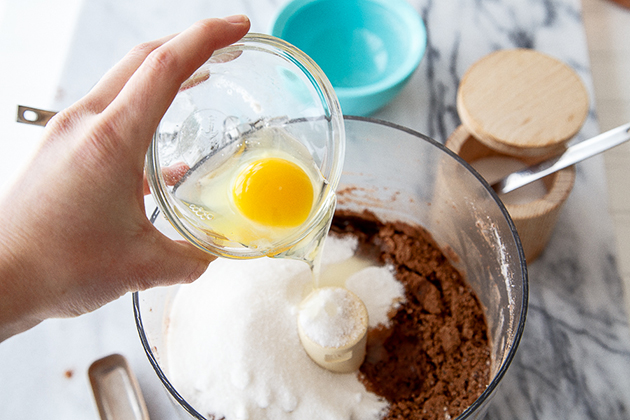
Next, all other ingredients are stirred in: corn syrup, eggs, vanilla.


Tasty Kitchen Blog: Chocolate Chip Oatmeal Pie. Guest post by Christina of Dessert for Two, recipe submitted by TK member Heather of Heather's Dish.

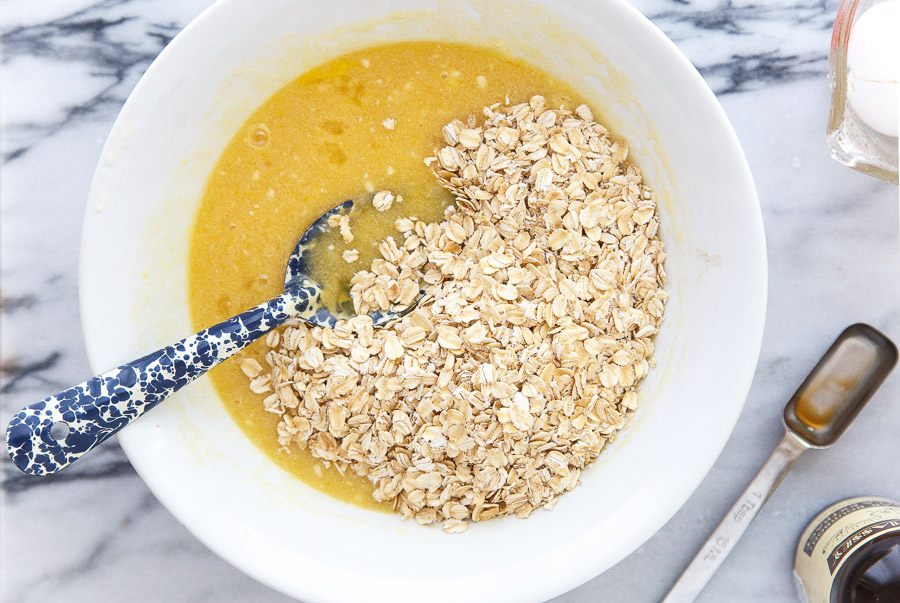
And finally, the oatmeal! The star ingredient!

Pour all ingredients over the chocolate chips in the crust and bake for 30–40 minutes, keeping an eye on the middle of the pie for jiggliness. That’s a technical term when it comes to custard-pie-making, by the way. A little jiggle in the center is good; it will set when it cools.


Tasty Kitchen Blog: Chocolate Chip Oatmeal Pie. Guest post by Christina of Dessert for Two, recipe submitted by TK member Heather of Heather's Dish.

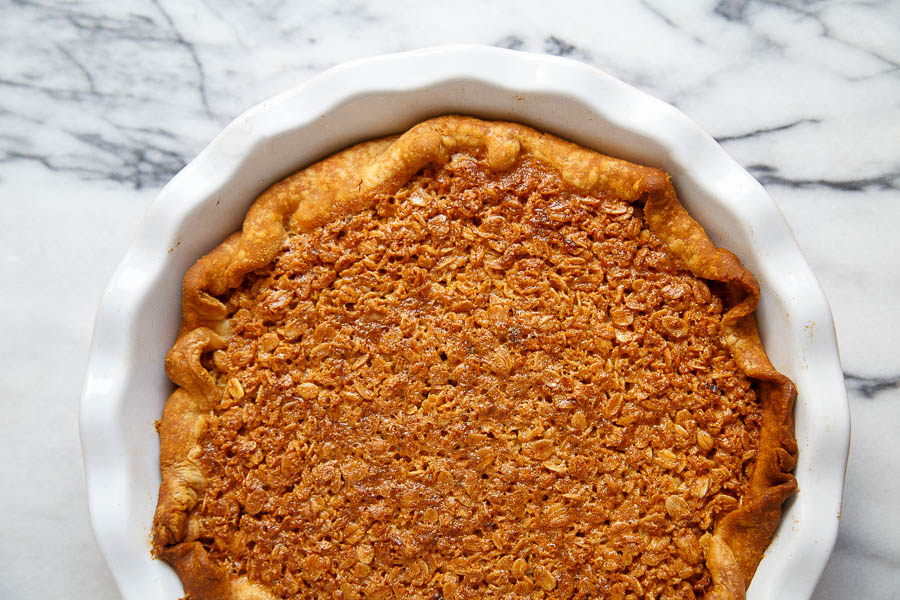
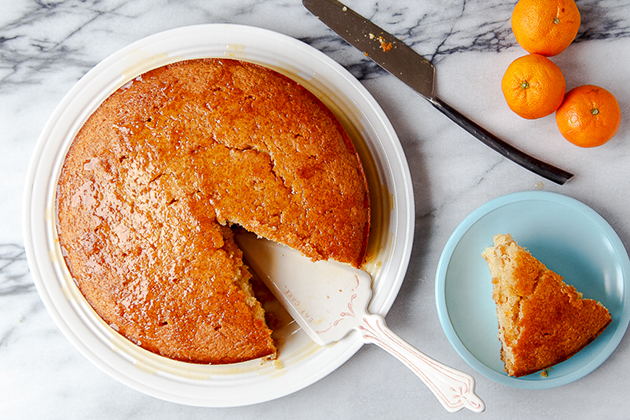
Isn’t she beautiful? Heather said to wait until it cools to cut. Even though it was hard to do, I dutifully obeyed.

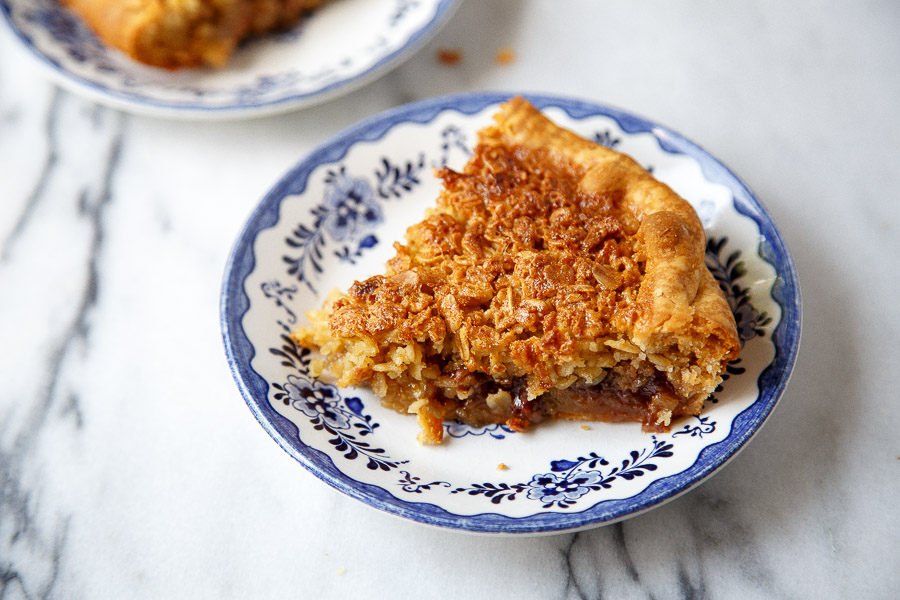
After one bite, I figured out what this pie is—it’s like pecan pie, but with oatmeal! And it’s so dang good! The corn syrup should have tipped me off that it would be like pecan pie, but I didn’t realize it until that first bite. Which led to many more bites. I’m hooked on this pie!


Tasty Kitchen Blog: Chocolate Chip Oatmeal Pie. Guest post by Christina of Dessert for Two, recipe submitted by TK member Heather of Heather's Dish.

Next time you’re craving pecan pie and spy a container of rolled oats in your pantry, make this pie. It should go right into your recipe box!

Thanks for a new classic pie recipe, Heather! Check out her blog, Heather’s Dish, for more of her creations.


Printable Recipe

Chocolate Chip Oatmeal Pie

See post on Heather Disarro’s site!
4.86 Mitt(s) 7 Rating(s)7 votes, average: 4.86 out of 57 votes, average: 4.86 out of 57 votes, average: 4.86 out of 57 votes, average: 4.86 out of 57 votes, average: 4.86 out of 5

Prep Time:

Cook Time:

Difficulty: Easy

Servings: 8

8
x

Print Options

Page size Letter 3x5 4x6
Text Size Small Medium Large
Content Include description
Include prep time, etc.
Show image

Description

This pie is literally the easiest and most delicious pie you’ll make. Plus it has oatmeal in it, which clearly makes it health food!

Ingredients

  • 1 whole Prepared (not Baked) 9-inch Pie Crust
  • ⅓ cups Semi-Sweet Chocolate Chips
  • ⅓ cups Softened Butter
  • ⅔ cups Granulated Sugar
  • 1 cup Light Corn Syrup
  • 1 Tablespoon Vanilla Extract
  • 3 whole Eggs
  • 1-¼ cup Old Fashioned Rolled Oats

Preparation Instructions

Preheat oven to 350 F. Press the prepared and rolled pie dough into a 9-inch pie pan and fix the edges however you like. Pour the chocolate chips evenly into the bottom of the pie crust. Set it aside.

In a large bowl, mix together the butter and sugar until smooth and creamy. Whisk in the corn syrup, vanilla, and eggs until smooth. Fold in the oats.

Pour the entire mixture evenly over the chocolate chips. Bake at 350 F for 45-60 minutes or until the pie is just set in the center. Keep an eye on it and make sure to tent the edges of the crust with a strip of foil if you need to keep it from browning too much.

When done remove pie from the oven and let it cool completely before serving!


_______________________________________

Growing up in a food-obsessed family and spending a lot of time in her Aunt Rose’s restaurant as a child, Christina was destined to be a fantastic cook. She’s a private chef during the day, but cooks for two at home. Like all of us, she has a sweet tooth that needs indulging after dinner. After becoming frustrated with the lack of recipes made for two, especially in the dessert category, she took matters into her own hands and started her blog, Dessert for Two, to share how she takes Southern classics (and a few surprises) and turns them into recipes that are perfect for just a few people. Her first cookbook, Dessert for Two, is now available at your favorite bookstore.


Profile photo of DessertForTwo

Whole Wheat Clementine Yogurt Cake

Posted by in Baking

Tasty Kitchen Blog: Whole Wheat Clementine Yogurt Cake. Guest post by Christina of Dessert for Two, recipe submitted by TK member Stephanie of Girl Versus Dough.

When someone says “healthy dessert,” I immediately grab two forks. To me, a healthy dessert means I can eat double the servings! Wait, is that not the point? It’s funny what a little whole wheat flour and yogurt in a cake will make you do.

This Whole Wheat Clementine Yogurt Cake by Tasty Kitchen member Stephanie was a must-make for me. I think I grabbed the last bag of clementines for the season last week, and I saved 4 little clementines for this cake. It was so worth it, too!


Tasty Kitchen Blog: Whole Wheat Clementine Yogurt Cake. Guest post by Christina of Dessert for Two, recipe submitted by TK member Stephanie of Girl Versus Dough.

First up, our simple, couldn’t-be-easier ingredients that you probably already have in your pantry: whole wheat flour, regular all-purpose flour, granulated sugar, Greek yogurt, vanilla, vegetable oil, eggs, salt and baking powder. Oh, and clementines! Pretty standard cake stuff, right?


Tasty Kitchen Blog: Whole Wheat Clementine Yogurt Cake. Guest post by Christina of Dessert for Two, recipe submitted by TK member Stephanie of Girl Versus Dough.

Stephanie recommends spraying and lining your pan with parchment paper. I say good call, Steph. When a recipe calls for the extra step of lining the pan, don’t ignore it. It could be the difference between a pretty cake that releases perfectly from the pan and a cake that comes out in pieces!


Tasty Kitchen Blog: Whole Wheat Clementine Yogurt Cake. Guest post by Christina of Dessert for Two, recipe submitted by TK member Stephanie of Girl Versus Dough.

Now we can get to work on the cake. First, we combine the dry ingredients: both flours, salt, and baking powder. Whisking it together helps break up the clumps and eliminates the pesky step of sifting.


Tasty Kitchen Blog: Whole Wheat Clementine Yogurt Cake. Guest post by Christina of Dessert for Two, recipe submitted by TK member Stephanie of Girl Versus Dough.

Once the dry ingredients are combined, it’s time to mix the wet ingredients together: combine the sugar, eggs, clementine zest, and vegetable oil. Anytime a recipe calls for citrus zest I get excited, because I know it’s going to be delicious. The zest is where all the flavors of the fruit hide. It’s full of oils that will perfume your whole cake.

I use a microplane grater to get as much zest off each clementine as possible. I only scraped my knuckles twice doing this. Totally worth it, though.


Tasty Kitchen Blog: Whole Wheat Clementine Yogurt Cake. Guest post by Christina of Dessert for Two, recipe submitted by TK member Stephanie of Girl Versus Dough.

After folding together the wet and dry ingredients until no streaks of flour remain, I scraped the batter into the pan. Off it went into a 350ºF oven for 45 minutes. Steph recommends 40-50 minutes, which means you should start checking on the cake at 40 minutes. Increase the baking time by a few minutes until the cake starts to pull away from the edges of the pan, and a toothpick inserted comes out clean with only moist crumbs clinging to it. For me, 45 minutes was the magic number, but every oven is different, so be patient!

Now we’re getting to the good part: after a 10 minute cool-off session, the cake comes out of the pan. Remember those clementines that we scraped bald for their zest? It’s time to juice them into a pan with some sugar! We’re going to poke holes all over the cake and pour this warm, sugary juice on top. Yep. It’s exactly as good as it sounds.


Tasty Kitchen Blog: Whole Wheat Clementine Yogurt Cake. Guest post by Christina of Dessert for Two, recipe submitted by TK member Stephanie of Girl Versus Dough.

I ate a slice of this cake warm, and then another slice cool. And then another slice warm again just to figure out my preference. Before I could have another slice cool, the cake was gone. I guess we’ll never know the best way to serve it, but one thing is for sure: this cake is delicious! Thanks for a great lightened-up cake recipe that I can feel good about eating at snack time, Steph! Check out her TK recipe box and visit her beautiful blog, Girl Versus Dough, for more of her masterpieces!


Tasty Kitchen Blog: Whole Wheat Clementine Yogurt Cake. Guest post by Christina of Dessert for Two, recipe submitted by TK member Stephanie of Girl Versus Dough.


Printable Recipe

Whole Wheat Clementine Yogurt Cake

See post on Stephanie | Girl Versus Dough’s site!
4.00 Mitt(s) 1 Rating(s)1 vote, average: 4.00 out of 51 vote, average: 4.00 out of 51 vote, average: 4.00 out of 51 vote, average: 4.00 out of 51 vote, average: 4.00 out of 5

Prep Time:

Cook Time:

Difficulty: Easy

Servings: 12

12
x

Print Options

Page size Letter 3x5 4x6
Text Size Small Medium Large
Content Include description
Include prep time, etc.
Show image

Description

A tangy, sweet, moist and citrus-y cake for breakfast, dessert, snacking or all of the above.

Ingredients

  • ¾ cups Unbleached All-purpose Flour
  • ¾ cups Whole Wheat Flour
  • 2 teaspoons Baking Powder
  • ½ teaspoons Salt
  • 1 cup Plain Greek Yogurt
  • 1-⅓ cup Granulated Sugar, Divided
  • 3  Eggs
  • 2 teaspoons Grated Clementine Zest (from About 2 Clementines)
  • ½ teaspoons Vanilla
  • ½ cups Vegetable Oil
  • ⅓ cups Fresh-Squeezed Clementine Juice
  • Powdered Sugar, For Sprinkling (optional)

Preparation Instructions

Heat oven to 350F. Grease bottom and sides of a 9-inch round cake pan with baking spray with flour; line bottom with parchment paper and spray paper.

In a large bowl, whisk together flours, baking powder and salt until combined. In a separate large bowl, whisk together yogurt, 1 cup sugar, eggs, clementine zest and vanilla until combined.

Slowly stir wet ingredients into dry ingredients until just combined. Stir in oil. Pour batter into prepared pan.

Bake 40 to 50 minutes until a toothpick inserted in the center comes out clean. Cool 10 minutes in pan, then carefully remove from cake pan and transfer to a cooling rack with a rimmed baking sheet or clean sheet of parchment or wax paper underneath.

Meanwhile, cook the clementine juice and remaining ⅓ cup sugar in a saucepan over medium heat, stirring until sugar is dissolved. Carefully pour evenly over warm cake on cooling rack. Cool completely.

Sprinkle top with powdered sugar before serving, if desired.

Recipe adapted from Ina Garten.


_______________________________________

Growing up in a food-obsessed family and spending a lot of time in her Aunt Rose’s restaurant as a child, Christina was destined to be a fantastic cook. She’s a private chef during the day, but cooks for two at home. Like all of us, she has a sweet tooth that needs indulging after dinner. After becoming frustrated with the lack of recipes made for two, especially in the dessert category, she took matters into her own hands and started her blog, Dessert for Two, to share how she takes Southern classics (and a few surprises) and turns them into recipes that are perfect for just a few people. Her first cookbook, Dessert for Two, is now available at your favorite bookstore.


Profile photo of DessertForTwo

Fudgy Black Bean Brownies

Posted by in Baking

Tasty Kitchen Blog: Fudgy Black Bean Brownies. Guest post by Christina of Dessert for Two, recipe submitted by TK member Sarah of Simple and Sweets.

I just now noticed that this is the second recipe I’ve pulled from Sarah’s recipe box to share here on the Tasty Kitchen Blog. It was pure coincidence, but after these Fudgy Black Bean Brownies, I’ll be pulling from her TK recipe box even more. Sarah knows her chocolate desserts, and these brownies are no exception.

These brownies are made in the bowl of the food processor entirely (no cleanup!), and they’re also relatively healthy with a gluten-free option. I didn’t think all of my chocolate dreams were going to come true with this recipe, but they really did. You might be discouraged by the recipe title, but don’t be. If the black beans are pureed very, very well, they are completely indistinguishable. I promise. Cross my heart. I wouldn’t tell a lie here on the Tasty Kitchen Blog!


Tasty Kitchen Blog: Fudgy Black Bean Brownies. Guest post by Christina of Dessert for Two, recipe submitted by TK member Sarah of Simple and Sweets.

So yes, we’re really making brownies with black beans. Embrace it. They’re good for you!


Tasty Kitchen Blog: Fudgy Black Bean Brownies. Guest post by Christina of Dessert for Two, recipe submitted by TK member Sarah of Simple and Sweets.

Let’s start with our lineup of ingredients: black beans, cocoa powder, applesauce, sugar, vanilla, salt, almond flour, an egg, baking soda, and cooking spray. I used regular flour in place of the almond flour successfully, but Sarah’s original recipe is gluten-free with almond flour.


Tasty Kitchen Blog: Fudgy Black Bean Brownies. Guest post by Christina of Dessert for Two, recipe submitted by TK member Sarah of Simple and Sweets.

You’re going to need a food processor for this recipe. I’m worried if you just hand-mashed the beans, you would have bean skins in the final product. I don’t think you want that, so use a food processor, my dears.

Into the bowl of the food processor goes the beans first. Puree them very, very well. Stop and scrape the sides several times to ensure everything is well blended.

Next, Sarah says to add all the dry ingredients: cocoa powder, baking soda, almond flour, and salt.


Tasty Kitchen Blog: Fudgy Black Bean Brownies. Guest post by Christina of Dessert for Two, recipe submitted by TK member Sarah of Simple and Sweets.

Add the wet ingredients: sugar, applesauce …


Tasty Kitchen Blog: Fudgy Black Bean Brownies. Guest post by Christina of Dessert for Two, recipe submitted by TK member Sarah of Simple and Sweets.

… egg, and vanilla.


Tasty Kitchen Blog: Fudgy Black Bean Brownies. Guest post by Christina of Dessert for Two, recipe submitted by TK member Sarah of Simple and Sweets.

Spray a mini muffin pan with 24 cups with cooking spray very well. This is something originally omitted in the recipe, but when I reached out to Sarah, she definitely recommended it.


Tasty Kitchen Blog: Fudgy Black Bean Brownies. Guest post by Christina of Dessert for Two, recipe submitted by TK member Sarah of Simple and Sweets.

Then, use a cookie scoop to make quick work of the batter. You will get 24 mini fudgy brownies. That’s a lot of brownies for not a lot of work. Sarah makes me one happy pregnant lady!


Tasty Kitchen Blog: Fudgy Black Bean Brownies. Guest post by Christina of Dessert for Two, recipe submitted by TK member Sarah of Simple and Sweets.

Here’s what it looks like before baking.


Tasty Kitchen Blog: Fudgy Black Bean Brownies. Guest post by Christina of Dessert for Two, recipe submitted by TK member Sarah of Simple and Sweets.

And this is after the brownies have baked.


Tasty Kitchen Blog: Fudgy Black Bean Brownies. Guest post by Christina of Dessert for Two, recipe submitted by TK member Sarah of Simple and Sweets.

Thanks again, Ms. Sarah! Your blog Simple and Sweets continues to inspire me in the kitchen, and keeps me very well fed!


Printable Recipe

Fudgy Black Bean Brownies

See post on Sarah’s site!
5.00 Mitt(s) 2 Rating(s)2 votes, average: 5.00 out of 52 votes, average: 5.00 out of 52 votes, average: 5.00 out of 52 votes, average: 5.00 out of 52 votes, average: 5.00 out of 5

Prep Time:

Cook Time:

Difficulty: Easy

Servings: 24

24
x

Print Options

Page size Letter 3x5 4x6
Text Size Small Medium Large
Content Include description
Include prep time, etc.
Show image

Description

Obviously, using black beans makes these brownies way healthier, but I’m not even focusing on that fact right now.

These are probably some of the best brownies I have ever made. They are thick, with soft centers, a crunchy top, and fudgy. They melt in your mouth.

Ingredients

  • 15 ounces, fluid Canned Black Beans, Drained And Rinsed
  • 9 Tablespoons Unsweetened Cocoa Powder
  • ¼ cups Almond Flour
  • 1 teaspoon Baking Soda
  • ⅛ teaspoons Salt
  • 1 cup Sugar
  • 1 whole Egg
  • 4 ounces, fluid Applesauce
  • 1 teaspoon Vanilla Extract

Preparation Instructions

Preheat oven to 350ºF.

In a food processor, blend black beans until they form into a smooth paste. You don’t want any chunks of black beans in your brownies.

Add in cocoa powder, almond flour, baking soda, and salt. Pulse the food process a couple more times to combine.

Add in sugar, egg, applesauce and vanilla. Run the food processor until everything is completely mixed together.

Spoon mixture into a mini muffin pan, filling each ¾ full. Bake for 15–20 minutes, or until the brownies are set, pull away from the side of the pan, and a toothpick inserted in the center comes out clean.


_______________________________________

Growing up in a food-obsessed family and spending a lot of time in her Aunt Rose’s restaurant as a child, Christina was destined to be a fantastic cook. She’s a private chef during the day, but cooks for two at home. Like all of us, she has a sweet tooth that needs indulging after dinner. After becoming frustrated with the lack of recipes made for two, especially in the dessert category, she took matters into her own hands and started her blog, Dessert for Two, to share how she takes Southern classics (and a few surprises) and turns them into recipes that are perfect for just a few people. Her first cookbook is due out in February 2015.


Profile photo of DessertForTwo

Slow Cooker Thai Chicken

Posted by in Step-by-Step Recipes

Tasty Kitchen Blog: Slow Cooker Thai Chicken. Guest post by Christina of Dessert for Two, recipe submitted by TK member Erin of Well Plated.

After our recent slow cooker chat here at the Tasty Kitchen Blog, I decided to pull my slow cooker down off the top shelf and dust it off. It really is such a workhouse in the kitchen for me, and yet I don’t utilize it enough. After a quick search on Tasty Kitchen for slow cooker recipes, I had a hard time choosing! There are so many great-looking ones out there!

My favorite kind of slow cooker recipes are those that are literally chop-and-drop. I’m not entirely against recipes that require a little browning of the meat or aromatics first, but there are days when I just don’t have the time. This Slow Cooker Thai Chicken recipe by Tasty Kitchen member Erin is a two-in-one for me: not only is it chop-and-drop, it’s also a homemade version of take-out. Anytime I see a recipe for a healthier version of take-out, I save it!


Tasty Kitchen Blog: Slow Cooker Thai Chicken. Guest post by Christina of Dessert for Two, recipe submitted by TK member Erin of Well Plated.

This recipe is chock full of vegetables in a creamy coconut-peanut butter sauce that I could just slurp with a straw—it is so good! The Thai flavors come from Thai red curry paste, fish sauce, lime and cilantro. I actually didn’t use the fish sauce because I had a bad experience with it in the past (I dropped it on my kitchen floor, and the smell, well, you know). Erin tells us that it doesn’t taste fishy, but it provides savoriness and depth of flavor. I totally trust her but my husband won’t let me bring another bottle in the house yet.

In the vegetable department, you’ll need chopped butternut squash, sliced mixed peppers, onions, peas. The sauce is made up of canned light coconut milk, a touch of brown sugar, peanut butter, chicken broth, red curry paste, crushed red pepper flakes, ginger, garlic, lime and cilantro. If that sounds like all your favorite Thai flavors, you’re right!


Tasty Kitchen Blog: Slow Cooker Thai Chicken. Guest post by Christina of Dessert for Two, recipe submitted by TK member Erin of Well Plated.

First, whisk together the sauce ingredients: coconut milk, chicken stock, peanut butter, curry paste, fish sauce, brown sugar, ginger, garlic and red pepper flakes. Whisk very well to dissolve the peanut butter and curry paste. I used a natural-style peanut butter that really didn’t want to dissolve, so I had to mash it with a fork first.


Tasty Kitchen Blog: Slow Cooker Thai Chicken. Guest post by Christina of Dessert for Two, recipe submitted by TK member Erin of Well Plated.

Next, stir in the chicken, squash, peppers, and onion. I used a bag of frozen sliced mixed peppers for ease.


Tasty Kitchen Blog: Slow Cooker Thai Chicken. Guest post by Christina of Dessert for Two, recipe submitted by TK member Erin of Well Plated.

Stir it all together. We’re almost done!

Cover and cook on low for 6–8 hours. About 30 minutes before serving, add the peas and lime juice. When serving, top with cilantro. I served mine with hot, cooked brown rice.


Tasty Kitchen Blog: Slow Cooker Thai Chicken. Guest post by Christina of Dessert for Two, recipe submitted by TK member Erin of Well Plated.

Thanks, Erin, for curing my take-out craving and making it super simple, too. Visit her beautiful blog, Well Plated, for more great and healthy recipes like this!


Printable Recipe

Slow Cooker Thai Chicken

See post on Erin | Well Plated’s site!
4.50 Mitt(s) 2 Rating(s)2 votes, average: 4.50 out of 52 votes, average: 4.50 out of 52 votes, average: 4.50 out of 52 votes, average: 4.50 out of 52 votes, average: 4.50 out of 5

Prep Time:

Cook Time:

Difficulty: Easy

Servings: 6

6
x

Print Options

Page size Letter 3x5 4x6
Text Size Small Medium Large
Content Include description
Include prep time, etc.
Show image

Description

A healthy slow cooker chicken recipe made with a simple, delicious Thai peanut and coconut milk sauce. Easily adapts to whatever vegetables you have on hand. This version is loaded with creamy butternut squash, red and green bell peppers, and peas for a beautiful, wholesome dish.

Ingredients

  • 2 cans (14 Oz. Size) Light Coconut Milk
  • 1 cup Low Sodium Chicken Stock
  • ¼ cups Peanut Butter Creamy Or Crunchy
  • 3 Tablespoons Red Curry Paste
  • 2 Tablespoons Fish Sauce
  • 2 Tablespoons Brown Sugar
  • 2 Tablespoons Minced Fresh Ginger
  • 1 Tablespoon Minced Garlic
  • ¼ teaspoons Crushed Red Pepper Flakes
  • 2 pounds Boneless Skinless Chicken Breasts, Cut Into 1 1/2 Inch Pieces
  • 3 cups Peeled And 1/2-inch Cubed Butternut Squash
  • 2 whole Red Bell Peppers, Cored And Sliced
  • 2 whole Green Bell Peppers, Cored And Sliced
  • 1 whole Yellow Onion, Thinly Sliced
  • 2 cups Frozen Peas, Thawed
  • 2 Tablespoons Lime Juice
  • ½ cups Chopped Fresh Cilantro, For Serving
  • 3 cups Prepared Brown Rice, For Serving

Preparation Instructions

In a 5-quart or larger slow cooker, stir together the coconut milk, chicken stock, peanut butter, curry paste, fish sauce, brown sugar, ginger, garlic, and red pepper flakes. Place the chicken breast, squash, red bell pepper, green bell pepper, and onion in the slow cooker and stir gently to coat with sauce. Cover and cook on high for 4 hours or on low for 8 hours.

Thirty minutes before you are ready to serve, stir in the peas and finish cooking. Immediately before serving, stir in lime juice. Serve garnished with cilantro, atop brown rice.


_______________________________________

Growing up in a food-obsessed family and spending a lot of time in her Aunt Rose’s restaurant as a child, Christina was destined to be a fantastic cook. She’s a private chef during the day, but cooks for two at home. Like all of us, she has a sweet tooth that needs indulging after dinner. After becoming frustrated with the lack of recipes made for two, especially in the dessert category, she took matters into her own hands and started her blog, Dessert for Two, to share how she takes Southern classics (and a few surprises) and turns them into recipes that are perfect for just a few people. Her first cookbook is due out in February 2015.


Profile photo of DessertForTwo

World’s Best Chocolate Chip Cookies

Posted by in Baking

When Sarah submitted this recipe to Tasty Kitchen and called it World's Best Chocolate Chip Cookies, you know I'm going to check her. I just appointed myself the official tester of all "world's best…