The Pioneer Woman Tasty Kitchen
Profile photo of georgiapellegrini

Wedge Salad

Posted by in Step-by-Step Recipes

Tasty Kitchen Blog: Wedge Salad. Guest post by Georgia Pellegrini, recipe submitted by TK member Lindsay of Perfecting the Pairing.

 
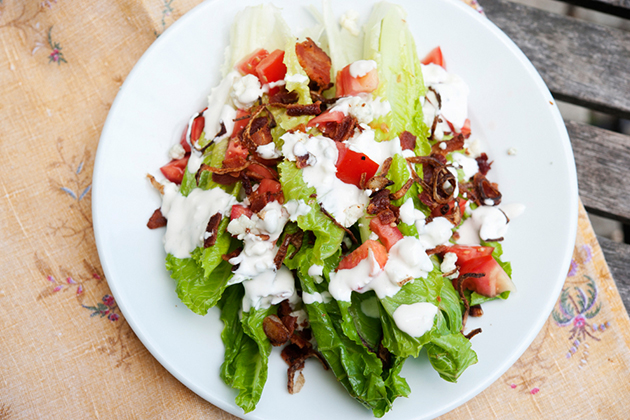
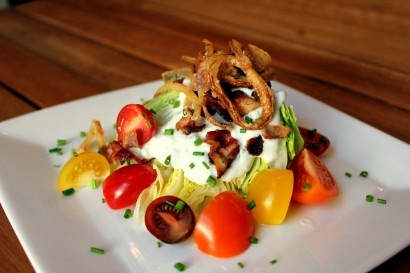
If I were to choose only one meal I could have forever it would probably be a salad with all the toppings that I want. This Wedge Salad by Tasty Kitchen member Lindsay was just that: lovely greens topped with crunchy, salty, sweet, creamy goodness.


Tasty Kitchen Blog: Wedge Salad. Guest post by Georgia Pellegrini, recipe submitted by TK member Lindsay of Perfecting the Pairing.

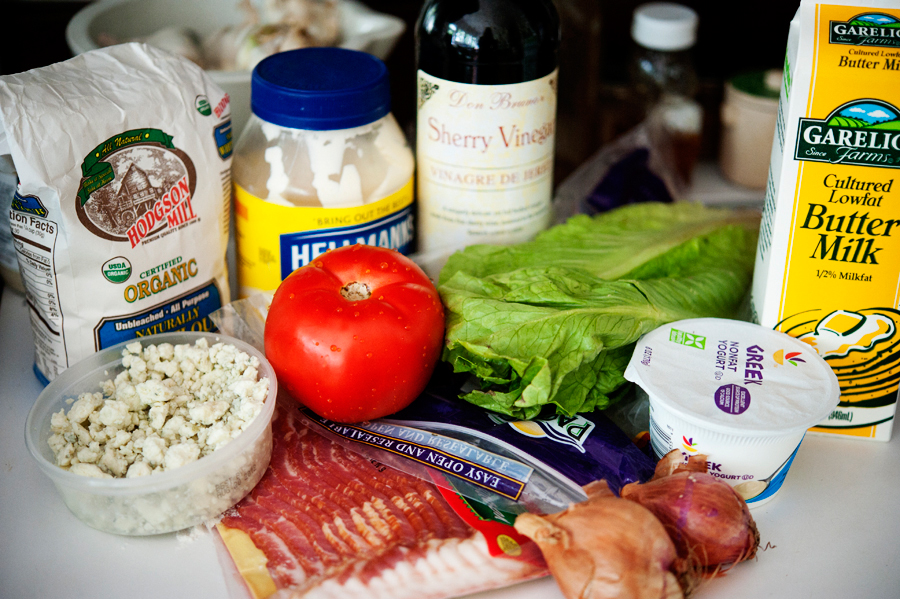
To make it you will need: blue cheese, bacon, shallots, Greek yogurt, buttermilk, iceberg lettuce (or romaine will also work nicely), red and white wine vinegar (or in my case, sherry vinegar), mayonnaise, cherry tomatoes (I used a big juicy ripe one), and flour. Also, chives would be nice for a garnish if you have them handy.


Tasty Kitchen Blog: Wedge Salad. Guest post by Georgia Pellegrini, recipe submitted by TK member Lindsay of Perfecting the Pairing.

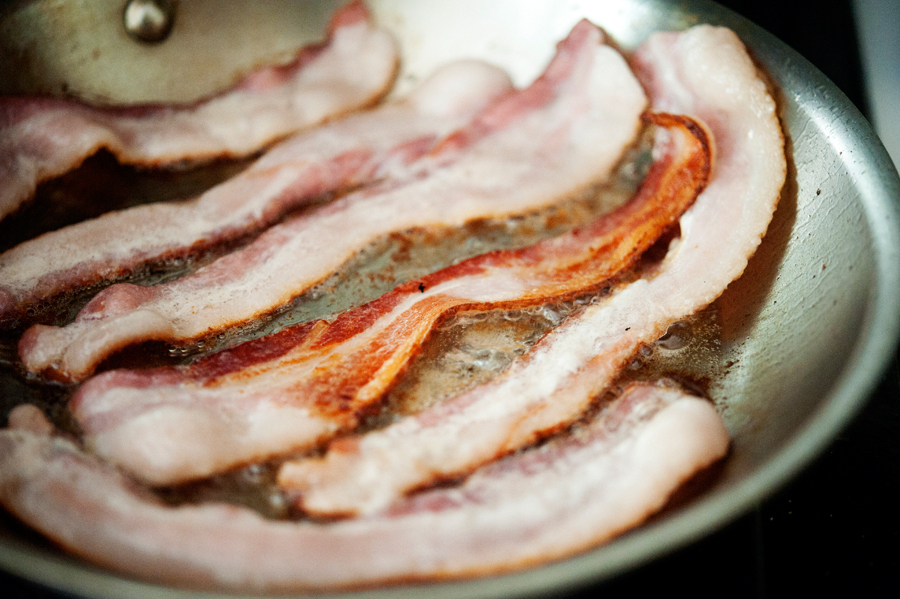
You’ll start by rendering the bacon in a pan over medium heat, letting all of the fat bubble until the bacon becomes crisp on both sides. Then you’ll remove the bacon to a paper towel and save the fat in the pan.


Tasty Kitchen Blog: Wedge Salad. Guest post by Georgia Pellegrini, recipe submitted by TK member Lindsay of Perfecting the Pairing.

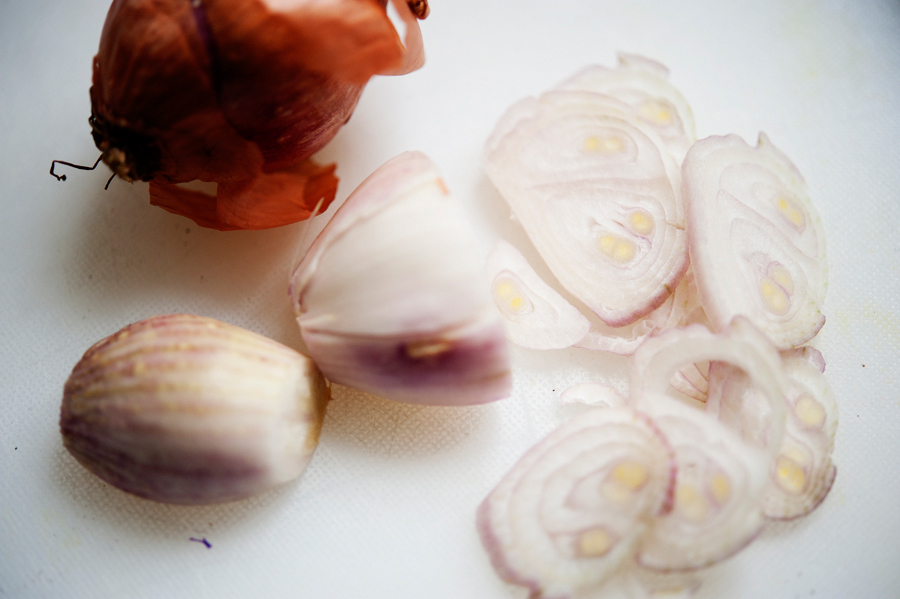
Next thinly slice your shallots and separate the rings.


Tasty Kitchen Blog: Wedge Salad. Guest post by Georgia Pellegrini, recipe submitted by TK member Lindsay of Perfecting the Pairing.

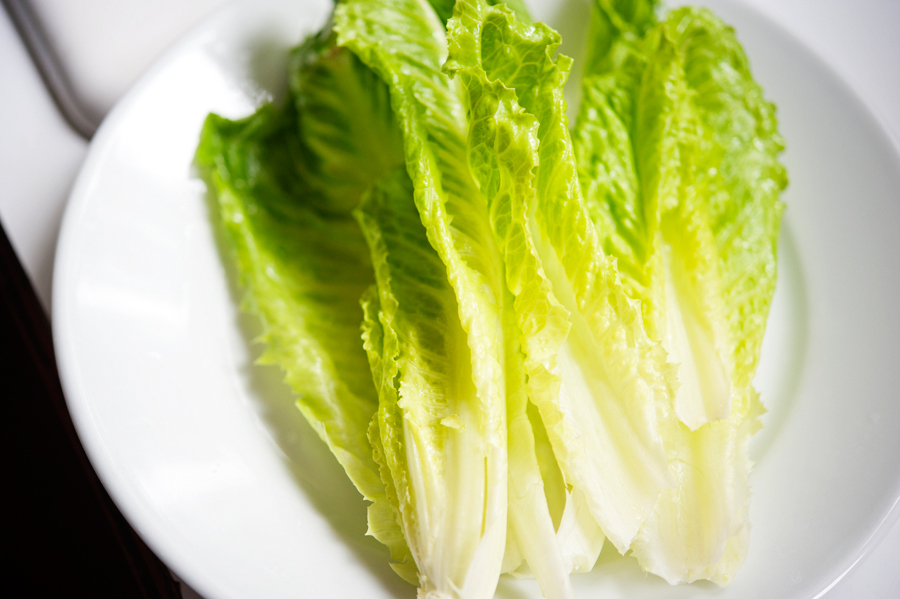
Give your lettuce a rinse and pat it dry. Lindsay used a nice wedge of iceberg, but since I happen to love romaine, I just took off the inner leaves and layered them on top of each other. It had a nice crispness the way iceberg would. Go wild with your lettuce I say!


Tasty Kitchen Blog: Wedge Salad. Guest post by Georgia Pellegrini, recipe submitted by TK member Lindsay of Perfecting the Pairing.

Dice your tomato. A medley of grape or cherry tomatoes would be nice here, simply cut in half. Or if you have a big tomato, give it a nice bite-sized dice.


Tasty Kitchen Blog: Wedge Salad. Guest post by Georgia Pellegrini, recipe submitted by TK member Lindsay of Perfecting the Pairing.

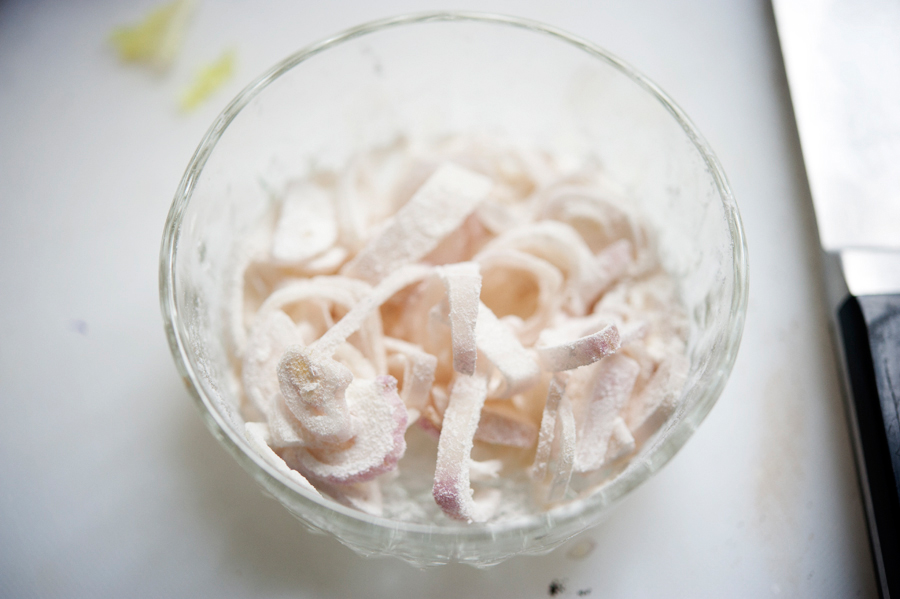
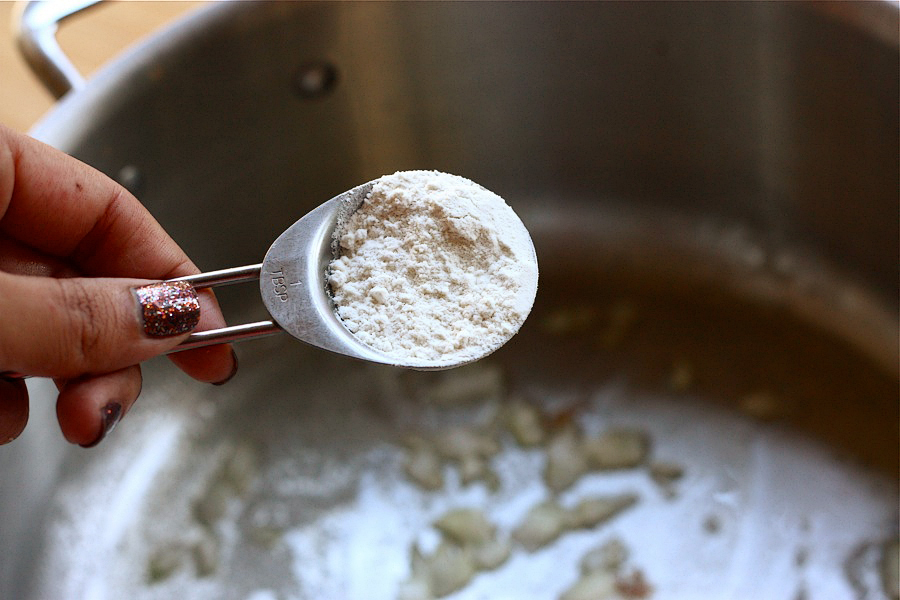
Toss your shallot rings into a bit of flour.


Tasty Kitchen Blog: Wedge Salad. Guest post by Georgia Pellegrini, recipe submitted by TK member Lindsay of Perfecting the Pairing.

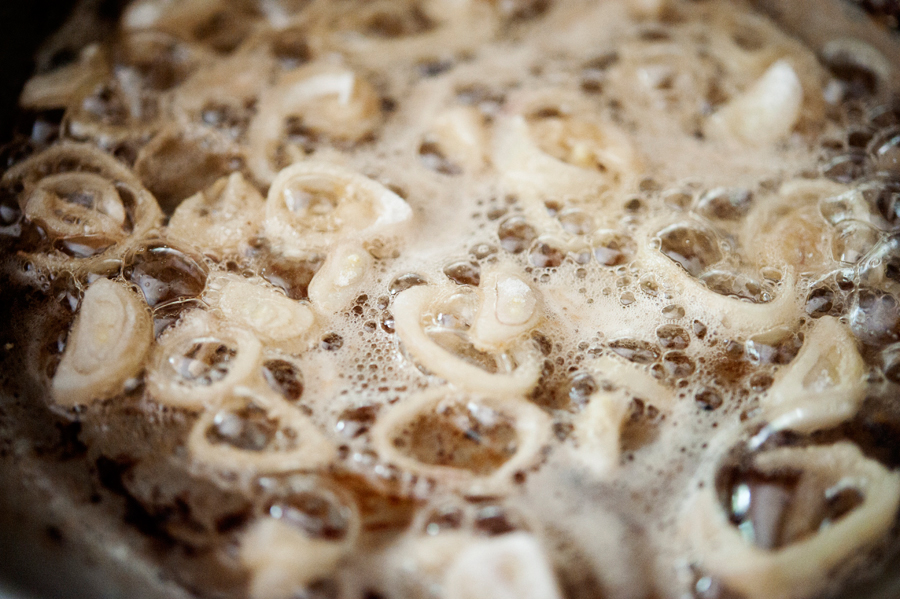
Get your bacon fat hot again and drop in the shallots to let them fry.


Tasty Kitchen Blog: Wedge Salad. Guest post by Georgia Pellegrini, recipe submitted by TK member Lindsay of Perfecting the Pairing.

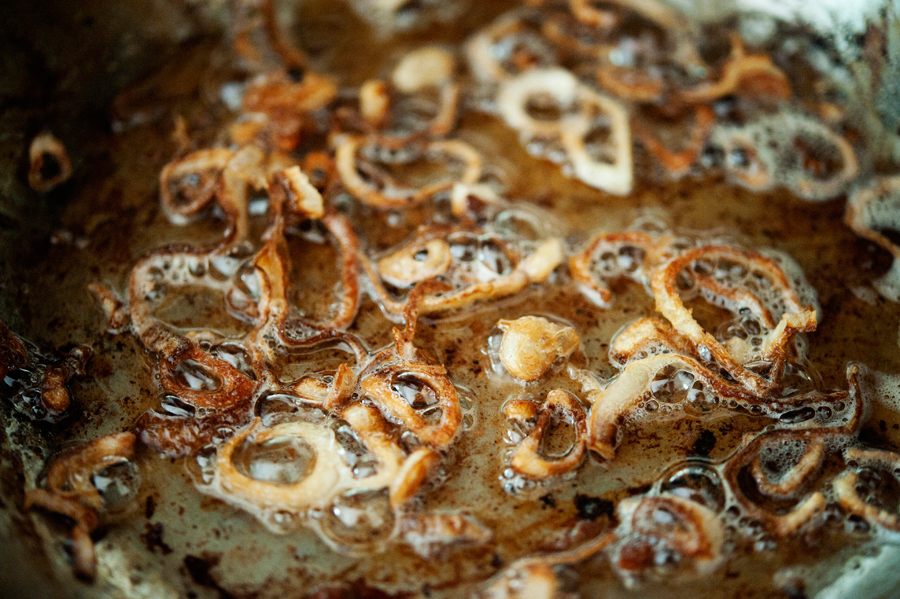
Keep turning them so they cook evenly and are nice and brown.


Tasty Kitchen Blog: Wedge Salad. Guest post by Georgia Pellegrini, recipe submitted by TK member Lindsay of Perfecting the Pairing.

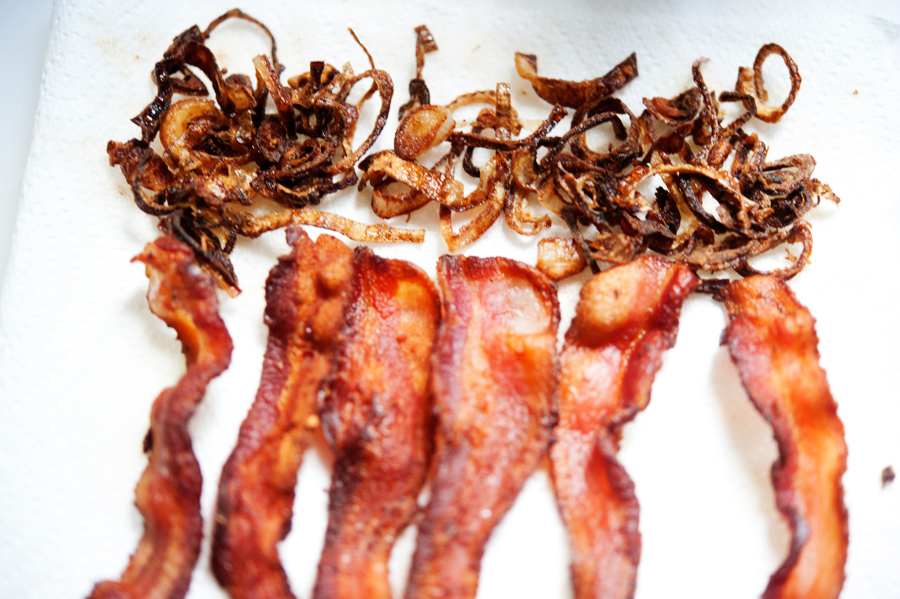
Add them to the paper towel with the bacon and as they cool, they will crisp up more.


Tasty Kitchen Blog: Wedge Salad. Guest post by Georgia Pellegrini, recipe submitted by TK member Lindsay of Perfecting the Pairing.

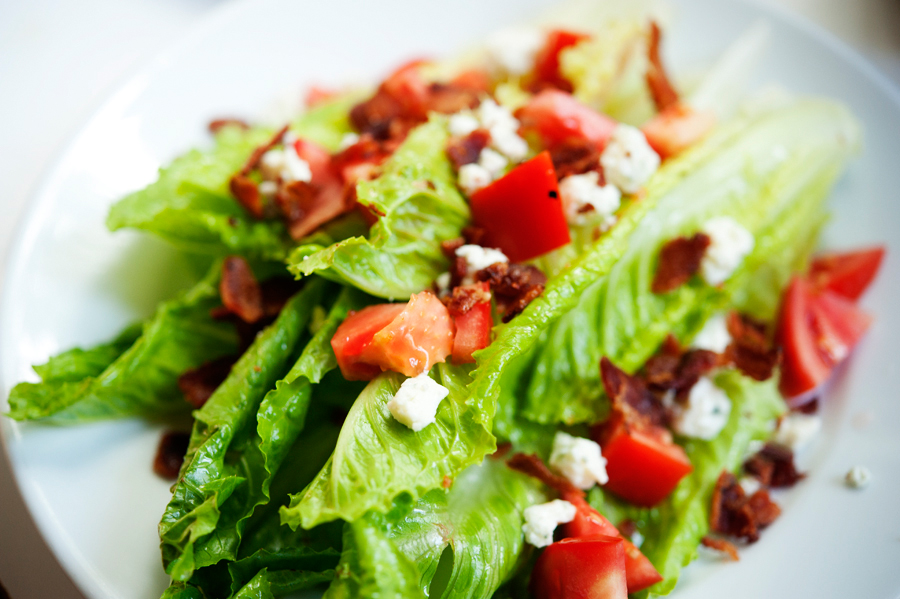
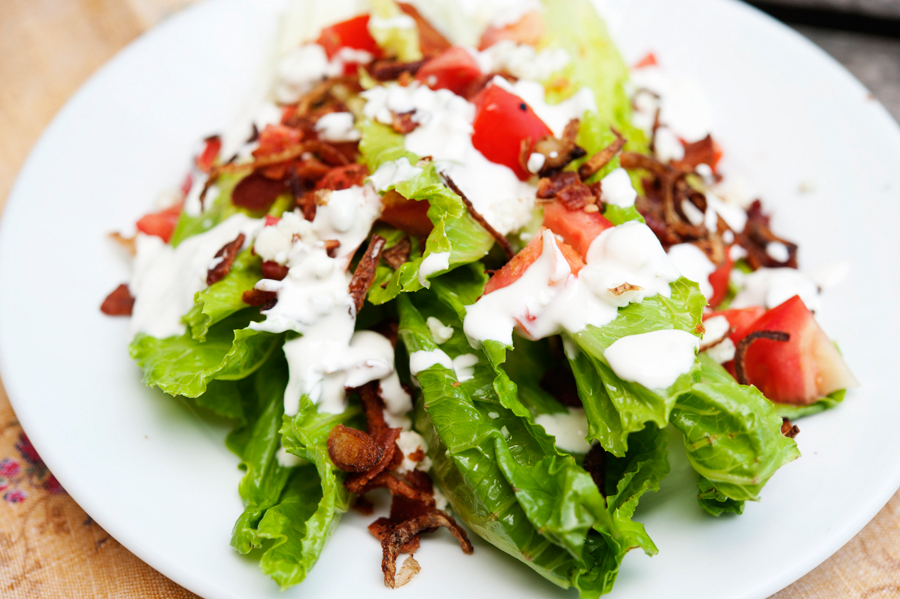
Start dressing the salad! Add the tomatoes, blue cheese, and crumble the bacon in your hands and sprinkle it over the lettuce.


Tasty Kitchen Blog: Wedge Salad. Guest post by Georgia Pellegrini, recipe submitted by TK member Lindsay of Perfecting the Pairing.

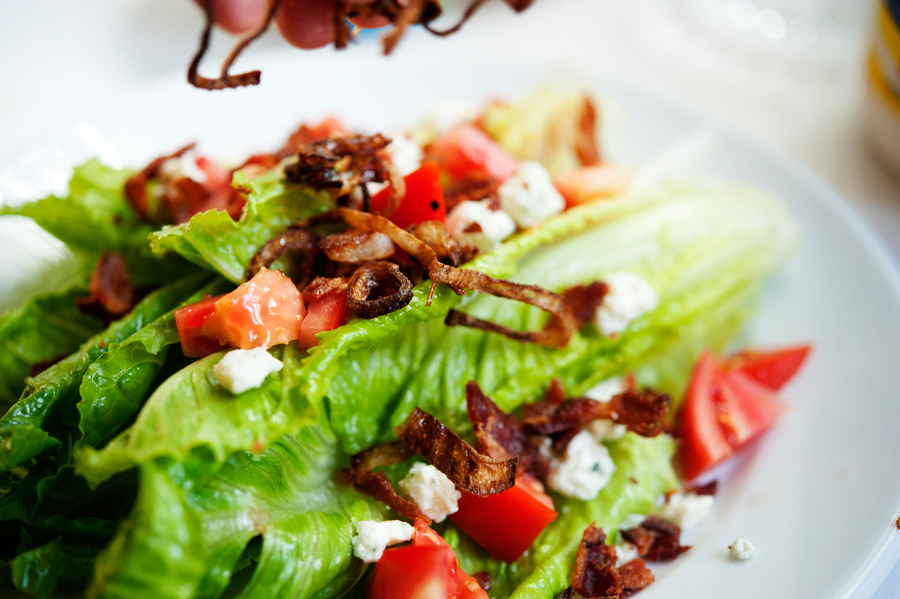
Then add your crispy shallots all over.


Tasty Kitchen Blog: Wedge Salad. Guest post by Georgia Pellegrini, recipe submitted by TK member Lindsay of Perfecting the Pairing.

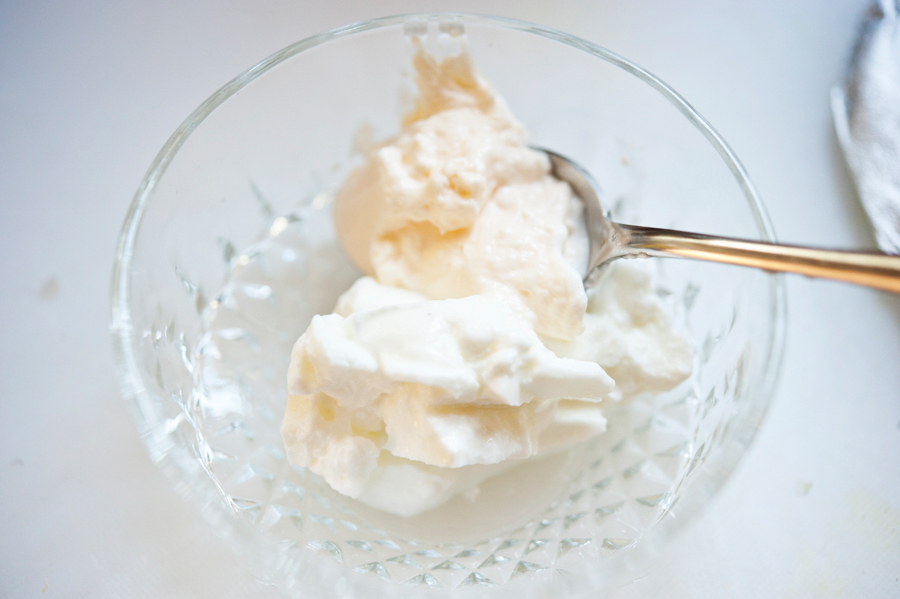
Next you’ll make your dressing, which is a lovely dressing to have on hand should you decide to make a larger batch in advance. Start by combining mayonnaise and Greek yogurt.


Tasty Kitchen Blog: Wedge Salad. Guest post by Georgia Pellegrini, recipe submitted by TK member Lindsay of Perfecting the Pairing.

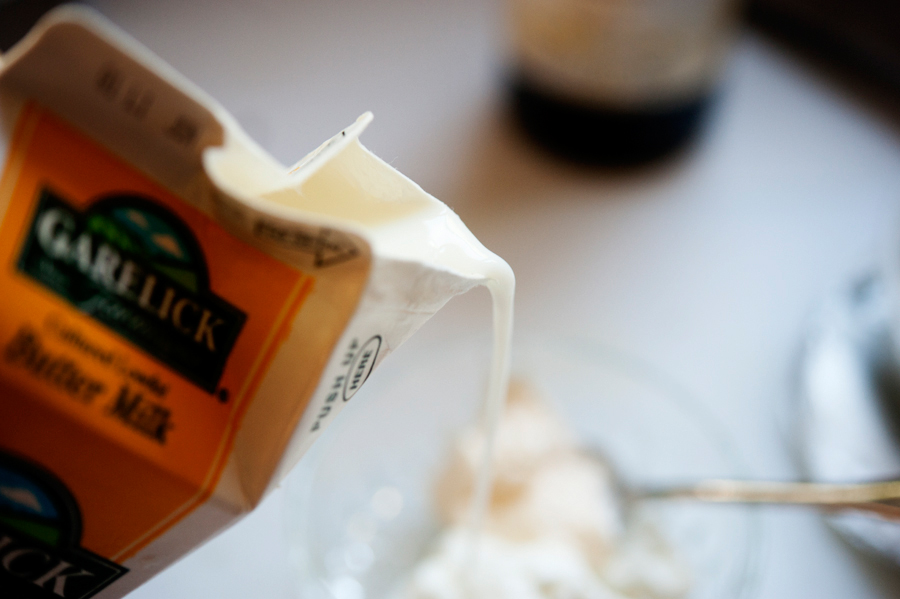
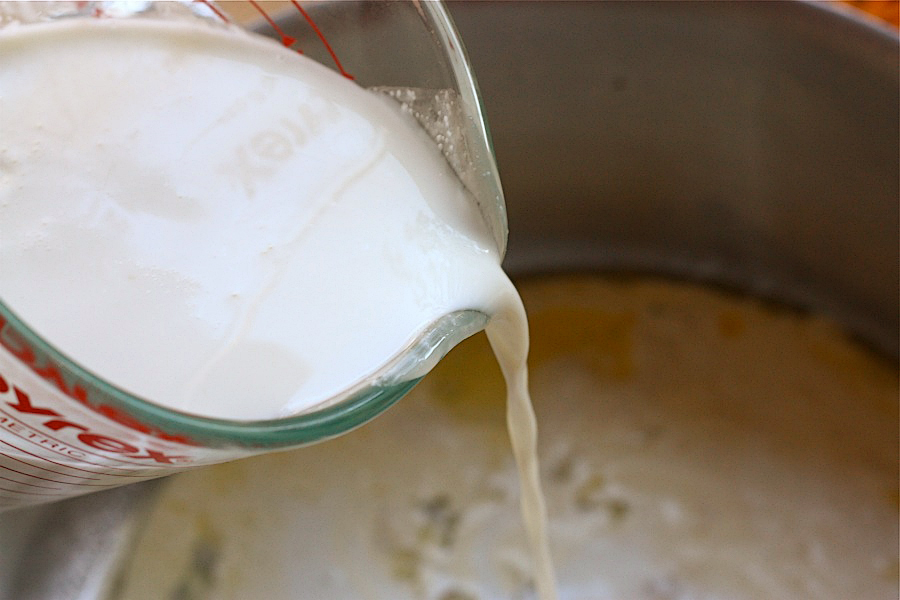
Then a bit of buttermilk.


Tasty Kitchen Blog: Wedge Salad. Guest post by Georgia Pellegrini, recipe submitted by TK member Lindsay of Perfecting the Pairing.

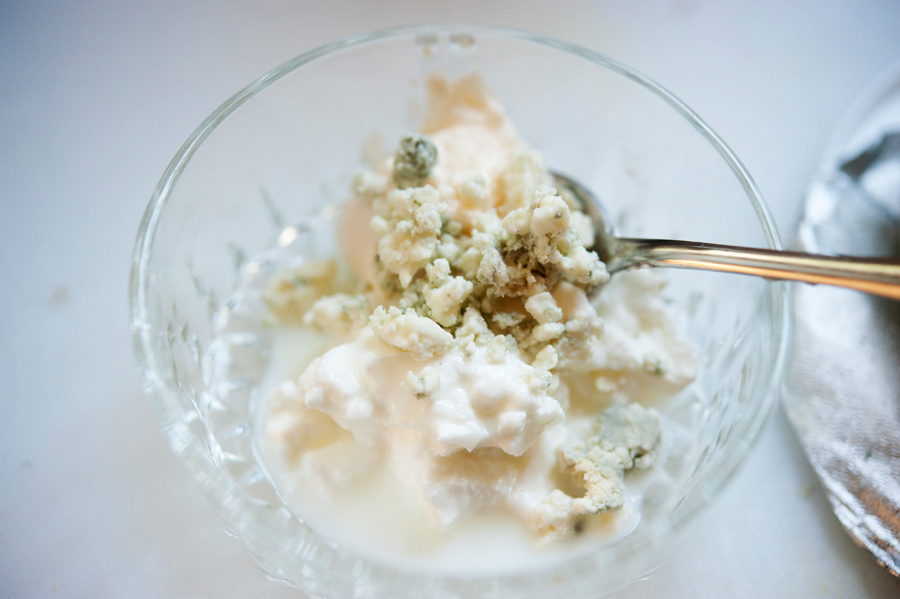
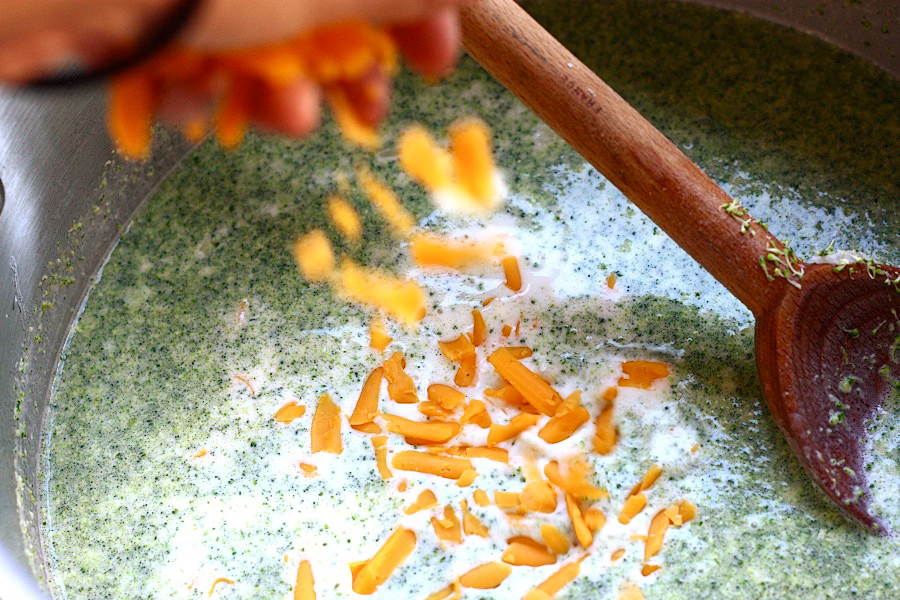
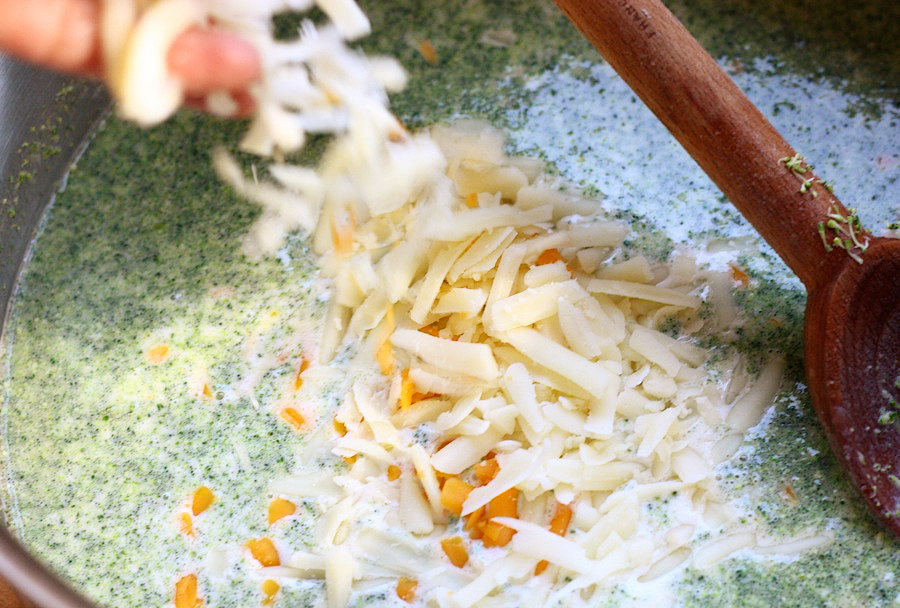
Then a sprinkle of blue cheese.


Tasty Kitchen Blog: Wedge Salad. Guest post by Georgia Pellegrini, recipe submitted by TK member Lindsay of Perfecting the Pairing.

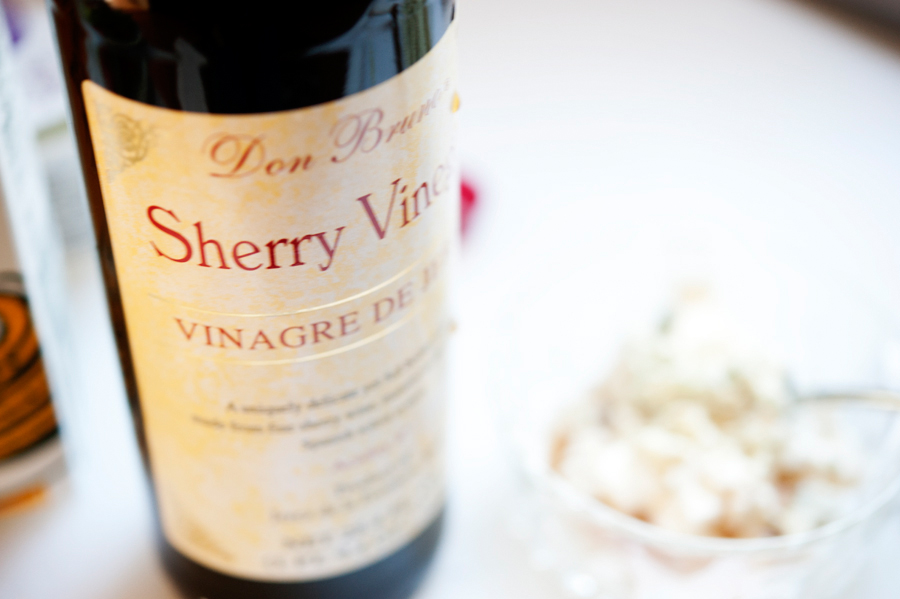
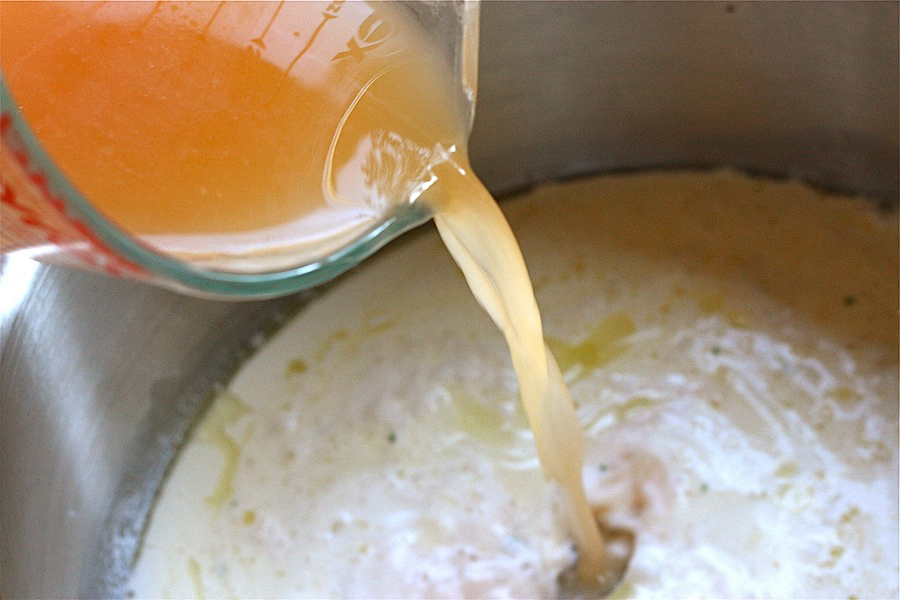
Then your vinegar. Lindsay used red and white wine vinegar but I happen to love this sherry vinegar I had on hand so I threw in a dash of that. Lindsay also added a bit of sugar, which you could do as well if it suits your taste buds. You can play here.


Tasty Kitchen Blog: Wedge Salad. Guest post by Georgia Pellegrini, recipe submitted by TK member Lindsay of Perfecting the Pairing.

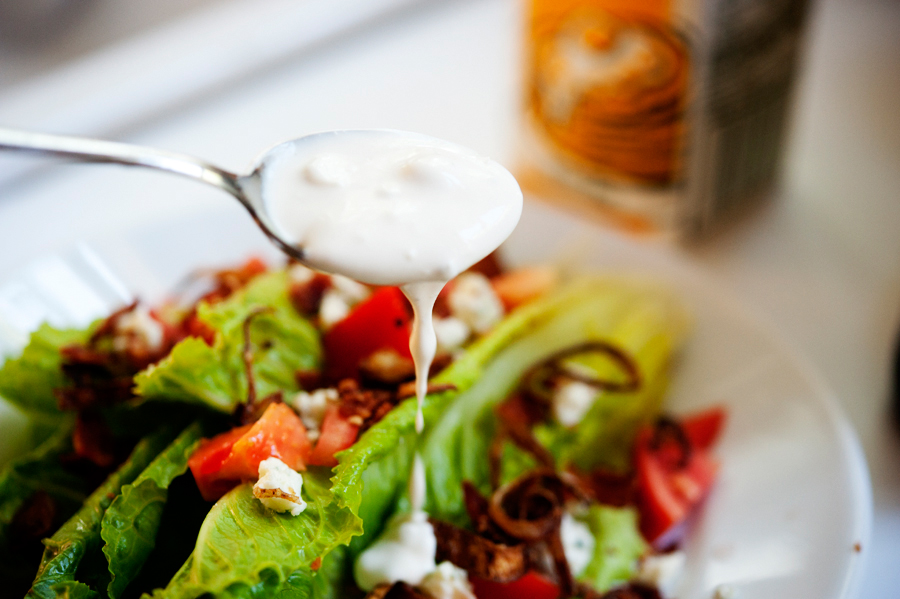
Mix it all up with a spoon and drizzle it onto your salad.


Tasty Kitchen Blog: Wedge Salad. Guest post by Georgia Pellegrini, recipe submitted by TK member Lindsay of Perfecting the Pairing.

It is creamy and delicious and crunchy and otherworldly.


Tasty Kitchen Blog: Wedge Salad. Guest post by Georgia Pellegrini, recipe submitted by TK member Lindsay of Perfecting the Pairing.

It’s a perfect meal when you’re dining solo on a summer afternoon. Or any day of the week or time of the year. I would eat this all the time.

Thanks so much to Lindsay for sharing this with us! Check out her website Perfecting the Pairing for other tasty treats.


Printable Recipe

Wedge Salad

See post on Lindsay’s site!
5.00 Mitt(s) 1 Rating(s)1 vote, average: 5.00 out of 51 vote, average: 5.00 out of 51 vote, average: 5.00 out of 51 vote, average: 5.00 out of 51 vote, average: 5.00 out of 5

Prep Time:

Cook Time:

Difficulty: Easy

Servings: 6

6
x

Print Options

Page size Letter 3x5 4x6
Text Size Small Medium Large
Content Include description
Include prep time, etc.
Show image

Description

The retro wedge salad is upgraded with a homemade blue cheese dressing and crispy shallots.

Ingredients

  • FOR THE SALAD:
  • 6 strips Bacon
  • Oil, For Frying
  • 8 whole Shallots, Sliced Into Rings
  • ¼ cups Flour
  • Salt To Taste
  • 1 head Iceberg Lettuce, Cut Into Wedges
  • 1 pint Grape Tomatoes, Halved
  • FOR THE DRESSING:
  • 2 ounces, weight High Quality Blue Cheese, Crumbled
  • ¼ cups Plain Greek Yogurt (light Or Fat Free Is Fine)
  • ¼ cups Plus 2 Tablespoons Of Low Fat Buttermilk
  • ¼ cups Mayonnaise
  • 1 teaspoon White Wine Vinegar
  • ½ teaspoons Red Wine Vinegar
  • ½ teaspoons Sugar
  • ¼ teaspoons Salt
  • Pepper To Taste
  • 1 Tablespoon Minced Chives

Preparation Instructions

Fry bacon in a skillet over medium heat until crispy. Drain bacon on paper towels. When cool enough to handle, crumble it and set aside.

Add 1 inch of oil to a pan, heat over high heat. Toss the shallot rings with flour until coated. Once the oil is hot, add one shallot to test the temperature, it should start bubbling immediately. If the oil is hot, add the remaining shallots and fry until golden. Remove from the oil with a slotted spoon and transfer to a plate lined with paper towels. Season generously with salt while still warm.

For the dressing, in a small bowl, add the blue cheese, yogurt, buttermilk, mayonnaise and vinegars. Mix until combined. Stir in the sugar, salt, pepper and chives. You can also use store-bought dressing if time is short.

To serve, place a wedge of lettuce on the plate, top with tomatoes, crumbled bacon, blue cheese dressing and crispy shallots.


_______________________________________

There’s so much to say about Georgia, we don’t know where to start. Leaving Wall Street for the French Culinary Institute, followed by a stint at the Gramercy Tavern and La Chassagnette in France, her passion for food and food traditions are evident and inspiring. Visit her site at Georgia Pellegrini, where you’ll find more recipes, photos, learn all about her wonderful books Girl Hunter and Food Heroes, and enjoy her latest adventures.


Profile photo of EatLiveRun

Slow-Cooker Chicken Tikka Masala

Posted by in Step-by-Step Recipes

Tasty Kitchen Blog: Slow-Cooker Chicken Tikka Masala. Guest post by Jenna Weber of Eat, Live, Run; recipe submitted by TK member Rebecca of Foodie with Family.

 
Indian food is total comfort for me. There’s just something about the spicy heat, the simple side of white basmati rice and the chewy garlic naan that soaks it all up perfectly. And as much as I love hitting up my local Indian restaurant for take-out, I also really love making my own Indian food at home. So when I stumbled upon Rebecca’s recipe for Slow-Cooker Chicken Tikka Masala, I knew it was an immediate must-make.

I adore my cheap slow cooker from Target and had a feeling this recipe would be the perfect meal for a weekend full of cold rainy weather here in Northern California. Turns out, I was right! This recipe was, hands down, the best thing to ever come out of my trusty little slow cooker and I loved it so much that I re-made it two days later for a friend’s birthday dinner. I think you’re gonna love it!


Tasty Kitchen Blog: Slow-Cooker Chicken Tikka Masala. Guest post by Jenna Weber of Eat, Live, Run; recipe submitted by TK member Rebecca of Foodie with Family.

You’ll need boneless, skinless chicken thighs (use thighs for the most flavor!), butter, yogurt, garam masala, coriander, salt, cumin, garlic, a jalapeno pepper, crushed tomatoes, cream, cornstarch, onion, fresh ginger and a pinch of sugar.

Now let’s get started!


Tasty Kitchen Blog: Slow-Cooker Chicken Tikka Masala. Guest post by Jenna Weber of Eat, Live, Run; recipe submitted by TK member Rebecca of Foodie with Family.

First, chop the chicken thighs into small pieces and place in a large bowl.


Tasty Kitchen Blog: Slow-Cooker Chicken Tikka Masala. Guest post by Jenna Weber of Eat, Live, Run; recipe submitted by TK member Rebecca of Foodie with Family.

Sprinkle the chicken with coriander, salt and cumin.


Tasty Kitchen Blog: Slow-Cooker Chicken Tikka Masala. Guest post by Jenna Weber of Eat, Live, Run; recipe submitted by TK member Rebecca of Foodie with Family.

Then add the yogurt and toss everything together. Let this chicken mixture sit for ten minutes so that the yogurt can soak into the chicken a little bit.


Tasty Kitchen Blog: Slow-Cooker Chicken Tikka Masala. Guest post by Jenna Weber of Eat, Live, Run; recipe submitted by TK member Rebecca of Foodie with Family.

Now, throw a little butter in a skillet and raise the heat to medium high. It’s go-time!


Tasty Kitchen Blog: Slow-Cooker Chicken Tikka Masala. Guest post by Jenna Weber of Eat, Live, Run; recipe submitted by TK member Rebecca of Foodie with Family.

Add the chicken and cook quickly, working with half at a time as to not overcrowd the pan. Once the chicken has browned, remove and place in the slow cooker.


Tasty Kitchen Blog: Slow-Cooker Chicken Tikka Masala. Guest post by Jenna Weber of Eat, Live, Run; recipe submitted by TK member Rebecca of Foodie with Family.

Take your jalapeno pepper and pierce it several times with a sharp knife. Place the pierced pepper on top of the chicken.


Tasty Kitchen Blog: Slow-Cooker Chicken Tikka Masala. Guest post by Jenna Weber of Eat, Live, Run; recipe submitted by TK member Rebecca of Foodie with Family.

Then start making the delicious sauce! Melt a little more butter in the same skillet you were working with before and add your onion, garlic and salt.


Tasty Kitchen Blog: Slow-Cooker Chicken Tikka Masala. Guest post by Jenna Weber of Eat, Live, Run; recipe submitted by TK member Rebecca of Foodie with Family.

Once the onion has softened a little, add the garam masala and fresh ginger. It will smell heavenly!


Tasty Kitchen Blog: Slow-Cooker Chicken Tikka Masala. Guest post by Jenna Weber of Eat, Live, Run; recipe submitted by TK member Rebecca of Foodie with Family.

Add the crushed tomatoes to the sauce, then pour over the chicken in the slow cooker. Set heat to low and cook for five hours.


Tasty Kitchen Blog: Slow-Cooker Chicken Tikka Masala. Guest post by Jenna Weber of Eat, Live, Run; recipe submitted by TK member Rebecca of Foodie with Family.

After five hours, the chicken should be fall-apart tender. Finally, whisk together the cornstarch and cream then pour into the slow cooker. Cook for ten more minutes until thick and bubbly.


Tasty Kitchen Blog: Slow-Cooker Chicken Tikka Masala. Guest post by Jenna Weber of Eat, Live, Run; recipe submitted by TK member Rebecca of Foodie with Family.

Serve tikka masala with basmati rice and cilantro and experience comfort food at its best! You’re gonna love it. A big thanks to Rebecca for supplying us with yet another wonderfully delicious recipe. Have you checked out her blog Foodie with Family yet? You should. You really should.

Get the handy dandy printable version of the recipe below!


Printable Recipe

Slow-Cooker Chicken Tikka Masala

See post on Rebecca’s site!
4.85 Mitt(s) 26 Rating(s)26 votes, average: 4.85 out of 526 votes, average: 4.85 out of 526 votes, average: 4.85 out of 526 votes, average: 4.85 out of 526 votes, average: 4.85 out of 5

Prep Time:

Cook Time:

Difficulty: Easy

Servings: 6

6
x

Print Options

Page size Letter 3x5 4x6
Text Size Small Medium Large
Content Include description
Include prep time, etc.
Show image

Description

This classic Indian dish is sure to win over even the pickiest eaters with its creamy, rich, complex comfort food bona fides. This dinner is the perfect fall or winter warm-me-up and it reheats like a dream.

Ingredients

  • FOR THE CHICKEN:
  • 9 whole Boneless, Skinless Chicken Thighs
  • 1 Tablespoon Ground Coriander
  • 1 Tablespoon Ground Cumin
  • 1 teaspoon Kosher Salt
  • 1 cup Yogurt
  • 4 Tablespoons Butter
  • 1 whole Jalapeno Pepper, Stem Removed, Pepper Pierced Several Times With A Sharp Knife
  • FOR THE SAUCE:
  • 4 Tablespoons Butter
  • 1 whole Large Onion, Peeled And Diced
  • 6 cloves Garlic, Peeled And Minced
  • 1 Tablespoon Kosher Salt
  • 3 Tablespoons Garam Masala
  • 1 piece Fresh Ginger, About 2-3 Inches, Peeled And Grated
  • 4 cups Crushed Tomatoes
  • 1 Tablespoon Raw Sugar (can Substitute White Granulated If Necessary)
  • 2 teaspoons Cornstarch Or Cleargel
  • 1-½ cup Heavy Cream
  • TO SERVE:
  • Hot Buttered Rice And Peas
  • Chopped Fresh Cilantro

Preparation Instructions

Cut the boneless, skinless chicken thighs into 1- 1 1/2 inch pieces. Sprinkle the coriander, cumin and salt over the chicken, then stir in the yogurt until all the pieces are evenly coated. Cover lightly and let sit for 10 minutes before proceeding.

Melt 1 tablespoon the butter in a large saute pan over medium heat. Raise the heat to medium high and quickly brown about 1/4 of the chicken. Transfer browned chicken to the slow cooker as it is finished, using 1 tablespoon of butter per batch, and repeat until the chicken is all in the slow-cooker. Throw the pierced jalapeno in on top of the chicken.

Prepare the sauce. Return the pan to the heat and melt the butter over medium high heat. Add the onions, garlic, and kosher salt, then stir. Cook, stirring frequently, until the onions begin to lightly brown around the edges.

Stir in the garam masala and ginger and cook until fragrant (about 1 minute) before raising the heat to high and adding the crushed tomatoes and raw sugar. Stir well, scraping the caramelized bits from the bottom of the pan, and bring to a boil. Pour over the chicken in the slow-cooker.

Cover and cook on LOW for 5 hours, or until the chicken is very tender.

Use a fork or whisk to stir the cornstarch or cleargel into the heavy cream until smooth. Pour into the slow-cooker and stir gently until the colour is even. Replace the lid and let cook for 10 minutes or until bubbly around the edges.

Serve over hot rice and peas, topped with a generous amount of chopped cilantro.


_______________________________________

Jenna is a food writer who has worked as a pastry chef and bread baker. Her blog Eat, Live, Run has great recipes, travel stories, and the perfect slogan: “Celebrating life, one crumb at a time.”


Profile photo of A Cozy Kitchen

Broccoli Cheddar Soup

Posted by in Step-by-Step Recipes

Tasty Kitchen Blog: Broccoli Cheddar Soup. Guest post by Adrianna Adarme of A Cozy Kitchen, recipe submitted by TK member Crystal (uumom2many).

 
Broccoli cheddar soup will forever make me think of those cold college nights when my friends and I would head to Panera to eat copious amounts of soup in bread bowls. It was one of those college activities we did since Panera was super inexpensive, pretty delicious and one of the only restaurants open past 8pm in our teeny-tiny college town. I’ve been wanting to recreate one of my favorite college memories for as long as I can remember, so when I came across this Broccoli Cheddar Soup recipe from TK member Crystal, I knew it was mine for the taking.  

Let’s get started, shall we?


Tasty Kitchen Blog: Broccoli Cheddar Soup. Guest post by Adrianna Adarme of A Cozy Kitchen, recipe submitted by TK member Crystal (uumom2many).

You’ll need to steam some broccoli (I’ll admit I totally forgot this step and it turned out great!), finely dice some onions, and shred two different types of cheeses: extra sharp white cheddar and extra sharp yellow cheddar.  


Tasty Kitchen Blog: Broccoli Cheddar Soup. Guest post by Adrianna Adarme of A Cozy Kitchen, recipe submitted by TK member Crystal (uumom2many).

Next you’re going to add the broccoli to a food processor and pulse until it’s the consistency of a meal. 

In a large stock pot, melt the butter and add the onion. You’ll want to cook them until they’re translucent. Mine took 5 minutes or so. 


Tasty Kitchen Blog: Broccoli Cheddar Soup. Guest post by Adrianna Adarme of A Cozy Kitchen, recipe submitted by TK member Crystal (uumom2many).

Then add the 2 tablespoons of flour and mix with the butter and onion mixture. You’ll create a bit of a roux. 


Tasty Kitchen Blog: Broccoli Cheddar Soup. Guest post by Adrianna Adarme of A Cozy Kitchen, recipe submitted by TK member Crystal (uumom2many).

Next up, add the cream and milk, being sure to stir constantly. 


Tasty Kitchen Blog: Broccoli Cheddar Soup. Guest post by Adrianna Adarme of A Cozy Kitchen, recipe submitted by TK member Crystal (uumom2many).

Then the beef stock. 

I had some vegetarian friends coming over so I opted for vegetarian stock; it worked wonderfully. 


Tasty Kitchen Blog: Broccoli Cheddar Soup. Guest post by Adrianna Adarme of A Cozy Kitchen, recipe submitted by TK member Crystal (uumom2many).

After you’re done mixing in the milks and broth, gently stir in the pulsed broccoli 


Tasty Kitchen Blog: Broccoli Cheddar Soup. Guest post by Adrianna Adarme of A Cozy Kitchen, recipe submitted by TK member Crystal (uumom2many).

And then the yellow cheddar …


Tasty Kitchen Blog: Broccoli Cheddar Soup. Guest post by Adrianna Adarme of A Cozy Kitchen, recipe submitted by TK member Crystal (uumom2many).

And then the white cheddar …

Are you getting excited yet? 


Tasty Kitchen Blog: Broccoli Cheddar Soup. Guest post by Adrianna Adarme of A Cozy Kitchen, recipe submitted by TK member Crystal (uumom2many).

Mix it all together and then do a little taste test. I actually ended up adding about a handful extra of each of the cheese. I was going for extra cheesy! 

Add some salt and pepper if you feel like it needs it. Mine needed about a teaspoon of salt and pepper. 


Tasty Kitchen Blog: Broccoli Cheddar Soup. Guest post by Adrianna Adarme of A Cozy Kitchen, recipe submitted by TK member Crystal (uumom2many).

If you don’t feel like doing the bread bowl thing, then your soup is totally ready to be served. 

If you do, grab the bread. I used a whole wheat sourdough. 


Tasty Kitchen Blog: Broccoli Cheddar Soup. Guest post by Adrianna Adarme of A Cozy Kitchen, recipe submitted by TK member Crystal (uumom2many).

Cut a circle in the top of the bread. 


Tasty Kitchen Blog: Broccoli Cheddar Soup. Guest post by Adrianna Adarme of A Cozy Kitchen, recipe submitted by TK member Crystal (uumom2many).

And take out the center, creating a bowl. 


Tasty Kitchen Blog: Broccoli Cheddar Soup. Guest post by Adrianna Adarme of A Cozy Kitchen, recipe submitted by TK member Crystal (uumom2many).

Ladle the soup into the center of the bread bowl until it’s full.


Tasty Kitchen Blog: Broccoli Cheddar Soup. Guest post by Adrianna Adarme of A Cozy Kitchen, recipe submitted by TK member Crystal (uumom2many).

Top with a small handful of cheese … and dinner! 

This soup was everything broccoli cheddar should be: it’s rich, thick, savory, and cheesy beyond belief, which makes it perfect for those cold nights we have in our near future.  

Thanks again to TK member Crystal, for this delicious tasting soup. 


Printable Recipe

Broccoli Cheddar Soup

See post on uumom2many’s site!
3.25 Mitt(s) 8 Rating(s)8 votes, average: 3.25 out of 58 votes, average: 3.25 out of 58 votes, average: 3.25 out of 58 votes, average: 3.25 out of 58 votes, average: 3.25 out of 5

Prep Time:

Cook Time:

Difficulty: Easy

Servings: 8

8
x

Print Options

Page size Letter 3x5 4x6
Text Size Small Medium Large
Content Include description
Include prep time, etc.
Show image

Description

Soup so thick it sticks to a spoon. Tastes like liquified Broccoli and Cheese. This recipe makes 2 liters of soup. Enough for a big hungry family.

Ingredients

  • 2 Tablespoons Salted Butter
  • 2 Tablespoons Finely Chopped Onion
  • 2 Tablespoons Flour
  • 2 cups Beef Broth Or Bouillon
  • 3 cups Whole Milk
  • 1 cup Heavy Cream
  • 1-½ cup Extra Sharp White Cheddar Shredded
  • 1-½ cup Extra Sharp Yellow Cheddar Shredded
  • 4 cups Steamed Broccoli Pulsed Into A Meal

Preparation Instructions

Melt butter in a large stock pot. Add onion and cook slowly until limp. Stir in flour and cook for 3 minutues, stirring. Slowly add the stock, milk and cream, alternating until all are combined. Heat to boiling, stirring frequently. Stir in the cheese and broccoli (see note below). Keep stirring until the cheese is completely melted. Add salt and pepper to taste.

The longer this soup sits, the thicker it gets, until you end up with a soup that won’t fall off a spoon.

Note: to prepare the broccoli, steam until tender and pulse in a food processor until you get a meal-like consistency.


_______________________________________

Adrianna is the lovely lady behind the scrumptious blog A Cozy Kitchen. It’s filled with all kinds of mouthwatering recipes and gorgeous photography. Whether you’re in the mood for something vegetarian or meaty, fancy or pure comfort, light or decadent, there’s sure to be something there for everyone.


Profile photo of cookincanuck

Zuppa di Gnocchi e Pesto

Posted by in Step-by-Step Recipes

Tasty Kitchen Blog: Zuppa di Gnocchi e Pesto. Guest post by Dara Michalski of Cookin' Canuck, recipe submitted by TK member Melanie of The Coupon Goddess.

 
If I had an Italian grandmother, I am sure this is the chicken soup she would make for my seven brothers and sisters and me. Okay, I don’t actually have seven siblings. In fact, I’m an only child. However, I always imagine Italian meals as large family affairs, so I have to conjure up some additional characters to set the scene. My pleasantly plump nonna would be standing by the stove, ladling out the steaming soup into large earthenware bowls, exclaiming “Mangia, mangia!” (Incidentally, “Nonna” is what my kids call my mum. We obviously have a deep-seated yearning for some Italian blood in our veins. And yet, nary a drop.)

When I spotted this recipe by Tasty Kitchen member Melanie, I knew it was likely to become a family favorite. The broth is rich with the taste of roasted onions and garlic, pesto and chicken broth pureed together (be sure to read about my broth mishap below and learn from my mistake so you can avoid green-colored blinds and carpet). The gnocchi is gently boiled in the broth until tender and plump and the savory mixture is ladled over simply roasted, shredded chicken. It is comfort in a bowl. I swear I can feel my fictitious nonna’s hug as I take each bite.


Tasty Kitchen Blog: Zuppa di Gnocchi e Pesto. Guest post by Dara Michalski of Cookin' Canuck, recipe submitted by TK member Melanie of The Coupon Goddess.

Here are the ingredients you’ll need to get started. Roasting chicken breasts can sound intimidating, but it’s one of the easiest things to do. Stay with me here.

Preheat oven to 350 degrees F.


Tasty Kitchen Blog: Zuppa di Gnocchi e Pesto. Guest post by Dara Michalski of Cookin' Canuck, recipe submitted by TK member Melanie of The Coupon Goddess.

Place the chicken breasts—skin, bones and all—into a roasting pan. Separate the onion quarters and scatter the pieces, along with the unpeeled garlic cloves, over and around the chicken breasts.


Tasty Kitchen Blog: Zuppa di Gnocchi e Pesto. Guest post by Dara Michalski of Cookin' Canuck, recipe submitted by TK member Melanie of The Coupon Goddess.

Drizzle over some olive oil. I promise it’s not going to get any harder than this.


Tasty Kitchen Blog: Zuppa di Gnocchi e Pesto. Guest post by Dara Michalski of Cookin' Canuck, recipe submitted by TK member Melanie of The Coupon Goddess.

Season with salt and pepper and slide those babies into the oven. You’re well on your way.

Roast the chicken for 35 to 45 minutes, or until it is cooked through.


Tasty Kitchen Blog: Zuppa di Gnocchi e Pesto. Guest post by Dara Michalski of Cookin' Canuck, recipe submitted by TK member Melanie of The Coupon Goddess.

Transfer the chicken breasts to a cutting board to cool. Remove the onion and garlic and peel the garlic. The cloves will be soft and buttery.


Tasty Kitchen Blog: Zuppa di Gnocchi e Pesto. Guest post by Dara Michalski of Cookin' Canuck, recipe submitted by TK member Melanie of The Coupon Goddess.

In the bowl of a food processor or a blender, combine the chicken broth, roasted onion pieces and peeled, roasted garlic. Add 3 tablespoons of pesto and pulse until smooth.

Now, let me give you a little tip here to save you some cleanup time. Do not—I repeat, DO NOT—try to do this all in one batch. I was feeling a little over-confident in my blender’s ability to hold mass quantities of liquid. Since I take all of my food photos in the living room (for the best light), that is where the blending took place. That is also where the combination of chicken broth, pesto, onions and garlic blew out the side of the blender lid and all over my carpet, blinds and furniture. It’s a good thing my kids weren’t home at the time or they would have learned some unsavory words to add to their vocabularies. Moral of the story: puree the mixture in two batches—in the kitchen!


Tasty Kitchen Blog: Zuppa di Gnocchi e Pesto. Guest post by Dara Michalski of Cookin' Canuck, recipe submitted by TK member Melanie of The Coupon Goddess.

Once the chicken is cool enough to handle, shred it into bite-sized pieces, removing and discarding the skin and bones. I like to use my hands to do this, but two forks would work well, too.


Tasty Kitchen Blog: Zuppa di Gnocchi e Pesto. Guest post by Dara Michalski of Cookin' Canuck, recipe submitted by TK member Melanie of The Coupon Goddess.

Transfer the chicken to a bowl and stir in the rest of the pesto until the chicken is coated.


Tasty Kitchen Blog: Zuppa di Gnocchi e Pesto. Guest post by Dara Michalski of Cookin' Canuck, recipe submitted by TK member Melanie of The Coupon Goddess.

Transfer the chicken broth mixture to a large saucepan and bring to a boil. Add the gnocchi and cook until the little guys pop up to the surface.


Tasty Kitchen Blog: Zuppa di Gnocchi e Pesto. Guest post by Dara Michalski of Cookin' Canuck, recipe submitted by TK member Melanie of The Coupon Goddess.

Place some of the chicken in each bowl and ladle over the broth and gnocchi.


Tasty Kitchen Blog: Zuppa di Gnocchi e Pesto. Guest post by Dara Michalski of Cookin' Canuck, recipe submitted by TK member Melanie of The Coupon Goddess.

Garnish with chopped Roma tomatoes and serve. “Mangia, mangia!”

Thank you, Melanie, for sharing your incredible recipe. Melanie’s site The Coupon Goddess is not only filled with tips on saving money at the grocery store, but has loads of mouthwatering recipes. Be sure to check it out.


Printable Recipe

Zuppa di Gnocchi e Pesto

See post on A Beautiful Bite’s site!
4.60 Mitt(s) 5 Rating(s)5 votes, average: 4.60 out of 55 votes, average: 4.60 out of 55 votes, average: 4.60 out of 55 votes, average: 4.60 out of 55 votes, average: 4.60 out of 5

Prep Time:

Cook Time:

Difficulty: Easy

Servings: 8

8
x

Print Options

Page size Letter 3x5 4x6
Text Size Small Medium Large
Content Include description
Include prep time, etc.
Show image

Description

A quick and delicious soup made from pantry and freezer staples that will have your guests thinking that your Nonna passed the recipe down to you!

Ingredients

  • 3  Chicken Breasts, On The Bone
  • 1 whole Yellow Onion, Quartered
  • 8 cloves Garlic, In Skins
  • 3 Tablespoons Olive Oil
  • 3 pinches Salt
  • 3 pinches Black Pepper
  • 2 cartons Chicken Broth, 32 Ounces Each
  • 1 jar Pesto 8oz
  • 1 package Gnocchi, 16 Ounce
  • 3 whole Roma Tomatoes Seeded And Chopped

Preparation Instructions

Preheat oven to 350F. Place chicken breasts in a roasting pan. Break apart quartered onion and scatter around and on top of breasts. Toss garlic, skins and all, around the chicken. The garlic will not flavor the chicken at this point. We are merely roasting them and will add them to the broth in a bit. Drizzle olive oil on chicken. Salt and pepper to taste and roast for 35-45 minutes or until the center is white and no longer pink.

Once cooked, allow the chicken to cool so that it can be shredded by hand. Scoop out roasted onion and garlic to use in broth. While the chicken is cooling, pour broth into a Cuisinart or blender along with the onions and roasted garlic (skins removed after roasting of course) and three tablespoons of the pesto. Pulse until there are no large chunks of garlic left. About 3 five second pulses should do the trick. The roasted garlic will give the soup a velvety feel in your mouth. Definitely don’t skip this step. It’s so worth it.

Back to the chicken. After shredding it, mix in the rest of the pesto. Stir well and set aside.

In a large pot, bring the broth/garlic/pesto mixture to a boil. Add gnocchi and cook until they float. In soup bowls, place a pile of chicken in the center. Ladle the hot broth over the chicken and garnish with chopped tomatoes. Mangia bene (eat well)!


_______________________________________

Dara Michalski is a doll and a sweetheart who clearly knows her way around the kitchen. She blogs at Cookin’ Canuck, where she shares her flavor-packed recipes and fun, engaging writing. The photography’s pretty incredible, too.


Profile photo of Amber {Sprinkled With Flour}

Ozark Apple Pudding

Posted by in Baking, Step-by-Step Recipes

  Here in the Missouri Ozarks, the leaves have just passed their colorful prime, scattering across the ground leaving their tell-tale message. Winter is coming. “Boo!” I say! If I lived in a perfect world, it would be fall every day of the year, except for one snowy day on Christmas. I do not like […]

Profile photo of whatsgabycooking

Sweet Pulled Pork Tacos

Posted by in Step-by-Step Recipes

  I’m a sucker for anything with pulled pork. When I first stumbled onto this recipe for Sweet Pulled Pork Tacos with Avocado Cream Sauce from TK member 4littlefergusons, my heart literally skipped a beat. Pulled pork tacos with an avocado cream sauce? Heck yes! As the self-proclaimed queen of all things avocado I knew […]

Profile photo of Laurie - Simply Scratch

Bacon Jam (Ooh Mommy!)

Posted by in Step-by-Step Recipes

Did someone say International Bacon Day? You mean that’s just one special day and not every single pork-loving day? Celebrate with this blast from the past: Bacon Jam. It’s spreadable bacon, friends. Yes. We know. You’re welcome.     From the very second my eyes laid upon Rebecca’s recipe for Bacon Jam aka “Ooh Mommy”…

Profile photo of Erica Lea

Chicken Cordon Bleu Casserole

Posted by in Step-by-Step Recipes

  Sometimes, you just need a warm, comforting supper; something that will fill your belly and keep you satisfied. This casserole (or, as I like to call it, hotdish) is admittedly not the most healthy on earth. But, trust me, Terri’s recipe is worth the extra calories. Let me show you how it goes together. […]