The Pioneer Woman Tasty Kitchen
Profile photo of Laurie - Simply Scratch

Citrus Spicy Wings with Cilantro Dipping Sauce

Posted by in Step-by-Step Recipes

Tasty Kitchen Blog: Spicy Citrus Spicy Wings with Cilantro Dripping Sauce. Guest post by Laurie McNamara of Simply Scratch, recipe submitted by TK member Sarah of Life is Still Sweet.

 
Chicken wings are the quintessential football party food. They go well with just about any salty snack food, icy cold beer and they don’t require a fork (bonus!). Although I’m not an avid football fan, I am a huge wing fan! Whether it’s slathered in a spicy sauce or dunked into a cool and creamy dip, I’ve never met a wing I didn’t like.
 
I spied this recipe from TK member Sarah (tallmisto) earlier this year and immediately placed it in my Tasty Kitchen recipe box. What caught my attention first was combination of spicy and citrus which then triggered a salivary response in my mouth forcing me to click over to her website Life Is Still Sweet to read more about them. Doing so led me to find her cilantro scallion dip. Honestly, I’ve never been so excited about a single dip in my entire life. These wings and this dip is where it’s at! So make them for your next football party or get-together. I promise you won’t regret it.


Tasty Kitchen Blog: Spicy Citrus Spicy Wings with Cilantro Dripping Sauce. Guest post by Laurie McNamara of Simply Scratch, recipe submitted by TK member Sarah of Life is Still Sweet.

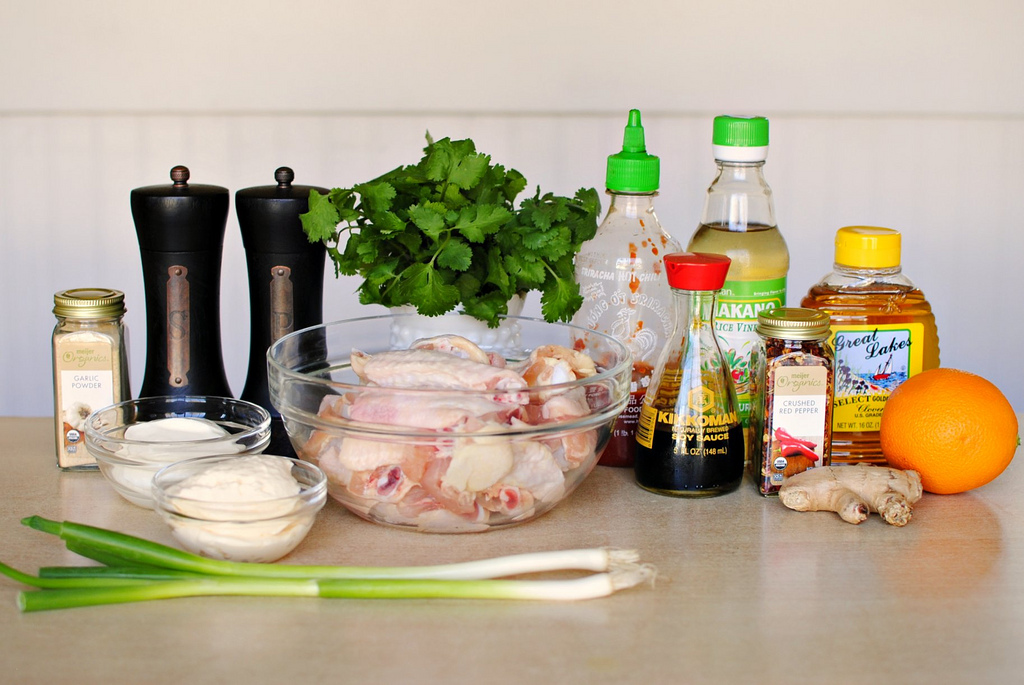
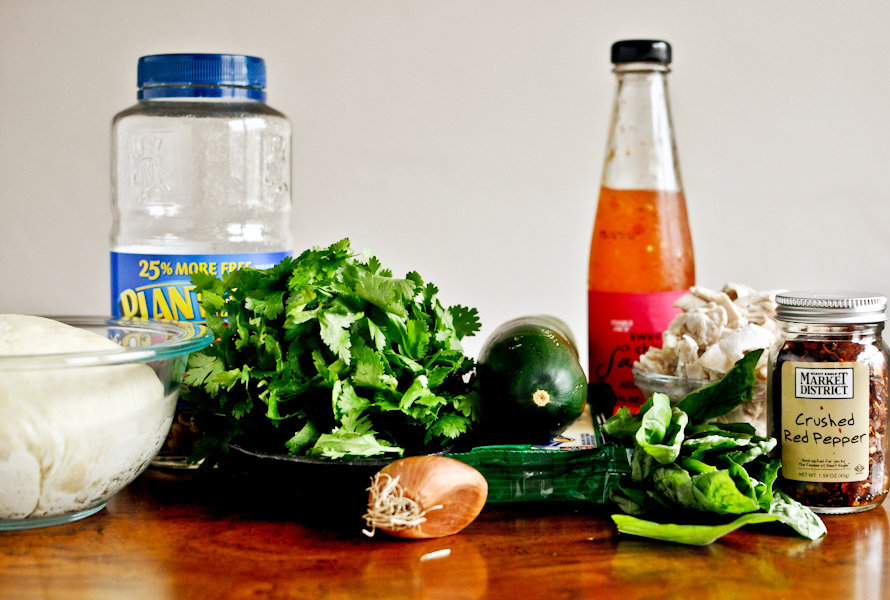
So I have a small, teensy-weensy confession to make. I’ve never made wings before. Never. Ever. I am, however, no stranger to chicken or sriracha, as you can see by the amount left in the bottle. These recipe instructions were so straightforward and it didn’t require any deep- frying on my part, which gave me total confidence that I could rock these wings out. And I did.  


Tasty Kitchen Blog: Spicy Citrus Spicy Wings with Cilantro Dripping Sauce. Guest post by Laurie McNamara of Simply Scratch, recipe submitted by TK member Sarah of Life is Still Sweet.

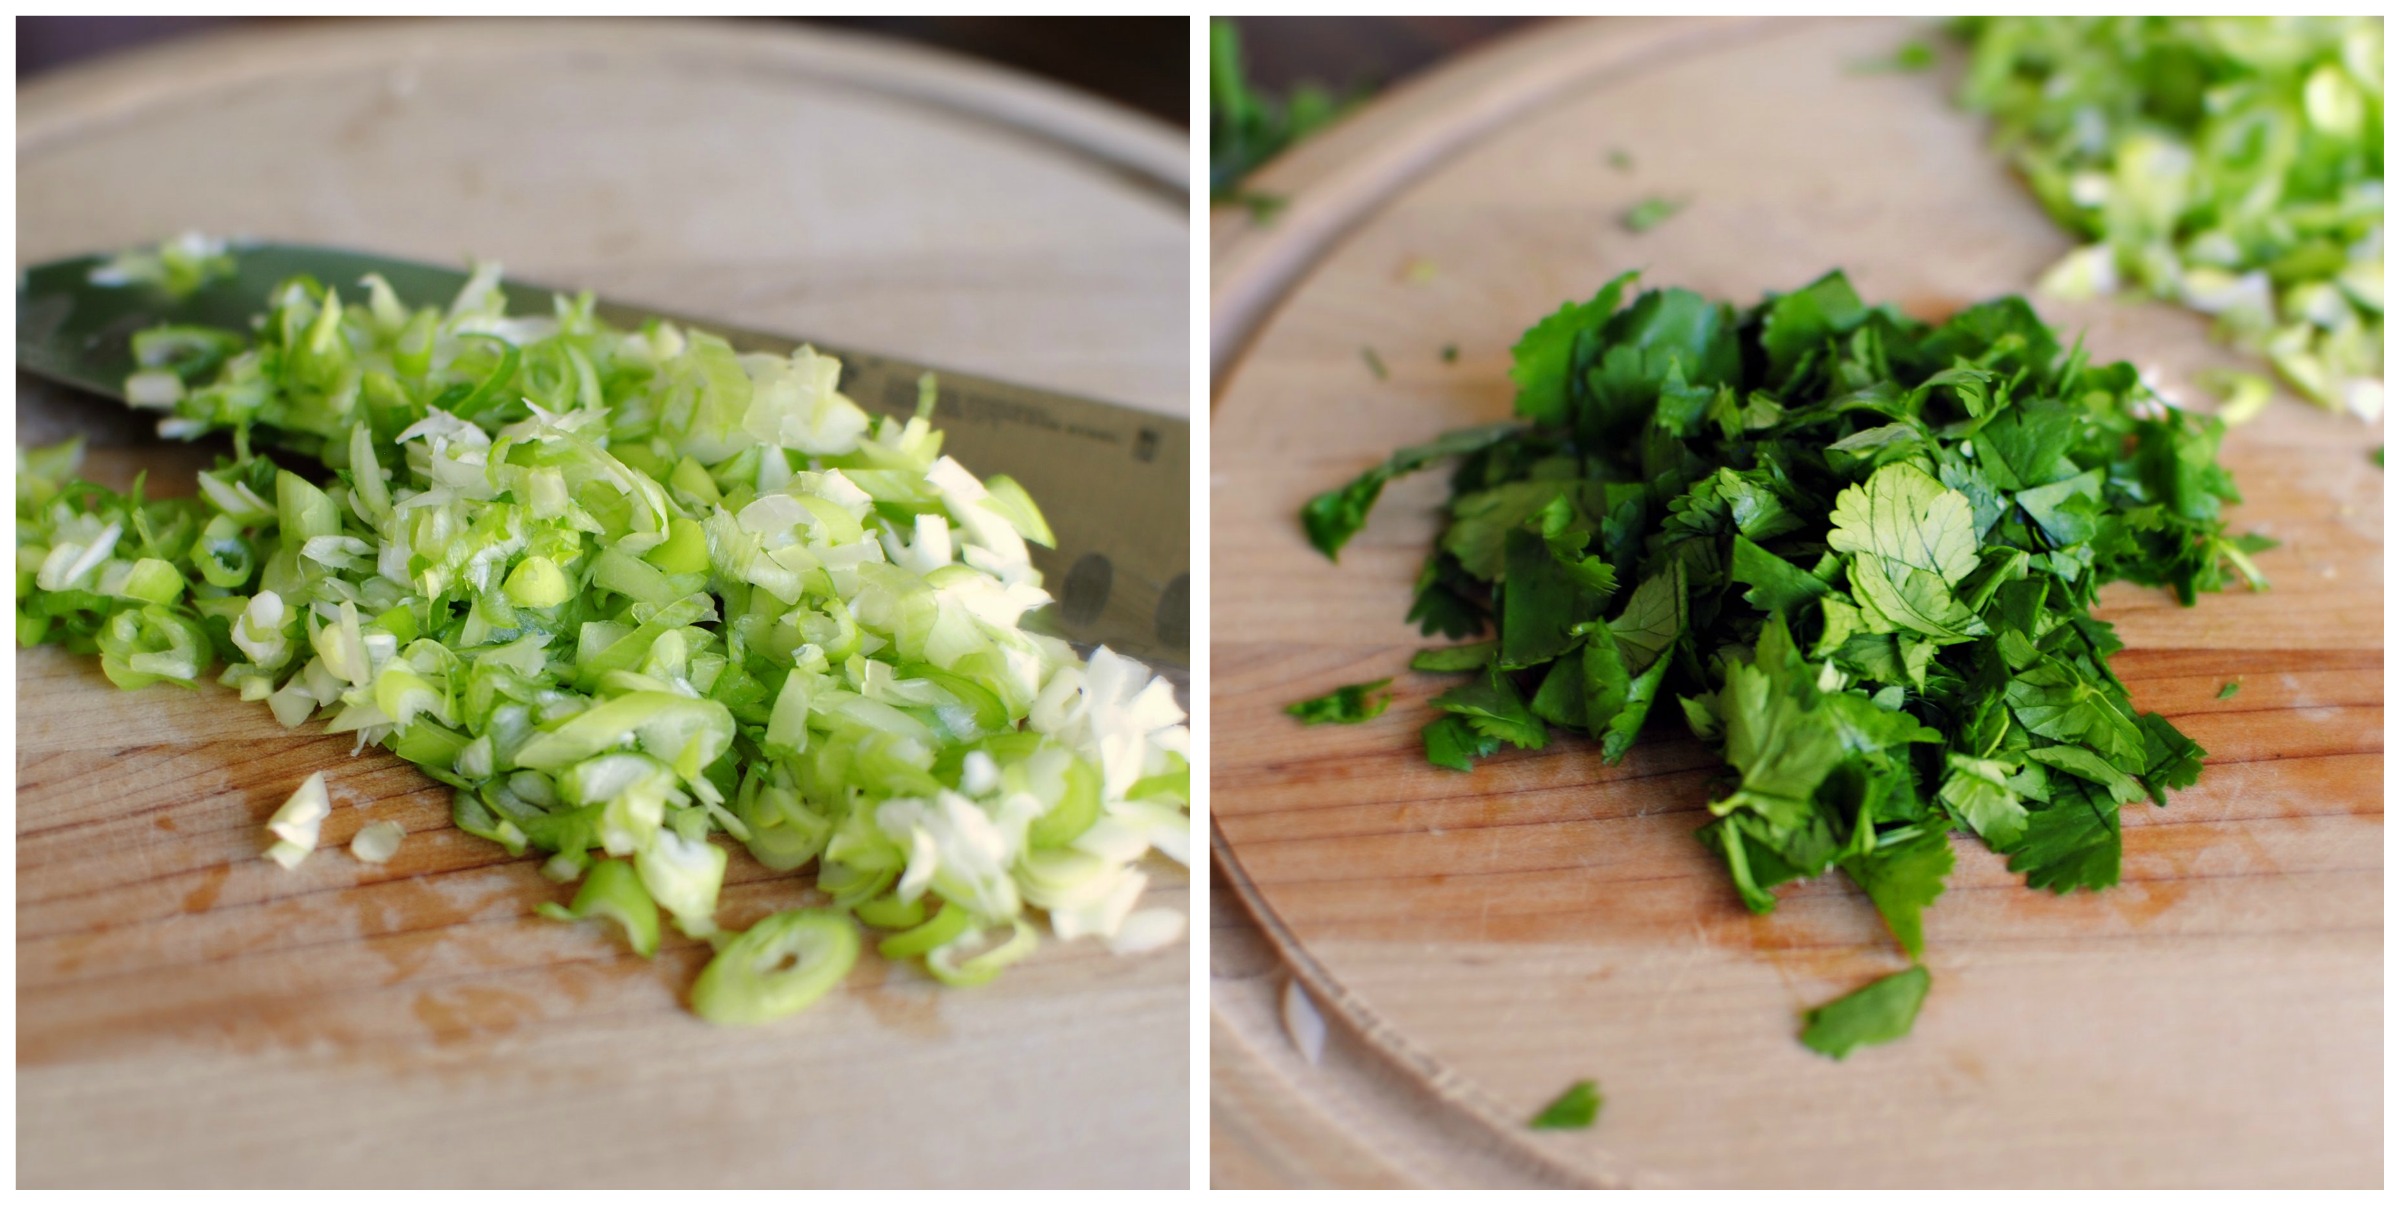
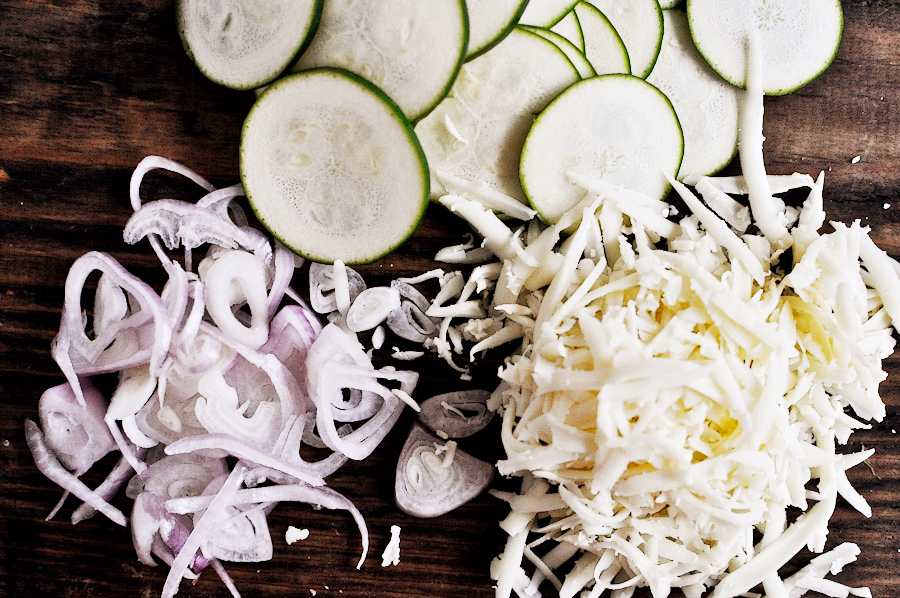
Slice and dice up two scallions and a bunch of cilantro.


Tasty Kitchen Blog: Spicy Citrus Spicy Wings with Cilantro Dripping Sauce. Guest post by Laurie McNamara of Simply Scratch, recipe submitted by TK member Sarah of Life is Still Sweet.

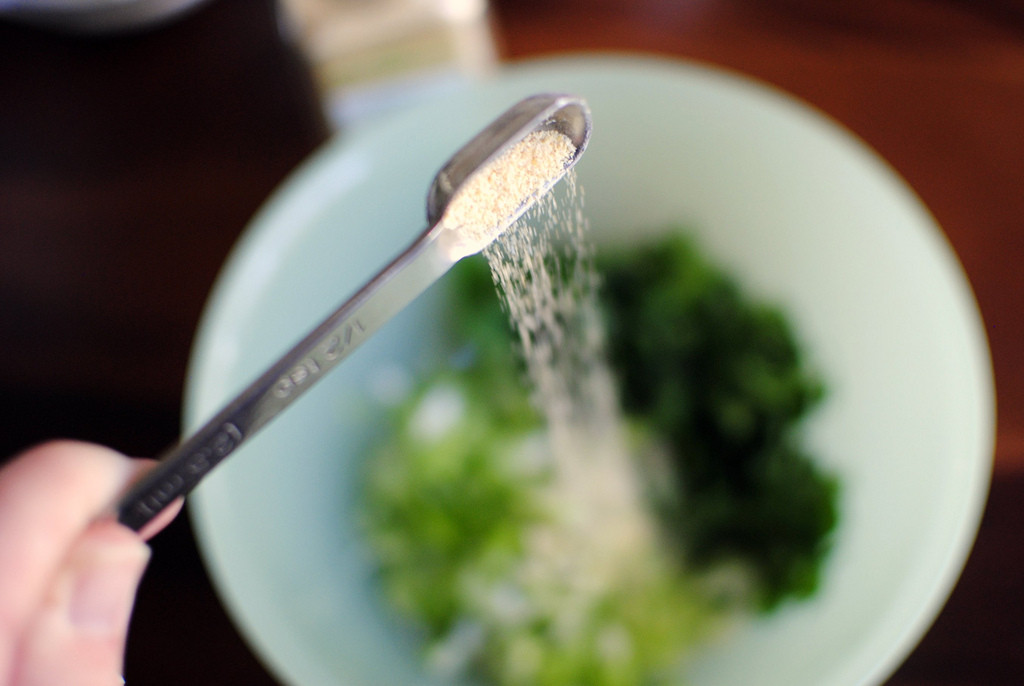
Throw the onions and cilantro into a small bowl and add a half teaspoon of garlic powder.


Tasty Kitchen Blog: Spicy Citrus Spicy Wings with Cilantro Dripping Sauce. Guest post by Laurie McNamara of Simply Scratch, recipe submitted by TK member Sarah of Life is Still Sweet.

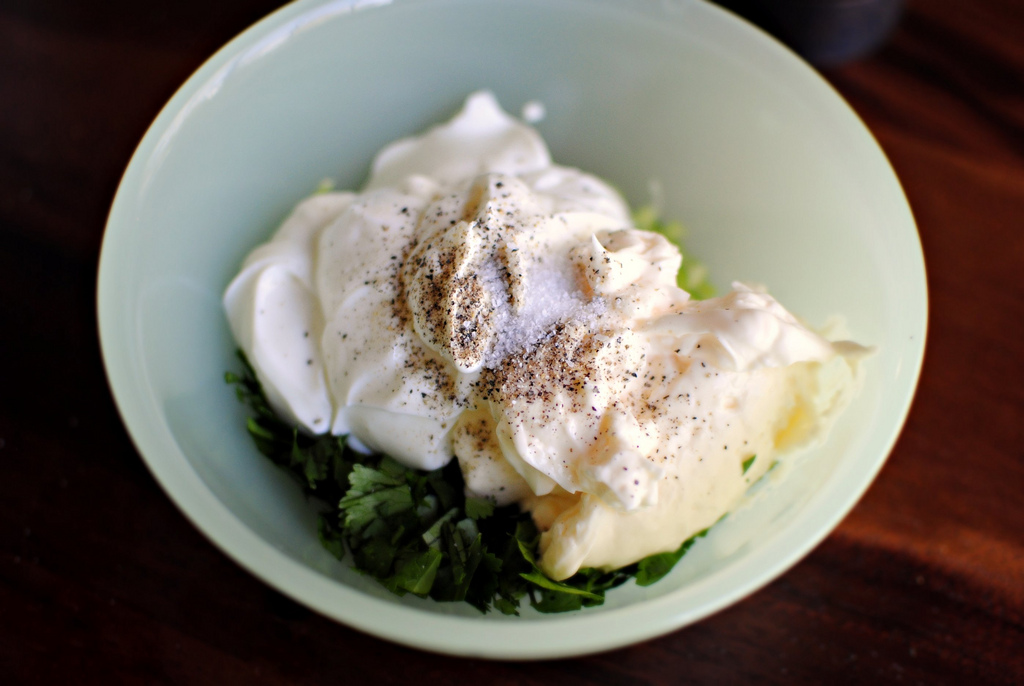
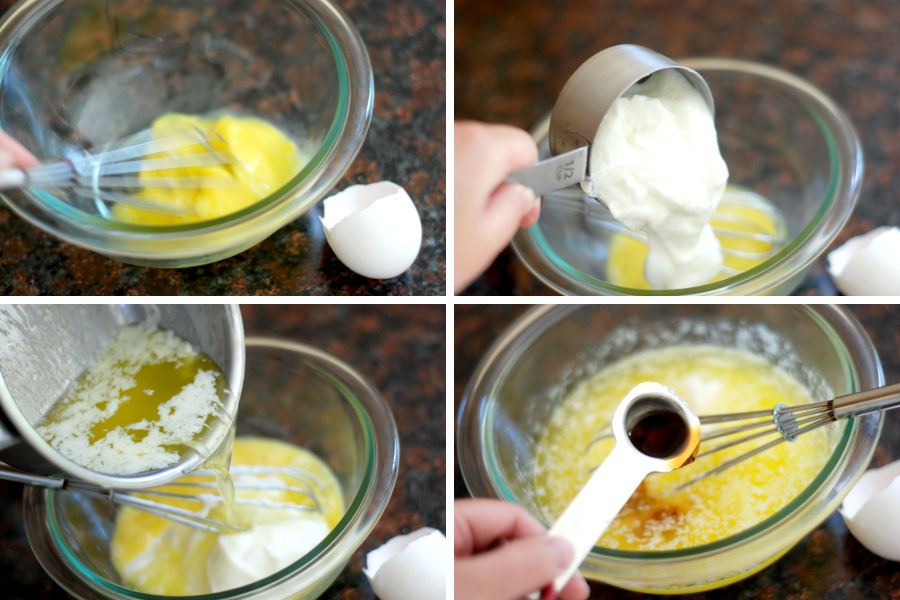
Measure out the mayo and Greek yogurt, then season with kosher salt and black pepper. If you have sour cream on hand (in place of Greek yogurt), that would work too.


Tasty Kitchen Blog: Spicy Citrus Spicy Wings with Cilantro Dripping Sauce. Guest post by Laurie McNamara of Simply Scratch, recipe submitted by TK member Sarah of Life is Still Sweet.

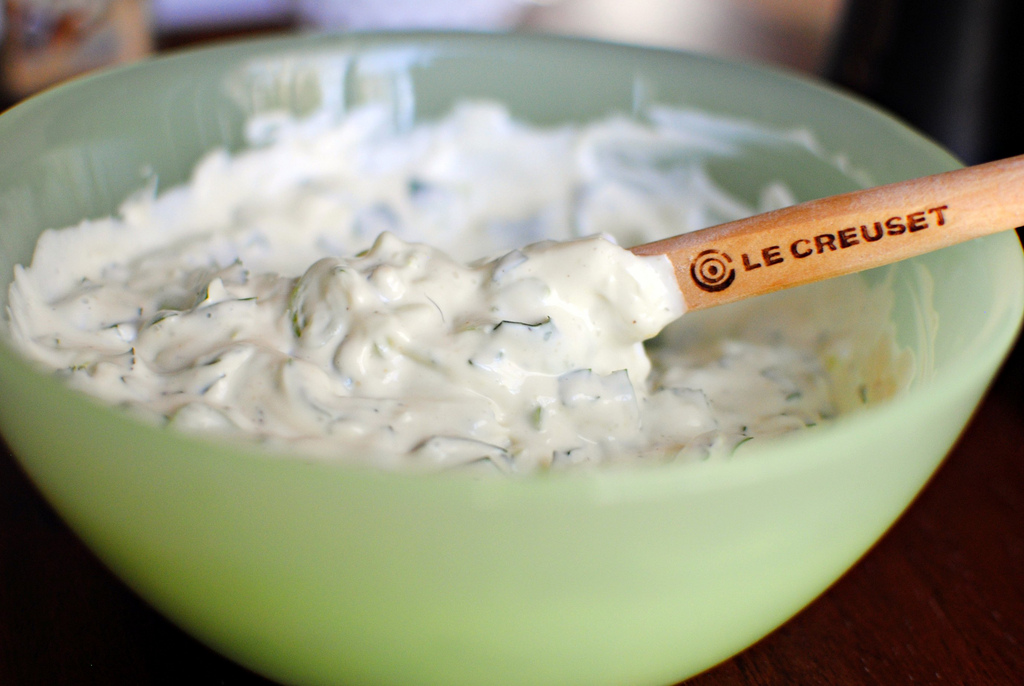
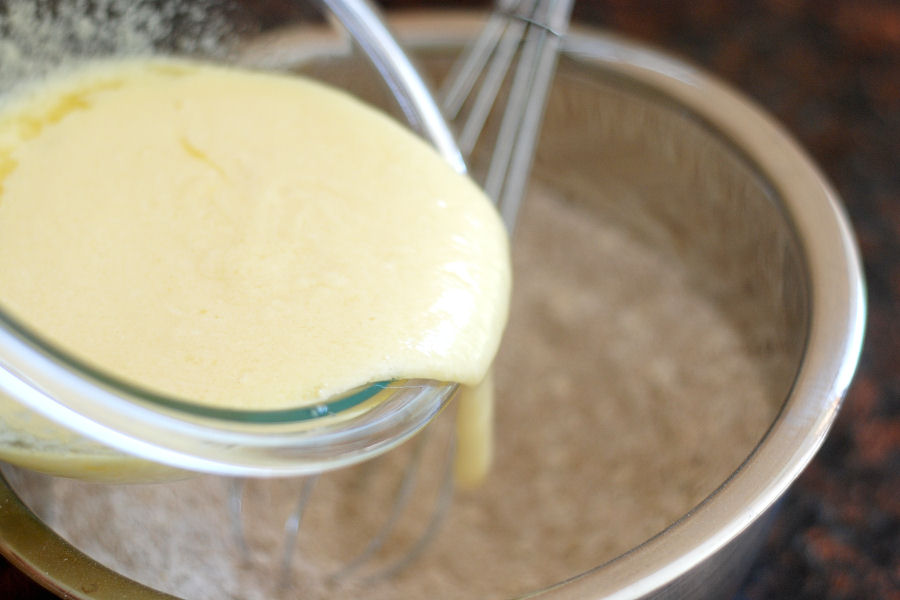
Stir and taste (to check the seasoning of course), then wrap with plastic wrap and stick it in your fridge to get those flavors developing.


Tasty Kitchen Blog: Spicy Citrus Spicy Wings with Cilantro Dripping Sauce. Guest post by Laurie McNamara of Simply Scratch, recipe submitted by TK member Sarah of Life is Still Sweet.

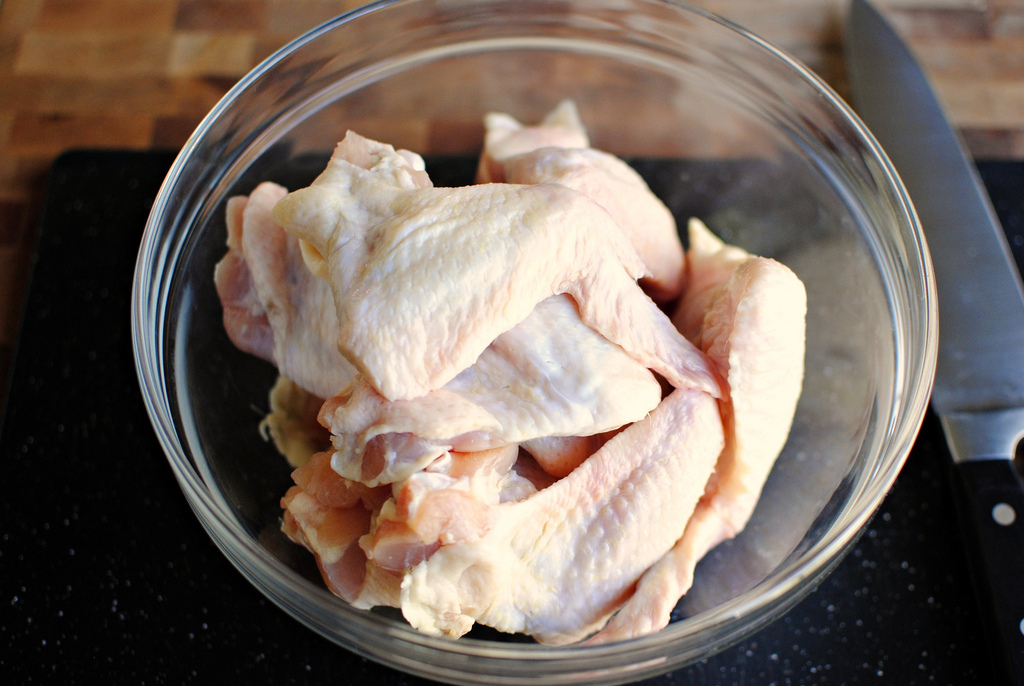
These are whole chicken wings. You’ll need to break them down into three parts; the wingtip (which you’ll discard), the wing or “wingette”, and the classic drumette. 


Tasty Kitchen Blog: Spicy Citrus Spicy Wings with Cilantro Dripping Sauce. Guest post by Laurie McNamara of Simply Scratch, recipe submitted by TK member Sarah of Life is Still Sweet.

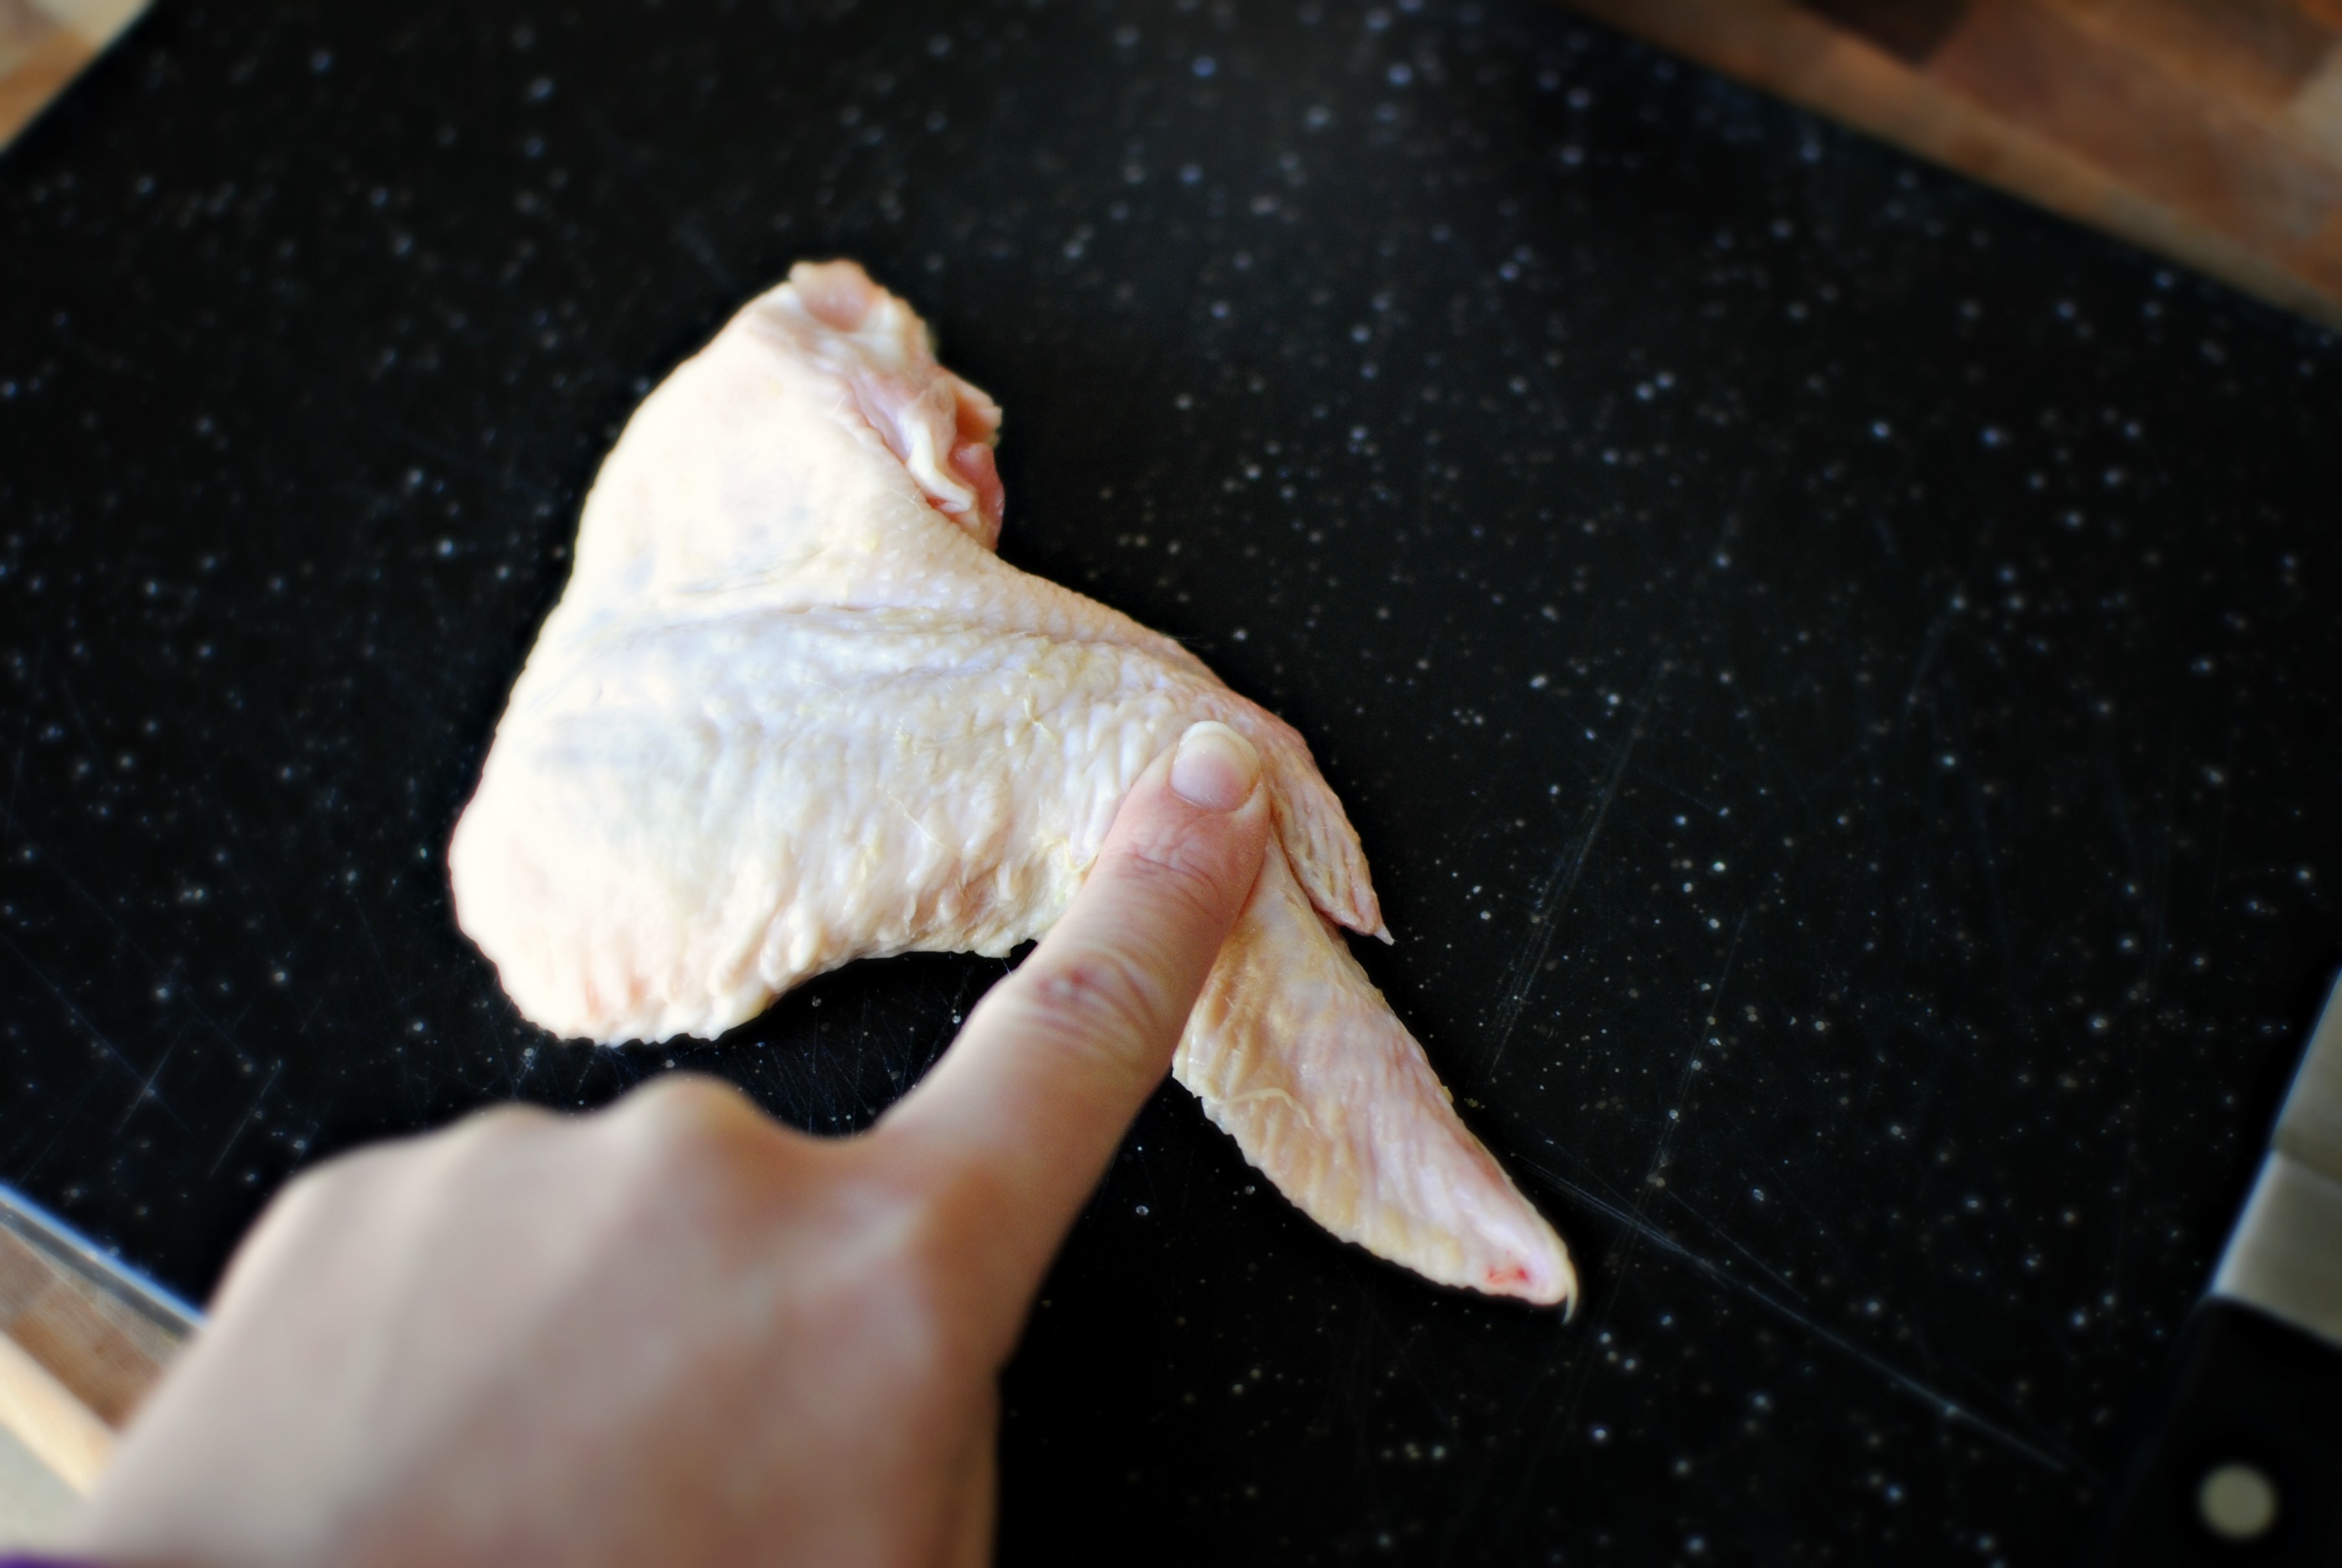
With your index finger. find each joint.


Tasty Kitchen Blog: Spicy Citrus Spicy Wings with Cilantro Dripping Sauce. Guest post by Laurie McNamara of Simply Scratch, recipe submitted by TK member Sarah of Life is Still Sweet.

With your sharpest knife, firmly cut into the center of each joint. It should only take a little pressure and your knife should do majority of the work to cut right through. I promise it’s actually not as hard as it looks.


Tasty Kitchen Blog: Spicy Citrus Spicy Wings with Cilantro Dripping Sauce. Guest post by Laurie McNamara of Simply Scratch, recipe submitted by TK member Sarah of Life is Still Sweet.

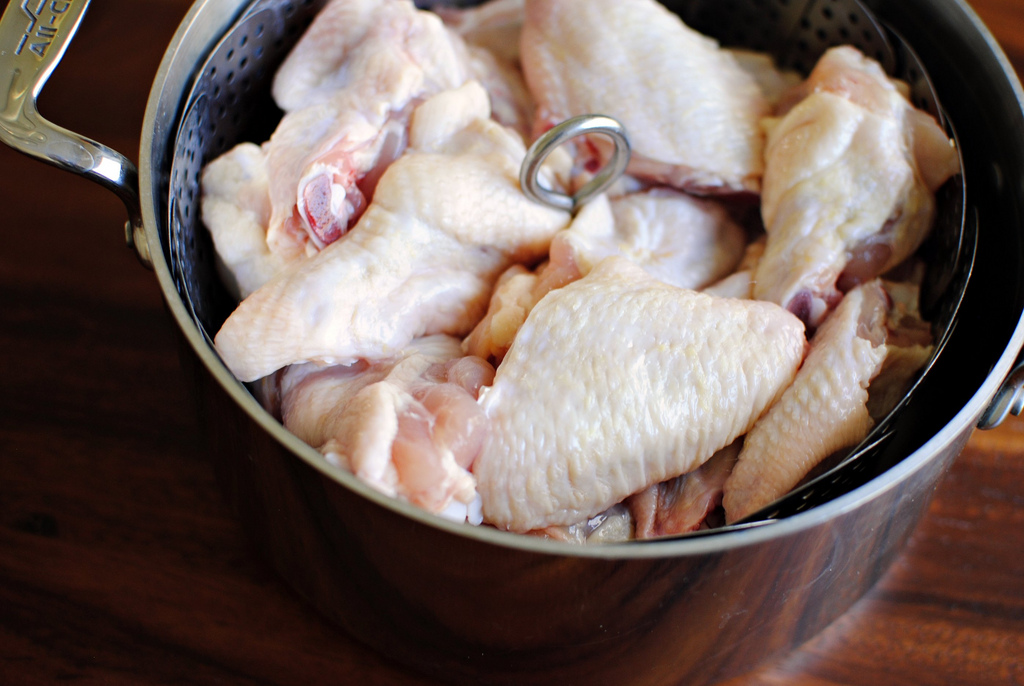
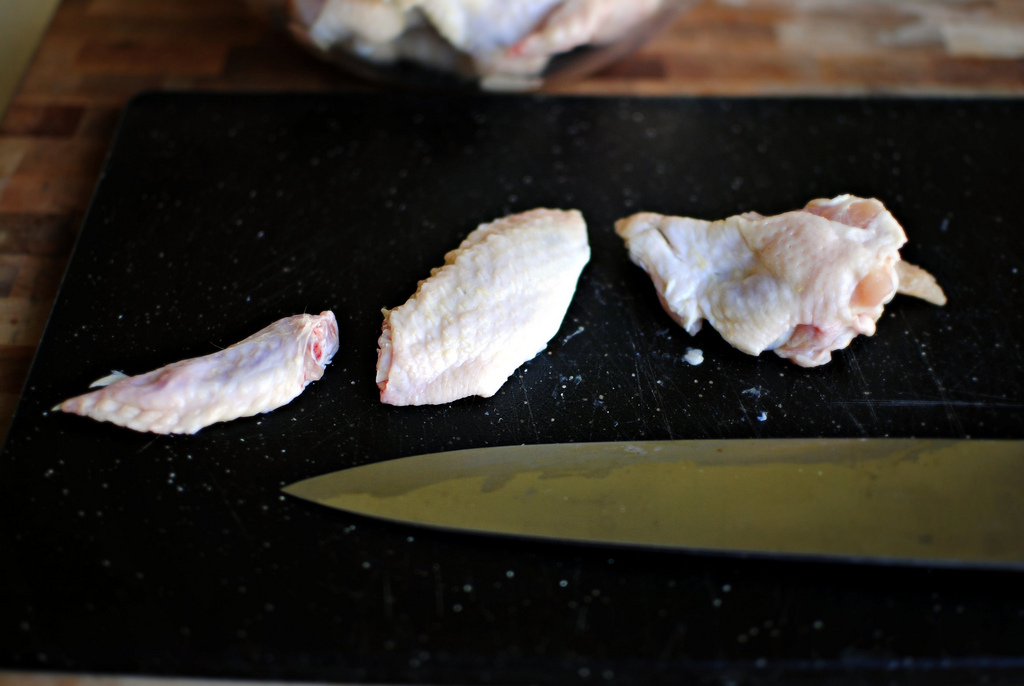
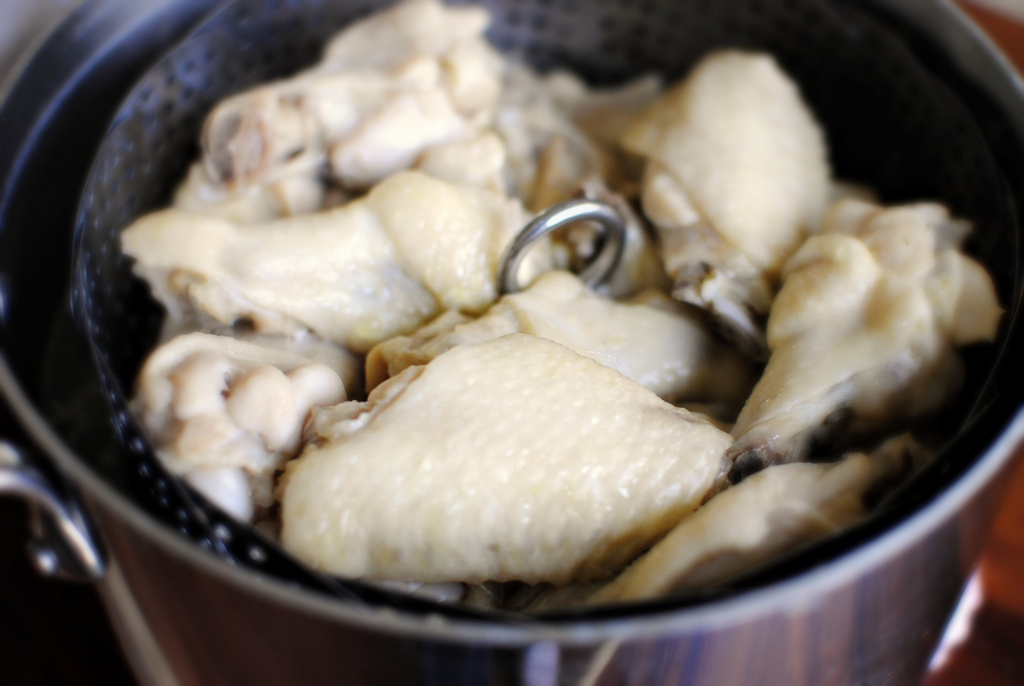
Discard the wing tips or save them for stock. Nestle the rest of the wing pieces into a large steamer basket, and place the basket into a good-sized pot.


Tasty Kitchen Blog: Spicy Citrus Spicy Wings with Cilantro Dripping Sauce. Guest post by Laurie McNamara of Simply Scratch, recipe submitted by TK member Sarah of Life is Still Sweet.

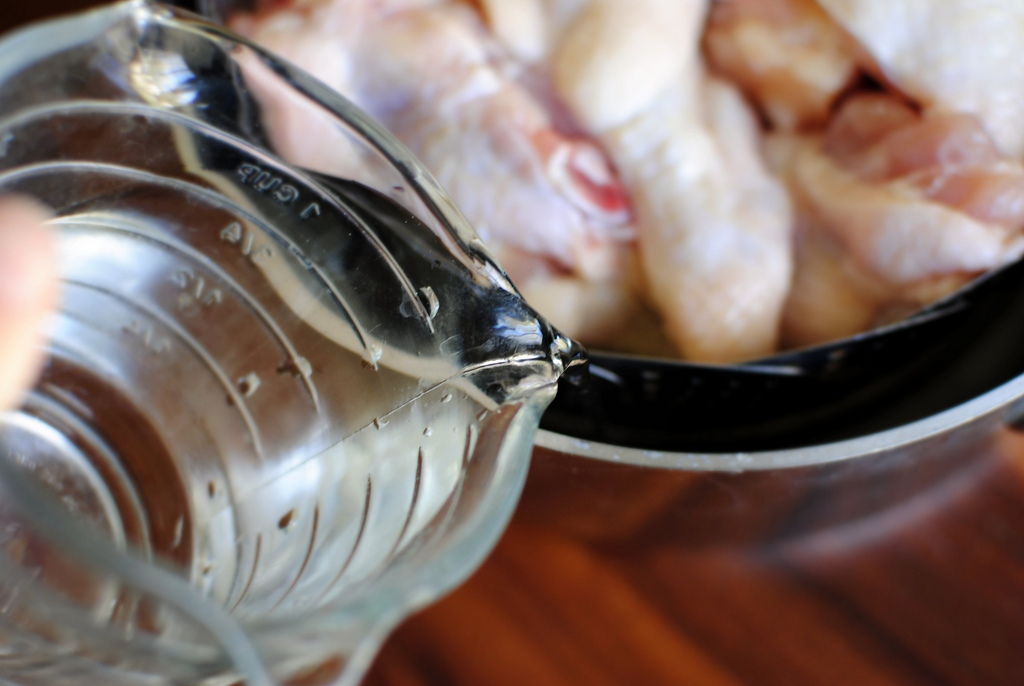
Fill the pot with water just until it reaches the bottom of the steamer basket.


Tasty Kitchen Blog: Spicy Citrus Spicy Wings with Cilantro Dripping Sauce. Guest post by Laurie McNamara of Simply Scratch, recipe submitted by TK member Sarah of Life is Still Sweet.

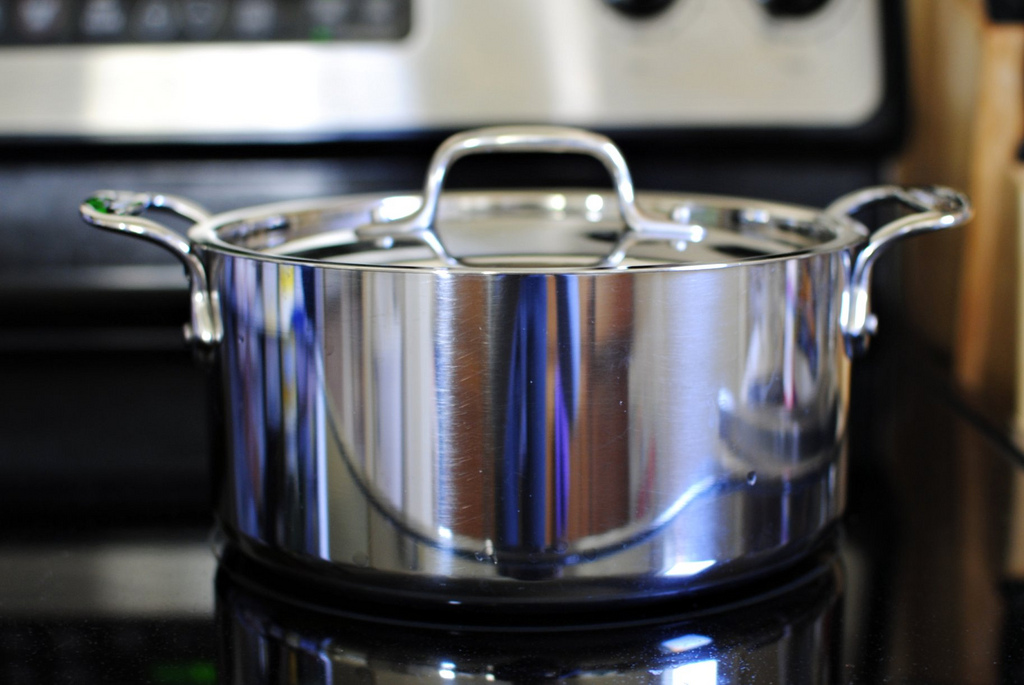
Place a tight-fitting lid or a heavy plate on top, bring to a simmer and steam for 18-20 minutes.


Tasty Kitchen Blog: Spicy Citrus Spicy Wings with Cilantro Dripping Sauce. Guest post by Laurie McNamara of Simply Scratch, recipe submitted by TK member Sarah of Life is Still Sweet.

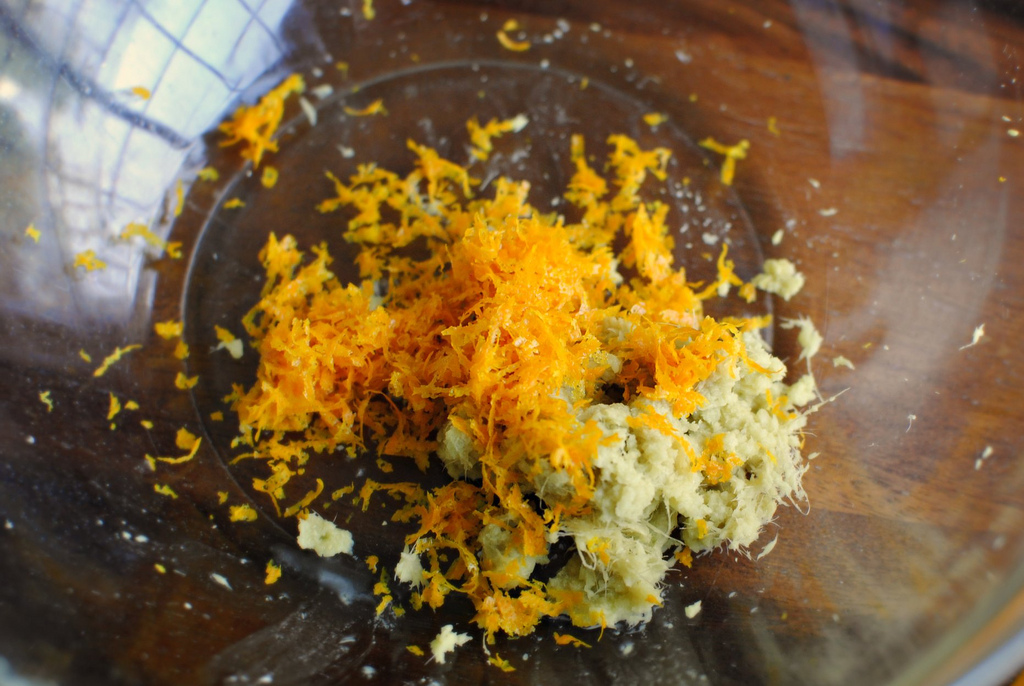
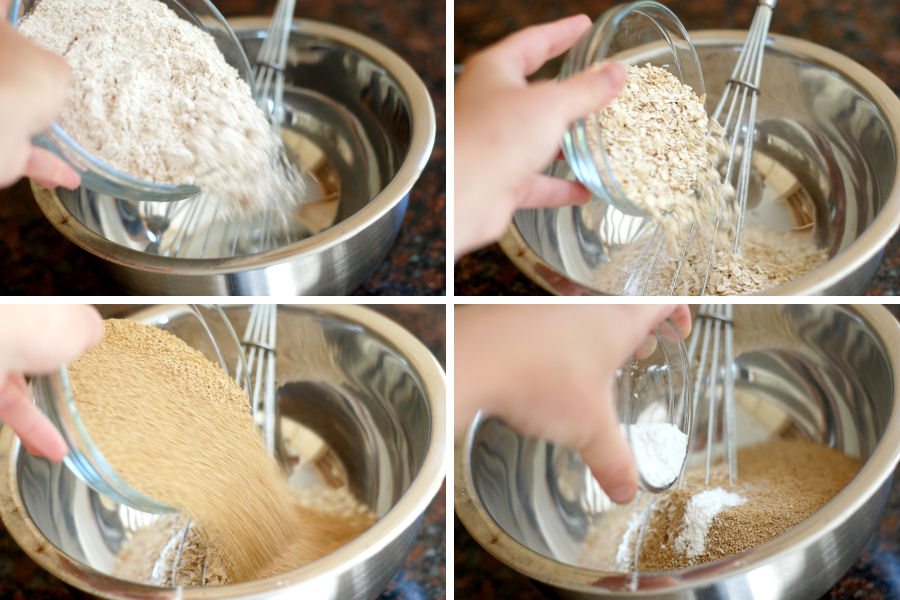
While the wings are steaming, warm up your biceps and grate two tablespoons of ginger and the zest of an entire orange into a large bowl.


Tasty Kitchen Blog: Spicy Citrus Spicy Wings with Cilantro Dripping Sauce. Guest post by Laurie McNamara of Simply Scratch, recipe submitted by TK member Sarah of Life is Still Sweet.

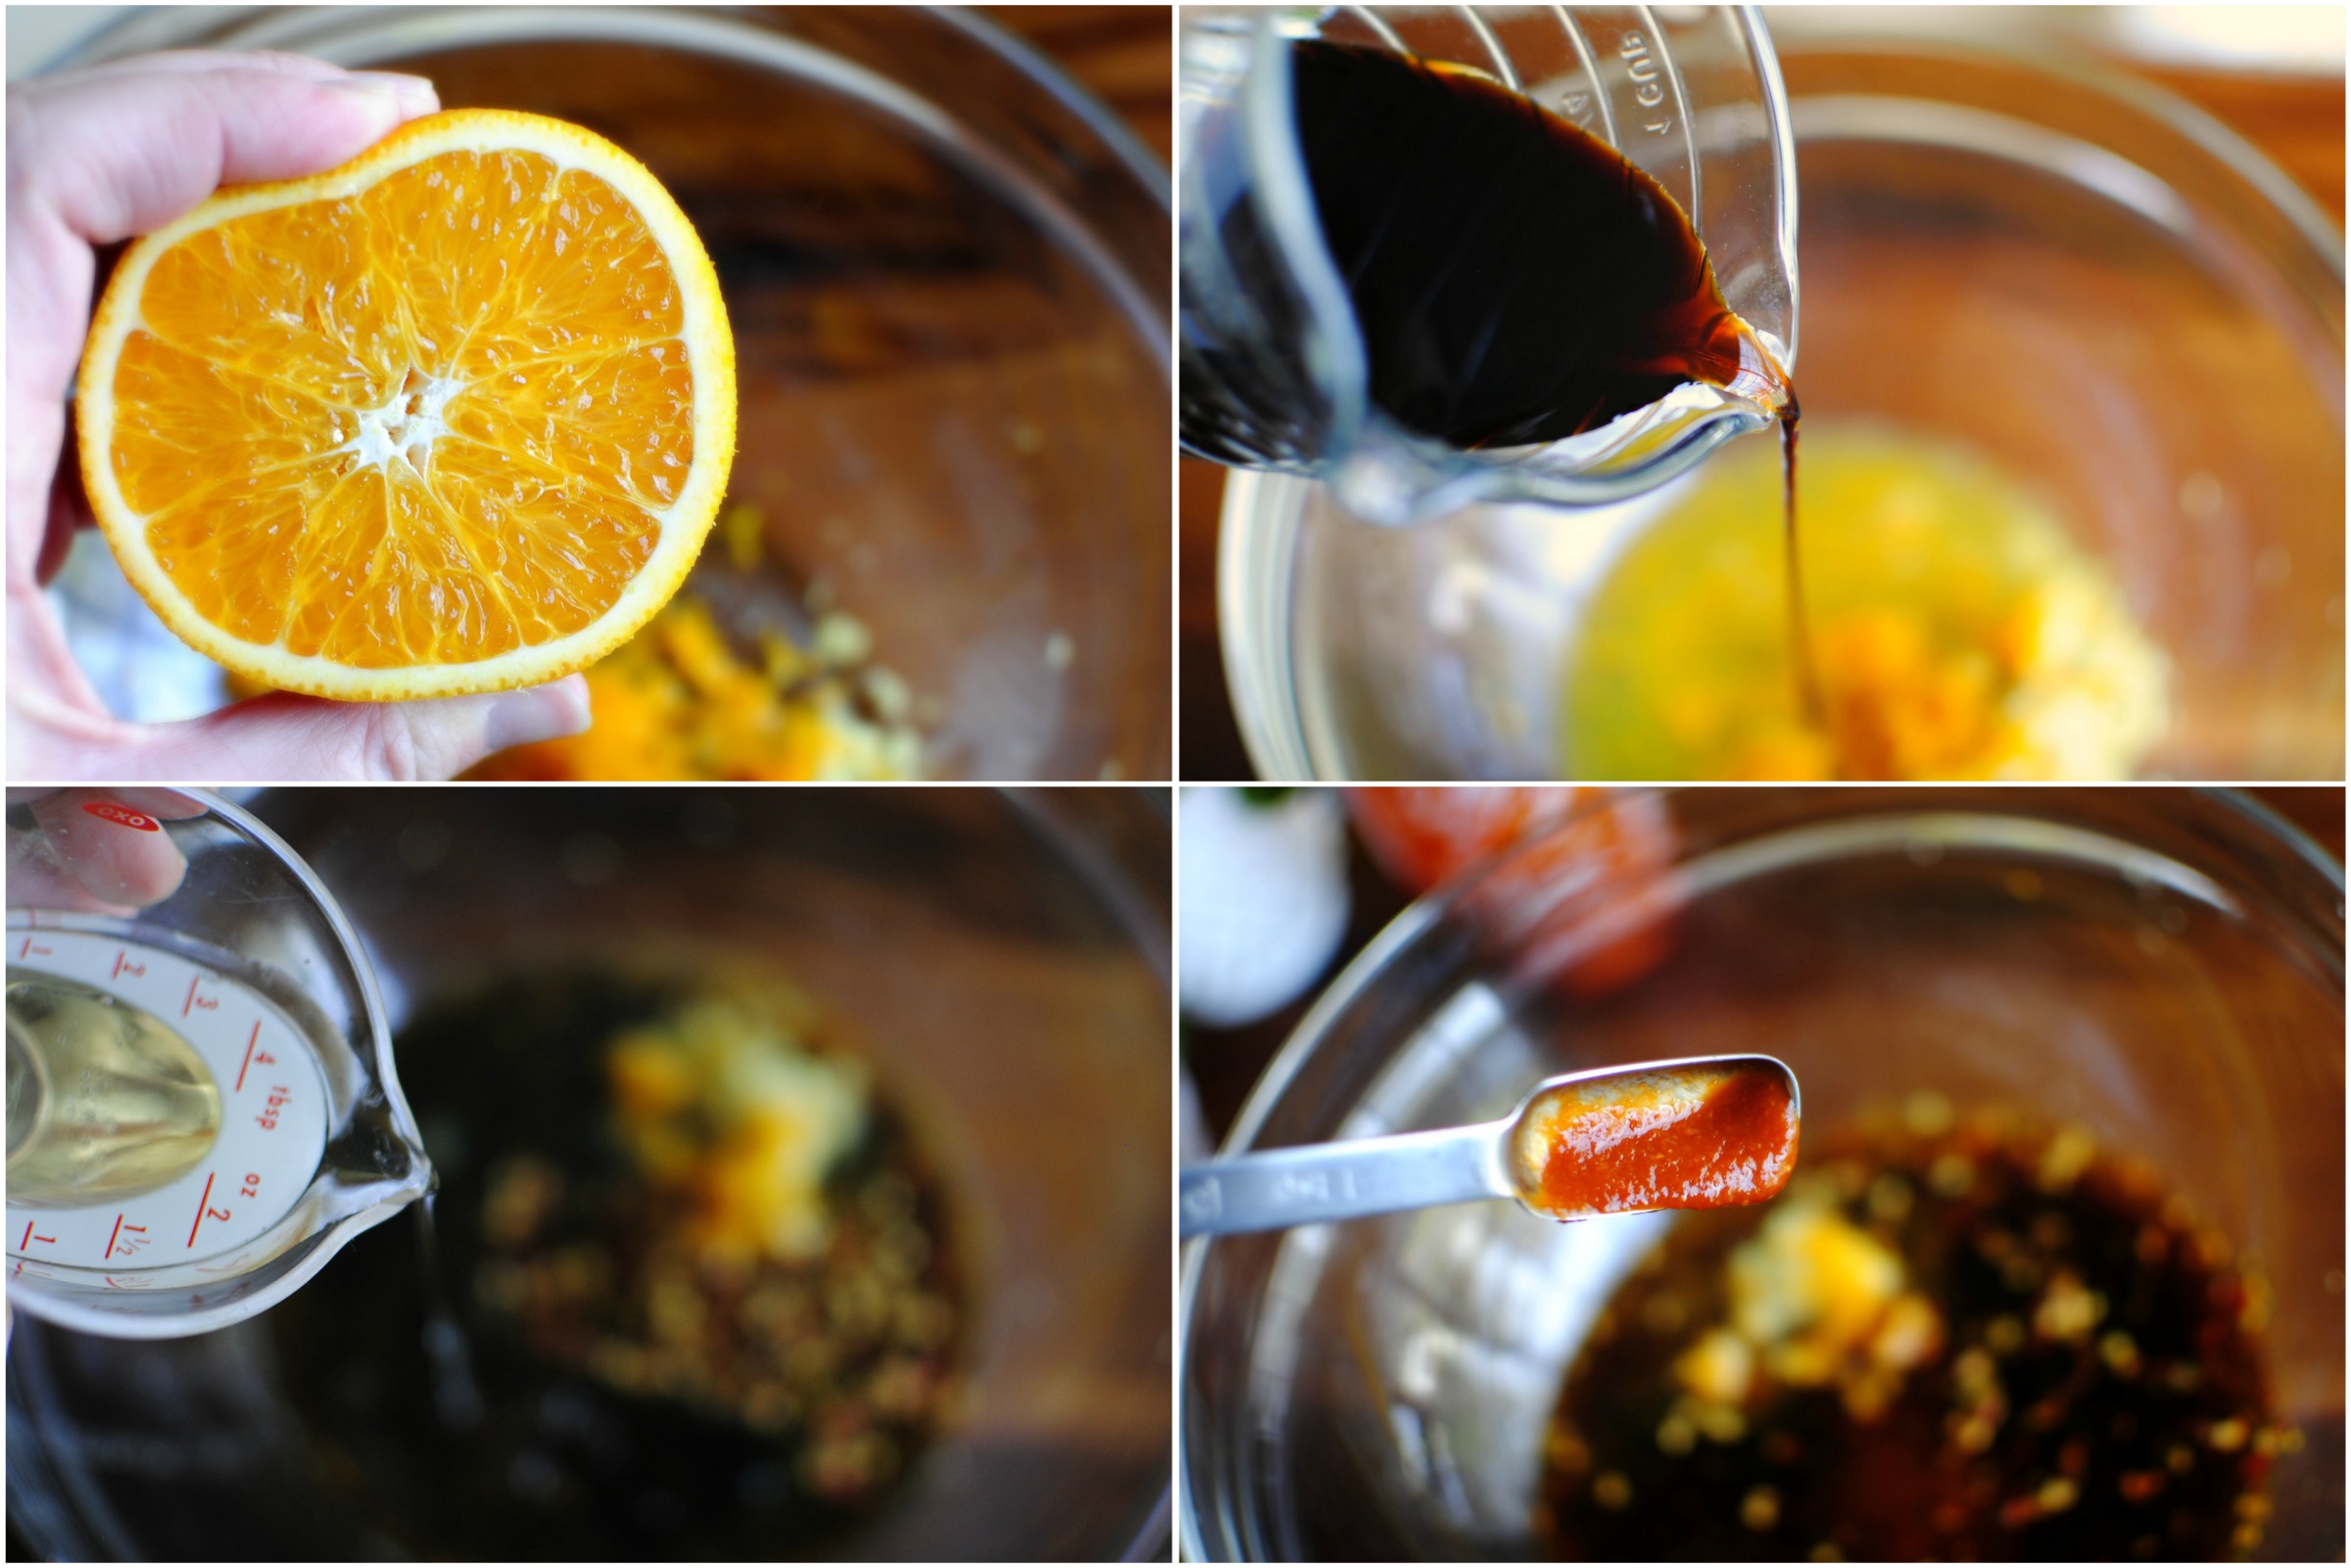
Over the same bowl, put the squeeze on both orange halves to extract all that juice, then measure and pour in the soy sauce, rice vinegar and sriracha. These aren’t blow-your-mind spicy, so measure with a heavy hand if you want a lot of kick!


Tasty Kitchen Blog: Spicy Citrus Spicy Wings with Cilantro Dripping Sauce. Guest post by Laurie McNamara of Simply Scratch, recipe submitted by TK member Sarah of Life is Still Sweet.

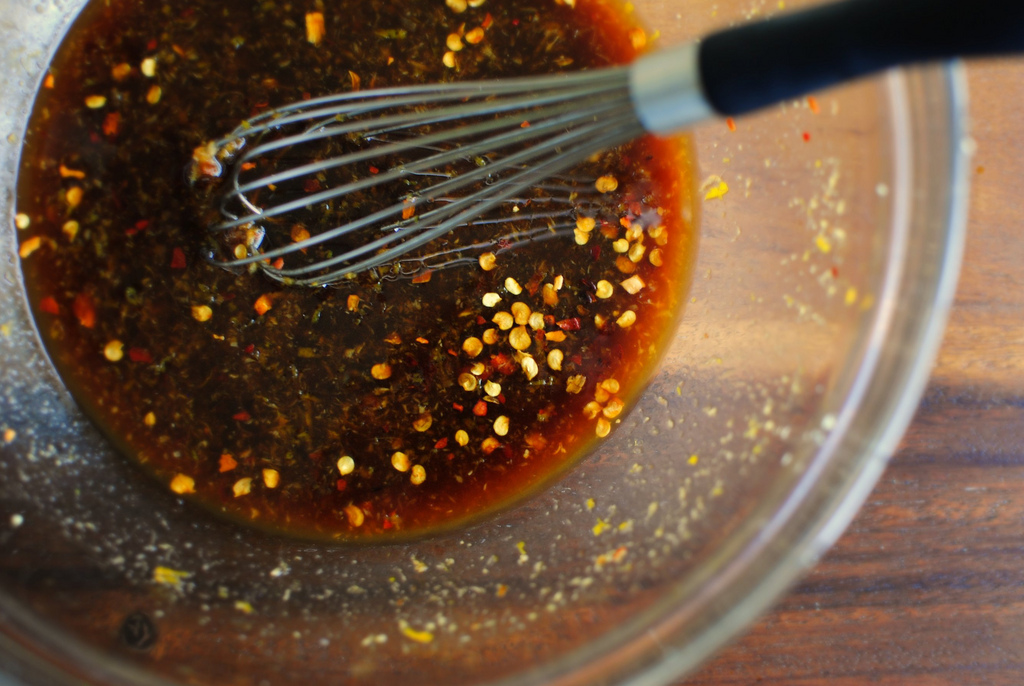
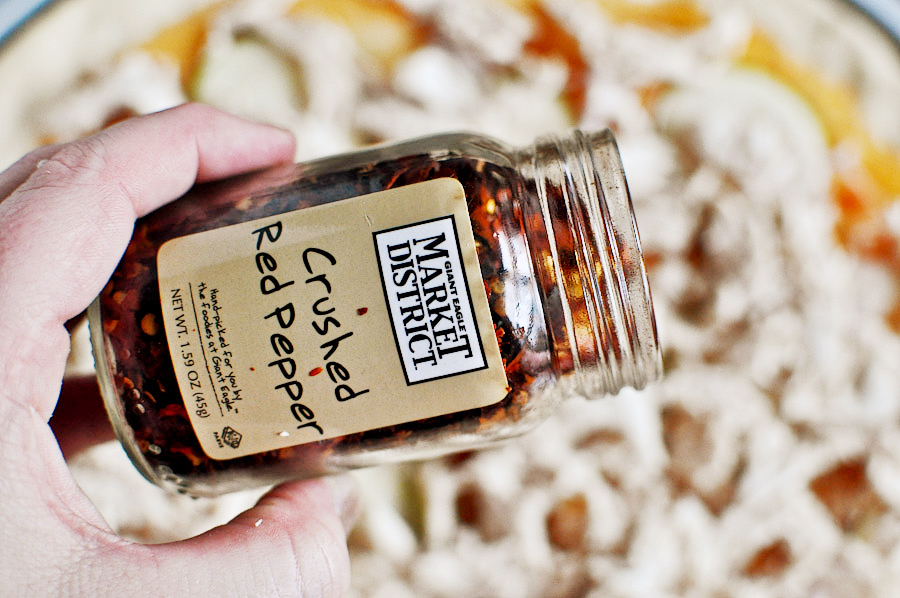
Sprinkle in the red pepper flakes and whisk to combine.


Tasty Kitchen Blog: Spicy Citrus Spicy Wings with Cilantro Dripping Sauce. Guest post by Laurie McNamara of Simply Scratch, recipe submitted by TK member Sarah of Life is Still Sweet.

The wings by now should be done steaming and fully cooked. All you have to do now is crisp that glorious chicken skin. First, though, we must glaze!


Tasty Kitchen Blog: Spicy Citrus Spicy Wings with Cilantro Dripping Sauce. Guest post by Laurie McNamara of Simply Scratch, recipe submitted by TK member Sarah of Life is Still Sweet.

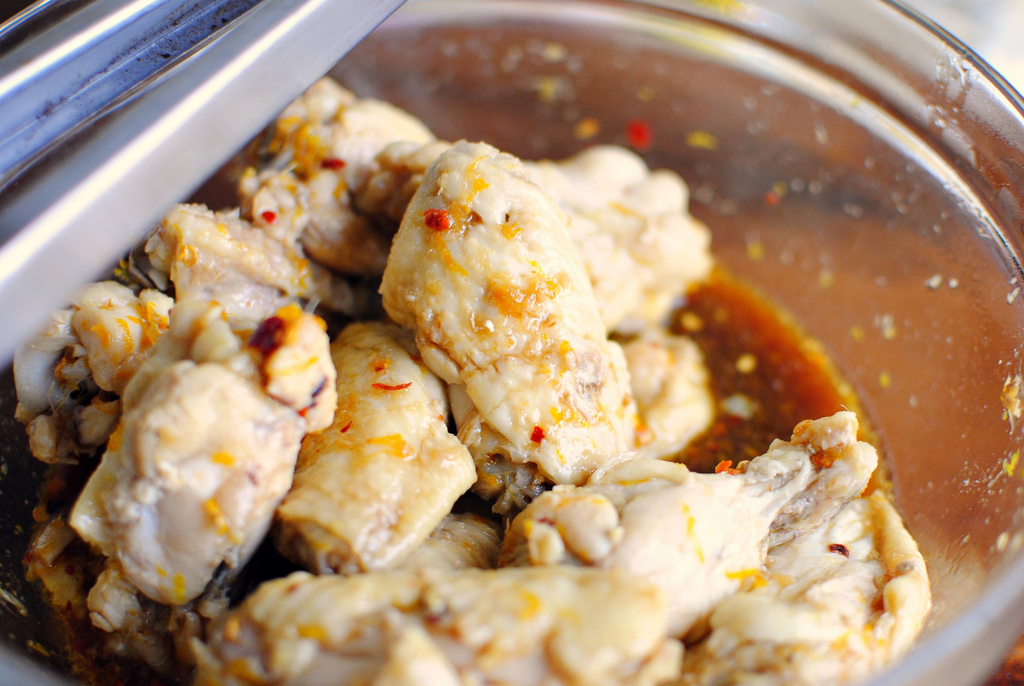
Add in all the chicken wings into the spicy orange glaze and toss gently to coat. Be careful not to tear or remove any of that skin.


Tasty Kitchen Blog: Spicy Citrus Spicy Wings with Cilantro Dripping Sauce. Guest post by Laurie McNamara of Simply Scratch, recipe submitted by TK member Sarah of Life is Still Sweet.

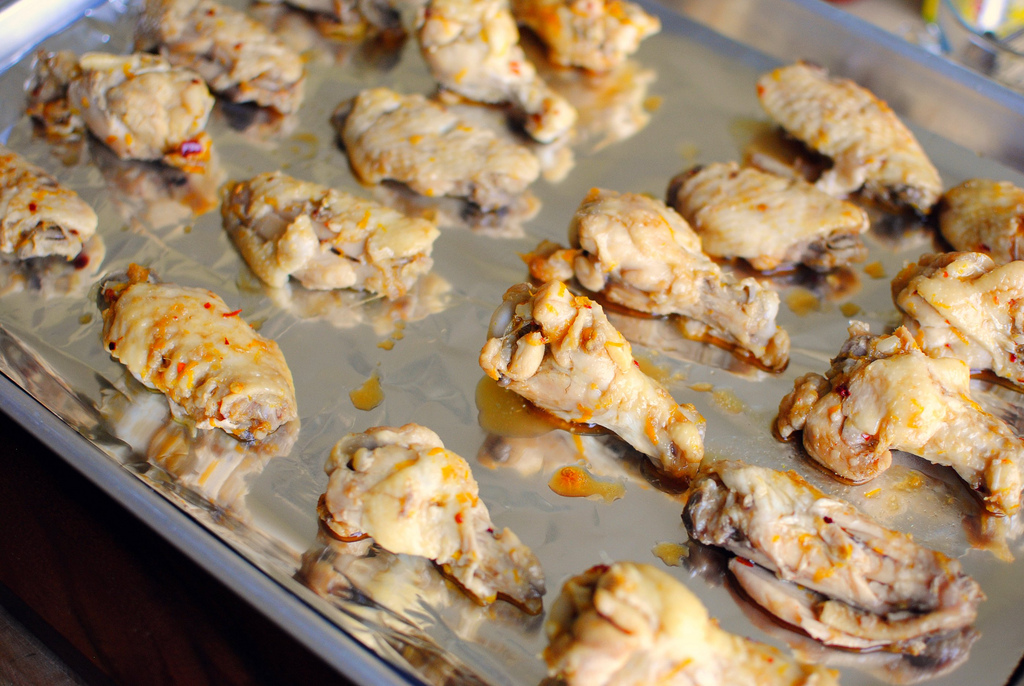
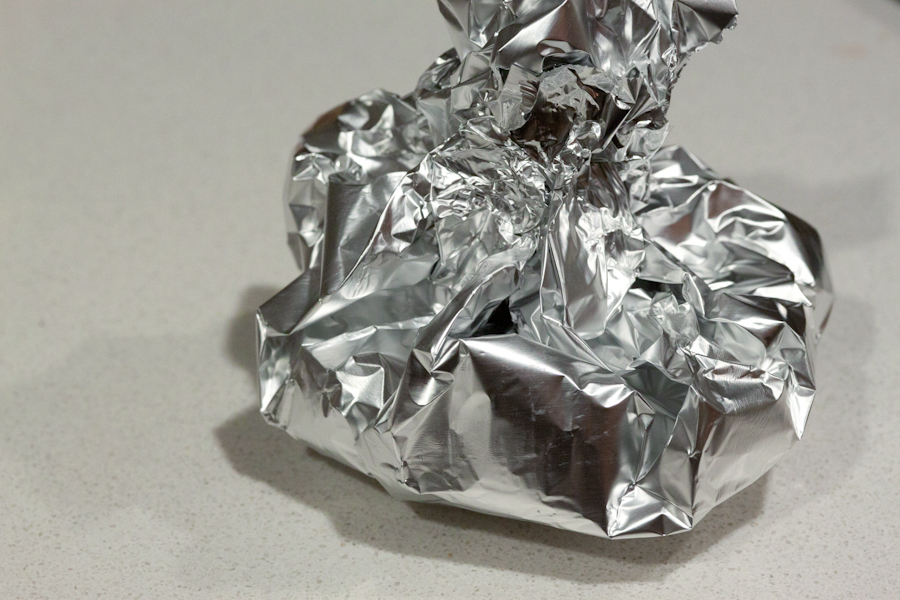
Place on a baking sheet (I lined mine with aluminum foil just to make sure things didn’t stick but I’m not sure that’s necessary), and place the pan-o-wings on the second notch under your preheated broiler and time it for 3-4 minutes. Watch carefully.


Tasty Kitchen Blog: Spicy Citrus Spicy Wings with Cilantro Dripping Sauce. Guest post by Laurie McNamara of Simply Scratch, recipe submitted by TK member Sarah of Life is Still Sweet.

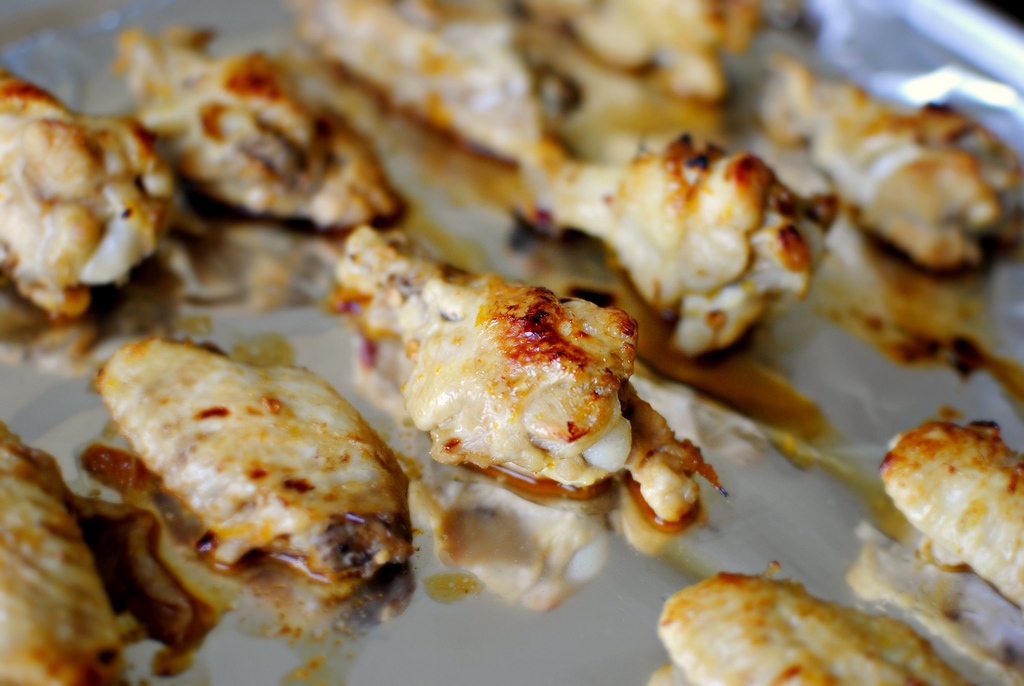
The skin should start to color and begin to crisp up.


Tasty Kitchen Blog: Spicy Citrus Spicy Wings with Cilantro Dripping Sauce. Guest post by Laurie McNamara of Simply Scratch, recipe submitted by TK member Sarah of Life is Still Sweet.

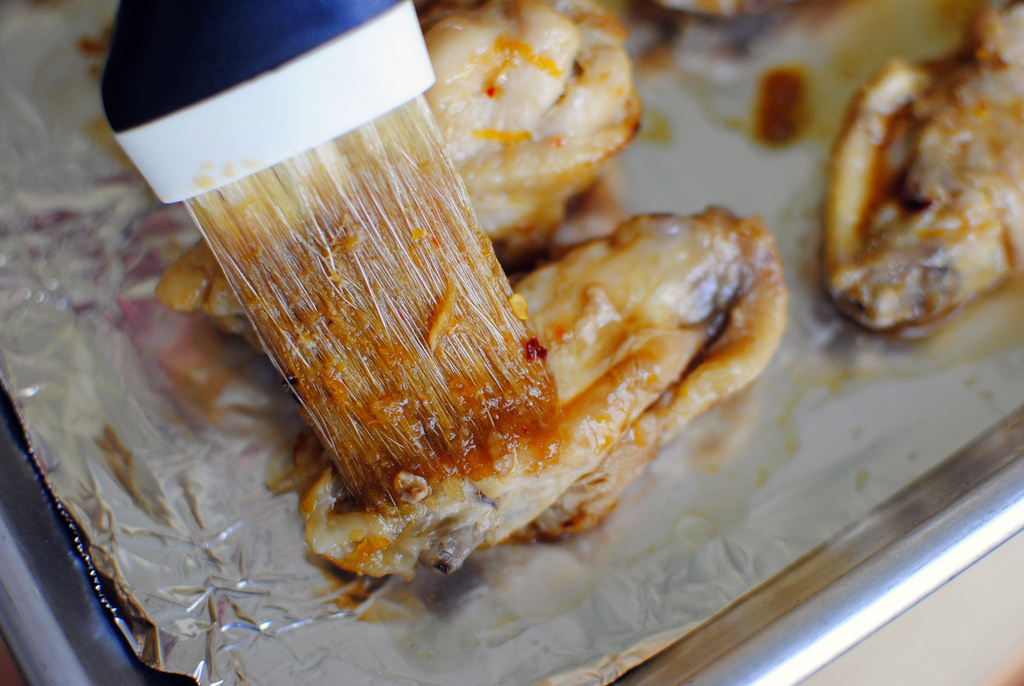
Remove, turn the wings and brush again with the spicy citrus glaze.


Tasty Kitchen Blog: Spicy Citrus Spicy Wings with Cilantro Dripping Sauce. Guest post by Laurie McNamara of Simply Scratch, recipe submitted by TK member Sarah of Life is Still Sweet.

Place back under the broiler for another 3 to 4 minutes and repeat 2 more times on each side.


Tasty Kitchen Blog: Spicy Citrus Spicy Wings with Cilantro Dripping Sauce. Guest post by Laurie McNamara of Simply Scratch, recipe submitted by TK member Sarah of Life is Still Sweet.

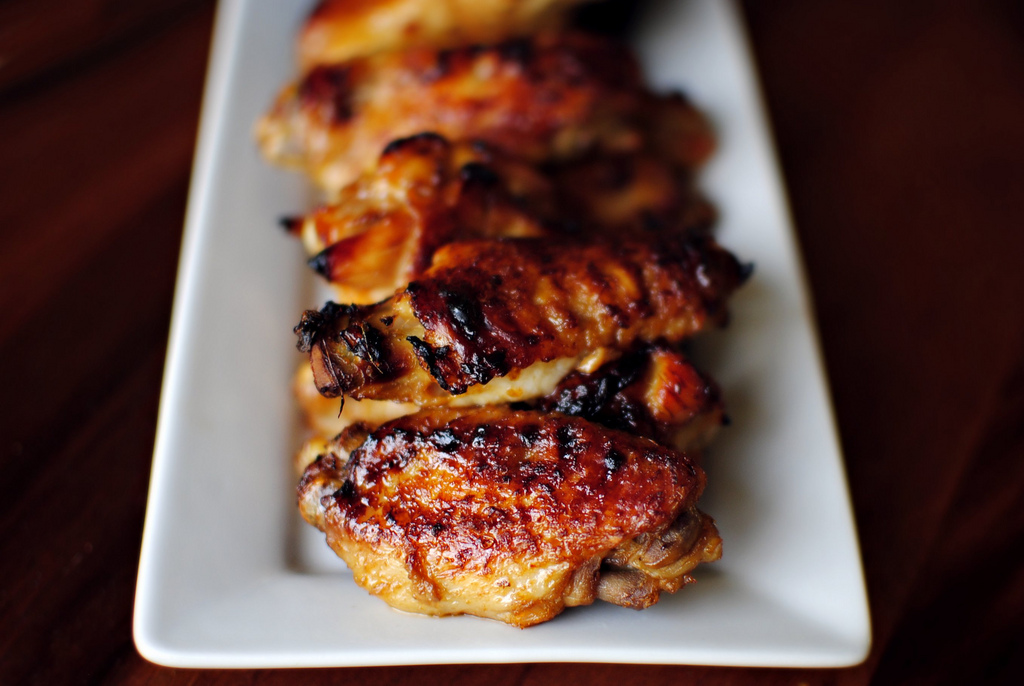
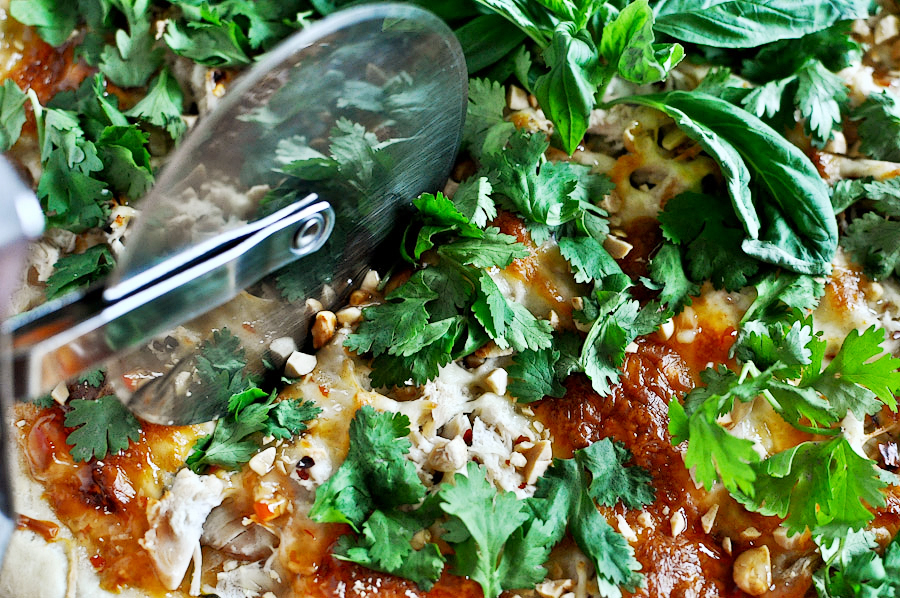
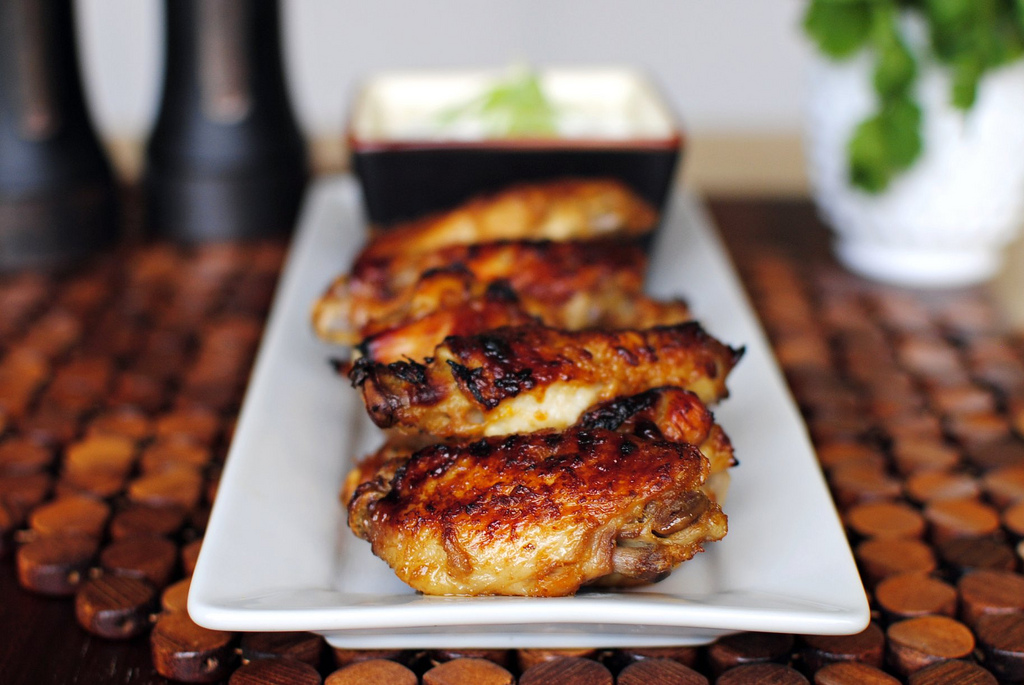
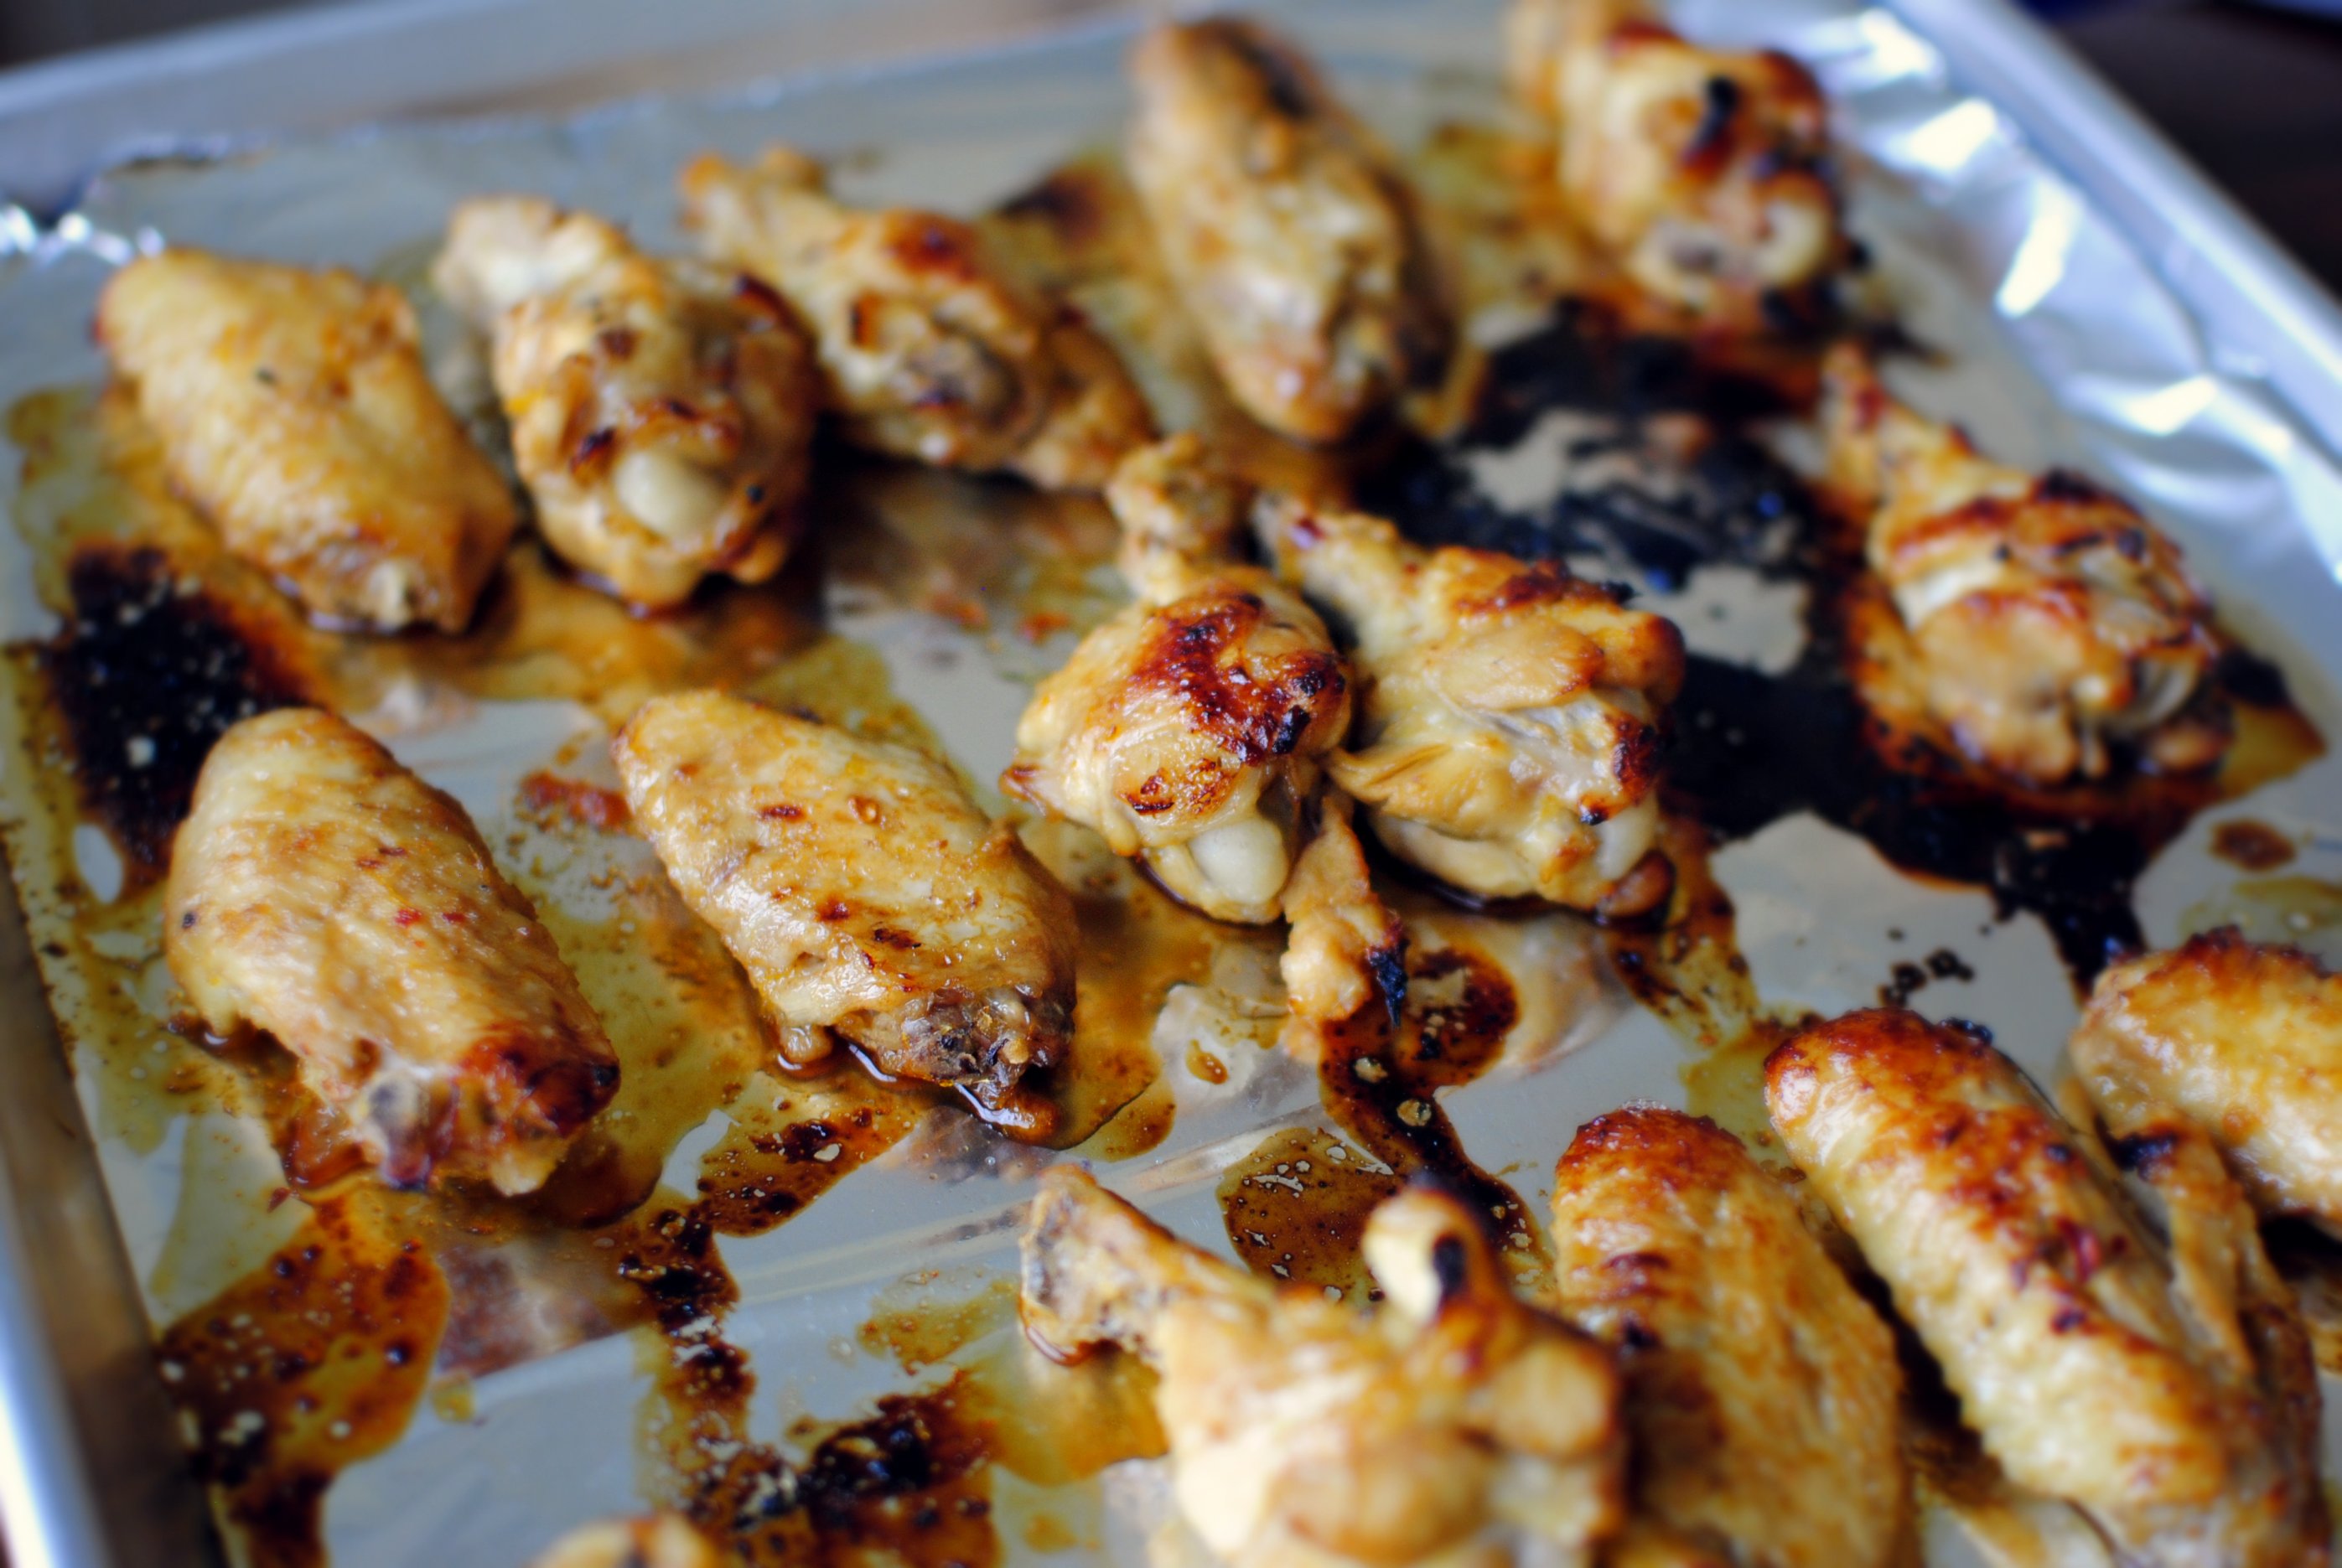
Keep going until the skin is golden and brown. Feel free to toss these back in the glaze if you like them “wet,” but I enjoyed them just the way they were: sticky and scrumptious!


Tasty Kitchen Blog: Spicy Citrus Spicy Wings with Cilantro Dripping Sauce. Guest post by Laurie McNamara of Simply Scratch, recipe submitted by TK member Sarah of Life is Still Sweet.

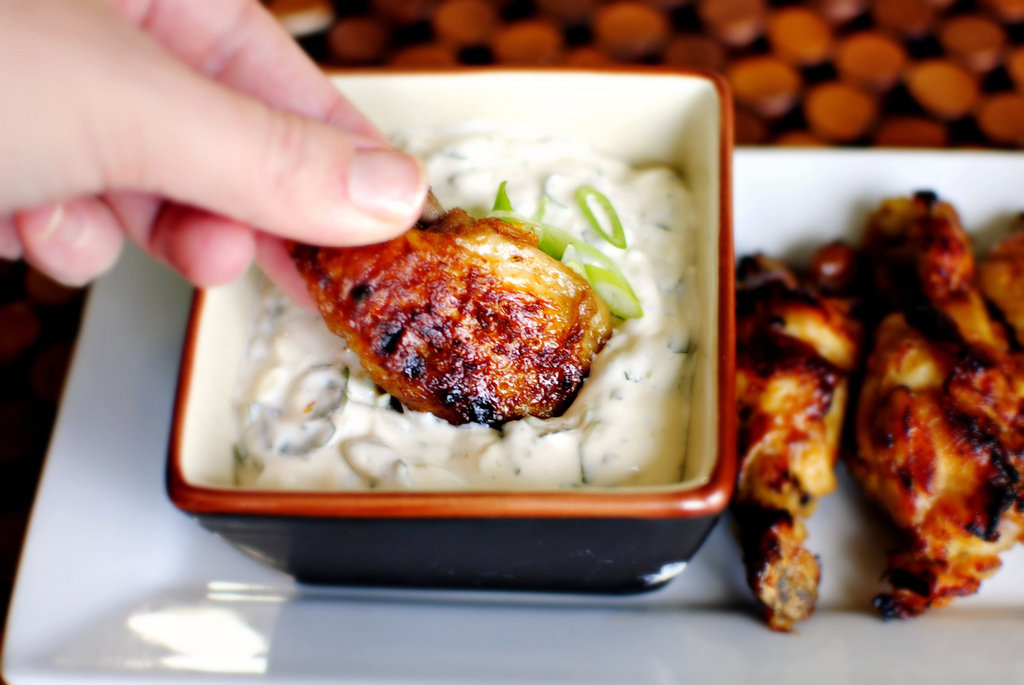
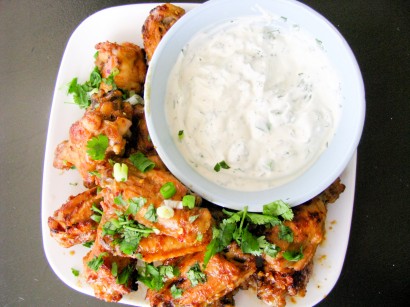
Serve it up with that fabulous cilantro dip and call it a day. I highly recommend making a double batch of the wings. You probably won’t want to share these!


Tasty Kitchen Blog: Spicy Citrus Spicy Wings with Cilantro Dripping Sauce. Guest post by Laurie McNamara of Simply Scratch, recipe submitted by TK member Sarah of Life is Still Sweet.

I made these just before my girls hopped off the bus. They ran in the house and immediately went to town on these wings. They weren’t too spicy for them to enjoy, but every now and again I got a little heat. Thanks to that fantastic dip, it wasn’t too hard to handle.
 
Such an amazing combination of flavors! Thank you Sarah for sharing this delicious wing recipe. They were absolutely delicious! Visit her blog Life Is Still Sweet for more of her amazing creations.


Printable Recipe

Citrus Spicy Wings

See post on tallmisto’s site!
5.00 Mitt(s) 5 Rating(s)5 votes, average: 5.00 out of 55 votes, average: 5.00 out of 55 votes, average: 5.00 out of 55 votes, average: 5.00 out of 55 votes, average: 5.00 out of 5

Prep Time:

Cook Time:

Difficulty: Easy

Servings: 6

6
x

Print Options

Page size Letter 3x5 4x6
Text Size Small Medium Large
Content Include description
Include prep time, etc.
Show image

Description

Slightly sweet, a little spicy, a nice change for your wing enjoyment.

Ingredients

  • 2-½ pounds Chicken Drummets And Wings
  • 1 whole Orange, Zest And Juice
  • ⅓ cups Soy Sauce
  • 2 Tablespoons Fresh Ginger, Grated
  • 1 teaspoon Red Pepper Flakes
  • 1 Tablespoon Honey
  • 2 Tablespoons Rice Wine Vinegar
  • 2 teaspoons Sriracha Sauce
  • 1 Tablespoon Cilantro, Chopped
  • 1 whole Scallion, Chopped

Preparation Instructions

In a large soup pot that has a steamer, place water in the bottom until it hits the steamer basket. Add all the chicken pieces to the steamer and place over high heat and cover with a lid. Bring to a boil, then lower the heat to a gentle simmer to steam the wings. Steam for 15-18 minutes.

While the wings are steaming, add orange zest and juice, soy sauce, ginger, red pepper, honey, rice wine vinegar and Sriracha sauce into a large bowl and stir. Remove the wings from the steamer and place into the large bowl with the sauce and stir to coat.

Heat the oven to broil at around 425ºF and place the rack the second notch down. Now you want to crisp the skin and glaze the sauce over the top. Place the wings evenly on a baking sheet and place under the broiler. After 3-4 minutes, remove from the oven, flip over and brush more sauce over the top. Broil again and continue this process off flipping and brushing on sauce until the skin is crisp. Usually 2 times on each side does the trick.

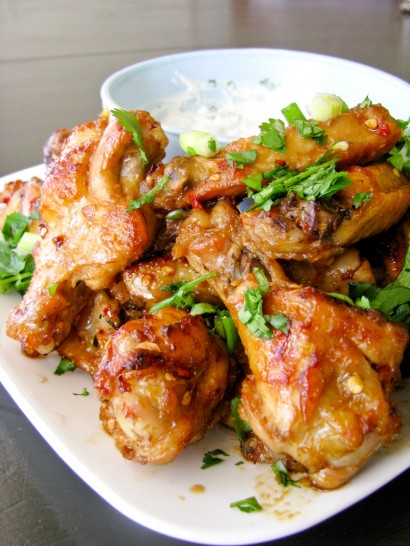
I like to place all the wings back into the bowl of sauce and coat them before placing them on the serving tray, but this isn’t necessary. Sprinkle with chopped cilantro and scallions to garnish.


Printable Recipe

Cilantro Dipping Sauce

See post on tallmisto’s site!
5.00 Mitt(s) 1 Rating(s)1 vote, average: 5.00 out of 51 vote, average: 5.00 out of 51 vote, average: 5.00 out of 51 vote, average: 5.00 out of 51 vote, average: 5.00 out of 5

Prep Time:

Cook Time:

Difficulty: Easy

Servings: 10

10
x

Print Options

Page size Letter 3x5 4x6
Text Size Small Medium Large
Content Include description
Include prep time, etc.
Show image

Description

This sauce is perfect for dipping citrus wings or any other spicy chicken.

Ingredients

  • ½ cups Plain Yogurt
  • ½ cups Mayonnaise
  • ¼ cups Cilantro
  • 2 whole Scallions, Chopped
  • ½ teaspoons Garlic Powder
  • Salt And Pepper

Preparation Instructions

To make the dip, place all ingredients in a small bowl and stir. Taste for salt and pepper and add as desired.


_______________________________________

Laurie is the force behind Simply Scratch, a blog that documents her efforts to find and create recipes that are made simply from scratch. (We think it’s sweet that her mother-in-law helped her set up her blog and get started.) We love her recipes; they’re not just tried and true, but they look gorgeous as well. Check out her blog and you’ll become a fan too.


Profile photo of HowSweetEats

Thai Chicken Pizza

Posted by in Step-by-Step Recipes

Tasty Kitchen Blog: Thai Chicken Pizza. Guest post by Jessica Merchant of How Sweet It Is, recipe submitted by TK member Dax Phillips of Simple Comfort Food.

 
While my favorite cuisine has always been Mexican, Thai is coming in at a very, very close second. On any given day, I am craving something with peanut sauce, a giant bowl of pineapple curry, summer rolls with sweet, syrupy chili flavor and pad thai … oh pad thai. Who would have thought that combining chicken or shrimp, peanuts, sweet sauces and bright cilantro would taste so utterly fantastic? Not I.

So when we ate Thai chicken pizza out a few weeks ago, I went on a mission to recreate it at home. After a quick glance, I knew this recipe from TK member Dax Phillips was just the ticket. There was no way I was going one more day without this homemade pizza in my life. I whipped up Erica Lea’s awesome homemade pizza dough and I was ready to roll.


Tasty Kitchen Blog: Thai Chicken Pizza. Guest post by Jessica Merchant of How Sweet It Is, recipe submitted by TK member Dax Phillips of Simple Comfort Food.

To make the pizza, you need one batch of your favorite pizza dough, peanuts, fresh cilantro and basil, zucchini, one shallot, mozzarella cheese, sweet chili sauce, shredded chicken and crushed red pepper. Spicy spicy. And a little sweet.


Tasty Kitchen Blog: Thai Chicken Pizza. Guest post by Jessica Merchant of How Sweet It Is, recipe submitted by TK member Dax Phillips of Simple Comfort Food.

To begin, flour your workspace and shape your pizza dough into the desired circle, rectangle, or goofy blob. The original instructions called for using a pizza stone, which unfortunately I do not have. I know! So deprived. I can almost promise you that this tastes better on a pizza stone. If you use one, make sure to preheat it first! You can also add a few teaspoons of cornmeal under your crust. So delicious and crunchy.


Tasty Kitchen Blog: Thai Chicken Pizza. Guest post by Jessica Merchant of How Sweet It Is, recipe submitted by TK member Dax Phillips of Simple Comfort Food.

Slice your zucchini and your shallot. A mandolin would probably work best here for uniformly thin slices, but alas, another kitchen gadget I do not own! That’s okay—it’s not completely necessary.

I also grated my mozzarella at this point. You can use pre-shredded mozz in a bag, but trust me, nothing tastes as delicious as freshly grated cheese.


Tasty Kitchen Blog: Thai Chicken Pizza. Guest post by Jessica Merchant of How Sweet It Is, recipe submitted by TK member Dax Phillips of Simple Comfort Food.

Spread the chili sauce on the dough. You want a thin layer, but enough to cover the dough.


Tasty Kitchen Blog: Thai Chicken Pizza. Guest post by Jessica Merchant of How Sweet It Is, recipe submitted by TK member Dax Phillips of Simple Comfort Food.

Layer on your zucchini and shallots …


Tasty Kitchen Blog: Thai Chicken Pizza. Guest post by Jessica Merchant of How Sweet It Is, recipe submitted by TK member Dax Phillips of Simple Comfort Food.

Then add your shredded chicken. The original recipe called for one cup of chicken, but I used about 1 1/4 cups. To get this amount, I cooked 3 thinly-sliced chicken breasts. Easy!


Tasty Kitchen Blog: Thai Chicken Pizza. Guest post by Jessica Merchant of How Sweet It Is, recipe submitted by TK member Dax Phillips of Simple Comfort Food.

Add on your crushed red pepper. More for heat, less for wimpy taste buds like my own. Except I dropped a huge spoonful in one spot on the pizza, which of course ended up being the slice that I ate. My mouth was on fiyah!


Tasty Kitchen Blog: Thai Chicken Pizza. Guest post by Jessica Merchant of How Sweet It Is, recipe submitted by TK member Dax Phillips of Simple Comfort Food.

Throw on your cheese.


Tasty Kitchen Blog: Thai Chicken Pizza. Guest post by Jessica Merchant of How Sweet It Is, recipe submitted by TK member Dax Phillips of Simple Comfort Food.

Then place that baby in the oven and watch it get all golden and bubbly.


Tasty Kitchen Blog: Thai Chicken Pizza. Guest post by Jessica Merchant of How Sweet It Is, recipe submitted by TK member Dax Phillips of Simple Comfort Food.

While the pizza is in the oven, chop your peanuts. Do NOT be afraid of the peanuts here, friends! They totally MAKE the pizza. They take it over the Thai edge. They are completely thrilling.


Tasty Kitchen Blog: Thai Chicken Pizza. Guest post by Jessica Merchant of How Sweet It Is, recipe submitted by TK member Dax Phillips of Simple Comfort Food.

As soon as the pizza comes out of the oven, sprinkle on the peanuts …


Tasty Kitchen Blog: Thai Chicken Pizza. Guest post by Jessica Merchant of How Sweet It Is, recipe submitted by TK member Dax Phillips of Simple Comfort Food.

Then top if off with lots of fresh cilantro and basil. Even though it’s nearing winter, I was able to find fresh cilantro and basil at my grocery store for about 98 cents, which is totally unheard of in the Pittsburgh area. Hopefully you can find some too, but if not (or if you choose to make this pizza in say, February or March when the pickin’s are even slimmer) I would go ahead a throw on a little dried basil and cilantro. These two herbs maximized the Thai flavor and I can’t imagine the pizza without them.


Tasty Kitchen Blog: Thai Chicken Pizza. Guest post by Jessica Merchant of How Sweet It Is, recipe submitted by TK member Dax Phillips of Simple Comfort Food.

Cut yourself a nice big slice …


Tasty Kitchen Blog: Thai Chicken Pizza. Guest post by Jessica Merchant of How Sweet It Is, recipe submitted by TK member Dax Phillips of Simple Comfort Food.

And enjoy!

This pizza was absolutely out of this world. Not only was it delicious, but the flavors were incredibly fresh, which was a nice change of pace from the typical comfort food this time of year. On top of that, using high quality ingredients combined with some whole wheat pizza crust and all-white meat chicken means one thing: healthier pizza! Which obviously translates to: have an extra slice (or two!).

Thanks so much to Dax Phillips for the fabulous recipe. Be sure to check out his blog, Simple Comfort Food—I think the title says it all!


Printable Recipe

Thai Chicken Pizza

See post on Dax Phillips’s site!
5.00 Mitt(s) 7 Rating(s)7 votes, average: 5.00 out of 57 votes, average: 5.00 out of 57 votes, average: 5.00 out of 57 votes, average: 5.00 out of 57 votes, average: 5.00 out of 5

Prep Time:

Cook Time:

Difficulty: Easy

Servings: 4

4
x

Print Options

Page size Letter 3x5 4x6
Text Size Small Medium Large
Content Include description
Include prep time, etc.
Show image

Description

A great pizza that has just the right amount of sweet heat to keep you coming back for more.

Ingredients

  • 1 whole Batch Of Your Favorite Pizza Dough, Rolled Out To About A 1/4 Inch, 12 Inch Diameter
  • ¼ cups Flour
  • 1 Tablespoon Fine Corn Meal
  • ½ cups Sweet Asian Chili Sauce, Plus 1 Tablespoon For Drizzle
  • 1 whole Shallot, Thinly Sliced
  • ½ whole Zucchini, Thinly Sliced
  • 1 teaspoon Red Chili Flakes
  • 1 cup Cooked Chicken Shredded
  • ⅔ cups Shredded Mozzarella Cheese
  • ¼ cups Chopped Peanuts
  • 2 Tablespoons Fresh Cilantro
  • 2 Tablespoons Fresh Basil (optional)

Preparation Instructions

Preheat your oven to 500 degrees F with a pizza stone in the oven. If you do not have a pizza stone, put a large baking sheet in the oven (make sure to use one that is large enough to house your dough).

Begin by adding some flour to your rolling surface. Take your dough that has already risen, and lightly knead it. Roll out the dough to about a 1/4 inch thick, or however your like the thickness of your crust.

Lay the dough down on a pizza peel (if you have one) that’s covered with corn meal. Otherwise put the dough on a surface that you can use to slide the entire pizza onto the hot pizza stone or pan. The corn meal helps assist with the pizza dough – so it slides off easily.

Spread the Asian chili sauce on the surface of the dough. Not too thick, not too thin. Add the sliced shallots and zucchini. Top with the red chili flakes and shredded chicken. Top with the cheese.

Using your pizza peel, place the pizza into the oven on your cooking surface (stone or pan) and cook for about 15 minutes, keeping an eye on your crust and toppings so they do not burn. Every oven is different.

Once the pizza dough is golden around the edges and the cheese is nice and bubbly, remove pizza from the oven.

Drizzle more of the Asian chili sauce over the top, top with the crushed peanuts and fresh cilantro. If you are feeling naughty, top it off with some fresh basil.

Slice and serve.

Every bite was pretty darn awesome. You get the great pizza crust with the sweet heat from the chili sauce, and the shallots, cilantro, and zucchini, along with the great crunch from the peanuts. All of this combined made this one a pizza that is hard to beat. Enjoy.


Printable Recipe

Pizza Dough

See post on Erica Lea’s site!
5.00 Mitt(s) 12 Rating(s)12 votes, average: 5.00 out of 512 votes, average: 5.00 out of 512 votes, average: 5.00 out of 512 votes, average: 5.00 out of 512 votes, average: 5.00 out of 5

Prep Time:

Cook Time:

Difficulty: Easy

Servings: 8

8
x

Print Options

Page size Letter 3x5 4x6
Text Size Small Medium Large
Content Include description
Include prep time, etc.
Show image

Description

Can you believe that this dough is 100% whole wheat? Yet it handles so well – better than any pizza dough recipe I’ve ever tried.

Ingredients

  • ½ cups Warm Water (about 110° F)
  • 2-¼ teaspoons Instant Yeast
  • 1-¼ cup Water At Room Temperature
  • 2 Tablespoons Extra-virgin Olive Oil Plus Extra For Greasing The Bowl
  • 4 cups White Whole Wheat Flour
  • 1-½ teaspoon Sea Salt

Preparation Instructions

1) Place the 1/2 cup warm water in a small bowl. Add the yeast and stir. Let sit for about 5 minutes, or until the yeast begins to swell. Add to the room temperature water and oil and stir.

2) Place the flour and salt in the bowl of a stand mixer fitted with the paddle attachment. Mix briefly until combined. With mixer on low speed, slowly add the liquid ingredients. Mix just until a cohesive dough forms. Let the dough rest for 5 minutes.

3) Change to the dough hook attachment. Knead the dough until it becomes smooth and elastic, about 5 more minutes.

4) Oil or butter a medium-sized bowl. Transfer the dough to the prepared bowl. Cover with a kitchen towel or plastic wrap and place in a warm spot. Allow to rise for 1 ½-2 hours, or until it doubles in volume. The dough is now ready to be used in your recipe.

Makes enough dough for approximately 3 thin-crust, large-sized pizzas.


_______________________________________

Jessica Merchant is a personal trainer turned food writer and blogger. Her blog, How Sweet Eats, is where she proclaims her love for all things sweet, all things bacon, and everything else in between. She works her magic in her Pittsburgh kitchen, which she shares with her husband of 2 years.


Profile photo of whatsgabycooking

Fiery Roasted Garlic and Tomato Soup

Posted by in Step-by-Step Recipes

Tasty Kitchen Blog: Fiery Roasted Garlic and Tomato Soup. Guest post by Gaby Dalkin of What's Gaby Cooking, recipe submitted by TK member Ingrid Beer of The Cozy Apron.

 
Tomato soup is something that is near and dear to my soul. I grew up eating it with the classic grilled cheese sandwich. Oh, what am I talking about, I still make tomato soup and eat it with a grilled cheese sandwich! Is there really anything better? Well, this recipe has me thinking that I can skip the grilled cheese, make this amazing soup and cheese crusted crouton (kind of a fancy grilled cheese) and call it a day!

This fabulous recipe was submitted The Cozy Apron. Here’s how to do it.


Tasty Kitchen Blog: Fiery Roasted Garlic and Tomato Soup. Guest post by Gaby Dalkin of What's Gaby Cooking, recipe submitted by TK member Ingrid Beer of The Cozy Apron.

First you’re going to start with some thinly sliced bread. Give it a drizzle of olive oil and then pop it into the oven for a few minutes until it turns golden brown.


Tasty Kitchen Blog: Fiery Roasted Garlic and Tomato Soup. Guest post by Gaby Dalkin of What's Gaby Cooking, recipe submitted by TK member Ingrid Beer of The Cozy Apron.

Once the slices of bread have toasted, sprinkle them with some cheese. Don’t be shy with the cheese—the more the merrier! Then pop the bread back into the oven.


Tasty Kitchen Blog: Fiery Roasted Garlic and Tomato Soup. Guest post by Gaby Dalkin of What's Gaby Cooking, recipe submitted by TK member Ingrid Beer of The Cozy Apron.

Once the cheese has melted, remove the baking sheet from the oven and set it aside.


Tasty Kitchen Blog: Fiery Roasted Garlic and Tomato Soup. Guest post by Gaby Dalkin of What's Gaby Cooking, recipe submitted by TK member Ingrid Beer of The Cozy Apron.

Next you’re going to place some halved tomatoes in a large bowl. Give them a drizzle of olive oil, a sprinkle of brown sugar, then throw in the balsamic vinegar, salt, pepper, red chili flakes and Italian seasoning. Give the tomatoes a good toss so that the seasoning is evenly distributed.


Tasty Kitchen Blog: Fiery Roasted Garlic and Tomato Soup. Guest post by Gaby Dalkin of What's Gaby Cooking, recipe submitted by TK member Ingrid Beer of The Cozy Apron.

Place the tomatoes on a parchment-lined baking sheet and pop them into the oven for 45 minutes.


Tasty Kitchen Blog: Fiery Roasted Garlic and Tomato Soup. Guest post by Gaby Dalkin of What's Gaby Cooking, recipe submitted by TK member Ingrid Beer of The Cozy Apron.

Cut the tops off of a few heads of garlic and drizzle some olive oil over the garlic.


Tasty Kitchen Blog: Fiery Roasted Garlic and Tomato Soup. Guest post by Gaby Dalkin of What's Gaby Cooking, recipe submitted by TK member Ingrid Beer of The Cozy Apron.

And then wrap it up in some foil. Pop it into the oven next to the tomatoes and let it bake for about 40 minutes. Now sit back, relax, perhaps watch some Real Housewives of Beverly Hills, and wait for the tomatoes and garlic to finish up in the oven.


Tasty Kitchen Blog: Fiery Roasted Garlic and Tomato Soup. Guest post by Gaby Dalkin of What's Gaby Cooking, recipe submitted by TK member Ingrid Beer of The Cozy Apron.

Once the tomatoes are done, they will look like this. Just let them hang out in their juices for a bit and set them aside.


Tasty Kitchen Blog: Fiery Roasted Garlic and Tomato Soup. Guest post by Gaby Dalkin of What's Gaby Cooking, recipe submitted by TK member Ingrid Beer of The Cozy Apron.

Meanwhile, in a large pot, sauté some onions.


Tasty Kitchen Blog: Fiery Roasted Garlic and Tomato Soup. Guest post by Gaby Dalkin of What's Gaby Cooking, recipe submitted by TK member Ingrid Beer of The Cozy Apron.

Add the roasted tomatoes along with all of their juices.


Tasty Kitchen Blog: Fiery Roasted Garlic and Tomato Soup. Guest post by Gaby Dalkin of What's Gaby Cooking, recipe submitted by TK member Ingrid Beer of The Cozy Apron.

Next, squeeze out all the garlic from the paper and add it into the pot.


Tasty Kitchen Blog: Fiery Roasted Garlic and Tomato Soup. Guest post by Gaby Dalkin of What's Gaby Cooking, recipe submitted by TK member Ingrid Beer of The Cozy Apron.

Throw in the basil, and then the parsley.


Tasty Kitchen Blog: Fiery Roasted Garlic and Tomato Soup. Guest post by Gaby Dalkin of What's Gaby Cooking, recipe submitted by TK member Ingrid Beer of The Cozy Apron.

Next goes the chicken stock.


Tasty Kitchen Blog: Fiery Roasted Garlic and Tomato Soup. Guest post by Gaby Dalkin of What's Gaby Cooking, recipe submitted by TK member Ingrid Beer of The Cozy Apron.

And then some croutons. (I know, sounds a little odd, right? Trust me, it’ll blow you away!) Let this boil for a little bit.


Tasty Kitchen Blog: Fiery Roasted Garlic and Tomato Soup. Guest post by Gaby Dalkin of What's Gaby Cooking, recipe submitted by TK member Ingrid Beer of The Cozy Apron.

Then add some Parmesan cheese.


Tasty Kitchen Blog: Fiery Roasted Garlic and Tomato Soup. Guest post by Gaby Dalkin of What's Gaby Cooking, recipe submitted by TK member Ingrid Beer of The Cozy Apron.

Give the mixture a blend with an immersion blender until it’s nice and smooth.


Tasty Kitchen Blog: Fiery Roasted Garlic and Tomato Soup. Guest post by Gaby Dalkin of What's Gaby Cooking, recipe submitted by TK member Ingrid Beer of The Cozy Apron.

Serve the soup immediately with some of the cheesy garlic toasts!

A big thank you to Ingrid for creating the best tomato soup recipe I’ve ever tasted! I’ll be making this one for years to come. Visit her blog, The Cozy Apron, for more of her recipes and beautiful food photography!


Printable Recipe

Fiery Roasted Garlic & Tomato Soup

See post on The Cozy Apron’s site!
5.00 Mitt(s) 7 Rating(s)7 votes, average: 5.00 out of 57 votes, average: 5.00 out of 57 votes, average: 5.00 out of 57 votes, average: 5.00 out of 57 votes, average: 5.00 out of 5

Prep Time:

Cook Time:

Difficulty: Easy

Servings: 6

6
x

Print Options

Page size Letter 3x5 4x6
Text Size Small Medium Large
Content Include description
Include prep time, etc.
Show image

Description

If spicy foods tickle your tongue, then this warming and rich soup is sure to please. Roasted garlic and Roma tomatoes are the sweet, deep base for this soup, while fresh herbs and parmesan round out the heat. Cozy up with a big bowl of this soup to melt away the cold!

Ingredients

  • 1 loaf Ciabatta Bread
  • 7 Tablespoons Olive Oil, Divided
  • 6 Tablespoons Gruyere Cheese, Shredded, Divided Use
  • 15 whole Roma Tomatoes
  • 1-½ Tablespoon Balsamic Vinegar
  • 3 Tablespoons Brown Sugar
  • 1 Tablespoon Salt
  • 1 teaspoon Fresh Cracked Black Pepper
  • 1 Tablespoon Red Chili Pepper Flakes
  • 2 teaspoons Italian Seasoning
  • 3 whole Heads Of Garlic (Peels Left On) Plus 2 Cloves, Chopped, Divided Use
  • 1 whole Onion, Chopped
  • 1 bunch Lemon Basil (or Regular Basil), Stems Removed And Chopped
  • ¼ cups Flat-leaf Parsley, Chopped
  • 3 cups Chicken Stock
  • 1 cup Croutons (packaged)
  • ½ cups Grated Parmesan Cheese

Preparation Instructions

Preheat oven to 400 degrees F and line 2 baking sheets with foil.

1. Cut the ciabatta bread into six 1/2″ slices, drizzle with 1 Tablespoon of olive oil, and place on baking sheet; toast until golden. Remove bread from oven, top each with 1 Tablespoon of the gruyere cheese and place in oven once again, just until cheese is melted. Remove bread from oven, cut each slice on the bias (making 12 pieces), and keep warm.
2. Cut the Roma tomatoes in half and place in a large bowl; add the 2 Tablespoons of olive oil as well as the balsamic vinegar and other ingredients down through the Italian seasoning to the tomatoes, and toss to coat. Add this to the second baking sheet and roast in the preheated oven for 45 minutes.
3. Cut the tops off of the 3 heads of garlic and add 2 Tablespoons of the olive oil. Wrap the heads tightly in foil; place them next to the tomatoes to roast for 40 minutes.
4. Once tomatoes and garlic are roasted, set aside to cool slightly, until they can be handled. Squeeze the roasted garlic cloves out of their papers, discard papers and set aside the roasted garlic aside.
5. In the meantime, in a large pot over medium heat, add the remaining 2 Tablespoons of olive oil, the chopped onion and 2 fresh, chopped garlic cloves. Allow them to become aromatic and translucent. Then add the roasted tomatoes (and all of their juice from the baking sheet), and the roasted garlic. Add the lemon basil and parsley and stir to combine. Add the hot chicken stock and the croutons, and allow to simmer without lid, for about 20 minutes.
6. Add the grated parmesan cheese, and stir. Using a hand immersion blender, puree the soup until smooth and all tomatoes are completely pureed (if using a blender, work in small batches to puree. Be careful to not overfill the blender, as hot soup can splatter). Check the salt/pepper, and adjust to taste, if necessary.
7. Ladle into serving bowls, and garnish with 2 pieces of the ciabatta cheese toasts. Enjoy!


_______________________________________

Gaby Dalkin is the young lady behind What’s Gaby Cooking, a food blog that’s bursting at the seams with incredible recipes and food photography. She’s a personal chef and professional recipe developer, and if you follow her on Twitter, you’ll soon discover her two-fold obsession: guacamole and cheese. She has small feet, a large heart, and a smile that can light up the whole building. We’re pretty stoked to have her here.


Profile photo of Erica Lea

Peachy-keen Muffins

Posted by in Baking, Step-by-Step Recipes

Tasty Kitchen Blog Peachy-keen Muffins. Guest post by Erica Kastner of Cooking for Seven, recipe submitted by TK member Karalie.

 
Ever since I can remember, peaches have been a special treat. This beautiful, golden fruit has such a delicate yet fabulous flavor. Soft and juicy, sweet but not overly so.

These muffins, brought to us by Karalie, are a wonderful way to feast upon peaches. Not only are they scrumptious, they’re nutritious as well! Whole wheat flour, natural sugar, and yogurt make this a treat you can feel good about eating or sharing.

Let me show you how to make them!


Tasty Kitchen Blog Peachy-keen Muffins. Guest post by Erica Kastner of Cooking for Seven, recipe submitted by TK member Karalie.

Here’s what you’ll need: whole wheat flour, quick cooking oats, turbinado (I used maple) sugar, baking powder, salt, an egg, peach or vanilla yogurt, butter, vanilla extract, and peaches.


Tasty Kitchen Blog Peachy-keen Muffins. Guest post by Erica Kastner of Cooking for Seven, recipe submitted by TK member Karalie.

First off, preheat your oven to 400°F. Grease a muffin tin or line it with papers. Put the flour, oats, sugar, and baking soda in a large mixing bowl.


Tasty Kitchen Blog Peachy-keen Muffins. Guest post by Erica Kastner of Cooking for Seven, recipe submitted by TK member Karalie.

The recipe didn’t call for it but I added a bit of salt to enhance the flavors. Whisk it all together until well-mixed.


Tasty Kitchen Blog Peachy-keen Muffins. Guest post by Erica Kastner of Cooking for Seven, recipe submitted by TK member Karalie.

Peel and chop the peaches. Aren’t they pretty?


Tasty Kitchen Blog Peachy-keen Muffins. Guest post by Erica Kastner of Cooking for Seven, recipe submitted by TK member Karalie.

In a separate mixing bowl, lightly whisk the egg. Add the yogurt, melted butter, and vanilla extract. Whisk until well-combined.


Tasty Kitchen Blog Peachy-keen Muffins. Guest post by Erica Kastner of Cooking for Seven, recipe submitted by TK member Karalie.

Pour the wet ingredients into the dry ingredients.


Tasty Kitchen Blog Peachy-keen Muffins. Guest post by Erica Kastner of Cooking for Seven, recipe submitted by TK member Karalie.

Stir just until combined.


Tasty Kitchen Blog Peachy-keen Muffins. Guest post by Erica Kastner of Cooking for Seven, recipe submitted by TK member Karalie.

Add the peaches and gently fold them in.


Tasty Kitchen Blog Peachy-keen Muffins. Guest post by Erica Kastner of Cooking for Seven, recipe submitted by TK member Karalie.

Spoon into the prepared muffin tin. Bake in preheated oven for 15-20 minutes, or until they test done. Cool in the pan 10 minutes before removing to a cooling rack.


Tasty Kitchen Blog Peachy-keen Muffins. Guest post by Erica Kastner of Cooking for Seven, recipe submitted by TK member Karalie.

Serve warm or at room temperature. Spread with butter.

Notes:
1. As mentioned above, I added a bit of salt to the recipe to enhance the flavor of the muffins. 
2. I found these muffins to be a bit dense. Next time I may add a little milk, some baking soda, or a little more baking powder to the batter.
3. These freeze beautifully. Simply place cooled leftover muffins in a freezer bag. Defrost on the counter, or in the oven if you like your muffins warm.


Tasty Kitchen Blog Peachy-keen Muffins. Guest post by Erica Kastner of Cooking for Seven, recipe submitted by TK member Karalie.

Thank you, Karalie, for sharing this fabulous recipe!


Printable Recipe

Peachy-keen Muffins

5.00 Mitt(s) 3 Rating(s)3 votes, average: 5.00 out of 53 votes, average: 5.00 out of 53 votes, average: 5.00 out of 53 votes, average: 5.00 out of 53 votes, average: 5.00 out of 5

Prep Time:

Cook Time:

Difficulty: Easy

Servings: 12

12
x

Print Options

Page size Letter 3x5 4x6
Text Size Small Medium Large
Content Include description
Include prep time, etc.
Show image

Description

Moist peach muffins, great for breakfast or as a snack!

Ingredients

  • 1-½ cup Whole Wheat Flour
  • ½ cups Quick Cooking Oats
  • ⅔ cups Turbinado Sugar
  • 1-½ teaspoon Baking Powder
  • 1 whole Egg, Lightly Beaten
  • ½ cups Peach Or Vanilla Yogurt
  • ¼ cups Butter, Melted
  • ¼ cups Oil
  • 1 teaspoon Vanilla Extract
  • 1 cup Fresh Peaches, Peeled And Chopped OR Well-drained Canned Peaches, Chopped

Preparation Instructions

In a large bowl, combine flour, oats, sugar and baking powder. Combine egg, yogurt, butter, oil, and vanilla; mix well. Stir into dry ingredients just until moistened. Fold in peaches. Fill greased or paper-lined muffin cups two-thirds full. Bake at 400°F for 15-20 minutes, or until muffins test done. Cool in the pan 10 minutes before removing to a wire rack.

Makes 12 muffins. Calories per muffin: 196.


_______________________________________

Newly-married Erica Kastner shares her wonderful recipes and amazing food photography on her blog, Cooking for Seven. She also writes about crafts and posts more of her beautiful photography in her personal blog, EricaLea.com. There really isn’t much that this amazing young lady can’t do, and we’re thrilled she does some of it here.


Profile photo of twopeasandtheirpod

Chocolate Nutella & Sea Salt Fudge

Posted by in Step-by-Step Recipes

  Every December I bake dozens and dozens of holiday cookies to share with family and friends. This year I wanted to add something new to our holiday goodies and was stumped on what to make. So I turned to Tasty Kitchen for help. Warning: do not browse Tasty Kitchen while hungry, you will be […]

Profile photo of Erika (TK)

Cookies for You

Posted by in Holidays, The Theme Is...

There’s something about the holidays and cookies that just feels right. Like pumpkin and autumn. Ice cream and summer. Coffee and mornings. Chocolate and any-o’clock. So, to send you off on your busy holiday weekend, we picked a few (okay, more than a few) cookie recipes for you, all highly-rated favorites here at Tasty Kitchen. […]

Profile photo of Erika (TK)

Meet John

Posted by in Meet the Member!

  Look, it’s a boy! Kidding aside (we’ve got lots of wonderful men here), today we’ll get to know John, otherwise known here as patiodaddio. As you may have guessed from his username, John is a grilling pro. No, really. He’s an actual professional, a member of the Kansas City Barbeque Society. With a mess […]

Profile photo of Laurie - Simply Scratch

Homemade Ricotta with Lemon and Basil

Posted by in Step-by-Step Recipes

  Are you like me and have this forever growing “recipe bucket-list”? Things like homemade fruit leathers, giant cinnamon rolls have snuck their way onto my mile long list, but on the very tippy-top of that long list was to make my own ricotta cheese. It was when I saw Megan’s recipe for Lemon Basil […]