The Pioneer Woman Tasty Kitchen
Profile photo of Natalie | Perry's Plate

Vegetarian Tamales

Posted by in Step-by-Step Recipes

Tasty Kitchen Blog: Vegetarian Tamales. Guest post by Natalie Perry of Perry's Plate, recipe submitted by TK member Julie of Mommie Cooks.

 
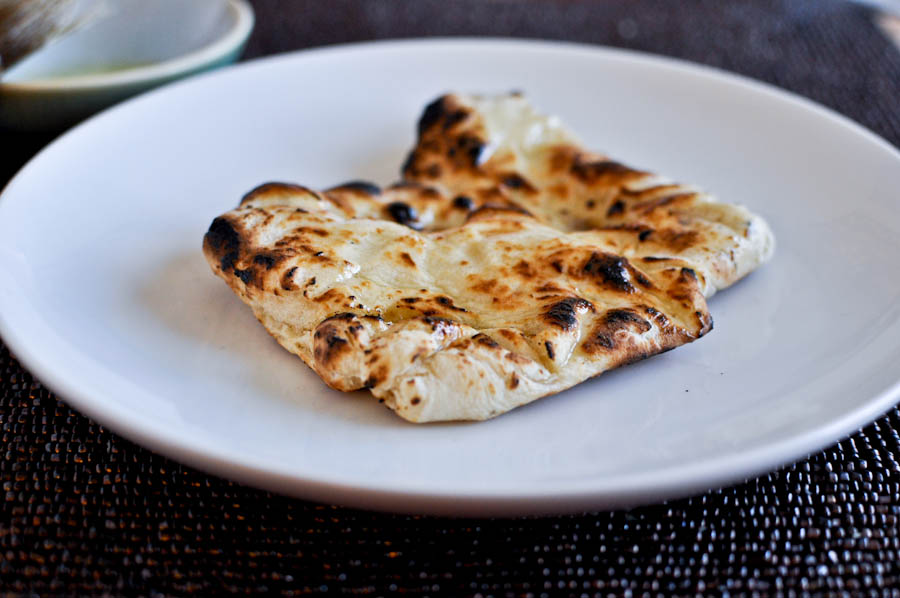
Everything you’ve heard about tamales is true, folks. Yes, these Mexican culinary wonders are a lot of work, and they take a lot of time. On the bright side, the work isn’t difficult and boy, is it worth it in the end. Eating one tamale after the other (after the other) makes you forget about your aching feet and back. Then when you run out, you’ll start craving more and begin the process all over again.

Kind of like having children. But most days I’d rather make tamales than give birth.

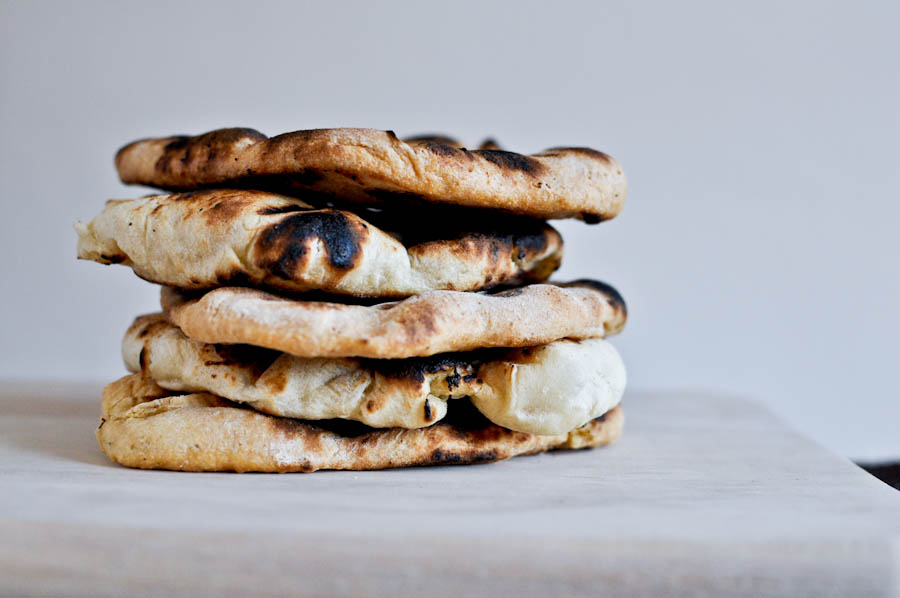
Never heard of tamales? They’re little corn husk packets of steamed dough made from corn flour, filled (usually) with different types of meat and vegetables.

For my first attempt at tamales I opted for these Vegetarian Tamales submitted by TK member mommiecooks (Julie) who blogs at Mommie Cooks! I’m sometimes hesitant to try new techniques with large cuts of meat and thought this vegetarian version would be a good one to get my feet wet. I was surprised how good these tasted. I’m not a vegetarian myself, but I didn’t miss the meat at all!

Before I begin, I need to remind you that I am not a Mexican grandmother who has made tamales for 40 years. I am a 30-year-old gringo who’s made tamales only a couple of times, but hopefully I can show you that you don’t have to be a Mexican grandmother to make some great ones. (But if you find one who can help you, you’ll be in excellent shape.)

One of the keys to making tamales (in my gringo opinion) is organization and time management. If you go from zero to tamale with no breaks, you’ll be exhausted. Luckily the filling and masa dough can be made several hours (or a couple of days) ahead of time. Take advantage of that. And make a lot of tamales while you’ve got everything prepped. The last time I made these, I doubled the masa and made two different fillings. I’ve got a freezer full of low-maintenance meals that I can whip out during the week!

Okay, now that you’ve got a plan and several hours set aside, let’s get going!


Tasty Kitchen Blog: Vegetarian Tamales. Guest post by Natalie Perry of Perry's Plate, recipe submitted by TK member Julie of Mommie Cooks.

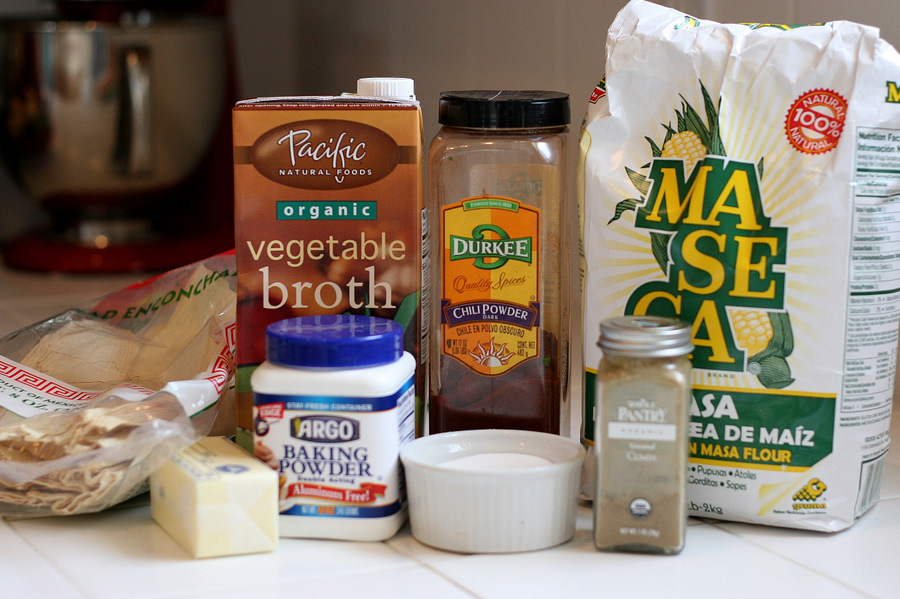
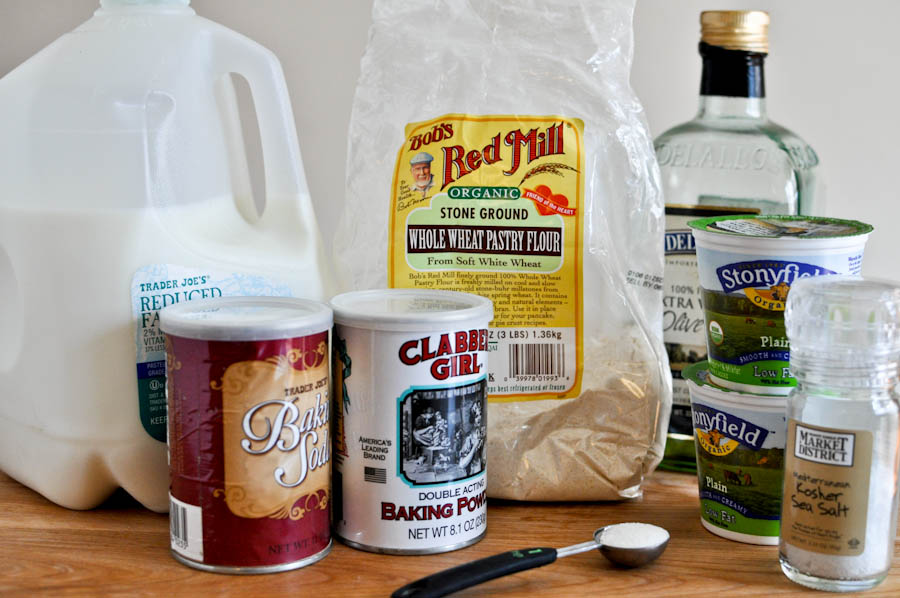
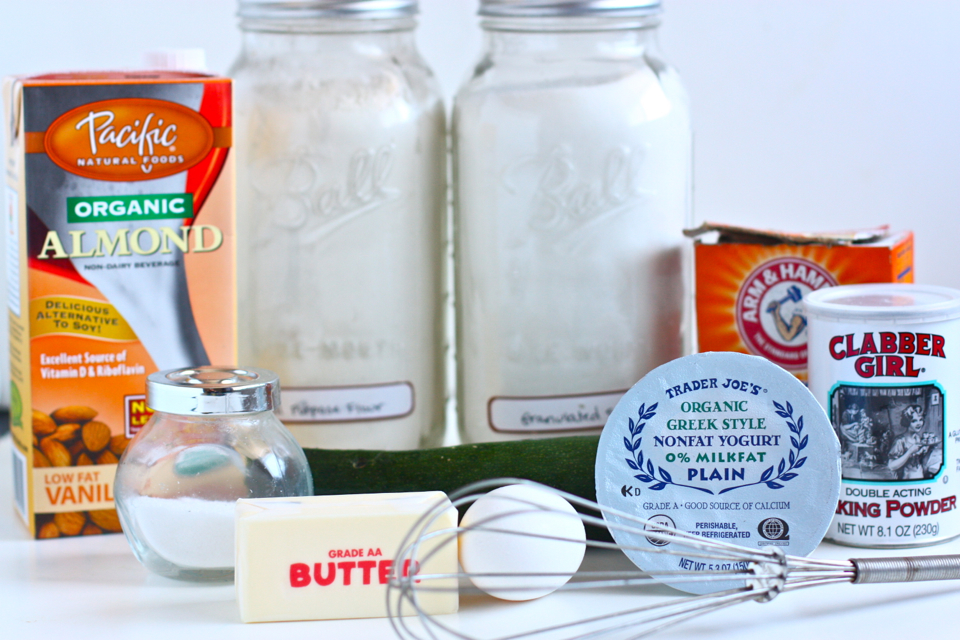
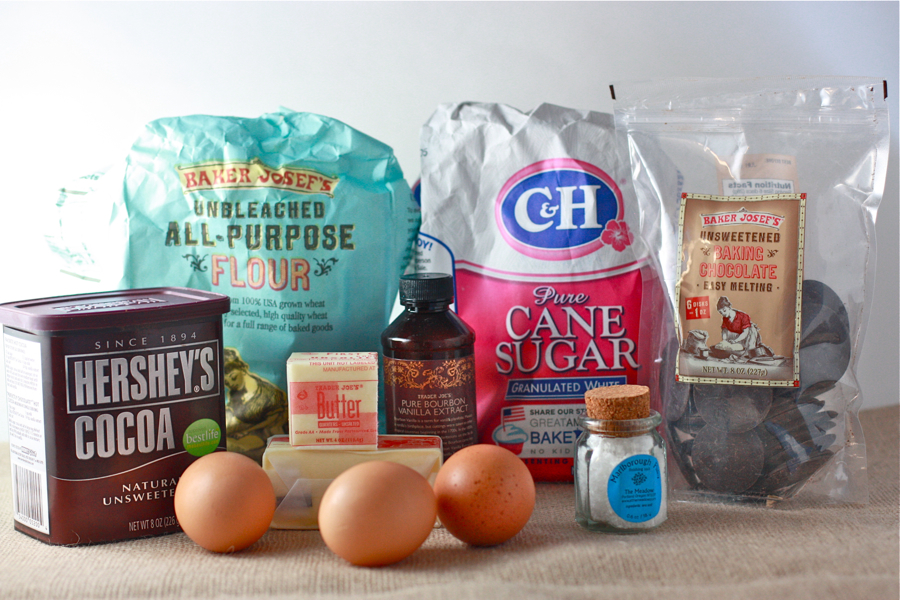
First, let’s make the masa. I loved Julie’s masa recipe. It was so flavorful! I think this will be my go-to recipe no matter what filling I make. You’ll need dried corn husks, vegetable broth, chili powder, corn masa flour, cumin, salt, baking powder, and a stick of butter. You can find the dried corn husks and corn masa flour in the Latin/ethnic aisle of a well-stocked grocery store. You could definitely find them at a Latin grocery store if your town happens to have one.

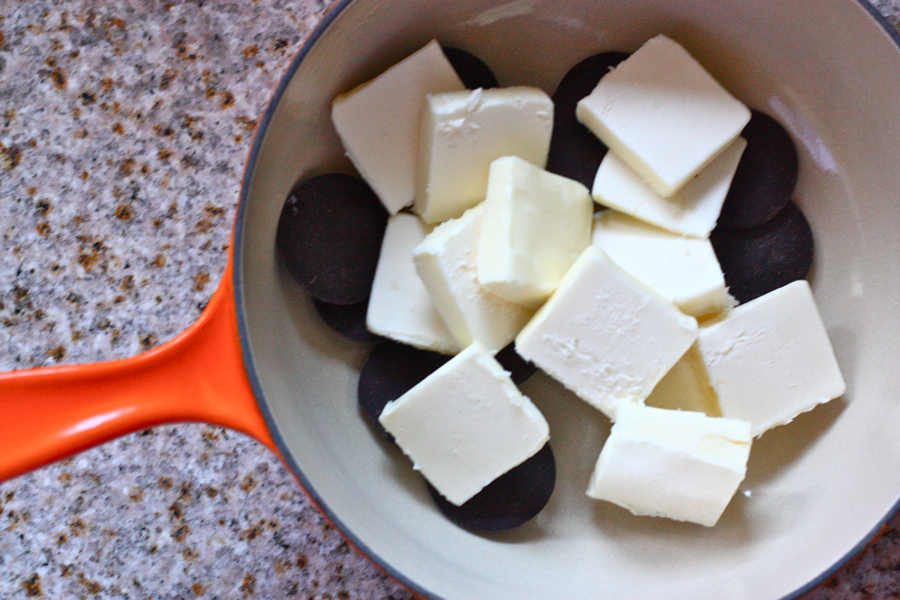
I also appreciated the use of butter in the masa dough as opposed to the traditional use of lard. Lard freaks me out. I wish they would call it something else. I’ll get over it eventually.


Tasty Kitchen Blog: Vegetarian Tamales. Guest post by Natalie Perry of Perry's Plate, recipe submitted by TK member Julie of Mommie Cooks.

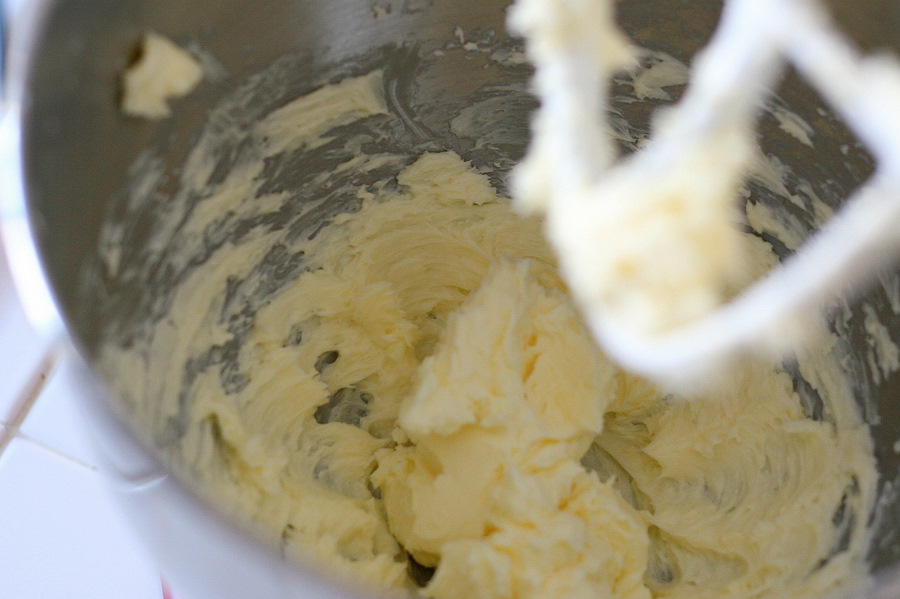
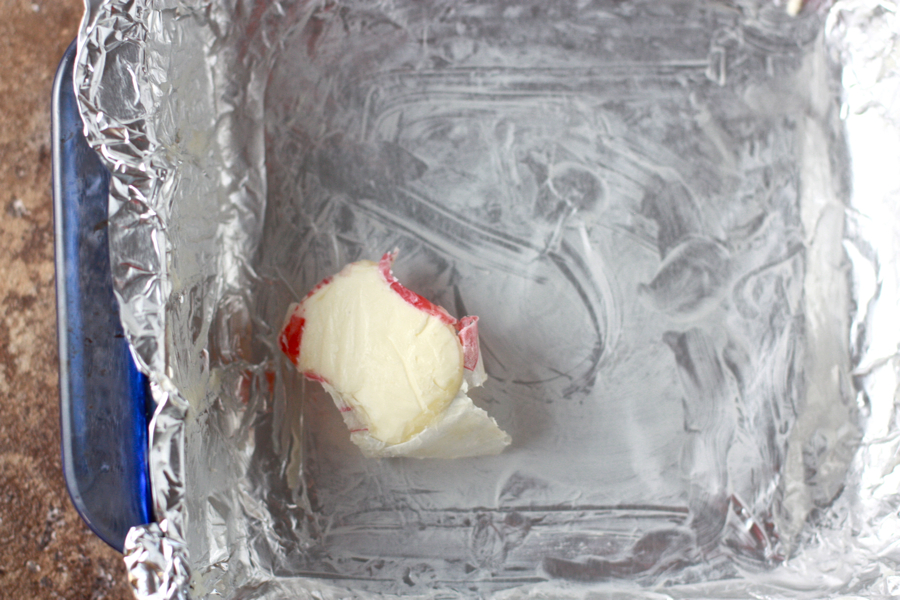
Cream the butter using an electric mixer or stand mixer.


Tasty Kitchen Blog: Vegetarian Tamales. Guest post by Natalie Perry of Perry's Plate, recipe submitted by TK member Julie of Mommie Cooks.

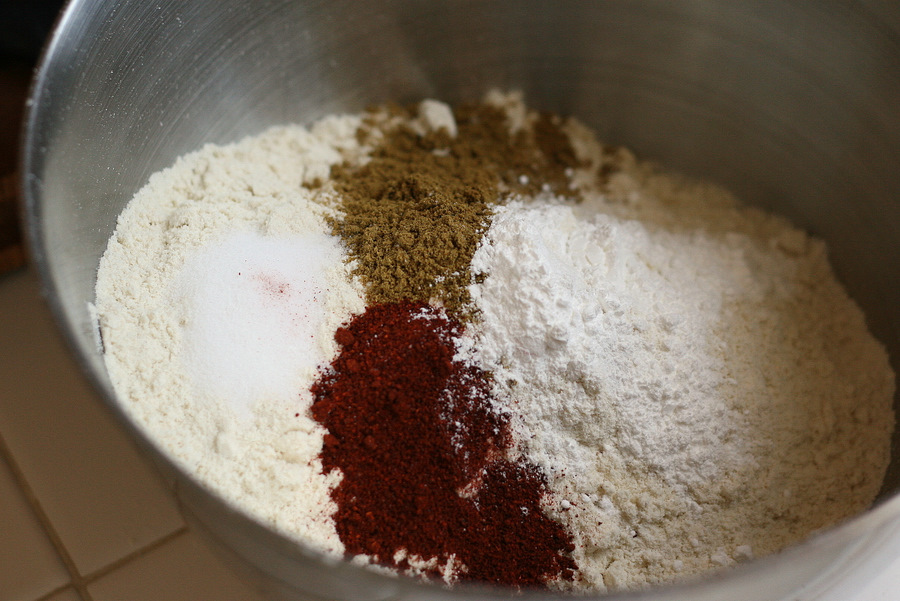
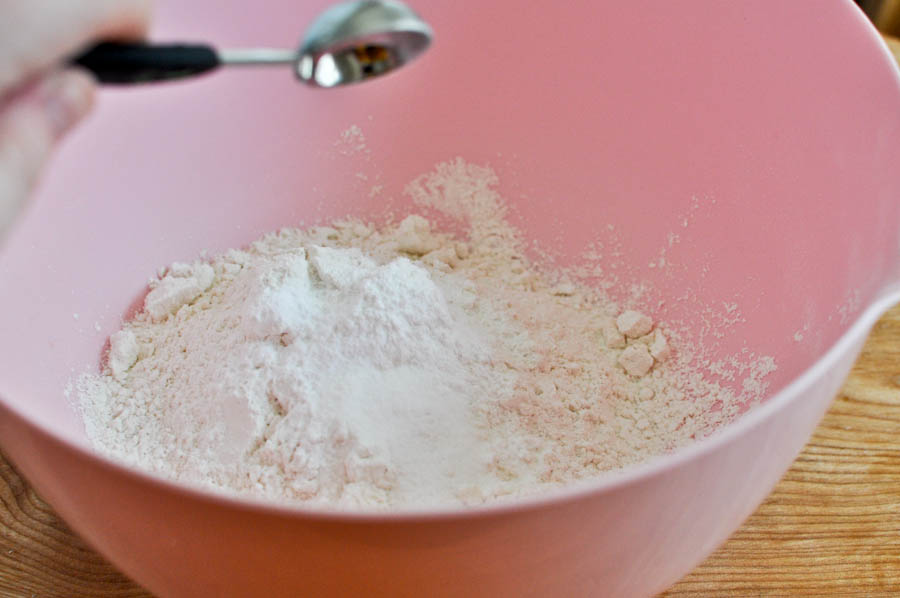
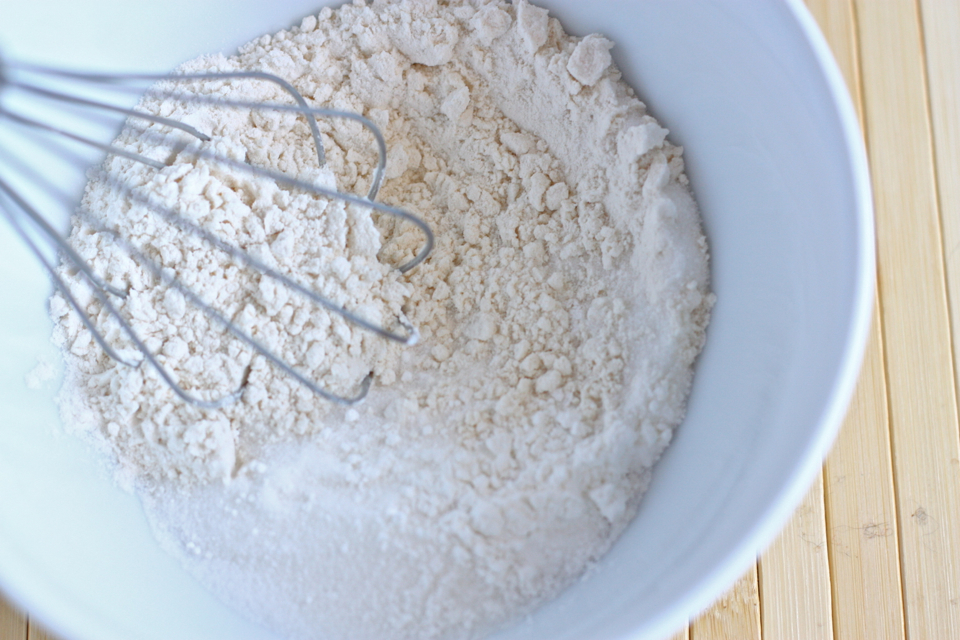
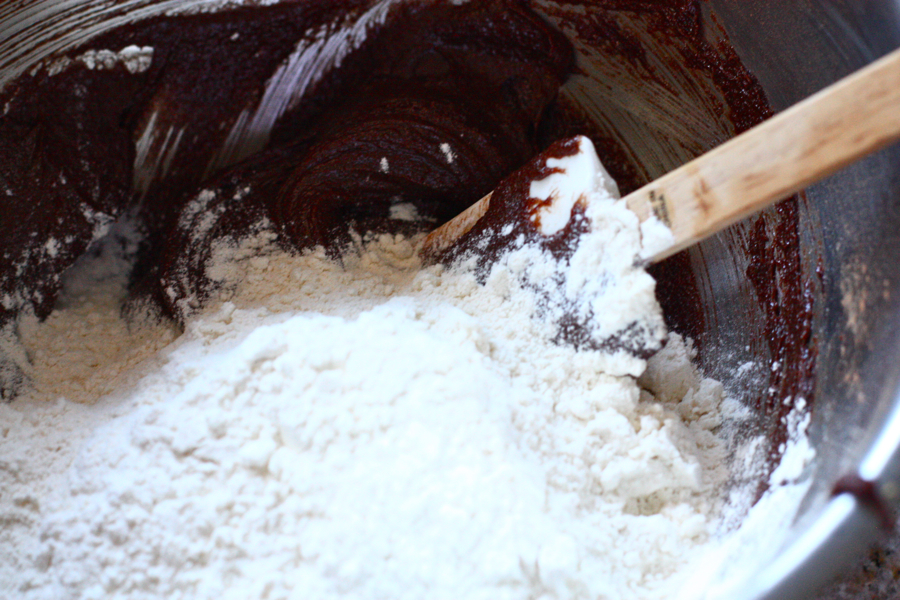
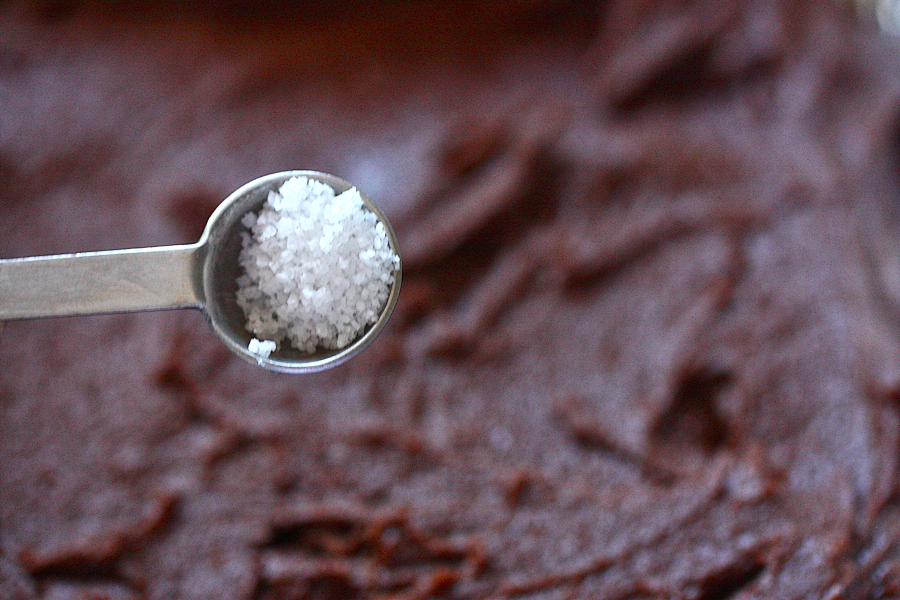
In a separate bowl, whisk together the masa flour, salt, baking powder, chili powder, and cumin.


Tasty Kitchen Blog: Vegetarian Tamales. Guest post by Natalie Perry of Perry's Plate, recipe submitted by TK member Julie of Mommie Cooks.

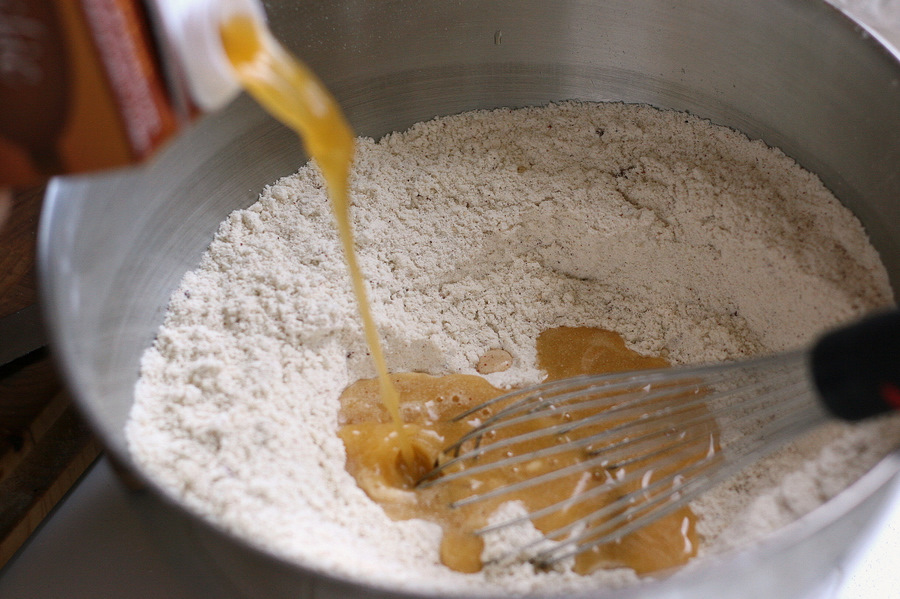
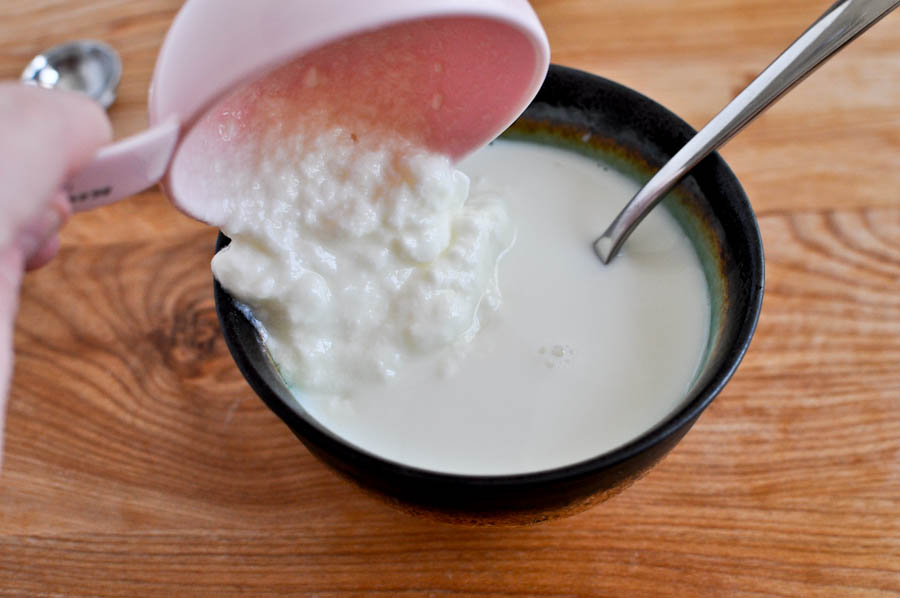
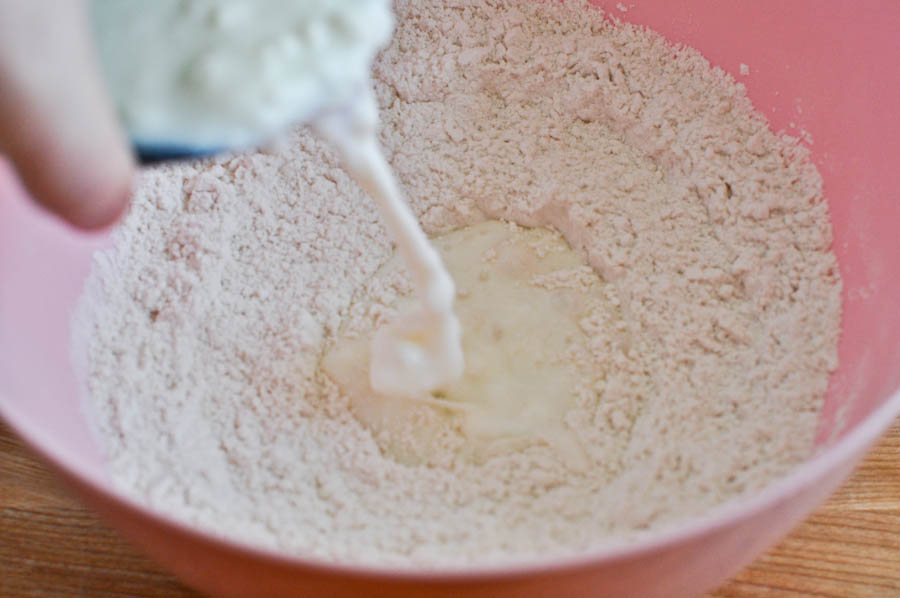
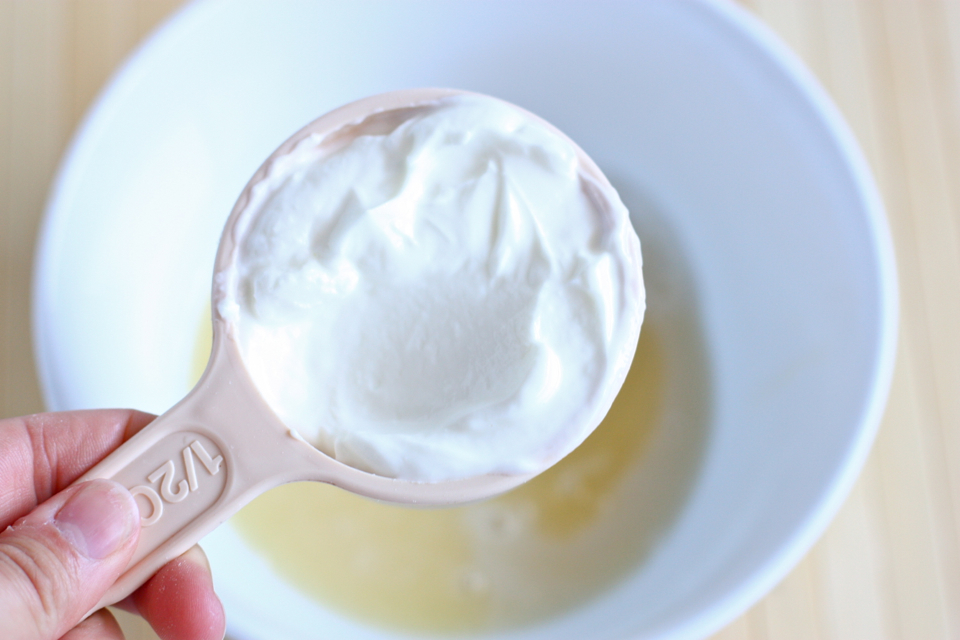
Add some of the vegetable broth.


Tasty Kitchen Blog: Vegetarian Tamales. Guest post by Natalie Perry of Perry's Plate, recipe submitted by TK member Julie of Mommie Cooks.

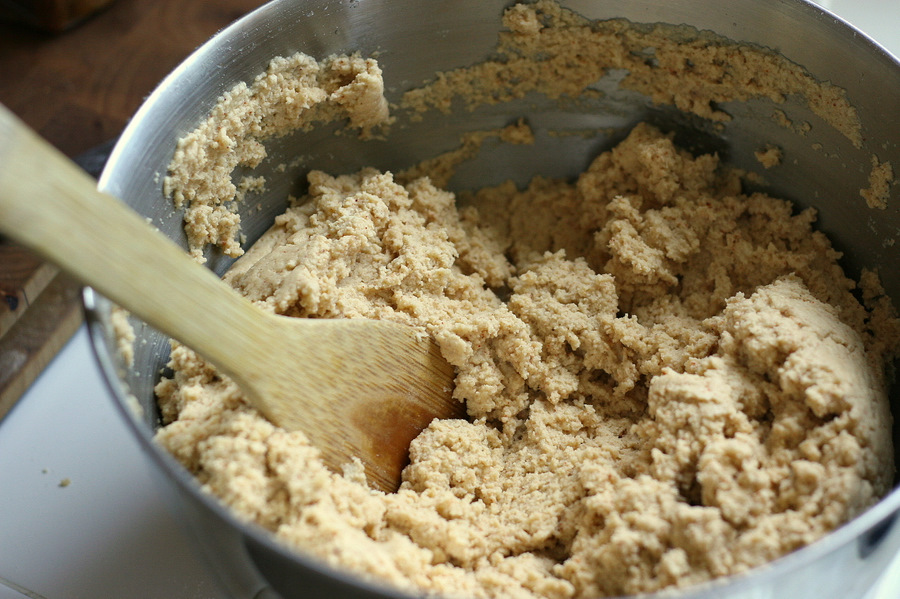
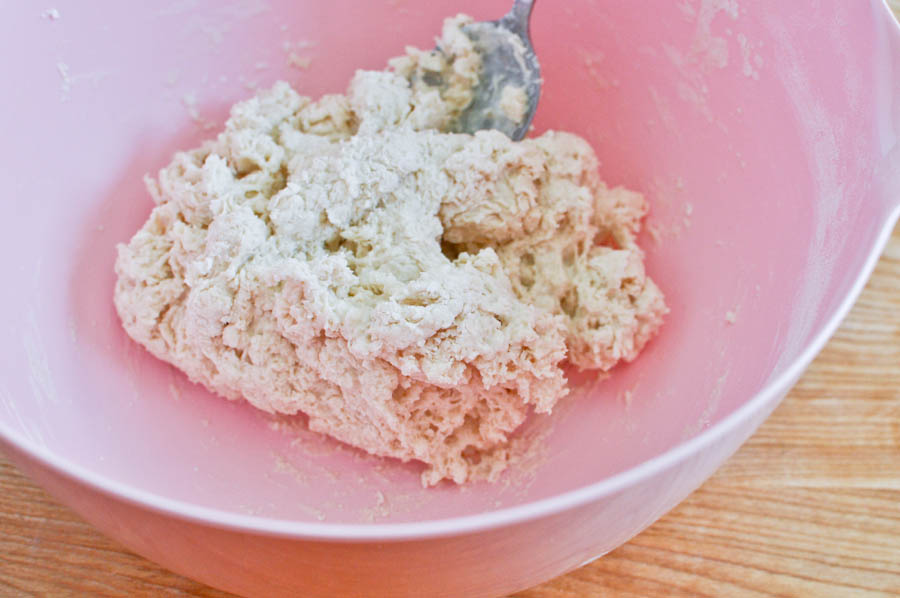
Stir well to form a fairly stiff, but sticky dough.


Tasty Kitchen Blog: Vegetarian Tamales. Guest post by Natalie Perry of Perry's Plate, recipe submitted by TK member Julie of Mommie Cooks.

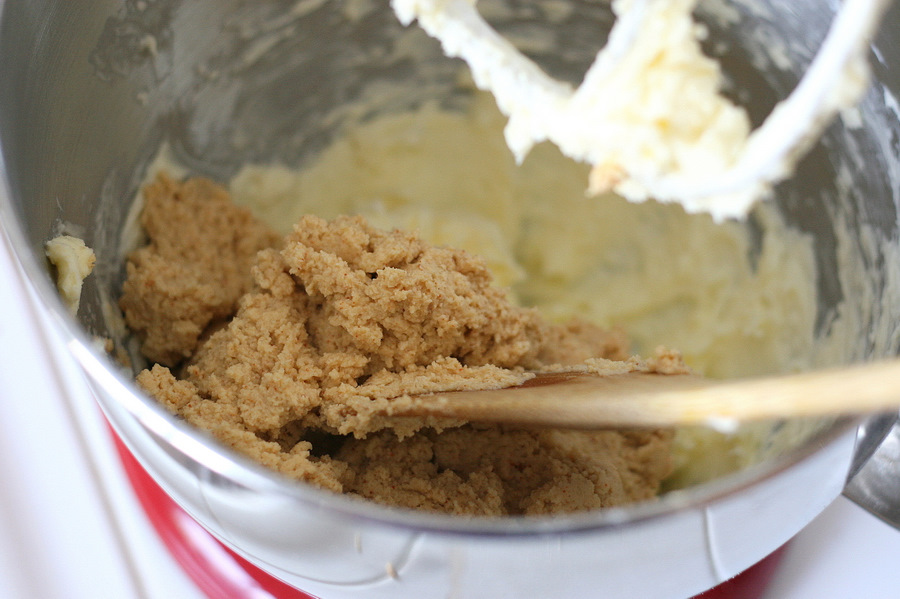
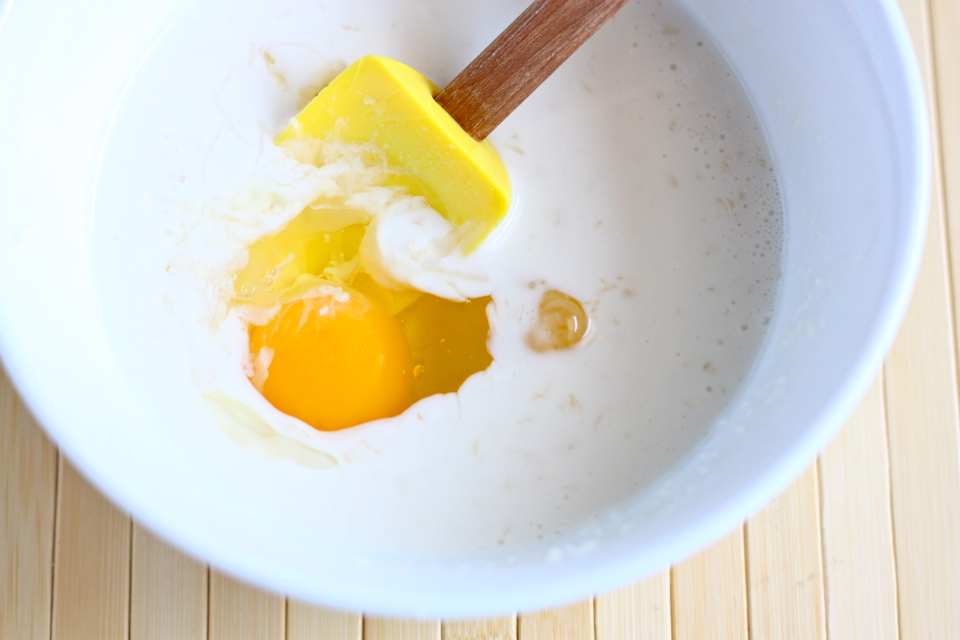
Add this dough to the creamed butter.


Tasty Kitchen Blog: Vegetarian Tamales. Guest post by Natalie Perry of Perry's Plate, recipe submitted by TK member Julie of Mommie Cooks.

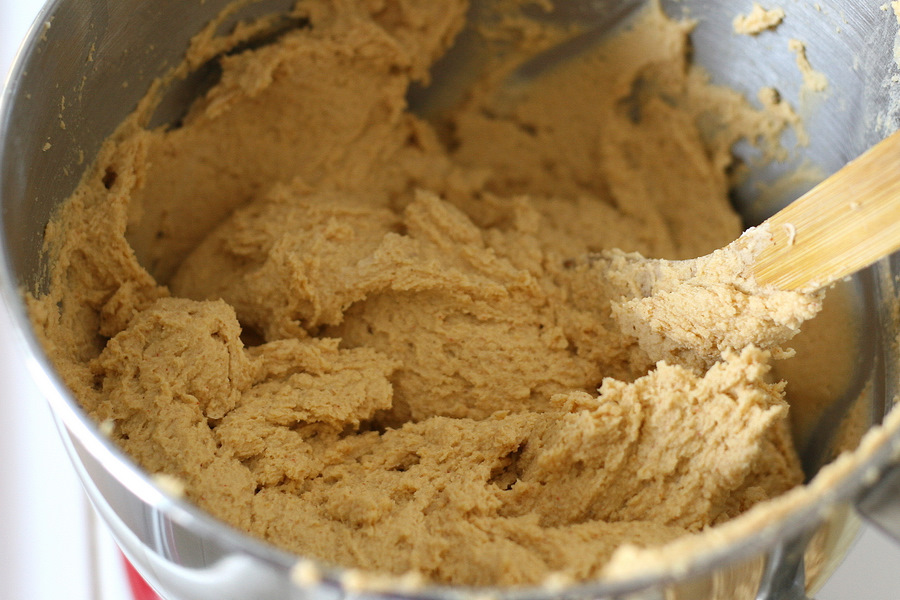
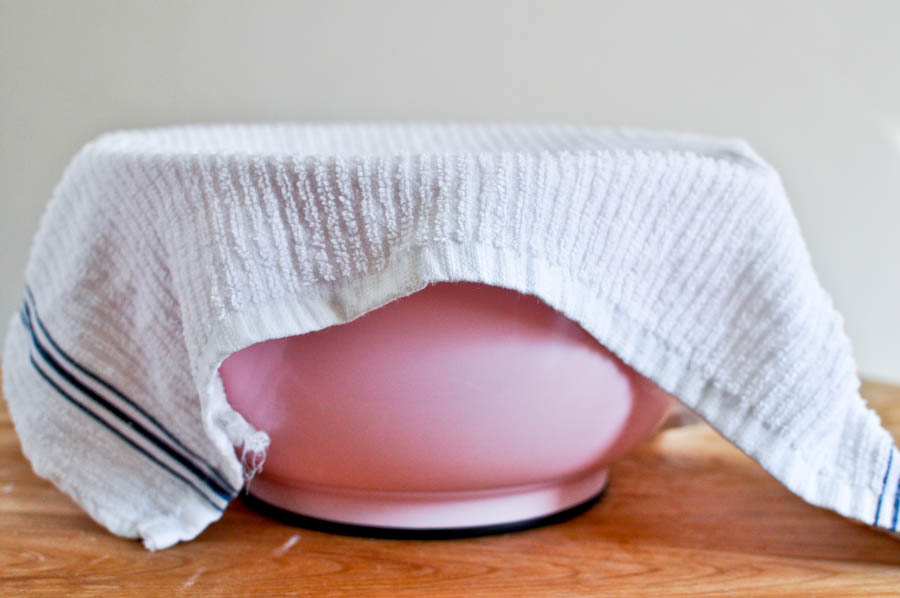
Cream everything together, scraping the sides of the bowl as necessary (the butter tends to stick to the sides and bottom), until you have a light, fluffy dough. Set this aside or cover and chill if you won’t be using it for more than a few hours.


Tasty Kitchen Blog: Vegetarian Tamales. Guest post by Natalie Perry of Perry's Plate, recipe submitted by TK member Julie of Mommie Cooks.

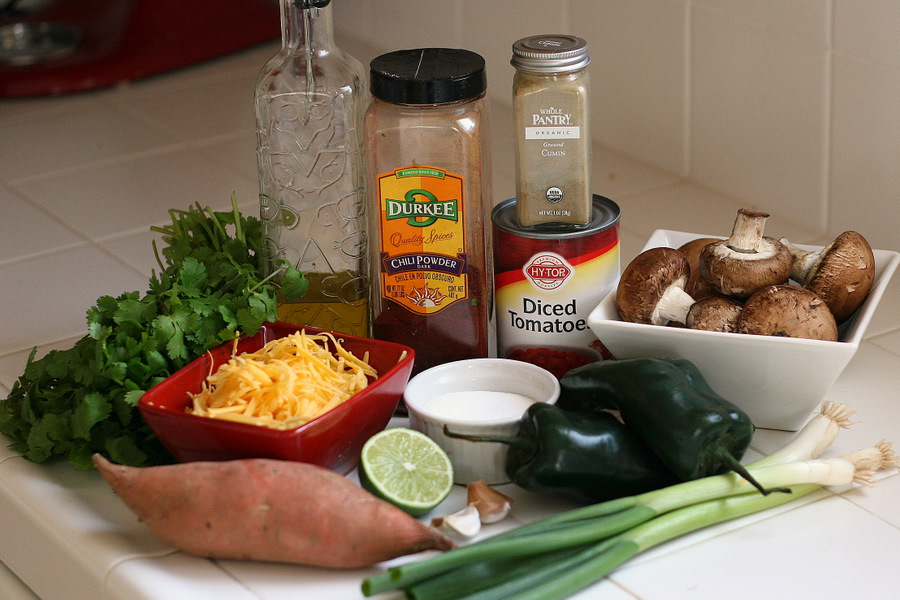
Now for the filling! I made a few changes to Julie’s recipe (noted at the bottom of this post) and quite liked this combination of vegetables. You’ll need a bunch of fresh cilantro, cooking oil, chili powder, cumin, diced tomatoes, a few brown mushrooms, green onions, poblano peppers, salt, fresh garlic, lime, a small potato, and some shredded cheddar cheese. (As well as 1/4 cup of vegetable broth. Just pretend it’s sitting next to the oil.)


Tasty Kitchen Blog: Vegetarian Tamales. Guest post by Natalie Perry of Perry's Plate, recipe submitted by TK member Julie of Mommie Cooks.

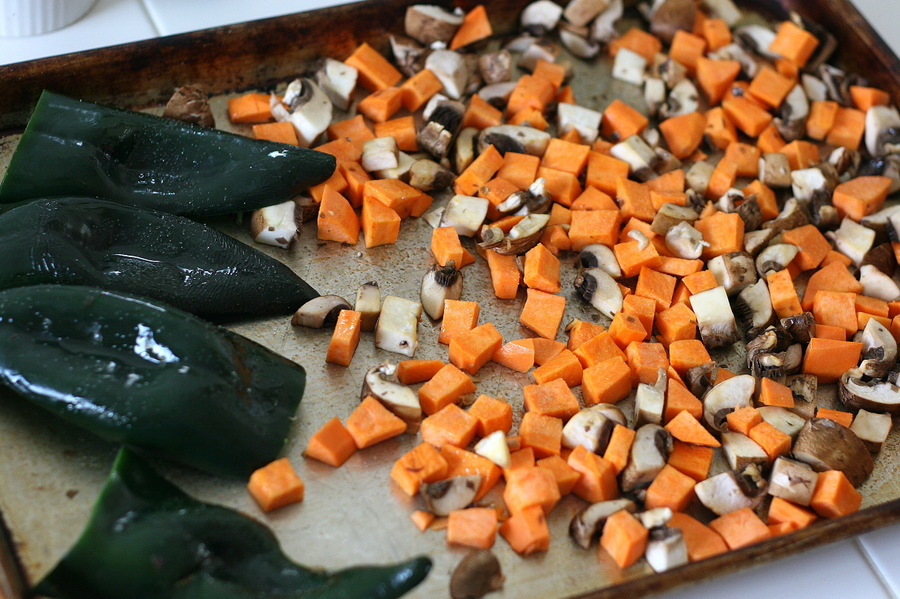
I’m mildly obsessed with roasting vegetables, so after I chopped the sweet potato and mushrooms and seeded and halved the peppers, I stuck them on a rimmed cookie sheet and roasted them at 425 degrees F for 30-35 minutes. (Peel the skin off the peppers and coarsely chop them after they’re roasted.) You could surely cook them in a skillet (per the original recipe), but if you’re using poblanos, you might want to reduce the amount. Roasting takes most of the heat out of them, and cooking them in a skillet may make the filling spicier than you anticipate.


Tasty Kitchen Blog: Vegetarian Tamales. Guest post by Natalie Perry of Perry's Plate, recipe submitted by TK member Julie of Mommie Cooks.

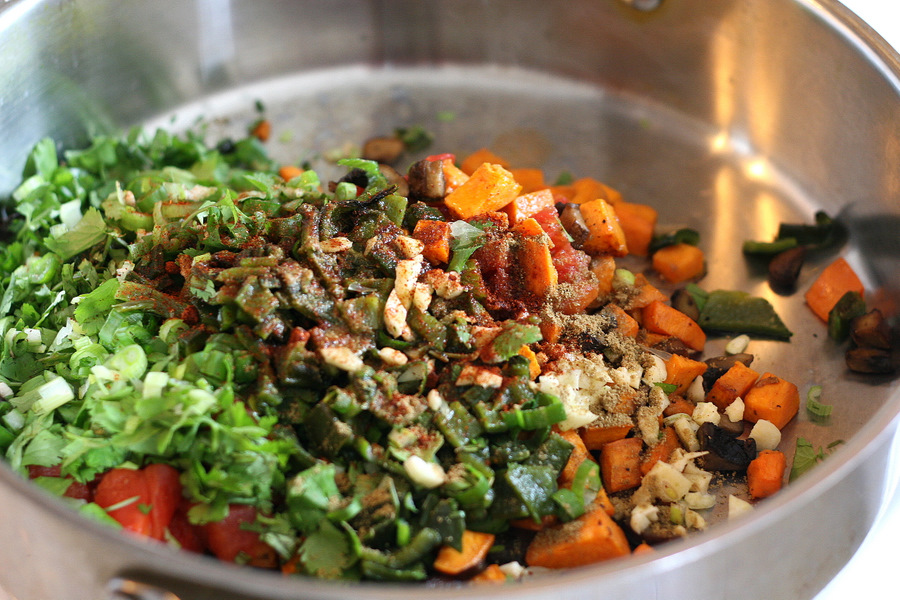
After they’re nice and roasted, throw them with the rest of the filling ingredients (except for the broth and cheese) into a large skillet and cook over medium heat until everything is heated through, about 2-3 minutes.


Tasty Kitchen Blog: Vegetarian Tamales. Guest post by Natalie Perry of Perry's Plate, recipe submitted by TK member Julie of Mommie Cooks.

Add the vegetable broth and scrape any bits that have stuck to the bottom of the skillet. Kill the heat, and stir in the cheese.


Tasty Kitchen Blog: Vegetarian Tamales. Guest post by Natalie Perry of Perry's Plate, recipe submitted by TK member Julie of Mommie Cooks.

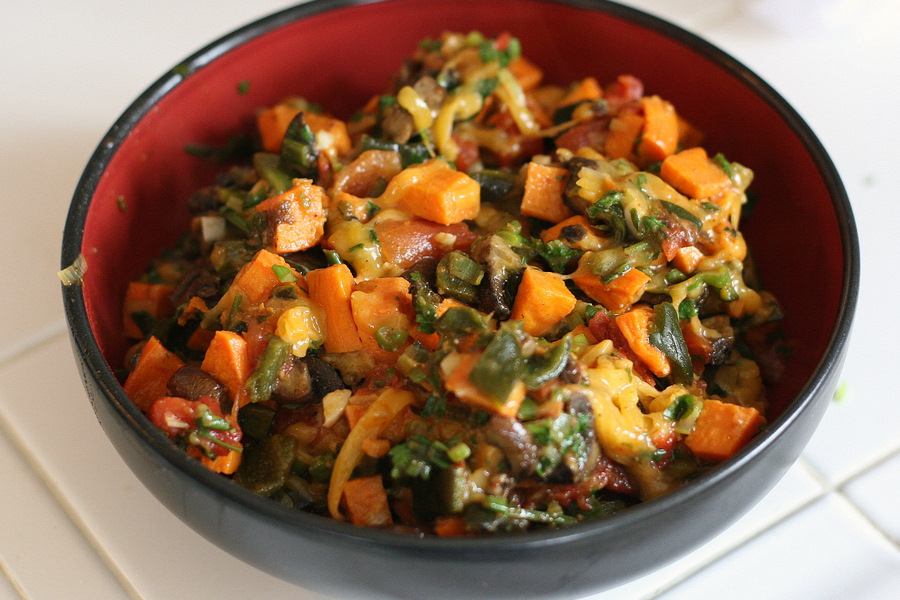
Transfer to a bowl and set aside until ready to assemble the tamales. Cover and chill if it will be more than a few hours.


Tasty Kitchen Blog: Vegetarian Tamales. Guest post by Natalie Perry of Perry's Plate, recipe submitted by TK member Julie of Mommie Cooks.

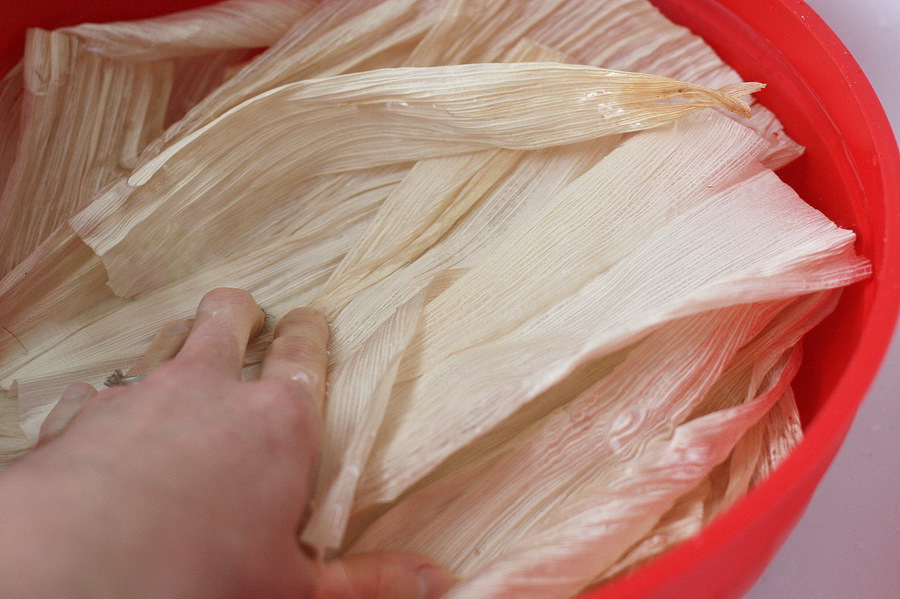
At some point you’ll need to soak the corn husks. They need to be immersed in water for about 30 minutes so they’ll be flexible enough to work with. Because I made my masa dough and filling ahead of time, I soaked my husks 30 minutes before I started wrapping them. If you’re going from zero to tamale, you might want to do this first. My husks floated to the top of the bowl, so I used a large can of pumpkin to weigh them down. The original recipe only makes between 13 and 16 tamales, so don’t soak the whole bag. Be sure to throw in a few extras to tear up and use as ties and in case a few of them rip; 25 ought to suffice.


Tasty Kitchen Blog: Vegetarian Tamales. Guest post by Natalie Perry of Perry's Plate, recipe submitted by TK member Julie of Mommie Cooks.

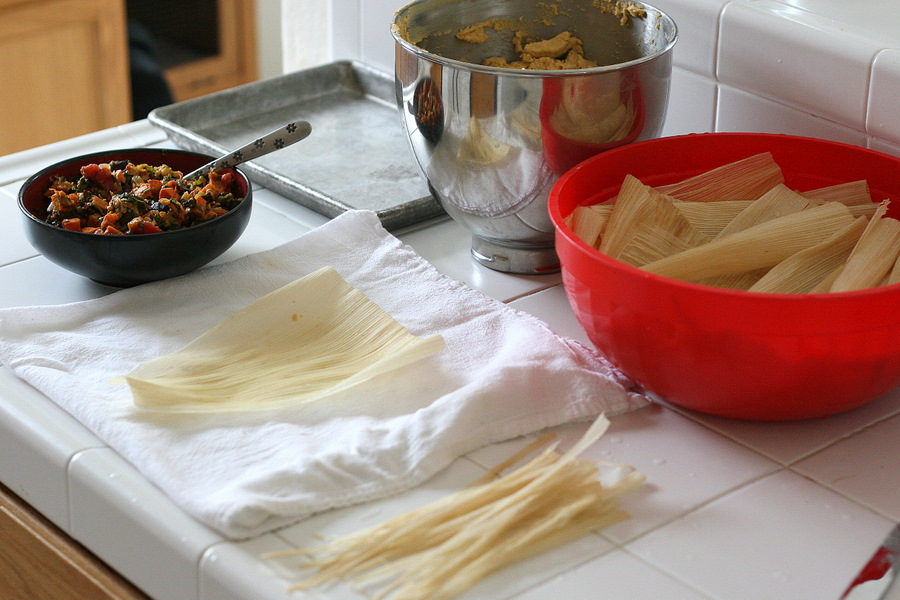
When you’re ready to start the fun part (yes, it really is fun!), clean up your workstation and get everything organized. You’ll need the filling, the masa dough, the soaking husks, a place to put the finished tamales, and a few husks that have been torn into 1/2-inch strips to use as ties. I also used a towel to place the husks on and dry them off when they come out of the water bowl.


Tasty Kitchen Blog: Vegetarian Tamales. Guest post by Natalie Perry of Perry's Plate, recipe submitted by TK member Julie of Mommie Cooks.

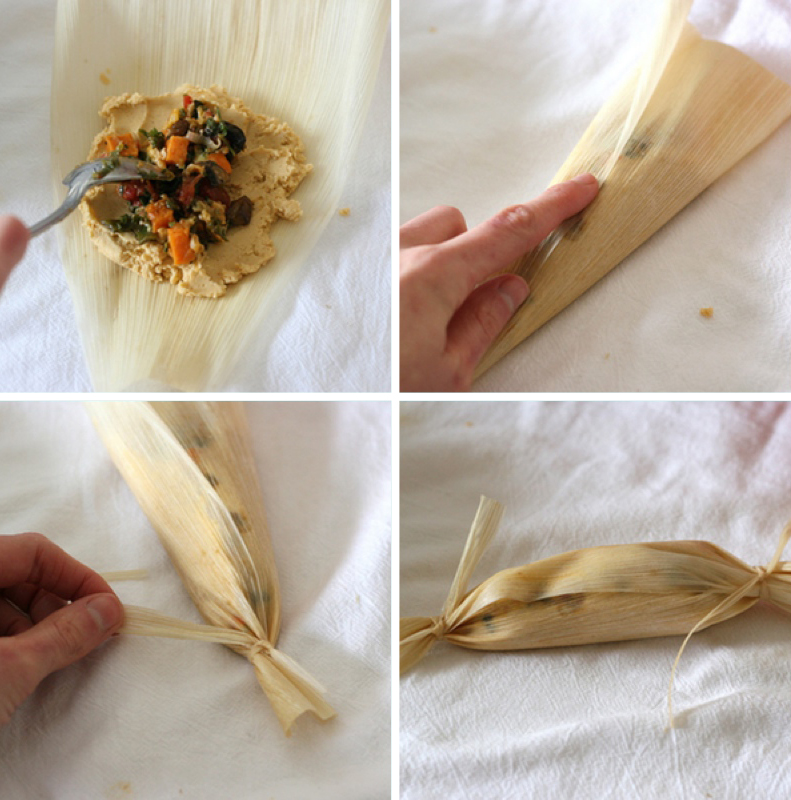
There are several ways to wrap tamales. I’ll show you two. This first way is definitely the easiest and the best way to use smaller husks that aren’t very wide or long. (You can also overlap husks if you don’t want to make really small tamales.)

First spread a 2 to 3 tablespoonfuls of masa dough in the center of the tamale, leaving a narrow border on each side. I found that using wet fingertips was the easiest way to spread the dough. It’s pretty sticky. Then put a spoonful of filling down the center of the dough. Fold the sides in (or roll like a burrito), then twist the ends and secure them with a husk tie or some kitchen twine.

See? Not so bad!


Tasty Kitchen Blog: Vegetarian Tamales. Guest post by Natalie Perry of Perry's Plate, recipe submitted by TK member Julie of Mommie Cooks.

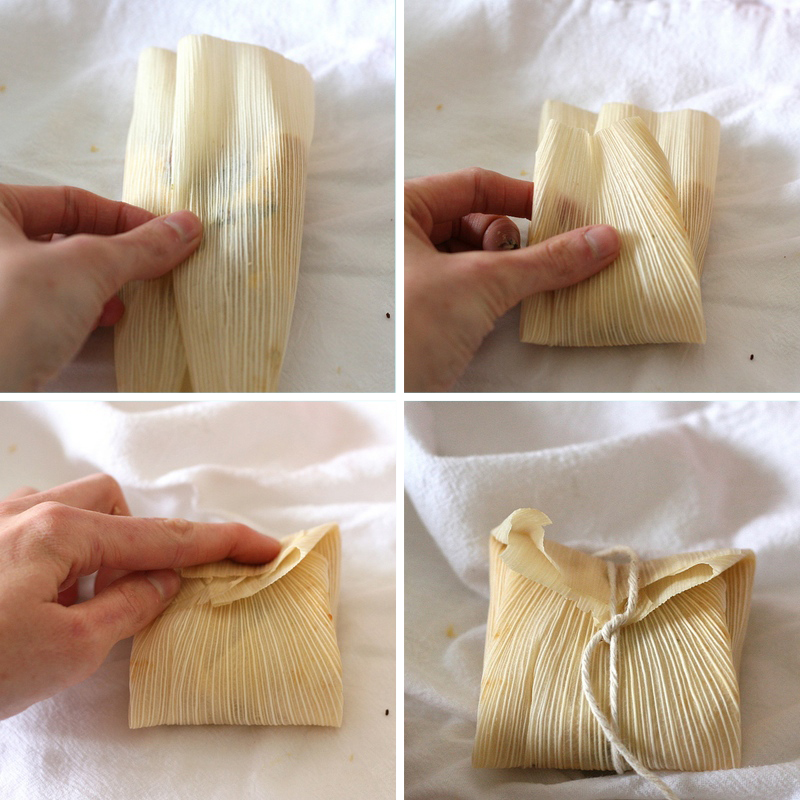
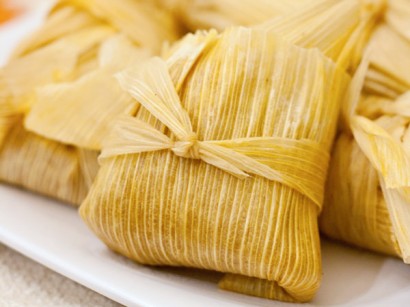
This next one was my favorite because they look like little packages when they’re tied. This method was much easier with large husks, but you could surely twist and tie the ends as well. First spread the masa and filling like the previous method, and bring the sides to the center. Then, fold the bottom of the husk to the center and fold down the top part of the husk to the center. Secure with a piece of kitchen twine from top to bottom or side to side, depending on your preference and the size of your husk.

Adorable.

Repeat, repeat, repeat! Now is the time to have some good music, your comfy crocs, and a few extra hands to help.


Tasty Kitchen Blog: Vegetarian Tamales. Guest post by Natalie Perry of Perry's Plate, recipe submitted by TK member Julie of Mommie Cooks.

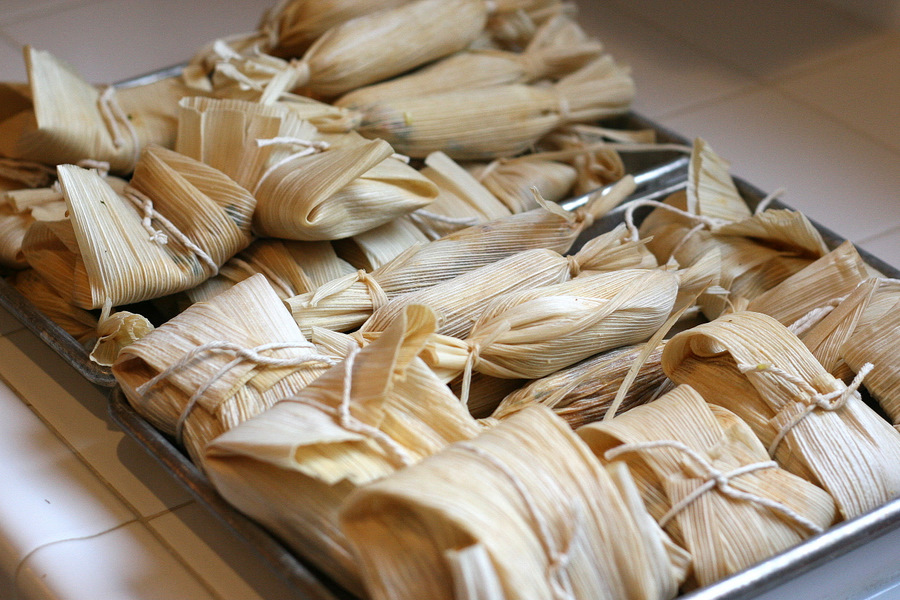
When you’re finished, you’ll have a tray (or two) of finished tamales. (I doubled the recipe, which is why I ended up with so many.) Some will be small, some will be big, some pretty, some will look like you had a toddler helping out. That’s perfectly fine. They’ll all taste great!

At this point you could stick them in a gallon-sized freezer bag and freeze them if you like.


Tasty Kitchen Blog: Vegetarian Tamales. Guest post by Natalie Perry of Perry's Plate, recipe submitted by TK member Julie of Mommie Cooks.

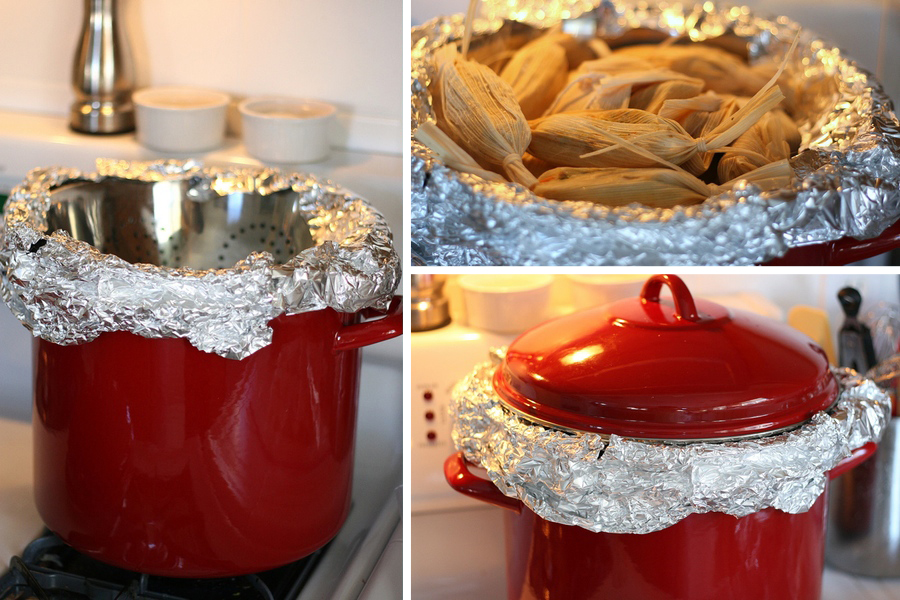
One of the reasons I never made tamales until now was because I don’t own a steamer. Julie suggested taking a big pot, adding a couple quarts of water and steam them in a metal colander nestled inside. Brilliant! My colander wasn’t wide enough, so I sealed the edges with aluminum foil to hold the steam in. It isn’t pretty, but it did the job.

Julie says to steam them for 90 minutes over medium-high heat, adding more water as necessary. If you have a proper steamer, I imagine they’d be finished in less time. Add an extra 15 minutes or so if they’re frozen. You don’t need to thaw them ahead of time.


Tasty Kitchen Blog: Vegetarian Tamales. Guest post by Natalie Perry of Perry's Plate, recipe submitted by TK member Julie of Mommie Cooks.

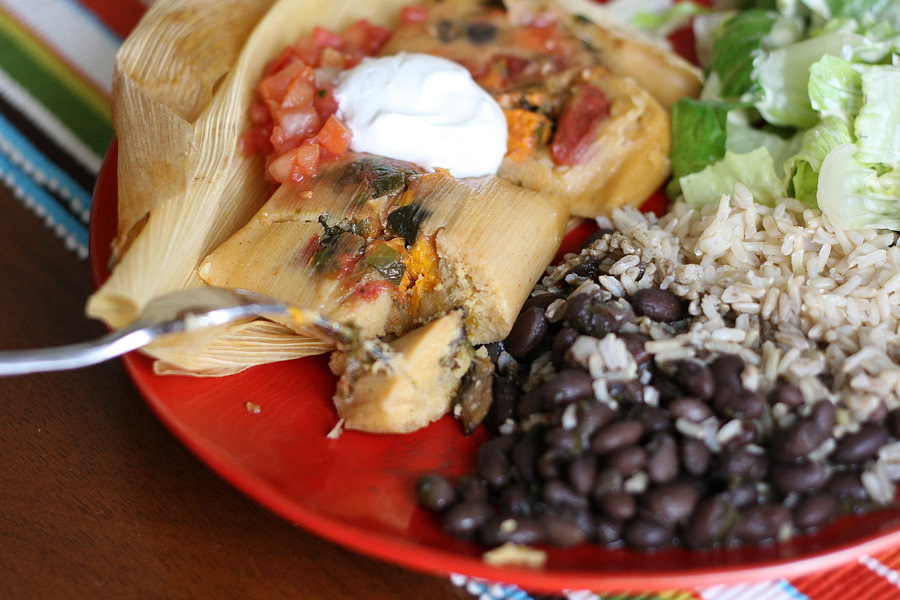
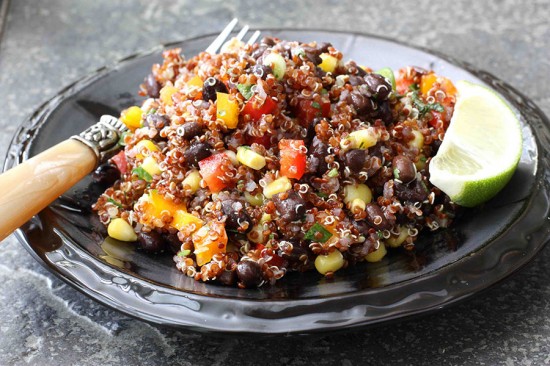
All your hard work will finally pay off as you bite into these tender, moist, flavorful little packets. Serve them with the traditional side of rice and beans, some salsa, and a dollop of sour cream, and you’ll wonder where this meal has been all your life. Seriously.

Julie, thank you for a great recipe and sharing your tamale wisdom! Visit her blog, Mommie Cooks, for more for her family-friendly recipes.

 
Recipe alterations: I omitted the zucchini and the fresh tomatoes and replaced it with 3-4 large brown mushrooms, 1 small sweet potato, 2 poblano peppers, and 1 can of diced tomatoes, drained. The altered filling made more than the original and needed 1 1/2 times the masa recipe.


Printable Recipe

Vegetarian Tamales

See post on mommiecooks’s site!
4.66 Mitt(s) 3 Rating(s)3 votes, average: 4.66 out of 53 votes, average: 4.66 out of 53 votes, average: 4.66 out of 53 votes, average: 4.66 out of 53 votes, average: 4.66 out of 5

Prep Time:

Cook Time:

Difficulty: Intermediate

Servings: 16

16
x

Print Options

Page size Letter 3x5 4x6
Text Size Small Medium Large
Content Include description
Include prep time, etc.
Show image

Description

A delicious vegetarian take on a Mexican classic.

Ingredients

  • 1 package Corn Husks (about 40-50 Husks)
  • _____
  • FOR THE DOUGH:
  • 2 cups Masa
  • 1 teaspoon Baking Powder
  • ¾ teaspoons Salt, Divided
  • 2 teaspoons Cumin, Divided Use
  • 2 teaspoons Chili Powder, Divided Use
  • 2-¼ cups Veggie Broth, Divided Use
  • 1 stick Butter
  • _____
  • FOR THE FILLING:
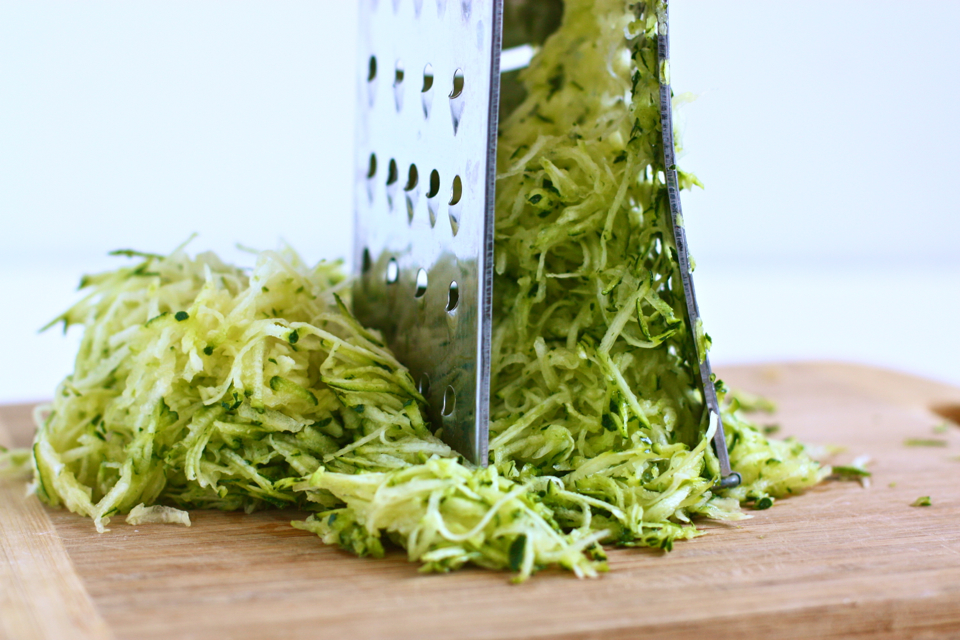
  • 1 whole Zucchini, Chopped
  • 3 whole Green Onions, Chopped
  • 2 cloves Garlic, Minced
  • 1 Tablespoon Oil
  • 1 bunch Cilantro, Chopped
  • 2 whole Roma Tomatoes, Chopped
  • ½ whole Lime, Juiced
  • ½ cups Shredded Cheddar Cheese

Preparation Instructions

Start off by soaking your corn husks in water for at least 30 minutes.

Grab a bowl and add in the masa, baking powder, 1/2 teaspoon of the salt, and 1 teaspoon of both the cumin, and chili powder.

Now add 2 cups of the veggie broth to your mixture and form a dough.

Pop your stick of butter into your mixer and whip it up for a minute or so. Add the masa dough in and mix it up well again. Set your finished dough aside and let’s move on to the filling.

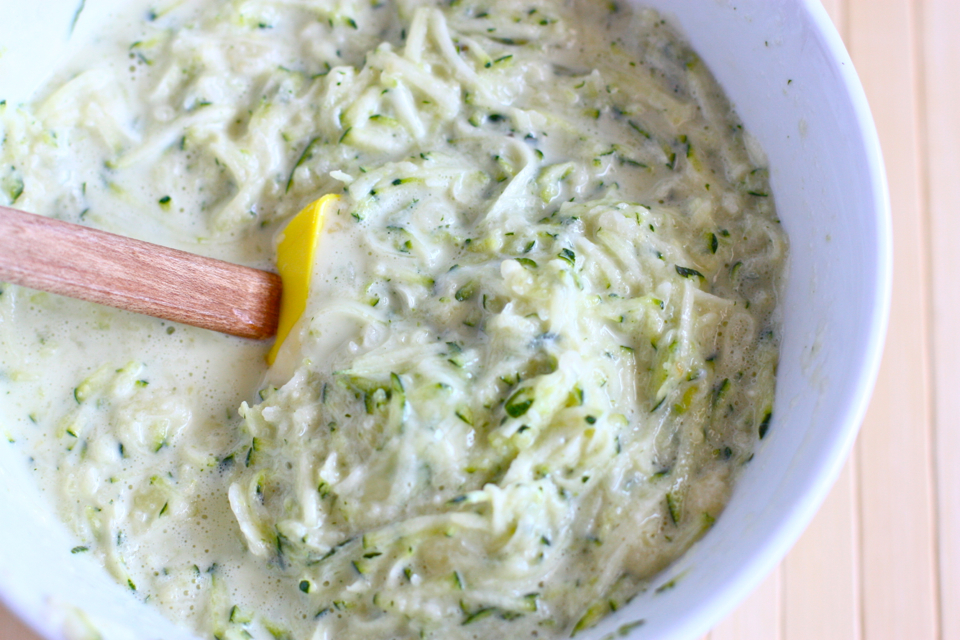
Grab your saute pan and cook up your zucchini, green onions, and garlic on medium heat in the Tablespoon of oil for 2 to 3 minutes.

Now add in the rest of your broth (1/4 cup), the cilantro, tomatoes, lime juice, and the remaining cumin, chili powder (1 teaspoon each) and salt (1/4 teaspoon).

Stir it together and add in the shredded cheese.

Grab one of your soaked corn husks and slather a good amount of the masa mixture on top.

Now, take a spoonful of your veggie filling and place it down the middle third of your tamale. Make sure to leave a bit of space at the ends.

Wrap it up like you would a burrito and tie off the husk. I used another corn husk to tie it up.

Grab a big pot, add about 2 quarts of water and steam those beautiful rolled up veggie delights for about 90 minutes on medium high heat. I didn’t have a steamer that big, so I used my large stock pot and placed my noodle strainer inside of it with the pot cover over the top. Make sure that your tamales aren’t touching the water.

While the tamales are steaming, periodically check your water level to ensure you don’t boil it all away!

Pull one out after 90 minutes and unwrap it to see if it’s cooked through. The masa should be firm.


_______________________________________

Be sure to check out Natalie’s own beautiful food blog, Perrys’ Plate, where you can see her growing collection of lovely recipes. There’s always something new to see there. Go visit now!


Profile photo of HowSweetEats

Homemade Naan

Posted by in Step-by-Step Recipes

Tasty Kitchen Blog: Homemade Naan. Guest post by Jessica Merchant of How Sweet It Is, recipe submitted by TK member Prerna of Indian Simmer.

 
One of my resolutions for New Year was to make more homemade bread. I couldn’t think of a better place to begin than with one of my favorites: fluffy naan.

To be honest, naan has always intimidated me a bit. It is so delicious that I assumed it must be complicated. Luckily, I stumbled upon Prerna’s recipe for Homemade Naan and can say that is has single-handedly changed my life. Long gone are the days that I have to run to the store and purchase naan to satisfy a craving. Now I can make it at home!

Not only that, but I can’t believe how simple it really is. I promise it is even easier than it looks.

I followed Prerna’s recipe exactly, and loved it so much that I also made a second batch with whole wheat pastry flour. It came out great too! Now my only problem is that I can’t stop eating naan with loads of butter. Send help!


Tasty Kitchen Blog: Homemade Naan. Guest post by Jessica Merchant of How Sweet It Is, recipe submitted by TK member Prerna of Indian Simmer.

Here’s everything you need for the dough: milk, plain yogurt, baking soda, baking powder, sugar, salt, olive oil and either whole wheat pastry flour or all-purpose flour. You probably have all the ingredients in your kitchen! In fact, I think you should head on in there right now and whip some up.


Tasty Kitchen Blog: Homemade Naan. Guest post by Jessica Merchant of How Sweet It Is, recipe submitted by TK member Prerna of Indian Simmer.

Begin by combining all of your dry ingredients—the flour, baking soda, baking powder, sugar and salt—into a bowl. Mix them up well.


Tasty Kitchen Blog: Homemade Naan. Guest post by Jessica Merchant of How Sweet It Is, recipe submitted by TK member Prerna of Indian Simmer.

In a separate bowl, warm the milk (I used the microwave and heated mine for about 25 seconds) with the plain yogurt. I let my yogurt sit out for about 15–20 minutes just to take the chill off. It may look a little funky, but just follow the rules. Prerna knows her stuff.


Tasty Kitchen Blog: Homemade Naan. Guest post by Jessica Merchant of How Sweet It Is, recipe submitted by TK member Prerna of Indian Simmer.

Make a well in the center of the dry ingredients and slowly add half of the yogurt and milk mixture. Right here is where I fell in love with Prerna’s recipe because of her honest instructions: she does not believe that there is one exact liquid measurement to mix with one exact flour measurement to form the perfect dough. I believe the same! While that theory may take a bit of practice and getting used to, it is nearly foolproof when it comes to this naan. After adding half of the mixture, gradually add a bit more until the dough comes together. I ended up using the entire milk and yogurt mixture with the all-purpose flour. However, I only used about 3/4 of the mixture when using the whole wheat pastry flour.


Tasty Kitchen Blog: Homemade Naan. Guest post by Jessica Merchant of How Sweet It Is, recipe submitted by TK member Prerna of Indian Simmer.

Mix the dough with a spoon until it comes together. Use a bit of oil to grease your hands and form the dough into a ball. No kneading at this stage!


Tasty Kitchen Blog: Homemade Naan. Guest post by Jessica Merchant of How Sweet It Is, recipe submitted by TK member Prerna of Indian Simmer.

Now it’s time to let the dough work its magic. Cover it with a damp cloth and let it sit for at least 2 hours. In this time, go do something fun like bake cookies or walk the dog. I took this moment to scrub my kitchen floor, which is very out of character for me. I hope I’m not falling ill.


Tasty Kitchen Blog: Homemade Naan. Guest post by Jessica Merchant of How Sweet It Is, recipe submitted by TK member Prerna of Indian Simmer.

After the two hours have passed, dust your work space with flour and knead the dough for 2-3 minutes. It should be soft and pliable. Form it into a circle. I actually scored my dough to make it easier to get uniform pieces.


Tasty Kitchen Blog: Homemade Naan. Guest post by Jessica Merchant of How Sweet It Is, recipe submitted by TK member Prerna of Indian Simmer.

Separate the dough into eight pieces. Sprinkle some flour on your workspace again and flatten each piece of dough. It should still be slightly thick and somewhat elongated.


Tasty Kitchen Blog: Homemade Naan. Guest post by Jessica Merchant of How Sweet It Is, recipe submitted by TK member Prerna of Indian Simmer.

The time has come to season your naan! You want to season one side with your flavor of choice; I chose garlic and a bit of smoked paprika. But there is a world of possibilities out there. Get creative! In the meantime, brush the opposite side with water.


Tasty Kitchen Blog: Homemade Naan. Guest post by Jessica Merchant of How Sweet It Is, recipe submitted by TK member Prerna of Indian Simmer.

Heat a skillet on medium heat. I used my dandy, trust old cast iron. I couldn’t live without it. Place your dough water-side down in the skillet. It will stick. Cook the naan for about 30-60 seconds. You know it’s time to flip it when you can see the dough bubbling. If it is still sticking, give it another 15 seconds and try again. Gently lift it up with kitchen tongs.

This is where you have two options. You can flip the naan in the skillet and cook the other side just like you did the first. I did this with a handful of my dough and each came out beautifully.


Tasty Kitchen Blog: Homemade Naan. Guest post by Jessica Merchant of How Sweet It Is, recipe submitted by TK member Prerna of Indian Simmer.

Prerna’s recipe calls for heating the other side of the naan over an open flame to achieve an authentic naan look and taste. I was hesitant at first, but I lit my burner next to my cast iron skillet and got to work.

I absolutely loved this result!

I used kitchen tongs and held the naan over the flame for about 30 seconds, rotating it constantly. The timing worked perfectly since the other naan was toasting in the skillet, and it became natural to get into a routine: move naan from the skillet to the flame, place the next naan in the skillet, rotate the naan over the open flame, then set aside on a plate to cool. Repeat!

I highly recommend this option for those of you with a gas stove. Just be careful! Make sure there is nothing flammable nearby (such as towels or napkins) and give your full attention to the naan.

And remember, the other option of completing the naan in the skillet yields an excellent result as well.


Tasty Kitchen Blog: Homemade Naan. Guest post by Jessica Merchant of How Sweet It Is, recipe submitted by TK member Prerna of Indian Simmer.

I ended up with a tall, fluffy stack of regular and whole wheat naan. I hope there is naan in Heaven.


Tasty Kitchen Blog: Homemade Naan. Guest post by Jessica Merchant of How Sweet It Is, recipe submitted by TK member Prerna of Indian Simmer.

Regardless of how you choose to flavor your naan, I recommend brushing it with tons of melted butter. Why would you do anything else?

Of course, you also have the option of making naan pizzas (a favorite in our house) or peanut butter and jelly naan or even dessert naan. Naan topped with peanut butter, honey, bananas and chocolate chips? Sign me up!


Tasty Kitchen Blog: Homemade Naan. Guest post by Jessica Merchant of How Sweet It Is, recipe submitted by TK member Prerna of Indian Simmer.

I promise you won’t ever want to buy store-bought naan again. Enjoy!

Thanks to Prerna for her fabulous recipe and for helping me step out of my comfort zone in the kitchen. She made my first naan experience quite enjoyable and extremely delicious. Check out her wonderful blog, Indian Simmer, which is chock full of beautiful photography and mouth watering recipes.


Printable Recipe

Homemade Naan

See post on indiansimmer’s site!
4.53 Mitt(s) 19 Rating(s)19 votes, average: 4.53 out of 519 votes, average: 4.53 out of 519 votes, average: 4.53 out of 519 votes, average: 4.53 out of 519 votes, average: 4.53 out of 5

Prep Time:

Cook Time:

Difficulty: Easy

Servings: 4

4
x

Print Options

Page size Letter 3x5 4x6
Text Size Small Medium Large
Content Include description
Include prep time, etc.
Show image

Description

Naan is one of the most popular Indian breads. It is a flat bread made with fermented dough, traditionally cooked in a clay oven called tandoor.

Ingredients

  • 2 cups All Purpose Flour Or Wheat Flour
  • ¾ teaspoons Baking Powder
  • ½ teaspoons Baking Soda
  • ½ teaspoons Sugar
  • ¼ teaspoons Salt
  • ½ cups Warm Milk
  • ½ cups Yogurt
  • ½ Tablespoons Oil, As Needed
  • Additional Optional Herbs And Seasonings To Flavor The Naan (See Note)

Preparation Instructions

Note: The ingredient list includes the ingredients for the dough. You can flavor your naan with all kinds of herbs. I made cumin naan, garlic naan, butter naan, and some topped with cilantro.

Mix all the dry ingredients together and make a well of flour.

Mix milk and yogurt together and pour half of it into the well and slowly combine it together.

I don’t think there’s an exact amount of liquid that should be added to the exact amount of flour to make a perfect dough. So what I do is continue adding liquid slowly and combining it all together slowly until a soft dough is made. The dough should be soft enough for you to be able to dig your finger into it without applying any pressure. If dough sticks to your hand too much, then use little bit of oil on your hands and then punch into the dough.

Cover with a damp cloth and let it sit in a warm place for at least 2 hours.

After a few hours, dust your working board, take out the dough and knead it for about 2-3 minutes. Divide the dough into smaller balls (in this case you should get about 8 balls to make naans).

Dust the board again and flatten the balls to make bread that is a little thick and elongated.

Now sprinkle one side of the bread with your desired flavor. I made cumin, minced garlic, chopped cilantro and some simple butter naans.

Brush the other side with water.

Heat a thick-bottomed skillet or a wok or any heavy-bottomed pan with a lid. Once it is nicely hot, place the naan wet side down (it will stick) and cover it with a lid.

Let it cook for about 30 seconds or until you see bubbles on it. Now cook the other side of the naan over a direct flame on the burner with the help of tongs. When you see some charred brown spots then you know that the naan is done.

Smother a good amount of butter on your naans and when you taste them, you’ll know what a peaceful life means!


_______________________________________

Jessica Merchant is a personal trainer turned food writer and blogger. Her blog, How Sweet Eats, is where she proclaims her love for all things sweet, all things bacon, and everything else in between. She works her magic in her Pittsburgh kitchen, which she shares with her husband of 2 years.


Profile photo of EatLiveRun

Sweet Zucchini Pancakes

Posted by in Step-by-Step Recipes

Tasty Kitchen Blog Sweet Zucchini Pancakes. Guest post by Jenna Weber of Eat, Live, Run; recipe submitted by TK member Lindsay of Pinch of Yum.

 
If you’re like me, you have a plethora of zucchini on your hands right now and have already made all the breads, muffins and pastas that you can with it. So when I found PinchofYum’s simple recipe for Sweet Zucchini Pancakes I decided to give it a go. I loved the idea of zucchini bread pancakes that came together in about the same time as if I had used a mix.

Sign me up!


Tasty Kitchen Blog Sweet Zucchini Pancakes. Guest post by Jenna Weber of Eat, Live, Run; recipe submitted by TK member Lindsay of Pinch of Yum.

Note: Lindsay’s original recipe said to use a half cup of either use milk or water, and I initially opted for almond milk because it’s what I had on hand. But my first attempt didn’t quite turn out as fluffy as I expected. They tasted wonderful though, and I knew they had the potential to be awesome. So after reading some reviews of the recipe, I decided to give these pancakes another go and just use Greek yogurt with NO additional liquid. I definitely recommend doing this—my second batch of batter was just the right consistency!


Tasty Kitchen Blog Sweet Zucchini Pancakes. Guest post by Jenna Weber of Eat, Live, Run; recipe submitted by TK member Lindsay of Pinch of Yum.

First things first. I grated up my zucchini. My box grater has seen better days but still did the trick!


Tasty Kitchen Blog Sweet Zucchini Pancakes. Guest post by Jenna Weber of Eat, Live, Run; recipe submitted by TK member Lindsay of Pinch of Yum.

Then, I whisked together all the dry ingredients in a large bowl.


Tasty Kitchen Blog Sweet Zucchini Pancakes. Guest post by Jenna Weber of Eat, Live, Run; recipe submitted by TK member Lindsay of Pinch of Yum.

In another bowl, I added the yogurt to the butter I had just melted in the microwave. Like I said, I chose not to use the milk this time around because I thought the batter would have too much liquid.


Tasty Kitchen Blog Sweet Zucchini Pancakes. Guest post by Jenna Weber of Eat, Live, Run; recipe submitted by TK member Lindsay of Pinch of Yum.

Now whisk the yogurt and butter together until smooth and add the egg. Whisk well so there are no yogurt clumps!


Tasty Kitchen Blog Sweet Zucchini Pancakes. Guest post by Jenna Weber of Eat, Live, Run; recipe submitted by TK member Lindsay of Pinch of Yum.

Then fold in the grated zucchini!


Tasty Kitchen Blog Sweet Zucchini Pancakes. Guest post by Jenna Weber of Eat, Live, Run; recipe submitted by TK member Lindsay of Pinch of Yum.

Add the dry ingredients and mix gently. Be careful not to over-mix here or else you’ll have rocks for pancakes.


Tasty Kitchen Blog Sweet Zucchini Pancakes. Guest post by Jenna Weber of Eat, Live, Run; recipe submitted by TK member Lindsay of Pinch of Yum.

Ta-dah! Beautiful, light, fluffy pancakes that taste and look remarkably similar to zucchini bread. Again though, I recommend not adding any extra liquid to the batter and taking care when flipping because they seem to cook faster than other pancakes. I topped my pancakes with some butter and real maple syrup. It was definitely a tasty way to start my day!

Thanks, Lindsay for such a fun summer breakfast treat! See her blog Pinch of Yum for more of her beautiful creations.


Printable Recipe

Sweet Zucchini Pancakes

See post on Lindsay’s site!
4.00 Mitt(s) 8 Rating(s)8 votes, average: 4.00 out of 58 votes, average: 4.00 out of 58 votes, average: 4.00 out of 58 votes, average: 4.00 out of 58 votes, average: 4.00 out of 5

Prep Time:

Cook Time:

Difficulty: Easy

Servings: 2

2
x

Print Options

Page size Letter 3x5 4x6
Text Size Small Medium Large
Content Include description
Include prep time, etc.
Show image

Description

Zucchini bread in pancake form.

Ingredients

  • ½ cups All-purpose Flour
  • 3 Tablespoons Sugar
  • 1 teaspoon Baking Powder
  • ¼ teaspoons Baking Soda
  • ¼ teaspoons Salt
  • 1 whole Egg
  • ½ cups Greek Yogurt (nonfat Is Fine)
  • 2 Tablespoons Melted Butter
  • 1 whole Zucchini, Grated
  • ½ cups Water Or Milk

Preparation Instructions

Preheat a nonstick skillet or griddle to medium-high heat (350ºF).

Whisk dry ingredients together (flour, sugar, baking powder, baking soda, salt) and set aside.

In a separate bowl, whisk egg, yogurt, and melted butter together. Combine dry and wet ingredients together and mix until just combined. Fold in grated zucchini. Add water or milk a little at a time until the batter consistency reaches the desired thickness. The more you add, the thinner your pancakes will be. For me, 1/2 cup was enough to thin the batter but keep them nice and fluffy.

Scoop 1/3 cup of batter onto the griddle and gently spread the batter if necessary. When you see bubbles rising around the edges, flip the pancakes. I found that some of the pancakes took as long as 10 minutes to cook (5 minutes per side). Top with butter and maple syrup!


_______________________________________

Jenna is a food writer who has worked as a pastry chef and bread baker. Her blog Eat, Live, Run has great recipes, travel stories, and the perfect slogan: “Celebrating life, one crumb at a time.”


Profile photo of EatLiveRun

Salted Fudge Brownies

Posted by in Baking, Step-by-Step Recipes

I’m so excited to introduce Jenna of Eat, Live, Run as our newest contributor here at the Tasty Kitchen Blog. She’s a doll who dearly loves the TK community. She also has quite the recipe box and it just keeps growing every day. We’re absolutely thrilled to have her! –Ree

 
Tasty Kitchen Blog: Salted Fudge Brownies. Guest post by Jenna Weber of Eat, Live, Run; recipe submitted by TK member Jennifer (janedeere) of Jennifer Cooks.

 
The first moment I saw Jennifer’s recipe for Salted Fudge Brownies, I knew I had to bake them as soon as possible. As a self-professed (dark) chocoholic with an affinity towards anything sprinkled with sea salt, these brownies were made for me.

My absolute favorite sweet treat and guilty pleasure is a Lindt Dark Chocolate with a Touch of Sea Salt bar, and I’ve been known to hide four or five of them in my secret “chocolate drawer” at any one time. I go crazy for that sweet/savory combination and, of course, you can never have too much chocolate.

To say that Jennifer’s brownies are delicious and fudge-like is an understatement. They positively melt in your mouth with a rich, creamy texture and intense flavor that is only heightened by the addition of salt. After baking them, I brought them to a church function where they were promptly deemed “the best brownies ever.”

Do yourself a favor and bake these today. You won’t be sorry.


Tasty Kitchen Blog: Salted Fudge Brownies. Guest post by Jenna Weber of Eat, Live, Run; recipe submitted by TK member Jennifer (janedeere) of Jennifer Cooks.

The ingredients are simple and pretty standard. Nothing you probably don’t have in your kitchen already! I love that. Because I don’t know about you, but when I need a brownie, I need a brownie fast.

So, first things first. Preheat your oven to 350 degrees.


Tasty Kitchen Blog: Salted Fudge Brownies. Guest post by Jenna Weber of Eat, Live, Run; recipe submitted by TK member Jennifer (janedeere) of Jennifer Cooks.

Butter and foil an eight-inch square pan. It’s a good idea to leave the foil hanging over the sides a bit so you can easily lift the brownies out later!


Tasty Kitchen Blog: Salted Fudge Brownies. Guest post by Jenna Weber of Eat, Live, Run; recipe submitted by TK member Jennifer (janedeere) of Jennifer Cooks.

Next, melt together the unsweetened chocolate and butter in a saucepan over very low heat. Be careful here, you don’t want the chocolate to burn!

Once the chocolate and butter have melted together and are smooth, take the pan off the heat and transfer to a bowl.


Tasty Kitchen Blog: Salted Fudge Brownies. Guest post by Jenna Weber of Eat, Live, Run; recipe submitted by TK member Jennifer (janedeere) of Jennifer Cooks.

Then, add cocoa powder …


Tasty Kitchen Blog: Salted Fudge Brownies. Guest post by Jenna Weber of Eat, Live, Run; recipe submitted by TK member Jennifer (janedeere) of Jennifer Cooks.

Three eggs …


Tasty Kitchen Blog: Salted Fudge Brownies. Guest post by Jenna Weber of Eat, Live, Run; recipe submitted by TK member Jennifer (janedeere) of Jennifer Cooks.

Two cups sugar …


Tasty Kitchen Blog: Salted Fudge Brownies. Guest post by Jenna Weber of Eat, Live, Run; recipe submitted by TK member Jennifer (janedeere) of Jennifer Cooks.

And the flour and vanilla.

Mix until smooth (batter will be thick!) and then pour all that deliciousness into your already greased and lined pan. It’s pretty much mandatory to lick the spoon here—no chocolate should ever go to waste!


Tasty Kitchen Blog: Salted Fudge Brownies. Guest post by Jenna Weber of Eat, Live, Run; recipe submitted by TK member Jennifer (janedeere) of Jennifer Cooks.

Finally, sprinkle sea salt all over the top.


Tasty Kitchen Blog: Salted Fudge Brownies. Guest post by Jenna Weber of Eat, Live, Run; recipe submitted by TK member Jennifer (janedeere) of Jennifer Cooks.

Don’t hesitate: just do it.


Tasty Kitchen Blog: Salted Fudge Brownies. Guest post by Jenna Weber of Eat, Live, Run; recipe submitted by TK member Jennifer (janedeere) of Jennifer Cooks.

Jennifer says to bake for about 35 minutes, but I ended up baking for 40 minutes because they weren’t quite done. You want the center to still be slightly gooey but the edges to pull away from the sides of the pan. When you insert a toothpick in the center, it still should have some of that yummy brownie batter on it.

Now comes the hard part! Let your brownies cool for ten minutes on the counter and then stick them in the fridge for an hour. I know, I know … use this time to wash your dishes and walk the dog.


Tasty Kitchen Blog: Salted Fudge Brownies. Guest post by Jenna Weber of Eat, Live, Run; recipe submitted by TK member Jennifer (janedeere) of Jennifer Cooks.

It’s hard to wait, but the end result is definitely worth it!


Tasty Kitchen Blog: Salted Fudge Brownies. Guest post by Jenna Weber of Eat, Live, Run; recipe submitted by TK member Jennifer (janedeere) of Jennifer Cooks.

 
They really are the best brownies I’ve ever had, and that’s saying something! A huge thank you to Jennifer for submitting such a winner! (And another thank you to Food & Wine, where Jennifer discovered this recipe.) Visit her blog, Jennifer Cooks, for more of her recipes and beautiful food photography.


Printable Recipe

Salted Fudge Brownies

See post on Jennifer | JenniferCooks.com’s site!
4.89 Mitt(s) 19 Rating(s)19 votes, average: 4.89 out of 519 votes, average: 4.89 out of 519 votes, average: 4.89 out of 519 votes, average: 4.89 out of 519 votes, average: 4.89 out of 5

Prep Time:

Cook Time:

Difficulty: Easy

Servings: 8

8
x

Print Options

Page size Letter 3x5 4x6
Text Size Small Medium Large
Content Include description
Include prep time, etc.
Show image

Description

Salty and sweet … mmm.

I found this recipe on the Food & Wine website and it has now become my all-time favorite brownie recipe!

Ingredients

  • 1-½ stick Butter
  • 2 ounces, weight Unsweetened Chocolate, Finely Chopped
  • ¼ cups Plus 2 Tablespoons Unsweetened Cocoa Powder
  • 2 cups Sugar
  • 3 whole Eggs
  • 1-½ teaspoon Pure Vanilla Extract
  • 1 cup All-purpose Flour
  • ½ teaspoons Maldon Sea Salt

Preparation Instructions

1. Preheat the oven to 350°. Place two large pieces of foil in a 9-inch square metal cake pan with foil, draping the foil over the edges. Spray foil with cooking spray.

2. Melt the butter with the unsweetened chocolate over very low heat, stirring occasionally. Remove from the heat. Whisk to combine. Add the cocoa, sugar, eggs, vanilla and flour. Pour the batter into the prepared pan and smooth the surface with a rubber spatula. Grind sea salt evenly over the batter. Using a butter knife, swirl the salt into the batter. Grind a little extra on top, making sure to sprinkle it evenly and leave it setting on top of the batter.

3. Bake for about 35 minutes, until the edge is set but the center is still a bit soft and a toothpick inserted into the center comes out coated with a little of the batter. Cool at room temperature in the pan for about an hour, then refrigerate just until they are firm. Lift the brownies from the pan and remove foil. Cut the brownies into 12 or 16 squares.


_______________________________________

Jenna is a food writer who has worked as a pastry chef and bread baker. She’s every bit as sweet and lovely inside as she is outside. Her blog Eat, Live, Run has great recipes, travel stories, and the perfect slogan: “Celebrating life, one crumb at a time.”


Profile photo of Natalie | Perry's Plate

Grandma Inez’s Pineapple Pie

Posted by in Baking, Step-by-Step Recipes

  I’m excited to share a recipe from my own box today because it’s one that’s close to my heart. I have a southern grandmother who cooks the best desserts. (I’m guessing many of you are nodding your heads and smiling. You know what I’m talking about, right?) Grandma Inez’s Pineapple Pie is my most […]

Profile photo of HowSweetEats

Gooey Butter Cake

Posted by in Baking, Step-by-Step Recipes

Note from Ree: I’m so excited to welcome Jessica from HowSweetEats as a new contributor here on Tasty Kitchen. Jessica’s bulging recipe box (149 recipes, anyone?) is a goldmine of deliciousness, and a testament to Jessica’s love for cooking and baking. For her inaugural post, Jessica brings us the step-by-step instructions for this Gooey Butter…

Profile photo of cookincanuck

Red Quinoa and Black Bean Salad

Posted by in Step-by-Step Recipes

  It was many years ago when my mum first set a bowl of quinoa (pronounced keen-wah) in front of me. It didn’t look like rice. To my teenaged self, it resembled something straight out of a hippie-infested Woodstock-ian field. Quinoa is, in fact, a grain that originated in South America and was once known […]

Profile photo of Erika (TK)

Meet Kelly

Posted by in Meet the Member!

  The lovely face you see above belongs to Kelly @ EvilShenanigans. She assures us that none of her shenanigans are terribly evil, “unless you are watching your calorie intake, where it takes a decidedly evil turn!” Let’s all wave hello to Kelly, then showcase her recipe box and get ready for that turn. Kelly […]