The Pioneer Woman Tasty Kitchen
Profile photo of whatsgabycooking

Potatoes Romanoff

Posted by in Step-by-Step Recipes

Tasty Kitchen Blog: Potatoes Romanoff. Guest post by Gaby Dalkin of What's Gaby Cooking, recipe submitted by TK member Duane of Cottage in the Oaks.

 
Twice Baked Potatoes have always been a favorite of mine, so when I saw this recipe for Potatoes Romanoff (something I had never tried before) I knew I had to make it immediately! It takes the twice baked potato to a whole new level by shredding the baked potato and folding in lots of sharp white cheddar cheese, flavorful shallots and sour cream. Once it’s tossed together, it’s topped with a little more cheese (because really, everything is better when topped in cheese) and then baked again until the cheese is golden and the potatoes are warm.

This recipe was submitted Tasty Kitchen member Duane Puitman from Cottage in the Oaks, and thank goodness for that because I’m officially obsessed. It’s going to be making many appearances in my kitchen in the coming months, that’s for sure!

Okay, here’s what to do…


Tasty Kitchen Blog: Potatoes Romanoff. Guest post by Gaby Dalkin of What's Gaby Cooking, recipe submitted by TK member Duane of Cottage in the Oaks.

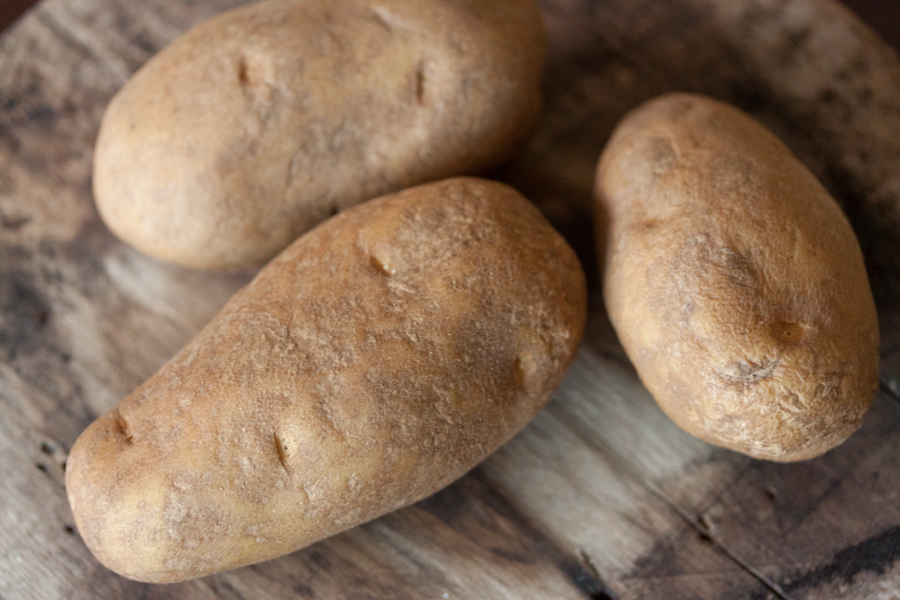
Start with 3 large russet potatoes.


Tasty Kitchen Blog: Potatoes Romanoff. Guest post by Gaby Dalkin of What's Gaby Cooking, recipe submitted by TK member Duane of Cottage in the Oaks.

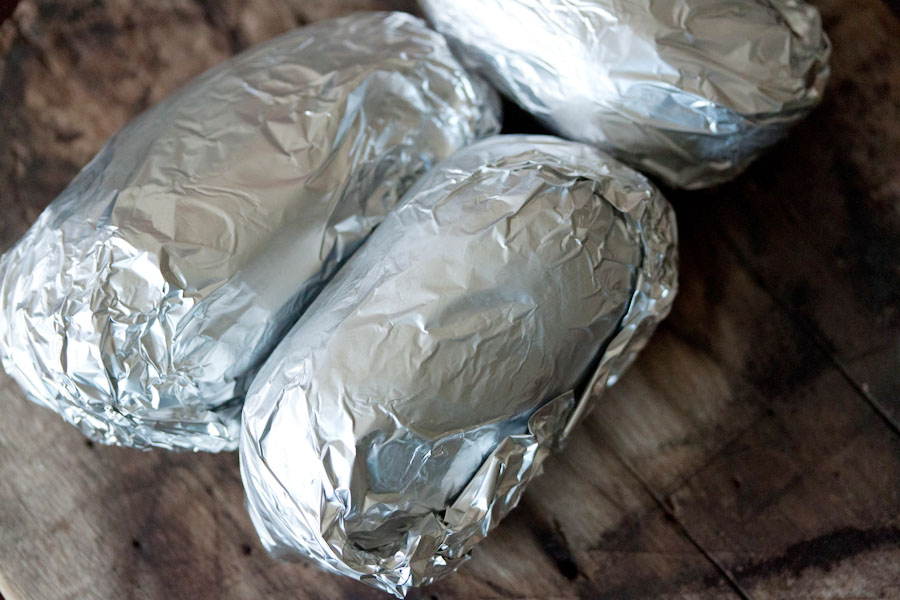
Wrap each of them up in tin foil.


Tasty Kitchen Blog: Potatoes Romanoff. Guest post by Gaby Dalkin of What's Gaby Cooking, recipe submitted by TK member Duane of Cottage in the Oaks.

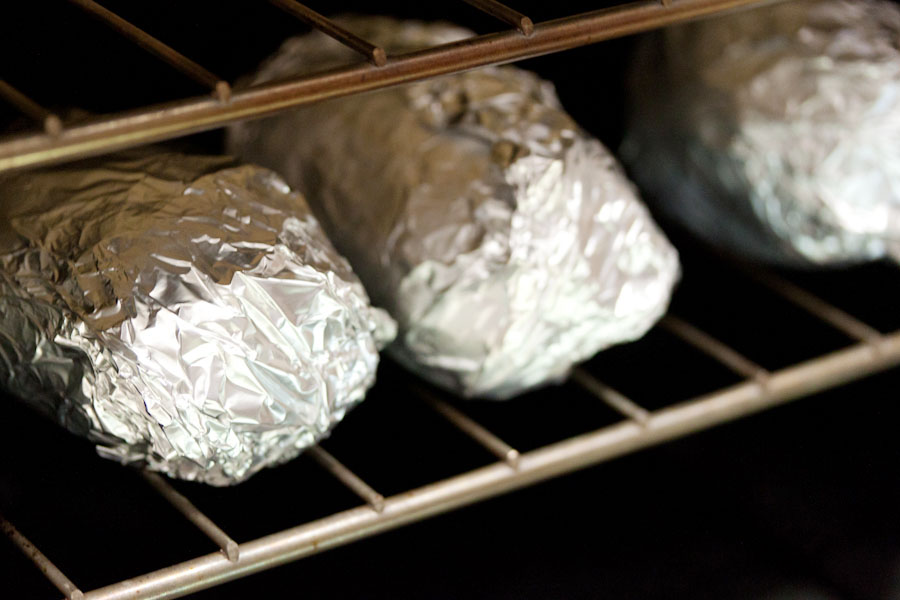
Stick them into a 425ºF preheated oven on the metal rack. They are going to bake for about 1 hour. Once the potatoes come out of the oven, remove the tin foil and let them cool. Once cooled, place them in a container and cover with plastic wrap and refrigerate overnight.


Tasty Kitchen Blog: Potatoes Romanoff. Guest post by Gaby Dalkin of What's Gaby Cooking, recipe submitted by TK member Duane of Cottage in the Oaks.

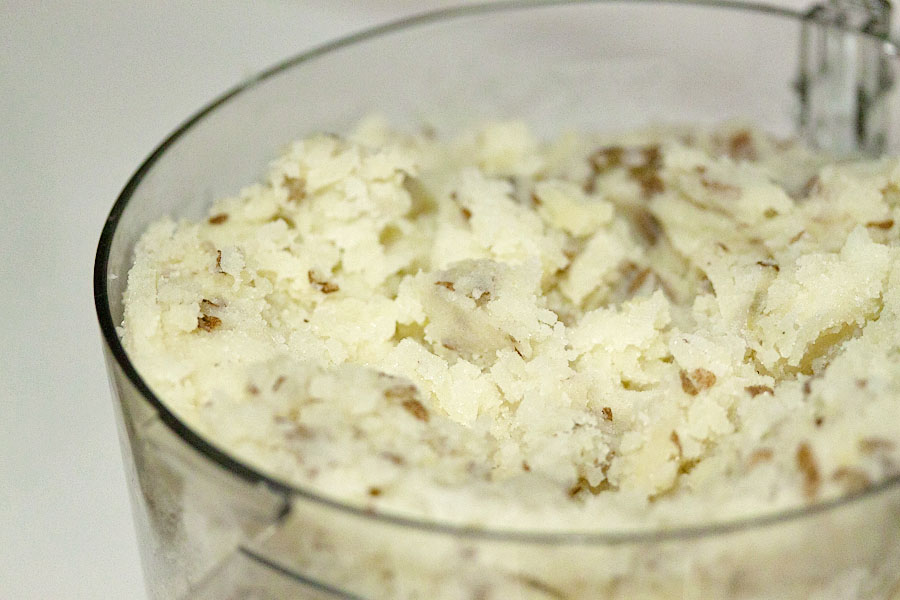
Next, using a box grater or your food processor grater attachment, grate all of the potatoes.


Tasty Kitchen Blog: Potatoes Romanoff. Guest post by Gaby Dalkin of What's Gaby Cooking, recipe submitted by TK member Duane of Cottage in the Oaks.

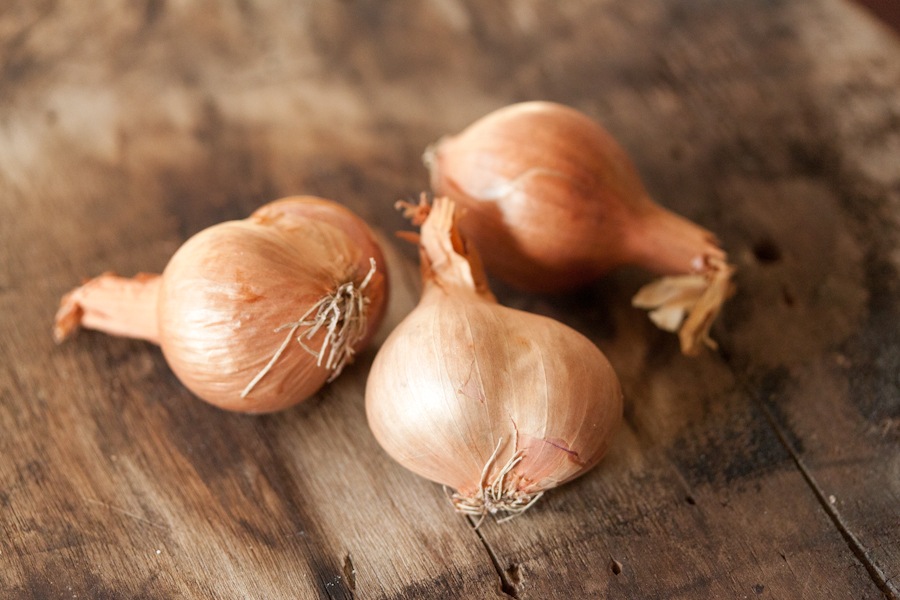
Chop up a few shallots.


Tasty Kitchen Blog: Potatoes Romanoff. Guest post by Gaby Dalkin of What's Gaby Cooking, recipe submitted by TK member Duane of Cottage in the Oaks.

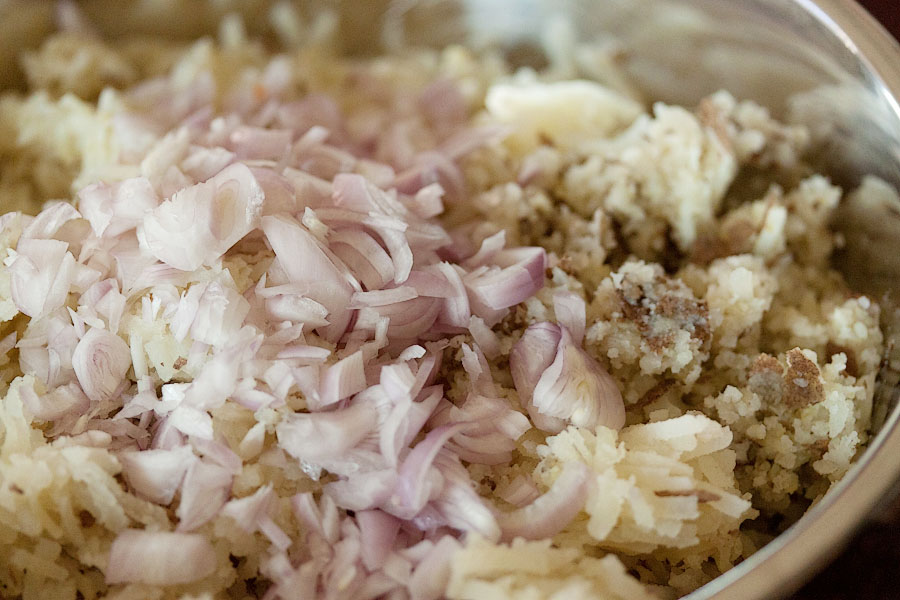
Combine the grated potato and chopped shallots in a large bowl.


Tasty Kitchen Blog: Potatoes Romanoff. Guest post by Gaby Dalkin of What's Gaby Cooking, recipe submitted by TK member Duane of Cottage in the Oaks.

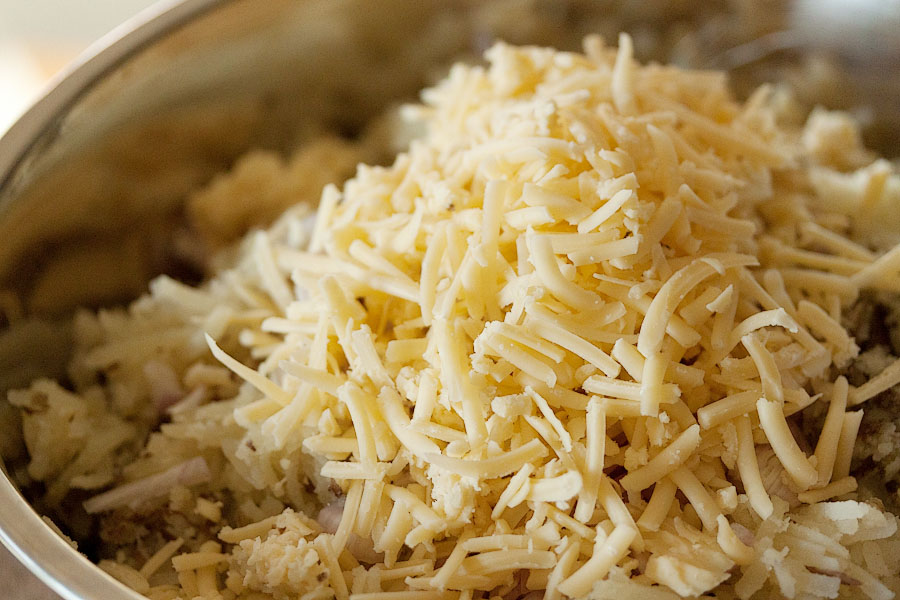
Pile on most of the white cheddar cheese. Try not to eat half of it like me because it just means you have to grate more when you’re ready for it!


Tasty Kitchen Blog: Potatoes Romanoff. Guest post by Gaby Dalkin of What's Gaby Cooking, recipe submitted by TK member Duane of Cottage in the Oaks.

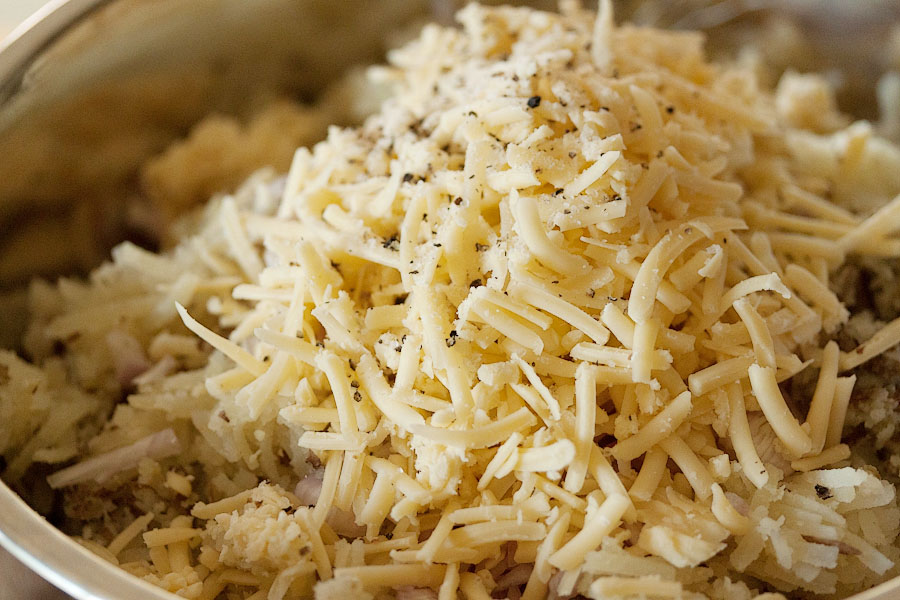
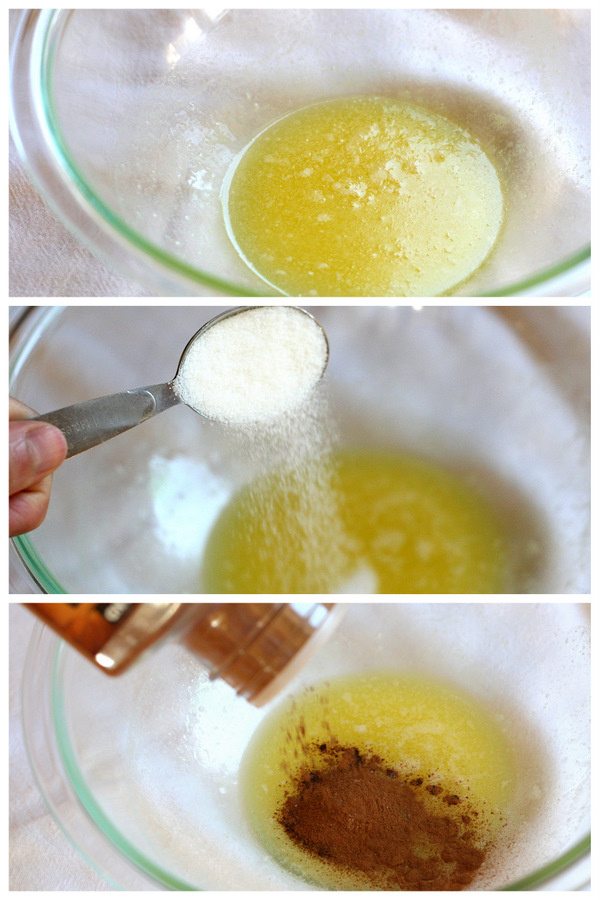
Add the salt and pepper.


Tasty Kitchen Blog: Potatoes Romanoff. Guest post by Gaby Dalkin of What's Gaby Cooking, recipe submitted by TK member Duane of Cottage in the Oaks.

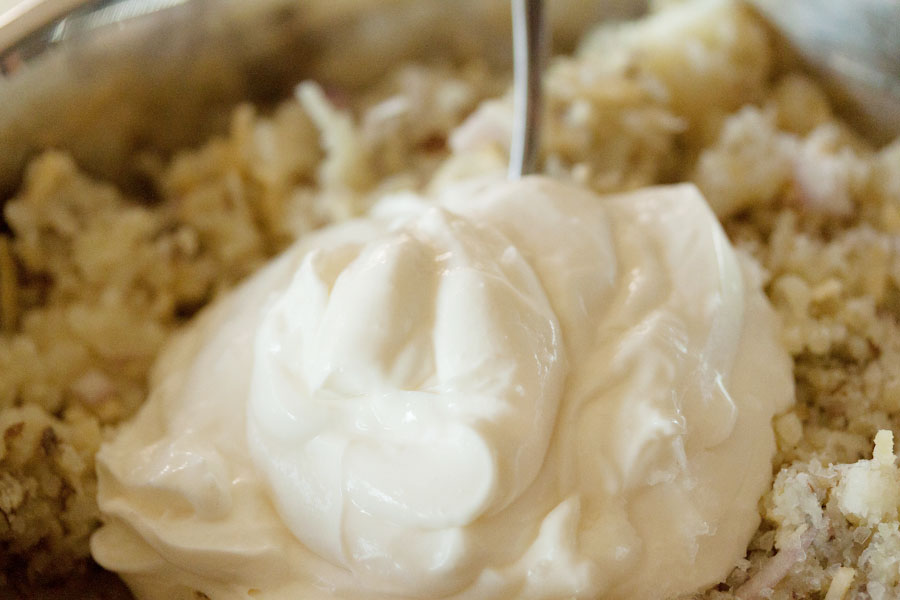
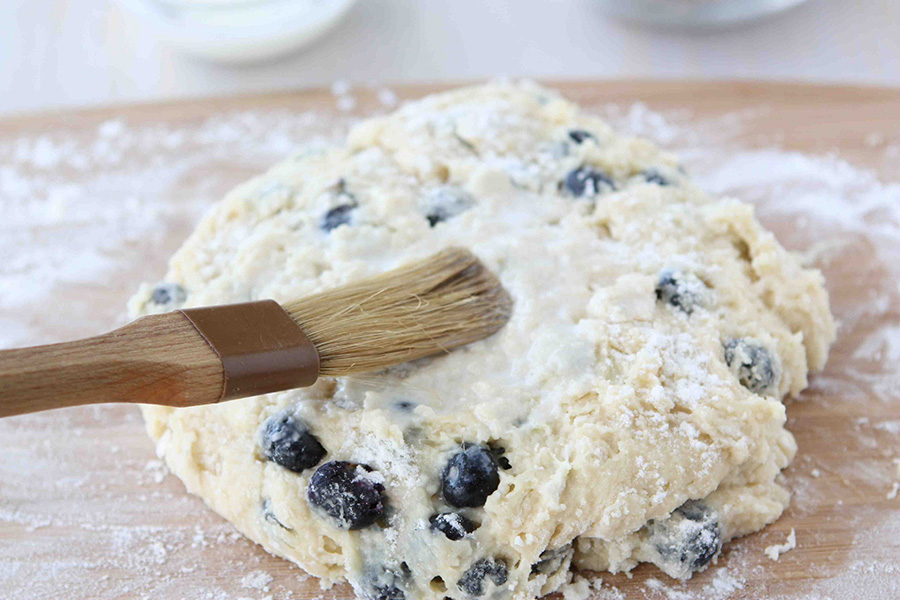
Followed by a big dollop of sour cream. Yum!


Tasty Kitchen Blog: Potatoes Romanoff. Guest post by Gaby Dalkin of What's Gaby Cooking, recipe submitted by TK member Duane of Cottage in the Oaks.

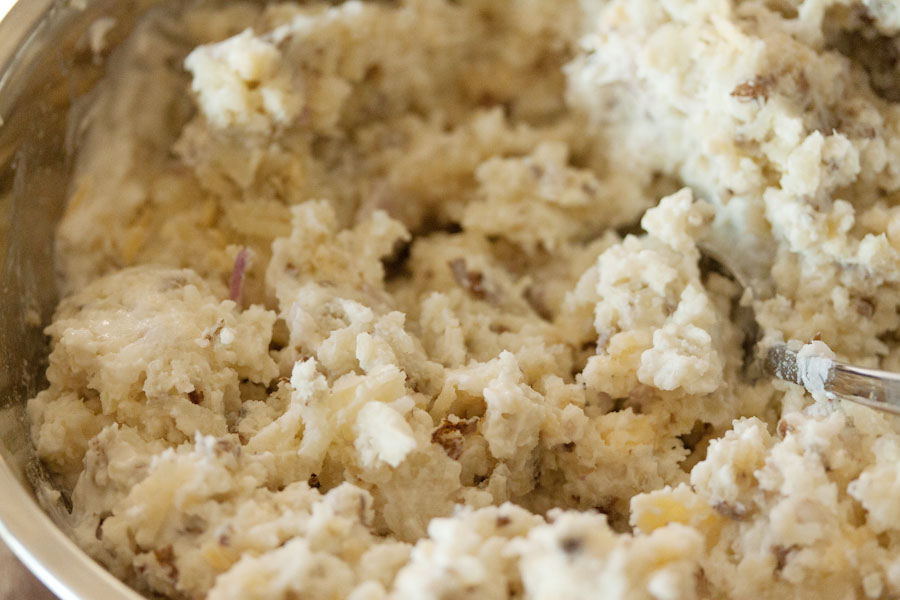
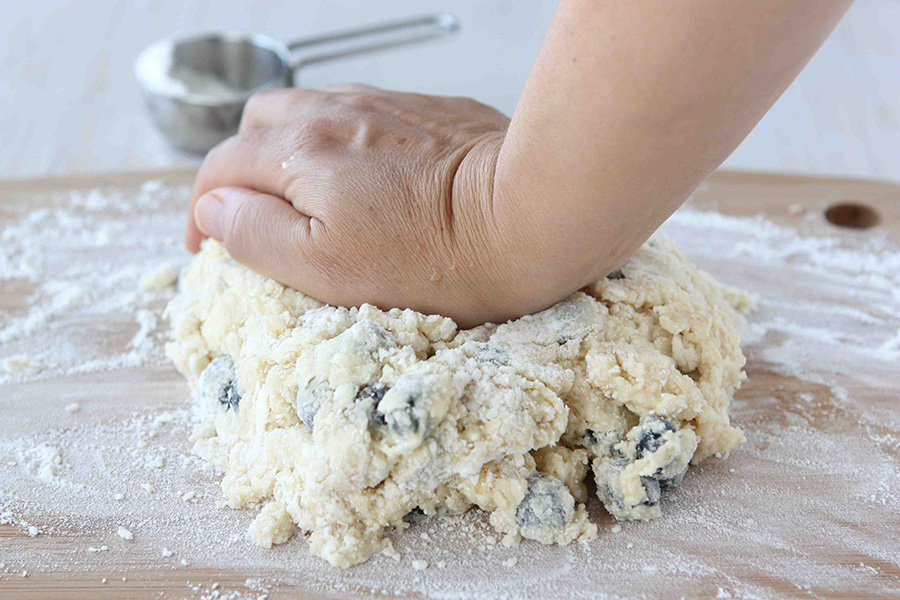
Mix everything together with your hands if you feel like getting a little messy, or with a spoon. Whichever you prefer!


Tasty Kitchen Blog: Potatoes Romanoff. Guest post by Gaby Dalkin of What's Gaby Cooking, recipe submitted by TK member Duane of Cottage in the Oaks.

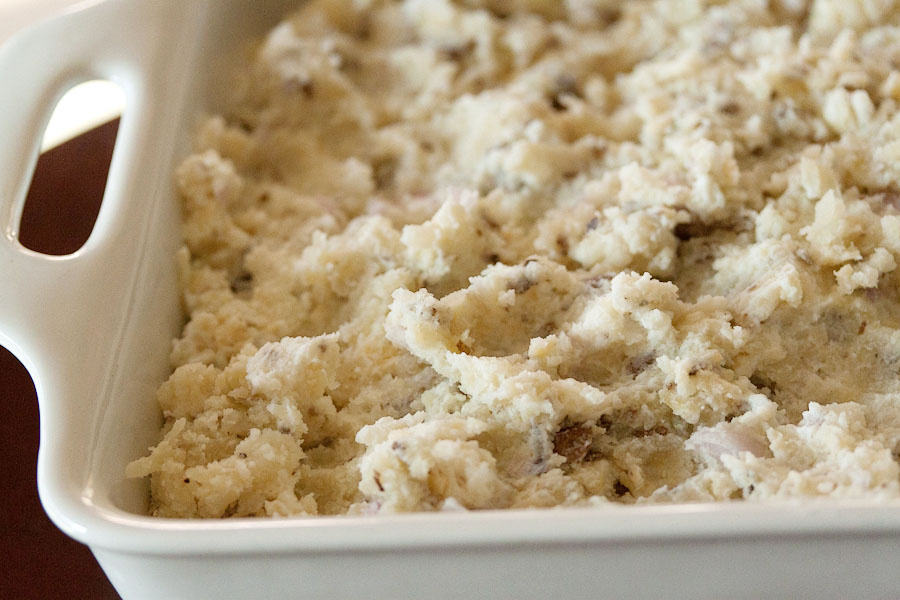
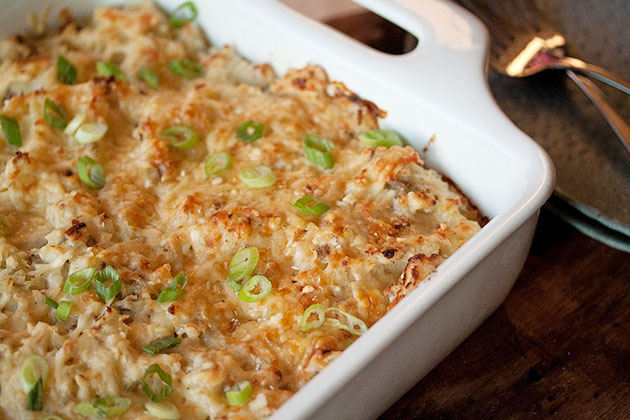
Transfer the mixture to a baking dish and plop it on in. No need to pack down the potatoes, leave them scattered about so it give it that rustic look.


Tasty Kitchen Blog: Potatoes Romanoff. Guest post by Gaby Dalkin of What's Gaby Cooking, recipe submitted by TK member Duane of Cottage in the Oaks.

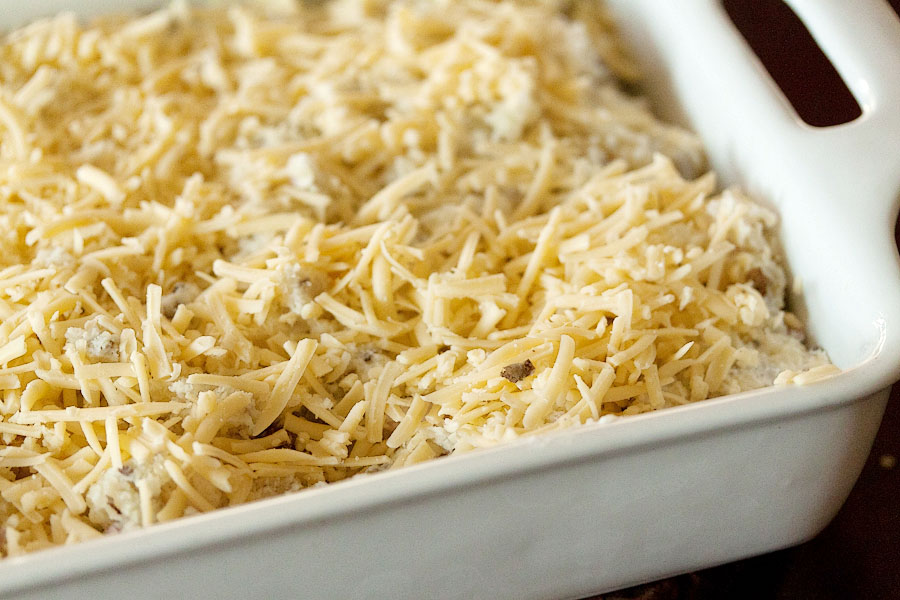
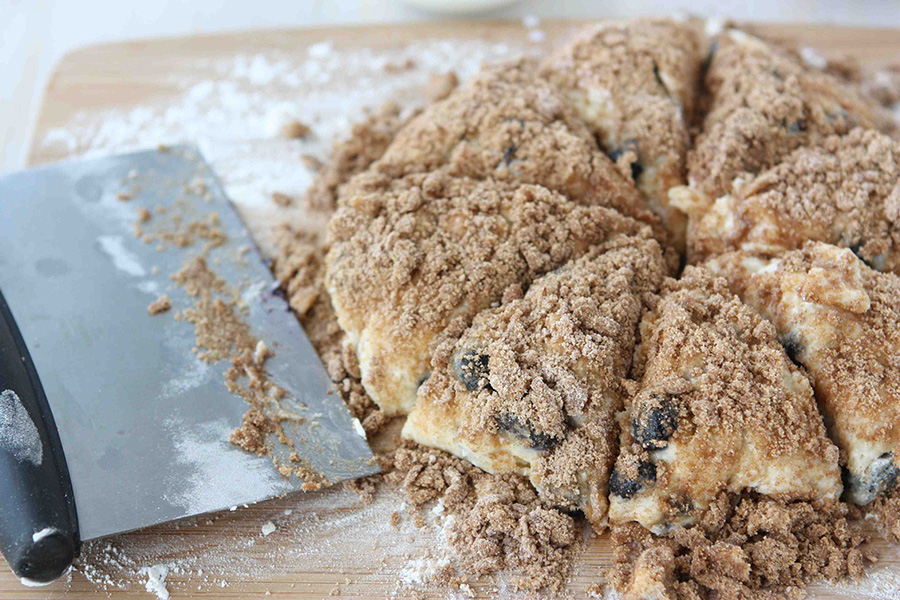
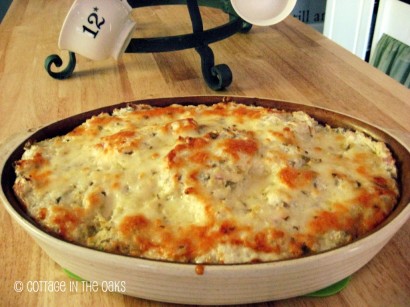
Scatter on the remaining cheddar cheese (by this step, I most certainly had to grate more cheese since I kept snacking on it) and bake it in a 350ºF oven for about 30-40 minutes until the cheese is just golden and the potatoes are hot!


Tasty Kitchen Blog: Potatoes Romanoff. Guest post by Gaby Dalkin of What's Gaby Cooking, recipe submitted by TK member Duane of Cottage in the Oaks.

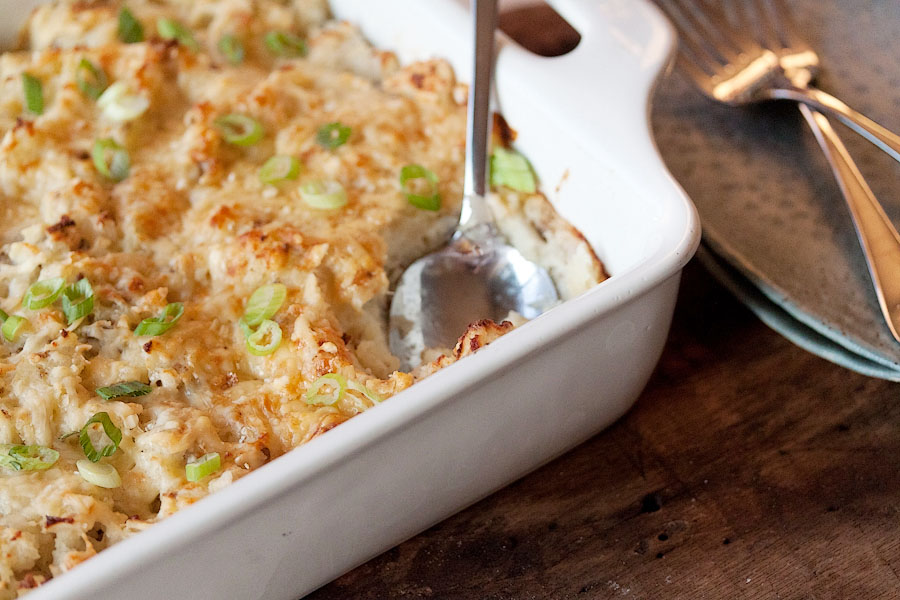
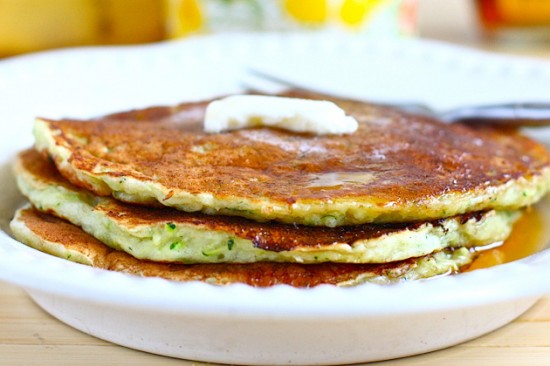
Once it’s out of the oven, it’s time to dig in!

Feel free to top your serving with some chopped scallions or chives. It gives it an extra dimension and it’s just the right thing to do. This would be an excellent side dish for some steaks. Just saying.

A big thank you to Duane for such a delicious and wonderful recipe! Be sure to check out Cottage in the Oaks for more awesome ideas.


Printable Recipe

Potatoes Romanoff

See post on Cottage In the Oaks | Daune Pitman’s site!
4.63 Mitt(s) 16 Rating(s)16 votes, average: 4.63 out of 516 votes, average: 4.63 out of 516 votes, average: 4.63 out of 516 votes, average: 4.63 out of 516 votes, average: 4.63 out of 5

Prep Time:

Cook Time:

Difficulty: Easy

Servings: 6

6
x

Print Options

Page size Letter 3x5 4x6
Text Size Small Medium Large
Content Include description
Include prep time, etc.
Show image

Description

A great side, wonderful with steak as an alternative to baked potatoes.

Ingredients

  • 3 whole Large Russet Potatoes, Unpeeled
  • ¾ cups Minced Shallots
  • 2-½ cups Grated White Cheddar Cheese, Divided
  • 2 teaspoons Kosher Salt
  • ¼ teaspoons Freshly Ground Pepper
  • 1-½ cup Sour Cream

Preparation Instructions

Preheat oven to 425 F.

Wrap potatoes in aluminum foil. Bake potatoes on a pan in the oven until done, about an hour. Remove foil and let potatoes cool to room temperature. Put potatoes on a plate, cover with plastic wrap, and refrigerate overnight.

Grate the chilled potatoes, including skins. You can use a large box grater or a food processor. (I like the food processor!) Transfer grated potatoes to a bowl and sprinkle in the shallots, 1 3/4 cup cheese, salt, and pepper.

Use your hands to gently toss together. (I guess you could stir it too but you would miss all the fun. Go ahead, plunge those hands down in there!) Then fold in sour cream.

Transfer mixture to a 1 1/2 quart gratin dish, making sure that you don’t compress (or squash, or moosh, or squish) it! Sprinkle the remaining cheese on top.

Bake at 350 F until the top is golden brown, about 30 minutes. Serves 6.

Recipe slightly adapted from williams-sonoma.com via Strip House.


_______________________________________

Gaby Dalkin is the young lady behind What’s Gaby Cooking, a food blog that’s bursting at the seams with incredible recipes and food photography. She’s a personal chef and professional recipe developer, and if you follow her on Twitter, you’ll soon discover her two-fold obsession: guacamole and cheese. She has small feet, a large heart, and a smile that can light up the whole building. We’re pretty stoked to have her here.


Profile photo of HowSweetEats

General Tso’s Chicken

Posted by in Step-by-Step Recipes

Tasty Kitchen Blog: General Tso's Chicken. Guest post by Jessica Merchant of How Sweet It Is, recipe submitted by TK member Rebecca of Foodie with Family.

 
My husband has a “thing” for General Tso’s chicken. A relationship of sorts. On any given day when I’m in the mood for Chinese takeout, sit down Thai, or a Japanese steakhouse, he’s in the mood for … General Tso’s. He rarely goes outside the box and tries anything new because his love for the crispy, saucy chicken dish is so strong. If it’s on the menu, I can’t even sway him into sharing the beef and broccoli, pad thai, or dare I say it: sushi. When I spied Rebecca’s recipe for General Tso’s chicken, I couldn’t wait to make it for dinner knowing fully that he’d flip his lid. The only issue? I knew I’d be making it all the time!

I love making dishes like this at home because I know exactly what is going in them, as opposed to ordering greasy (albeit delicious) takeout in a box. This original recipe came from Food and Wine and it certainly did not disappoint! I have tried a few different versions of General Tso’s over the years and I must say that this ranks up there as my favorite. It’s as simple as can be and doesn’t require ingredients that I not only can’t spell, but can’t even find in my local grocery store. You likely have almost everything on hand!


Tasty Kitchen Blog: General Tso's Chicken. Guest post by Jessica Merchant of How Sweet It Is, recipe submitted by TK member Rebecca of Foodie with Family.

To start, you need raw sugar (I’m sure you can substitute some regular or brown sugar here), chicken stock, soy sauce, cornstarch, sesame oil, frying oil of your choice (I used canola), chili garlic sauce, ginger, garlic, an egg white, green onions, and chicken. Rebecca’s recipe called for chicken thighs, but I happened to have chicken breasts on hand and was eager to try the recipe with them. It was a success!


Tasty Kitchen Blog: General Tso's Chicken. Guest post by Jessica Merchant of How Sweet It Is, recipe submitted by TK member Rebecca of Foodie with Family.

Begin by adding the sesame oil, egg white and soy sauce in a bowl.


Tasty Kitchen Blog: General Tso's Chicken. Guest post by Jessica Merchant of How Sweet It Is, recipe submitted by TK member Rebecca of Foodie with Family.

Whisk in the corn starch. Don’t worry if it gets a little “goopy.” That is exactly what it’s supposed to do!


Tasty Kitchen Blog: General Tso's Chicken. Guest post by Jessica Merchant of How Sweet It Is, recipe submitted by TK member Rebecca of Foodie with Family.

Cut your chicken into pieces …


Tasty Kitchen Blog: General Tso's Chicken. Guest post by Jessica Merchant of How Sweet It Is, recipe submitted by TK member Rebecca of Foodie with Family.

Then toss it into the mixture until it’s thoroughly coated. At this time, cover the bowl lightly with plastic wrap and let it sit in a cool, dry place to marinate for about 20 minutes, tossing it once or twice. Now you can also begin to prepare any dishes that you want to serve with your chicken—brown rice and broccoli, in our case.


Tasty Kitchen Blog: General Tso's Chicken. Guest post by Jessica Merchant of How Sweet It Is, recipe submitted by TK member Rebecca of Foodie with Family.

While the chicken is getting flavorful, whisk together stock, soy sauce, cornstarch, chili garlic sauce and sugar in a bowl until combined. It’s time to make the sauce!


Tasty Kitchen Blog: General Tso's Chicken. Guest post by Jessica Merchant of How Sweet It Is, recipe submitted by TK member Rebecca of Foodie with Family.

Add the tablespoon of oil to a saucepan. Once it’s hot, add in your garlic and ginger. I actually grated both my garlic and ginger with a microplane as it was easiest for me. If you do this, only cook the garlic and ginger for a minute or so until it’s fragrant. Don’t let them burn!


Tasty Kitchen Blog: General Tso's Chicken. Guest post by Jessica Merchant of How Sweet It Is, recipe submitted by TK member Rebecca of Foodie with Family.

Add the sauce ingredients to the garlic and ginger, stirring until it becomes thick and shiny.


Tasty Kitchen Blog: General Tso's Chicken. Guest post by Jessica Merchant of How Sweet It Is, recipe submitted by TK member Rebecca of Foodie with Family.

Once the sauce thickens, lower the heat and keep the sauce partially covered to stay warm.


Tasty Kitchen Blog: General Tso's Chicken. Guest post by Jessica Merchant of How Sweet It Is, recipe submitted by TK member Rebecca of Foodie with Family.

To begin frying the chicken, heat about 1/2 inch of oil in a large skillet, preferably with higher sides since the oil may splatter a bit.


Tasty Kitchen Blog: General Tso's Chicken. Guest post by Jessica Merchant of How Sweet It Is, recipe submitted by TK member Rebecca of Foodie with Family.

Add the chicken to the oil one piece at a time, making sure not to crowd the chicken pieces.


Tasty Kitchen Blog: General Tso's Chicken. Guest post by Jessica Merchant of How Sweet It Is, recipe submitted by TK member Rebecca of Foodie with Family.

Cook until crispy and golden, about 4 minutes per side.


Tasty Kitchen Blog: General Tso's Chicken. Guest post by Jessica Merchant of How Sweet It Is, recipe submitted by TK member Rebecca of Foodie with Family.

Transfer the chicken to a paper towel-covered plate to drain and continue frying the remaining chicken.


Tasty Kitchen Blog: General Tso's Chicken. Guest post by Jessica Merchant of How Sweet It Is, recipe submitted by TK member Rebecca of Foodie with Family.

Once all the chicken is cooked and drained, add it directly into the sauce. You can also opt to drizzle or pour the sauce on top of each portion, but I found that adding the chicken to the sauce as the recipe calls for is perfect.

Stir, stir, stir! At this time, you can also add your broccoli or other side dish of choice to the sauce if you wish.


Tasty Kitchen Blog: General Tso's Chicken. Guest post by Jessica Merchant of How Sweet It Is, recipe submitted by TK member Rebecca of Foodie with Family.

Serve some to your drooling friends and family …


Tasty Kitchen Blog: General Tso's Chicken. Guest post by Jessica Merchant of How Sweet It Is, recipe submitted by TK member Rebecca of Foodie with Family.

Garnish with sliced green onions and dig in!

 
I can’t tell you enough how much we absolutely loved this meal. It is in the rotation and doesn’t appear to be leaving anytime soon. I highly recommend it for the General Tso’s Chicken lovers in your house. Thanks so much for the delicious dish Rebecca! Be sure to check out Rebecca’s incredible blog Foodie with Family where she shares all sorts of fabulous ideas from coffee milkshakes to mozzarella sticks. I’m hungry again!


Printable Recipe

General Tso’s Chicken

See post on Rebecca’s site!
4.23 Mitt(s) 26 Rating(s)26 votes, average: 4.23 out of 526 votes, average: 4.23 out of 526 votes, average: 4.23 out of 526 votes, average: 4.23 out of 526 votes, average: 4.23 out of 5

Prep Time:

Cook Time:

Difficulty: Intermediate

Servings: 4

4
x

Print Options

Page size Letter 3x5 4x6
Text Size Small Medium Large
Content Include description
Include prep time, etc.
Show image

Description

Sweet and hot, crispy and tender, garlicky, gingery General Tso’s chicken is a mainstay of Chinese buffets and restaurants, but you can make it better, fresher and healthier at home!

Ingredients

  • FOR THE CHICKEN:
  • 1-½ teaspoon Toasted Sesame Oil
  • 1 Tablespoon Soy Sauce
  • 1 whole Large Egg White
  • ¼ cups Plus 2 Tablespoons Cornstarch
  • 1 pound Boneless, Skinless Chicken Thighs
  • Canola, Peanut, Or Vegetable Oil For Frying
  • FOR THE SAUCE:
  • 1 Tablespoon Peanut, Canola Or Vegetable Oil
  • 2 cloves Garlic, Peeled And Minced
  • 2 Tablespoons Finely Chopped Fresh Ginger Root
  • 1 cup Chicken Broth Or Stock
  • ¼ cups Soy Sauce
  • 1 Tablespoon Cornstarch
  • 1 teaspoon Chinese Chile-garlic Sauce
  • 3 Tablespoons Raw (turbinado Or Demerara) Sugar
  • FOR SERVING:
  • 4 whole Scallions, Thinly Sliced
  • Steamed Rice
  • Steamed Broccoli

Preparation Instructions

Prep your chicken:
In a mixing bowl, stir together the sesame oil, soy sauce, egg white, and 1/4 cup plus 2 tablespoons of cornstarch until a thick slurry forms. It will look gummy but smooth.

Add the chicken pieces and stir until all are evenly coated. At first it may appear that it will not come together but it does!
Set chicken aside, covered lightly with plastic wrap, at room temperature for 20 minutes, stirring occasionally.

Begin the sauce:
Add the tablespoon of oil to a large, heavy-bottomed saucepan over high heat. Stir the garlic and ginger into the oil and cook, stirring constantly, until fragrant, about 1 minute.

In a separate bowl, whisk together the remaining sauce ingredients until smooth. Pour into the garlic and ginger, stirring, until the sauce becomes thick and shiny. Once the sauce thickens, lower heat and keep the saucepan over a low burner partially covered to stay warm.

To fry the chicken:
Heat 1/2-inches of oil in a heavy-bottomed, high-sided frying pan or skillet over high heat.

When the oil is shimmering, add one piece of chicken at a time, taking care not to crowd the pan. Cook chicken for 4 minutes on each side, or until deep golden brown and crisp on both sides**.

Transfer the fried chicken to a paper towel lined plate and repeat the process until you’ve cooked all the chicken.

Then slide all of the fried chicken into the prepared sauce and toss to coat. (If desired, add some steamed broccoli to coat with the sauce also.) Increase the heat to medium, stir and cook just until hot all the way through.

Sprinkle with sliced scallions and serve immediately over white rice.

**A note: Chicken is a safe food for me. I know that just about anything done to it is going to yield something that is, at the very least, edible. This is especially true of boneless skinless chicken thighs. It’s really hard to mess those up! They stay tender and juicy and it’s very hard indeed to cook them to the point of chicken jerky. Be sure to cook them through, you definitely want that crisp, deep-brown coating to hold up to the sauce!


_______________________________________

Jessica Merchant is a personal trainer turned food writer and blogger. Her blog, How Sweet Eats, is where she proclaims her love for all things sweet, all things bacon, and everything else in between. She works her magic in her Pittsburgh kitchen, which she shares with her husband of 2 years.


Profile photo of Natalie | Perry's Plate

Breakfast Salad

Posted by in Step-by-Step Recipes

Tasty Kitchen Blog Breakfast Salad. Guest post by Natalie Perry of Perry's Plate, recipe submitted by TK member Sommer of A Spicy Perspective.

 
Salad. For breakfast. Sounds a little weird, but we’ve been making breakfast salads in the Perry house for over a year now. If anyone had told me five years ago that I’d be eating salads for breakfast and keeping things like flaxseed and giant containers of coconut oil in my pantry, I would have laughed. And maybe shed a tear or two.

TK member Sommer from A Spicy Perspective is obviously a salad-for-breakfast convert, judging from this amazing creation of hers: Breakfast Salad with Cinnamon Toast Croutons and Maple Vinaigrette. The sound of those croutons and vinaigrette practically clubbed me over the head and forced me to add it to my recipe box. They’ll make anyone a salad-for-breakfast convert. I guarantee it.

I made this salad for my husband’s birthday breakfast. Yes, my husband loves salads. He’s actually the one who got ME to eat salads for breakfast. (How did I luck out?)


Tasty Kitchen Blog Breakfast Salad. Guest post by Natalie Perry of Perry's Plate, recipe submitted by TK member Sommer of A Spicy Perspective.

Let’s start on those tasty cinnamon-sugar morsels by preheating the oven and slicing a baguette into 1-inch cubes.


Tasty Kitchen Blog Breakfast Salad. Guest post by Natalie Perry of Perry's Plate, recipe submitted by TK member Sommer of A Spicy Perspective.

Melt some butter in a bowl and add the sugar and cinnamon. Mix to combine.


Tasty Kitchen Blog Breakfast Salad. Guest post by Natalie Perry of Perry's Plate, recipe submitted by TK member Sommer of A Spicy Perspective.

Throw the bread cubes on top.


Tasty Kitchen Blog Breakfast Salad. Guest post by Natalie Perry of Perry's Plate, recipe submitted by TK member Sommer of A Spicy Perspective.

Toss them around to make sure the cubes are coated. Go ahead and eat a few. I ate six.


Tasty Kitchen Blog Breakfast Salad. Guest post by Natalie Perry of Perry's Plate, recipe submitted by TK member Sommer of A Spicy Perspective.

Spread the cubes out on a sheet pan and pop them in the oven for 5-10 minutes until they’re toasty.


Tasty Kitchen Blog Breakfast Salad. Guest post by Natalie Perry of Perry's Plate, recipe submitted by TK member Sommer of A Spicy Perspective.

Like this. Okay, so they don’t really look that different when they’re toasted. They sure taste great though. (Six more down the hatch.)


Tasty Kitchen Blog Breakfast Salad. Guest post by Natalie Perry of Perry's Plate, recipe submitted by TK member Sommer of A Spicy Perspective.

Now on to the bacon. Add the chopped, uncooked bacon to a skillet and cook over medium heat.


Tasty Kitchen Blog Breakfast Salad. Guest post by Natalie Perry of Perry's Plate, recipe submitted by TK member Sommer of A Spicy Perspective.

Keep an eye on it and stir it around frequently. It amazes me that I never knew how to cook bacon for half of my adult life. I’m not sure if that was a good thing or a bad thing.


Tasty Kitchen Blog Breakfast Salad. Guest post by Natalie Perry of Perry's Plate, recipe submitted by TK member Sommer of A Spicy Perspective.

When it’s as crispy as you like it (I like it about 30 seconds away from burned), transfer the bits to a paper towel to drain.


Tasty Kitchen Blog Breakfast Salad. Guest post by Natalie Perry of Perry's Plate, recipe submitted by TK member Sommer of A Spicy Perspective.

Now for the vinaigrette. This all seems time-consuming, but it really isn’t. You can have the croutons in the oven and the bacon sizzling away while you quickly whisk up the dressing. It’s worth it.

You’ll need (real) maple syrup, a neutral-flavored oil (I used grapeseed), apple cider vinegar, a smidgen of dijon mustard, and a pinch or two of salt and pepper.


Tasty Kitchen Blog Breakfast Salad. Guest post by Natalie Perry of Perry's Plate, recipe submitted by TK member Sommer of A Spicy Perspective.

Whisk until the dressing starts to thicken.


Tasty Kitchen Blog Breakfast Salad. Guest post by Natalie Perry of Perry's Plate, recipe submitted by TK member Sommer of A Spicy Perspective.

Now put some salad greens on a plate. Sommer used baby spinach. I was fresh out, so I used some lettuce from my CSA box.


Tasty Kitchen Blog Breakfast Salad. Guest post by Natalie Perry of Perry's Plate, recipe submitted by TK member Sommer of A Spicy Perspective.

Sprinkle on your toppings: bacon bits, dried cranberries or raisins, nuts (I opted for sliced almonds), and those beautiful croutons.


Tasty Kitchen Blog Breakfast Salad. Guest post by Natalie Perry of Perry's Plate, recipe submitted by TK member Sommer of A Spicy Perspective.

One more time at the stove, then you’re through. Crack an egg into a heated skillet.


Tasty Kitchen Blog Breakfast Salad. Guest post by Natalie Perry of Perry's Plate, recipe submitted by TK member Sommer of A Spicy Perspective.

Cook it how you like it—scrambled or sunny side up. You could even poach it in a pan of simmering water. (Don’t ask me how to do that. All of mine end up looking like ragged ghosts, albeit tasty ragged ghosts.)


Tasty Kitchen Blog Breakfast Salad. Guest post by Natalie Perry of Perry's Plate, recipe submitted by TK member Sommer of A Spicy Perspective.

Carefully place the egg over the salad and drizzle some vinaigrette over the whole thing.


Tasty Kitchen Blog Breakfast Salad. Guest post by Natalie Perry of Perry's Plate, recipe submitted by TK member Sommer of A Spicy Perspective.

I used to be a scrambled-only girl, but I’ve grown to love a slightly runny yolk. Especially those found in farm-fresh eggs. I don’t know if there’s anything better than that rich yolk mingling with that sweet vinaigrette. On a crouton. With a piece of bacon stuck to it.

My heavens, Sommer. You’re officially my hero.

Be sure to check out Sommer’s recipe box as well as her beautiful blog A Spicy Perspective for more wonderful recipes!


Printable Recipe

See post on aspicyperspective’s site!
5.00 Mitt(s) 4 Rating(s)4 votes, average: 5.00 out of 54 votes, average: 5.00 out of 54 votes, average: 5.00 out of 54 votes, average: 5.00 out of 54 votes, average: 5.00 out of 5

Prep Time:

Cook Time:

Difficulty: Easy

Servings: 6

6
x

Print Options

Page size Letter 3x5 4x6
Text Size Small Medium Large
Content Include description
Include prep time, etc.
Show image

Description

Get your greens for breakfast, without missing out on your bacon and eggs!

Ingredients

  • 6 cups French Bread Cubes
  • 3 Tablespoons Melted Butter
  • ¼ cups Sugar
  • 1 teaspoon Cinnamon
  • ¼ cups Maple Syrup
  • ¼ cups Vegetable Oil
  • 1 Tablespoon Apple Cider Vinegar
  • 2 teaspoons Dijon Mustard
  • ½ teaspoons Salt
  • Black Pepper To Taste
  • 12 ounces, weight Bacon, Cooked And Crumbled
  • 12 whole Eggs
  • 6 cups Packed Baby Spinach
  • 1 cup Candied Nuts
  • ¾ cups Dried Cherries

Preparation Instructions

For the cinnamon toast croutons: Preheat the oven to 350 degrees F. Lay the bread cubes out on a rimmed baking sheet. Mix the melted butter, sugar, and cinnamon together and drizzle over the bread cubes. Toss and bake for 5-10 minutes until toasted.

For the maple vinaigrette: Whisk the maple syrup, oil, vinegar, mustard, and salt together until smooth. Add pepper to taste. Set aside.

Cook and drain the bacon.

Prepare the eggs to your liking—scrambled, poached, sunny-side-up.

Prepare each salad plate with a heaping cup of baby spinach, topped with cinnamon toast croutons, candied nuts, dried cherries, and crumbled bacon. Then top each with 1-2 eggs and drizzle with maple vinaigrette!


_______________________________________

Be sure to check out Natalie’s own beautiful food blog, Perrys’ Plate, where you can see her growing collection of lovely recipes. There’s always something new to see there. Go visit now!


Profile photo of cookincanuck

Blueberry Streusel Scones

Posted by in Baking, Step-by-Step Recipes

Tasty Kitchen Blog: Blueberry Strudel Scones. Guest post by Dara Michalski of Cookin' Canuck, recipe submitted by TK member Katrin (ppkongacooks) of Running with the Devil(ed) Eggs.

 
Up until a few years ago, I didn’t consider myself a scone gal. I don’t want to point any fingers, but my lack of enthusiasm for the traditional breakfast bread likely had something to do with a decidedly dry specimen my 9th-grade friends and I made in our Home Economics class. Of course, that was shortly following a decidedly unnerving session with an applesauce-stuffed pork roll. The dry scone was starting to look pretty good after that.

Over the past few years, I have happily eaten many a scone that could only be described as moist, tender and completely addictive. This Blueberry Streusel Scone by Tasty Kitchen member ppkongacooks certainly deserves that description. Sweet, juicy blueberries and a tender crumb are made even better by a layer of streusel topping. Really, does it get any better than brown sugar and butter?

While I did not try it with this recipe specifically, I have great success with freezing other scone recipes. Simply place the raw scones on a baking sheet lined with waxed paper. Place them in the freezer, uncovered. When the scones are completely frozen, place them in plastic freezer bags. When you are ready to bake them, take out the desired amount of scones and bake on a parchment-lined baking sheet at 375 degrees F for 17 to 21 minutes, or until golden brown. Your family will think you’re a magician for producing hot, fresh scones within minutes.

Now, let’s get down to business with this wonderful recipe.

Preheat oven to 400ºF. Line a large baking sheet with parchment paper.


Tasty Kitchen Blog: Blueberry Strudel Scones. Guest post by Dara Michalski of Cookin' Canuck, recipe submitted by TK member Katrin (ppkongacooks) of Running with the Devil(ed) Eggs.

In a large bowl, whisk together flour, sugar …


Tasty Kitchen Blog: Blueberry Strudel Scones. Guest post by Dara Michalski of Cookin' Canuck, recipe submitted by TK member Katrin (ppkongacooks) of Running with the Devil(ed) Eggs.

Baking powder and salt.


Tasty Kitchen Blog: Blueberry Strudel Scones. Guest post by Dara Michalski of Cookin' Canuck, recipe submitted by TK member Katrin (ppkongacooks) of Running with the Devil(ed) Eggs.

Add cold butter that has been cut into small pieces.


Tasty Kitchen Blog: Blueberry Strudel Scones. Guest post by Dara Michalski of Cookin' Canuck, recipe submitted by TK member Katrin (ppkongacooks) of Running with the Devil(ed) Eggs.

Using a pastry blender or 2 knives, cut in the butter pieces until the mixture resembles coarse meal.


Tasty Kitchen Blog: Blueberry Strudel Scones. Guest post by Dara Michalski of Cookin' Canuck, recipe submitted by TK member Katrin (ppkongacooks) of Running with the Devil(ed) Eggs.

Gently stir in blueberries.


Tasty Kitchen Blog: Blueberry Strudel Scones. Guest post by Dara Michalski of Cookin' Canuck, recipe submitted by TK member Katrin (ppkongacooks) of Running with the Devil(ed) Eggs.

In a measuring cup, whisk together egg, milk and vanilla.


Tasty Kitchen Blog: Blueberry Strudel Scones. Guest post by Dara Michalski of Cookin' Canuck, recipe submitted by TK member Katrin (ppkongacooks) of Running with the Devil(ed) Eggs.

Pour the egg mixture into the flour mixture.


Tasty Kitchen Blog: Blueberry Strudel Scones. Guest post by Dara Michalski of Cookin' Canuck, recipe submitted by TK member Katrin (ppkongacooks) of Running with the Devil(ed) Eggs.

Using a fork, combine the two until a dough forms.

In the recipe, ppkongacook suggests that you can throw in the zest of 1 lemon at this point. You don’t have to ask me twice. I adore the combination of blueberry and lemon. But take care not to over mix the dough.


Tasty Kitchen Blog: Blueberry Strudel Scones. Guest post by Dara Michalski of Cookin' Canuck, recipe submitted by TK member Katrin (ppkongacooks) of Running with the Devil(ed) Eggs.

Turn out the dough onto a well-floured surface, put flour on your hands and knead the dough 5 or 6 times to incorporate the ingredients completely.

Roll the dough into a ball and press down to flatten slightly.


Tasty Kitchen Blog: Blueberry Strudel Scones. Guest post by Dara Michalski of Cookin' Canuck, recipe submitted by TK member Katrin (ppkongacooks) of Running with the Devil(ed) Eggs.

To make the streusel, mix together brown sugar, flour, cinnamon and butter in a small bowl until crumbly.


Tasty Kitchen Blog: Blueberry Strudel Scones. Guest post by Dara Michalski of Cookin' Canuck, recipe submitted by TK member Katrin (ppkongacooks) of Running with the Devil(ed) Eggs.

Brush the top of the dough with milk and sprinkle the streusel over top.


Tasty Kitchen Blog: Blueberry Strudel Scones. Guest post by Dara Michalski of Cookin' Canuck, recipe submitted by TK member Katrin (ppkongacooks) of Running with the Devil(ed) Eggs.

Cut the dough into 8 triangles. I used a kitchen scraper for this, but alternatively you could use a knife.


Tasty Kitchen Blog: Blueberry Strudel Scones. Guest post by Dara Michalski of Cookin' Canuck, recipe submitted by TK member Katrin (ppkongacooks) of Running with the Devil(ed) Eggs.

Place the scones on a parchment-lined baking sheet and bake until golden brown, 18 to 20 minutes. Let cool and then dig in.


Tasty Kitchen Blog: Blueberry Strudel Scones. Guest post by Dara Michalski of Cookin' Canuck, recipe submitted by TK member Katrin (ppkongacooks) of Running with the Devil(ed) Eggs.

 
Thank you, Katrin, for these wonderful scones. They are bound to become a favorite weekend breakfast treat for my family. You can find more of her recipes on her blog, Running with the Devil(ed) Eggs.


Printable Recipe

Blueberry Streusel Scones

See post on ppkongacooks’s site!
4.92 Mitt(s) 13 Rating(s)13 votes, average: 4.92 out of 513 votes, average: 4.92 out of 513 votes, average: 4.92 out of 513 votes, average: 4.92 out of 513 votes, average: 4.92 out of 5

Prep Time:

Cook Time:

Difficulty: Easy

Servings: 8

8
x

Print Options

Page size Letter 3x5 4x6
Text Size Small Medium Large
Content Include description
Include prep time, etc.
Show image

Description

Blueberries and the strudel topping make this scone recipe more like a dessert than a tea biscuit. Add in some lemon zest for another flavor component!

Ingredients

  • FOR THE SCONES:
  • 2 cups Flour, All Purpose
  • ⅓ cups Sugar
  • 2 teaspoons Baking Powder
  • ⅛ teaspoons Salt
  • 6 Tablespoons Cold Butter
  • 1 cup Fresh Blueberries
  • 1 whole Egg
  • ½ cups Milk
  • 1-½ teaspoon Vanilla
  • _____
  • FOR THE STRUDEL TOPPING:
  • ¼ cups Brown Sugar
  • ¼ cups Flour
  • 2 teaspoons Cinnamon
  • 2 Tablespoons Butter

Preparation Instructions

In a bowl mix together the dry ingredients for the scones. Cut in the chunks of butter with a pastry knife (I don’t have one so I used 2 knives). It should be crumbly in texture. Gently fold in the blueberries. In a measuring cup mix together the egg, milk and vanilla. Pour into dry ingredients and with a fork, combine just until it forms a dough. (If you want to add the zest of 1 lemon, here’s where you’d throw it in.) You don’t want to over mix it because you are going to turn it out onto a lightly floured surface and knead it 5 or 6 times to incorporate everything.

Roll it into a ball and press it down. Brush a little milk on the top and top with the strudel topping, or omit if you want to cut calories. (To make the strudel topping, mix together the topping ingredients to form a crumb mixture.)

Cut the dough in half, then half again and so on until you get 8 triangles. Bake in a preheated 400ºF oven for 18–20 minutes on a parchment-lined baking sheet.


_______________________________________

Dara Michalski is a doll and a sweetheart who clearly knows her way around the kitchen. She blogs at Cookin’ Canuck, where she shares her flavor-packed recipes and fun, engaging writing. The photography’s pretty incredible, too.


Profile photo of A Cozy Kitchen

When French Toast Met Pancakes

Posted by in Step-by-Step Recipes

  If you ever want me to like you, just make me a light, fluffy stack of pancakes. I’ll blush, I’ll smile a lot, I might propose–it’ll be weird and cute. Promise. Just when I thought pancakes couldn’t get any better, I stumbled upon this recipe by Tasty Kitchen member frecklesandsunshine. The title: When French […]

Profile photo of georgiapellegrini

Grilled Corn with Bacon Butter and Cotija Cheese

Posted by in Step-by-Step Recipes

  I’ve been trying all summer to grow corn. I planted the seeds in two long rows and waited patiently. Out of one hundred or so seeds, about six sprouted. Then a woodchuck came along and helped himself to about half of those. So I went to the gardening store and bought some corn in […]

Profile photo of Erica Lea

Peachy-keen Muffins

Posted by in Baking, Step-by-Step Recipes

  Ever since I can remember, peaches have been a special treat. This beautiful, golden fruit has such a delicate yet fabulous flavor. Soft and juicy, sweet but not overly so. These muffins, brought to us by Karalie, are a wonderful way to feast upon peaches. Not only are they scrumptious, they’re nutritious as well! Whole […]

Profile photo of EatLiveRun

Sweet Zucchini Pancakes

Posted by in Step-by-Step Recipes

  If you’re like me, you have a plethora of zucchini on your hands right now and have already made all the breads, muffins and pastas that you can with it. So when I found PinchofYum’s simple recipe for Sweet Zucchini Pancakes I decided to give it a go. I loved the idea of zucchini […]