The Pioneer Woman Tasty Kitchen
Profile photo of twopeasandtheirpod

Basil Butter Garlic Bread

Posted by in Step-by-Step Recipes

Tasty Kitchen Blog: Basil Butter Garlic Bread. Guest post by Maria Lichty of Two Peas and Their Pod, recipe submitted by TK member Jenna (kitchenlovenest) of Jenna's Everything Blog.

 
Our herb garden is going crazy this year. I am not complaining because I love fresh herbs, but I am having a hard time keeping up. Our basil plants are especially out of control. I’ve made several batches of pesto, but every time I walk outside it looks like I haven’t touched the plants. They are growing like weeds. 

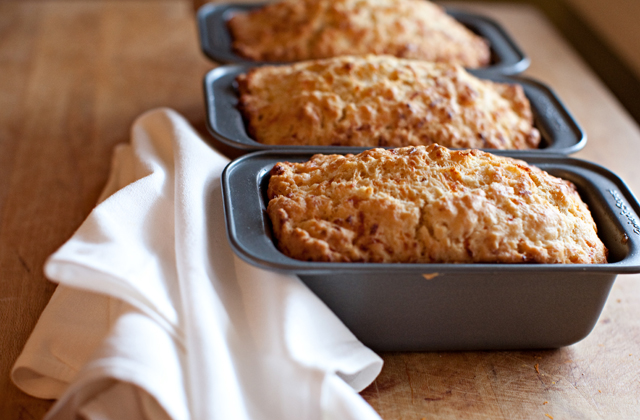
I am always looking for new ways to use up our basil, so when I saw Jenna’s recipe (TK member kitchenlovenest) for Basil Butter Garlic Bread, I knew I had to try it. I love regular garlic bread and this version looked even better. The garlic bread gets jazzed up with basil butter and Parmesan cheese. 


Tasty Kitchen Blog: Basil Butter Garlic Bread. Guest post by Maria Lichty of Two Peas and Their Pod, recipe submitted by TK member Jenna (kitchenlovenest) of Jenna's Everything Blog.

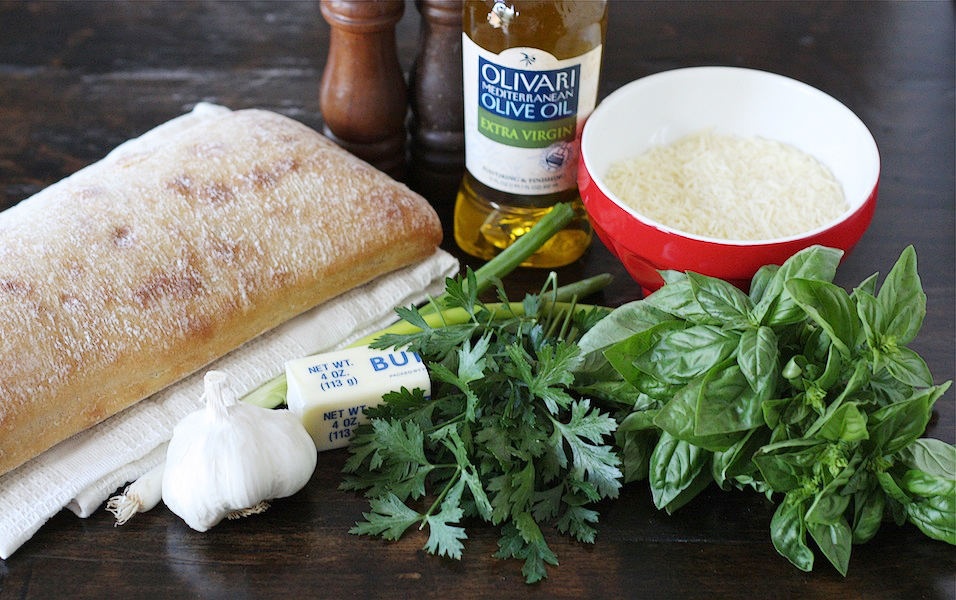
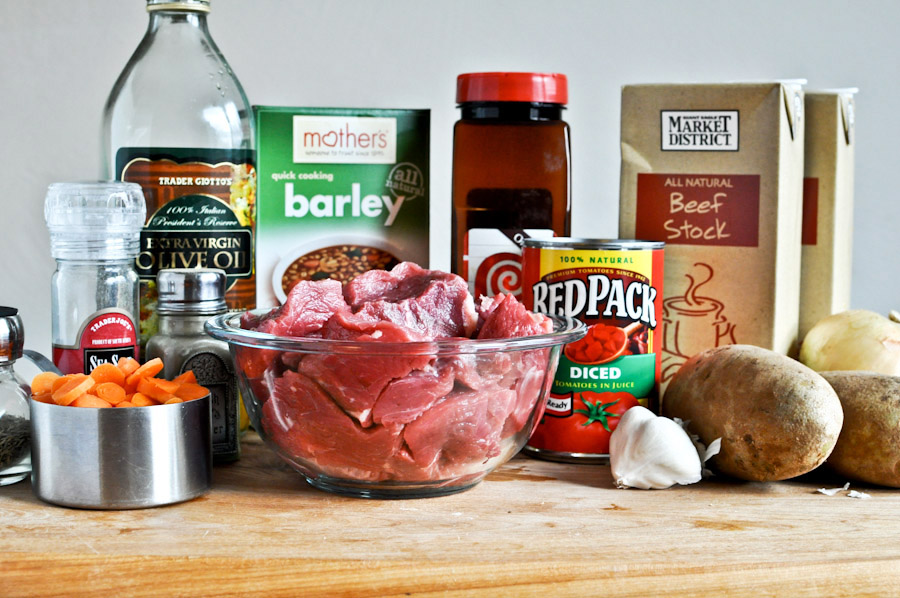
To make the bread you will need: ciabatta or French bread, butter, olive oil, basil, parsley, garlic, green onion, salt, pepper, and Parmesan cheese. 


Tasty Kitchen Blog: Basil Butter Garlic Bread. Guest post by Maria Lichty of Two Peas and Their Pod, recipe submitted by TK member Jenna (kitchenlovenest) of Jenna's Everything Blog.

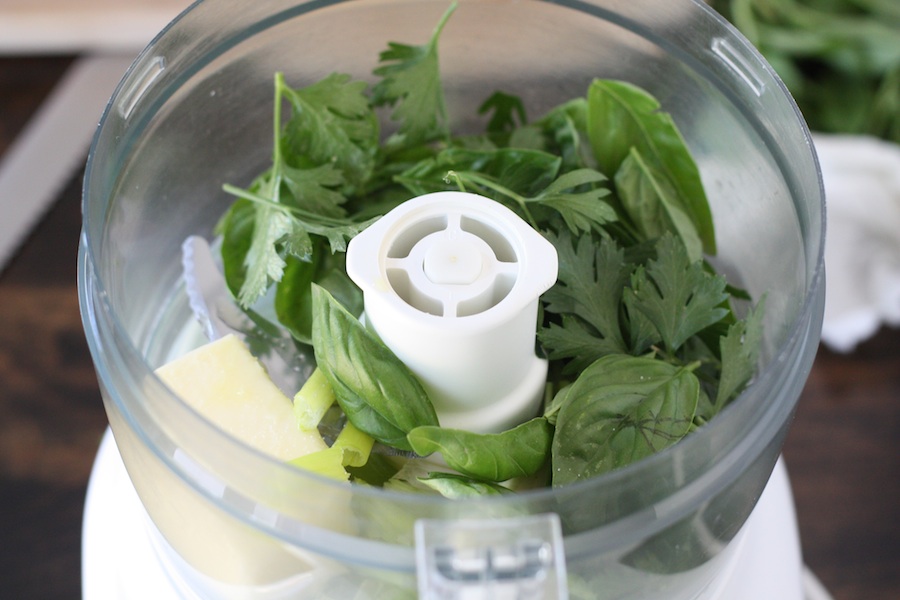
First, combine all of the ingredients, except for the bread and cheese, in a food processor. 


Tasty Kitchen Blog: Basil Butter Garlic Bread. Guest post by Maria Lichty of Two Peas and Their Pod, recipe submitted by TK member Jenna (kitchenlovenest) of Jenna's Everything Blog.

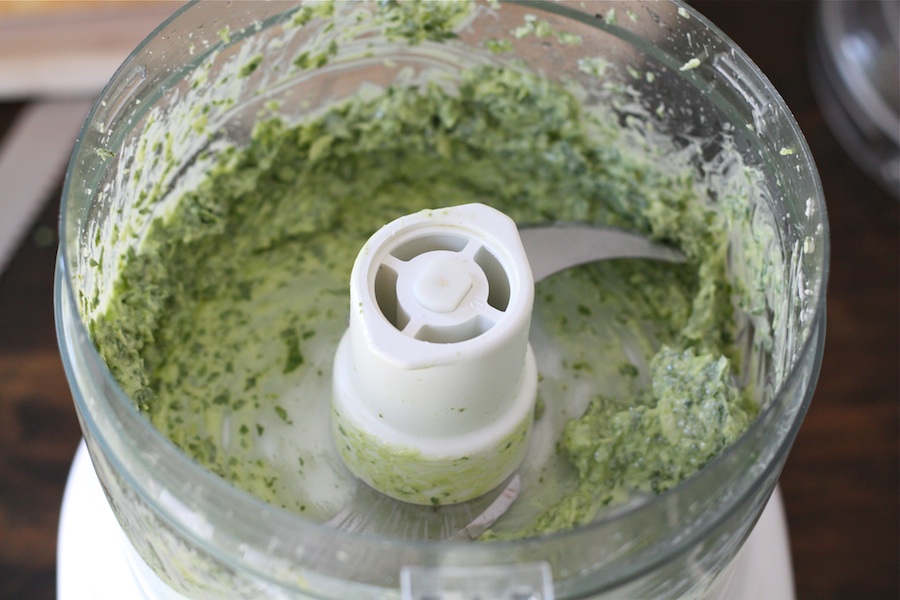
Process until smooth. 


Tasty Kitchen Blog: Basil Butter Garlic Bread. Guest post by Maria Lichty of Two Peas and Their Pod, recipe submitted by TK member Jenna (kitchenlovenest) of Jenna's Everything Blog.

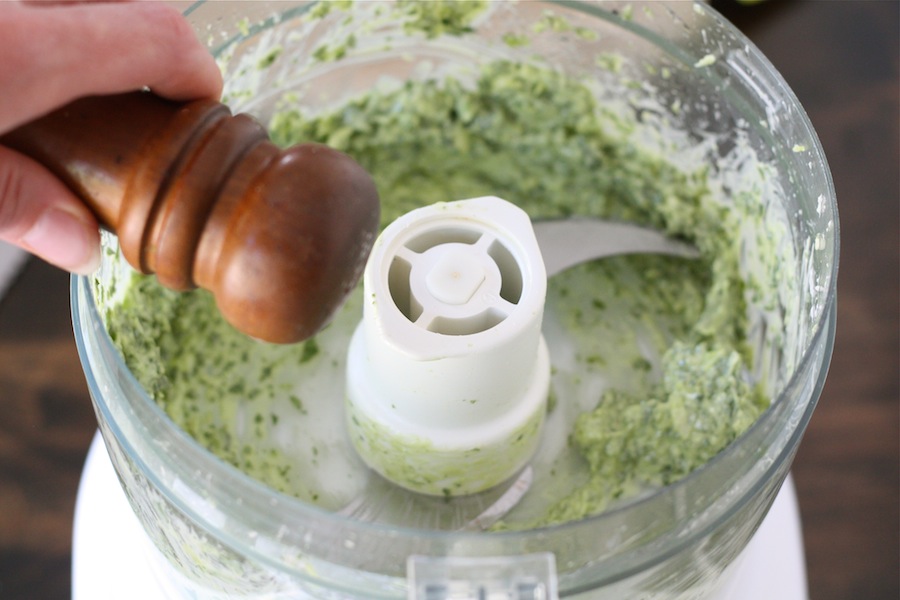
Season basil butter with salt and pepper, to taste. 


Tasty Kitchen Blog: Basil Butter Garlic Bread. Guest post by Maria Lichty of Two Peas and Their Pod, recipe submitted by TK member Jenna (kitchenlovenest) of Jenna's Everything Blog.

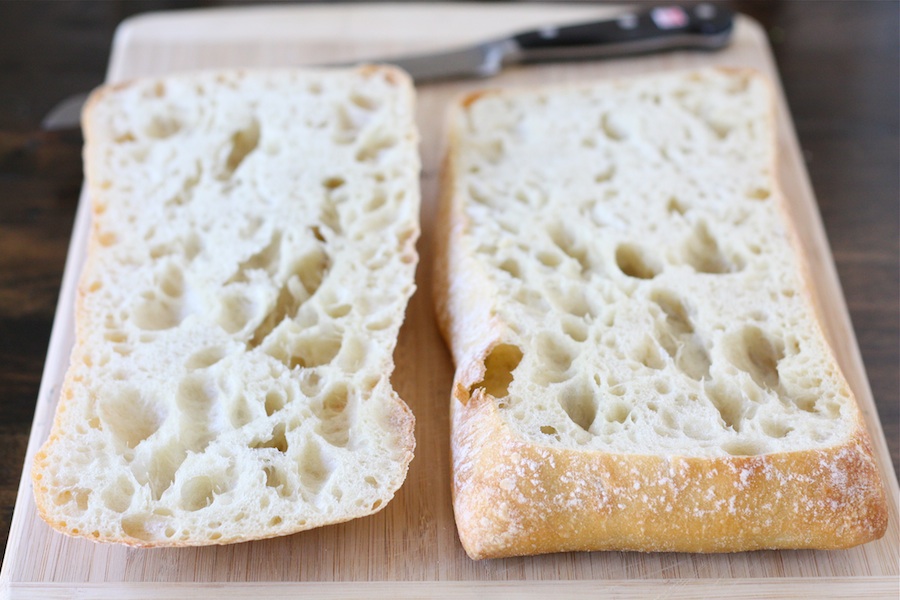
Cut the bread in half using a bread knife. 


Tasty Kitchen Blog: Basil Butter Garlic Bread. Guest post by Maria Lichty of Two Peas and Their Pod, recipe submitted by TK member Jenna (kitchenlovenest) of Jenna's Everything Blog.

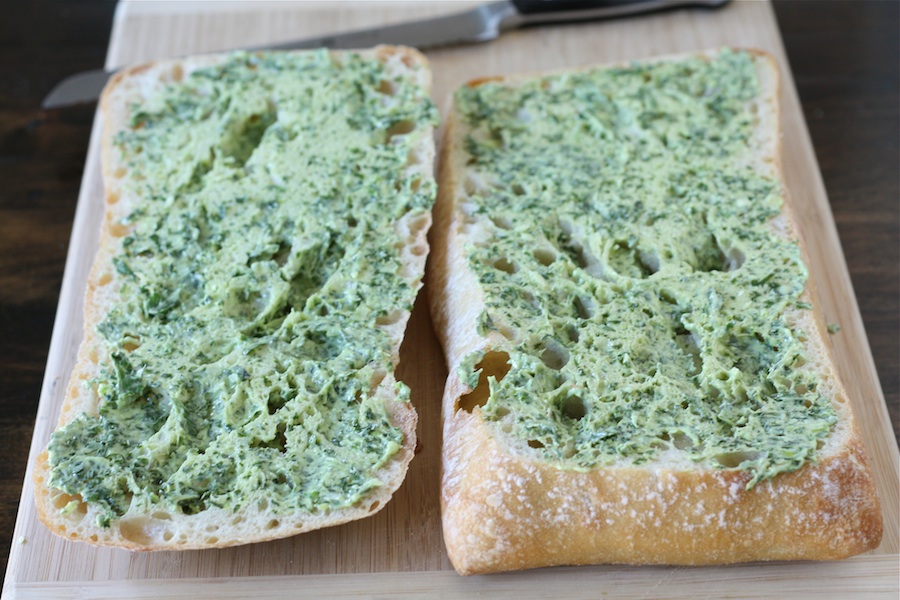
Spread the basil butter generously over each half of bread. 


Tasty Kitchen Blog: Basil Butter Garlic Bread. Guest post by Maria Lichty of Two Peas and Their Pod, recipe submitted by TK member Jenna (kitchenlovenest) of Jenna's Everything Blog.

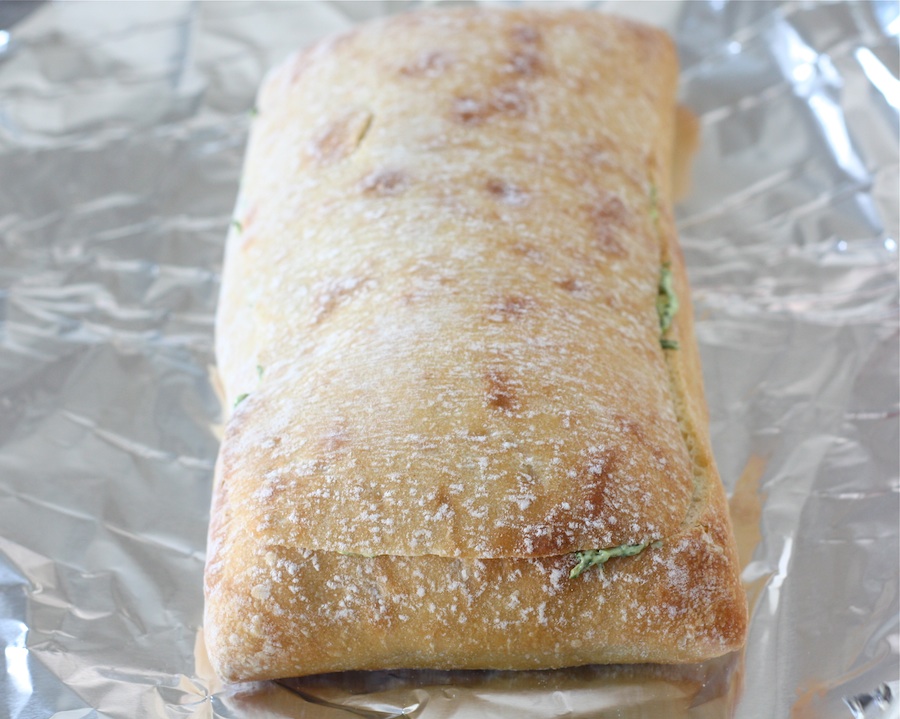
Put the bread halves together and wrap in aluminum foil. Bake for 10 minutes at 400 degrees F. 


Tasty Kitchen Blog: Basil Butter Garlic Bread. Guest post by Maria Lichty of Two Peas and Their Pod, recipe submitted by TK member Jenna (kitchenlovenest) of Jenna's Everything Blog.

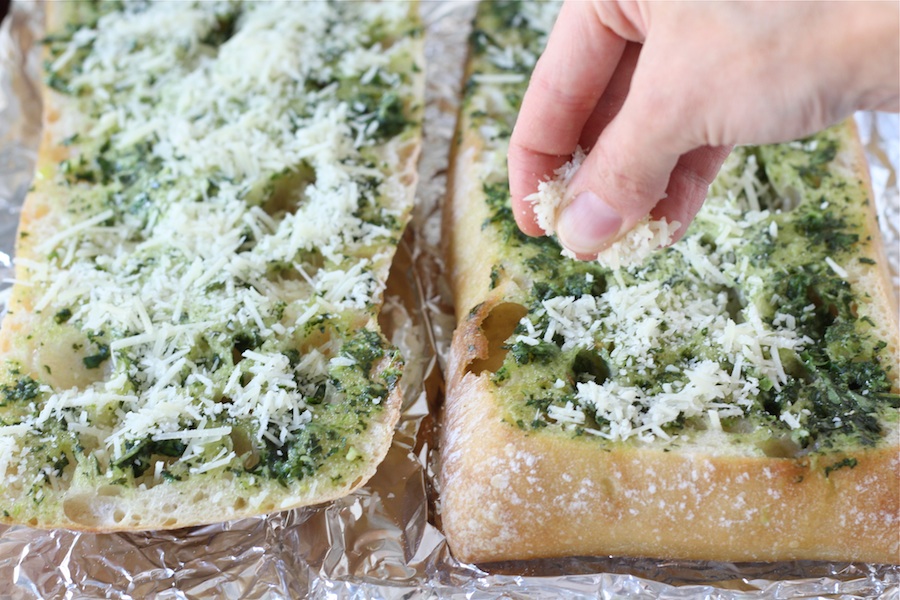
Remove the bread from the oven and carefully separate the bread halves. Sprinkle each half with Parmesan cheese. 


Tasty Kitchen Blog: Basil Butter Garlic Bread. Guest post by Maria Lichty of Two Peas and Their Pod, recipe submitted by TK member Jenna (kitchenlovenest) of Jenna's Everything Blog.

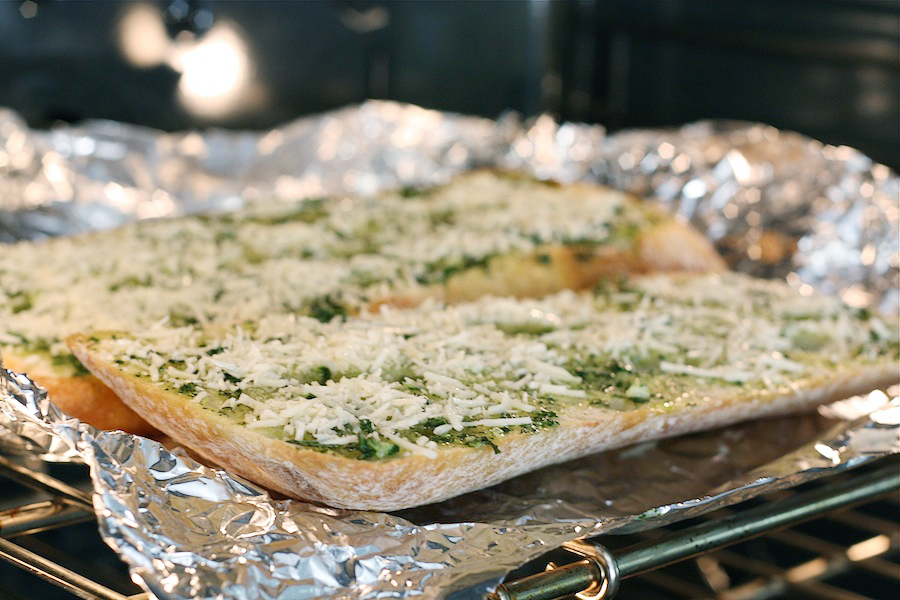
Return the bread halves to the oven and turn up the heat to 500 degrees F or put them under the broiler. Cook until the cheese is melted and bubbly. 


Tasty Kitchen Blog: Basil Butter Garlic Bread. Guest post by Maria Lichty of Two Peas and Their Pod, recipe submitted by TK member Jenna (kitchenlovenest) of Jenna's Everything Blog.

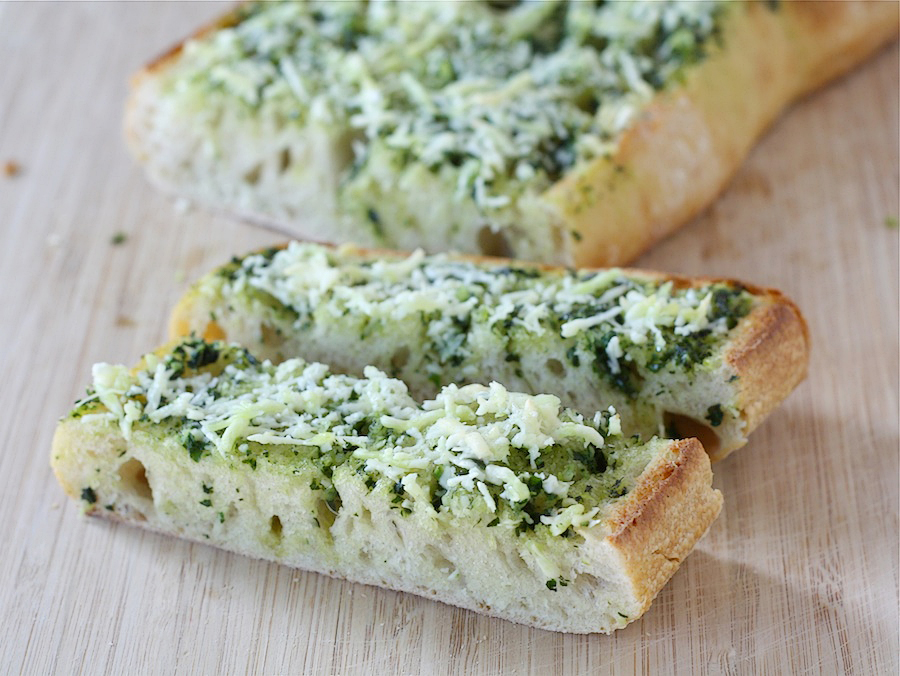
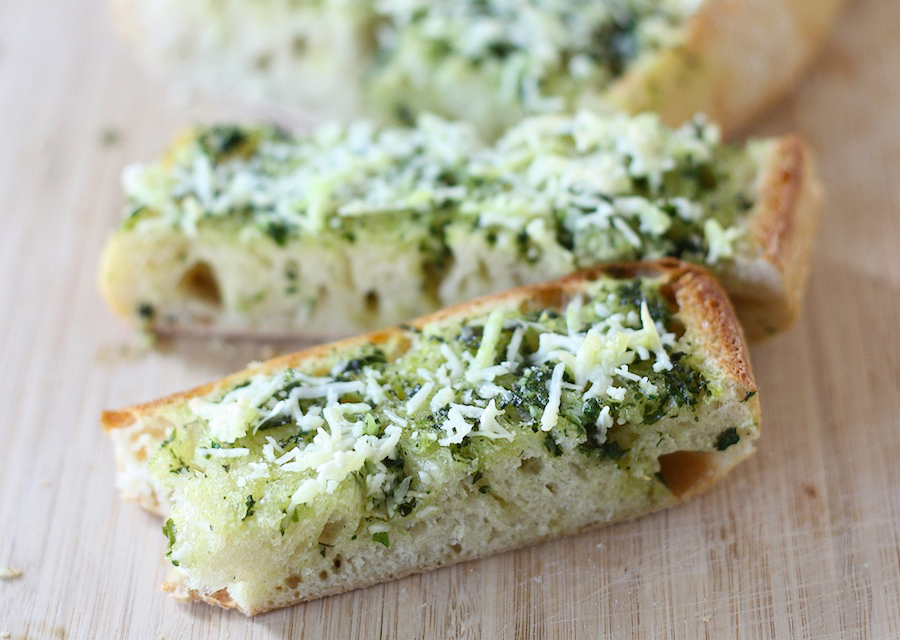
Cut the bread into slices and serve warm. 


Tasty Kitchen Blog: Basil Butter Garlic Bread. Guest post by Maria Lichty of Two Peas and Their Pod, recipe submitted by TK member Jenna (kitchenlovenest) of Jenna's Everything Blog.

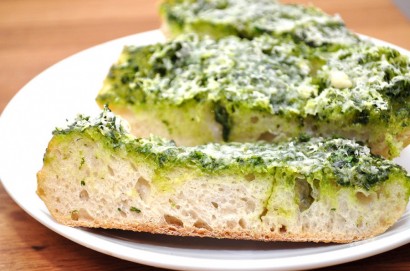
We made the bread for a pizza party and everyone loved it. It was the perfect appetizer. The basil butter is full of flavor and the perfect addition to garlic bread. The melted cheese on top also makes this bread extra special. If you are looking for a way to spice up traditional garlic bread, try this Basil Butter Garlic Bread. It is easy to make and out of this world delicious. Thanks Jenna for helping us use up our garden basil. We love this bread! Visit her blog, Jenna’s Everything Blog, for other tasty recipes. 


Printable Recipe

Basil Butter Garlic Bread

See post on kitchenlovenest’s site!
4.83 Mitt(s) 6 Rating(s)6 votes, average: 4.83 out of 56 votes, average: 4.83 out of 56 votes, average: 4.83 out of 56 votes, average: 4.83 out of 56 votes, average: 4.83 out of 5

Prep Time:

Cook Time:

Difficulty: Easy

Servings: 6

6
x

Print Options

Page size Letter 3x5 4x6
Text Size Small Medium Large
Content Include description
Include prep time, etc.
Show image

Description

Garden overflowing with basil? Look no further for a recipe that will use a generous handful!

Ingredients

  • 2 ounces, weight Butter
  • 2 Tablespoons Olive Oil
  • 1 bunch Basil Leaves (generous Handful)
  • 1 bunch Parsley (use 1/3 Of The Amount Of Basil)
  • 2 cloves Garlic
  • 1 whole Green Onion
  • 2 pinches Salt To Taste
  • 1 pinch Pepper To Taste
  • 1 loaf Ciabatta Or French Bread
  • 1-½ cup Grated Parmesan Cheese (up To 2 Cups)

Preparation Instructions

1. Combine all the ingredients except the bread and cheese in a food processor, and process until smooth. Season with salt and pepper.
2. Cut open the loaf of bread and spread both halves with the basil butter. Put the halves together and wrap in aluminum foil. Bake for in a 400ºF oven for 10 minutes.
3. Remove the bread, separate the halves and load them up with Parmesan cheese. Return them to the oven and either crank up the heat to 500ºF or put them under the broiler.
4. Cook until the cheese is melted, bubbly, and starting to get brown. Serve!


_______________________________________

Maria and her husband Josh (who she affectionately refers to as her “dough boy”) blog at Two Peas and Their Pod. They’ve been featured on Saveur, Eatocracy, Gourmet Live, Glamour, and the Los Angeles Times, to name just a few. We’re so glad to have them here!


Profile photo of EatLiveRun

BBQ Chicken, Brie and Plantain Wraps

Posted by in Step-by-Step Recipes

Tasty Kitchen Blog: BBQ Chicken, Brie and Plantain Wraps. Guest post by Jenna Weber of Eat, Live, Run; recipe submitted by TK member Tina of My Life as a Mrs.

 
I have a thing for plantains. Specifically, crunchy fried, golden sweet plantains that are just dripping with caramelized brown sugar. Just hand me a plate of sweet plantains and I’m in heaven. So, when I saw Tina’s recipe for BBQ Chicken, Brie and Plantain Wraps I knew it would be a winner. Spicy barbecue chicken with gooey brie cheese and sweet crunchy plantains? Sign me up!


Tasty Kitchen Blog: BBQ Chicken, Brie and Plantain Wraps. Guest post by Jenna Weber of Eat, Live, Run; recipe submitted by TK member Tina of My Life as a Mrs.

Tina’s recipe calls for a box of frozen sweet plantains, but after searching five grocery stores to no avail, I decided to take matters into my own hands and make my own. I found this easy Tasty Kitchen recipe for Sweet Plantains submitted by Stephanie. It only took about ten minutes and the end result was delicious! (I’ll include that recipe at the bottom of this post.)


Tasty Kitchen Blog: BBQ Chicken, Brie and Plantain Wraps. Guest post by Jenna Weber of Eat, Live, Run; recipe submitted by TK member Tina of My Life as a Mrs.

Since I skipped a step by not getting packaged plantains, after frying them I sliced them in half to prep them for my yummy wrap!


Tasty Kitchen Blog: BBQ Chicken, Brie and Plantain Wraps. Guest post by Jenna Weber of Eat, Live, Run; recipe submitted by TK member Tina of My Life as a Mrs.

Then, I set the plantains aside and got to work on my barbecue chicken! Tina used a grill, but I decided to go the grill pan route in my oven instead for convenience. I also used garlic powder plus salt instead of garlic salt. So I sprinkled these guys with a little garlic powder first…


Tasty Kitchen Blog: BBQ Chicken, Brie and Plantain Wraps. Guest post by Jenna Weber of Eat, Live, Run; recipe submitted by TK member Tina of My Life as a Mrs.

Then I gave them a good pinch of sea salt.


Tasty Kitchen Blog: BBQ Chicken, Brie and Plantain Wraps. Guest post by Jenna Weber of Eat, Live, Run; recipe submitted by TK member Tina of My Life as a Mrs.

Followed by a healthy dash of cayenne—my favorite!


Tasty Kitchen Blog: BBQ Chicken, Brie and Plantain Wraps. Guest post by Jenna Weber of Eat, Live, Run; recipe submitted by TK member Tina of My Life as a Mrs.

I cooked my chicken breasts for 25 minutes at 375ºF.


Tasty Kitchen Blog: BBQ Chicken, Brie and Plantain Wraps. Guest post by Jenna Weber of Eat, Live, Run; recipe submitted by TK member Tina of My Life as a Mrs.

Then poured on my favorite BBQ sauce during the last five minutes of the cooking process.


Tasty Kitchen Blog: BBQ Chicken, Brie and Plantain Wraps. Guest post by Jenna Weber of Eat, Live, Run; recipe submitted by TK member Tina of My Life as a Mrs.

Once the chicken was done and juicy, it was time to assemble the wraps! I thinly sliced my barbecue sauce-laden chicken breast and placed it on top of my wrap and mixed greens.


Tasty Kitchen Blog: BBQ Chicken, Brie and Plantain Wraps. Guest post by Jenna Weber of Eat, Live, Run; recipe submitted by TK member Tina of My Life as a Mrs.

Followed by chunks of brie cheese. Doesn’t that look delicious?! Just you wait.


Tasty Kitchen Blog: BBQ Chicken, Brie and Plantain Wraps. Guest post by Jenna Weber of Eat, Live, Run; recipe submitted by TK member Tina of My Life as a Mrs.

Lastly, I scattered my sweet plantains on top of everything. I’m getting hungry again just looking at this!


Tasty Kitchen Blog: BBQ Chicken, Brie and Plantain Wraps. Guest post by Jenna Weber of Eat, Live, Run; recipe submitted by TK member Tina of My Life as a Mrs.

The hardest part of the whole thing was rolling the wrap up! But that’s probably just because I have a history of overstuffing my tortillas.


Tasty Kitchen Blog: BBQ Chicken, Brie and Plantain Wraps. Guest post by Jenna Weber of Eat, Live, Run; recipe submitted by TK member Tina of My Life as a Mrs.

There you have it—lunch is served! I absolutely loved the flavor combination here and have a feeling these will now be my go-to lunch. Thanks, Tina, for this awesome recipe! It was cheesy, smoky, sweet and delicious! (Check out Tina’s blog My Life As A Mrs. for more of her delicious recipes!)


Printable Recipe

BBQ Chicken, Brie, and Plantain Wraps

See post on Tina (My Life as a Mrs)’s site!
5.00 Mitt(s) 2 Rating(s)2 votes, average: 5.00 out of 52 votes, average: 5.00 out of 52 votes, average: 5.00 out of 52 votes, average: 5.00 out of 52 votes, average: 5.00 out of 5

Prep Time:

Cook Time:

Difficulty: Easy

Servings: 4

4
x

Print Options

Page size Letter 3x5 4x6
Text Size Small Medium Large
Content Include description
Include prep time, etc.
Show image

Description

Smokey BBQ, creamy brie, and sweet plantain wrap = party in your mouth!

Ingredients

  • 1 box (about 11 Oz.. Size) Frozen Sweet Plantains
  • 4 whole Boneless, Skinless Chicken Breasts
  • 1 teaspoon Garlic Salt
  • ½ teaspoons Cayenne
  • ¾ cups BBQ Sauce Of Choice
  • 4 whole Spinach Wraps
  • 1 cup Mixed Greens
  • 6 ounces, weight Brie Cheese

Preparation Instructions

Ignore the cooking instructions on the box/bag your plantains. Preheat oven to 400°F. Line a baking sheet with foil and spray with nonstick cooking spray. Lay frozen plantains out in a single layer (make sure none of them are overlapping).

Bake for a good 20–30 minutes, allowing them to caramalize and get that gorgeous chewy edge! They are done when they are nice and golden with dark brown edges. Remove from the oven and allow to cool slightly. When cool enough to handle, slice each piece in half lengthwise, and set aside until ready to use.

Season each piece of chicken with a sprinkling of garlic salt and cayenne pepper on both sides and throw them on the grill until cooked completely through (flipping halfway through). Baste both sides with BBQ sauce in the last 5 minutes or so of cooking. Remove from the grill and slice into thin strips.

To assemble, lay a wrap flat and add a small amount of mixed greens. Top with a few slices of chicken, some brie, and a some of the plantains (I like mine with lots of plantains!). If you want to get REALLY crazy, go ahead and add an extra drizzle of BBQ!

Carefully wrap the wrap up (burrito style), place on a baking sheet (seam side down), and put back into the 400°F oven for just a few minutes (3–5 minutes). This allows the cheese to melt a little and the outside of the tortilla to crisp up slightly. Remove from the oven, slice in half, and serve!


Printable Recipe

Sweet Plantains

See post on Stephanie Deal’s site!
5.00 Mitt(s) 2 Rating(s)2 votes, average: 5.00 out of 52 votes, average: 5.00 out of 52 votes, average: 5.00 out of 52 votes, average: 5.00 out of 52 votes, average: 5.00 out of 5

Prep Time:

Cook Time:

Difficulty: Easy

Servings: 4

4
x

Print Options

Page size Letter 3x5 4x6
Text Size Small Medium Large
Content Include description
Include prep time, etc.
Show image

Description

This tasty dish is really easy to prepare and tastes great with pork chops, etc. It can also just be eaten as a snack.

Ingredients

  • 3 whole Plantains, Very Ripe
  • 3 Tablespoons Brown Sugar
  • ¼ cups Peanut Oil
  • 2 Tablespoons Butter
  • ¼ teaspoons Salt

Preparation Instructions

Slice plantains into 1-inch slices, put in a bowl and gently toss plantain slices with brown sugar.

Heat peanut oil and butter in a large skillet over medium-high heat until the butter begins to sizzle. Put plaintain slices into the skillet and fry until the plantains begin to turn golden brown, then turn over, and continue frying until they have caramelized, about 2–3 minutes per side.

Remove slices from the skillet and dab onto paper towels. Do not put slices onto paper towels as they will stick to the paper due to the caramelization. Put on a plate and sprinkle with salt before serving.


_______________________________________

Jenna is a food writer who has worked as a pastry chef and bread baker. Her blog Eat, Live, Run has great recipes, travel stories, and the perfect slogan: “Celebrating life, one crumb at a time.”


Profile photo of HowSweetEats

Beef with Barley Soup

Posted by in Step-by-Step Recipes

Tasty Kitchen Blog: Beef Barley Soup. Guest post by Jessica Merchant of How Sweet It Is, recipe submitted by TK member Terri of That's Some Good Cookin'.

 
I don’t know about you, but it’s finally winter in my neck of the woods. It’s cold. I’m hungry. And I’m ready to hibernate.

I could live off soups year round, and find that nothing is more satisfying that a big bowl of stew (or two) followed by a few cookies. Maybe some bread. Maybe a salad. But the soup is where it’s at. According to my mom, my grandma made an excellent beef and barley soup. However, it was never one of the recipes she made in my lifetime. It’s been hidden in my recipe box since she passed away, and I had all but forgotten about it until I came across this Beef with Barley Soup recipe from Terri. I could hardly wait to whip up a pot; it just screamed comfort. And it’s much easier than I thought it would be. Win!


Tasty Kitchen Blog: Beef Barley Soup. Guest post by Jessica Merchant of How Sweet It Is, recipe submitted by TK member Terri of That's Some Good Cookin'.

Here are your super simple ingredients: salt, pepper, thyme, carrots, olive oil barley, stew beef, season salt, diced tomatoes, beef stock, garlic, potatoes, onions and 1 bay leaf.
It should be noted that I had a difficult time finding pearl barley and had to resort to a quick cooking barley. Because of this, I reduced my simmer time a bit, and while I was afraid the barley would be a hot mess, it still came out great! More on that later.


Tasty Kitchen Blog: Beef Barley Soup. Guest post by Jessica Merchant of How Sweet It Is, recipe submitted by TK member Terri of That's Some Good Cookin'.

Begin by dicing your onion. Also peel and chop your potatoes.


Tasty Kitchen Blog: Beef Barley Soup. Guest post by Jessica Merchant of How Sweet It Is, recipe submitted by TK member Terri of That's Some Good Cookin'.

Next up, add your olive oil to a large stock pot and let it get nice and hot. Once hot, add your beef and DON’T TOUCH IT. Let it sear first, then once it can easily be flipped (and is not sticking to the pot), toss it.


Tasty Kitchen Blog: Beef Barley Soup. Guest post by Jessica Merchant of How Sweet It Is, recipe submitted by TK member Terri of That's Some Good Cookin'.

See the caramelly brown color? That’s what you want. Gray meat is the worst. Trust me. Give it some color!


Tasty Kitchen Blog: Beef Barley Soup. Guest post by Jessica Merchant of How Sweet It Is, recipe submitted by TK member Terri of That's Some Good Cookin'.

After about 5 minutes your meat should be browned, and it’s time to add your onions and garlic. Stir everything together.


Tasty Kitchen Blog: Beef Barley Soup. Guest post by Jessica Merchant of How Sweet It Is, recipe submitted by TK member Terri of That's Some Good Cookin'.

Continue stirring every few minutes until the onions become caramelized. You can add a little more oil here if needed, but it wasn’t necessary for me.


Tasty Kitchen Blog: Beef Barley Soup. Guest post by Jessica Merchant of How Sweet It Is, recipe submitted by TK member Terri of That's Some Good Cookin'.

Now it’ time to add everything else! Throw in the potatoes and carrots and barley …


Tasty Kitchen Blog: Beef Barley Soup. Guest post by Jessica Merchant of How Sweet It Is, recipe submitted by TK member Terri of That's Some Good Cookin'.

Dump in the stock …


Tasty Kitchen Blog: Beef Barley Soup. Guest post by Jessica Merchant of How Sweet It Is, recipe submitted by TK member Terri of That's Some Good Cookin'.

Then add your seasonings and bay leaf.


Tasty Kitchen Blog: Beef Barley Soup. Guest post by Jessica Merchant of How Sweet It Is, recipe submitted by TK member Terri of That's Some Good Cookin'.

Bring the soup to a boil, then reduce it to a simmer and let it cook for about 2 hours, stirring occasionally. Again, I shaved a bit of time off here since I used the quick cooking barley. I let mine simmer for about 45-60 minutes.


Tasty Kitchen Blog: Beef Barley Soup. Guest post by Jessica Merchant of How Sweet It Is, recipe submitted by TK member Terri of That's Some Good Cookin'.

After the 2 hours (or 45-60 minutes, in my case), add in your diced tomatoes. Give it a good stir and let it simmer for another hour. Easy!


Tasty Kitchen Blog: Beef Barley Soup. Guest post by Jessica Merchant of How Sweet It Is, recipe submitted by TK member Terri of That's Some Good Cookin'.

Give it a taste and adjust your seasonings. I snuck multiple spoonfuls for about 2 hours straight.


Tasty Kitchen Blog: Beef Barley Soup. Guest post by Jessica Merchant of How Sweet It Is, recipe submitted by TK member Terri of That's Some Good Cookin'.

Remove your bay leaf and serve it hot with a sprinkle of fresh parsley. I added some crusty bread with butter for dipping. Crackers would be good, too!


Tasty Kitchen Blog: Beef Barley Soup. Guest post by Jessica Merchant of How Sweet It Is, recipe submitted by TK member Terri of That's Some Good Cookin'.

Dig in!

This soup actually warmed me to the core and the flavor was just incredible. It is a perfect dish for cold winter nights, and if you use the quick cooking barley, you can even make this as an easy weeknight meal. I didn’t even care that I burn every inch of my mouth.

Thanks so much Terri for the delicious recipe! Be sure to check out her blog That’s Some Good Cookin’. It’s chock full of fabulous dishes and stories.


Printable Recipe

Beef with Barley Soup

See post on Terri @ that's some good cookin'’s site!
4.82 Mitt(s) 17 Rating(s)17 votes, average: 4.82 out of 517 votes, average: 4.82 out of 517 votes, average: 4.82 out of 517 votes, average: 4.82 out of 517 votes, average: 4.82 out of 5

Prep Time:

Cook Time:

Difficulty: Easy

Servings: 8

8
x

Print Options

Page size Letter 3x5 4x6
Text Size Small Medium Large
Content Include description
Include prep time, etc.
Show image

Description

Take the chill off with a warm bowl of this filling soup.

Ingredients

  • 2 Tablespoons Olive Oil
  • 1 pound Beef Cubes (for Stew)
  • 1 whole Large Onion, Medium Diced
  • 2 cloves Minced Garlic
  • 2 whole Carrots, Smaller Ends Cut Into Rounds, Larger Ends Diced
  • 2 whole Potatoes, Large Dice
  • 1-½ teaspoon Seasoning Salt
  • 1 teaspoon Sea Salt (or To Taste)
  • Ground Black Pepper To Taste
  • 6 cups Beef Stock
  • 2 cups Water Or As Needed
  • ½ cups Pearl Barley
  • ½ teaspoons Thyme
  • 1 whole Bay Leaf
  • 1 can (14.5 Oz. Size) Diced Tomatoes

Preparation Instructions

Heat a large stock pot over medium high heat. Add the olive oil.

Brown the beef cubes for three minutes in the oil, then add the onions and garlic. Lower the heat to medium low and cook until the onions are cooked and just start to caramelize. Stir as needed to keep onions and garlic from burning. Lower heat if necessary; drizzle a little more olive oil if needed to keep food from sticking.

Add everything except the tomatoes to the pot and stir well. Increase the heat and bring the soup to a boil, then turn heat to low, cover pot, and simmer for two hours, stirring occasionally. Adjust heat as necessary to keep soup at a slow simmer. If the soup thickens too much, add a little more water or broth.

Taste to correct seasonings, then add tomatoes and simmer for another hour. Remove bay leaf before serving.


_______________________________________

Jessica Merchant is a personal trainer turned food writer and blogger. Her blog, How Sweet Eats, is where she proclaims her love for all things sweet, all things bacon, and everything else in between. She works her magic in her Pittsburgh kitchen, which she shares with her husband of 2 years.


Profile photo of Erika (TK)

Beer Bread

Posted by in Baking, Looks Delicious!

Tasty Kitchen Blog: Cheesy Beer Bread. Photo by Erika of Tasty Kitchen, recipe submitted by TK member BellaDonna.

 
Hello everyone! I’d like to welcome you all by name, and you know, I probably could. I’ve read through just about every single recipe here at Tasty Kitchen, and I’m telling you, sometimes I wish I could summon memory lapses at will. There are so many wonderful recipes in here that I think I’m good with my meal plan for the next 8.27 years. (I actually calculated that.)

One of the first discoveries that excited me was Beer Bread (look Ma, no yeast!). There are more than a few recipes for Beer Bread here, and they’re all incredibly simple. Using a bottle of pomegranate-raspberry beer, I made mini-loaves of bread in less than 45 minutes. They disappeared in about the same amount of time. I made another batch the next day, this time with cream ale and some leftover shredded cheese. (It was BellaDonna and her Cheesy Beer Bread recipe that made me do it.) Oh my. Adding the melted butter on top really does the trick.

So the next time you’re making some soup or a hearty salad for dinner and forego the bread because you think there’s just no time to make it, think again! Excluding the time spent preheating the oven, a loaf of fresh beer bread can be on your table in about an hour, or less if you make mini-loaves or muffins. Try it!

 
Happy cooking,
Erika

 
P.S. If you want to peruse the various recipes for Beer Bread here, simply type in “beer bread” enclosed in double quotes in the search box. That gives you results with the exact phrase “beer bread” and will save you from having to wade through other recipes with either “beer” or “bread” in them. Like beer-battered fish. Or bread pudding. On second thought, sometimes wading is good. You just might stumble upon something tempting enough to make you forget what you searched for in the first place.

Profile photo of georgiapellegrini

Beer-Battered Fried Pickles

Posted by in Step-by-Step Recipes

  I’m fairly certain there is nothing more satisfying to eat than a fried pickle. The sad part is that it took me 29 years to discover this. Last year I tasted my first fried pickle in an Irish pub in California and I was forever transformed. I crossed the threshold into a new phase […]

Profile photo of EatLiveRun

Beet Risotto with Goat Cheese

Posted by in Step-by-Step Recipes

Hi, my names Jenna and I love beets. Like, I really love beets. When I was little, I remember going to visit my grandma and she would boil beets for me then sprinkle them with sugar for an afternoon treat. I must have been one of the only six-year-olds that actually asked for beets. Then, […]

Profile photo of georgiapellegrini

Best Breakfast Burrito

Posted by in Step-by-Step Recipes

  Since moving to Texas, I’ve fallen in love with the breakfast taco and all of its many possibilities. But these Best Breakfast Burritos by ever-entertaining TK member Bev Weidner caught my eye because of the beautiful mound of spinach on top. That is not something I’ve tried before and I decided it was time. […]

Profile photo of A Cozy Kitchen

Best Carrot Cake of All Time

Posted by in Baking, Step-by-Step Recipes

There’s plenty of reasons -to make this carrot cake. Like its appropriate title, this was in fact the best carrot cake I’ve had to date. Big-ups to TK member Katy and Christin (kpurwin) of Young and Hungry (who adapted it from Southern Living) for providing us with such an honest and delightful recipe.