The Pioneer Woman Tasty Kitchen
Profile photo of whatsgabycooking

Fish Tacos with Avocado Cabbage Slaw

Posted by in Step-by-Step Recipes

Tasty Kitchen Blog: Fish Tacos with Avocado Cabbage Slaw. Guest post by Gaby Dalkin of What's Gaby Cooking, recipe submitted by TK member Nam of The Culinary Chronicles

 
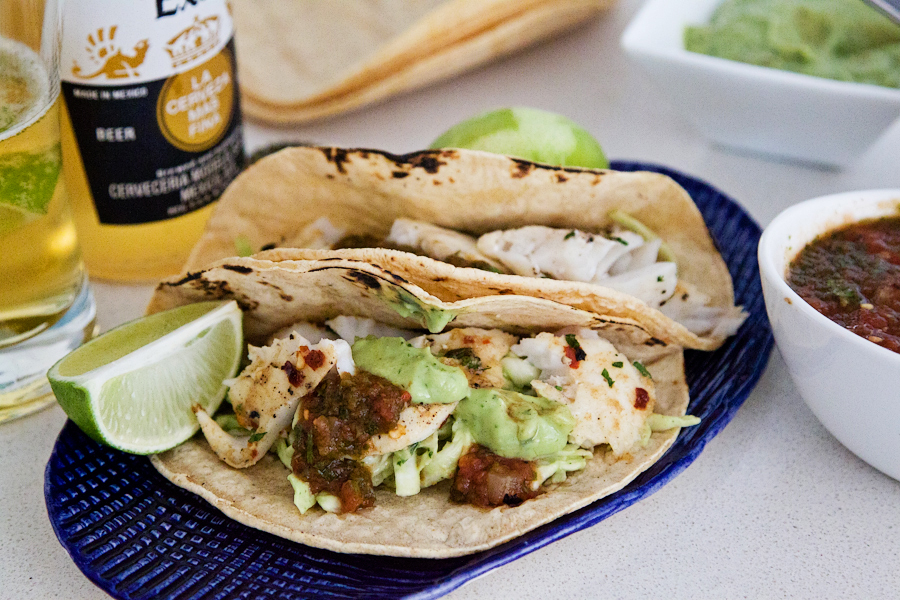
Who doesn’t like fish tacos? They are the best meal for those gorgeous sunny spring and summer days. Add in some cabbage slaw doused with an avocado crema and some salsa and I seriously don’t think you can go wrong. If you’re into having a cerveza, then pour one and call it a day!

These flaky Fish Tacos with Avocado Cabbage Slaw from TK member The Culinary Chronicles are totally to die for. I made them twice this week and both times they were excellent!


Tasty Kitchen Blog: Fish Tacos with Avocado Cabbage Slaw. Guest post by Gaby Dalkin of What's Gaby Cooking, recipe submitted by TK member Nam of The Culinary Chronicles

Okay, here’s what to do. First we are going to torch some tortillas, which means you need to turn on your burner.


Tasty Kitchen Blog: Fish Tacos with Avocado Cabbage Slaw. Guest post by Gaby Dalkin of What's Gaby Cooking, recipe submitted by TK member Nam of The Culinary Chronicles

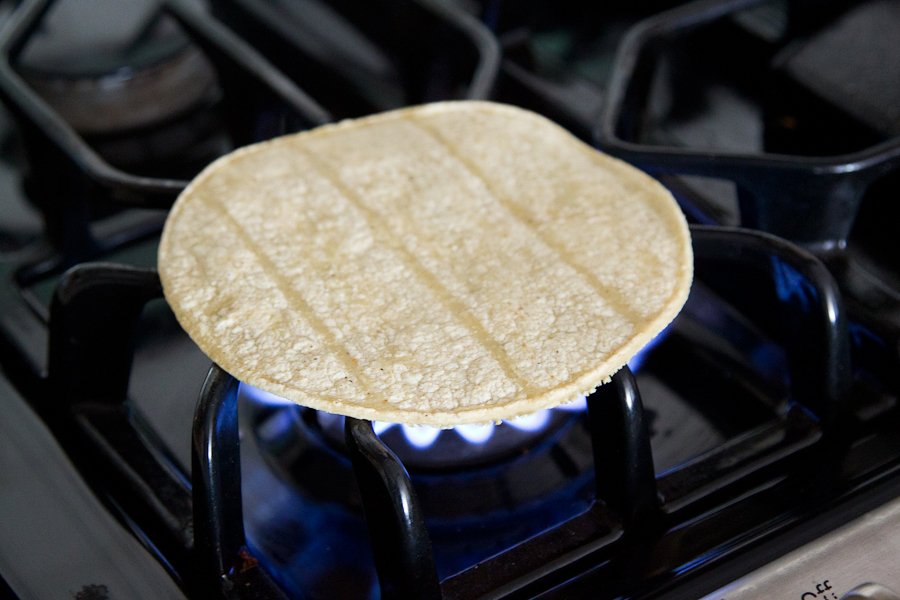
Place a small corn tortilla over the open flame for a few seconds


Tasty Kitchen Blog: Fish Tacos with Avocado Cabbage Slaw. Guest post by Gaby Dalkin of What's Gaby Cooking, recipe submitted by TK member Nam of The Culinary Chronicles

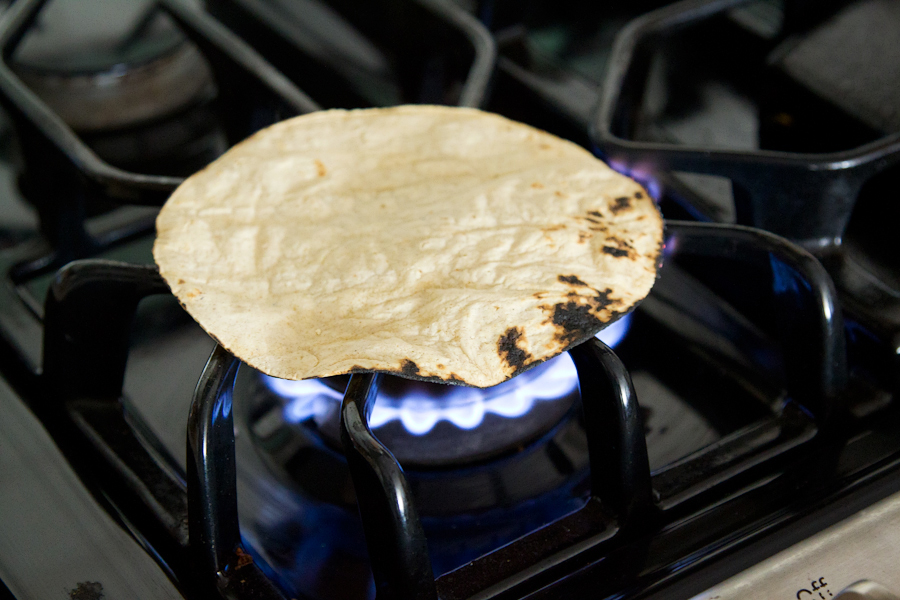
And then give it a flip to toast the other side for a few seconds more. Repeat this process with all the tortillas and then wrap them in a clean kitchen towel and set them aside.


Tasty Kitchen Blog: Fish Tacos with Avocado Cabbage Slaw. Guest post by Gaby Dalkin of What's Gaby Cooking, recipe submitted by TK member Nam of The Culinary Chronicles

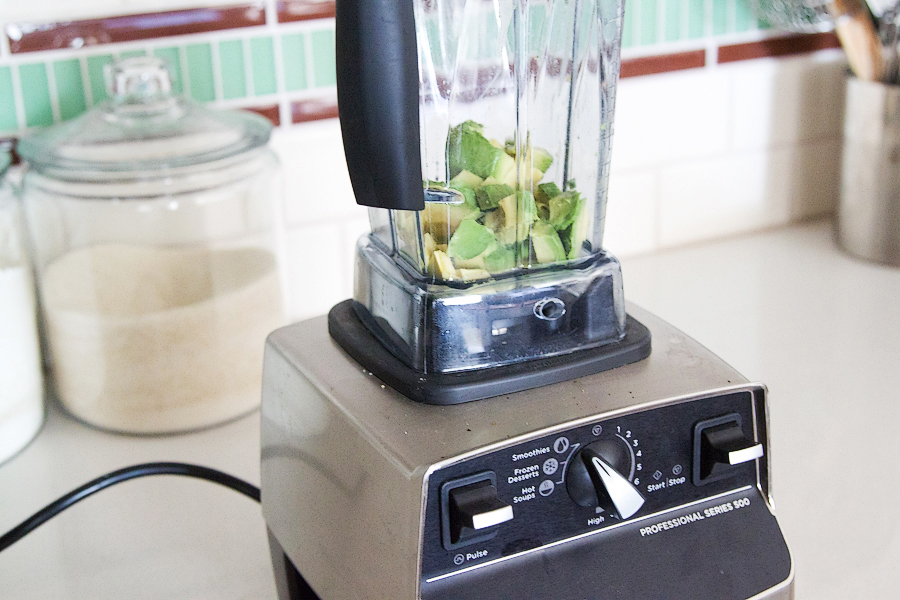
Next we’re going to put some avocado in a blender …


Tasty Kitchen Blog: Fish Tacos with Avocado Cabbage Slaw. Guest post by Gaby Dalkin of What's Gaby Cooking, recipe submitted by TK member Nam of The Culinary Chronicles

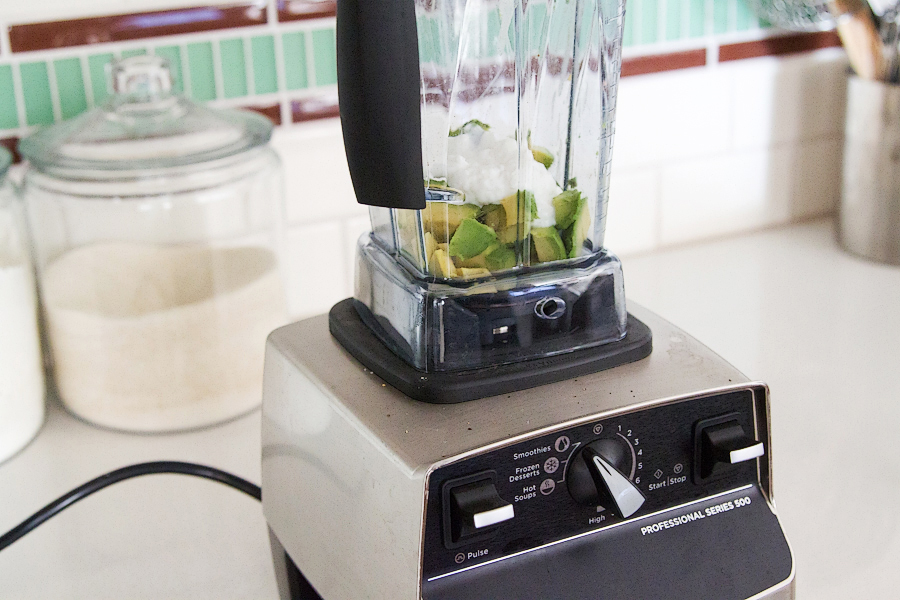
Followed by some crema or sour cream. I only had sour cream on hand and let me tell you, it’s pure perfection.


Tasty Kitchen Blog: Fish Tacos with Avocado Cabbage Slaw. Guest post by Gaby Dalkin of What's Gaby Cooking, recipe submitted by TK member Nam of The Culinary Chronicles

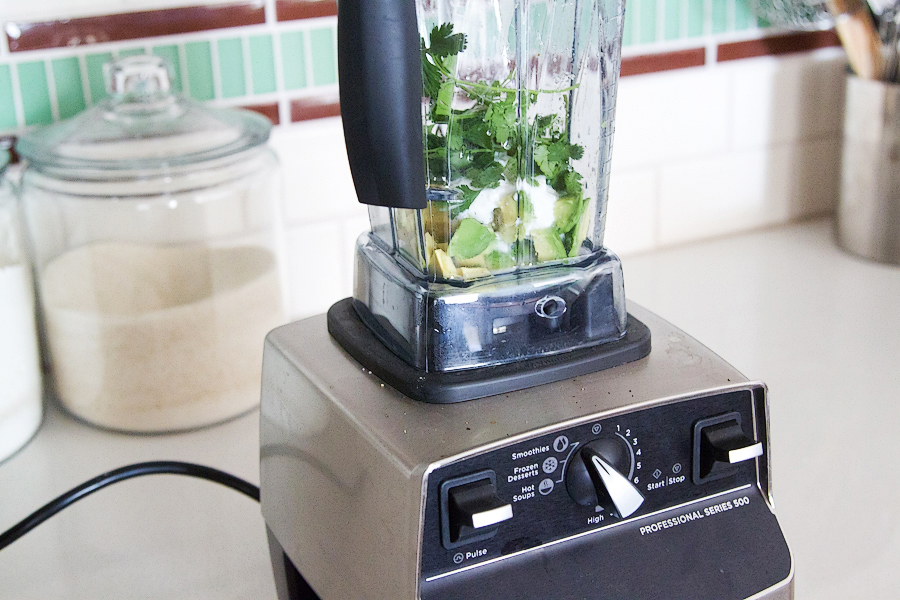
Throw in some fresh cilantro and jalapeño pepper …


Tasty Kitchen Blog: Fish Tacos with Avocado Cabbage Slaw. Guest post by Gaby Dalkin of What's Gaby Cooking, recipe submitted by TK member Nam of The Culinary Chronicles

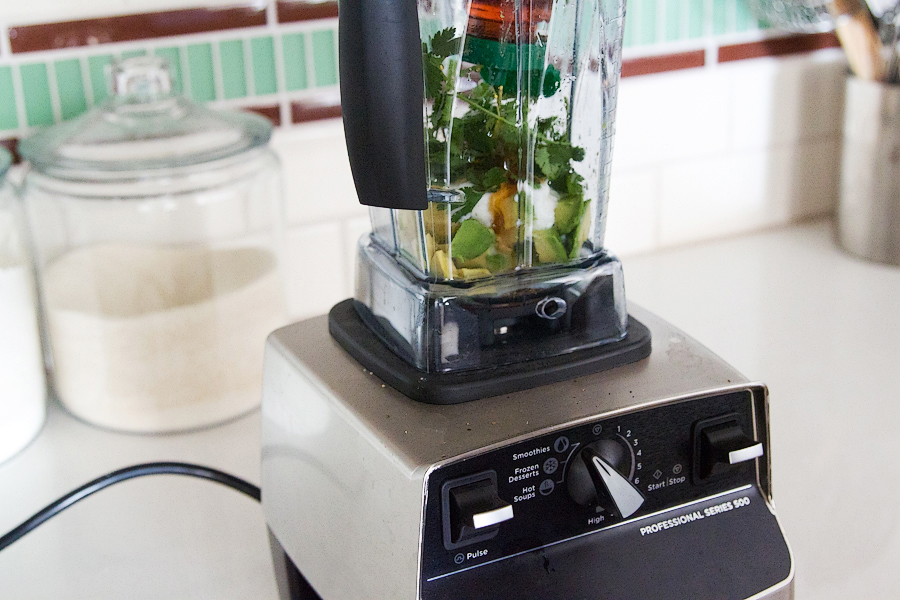
Followed by some agave nectar just to give it a hint of sweetness.


Tasty Kitchen Blog: Fish Tacos with Avocado Cabbage Slaw. Guest post by Gaby Dalkin of What's Gaby Cooking, recipe submitted by TK member Nam of The Culinary Chronicles

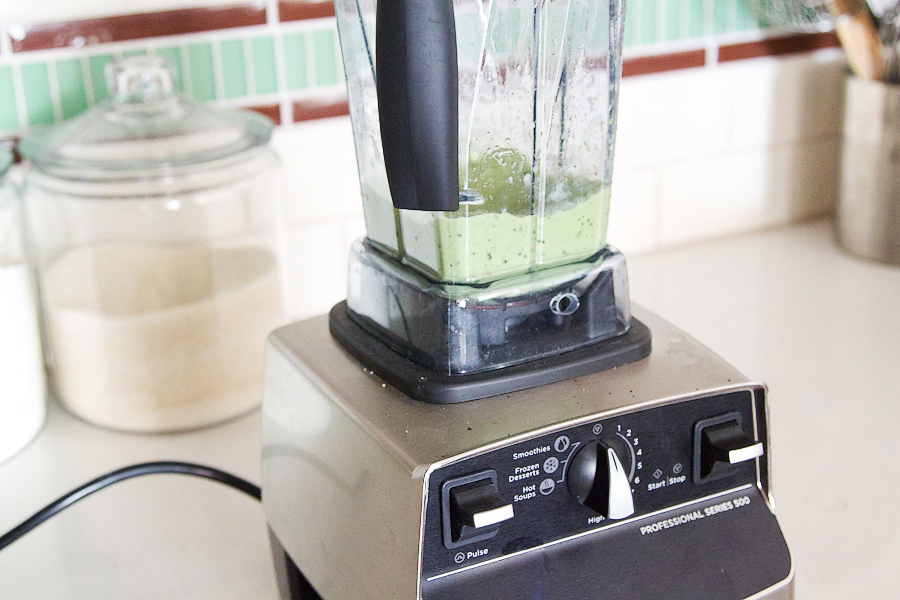
Blend it until everything is smooth and then remove the avocado crema to a bowl.


Tasty Kitchen Blog: Fish Tacos with Avocado Cabbage Slaw. Guest post by Gaby Dalkin of What's Gaby Cooking, recipe submitted by TK member Nam of The Culinary Chronicles

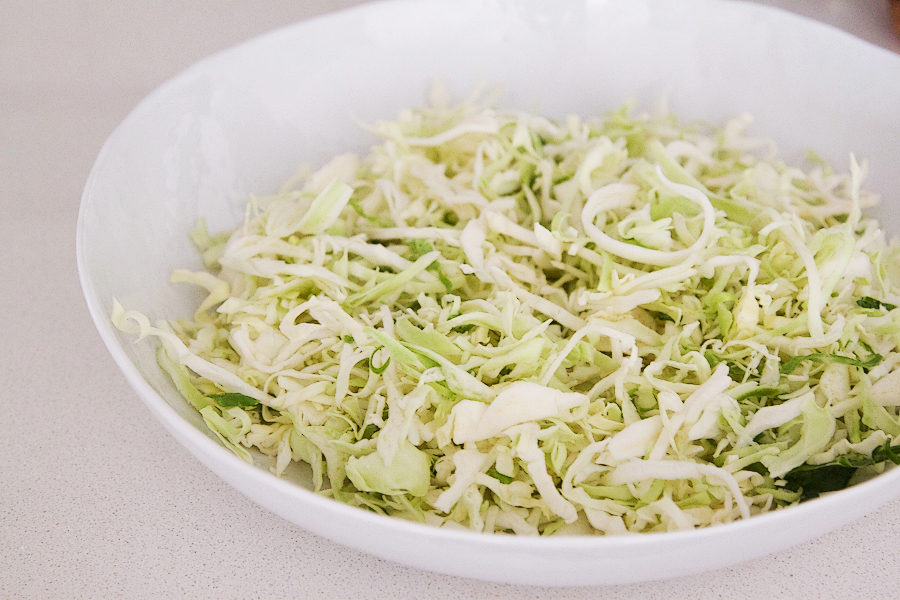
I just used some pre-shredded cabbage from Trader Joe’s, but if you shred your own, just go ahead and shred it and place it into a big bowl.


Tasty Kitchen Blog: Fish Tacos with Avocado Cabbage Slaw. Guest post by Gaby Dalkin of What's Gaby Cooking, recipe submitted by TK member Nam of The Culinary Chronicles

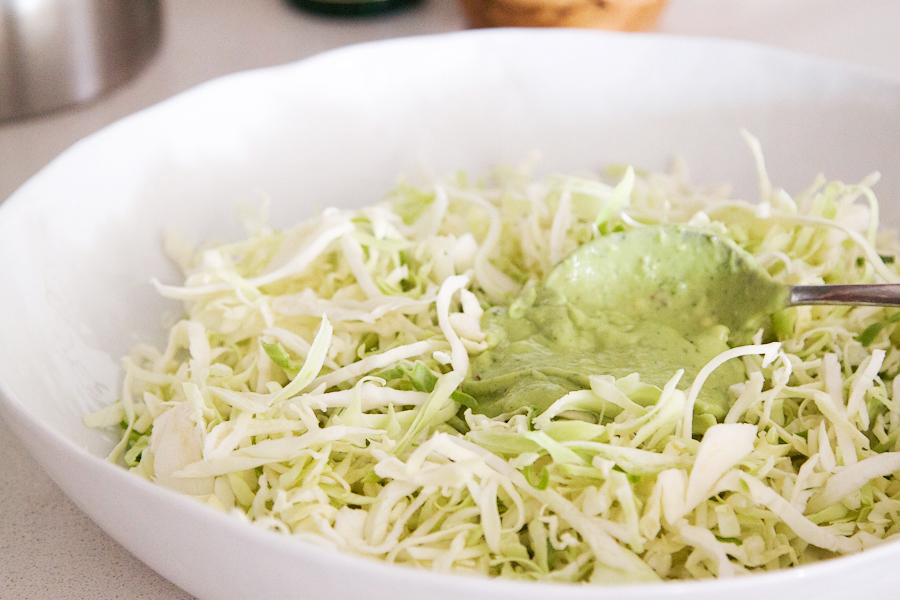
Add in a few spoonfuls of the avocado crema. Reserve some crema for later but be sure to add enough to give all the cabbage a good coating.


Tasty Kitchen Blog: Fish Tacos with Avocado Cabbage Slaw. Guest post by Gaby Dalkin of What's Gaby Cooking, recipe submitted by TK member Nam of The Culinary Chronicles

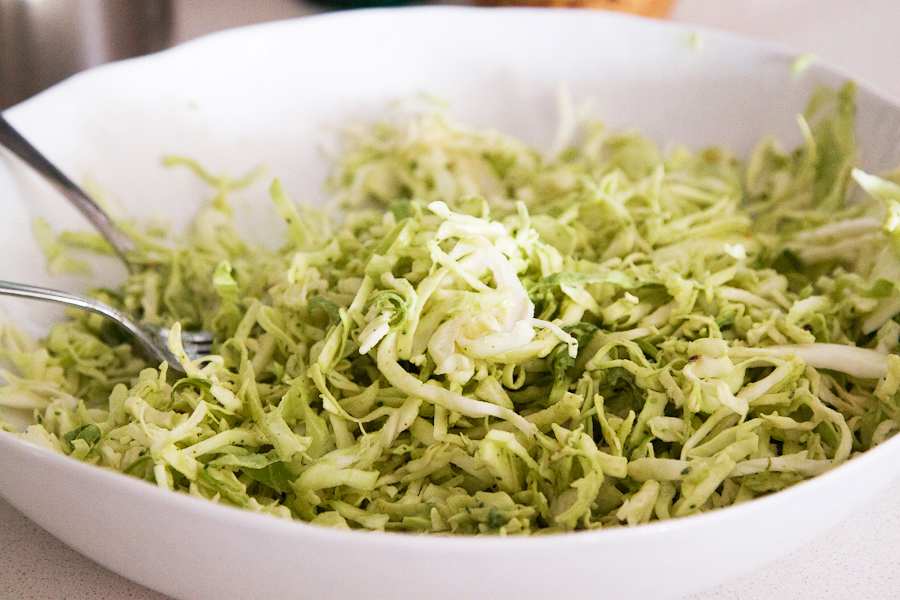
Toss it all together and season it with salt and pepper as needed.


Tasty Kitchen Blog: Fish Tacos with Avocado Cabbage Slaw. Guest post by Gaby Dalkin of What's Gaby Cooking, recipe submitted by TK member Nam of The Culinary Chronicles

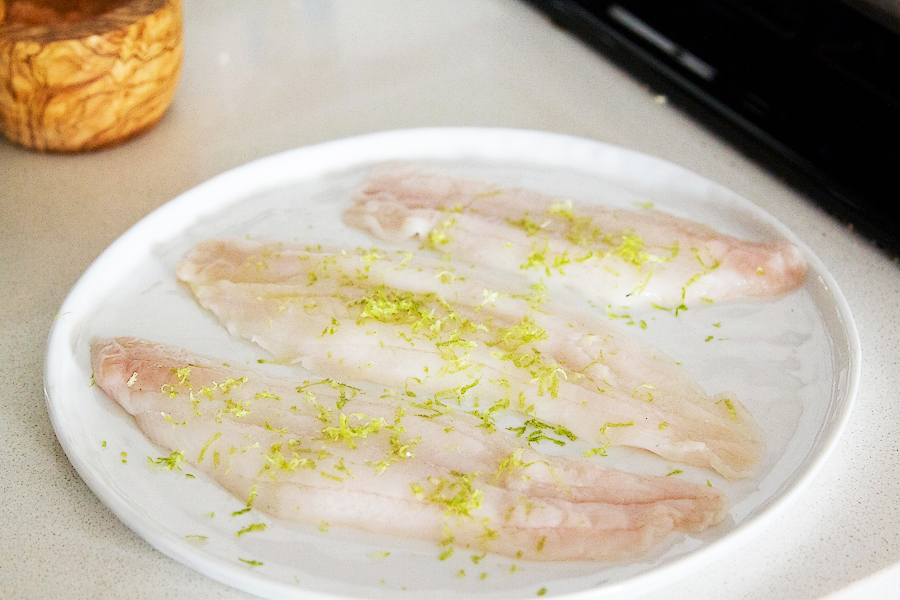
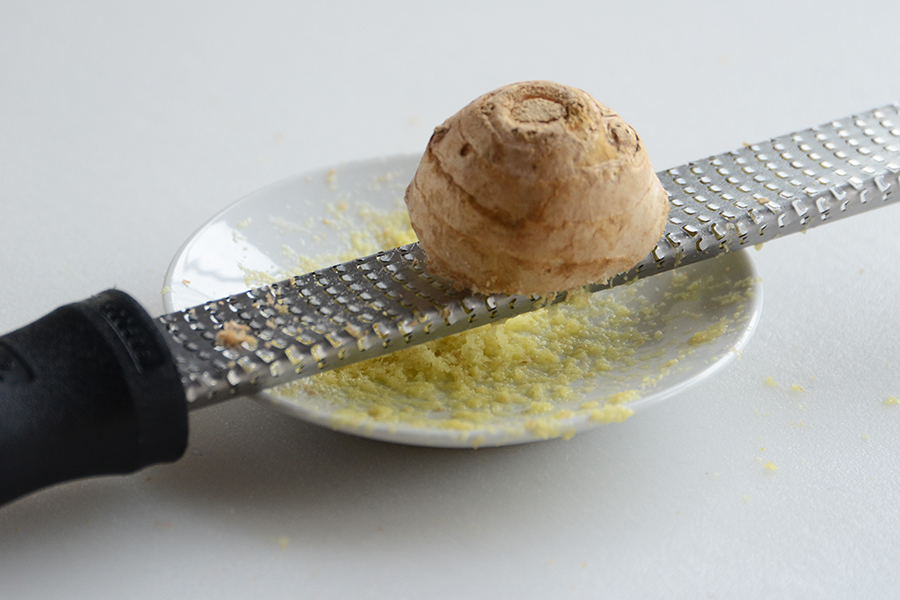
Alright let’s move onto the fish. Season some white fish of your choice with some lime zest.


Tasty Kitchen Blog: Fish Tacos with Avocado Cabbage Slaw. Guest post by Gaby Dalkin of What's Gaby Cooking, recipe submitted by TK member Nam of The Culinary Chronicles

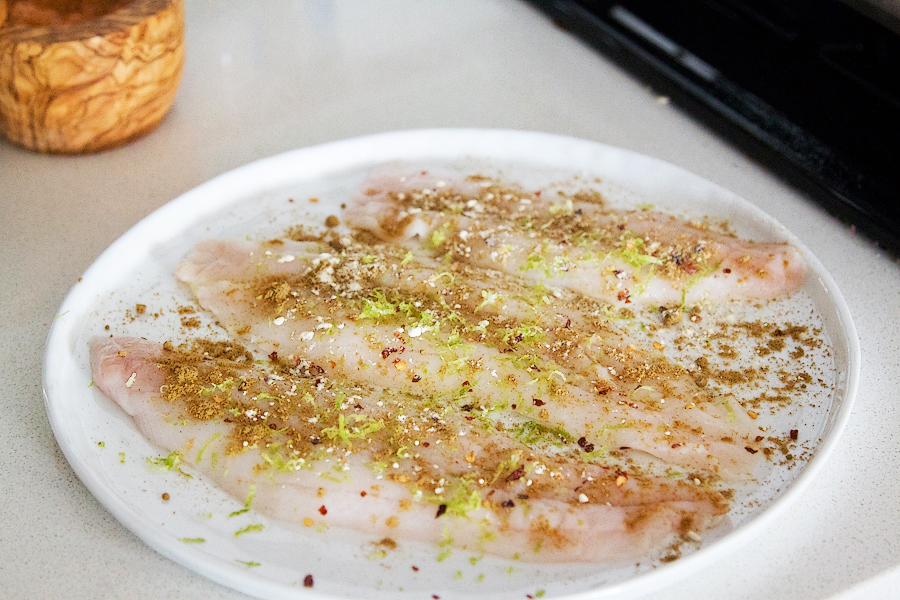
Then add in some red pepper flakes, followed by ground cumin and some garlic powder. You could use fresh garlic too, but I was concerned about the garlic burning when I broiled the fish so I opted for the powder.


Tasty Kitchen Blog: Fish Tacos with Avocado Cabbage Slaw. Guest post by Gaby Dalkin of What's Gaby Cooking, recipe submitted by TK member Nam of The Culinary Chronicles

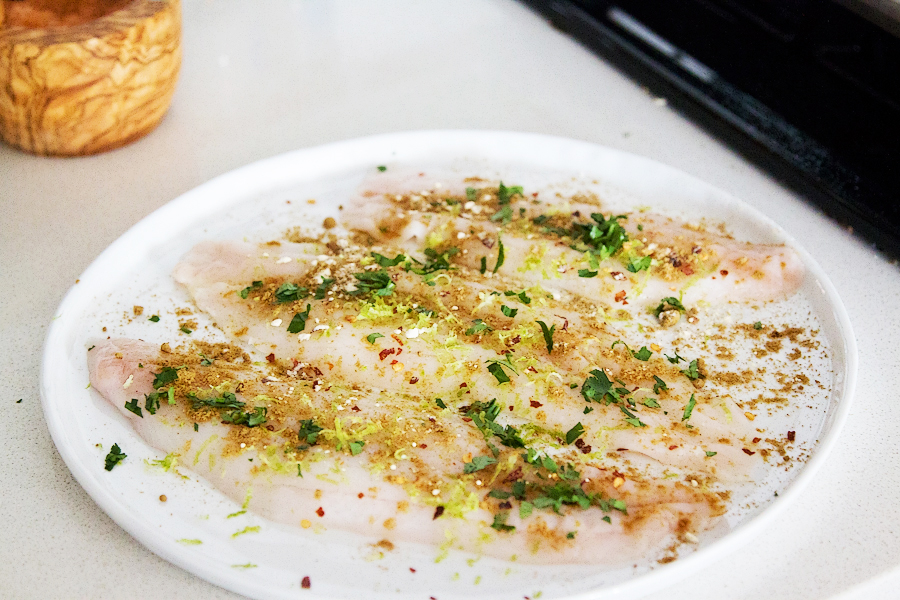
Lastly, let’s add on some chopped cilantro.


Tasty Kitchen Blog: Fish Tacos with Avocado Cabbage Slaw. Guest post by Gaby Dalkin of What's Gaby Cooking, recipe submitted by TK member Nam of The Culinary Chronicles

Throw the fish in the fridge to marinate for a few minutes and then transfer it to a parchment-lined baking sheet and season it with salt and pepper. I used the juice of 1 lime to juice on top of the fish and then drizzled a touch of olive oil on top. Into the oven it goes on broil for a few minutes on each side until the fish can easily be flaked apart.


Tasty Kitchen Blog: Fish Tacos with Avocado Cabbage Slaw. Guest post by Gaby Dalkin of What's Gaby Cooking, recipe submitted by TK member Nam of The Culinary Chronicles

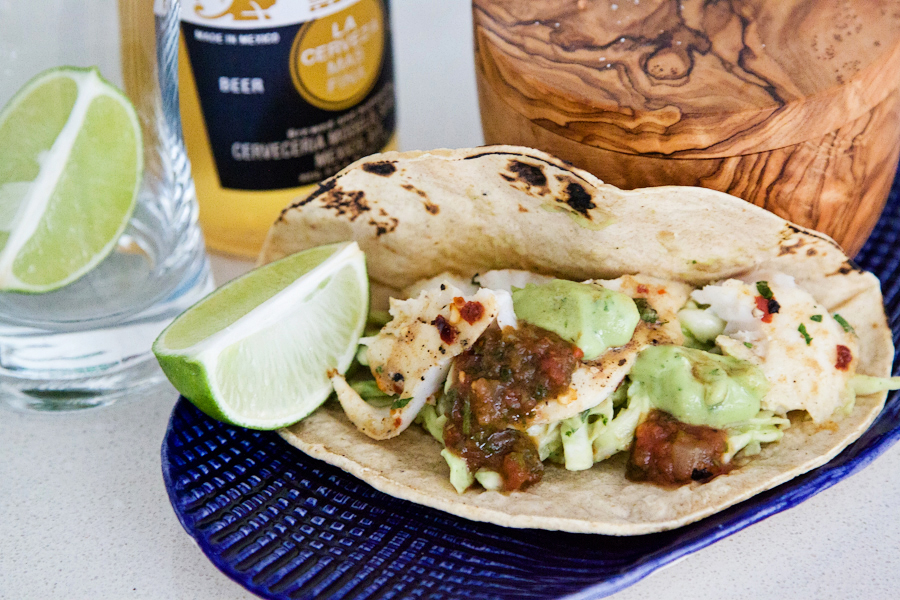
And now you’re in the home stretch. Just assemble the tacos with the cabbage slaw, flaked fish, extra avocado crema and some salsa! Serve it up and enjoy.

A big giant avocado-filled thank you to Nam of the amazing blog The Culinary Chronicles for giving us another amazing recipe featuring avocado! These tacos are a winner and you will totally dig them!


Printable Recipe

Fish Tacos with Avocado-Cabbage Slaw

See post on Nam | The Culinary Chronicles’s site!
5.00 Mitt(s) 1 Rating(s)1 vote, average: 5.00 out of 51 vote, average: 5.00 out of 51 vote, average: 5.00 out of 51 vote, average: 5.00 out of 51 vote, average: 5.00 out of 5

Prep Time:

Cook Time:

Difficulty: Easy

Servings: 2

2
x

Print Options

Page size Letter 3x5 4x6
Text Size Small Medium Large
Content Include description
Include prep time, etc.
Show image

Description

Fish tacos with a creamy avocado-cabbage slaw.

Ingredients

  • ½ pounds Firm White Fish Fillets, Such As Cod Or Tilapia
  • 2 cloves Garlic, Finely Minced
  • 1 teaspoon Lime Zest
  • 2 Tablespoons Chopped Cilantro, Plus More For Garnish
  • ¼ teaspoons Red Pepper Flakes
  • 2 pinches Ground Cumin
  • 2 Tablespoons Vegetable Oil
  • Kosher Salt And Pepper To Taste
  • 4 whole Corn Or Flour Tortillas
  • 1 cup Chunky Salsa
  • Lime Wedges
  • FOR THE SLAW:
  • 1 cup Ripe Avocado, Diced
  • ¼ cups Mexican Crema, Or Sour Cream
  • ¼ cups Fresh Cilantro, Chopped
  • ½ whole Jalapeno Pepper, Finely Diced And Seeded
  • 1 Tablespoon Lime Juice
  • ½ Tablespoons Agave Or Honey
  • Kosher Salt And Pepper To Taste
  • 2 cups Shredded Cabbage

Preparation Instructions

In a shallow dish, coat the fish with garlic, lime zest, cilantro, red pepper flakes, cumin, and oil. Season with kosher salt and pepper. Allow to marinate for 20 minutes in the refrigerator.

For the slaw, in a blender, puree the avocado, crema, cilantro, jalapeno pepper, lime juice and agave until smooth. Season with salt and pepper. In a large bowl, toss the cabbage with a few spoonfuls of the avocado puree until lightly coated. Cover the bowl with plastic wrap and refrigerate.

Preheat the oven broiler and arrange the marinated fish on a baking sheet. Place the baking sheet a few inches away from the broiler, and broil the fish for 2-3 minutes on each side or until the fish becomes opaque and flakes easily with a fork.

Warm the tortillas. Divide the fish, salsa and slaw amongst the tortillas. Sprinkle each taco with the extra chopped cilantro and serve warm with lime wedges on the side.


_______________________________________

Gaby Dalkin is the young lady behind What’s Gaby Cooking, a food blog that’s bursting at the seams with incredible recipes and food photography. She’s a personal chef and professional recipe developer, and if you follow her on Twitter, you’ll soon discover her two-fold obsession: guacamole and cheese. She has small feet, a large heart, and a smile that can light up the whole building. We’re pretty stoked to have her here.


Profile photo of Faith (An Edible Mosaic)

Vietnamese Summer Roll Salad

Posted by in Step-by-Step Recipes

Tasty Kitchen Blog: Vietnamese Summer Roll Salad. Guest post by Faith Gorsky of An Edible Mosaic, recipe submitted by TK member Vicky of Avocado Pesto.

 
Even though I’m a winter-loving girl, I’m secretly longing for summer’s arrival. Which is pretty much blasphemy around these parts; I’m in snow-country, just about as north as a girl can go. Although spring has just arrived, I’m ready to welcome summer. In fact, I’ll take summer in any form I can get.

Even roll form.

Summer rolls have always been a favorite of mine: Fresh, bright-flavored veggies, perfectly cooked shrimp, and chewy noodles, all wrapped up in a pretty little rice paper package. Add a great dipping sauce and what more could anyone want, right? (Because sauces not only make food more flavorful, but they also make eating more fun…that’s what my niece says and I’m inclined to agree!) When I first saw Vicky’s recipe for Vietnamese Summer Roll Salad, I couldn’t wait to make it.

Summer rolls are great, but this salad is fantastic. Why not turn a starter into a complete meal?

Start by getting out all your ingredients.


Tasty Kitchen Blog: Vietnamese Summer Roll Salad. Guest post by Faith Gorsky of An Edible Mosaic, recipe submitted by TK member Vicky of Avocado Pesto.

You’ll need bean thread noodles, honey, coconut oil, rice vinegar, fish sauce, fresh herbs (basil, mint, and cilantro), shrimp, cucumber, shallot, carrot, lime, ginger, bean sprouts, peanuts, and red chilies. For the life of me, I couldn’t find red chilies and I didn’t have time to make the 30-minute drive to the closest Asian grocery in my area (strangely enough, I don’t live in the middle of nowhere—we just need better grocery stores nearby!), so I used crushed red pepper flakes.


Tasty Kitchen Blog: Vietnamese Summer Roll Salad. Guest post by Faith Gorsky of An Edible Mosaic, recipe submitted by TK member Vicky of Avocado Pesto.

Because they’re so purty, here’s a close-up of the bean thread noodles. You might also find them called cellophane noodles or glass noodles. I found these in the international aisle of my regular grocery store.

Now for a little prep work.


Tasty Kitchen Blog: Vietnamese Summer Roll Salad. Guest post by Faith Gorsky of An Edible Mosaic, recipe submitted by TK member Vicky of Avocado Pesto.

Thinly slice the shallots.


Tasty Kitchen Blog: Vietnamese Summer Roll Salad. Guest post by Faith Gorsky of An Edible Mosaic, recipe submitted by TK member Vicky of Avocado Pesto.

Julienne the carrots by trimming off the ends and cutting them each into 2 to 3-inch pieces; cut each piece lengthwise into planks, then cut each plank lengthwise again into thin sticks. It sounds complicated but it’s not, and once you get into it, it goes pretty fast. (If you want, you can peel your carrot before you start cutting it; I always give my carrots a good scrub but leave the peel on.)


Tasty Kitchen Blog: Vietnamese Summer Roll Salad. Guest post by Faith Gorsky of An Edible Mosaic, recipe submitted by TK member Vicky of Avocado Pesto.

Julienne the cucumber the same way.


Tasty Kitchen Blog: Vietnamese Summer Roll Salad. Guest post by Faith Gorsky of An Edible Mosaic, recipe submitted by TK member Vicky of Avocado Pesto.

Grate the ginger. I like to use a microplane for this, and I keep my ginger in the freezer so it grates up easily.


Tasty Kitchen Blog: Vietnamese Summer Roll Salad. Guest post by Faith Gorsky of An Edible Mosaic, recipe submitted by TK member Vicky of Avocado Pesto.

Smash the peanuts. You can keep chop them by hand until they’re as finely chopped as you like, or use a food processor (but be careful you don’t end up with peanut flour or nut butter if you use your processor). If you’re like me and cleaning your food processor is the bane of your existence, know that this is really easy to do by hand. And heads up, I chopped up extra peanuts (around 3 tablespoons) to serve alongside the salad so people could add more on top if they wanted.


Tasty Kitchen Blog: Vietnamese Summer Roll Salad. Guest post by Faith Gorsky of An Edible Mosaic, recipe submitted by TK member Vicky of Avocado Pesto.

Whisk up the dressing: fish sauce, rice vinegar, ginger, red chilies (I used about 2 teaspoons crushed red pepper flakes instead; you can use more or less to taste), and honey. There was quite a bit of extra dressing pooled in the bottom so next time I’ll make a little less; I’m planning to decrease both the rice vinegar and fish sauce to 1/2 cup, and also add 2 tablespoons of soy sauce for even more depth of flavor.


Tasty Kitchen Blog: Vietnamese Summer Roll Salad. Guest post by Faith Gorsky of An Edible Mosaic, recipe submitted by TK member Vicky of Avocado Pesto.

Cook the noodles following what it says to on the package directions—but be careful not to overcook them! I soaked my noodles in warm water for about 10 to 15 minutes, then drained them in a colander and rinsed them under cold running water.


Tasty Kitchen Blog: Vietnamese Summer Roll Salad. Guest post by Faith Gorsky of An Edible Mosaic, recipe submitted by TK member Vicky of Avocado Pesto.

Add the coconut oil to a medium pan over medium-high heat. Once melted, add the shallot and cook until it starts to brown in spots. Use a slotted spoon to transfer the browned shallot to a paper towel-lined plate. (Thank you, Vicky, for reminding us of that trick! I don’t always remember to do that, but shhhh, don’t tell.)


Tasty Kitchen Blog: Vietnamese Summer Roll Salad. Guest post by Faith Gorsky of An Edible Mosaic, recipe submitted by TK member Vicky of Avocado Pesto.

Add the shrimp to the pan and cook until it turns completely pink, about 3 to 4 minutes.

The recipe calls for 1/2 pound of shrimp, but if you’re getting it without the shell/vein/tail removed I recommend getting about 2/3 to 3/4 of a pound to account for the lost weight when you clean your shrimp. Heck, I love shrimp so much in here I think next time I’ll increase it to a full 1 pound either way.


Tasty Kitchen Blog: Vietnamese Summer Roll Salad. Guest post by Faith Gorsky of An Edible Mosaic, recipe submitted by TK member Vicky of Avocado Pesto.

Now for the fun part: Add everything to a large bowl (be sure you don’t forget the fresh herbs—I almost did!) and give it all a good toss. This makes a lot of salad. That’s a 4-quart bowl in the photo!


Tasty Kitchen Blog: Vietnamese Summer Roll Salad. Guest post by Faith Gorsky of An Edible Mosaic, recipe submitted by TK member Vicky of Avocado Pesto.

Put the salad into pretty individual bowls to serve it up. Don’t forget the fresh lime wedges to squeeze on top, and remember, I chopped up extra peanuts to serve alongside so people can add more as they want. Gorgeous, isn’t it?

Thank you to Vicky for sharing a fantastic recipe with us! Be sure to check out Vicky’s beautiful blog Avocado Pesto for what she calls a “smorgasbord of ethnic cuisines” (I love that description!). Also, a big thank you to Running with Tweezers for the original inspiration for this recipe!


Printable Recipe

Vietnamese Summer Roll Salad

See post on Vicky @AvocadoPesto’s site!
3.00 Mitt(s) 3 Rating(s)3 votes, average: 3.00 out of 53 votes, average: 3.00 out of 53 votes, average: 3.00 out of 53 votes, average: 3.00 out of 53 votes, average: 3.00 out of 5

Prep Time:

Cook Time:

Difficulty: Easy

Servings: 6

6
x

Print Options

Page size Letter 3x5 4x6
Text Size Small Medium Large
Content Include description
Include prep time, etc.
Show image

Description

A deconstructed summer roll salad. Less time consuming than making the rolls but full of all the same flavors.

Ingredients

  • 8 ounces, weight Bean Thread Noodles
  • 1 Tablespoon Coconut Oil
  • 2 whole Shallots, Thinly Sliced
  • ½ pounds Shrimp, Shells, Veins And Tails Removed
  • ¾ cups Fish Sauce
  • ¾ cups Rice Vinegar
  • 2 Tablespoons Ginger, grated
  • 2 whole Small Red Chilies, Diced
  • 2 Tablespoons Honey
  • 1 whole Medium Cucumber, Julienned
  • 2 whole Carrots, Peeled And Julienned
  • 1 cup Bean Sprouts
  • ⅓ cups Fresh Basil, Chopped
  • ⅓ cups Fresh Cilantro, Chopped
  • ⅓ cups Fresh Mint, Chopped
  • ⅓ cups Roasted Peanuts, Smashed
  • 3 whole Lime Wedges

Preparation Instructions

1. Bring a pot of water to a boil and add noodles. Cook 3-5 minutes making sure not to overcook (refer to the package instructions for the specific timing for your noodles). Put the noodles into a colander to drain and rinse with cold water to stop the cooking process.

2. In a pan heat coconut oil over medium-high heat and add shallots. Cook until shallots are starting to get golden brown. Remove them from the pan and drain on a paper towel. Add shrimp to the pan and cook until cooked through, roughly 3-4 minutes. Then remove the shrimp from the pan.

3. To make the dressing: In a small bowl whisk together the fish sauce, rice vinegar, ginger, red chili pepper and honey.

4. To assemble the salad: In a large bowl add cucumber, carrot, bean sprouts and noodles, toss to combine. Add all of the herbs, shallots and peanuts, and top with shrimp. Squeeze lime wedges over the salad. Pour the dressing over the salad when ready to eat, otherwise noodles will get soggy. Serve with additional lime wedges.

Recipe adapted from Running With Tweezers.


_______________________________________

Faith Gorsky is the writer, recipe developer, photographer, and food stylist behind the blog An Edible Mosaic. She lives in Upstate New York and loves to travel, especially to places steeped in rich culture and history. She also enjoys reading, vintage shopping, watching movies, and is enamored with ancient cultures. She just released her first cookbook, “An Edible Mosaic: Middle Eastern Fare with Extraordinary Flair” (Tuttle Publishing), a collection of authentic Middle Eastern recipes handed down to her from her husband’s family.


Profile photo of missamy

Dark Chocolate Banana Bread (with Coconut)

Posted by in Baking, Step-by-Step Recipes

Tasty Kitchen Blog: Dark Chocolate Banana Bread (with Coconut). Guest post by Amy Johnson of She Wears Many Hats, recipe submitted by TK members Chrissy and Lauren of Little Yellow Kitchen.

 
Combinations of chocolate and coconut hardly go unnoticed around here, so when I saw this recipe for Dark Chocolate Banana Bread (with Coconut) from Tasty Kitchen members Chrissy and Lauren, I just had to try it. I had to. The line between “need” and “want” gets kind of blurred when chocolate is involved. And dark chocolate in moderation can be a healthy thing, don’t cha know?


Tasty Kitchen Blog: Dark Chocolate Banana Bread (with Coconut). Guest post by Amy Johnson of She Wears Many Hats, recipe submitted by TK members Chrissy and Lauren of Little Yellow Kitchen.

Overall this bread may look sinful, but considering the list of ingredients, it’s on the healthier side: dark chocolate, flour, cocoa powder, baking powder, baking soda, salt, cinnamon, eggs, brown sugar, Greek yogurt, coconut oil, overripe bananas, shredded coconut, and a little turbinado sugar.

(Just so you know, I made a couple of substitutions using what I had on hand: all-purpose white flour instead of whole wheat, and sweetened shredded coconut for the unsweetened coconut.)

Begin by preheating your oven to 350°F and preparing a 9x5x3″ (or thereabouts) baking pan.


Tasty Kitchen Blog: Dark Chocolate Banana Bread (with Coconut). Guest post by Amy Johnson of She Wears Many Hats, recipe submitted by TK members Chrissy and Lauren of Little Yellow Kitchen.

Chop the dark chocolate. Don’t eat any! The cake needs it.


Tasty Kitchen Blog: Dark Chocolate Banana Bread (with Coconut). Guest post by Amy Johnson of She Wears Many Hats, recipe submitted by TK members Chrissy and Lauren of Little Yellow Kitchen.

In a double boiler or in the microwave, melt the dark chocolate and set aside.


Tasty Kitchen Blog: Dark Chocolate Banana Bread (with Coconut). Guest post by Amy Johnson of She Wears Many Hats, recipe submitted by TK members Chrissy and Lauren of Little Yellow Kitchen.

Sift together the flour, cocoa powder, baking powder, baking soda, salt and cinnamon. Set aside. (Shhh … don’t tell anyone, but I just whisked mine altogether. My sifter is wonky and leaks all over the place. Whisking worked just lovely for me.)


Tasty Kitchen Blog: Dark Chocolate Banana Bread (with Coconut). Guest post by Amy Johnson of She Wears Many Hats, recipe submitted by TK members Chrissy and Lauren of Little Yellow Kitchen.

Add the eggs and brown sugar to a large mixing bowl, and beat them together on medium speed.


Tasty Kitchen Blog: Dark Chocolate Banana Bread (with Coconut). Guest post by Amy Johnson of She Wears Many Hats, recipe submitted by TK members Chrissy and Lauren of Little Yellow Kitchen.

Look, an action shot! Beat for about 30 seconds.


Tasty Kitchen Blog: Dark Chocolate Banana Bread (with Coconut). Guest post by Amy Johnson of She Wears Many Hats, recipe submitted by TK members Chrissy and Lauren of Little Yellow Kitchen.

The Greek yogurt, coconut oil, and mashed bananas go in next for a little mixing.


Tasty Kitchen Blog: Dark Chocolate Banana Bread (with Coconut). Guest post by Amy Johnson of She Wears Many Hats, recipe submitted by TK members Chrissy and Lauren of Little Yellow Kitchen.

More action! Mix until well combined.


Tasty Kitchen Blog: Dark Chocolate Banana Bread (with Coconut). Guest post by Amy Johnson of She Wears Many Hats, recipe submitted by TK members Chrissy and Lauren of Little Yellow Kitchen.

On a low setting, gradually add in the flour mixture.


Tasty Kitchen Blog: Dark Chocolate Banana Bread (with Coconut). Guest post by Amy Johnson of She Wears Many Hats, recipe submitted by TK members Chrissy and Lauren of Little Yellow Kitchen.

Mix until just incorporated. Nice.


Tasty Kitchen Blog: Dark Chocolate Banana Bread (with Coconut). Guest post by Amy Johnson of She Wears Many Hats, recipe submitted by TK members Chrissy and Lauren of Little Yellow Kitchen.

Fold in the shredded coconut.

(Again, I used sweetened shredded coconut instead of the unsweetened called for in the recipe. I liked it with the added sweetness and didn’t feel it was overly sweet.)


Tasty Kitchen Blog: Dark Chocolate Banana Bread (with Coconut). Guest post by Amy Johnson of She Wears Many Hats, recipe submitted by TK members Chrissy and Lauren of Little Yellow Kitchen.

Evenly spread the batter in the prepared baking pan.


Tasty Kitchen Blog: Dark Chocolate Banana Bread (with Coconut). Guest post by Amy Johnson of She Wears Many Hats, recipe submitted by TK members Chrissy and Lauren of Little Yellow Kitchen.

Now for the healthy melted dark chocolate. Pour the melted chocolate over the batter.


Tasty Kitchen Blog: Dark Chocolate Banana Bread (with Coconut). Guest post by Amy Johnson of She Wears Many Hats, recipe submitted by TK members Chrissy and Lauren of Little Yellow Kitchen.

To swirl in the melted chocolate, drag a knife back and forth several times through the batter. Can you say “yum?”


Tasty Kitchen Blog: Dark Chocolate Banana Bread (with Coconut). Guest post by Amy Johnson of She Wears Many Hats, recipe submitted by TK members Chrissy and Lauren of Little Yellow Kitchen.

Sprinkle the top with more shredded coconut and the turbinado sugar.


Tasty Kitchen Blog: Dark Chocolate Banana Bread (with Coconut). Guest post by Amy Johnson of She Wears Many Hats, recipe submitted by TK members Chrissy and Lauren of Little Yellow Kitchen.

Bake until done (see recipe below for bake times). Notice the toasted coconut? Toasted coconut is one of the most delectable things ever. I could eat it as a snack. It’s lovely on this bread, but be careful to avoid burning the coconut while baking. If needed, loosely cover the top with foil the slow the toasting.


Tasty Kitchen Blog: Dark Chocolate Banana Bread (with Coconut). Guest post by Amy Johnson of She Wears Many Hats, recipe submitted by TK members Chrissy and Lauren of Little Yellow Kitchen.

This bread turned out wonderfully. It was so gorgeous I hated to cut it. But I did anyway.

I’ll be making this one again soon. Maybe in muffin form next time.

Thank you so much to the Chrissy and Lauren for sharing this new favorite with me and my family. Check out other wonderfulness over at their site: From the Little Yellow Kitchen.


Printable Recipe

Dark Chocolate Banana Bread (with Coconut)

See post on LittleYellowKitchen’s site!
5.00 Mitt(s) 2 Rating(s)2 votes, average: 5.00 out of 52 votes, average: 5.00 out of 52 votes, average: 5.00 out of 52 votes, average: 5.00 out of 52 votes, average: 5.00 out of 5

Prep Time:

Cook Time:

Difficulty: Easy

Servings: 12

12
x

Print Options

Page size Letter 3x5 4x6
Text Size Small Medium Large
Content Include description
Include prep time, etc.
Show image

Description

The best version of banana bread out there! The dark chocolate swirls and yummy coconut flavor make for the perfect complements to a classic.

Ingredients

  • 3 ounces, weight Dark Chocolate
  • 1-¾ cup White Whole Wheat Flour
  • ½ cups Cocoa Powder, Unsweetened
  • 1 teaspoon Baking Powder
  • ¾ teaspoons Baking Soda
  • ¼ teaspoons Salt
  • ½ teaspoons Cinnamon
  • 2 whole Large Eggs
  • ½ cups Packed Brown Sugar
  • ⅓ cups Greek Yogurt
  • ⅓ cups Coconut Oil, Melted/liquid
  • 3 whole Medium Overripe Bananas, Peeled And Mashed (3 Should Yield About 1 1/2 Cups)
  • ¾ cups Shredded Coconut, Unsweetened, Plus 3 Tablespoons More For The Top
  • 1 Tablespoon Turbinado Sugar, For The Top

Preparation Instructions

Preheat oven to 350 F. Lightly grease a 9x5x3 pan.

Finely chop the chocolate and melt it in the top of a double-boiler or in the microwave in 30 second increments, stirring in between each increment and continuing until melted. Set the melted chocolate aside.

In a medium bowl, sift the flour, cocoa powder, baking powder, baking soda, salt, and cinnamon; set aside.

In the bowl of your stand mixer, beat the eggs and sugar on medium speed for about 30 seconds. Add the yogurt, coconut oil and mashed bananas and mix until well combined. While mixing on low, slowly add the flour mixture until it’s just incorporated. Fold in the coconut.

Pour the batter into the greased pan and spread evenly. Pour the melted dark chocolate over the top, dragging a knife back and forth several times, until the chocolate is swirled throughout the entire loaf. Sprinkle the top with some shredded coconut and turbinado sugar.

Bake for about 50-60 minutes or until a toothpick inserted into the center of the loaf comes out clean. If the coconut on top looks like it is browning quickly, loosely place a piece a foil over the top to slow the toasting.

Remove pan from oven when done, and set it on a cooling rack. Let bread cool for 10 minutes in the pan. Then carefully remove it from pan and transfer to a wire rack to finish cooling before cutting into the loaf.


_______________________________________

Amy Johnson is a blogger who writes about food, travel, the home (both inside and out), and various observations and random musings about anything and everything. Visit her blog She Wears Many Hats for a dose of deliciousness, practicality, hilarity, or just plain fun. She lives in South Carolina with her husband and two children.


Profile photo of Faith (An Edible Mosaic)

Espresso Mini Muffins with Chocolate Ganache

Posted by in Baking, Step-by-Step Recipes

Tasty Kitchen Blog: Espresso Mini Muffins with Chocolate Ganache. Guest post by Faith Gorsky of An Edible Mosaic, recipe submitted by TK member Michelle of The Lucky Penny Blog.

 
Some days a girl just needs a little something chocolaty. And most days a girl needs coffee. Put the two together into one sweet treat like this and now you’re really talking. The fact that this treat is pretty healthy just sweetens the deal (pun intended).

When I saw Tasty Kitchen member Michelle’s recipe for Espresso Mini Muffins with Chocolate Ganache, I was intrigued. And if I’m being honest, by intrigued I mean practically drooling and dying to make them first chance I got, which, incidentally, happened to be for breakfast. I don’t feel guilty though; these are legitimate muffins, not cupcakes masquerading as muffins (they are grain-free and refined-sugar-free, to name a couple of their perks!). The biggest perk of all is that I get to eat chocolate for breakfast and not feel bad about it.

But if you decide to make them for dessert I won’t tell—they’re good like that too. Ok, and while I’m at it, they’d make a happy snacker out of just about anyone.

To get started, get out your ingredients.


Tasty Kitchen Blog: Espresso Mini Muffins with Chocolate Ganache. Guest post by Faith Gorsky of An Edible Mosaic, recipe submitted by TK member Michelle of The Lucky Penny Blog.

You’ll need: coconut milk, baking soda, dark chocolate, an egg, vanilla extract, coconut oil, maple syrup, espresso powder, almond meal, nutmeg, and salt.

You are just 11 ingredients away from chocolate-coffee bliss.


Tasty Kitchen Blog: Espresso Mini Muffins with Chocolate Ganache. Guest post by Faith Gorsky of An Edible Mosaic, recipe submitted by TK member Michelle of The Lucky Penny Blog.

Generously grease a muffin tray with coconut oil. Love the paper towel method, but a pastry brush works well too. And if I’m feeling really crazy, sometimes I’ll just use my fingers. Whatever works, right?


Tasty Kitchen Blog: Espresso Mini Muffins with Chocolate Ganache. Guest post by Faith Gorsky of An Edible Mosaic, recipe submitted by TK member Michelle of The Lucky Penny Blog.

Depending on the temperature of your kitchen, your coconut oil might already be softened. Mine wasn’t, so I softened it briefly in the microwave, trying not to melt it fully (literally just a couple seconds and then a good stir).

Part of what I love about this recipe (in addition to the fact that it’s incredibly delicious) is the fact that it whips up in just a couple minutes right in the food processor.


Tasty Kitchen Blog: Espresso Mini Muffins with Chocolate Ganache. Guest post by Faith Gorsky of An Edible Mosaic, recipe submitted by TK member Michelle of The Lucky Penny Blog.

First pulse together the dry ingredients to combine: almond meal, espresso powder, baking soda, nutmeg, and salt. Don’t over-process it; the mixture should look like wet sand. Next add the egg, coconut oil, maple syrup, and vanilla and process until smooth.


Tasty Kitchen Blog: Espresso Mini Muffins with Chocolate Ganache. Guest post by Faith Gorsky of An Edible Mosaic, recipe submitted by TK member Michelle of The Lucky Penny Blog.

Spoon the batter into the prepared muffin tray. It’ll be thick, almost like brownie batter. You should get around 12 mini muffins; I think I actually could have gotten a couple more. But I might have licked the bowl.

Cook ‘em up! Be careful not to overcook them so they don’t dry out. Mine took ever-so-slightly longer than the recommended time, about 9 to 10 minutes instead of 8 to 9. Use the toothpick test to see if they’re done!


Tasty Kitchen Blog: Espresso Mini Muffins with Chocolate Ganache. Guest post by Faith Gorsky of An Edible Mosaic, recipe submitted by TK member Michelle of The Lucky Penny Blog.

They should come right out of the tray, but if they don’t, let them cool a couple minutes in the tray and then transfer them to a wire rack to finish cooling.

Now it’s time to whip up a quick little ganache. It’s just 2 ingredients.


Tasty Kitchen Blog: Espresso Mini Muffins with Chocolate Ganache. Guest post by Faith Gorsky of An Edible Mosaic, recipe submitted by TK member Michelle of The Lucky Penny Blog.

Dark chocolate and coconut milk! I used 62% cacao, but by all means go darker if you like. I’m a big fan of the 70% too.

You can either melt it in the microwave or on a double boiler.


Tasty Kitchen Blog: Espresso Mini Muffins with Chocolate Ganache. Guest post by Faith Gorsky of An Edible Mosaic, recipe submitted by TK member Michelle of The Lucky Penny Blog.

And here it is melted together.

The recipe didn’t say what kind of coconut milk to use, so I used full-fat canned coconut milk because that’s what I keep in my pantry. My ganache was super thick and looked quite a bit different from Michelle’s ganache, so she might have used light coconut milk or even the coconut milk from the carton. I’m not sure, but either way, it was delicious this way—and hers looks delicious too!


Tasty Kitchen Blog: Espresso Mini Muffins with Chocolate Ganache. Guest post by Faith Gorsky of An Edible Mosaic, recipe submitted by TK member Michelle of The Lucky Penny Blog.

Spoon the ganache on top of the muffins. I had enough for a thick layer on each.

And that’s it! You can dive into them now (recommended drink: an espresso, of course), or enjoy them later. I like to refrigerate them if I’m saving them for later because the ganache sets nicely into a truffle-like consistency. And the muffins themselves are incredible—they’re not too heavy and they have a nice moist crumb, almost like a brownie but not as dense. Are you convinced yet?


Tasty Kitchen Blog: Espresso Mini Muffins with Chocolate Ganache. Guest post by Faith Gorsky of An Edible Mosaic, recipe submitted by TK member Michelle of The Lucky Penny Blog.

Thanks to Michelle for a fantastic recipe! Be sure to check out The Lucky Penny Blog for more of her delicious creations.


Printable Recipe

Espresso Mini Muffins with Chocolate Ganache

See post on The Lucky Penny Blog’s site!
4.00 Mitt(s) 2 Rating(s)2 votes, average: 4.00 out of 52 votes, average: 4.00 out of 52 votes, average: 4.00 out of 52 votes, average: 4.00 out of 52 votes, average: 4.00 out of 5

Prep Time:

Cook Time:

Difficulty: Easy

Servings: 12

12
x

Print Options

Page size Letter 3x5 4x6
Text Size Small Medium Large
Content Include description
Include prep time, etc.
Show image

Description

Delicious gluten and grain-free espresso mini muffins topped with chocolate ganache.

Ingredients

  • FOR THE MUFFINS:
  • ¾ cups Almond Meal Or Almond Flour
  • 1 Tablespoon Ground Espresso Beans
  • ¼ teaspoons Baking Soda
  • ¼ teaspoons Ground Nutmeg
  • 1 pinch Salt
  • 1 whole Egg
  • 2 Tablespoons Coconut Oil
  • 2 Tablespoons Maple Syrup
  • ½ teaspoons Vanilla
  • FOR THE GANACHE:
  • 2 ounces, fluid Dark Chocolate
  • 2 Tablespoons Coconut Milk

Preparation Instructions

Preheat oven to 350ºF. Grease a mini muffin tin well with coconut oil or greasing method of your choice.

In a food processor, combine all the dry ingredients for the muffins: almond meal, ground espresso beans, baking soda, nutmeg, and salt. Pulse to combine.

Add in the wet ingredients for the muffins: egg, coconut oil, maple syrup, and vanilla. Mix on high until everything is nice and smooth.

Fill greased muffin tins 3/4 of the way full. You should have just enough to make 12, if you really scrape the bowl clean.

Bake for 8-9 minutes until a toothpick comes out clean. Do not over bake!

Allow muffins to cool.

Make the ganache. In a microwave safe bowl, combine the coconut milk and chocolate, microwave for 30 seconds, stir, microwave for 15 more seconds if it is not melted. Be careful not to burn it.

Top muffins with desired amount of ganache. Enjoy!


_______________________________________

Faith Gorsky is the writer, recipe developer, photographer, and food stylist behind the blog An Edible Mosaic. She lives in Upstate New York and loves to travel, especially to places steeped in rich culture and history. She also enjoys reading, vintage shopping, watching movies, and is enamored with ancient cultures. She just released her first cookbook, “An Edible Mosaic: Middle Eastern Fare with Extraordinary Flair” (Tuttle Publishing), a collection of authentic Middle Eastern recipes handed down to her from her husband’s family.


Profile photo of twopeasandtheirpod

Flourless Peanut Butter Oatmeal Chocolate Chip Cookies

Posted by in Baking, Step-by-Step Recipes

  I get asked all of the time what my favorite cookie is. I can never give a completely honest answer because I have more than one favorite. It just depends on my mood. I love all kinds of cookies—chocolate chip, snickerdoodles, peanut butter, oatmeal, lemon, chocolate, coconut … and the list goes on. There are […]

Profile photo of ThreeManyCooks

Chocolate Hazelnut Milk

Posted by in Step-by-Step Recipes

  At the risk of sounding like Mugatu in the film Zoolander: nut milks are “so hot right now.” I’m seeing them everywhere. I think they’ve hit the mainstream, not only because they are non-dairy and vegan (and in most cases raw), but also because they are delicious. Nut milks have a wonderful depth of […]

Profile photo of Faith (An Edible Mosaic)

Lamb Meatballs in a Spicy Curry

Posted by in Step-by-Step Recipes

  Lamb lovers, you will love me for this one. Ok, actually, you will love Tasty Kitchen members (and sisters!) Vanessa and Ingrid for this one. Their recipe for Lamb Meatballs in a Spicy Curry might seem like an ordinary meatball recipe, but the secret is in the sauce. Truthfully, these are no ordinary meatballs. […]

Profile photo of Laurie - Simply Scratch

Brown Butter Chocolate Chip Blondies

Posted by in Baking, Step-by-Step Recipes

   So what if I told you this was my first go at blondies? It’s true! Not a day in my thirty-something years on earth have I ever had a blondie until the other day. Truly it was only a matter of time, and when my eyes locked on Sharon’s recipe for Brown Butter Chocolate […]