The Pioneer Woman Tasty Kitchen
Profile photo of missamy

Baked Sweet Potato Fries

Posted by in Step-by-Step Recipes

Tasty Kitchen Blog: Baked Sweet Potato Fries. Guest post by Amy Johnson of She Wears Many Hats, recipe submitted by TK member Caitlin (maude10).

 
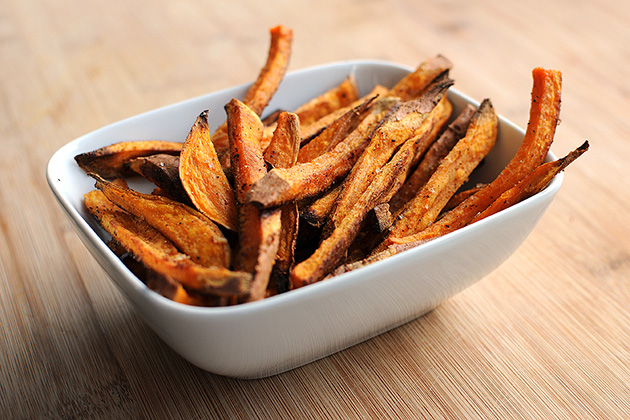
Healthy snack options mean, well, it means options. And options are good, especially when we’re heading into the holiday season, packed with all flavors of goodies at every turn. Yes, having healthy and tasty options in your repertoire is always a good thing. This recipe for Baked Sweet Potato Fries submitted by Tasty Kitchen member Caitlin is one of those options. Sweet potatoes are packed with carotenoids, vitamin C, potassium, and fiber, and baking the fries, as this recipe calls for, keeps the fat down. Good for snacking, or as a side dish, these Baked Sweet Potato Fries are satisfying to the max. Simple too. Let me show ya.

For starters, I’d recommend doubling or tripling this recipe right off the bat. They’re good and will get gobbled up quick.


Tasty Kitchen Blog: Baked Sweet Potato Fries. Guest post by Amy Johnson of She Wears Many Hats, recipe submitted by TK member Caitlin (maude10).

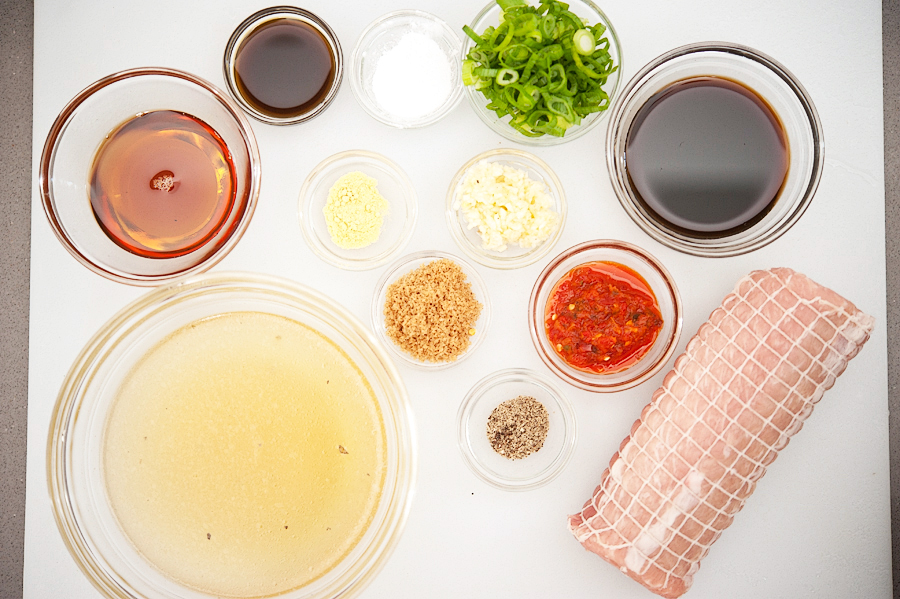
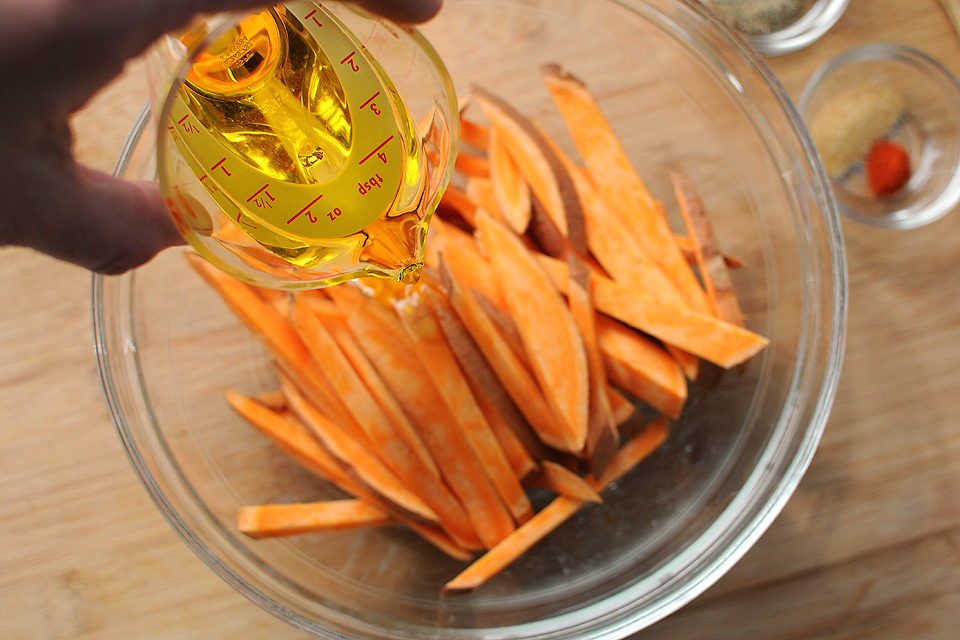
You’ll need: sweet potato(es), olive oil, salt, pepper, garlic powder, and cayenne pepper.

(The spices/herbs can easily be changed for different flavor combos, so be creative with these. Maybe rosemary, salt, and olive oil? A simple trio, but mighty tasty too.)


Tasty Kitchen Blog: Baked Sweet Potato Fries. Guest post by Amy Johnson of She Wears Many Hats, recipe submitted by TK member Caitlin (maude10).

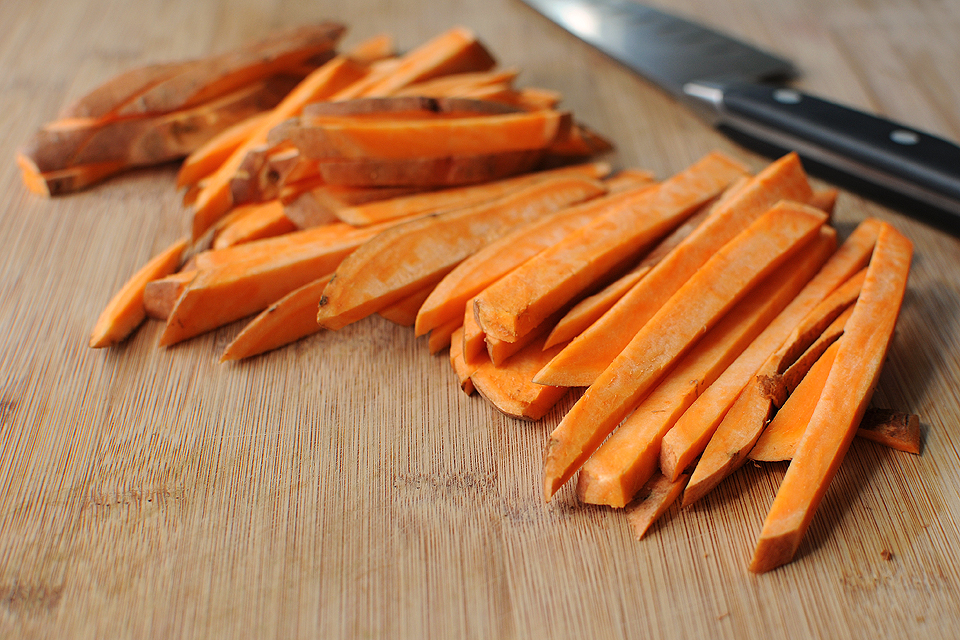
Slice the sweet potato into strips, about 1/2″ thick. The thinner they are, the crispier they’ll be. They’ll cook quicker too, so make sure you account for that in the cook time.


Tasty Kitchen Blog: Baked Sweet Potato Fries. Guest post by Amy Johnson of She Wears Many Hats, recipe submitted by TK member Caitlin (maude10).

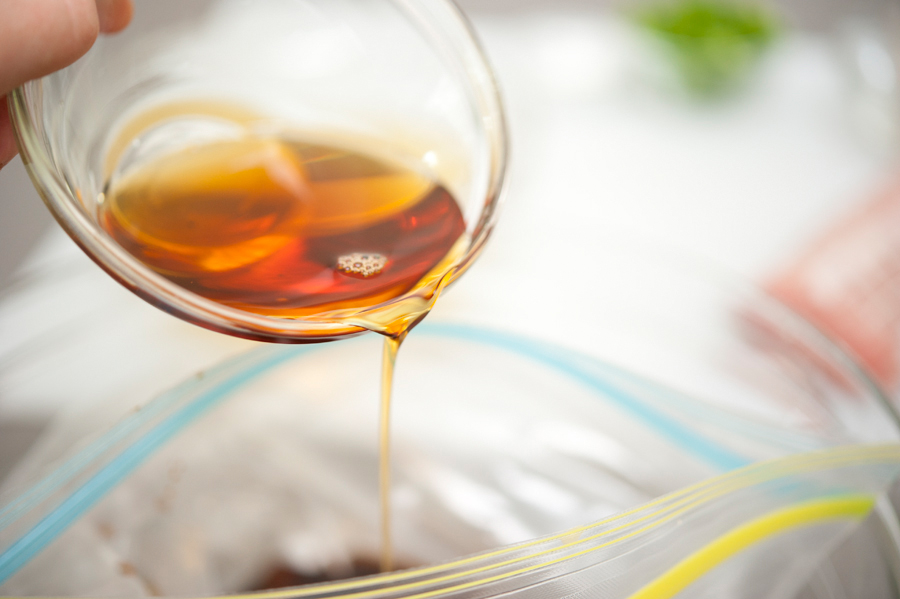
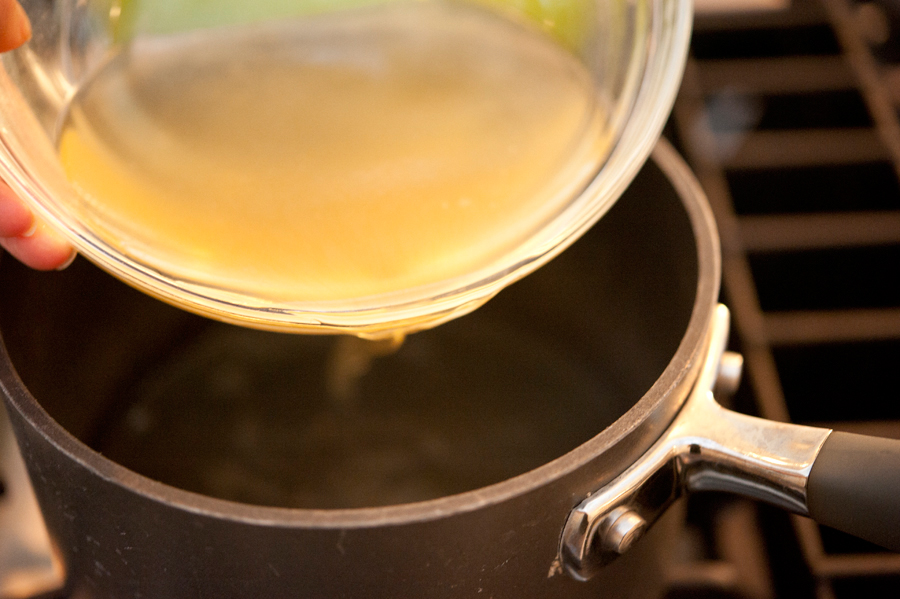
Place the fries in a bowl and add the olive oil.


Tasty Kitchen Blog: Baked Sweet Potato Fries. Guest post by Amy Johnson of She Wears Many Hats, recipe submitted by TK member Caitlin (maude10).

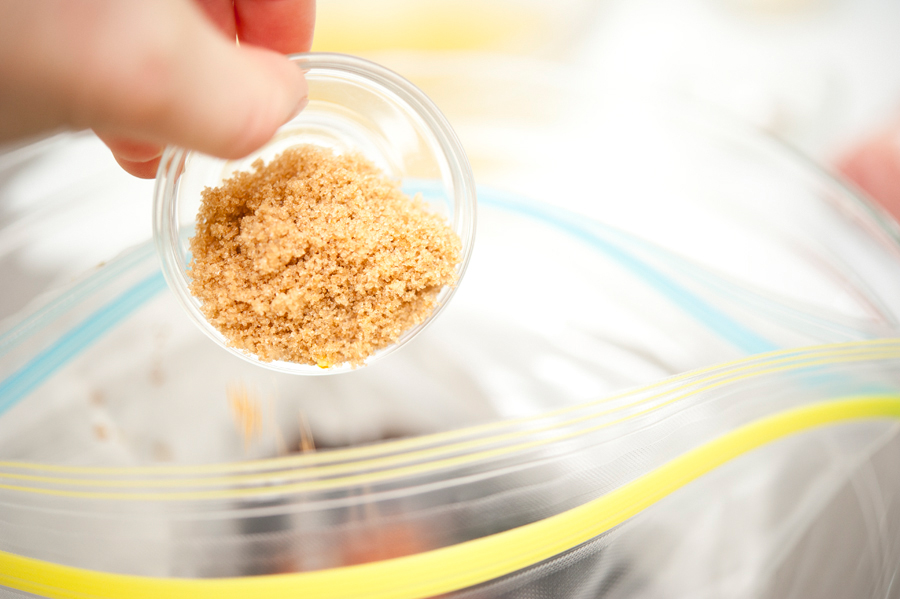
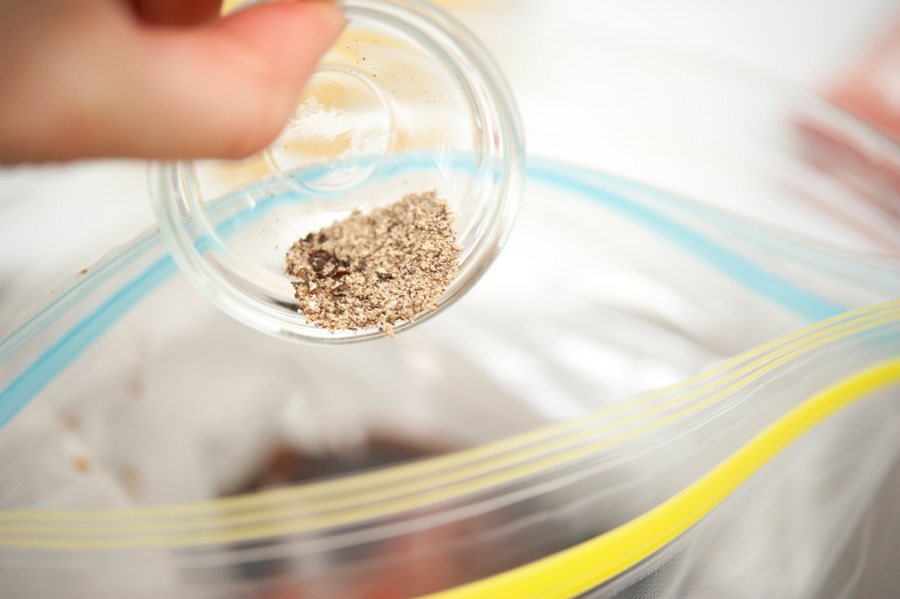
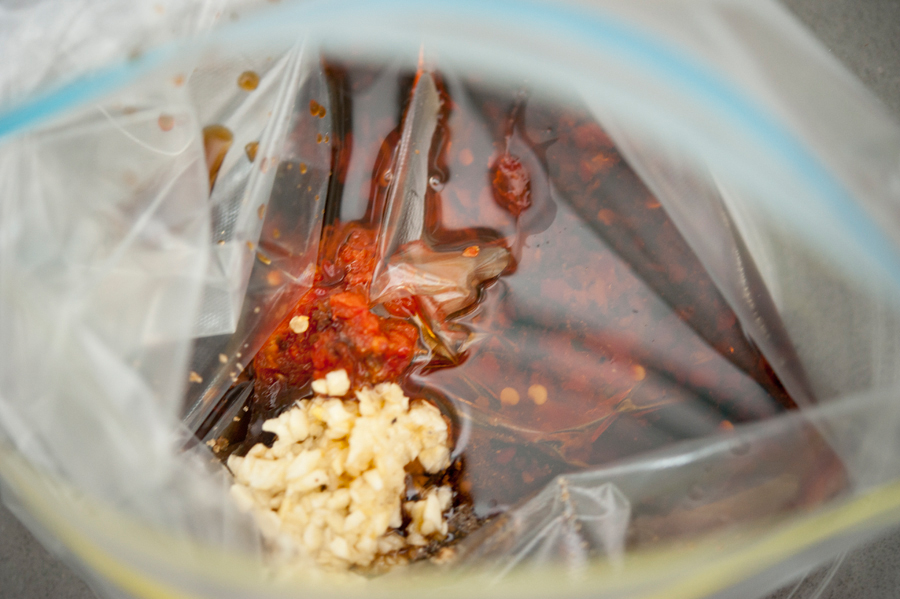
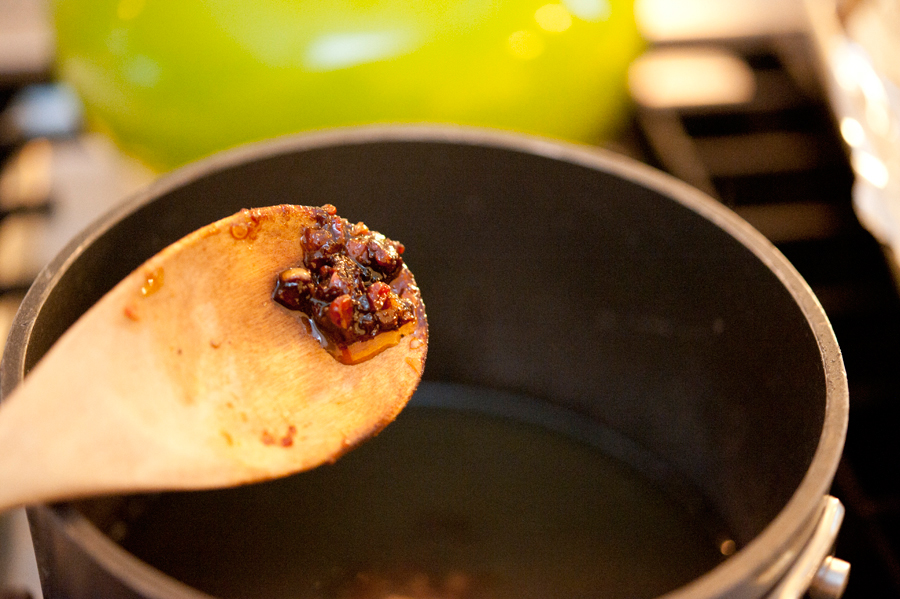
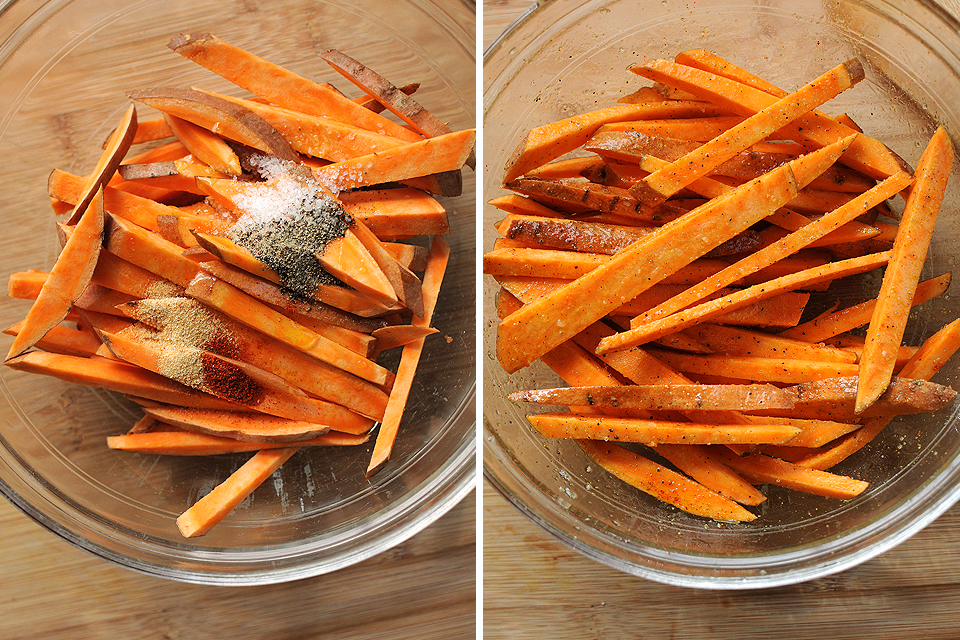
Then add the spices and combine well, coating all fries evenly. We like it spicy, so I added a full 1/8 teaspoon of cayenne to ours. Yum!


Tasty Kitchen Blog: Baked Sweet Potato Fries. Guest post by Amy Johnson of She Wears Many Hats, recipe submitted by TK member Caitlin (maude10).

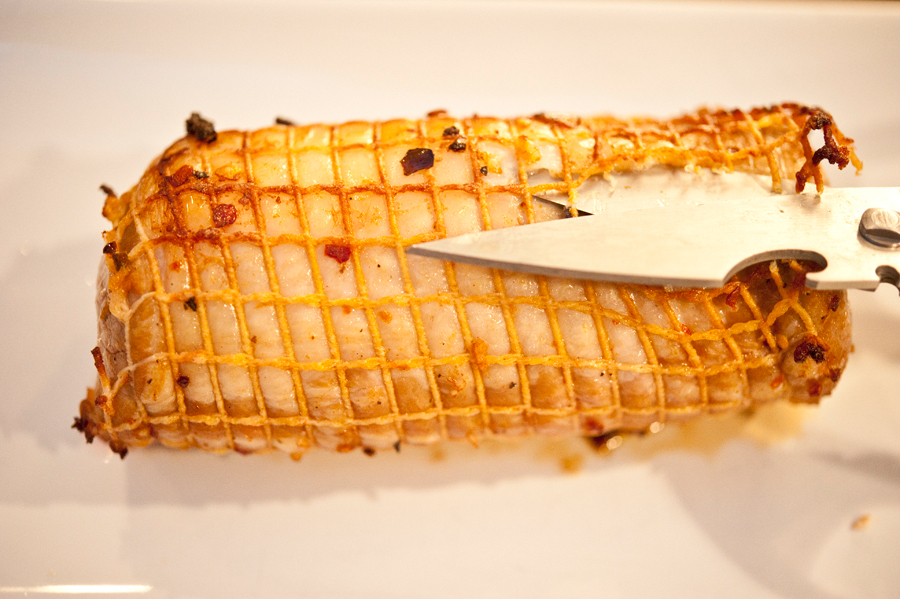
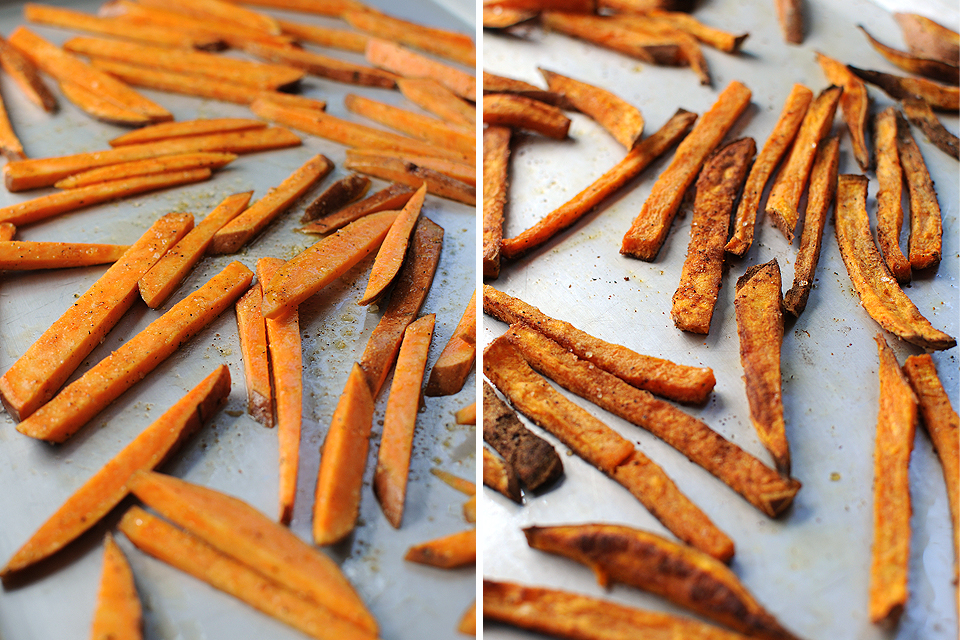
Spread in a single layer on a baking sheet and bake for 15 minutes. Toss and continue baking another 10-15 minutes until crisp. Ovens vary, so make sure to watch your first batch closely to see what cook time is appropriate for your oven.


Tasty Kitchen Blog: Baked Sweet Potato Fries. Guest post by Amy Johnson of She Wears Many Hats, recipe submitted by TK member Caitlin (maude10).

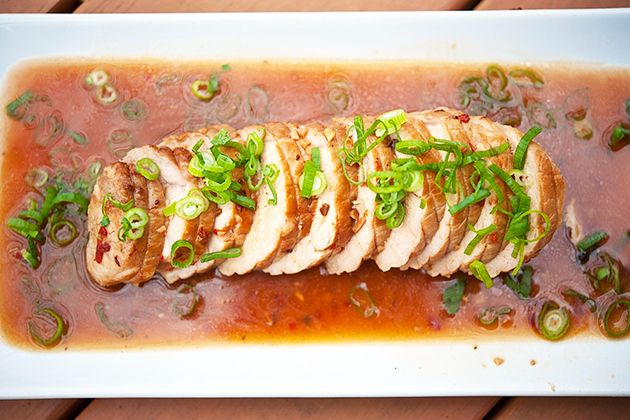
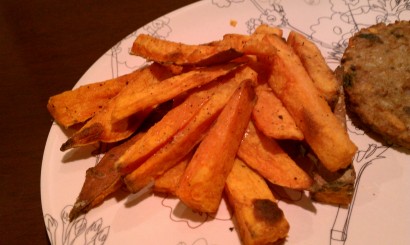
That’s it! Easy huh? And totally drool worthy. Try them soon and let me know what you think. And again, you may wanna double the batch.

A big thanks to Caitlin for the recipe. We’ve already made it three times this week. My 13-year-old son even asked for them for a snack. Smart kid, I think. Definitely a good option.


Printable Recipe

Baked Sweet Potato Fries

5.00 Mitt(s) 8 Rating(s)8 votes, average: 5.00 out of 58 votes, average: 5.00 out of 58 votes, average: 5.00 out of 58 votes, average: 5.00 out of 58 votes, average: 5.00 out of 5

Prep Time:

Cook Time:

Difficulty: Easy

Servings: 1

1
x

Print Options

Page size Letter 3x5 4x6
Text Size Small Medium Large
Content Include description
Include prep time, etc.
Show image

Description

These puppies are quickly becoming my new popcorn, a.k.a. my new late-night, movie watching snack. They are quick and easy, as well as healthier than the starchy alternative. I leave the skins on them, because Maude tells me to, but you should follow your instincts on that one. Don’t be surprised if you find yourself making these at 11 pm when everyone else is asleep, but you have a lot of Grey’s Anatomy to catch up on.

Ingredients

  • 1 whole Sweet Potato
  • 2 Tablespoons Olive Oil
  • ½ teaspoons Kosher Salt
  • ¼ teaspoons Freshly Ground Pepper
  • ¼ teaspoons Garlic Powder
  • 1 pinch Cayenne Pepper (if You're Down With That)

Preparation Instructions

1. Preheat the oven to 450F.

2. Scrub the sweet potato and cut into 1/2 inch slices (or thinner if you like your fries crispier).

3. In a bowl, toss the sweet potatoes with the olive oil, kosher salt, pepper, garlic powder, and cayenne (if you like-ah some spice-ah).

4. Arrange fries evenly on a cookie sheet and bake for about 20 to 30 minutes minutes, checking after 20 minutes to prevent burning (ovens vary). Flip halfway so they cook evenly.

5. Settle in for a good movie and a glass of wine with a delicious snack.

Suggestion: Try throwing on some parmesan cheese during the last few minutes of baking for a yummy surprise!


_______________________________________

Amy Johnson is a blogger who writes about food, travel, the home (both inside and out), and various observations and random musings about anything and everything. Visit her blog She Wears Many Hats for a dose of deliciousness, practicality, hilarity, or just plain fun. She lives in South Carolina with her husband and two children.


Profile photo of georgiapellegrini

Asian Pork Tenderloin

Posted by in Step-by-Step Recipes

Tasty Kitchen Blog: Asian Pork Tenderloin. Guest post by Georgia Pellegrini, recipe submitted by TK member Mags of The Other Side of Fifty.

 
I finally made a pork tenderloin that I like! My problem in the past has been that it can be dry and lacking flavor. This Asian Pork Tenderloin recipe from TK member mags7461 (which she adapted from All Recipes) is flavorful and juicy all at once.


Tasty Kitchen Blog: Asian Pork Tenderloin. Guest post by Georgia Pellegrini, recipe submitted by TK member Mags of The Other Side of Fifty.

You will need: pork tenderloin, soy sauce, sesame oil, Worcestershire sauce, minced garlic, brown sugar, onion powder, freshly cracked black pepper, chili garlic sauce, cornstarch, chicken broth and green onions.


Tasty Kitchen Blog: Asian Pork Tenderloin. Guest post by Georgia Pellegrini, recipe submitted by TK member Mags of The Other Side of Fifty.

To start, you’ll take a large gallon-sized Ziploc bag and pour in the soy sauce …


Tasty Kitchen Blog: Asian Pork Tenderloin. Guest post by Georgia Pellegrini, recipe submitted by TK member Mags of The Other Side of Fifty.

The Worcestershire sauce …


Tasty Kitchen Blog: Asian Pork Tenderloin. Guest post by Georgia Pellegrini, recipe submitted by TK member Mags of The Other Side of Fifty.

The chili garlic sauce …


Tasty Kitchen Blog: Asian Pork Tenderloin. Guest post by Georgia Pellegrini, recipe submitted by TK member Mags of The Other Side of Fifty.

The brown sugar …


Tasty Kitchen Blog: Asian Pork Tenderloin. Guest post by Georgia Pellegrini, recipe submitted by TK member Mags of The Other Side of Fifty.

The onion powder …


Tasty Kitchen Blog: Asian Pork Tenderloin. Guest post by Georgia Pellegrini, recipe submitted by TK member Mags of The Other Side of Fifty.

The black pepper …


Tasty Kitchen Blog: Asian Pork Tenderloin. Guest post by Georgia Pellegrini, recipe submitted by TK member Mags of The Other Side of Fifty.

The minced garlic …


Tasty Kitchen Blog: Asian Pork Tenderloin. Guest post by Georgia Pellegrini, recipe submitted by TK member Mags of The Other Side of Fifty.

And the sesame oil.


Tasty Kitchen Blog: Asian Pork Tenderloin. Guest post by Georgia Pellegrini, recipe submitted by TK member Mags of The Other Side of Fifty.

This will be your marinade!


Tasty Kitchen Blog: Asian Pork Tenderloin. Guest post by Georgia Pellegrini, recipe submitted by TK member Mags of The Other Side of Fifty.

You’ll seal the bag and shake up the contents.


Tasty Kitchen Blog: Asian Pork Tenderloin. Guest post by Georgia Pellegrini, recipe submitted by TK member Mags of The Other Side of Fifty.

Then you’ll add your pork tenderloin.


Tasty Kitchen Blog: Asian Pork Tenderloin. Guest post by Georgia Pellegrini, recipe submitted by TK member Mags of The Other Side of Fifty.

Shake it around to coat it nicely. Then put it in the refrigerator to marinate for 6 hours or so. It will help if you turn it every so often so that all sides soak evenly.


Tasty Kitchen Blog: Asian Pork Tenderloin. Guest post by Georgia Pellegrini, recipe submitted by TK member Mags of The Other Side of Fifty.

When you’re ready to cook it, line a sheet tray with foil and add the loin and some of the juice. I would recommend holding back some of the juice in order to make the sauce, since you may not end up with enough pan juice after it cooks.


Tasty Kitchen Blog: Asian Pork Tenderloin. Guest post by Georgia Pellegrini, recipe submitted by TK member Mags of The Other Side of Fifty.

To make the sauce, heat up the chicken broth in a small saucepan.


Tasty Kitchen Blog: Asian Pork Tenderloin. Guest post by Georgia Pellegrini, recipe submitted by TK member Mags of The Other Side of Fifty.

Add any pan drippings and leftover marinade.


Tasty Kitchen Blog: Asian Pork Tenderloin. Guest post by Georgia Pellegrini, recipe submitted by TK member Mags of The Other Side of Fifty.

And whisk in a bit of cornstarch to help thicken it.


Tasty Kitchen Blog: Asian Pork Tenderloin. Guest post by Georgia Pellegrini, recipe submitted by TK member Mags of The Other Side of Fifty.

Let it bubble and simmer, and whisk it along the way.


Tasty Kitchen Blog: Asian Pork Tenderloin. Guest post by Georgia Pellegrini, recipe submitted by TK member Mags of The Other Side of Fifty.

Remove the pork from the oven and let it rest for 15 minutes or so, covered, to let the juices retreat back into the meat.


Tasty Kitchen Blog: Asian Pork Tenderloin. Guest post by Georgia Pellegrini, recipe submitted by TK member Mags of The Other Side of Fifty.

Slice it into juicy pieces …


Tasty Kitchen Blog: Asian Pork Tenderloin. Guest post by Georgia Pellegrini, recipe submitted by TK member Mags of The Other Side of Fifty.

Then lay it out on a platter and drizzle the sauce over it.


Tasty Kitchen Blog: Asian Pork Tenderloin. Guest post by Georgia Pellegrini, recipe submitted by TK member Mags of The Other Side of Fifty.

Chop up some green onions as a garnish. This really adds a nice flavor.


Tasty Kitchen Blog: Asian Pork Tenderloin. Guest post by Georgia Pellegrini, recipe submitted by TK member Mags of The Other Side of Fifty.

The dish looks as lovely as it tastes. And it will be a real dinner crowd pleaser. I now have a renewed interest in domestic pork loin! Of course, this would also work wonderfully with wild hog loin. Thanks so much to mags7461 for the recipe! Check out her great blog, The Other Side of Fifty, for more inspiration!


Printable Recipe

Asian Pork Tenderloin

See post on mags7461’s site!
4.83 Mitt(s) 6 Rating(s)6 votes, average: 4.83 out of 56 votes, average: 4.83 out of 56 votes, average: 4.83 out of 56 votes, average: 4.83 out of 56 votes, average: 4.83 out of 5

Prep Time:

Cook Time:

Difficulty: Easy

Servings: 6

6
x

Print Options

Page size Letter 3x5 4x6
Text Size Small Medium Large
Content Include description
Include prep time, etc.
Show image

Description

This marinated and baked Asian pork tenderloin is from my “lick your plate clean” series. And I’m serious, you WILL literally lick your plate clean.

Ingredients

  • 2-½ pounds Whole Pork Tenderloin
  • ⅓ cups Reduced Sodium Soy Sauce
  • ¼ cups Sesame Oil
  • 2 Tablespoons Worcestershire Sauce
  • 2 cloves Garlic, Minced
  • 2 Tablespoons Light Brown Sugar
  • ½ teaspoons Onion Powder
  • 1 teaspoon Freshly Cracked Black Pepper
  • 2 Tablespoons Chili Garlic Sauce (found In The Asian Ethnic Foods Aisle At Your Grocery Store. If You're Not Into Foods With A Little Bit Of "kick" Cut Back On This Ingredient To 1 TBSP.
  • 1 Tablespoon Cornstarch
  • 1 cup Reduced Sodium Chicken Broth, At Room Temperature
  • 2 whole Green Onions (green Parts Only) Diced, For Garnish

Preparation Instructions

Rinse and pat dry the pork loin.

In a gallon baggie, combine the soy sauce, sesame oil, Worcestershire sauce, garlic, brown sugar, onion powder, pepper and chili garlic sauce. Seal, squeeze and shake the baggie to combine the ingredients well. Place pork loin in baggie, squeeze out air, seal baggie and refrigerate for 6-8 hours.

Preheat oven to 400ºF. Line a 9×11 baking dish with nonstick foil or use regular foil and spray with cooking spray.

Using tongs, transfer the pork loin to the prepared baking dish. Pour the marinade over the pork loin. Bake for 1 hour, turning pork loin every 20 minutes, or until internal temperature reaches 145-150ºF. Remove loin to serving plate, cover with foil, and let rest for 15-20 minutes while you finish the sauce.

Empty the pan drippings into a small sauce pan and heat over medium heat. Combine the cornstarch with room temperature chicken broth and whisk until smooth. Add the broth to the boiling pan drippings and cook for a minute or two. Remove from heat.

Slice pork loin and place on serving platter. Drizzle sauce over all before serving and place any extra sauce in an extra dish on the side. Garnish with sliced green onions if desired.


_______________________________________

There’s so much to say about Georgia, we don’t know where to start. Leaving Wall Street for the French Culinary Institute, followed by a stint at the Gramercy Tavern and La Chassagnette in France, her passion for food and food traditions are evident and inspiring. Visit her site at Georgia Pellegrini, where you’ll find more recipes, photos, learn all about her wonderful books Girl Hunter and Food Heroes, and enjoy her latest adventures.


Profile photo of ThreeManyCooks

Homemade Tortillas

Posted by in Step-by-Step Recipes

Tasty Kitchen Blog: Healthy Homemade Tortillas. Guest post by Maggy Keet of Three Many Cooks, recipe submitted by TK member KGSouthernComfort of Life in the A-Frame.

 
I know what you’re thinking, and I’m going to answer your question right up front. Yes, making flour tortillas from scratch is worth it. It was certainly my question before making them the first time. But here’s why it’s worth it: the ones at the store are uniform, bland, and blonde. The ones you make fresh are perfectly imperfect—puffy, warm, full of flavor, and dotted with delicious little charred pockets.

Since this recipe’s author, kgsoutherncomfort is native Texan, I felt certain the recipe would work, if a little tedious. Her recipe is, in fact, flawless, and these Homemade Tortillas were surprisingly easy to make. As the tortillas puffed and browned in the skillet I dreamed of how I would fill them—some with soft scrambled eggs, sour cream, black beans, and cilantro, others filled with thick slices of Monterey Jack, quesadilla-style. Of course I had fun eating them hot out of the skillet and unadorned, the very best of blank canvases. One thing I know: once you make them from scratch, you’ll think twice before picking them up at the store.


Tasty Kitchen Blog: Healthy Homemade Tortillas. Guest post by Maggy Keet of Three Many Cooks, recipe submitted by TK member KGSouthernComfort of Life in the A-Frame.

The ingredients are so simple. In fact, you probably already have everything you need: flour, salt, baking powder, canola oil, and water.


Tasty Kitchen Blog: Healthy Homemade Tortillas. Guest post by Maggy Keet of Three Many Cooks, recipe submitted by TK member KGSouthernComfort of Life in the A-Frame.

Mix the dry ingredients together with a whisk (or if you’re like my mom, with your fingers).


Tasty Kitchen Blog: Healthy Homemade Tortillas. Guest post by Maggy Keet of Three Many Cooks, recipe submitted by TK member KGSouthernComfort of Life in the A-Frame.

Then add the oil and mix with your fingers until the flour and oil combine to become a fine crumb.


Tasty Kitchen Blog: Healthy Homemade Tortillas. Guest post by Maggy Keet of Three Many Cooks, recipe submitted by TK member KGSouthernComfort of Life in the A-Frame.

Your flour-oil mix should look something like this. Once it does, add the water.


Tasty Kitchen Blog: Healthy Homemade Tortillas. Guest post by Maggy Keet of Three Many Cooks, recipe submitted by TK member KGSouthernComfort of Life in the A-Frame.

Mix until a ball forms, then transfer to a floured surface.


Tasty Kitchen Blog: Healthy Homemade Tortillas. Guest post by Maggy Keet of Three Many Cooks, recipe submitted by TK member KGSouthernComfort of Life in the A-Frame.

Work the dough until it’s smooth and round.


Tasty Kitchen Blog: Healthy Homemade Tortillas. Guest post by Maggy Keet of Three Many Cooks, recipe submitted by TK member KGSouthernComfort of Life in the A-Frame.

Transfer back to the bowl, cover with plastic and let rest for at least 30 minutes. Though you can leave it overnight, which is good to know if you’d like to make the dough in advance!


Tasty Kitchen Blog: Healthy Homemade Tortillas. Guest post by Maggy Keet of Three Many Cooks, recipe submitted by TK member KGSouthernComfort of Life in the A-Frame.

After it has set, cut the dough into twelve balls. We weighed them to make sure they were all about the same size.


Tasty Kitchen Blog: Healthy Homemade Tortillas. Guest post by Maggy Keet of Three Many Cooks, recipe submitted by TK member KGSouthernComfort of Life in the A-Frame.

Flour your surface and pat the ball down a bit to create an even, flat surface.


Tasty Kitchen Blog: Healthy Homemade Tortillas. Guest post by Maggy Keet of Three Many Cooks, recipe submitted by TK member KGSouthernComfort of Life in the A-Frame.

Roll out the dough…


Tasty Kitchen Blog: Healthy Homemade Tortillas. Guest post by Maggy Keet of Three Many Cooks, recipe submitted by TK member KGSouthernComfort of Life in the A-Frame.

…flipping intermittently, rolling, and adding flour as needed…


Tasty Kitchen Blog: Healthy Homemade Tortillas. Guest post by Maggy Keet of Three Many Cooks, recipe submitted by TK member KGSouthernComfort of Life in the A-Frame.

..until your tortilla is uniformly thick (or close enough) and approximately 8 inches across.


Tasty Kitchen Blog: Healthy Homemade Tortillas. Guest post by Maggy Keet of Three Many Cooks, recipe submitted by TK member KGSouthernComfort of Life in the A-Frame.

Once all your dough balls are rolled out, heat a dry skillet to medium-high. Working one at a time, cook until brown blisters form on one side, then flip. Don’t get so caught up dreaming about what you’re going to put in your tortilla that you forget to flip!


Tasty Kitchen Blog: Healthy Homemade Tortillas. Guest post by Maggy Keet of Three Many Cooks, recipe submitted by TK member KGSouthernComfort of Life in the A-Frame.

Once cooked, your tortilla should look something like this.


Tasty Kitchen Blog: Healthy Homemade Tortillas. Guest post by Maggy Keet of Three Many Cooks, recipe submitted by TK member KGSouthernComfort of Life in the A-Frame.

As I cooked the tortillas, I wrapped the finished ones in a clean dish towel to keep them warm. Then we promptly devoured them all!


Tasty Kitchen Blog: Healthy Homemade Tortillas. Guest post by Maggy Keet of Three Many Cooks, recipe submitted by TK member KGSouthernComfort of Life in the A-Frame.

This is such a great staple recipe; I will use it again and again. Thanks to kgsoutherncomfort for turning me into a homemade tortilla convert! Visit her blog, Life in the A-Frame, for more recipes and glimpses of her country life.


Printable Recipe

Healthy Homemade Tortillas

See post on kgsoutherncomfort’s site!
4.96 Mitt(s) 57 Rating(s)57 votes, average: 4.96 out of 557 votes, average: 4.96 out of 557 votes, average: 4.96 out of 557 votes, average: 4.96 out of 557 votes, average: 4.96 out of 5

Prep Time:

Cook Time:

Difficulty: Easy

Servings: 12

12
x

Print Options

Page size Letter 3x5 4x6
Text Size Small Medium Large
Content Include description
Include prep time, etc.
Show image

Description

This is a healthier version of homemade tortillas with the use of canola oil instead of lard or shortening, and the use of organic, unbleached flour.

Ingredients

  • 3 cups Organic, Unbleached Flour
  • 1 teaspoon Salt
  • ½ teaspoons Baking Powder
  • ⅓ cups Canola Oil
  • 1 cup Hot Water

Preparation Instructions

Mix the flour, salt, and baking powder with a whisk. Add the canola oil and mix with your fingers until all the oil is incorporated and the mixture looks like fine crumbs. Add 1 cup of hot water and mix until a ball is formed. Cover with plastic wrap and let the dough rest for about 30 minutes. (I have also refrigerated it overnight).

Divide the dough into 12 balls and roll out one at a time on a floured surface. Brush off excess flour. Cook on a hot, ungreased griddle over medium-high heat. Turn the tortilla when brown blisters form on the first side. Stack the totillas and serve warm.


_______________________________________

Three Many Cooks is the always-entertaining food blog of Pam Anderson and her two daughters, Maggy and Sharon. Pam is a well-known and much-respected food writer and author, Maggy is a “hippy adventurer meets 1950s housewife,” and Sharon refers to herself as a recovering food snob learning to survive on a graduate student’s budget. Theirs is a strong relationship both inside and outside the kitchen, and it shows in the food they create and the stories they tell.


Profile photo of HowSweetEats

Smoky White Bean Chicken Chili

Posted by in Step-by-Step Recipes

Tasty Kitchen Blog: Smoky White Bean Chicken Chili. Guest post by Jessica Merchant of How Sweet It Is, recipe submitted by TK member Terri of That's Some Good Cookin'.

 
With spring quickly approaching in the next few weeks, I fear my warm and comforting soups may be on their way out. I easily love a bowl of soup no matter the season, but sometimes the thought of standing over a large stock pot for a few hours just isn’t as appealing as laying outside in the green grass. Especially when you sweat like a man.

However! This year I’m saved. I ran across this Smoky White Bean Chicken Chili from Tasty Kitchen member Terri, and the moment I spied bacon and smoked paprika in the recipe, I was sold. To my surprise, this soup was completed in just a little over an hour and packed more flavor that I ever could have imagined. It’s pretty healthy too—bonus points!

The ease of this soup is a huge plus. It calls for a store-bought rotisserie chicken, but feel free to roast your own and use your own stock if you have some on hand. It also makes a pretty large pot of chili, so if you’re cooking for one or two, you’ll have lots of leftovers to freeze for those super busy nights. Let’s get started!


Tasty Kitchen Blog: Smoky White Bean Chicken Chili. Guest post by Jessica Merchant of How Sweet It Is, recipe submitted by TK member Terri of That's Some Good Cookin'.

Here’s what you need: a rotisserie chicken, chicken stock, cannellini beans, diced tomatoes, diced green chilis, bacon, a large onion, garlic, smoked paprika, cumin, garlic powder, onion powder, chipotle chili powder, fresh cilantro and some cheese for topping if you wish. Also have some salt and pepper on hand for seasoning. If you can’t find chipotle chili powder, the regular stuff should do just fine.

As a note, the first thing I did before beginning was to prepare all my ingredients. I opened all the cans, I stripped the meat from the chicken, chopped my bacon, onion and garlic and combined all my spices. This makes the process much, much easier.


Tasty Kitchen Blog: Smoky White Bean Chicken Chili. Guest post by Jessica Merchant of How Sweet It Is, recipe submitted by TK member Terri of That's Some Good Cookin'.

First up, add the chopped bacon to a hot pot and let sizzle away! Mmmm. Definitely my favorite part. I need a bacon candle.


Tasty Kitchen Blog: Smoky White Bean Chicken Chili. Guest post by Jessica Merchant of How Sweet It Is, recipe submitted by TK member Terri of That's Some Good Cookin'.

After the bacon has crisped a bit and rendered some fat, throw in the diced onion. Give the mixture a good stir to coat, then cover and let cook over medium-low heat for about 20 minutes, stirring occasionally, while the onions get all caramelly. If you have not taken the meat off your chicken or opened your cans, now is a great time to do so. If you have, now is a great time to clean up your kitchen. I just wish I would take my own advice.


Tasty Kitchen Blog: Smoky White Bean Chicken Chili. Guest post by Jessica Merchant of How Sweet It Is, recipe submitted by TK member Terri of That's Some Good Cookin'.

After about 20 minutes, the onions should be soft and look like this. And in that pot of heaven you have two of the most delicious building blocks of flavor. Inhale.


Tasty Kitchen Blog: Smoky White Bean Chicken Chili. Guest post by Jessica Merchant of How Sweet It Is, recipe submitted by TK member Terri of That's Some Good Cookin'.

Next up, add your spices and your chicken. Don’t leave out the dark meat! So. Much. Flavor. I wish I could go back in time to all the Thanksgivings I spent shunning dark meat and eat my way to the present day.


Tasty Kitchen Blog: Smoky White Bean Chicken Chili. Guest post by Jessica Merchant of How Sweet It Is, recipe submitted by TK member Terri of That's Some Good Cookin'.

Stir the whole mixture to coat, and let it cook (with the lid on) for another 10 minutes so the flavors can mesh.


Tasty Kitchen Blog: Smoky White Bean Chicken Chili. Guest post by Jessica Merchant of How Sweet It Is, recipe submitted by TK member Terri of That's Some Good Cookin'.

The only thing left to do is add everything else to the pot. Super simple, right? Throw in the tomatoes, beans, green chilis and chicken stock. Give the soup a good stir and bring to a boil.


Tasty Kitchen Blog: Smoky White Bean Chicken Chili. Guest post by Jessica Merchant of How Sweet It Is, recipe submitted by TK member Terri of That's Some Good Cookin'.

Once boiling, reduce heat to a simmer and let cook uncovered, stirring occasionally, until the liquid has reduced to your preference. I let mine simmer for about 20 minutes, then it was good to go. I also couldn’t take it anymore and was starving. The smell is intoxicating!


Tasty Kitchen Blog: Smoky White Bean Chicken Chili. Guest post by Jessica Merchant of How Sweet It Is, recipe submitted by TK member Terri of That's Some Good Cookin'.

Serve it up in a big bowl, topped with your favorite cheese (the recipe calls for cotija; I used Monterey Jack) and a bunch of fresh cilantro. I also suggest a few handfuls of blue corn chips on the side for dipping and crunching over top. Trust me on this.


Tasty Kitchen Blog: Smoky White Bean Chicken Chili. Guest post by Jessica Merchant of How Sweet It Is, recipe submitted by TK member Terri of That's Some Good Cookin'.

I still can’t get over how much flavor this chili has for being a fairly simple recipe. It was one of the most delicious versions of chicken chili we have tried in quite a while, and I just couldn’t get enough. It’s been the star of our lunches and dinners for days and I’m ready to make another batch.

Thanks so much to Terri for the fabulous recipe. Be sure to check out her great blog, That’s Some Good Cookin’, for more incredibly delicious and comforting dishes.


Printable Recipe

Smoky White Bean Chicken Chili

See post on Terri @ that's some good cookin'’s site!
4.87 Mitt(s) 15 Rating(s)15 votes, average: 4.87 out of 515 votes, average: 4.87 out of 515 votes, average: 4.87 out of 515 votes, average: 4.87 out of 515 votes, average: 4.87 out of 5

Prep Time:

Cook Time:

Difficulty: Easy

Servings: 8

8
x

Print Options

Page size Letter 3x5 4x6
Text Size Small Medium Large
Content Include description
Include prep time, etc.
Show image

Description

The smoky flavors of bacon, chipotle chili powder, smoky paprika, cumin, and roasted tomatoes bring depth to this super easy and healthy chili.

Ingredients

  • 4 slices Bacon, Chopped
  • 1 whole Large Onion, Diced
  • 3 cloves Garlic, Chopped
  • 1 whole Rotisserie Chicken, Shredded Or Diced
  • 1 teaspoon Smoky Paprika
  • 1 teaspoon Ground Cumin
  • 1 teaspoon Onion Powder Or Granulated Onion
  • ½ teaspoons Garlic Powder Or Granulated Garlic
  • ½ teaspoons Chipotle Chile Powder, Or To Taste
  • 6 cups Chicken Stock Or Broth
  • 1 can (28-ounce Size) Roasted, Diced Tomatoes
  • 4 cans (14.5 Ounce Size) White Beans, Cannelini Or Great Northern
  • 2 cans (4 Ounce Size) Diced Green Chiles
  • Salt And Pepper, to taste
  • ½ cups Grated Cotija Cheese, Optional For Topping
  • ¼ cups Chopped Fresh Cilantro, For Topping (optional)

Preparation Instructions

In a hot Dutch oven, cook bacon for about 3 minutes.

Add the onion and garlic to the bacon. Lower the heat to medium low and cover pot. Cook, stirring as needed until the onions are translucent and just starting to caramelize. This takes about 30 minutes.

Add the chicken, smoky paprika, ground cumin, onion powder, garlic powder, and chipotle to the pot and continue to cook for an additional 10 minutes (covered) so that the chicken gets infused with the aromatics and the spices.

Stir in the chicken stock, diced tomatoes, white beans, and green chiles. Add salt and pepper to taste. Bring to a slow boil and cook, uncovered, stirring as needed until the liquid has reduced to your level of preference.

For serving, pass the cotija cheese and chopped cilantro for topping as desired.

This is great with cornbread or a crusty bread and a salad.

Note: a can of the white beans can be reserved, pureed or well mashed, and then added to chili for thickening at the same time as the other beans are added to the chili.


_______________________________________

Jessica Merchant is a personal trainer turned food writer and blogger. Her blog, How Sweet Eats, is where she proclaims her love for all things sweet, all things bacon, and everything else in between. She works her magic in her Pittsburgh kitchen, which she shares with her husband of 2 years.


Profile photo of Laurie - Simply Scratch

Mayan Chocolate Truffles

Posted by in Step-by-Step Recipes

  Mayan Chocolate Truffles. Oh my heavens. Just the name alone gets me excited all over again. These chocolaty delights have a little sweet, a little spice and a whole lot of sass. When I saw Kari’s recipe, I found myself suddenly craving chocolate in truffle form.     Kari a.k.a. Craftinomicon probably doesn’t realize the phenomenon her […]

Profile photo of twopeasandtheirpod

Lemon Cornmeal Pancakes

Posted by in Step-by-Step Recipes

  Weekends are made for sleeping in and for pancakes. Ok, let’s be honest, we have a baby, so we are not sleeping in anymore, but we are still making pancakes. My husband, Josh, would be fine eating our Cinnamon Streusel Pancakes every weekend, but I like to try new pancake recipes. I spotted Jenna’s […]

Profile photo of Amber {Sprinkled With Flour}

Lemon Blueberry Crunch Muffins

Posted by in Baking, Step-by-Step Recipes

  I love muffins. Soft and delicate or chunky and hearty, I’ll take them any way they come. Now, there’s is a thin line that separates muffins from cupcakes. I’m not sure exactly what it is, but I feel a great deal better about myself when eating a muffin. Who cares if the muffin is […]

Profile photo of Laurie - Simply Scratch

Brown Butter Peanut Butter Cookies

Posted by in Baking, Step-by-Step Recipes

  When I think of peanut butter cookies my mind instantly recalls those perfectly round cookies with the fork-hashed “X” in the center. But what if I told you TK member Bellelatte does it one better? What if I told you Melissa takes your everyday peanut butter cookie and transcends it into a realm of […]