The Pioneer Woman Tasty Kitchen
Profile photo of georgiapellegrini

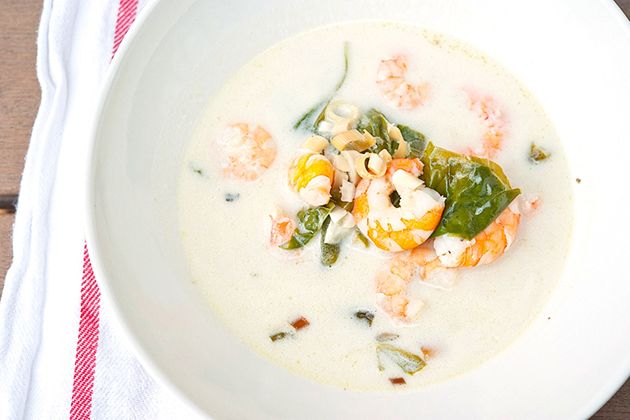
Spicy Thai Coconut Shrimp Soup

Posted by in Step-by-Step Recipes

Tasty Kitchen Blog: Spicy Thai Coconut Shrimp Soup. Guest post by Georgia Pellegrini, recipe submitted by TK member Jackie of Domestic Fits.

 
I love recipes that expand my horizons. This Spicy Thai Coconut Shrimp Soup from Jackie Dodd, for example, is not something that I would normally make on my own. But her recipe looked to enticing that I had to give it a try. Plus there’s a grocery store near me that offers up things like lemongrass and Thai chili, and that sealed the deal.


Tasty Kitchen Blog: Spicy Thai Coconut Shrimp Soup. Guest post by Georgia Pellegrini, recipe submitted by TK member Jackie of Domestic Fits.

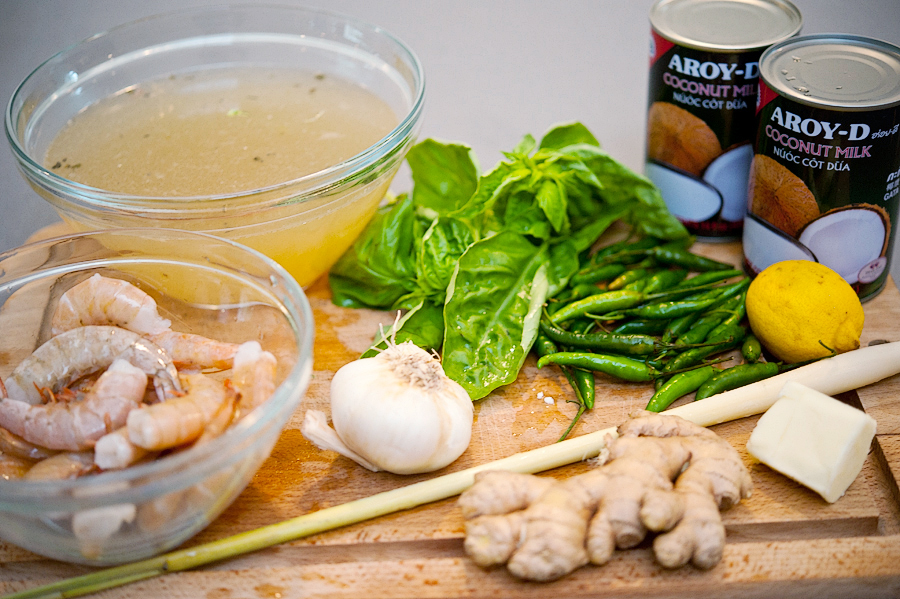
You’ll need: shrimp, chicken stock, basil, Thai chili, coconut milk, lemon, lemongrass, butter, ginger, garlic, and fish sauce.


Tasty Kitchen Blog: Spicy Thai Coconut Shrimp Soup. Guest post by Georgia Pellegrini, recipe submitted by TK member Jackie of Domestic Fits.

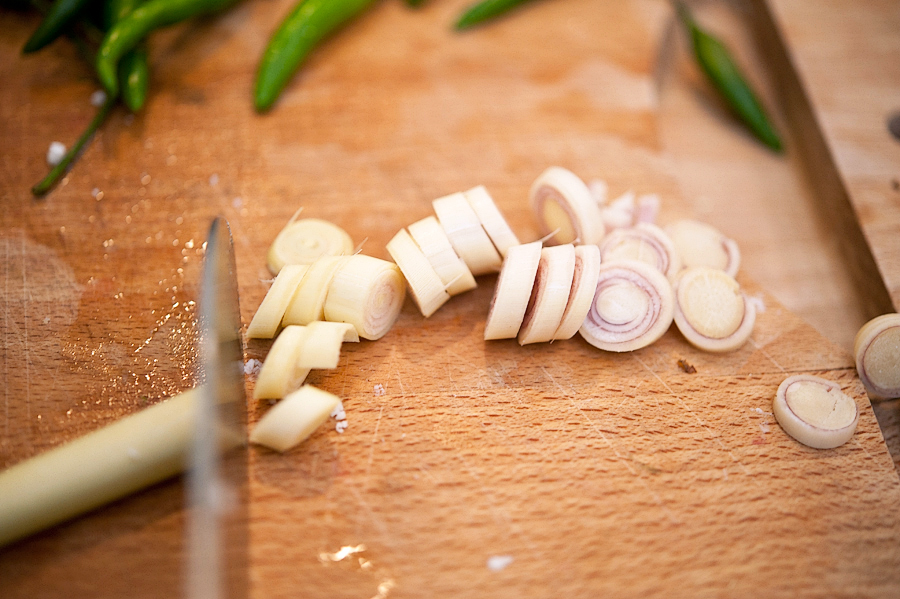
Start by removing the outer layers of the lemon grass and slicing it.


Tasty Kitchen Blog: Spicy Thai Coconut Shrimp Soup. Guest post by Georgia Pellegrini, recipe submitted by TK member Jackie of Domestic Fits.

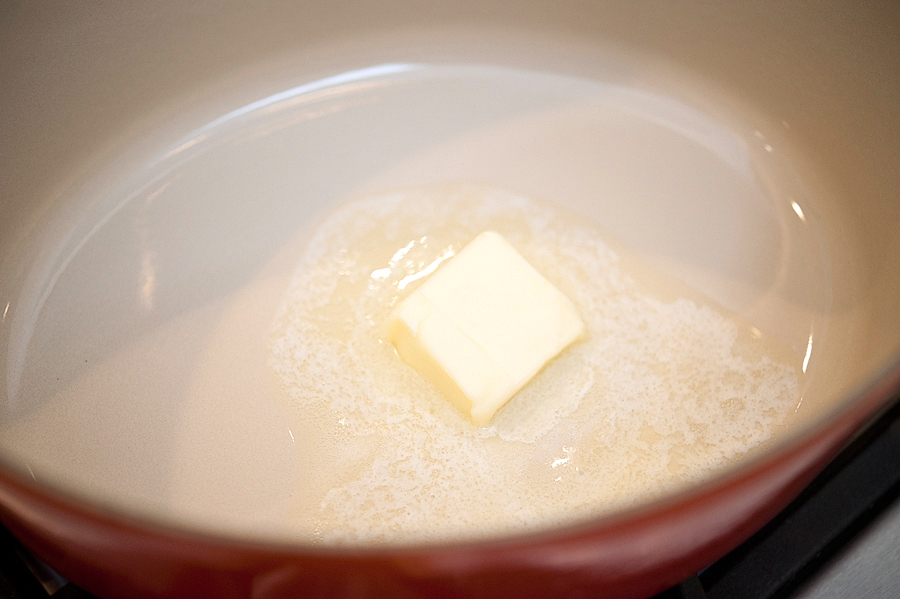
Melt some butter or oil or margarine in a pot until it bubbles.


Tasty Kitchen Blog: Spicy Thai Coconut Shrimp Soup. Guest post by Georgia Pellegrini, recipe submitted by TK member Jackie of Domestic Fits.

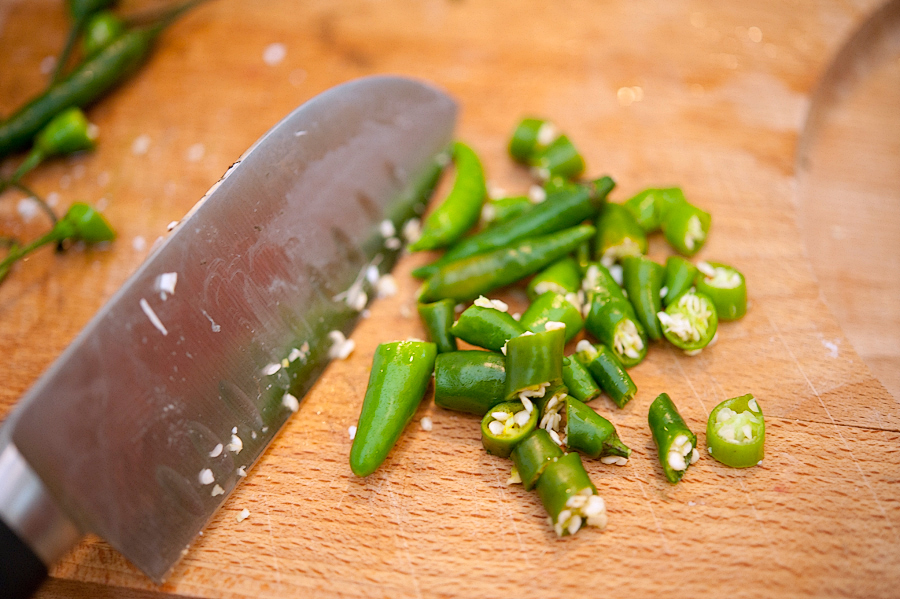
Next slice your chiles. These are green chiles because that is what I could find but Jackie suggests red chiles which are equally wonderful, I’m sure. Depending on your tolerance for heat, you’ll probably want to remove the seeds from these before chopping and adding them to the pot. And be sure not to touch your eyes for a long while afterward and give your hands a good wash. Since I love things super spicy, I left the seeds in. I was testing fate.


Tasty Kitchen Blog: Spicy Thai Coconut Shrimp Soup. Guest post by Georgia Pellegrini, recipe submitted by TK member Jackie of Domestic Fits.

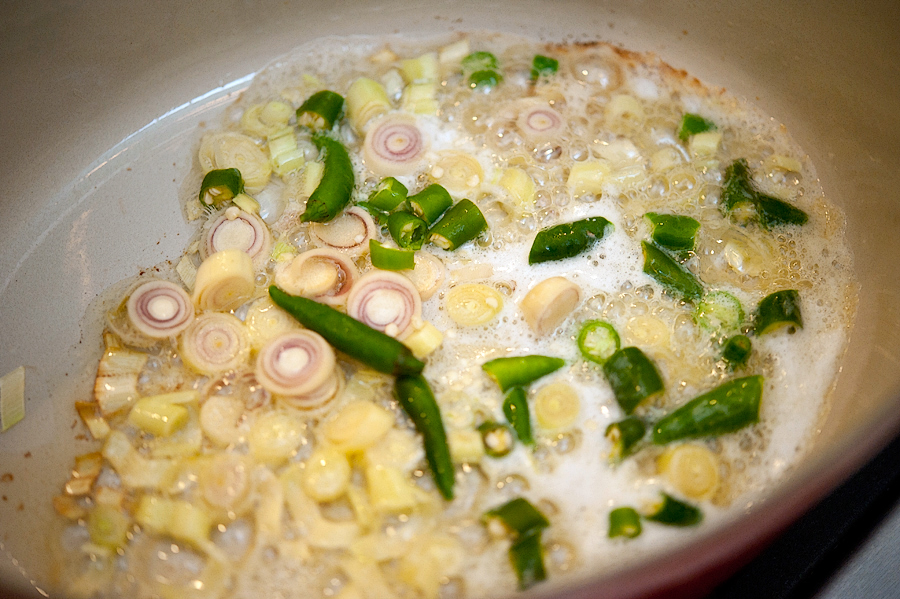
Saute it all together in the butter.


Tasty Kitchen Blog: Spicy Thai Coconut Shrimp Soup. Guest post by Georgia Pellegrini, recipe submitted by TK member Jackie of Domestic Fits.

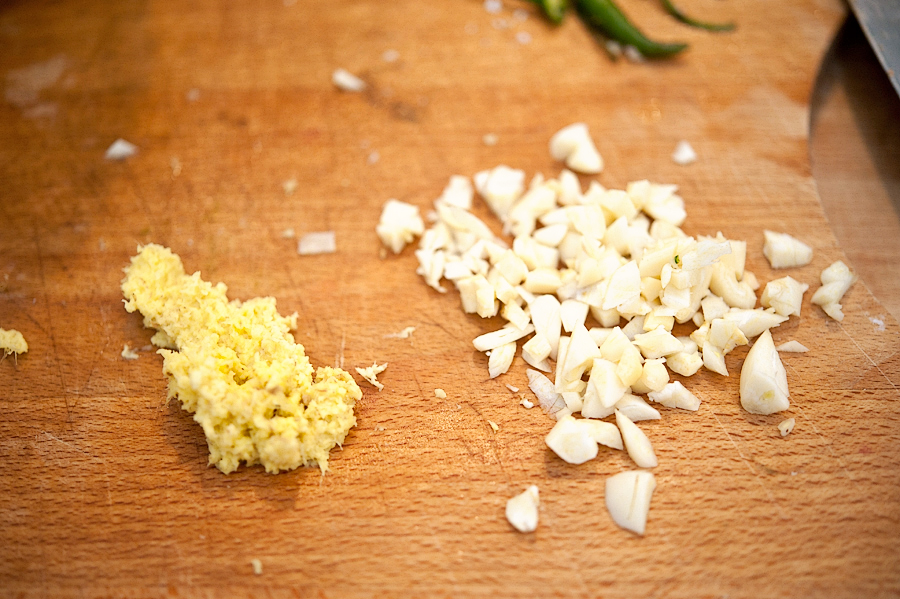
Then mince your garlic and ginger. You could leave the garlic a little chunky if you want as well, it adds some texture.


Tasty Kitchen Blog: Spicy Thai Coconut Shrimp Soup. Guest post by Georgia Pellegrini, recipe submitted by TK member Jackie of Domestic Fits.

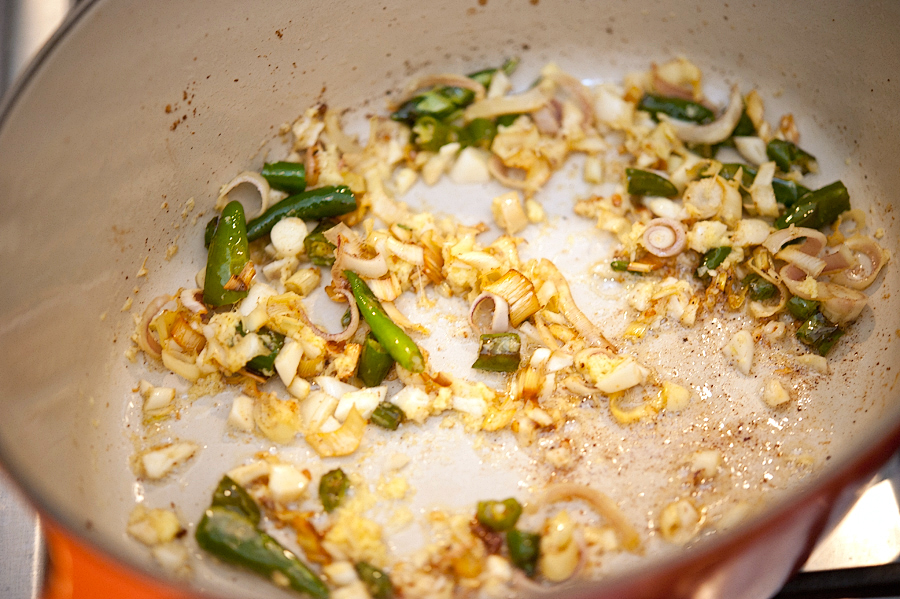
Saute that for a few minutes as well.


Tasty Kitchen Blog: Spicy Thai Coconut Shrimp Soup. Guest post by Georgia Pellegrini, recipe submitted by TK member Jackie of Domestic Fits.

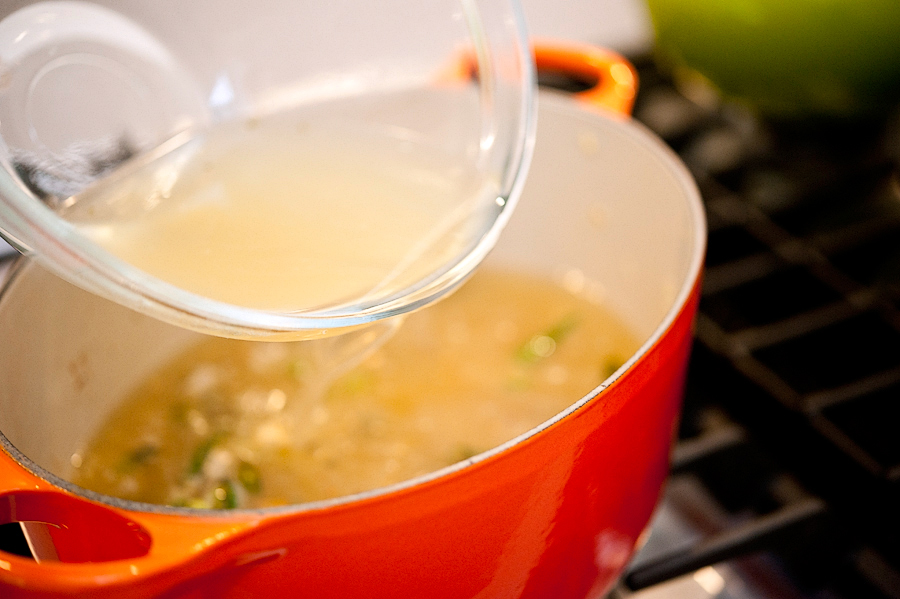
Next pour in the stock and simmer for a few minutes.


Tasty Kitchen Blog: Spicy Thai Coconut Shrimp Soup. Guest post by Georgia Pellegrini, recipe submitted by TK member Jackie of Domestic Fits.

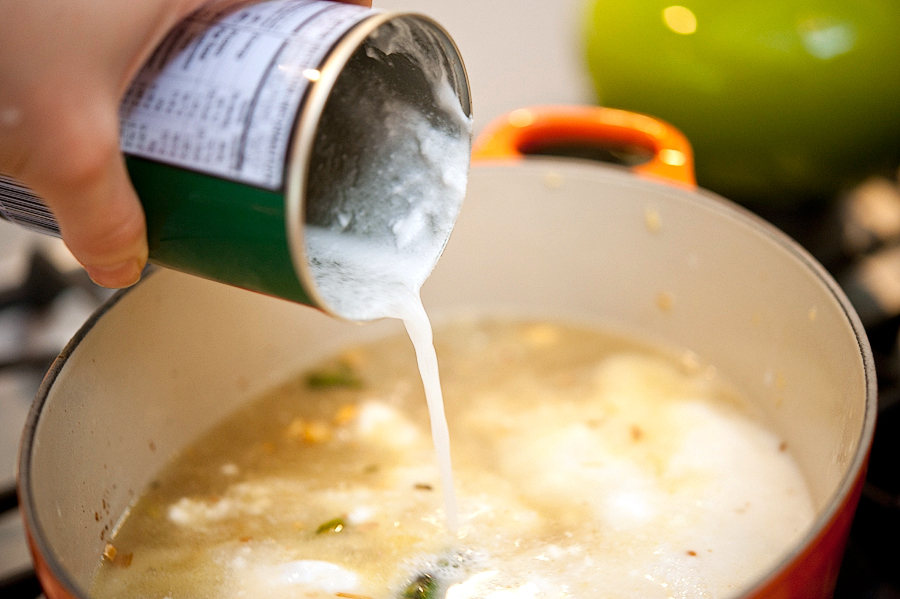
Then add the coconut milk and simmer for a few minutes more.


Tasty Kitchen Blog: Spicy Thai Coconut Shrimp Soup. Guest post by Georgia Pellegrini, recipe submitted by TK member Jackie of Domestic Fits.

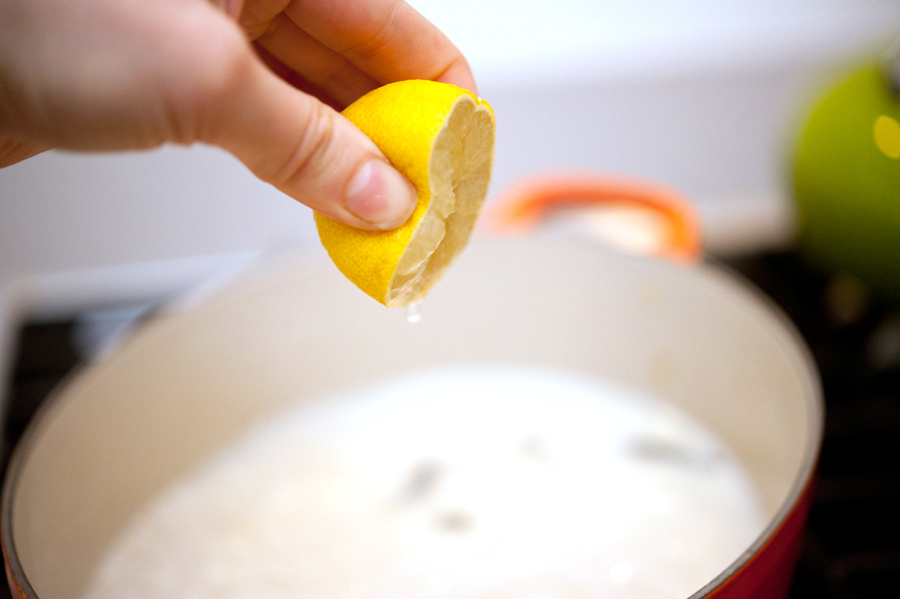
Then squeeze a bit of lemon juice for some tang. You can also add some fish sauce here if you’d like. I skipped that step but it would add another dimension of flavor.


Tasty Kitchen Blog: Spicy Thai Coconut Shrimp Soup. Guest post by Georgia Pellegrini, recipe submitted by TK member Jackie of Domestic Fits.

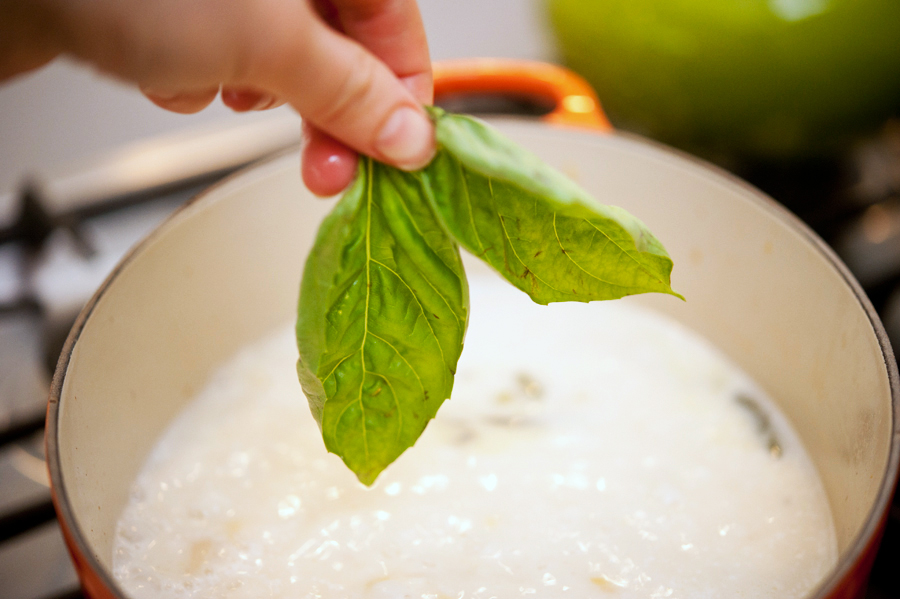
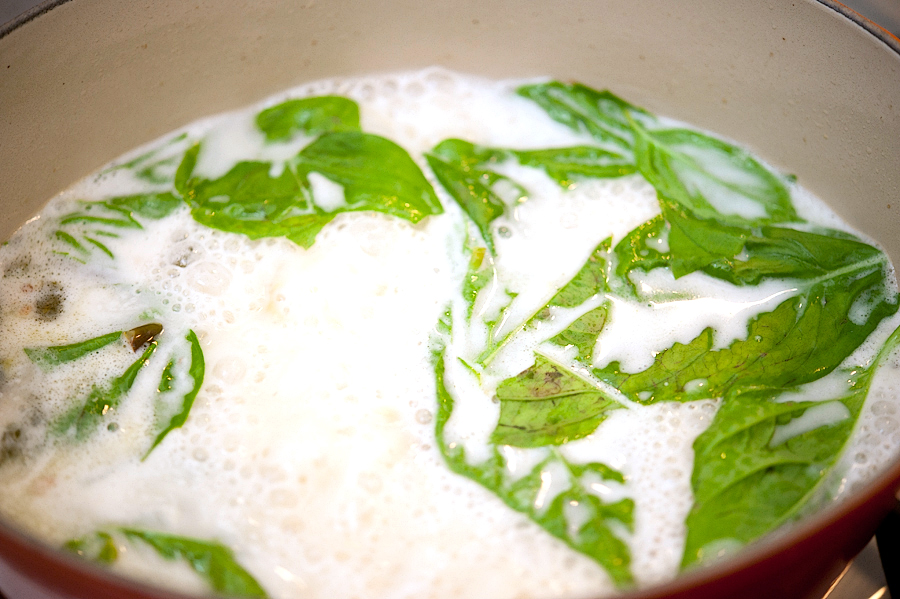
Toward the end you’ll add the basil. Tear it up into various sized pieces.


Tasty Kitchen Blog: Spicy Thai Coconut Shrimp Soup. Guest post by Georgia Pellegrini, recipe submitted by TK member Jackie of Domestic Fits.

Toss it in and let it stew for a few minutes.


Tasty Kitchen Blog: Spicy Thai Coconut Shrimp Soup. Guest post by Georgia Pellegrini, recipe submitted by TK member Jackie of Domestic Fits.

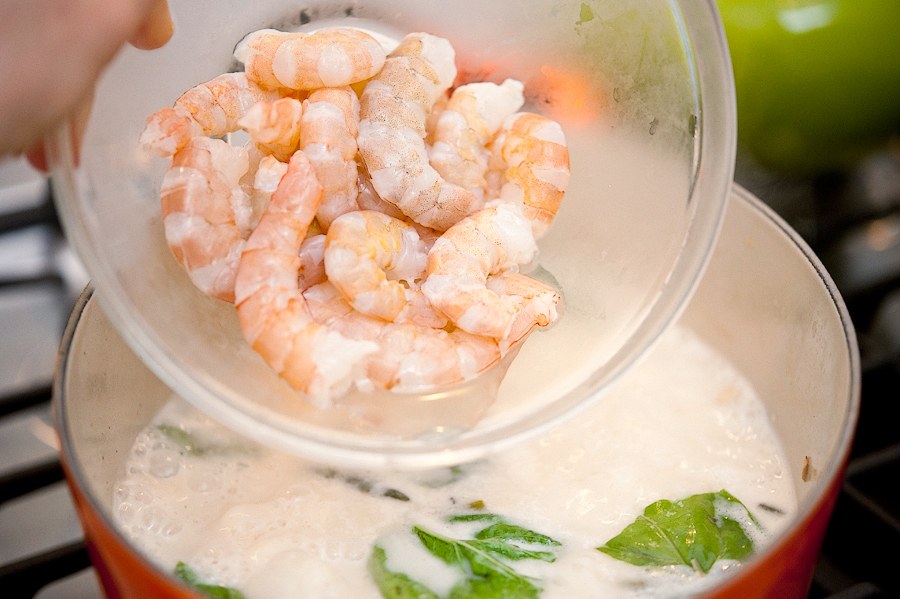
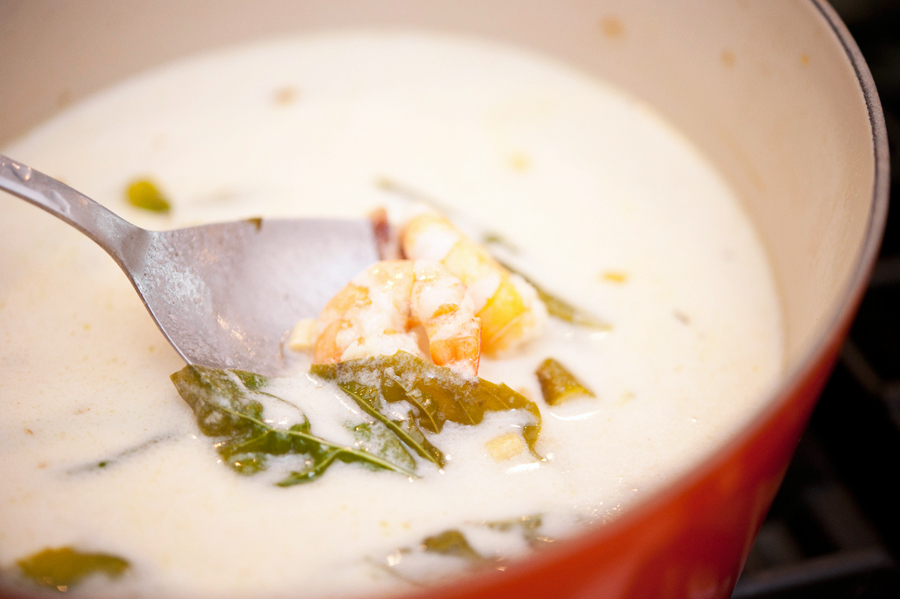
Then toss in the peeled rinsed shrimp.


Tasty Kitchen Blog: Spicy Thai Coconut Shrimp Soup. Guest post by Georgia Pellegrini, recipe submitted by TK member Jackie of Domestic Fits.

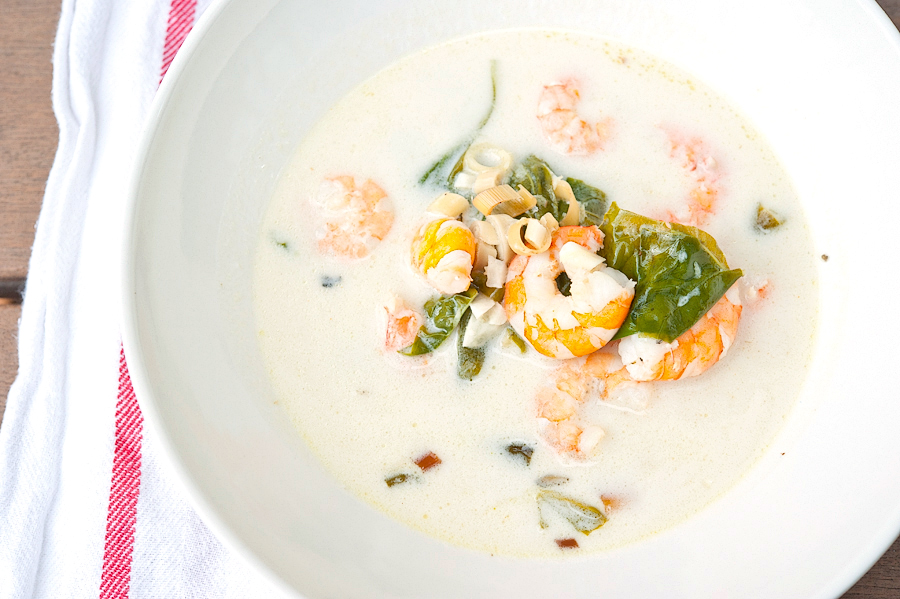
They will only need a few minutes to cook. In fact, you can turn off the heat shortly after you put them in and let the flavors meld as the shrimp finishes cooking.


Tasty Kitchen Blog: Spicy Thai Coconut Shrimp Soup. Guest post by Georgia Pellegrini, recipe submitted by TK member Jackie of Domestic Fits.

This is a magical soup. It is so quick to make and it is refreshing to work with these light and tangy flavors. Thanks so much to Jackie for this recipe! Be sure to check out her website, Domestic Fits, for other delicious concoctions.


Printable Recipe
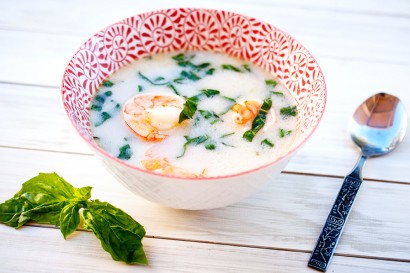
Spicy Thai Coconut Shrimp Soup

See post on Jackie Dodd’s site!
4.00 Mitt(s) 1 Rating(s)1 vote, average: 4.00 out of 51 vote, average: 4.00 out of 51 vote, average: 4.00 out of 51 vote, average: 4.00 out of 51 vote, average: 4.00 out of 5

Prep Time:

Cook Time:

Difficulty: Easy

Servings: 4

4
x

Print Options

Page size Letter 3x5 4x6
Text Size Small Medium Large
Content Include description
Include prep time, etc.
Show image

Description

A warm and delicious soup that is full of immune boosters to help you get through the winter.

Ingredients

  • 2 Tablespoons Smart Balance Light Margarine
  • 2 teaspoons Chopped Thai Red Chili, Seeds Removed
  • 2 Tablespoons Fresh Lemongrass, Chopped
  • 6 cloves Garlic, Minced
  • 1 Tablespoon Ginger, Peeled And Minced
  • 5 cups Fat Free, Low Sodium Chicken Broth
  • 2 cans (13.5 Oz. Size) Light Coconut Milk
  • 3 Tablespoons Fish Sauce
  • 2 teaspoons Black Pepper
  • 1 teaspoon Salt
  • 1 Tablespoon Lemon Juice
  • 8 whole Basil Leaves, Chopped Into Ribbons
  • 16 whole Large Shrimp, Raw, Peeled And Deveined, Tails Off (can Substitute 1 Cup, Chopped Raw Chicken)

Preparation Instructions

In a large pot over medium-high heat, melt the margarine. Add the chili and the lemongrass and cook until soft, about 3 minutes. Add the garlic and the ginger. Stir frequently until you can smell the garlic, about 30 seconds. Add the chicken broth and coconut milk and allow to simmer for 10 minutes.

Add the remaining ingredients and cook until the shrimp is cooked through, about 5 minutes. Taste and adjust seasoning to your personal preference.


_______________________________________

There’s so much to say about Georgia, we don’t know where to start. Leaving Wall Street for the French Culinary Institute, followed by a stint at the Gramercy Tavern and La Chassagnette in France, her passion for food and food traditions are evident and inspiring. Visit her site at Georgia Pellegrini, where you’ll find more recipes, photos, learn all about her wonderful books Girl Hunter and Food Heroes, and enjoy her latest adventures.


Profile photo of missamy

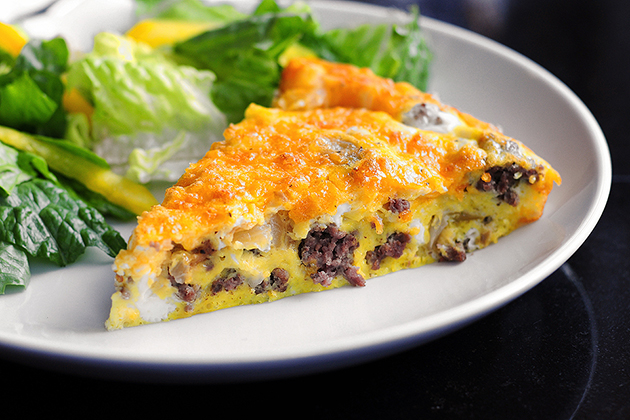
Cheeseburger Frittata

Posted by in Step-by-Step Recipes

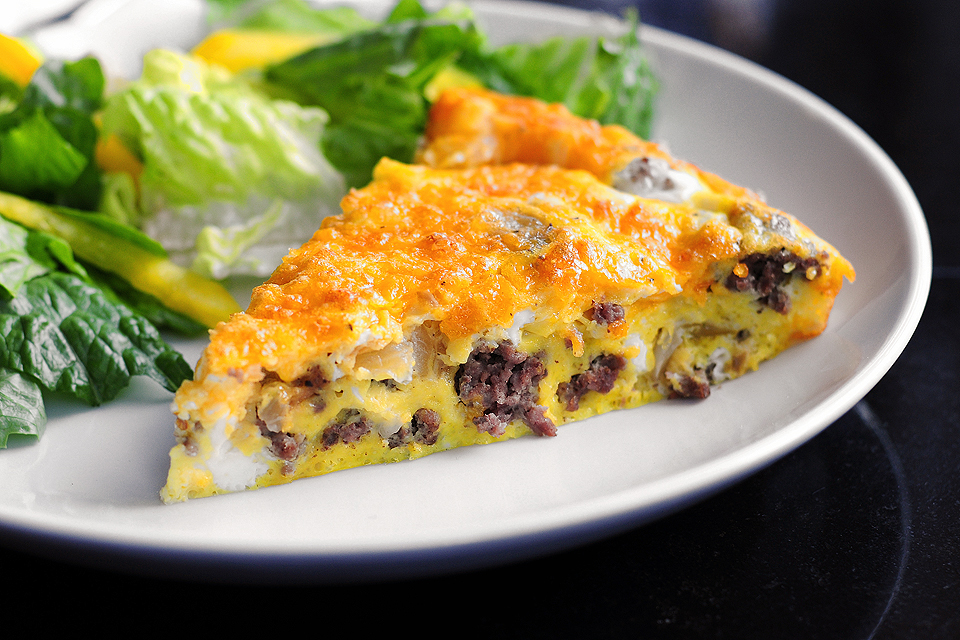
Tasty Kitchen Blog: Cheeseburger Frittata. Guest post and recipe from Amy Johnson of She Wears Many Hats.

 
Trying to manage a balanced diet is difficult for me. One of the hardest things is to make sure I’m getting enough healthy protein. During a busy day, carbs are usually the quick go-to meal for me, but I’ve found when I focus on getting more good protein during the day I function much better, physically and mentally. I feel more even keel, if you know what I mean.

Enter the frittata. A frittata is a great meal option for breakfast, lunch, or dinner. It’s quick like an omelet, and much lighter than its cousin the quiche. And like an omelet or quiche, the frittata flavor combinations are endless. It’s the perfect “clean out the fridge” meal.

For this version I had cheeseburger on the brain, so a Cheeseburger Frittata it was. I added browned ground beef, cheddar, and sautéed onions, but like any burger, build it like you want. Add some bacon, substitute a different cheese, or maybe mushrooms? Yum, mushrooms would be mighty nice.

Also, while a frittata is usually made stovetop in a skillet then finished under the broiler, I baked this one in a pie pan for the whole cook time. I found it gave a lighter texture, and it was easier, no fuss.

Take a second to assess your fridge, see what you have on hand and let’s make a frittata. Let me show you how I made this one.


Tasty Kitchen Blog: Cheeseburger Frittata. Guest post and recipe from Amy Johnson of She Wears Many Hats.

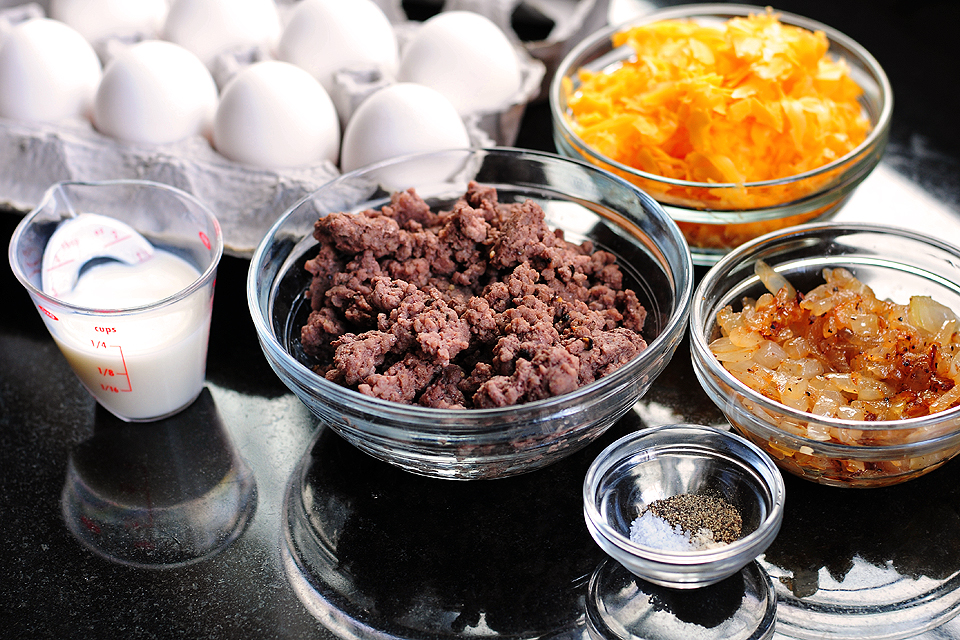
You’ll need eggs, a little milk, cheese (I used cheddar), browned ground beef, sautéed onions, and seasonings. I used salt, pepper and garlic powder (our favorite hamburger addition). Pretty simple stuff.


Tasty Kitchen Blog: Cheeseburger Frittata. Guest post and recipe from Amy Johnson of She Wears Many Hats.

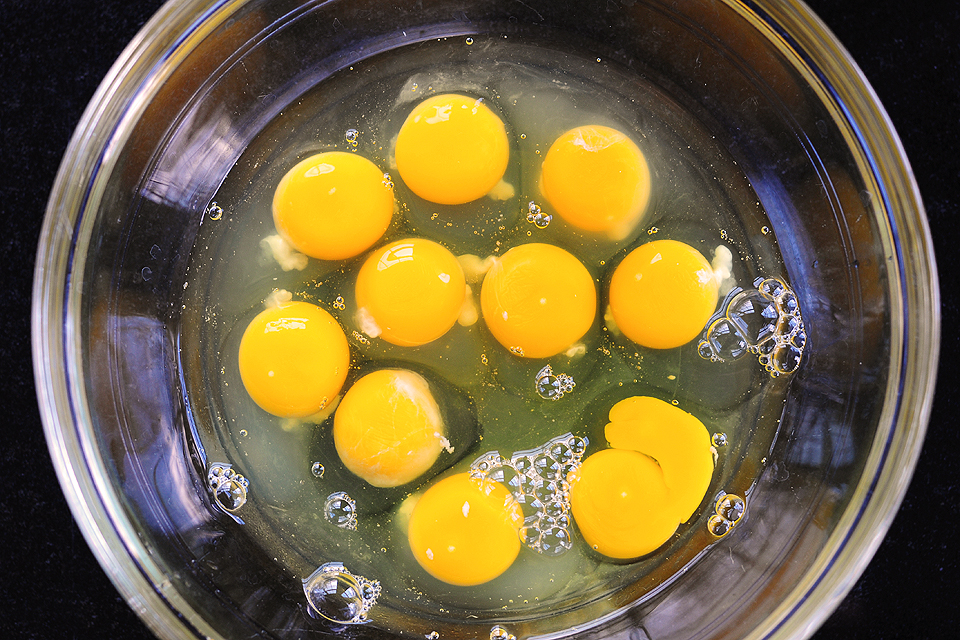
Begin by cracking the eggs into a large bowl.


Tasty Kitchen Blog: Cheeseburger Frittata. Guest post and recipe from Amy Johnson of She Wears Many Hats.

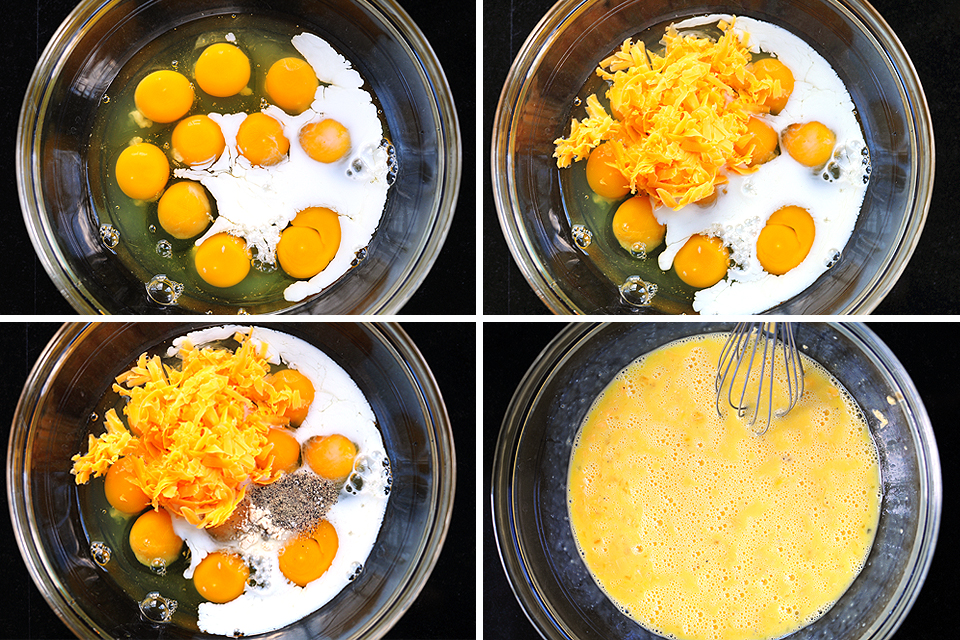
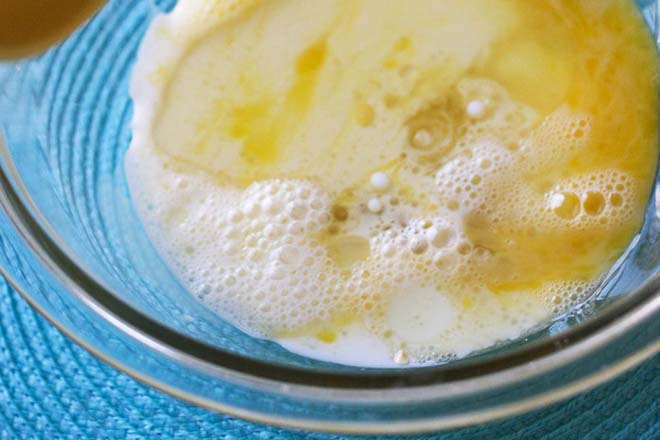
Next add the milk, half of the cheese, and 1/4 teaspoon of each of the seasonings. Beat all together until combined well.


Tasty Kitchen Blog: Cheeseburger Frittata. Guest post and recipe from Amy Johnson of She Wears Many Hats.

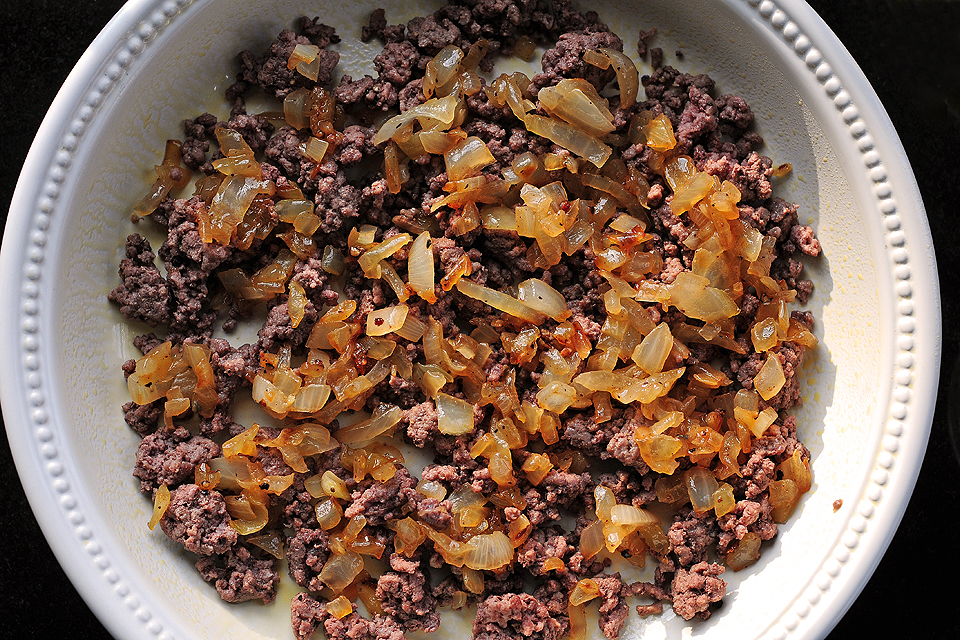
In a pie pan coated well with butter or cooking spray, layer the browned ground beef and sautéed onions. Note: I used a 10″ pie pan, but a 9″ deep dish pie pan would work nicely here and give you a thicker frittata, too. Remember to adjust cook time for different sized dishes.


Tasty Kitchen Blog: Cheeseburger Frittata. Guest post and recipe from Amy Johnson of She Wears Many Hats.
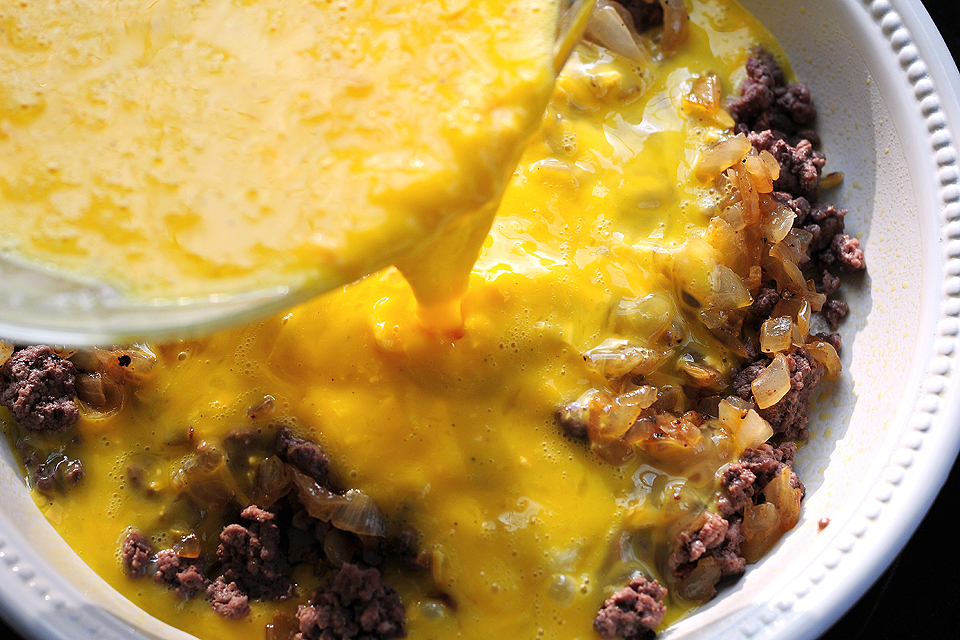
Pour the egg mixture over the ground beef and onions.


Tasty Kitchen Blog: Cheeseburger Frittata. Guest post and recipe from Amy Johnson of She Wears Many Hats.

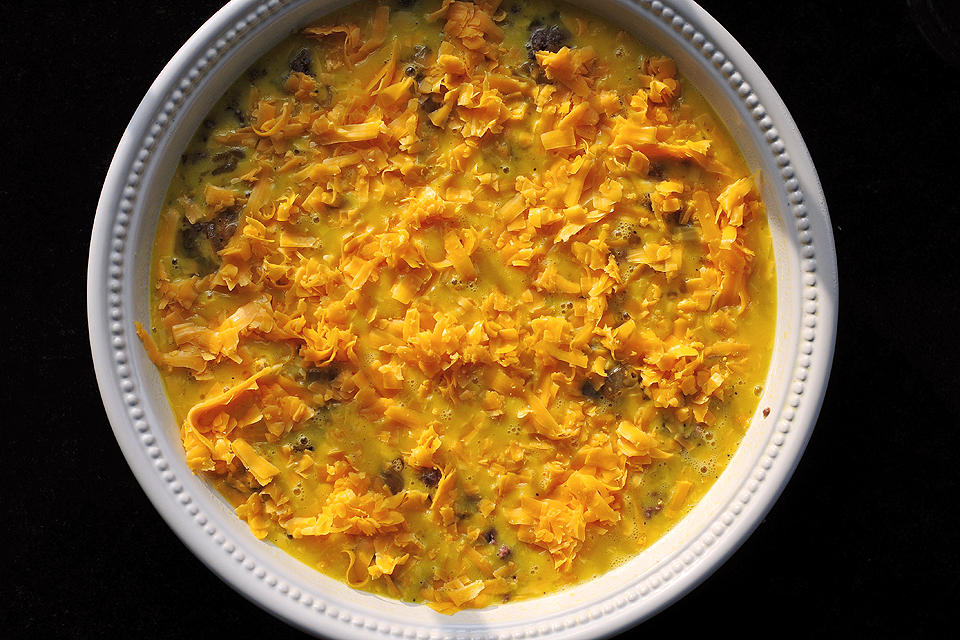
Spread the remaining cheese evenly over the top.


Tasty Kitchen Blog: Cheeseburger Frittata. Guest post and recipe from Amy Johnson of She Wears Many Hats.

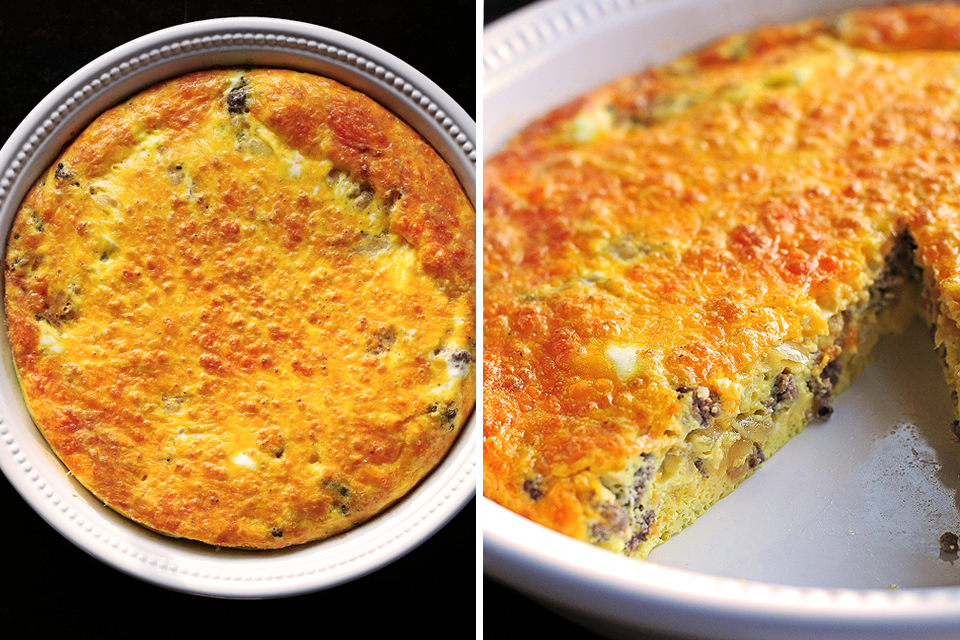
Bake in a 400°F oven for about 15-20 minutes until center is set. Oven temperatures vary so be careful and watch for overcooking.


Tasty Kitchen Blog: Cheeseburger Frittata. Guest post and recipe from Amy Johnson of She Wears Many Hats.

Slice a piece and serve with a side of fruit for breakfast, or with a salad and/or soup for lunch or dinner. Frittata is flexible like that. Enjoy!

If you have any other frittata combos, please share below in the comments. I’m in a frittata-making mode right now.


Printable Recipe

Cheeseburger Frittata

See post on missamy’s site!
4.25 Mitt(s) 8 Rating(s)8 votes, average: 4.25 out of 58 votes, average: 4.25 out of 58 votes, average: 4.25 out of 58 votes, average: 4.25 out of 58 votes, average: 4.25 out of 5

Prep Time:

Cook Time:

Difficulty: Easy

Servings: 8

8
x

Print Options

Page size Letter 3x5 4x6
Text Size Small Medium Large
Content Include description
Include prep time, etc.
Show image

Description

A simple Cheeseburger Frittata for a quick, low-carb cheeseburger meal.

Ingredients

  • 1 pound Ground Beef
  • ¼ teaspoons Plus Two Dashes Of Salt, Divided
  • ¼ teaspoons Plus Two Dashes Of Pepper, Divided
  • ¼ teaspoons Plus Two Dashes Of Garlic Powder, Divided
  • 1 Tablespoon Olive Oil
  • 1 whole Medium-large Onion, Chopped
  • 10 whole Large Eggs
  • 3 Tablespoons Milk
  • 4 ounces, weight Cheddar Cheese, Shredded, Divided
  • Optional Additions: Bacon, Sautéed Mushroom, Sliced/diced Tomatoes

Preparation Instructions

Preheat oven to 400 F.

I used a 10″ pie pan for this recipe, but a 9″ deep dish should work as well. Grease it with some butter or spray it with cooking spray.

Brown the beef in a skillet over medium heat with a dash of salt, pepper and garlic powder.

In another skillet, heat olive oil over medium heat and sauté onion with a dash of salt and pepper. Saute until onions are translucent.

Beat together eggs, milk, 1/2 of the shredded cheddar cheese and 1/4 teaspoon of salt pepper and garlic powder.

Evenly distribute the browned hamburger on the bottom of the pie pan then top it with the sautéed onions.

Pour the egg mixture over the top of the hamburger and onion. Top that with the remaining cheese.

Bake at 400 F for 15-20 minutes until set. (I used a 10″ pie pan, so adjust cooking time accordingly for a different size of pan.)


_______________________________________

Amy Johnson is a blogger who writes about food, travel, the home (both inside and out), and various observations and random musings about anything and everything. Visit her blog She Wears Many Hats for a dose of deliciousness, practicality, hilarity, or just plain fun. She lives in South Carolina with her husband and two children.


Profile photo of Natalie | Perry's Plate

Baked Hushpuppies

Posted by in Baking, Step-by-Step Recipes

Tasty Kitchen Blog: Baked Hushpuppies. Guest post by Natalie Perry of Perry's Plate, recipe submitted by TK member beachbumwannabe.

 
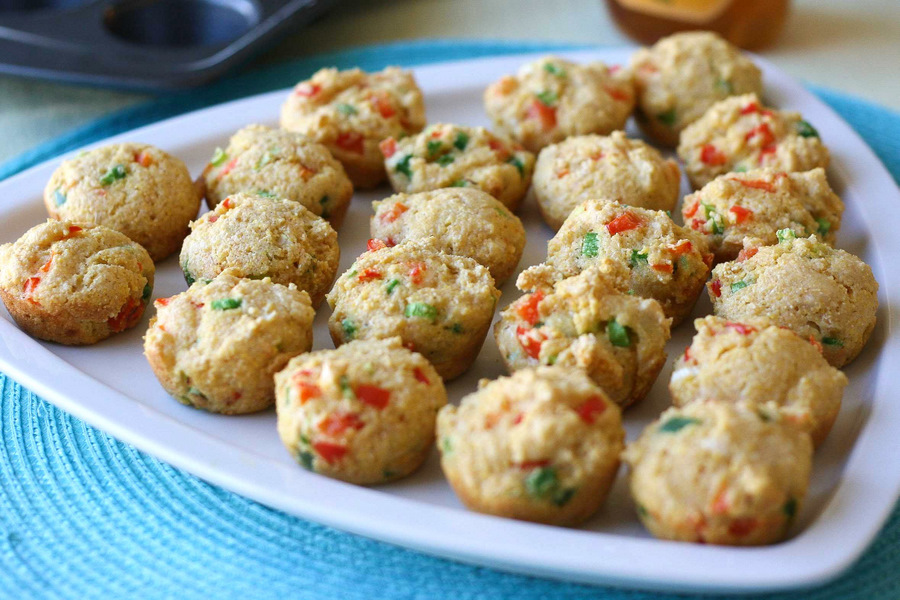
Have you ever had a hushpuppy? A true hushpuppy is a cornmeal-based dough that’s fried into little balls. Sometimes onions and peppers are added, but that’s basically it. Hushpuppies have very strong ties to the American South, like fried dill pickles and fried okra (two more of my favorite fried goodies) and are commonly served as a side dish at seafood restaurants.

Oh, and they’re deliciously addictive. I head straight for these when the competitive BBQ tents go up here in Reno, Nevada. Sorry ribs, I’ll catch you later.

Tasty Kitchen member beachbumwannabe (aren’t we all??) submitted this grease-free version, and I was dying to try it. Baked Hushpuppies are pretty good. They’re not identical to the fried version, but they’re a great, lighter alternative. Plus, they’re a great little dipper for soups and chilis. Or a finger food at a party buffet.

If you happen to be a hushpuppy purist and red flags are going off all over the place, just think of these as mini corn muffins. Ah, better?


Tasty Kitchen Blog: Baked Hushpuppies. Guest post by Natalie Perry of Perry's Plate, recipe submitted by TK member beachbumwannabe.

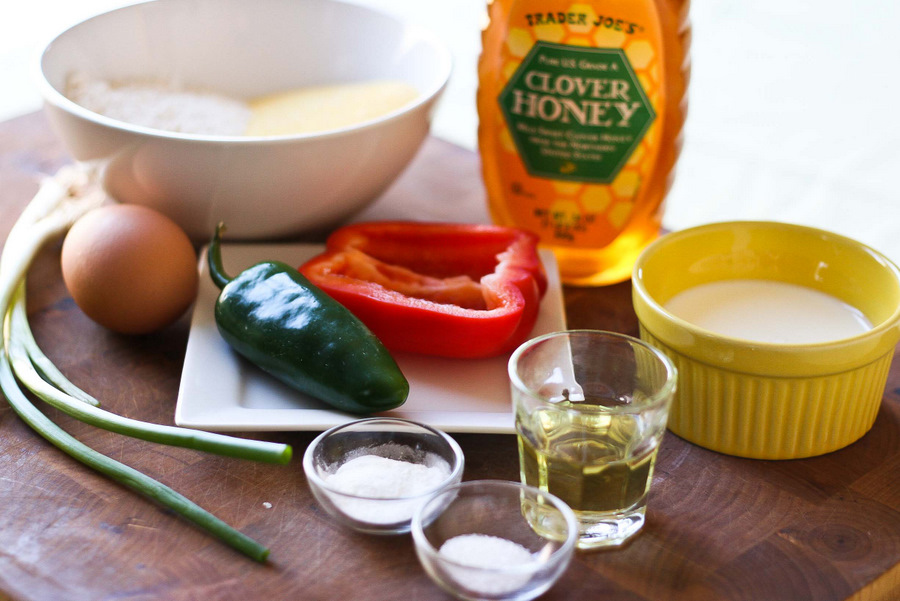
First, gather your ingredients. You’ll need cornmeal, flour, an egg, baking powder, salt, cooking oil, milk, an egg, green onions, peppers, and honey.


Tasty Kitchen Blog: Baked Hushpuppies. Guest post by Natalie Perry of Perry's Plate, recipe submitted by TK member beachbumwannabe.

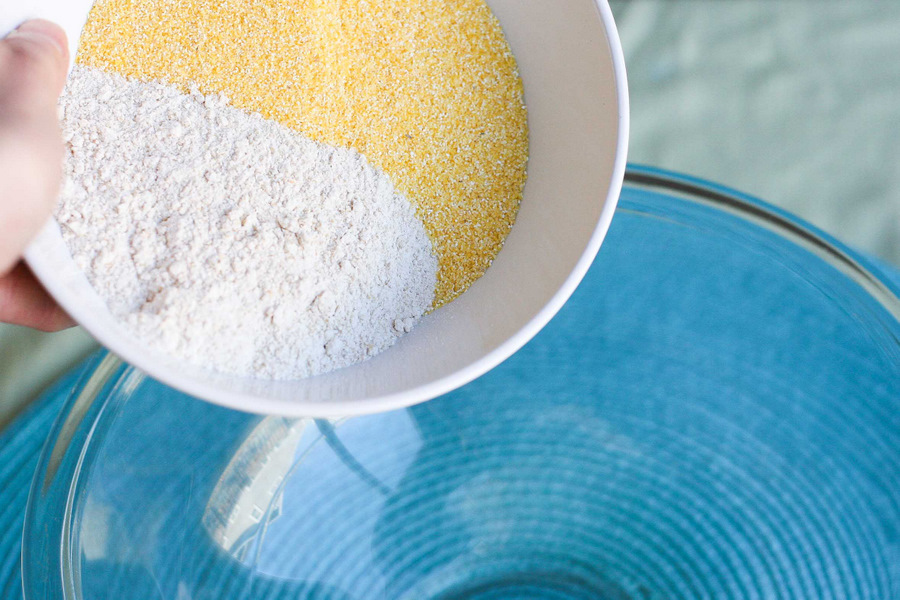
Grab a medium-sized mixing bowl and toss in the cornmeal and flour. For mine, I used whole wheat pastry flour to add some whole grains. It’s a great replacement for all-purpose flour in things like this because you can’t tell the difference.


Tasty Kitchen Blog: Baked Hushpuppies. Guest post by Natalie Perry of Perry's Plate, recipe submitted by TK member beachbumwannabe.

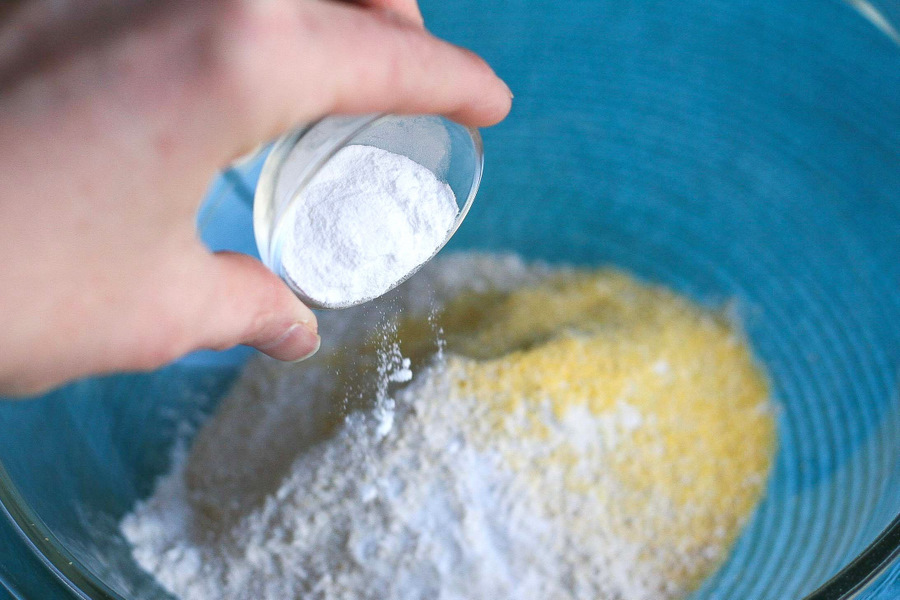
Add the baking powder.


Tasty Kitchen Blog: Baked Hushpuppies. Guest post by Natalie Perry of Perry's Plate, recipe submitted by TK member beachbumwannabe.

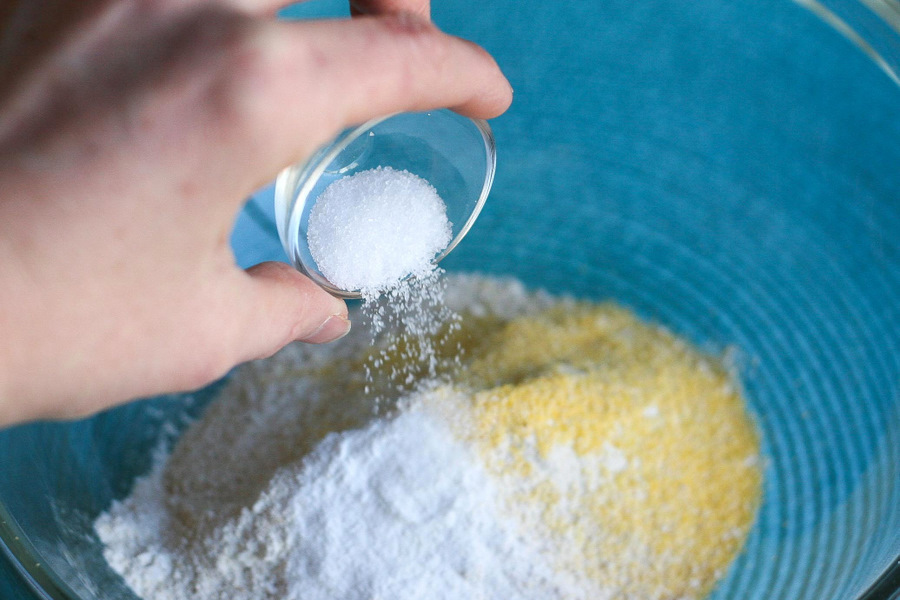
And the salt.


Tasty Kitchen Blog: Baked Hushpuppies. Guest post by Natalie Perry of Perry's Plate, recipe submitted by TK member beachbumwannabe.

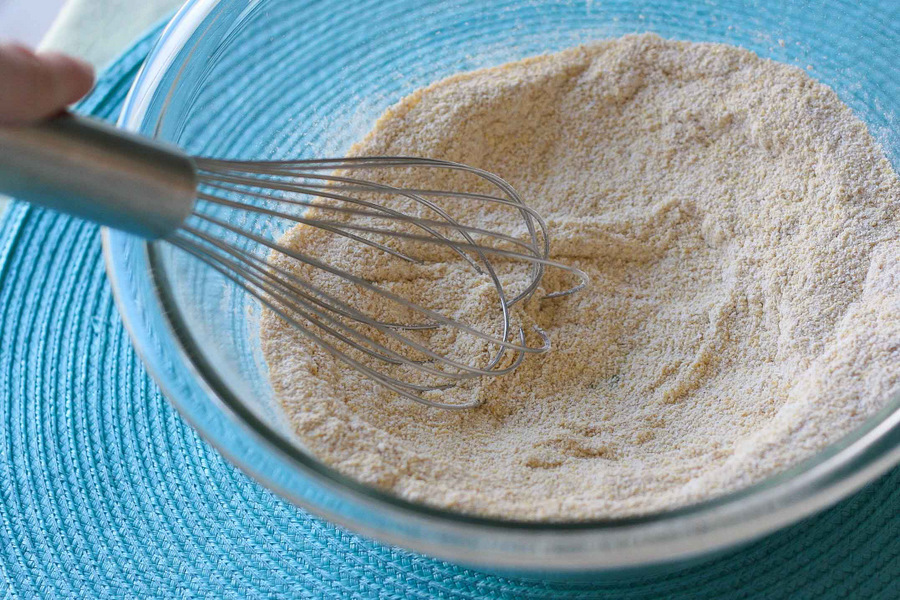
Give it a good whisk.


Tasty Kitchen Blog: Baked Hushpuppies. Guest post by Natalie Perry of Perry's Plate, recipe submitted by TK member beachbumwannabe.

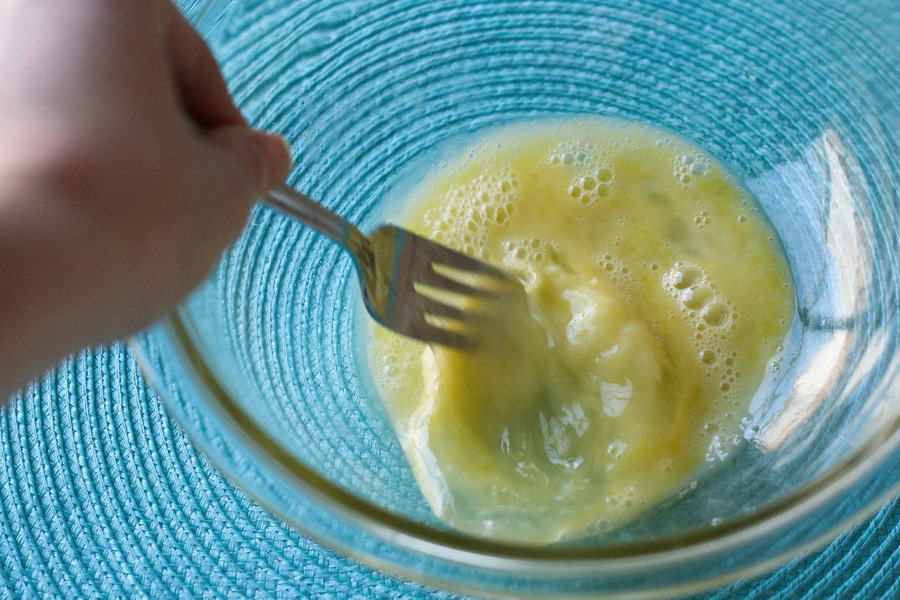
Grab another smaller bowl. Crack the egg into it and shake it up a bit with a fork.


Tasty Kitchen Blog: Baked Hushpuppies. Guest post by Natalie Perry of Perry's Plate, recipe submitted by TK member beachbumwannabe.

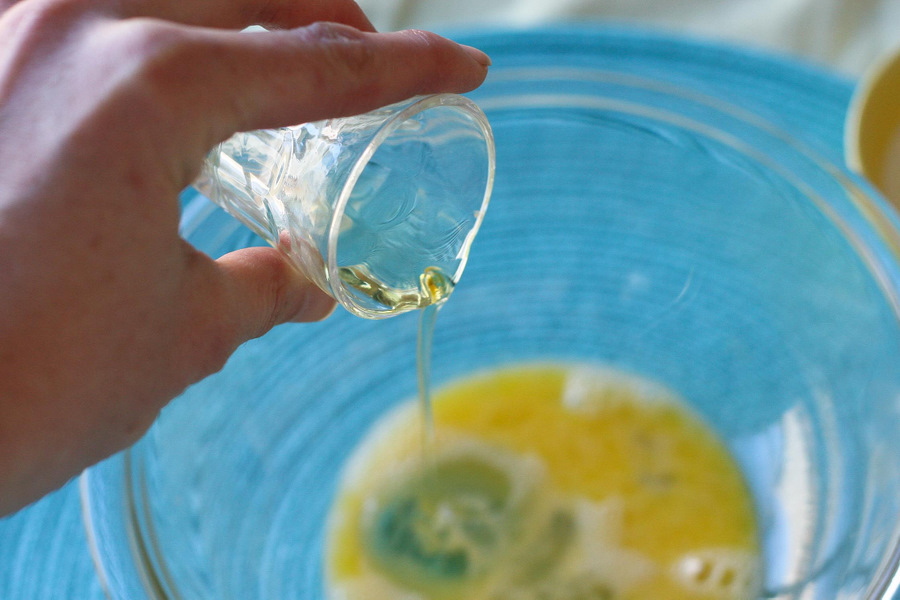
To this, add the oil. I used grapeseed.


Tasty Kitchen Blog: Baked Hushpuppies. Guest post by Natalie Perry of Perry's Plate, recipe submitted by TK member beachbumwannabe.

And add the milk.


Tasty Kitchen Blog: Baked Hushpuppies. Guest post by Natalie Perry of Perry's Plate, recipe submitted by TK member beachbumwannabe.

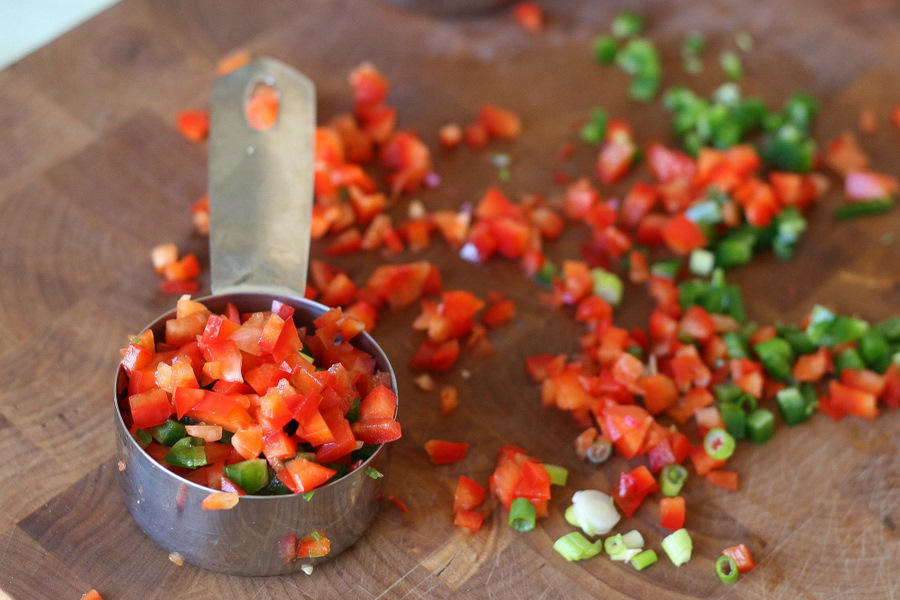
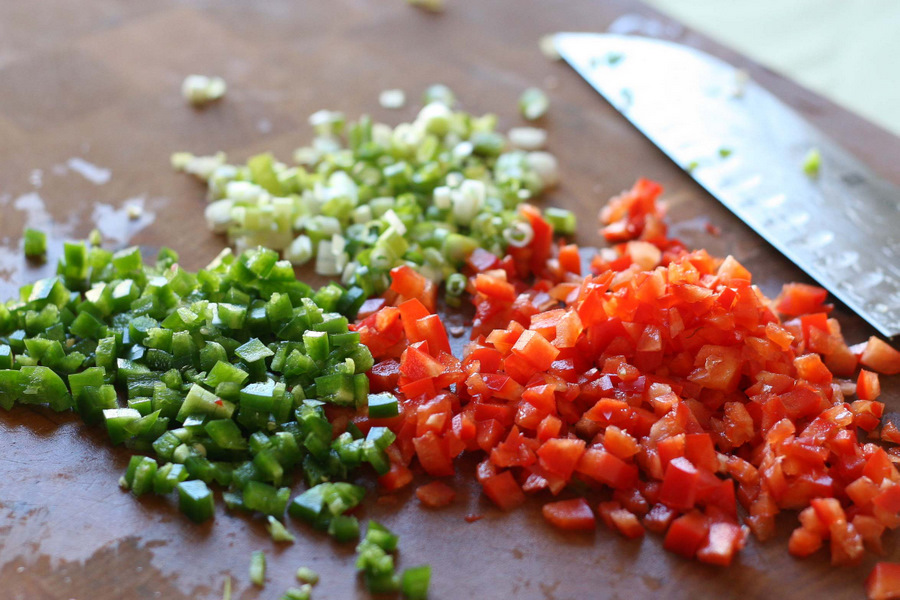
Next, chop the green onion and peppers. The recipe suggested a combination of red bell pepper and jalapeno. I used them, too. I also de-flamed my jalapenos because I have small children, but if you want more heat in these, leave a few seeds in the mix.


Tasty Kitchen Blog: Baked Hushpuppies. Guest post by Natalie Perry of Perry's Plate, recipe submitted by TK member beachbumwannabe.

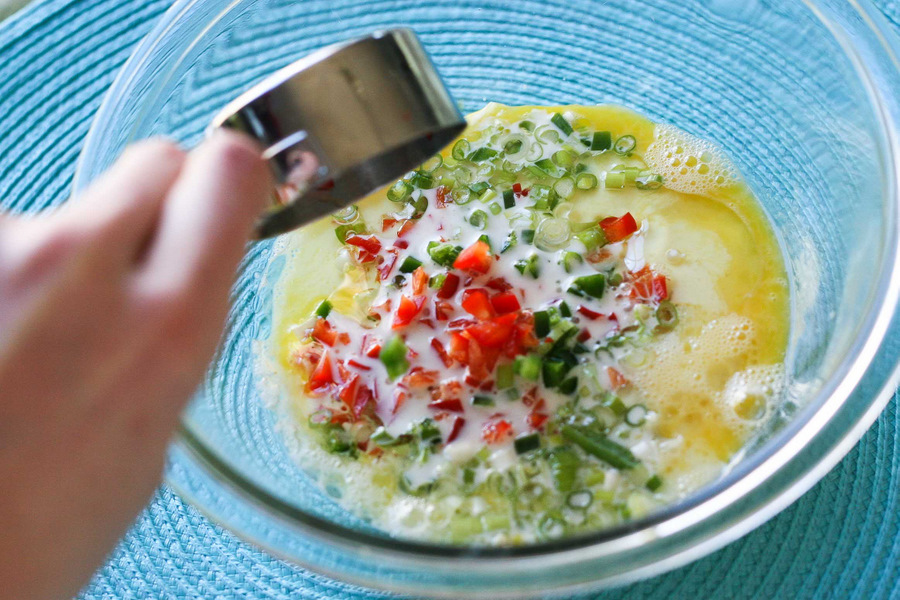
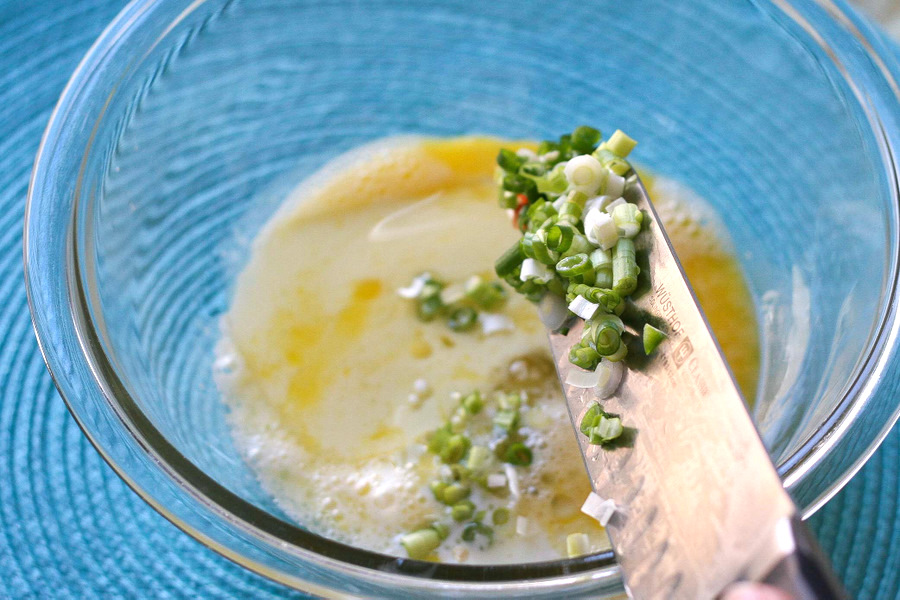
Add the green onion to the egg mixture.


Tasty Kitchen Blog: Baked Hushpuppies. Guest post by Natalie Perry of Perry's Plate, recipe submitted by TK member beachbumwannabe.

You’ll only need about 1/3 cup of chopped peppers, so combine them how you like into a measuring cup. Save the rest for an omelet. Or a frittata.


Tasty Kitchen Blog: Baked Hushpuppies. Guest post by Natalie Perry of Perry's Plate, recipe submitted by TK member beachbumwannabe.

Add those to the wet mixture, and stir it well.


Tasty Kitchen Blog: Baked Hushpuppies. Guest post by Natalie Perry of Perry's Plate, recipe submitted by TK member beachbumwannabe.

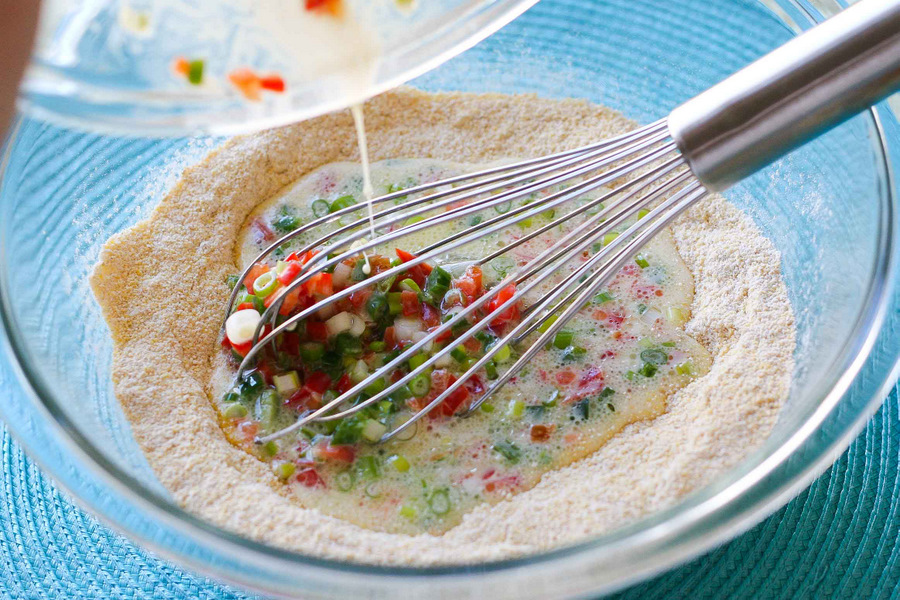
Add the entire egg mixture to the cornmeal mixture. Give it a whisk, but just until it’s moistened.


Tasty Kitchen Blog: Baked Hushpuppies. Guest post by Natalie Perry of Perry's Plate, recipe submitted by TK member beachbumwannabe.

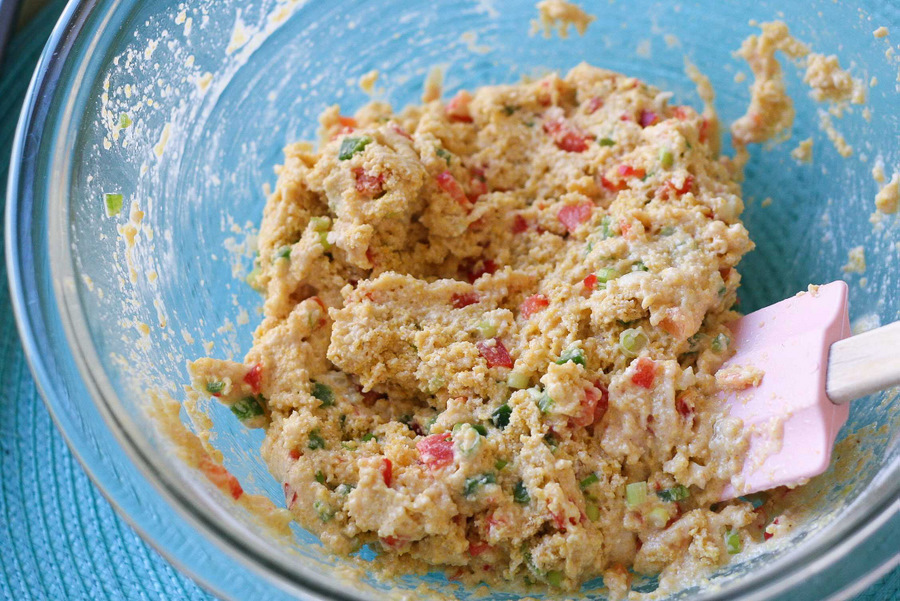
Know what? A whisk wasn’t such a great idea. Use a rubber spatula instead.


Tasty Kitchen Blog: Baked Hushpuppies. Guest post by Natalie Perry of Perry's Plate, recipe submitted by TK member beachbumwannabe.

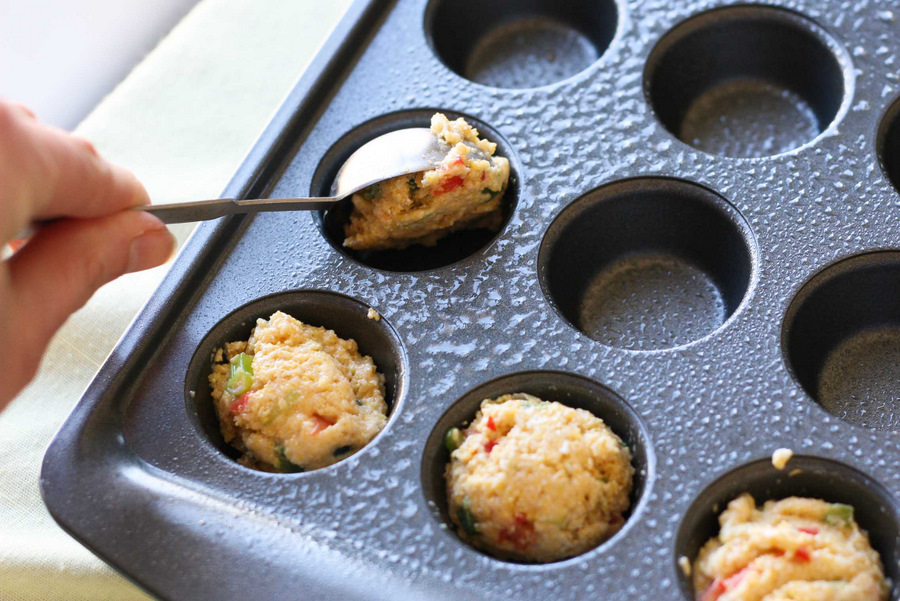
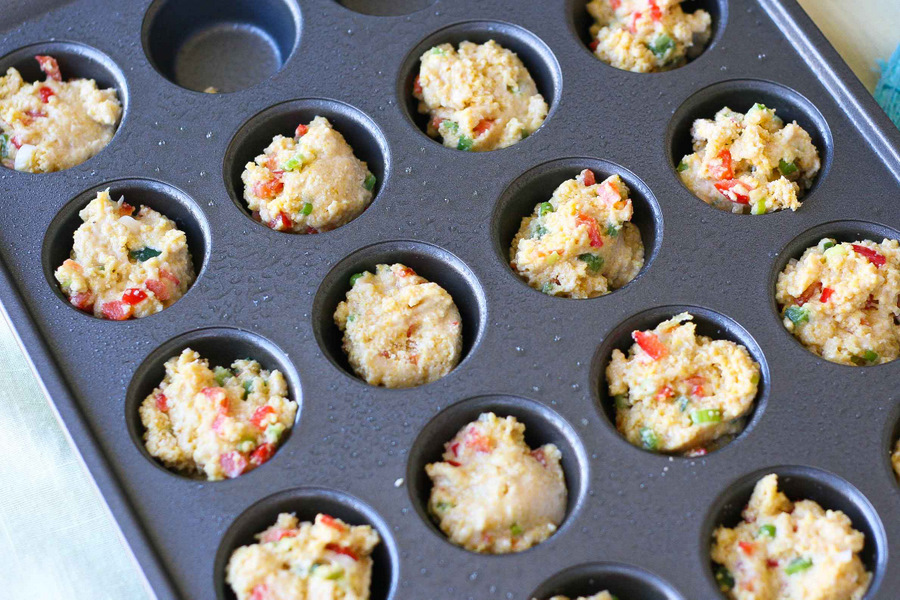
If you’ve got a mini muffin pan, good for you! Add a tablespoon of dough to each cup. If you’re using a regular muffin pan, add 2-3 tablespoons per cup.


Tasty Kitchen Blog: Baked Hushpuppies. Guest post by Natalie Perry of Perry's Plate, recipe submitted by TK member beachbumwannabe.

My pan has 24 cups, but I only had enough dough for 21. If you have extra cups, fill them halfway with water. It helps to distribute the heat more evenly on that end of the pan. You wouldn’t want any scorched hushpuppies now.


Tasty Kitchen Blog: Baked Hushpuppies. Guest post by Natalie Perry of Perry's Plate, recipe submitted by TK member beachbumwannabe.

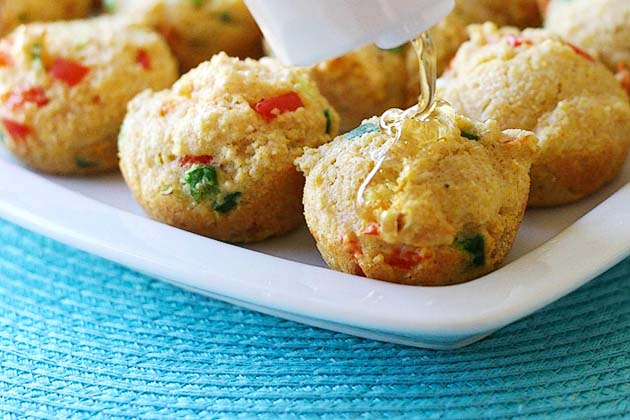
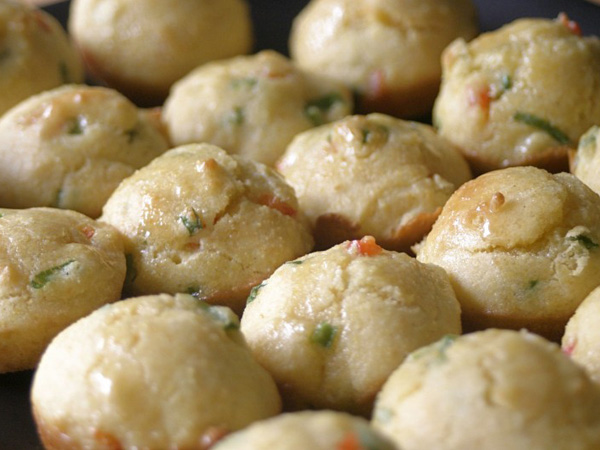
Bake them for about 8-10 minutes (longer for a regular muffin tin) or until they’re firm and a little golden brown on the sides. Pretty, aren’t they? They’re about to get better, though …


Tasty Kitchen Blog: Baked Hushpuppies. Guest post by Natalie Perry of Perry's Plate, recipe submitted by TK member beachbumwannabe.

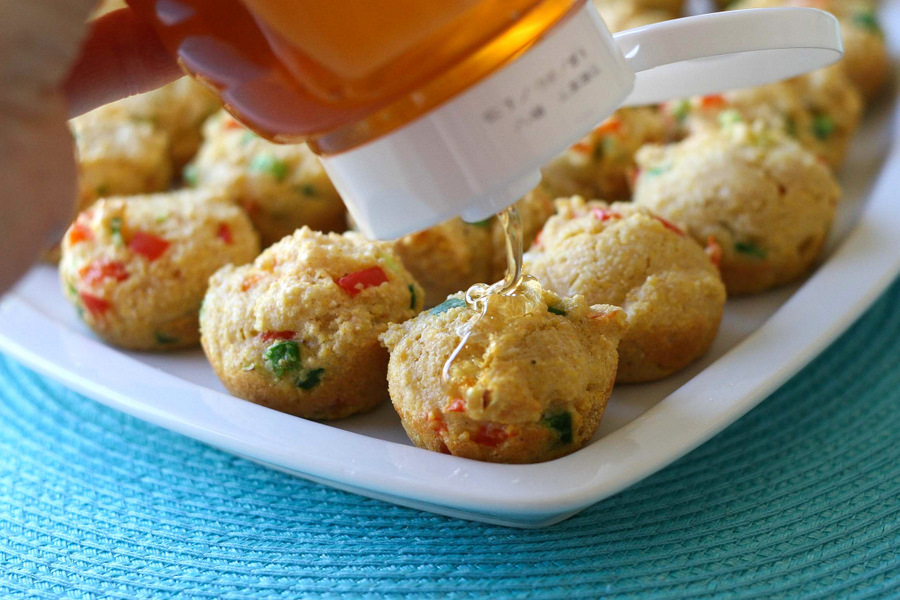
Oh yes. Drizzle honey over the warm hushpuppies. Then pop one in your mouth. (Or five. Don’t judge, I’m pregnant.)

Thank you so much, beachbumwannabe!

Notes:
1. I omitted the sugar in the recipe because I like my cornbread on the savory side, but for these, I think I would add a tablespoon next time.
2. I live in Nevada, and I think because of the dry air, my dough turned out drier than it should have. Add a little more milk if you think your dough may be too dry as well.


Printable Recipe

Baked Hushpuppies

4.75 Mitt(s) 4 Rating(s)4 votes, average: 4.75 out of 54 votes, average: 4.75 out of 54 votes, average: 4.75 out of 54 votes, average: 4.75 out of 54 votes, average: 4.75 out of 5

Prep Time:

Cook Time:

Difficulty: Easy

Servings: 24

24
x

Print Options

Page size Letter 3x5 4x6
Text Size Small Medium Large
Content Include description
Include prep time, etc.
Show image

Description

Another great recipe from Grandma Blacknall’s recipe box: baked hushpuppies!

Making a pot of chili for game day? These baked hushpuppies are a great addition to your menu! You can also just add these to a finger food buffet. Everyone will love them!

Ingredients

  • ½ cups Cornmeal
  • ½ cups Flour
  • 1-½ teaspoon Baking Powder
  • ½ teaspoons Salt
  • 3 Tablespoons Sugar
  • 1 whole Egg, Beaten
  • 6 Tablespoons Finely Chopped Red Pepper & Jalapeno
  • ¼ cups Chopped Green Onion
  • ⅓ cups Skim Milk
  • 2 Tablespoons Vegetable Oil
  • 24 teaspoons Honey

Preparation Instructions

Preheat oven to 425F.

Combine cornmeal, flour, baking powder, salt, and sugar in a bowl.

Beat egg in a separate bowl.

Finely chop red pepper, jalapeno, and green onions.

Combine all ingredients and stir until moistened.

Spoon about 1 tablespoonful into greased muffin pans. I used a mini muffin pan to make them more finger friendly. Plus, I just love mini anything!

Bake at 425F for 15 to 20 minutes for regular muffin pans and about 8 to 12 minutes for mini muffin pans.

Although I added more sugar than Grandma Blacknall’s recipe called for, I still thought they needed something sweet. So I after I pulled them out of the oven, I spooned a little bit of honey over the top of each hushpuppy while they were cooling in the muffin pans. This was the perfect touch in my opinion, but experiment and find what’s perfect for your family! I also added in the jalapenos to give it a touch of spiciness. I didn’t really notice it too much, but you could leave it out if needed!


_______________________________________

Be sure to check out Natalie’s own beautiful food blog, Perrys’ Plate, where you can see her growing collection of lovely recipes. There’s always something new to see there. Go visit now!


Profile photo of Laurie - Simply Scratch

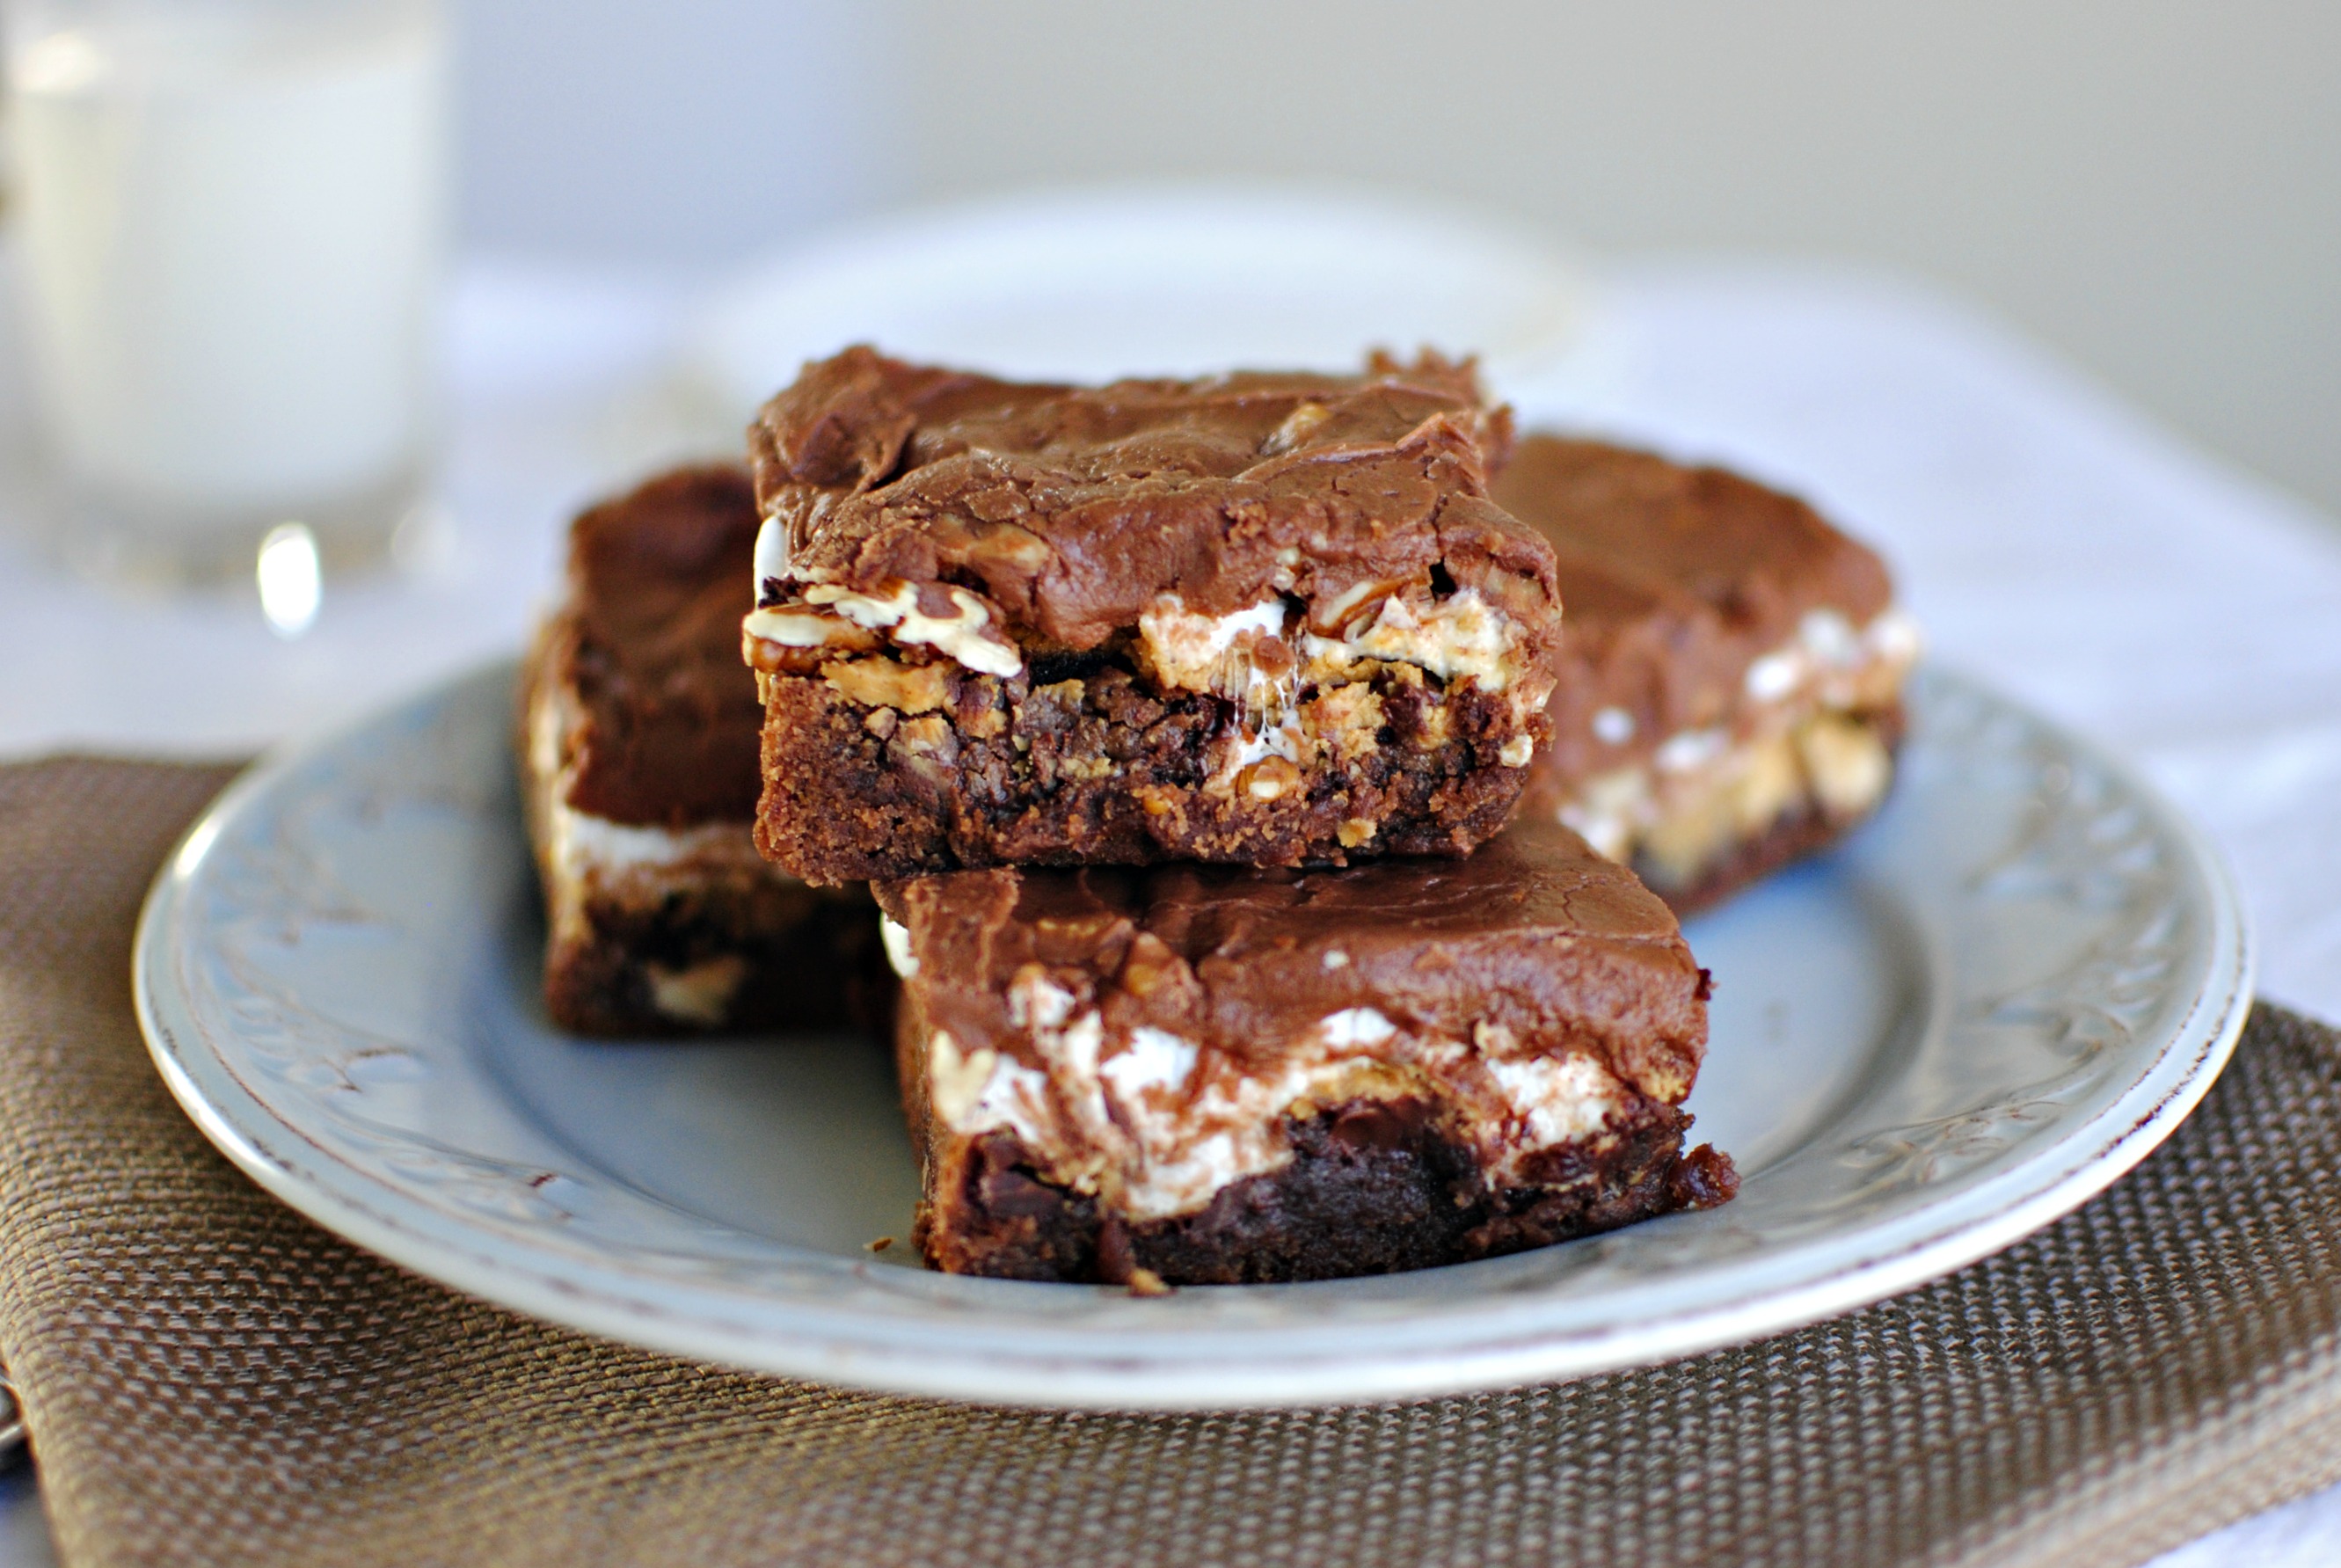
Mississippi Mud Brownies

Posted by in Baking, Step-by-Step Recipes

Tasty Kitchen Blog Mississippi Mud Brownies. Guest post by Laurie McNamara of Simply Scratch, recipe submitted by TK member Taylor of Greens and Chocolate.

 
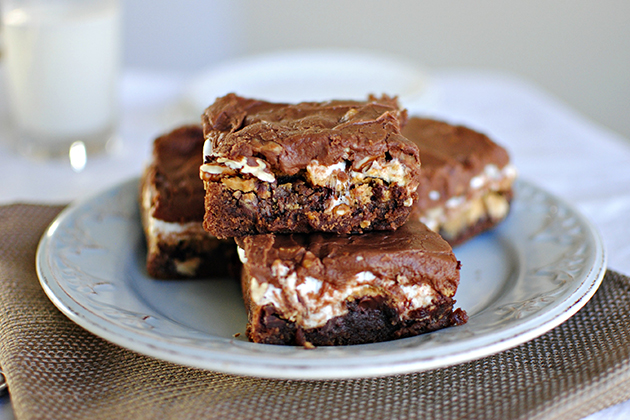
What exactly is a Mississippi Mud Brownie? Okay, so get this: it’s a moist brownie layered with chocolate chips, topped with melted crunchy peanut butter, marshmallows, sprinkled with toasted pecans and lacquered with a thin layer of frosting. Are you sold?

Instantly, when my eyes fell upon TK member Taylor’s (greensnchocolate) recipe for Mississippi Mud Brownies, I just knew I had to make them. I desperately felt the need to sink my teeth into these ooey-gooey sinful brownies! And these brownies didn’t disappoint.


Tasty Kitchen Blog Mississippi Mud Brownies. Guest post by Laurie McNamara of Simply Scratch, recipe submitted by TK member Taylor of Greens and Chocolate.

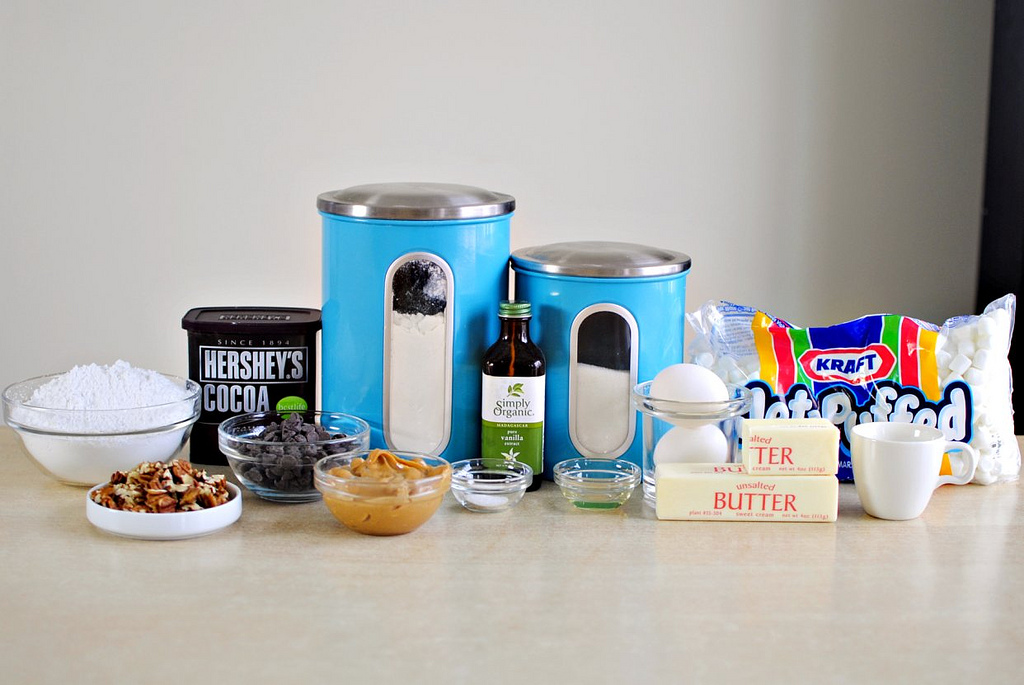
These brownies require a few basic pantry ingredients, and they take less than 30 minutes to prepare! I chopped the toasted pecans ahead of time to quicken the process a bit. 


Tasty Kitchen Blog Mississippi Mud Brownies. Guest post by Laurie McNamara of Simply Scratch, recipe submitted by TK member Taylor of Greens and Chocolate.  

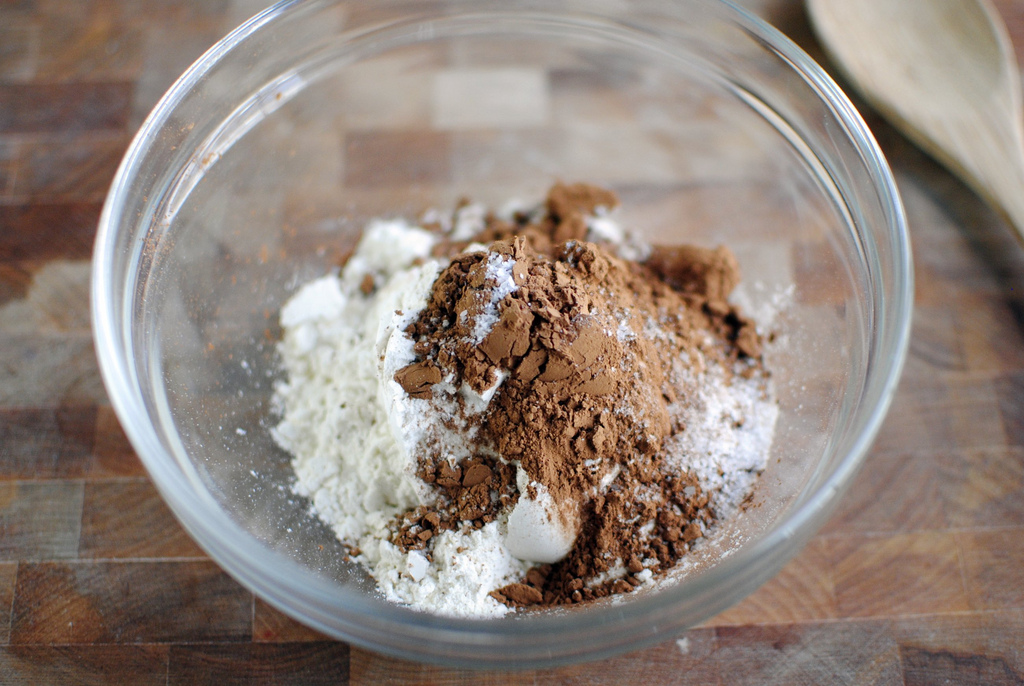
Start off by measuring the flour, cocoa powder and salt. Add them into a small bowl.


Tasty Kitchen Blog Mississippi Mud Brownies. Guest post by Laurie McNamara of Simply Scratch, recipe submitted by TK member Taylor of Greens and Chocolate.

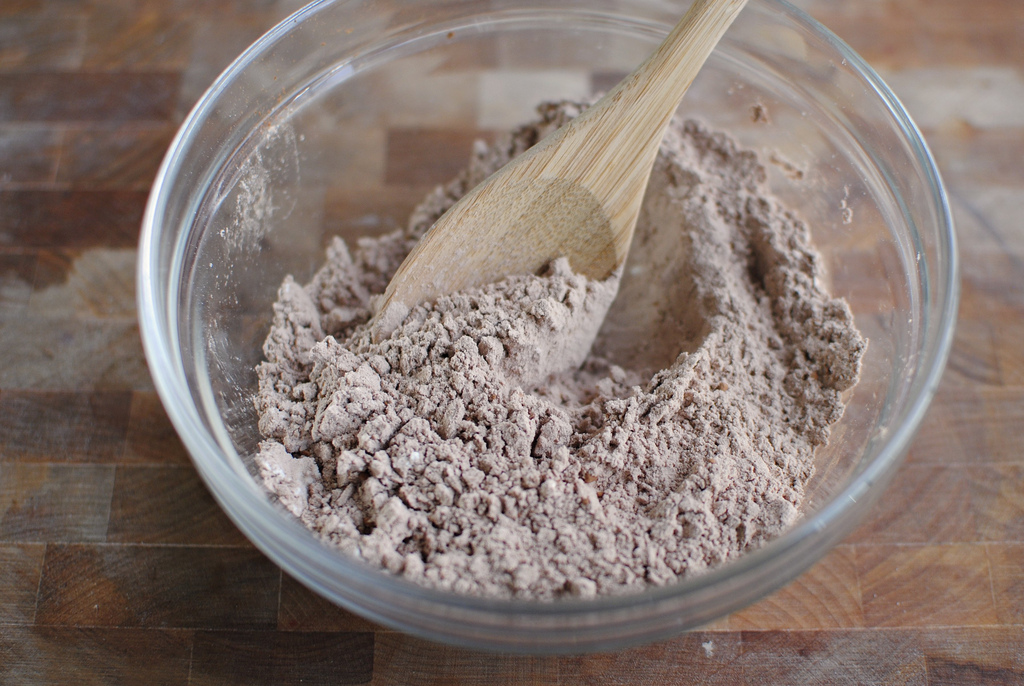
Stir to combine and set aside. 


Tasty Kitchen Blog Mississippi Mud Brownies. Guest post by Laurie McNamara of Simply Scratch, recipe submitted by TK member Taylor of Greens and Chocolate.

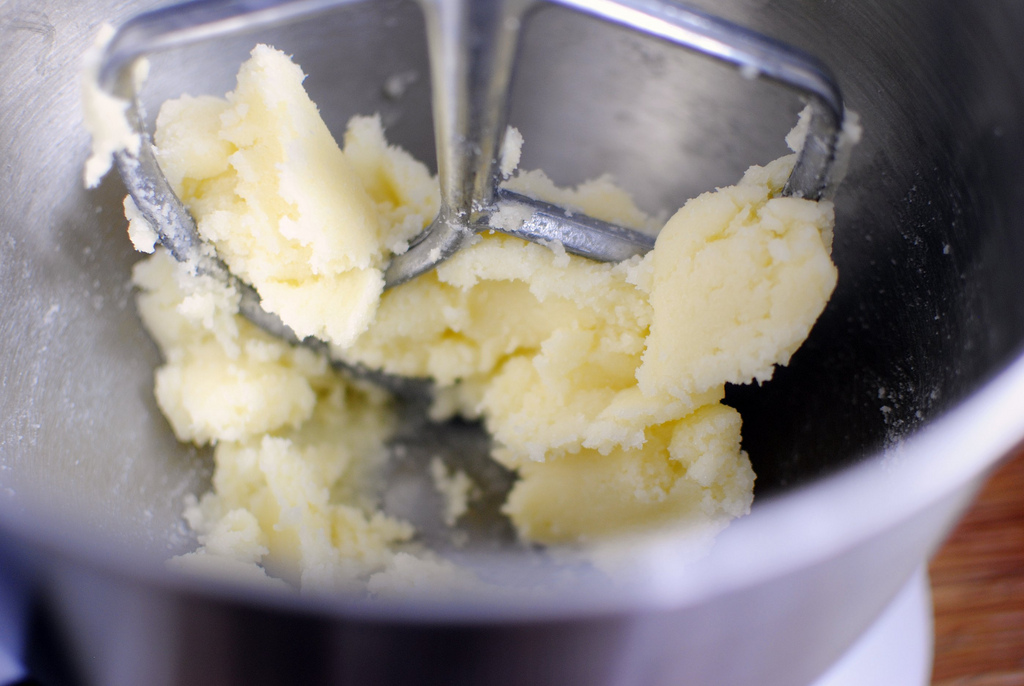
Cream the stick of butter along with a cup of sugar until light and fluffy.


Tasty Kitchen Blog Mississippi Mud Brownies. Guest post by Laurie McNamara of Simply Scratch, recipe submitted by TK member Taylor of Greens and Chocolate.

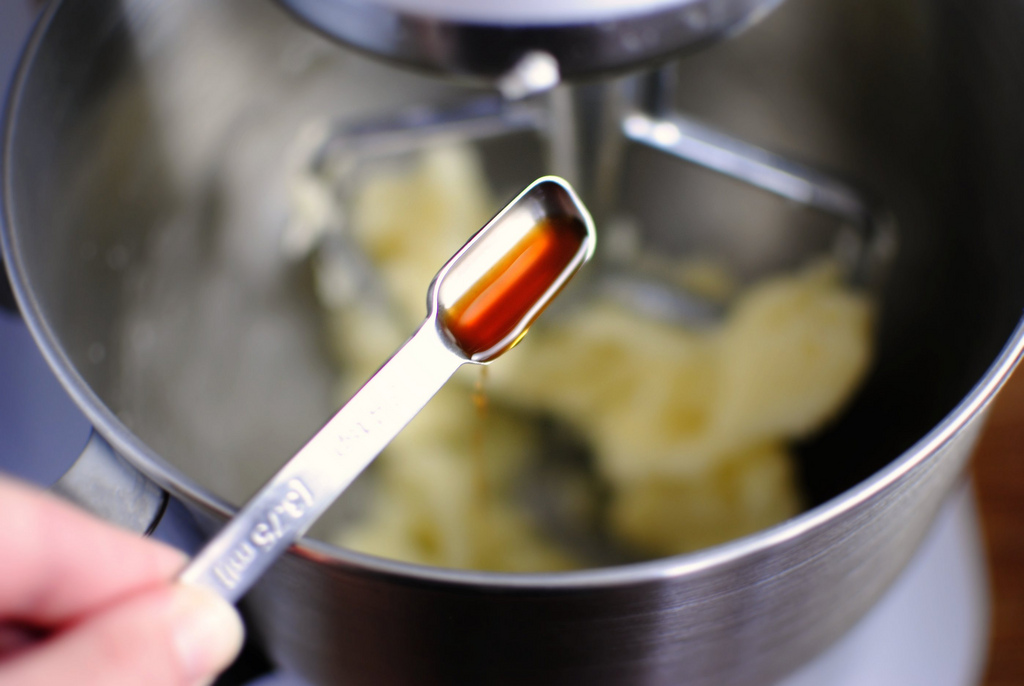
Add in the vanilla extract.


Tasty Kitchen Blog Mississippi Mud Brownies. Guest post by Laurie McNamara of Simply Scratch, recipe submitted by TK member Taylor of Greens and Chocolate.

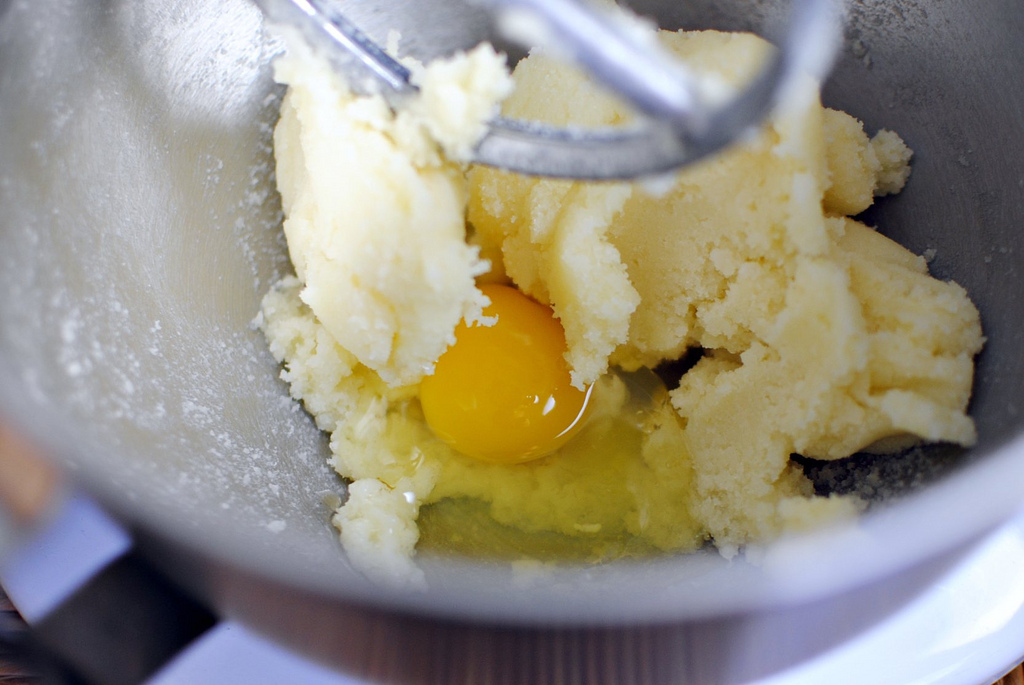
Add one egg at a time and blend well after each addition until both are incorporated.


Tasty Kitchen Blog Mississippi Mud Brownies. Guest post by Laurie McNamara of Simply Scratch, recipe submitted by TK member Taylor of Greens and Chocolate.

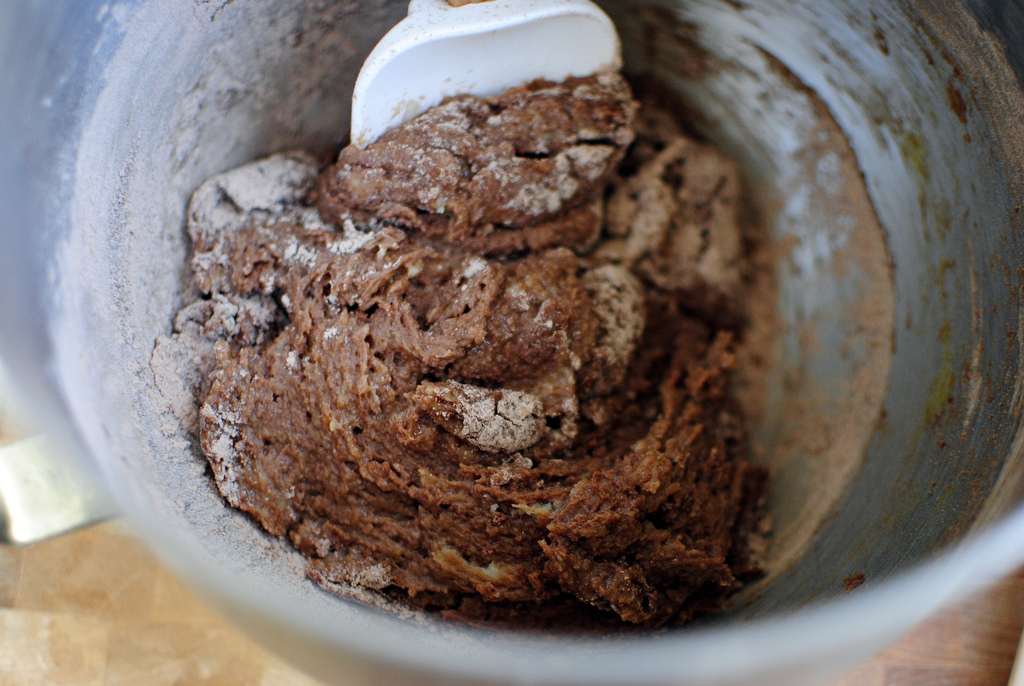
Add the dry ingredients in with the sugar/butter mixture and stir to combine.


Tasty Kitchen Blog Mississippi Mud Brownies. Guest post by Laurie McNamara of Simply Scratch, recipe submitted by TK member Taylor of Greens and Chocolate.

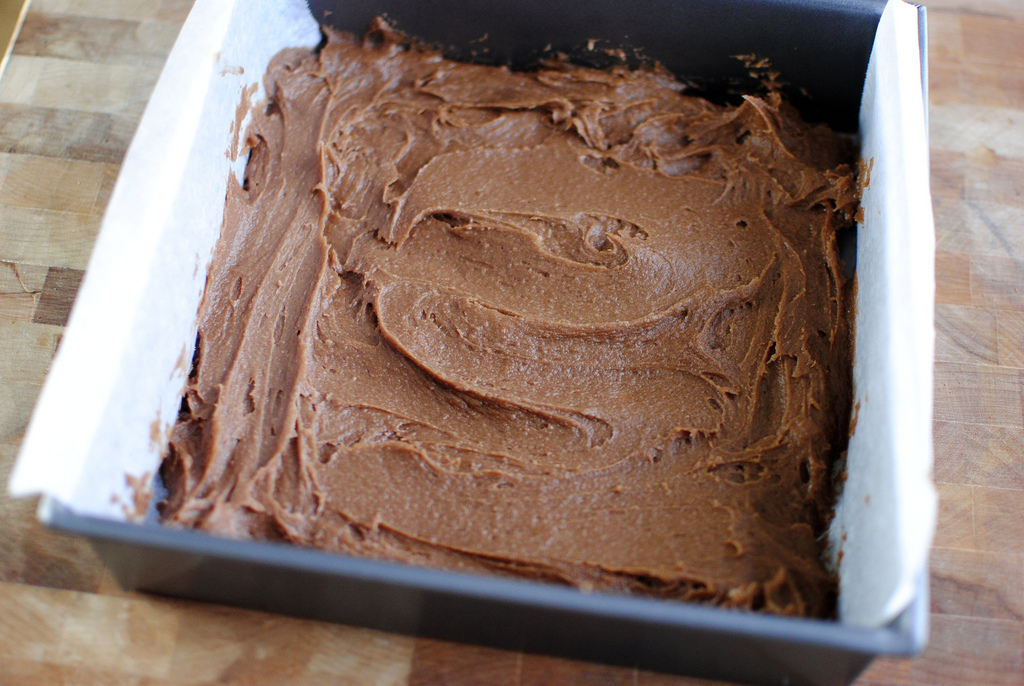
Spread the brownie mixture into the bottom of a lined 8×8 square pan.


Tasty Kitchen Blog Mississippi Mud Brownies. Guest post by Laurie McNamara of Simply Scratch, recipe submitted by TK member Taylor of Greens and Chocolate.

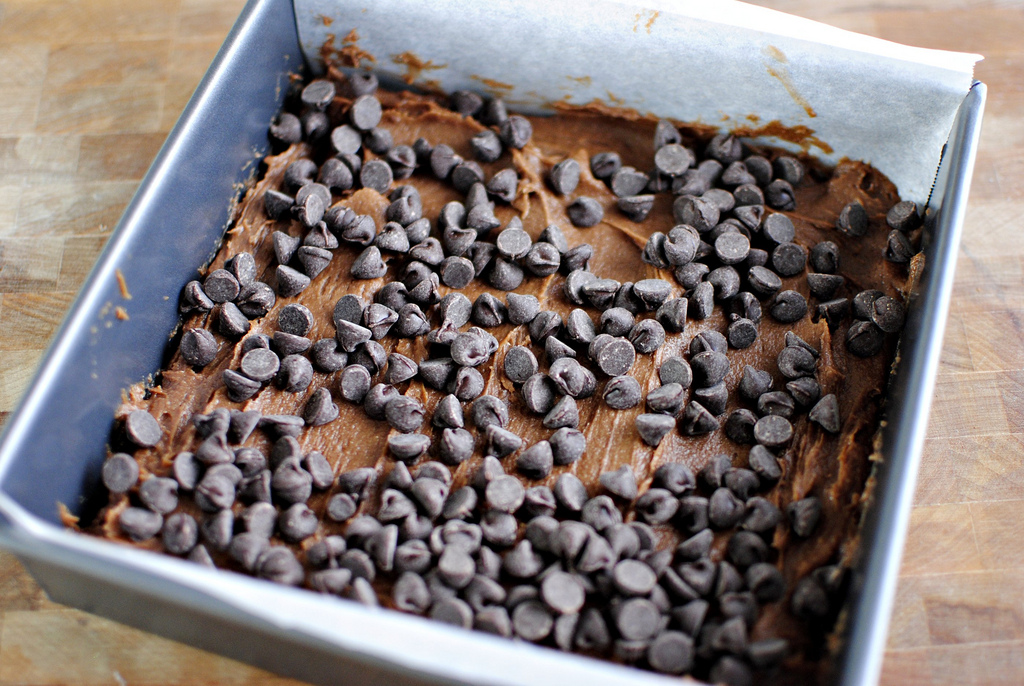
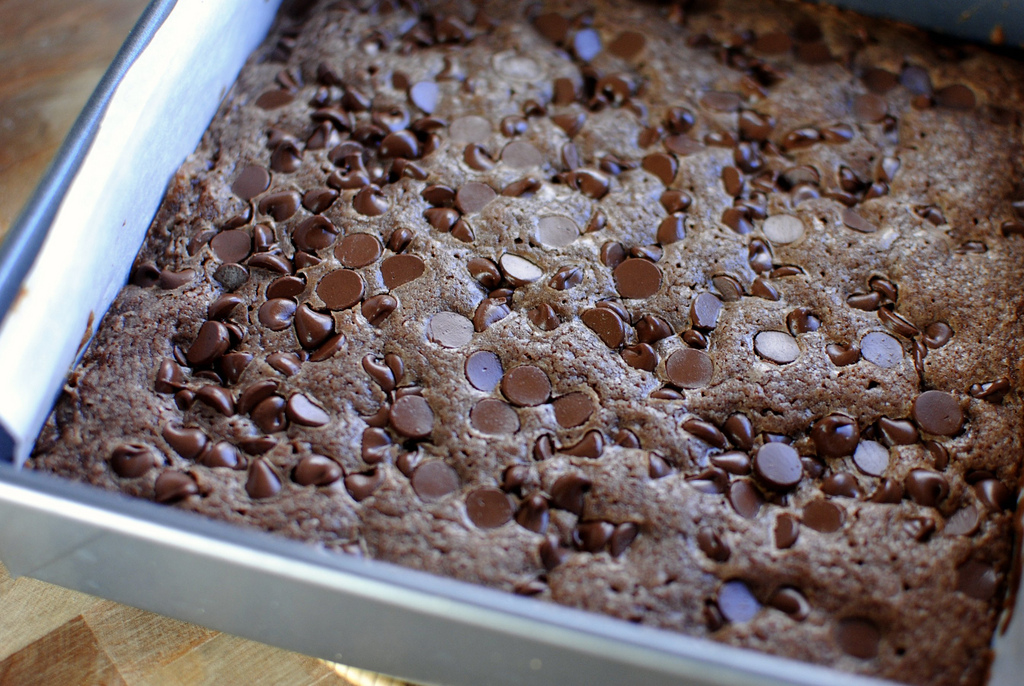
Sprinkle with chocolate chips and pop into a 350ºF oven for about 20-22 minutes.


Tasty Kitchen Blog Mississippi Mud Brownies. Guest post by Laurie McNamara of Simply Scratch, recipe submitted by TK member Taylor of Greens and Chocolate.

Once the brownies have baked, here comes the really fun part. 


Tasty Kitchen Blog Mississippi Mud Brownies. Guest post by Laurie McNamara of Simply Scratch, recipe submitted by TK member Taylor of Greens and Chocolate.

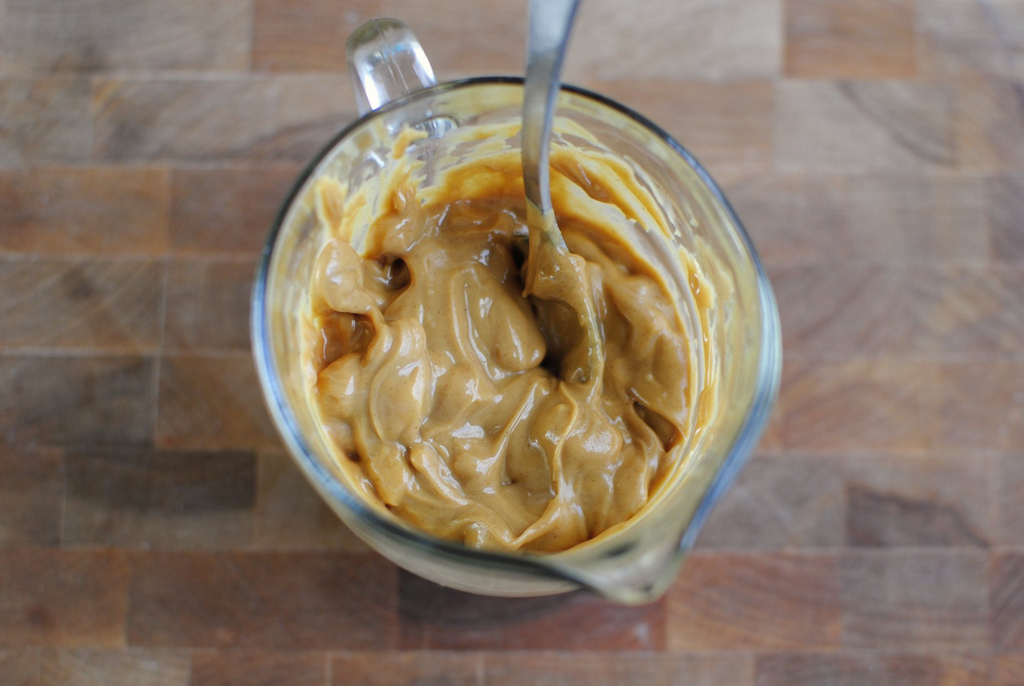
Start by mixing oil in with some warmed peanut butter.


Tasty Kitchen Blog Mississippi Mud Brownies. Guest post by Laurie McNamara of Simply Scratch, recipe submitted by TK member Taylor of Greens and Chocolate.

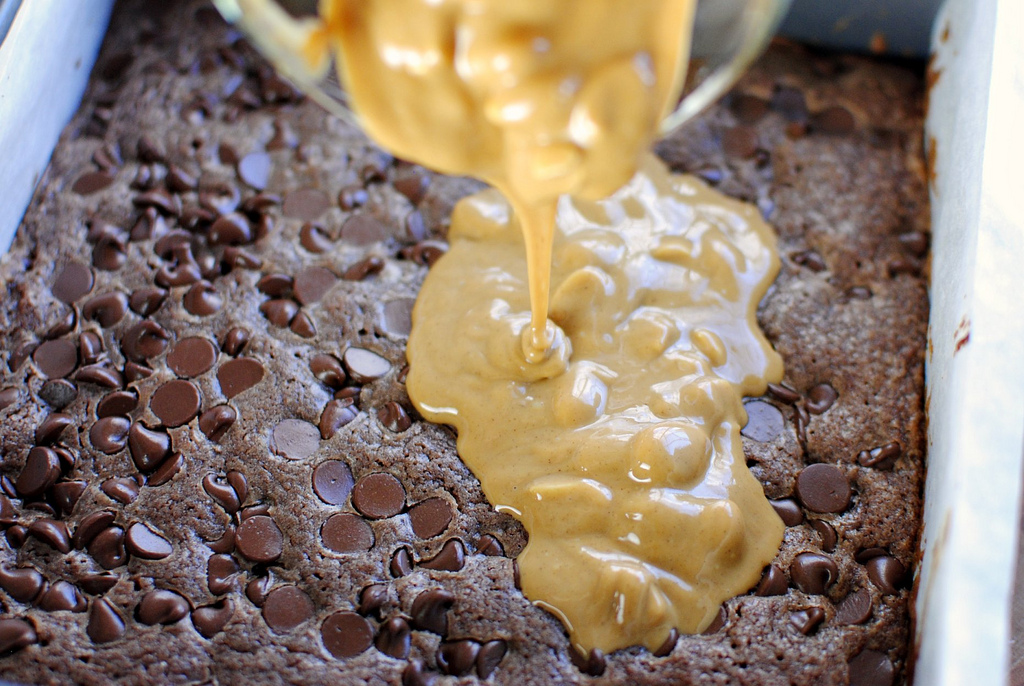
Then evenly pour the peanut butter all over the warm brownies.


Tasty Kitchen Blog Mississippi Mud Brownies. Guest post by Laurie McNamara of Simply Scratch, recipe submitted by TK member Taylor of Greens and Chocolate.

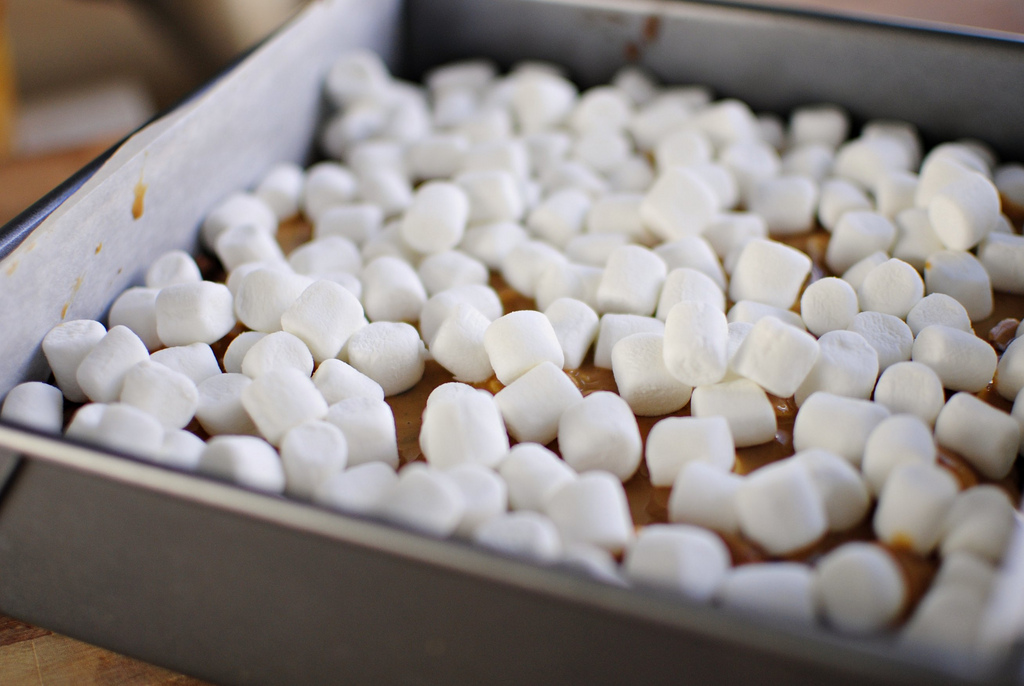
Sprinkle 2 cups of marshmallows over the peanut butter. Bake in the oven for 3 minutes, just to puff up the marshmallows.


Tasty Kitchen Blog Mississippi Mud Brownies. Guest post by Laurie McNamara of Simply Scratch, recipe submitted by TK member Taylor of Greens and Chocolate.

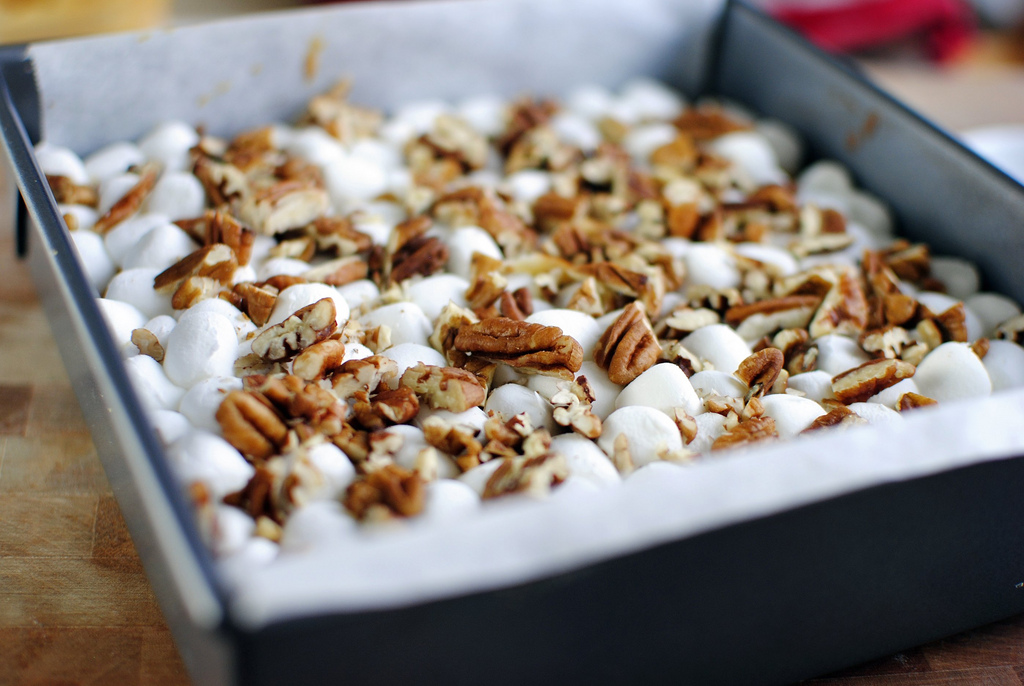
Top with the chopped toasted pecans and set aside to cool. Now it’s time to make the frosting!


Tasty Kitchen Blog Mississippi Mud Brownies. Guest post by Laurie McNamara of Simply Scratch, recipe submitted by TK member Taylor of Greens and Chocolate.

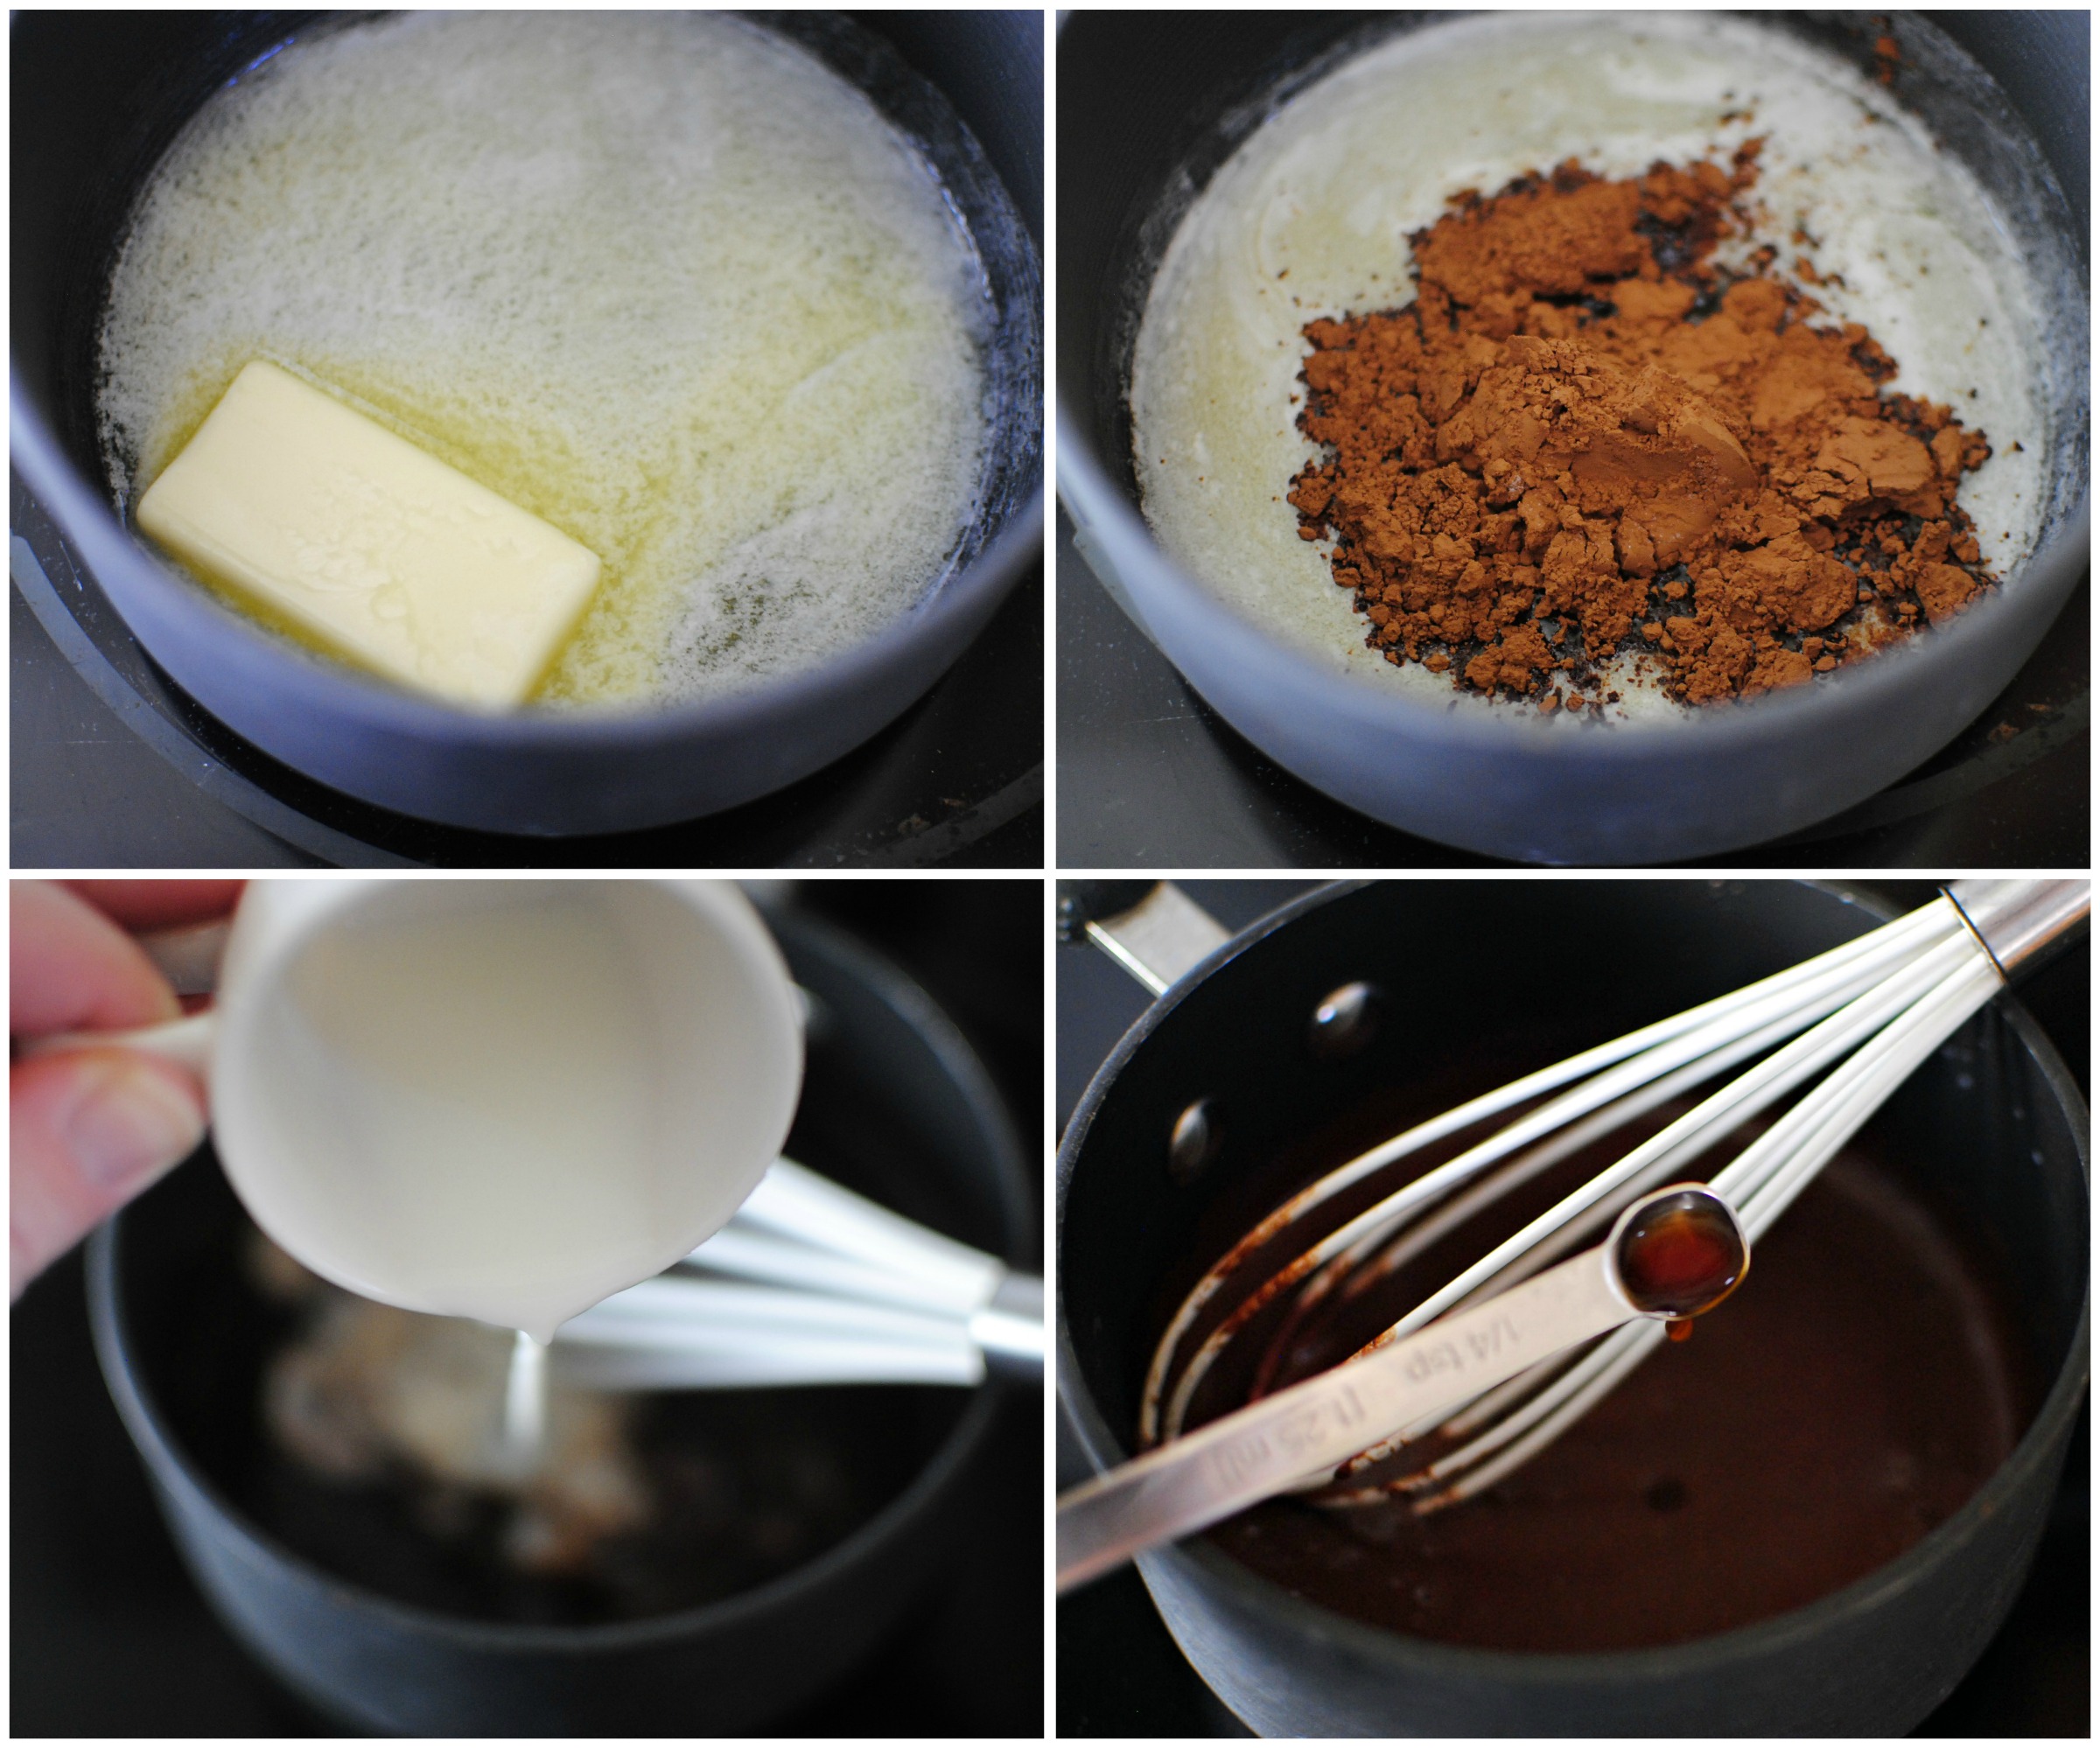
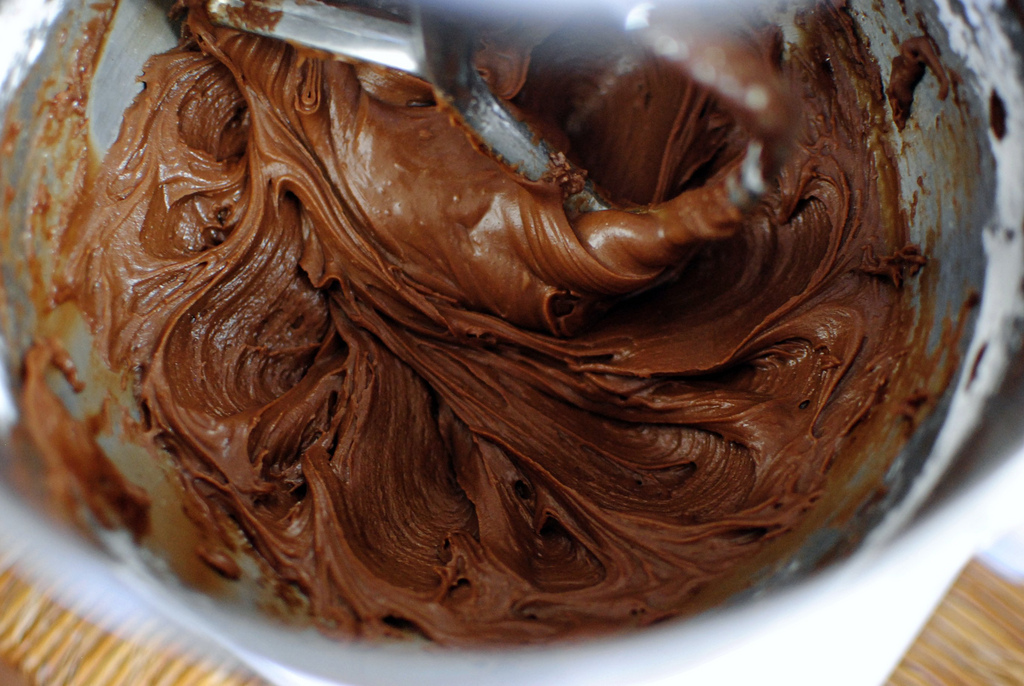
In a small pan, melt 4 tablespoons of unsalted butter. Next add in the cocoa. Stir and gradually pour in the milk. Heat the chocolate mixture until just about boiling, remove from the heat and add the vanilla extract. You could also add the vanilla to the frosting once it’s been mixed.


Tasty Kitchen Blog Mississippi Mud Brownies. Guest post by Laurie McNamara of Simply Scratch, recipe submitted by TK member Taylor of Greens and Chocolate.

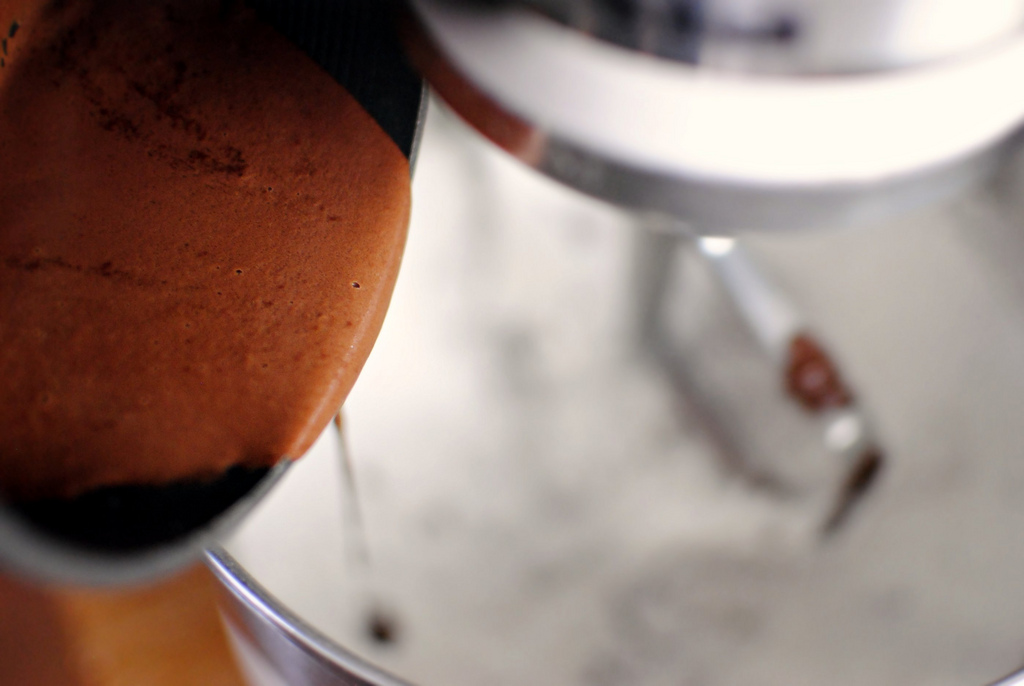
In a mixing bowl that contains 2 cups powdered sugar and 1/8 teaspoon salt, pour in the warm chocolate mixture while the mixer is on low speed.


Tasty Kitchen Blog Mississippi Mud Brownies. Guest post by Laurie McNamara of Simply Scratch, recipe submitted by TK member Taylor of Greens and Chocolate.

Scraping down the sides as you go, mix until the powdered sugar is absorbed into the chocolate. If the frosting looks too thick, add a tablespoon or two of milk to thin it out.


Tasty Kitchen Blog Mississippi Mud Brownies. Guest post by Laurie McNamara of Simply Scratch, recipe submitted by TK member Taylor of Greens and Chocolate.

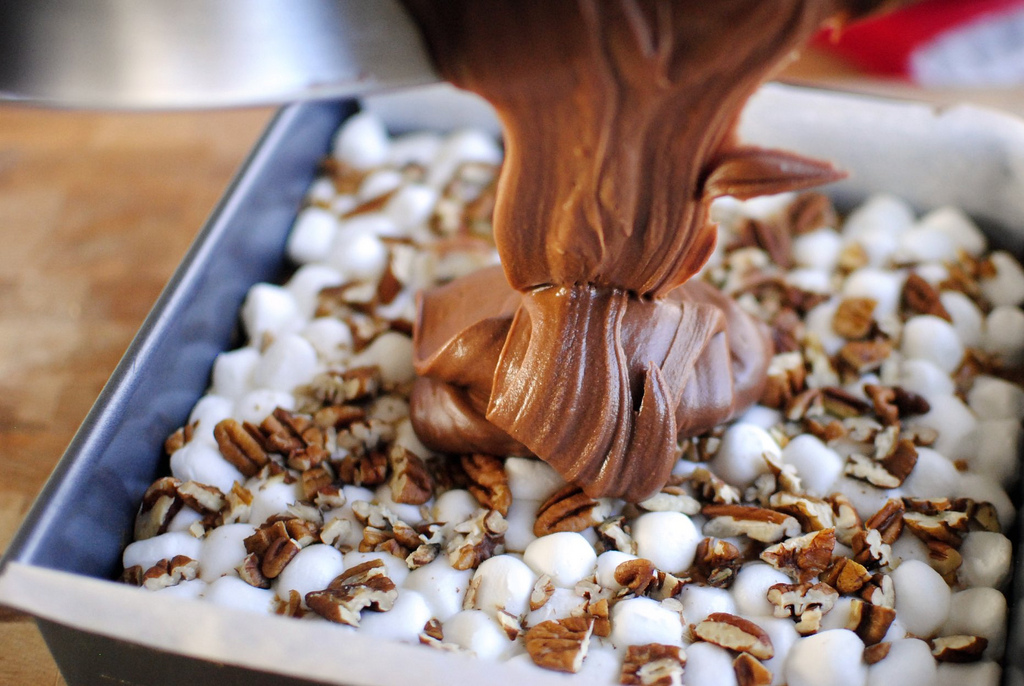
Pour over the pecans and marshmallows. 


Tasty Kitchen Blog Mississippi Mud Brownies. Guest post by Laurie McNamara of Simply Scratch, recipe submitted by TK member Taylor of Greens and Chocolate.

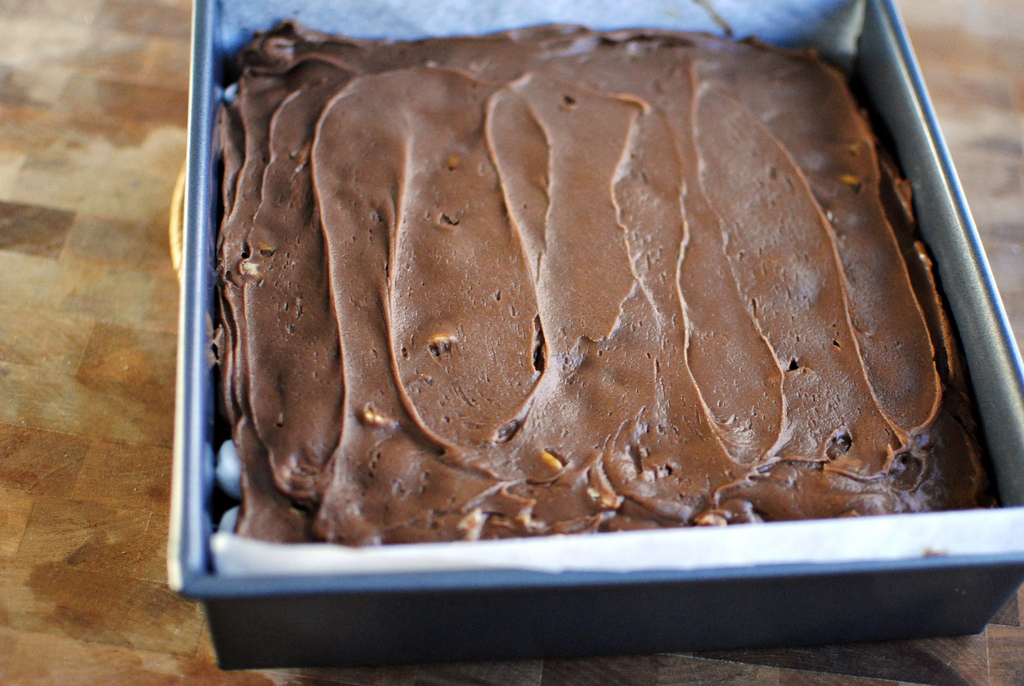
After I poured the icing over top, I realized my frosting must have cooled down too much because the icing didn’t melt into the crevices of the pecans and marshmallow. So I just spread the frosting out evenly. Once cooled enough, I placed the pan into the fridge for an hour or two. 


Tasty Kitchen Blog Mississippi Mud Brownies. Guest post by Laurie McNamara of Simply Scratch, recipe submitted by TK member Taylor of Greens and Chocolate.

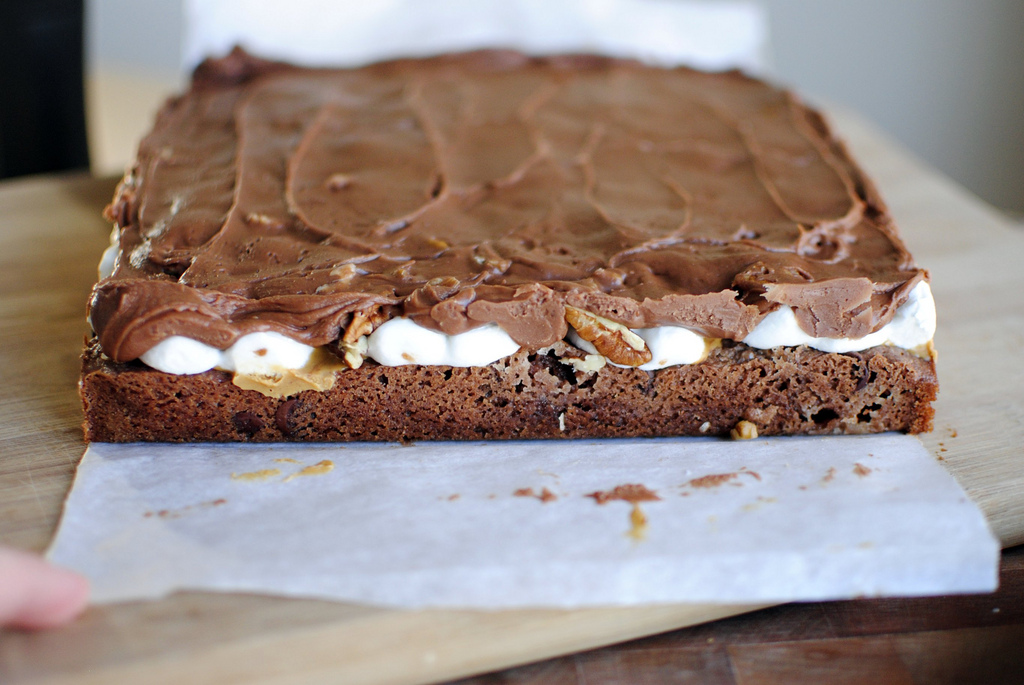
It wasn’t until I removed the brownies and pulled back the parchment paper did I realize what I was in for. These bars contain everything that I love in life. And it was almost to pretty to eat.

Almost.


Tasty Kitchen Blog Mississippi Mud Brownies. Guest post by Laurie McNamara of Simply Scratch, recipe submitted by TK member Taylor of Greens and Chocolate.

This is exactly what one needs to get over the cold weather and post holiday blues. Just be sure to pour yourself a giant glass of milk, because these brownies are rich and will definitely make you thirsty.
 
Thank you to Taylor for sharing this recipe with us on Tasty Kitchen. It was so much fun to make and definitely the most decadent brownie I have ever had the pleasure to taste!
 
Taylor has a plethora of delicious recipes on her blog Greens and Chocolate. From Avalanche Bars to Zucchini, Leek and Bean soup, you’ll definitely walk away with at least a dozen recipes to try! You could also stop by Taylor’s recipe box here on Tasty Kitchen; I guarantee you’ll find recipes equally fantastic there, too.


Printable Recipe

Mississippi Mud Brownies

See post on greensnchocolate’s site!
4.66 Mitt(s) 6 Rating(s)6 votes, average: 4.66 out of 56 votes, average: 4.66 out of 56 votes, average: 4.66 out of 56 votes, average: 4.66 out of 56 votes, average: 4.66 out of 5

Prep Time:

Cook Time:

Difficulty: Easy

Servings: 9

9
x

Print Options

Page size Letter 3x5 4x6
Text Size Small Medium Large
Content Include description
Include prep time, etc.
Show image

Description

A dense brownie layer topped with crunchy pecans, sticky marshmallows, then drizzled with a thin chocolate frosting.

Ingredients

  • ¾ cups All-purpose Flour
  • 2 Tablespoons Unsweetened Cocoa Powder
  • ½ teaspoons Salt
  • ½ cups Unsalted Butter, At Room Temperature
  • 1 cup White Sugar
  • ¾ teaspoons Pure Vanilla Extract
  • 2 whole Large Eggs
  • ¾ cups Semi-Sweet Chocolate Chips
  • ½ cups Crunchy Peanut Butter
  • 1-½ teaspoon Canola Oil
  • 2 cups Mini Marshmallows
  • ½ cups Chopped And Toasted Pecans
  • 2 cups Confectioners Sugar
  • ⅛ teaspoons Salt
  • 4 Tablespoons Unsalted Butter
  • 2 Tablespoons Unsweetened Cocoa Powder
  • ¼ cups Plus 2 Tablespoons Of Milk
  • ¼ teaspoons Pure Vanilla Extract

Preparation Instructions

Preheat oven to 350 degrees F. Line an 8×8″ square baking pan with parchment paper or foil. If using foil, spray it with cooking spray.

In medium bowl, combine flour, 2 Tablespoons cocoa powder, and 1/2 teaspoon salt. Set aside.

In large mixing bowl, beat together 1/2 cup butter, sugar, and 3/4 teaspoons vanilla until creamy. Add the eggs one at a time. Stir dry ingredients into batter. Pour batter into prepared pan and spread evenly. Sprinkle with chocolate chips. Bake in preheated oven for 22-25 minutes.

When brownie layer is done baking, combine peanut butter and oil in a microwave safe bowl or measuring cup and microwave on high for 20 seconds to soften. Pour this warm mixture over hot brownie and spread. Sprinkle the peanut butter covered brownies with marshmallows. Return to oven to bake for 3 more minutes, or until the marshmallows puff. Remove from oven and sprinkle puffed marshmallows with toasted pecans.

To make frosting, combine confectioners sugar and salt. In small saucepan, melt 4 Tablespoons butter over medium heat. When butter is melted, add the 2 Tablespoons of cocoa powder and 1/4 cup of the milk and heat until the mixture begins to boil. Pour this mixture into confectioners sugar/salt mixture and beat on high speed with an electric mixer until smooth and glossy. If frosting is not pourable at this point, add remaining 2 Tablespoons of milk (I didn’t have to do this). Lastly, beat in 1/4 teaspoon vanilla, then pour evenly over puffed marshmallows and pecans.

Let cool completely in refrigerator for 1-2 hours. Cut into squares and enjoy!


_______________________________________

Laurie is the force behind Simply Scratch, a blog that documents her efforts to find and create recipes that are made simply from scratch. (We think it’s sweet that her mother-in-law helped her set up her blog and get started.) We love her recipes; they’re not just tried and true, but they look gorgeous as well. Check out her blog and you’ll become a fan too.


Profile photo of whatsgabycooking

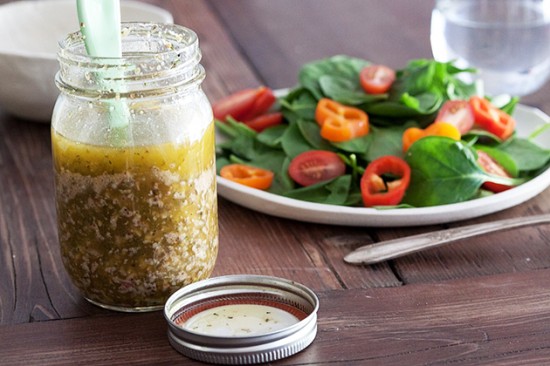
Herb Mustard Vinaigrette

Posted by in Step-by-Step Recipes

  After all those delicious holiday cookies and treats, I’m ready for a bit of lighter fare. I’m thinking salads. Lots and lots of loaded salads are in my near future. And with a fabulous loaded salad, you’ve got to have an awesome dressing. The dressing is pretty much the most important part. It gets […]

Profile photo of savorysweetlife

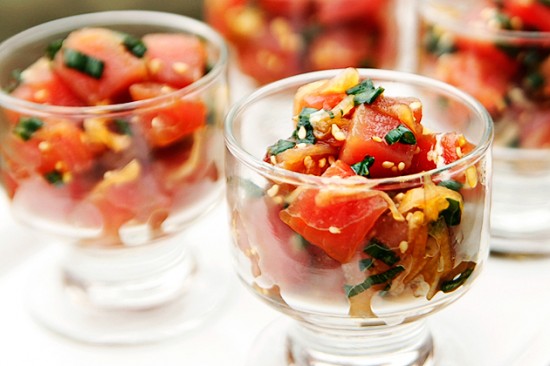
Hawaiian Ahi Poke

Posted by in Step-by-Step Recipes

  If you love ahi (tuna) sashimi or sushi, then you are going to love this easy Hawaiian Ahi Poke recipe by Tasty Kitchen member A Spicy Perspective. When served in little bowls, this dish makes a stunning starter for a dinner party. Let’s get started.       Here’s a list of ingredients you’ll […]

Profile photo of georgiapellegrini

Brazilian Cheesebread (Naturally Gluten-free!)

Posted by in Baking, Step-by-Step Recipes

  Brazilian Cheese Bread or Pao de Queijo was one of the most interesting recipes I’ve made in a while. First, it’s naturally gluten-free. And second, it didn’t require any kneading or rising time. And it was very cheesy and chewy, a fun take on the dinner roll! When I saw this recipe by Jill […]

Profile photo of Amber {Sprinkled With Flour}

Spinach Lemon Orzo Soup

Posted by in Step-by-Step Recipes

  I love soup, but for some reason it’s one of those dishes that I never make at home. I don’t know why, maybe it’s because I live in a house of boys … and bigger boys. Meals usually consist of manly food, like burgers, roast, and steak. If I put a bowl of soup […]