The Pioneer Woman Tasty Kitchen
Profile photo of EatLiveRun

Linguine and Clam Sauce

Posted by in Step-by-Step Recipes

Tasty Kitchen Blog: Linguine and Clam Sauce. Guest post and recipe submitted by Jenna Weber of Eat, Live, Run.

 
Hello friends! I’m here today to share a recipe out of my new book, White Jacket Required. It feels a bit odd to say “my new book”, as if I ever had an old book (I did not!). I’m still getting used to this whole author thing — so far, it’s pretty cool! The book is a memoir about my time at culinary school, and it includes about thirty of my very favorite family recipes. I’m really excited to share one of them with y’all today, and that is Linguine and Clam Sauce.

I LOVE linguine and clam sauce. It’s been my absolute favorite meal since about the time I was six years old (what six year old loves clams?) and it’s the one I most often request when I go home to visit my parents. My mom can make a mean clam sauce! My version is very simple … and very delicious! I hope you enjoy it as much as I do.


Tasty Kitchen Blog: Linguine and Clam Sauce. Guest post and recipe submitted by Jenna Weber of Eat, Live, Run.

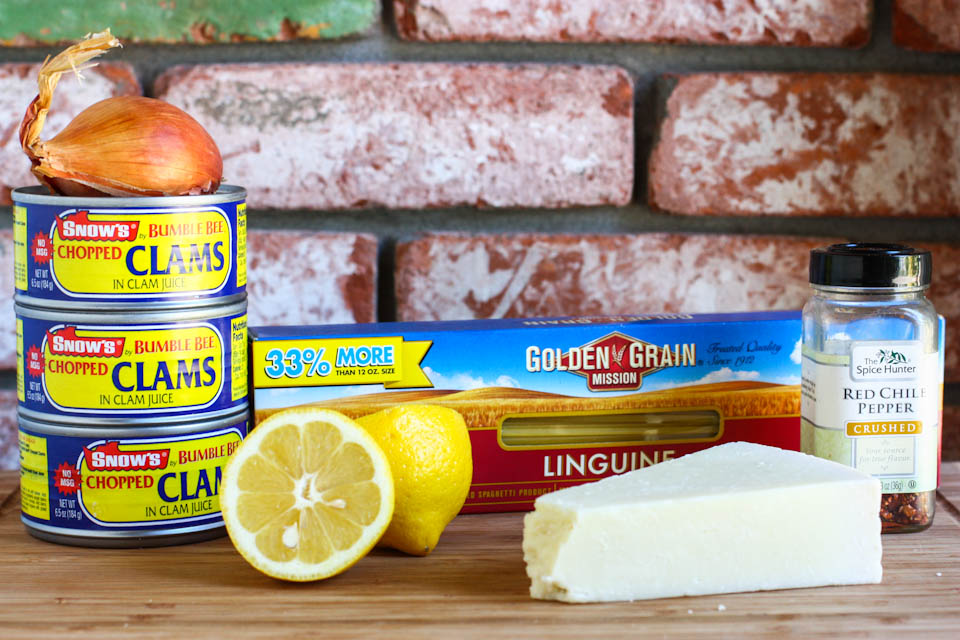
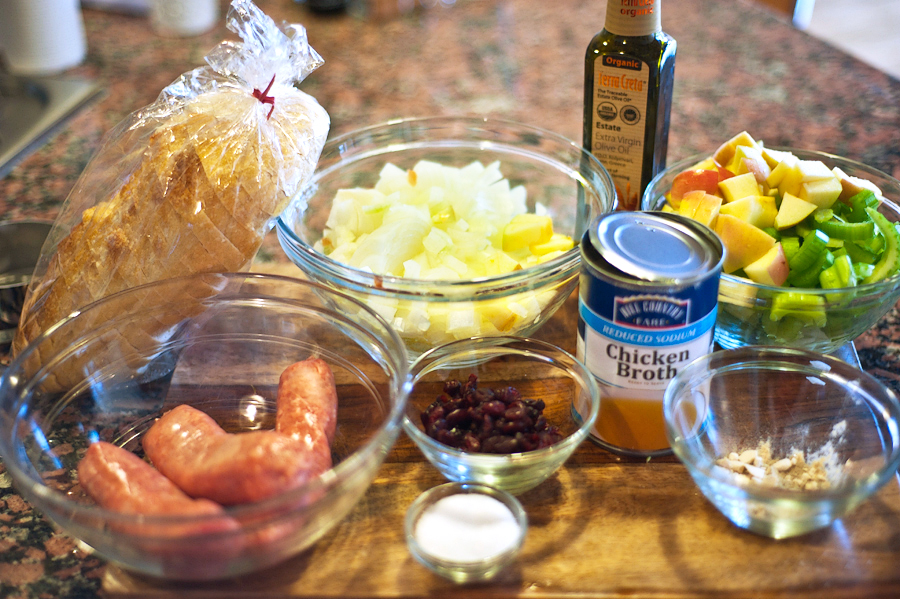
Here are all the ingredients you’ll need, minus extra virgin olive oil and parsley for serving. So grab your linguine, lemon, red pepper flakes, three cans of clams, shallot and Parmesan cheese. No need to get fancy clams from the seafood counter at the store—I actually prefer using canned clams here!


Tasty Kitchen Blog: Linguine and Clam Sauce. Guest post and recipe submitted by Jenna Weber of Eat, Live, Run.

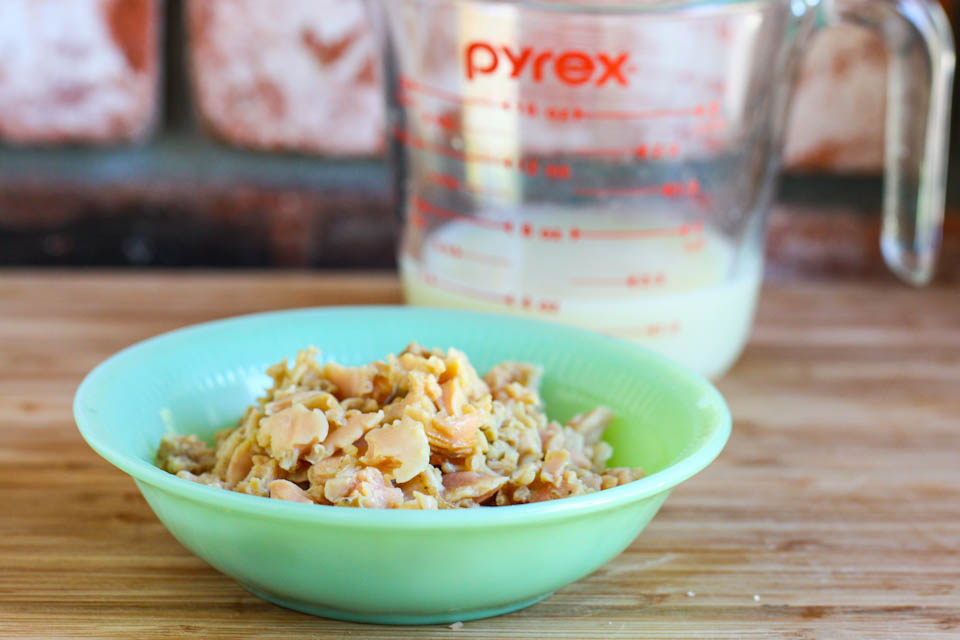
First, you’ll want to drain your clams and reserve about a half cup of clam juice for the sauce. I usually just toss all my drained clams in a small bowl for easy access later.


Tasty Kitchen Blog: Linguine and Clam Sauce. Guest post and recipe submitted by Jenna Weber of Eat, Live, Run.

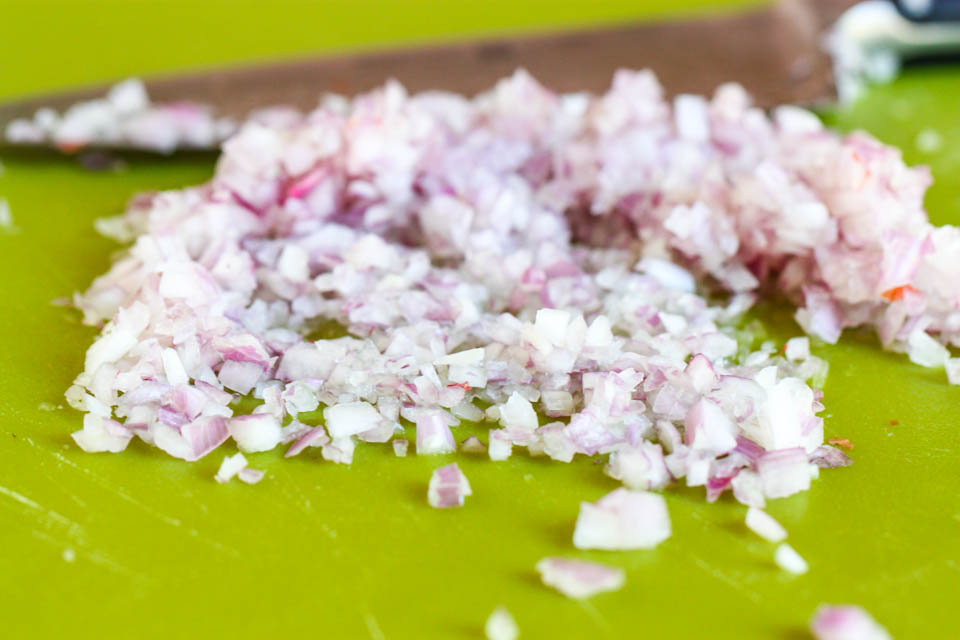
Now, mince your shallot. (I almost chopped my finger off thirty seconds before taking this photo. Don’t follow my lead! Pay attention to what you’re doing; your fingers depend on it.)


Tasty Kitchen Blog: Linguine and Clam Sauce. Guest post and recipe submitted by Jenna Weber of Eat, Live, Run.

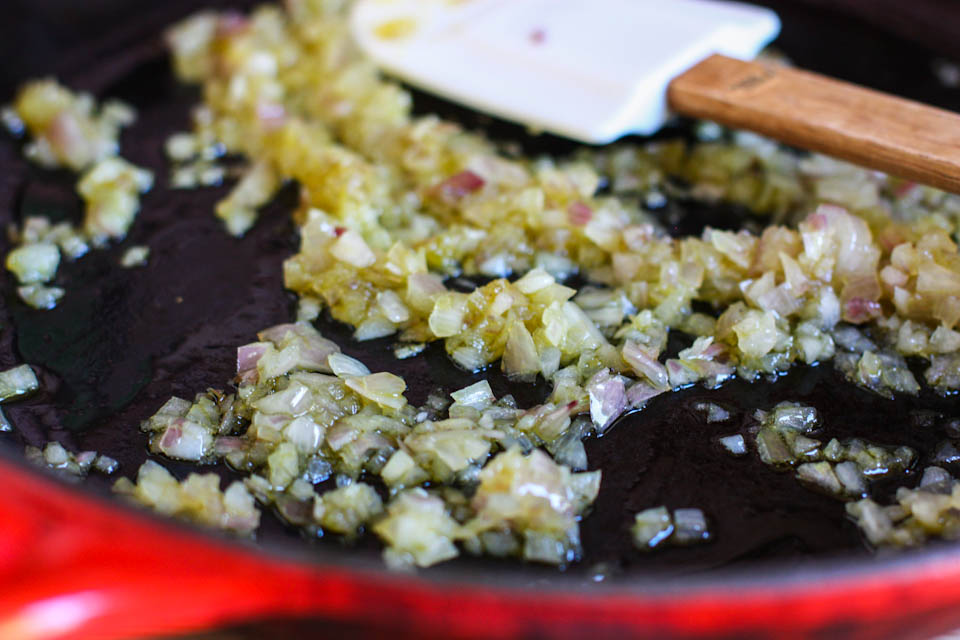
Heat up a tablespoon of olive oil in a large skillet and add your minced shallots.

I absolutely love using my shiny red Le Creuset cast iron skillet for this—and anything, for that matter! It was a gift when I was going through culinary school and the first “nice” piece of cookware I ever owned. I love it so.


Tasty Kitchen Blog: Linguine and Clam Sauce. Guest post and recipe submitted by Jenna Weber of Eat, Live, Run.

Sauté the shallots for about five minutes till soft, then add the clams. Continue cooking for another couple minutes here.


Tasty Kitchen Blog: Linguine and Clam Sauce. Guest post and recipe submitted by Jenna Weber of Eat, Live, Run.

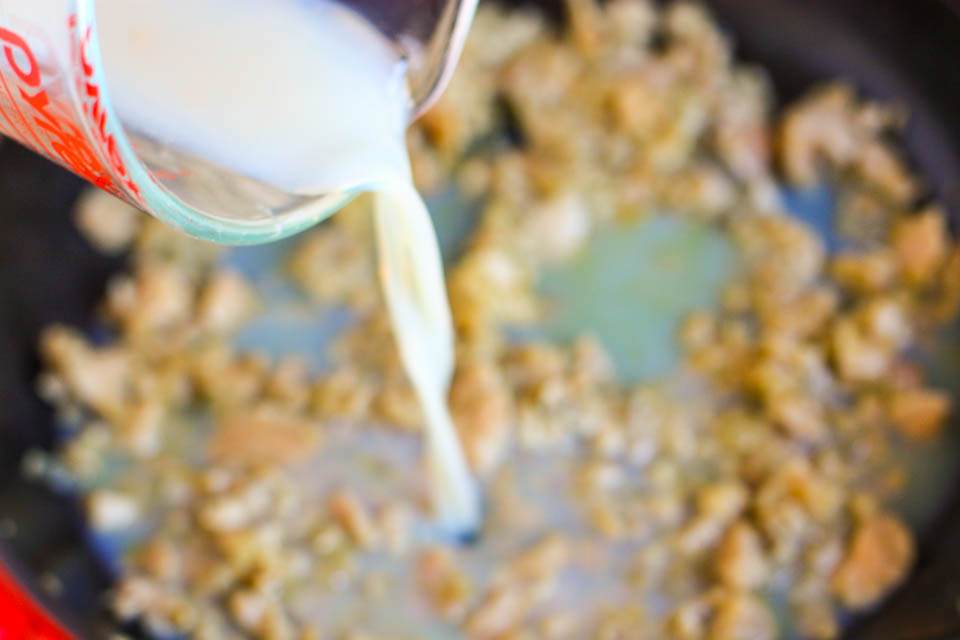
Then, pour in the reserved clam juice …


Tasty Kitchen Blog: Linguine and Clam Sauce. Guest post and recipe submitted by Jenna Weber of Eat, Live, Run.

Add a squeeze of lemon …


Tasty Kitchen Blog: Linguine and Clam Sauce. Guest post and recipe submitted by Jenna Weber of Eat, Live, Run.

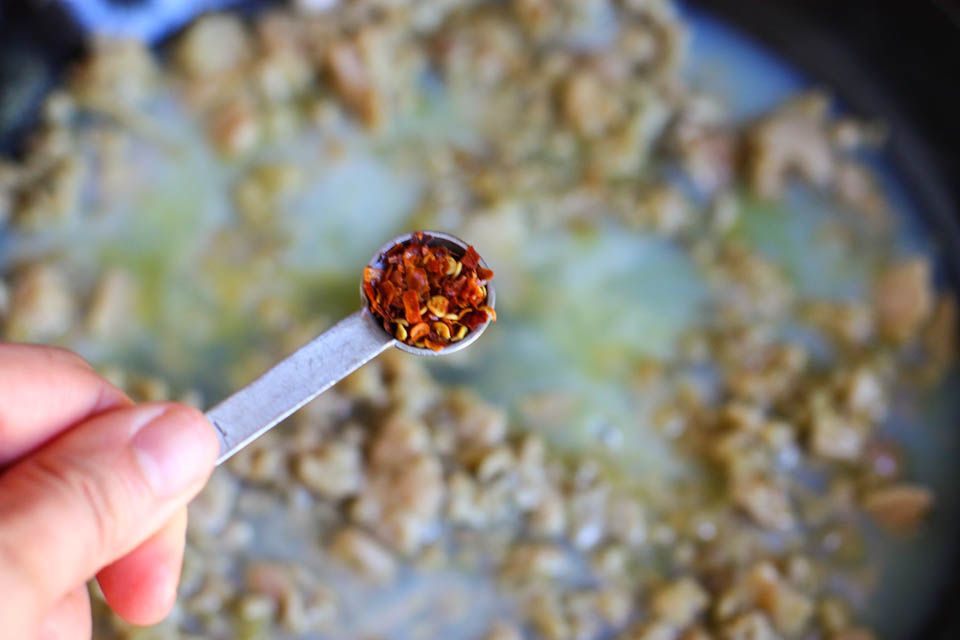
And, finally, a sprinkle of red pepper flakes. You can adjust the amount of red pepper flakes according to how spicy you’d like your sauce to be. Personally, I’m a huge fan of spice so I love to add more hot pepper flakes here!


Tasty Kitchen Blog: Linguine and Clam Sauce. Guest post and recipe submitted by Jenna Weber of Eat, Live, Run.

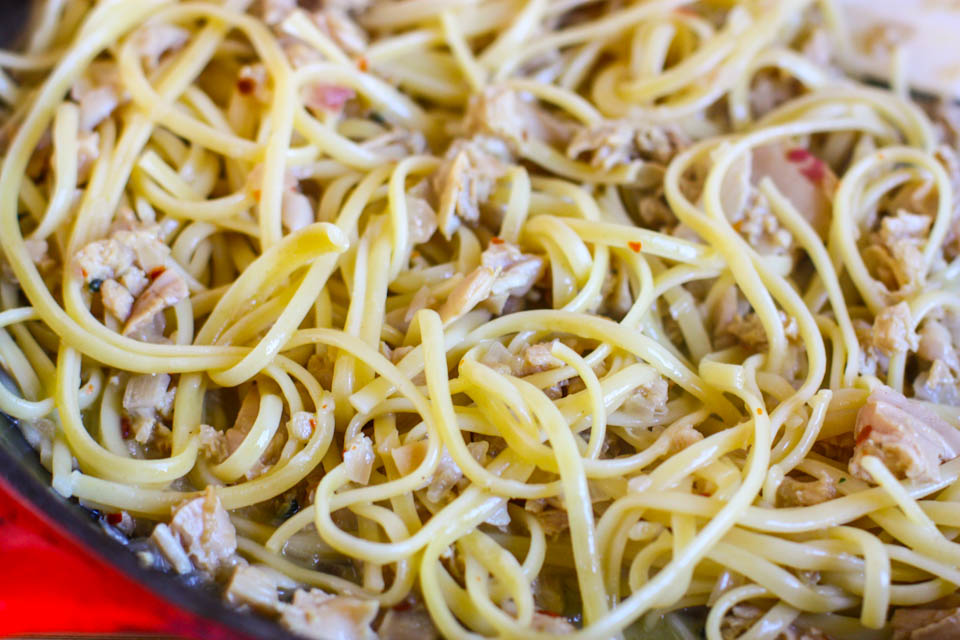
Bring sauce to a boil, then reduce heat and simmer for three minutes. Then, add your hot cooked linguine to the pan and toss well.


Tasty Kitchen Blog: Linguine and Clam Sauce. Guest post and recipe submitted by Jenna Weber of Eat, Live, Run.

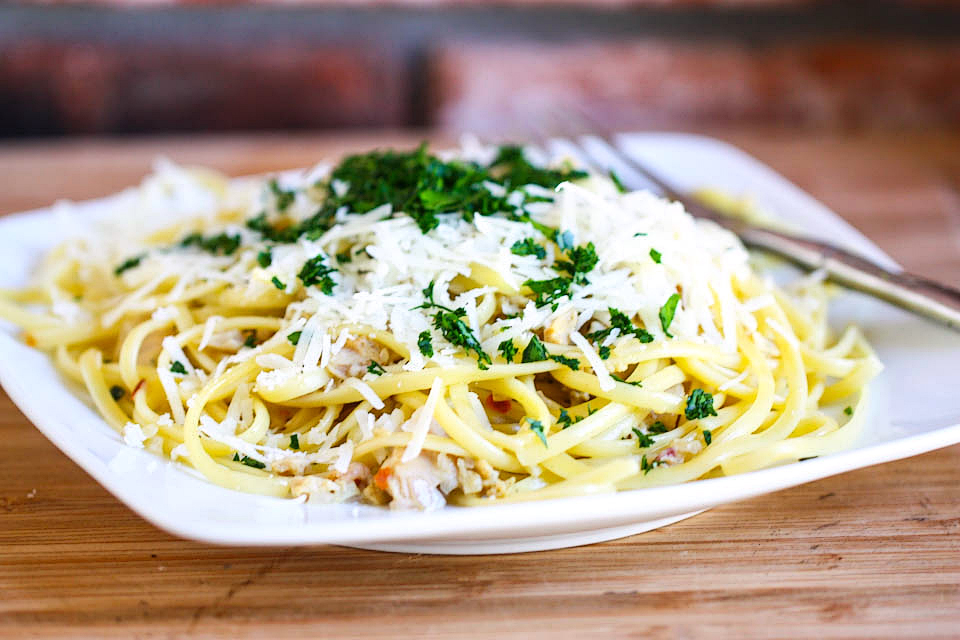
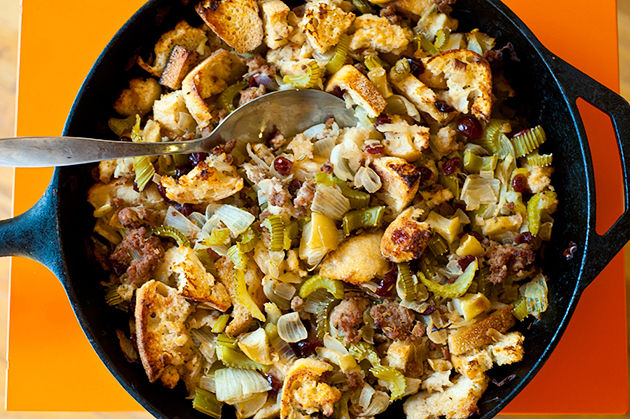
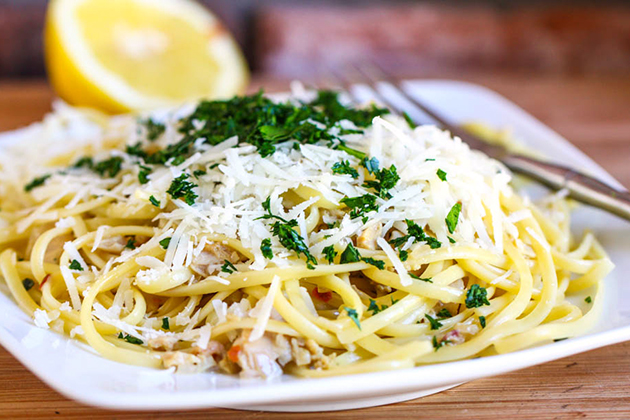
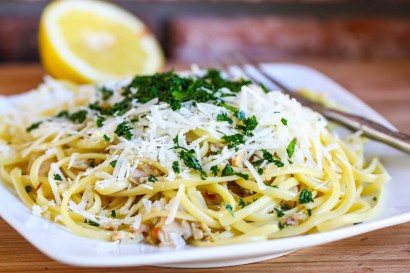
Divide linguine and clam sauce amongst four plates and top with the freshly grated Parmesan cheese and minced parsley. The parsley is optional but oh so pretty!


Tasty Kitchen Blog: Linguine and Clam Sauce. Guest post and recipe submitted by Jenna Weber of Eat, Live, Run.

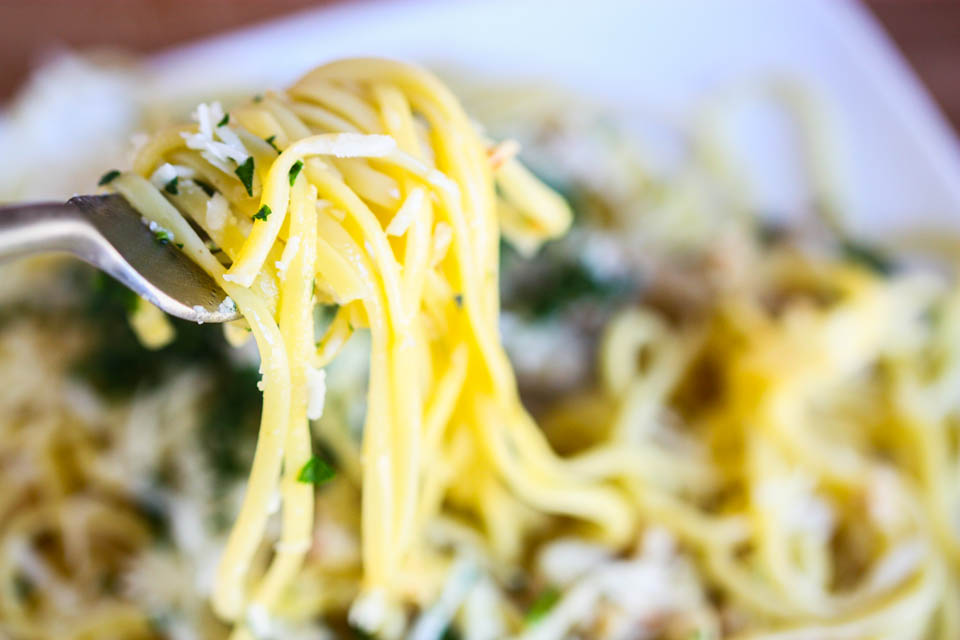
Enjoy! I entered the recipe in my Tasty Kitchen recipe box so you can print it out and enjoy your own delicious linguine and clam sauce at home soon. And speaking of making it at home, check back here tomorrow for a chance to win little special something that’ll help you do just that. I promise I won’t reveal more than that.

P.S. It’s red. (Sorry, I couldn’t help myself.)


Printable Recipe

Linguine and Clam Sauce

0.00 Mitt(s) 0 Rating(s)0 votes, average: 0.00 out of 50 votes, average: 0.00 out of 50 votes, average: 0.00 out of 50 votes, average: 0.00 out of 50 votes, average: 0.00 out of 5

Prep Time:

Cook Time:

Difficulty: Easy

Servings: 4

4
x

Print Options

Page size Letter 3x5 4x6
Text Size Small Medium Large
Content Include description
Include prep time, etc.
Show image

Description

Delicious and nutritious linguine and clams!

Ingredients

  • 8 ounces, weight Dry Linguine Pasta
  • 1 Tablespoon Extra Virgin Olive Oil
  • 1 whole Large Shallot, Minced
  • 3 cans (6.5 Oz. Size) Clams, Drained With 1/2 Cup Juice Reserved
  • 1 whole Lemon, Juiced
  • ¼ teaspoons Red Pepper Flakes
  • ½ cups Freshly Grated Parmesan Cheese
  • Minced Parsley, For Garnish

Preparation Instructions

Cook the pasta according to package directions. Drain and set aside.

In a skillet, heat the olive oil over medium heat. When hot, add the minced shallots and saute for about 5 minutes, until very soft. Add the drained clams and continue cooking for another 4-5 minutes.

Add the 1/2 cup reserved clam juice, lemon juice and red pepper flakes to the skillet. Bring mixture to a boil, then simmer for 3 minutes.

Add hot cooked linguine to the pan and toss well with the sauce. Divide amongst plates and top each dish with Parmesan cheese and minced parsley (optional).


_______________________________________

Jenna is a food writer who has worked as a pastry chef and bread baker. Her blog Eat, Live, Run has great recipes, travel stories, and the perfect slogan: “Celebrating life, one crumb at a time.”


Profile photo of georgiapellegrini

Gingerbread Popcorn

Posted by in Step-by-Step Recipes

Tasty Kitchen Blog: Gingerbread Popcorn. Guest post by Georgia Pellegrini, recipe submitted by TK member Faith Gorsky of An Edible Mosaic.

 
‘Tis the season for this addictive Gingerbread Popcorn recipe by Tasty Kitchen member Faith. The almonds and popcorn and sweet crunchy toppings make this such a fun party food for the holidays.


Tasty Kitchen Blog: Gingerbread Popcorn. Guest post by Georgia Pellegrini, recipe submitted by TK member Faith Gorsky of An Edible Mosaic.

To make it you will need: air popped popcorn, almonds, baking soda, cinnamon, ginger, nutmeg, cloves, butter, brown sugar, molasses, water, salt and vanilla extract.


Tasty Kitchen Blog: Gingerbread Popcorn. Guest post by Georgia Pellegrini, recipe submitted by TK member Faith Gorsky of An Edible Mosaic.

Get your luscious topping going in a saucepan by combining the brown sugar, butter, molasses, and water.


Tasty Kitchen Blog: Gingerbread Popcorn. Guest post by Georgia Pellegrini, recipe submitted by TK member Faith Gorsky of An Edible Mosaic.

Chop your almonds in various shapes and sizes. You could also use pre-chopped almonds or even slivered almonds.


Tasty Kitchen Blog: Gingerbread Popcorn. Guest post by Georgia Pellegrini, recipe submitted by TK member Faith Gorsky of An Edible Mosaic.

Combine your popcorn and almonds on a tray lined with parchment.


Tasty Kitchen Blog: Gingerbread Popcorn. Guest post by Georgia Pellegrini, recipe submitted by TK member Faith Gorsky of An Edible Mosaic.

Then sift together your baking soda, spices and salt.


Tasty Kitchen Blog: Gingerbread Popcorn. Guest post by Georgia Pellegrini, recipe submitted by TK member Faith Gorsky of An Edible Mosaic.

As it cooks, the mixture in your pot will start to darken and thicken when it is ready, so you’ll want to stir vigorously and watch the heat to make sure it doesn’t burn.


Tasty Kitchen Blog: Gingerbread Popcorn. Guest post by Georgia Pellegrini, recipe submitted by TK member Faith Gorsky of An Edible Mosaic.

Turn off the heat and add the vanilla extract.


Tasty Kitchen Blog: Gingerbread Popcorn. Guest post by Georgia Pellegrini, recipe submitted by TK member Faith Gorsky of An Edible Mosaic.

Then add your seasonings to the molasses mixture and stir well.


Tasty Kitchen Blog: Gingerbread Popcorn. Guest post by Georgia Pellegrini, recipe submitted by TK member Faith Gorsky of An Edible Mosaic.

It will be creamy and thick and very hot so don’t try to taste it yet!


Tasty Kitchen Blog: Gingerbread Popcorn. Guest post by Georgia Pellegrini, recipe submitted by TK member Faith Gorsky of An Edible Mosaic.

Now, either toss the popcorn in, or drizzle the sauce all over the sheet tray. Let it dry and harden, then break it up and store it in an air-tight container (or start eating it)!


Tasty Kitchen Blog: Gingerbread Popcorn. Guest post by Georgia Pellegrini, recipe submitted by TK member Faith Gorsky of An Edible Mosaic.

Thank you Faith for this delicious Gingerbread Popcorn recipe! Visit her website An Edible Mosaic for other delicious treats.


Printable Recipe

Gingerbread Popcorn

See post on Faith (An Edible Mosaic)’s site!
5.00 Mitt(s) 1 Rating(s)1 vote, average: 5.00 out of 51 vote, average: 5.00 out of 51 vote, average: 5.00 out of 51 vote, average: 5.00 out of 51 vote, average: 5.00 out of 5

Prep Time:

Cook Time:

Difficulty: Easy

Servings: 12

12
x

Print Options

Page size Letter 3x5 4x6
Text Size Small Medium Large
Content Include description
Include prep time, etc.
Show image

Description

The perfect last-minute holiday treat.

Ingredients

  • 12 cups Air-popped Popcorn (for 12 Cups Of Popped You'll Need 1/2 Cup Of Popcorn Kernels)
  • 1 cup Toasted Sliced Almonds
  • 1 teaspoon Baking Soda
  • 1 teaspoon Cinnamon
  • 1 teaspoon Ginger
  • ½ teaspoons Nutmeg
  • ¼ teaspoons Cloves
  • ½ cups Unsalted Butter
  • 1 cup Light Brown Sugar, Lightly Packed
  • 2 Tablespoons Molasses
  • 1 Tablespoon Water
  • 1 pinch Salt
  • 1 teaspoon Pure Vanilla Extract

Preparation Instructions

Toss together the popped popcorn and nuts in a large bowl and set aside.

Line a large baking sheet with parchment paper or a Silpat liner and set aside.

Sift together the baking soda, cinnamon, ginger, nutmeg, and cloves in a small bowl and set aside.

Cook the butter, sugar, molasses, water, and salt in a medium-sized, thick-bottomed saucepan over medium heat until the temperature reaches 305ºF (hard crack stage), stirring occasionally. Then remove from heat. Carefully stir in the vanilla and baking soda/spice mix and then pour it over the popcorn/nut mixture.

Use 2 heat-safe rubber spatulas to toss the popcorn around to distribute the toffee throughout. Spread out the popcorn onto the prepared baking sheet. Let it cool and then break it apart. Store in an airtight container at room temperature.


_______________________________________

There’s so much to say about Georgia, we don’t know where to start. Leaving Wall Street for the French Culinary Institute, followed by a stint at the Gramercy Tavern and La Chassagnette in France, her passion for food and food traditions are evident and inspiring. Visit her site at Georgia Pellegrini, where you’ll find more recipes, photos, learn all about her wonderful books Girl Hunter and Food Heroes, and enjoy her latest adventures.


Profile photo of missamy

Pumpkin Pie Bars

Posted by in Baking, Holidays, Step-by-Step Recipes

Tasty Kitchen Blog: Pumpkin Pie Bars. Guest post by Amy Johnson of She Wears Many Hats, recipe submitted by TK member Sharon of Cheesy Pennies.

 
For all of you pumpkin pie fans out there looking for an alternative to the holiday favorite, do I have a recipe for you! The recipe for Pumpkin Pie Bars, submitted by Tasty Kitchen member Sharon from cheesypennies, has been waiting in my TK recipe box for a while. I finally got around to making a batch a few days ago, and then a second batch today. Yep, they were that good. Not sure why I’ve waited so long. They met approval from all who tried them, so you can be sure that they’ll make a few more appearances around here throughout the holiday season.

Wanna see how to make them?


Tasty Kitchen Blog: Pumpkin Pie Bars. Guest post by Amy Johnson of She Wears Many Hats, recipe submitted by TK member Sharon of Cheesy Pennies.

First you’ll need: yellow cake mix, eggs, butter, sugar, cinnamon, ginger, ground cloves, salt, canned pumpkin, and evaporated milk (although I used almond milk the second time around).

There are three steps to the recipe, with different ingredients divided, so be sure to read through the whole recipe first to avoid any confusion. Not that I would know anything about getting confused or anything … no, not me.


Tasty Kitchen Blog: Pumpkin Pie Bars. Guest post by Amy Johnson of She Wears Many Hats, recipe submitted by TK member Sharon of Cheesy Pennies.

Begin making the crust for the bars by mixing part of the cake mix, with one egg, and some melted butter. Once combined well, spread evenly in 13×9″ pan. I found using my hands to spread out the crust worked much easier, and was much more fun, too.


Tasty Kitchen Blog: Pumpkin Pie Bars. Guest post by Amy Johnson of She Wears Many Hats, recipe submitted by TK member Sharon of Cheesy Pennies.

The second step is to make the pumpkin filling for the bars. Whisk together sugar, cinnamon, ginger, cloves, salt, pumpkin, evaporated milk, and eggs.


Tasty Kitchen Blog: Pumpkin Pie Bars. Guest post by Amy Johnson of She Wears Many Hats, recipe submitted by TK member Sharon of Cheesy Pennies.

Pour the filling over the crust.

Note: The filling may seem a little thin, but it thickens up during baking just fine. I promise. Also, for the second pan I made, I was out of evaporated milk, so I substituted unsweetened almond milk with no problems whatsoever.


Tasty Kitchen Blog: Pumpkin Pie Bars. Guest post by Amy Johnson of She Wears Many Hats, recipe submitted by TK member Sharon of Cheesy Pennies.

Finally, for the last step, the topping. Stir together the rest of the cake mix, sugar, and cinnamon.

More butter! Toppings need butter, don’t they? Sure they do.


Tasty Kitchen Blog: Pumpkin Pie Bars. Guest post by Amy Johnson of She Wears Many Hats, recipe submitted by TK member Sharon of Cheesy Pennies.

Cut in cold diced up butter. Once incorporated, evenly sprinkle the topping over the filling. Again, I used my hands for sprinkling.

A tip: A pastry cutter is a wonderful tool. I used a fork, but something I remembered while cutting the butter is a tip I learned from my friend Deb over at Smith Bites. She freezes butter and then uses a cheese grater to shred it into biscuits and other doughs when needed. It works wonders. I only wish I would’ve remembered that trick for this recipe. That reminds me, I should stash a pound or two of butter in the freezer now so it’s ready throughout the holiday baking season.


Tasty Kitchen Blog: Pumpkin Pie Bars. Guest post by Amy Johnson of She Wears Many Hats, recipe submitted by TK member Sharon of Cheesy Pennies.

The first time I made these I thought the topping would just sink down into the filling, but it magically sits nicely on top.


Tasty Kitchen Blog: Pumpkin Pie Bars. Guest post by Amy Johnson of She Wears Many Hats, recipe submitted by TK member Sharon of Cheesy Pennies.

Carefully transfer to an oven and bake according to recipe instructions, until golden. Your house will smell divine!


Tasty Kitchen Blog: Pumpkin Pie Bars. Guest post by Amy Johnson of She Wears Many Hats, recipe submitted by TK member Sharon of Cheesy Pennies.

Let cool completely before cutting and serving (if you can wait that long). To push it over the top, serve with a scoop of ice cream, along with a warm cup of coffee. Perfect.

Thanks so much to Sharon from Cheesy Pennies for sharing this delightful recipe with the Tasty Kitchen community. I know it will soon be a new holiday favorite in our home.


Printable Recipe

Pumpkin Pie Bars

See post on Cheesy Pennies’s site!
4.55 Mitt(s) 9 Rating(s)9 votes, average: 4.55 out of 59 votes, average: 4.55 out of 59 votes, average: 4.55 out of 59 votes, average: 4.55 out of 59 votes, average: 4.55 out of 5

Prep Time:

Cook Time:

Difficulty: Easy

Servings: 24

24
x

Print Options

Page size Letter 3x5 4x6
Text Size Small Medium Large
Content Include description
Include prep time, etc.
Show image

Description

All the yum of pumpkin pie, minus the hassle of a pie crust, plus the bonus of a buttery cinnamon topping. No trick…just an amazing treat!

Ingredients

  • 1 box (18 oz. size) Yellow Cake Mix, Divided
  • 1 whole Egg, Lightly Beaten
  • ½ cups Butter, Melted
  • 1 cup Sugar, Divided
  • 2 teaspoons Cinnamon, Divided
  • ½ teaspoons Ginger
  • ¼ teaspoons Ground Cloves
  • ¼ teaspoons Salt
  • 1 cup Canned Pumpkin
  • ⅔ cups Evaporated Milk
  • 2 whole Eggs
  • ¼ cups Cold Butter, Diced

Preparation Instructions

This recipe has three parts, a crust, a filling and a topping. Before you start anything, preheat your oven to 350F, and get out a 13×9 pan.

For the crust:
Reserve 1 cup of the cake mix for the topping. Pour remaining cake mix into a bowl, then stir in the one beaten egg and the 1/2 cup of melted butter until the mixture is well combined. Press evenly into the 13×9 pan and set aside.

For the filling:
Combine 3/4 cup of sugar, 1 teaspoon of cinnamon, the ginger, cloves, salt, pumpkin, evaporated milk and 2 eggs together. Using a whisk, stir until smooth. Pour over the crust.

For the topping:
Stir together the 1 cup of reserved cake mix, and the remaining 1/4 cup of sugar and 1 teaspoon of cinnamon. Cut in the 1/4 cup of butter dice using a pastry blender or a fork. Sprinkle evenly over the filling.

Bake at 350F for 35-40 minutes, or until filling is set. Allow to cool completely, cut into bars, and serve!


_______________________________________

Amy Johnson is a blogger who writes about food, travel, the home (both inside and out), and various observations and random musings about anything and everything. Visit her blog She Wears Many Hats for a dose of deliciousness, practicality, hilarity, or just plain fun. She lives in South Carolina with her husband and two children.


Profile photo of georgiapellegrini

Turkey Sausage, Apple and Cranberry Stuffing

Posted by in Holidays, Step-by-Step Recipes

Tasty Kitchen Blog: Turkey Sausage, Apple, and Cranberry Stuffing. Guest post by Georgia Pellegrini, recipe submitted by TK members Kim and Kelsey of K&K Test Kitchen.

 
I think that stuffing might be my favorite holiday side. It is so versatile and goes with anything I can dream up. So when I saw a new stuffing recipe by mother-and-daughter tandem Kim and Kelsey, I decided it was definitely worth trying. One can never have too much stuffing in their life.


Tasty Kitchen Blog: Turkey Sausage, Apple, and Cranberry Stuffing. Guest post by Georgia Pellegrini, recipe submitted by TK members Kim and Kelsey of K&K Test Kitchen.

You will need: a loaf of bread, turkey sausage, olive oil, celery, onion, poultry seasoning (or your own favorite mix), salt, apple, dried cranberries, and chicken broth.


Tasty Kitchen Blog: Turkey Sausage, Apple, and Cranberry Stuffing. Guest post by Georgia Pellegrini, recipe submitted by TK members Kim and Kelsey of K&K Test Kitchen.

Begin by tearing the bread into small pieces and drying it out in a low oven until it is crunchy.


Tasty Kitchen Blog: Turkey Sausage, Apple, and Cranberry Stuffing. Guest post by Georgia Pellegrini, recipe submitted by TK members Kim and Kelsey of K&K Test Kitchen.

Meanwhile, open the sausage casings and remove the ground turkey.


Tasty Kitchen Blog: Turkey Sausage, Apple, and Cranberry Stuffing. Guest post by Georgia Pellegrini, recipe submitted by TK members Kim and Kelsey of K&K Test Kitchen.

Sauté the meat in a bit of oil until it is nicely browned. Transfer it to a large bowl.


Tasty Kitchen Blog: Turkey Sausage, Apple, and Cranberry Stuffing. Guest post by Georgia Pellegrini, recipe submitted by TK members Kim and Kelsey of K&K Test Kitchen.

Next, sauté the onion and celery in a bit more oil until they are soft and translucent.


Tasty Kitchen Blog: Turkey Sausage, Apple, and Cranberry Stuffing. Guest post by Georgia Pellegrini, recipe submitted by TK members Kim and Kelsey of K&K Test Kitchen.

Finish by mixing in the apples and cranberries.


Tasty Kitchen Blog: Turkey Sausage, Apple, and Cranberry Stuffing. Guest post by Georgia Pellegrini, recipe submitted by TK members Kim and Kelsey of K&K Test Kitchen.

Transfer it all to the mixing bowl with the meat and add the bread.


Tasty Kitchen Blog: Turkey Sausage, Apple, and Cranberry Stuffing. Guest post by Georgia Pellegrini, recipe submitted by TK members Kim and Kelsey of K&K Test Kitchen.

Pour in the stock and mix it all together with a large wooden spoon.


Tasty Kitchen Blog: Turkey Sausage, Apple, and Cranberry Stuffing. Guest post by Georgia Pellegrini, recipe submitted by TK members Kim and Kelsey of K&K Test Kitchen.

Transfer it into a baking dish or skillet and pop it in the oven.


Tasty Kitchen Blog: Turkey Sausage, Apple, and Cranberry Stuffing. Guest post by Georgia Pellegrini, recipe submitted by TK members Kim and Kelsey of K&K Test Kitchen.

Cover it at first so it cooks through, then toward the end remove the foil so that the top browns.


Tasty Kitchen Blog: Turkey Sausage, Apple, and Cranberry Stuffing. Guest post by Georgia Pellegrini, recipe submitted by TK members Kim and Kelsey of K&K Test Kitchen.

There’s nothing like a stuffing with a crusty top!

Thank you to Kim and Kelsey for sharing this delicious stuffing recipe with us. There’s nothing better. Check out their website K&K Test Kitchen for more deliciousness!


Printable Recipe

Turkey Sausage, Apple, and Cranberry Stuffing

See post on kandktestkitchen’s site!
0.00 Mitt(s) 0 Rating(s)0 votes, average: 0.00 out of 50 votes, average: 0.00 out of 50 votes, average: 0.00 out of 50 votes, average: 0.00 out of 50 votes, average: 0.00 out of 5

Prep Time:

Cook Time:

Difficulty: Easy

Servings: 8

8
x

Print Options

Page size Letter 3x5 4x6
Text Size Small Medium Large
Content Include description
Include prep time, etc.
Show image

Description

A healthy, delicious alternative to traditional stuffing.

Ingredients

  • 1 loaf Harvest Grain Bread
  • 3 pieces Turkey Sausage Links
  • 2 Tablespoons Olive Oil
  • 4 stalks Celery, Sliced
  • 2 whole Onions, Diced
  • 1 Tablespoon Poultry Seasoning
  • ½ teaspoons Salt
  • 1 whole Honeycrisp Apple, Diced
  • ½ cups Dried Cranberries
  • ½ cups Low Sodium Chicken Broth

Preparation Instructions

Cut the bread into cubes. Try to remove most of the crust. Toast the bread cubes for 15 minutes at 350°F, flipping them once. Put the bread into a large bowl.

While you are toasting the bread, cook the sausage. Heat a medium skillet over medium-high heat. When the skillet is hot, remove the sausage from the casing and add it to the skillet. Cook it, breaking it into small pieces, until it is cooked through. Add the sausage to the bread cubes.

Add the olive oil to the skillet, and then add the celery, onions, poultry seasoning, and salt. When the celery and onions begin to soften, add the apples and cranberries. Cook for another 5 minutes.

Add the celery, onion, apple mixture to the sausage and bread. Pour the chicken broth over everything and mix it well. Transfer the stuffing to a buttered casserole dish, with a lid or covered in aluminum foil, and cook for 20 minutes at 400°F. Uncover and cook for another 15 minutes.

Alternatively, you could stuff the stuffing into your turkey. In that case, let the stuffing come to room temperature before you stuff the turkey (never put hot stuffing in the bird!).


_______________________________________

There’s so much to say about Georgia, we don’t know where to start. Leaving Wall Street for the French Culinary Institute, followed by a stint at the Gramercy Tavern and La Chassagnette in France, her passion for food and food traditions are evident and inspiring. Visit her site at Georgia Pellegrini, where you’ll find more recipes, photos, learn all about her wonderful books Girl Hunter and Food Heroes, and enjoy her latest adventures.


Profile photo of Erica Lea

Outrageous Garlic Soup

Posted by in Step-by-Step Recipes

  Are you ready for this? Garlic. Onions. Cream. White wine. Oh, yes. These are just a few of the ingredients that combine to make this wonderful, creamy soup, brought to us by n8tivenyer. I made this soup for our family. It was a big hit. Dad loved it—had several bowls of it. Even Grandma […]

Profile photo of EatLiveRun

Salted Chocolate and Pecan Cake Bars

Posted by in Baking, Step-by-Step Recipes

  If you haven’t noticed yet, I really have a thing for sweet and savory baked goods. I’m of the firm belief that a little sea salt sprinkled on top of a piece of cake or a brownie makes everything better, and for that reason, was incredibly excited when I found these Salted Chocolate and […]

Profile photo of missamy

Rosemary Turkey Pockets

Posted by in Step-by-Step Recipes

  Tasty Kitchen is full of recipes that bring back memories from potlucks, parties and shindigs long past. As I was meandering through the Tasty Kitchen offerings, I found this recipe for Rosemary Chicken Pockets, submitted by Tasty Kitchen member, punkrebelmama. It reminded me of a recipe my mother used to make each year using […]

Profile photo of cookincanuck

Apple Pie Egg Rolls

Posted by in Baking, Step-by-Step Recipes

As soon as apples hit the market in the autumn, our minds turn to apple pie and turnovers, preferably accompanied by large spoonfuls of vanilla ice cream. However, if you’re running short on time, or are inexplicably freaked out by pie dough (like me), you may be tempted to whip up a dessert that incorporates all of the flavors of apple pie, without the fuss.…