


Let’s face it. There’s just nothing like fresh, homemade bread. Sure, you can get some wonderful, artisan breads at local shops, but they can’t come close to magic of the smell and taste of home-baked bread pulled from the oven and spread with butter and jam (or honey).
But here’s the problem: With busy lives, especially around the holidays, there’s precious little time to spend agonizing over kneading and rise times. And so homemade bread is often neglected.
This recipe, brought to us by Terri, is about as low-fuss as yeast bread gets. All you have to do is mix everything in a large bowl, let it rise, form into buns, and bake once they’re puffy. Still skeptical about no-knead bread? Let me assure you, it is good. Like, really good: fluffy and flavorful and soft. Let me show you!
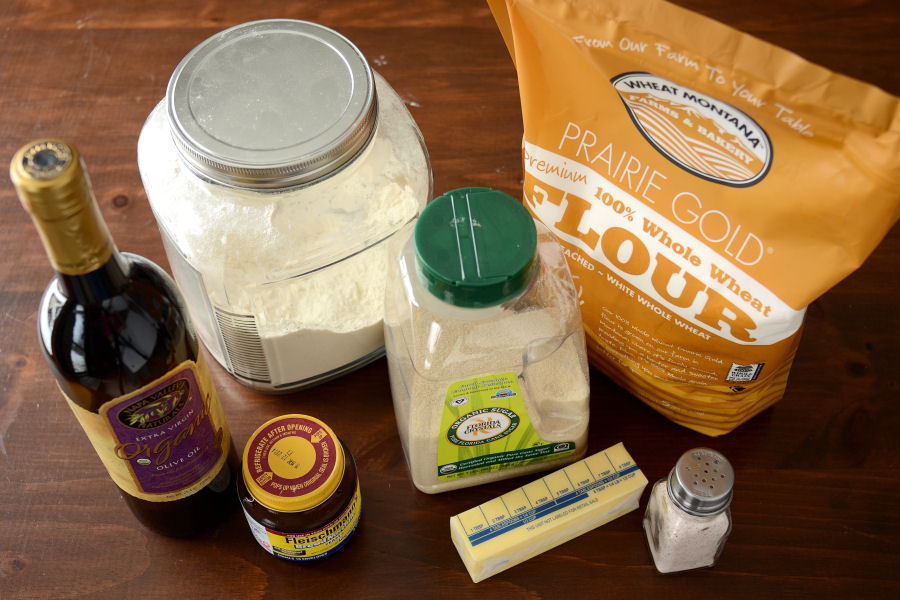
To begin, grab the few ingredients you’ll need: yeast, sugar, oil (I used olive, but if you don’t like the flavor, you could use melted butter or vegetable oil), salt, flour (I used part white, part wheat), butter, and water.
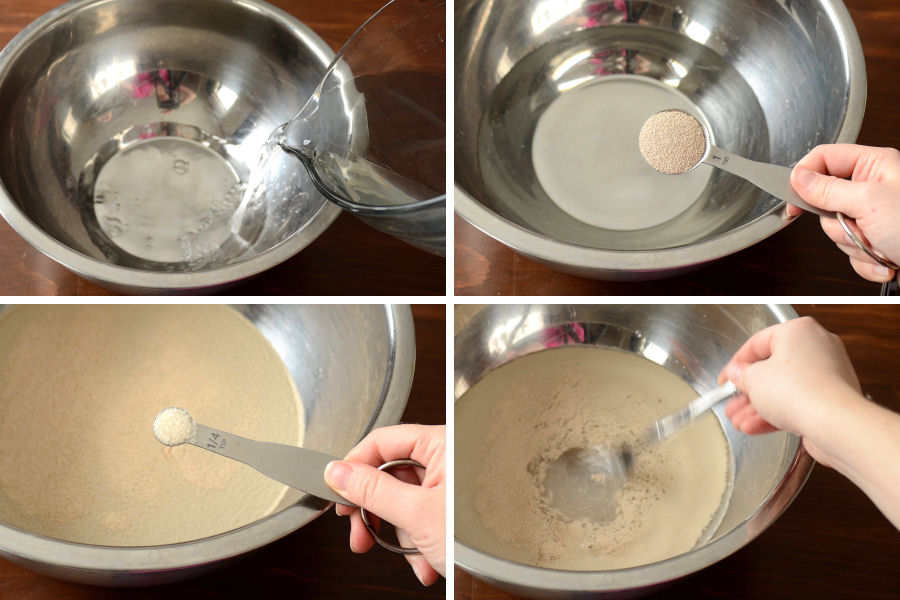
Pour some warm water into a large mixing bowl and sprinkle in the yeast and 1/4 teaspoon of sugar. You can gently stir it with a fork if you wish.
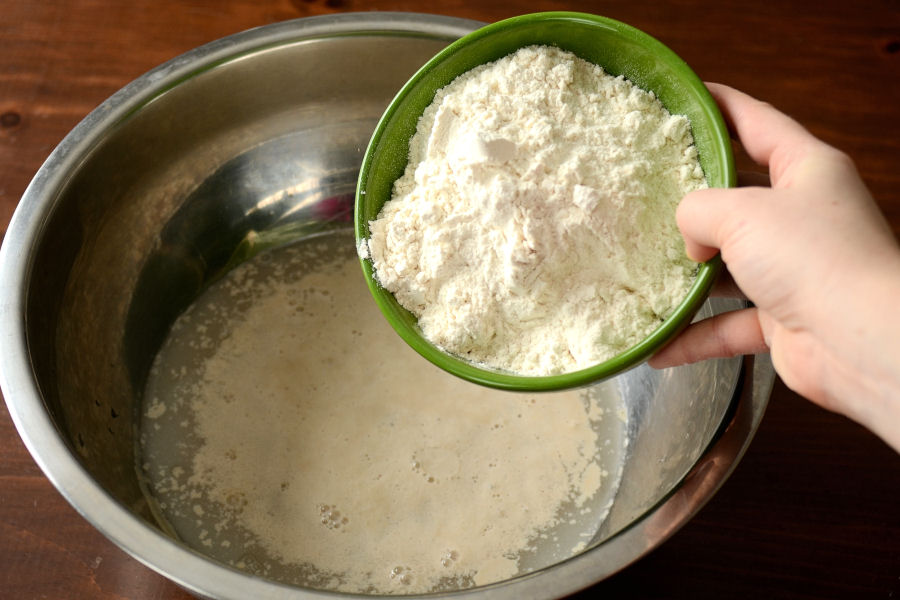
Let the yeast “activate” in the water (about 5 minutes). Then add the flour …
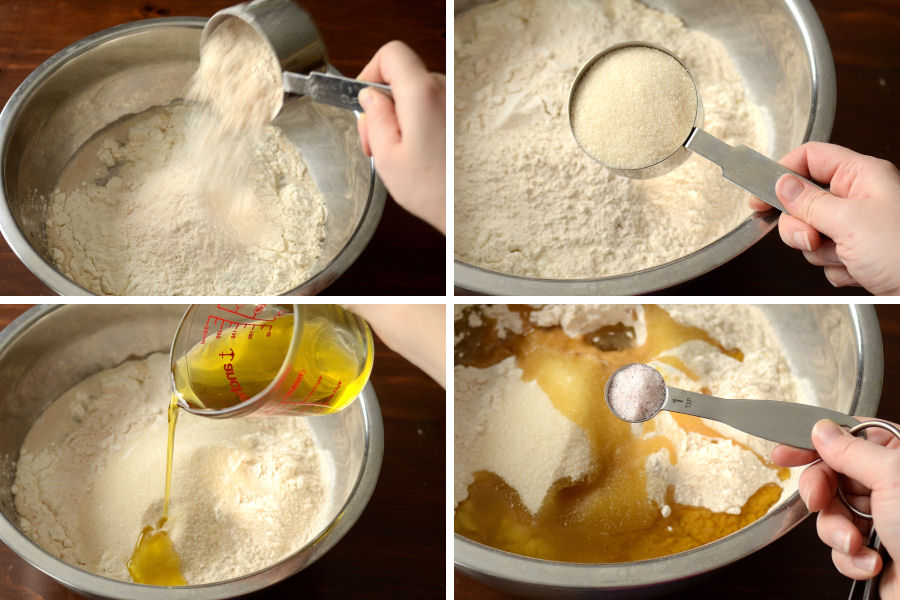
… wheat flour (if using), sugar, oil and salt.
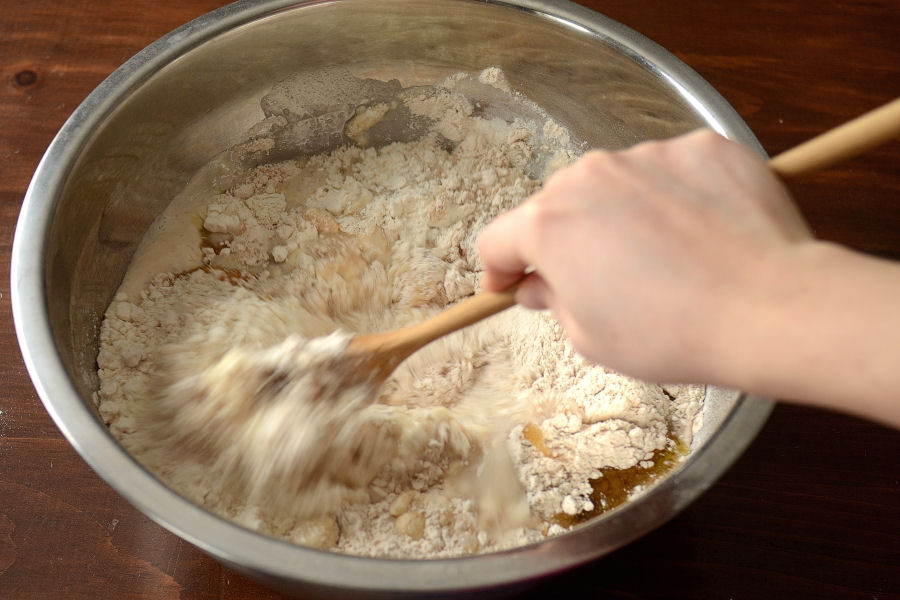
Stir it all together.
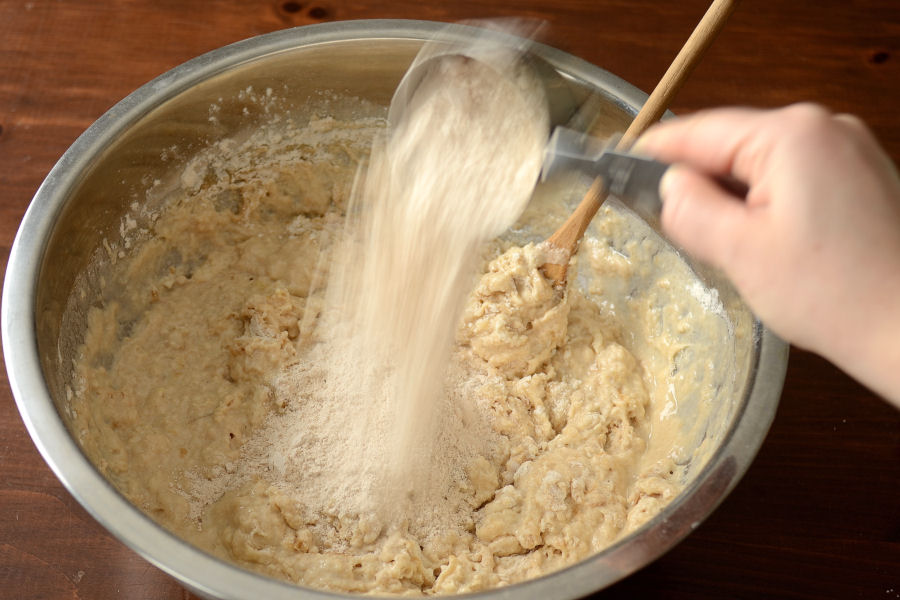
If the dough is too wet, you can add more flour. The right texture is soft and sticky, but not soupy.

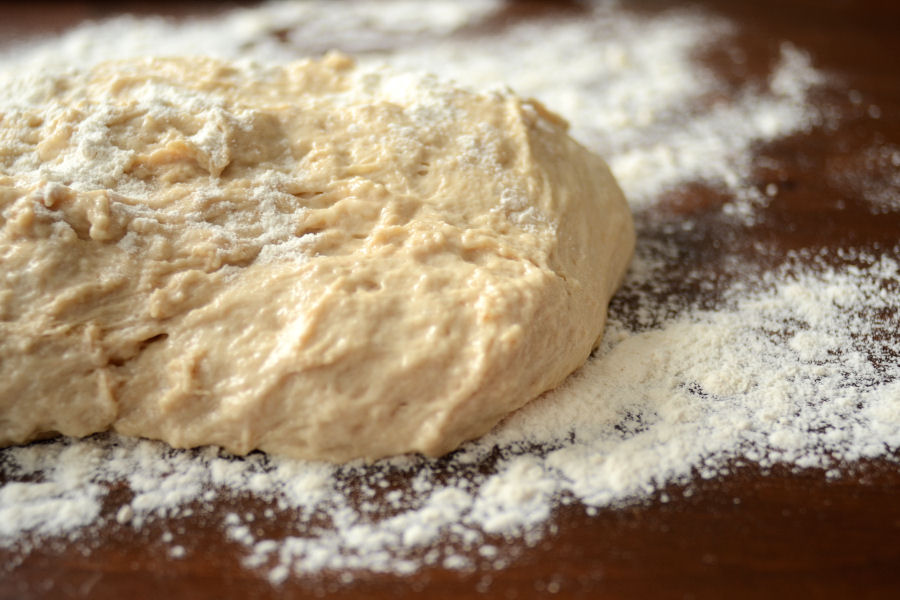
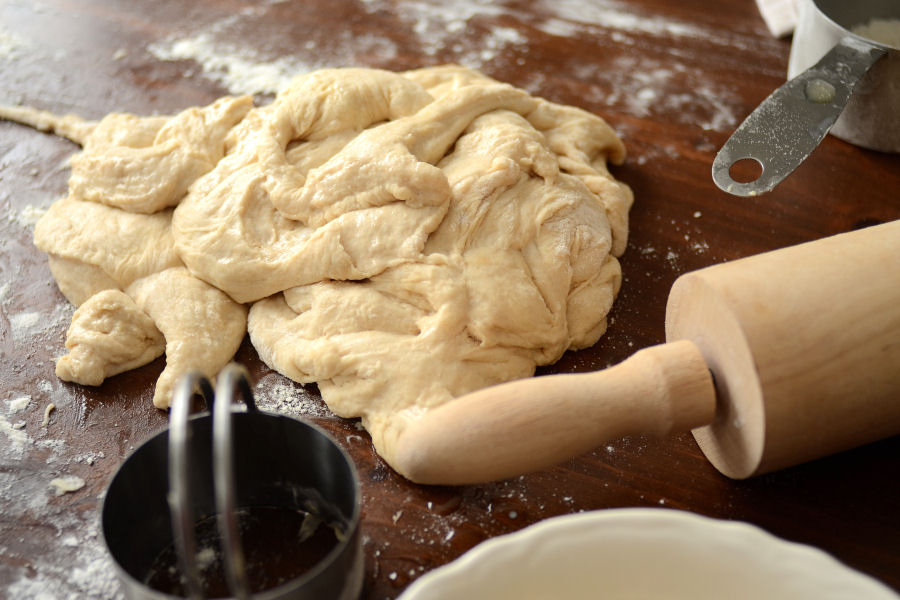
See that? That’s how it should look. Don’t stir too much! After all, these are no-knead.
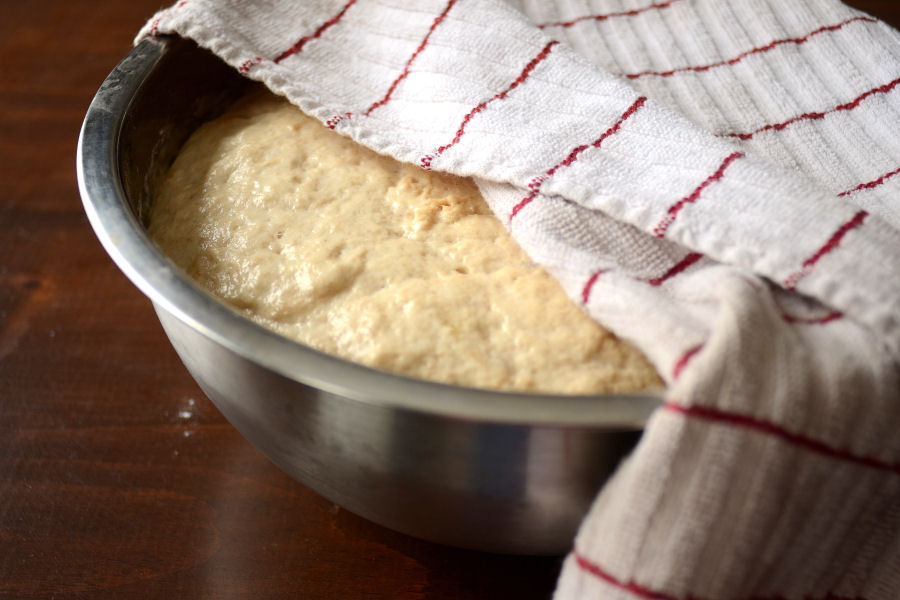
Cover the dough and set aside to rise until doubled. This only took about and hour for me, but it all depends on how warm your house is.
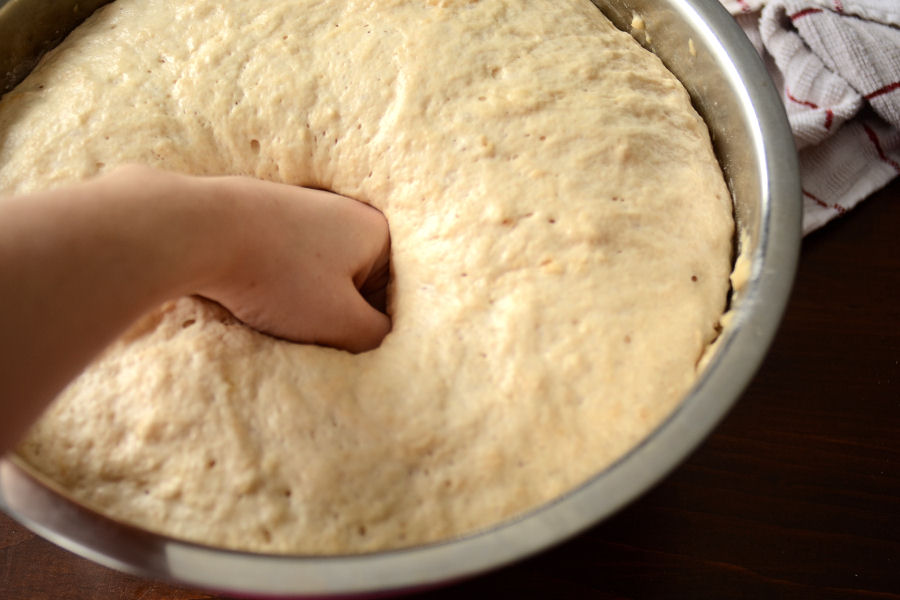
Now, give that dough a punch!
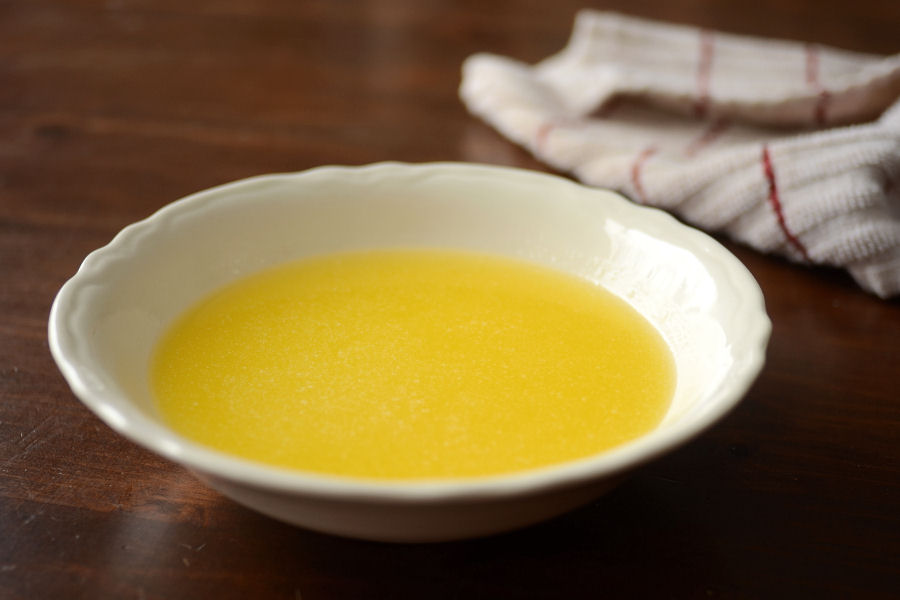
Ahhh … melted butter.
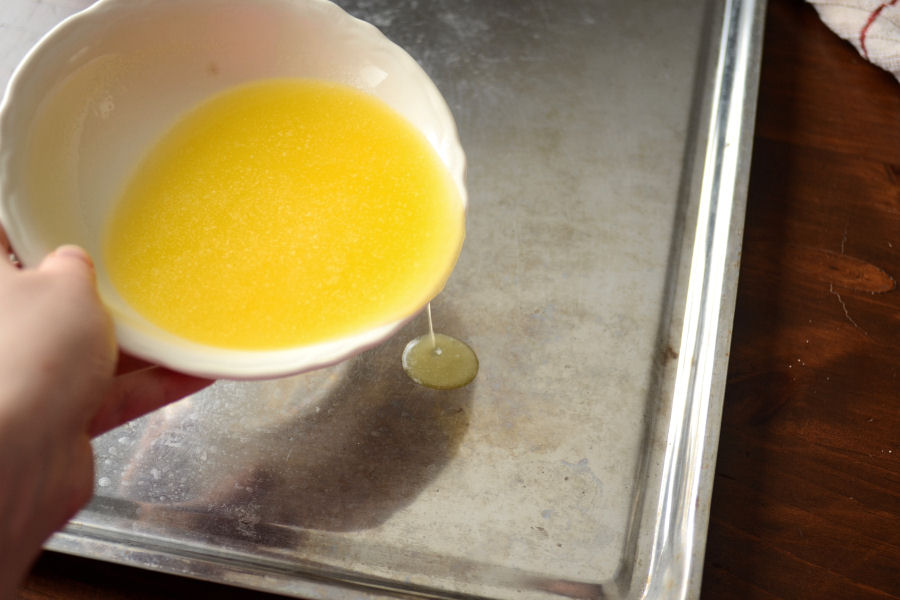
Pour a little onto a rimmed baking sheet.
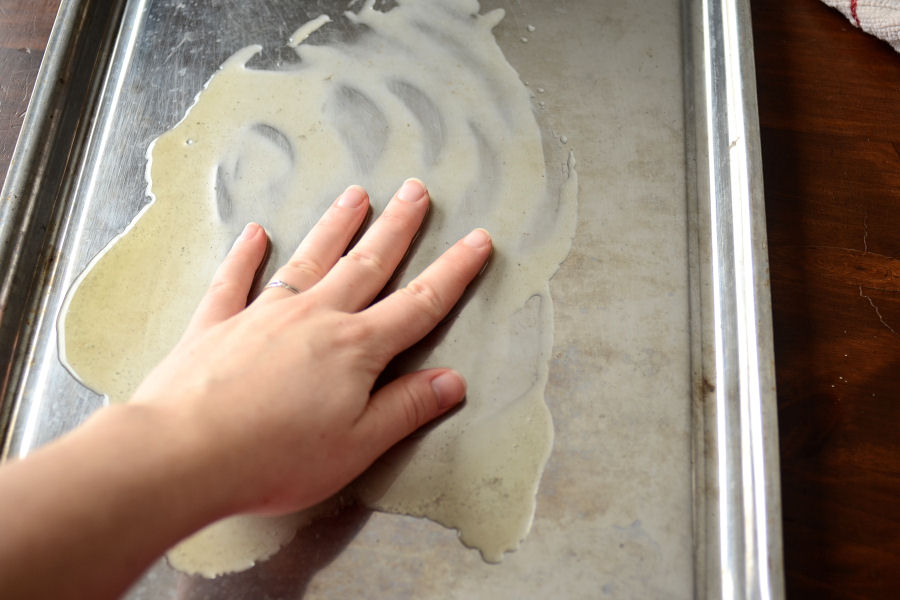
Get your hands in it and smear it around.
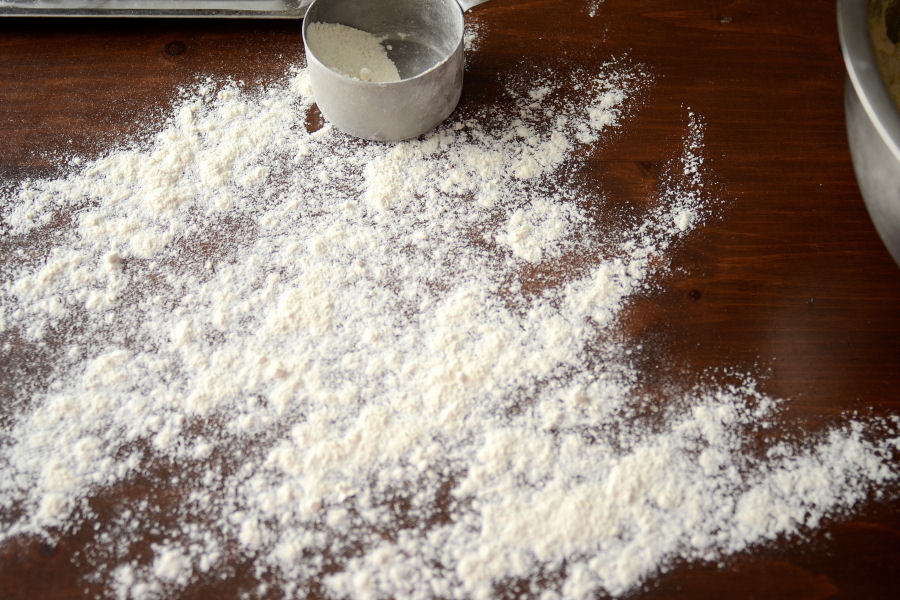
Now it’s time to make a mess! Sprinkle your work surface generously with flour.
Scoop your risen dough out onto your counter/table and sprinkle with some more flour.
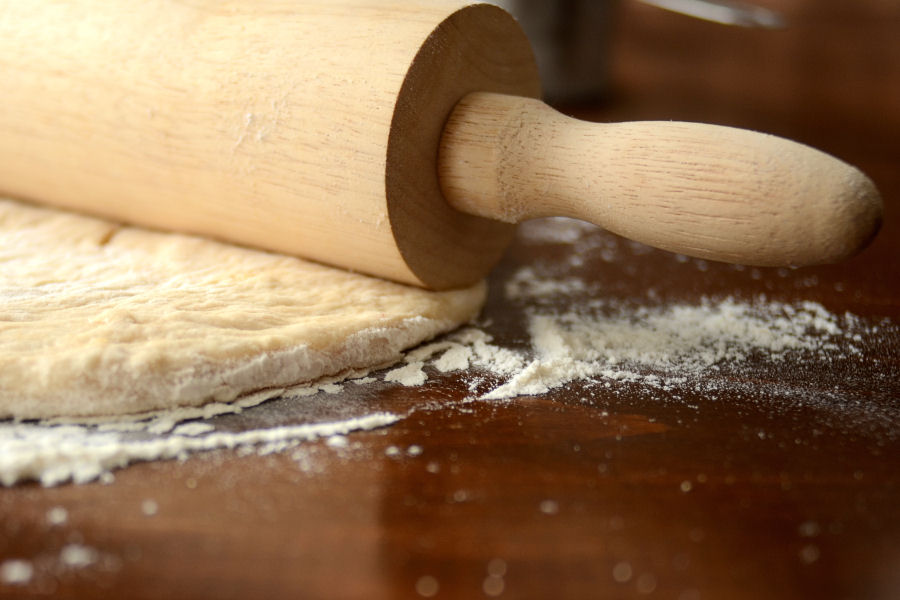
Roll the dough out to about a 1/2-inch thickness.
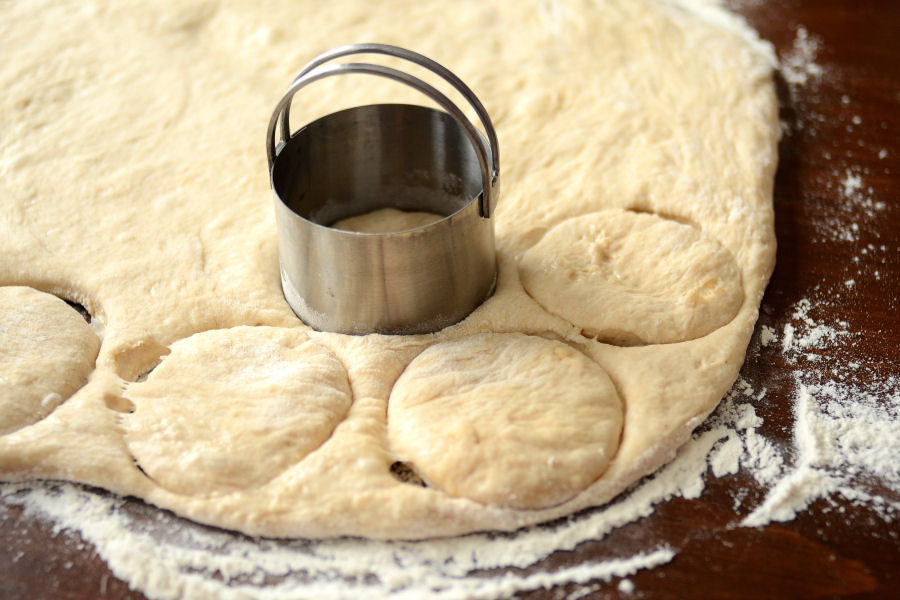
Take a round cookie/biscuit cutter and stamp out circles of dough. You could get your circles closer together than mine.
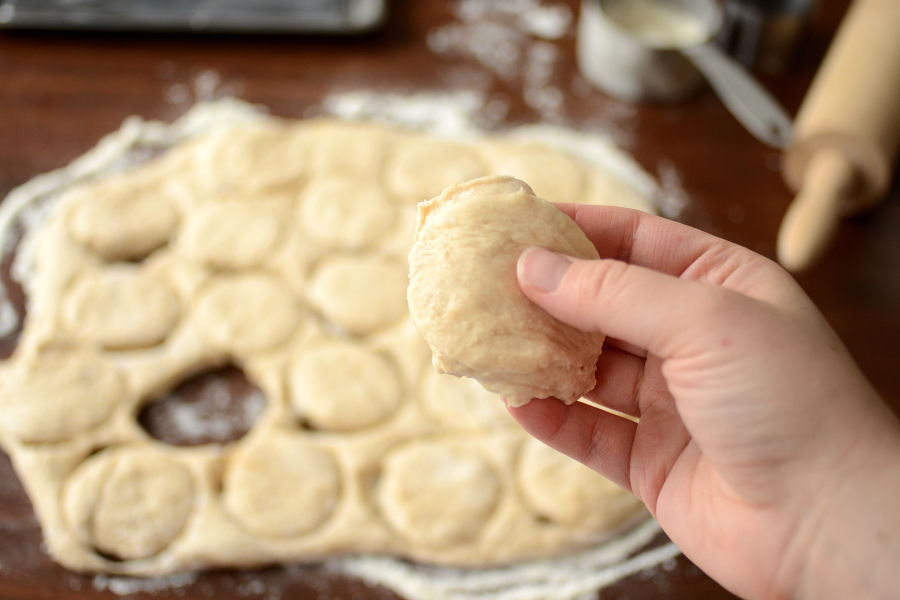
Grab a circle of dough …
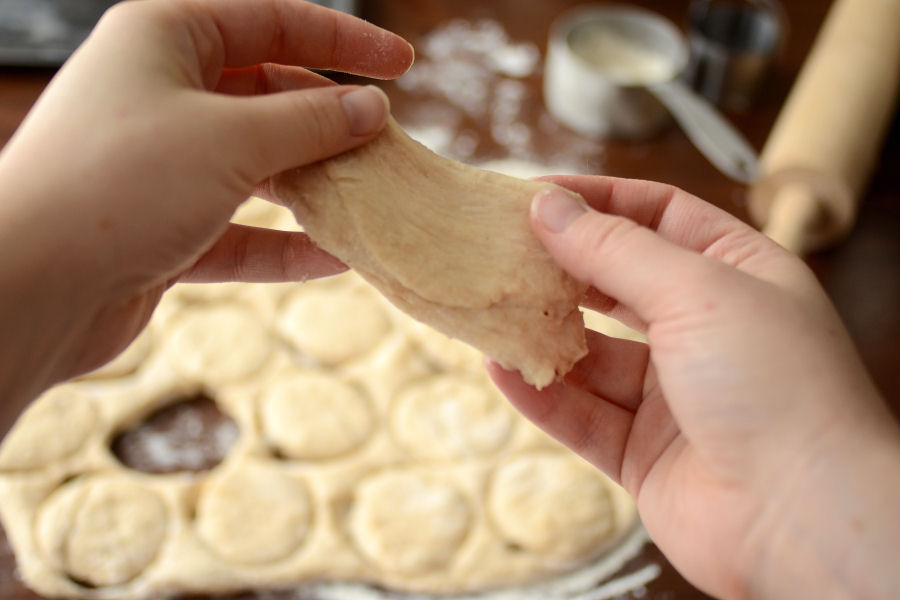
And stretch it out a bit.
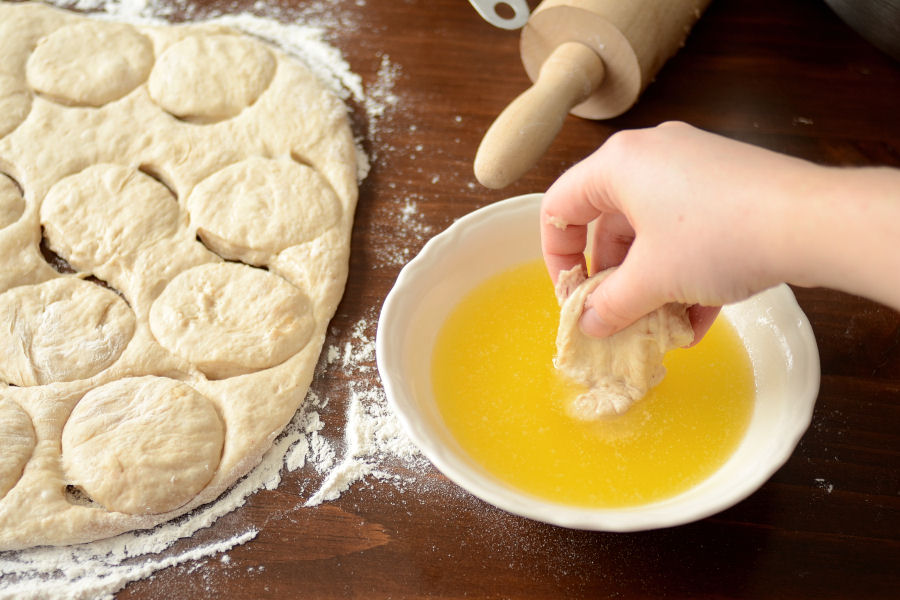
Dunk half of it into the melted butter …
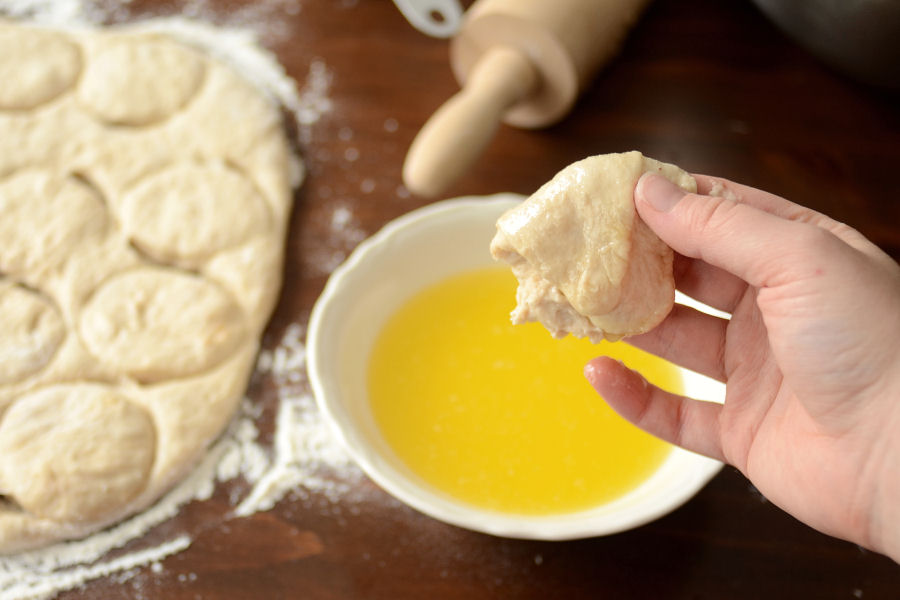
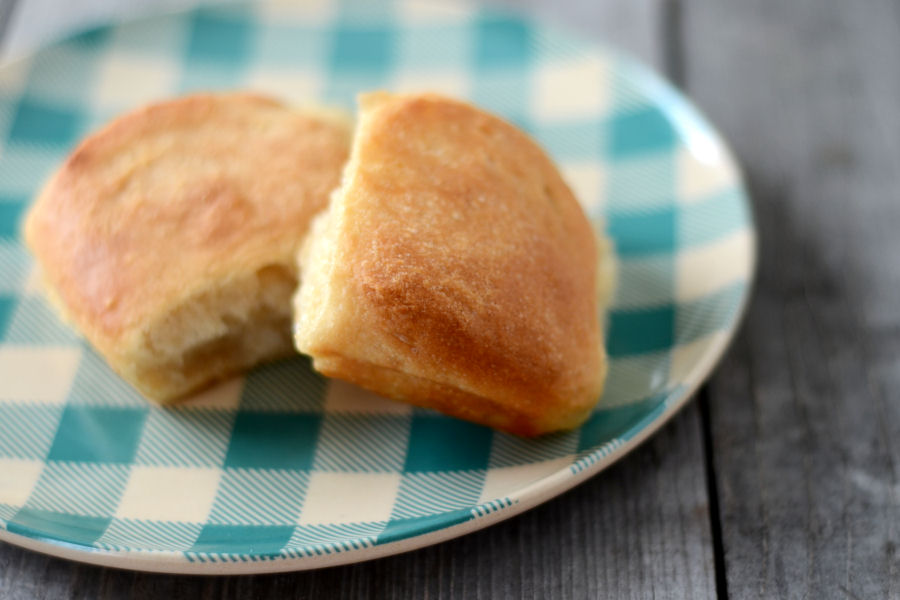
And fold it in half with the butter side up. Now you have a lovely little Parker House roll.
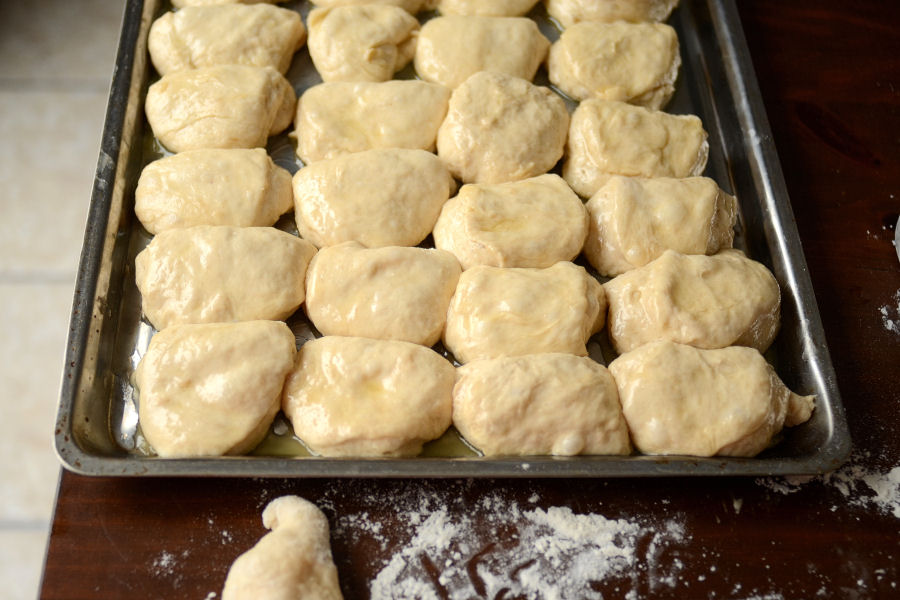
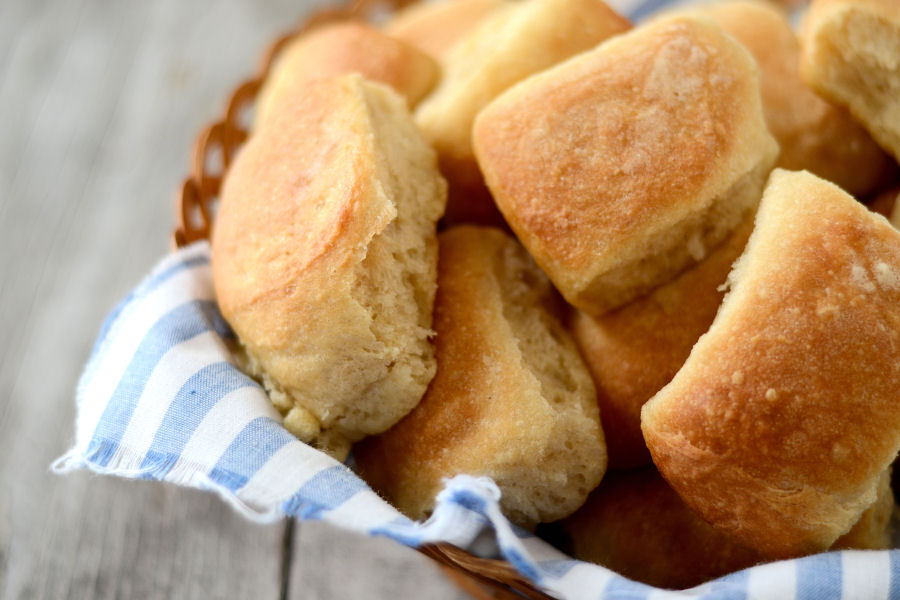
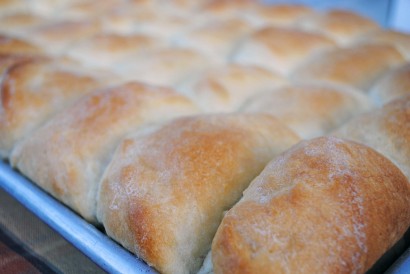
Place on your buttered baking sheet (buttered side up). Repeat with remaining dough, placing the buns close together.
Gather up your scraps and go again!
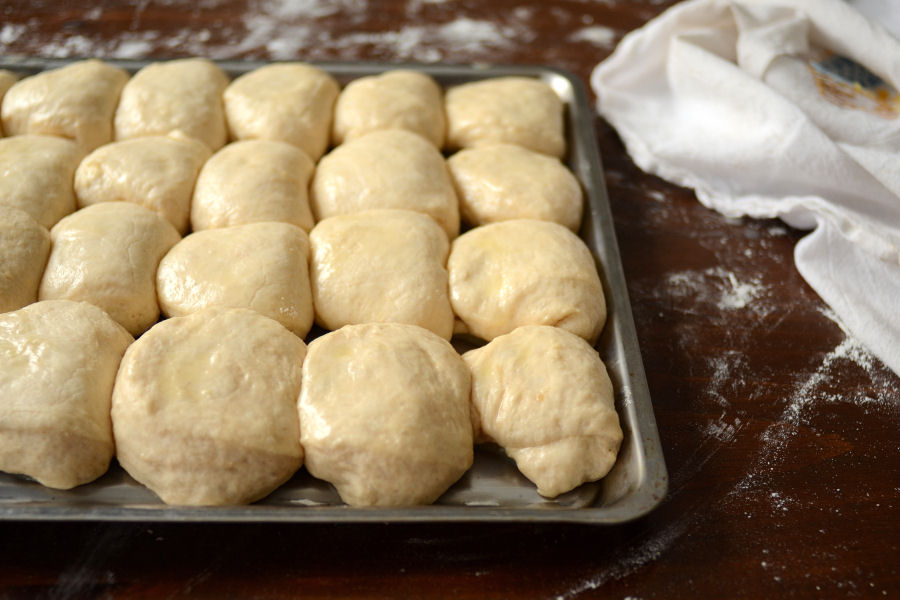
Cover the buns and let rise until nice and puffy. Aren’t they beautiful?
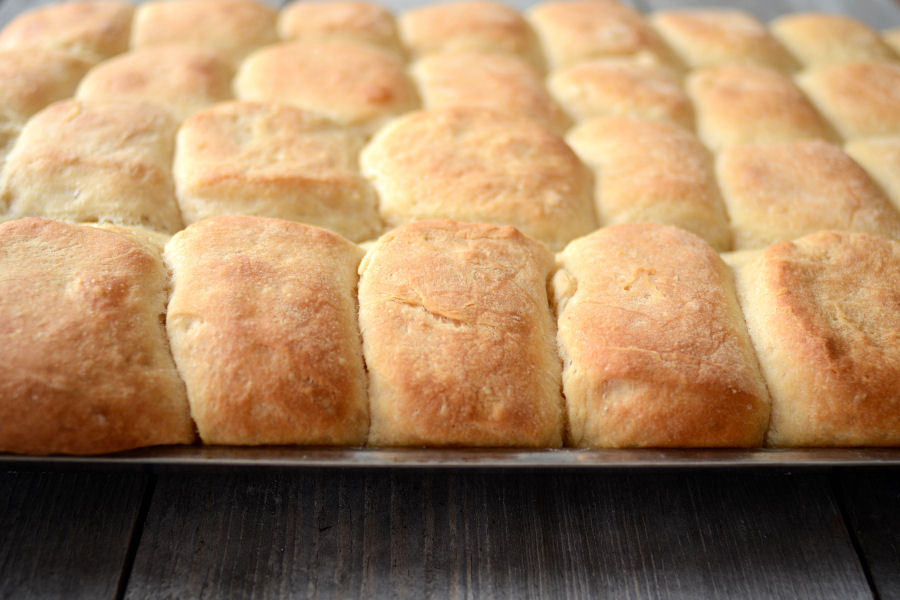
Bake at 375°F until lovely and golden brown. You can brush the tops of the buns with extra butter, if you wish.
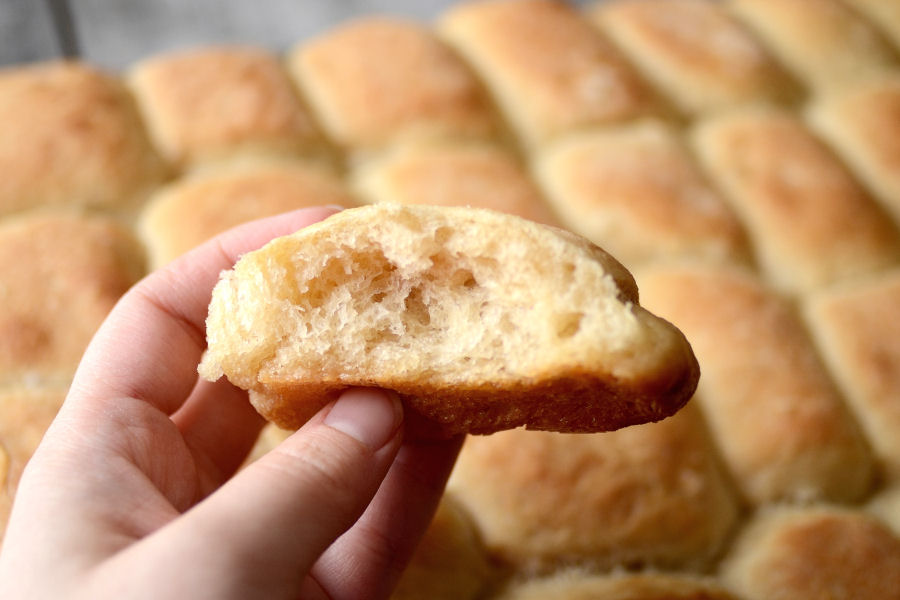
Just look at how pillowy soft they are!
Recipe notes:
1. This dough can be refrigerated for up to a week. You can mix up a big batch and just pull off pieces of dough and bake them for fresh bread throughout the week!
2. You don’t have to make Parker House rolls from the dough. Terri suggests cinnamon rolls, pull-aparts and breadsticks.
3. These rolls reheat very well. Just pop them in a 350°F oven for 10 minutes.
Thanks so much to Terri for sharing these buttery rolls with us. She blogs over at That’s Some Good Cookin’, where she posts many more lip-smackin’ recipes.
Printable Recipe


Print Options
Description
I have no idea why these easy rolls work so well time after delicious time.
Ingredients
- 3 cups Warm Water
- 2 Tablespoons Yeast
- ½ cups Sugar
- ½ cups Vegetable Oil (canola Works Best)
- 2 teaspoons Salt
- 6 cups To 7 Cups White Flour
- 1 stick Butter
Preparation Instructions
In a large mixing bowl dissolve yeast in warm water with 1/4 teaspoon sugar.
When the yeast has activated, add all other ingredients (except butter) and stir well with a wooden spoon until all ingredients are incorporated. Avoid over mixing and do not knead the dough. Just stir it. The dough is soft and will be somewhat sticky, not drier like other roll doughs that you may be used to using.
Cover bowl and let dough rise until doubled in bulk. Punch dough down and let it rest for a few minutes.
Melt the butter in a small bowl. Prepare a baking pan by greasing the pan with some of the melted butter.
To shape a Parker House style roll, divide the dough in half and roll out one half of the dough on a well floured counter top until about 1/2-inch thick. Using a round biscuit cutter, cut out circles of dough. Stretch the dough just a little lengthwise and dip one half into melted butter. Fold dough over in half and place on the pan. Place the rolls close to each other in rows. Repeat with remaining half of dough. Work the left-over dough from the two dough halves together to finish making your rolls. You should be able to get 32 rolls on a large baking sheet (4 rolls across and 8 rolls down).
Cover rolls and let rise again until almost doubled in size. Bake at 375ºF for 20 minutes or until the rolls are golden brown. Brush hot rolls with additional butter if desired.
Note: This dough can be kept in the refrigerator for at least a week and the dough just pulled off as you wish to use it to make cinnamon rolls, scones, pull-aparts, hot rolls or bread sticks during the week.
_______________________________________
Newly-married Erica Kastner shares her wonderful recipes and amazing food photography on her blog, Cooking for Seven. She also writes about crafts and posts more of her beautiful photography in her personal blog, EricaLea.com. There really isn’t much that this amazing young lady can’t do, and we’re thrilled she does some of it here.

13 Comments
Comments are closed for this recipe.
Natascha on 4.13.2013
Just whipped up this batch, i was so exited when they finnaly came out from the oven. However, the whole batch smells and taste like yeast. I had to throw it all out! There goes my saturday.
At first i was doubtful when i read your ingredient list of 2 tablespoon of yeast. It did seems abundant. Are you sure its not suppose to be teaspoon instead of tablespoon?
Jen on 12.18.2012
Love to see you are using Wheat Montana flour. LOVE our local flour!
Terri @ that's some good cookin' on 12.16.2012
Mel, the dough can be rolled 1/2″-3/4″. Any thicker and the rolls won’t stay folded over very well. Since they are a “no-knead” type of yeast roll, the gluten structure isn’t present to sustain a really “high” rising roll. They are tender and delicious, nonetheless.
Also, one of the reviewers stated that she had to use more flour than is stated in the recipe. This is probably true for anyone living in a more humid climate. I live in a very dry climate, so my flour has less moisture than it would if I lived in a dry climate. It may take 7-8 cups of flour for moist climates. The dough is a soft dough and should feel somewhat sticky. After it has risen, be sure to turn it out on a nicely floured surface. Turn the dough over so that both sides of the dough gets a nice coating of flour before you start rolling it out. I forgot to mention that in the directions when I wrote the recipe–sorry, my bad. Otherwise you can do as Erica suggests and sprinkle the side facing up with flour before rolling.
Mel G on 12.16.2012
If I roll the dough a bit thicker, will that make my rolls a bit higher? I’ve never attempted homemade bread or rolls before, and this recipe looks so nice and easy that I’m inspired!
Nana Tijano on 12.15.2012
Nice
Jayne on 12.15.2012
Wow! They do get really pillowy and soft. Very manageable especially during this time of the year when any help is welcomed. That will go very well with gravy.
Kellie on 12.14.2012
The 4:2 ratio makes me happy:) These look so wonderful – thinking that today now requires the making of some soup and rolls…!
Erica Lea on 12.14.2012
Emily: You’re welcome! Just make sure you don’t eat the whole batch…
Erica Lea on 12.14.2012
Celia: No, it was more of a 4:2 ratio (4 cups white, 2 cups WW). I’d like to try them with more whole wheat, but I love how soft they are with that ratio. The sugar I used is Florida Crystals’ organic cane sugar – basically evaporated cane juice. I think it’s a great substitute for white sugar.
Emily on 12.14.2012
Thanks Erica, that was my guess! I’ve never prepped dough ahead of time though so I thought I’d ask! I might have to test a few ahead of time too…
Celia B on 12.14.2012
Erica, did you use half white and half wheat for the flour or what was your ratio? Also, what kind of sugar did you use? It doesn’t look like white granulated sugar or light brown sugar. Thanks!
Erica Lea on 12.14.2012
Emily: the recipe doesn’t really say, but I would suggest refrigerating the dough after the first rise. Then you can just pull off pieces of dough, shape them, and bake when they’ve puffed up! Mmhmm – I’ll bet they’d be awesome with soup.
Emily on 12.14.2012
We’re moving in a week and recruited some of my husband’s coworkers to help out and were planning on feeding them soup. I think these would be a great accompaniment since I could make the dough ahead of time!!! My only question is at what point do you refrigerate the dough?
Thanks so much!