The Pioneer Woman Tasty Kitchen
Profile photo of HowSweetEats

Peanut Butter Stuffed Hot Fudge Cupcakes

Posted by in Baking, Step-by-Step Recipes

Tasty Kitchen Blog: Peanut Butter Stuffed Hot Fudge Cupcakes. Guest post and recipe from Jessica Merchant of How Sweet It Is.

 
I think it’s true what they say: you can never go wrong with peanut butter and chocolate. It’s the combination that I consoled myself with after my first high school heartbreak (think a spoon in the jar and a sprinkling of chocolate chips) and the way we celebrated our marriage (think the best cheesecake in the universe, sliced doubly thick) on our honeymoon.

It’s a comforting combination, a delicious one, and sometimes even a healthy one. Dark chocolate has loads of antioxidants, and peanut butter? Well, we have our healthy fats. Trust me. I can justify just about anything.

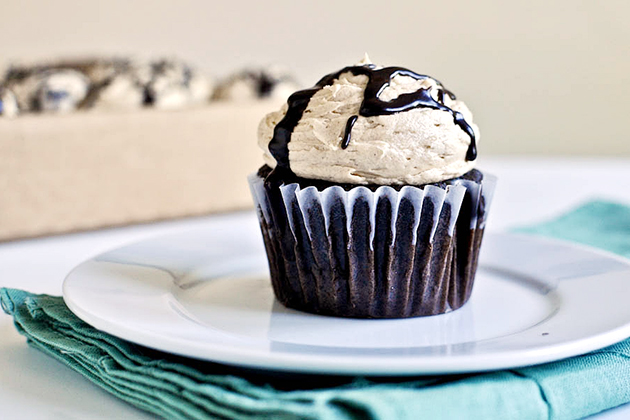
A few months ago I made this cupcake and it has since become my go-to cupcake. It’s the cupcake that my family asks for on birthdays, the one that my brother dubbed “the best he’d ever had,” and the one that I happily suggest when I’m quizzed about fabulous dessert recipes.

It’s slightly more time consuming that your run-of-the-mill cupcake with a glob of frosting, but I promise it is completely worth it.


Tasty Kitchen Blog: Peanut Butter Stuffed Hot Fudge Cupcakes. Guest post and recipe from Jessica Merchant of How Sweet It Is.

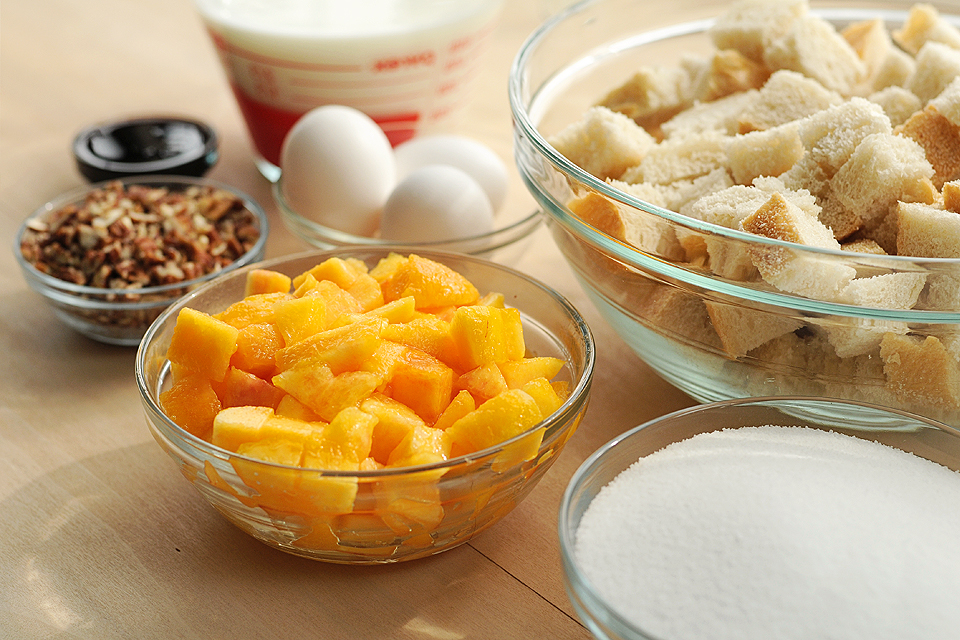
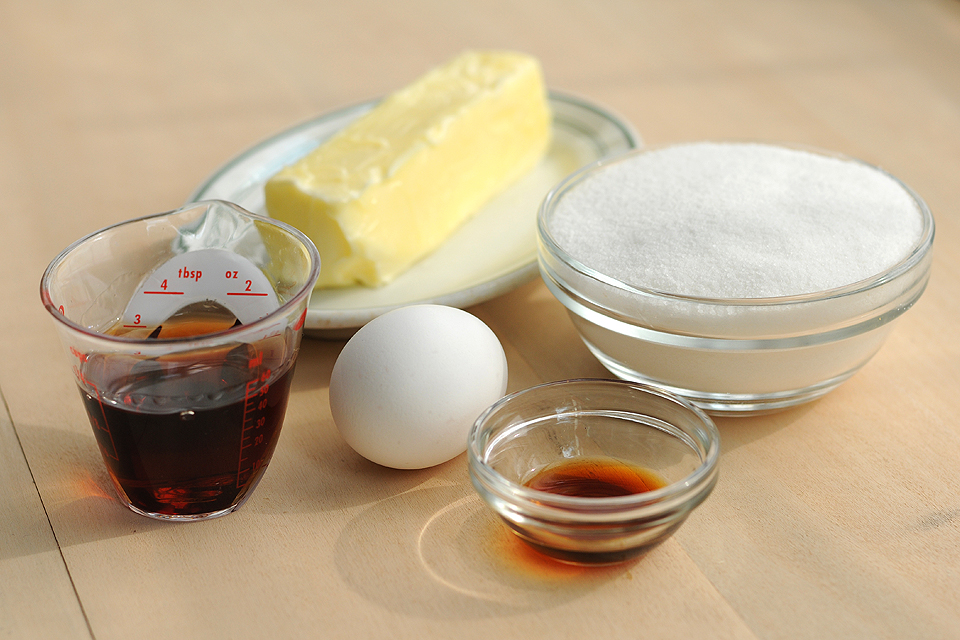
Here’s what you need: milk, eggs, heavy cream, sour cream, vanilla extract, peanut butter, flour, baking soda, butter, cocoa powder (I use the dark stuff), powdered sugar, and brown sugar. Lots of cream going on here. That only means one thing: deliciousness.

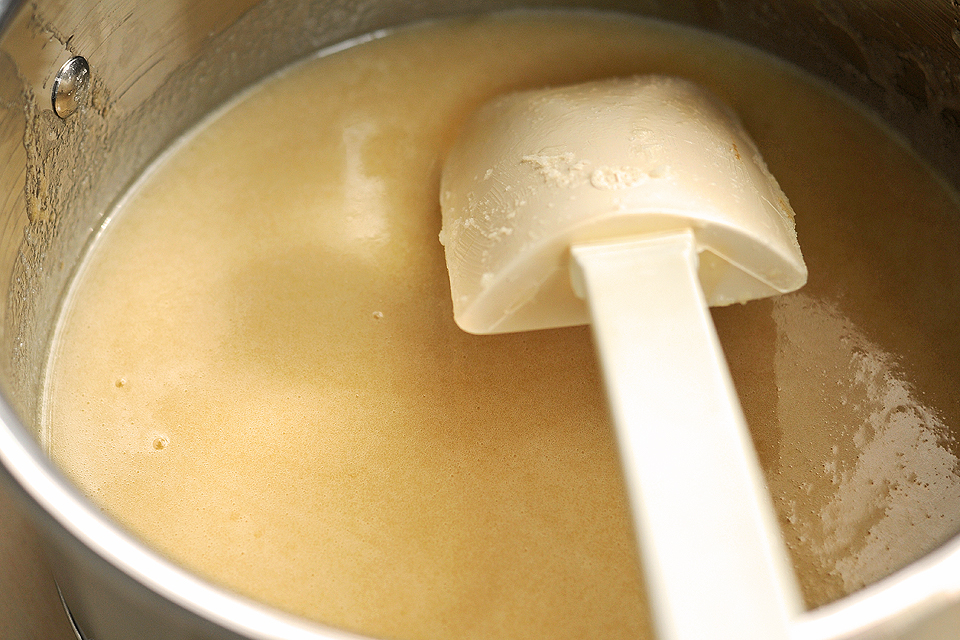
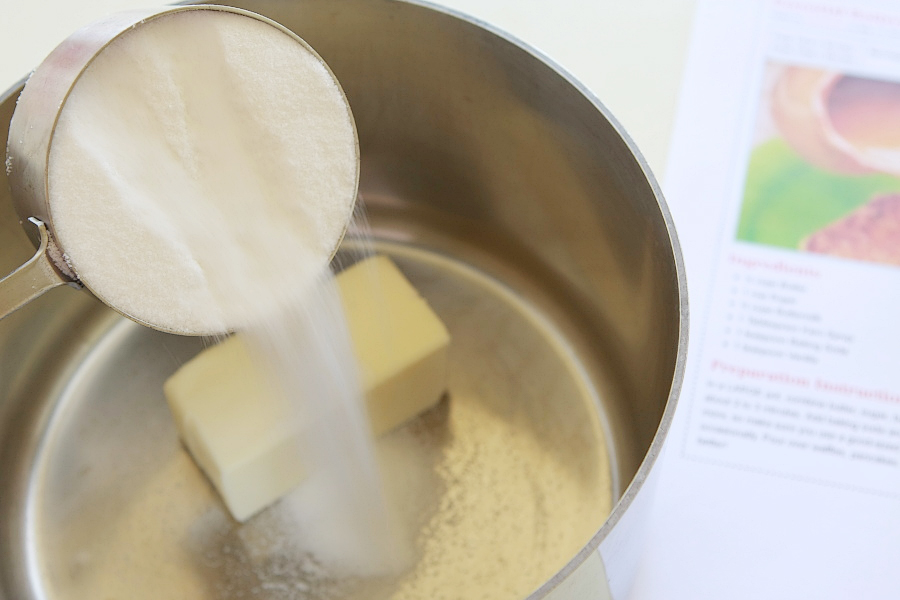
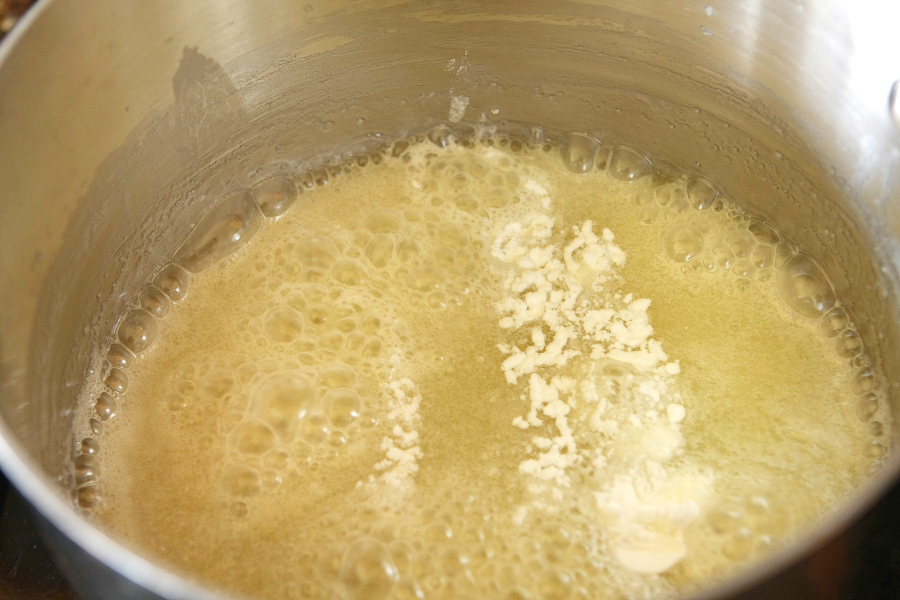
First up, I make the hot fudge. I find that if I get this out of the way, it has time to sit and thicken while I make the cupcakes. You can use a double boiler, but this time around I simply combined everything in a small saucepan and let it work its magic. Super easy!


Tasty Kitchen Blog: Peanut Butter Stuffed Hot Fudge Cupcakes. Guest post and recipe from Jessica Merchant of How Sweet It Is.

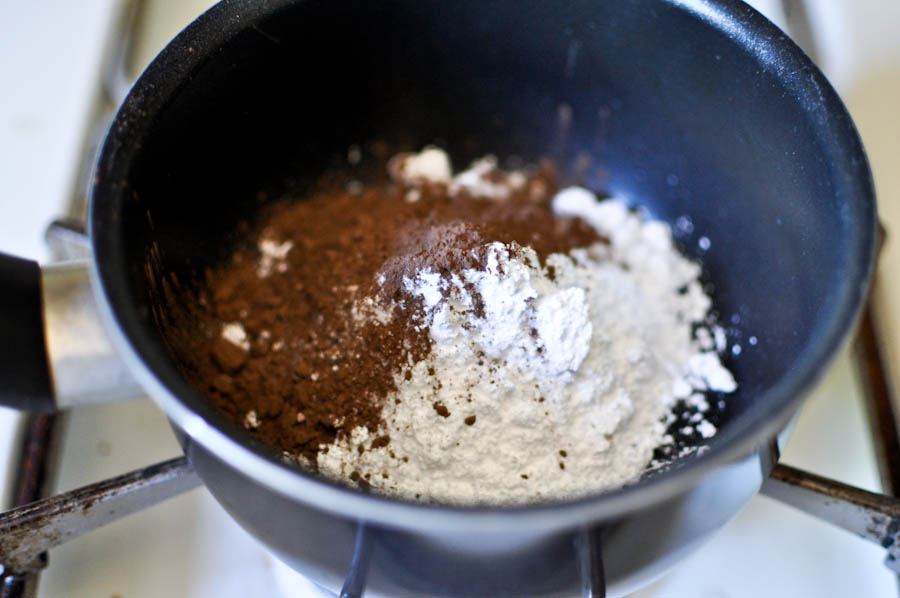
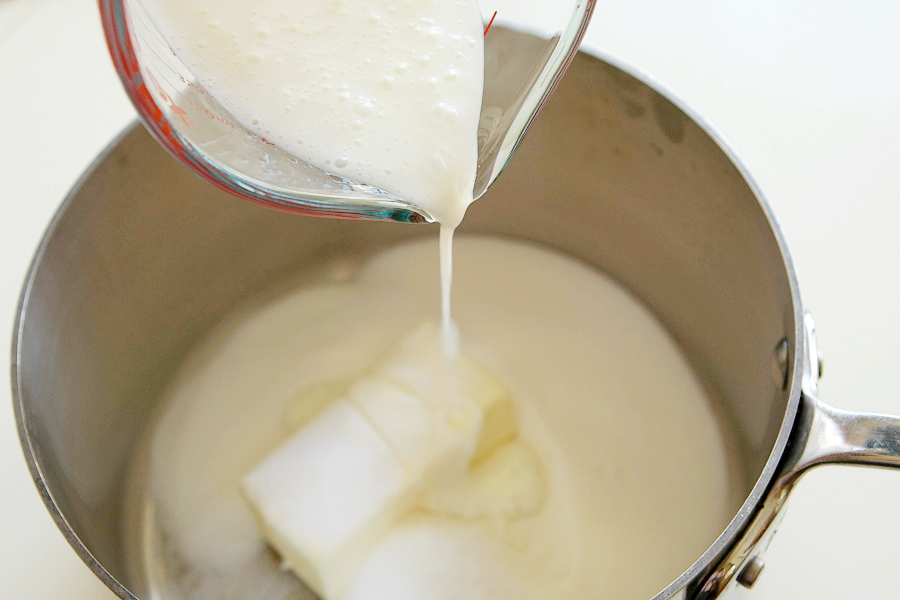
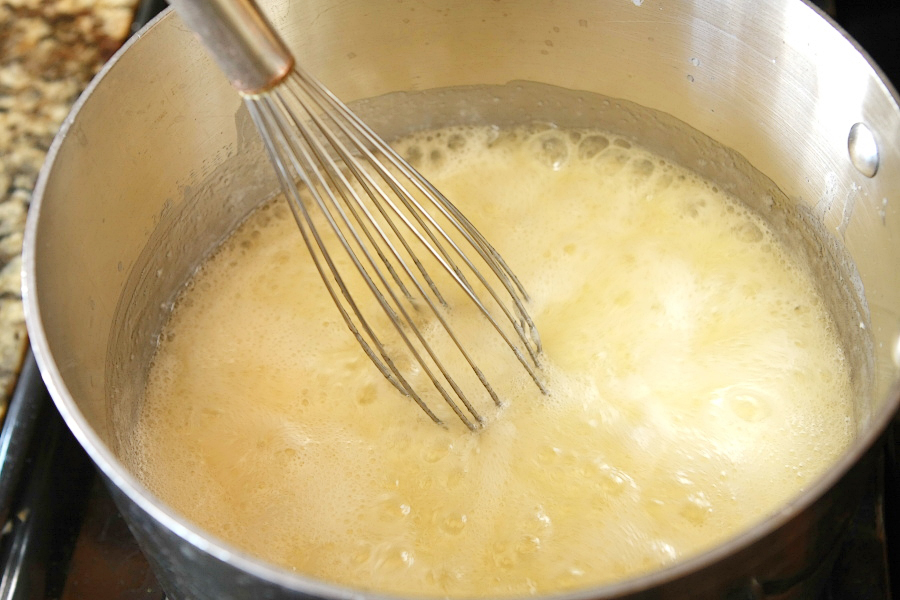
Combine the sugar, cocoa, salt, and flour in the saucepan. Separately, bring your milk or water (I always use milk, but water is fine) to a boil, then add it to the flour and cocoa mixture and stir, stir, stir over low heat. Do not look up, pass go, or collect $200. Just keep stirring until the fudge thickens.


Tasty Kitchen Blog: Peanut Butter Stuffed Hot Fudge Cupcakes. Guest post and recipe from Jessica Merchant of How Sweet It Is.

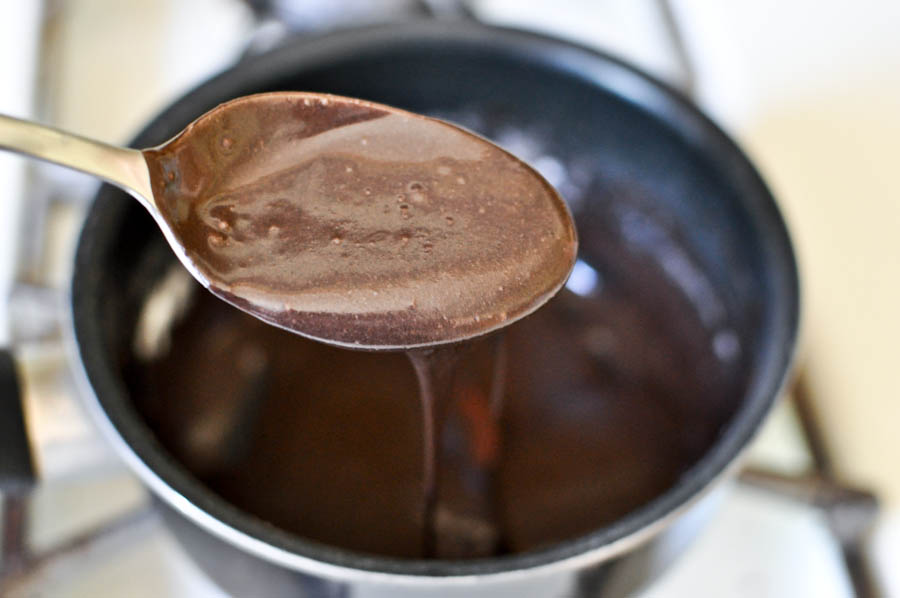
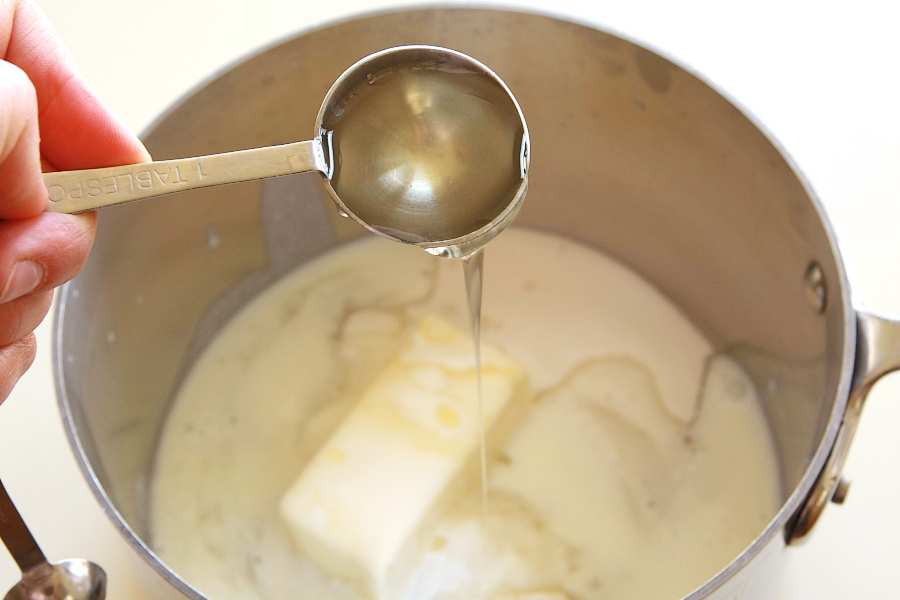
One it gets thick, remove it from the heat and stir in your butter and vanilla. Then set it aside and let it cool down to thicken a bit more.

Now it’s time to start the cupcakes. My favorite part about these cupcakes is that you only have to use one bowl to bring them together. No mixer necessary. First, sift together your flour, cocoa, salt, and baking soda and set them aside.


Tasty Kitchen Blog: Peanut Butter Stuffed Hot Fudge Cupcakes. Guest post and recipe from Jessica Merchant of How Sweet It Is.

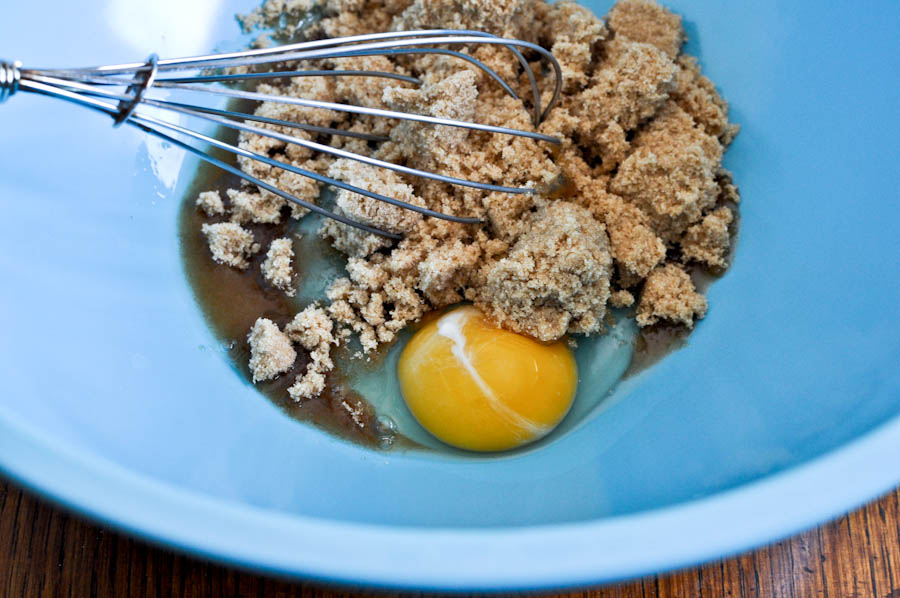
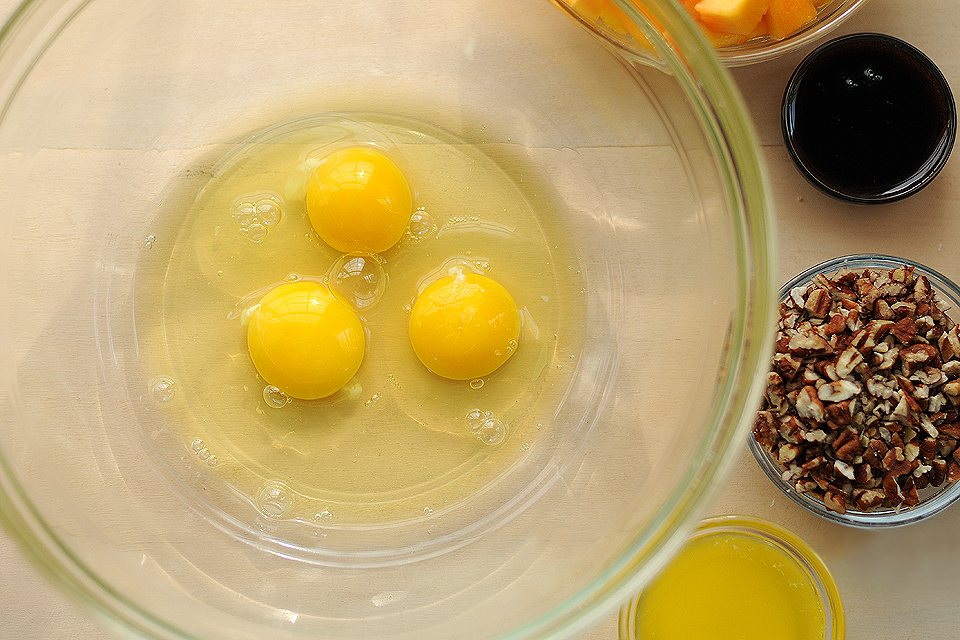
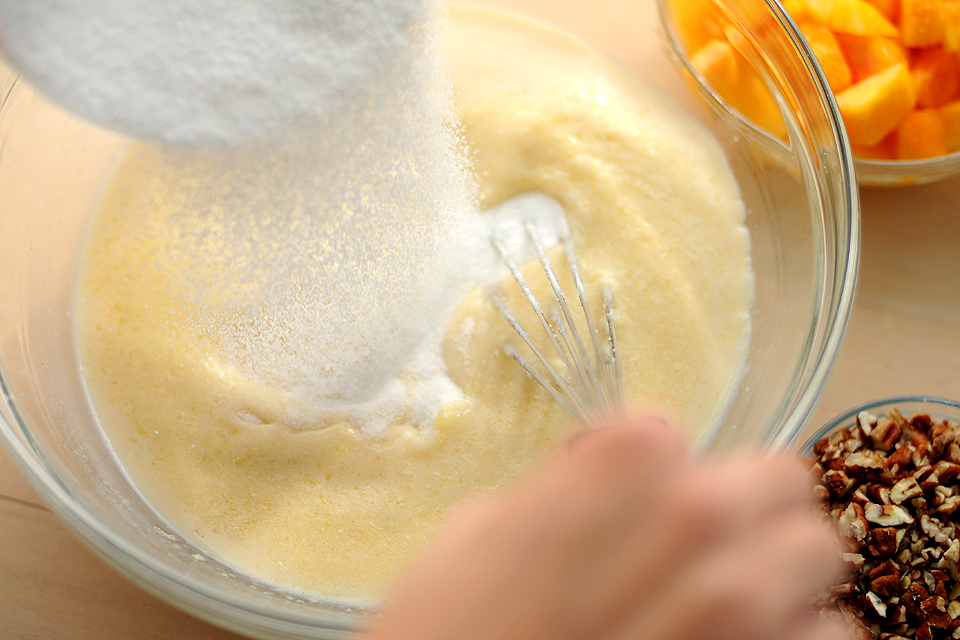
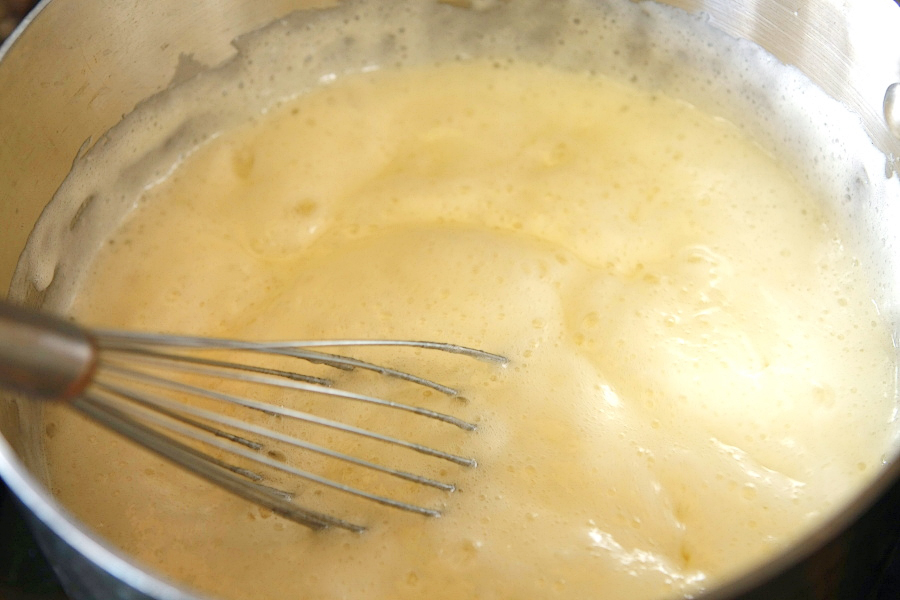
Next, in a large bowl, mix your egg and brown sugar together until no lumps remain.


Tasty Kitchen Blog: Peanut Butter Stuffed Hot Fudge Cupcakes. Guest post and recipe from Jessica Merchant of How Sweet It Is.

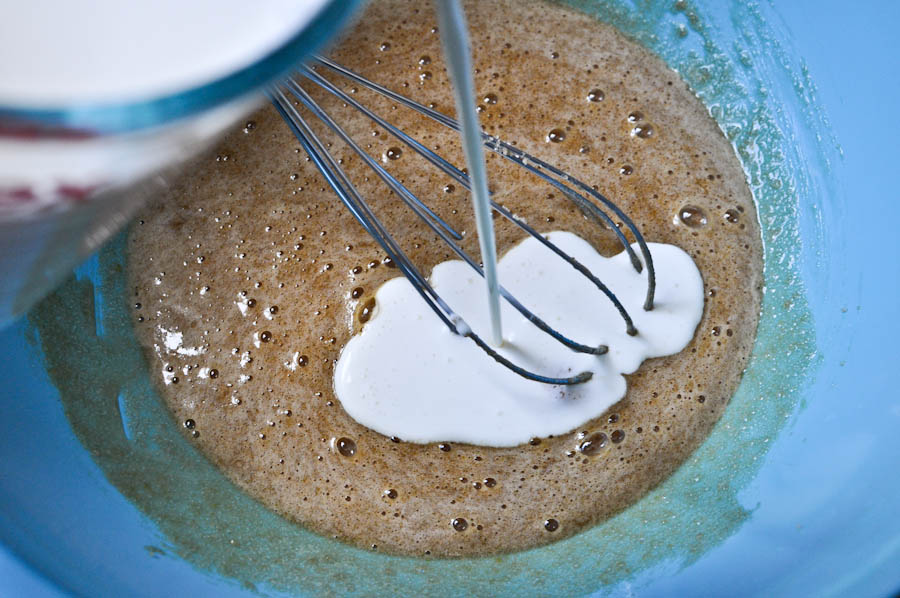
Stir in your heavy cream and milk, mixing continuously.


Tasty Kitchen Blog: Peanut Butter Stuffed Hot Fudge Cupcakes. Guest post and recipe from Jessica Merchant of How Sweet It Is.

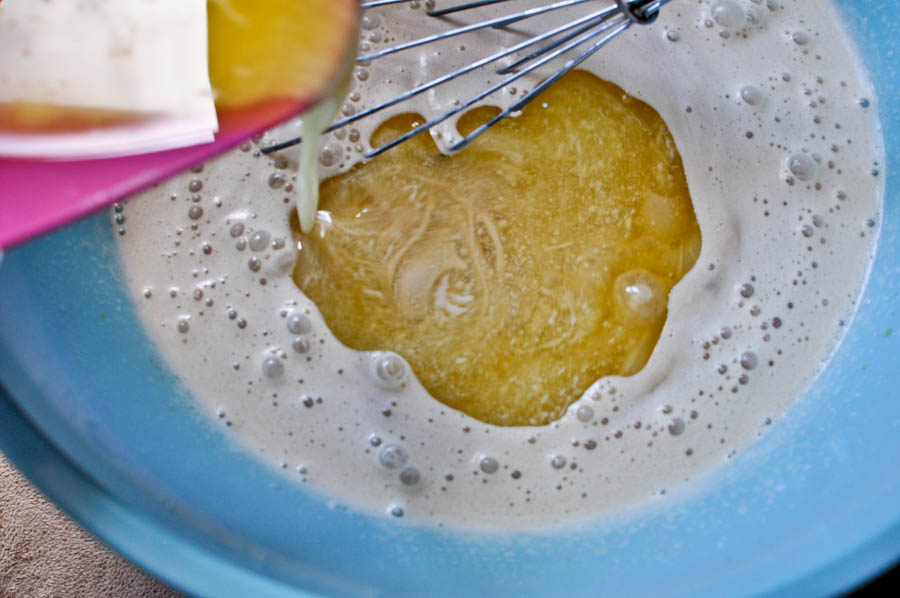
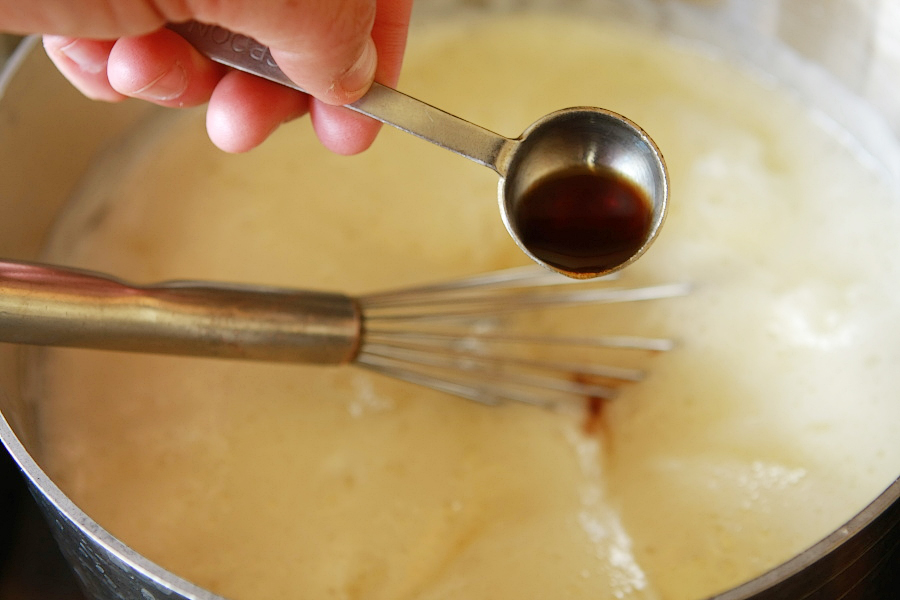
Now add in your butter and vanilla. Keep mixing away!


Tasty Kitchen Blog: Peanut Butter Stuffed Hot Fudge Cupcakes. Guest post and recipe from Jessica Merchant of How Sweet It Is.

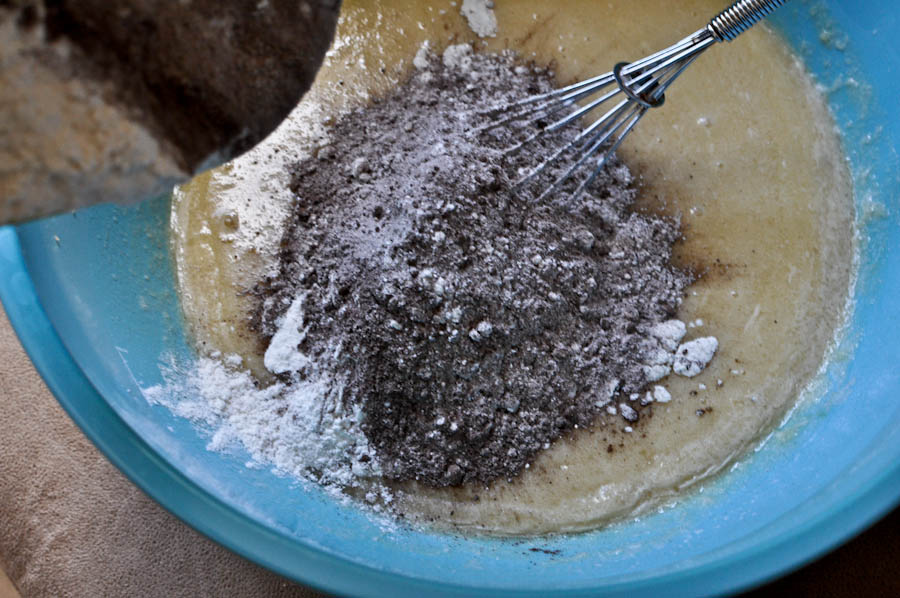
Add in your dry ingredients slowly while you continue to mix. Make sure you get out all of the lumps. And make sure you take a taste. Deeeelish.


Tasty Kitchen Blog: Peanut Butter Stuffed Hot Fudge Cupcakes. Guest post and recipe from Jessica Merchant of How Sweet It Is.

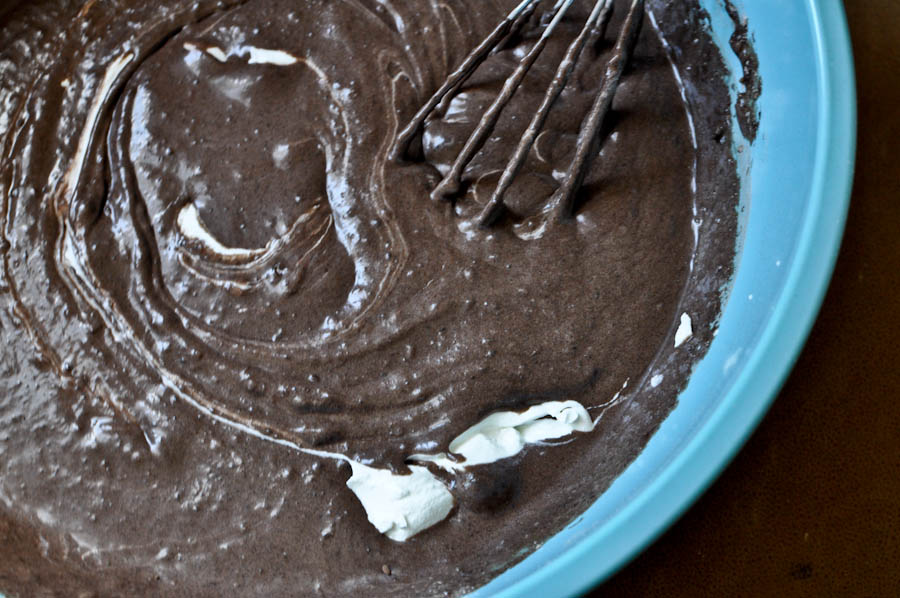
Your batter should be thick and chocolaty now. Even though you want to shovel it into your face, stir in a little sour cream. This takes it over the edge.


Tasty Kitchen Blog: Peanut Butter Stuffed Hot Fudge Cupcakes. Guest post and recipe from Jessica Merchant of How Sweet It Is.

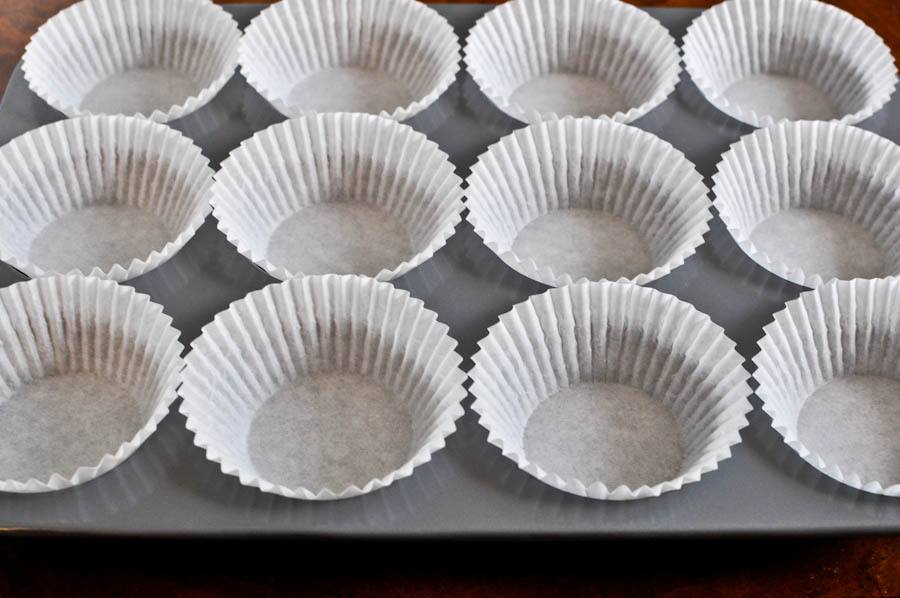
Next, line a cupcake tin with liners.


Tasty Kitchen Blog: Peanut Butter Stuffed Hot Fudge Cupcakes. Guest post and recipe from Jessica Merchant of How Sweet It Is.

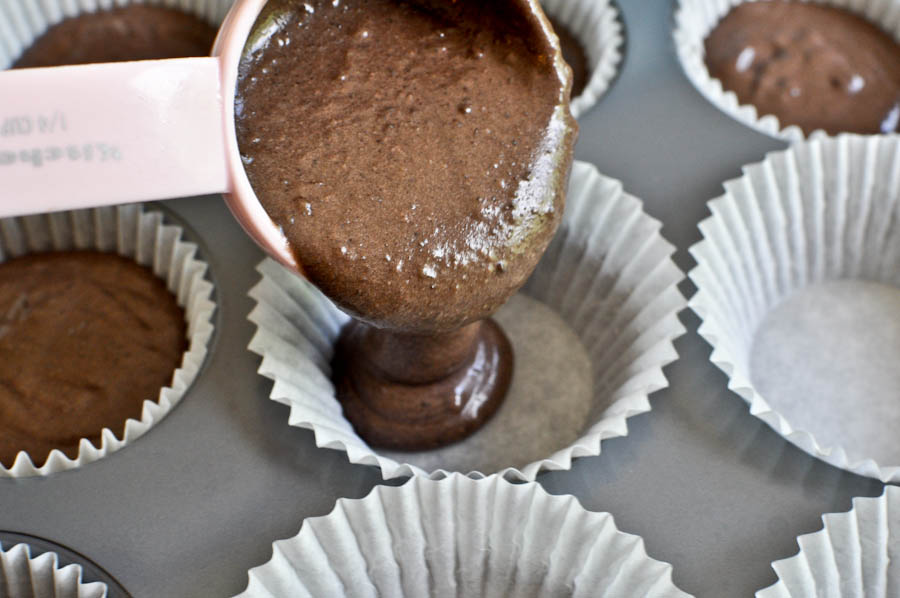
Using a 1/4 cup measure, pour the batter into each liner. I like to spray my measuring cup with non-stick spray beforehand so the batter slides right out.

Into the oven they go!


Tasty Kitchen Blog: Peanut Butter Stuffed Hot Fudge Cupcakes. Guest post and recipe from Jessica Merchant of How Sweet It Is.

After baking, I let my cupcakes sit for about 5 minutes, then remove them from the tins and let cool on the counter. This well help them cool a little quicker and we want them to be completely cool before frosting.

While the cupcakes are cooling, you can make your frosting or do the dishes. I always choose the first option.


Tasty Kitchen Blog: Peanut Butter Stuffed Hot Fudge Cupcakes. Guest post and recipe from Jessica Merchant of How Sweet It Is.

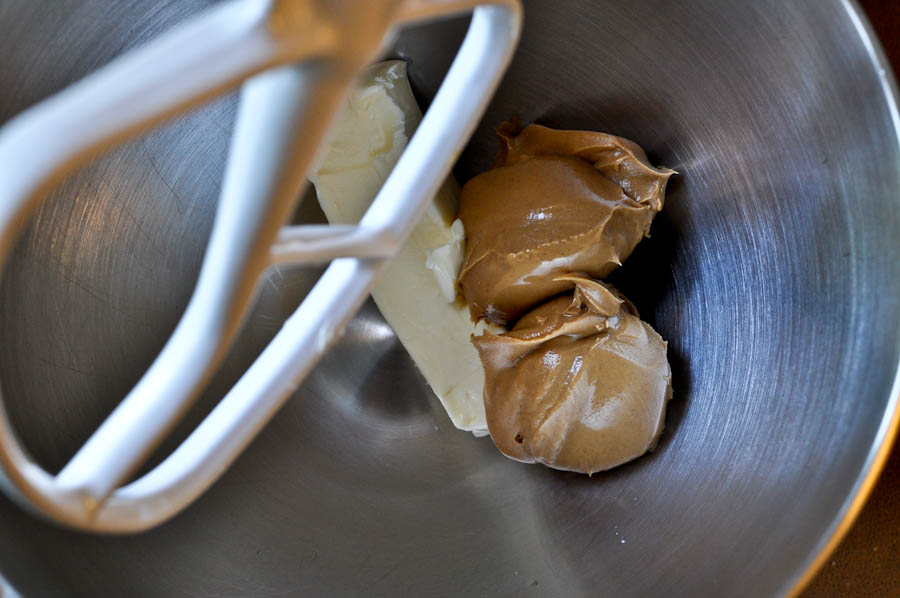
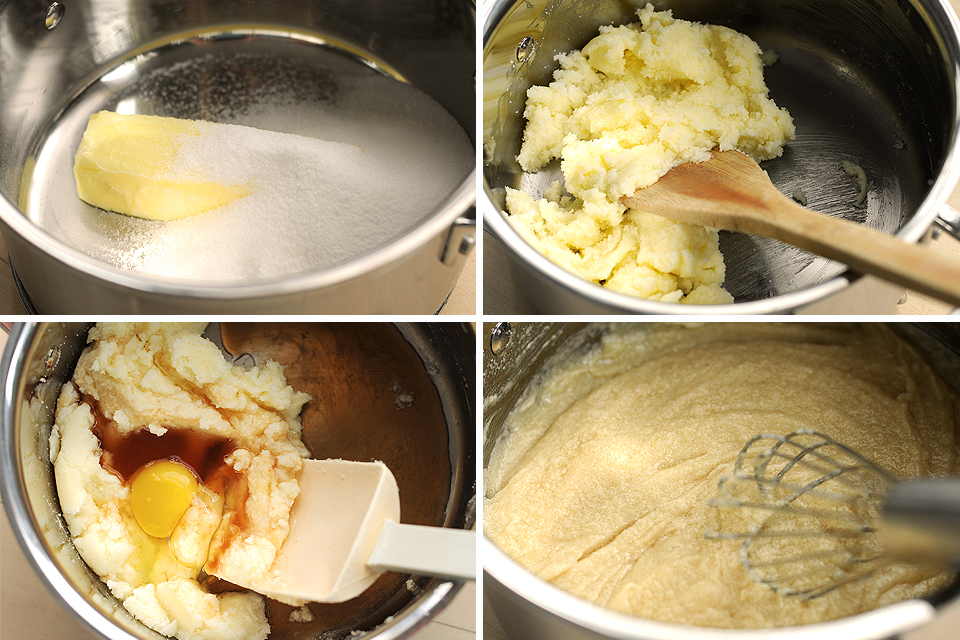
Combine softened butter and peanut butter in the bowl of your electric mixer and beat until fluffy, about 5 minutes. You gotta scrape down the sides every so often, too.


Tasty Kitchen Blog: Peanut Butter Stuffed Hot Fudge Cupcakes. Guest post and recipe from Jessica Merchant of How Sweet It Is.

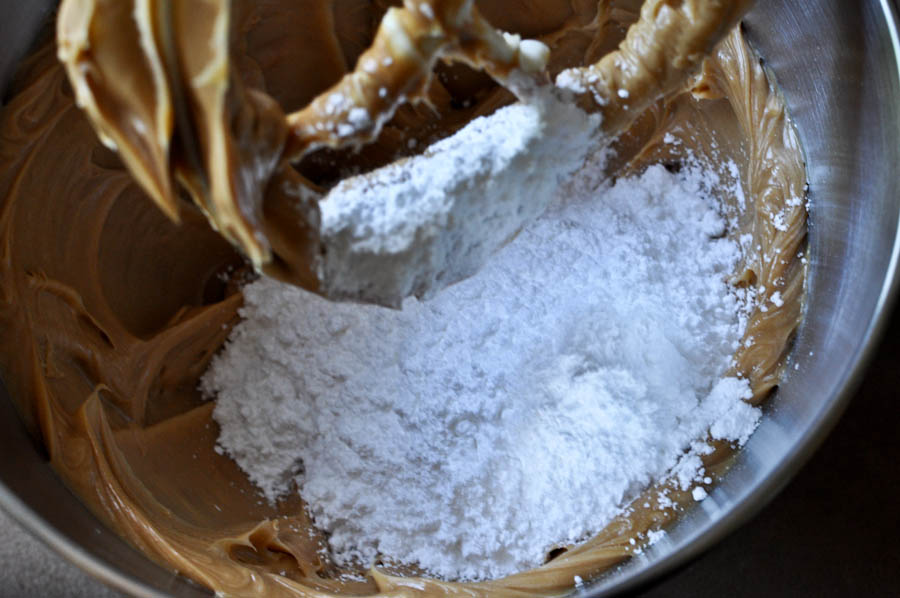
Add in your powdered sugar bit by bit and stir on low speed, gradually increasing to high speed. I’m warning you: this frosting is like a drug. Stay away. Far, far away. (At least until after you’ve frosted your cupcakes.)

Once your frosting is made and your cupcakes have cooled, it’s time to stuff the ‘cakes. I find that the easiest way to do this is to fill a pastry bag with frosting and simply plunge it down into the cake. If you don’t have a pastry bag (the disposable ones are the best!), you can also use a spoon. All you have to do is remove a tiny circle from the top of the cupcake until you reach the middle, and spoon some frosting in. Then replace the top that you cut off. Easy!


Tasty Kitchen Blog: Peanut Butter Stuffed Hot Fudge Cupcakes. Guest post and recipe from Jessica Merchant of How Sweet It Is.

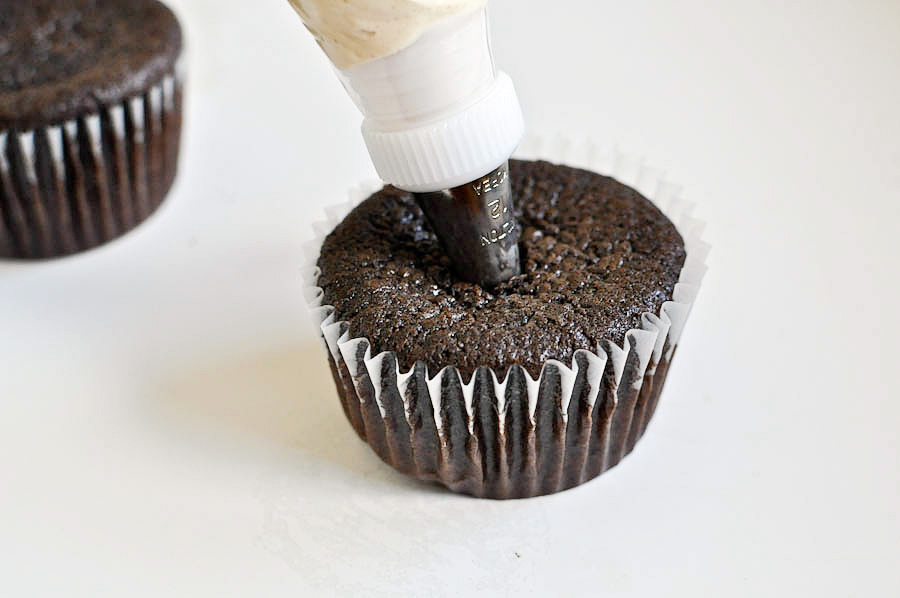
I fill a bag with frosting, stick it in the cupcake, squeeze …


Tasty Kitchen Blog: Peanut Butter Stuffed Hot Fudge Cupcakes. Guest post and recipe from Jessica Merchant of How Sweet It Is.

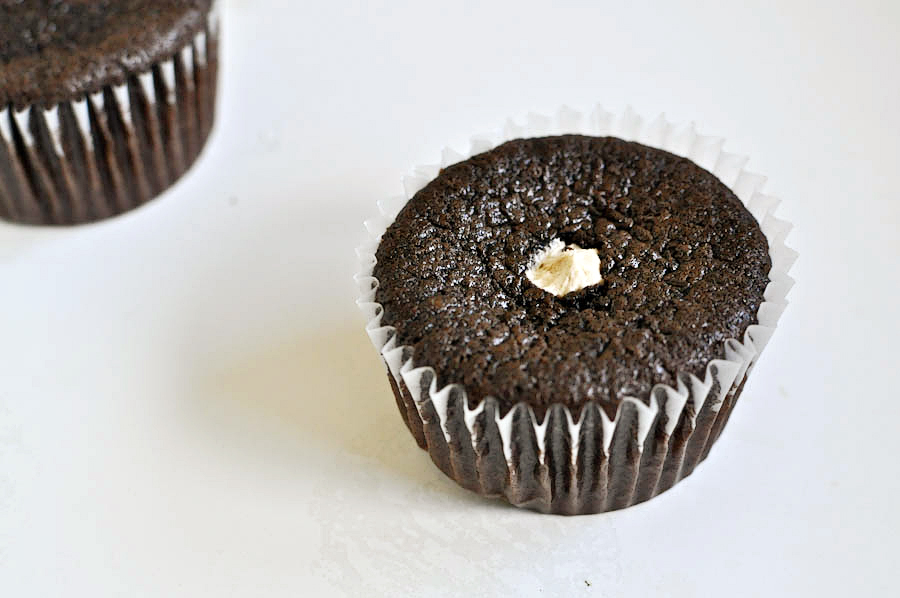
And voila! Instant stuffing. Mmmm.


Tasty Kitchen Blog: Peanut Butter Stuffed Hot Fudge Cupcakes. Guest post and recipe from Jessica Merchant of How Sweet It Is.

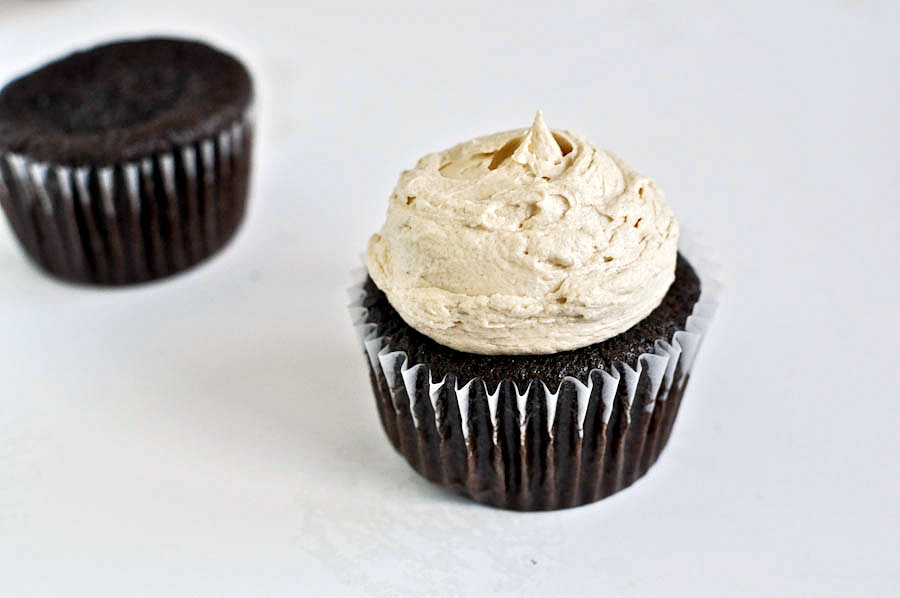
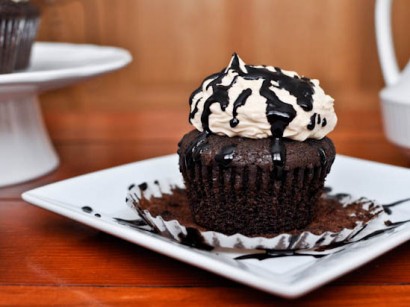
Next, I frost the top. Again, if you’re not using a pastry bag, just frost the cupcake the way you normally would.


Tasty Kitchen Blog: Peanut Butter Stuffed Hot Fudge Cupcakes. Guest post and recipe from Jessica Merchant of How Sweet It Is.

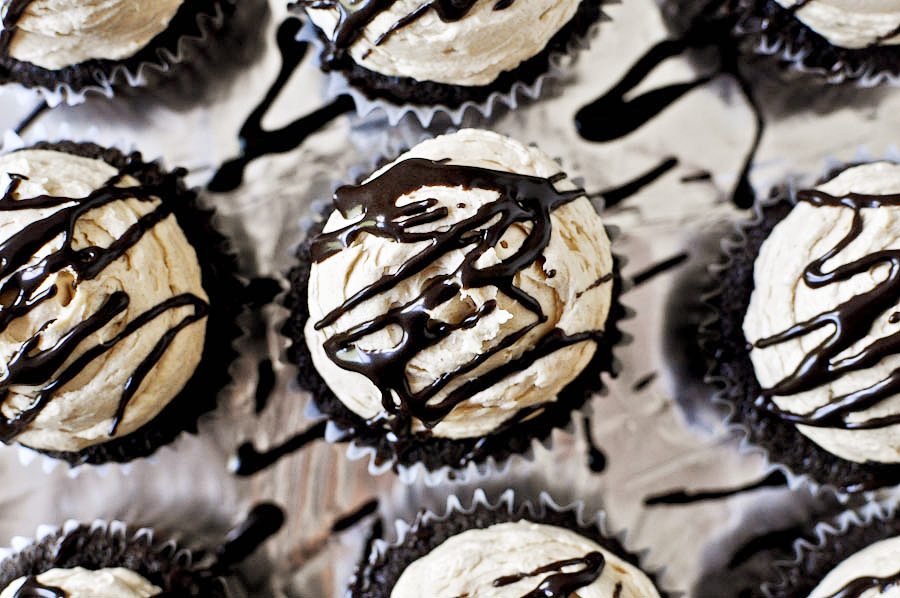
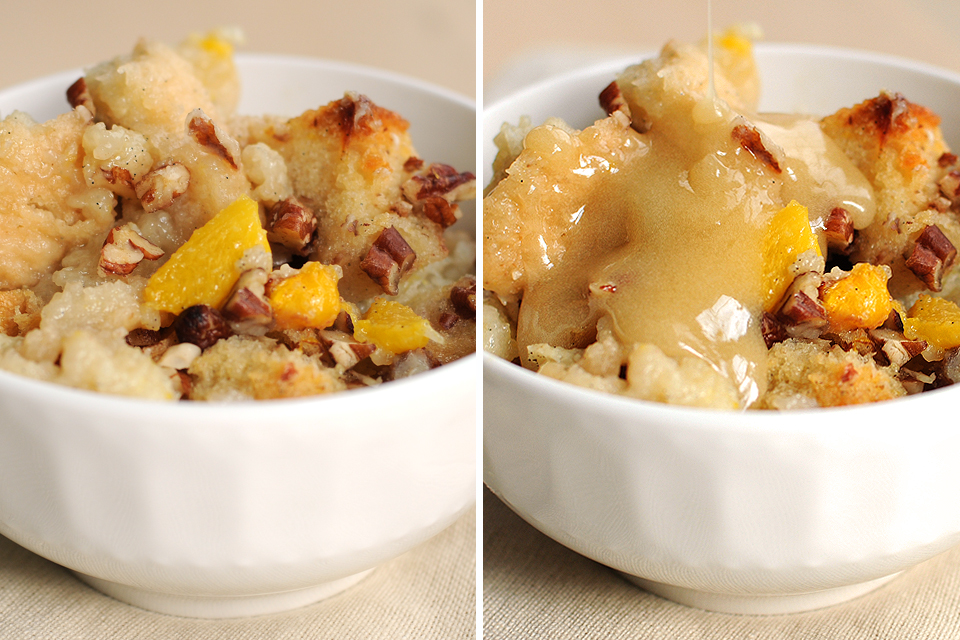
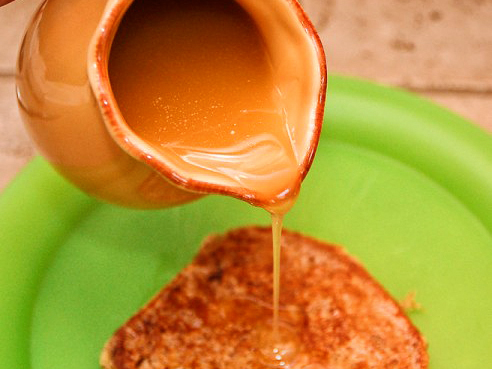
Now comes the fun part. Line up your cupcakes on parchment paper or aluminum foil and throw that hot fudge sauce you made a few hours ago all over the top. You be the artist.


Tasty Kitchen Blog: Peanut Butter Stuffed Hot Fudge Cupcakes. Guest post and recipe from Jessica Merchant of How Sweet It Is.

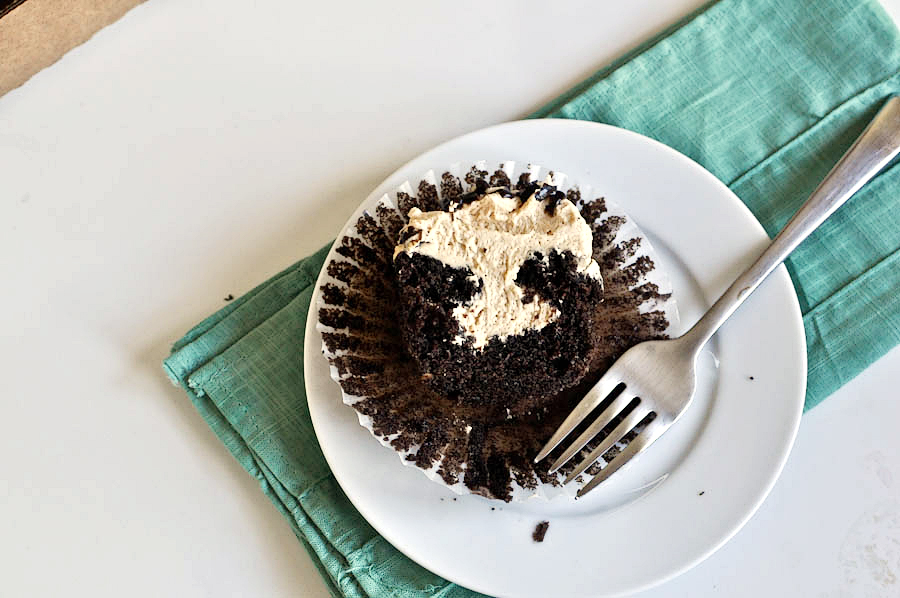
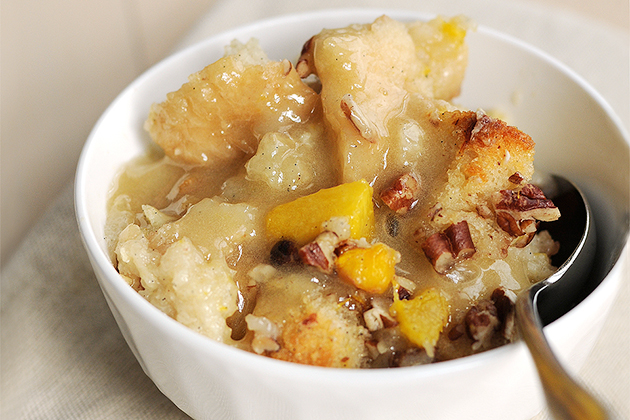
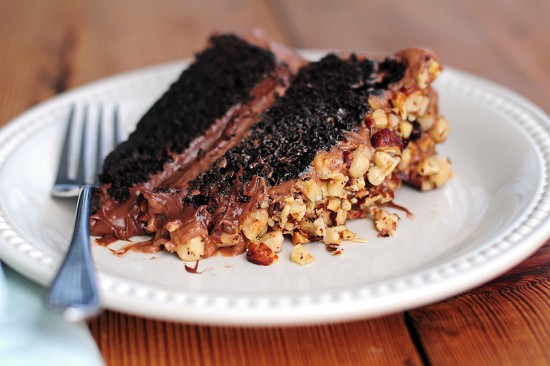
Oh, look! Another fun part. You get to eat one. No one can pass this up.


Tasty Kitchen Blog: Peanut Butter Stuffed Hot Fudge Cupcakes. Guest post and recipe from Jessica Merchant of How Sweet It Is.

Dig right in and savor it. Chocolate and peanut butter work miracles, I tell you.

I hope you try these cupcakes and love them as much as we do! The hot fudge can be stored in your fridge for later use—like spoon dipping. It comes in handy at midnight. Just sayin.’


Printable Recipe

Peanut Butter Stuffed Hot Fudge Cupcakes

See post on HowSweetEats’s site!
4.78 Mitt(s) 23 Rating(s)23 votes, average: 4.78 out of 523 votes, average: 4.78 out of 523 votes, average: 4.78 out of 523 votes, average: 4.78 out of 523 votes, average: 4.78 out of 5

Prep Time:

Cook Time:

Difficulty: Easy

Servings: 12

12
x

Print Options

Page size Letter 3x5 4x6
Text Size Small Medium Large
Content Include description
Include prep time, etc.
Show image

Description

Easy (one bowl!), fluffy dark chocolate cupcakes with peanut butter buttercream and hot fudge.

Ingredients

  • FOR THE CUPCAKES:
  • 1 whole Egg
  • ¾ cups Brown Sugar
  • ½ cups Milk
  • ½ cups Plus 1 Tablespoon Heavy Cream
  • ½ cups Butter, Melted
  • 1 teaspoon Vanilla Extract
  • 2 Tablespoons Sour Cream
  • 1-⅛ cup All-purpose Flour
  • ¼ cups Dark Cocoa Powder
  • 1-¼ teaspoon Baking Soda
  • ½ teaspoons Salt
  • ¼ cups Homemade Hot Fudge (recipe Below)
  • _____
  • FOR THE BUTTERCREAM:
  • ½ cups Butter, Softened
  • ⅔ cups Peanut Butter
  • 3 cups Powdered Sugar (you May Need 1 More Cup)
  • 1 Tablespoon Milk, Have 1-2 More On Hand If Needed
  • 1 teaspoon Vanilla Extract
  • 1 pinch Salt
  • _____
  • FOR THE HOT FUDGE SAUCE:
  • 1 cup Sugar
  • 1 cup Dark Cocoa Powder
  • 1 pinch Salt
  • 2 Tablespoons Flour
  • 1 cup Boiling Water Or Scalding Milk
  • 1 Tablespoon Butter
  • 1 teaspoon Vanilla Extract

Preparation Instructions

For the cupcakes:
Preheat oven to 350 degrees F.

In a bowl, whisk egg and sugar until smooth and no lumps remain. Add milk, cream, butter and vanilla, and mix until combined. Stir in sour cream.

Sift dry ingredients together and then add to the wet mixture. Mix until batter is smooth, then swirl in fudge sauce. Line a muffin tin (12 count) with liners and using a 1/4 cup measure, add batter to each cup. Bake for 15-18 minutes. Let cool before frosting.

For the frosting:
Cream butter and peanut butter together in the bowl of an electric mixer. Add powdered sugar with mixer on low speed and gradually add milk and vanilla extract. Add a pinch of salt and mix until frosting is smooth. If too thick, add more milk; if too thin, add more sugar.

Put the frosting in a pastry bag fitted with a tip. Poke a hole in the cupcake with the pastry tip and fill the cupcake. Then frost the cooled cupcakes as desired.

For the homemade fudge:
Combine sugar, cocoa, salt, and flour in a bowl or pot over a double boiler. Bring water or milk to a boil in another saucepan or in the microwave. Gradually add hot liquid to sugar mixture. Stir constantly until mixture thickens.

Once it has reached the desired thickness, remove from heat and stir in butter and vanilla. Drizzle over cupcakes and store the rest of the sauce in the fridge for 1-2 weeks.


_______________________________________

Jessica Merchant is a personal trainer turned food writer and blogger. Her blog, How Sweet Eats, is where she proclaims her love for all things sweet, all things bacon, and everything else in between. She works her magic in her Pittsburgh kitchen, which she shares with her husband of 2 years.


Profile photo of missamy

Marvin’s Peachy Bread Pudding

Posted by in Baking, Step-by-Step Recipes

Tasty Kitchen Blog: Peachy Bread Pudding. Guest post by Amy Johnson of She Wears Many Hats, recipe submitted by TK member Marvin.

 
Tasty Kitchen is such a fun online community. Discovering delicious recipes is great, but what makes it even better is making new friends. Each time I find a recipe here on Tasty Kitchen, it’s as if a new friend has invited me into their kitchen, into their home, for a peek into their lives through my taste buds. That’s pretty cool, I think.

Take Marvin, for example. Marvin and I have been friends for a while now (he just doesn’t know it). I’ve had his recipes bookmarked, and know all about him and his wife, Jane, on their blog. They’re a talented couple of artists from Texas. Marvin doesn’t know me from Adam. But I know him. I know him and his Peachy Bread Pudding.

Marvin is the type of guy you’d want as a next door neighbor. The neighbor you casually drop in on because maybe the wafting aroma of his Peachy Bread Pudding or Sausage and Potato Bake caught you up in a trance that propelled you to his front door with the excuse of needing to let him know that in a few months you’d be going out of town for a day and … “What’s that Marvin? Is that bread pudding I smell?” Yep, he’d make a darn good neighbor I say. Maybe one day we’ll meet in person, and I can thank him for sharing his delicious version of Peachy Bread Pudding. But until then, knowing him through Tasty Kitchen will do just fine. Just fine indeed.

Wanna get to know Marvin a little better too? Let me show you his Peachy Bread Pudding, and y’all will become the best of friends in no time. It’s a really marvelous dish by Marvin. The sauce alone is a keeper to serve with many other desserts. Just perfect! Let’s get to it.


Tasty Kitchen Blog: Peachy Bread Pudding. Guest post by Amy Johnson of She Wears Many Hats, recipe submitted by TK member Marvin.

For the bread pudding you’ll need: eggs, melted butter, vanilla, half and half or milk, sugar, fresh peaches, sourdough bread and pecans.


Tasty Kitchen Blog: Peachy Bread Pudding. Guest post by Amy Johnson of She Wears Many Hats, recipe submitted by TK member Marvin.

To make that yummy sauce, you’ll need: butter, sugar, vanilla, an egg, and rum.


Tasty Kitchen Blog: Peachy Bread Pudding. Guest post by Amy Johnson of She Wears Many Hats, recipe submitted by TK member Marvin.

To prepare the bread pudding for baking, add the three eggs to a large bowl.


Tasty Kitchen Blog: Peachy Bread Pudding. Guest post by Amy Johnson of She Wears Many Hats, recipe submitted by TK member Marvin.

Next goes in the melted butter, vanilla, half-and-half (or milk). Combine those well first, then add the sugar.


Tasty Kitchen Blog: Peachy Bread Pudding. Guest post by Amy Johnson of She Wears Many Hats, recipe submitted by TK member Marvin.

Add the sugar slowly, stirring as you go until the sugar is dissolved.


Tasty Kitchen Blog: Peachy Bread Pudding. Guest post by Amy Johnson of She Wears Many Hats, recipe submitted by TK member Marvin.

Now, the lovely peaches (nectarines will do too!). Mix it up. And finally, the bread.


Tasty Kitchen Blog: Peachy Bread Pudding. Guest post by Amy Johnson of She Wears Many Hats, recipe submitted by TK member Marvin.

Gently push the cubed bread down into the mixture so it can soak up all the goodness, like little sponges. Let it soak for about 30 minutes.

It’s not shown here, but butter the dish you’ll be baking the bread pudding up real good, ya here? It helps to avoid sticking and adds some more flavor, too.


Tasty Kitchen Blog: Peachy Bread Pudding. Guest post by Amy Johnson of She Wears Many Hats, recipe submitted by TK member Marvin.

After the bread has soaked, spread the mixture into your baking dish and sprinkle with the chopped pecans. Bake uncovered for 50-60 minutes.


Tasty Kitchen Blog: Peachy Bread Pudding. Guest post by Amy Johnson of She Wears Many Hats, recipe submitted by TK member Marvin.

While the bread pudding is baking, put together the sauce. In a pan, cream together the softened butter and sugar. Add the vanilla, egg, rum and combine well.


Tasty Kitchen Blog: Peachy Bread Pudding. Guest post by Amy Johnson of She Wears Many Hats, recipe submitted by TK member Marvin.

Over low-medium heat, stir for about 5 minutes until sugar has dissolved and the sauce is smooth. Like I said before, this sauce is something you’ll want to remember for other desserts. It would be the perfect complement to pound cake, or as an ice cream topping. Seriously tasty!


Tasty Kitchen Blog: Peachy Bread Pudding. Guest post by Amy Johnson of She Wears Many Hats, recipe submitted by TK member Marvin.

Back to the oven. You’ll want to check the bread pudding for doneness in the center with a knife. If it comes out clean, she’s done; if not, keep her cooking. I had to add about 10-15 more minutes to the baking time.

What a beautiful golden brown. And, oh, the aroma!


Tasty Kitchen Blog: Peachy Bread Pudding. Guest post by Amy Johnson of She Wears Many Hats, recipe submitted by TK member Marvin.

Serve warm, with some of the sauce drizzled over the top.


Tasty Kitchen Blog: Peachy Bread Pudding. Guest post by Amy Johnson of She Wears Many Hats, recipe submitted by TK member Marvin.

The perfect bite!


Tasty Kitchen Blog: Peachy Bread Pudding. Guest post by Amy Johnson of She Wears Many Hats, recipe submitted by TK member Marvin.

I was never a bread pudding fan, but that Marvin changed my mind with this one. He’s a good friend to have. Thanks Marvin!


Printable Recipe

Peachy Bread Pudding

5.00 Mitt(s) 8 Rating(s)8 votes, average: 5.00 out of 58 votes, average: 5.00 out of 58 votes, average: 5.00 out of 58 votes, average: 5.00 out of 58 votes, average: 5.00 out of 5

Prep Time:

Cook Time:

Difficulty: Easy

Servings: 10

10
x

Print Options

Page size Letter 3x5 4x6
Text Size Small Medium Large
Content Include description
Include prep time, etc.
Show image

Description

Bread pudding with fresh peaches, and rum sauce.

Ingredients

  • FOR BREAD PUDDING:
  • 3 whole Eggs
  • 3 Tablespoons Butter, Melted
  • 2 Tablespoons Vanilla
  • 2-½ cups Half-and-Half Or Milk
  • 2 cups Sugar
  • 2 cups Fresh Peaches, Pitted And Diced
  • 1 pound Sourdough Bread, 1" Cubed
  • ½ cups Pecans, Chopped (optional)
  • _____
  • FOR RUM SAUCE
  • ½ cups Butter
  • 1 cup Sugar
  • 1 teaspoon Vanilla
  • 1 whole Egg
  • 3 Tablespoons Rum, Or To Taste

Preparation Instructions

Preheat oven to 325 degrees F.

In a large bowl beat 3 eggs, add 3 tablespoons melted butter, 2 tablespoons vanilla, and 2 1/2 cups half and half. Add 2 cups sugar slowly, stirring until it is dissolved. Add peaches and bread, mixing well. Allow mixture to soak into bread 30 minutes.

Spread a bit of butter in a 9 X 13 X 2-inch pan or dish. Pour in the bread mixture, and sprinkle on pecans if using. Bake uncovered 50 to 60 minutes, or until knife inserted in center comes out clean.

For rum sauce:
Cream 1/2 cup butter with 1 cup sugar. Add 1 teaspoon vanilla. Stir in 1 egg, then add rum. Stir over low heat for about 5 minutes. Serve warm over individual servings of pudding.


_______________________________________

Amy Johnson is a blogger who writes about food, travel, the home (both inside and out), and various observations and random musings about anything and everything. Visit her blog She Wears Many Hats for a dose of deliciousness, practicality, hilarity, or just plain fun. She lives in South Carolina with her husband and two children.


Profile photo of Natalie | Perry's Plate

Quick and Easy Gyros

Posted by in Step-by-Step Recipes

Tasty Kitchen Blog: Easy and Fast Greek Gyros. Guest post by Natalie Perry of Perry's Plate, recipe submitted by TK member Whitney Stephens (misswhit85).

 
If there is such a thing as an easy gyro, it must mean that some shortcuts have been made. I’m willing to bet very few of you own a vertical gyro grill. I do not. And if you glanced at the recipe, you might notice that instead of lamb, these gyros are made with sliced deli roast beef.

If you’re a gyro purist, you may want to divert your eyes. I had a similar experience after living in Austria for over a year. I walked into a Wienerschnitzel restaurant for the first time after returning to the States and almost had a heart attack. Hot dogs are neither “Wiener” (Viennese) nor a “schnitzel” (a thin, breaded cutlet). Despite how badly I wanted to jump up and down and tell everyone how ridiculous it was, I told myself, “Just walk away, Nat. Shake it off.”

So, I get it. I really do.

These gyros don’t stray too far from the traditional, and they turned out to be fast, easy, and delicious! Even my kiddos thought so. They’re especially perfect if you don’t like lamb, can’t find lamb, or can’t afford lamb. Or don’t feel like roasting a giant slab of meat for hours and hours. Thank you, misswhit85 for your Easy and Fast Greek Gyros!


Tasty Kitchen Blog: Easy and Fast Greek Gyros. Guest post by Natalie Perry of Perry's Plate, recipe submitted by TK member Whitney Stephens (misswhit85).

To make the meat filling, you’ll need some deli roast beef, olive oil, Worcestershire sauce, and spices (garlic powder, paprika, black pepper, and lemon-pepper).


Tasty Kitchen Blog: Easy and Fast Greek Gyros. Guest post by Natalie Perry of Perry's Plate, recipe submitted by TK member Whitney Stephens (misswhit85).

Slice the roast beef into 1/2-inch strips.


Tasty Kitchen Blog: Easy and Fast Greek Gyros. Guest post by Natalie Perry of Perry's Plate, recipe submitted by TK member Whitney Stephens (misswhit85).

Heat the oil in a skillet over medium heat.


Tasty Kitchen Blog: Easy and Fast Greek Gyros. Guest post by Natalie Perry of Perry's Plate, recipe submitted by TK member Whitney Stephens (misswhit85).

Add the beef strips, Worcestershire sauce and spices.


Tasty Kitchen Blog: Easy and Fast Greek Gyros. Guest post by Natalie Perry of Perry's Plate, recipe submitted by TK member Whitney Stephens (misswhit85).

Toss it around with some tongs and let it hang out on low while you prepare the rest of the ingredients.


Tasty Kitchen Blog: Easy and Fast Greek Gyros. Guest post by Natalie Perry of Perry's Plate, recipe submitted by TK member Whitney Stephens (misswhit85).

It’s tzatziki time! I love tzatziki. And by love, I mean I’d love to get it on tap somehow. When I figure it out, I’ll let you know.

For this delectable cucumber-yogurt sauce, you’ll need yogurt, cucumbers, some onion, salt, fresh dill, and white wine vinegar. You could even use fresh lemon juice in place of the vinegar.


Tasty Kitchen Blog: Easy and Fast Greek Gyros. Guest post by Natalie Perry of Perry's Plate, recipe submitted by TK member Whitney Stephens (misswhit85).

Dice about 1/4 of an onion, saving the remainder as a garnish for the gyros.


Tasty Kitchen Blog: Easy and Fast Greek Gyros. Guest post by Natalie Perry of Perry's Plate, recipe submitted by TK member Whitney Stephens (misswhit85).

Then dice half of the cucumber, saving the remainder … yep. For the gyros. I started out with half of an English cucumber, so I used 1/4 for the sauce.


Tasty Kitchen Blog: Easy and Fast Greek Gyros. Guest post by Natalie Perry of Perry's Plate, recipe submitted by TK member Whitney Stephens (misswhit85).

Add the diced vegetables to the yogurt in a medium bowl.


Tasty Kitchen Blog: Easy and Fast Greek Gyros. Guest post by Natalie Perry of Perry's Plate, recipe submitted by TK member Whitney Stephens (misswhit85).

A splash of vinegar.


Tasty Kitchen Blog: Easy and Fast Greek Gyros. Guest post by Natalie Perry of Perry's Plate, recipe submitted by TK member Whitney Stephens (misswhit85).

Don’t forget some minced fresh dill. And a generous pinch of salt.


Tasty Kitchen Blog: Easy and Fast Greek Gyros. Guest post by Natalie Perry of Perry's Plate, recipe submitted by TK member Whitney Stephens (misswhit85).

Give it a good mix and resist the urge to dive in head first. Luckily the recipe makes quite a bit of tzatziki. The more leftover the better!


Tasty Kitchen Blog: Easy and Fast Greek Gyros. Guest post by Natalie Perry of Perry's Plate, recipe submitted by TK member Whitney Stephens (misswhit85).

Gather the garnishes and slice/dice as necessary. The recipe suggested chopped tomatoes, feta, cucumbers, onions, and olives. We aren’t too fond of olives around here, so we left those out and added some fresh baby spinach. It’s almost impossible for me to make anything of this nature without throwing in a handful of greens.


Tasty Kitchen Blog: Easy and Fast Greek Gyros. Guest post by Natalie Perry of Perry's Plate, recipe submitted by TK member Whitney Stephens (misswhit85).

Add some of the warm, seasoned beef (which tastes amazing, by the way) to the center of some flat bread, naan, or a pita.


Tasty Kitchen Blog: Easy and Fast Greek Gyros. Guest post by Natalie Perry of Perry's Plate, recipe submitted by TK member Whitney Stephens (misswhit85).

Pile on the garnishes and dig in!

Thanks again, Whitney, for another fast and easy recipe that my whole family loved!


Printable Recipe

Easy and Fast Greek Gyros

See post on misswhit85’s site!
4.80 Mitt(s) 10 Rating(s)10 votes, average: 4.80 out of 510 votes, average: 4.80 out of 510 votes, average: 4.80 out of 510 votes, average: 4.80 out of 510 votes, average: 4.80 out of 5

Prep Time:

Cook Time:

Difficulty: Easy

Servings: 2

2
x

Print Options

Page size Letter 3x5 4x6
Text Size Small Medium Large
Content Include description
Include prep time, etc.
Show image

Description

These gyros and incredibly easy, delicious, and very summery when smothered in cool, creamy, cucumber tzatziki sauce! While they may not be the most traditional gyro recipe they’re mighty tasty!

Ingredients

  • FOR THE GYRO FILLING:
  • ½ Tablespoons Olive Oil
  • 4 ounces, weight Sliced Deli Roast Beef
  • 3 drops Worcestershire Sauce
  • 2 dashes Lemon Pepper
  • 1 dash Paprika
  • 1 teaspoon Garlic Powder, Divided
  • 3 dashes Black Pepper
  • _____
  • FOR THE TZATZIKI SAUCE:
  • 1 whole Cucumber, Divided Use
  • 1 container 8oz Greek Yogurt
  • ½ whole Red Onion, Divided Use
  • 2 dashes White Wine Vinegar
  • ½ teaspoons Dill
  • ½ teaspoons Salt
  • _____
  • FOR ASSEMBLY:
  • 2 slices Naan Bread Or Any Flatbread
  • 1 whole Tomato, Sliced
  • 2 ounces, weight Feta Cheese, Diced
  • 6 ounces, weight Canned Black Olives Sliced

Preparation Instructions

For gyro filling:

Heat olive oil in a skillet and add beef, worcestershire sauce, a dash of lemon pepper, paprika, 1/2 teaspoon of garlic powder, black pepper, and heat the beef. Let it sit on low heat while tzatziki sauce is prepared.

For Tzatziki sauce:
Finely dice half of the cucumber and combine with yogurt, 1/4 of the red onion finely diced, vinegar, and all remaining seasonings.

Spray your flatbread with cooking spray and put it under the broiler until it is soft and warmed through. Fill it with a generous amount of roast beef, followed by lots of tzatziki sauce, feta cheese, tomato, cucumber, and black olives.


_______________________________________

Be sure to check out Natalie’s own beautiful food blog, Perrys’ Plate, where you can see her growing collection of lovely recipes. There’s always something new to see there. Go visit now!


Profile photo of callimakesdo

Essential Buttermilk Syrup

Posted by in Step-by-Step Recipes

Tasty Kitchen Blog: Essential Buttermilk Syrup. Guest post by Calli Taylor of Make It Do, recipe submitted by TK member Elisa of Liza's Kitchen.

Do you ever wonder what recipes you’ll be known for? When I saw the recipe for Essential Buttermilk Syrup from TK member lizaskitchen, I couldn’t help but think of my mom.

She makes the most amazing Scones served with Homemade Buttermilk Syrup. You might think scones and syrup are an odd combination. But here in Utah, a scone is a piece of delicious deep-fried bread dough. They puff up and cook to a golden brown and are served piping hot with a pat of butter, syrup, jam, or dripping with honey butter—a favorite here in the Beehive State.

My mom has been making her scones since I was a little girl—sometimes for Sunday morning breakfast, or if we were really lucky, for dinner. In our family the favorite topping by far is mom’s homemade buttermilk syrup.

It’s not a recipe I’d ever seen outside my mom’s kitchen. Until I saw it here on Tasty Kitchen.

I’ve watched happily as Essential Buttermilk Syrup stayed on TK’s most popular recipes list. Elisa’s recipe is so unbelievably good, it’s sure to become a favorite for your family, too.

You won’t believe how fast and easy something this good could be.

Here’s the how to make it.


Tasty Kitchen Blog: Essential Buttermilk Syrup. Guest post by Calli Taylor of Make It Do, recipe submitted by TK member Elisa of Liza's Kitchen.

Start with a large pot. There aren’t a lot of ingredients in this recipe, but it’s a little like those volcanoes you made back in science class—when you add the baking soda, it is really going to bubble and fizz. I used a 4-quart saucepan and it was large enough because of the high sides.


Tasty Kitchen Blog: Essential Buttermilk Syrup. Guest post by Calli Taylor of Make It Do, recipe submitted by TK member Elisa of Liza's Kitchen.

In your large pot, add a cube (1/2 cup or 1 stick, in case you were wondering) of butter. Why, oh why, do all my favorite recipes start with a cube of butter!

Add a cup of sugar …


Tasty Kitchen Blog: Essential Buttermilk Syrup. Guest post by Calli Taylor of Make It Do, recipe submitted by TK member Elisa of Liza's Kitchen.

And 1/2 cup of buttermilk. I pretty much love anything with buttermilk, too.


Tasty Kitchen Blog: Essential Buttermilk Syrup. Guest post by Calli Taylor of Make It Do, recipe submitted by TK member Elisa of Liza's Kitchen.

Add one tablespoon of Karo syrup.


Tasty Kitchen Blog: Essential Buttermilk Syrup. Guest post by Calli Taylor of Make It Do, recipe submitted by TK member Elisa of Liza's Kitchen.

Stirring constantly, bring these ingredients to a boil for 2 to 3 minutes.


Tasty Kitchen Blog: Essential Buttermilk Syrup. Guest post by Calli Taylor of Make It Do, recipe submitted by TK member Elisa of Liza's Kitchen.

Now for the fun.


Tasty Kitchen Blog: Essential Buttermilk Syrup. Guest post by Calli Taylor of Make It Do, recipe submitted by TK member Elisa of Liza's Kitchen.

Stir in the baking soda and watch it go.


Tasty Kitchen Blog: Essential Buttermilk Syrup. Guest post by Calli Taylor of Make It Do, recipe submitted by TK member Elisa of Liza's Kitchen.

It doubles in size!


Tasty Kitchen Blog: Essential Buttermilk Syrup. Guest post by Calli Taylor of Make It Do, recipe submitted by TK member Elisa of Liza's Kitchen.

Add the vanilla.

Remove from the heat and set it aside, stirring occasionally while it thickens.


Tasty Kitchen Blog: Essential Buttermilk Syrup. Guest post by Calli Taylor of Make It Do, recipe submitted by TK member Elisa of Liza's Kitchen.

My mom always serves her buttermilk syrup warm. Try it on your favorite pancakes, waffles, German Pancakes, or even on “Utah” scones. Essential Buttermilk Syrup is light and buttery with a hint of caramel flavor. It is a little less sweet than maple syrup and all the better for it! The last time we had it at my mom’s, my sister said, “I swear this Buttermilk Syrup will change your life!”

Thanks, Elisa, for sharing this wonderful recipe! I love how Tasty Kitchen brings families and food traditions together! Be sure to visit her blog Liza’s Kitchen for more of her wonderful recipes.


Printable Recipe

Essential Buttermilk Syrup

See post on lizaskitchen’s site!
4.97 Mitt(s) 30 Rating(s)30 votes, average: 4.97 out of 530 votes, average: 4.97 out of 530 votes, average: 4.97 out of 530 votes, average: 4.97 out of 530 votes, average: 4.97 out of 5

Prep Time:

Cook Time:

Difficulty: Easy

Servings: 4

4
x

Print Options

Page size Letter 3x5 4x6
Text Size Small Medium Large
Content Include description
Include prep time, etc.
Show image

Description

Pour this yummy syrup over waffles, pancakes, and French toast to make them oh. so. much. better!

Ingredients

  • ½ cups Butter
  • 1 cup Sugar
  • ½ cups Buttermilk
  • 1 Tablespoon Karo Syrup
  • 1 teaspoon Baking Soda
  • 1 teaspoon Vanilla

Preparation Instructions

In a LARGE pot, combine butter, sugar, buttermilk, and Karo syrup, and bring to a boil for about 2 to 3 minutes. Add baking soda and vanilla. Mixture will fizz to TWICE THE SIZE or more, so make sure you use a good-sized pot! Set it aside to thicken while stirring occasionally. Pour over waffles, pancakes, and French toast to make them oh. so. much. better!


_______________________________________

Calli is truly a woman of many talents, from cooking, sewing, crafts, beautiful photography and gardening. Her blog, Make it Do is a treasure trove of recipes, household tips, crafts projects, sewing patterns … you name it. It’s also peppered with photos of her beautiful kids. Go visit her site, and visit it often. There’s always something new to learn there!


Profile photo of Erika (TK)

The Theme Is … Rhubarb!

Posted by in The Theme Is...

  The season for rhubarb is upon us, and I can tell not so much by the appearance of these crimson stalks in my grocery as by the number of new recipes coming in featuring this vegetable. Or fruit (according to the US courts). The rhubarb has an interesting history. It was originally cultivated in […]

Profile photo of Natalie | Perry's Plate

Mango Frozen Yogurt

Posted by in Step-by-Step Recipes

My summertime needs are pretty simple: 1. Flip flops 2. Air-conditioning 3. Lots of fresh fruit 4. An ice cream maker There’s also grilling about 75% of our meals, attempting to tan without burning, and gardening (me=brown, shriveled thumb), but the ones above are absolutely essential. Luckily I was able to combine #3 and #4 […]

Profile photo of Amber {Sprinkled With Flour}

Grandma’s Sugar Cream Pie

Posted by in Step-by-Step Recipes

Join us in welcoming Amber of Sprinkled with Flour to the TK Blog. We’re thrilled to have her! She picked a mighty fine Sugar Cream Pie recipe to share with us today, courtesy of Tasty Kitchen member sturgismama68. My goodness, does that look good. Take it away, Amber! _______________________________________     There are certain things […]

Profile photo of missamy

Chocolate Hazelnut Cake

Posted by in Baking, Step-by-Step Recipes

Note: I’ve been doing a bit of housecleaning here at the Tasty Kitchen Blog and haven’t been able to stop thinking about this post from the step-by-step archives. It has chocolate. And hazelnuts. In cake form. I’m just as smitten now as I was before. And rumor has it there’s some kind of romantic holiday […]