The Pioneer Woman Tasty Kitchen
Profile photo of Erika (TK)

Burgers for the Weekend!

Posted by in The Theme Is...

Tasty Kitchen Blog: Looks Delicious! (Memorial Day Burgers)

It’s Friday! Better yet, it’s the Friday before a 3-day weekend. It’s the best kind of Friday! Except, of course, for the Friday before a 4-day weekend.

Whatever you may have planned for the next few days, chances are some form of grilling will be involved. Actually, let me be more specific: some form of grilling burgers will be involved. We’re here to support you all the way. After all, that’s what we’re here for.

Now most of you probably already have your burger method down pat. You know the kind of meat you like to use, the meat-to-fat ratio, and you know exactly where to get the perfect rolls for your burgers. You already know not to handle the meat too much to keep it tender, and you automatically make that center depression on the patty so it cooks flat. So today, we won’t be showing you the classic American burger. Instead, we want to show you a few recent ones—ten of them, to be exact—that we think you might want to try if you’re looking to spruce up your burger repertoire. Let’s begin!


Tasty Kitchen Blog: Looks Delicious! (Memorial Day Burgers)

Peanut Butter, Egg, and Bacon Burger. Who knew peanut butter would pair so well with burgers! Just trust us on this one.


Tasty Kitchen Blog: Looks Delicious! (Memorial Day Burgers)

Green Goddess Burgers. Take all those wonderful, fresh, herbaceous spring flavors, and pile them on your burger. Done.


Tasty Kitchen Blog: Looks Delicious! (Memorial Day Burgers)

Crab Cake Burger. Go uptown using the seafood route. Just make sure you’ll have enough for seconds for everyone. Make that thirds.


Tasty Kitchen Blog: Looks Delicious! (Memorial Day Burgers)

Bacon and Brie Burger with Spicy Peach Caramelized Onions. Jazz up the standard cheeseburger with Brie, and balance the salty smoky flavor with sweet and spicy onions. Oh yes.


Tasty Kitchen Blog: Looks Delicious! (Memorial Day Burgers)

French Burgers & French Fries. Ground chicken, cornichons, lemon, and fresh tarragon. Oh, and Brie. (Can you tell we love Brie?) Skip the usual burger bun and go with a crusty baguette! As a bonus, the recipe includes easy no-thermometer, no-double-fry french fries.


Tasty Kitchen Blog: Looks Delicious! (Memorial Day Burgers)

Homemade Butter Burgers. These are all the rage now. Whether you wrap the meat around the butter, or dice the butter into pieces and mix them into the burger, we say a little extra butter makes everything better. (Also, we used the word ‘butter’ four times in this paragraph. Case closed.)


Tasty Kitchen Blog: Looks Delicious! (Memorial Day Burgers)

Bangkok Burger. All your favorite Thai flavors in a handheld package.


Tasty Kitchen Blog: Looks Delicious! (Memorial Day Burgers)

Mini Guinness Pork Burgers with Guinness BBQ Sauce. Don’t let beef have all the fun. These pork burgers are where it’s at, and we know you won’t want to make them mini.


Tasty Kitchen Blog: Looks Delicious! (Memorial Day Burgers)

Pork Belly Pimento Cheese Burger. Did someone say pork belly? And pimento cheese? So much goodness in one sandwich!


Tasty Kitchen Blog: Looks Delicious! (Memorial Day Burgers)

Tex-Mex BBQ Black Bean Veggie Burgers. Hey, meatless burgers deserve their own place in the sun, too. These are hearty and loaded with flavor!

Did you see anything you liked? Or maybe you have a favorite that we missed. If so, share the love below!

Happy Friday, everyone! Travel safely, enjoy the weekend, and make something special on the grill. Then come tell us all about it!


Profile photo of steamykitchen

Burgers, Shakes, Fries and Don’t Forget the Apple Pie!

Posted by in Looks Delicious!

Tasty Kitchen Blog: Burgers, Shakes, Fries and Don't Forget the Apple Pie! Guest post by Jaden Hair of Steamy Kitchen.

 
When it comes to Fourth of July, are you a traditionalist or adventurous when it comes to the food? For our family, we’ve pretty much stuck to the traditional fare: grilling hot dogs, hamburgers and finishing off the meal with a swim in the pool and super-cold watermelon slices.

This year, I can’t decide between the classics or something totally new. My steady, solid, routine-lovin’ husband votes for the same ol’ same ol’. But hey, I’m craving for creativity. So I need your help to take “Burgers, Shakes, Fries and Don’t Forget the Apple Pie” in a new direction. I’ll take a few of your recipes and make it our Fourth of July meal.

My good friend Sarah of Tastespotting actually ground her own beef to make Bacon Cheddar Cheeseburger. But wait, Sarah told me she doesn’t cook, which is why we’ve always dined at restaurants together. Oh, Sarah … so bleepin’ BUSTED!

Tasty Kitchen Blog: Burgers, Shakes, Fries and Don't Forget the Apple Pie! (Bacon Cheddar Cheeseburger, from Sarah of Tastespotting)


My kids vote for this one! Andrew loves chocolate, Nathan loves cherries. We all win with Dine and Dish’s Chocolate Cherry Float.

Tasty Kitchen Blog: Burgers, Shakes, Fries and Don't Forget the Apple Pie! (Chocolate Cherry Float, from TK member Kristen of Dine and Dish)


You’d think these crisp fries would be massively fattening, but nope! Annie’s Eats’ skips the oil and makes Baked Oven Fries.

Tasty Kitchen Blog: Burgers, Shakes, Fries and Don't Forget the Apple Pie! (Baked Oven Fries, from TK member Annie's Eats)


And finish the meal off with the most decadent apple pie my mouse has ever clicked on: Doughmesstic’s Candy Apple Pie.

Tasty Kitchen Blog: Burgers, Shakes, Fries and Don't Forget the Apple Pie! (Candy Apple Pie, from TK member Doughmesstic)


Those are some great ideas to start with, just to get the creative juices flowin’! Send on over some fun twists to “Burgers, Shakes, Fries and Don’t Forget the Apple Pie!”

May your 4th be sparkling!

 
Jaden


_______________________________________

Jaden Hair is a food writer, television personality, and food photographer based in Tampa Bay, Florida. Find more of her recipes in her blog, Steamy Kitchen, where you can also read more about Jaden’s new book, The Steamy Kitchen Cookbook, and the rave reviews it’s received!


Profile photo of Natalie | Perry's Plate

Burnt Sugar Almonds

Posted by in Holidays, Step-by-Step Recipes

Tasty Kitchen Blog: Burnt Sugar Almonds. Guest post by Natalie Perry of Perry's Plate, recipe submitted by TK member Birgit Kerr of Scrapalicious Bytes.

 
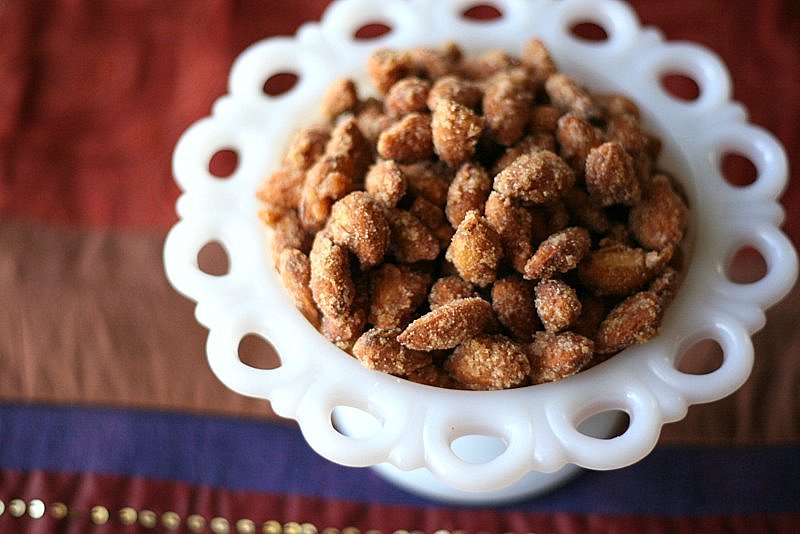
These Burnt Sugar Almonds (Gebrannte Mandeln), in my opinion, are the only redeeming quality of a crowded shopping mall during the holidays. Luckily, they’re a cinch to make at home and will put all of your scented candles to shame. This recipe was submitted by Tasty Kitchen member Birgit Kerr, who is originally from Germany. These almonds are found roasting at the Christmas markets in Germany as well as Austria, where I spent about 18 months (a long time ago). I about fell out of my chair when I saw this recipe.

There are other variations of these almonds which use beaten egg whites, but I really liked this non-fussy approach. Plus, I didn’t have to turn on my oven.


Tasty Kitchen Blog: Burnt Sugar Almonds. Guest post by Natalie Perry of Perry's Plate, recipe submitted by TK member Birgit Kerr of Scrapalicious Bytes.

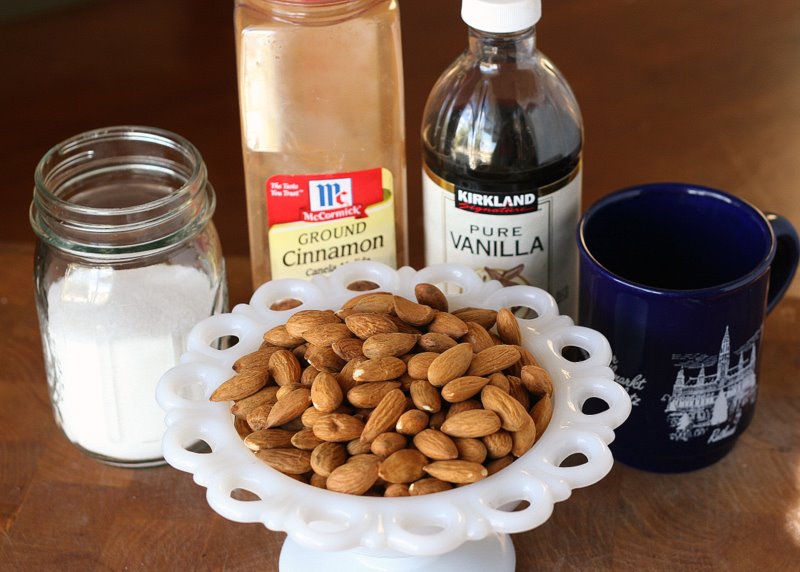
Five ingredients is all you need: raw almonds, sugar, cinnamon, vanilla, and water. For real.


Tasty Kitchen Blog: Burnt Sugar Almonds. Guest post by Natalie Perry of Perry's Plate, recipe submitted by TK member Birgit Kerr of Scrapalicious Bytes.

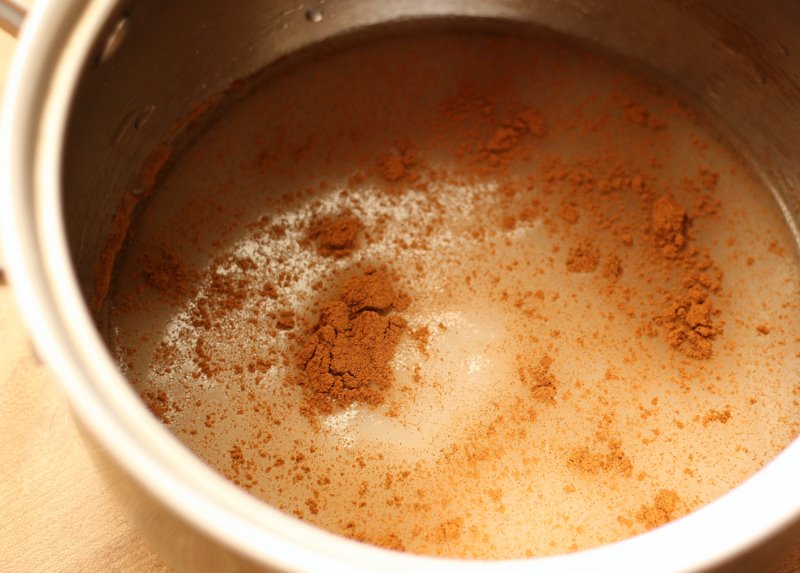
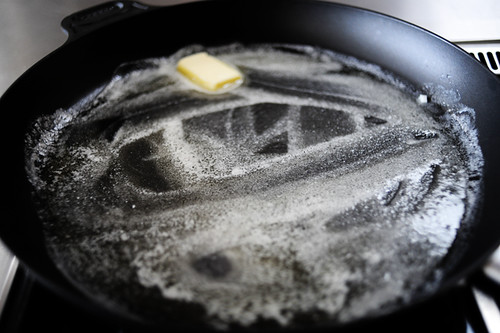
To start, grab a medium-sized pot (not non-stick) and a big wooden spoon. Add the water, cinnamon, and 1 cup of sugar. Bring to a boil over medium heat.


Tasty Kitchen Blog: Burnt Sugar Almonds. Guest post by Natalie Perry of Perry's Plate, recipe submitted by TK member Birgit Kerr of Scrapalicious Bytes.

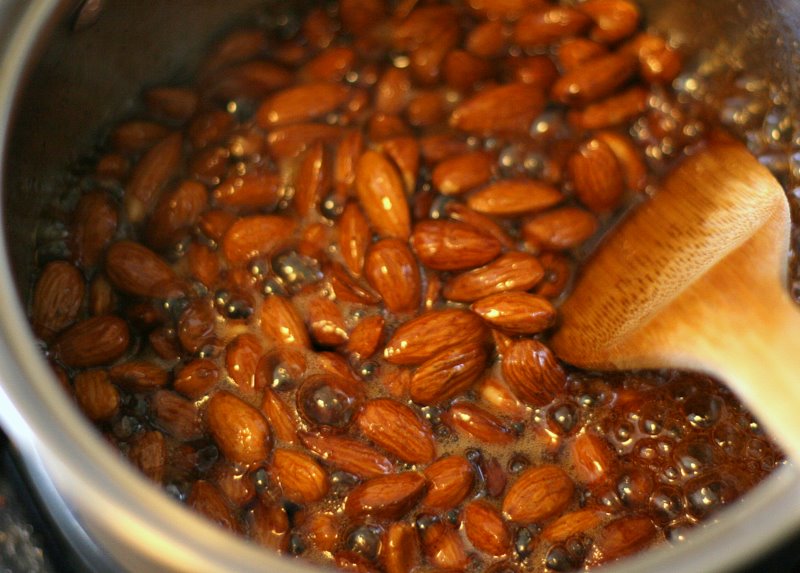
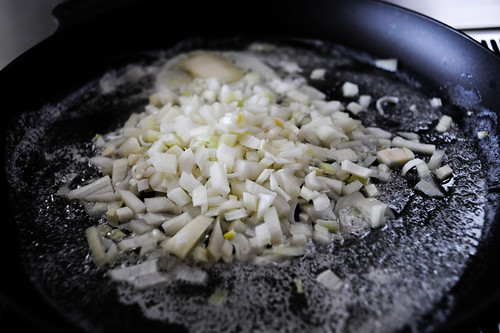
Add the almonds, crank up the heat, then stir. And stir. And stir. And . . . stir. Don’t stop stirring. Especially to take pictures.


Tasty Kitchen Blog: Burnt Sugar Almonds. Guest post by Natalie Perry of Perry's Plate, recipe submitted by TK member Birgit Kerr of Scrapalicious Bytes.

After about 5-7 minutes of constant stirring, the water will have begun to noticeably evaporate. It’ll start to look like the almonds are swimming in syrup, and when you drag your spoon across the bottom, you’ll be able to see the bottom of your pot. When it looks like this . . .


Tasty Kitchen Blog: Burnt Sugar Almonds. Guest post by Natalie Perry of Perry's Plate, recipe submitted by TK member Birgit Kerr of Scrapalicious Bytes.

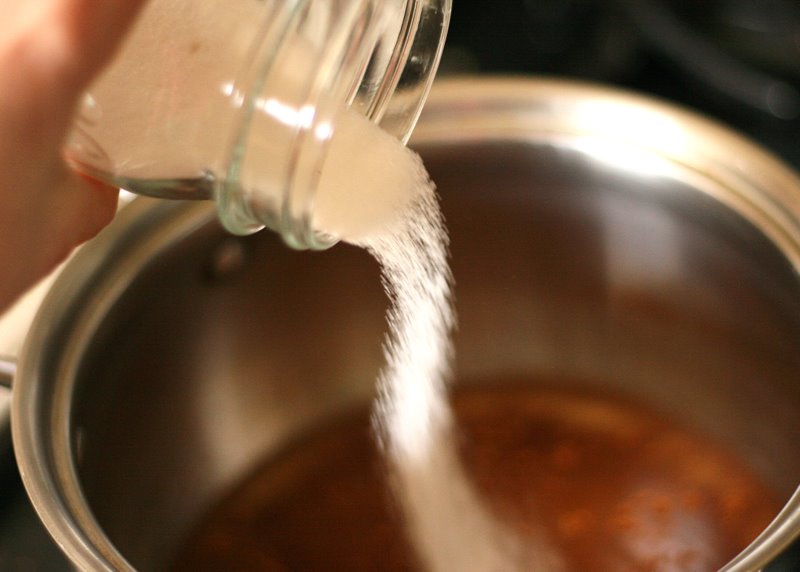
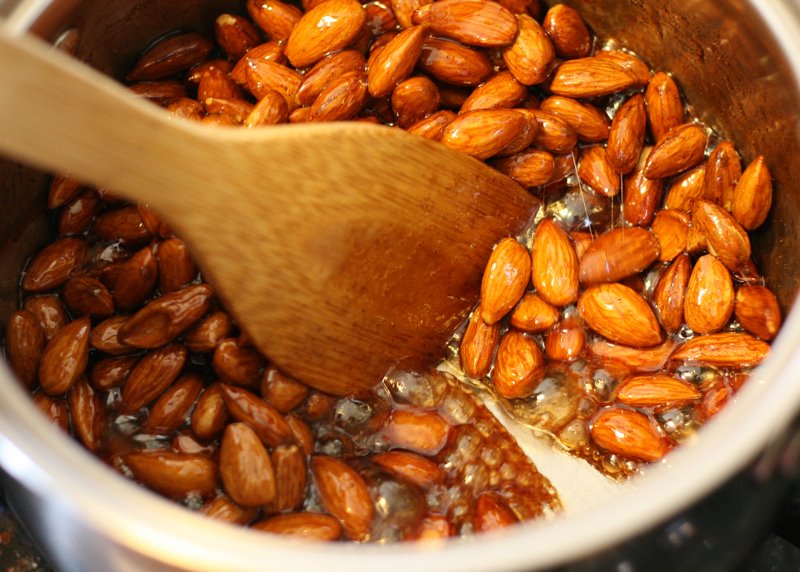
Lower the heat, then add the vanilla and the remaining sugar. Because, despite what you may think, there isn’t enough sugar.


Tasty Kitchen Blog: Burnt Sugar Almonds. Guest post by Natalie Perry of Perry's Plate, recipe submitted by TK member Birgit Kerr of Scrapalicious Bytes.

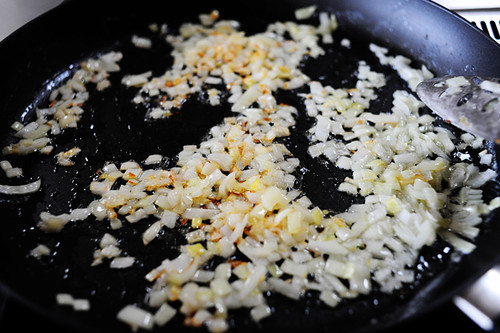
Stir it around to get it incorporated. Yep, keep stirring.


Tasty Kitchen Blog: Burnt Sugar Almonds. Guest post by Natalie Perry of Perry's Plate, recipe submitted by TK member Birgit Kerr of Scrapalicious Bytes.

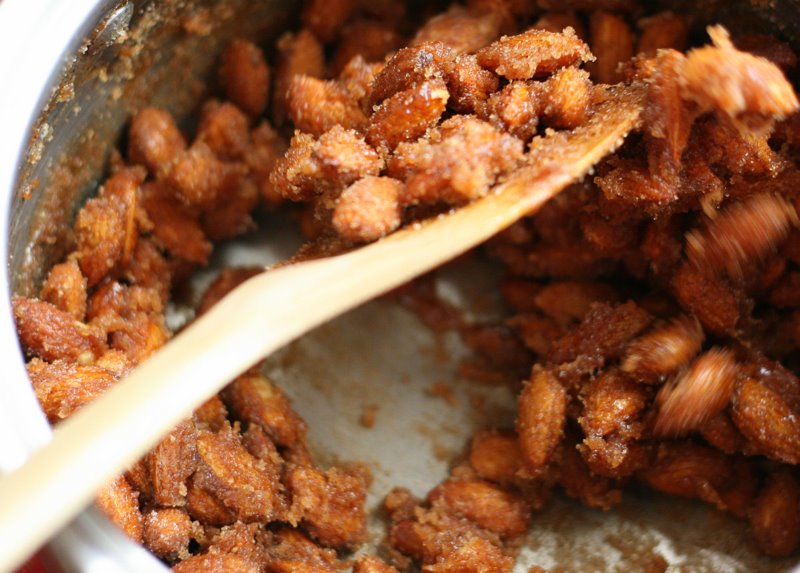
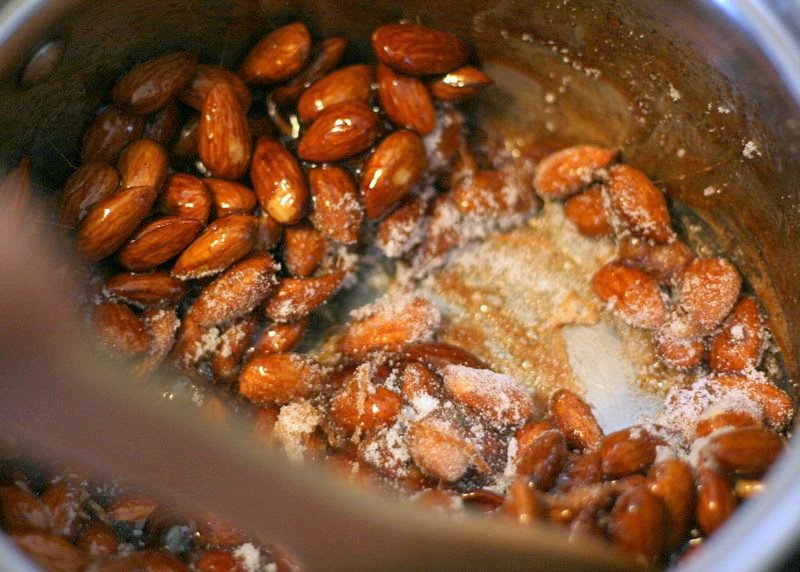
After a minute or so, the almonds will be coated in a sandy-looking sugar mixture and the pot will appear very dry.


Tasty Kitchen Blog: Burnt Sugar Almonds. Guest post by Natalie Perry of Perry's Plate, recipe submitted by TK member Birgit Kerr of Scrapalicious Bytes.

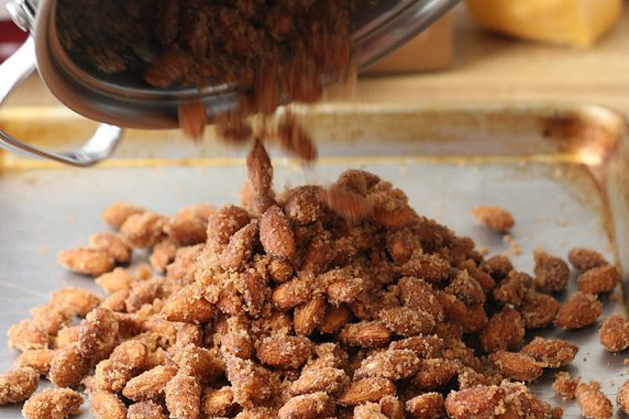
After three batches of these nuts, I can testify to you that now is the time to remove them from the pot. If you stir any longer, the sugar clumps will fall off the almonds and there may be some tears involved. We need that sugar.


Tasty Kitchen Blog: Burnt Sugar Almonds. Guest post by Natalie Perry of Perry's Plate, recipe submitted by TK member Birgit Kerr of Scrapalicious Bytes.

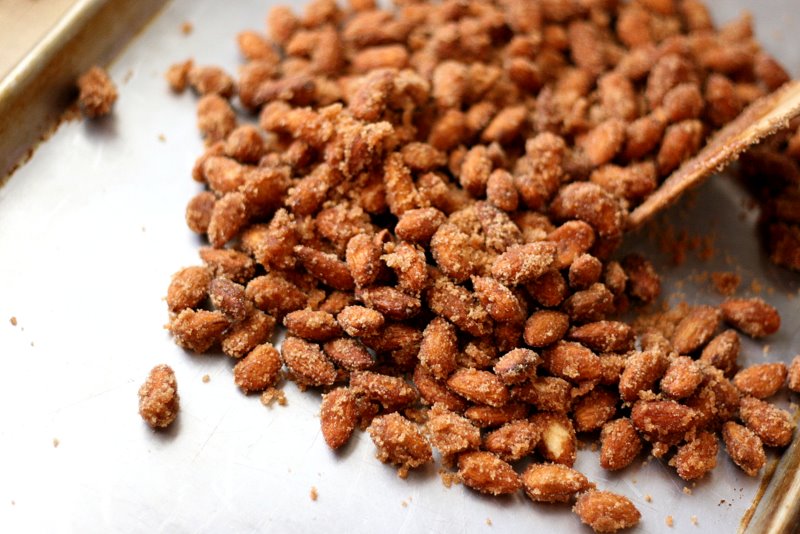
Spread the almonds out on a cookie sheet and let them cool. Chances are they’ll cool just long enough for you to pop one in your mouth and only wince slightly.


Tasty Kitchen Blog: Burnt Sugar Almonds. Guest post by Natalie Perry of Perry's Plate, recipe submitted by TK member Birgit Kerr of Scrapalicious Bytes.

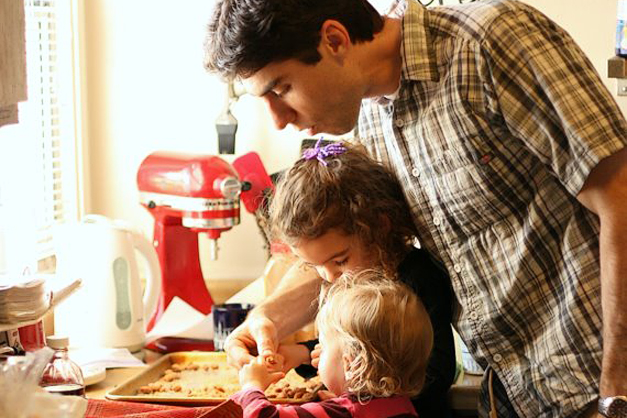
They taste even better than they smell (especially while they’re still warm!), and you’ll soon be surrounded by snitching fingers and whining children and/or husbands.


Tasty Kitchen Blog: Burnt Sugar Almonds. Guest post by Natalie Perry of Perry's Plate, recipe submitted by TK member Birgit Kerr of Scrapalicious Bytes.

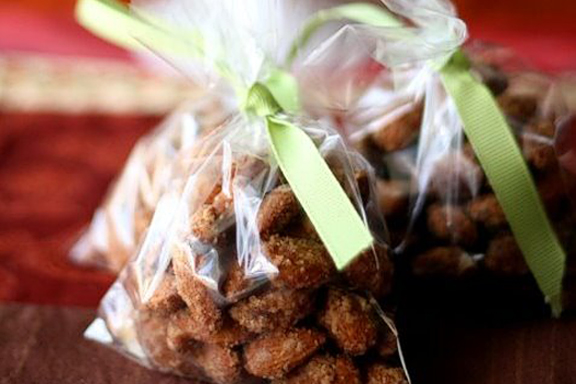
If you happen to have a few leftover (or if you were smart and made a triple batch), wrap some up and give them away. You’ll make some new friends. Maybe even a few best friends. Perhaps a stalker or two, but they may be peeking in your windows just to get a better whiff.

Many thanks to Birgit Kerr (who blogs at Scrapalicious Bytes) for a wonderful recipe!

Recipe notes: I used this recipe as a starting point and reduced the amount of sugar to 1 1/3 cups. I also added the remaining sugar into the almonds when the mixture looked syrupy instead of dry, and I only cooked it for another minute or two before I spread them out to cool.


Printable Recipe

Burnt Sugar Almonds (Gebrannte Mandeln)

4.97 Mitt(s) 42 Rating(s)42 votes, average: 4.97 out of 542 votes, average: 4.97 out of 542 votes, average: 4.97 out of 542 votes, average: 4.97 out of 542 votes, average: 4.97 out of 5

Prep Time:

Cook Time:

Difficulty: Intermediate

Servings: 4

4
x

Print Options

Page size Letter 3x5 4x6
Text Size Small Medium Large
Content Include description
Include prep time, etc.
Show image

Description

There are many things I associated with Advent/Christmas time growing up in Germany. But none more than the deliciously enticing smell of fresh “burnt” almonds walking through a Christkindlmarkt (German Christmas markets). They are actually quite easy to make at home, and presented in cute little cellophane or paper cone bags, they make lovely favors or hostess gifts around this time of year, too!

Ingredients

  • ⅓ cups Water, Plus 2 Tablespoons
  • 1-⅓ cup Sugar, Divided
  • 1 teaspoon Cinnamon, Ground
  • 2 cups Raw Almonds
  • 1 teaspoon Vanilla Extract

Preparation Instructions

Use a heavy saucepan (NOT the nonstick kind) and a wooden spoon.

First add the water, 1 cup of sugar and the cinnamon and stir. Bring it to a boil over medium heat. Add the almonds to the mix, raise the temperature to high heat and stir CONSTANTLY until the water is boiled away.

The sugar will dry out a little but start to stick to the almonds. Keep stirring them around, so that the almonds don’t burn on the bottom of the pan.

Turn the heat under the pan to medium-low, to keep the sugar from browning too fast. Keep stirring until the almonds start having an even shiny coat.

Don’t be distracted by the heavenly aroma that is enveloping your kitchen—you need your full concentration on the task!

Now dump in the rest of your sugar. Keep stirring, and add your vanilla. At this point, I like to mention that if you have vanilla sugar or a powdered type of vanilla flavoring, do feel free to use that over the liquid kind. It tends to work better. If you do, mix it with the 1/3 of a cup of sugar you are using for the second lot of sugar.

At this point, there might be quite some noise ensuing from your pan. Some crackling and popping, but hopefully no snapping. It depends on how fresh your almonds were. Really fresh almonds will make a popping noise and the coat may start to crack. That’s the water in the almonds escaping. If the almonds are older, there won’t be as much of that!

Keep stirring until the almonds are fairly shiny, but still a bit lumpy. You don’t want them completely smooth. The best ones are the ones that are shiny in some areas with some delicious lumps of cinnamon sugar on other parts of the almond.

As soon as you see that happening, take them off the heat and transfer the almonds to a sheet of parchment paper. Spread them apart as much as you can, but don’t worry about some of them sticking together initially. BE CAREFUL, however. These are extremely hot, so only use a spoon. These babies can really burn you!

While they are cooling down, keep on breaking them apart with your spoon(s) until they are all separated. Fair warning: these are totally divine when they are still ever-so-slightly warm. There, you’ve been warned!

Once they are cooled, hide (ahem, I meant store) them in a dry, closed container. Theoretically, they keep for several weeks. I’ve never had an opportunity to test that theory.


_______________________________________

Be sure to check out Natalie’s own beautiful food blog, Perrys’ Plate, where you can see her growing collection of lovely recipes. There’s always something new to see there. Go visit now!


Profile photo of Ree | The Pioneer Woman

Butter Chicken

Posted by in Step-by-Step Recipes

Note: By popular demand, we’re featuring this recipe again. Great reports across the board!

I originally loved the looks of this recipe, submitted by Tasty Kitchen member lillieknits, because I knew I had almost all the ingredients in my kitchen (important, since I don’t live around the corner from a grocery store)…and because the sauce contained both tomatoes and cream. Yum. My favorite.

 
But after I made it…oh, boy. Was I a believer. Definitely delicious and flavorful, but also extremely easy to throw together. It’s a great addition to any dinner rotation!

 
TPW_7089

You need these spices…AND ground coriander, which I didn’t have in my pantry.


TPW_7091

Chop up several cloves of garlic.


TPW_7095

And throw everything in a mixing bowl! Chicken breasts, garlic, all the spices…and the juice of a whole lime. Cover the bowl and stick it in the fridge for several hours, just to let everything meet and fall in love.


TPW_7100

After marinating the chicken, dice up a whole onion.


TPW_7111

Heat 1/4 cup (1/2 stick) butter in a large skillet.


TPW_7113

Let the onions cook for several minutes…


TPW_7114

…Until they’re golden brown and translucent.


TPW_7115

Next, Add the chicken breasts to the pan. I sort of scooted the onions over so the chicken would go right against the pan.


TPW_7118

Cook the chicken for a couple of minutes, then flip it to the other side.


TPW_7122

Pour in the tomato sauce…


TPW_7128

And the diced tomatoes. Now cover the pan and cook it for 30 minutes.


TPW_7129

Right before serving, pour in the cream. Of course.


TPW_7131

Try to pour it all around the edges of the pan to make it easy to stir together.


TPW_7133

Come on. This is absolutely too much for me. And you should smell it!


TPW_7137

Just slowly stir around the chicken—you could even remove the chicken for a minute or two to make it easy to stir.


TPW_7139

When it’s all combined, throw in a bunch of chopped cilantro.


TPW_7142

Stir it to combine, and make sure the sauce heats back up.


TPW_7152

And that’s it!


TPW_7164

The recipe says to serve it over Basmati rice, but I didn’t have any…so I just used plain white rice.


TPW_7168

The Verdict: It was splendid! The tomato/cream mixture combined with the spices…oh, man. I loved it. (FYI: According to Erika, Butter Chicken is also known as “Chicken Makhani”.)

Here’s the printable recipe:

Butter Chicken

Thank you for sharing, lilliekits!

Profile photo of Megan {Country Cleaver}

Buttermilk Pie

Posted by in Baking

You can’t beat a classic, and by the looks of it, Buttermilk Pies are a big deal here on Tasty Kitchen! There are so many variations of this Southern classic and it was hard to choose where to begin. Cassie had a very well-loved recipe that has received some pretty stellar reviews.

Profile photo of Megan {Country Cleaver}

Buttermilk-Vanilla Glazed Cronuts

Posted by in Baking

I love a good food fad. I remember the first time I heard the word “cronut” and I was utterly confused! But I was also equally intrigued. How could a mash up of croissant and doughnut possibly be a bad thing? When I saw Chris Castro's recipe for

Profile photo of Natalie | Perry's Plate

Butternut and Black Bean Enchilada Skillet

Posted by in Step-by-Step Recipes

  After having my third baby last summer, I’m beginning to understand the desperation I sometimes hear from moms who want fast, easy meals. Because I love to cook, spending 15 minutes chopping vegetables isn’t a big deal to me, but it is if I have a baby crying at my feet (or strapped to […]

Profile photo of EatLiveRun

Butterscotch Meringue Bars

Posted by in Baking, Step-by-Step Recipes

If there’s anything I love more than chocolate chip cookies, it’s meringue. And so when I saw The Church Cook’s recipe for Butterscotch Meringue Bars, I knew I had to give it a go! I’m blessed to know Kay in real life and let me tell you, she has a knack for creating mouthwatering dishes! […]