The Pioneer Woman Tasty Kitchen
Profile photo of DessertForTwo

Whole Wheat Clementine Yogurt Cake

Posted by in Baking

Tasty Kitchen Blog: Whole Wheat Clementine Yogurt Cake. Guest post by Christina of Dessert for Two, recipe submitted by TK member Stephanie of Girl Versus Dough.

When someone says “healthy dessert,” I immediately grab two forks. To me, a healthy dessert means I can eat double the servings! Wait, is that not the point? It’s funny what a little whole wheat flour and yogurt in a cake will make you do.

This Whole Wheat Clementine Yogurt Cake by Tasty Kitchen member Stephanie was a must-make for me. I think I grabbed the last bag of clementines for the season last week, and I saved 4 little clementines for this cake. It was so worth it, too!


Tasty Kitchen Blog: Whole Wheat Clementine Yogurt Cake. Guest post by Christina of Dessert for Two, recipe submitted by TK member Stephanie of Girl Versus Dough.

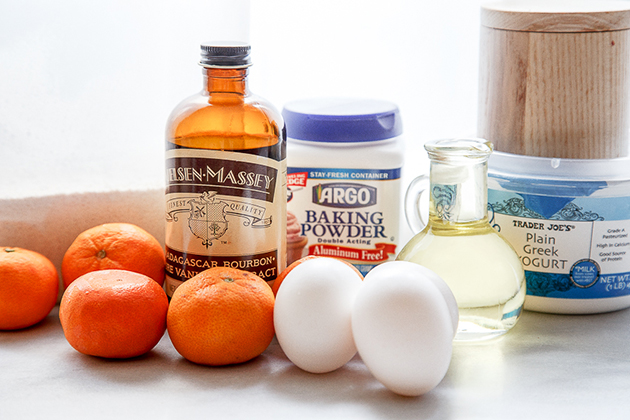
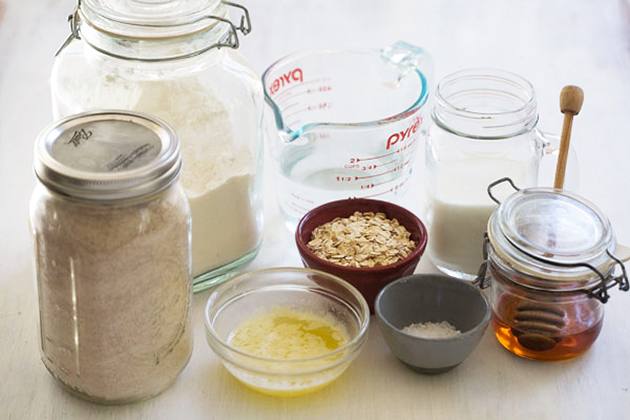
First up, our simple, couldn’t-be-easier ingredients that you probably already have in your pantry: whole wheat flour, regular all-purpose flour, granulated sugar, Greek yogurt, vanilla, vegetable oil, eggs, salt and baking powder. Oh, and clementines! Pretty standard cake stuff, right?


Tasty Kitchen Blog: Whole Wheat Clementine Yogurt Cake. Guest post by Christina of Dessert for Two, recipe submitted by TK member Stephanie of Girl Versus Dough.

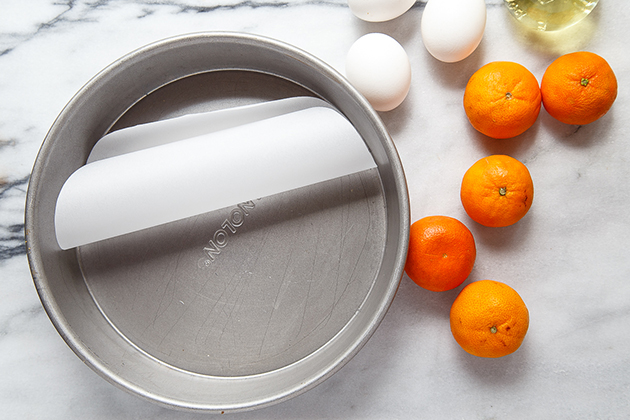
Stephanie recommends spraying and lining your pan with parchment paper. I say good call, Steph. When a recipe calls for the extra step of lining the pan, don’t ignore it. It could be the difference between a pretty cake that releases perfectly from the pan and a cake that comes out in pieces!


Tasty Kitchen Blog: Whole Wheat Clementine Yogurt Cake. Guest post by Christina of Dessert for Two, recipe submitted by TK member Stephanie of Girl Versus Dough.

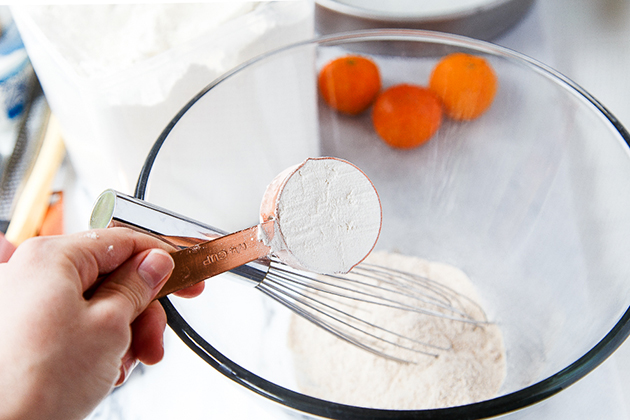
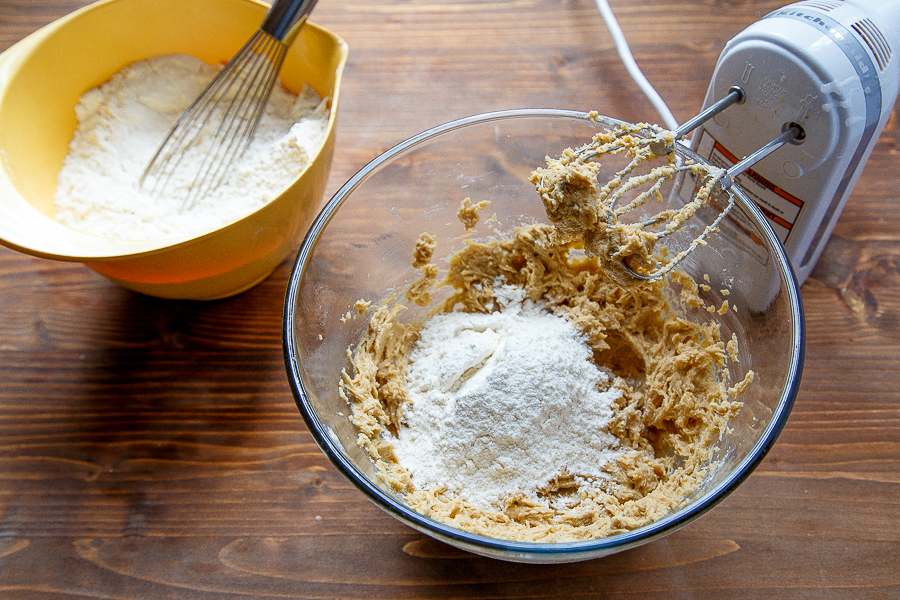
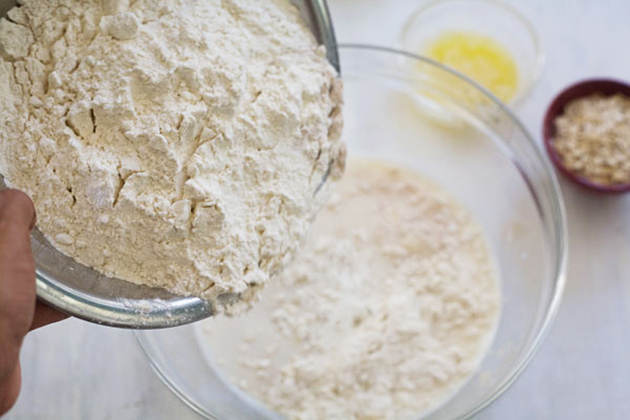
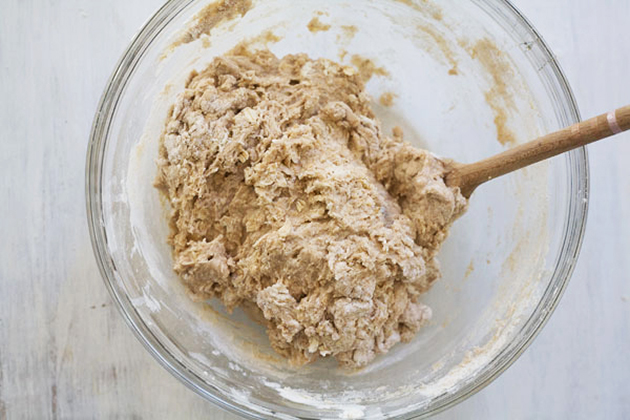
Now we can get to work on the cake. First, we combine the dry ingredients: both flours, salt, and baking powder. Whisking it together helps break up the clumps and eliminates the pesky step of sifting.


Tasty Kitchen Blog: Whole Wheat Clementine Yogurt Cake. Guest post by Christina of Dessert for Two, recipe submitted by TK member Stephanie of Girl Versus Dough.

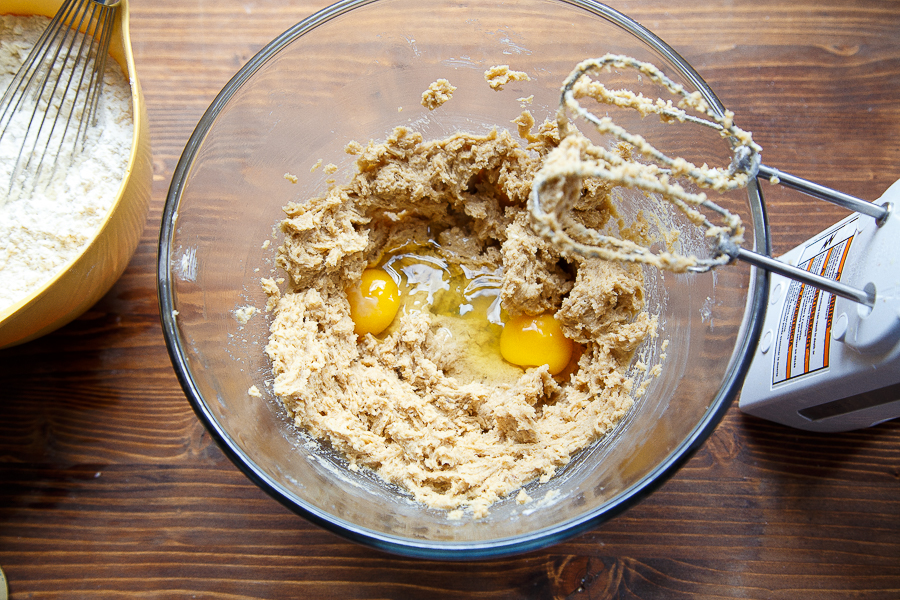
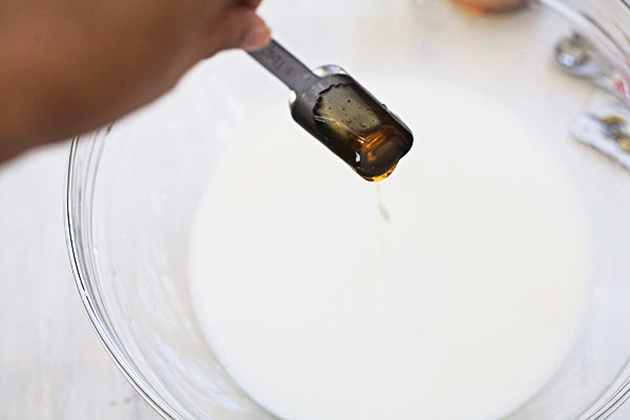
Once the dry ingredients are combined, it’s time to mix the wet ingredients together: combine the sugar, eggs, clementine zest, and vegetable oil. Anytime a recipe calls for citrus zest I get excited, because I know it’s going to be delicious. The zest is where all the flavors of the fruit hide. It’s full of oils that will perfume your whole cake.

I use a microplane grater to get as much zest off each clementine as possible. I only scraped my knuckles twice doing this. Totally worth it, though.


Tasty Kitchen Blog: Whole Wheat Clementine Yogurt Cake. Guest post by Christina of Dessert for Two, recipe submitted by TK member Stephanie of Girl Versus Dough.

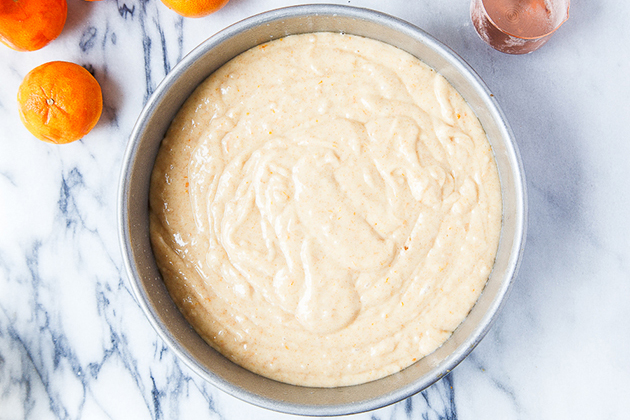
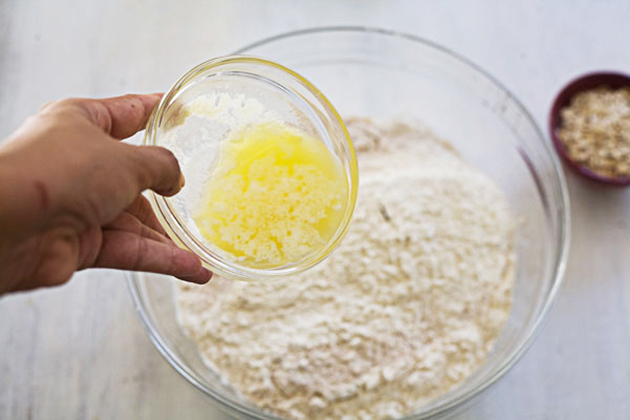
After folding together the wet and dry ingredients until no streaks of flour remain, I scraped the batter into the pan. Off it went into a 350ºF oven for 45 minutes. Steph recommends 40-50 minutes, which means you should start checking on the cake at 40 minutes. Increase the baking time by a few minutes until the cake starts to pull away from the edges of the pan, and a toothpick inserted comes out clean with only moist crumbs clinging to it. For me, 45 minutes was the magic number, but every oven is different, so be patient!

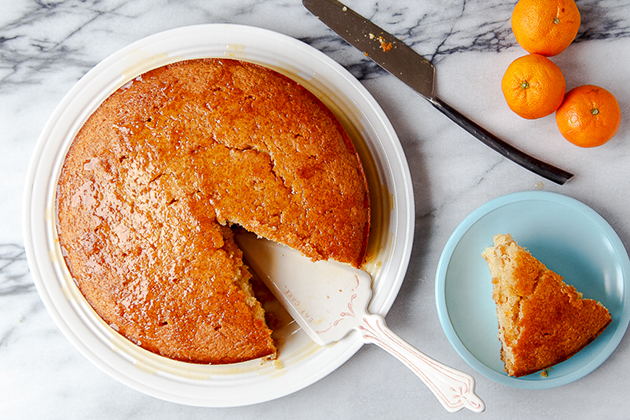
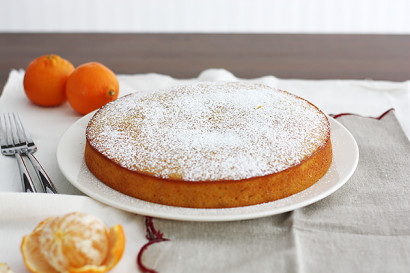
Now we’re getting to the good part: after a 10 minute cool-off session, the cake comes out of the pan. Remember those clementines that we scraped bald for their zest? It’s time to juice them into a pan with some sugar! We’re going to poke holes all over the cake and pour this warm, sugary juice on top. Yep. It’s exactly as good as it sounds.


Tasty Kitchen Blog: Whole Wheat Clementine Yogurt Cake. Guest post by Christina of Dessert for Two, recipe submitted by TK member Stephanie of Girl Versus Dough.

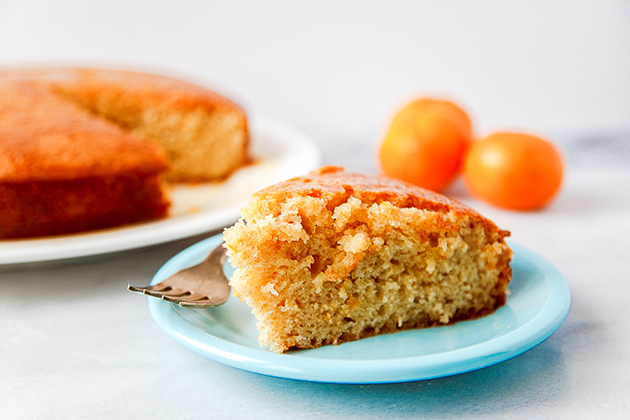
I ate a slice of this cake warm, and then another slice cool. And then another slice warm again just to figure out my preference. Before I could have another slice cool, the cake was gone. I guess we’ll never know the best way to serve it, but one thing is for sure: this cake is delicious! Thanks for a great lightened-up cake recipe that I can feel good about eating at snack time, Steph! Check out her TK recipe box and visit her beautiful blog, Girl Versus Dough, for more of her masterpieces!


Tasty Kitchen Blog: Whole Wheat Clementine Yogurt Cake. Guest post by Christina of Dessert for Two, recipe submitted by TK member Stephanie of Girl Versus Dough.


Printable Recipe

Whole Wheat Clementine Yogurt Cake

See post on Stephanie | Girl Versus Dough’s site!
4.00 Mitt(s) 1 Rating(s)1 vote, average: 4.00 out of 51 vote, average: 4.00 out of 51 vote, average: 4.00 out of 51 vote, average: 4.00 out of 51 vote, average: 4.00 out of 5

Prep Time:

Cook Time:

Difficulty: Easy

Servings: 12

12
x

Print Options

Page size Letter 3x5 4x6
Text Size Small Medium Large
Content Include description
Include prep time, etc.
Show image

Description

A tangy, sweet, moist and citrus-y cake for breakfast, dessert, snacking or all of the above.

Ingredients

  • ¾ cups Unbleached All-purpose Flour
  • ¾ cups Whole Wheat Flour
  • 2 teaspoons Baking Powder
  • ½ teaspoons Salt
  • 1 cup Plain Greek Yogurt
  • 1-⅓ cup Granulated Sugar, Divided
  • 3  Eggs
  • 2 teaspoons Grated Clementine Zest (from About 2 Clementines)
  • ½ teaspoons Vanilla
  • ½ cups Vegetable Oil
  • ⅓ cups Fresh-Squeezed Clementine Juice
  • Powdered Sugar, For Sprinkling (optional)

Preparation Instructions

Heat oven to 350F. Grease bottom and sides of a 9-inch round cake pan with baking spray with flour; line bottom with parchment paper and spray paper.

In a large bowl, whisk together flours, baking powder and salt until combined. In a separate large bowl, whisk together yogurt, 1 cup sugar, eggs, clementine zest and vanilla until combined.

Slowly stir wet ingredients into dry ingredients until just combined. Stir in oil. Pour batter into prepared pan.

Bake 40 to 50 minutes until a toothpick inserted in the center comes out clean. Cool 10 minutes in pan, then carefully remove from cake pan and transfer to a cooling rack with a rimmed baking sheet or clean sheet of parchment or wax paper underneath.

Meanwhile, cook the clementine juice and remaining ⅓ cup sugar in a saucepan over medium heat, stirring until sugar is dissolved. Carefully pour evenly over warm cake on cooling rack. Cool completely.

Sprinkle top with powdered sugar before serving, if desired.

Recipe adapted from Ina Garten.


_______________________________________

Growing up in a food-obsessed family and spending a lot of time in her Aunt Rose’s restaurant as a child, Christina was destined to be a fantastic cook. She’s a private chef during the day, but cooks for two at home. Like all of us, she has a sweet tooth that needs indulging after dinner. After becoming frustrated with the lack of recipes made for two, especially in the dessert category, she took matters into her own hands and started her blog, Dessert for Two, to share how she takes Southern classics (and a few surprises) and turns them into recipes that are perfect for just a few people. Her first cookbook, Dessert for Two, is now available at your favorite bookstore.


Profile photo of A Cozy Kitchen

Whole Wheat Honey Oatmeal Bread

Posted by in Baking, Step-by-Step Recipes

Tasty Kitchen Blog: Whole Wheat Honey Oatmeal Bread. Guest post by Adrianna Adarme of A Cozy Kitchen, recipe submitted by TK member Stephanie of Girl Versus Dough.

 
There’s simply nothing like fresh homemade bread. Despite knowing the powers of “homemade,” I usually leave bread as a grocery-store purchase but when I came across this Whole Wheat Honey Oatmeal Bread recipe by TK member Stephanie (a she recipe adapted from White On Rice Couple), I was enamored with the combination of oats, honey and whole wheat flour. When this loaf came out of the oven, I immediately made a commitment to myself to bake more bread. This bread yields a loaf that is slightly sweet in flavor, hearty in texture and utterly delicious when eaten warm. 


Tasty Kitchen Blog: Whole Wheat Honey Oatmeal Bread. Guest post by Adrianna Adarme of A Cozy Kitchen, recipe submitted by TK member Stephanie of Girl Versus Dough.

To get started, you’ll need: water, honey, whole wheat flour, all-purpose flour, oats, butter and salt. 

You can make the dough in a stand-up mixer if you have one, but if you don’t, you can make this whole loaf by hand. This dough is actually very easy to knead by hand. It won’t leave you sweating like other doughs. 


Tasty Kitchen Blog: Whole Wheat Honey Oatmeal Bread. Guest post by Adrianna Adarme of A Cozy Kitchen, recipe submitted by TK member Stephanie of Girl Versus Dough.

Combine the water and milk in a microwave-safe bowl and nuke it for 30 to 40 seconds, until the mixture is warm. Then pour in the honey.


Tasty Kitchen Blog: Whole Wheat Honey Oatmeal Bread. Guest post by Adrianna Adarme of A Cozy Kitchen, recipe submitted by TK member Stephanie of Girl Versus Dough.

Sprinkle the dry active yeast atop the milk mixture and allow it to get nice and foamy, about 10 minutes. 


Tasty Kitchen Blog: Whole Wheat Honey Oatmeal Bread. Guest post by Adrianna Adarme of A Cozy Kitchen, recipe submitted by TK member Stephanie of Girl Versus Dough.

Add the whole wheat flour and all-purpose flour. 


Tasty Kitchen Blog: Whole Wheat Honey Oatmeal Bread. Guest post by Adrianna Adarme of A Cozy Kitchen, recipe submitted by TK member Stephanie of Girl Versus Dough.

Pour in the melted butter and oats. 


Tasty Kitchen Blog: Whole Wheat Honey Oatmeal Bread. Guest post by Adrianna Adarme of A Cozy Kitchen, recipe submitted by TK member Stephanie of Girl Versus Dough.

Mix all of the ingredients together until the dough forms. 


Tasty Kitchen Blog: Whole Wheat Honey Oatmeal Bread. Guest post by Adrianna Adarme of A Cozy Kitchen, recipe submitted by TK member Stephanie of Girl Versus Dough.

If you’re using a stand-up mixer, you can knead the dough using the dough hook for 10 to 15 minutes. If you’re using your hands, you can simply knead the dough on a heavily floured surface for 15 minutes until the dough transform from sticky to nice and smooth. 


Tasty Kitchen Blog: Whole Wheat Honey Oatmeal Bread. Guest post by Adrianna Adarme of A Cozy Kitchen, recipe submitted by TK member Stephanie of Girl Versus Dough.

When you’re done kneading, transfer it to a clean bowl and cover it with a tea towel to rise for 1 hour or until the dough has doubled in size. 


Tasty Kitchen Blog: Whole Wheat Honey Oatmeal Bread. Guest post by Adrianna Adarme of A Cozy Kitchen, recipe submitted by TK member Stephanie of Girl Versus Dough.

After the dough is done with its first rise, this is how it’ll look. 


Tasty Kitchen Blog: Whole Wheat Honey Oatmeal Bread. Guest post by Adrianna Adarme of A Cozy Kitchen, recipe submitted by TK member Stephanie of Girl Versus Dough.

Punch it down and transfer it to a lightly floured surface. Shape it into an 8-by-8-inch square. 


Tasty Kitchen Blog: Whole Wheat Honey Oatmeal Bread. Guest post by Adrianna Adarme of A Cozy Kitchen, recipe submitted by TK member Stephanie of Girl Versus Dough.

Roll up the dough …


Tasty Kitchen Blog: Whole Wheat Honey Oatmeal Bread. Guest post by Adrianna Adarme of A Cozy Kitchen, recipe submitted by TK member Stephanie of Girl Versus Dough.

And then transfer it to a 9-by-5-inch loaf pan, seam-side down. Cover the loaf again with a tea towel and let it rise for 30 minutes, or until the dough reaches the edges of the pan. 


Tasty Kitchen Blog: Whole Wheat Honey Oatmeal Bread. Guest post by Adrianna Adarme of A Cozy Kitchen, recipe submitted by TK member Stephanie of Girl Versus Dough.

Preheat the oven to 400ºF. Sprinkle the oats on top of the loaf and transfer it to the oven to bake for about 45 minutes. You’ll know when the bread is done when the loaf’s top is dark brown and the bread sounds hollow when tapped on the bottom. 


Tasty Kitchen Blog: Whole Wheat Honey Oatmeal Bread. Guest post by Adrianna Adarme of A Cozy Kitchen, recipe submitted by TK member Stephanie of Girl Versus Dough.

Allow the loaf to cool to room temperature and then slice it up!

This bread is a beauty when it comes out of the oven. It’s ideal for everything from your weekday sandwiches to a snack with a cup of coffee. I personally enjoyed a slice with a smear of salted butter and a drizzle of honey. It was perfection. 

Thanks for sharing the recipe, Stephanie! Go check out her blog, Girl Versus Dough, for more of her recipes.


Printable Recipe

Whole Wheat Honey Oatmeal Bread

See post on Stephanie | Girl Versus Dough’s site!
5.00 Mitt(s) 6 Rating(s)6 votes, average: 5.00 out of 56 votes, average: 5.00 out of 56 votes, average: 5.00 out of 56 votes, average: 5.00 out of 56 votes, average: 5.00 out of 5

Prep Time:

Cook Time:

Difficulty: Easy

Servings: 8

8
x

Print Options

Page size Letter 3x5 4x6
Text Size Small Medium Large
Content Include description
Include prep time, etc.
Show image

Description

Whole wheat sandwich bread made with oats and honey and a whole lot of yum.

Ingredients

  • 1 cup Water
  • 1 cup Milk
  • 2-¼ teaspoons Active Dry Yeast
  • 2 Tablespoons Honey
  • 2-½ cups Whole Wheat Flour
  • 2 cups Bread Or All-Purpose Flour
  • 1 cup Rolled Oats, Plus More For Topping Loaf
  • 4 Tablespoons Unsalted Butter, Melted And Cooled Slightly
  • 1 Tablespoon Salt

Preparation Instructions

Pour water and milk into a microwave-safe bowl; heat 30 to 45 seconds until warm (about 115ºF). Pour into the bowl of a stand mixer.

Add yeast and honey. Let sit 10 minutes until yeast is foamy.

Stir in flours, oats, butter and salt. Using a dough hook, knead on medium speed 6 minutes until dough is smooth, elastic and only slightly sticky (alternatively, knead by hand 10 to 15 minutes on a lightly floured surface until smooth, elastic and only slightly sticky). Keep dough in bowl and cover with a tea towel. Let rise 1 hour until doubled.

When dough is doubled, punch down and transfer to a lightly floured surface. Press into an 8-by-8-inch square, then tuck in sides slightly and roll up into a log. Transfer to a lightly greased 9-by-5-inch loaf pan, seam-side down. Cover with a tea towel and let rise 30 to 40 minutes until dough reaches the edges of the pan (but not doubled).

Heat oven to 400ºF (375ºF if loaf pan is dark or nonstick). Sprinkle oats on top of risen loaf. Bake 40 to 50 minutes, rotating halfway through baking, until loaf is deep brown on top and sounds hollow when tapped on the bottom. Remove from loaf pan and transfer to a cooling rack to cool completely.

Adapted from White On Rice Couple.


_______________________________________

Adrianna is the lovely lady behind the scrumptious blog A Cozy Kitchen. It’s filled with all kinds of mouthwatering recipes and gorgeous photography. Whether you’re in the mood for something vegetarian or meaty, fancy or pure comfort, light or decadent, there’s sure to be something there for everyone.


Profile photo of Ree | The Pioneer Woman

Wonderful (and Important!) Changes

Posted by in Miscellaneous

(Photo: Flourless Chocolate Cupcakes submitted by Elana’s Pantry.)

Beginning today, we’ve made some important changes in the Review/Rating system here on Tasty Kitchen!

As many of you know, Tasty Kitchen was launched less than a year ago. It’s been just wonderful watching so many of you join, participate, and share your best dishes with the community of awesome folks here. All bias aside, it has seriously become my new go-to recipe source whenever I’m in search of something specific.

Of course, all new sites are works in progress and I knew from the get-go that I’d need to continually tweak things here and there to make everything work perfectly. One of the most important areas that has needed work—and the number one source of concern from the community—has always been the Ratings/Reviews system for recipes. As many of you pointed out, it was a little too easy to click on the red mitt rating system and assign arbitrary ratings to this recipe or that, and many who submitted recipes found it frustrating (rightly so) that anyone could click on one or two mitts and lower the overall rating of their recipes. Also, it was a little too easy to accidentally click on the wrong mitt rating—and with no way for this to be undone, the rating stuck.

Another common complaint: the Reviews section. The “Reviews” were actually more in line with a regular “Comments” section—while there were many legitimate reviews from folks who’d made the recipe in question, there were also just general comments relating to the recipe, things like “This looks yummy” or “I make something similar to this at Christmastime every year.” Both categories of dialog are absolutely welcome and an important aspect of the community—but we realized over time that it was important for Reviews and Comments to be separate.

So here are the changes, which just went into effect today:

 
REVIEW:

Picture 87


COMMENT:

Picture 84

1. On recipes, Reviews and Comments will be in separate (tabbed) sections. You must be logged in to leave either a Review (feedback if you’ve made the dish) or Comment (general discussion/remarks)


Picture 86

2. In order to leave a Rating (1 through 5 mitts), you must also leave a Review. Assigning the mitt rating is part of the Review dialog box.


These changes should really make a difference when it comes to searching for tried and true recipes. You can read honest Reviews from those who’ve made, served, and gobbled down the recipe, and you can read general feedback from others in the Comments. Best of both worlds!

A few important things to keep in mind:

* All Reviews posted before today will automatically revert to Comments. There really wasn’t any way for the system to discern the difference in past Reviews/Comments, so to be on the safe side, we’ve made them all Comments. If you have tried and reviewed recipes here on Tasty Kitchen and would like your Review to be included in a recipe’s overall rating, feel free to go ahead and leave a new Review.

* All Mitt Ratings before today have been erased. We realize this is a radical move and will mean that we are all, in essence, “starting from scratch” with our recipe ratings. However, we felt that it was important to the overall integrity of Tasty Kitchen’s ratings system to begin with a blank slate and remove all ratings from the old system, which was fraught with error. Don’t worry, though—I intend to make my way through many of my favorite recipes I’ve tried and bring the ratings up to date. In no time, the ratings will be built back up again.

* You will not be able to review and rate your own recipe.

* You can only rate and review a recipe once. If for any reason you want to change a review or rating that you’ve made, you can now delete your review AND rating, and leave a new one.

* If you’re used to sorting recipe searches by rating, keep in mind that the pages will turn up empty/scarce while the ratings being to repopulate throughout the site. To help with that process, we encourage you to go back to the recipes you’ve tried and review them.

And that’s it!

Implementing these changes ensures that all ratings are based on reviews left by those who have actually tried the recipe. So while it may be painful to see everything reset to zero, in the long run, this will make the recipe ratings a more reliable gauge of people’s actual experience with the recipe.

I LOVE YOU, MAN!

Thank you for being patient, not only throughout this post…but during this small adjustment period! I’m confident this new change will be a super improvement for the recipe community here on Tasty Kitchen.

Ree

Profile photo of DessertForTwo

World’s Best Chocolate Chip Cookies

Posted by in Baking

Please join us in welcoming Tina from Dessert for Two to the Tasty Kitchen Blog! She’s tempted us for years with all kinds of sweet and savory creations, and what better way to start things off than with these cookies from Sarah. They look perfect! Welcome to the TK Blog, Tina, and thanks for the recipe, Sarah!

 
Tasty Kitchen Blog: World's Best Chocolate Chip Cookies. Guest post by Christina of Dessert for Two, recipe submitted by TK member Sarah of Simple & Sweets.

When Sarah submitted this recipe to Tasty Kitchen and called it World’s Best Chocolate Chip Cookies, you know I’m going to check her. I just appointed myself the official tester of all “world’s best recipes.” Life is pretty sweet.

So, girlfriend claimed world’s best, and I claim she’s right. Sarah’s chocolate chip cookie recipe has a few unusual ingredients, and it has very specific instructions. I love a recipe with very strict instructions. It doesn’t mean I always follow them, but it does mean that I try it exactly as written the first time around. In this case, I tested the recipe with a 2-hour freezing period, like Sarah recommends, and without a freezing period. Sarah was right, again. Girlfriend knows her cookies! Let’s all tip our hats to Sarah for bringing the world dense, thick chocolate chip cookies the size of scones!


Tasty Kitchen Blog: World's Best Chocolate Chip Cookies. Guest post by Christina of Dessert for Two, recipe submitted by TK member Sarah of Simple & Sweets.

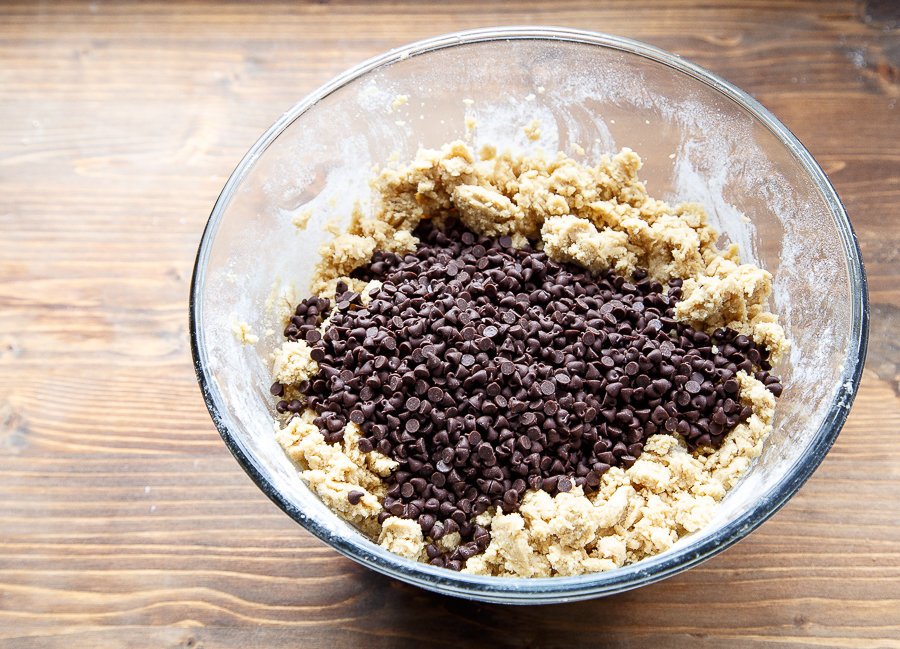
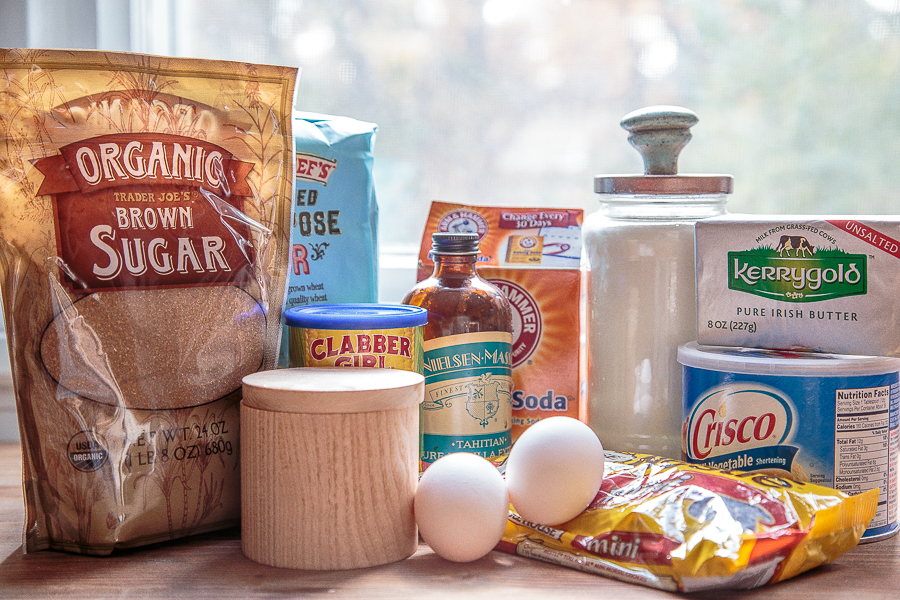
Here’s your lineup of ingredients. Pretty standard for CCC (chocolate chip cookies, if you didn’t know), but that corn starch is catching your eye isn’t it? Are we making pudding or cookies? Definitely cookies. Make sure all ingredients are at room temperature.


Tasty Kitchen Blog: World's Best Chocolate Chip Cookies. Guest post by Christina of Dessert for Two, recipe submitted by TK member Sarah of Simple & Sweets.

It all starts out innocently enough (doesn’t it always?)—cream the butter, shortening and two types of sugar together. After about 2 minutes, the mixture is fluffy and has slightly lightened in color. That’s how you know it’s time to add the eggs. Don’t skimp on creaming!

These cookies have quite a bit more brown sugar than granulated white sugar. I think this is key to their soft, chewy flavor. I’m not complaining one bit!


Tasty Kitchen Blog: World's Best Chocolate Chip Cookies. Guest post by Christina of Dessert for Two, recipe submitted by TK member Sarah of Simple & Sweets.

After the eggs and 1 whole tablespoon of vanilla (definitely not a typo!) are incorporated, it’s time to add the dry ingredients, which includes flour, cornstarch, baking soda, and coarse salt. What does cornstarch do for cookies? I’m so glad you asked! Cornstarch makes cookies chewy. It softens the cookies and allows for that soft and chewy inside while the edges of the cookie stay crisp. Good call, Sarah. Good call.


Tasty Kitchen Blog: World's Best Chocolate Chip Cookies. Guest post by Christina of Dessert for Two, recipe submitted by TK member Sarah of Simple & Sweets.

Sarah calls for mini chocolate chips. At first, I had my doubts. But I soon realized that mini chocolate chips mean I’m guaranteed a chocolate chunk in every single bite. I love the way this girl thinks!


Tasty Kitchen Blog: World's Best Chocolate Chip Cookies. Guest post by Christina of Dessert for Two, recipe submitted by TK member Sarah of Simple & Sweets.

The most important part of this recipe is to make 1/4 cup scoops of the dough and freeze them for at least 2 hours, but preferably overnight. The first time I made this recipe, I wanted cookies right away. So, I baked off 6 real quick without freezing. The cookies worked just fine, but the ones I baked the following day that had a nap in the freezer held together better and had a denser crumb. My best advice when making this recipe is to make the full batch for the freezer, but it’s okay to make just a few cookies right away, too. I’m the last person to tell you to hold off on your cookie craving.


Tasty Kitchen Blog: World's Best Chocolate Chip Cookies. Guest post by Christina of Dessert for Two, recipe submitted by TK member Sarah of Simple & Sweets.

There you have it! The world’s best chocolate chip cookies, if you like thick, large and dense cookies chock full of chocolate. Thanks for a great recipe, Sarah! Check out her blog, Simple & Sweets. I’m sure it’s packed with more great recipes like this.

Recipe notes: The original recipe calls for salted butter, but I almost always bake with unsalted butter. I used it out of habit. Next time I bake these, I’ll use salted butter, and I’m sure they’ll be just as delicious.


Printable Recipe

World’s Best Chocolate Chip Cookies

See post on Sarah’s site!
5.00 Mitt(s) 2 Rating(s)2 votes, average: 5.00 out of 52 votes, average: 5.00 out of 52 votes, average: 5.00 out of 52 votes, average: 5.00 out of 52 votes, average: 5.00 out of 5

Prep Time:

Cook Time:

Difficulty: Easy

Servings: 12

12
x

Print Options

Page size Letter 3x5 4x6
Text Size Small Medium Large
Content Include description
Include prep time, etc.
Show image

Description

The thickest and chewiest chocolate chip cookies. Hands down the best chocolate chip cookie I have ever had! This is my most requested recipe!

Ingredients

  • 4-½ cups All-purpose Flour
  • 2 Tablespoons Cornstarch
  • 2 teaspoons Baking Soda
  • 1 teaspoon Coarse Sea Salt
  • 2 sticks Butter, Softened
  • ½ cups Shortening
  • 1-½ cup Brown Sugar
  • ½ cups Granulated Sugar
  • 2 whole Eggs
  • 1 Tablespoon Vanilla Extract
  • 1 bag Mini Semi-sweet Chocolate Chips, 10-12 Ounce Bag

Preparation Instructions

1. In a large bowl mix together flour, cornstarch, baking soda, and salt. Set aside.

2. In the bowl of an electric mixer, cream butter, shortening, and sugars until light and fluffy. Add eggs and vanilla and stir to combine.

3. Add your dry ingredients into the wet ones and stir just until everything is combined. Do not over mix. Mix in the mini chocolate chips.

4. Using a ¼ cup measuring cup, scoop dough into rounded discs and place on a plate that’s small enough to fit into your freezer. Freeze for at least 2 hours or up to 3 months.

5. If you’re not going to use the dough right away, transfer the frozen dough to a freezer bag to keep them fresh.

6. Preheat the oven to 350ºF.

7. Place frozen dough directly onto a greased cookie sheet leaving about 2 inches between each.

8. Bake for about 15 minutes or until you see golden brown spots form on top. Remove from oven and allow to cool a bit before serving.


_______________________________________

Growing up in a food-obsessed family and spending a lot of time in her Aunt Rose’s restaurant as a child, Christina was destined to be a fantastic cook. She’s a private chef during the day, but cooks for two at home. Like all of us, she has a sweet tooth that needs indulging after dinner. After becoming frustrated with the lack of recipes made for two, especially in the dessert category, she took matters into her own hands and started her blog, Dessert for Two, to share how she takes Southern classics (and a few surprises) and turns them into recipes that are perfect for just a few people. Her first cookbook is due out in February 2015.


Profile photo of Erika (TK)

Your Most Memorable Holiday Fails

Posted by in Kitchen Talk

All holiday plans have probably already been made, and some of you might be a bit anxious or nervous about tomorrow. So today, let's encourage one another and try to alleviate some of that holiday stress. Tell us:

What are your most memorable holiday fails?

Profile photo of Erica Lea

Zand Gebak

Posted by in Baking, Step-by-Step Recipes

Today, Erica Lea will share with us this incredible Tasty Kitchen recipe she found. The name may sound funny and strange to some of you, but oh my. It’s absolutely beautiful. Let’s watch as Erica walks us through it!     I know what you’re thinking, because I thought it as well: “Zand what?!” Then […]

Profile photo of georgiapellegrini

Zesty Brussels Sprouts

Posted by in Step-by-Step Recipes

  These Zesty Brussels Sprouts from Spontaneous Hausfrau were divine. They were crispy on the outside and the dressing gave them a special sort of tang.       To make them, you will need: olive oil, Worcestershire sauce, balsamic vinegar, agave, mustard, parsley, and my friend the Brussels sprout.       Start by […]

Profile photo of missamy

Zhong-Xi Breakfast

Posted by in Step-by-Step Recipes

  Most mornings around here begin with an egg of some form. I’m pretty spoiled with a husband who cooks a mean omelet. It’s not something I take for granted. It’s a mighty nice way to start the day. We’re always trying to mix things up by trying different cheeses and toppings. Omelets are flexible […]