The Pioneer Woman Tasty Kitchen
Profile photo of georgiapellegrini

Zucchini Blossom Fritters

Posted by in Step-by-Step Recipes

Tasty Kitchen Blog: Zucchini Blossom Fritters. Guest post by Georgia Pellegrini, recipe submitted by TK member Katie of The Parsley Thief.

These Zucchini Blossom Fritters are a family recipe shared by TK member Katie. They are wonderfully unique, and contain the delicious flowers that bloom from a zucchini plant before the fruit forms. We’re coming up to zucchini season, so if you can find the blooms in your market or your own garden, you should definitely try this using fresh zucchini blossoms! Since the blossoms can be difficult to find in some locales, we were inspired to use grated zucchini instead. With this slightly modified dish, you can now now enjoy a batch of fritters anywhere and any time of the year!


Tasty Kitchen Blog: Zucchini Blossom Fritters. Guest post by Georgia Pellegrini, recipe submitted by TK member Katie of The Parsley Thief.

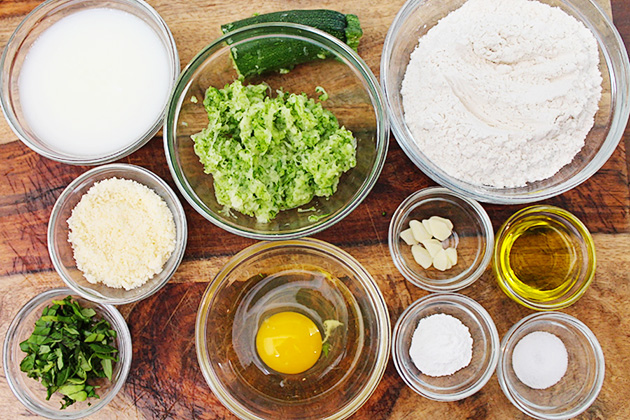
To make the fritters you will need: extra virgin olive oil, grated Parmesan cheese, flour, milk, a whole egg, sliced garlic, baking powder, fresh basil, Salt, ½ cup grated zucchini (or 7-8 squash blossoms if you can get them), and cooking oil for frying. Try your best to drain the zucchini of excess moisture.


Tasty Kitchen Blog: Zucchini Blossom Fritters. Guest post by Georgia Pellegrini, recipe submitted by TK member Katie of The Parsley Thief.

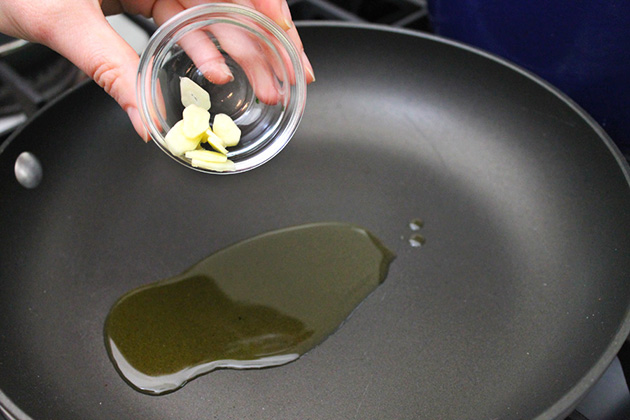
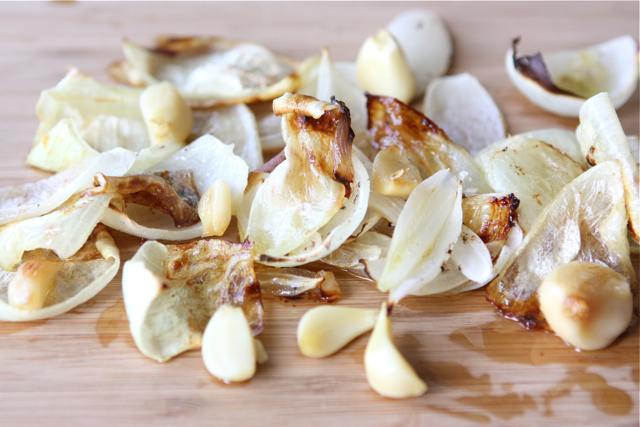
Heat the olive oil in a pan and sauté the garlic over medium high heat until lightly browned.


Tasty Kitchen Blog: Zucchini Blossom Fritters. Guest post by Georgia Pellegrini, recipe submitted by TK member Katie of The Parsley Thief.

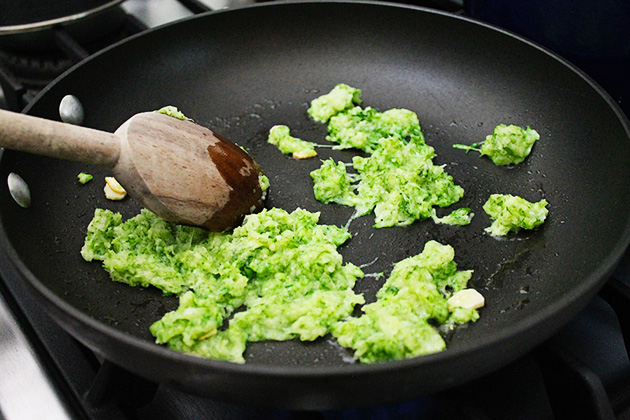
Add the grated zucchini and continue to sauté until cooked through and most of the watery liquid has cooked off.


Tasty Kitchen Blog: Zucchini Blossom Fritters. Guest post by Georgia Pellegrini, recipe submitted by TK member Katie of The Parsley Thief.

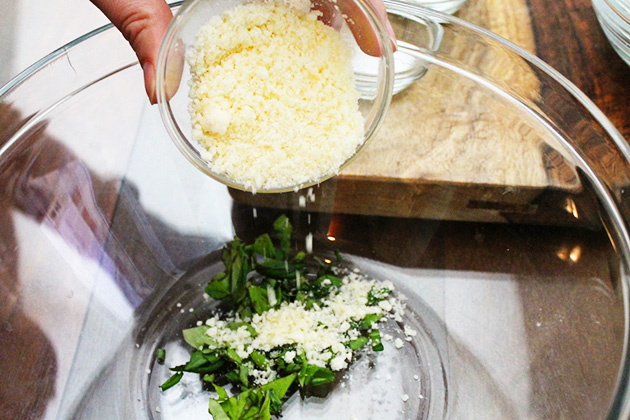
Next, in a large bowl add 1 tablespoon of freshly chopped basil and 3 tablespoons of grated parmesan cheese.


Tasty Kitchen Blog: Zucchini Blossom Fritters. Guest post by Georgia Pellegrini, recipe submitted by TK member Katie of The Parsley Thief.

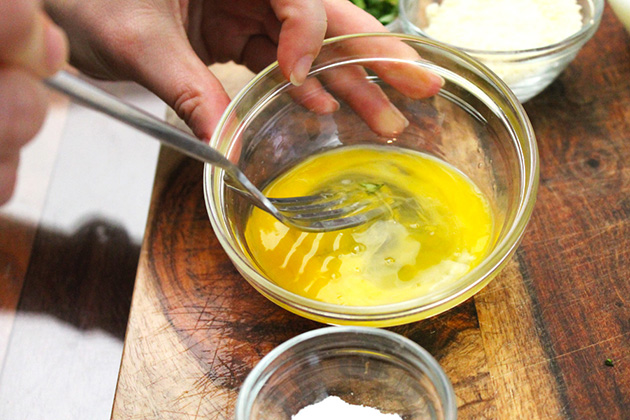
Whisk the egg, and then add it to the large bowl.


Tasty Kitchen Blog: Zucchini Blossom Fritters. Guest post by Georgia Pellegrini, recipe submitted by TK member Katie of The Parsley Thief.

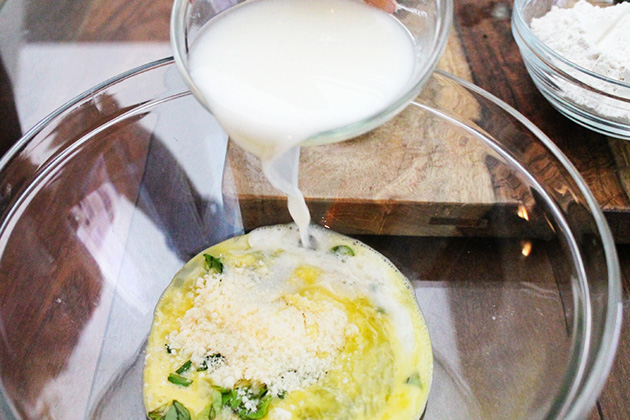
Pour ½ cup milk into the large bowl as well. Start whisking all of these ingredients together.


Tasty Kitchen Blog: Zucchini Blossom Fritters. Guest post by Georgia Pellegrini, recipe submitted by TK member Katie of The Parsley Thief.

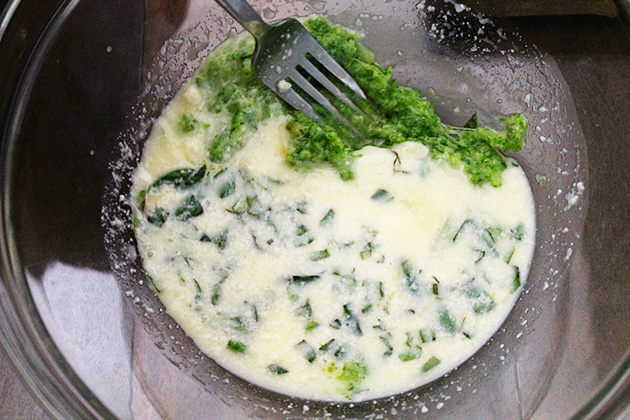
Add the zucchini mixture and give it a stir.


Tasty Kitchen Blog: Zucchini Blossom Fritters. Guest post by Georgia Pellegrini, recipe submitted by TK member Katie of The Parsley Thief.

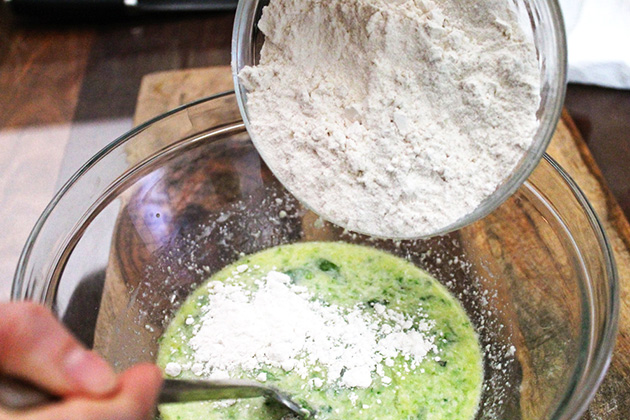
In a separate bowl, combine 1 cup flour, 1 teaspoon baking powder, and ½ teaspoons salt.

Combine the dry ingredients into the wet ingredients.


Tasty Kitchen Blog: Zucchini Blossom Fritters. Guest post by Georgia Pellegrini, recipe submitted by TK member Katie of The Parsley Thief.

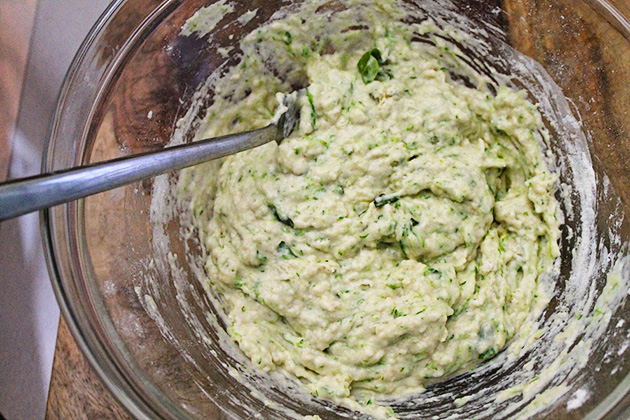
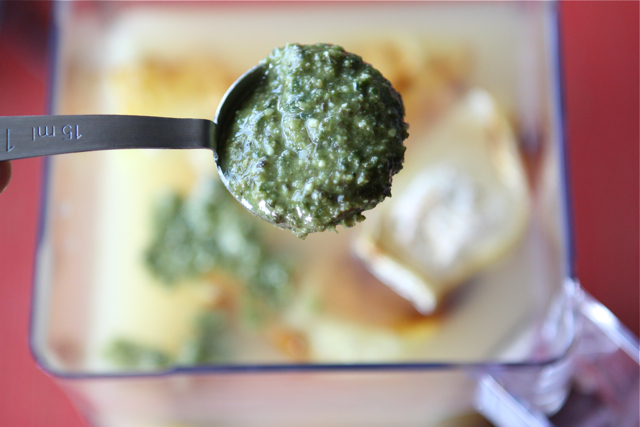
Mix everything together until it is a little thicker than pancake batter.


Tasty Kitchen Blog: Zucchini Blossom Fritters. Guest post by Georgia Pellegrini, recipe submitted by TK member Katie of The Parsley Thief.

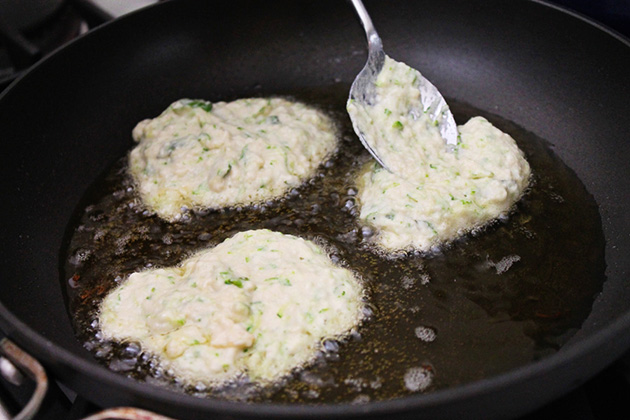
Pour about ¼ inch of oil into a skillet; heat over medium high heat. Scoop the batter (a full tablespoon) and drop it into the hot oil. Gently press down on the top of the fritter with a spoon to flatten.


Tasty Kitchen Blog: Zucchini Blossom Fritters. Guest post by Georgia Pellegrini, recipe submitted by TK member Katie of The Parsley Thief.

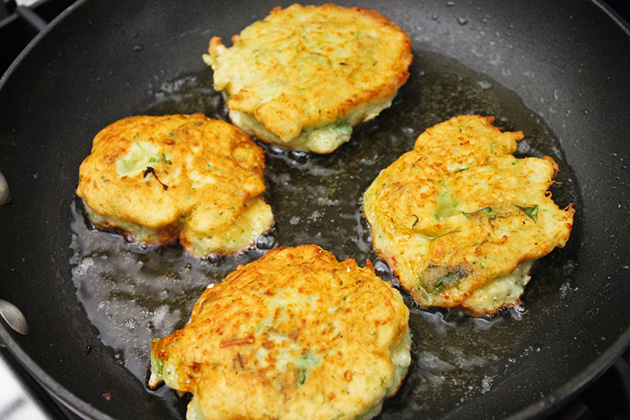
Once you have placed a few in the pan, fry the fritters until golden brown on one side, about 3–4 minutes. Flip them over and continue to fry for an additional 3-4 minutes.

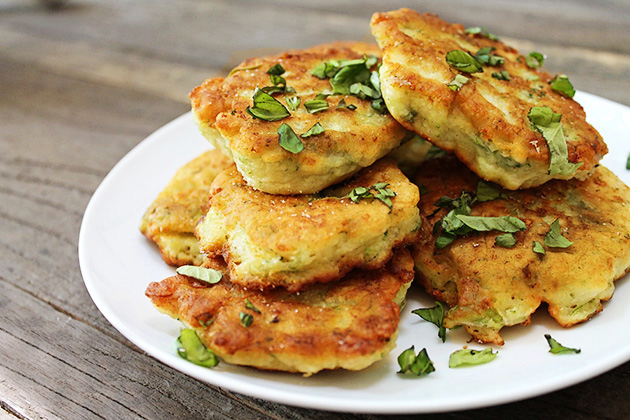
Remove from the pan and place onto a plate covered with paper towels (the towels soak up the excess oil). Let cool.


Tasty Kitchen Blog: Zucchini Blossom Fritters. Guest post by Georgia Pellegrini, recipe submitted by TK member Katie of The Parsley Thief.

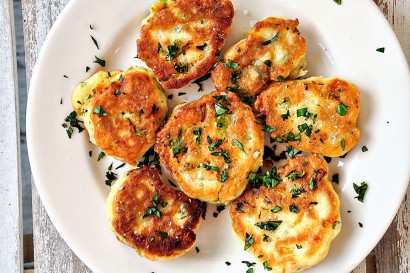
All golden brown and delicious, your fritters are now complete. Top with additional chopped basil or brush the tops with butter. Enjoy them while they are still warm, crispy, and full of goodness. They make the perfect appetizer, party food, or afternoon lunch and would work well with all kinds of condiments, from crème fraiche to diced ham.

Go check out more recipes from Katie in her TK recipe box or the recipe index of her blog, The Parsley Thief!


Printable Recipe

Zucchini Blossom Fritters

See post on theparsleythief’s site!
0.00 Mitt(s) 0 Rating(s)0 votes, average: 0.00 out of 50 votes, average: 0.00 out of 50 votes, average: 0.00 out of 50 votes, average: 0.00 out of 50 votes, average: 0.00 out of 5

Prep Time:

Cook Time:

Difficulty: Easy

Servings: 4

4
x

Print Options

Page size Letter 3x5 4x6
Text Size Small Medium Large
Content Include description
Include prep time, etc.
Show image

Description

Zucchini blossoms are the edible flowers that grow from a zucchini plant. In this family recipe, the flowers are lightly sauteed in garlic, then chopped and used as the base for a fritter batter, along with fresh basil and Parmesan cheese. They’re delicious!

Ingredients

  • 8 whole Squash Blossoms
  • 1 clove Garlic, Sliced
  • 1 Tablespoon Olive Oil
  • 1 Tablespoon Chopped Fresh Basil Leaves, Plus More For Optional Garnish
  • 3 Tablespoons Freshly Grated Parmesan Cheese
  • 1 whole Egg
  • ½ cups Milk
  • 1 cup Flour
  • 1 teaspoon Baking Powder
  • ½ teaspoons Kosher Salt
  • Vegetable Oil, For Frying

Preparation Instructions

Prepare the squash blossoms by inspecting each flower for dirt, or bugs (little critters do like to hide inside them). Give them a gentle rinse with water and dry with paper towels. Remove the pistil from inside each flower. Note: For this application, it’s fine to cut a slit alongside the length of each flower, to make removal easier. You wouldn’t want to do this if you were stuffing the blossoms. I also like to remove the little green spikes from around the stem of the flowers.

Saute the blossoms with the garlic and olive oil, in a skillet over medium high heat until softened and lightly browned. Remove from the skillet and coarsely chop. Transfer to a bowl and add in the chopped basil leaves, Parmesan cheese, egg, and milk. Use a fork to gently beat the ingredients together. In a separate bowl, whisk together the flour, baking powder, and salt. Pour the wet ingredients into the bowl and stir to combine. The mixture should be slightly thicker than pancake batter. If needed, add in a bit more milk.

Pour enough vegetable oil into a skillet to coat the bottom by about a 1/4″; heat over medium high heat. Scoop the batter by the heaping tablespoonful and drop into the hot oil. Use the back of a spoon to flatten each fritter slightly. Cook until golden brown, about 3 minutes. Flip the fritter over and brown the other side. Transfer to a paper towel-lined plate. Sprinkle lightly with some coarse salt and chopped fresh basil. Serve while hot.


_______________________________________

There’s so much to say about Georgia, we don’t know where to start. Leaving Wall Street for the French Culinary Institute, followed by a stint at the Gramercy Tavern and La Chassagnette in France, her passion for food and food traditions are evident and inspiring. Visit her site at Georgia Pellegrini, where you’ll find more recipes, photos, learn all about her wonderful books (including her latest one, Modern Pioneering, and enjoy her latest adventures.


Profile photo of cookincanuck

Zuppa di Gnocchi e Pesto

Posted by in Step-by-Step Recipes

Tasty Kitchen Blog: Zuppa di Gnocchi e Pesto. Guest post by Dara Michalski of Cookin' Canuck, recipe submitted by TK member Melanie of The Coupon Goddess.

 
If I had an Italian grandmother, I am sure this is the chicken soup she would make for my seven brothers and sisters and me. Okay, I don’t actually have seven siblings. In fact, I’m an only child. However, I always imagine Italian meals as large family affairs, so I have to conjure up some additional characters to set the scene. My pleasantly plump nonna would be standing by the stove, ladling out the steaming soup into large earthenware bowls, exclaiming “Mangia, mangia!” (Incidentally, “Nonna” is what my kids call my mum. We obviously have a deep-seated yearning for some Italian blood in our veins. And yet, nary a drop.)

When I spotted this recipe by Tasty Kitchen member Melanie, I knew it was likely to become a family favorite. The broth is rich with the taste of roasted onions and garlic, pesto and chicken broth pureed together (be sure to read about my broth mishap below and learn from my mistake so you can avoid green-colored blinds and carpet). The gnocchi is gently boiled in the broth until tender and plump and the savory mixture is ladled over simply roasted, shredded chicken. It is comfort in a bowl. I swear I can feel my fictitious nonna’s hug as I take each bite.


Tasty Kitchen Blog: Zuppa di Gnocchi e Pesto. Guest post by Dara Michalski of Cookin' Canuck, recipe submitted by TK member Melanie of The Coupon Goddess.

Here are the ingredients you’ll need to get started. Roasting chicken breasts can sound intimidating, but it’s one of the easiest things to do. Stay with me here.

Preheat oven to 350 degrees F.


Tasty Kitchen Blog: Zuppa di Gnocchi e Pesto. Guest post by Dara Michalski of Cookin' Canuck, recipe submitted by TK member Melanie of The Coupon Goddess.

Place the chicken breasts—skin, bones and all—into a roasting pan. Separate the onion quarters and scatter the pieces, along with the unpeeled garlic cloves, over and around the chicken breasts.


Tasty Kitchen Blog: Zuppa di Gnocchi e Pesto. Guest post by Dara Michalski of Cookin' Canuck, recipe submitted by TK member Melanie of The Coupon Goddess.

Drizzle over some olive oil. I promise it’s not going to get any harder than this.


Tasty Kitchen Blog: Zuppa di Gnocchi e Pesto. Guest post by Dara Michalski of Cookin' Canuck, recipe submitted by TK member Melanie of The Coupon Goddess.

Season with salt and pepper and slide those babies into the oven. You’re well on your way.

Roast the chicken for 35 to 45 minutes, or until it is cooked through.


Tasty Kitchen Blog: Zuppa di Gnocchi e Pesto. Guest post by Dara Michalski of Cookin' Canuck, recipe submitted by TK member Melanie of The Coupon Goddess.

Transfer the chicken breasts to a cutting board to cool. Remove the onion and garlic and peel the garlic. The cloves will be soft and buttery.


Tasty Kitchen Blog: Zuppa di Gnocchi e Pesto. Guest post by Dara Michalski of Cookin' Canuck, recipe submitted by TK member Melanie of The Coupon Goddess.

In the bowl of a food processor or a blender, combine the chicken broth, roasted onion pieces and peeled, roasted garlic. Add 3 tablespoons of pesto and pulse until smooth.

Now, let me give you a little tip here to save you some cleanup time. Do not—I repeat, DO NOT—try to do this all in one batch. I was feeling a little over-confident in my blender’s ability to hold mass quantities of liquid. Since I take all of my food photos in the living room (for the best light), that is where the blending took place. That is also where the combination of chicken broth, pesto, onions and garlic blew out the side of the blender lid and all over my carpet, blinds and furniture. It’s a good thing my kids weren’t home at the time or they would have learned some unsavory words to add to their vocabularies. Moral of the story: puree the mixture in two batches—in the kitchen!


Tasty Kitchen Blog: Zuppa di Gnocchi e Pesto. Guest post by Dara Michalski of Cookin' Canuck, recipe submitted by TK member Melanie of The Coupon Goddess.

Once the chicken is cool enough to handle, shred it into bite-sized pieces, removing and discarding the skin and bones. I like to use my hands to do this, but two forks would work well, too.


Tasty Kitchen Blog: Zuppa di Gnocchi e Pesto. Guest post by Dara Michalski of Cookin' Canuck, recipe submitted by TK member Melanie of The Coupon Goddess.

Transfer the chicken to a bowl and stir in the rest of the pesto until the chicken is coated.


Tasty Kitchen Blog: Zuppa di Gnocchi e Pesto. Guest post by Dara Michalski of Cookin' Canuck, recipe submitted by TK member Melanie of The Coupon Goddess.

Transfer the chicken broth mixture to a large saucepan and bring to a boil. Add the gnocchi and cook until the little guys pop up to the surface.


Tasty Kitchen Blog: Zuppa di Gnocchi e Pesto. Guest post by Dara Michalski of Cookin' Canuck, recipe submitted by TK member Melanie of The Coupon Goddess.

Place some of the chicken in each bowl and ladle over the broth and gnocchi.


Tasty Kitchen Blog: Zuppa di Gnocchi e Pesto. Guest post by Dara Michalski of Cookin' Canuck, recipe submitted by TK member Melanie of The Coupon Goddess.

Garnish with chopped Roma tomatoes and serve. “Mangia, mangia!”

Thank you, Melanie, for sharing your incredible recipe. Melanie’s site The Coupon Goddess is not only filled with tips on saving money at the grocery store, but has loads of mouthwatering recipes. Be sure to check it out.


Printable Recipe

Zuppa di Gnocchi e Pesto

See post on A Beautiful Bite’s site!
4.60 Mitt(s) 5 Rating(s)5 votes, average: 4.60 out of 55 votes, average: 4.60 out of 55 votes, average: 4.60 out of 55 votes, average: 4.60 out of 55 votes, average: 4.60 out of 5

Prep Time:

Cook Time:

Difficulty: Easy

Servings: 8

8
x

Print Options

Page size Letter 3x5 4x6
Text Size Small Medium Large
Content Include description
Include prep time, etc.
Show image

Description

A quick and delicious soup made from pantry and freezer staples that will have your guests thinking that your Nonna passed the recipe down to you!

Ingredients

  • 3  Chicken Breasts, On The Bone
  • 1 whole Yellow Onion, Quartered
  • 8 cloves Garlic, In Skins
  • 3 Tablespoons Olive Oil
  • 3 pinches Salt
  • 3 pinches Black Pepper
  • 2 cartons Chicken Broth, 32 Ounces Each
  • 1 jar Pesto 8oz
  • 1 package Gnocchi, 16 Ounce
  • 3 whole Roma Tomatoes Seeded And Chopped

Preparation Instructions

Preheat oven to 350F. Place chicken breasts in a roasting pan. Break apart quartered onion and scatter around and on top of breasts. Toss garlic, skins and all, around the chicken. The garlic will not flavor the chicken at this point. We are merely roasting them and will add them to the broth in a bit. Drizzle olive oil on chicken. Salt and pepper to taste and roast for 35-45 minutes or until the center is white and no longer pink.

Once cooked, allow the chicken to cool so that it can be shredded by hand. Scoop out roasted onion and garlic to use in broth. While the chicken is cooling, pour broth into a Cuisinart or blender along with the onions and roasted garlic (skins removed after roasting of course) and three tablespoons of the pesto. Pulse until there are no large chunks of garlic left. About 3 five second pulses should do the trick. The roasted garlic will give the soup a velvety feel in your mouth. Definitely don’t skip this step. It’s so worth it.

Back to the chicken. After shredding it, mix in the rest of the pesto. Stir well and set aside.

In a large pot, bring the broth/garlic/pesto mixture to a boil. Add gnocchi and cook until they float. In soup bowls, place a pile of chicken in the center. Ladle the hot broth over the chicken and garnish with chopped tomatoes. Mangia bene (eat well)!


_______________________________________

Dara Michalski is a doll and a sweetheart who clearly knows her way around the kitchen. She blogs at Cookin’ Canuck, where she shares her flavor-packed recipes and fun, engaging writing. The photography’s pretty incredible, too.