The Pioneer Woman Tasty Kitchen
Profile photo of cookincanuck

Shrimp Martini Appetizers

Posted by in Step-by-Step Recipes

Tasty Kitchen Blog Shrimp Martini Appetizers

 
You know when you make a recipe that immediately makes you say, “I have to make this at least once a week”? Well, this is one of those recipes. If you are a fan of shrimp, then this simple Shrimp Martini Appetizer recipe by Tasty Kitchen member 4littlefergusons is a must-try. Not only does it taste good and look pretty (who doesn’t love appetizers presented in martini glasses?), but it’s really easy to put together. Toss the shrimp with cilantro, stuffed olives, tomatoes, garlic, jalapeno and lemon juice, and you’re done. Ba-da-bing, ba-da-boom (I like to pretend I still live in New York).

Now, let’s get started.


Tasty Kitchen Blog Shrimp Martini Appetizers

Here’s everything you will need for this recipe: shrimp, cilantro, tomatoes, pimento-stuffed olives (the little guys), a jalapeno pepper, garlic, salt and lemon juice.


Tasty Kitchen Blog Shrimp Martini Appetizers

Set a medium saucepan of water over high heat and bring the water to a boil. Add shrimp and cook until shrimp is cooked through, about 1 minute.

Do everything in your power to avoid overcooking the shrimp. Overcooking + shrimp = rubbery mess. Not good.


Tasty Kitchen Blog Shrimp Martini Appetizers

Drain the shrimp.


Tasty Kitchen Blog Shrimp Martini Appetizers

Immediately plunge the shrimp into ice water to stop it from cooking. Aren’t they pretty in pink?


Tasty Kitchen Blog Shrimp Martini Appetizers

In a medium-sized bowl, combine chopped cilantro …


Tasty Kitchen Blog Shrimp Martini Appetizers

Seeded and diced tomatoes …


Tasty Kitchen Blog Shrimp Martini Appetizers

Chopped stuffed olives (the little ones) …


Tasty Kitchen Blog Shrimp Martini Appetizers

Seeded and chopped jalapeno pepper …


Tasty Kitchen Blog Shrimp Martini Appetizers

Garlic and salt.


Tasty Kitchen Blog Shrimp Martini Appetizers

Squeeze in fresh lemon juice. You’re almost there.


Tasty Kitchen Blog Shrimp Martini Appetizers

Add the cooked shrimp and give everything a gentle stir.


Tasty Kitchen Blog Shrimp Martini Appetizers

Garnish with extra olives, serve and dive in.

Thanks so much to 4littlefergusons for this great recipe. I will be making this for a quick lunch or serving it to guests as an impressive but easy appetizer. Be sure to check out the blog 4 Little Fergusons, where adorable Tonya talks about her life with four little ones and posts recipes as tempting as this one.


Printable Recipe

Shrimp Martini Appetizers

0.00 Mitt(s) 0 Rating(s)0 votes, average: 0.00 out of 50 votes, average: 0.00 out of 50 votes, average: 0.00 out of 50 votes, average: 0.00 out of 50 votes, average: 0.00 out of 5

Prep Time:

Cook Time:

Difficulty: Easy

Servings: 4

4
x

Print Options

Page size Letter 3x5 4x6
Text Size Small Medium Large
Content Include description
Include prep time, etc.
Show image

Description

These appetizers are DIVINE and just gorgeous to look at!

Ingredients

  • ½ pounds Shrimp, Peeled
  • 1 Tablespoon Chopped Fresh Cilantro
  • 2 whole Plum Tomatoes, Seeded And Chopped
  • 8 whole Pimento-stuffed Spanish Olives, Coarsely Chopped, Plus More Left Whole For Garnish
  • 1 whole Jalapeno Pepper, Seeded And Minced
  • 1 clove Garlic, Minced
  • ¼ teaspoons Salt
  • 1 Tablespoon Fresh Lemon Juice (from About 1/2 Lemon)

Preparation Instructions

Cook shrimp in boiling water until it turns pink. Drain. Place shrimp in ice water until chilled; drain again.

In a small bowl combine cilantro, tomatoes, olives, jalapeno, garlic and salt. Squeeze lemon juice over all and stir.

Add shrimp and toss gently. Serve immediately or refrigerate until serving time. Spoon shrimp mixture into 4 martini glasses, garnish with a toothpick of Spanish olives.


_______________________________________

Dara Michalski is a doll and a sweetheart who clearly knows her way around the kitchen. She blogs at Cookin’ Canuck, where she shares her flavor-packed recipes and fun, engaging writing. The photography’s pretty incredible, too.


Profile photo of Erica Lea

Shrimp Spring Rolls with Sweet and Spicy Peanut Dipping Sauce

Posted by in Step-by-Step Recipes

Tasty Kitchen Blog: Shrimp Spring Rolls with Sweet and Spicy Peanut Dipping Sauce. Guest post by Erica Kastner of Buttered Side Up, recipe submitted by TK member Lauren of Lauren's Latest.

Sometimes, the mere fact that I’ve never tried a recipe before inspires me to make it. I see a fancy recipe and it gets my creativity going. But an unfamiliar recipe can also be quite intimidating. Take spring rolls as an example. A year ago, I saw a recipe that sounded delicious. I knew one day I needed to try my hand at them. I even bought the rice wrappers. But it all seemed very daunting, so I could never quite take the plunge.

Then I saw Lauren’s recipe for Shrimp Spring Rolls with Sweet and Spicy Peanut Dipping Sauce, which included lovely spring vegetables. Erika encouraged me to make them and show you guys how they come together. Seeing step-by-step photos can sometimes open your eyes and explain a process in a way that words never quite can. That’s what we’re all about here on the Tasty Kitchen blog—empowering you to try delicious new recipes.

Let me take you through the steps of making spring rolls!


Tasty Kitchen Blog: Shrimp Spring Rolls with Sweet and Spicy Peanut Dipping Sauce. Guest post by Erica Kastner of Buttered Side Up, recipe submitted by TK member Lauren of Lauren's Latest.

First of all, here are the ingredients that you’ll need:

For the rolls: rice noodles, shrimp, asparagus, spring roll wrappers, green onions, carrot, and cilantro.

For the sauce: smooth peanut butter, brown sugar (I used coconut sugar), dried ginger, garlic, Hoisin sauce (I used Julia’s recipe for homemade Hoisin sauce), cayenne pepper, and hot water (not shown).


Tasty Kitchen Blog: Shrimp Spring Rolls with Sweet and Spicy Peanut Dipping Sauce. Guest post by Erica Kastner of Buttered Side Up, recipe submitted by TK member Lauren of Lauren's Latest.

Begin by soaking the rice noodles in cold water. Place a small pot of water on the stove to boil.


Tasty Kitchen Blog: Shrimp Spring Rolls with Sweet and Spicy Peanut Dipping Sauce. Guest post by Erica Kastner of Buttered Side Up, recipe submitted by TK member Lauren of Lauren's Latest.

Now it’s time to prep your veggies! Slice the green onions, chop the cilantro, julienne the carrot (don’t laugh at my julienning skills), and mince the garlic.


Tasty Kitchen Blog: Shrimp Spring Rolls with Sweet and Spicy Peanut Dipping Sauce. Guest post by Erica Kastner of Buttered Side Up, recipe submitted by TK member Lauren of Lauren's Latest.

To prep the asparagus, start by bending them in half. The woody end should snap right off! This makes me happy for some reason.


Tasty Kitchen Blog: Shrimp Spring Rolls with Sweet and Spicy Peanut Dipping Sauce. Guest post by Erica Kastner of Buttered Side Up, recipe submitted by TK member Lauren of Lauren's Latest.

Slice the spears in half lengthwise. I found that a paring knife worked well for this job.


Tasty Kitchen Blog: Shrimp Spring Rolls with Sweet and Spicy Peanut Dipping Sauce. Guest post by Erica Kastner of Buttered Side Up, recipe submitted by TK member Lauren of Lauren's Latest.

Once the water is boiling, salt it generously.


Tasty Kitchen Blog: Shrimp Spring Rolls with Sweet and Spicy Peanut Dipping Sauce. Guest post by Erica Kastner of Buttered Side Up, recipe submitted by TK member Lauren of Lauren's Latest.

Add the shrimp to the boiling water. It will only take about a minute for them to cook! You’ll know they’re done when they’re pink and opaque.


Tasty Kitchen Blog: Shrimp Spring Rolls with Sweet and Spicy Peanut Dipping Sauce. Guest post by Erica Kastner of Buttered Side Up, recipe submitted by TK member Lauren of Lauren's Latest.

Remove the shrimp to a bowl of ice water.


Tasty Kitchen Blog: Shrimp Spring Rolls with Sweet and Spicy Peanut Dipping Sauce. Guest post by Erica Kastner of Buttered Side Up, recipe submitted by TK member Lauren of Lauren's Latest.

Add the asparagus to the now-empty pot. Cook until crisp-tender, about 2 minutes.


Tasty Kitchen Blog: Shrimp Spring Rolls with Sweet and Spicy Peanut Dipping Sauce. Guest post by Erica Kastner of Buttered Side Up, recipe submitted by TK member Lauren of Lauren's Latest.

Add the asparagus to the bowl of ice water along with the shrimp.


Tasty Kitchen Blog: Shrimp Spring Rolls with Sweet and Spicy Peanut Dipping Sauce. Guest post by Erica Kastner of Buttered Side Up, recipe submitted by TK member Lauren of Lauren's Latest.

Now put the rice noodles into the boiling water and cook until tender, about 7 minutes. Drain.


Tasty Kitchen Blog: Shrimp Spring Rolls with Sweet and Spicy Peanut Dipping Sauce. Guest post by Erica Kastner of Buttered Side Up, recipe submitted by TK member Lauren of Lauren's Latest.

Meanwhile, slice the shrimp in half lengthwise. I used my trusty paring knife for this job as well.


Tasty Kitchen Blog: Shrimp Spring Rolls with Sweet and Spicy Peanut Dipping Sauce. Guest post by Erica Kastner of Buttered Side Up, recipe submitted by TK member Lauren of Lauren's Latest.

Whisk together all of the sauce ingredients. If it’s too thick you can always add more hot water. This peanut sauce is amazing. I would make these rolls just to have an excuse to dip something in it.


Tasty Kitchen Blog: Shrimp Spring Rolls with Sweet and Spicy Peanut Dipping Sauce. Guest post by Erica Kastner of Buttered Side Up, recipe submitted by TK member Lauren of Lauren's Latest.

Have all of your ingredients at the ready.


Tasty Kitchen Blog: Shrimp Spring Rolls with Sweet and Spicy Peanut Dipping Sauce. Guest post by Erica Kastner of Buttered Side Up, recipe submitted by TK member Lauren of Lauren's Latest.

Dip a spring roll wrapper into warm water. I like to use a skillet for this since it’s the right shape and diameter for the rice papers.

It takes a bit of practice to figure out how long to soak the wrappers. There’s a fine line between workable and so soft that it falls apart. Remember that it will continue to soften after you take it out of the water. Some advise you to dip it in the water very briefly, and others suggest going for about a minute. You’ll have to experiment to find what works for you.


Tasty Kitchen Blog: Shrimp Spring Rolls with Sweet and Spicy Peanut Dipping Sauce. Guest post by Erica Kastner of Buttered Side Up, recipe submitted by TK member Lauren of Lauren's Latest.

Place the softened wrapper on a work surface. If you’re working on a porous surface (like a wood cutting board), I find that it’s easier to work with the rolls if the surface is a tad wet.

Lay the shrimp, pink side down, on the end of the wrapper nearest to you.


Tasty Kitchen Blog: Shrimp Spring Rolls with Sweet and Spicy Peanut Dipping Sauce. Guest post by Erica Kastner of Buttered Side Up, recipe submitted by TK member Lauren of Lauren's Latest.

Place the noodles and then the asparagus on top of the shrimp.


Tasty Kitchen Blog: Shrimp Spring Rolls with Sweet and Spicy Peanut Dipping Sauce. Guest post by Erica Kastner of Buttered Side Up, recipe submitted by TK member Lauren of Lauren's Latest.

Stack the green onions and carrots on top.


Tasty Kitchen Blog: Shrimp Spring Rolls with Sweet and Spicy Peanut Dipping Sauce. Guest post by Erica Kastner of Buttered Side Up, recipe submitted by TK member Lauren of Lauren's Latest.

Add the cilantro on top of the stack.


Tasty Kitchen Blog: Shrimp Spring Rolls with Sweet and Spicy Peanut Dipping Sauce. Guest post by Erica Kastner of Buttered Side Up, recipe submitted by TK member Lauren of Lauren's Latest.

Roll the end of the wrapper nearest to you upwards, like you’re rolling up a taco. Fold the sides in and finish rolling up the spring roll.


Tasty Kitchen Blog: Shrimp Spring Rolls with Sweet and Spicy Peanut Dipping Sauce. Guest post by Erica Kastner of Buttered Side Up, recipe submitted by TK member Lauren of Lauren's Latest.

Isn’t it lovely?


Tasty Kitchen Blog: Shrimp Spring Rolls with Sweet and Spicy Peanut Dipping Sauce. Guest post by Erica Kastner of Buttered Side Up, recipe submitted by TK member Lauren of Lauren's Latest.

If you’d like the shrimp to really show through the wrapper you can wait to add them until you’ve folded in the sides.


Tasty Kitchen Blog: Shrimp Spring Rolls with Sweet and Spicy Peanut Dipping Sauce. Guest post by Erica Kastner of Buttered Side Up, recipe submitted by TK member Lauren of Lauren's Latest.

If you want to make an open-ended roll, place the ingredients on the wrapper vertically instead of horizontally. Then fold up the bottom of the spring roll. Finish by folding over one side and rolling it up.


Tasty Kitchen Blog: Shrimp Spring Rolls with Sweet and Spicy Peanut Dipping Sauce. Guest post by Erica Kastner of Buttered Side Up, recipe submitted by TK member Lauren of Lauren's Latest.

Notes:
1) These spring rolls can easily be made gluten free if you make sure to use a GF Hoisin sauce.
2) Make sure you salt the boiling water very generously. When I made these a second time, I definitely added more salt.
3) I find it’s helpful to have a towel handy to wipe your hands on while you’re working with the rolls. This way the ingredients don’t get everywhere and the roll looks less messy.
4) These rolls can be quite sticky. I think it would be a good idea to have a bowl of water to dip your fingers in while you’re eating so your hands don’t stick to them. They’ll also stick to each other, so it’s best to leave some space between them on your serving tray.
5) To make these come together more quickly, you can prep your veggies, cook the shrimp and asparagus, and make the sauce ahead of time.
6) If you have leftovers, you can always make a salad. The peanut sauce is a delicious dressing.


Tasty Kitchen Blog: Shrimp Spring Rolls with Sweet and Spicy Peanut Dipping Sauce. Guest post by Erica Kastner of Buttered Side Up, recipe submitted by TK member Lauren of Lauren's Latest.

Thanks so much to Lauren for sharing this recipe with us! I’m sure you’ve heard of her lovely blog, Lauren’s Latest. If not, make sure to give her a visit! Her Sweet Chili Hoisin Glazed Drumsticks look amazing.

Also, I am still learning the art of spring rolls. If you have any tips or tricks, please share in the comments!


Printable Recipe

Shrimp Spring Rolls with Sweet & Spicy Peanut Dipping Sauce

See post on Lauren's Latest’s site!
0.00 Mitt(s) 0 Rating(s)0 votes, average: 0.00 out of 50 votes, average: 0.00 out of 50 votes, average: 0.00 out of 50 votes, average: 0.00 out of 50 votes, average: 0.00 out of 5

Prep Time:

Cook Time:

Difficulty: Easy

Servings: 4

4
x

Print Options

Page size Letter 3x5 4x6
Text Size Small Medium Large
Content Include description
Include prep time, etc.
Show image

Description

A yummy and healthy snack, appetizer or light lunch.

Ingredients

  • FOR THE SPRING ROLLS:
  • 2 ounces, weight Rice Noodles
  • 12 whole Shrimp, Peeled And Deveined (51-60 Count)
  • 6 whole Asparagus Spears
  • 12 whole Round Rice Spring Roll Wrappers
  • 4 whole Green Onions, Sliced
  • 1 whole Carrot, Peeled And Finely Julienned
  • ½ bunches Cilantro, Chopped
  • FOR THE SAUCE:
  • 2 Tablespoons Smooth Peanut Butter
  • 1-½ Tablespoon Brown Sugar
  • ⅛ teaspoons Dried Ginger
  • 1 clove Garlic, Finely Minced
  • 2 Tablespoons Hoisin Sauce
  • 2 Tablespoons Hot Water
  • 2 pinches Cayenne Pepper (adjust To Your Heat Level)

Preparation Instructions

Place rice noodles in a bowl and cover with cold water. Set aside.

Bring a small pot of water to boil. Salt water generously, drop shrimp in and cook until pink and opaque, about 1 minute. Remove them from the water (keep the pot of water – you’ll use it in a second) and place shrimp into a bowl of ice water.

Bend asparagus in half until the bottom woody end snaps off. Discard the woody end. Slice down the center of the remaining spear vertically to get 2 very skinny spears. Drop them into the boiling water and boil until crisp-tender, 2 minutes. Remove them from the water and place into the ice water with shrimp.

Drain the soaking rice noodles and place them into the boiling water. Cook until tender, about 7 minutes and then drain.

While noodles are cooking, slice shrimp in half lengthwise.

To assemble spring rolls, place one spring roll wrapper into very warm water until it softens up. Remove it from the water and place onto a work surface. Stack up shrimp, noodles, asparagus, green onions, carrot and cilantro on the bottom half of the wrapper. Then roll it up tightly, burrito-style and place on serving platter. Repeat until all wrappers have been filled.

For the sauce, mix all ingredients together until smooth in consistency. If the hot water doesn’t dissolve the sugar or create a smooth sauce, microwave the sauce for 30 seconds. Pour into a serving dish and place along side spring rolls. Serve cold.


_______________________________________

Erica Kastner has always been one of our most cherished members of the Tasty Kitchen community. She shares her wonderful recipes and amazing food photography on her blog, Buttered Side Up, and she also writes about crafts and posts more of her beautiful photography in her personal blog, Simple Days. There really isn’t much that this amazing young wife and mother can’t do, and we’re thrilled she does some of it here.


Profile photo of HowSweetEats

Simple Wonton Soup

Posted by in Step-by-Step Recipes

Tasty Kitchen Blog: Simple Wonton Soup. Guest post by Jessica Merchant of How Sweet It Is, recipe submitted by TK member Sarah of The Woks of Life.

Oh my gosh. Today we’re going to make some easy comfort food and it’s like a giant hug in a bowl. So much flavor, so much punch!

I’ve loved wonton soup forever and a day, but I never thought it was something that was doable at home. Being totally uneducated about it, I was clueless when it came to prepping something like this. But I came across Sarah’s recipe for Simple Wonton Soup and the “simple” part seriously sold me. You mean it isn’t that tough to make wonton soup?

It so isn’t. It’s doable, even on a weeknight, but better yet, this recipe makes a lot of wontons, so you can store them in the freezer and have soup for days. What’s better than that?

Let’s get started.


Tasty Kitchen Blog: Simple Wonton Soup. Guest post by Jessica Merchant of How Sweet It Is, recipe submitted by TK member Sarah of The Woks of Life.

Here are the goods that you need: baby bok choy, sesame oil (I used toasted), soy sauce, shoaxing wine (I subbed rice wine vinegar), green onions, chicken stock, wonton wraps, ground pork, salt and pepper. Pretty simple stuff—I actually had most of it on hand.

First, you make the wontons. It’s definitely simple as the recipe title portrays but it’s slightly time-consuming and requires a little bit of patience. Not lots! Just a little.


Tasty Kitchen Blog: Simple Wonton Soup. Guest post by Jessica Merchant of How Sweet It Is, recipe submitted by TK member Sarah of The Woks of Life.

The initial step is to bring your bok choy greens to a boil quickly, then blanch them in cold water.


Tasty Kitchen Blog: Simple Wonton Soup. Guest post by Jessica Merchant of How Sweet It Is, recipe submitted by TK member Sarah of The Woks of Life.

Grab the bunch and squeeze out as much water as you can, then finely chop the greens.


Tasty Kitchen Blog: Simple Wonton Soup. Guest post by Jessica Merchant of How Sweet It Is, recipe submitted by TK member Sarah of The Woks of Life.

Mix together the ground pork, soy sauce, sesame oil, rice wine vinegar salt, pepper and wilted greens. Stir, stir, stir. Even use your hands. You want it super mixed, almost to the point of being paste-like. After that, grab a small bowl and fill it with water.


Tasty Kitchen Blog: Simple Wonton Soup. Guest post by Jessica Merchant of How Sweet It Is, recipe submitted by TK member Sarah of The Woks of Life.

Dip your finger or a thin pastry brunch in the water and brush it along the edges of the wrapper. This will help seal this sucker together.


Tasty Kitchen Blog: Simple Wonton Soup. Guest post by Jessica Merchant of How Sweet It Is, recipe submitted by TK member Sarah of The Woks of Life.

Place about a teaspoon of the ground pork mixture in the center of the wonton…


Tasty Kitchen Blog: Simple Wonton Soup. Guest post by Jessica Merchant of How Sweet It Is, recipe submitted by TK member Sarah of The Woks of Life.

Then fold it in half and press the edges together. I also squeeze out any air in the wrapper with my fingers.


Tasty Kitchen Blog: Simple Wonton Soup. Guest post by Jessica Merchant of How Sweet It Is, recipe submitted by TK member Sarah of The Woks of Life.

Brush a drop of water on one sealed corner of the wrapper and bring it to meet the other corner, forming a little package. So cute!


Tasty Kitchen Blog: Simple Wonton Soup. Guest post by Jessica Merchant of How Sweet It Is, recipe submitted by TK member Sarah of The Woks of Life.

Do so with the remaining wrappers and pork until you have a big old tray. It’s kind of soothing and the type of busy work that I love.

Once all of the wontons are made, you can use them or freeze a bunch for later use. To serve two of us, I kept about a quarter of the wontons out and froze the rest. This way, they are ready at the drop of a hat for some soup.


Tasty Kitchen Blog: Simple Wonton Soup. Guest post by Jessica Merchant of How Sweet It Is, recipe submitted by TK member Sarah of The Woks of Life.

Bring a pot of water to a boil. Once boiling, add the wontons and cook just until they float. At the same time, add the chicken stock to a large pot and bring it to a simmer. When it’s simmering, add in the salt, pepper and sesame oil.


Tasty Kitchen Blog: Simple Wonton Soup. Guest post by Jessica Merchant of How Sweet It Is, recipe submitted by TK member Sarah of The Woks of Life.

Remove the wontons from the water as soon as they are floating. You don’t want to overcook them or else the wontons get very mushy and soft. If you’re serving immediately, you can throw them in the simmering chicken stock, but make sure you’re eating right away. The recipe calls for adding your wontons to a bowl and pouring your chicken stock over when ready to eat. Either way works well. Add some green onions to the broth and you’re good to go.


Tasty Kitchen Blog: Simple Wonton Soup. Guest post by Jessica Merchant of How Sweet It Is, recipe submitted by TK member Sarah of The Woks of Life.

Ah! This was so good. Such comfort food that reminded me of when I was a kid and we’d get take-out Chinese food. It was such a treat. It really is simple yet I never thought I’d be able to make something like this at home with ease. Glad I was wrong. This one’s a keeper.

Be sure to check out Sarah’s blog, The Woks of Life, where she shares more delicious recipes and an array of cuisines!


Printable Recipe

Simple Wonton Soup

See post on Sarah @ The Woks of Life’s site!
5.00 Mitt(s) 3 Rating(s)3 votes, average: 5.00 out of 53 votes, average: 5.00 out of 53 votes, average: 5.00 out of 53 votes, average: 5.00 out of 53 votes, average: 5.00 out of 5

Prep Time:

Cook Time:

Difficulty:

Servings: 6

6
x

Print Options

Page size Letter 3x5 4x6
Text Size Small Medium Large
Content Include description
Include prep time, etc.
Show image

Description

This is the best thing ever on a cold wintry day. Surprisingly simple and so good. You’ll love this!

Ingredients

  • FOR THE WONTONS:
  • 10 ounces, weight Baby Bok Choy Or Similar Green Leafy Vegetable
  • 1 cup Ground Pork
  • 2-½ Tablespoons Sesame Oil
  • 1 pinch White Pepper
  • 1 Tablespoon Soy Sauce
  • ½ teaspoons Salt
  • 1 Tablespoon Shaoxing Wine
  • 1 package Wonton Skins, 12 Ounce Package
  • FOR THE SOUP:
  • 6 cups Good Chicken Stock
  • 1 Tablespoon Sesame Oil
  • 1 teaspoon Salt, Or To Taste
  • ¼ teaspoons White Pepper
  • 1 whole Scallion, Chopped

Preparation Instructions

Start by thoroughly washing the greens. Bring a large pot of water to a boil, add the greens and blanch them just until wilted (this will only take a couple of minutes). Drain off the hot water and rinse the greens in cold water.

Grab a good clump of greens and carefully squeeze out as much water as you can. Very finely chop them (you can also speed up the process by throwing them in the food processor).

In a medium bowl, add the finely chopped greens, ground pork, sesame oil, white pepper, soy sauce, salt and wine. Mix very thoroughly until the mixture is totally emulsified—almost like a paste.

Now it’s time to assemble! Fill a small bowl with water. Grab a wrapper and use your finger to moisten the edges of the wrapper. Add a little over a teaspoon of filling to the middle. Fold the wrapper in half and press the two sides together so you get a firm seal.

Hold the bottom two corners of the little rectangle you just made and bring the two corners together. You can use a bit of water to make sure they stick. And that’s it! Place the assembled wonton on a baking sheet or plate lined with parchment paper to prevent sticking. Keep assembling until all the filling is gone.

At this point, you can cover the wontons with plastic wrap, put the baking sheet/plate into the freezer, and then transfer them to Ziploc bags once they’re frozen. They’ll keep for a couple months in the freezer and be ready for wonton soup whenever you want it.

To make the soup, heat your chicken stock to a simmer in a large pot. Then add sesame oil, salt and white pepper and keep it simmering.

Bring a separate pot of water to a boil. Carefully add the wontons one at a time to the pot. Pick up the pot and use a swirling, twisting motion to keep the pot moving and prevent the wontons from sticking to the bottom. If they do stick, don’t worry, They should come free once they’re cooked. They’re done when they float. Take care not to over-cook them. Remove the wontons with a slotted spoon and put them in bowls.

Pour the broth over the wontons and garnish with scallions. Serve!


_______________________________________

Jessica Merchant is a personal trainer turned food writer and blogger. Her blog, How Sweet Eats, is where she proclaims her love for all things sweet, all things bacon, and everything else in between. She works her magic in her Pittsburgh kitchen, which she shares with her husband of 2 years.


Profile photo of Natalie | Perry's Plate

Singapore Noodles (Singapore Mei Fun)

Posted by in Step-by-Step Recipes

Tasty Kitchen Blog: Singapore Noodles (Singapore Mei Fun). Guest post by Natalie Perry of Perry's Plate, recipe submitted by TK member Sarah of The Woks of Life.

As much as I love eating out, I can’t help but mentally calculate the meal I could have prepared at home for the cost of the meal in the restaurant. That meal in my head is usually much larger and consists of higher quality food. Often it ends up tasting better and costing less. Plus, it’s almost always healthier when made at home.

That being said, I don’t miss having someone else do the work and clean up the mess when it’s all over. I suppose that’s what we pay for when we eat out. Not having a toddler clinging to my legs is sometimes worth the extra cost.

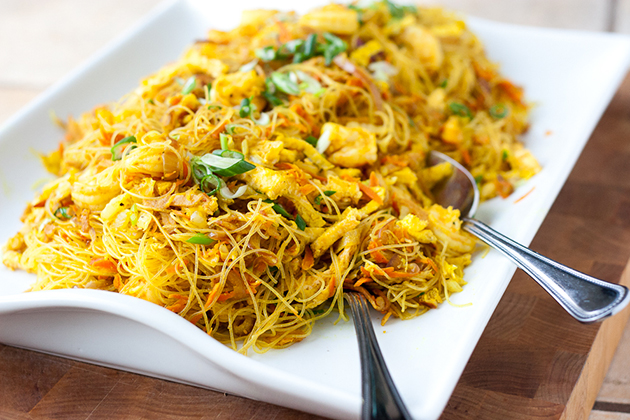
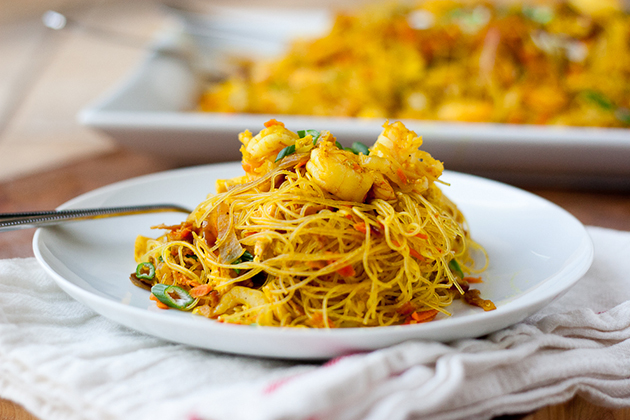
Having small children definitely helps with the temptation to eat out frequently. So does finding popular restaurant or take out recipes to prepare at home. Enter: Singapore Noodles (Singapore Mei Fun) from Tasty Kitchen member Sarah

You’ll be glad you stayed home for this. I promise.

Let’s get started!


Tasty Kitchen Blog: Singapore Noodles (Singapore Mei Fun). Guest post by Natalie Perry of Perry's Plate, recipe submitted by TK member Sarah of The Woks of Life.

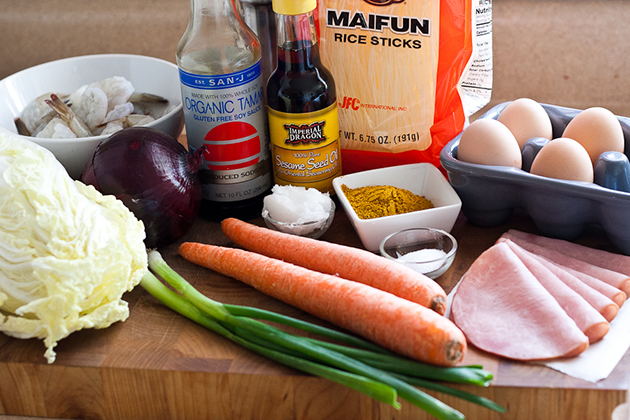
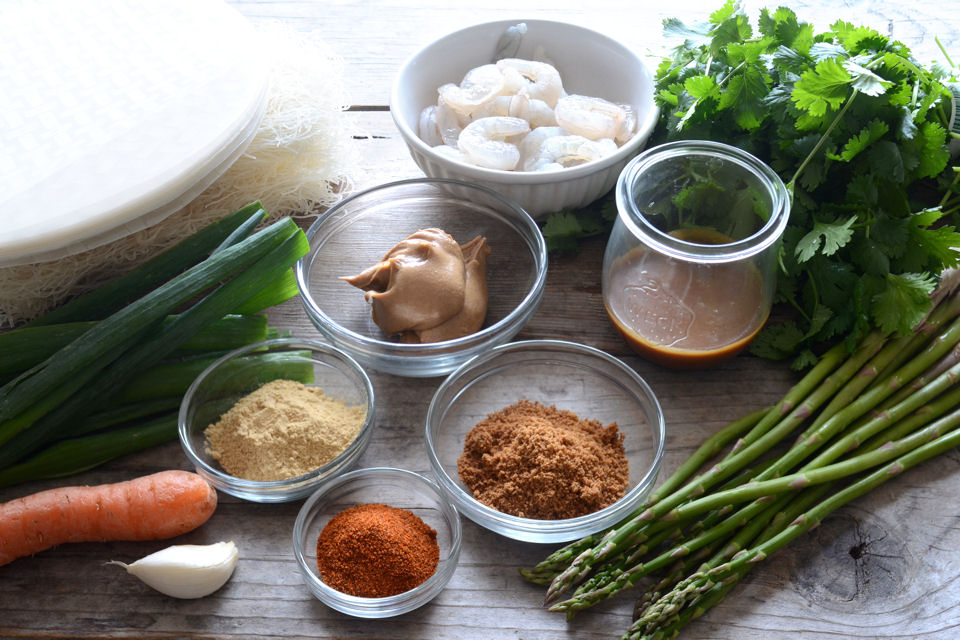
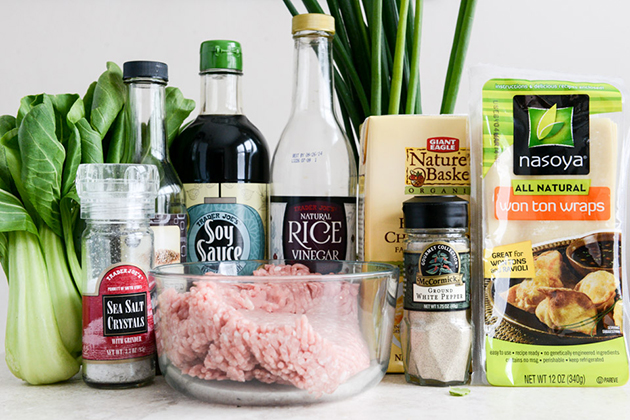
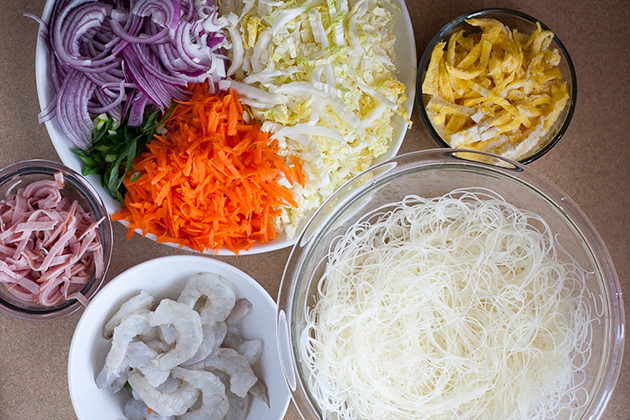
First you’ll need a bunch of stuff. Nothing too hard to find, though. You’ll need medium uncooked shrimp (peeled, tail-on), Napa cabbage, a red onion, soy sauce (or tamari), sesame seed oil, rice noodles (I used Maifun rice sticks), coconut oil (or any other heat-safe oil), curry powder, eggs, salt, carrots, and green onions. The recipe also calls for Chinese sausage. I don’t recall ever seeing Chinese sausage in a store in Northern Nevada and taking small children on a hunt around town is about as fun as taking them to a nice restaurant. So, I used smoked deli ham like Sarah suggested. 


Tasty Kitchen Blog: Singapore Noodles (Singapore Mei Fun). Guest post by Natalie Perry of Perry's Plate, recipe submitted by TK member Sarah of The Woks of Life.

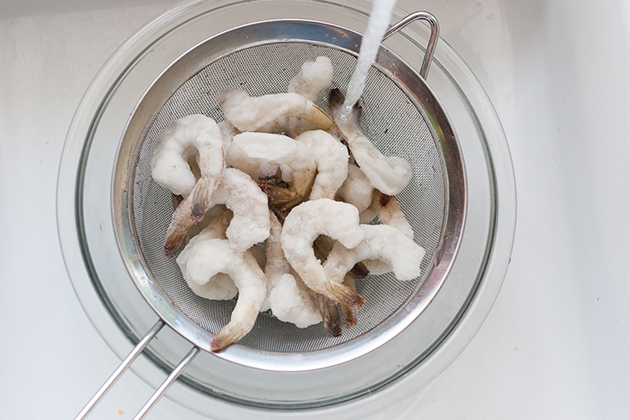
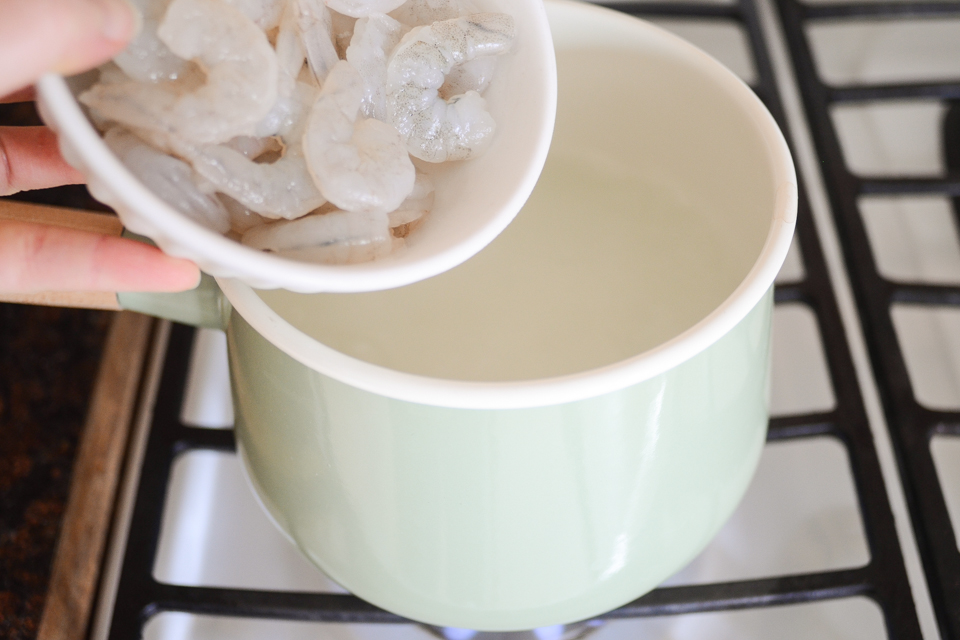
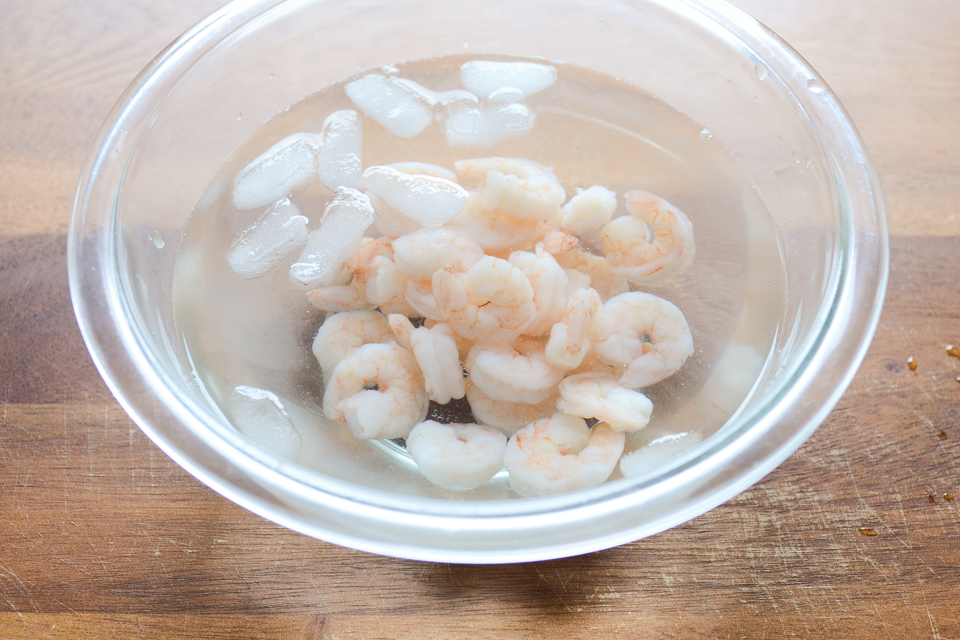
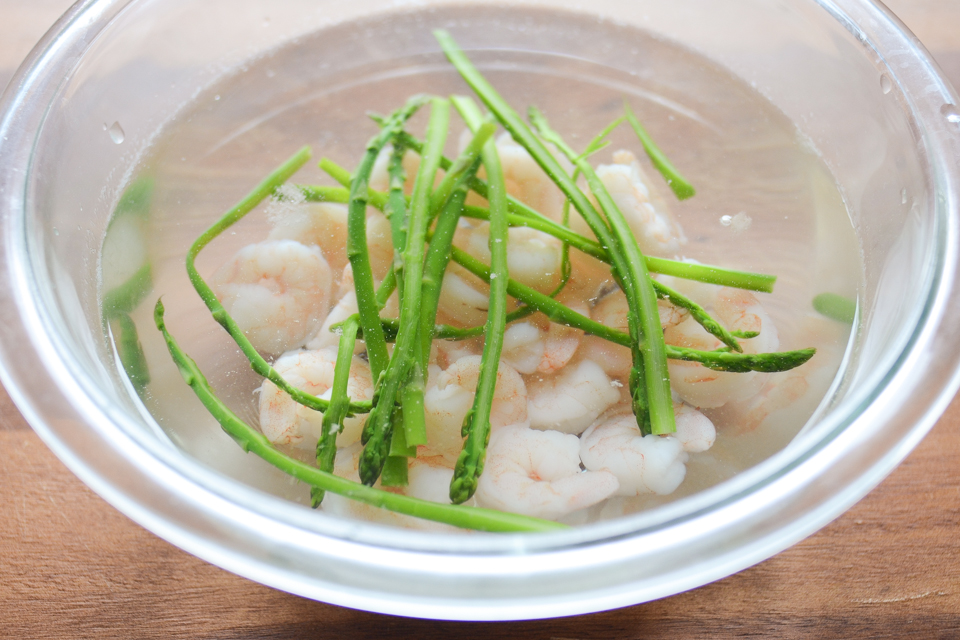
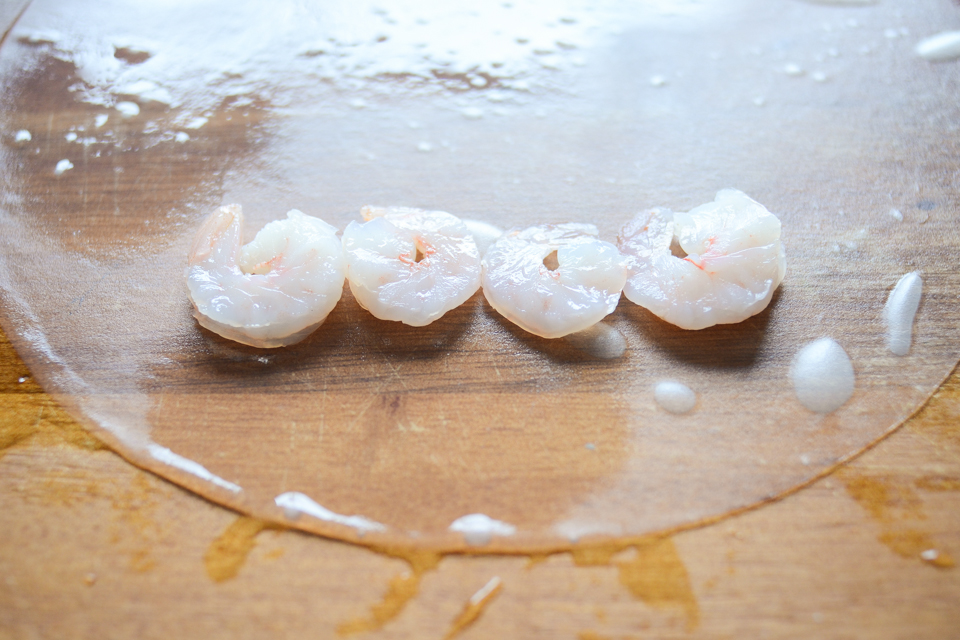
If your shrimp is frozen (like mine was), put them in a sieve and run tepid water over them for a minute or so until they soften. I left mine sitting in the sink for several minutes while I gathered the rest of the ingredients. 


Tasty Kitchen Blog: Singapore Noodles (Singapore Mei Fun). Guest post by Natalie Perry of Perry's Plate, recipe submitted by TK member Sarah of The Woks of Life.

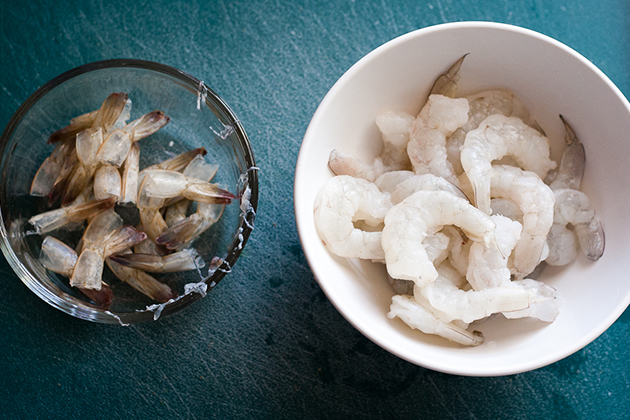
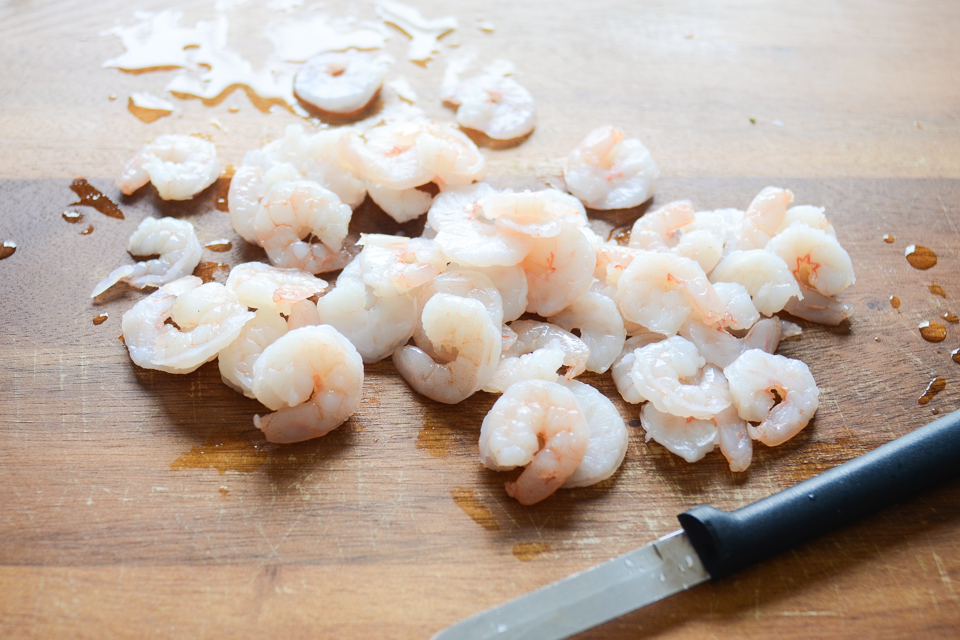
Once the shrimp is fully thawed, pull the tails off. Then, run the tip of your knife along the inside curve of each shrimp to remove the intestinal tract. (Yep, that’s what that is. Gross, huh?) This really doesn’t take long. 


Tasty Kitchen Blog: Singapore Noodles (Singapore Mei Fun). Guest post by Natalie Perry of Perry's Plate, recipe submitted by TK member Sarah of The Woks of Life.

Now we start prepping the vegetables. This recipe is rather heavy on the chopping, but the cooking time is super quick and easy. It all balances out!

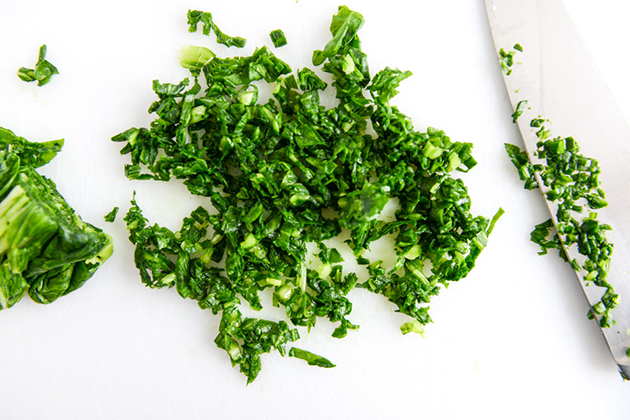
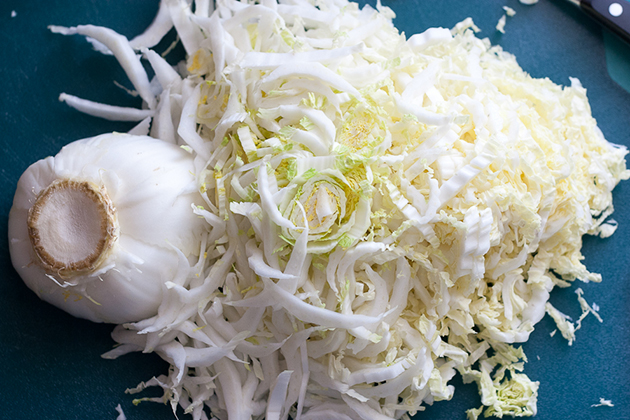
Slice the Napa cabbage into skinny ribbons.


Tasty Kitchen Blog: Singapore Noodles (Singapore Mei Fun). Guest post by Natalie Perry of Perry's Plate, recipe submitted by TK member Sarah of The Woks of Life.

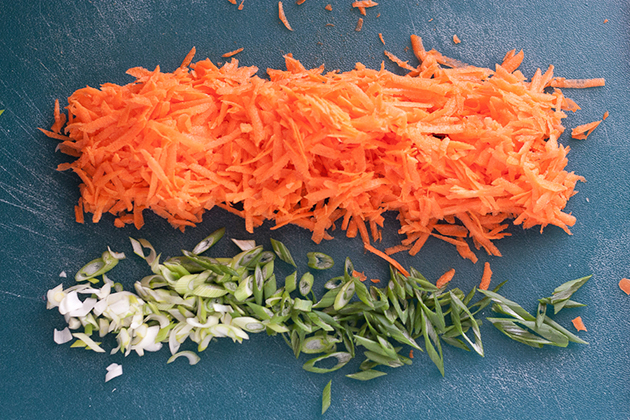
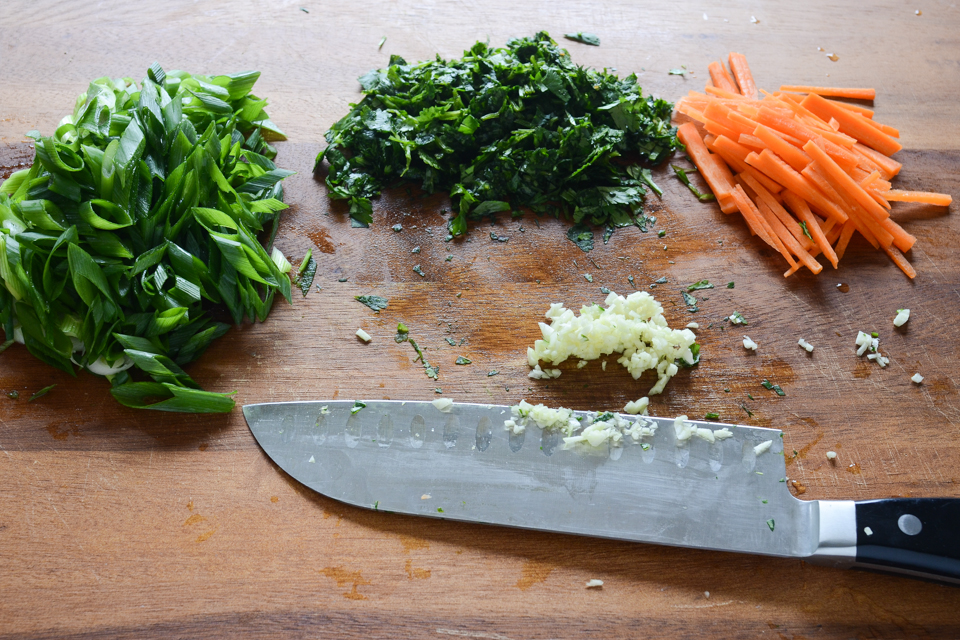
Shred the carrots and slice the green onions thinly.


Tasty Kitchen Blog: Singapore Noodles (Singapore Mei Fun). Guest post by Natalie Perry of Perry's Plate, recipe submitted by TK member Sarah of The Woks of Life.

Trim, peel, and slice the red onion. 


Tasty Kitchen Blog: Singapore Noodles (Singapore Mei Fun). Guest post by Natalie Perry of Perry's Plate, recipe submitted by TK member Sarah of The Woks of Life.

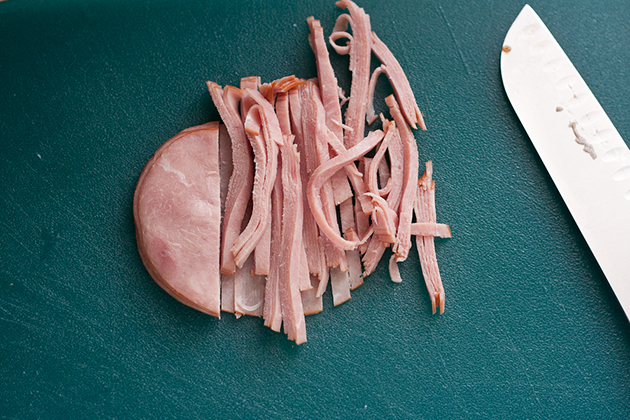
Slice up that deli ham, too. 

Chopping is over! We survived!


Tasty Kitchen Blog: Singapore Noodles (Singapore Mei Fun). Guest post by Natalie Perry of Perry's Plate, recipe submitted by TK member Sarah of The Woks of Life.

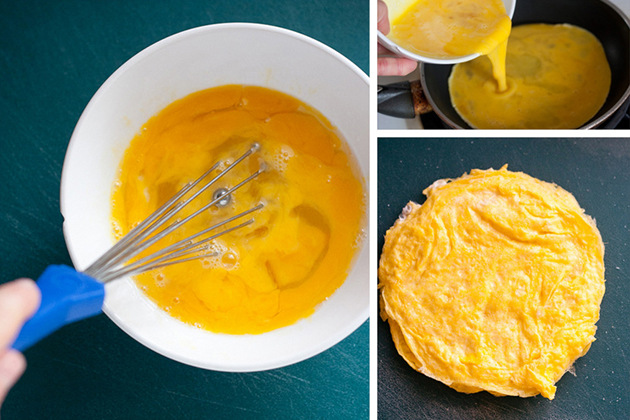
Now crack the eggs into a bowl and give them a good whisk. Pour them into a small nonstick skillet, and cook until eggs are done, flipping halfway through. You want to make an omelet-like form instead of a scramble, so don’t move them around while they cook. 

Transfer them to a cutting board and … oh. I guess we do have a little chopping left. But it’s super quick. Cut the eggs into ribbons.


Tasty Kitchen Blog: Singapore Noodles (Singapore Mei Fun). Guest post by Natalie Perry of Perry's Plate, recipe submitted by TK member Sarah of The Woks of Life.

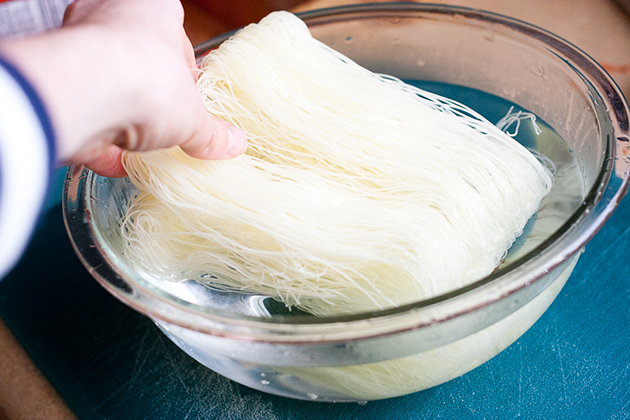
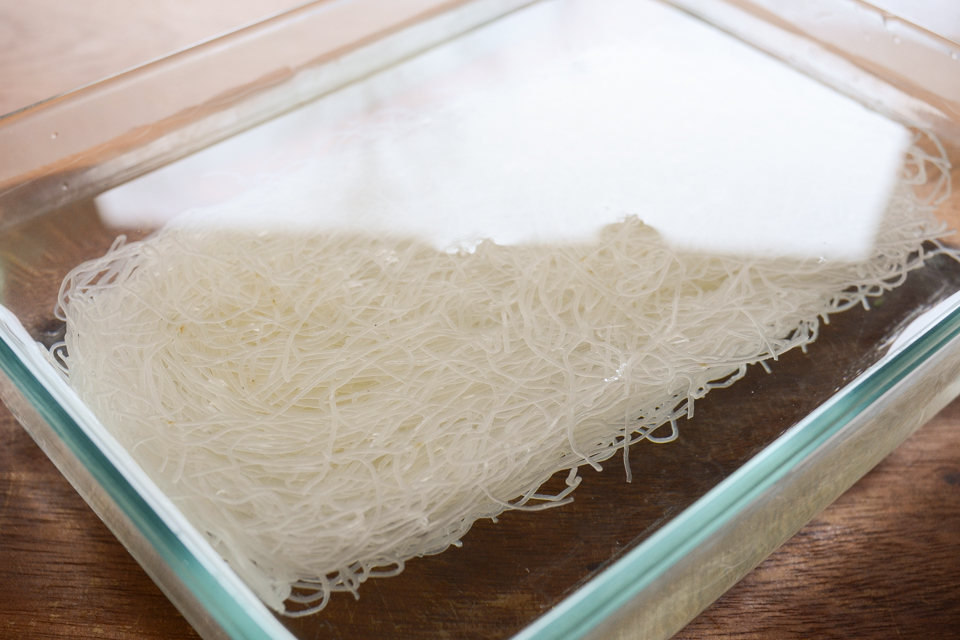
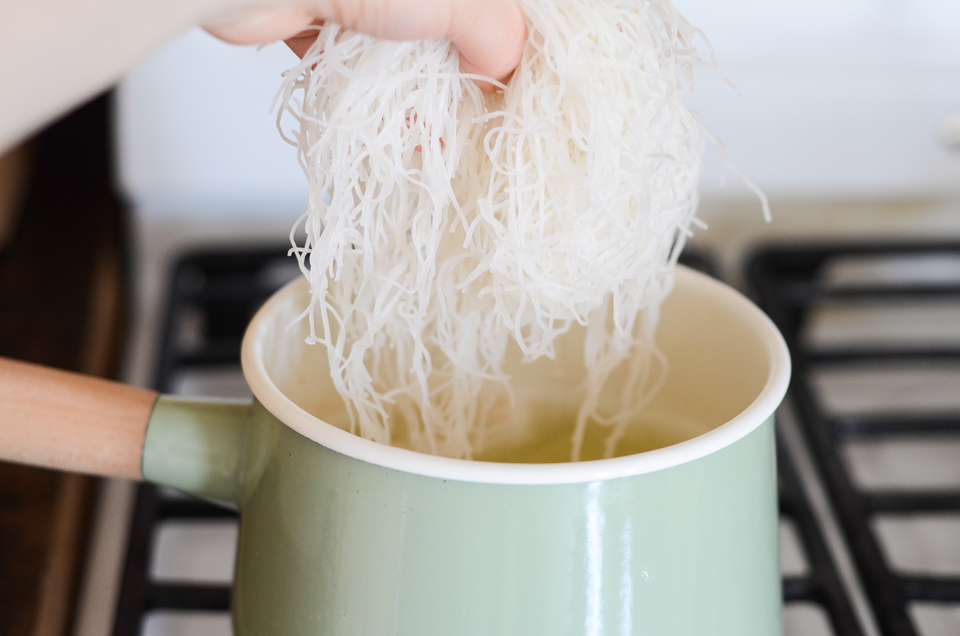
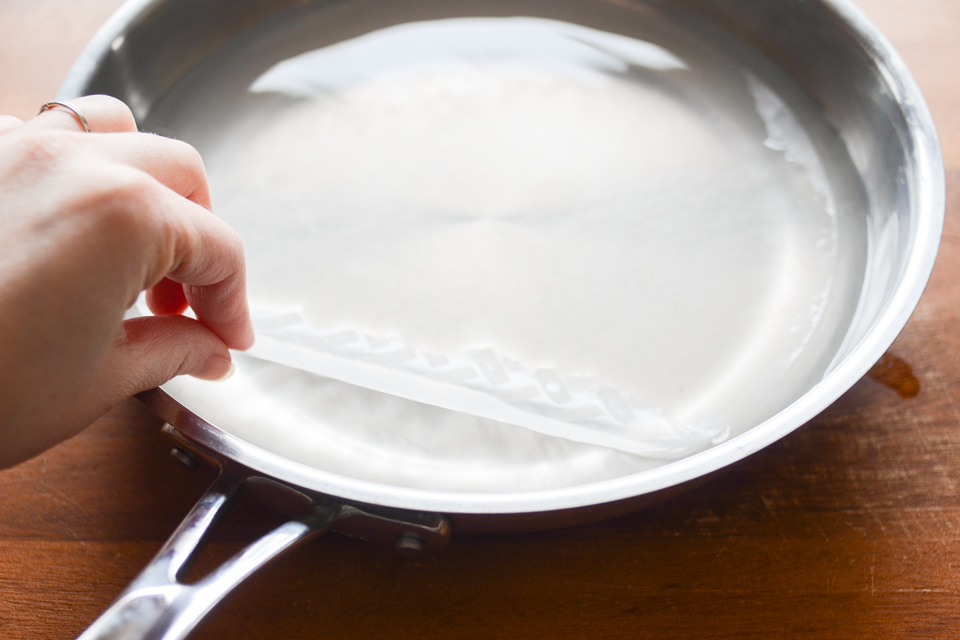
Place the rice noodles in a bowl of hot water. Let them sit for 5 minutes or until they become pliable but still too crunchy to eat. If you leave them in too long, they’ll turn to mush when you cook them. 


Tasty Kitchen Blog: Singapore Noodles (Singapore Mei Fun). Guest post by Natalie Perry of Perry's Plate, recipe submitted by TK member Sarah of The Woks of Life.

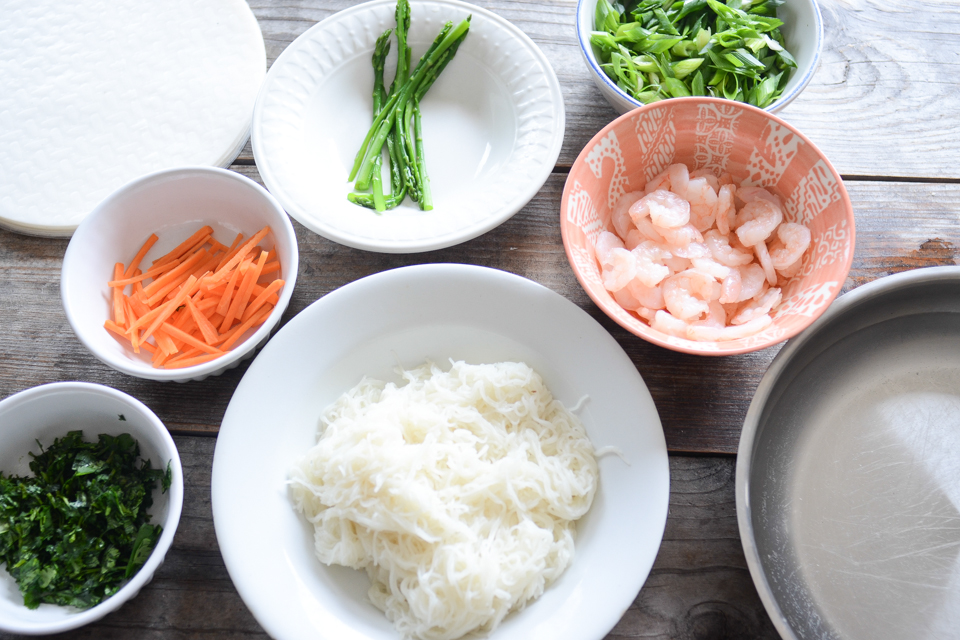
Alrighty. We’ve got our ingredients prepped and ready to go. You could actually do this the night before and keep them refrigerated until you need them. That would be handy on a busy night and you’d have dinner on the table in less than 15 minutes.

Your family will think you’re a rockstar. 


Tasty Kitchen Blog: Singapore Noodles (Singapore Mei Fun). Guest post by Natalie Perry of Perry's Plate, recipe submitted by TK member Sarah of The Woks of Life.

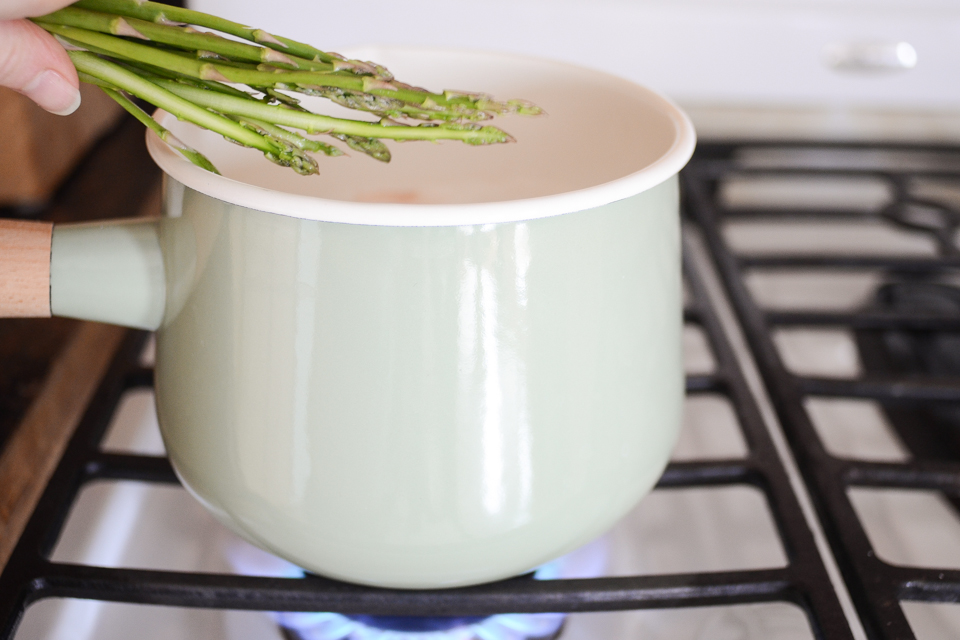
Grab your wok. Or large saute pan with high sides. Or some kind of deep skillet to keep everything in.

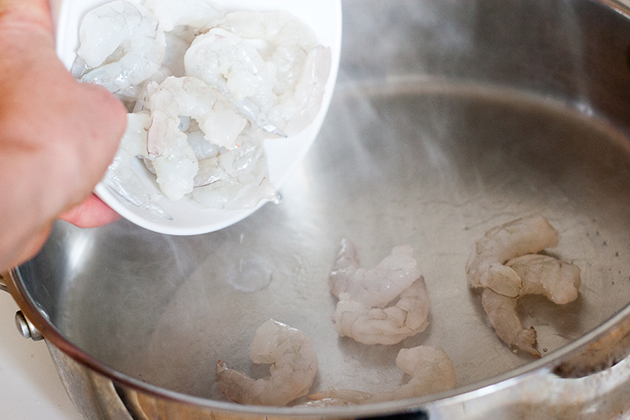
Bring the coconut oil to medium-high heat, then add the shrimp.


Tasty Kitchen Blog: Singapore Noodles (Singapore Mei Fun). Guest post by Natalie Perry of Perry's Plate, recipe submitted by TK member Sarah of The Woks of Life.

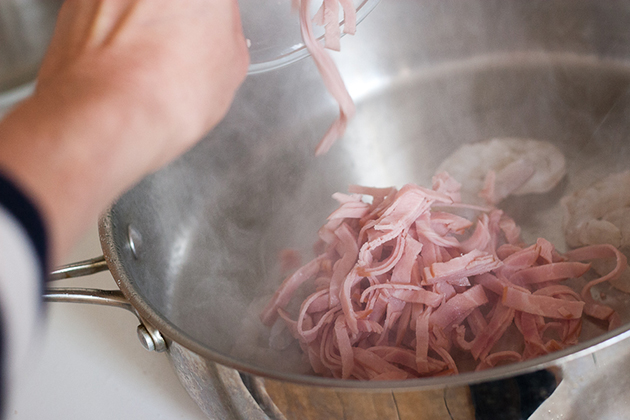
Add the ham. Stir them around and keep things moving as you add the other ingredients.


Tasty Kitchen Blog: Singapore Noodles (Singapore Mei Fun). Guest post by Natalie Perry of Perry's Plate, recipe submitted by TK member Sarah of The Woks of Life.

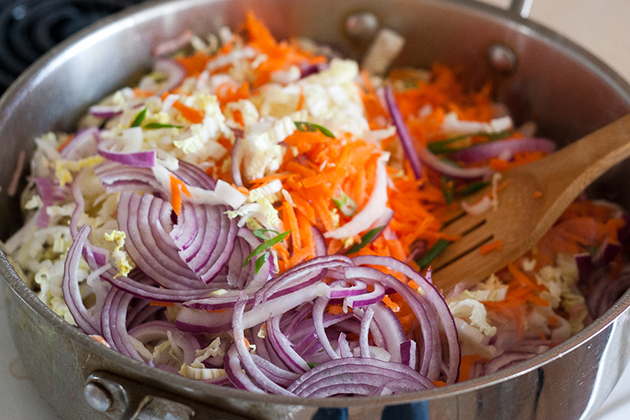
Now throw in the cabbage, red onion, and shredded carrots. 

I have to tell you. Trying to photograph a stir-fry step-by-step is an adventure. Seriously. Tossing vegetables into a screaming hot skillet and keeping them from burning while trying to get decent sort-of-in-focus photos through all the steam is wild. I like to live on the edge. 


Tasty Kitchen Blog: Singapore Noodles (Singapore Mei Fun). Guest post by Natalie Perry of Perry's Plate, recipe submitted by TK member Sarah of The Woks of Life.

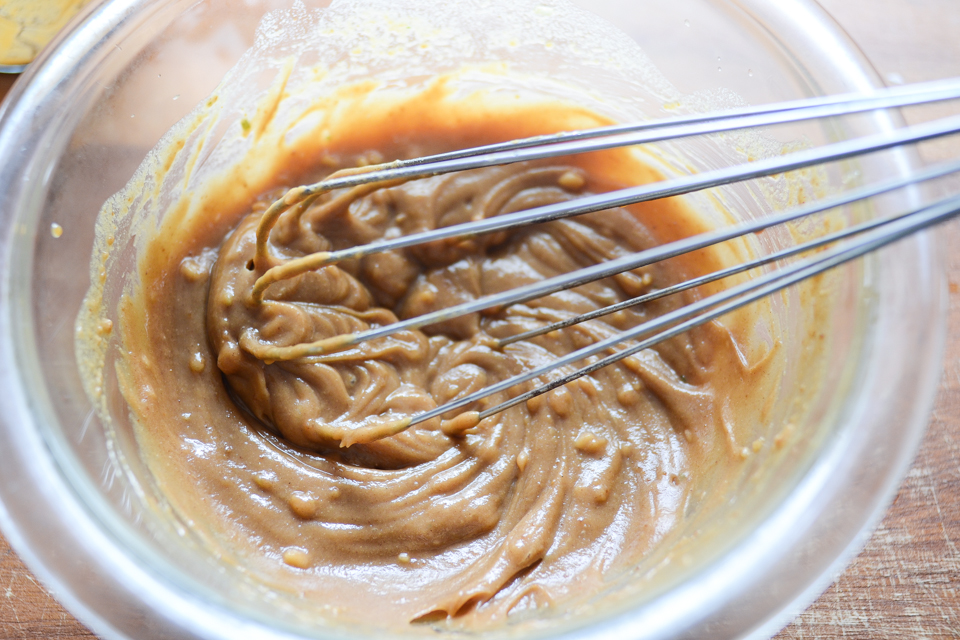
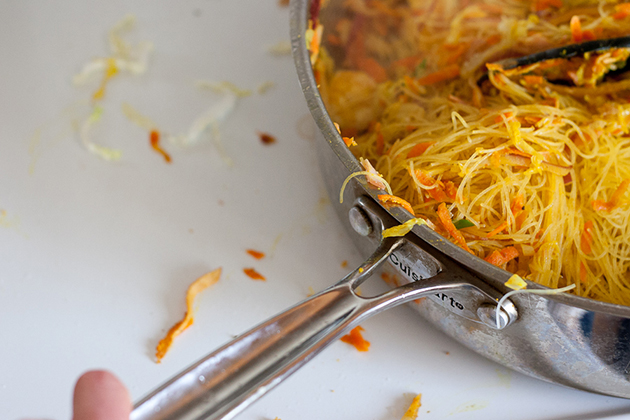
Once you get it all mixed together, add the curry. And stir again. 

There’s a reason why this is a stir-fry. 


Tasty Kitchen Blog: Singapore Noodles (Singapore Mei Fun). Guest post by Natalie Perry of Perry's Plate, recipe submitted by TK member Sarah of The Woks of Life.

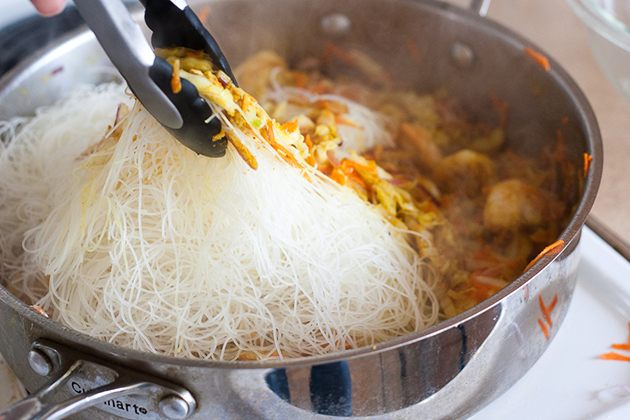
Add the rice noodles, breaking them apart as you put them in. Using your tongs, try to combine the rice noodles with the rest of the contents of the pan. 


Tasty Kitchen Blog: Singapore Noodles (Singapore Mei Fun). Guest post by Natalie Perry of Perry's Plate, recipe submitted by TK member Sarah of The Woks of Life.

If you spill, I won’t judge.


Tasty Kitchen Blog: Singapore Noodles (Singapore Mei Fun). Guest post by Natalie Perry of Perry's Plate, recipe submitted by TK member Sarah of The Woks of Life.

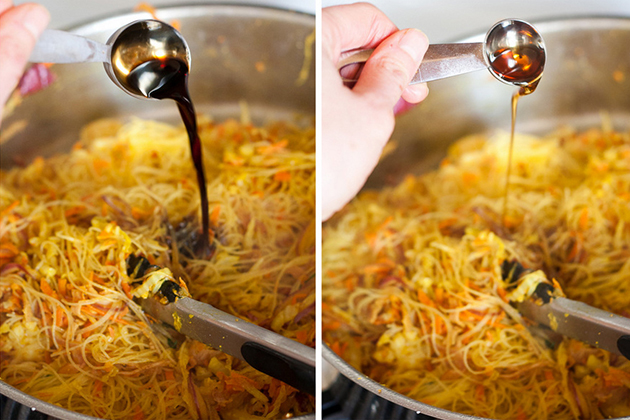
We’re almost to the finish line! Add the soy sauce and sesame oil.


Tasty Kitchen Blog: Singapore Noodles (Singapore Mei Fun). Guest post by Natalie Perry of Perry's Plate, recipe submitted by TK member Sarah of The Woks of Life.

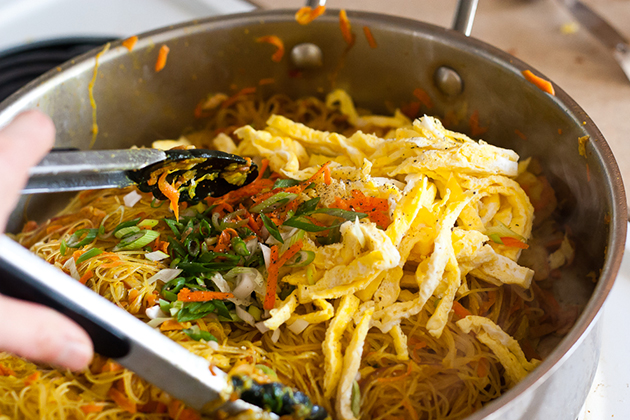
Add the green onions, salt, pepper, and egg ribbons. Stir those in gently. 


Tasty Kitchen Blog: Singapore Noodles (Singapore Mei Fun). Guest post by Natalie Perry of Perry's Plate, recipe submitted by TK member Sarah of The Woks of Life.

Dump it all onto a platter and serve it up!

I have to say, this exceeded my expectations. I ADORE this meal. It was fun to make, and I love the bright colors from the spices and vegetables. It’s also light, but filling. You could even replace some noodles with more vegetables to add more of those vitamin things. If you don’t like shrimp, thinly sliced chicken or beef would also be good.


Tasty Kitchen Blog: Singapore Noodles (Singapore Mei Fun). Guest post by Natalie Perry of Perry's Plate, recipe submitted by TK member Sarah of The Woks of Life.

Thank you, Sarah, for giving me another reason to make a meal at home! 

Be sure to visit Sarah’s TK recipe box and her blog, The Woks of Life (I love that name) for more Chinese recipes!
 
Notes:
1. This recipe called for dried chiles which I initially omitted because my kids freak out when food has the slightest amount of heat. However, I added them anyway at the last minute, and I’m glad I did! Three peppers gave it just the right amount of tingle.
2. I doubled this recipe to feed our family of five and ended up with a lot of food. Enough for 6 adult servings. 


Printable Recipe

Singapore Noodles (Singapore Mei Fun)

See post on Sarah @ The Woks of Life’s site!
5.00 Mitt(s) 2 Rating(s)2 votes, average: 5.00 out of 52 votes, average: 5.00 out of 52 votes, average: 5.00 out of 52 votes, average: 5.00 out of 52 votes, average: 5.00 out of 5

Prep Time:

Cook Time:

Difficulty: Easy

Servings: 2

2
x

Print Options

Page size Letter 3x5 4x6
Text Size Small Medium Large
Content Include description
Include prep time, etc.
Show image

Description

You’ll find it on every takeout menu in America but it’s actually really easy to make at home! Try my dad’s authentic recipe.

Ingredients

  • 12 whole Shrimps, Peeled, Deveined, And Butterflied
  • 2 cups Soaked Rice Noodles
  • 2 whole Eggs (optional)
  • 3 cups Shredded Napa Cabbage
  • 1 whole Carrot
  • 1 whole Scallion
  • ½ whole Red Onion
  • 3 whole Dried Red Chiles (optional)
  • ⅓ cups Thinly Sliced Roast Pork, Ham, Or Chinese Sausage
  • 1 Tablespoon Oil
  • 1-½ Tablespoon Curry Powder
  • 2 teaspoons Salt
  • 1 Tablespoon Shaoxing Wine
  • ½ teaspoons Sesame Oil
  • ½ Tablespoons Soy Sauce
  • ¼ teaspoons White Pepper

Preparation Instructions

Rinse the shrimp and pat dry. Soak the rice noodles in cold water for 20 minutes. Drain the noodles just before you’re ready cook.

If you decide to use eggs in this, beat them in a bowl and make a thin omelet by cooking eggs in a hot oiled wok or nonstick skillet. Transfer to the cutting board and cut the omelet into thin strips about 2 to 3 inches long and set aside. Julienne the napa cabbage, carrot, and scallion. Thinly slice the red onion and set aside along with the dried chili peppers. Cut the Chinese sausage (or ham or pork) into thin pieces similar to the size of the carrots.

Heat the wok on the highest setting and add oil, sausage and shrimp and stir-fry for about 10 seconds. Add the dried chili peppers, carrot, napa cabbage and onion and stir-fry for about 30 seconds and then sprinkle the curry powder evenly over the mixture.

Add the rice noodles and while doing so, make sure you rip them into manageable 7- to 8-inch lengths for easy eating later. Add the salt and wine and mix well (about 1 to 2 minutes), making sure you firmly scrape the bottom of the wok with your spatula to prevent the noodles from sticking. A hot wok is a must to prevent sticking but ensuring that you scrape the bottom of the wok as you mix is an important technique.

The noodles should be taking on the rich color of the curry powder. Add the sesame oil, soy sauce, white pepper, scallions and the cooked egg if you decided to include it. Mix thoroughly again for another minute, plate and serve immediately!


_______________________________________

Be sure to check out Natalie’s own beautiful food blog, Perrys’ Plate, where you can see her growing collection of lovely recipes. There’s always something new to see there. Go visit now!

Profile photo of Amber {Sprinkled With Flour}

Skillet Asparagus Tart

Posted by in Step-by-Step Recipes

  I love asparagus. Serve it to me any way: grilled, roasted, pureed in a soup … thrown across the room while I catch it like a seal. Yes, I am slightly weird. Yes, I love it that much. With spring in full bloom, it’s the perfect season to enjoy my favorite vegetable. So when […]

Profile photo of georgiapellegrini

Skinny Crab Rangoon

Posted by in Step-by-Step Recipes

Ragoons, while always delicious, are not your typical go-to health snack. They are generally time-consuming and full of calories. This quick Skinny Crab Rangoon recipe by TK member Dara of Generation Y Foodie, however, takes about 15 minutes, and is only 41 calories per ragoon!       You’re going to start with wonton wrappers, […]

Profile photo of Megan {Country Cleaver}

Skinny Green Chile Chicken Enchilada Dip

Posted by in Step-by-Step Recipes

There is never a time that Mexican food doesn’t sound good. It sounds good all the time: the flavors, the cheese, the limes, the spices ... I’m hungry just thinking about it.

Profile photo of ThreeManyCooks

Slow Cooker Coconut Chicken Curry

Posted by in Step-by-Step Recipes

  Two weeks ago my husband and I moved into a new apartment in Manhattan. We love everything about our new place, but (there’s always a “but”) the kitchen is tiny. I mean really tiny. I have about two square feet of counter space and I can’t open my oven and dishwasher at the same […]