The Pioneer Woman Tasty Kitchen
Profile photo of georgiapellegrini

Raw Vegan Chocolate Mousse

Posted by in Step-by-Step Recipes

Tasty Kitchen Blog: Raw Vegan Chocolate Mousse. Guest post by Georgia Pellegrini, recipe submitted by TK member Sally of Spontaneous Hausfrau.

 
I’m making a national appeal to everyone to make this pudding as soon as possible. It really has something for everyone—it’s beyond delicious, but is also perfect for anyone trying to curb their sweet tooth. I’m so, so glad I stumbled upon this Raw Vegan Chocolate Mousserecipe from Spontaneous Hausfrau and had the opportunity to make it.


Tasty Kitchen Blog: Raw Vegan Chocolate Mousse. Guest post by Georgia Pellegrini, recipe submitted by TK member Sally of Spontaneous Hausfrau.

It requires a little planning ahead because the cashews will need to be soaked in water, but after that, there is no cooking required and it will be ready to eat in a jiffy.

You will need: raw unsalted cashews that have been soaked in water for six hours, agave, vanilla, unsweetened cocoa powder, coconut oil, water.


Tasty Kitchen Blog: Raw Vegan Chocolate Mousse. Guest post by Georgia Pellegrini, recipe submitted by TK member Sally of Spontaneous Hausfrau.

Drain the cashews and put them in a food processor.


Tasty Kitchen Blog: Raw Vegan Chocolate Mousse. Guest post by Georgia Pellegrini, recipe submitted by TK member Sally of Spontaneous Hausfrau.

Next add the unsweetened cocoa powder …


Tasty Kitchen Blog: Raw Vegan Chocolate Mousse. Guest post by Georgia Pellegrini, recipe submitted by TK member Sally of Spontaneous Hausfrau.

The agave …


Tasty Kitchen Blog: Raw Vegan Chocolate Mousse. Guest post by Georgia Pellegrini, recipe submitted by TK member Sally of Spontaneous Hausfrau.

The coconut oil, which adds an amazing creaminess …


Tasty Kitchen Blog: Raw Vegan Chocolate Mousse. Guest post by Georgia Pellegrini, recipe submitted by TK member Sally of Spontaneous Hausfrau.

Vanilla …


Tasty Kitchen Blog: Raw Vegan Chocolate Mousse. Guest post by Georgia Pellegrini, recipe submitted by TK member Sally of Spontaneous Hausfrau.

And a bit of water.


Tasty Kitchen Blog: Raw Vegan Chocolate Mousse. Guest post by Georgia Pellegrini, recipe submitted by TK member Sally of Spontaneous Hausfrau.

I also added a pinch of sea salt to give it some brightness. You could also add any other flavorings you please. Cinnamon would be nice, for example.


Tasty Kitchen Blog: Raw Vegan Chocolate Mousse. Guest post by Georgia Pellegrini, recipe submitted by TK member Sally of Spontaneous Hausfrau.

Puree the mixture in the food processor for about three minutes, being sure to scrape down the sides every minute or so. The mixture will become fluffy and creamy as the cashews break down and emulsify with the other ingredients.


Tasty Kitchen Blog: Raw Vegan Chocolate Mousse. Guest post by Georgia Pellegrini, recipe submitted by TK member Sally of Spontaneous Hausfrau.

You can eat it at this point, or even better you can pop it in the refrigerator for an hour until it firms up and becomes even more amazing.


Tasty Kitchen Blog: Raw Vegan Chocolate Mousse. Guest post by Georgia Pellegrini, recipe submitted by TK member Sally of Spontaneous Hausfrau.

Serve it up in little glasses or bowls. And if you’re feeling fancy, grate a bit of dark chocolate over the top and pop on a raspberry or your other favorite fruit.


Tasty Kitchen Blog: Raw Vegan Chocolate Mousse. Guest post by Georgia Pellegrini, recipe submitted by TK member Sally of Spontaneous Hausfrau.

You will love, love, love this. I served it to friends and one of them asked if they could lick the bowl. I said yes of course, it was the only logical thing to do.

Thanks so much to Sally for this wonderful recipe. Check out her website The Spontaneous Hausfrau for other great finds!


Printable Recipe

Raw Vegan Chocolate Mousse

See post on Spontaneous Hausfrau’s site!
3.00 Mitt(s) 1 Rating(s)1 vote, average: 3.00 out of 51 vote, average: 3.00 out of 51 vote, average: 3.00 out of 51 vote, average: 3.00 out of 51 vote, average: 3.00 out of 5

Prep Time:

Cook Time:

Difficulty: Easy

Servings: 3

3
x

Print Options

Page size Letter 3x5 4x6
Text Size Small Medium Large
Content Include description
Include prep time, etc.
Show image

Description

This creamy, intense mousse is healthy and crave-worthy.

Ingredients

  • 1 cup Raw Cashews, Soaked 6 Hours
  • 2 Tablespoons Agave Syrup
  • 4 teaspoons Coconut Oil
  • 1 whole Vanilla Bean, Scraped
  • ½ cups Water
  • 2 Tablespoons Raw Cacao Powder

Preparation Instructions

Combine all the ingredients in the bowl of a food processor and puree for 3-4 minutes, periodically scraping the bowl, until the mixture is creamy and fluffy. Chill 1 hour to further thicken the mousse. Serve garnished with raw cacao nibs.


_______________________________________

There’s so much to say about Georgia, we don’t know where to start. Leaving Wall Street for the French Culinary Institute, followed by a stint at the Gramercy Tavern and La Chassagnette in France, her passion for food and food traditions are evident and inspiring. Visit her site at Georgia Pellegrini, where you’ll find more recipes, photos, learn all about her wonderful books Girl Hunter and Food Heroes, and enjoy her latest adventures.


Profile photo of Erica Lea

Red Curry Coconut Noodles

Posted by in Step-by-Step Recipes

Rounding up our Terrific Threesome of guest posts is Erica Lea, who brings us a yummy dish that she saved in her recipe box as soon as she saw it. If you’ve read the Tasty Kitchen blog post last month when we featured Erica, then you know you’re in for some good food that’s beautifully photographed. We’re all ears (and eyes), Erica!

Tasty Kitchen Blog: Red Curry Coconut Noodles. Guest post by Erica Kastner of Cooking for Seven, recipe submitted by TK member nika.

 
Red Curry Coconut Noodles. Just the name sent my imagination spinning. As I glanced at the ingredient list, I knew I wanted to make this recipe.

This dish, brought to us by nika, is a glorious explosion of flavors. Don’t be intimidated if some of the ingredients seem exotic. You should be able to find most of them at your local grocery store or an Asian market.


Tasty Kitchen Blog: Red Curry Coconut Noodles. Guest post by Erica Kastner of Cooking for Seven, recipe submitted by TK member nika.

Here’s what you’ll need: boneless, skinless chicken breasts, coconut milk, red curry paste, fresh ginger, cilantro, Thai sweet chili sauce, chicken broth, rice noodles (I used the flat kind), an onion, two red bell peppers, and two heads of broccoli.


Tasty Kitchen Blog: Red Curry Coconut Noodles. Guest post by Erica Kastner of Cooking for Seven, recipe submitted by TK member nika.

Start by prepping your ingredients. Grate enough ginger to make about 1 tablespoon. Chop up enough cilantro to make a tablespoon or so. I went heavy on the cilantro. Next, julienne your veggies. Julienne is just another way of saying “cut into long, thin slices.”


Tasty Kitchen Blog: Red Curry Coconut Noodles. Guest post by Erica Kastner of Cooking for Seven, recipe submitted by TK member nika.

To make this recipe easier, you can use prepackaged broccoli slaw in place of the broccoli stems. But I like to do things the hard way.

Remove the broccoli heads (reserve for a later use), cut off the hard bottoms, and carefully peel the stem. Chop the broccoli stems into pieces about 2-3 inches long, cut into thin slices, stack the slices, and cut across the slices. Now you have little matchstick-sized broccoli pieces.


Tasty Kitchen Blog: Red Curry Coconut Noodles. Guest post by Erica Kastner of Cooking for Seven, recipe submitted by TK member nika.

Cut the chicken into bite-sized cubes.


Tasty Kitchen Blog: Red Curry Coconut Noodles. Guest post by Erica Kastner of Cooking for Seven, recipe submitted by TK member nika.

Scoop the thick cream off the top of the coconut milk. This will be your “oil” for frying the chicken and vegetables.


Tasty Kitchen Blog: Red Curry Coconut Noodles. Guest post by Erica Kastner of Cooking for Seven, recipe submitted by TK member nika.

Plop the coconut cream into a large pot set over medium-high heat. Add the curry paste and ginger and let simmer for one minute. Your kitchen will begin to smell lovely.


Tasty Kitchen Blog: Red Curry Coconut Noodles. Guest post by Erica Kastner of Cooking for Seven, recipe submitted by TK member nika.

Add the chicken pieces and cook, stirring occasionally, until the chicken is cooked through.


Tasty Kitchen Blog: Red Curry Coconut Noodles. Guest post by Erica Kastner of Cooking for Seven, recipe submitted by TK member nika.

Once the chicken is completely cooked, add the rest of the coconut milk, chili sauce, cilantro, and chicken broth. Bring to a simmer.


Tasty Kitchen Blog: Red Curry Coconut Noodles. Guest post by Erica Kastner of Cooking for Seven, recipe submitted by TK member nika.

Shove the veggies into the pot.


Tasty Kitchen Blog: Red Curry Coconut Noodles. Guest post by Erica Kastner of Cooking for Seven, recipe submitted by TK member nika.

Now it’s time for a bit of magic. Poke the rice noodles into the pot and stir.


Tasty Kitchen Blog: Red Curry Coconut Noodles. Guest post by Erica Kastner of Cooking for Seven, recipe submitted by TK member nika.

Return to a simmer and cook until the noodles are done, about 5 minutes. The sauce should begin to thicken.


Tasty Kitchen Blog: Red Curry Coconut Noodles. Guest post by Erica Kastner of Cooking for Seven, recipe submitted by TK member nika.

Remove from the heat and let sit for about five minutes. This allows the sauce to thicken even more.


Tasty Kitchen Blog: Red Curry Coconut Noodles. Guest post by Erica Kastner of Cooking for Seven, recipe submitted by TK member nika.

Serve in bowls and garnish with extra cilantro.


Tasty Kitchen Blog: Red Curry Coconut Noodles. Guest post by Erica Kastner of Cooking for Seven, recipe submitted by TK member nika.

Notes: I was very pleased with this recipe and hope to make it again! Another time, I might add more curry paste and less noodles. The noodles really soaked up the sauce, and I ended up pouring the whole package of chicken broth into the pot. This recipe is so forgiving and versatile.

I served the noodles with many sides and sauces: yogurt, sweet chili sauce, curry paste, peanut butter, and toasted coconut. Use your imagination!

Thank you, Nikki (nika), for sharing this recipe and for answering all my questions about your recipe.


Printable Recipe

Red Curry Coconut Noodles

See post on nika’s site!
4.38 Mitt(s) 21 Rating(s)21 votes, average: 4.38 out of 521 votes, average: 4.38 out of 521 votes, average: 4.38 out of 521 votes, average: 4.38 out of 521 votes, average: 4.38 out of 5

Prep Time:

Cook Time:

Difficulty: Easy

Servings: 8

8
x

Print Options

Page size Letter 3x5 4x6
Text Size Small Medium Large
Content Include description
Include prep time, etc.
Show image

Description

This has become a family favourite! I love that it never tastes exactly the same, and it is easy to add in other flavours that you might like in your coconut curry.

Ingredients

  • 6 whole Chicken, Boneless, Skinless Breasts, Cubed
  • 2 cans Coconut Milk
  • 2 teaspoons Red Curry Paste
  • 1 Tablespoon Ginger (fresh, Grated)
  • 1 Tablespoon Cilantro (fresh, Chopped)
  • ¼ cups Sweet Thai Chili Sauce
  • 2 cups, 1 tablespoon, 2 teaspoons, 7-⅛ pinches Chicken Or Vegetable Broth
  • 1 package Rice Noodles
  • 1 whole Onion (julienne)
  • 2 whole Red Peppers (julienne)
  • 1 cup Broccoli Slaw
  • 1 Tablespoon Salt To Taste

Preparation Instructions

Start with a large pot over medium-high heat. Scoop the cream off the top of the coconut milk, and put into the pot. The cream will be used as the “fat” instead of oil or butter. Along with the cream, add the curry paste and ginger. Let this simmer for 1 minute.

Then add the chicken. Cook the chicken through.
Then add the rest of what is in the coconut milk cans, sweet Thai chili sauce, cilantro, and chicken broth. Bring this to a simmer.

Then add your julienned veggies and rice noodles. Simmer this. You will see the broth slowly thicken as the rice noodles absorb it. It should only take about 5 minutes for the rice noodles to be cooked through.

Pull the pot off the heat, and let sit for about 5 minutes. It will thicken during this time. Then, it’s done. Slurp these noodles out of big noodle bowls! Garnish it with a bit more cilantro.

* I have also added peanut butter to this recipe, and a bit of honey if you want a less savoury/spicy version.


_______________________________________

Erica Berge shares her wonderful recipes and amazing food photography on her blog, Cooking for Seven. She also writes about crafts and posts more of her beautiful photography in her personal blog, EricaLea.com. There really isn’t much that this amazing young lady can’t do, and we’re thrilled she does some of it here.


Profile photo of georgiapellegrini

Red Lentils and Coconut

Posted by in Step-by-Step Recipes

Tasty Kitchen Blog: Red Lentil Coconut Soup. Guest post by Georgia Pellegrini, recipe submitted by TK member Casey of A Touch of Zest.

 
This Red Lentil Coconut Soup from TK member Casey was the first time I’ve made lentils with such complex flavor, and now I am never going back. The richness from the coconut milk along with the spices make it wonderful not just as a soup but also tossed into salads and with other roasted vegetables, either room temperature or cold. It also freezes well to be stored for a rainy day.


Tasty Kitchen Blog: Red Lentil Coconut Soup. Guest post by Georgia Pellegrini, recipe submitted by TK member Casey of A Touch of Zest.

To make it you will need: white onion, garlic, ginger, chili pepper, carrots, cumin, coriander, paprika, vegetable or chicken stock, red lentils, coconut milk, tomato paste, and diced tomatoes.


Tasty Kitchen Blog: Red Lentil Coconut Soup. Guest post by Georgia Pellegrini, recipe submitted by TK member Casey of A Touch of Zest.

To start dice your veggies and grate your ginger.


Tasty Kitchen Blog: Red Lentil Coconut Soup. Guest post by Georgia Pellegrini, recipe submitted by TK member Casey of A Touch of Zest.

Add the onion, garlic, ginger, chili and carrot to a large pot with some oil and sauté for 10 minutes.


Tasty Kitchen Blog: Red Lentil Coconut Soup. Guest post by Georgia Pellegrini, recipe submitted by TK member Casey of A Touch of Zest.

Add the cumin, coriander, and paprika. Stir it all to toast it.


Tasty Kitchen Blog: Red Lentil Coconut Soup. Guest post by Georgia Pellegrini, recipe submitted by TK member Casey of A Touch of Zest.

Pour in the stock to deglaze the pan.


Tasty Kitchen Blog: Red Lentil Coconut Soup. Guest post by Georgia Pellegrini, recipe submitted by TK member Casey of A Touch of Zest.

Then add the rinsed lentils and stir together well. Simmer for 10 minutes, stirring occasionally.


Tasty Kitchen Blog: Red Lentil Coconut Soup. Guest post by Georgia Pellegrini, recipe submitted by TK member Casey of A Touch of Zest.

Then add the diced tomatoes …


Tasty Kitchen Blog: Red Lentil Coconut Soup. Guest post by Georgia Pellegrini, recipe submitted by TK member Casey of A Touch of Zest.

… and the coconut milk. Simmer for 20 minutes more.


Tasty Kitchen Blog: Red Lentil Coconut Soup. Guest post by Georgia Pellegrini, recipe submitted by TK member Casey of A Touch of Zest.

You will love how rich and flavorful this dish is. And it is very versatile! Serve with a dollop of plain yogurt on top for some extra tang. Mine was pretty thick but you can make yours with more stock and cook it longer for a creamier texture. You can even mash some of the lentils in the pot with the back of a wooden spoon if you’d like!

Thank you to Casey for sharing this wonderful recipe with us! Visit her blog A Touch of Zest for more of her simple, fresh, and flavorful recipes.


Printable Recipe

Red Lentil & Coconut Soup

See post on Casey’s site!
5.00 Mitt(s) 1 Rating(s)1 vote, average: 5.00 out of 51 vote, average: 5.00 out of 51 vote, average: 5.00 out of 51 vote, average: 5.00 out of 51 vote, average: 5.00 out of 5

Prep Time:

Cook Time:

Difficulty: Easy

Servings: 6

6
x

Print Options

Page size Letter 3x5 4x6
Text Size Small Medium Large
Content Include description
Include prep time, etc.
Show image

Description

This lentil soup is packed full of flavour, nutritious and comforting. It requires a few staple ingredients, no fancy cooking methods and delivers a meal that you’ll want to eat over and over again.

Ingredients

  • 1 whole White Onion, Diced
  • 3 cloves Garlic, Minced
  • 1 Tablespoon Fresh Ginger, Minced
  • 1 whole Chilli, Finely Chopped
  • 2 whole Carrots, Peeled And Chopped
  • 3 Tablespoons Cumin
  • 2 Tablespoons Coriander
  • 1 Tablespoon Paprika
  • 8 cups Vegetable Stock
  • 2 cups Red Lentils, Rinsed And Washed Over
  • ½ cups Coconut Milk
  • ¼ cups Tomato Paste
  • 1 can (400g Size) Diced Tomatoes

Preparation Instructions

Add onion, garlic, ginger, chilli and carrot to a large pot with a little oil and fry for around 10 minutes. Add cumin, coriander and paprika and mix well to combine.

Add stock and lentils to the pot and bring to boil. Simmer for approximately 10 minutes.

Add the coconut milk, tomato paste and diced tomatoes and simmer for a further 20 minutes.


_______________________________________

There’s so much to say about Georgia, we don’t know where to start. Leaving Wall Street for the French Culinary Institute, followed by a stint at the Gramercy Tavern and La Chassagnette in France, her passion for food and food traditions are evident and inspiring. Visit her site at Georgia Pellegrini, where you’ll find more recipes, photos, learn all about her wonderful books Girl Hunter and Food Heroes, and enjoy her latest adventures.


Profile photo of cookincanuck

Red Quinoa and Black Bean Salad

Posted by in Step-by-Step Recipes

Tasty Kitchen Blog: Red Quinoa and Black Bean Salad. Guest post by Dara Michalski of Cookin' Canuck, recipe submitted by TK member Kay Heritage of The Church Cook.

 
It was many years ago when my mum first set a bowl of quinoa (pronounced keen-wah) in front of me. It didn’t look like rice. To my teenaged self, it resembled something straight out of a hippie-infested Woodstock-ian field. Quinoa is, in fact, a grain that originated in South America and was once known as “the gold of the Incas”. It became a sustaining grain for the people of the Andean region about 6000 years before Jerry Garcia and Janis Joplin performed for the long-tressed flower-carrying children of the sixties.

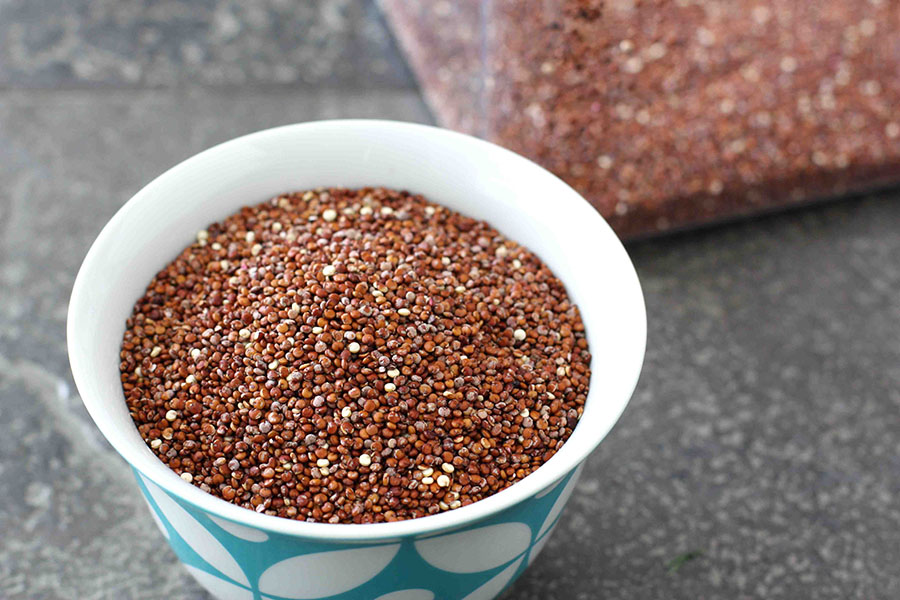
Quinoa can be found in well-stocked supermarkets or health food stores, sold in boxes or in bulk. It is either sold as regular quinoa, which is tan in color, or in this pretty red version. If you are trying to clean up your diet, quinoa is a virtual powerhouse of protein, fiber and folate. I figure I can eat about four slices of bacon for every cup of quinoa I consume. Somehow I don’t think you will find that recommendation sanctioned by any national health organizations, but I can guarantee it will keep that feeling of deprivation in check.

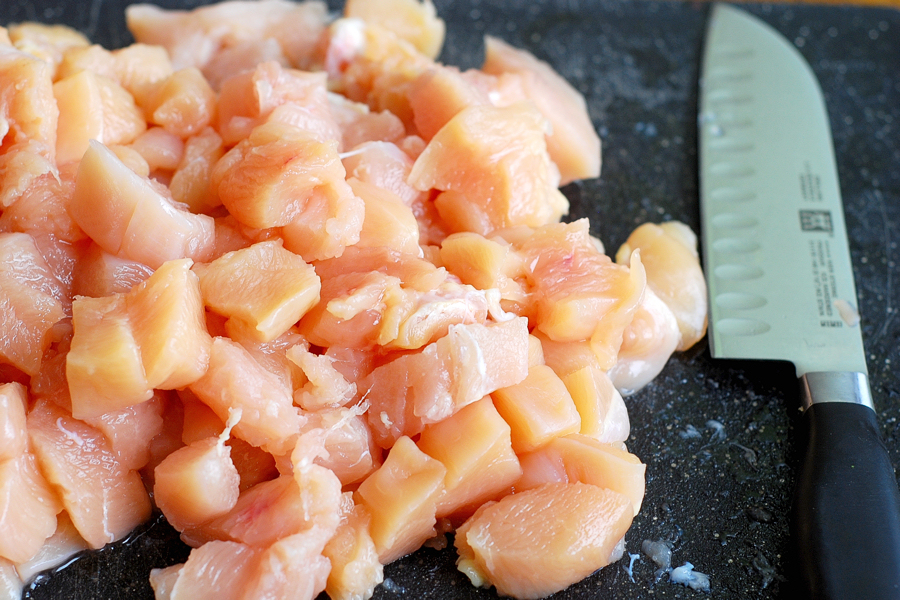
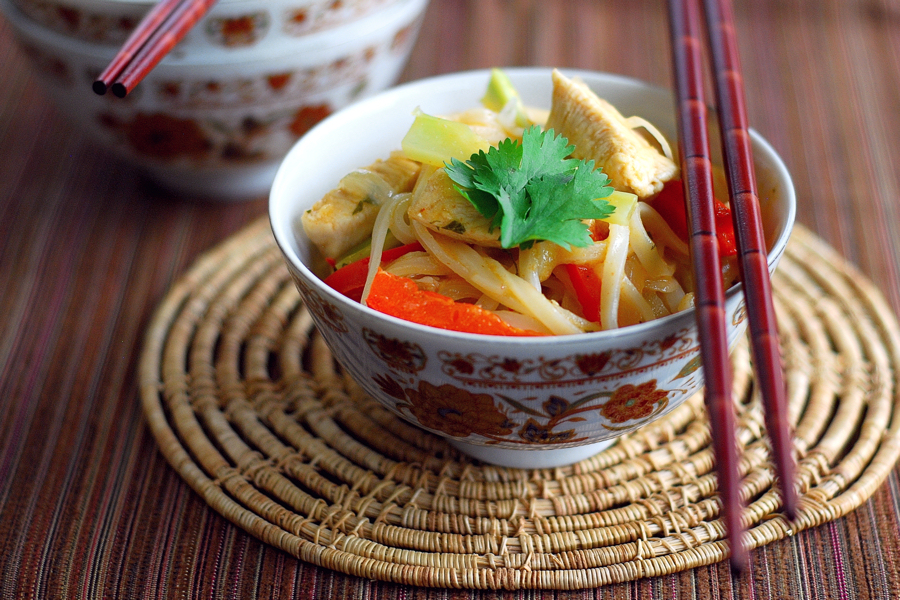
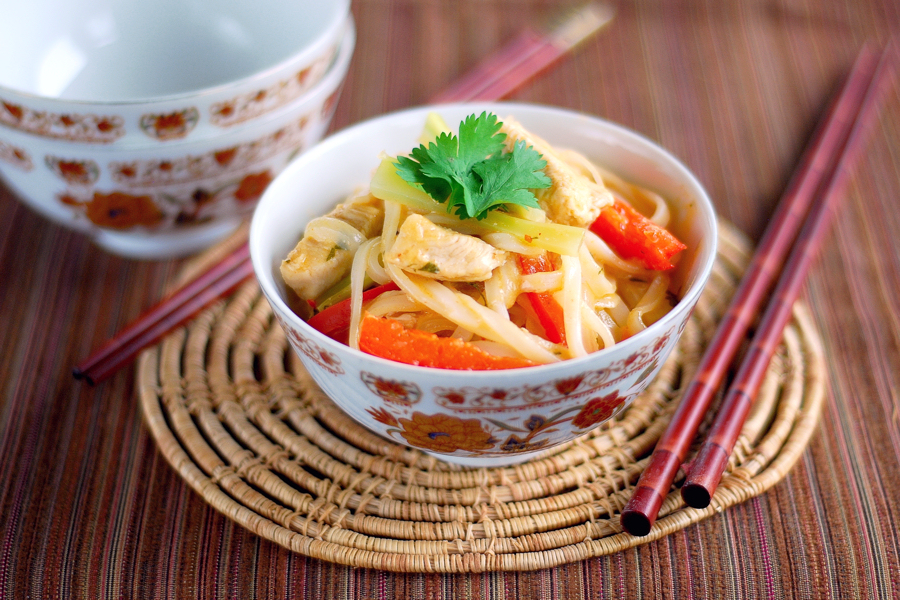
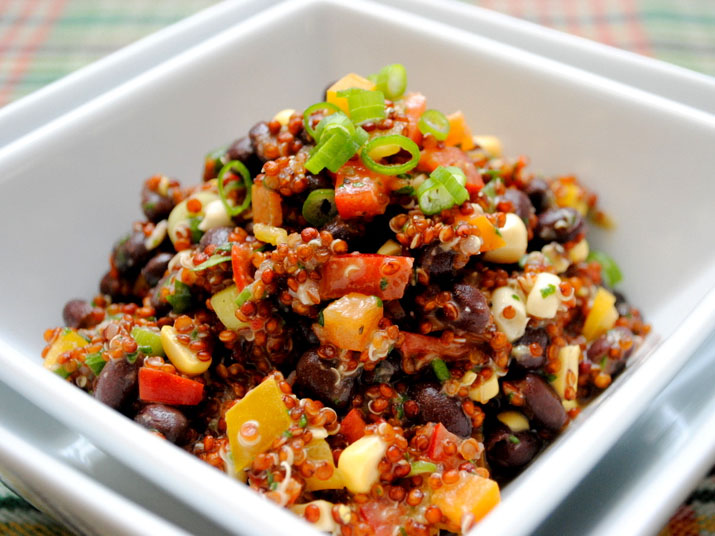
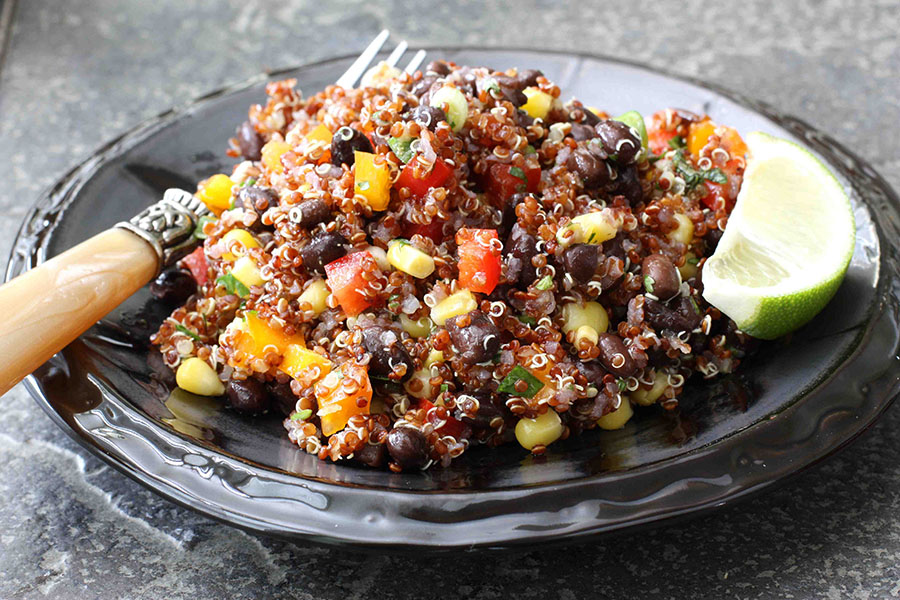
This Red Quinoa and Black Bean Salad by The Church Cook is packed with colorful vegetables, black beans, and a complementary lime-cumin dressing. My husband and I were immediately enamored with the taste and texture of this salad, and proceeded to eat several helpings, either by itself or combined with cooked chicken breast in whole-wheat wraps.

Now, I have a little confession to make. I typically use the lazy cook’s way of preparing quinoa. I simply combine one part quinoa with two parts water in a medium saucepan, bring the mixture to a bowl, cover and reduce the heat to low, and simmer until the quinoa absorbs all of the water, about 20 minutes—just like cooking rice.

However, when I read Kay’s slightly more complicated method, I was up for the challenge. This is the method I am presenting to you in the following photos. Now, a cook that is not as messy as me probably will not spill the quinoa (and end up with a good quantity in her hair) when transferring the quinoa from the cheesecloth to the bowl. By the time I was done, it looked as though a tornado had blown throw my kitchen, leaving a very happy dog (licking the floor) in its wake.

For my own sanity and time considerations on busy weeknights, I will stick with my boil and simmer method. Whichever route you choose, I guarantee that you will be smitten by the tangy dressing, fresh vegetables, tender pop of the quinoa, and the promise of healthy protein and fiber.

Let’s start with the dressing.


Tasty Kitchen Blog: Red Quinoa and Black Bean Salad. Guest post by Dara Michalski of Cookin' Canuck, recipe submitted by TK member Kay Heritage of The Church Cook.

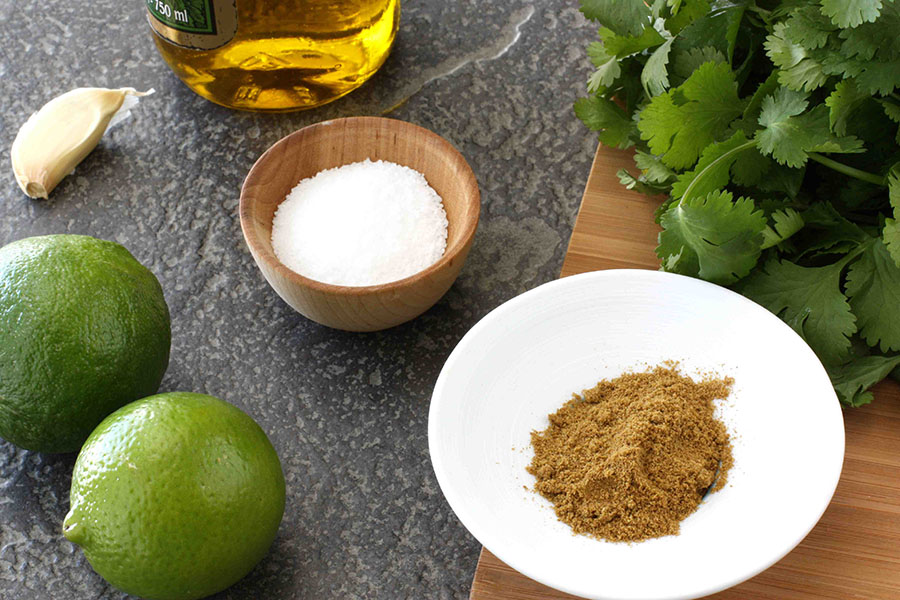
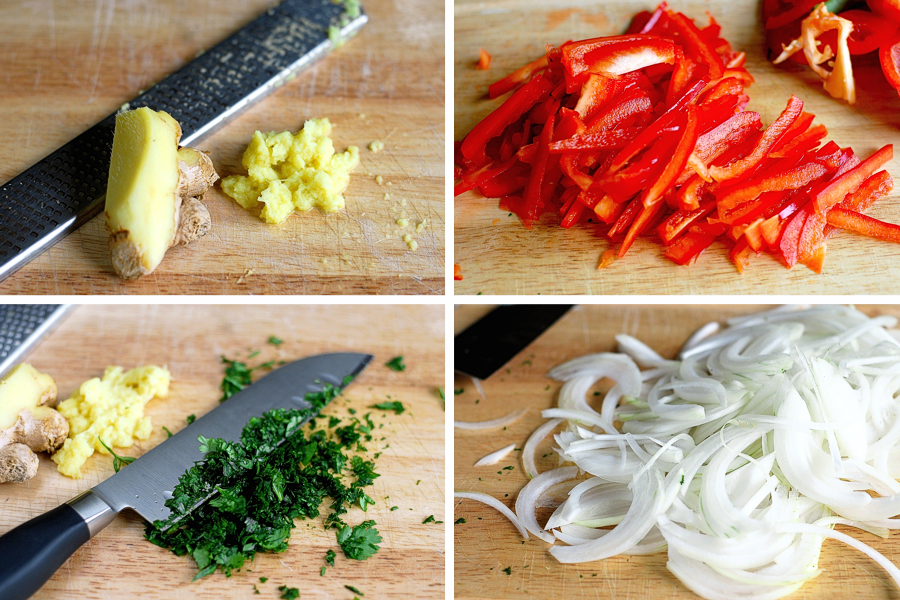
You’ll need fresh lime juice, salt, garlic, cilantro, cumin, and olive oil. You’ll want some freshly ground pepper, too.


Tasty Kitchen Blog: Red Quinoa and Black Bean Salad. Guest post by Dara Michalski of Cookin' Canuck, recipe submitted by TK member Kay Heritage of The Church Cook.

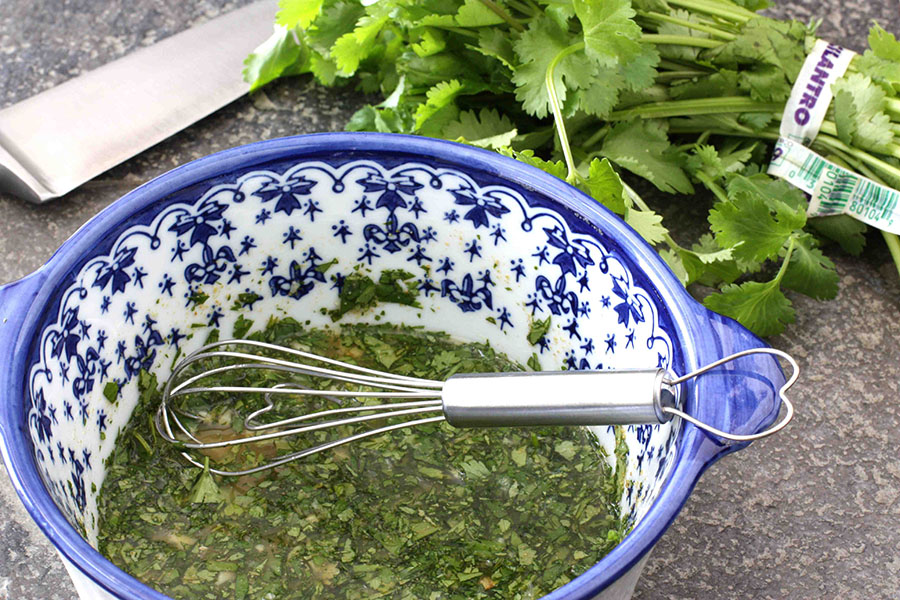
In a small bowl, whisk together lime juice, salt, minced garlic, chopped cilantro, and cumin.


Tasty Kitchen Blog: Red Quinoa and Black Bean Salad. Guest post by Dara Michalski of Cookin' Canuck, recipe submitted by TK member Kay Heritage of The Church Cook.

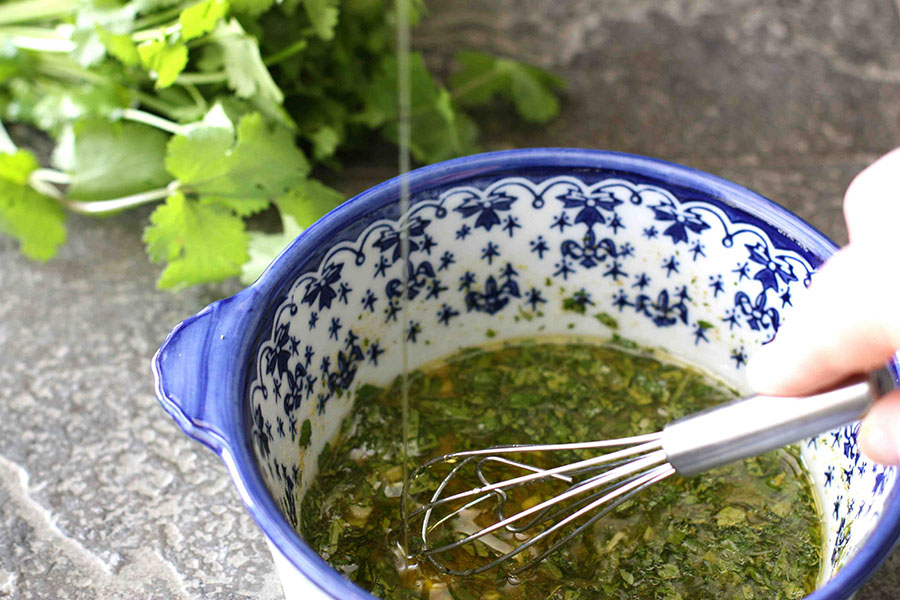
Whisking constantly, slowly add olive oil in a thin stream until combined.

Season with pepper, to taste. Set aside.

Now let’s tackle the quinoa.


Tasty Kitchen Blog: Red Quinoa and Black Bean Salad. Guest post by Dara Michalski of Cookin' Canuck, recipe submitted by TK member Kay Heritage of The Church Cook.

There is a natural coating on quinoa called saponin, which can have a bitter taste. In nature, the saponin helps to repel birds and insects. You have to love a grain that can fend for itself.


Tasty Kitchen Blog: Red Quinoa and Black Bean Salad. Guest post by Dara Michalski of Cookin' Canuck, recipe submitted by TK member Kay Heritage of The Church Cook.

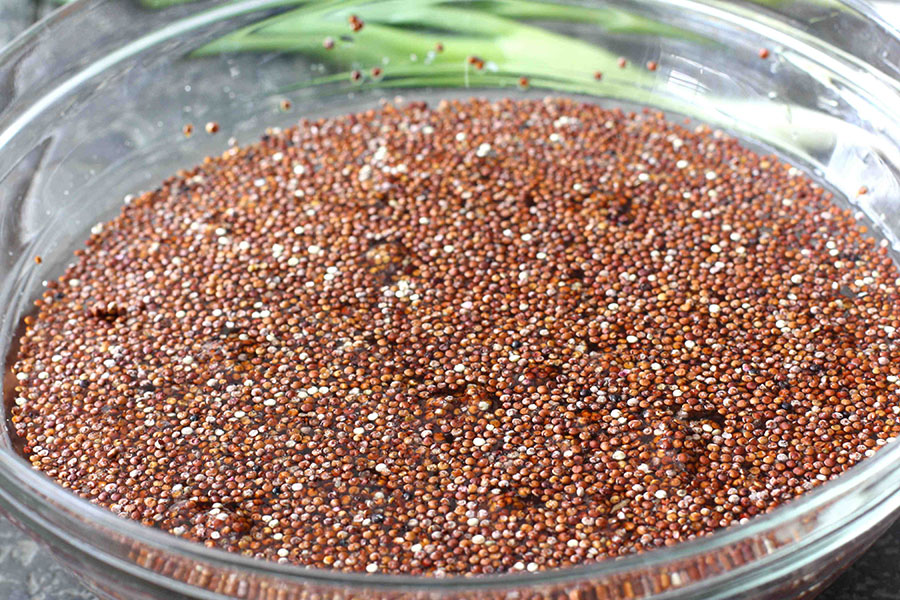
To remove any bitter taste, rinse the quinoa in several changes of cold water. Each time, let most of the quinoa sink to bottom of the bowl, then pour off the water.


Tasty Kitchen Blog: Red Quinoa and Black Bean Salad. Guest post by Dara Michalski of Cookin' Canuck, recipe submitted by TK member Kay Heritage of The Church Cook.

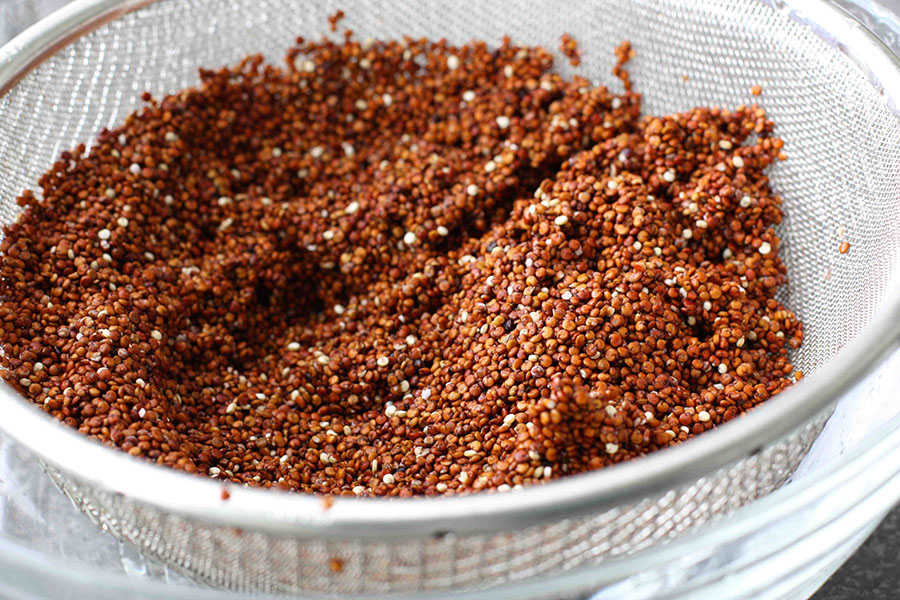
Strain the quinoa in a large fine mesh sieve.

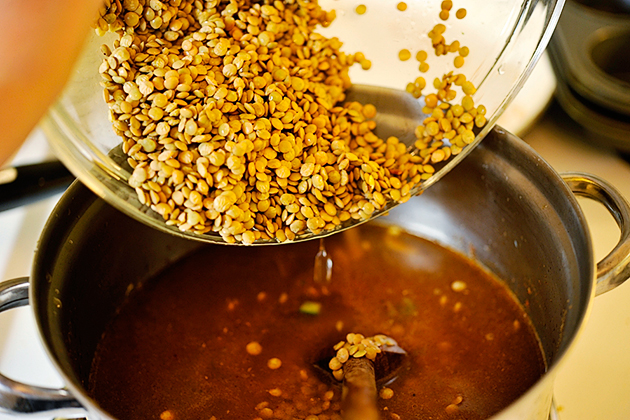
Bring 1 ½ quarts (about 6 cups) water to a boil in a medium saucepan and add some salt. Pour in the quinoa and boil for 10 minutes.

Meanwhile prepare a colander by lining it with cheesecloth. I used the steamer insert for my double-boiler.


Tasty Kitchen Blog: Red Quinoa and Black Bean Salad. Guest post by Dara Michalski of Cookin' Canuck, recipe submitted by TK member Kay Heritage of The Church Cook.

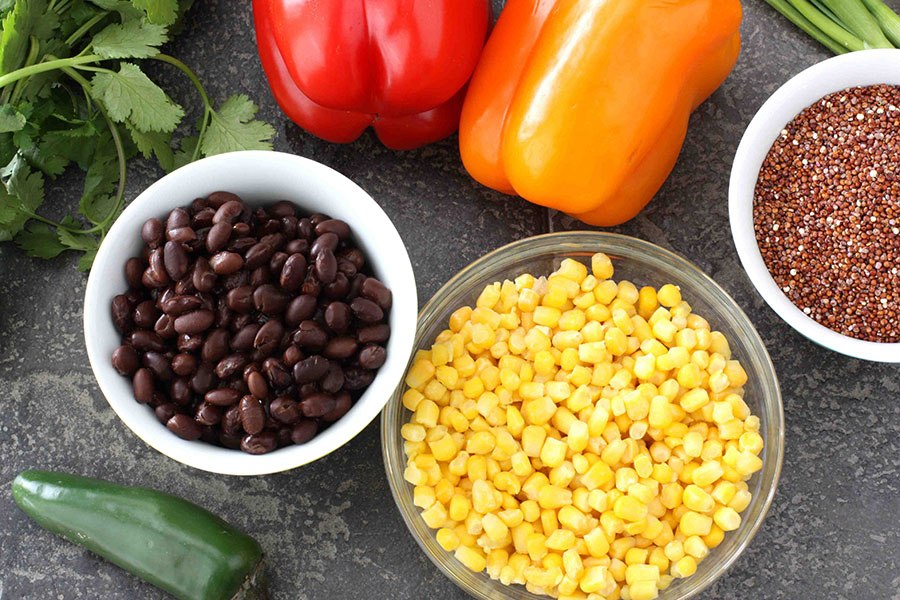
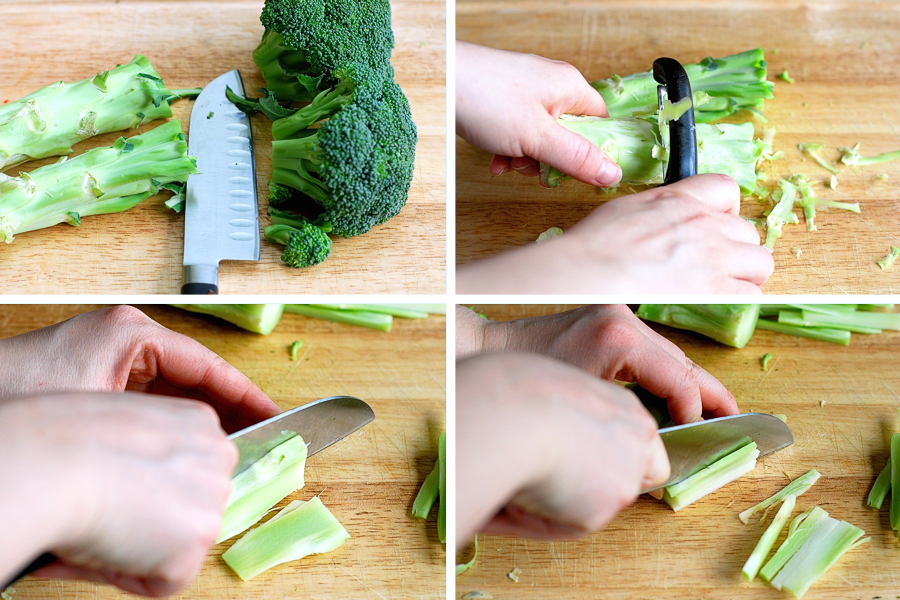
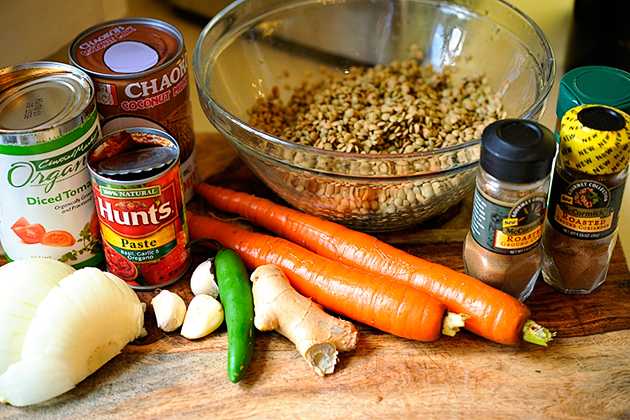
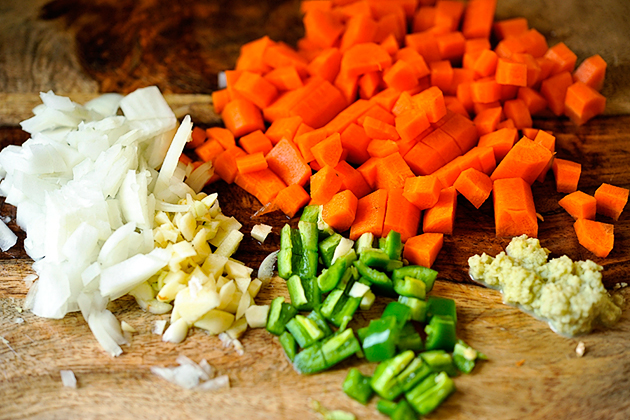
You can also use this time to prepare the other ingredients that go into this salad.


Tasty Kitchen Blog: Red Quinoa and Black Bean Salad. Guest post by Dara Michalski of Cookin' Canuck, recipe submitted by TK member Kay Heritage of The Church Cook.

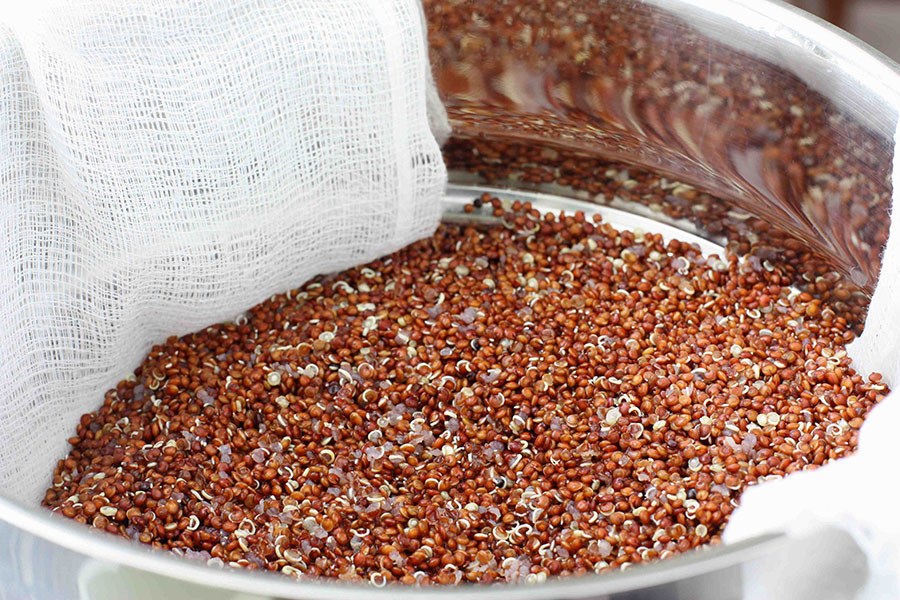
Drain the quinoa into the cheesecloth.

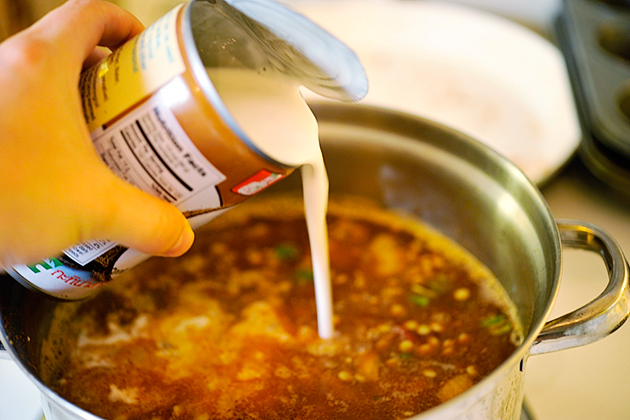
Add 2 inches of water to the bottom of the pot and bring the water to a boil. Set the steamer insert (with cheesecloth and quinoa) over the boiling water and cover. Be certain that the quinoa is not touching the water. Steam for 10 minutes.

Fluff the quinoa with a fork and cool.


Tasty Kitchen Blog: Red Quinoa and Black Bean Salad. Guest post by Dara Michalski of Cookin' Canuck, recipe submitted by TK member Kay Heritage of The Church Cook.

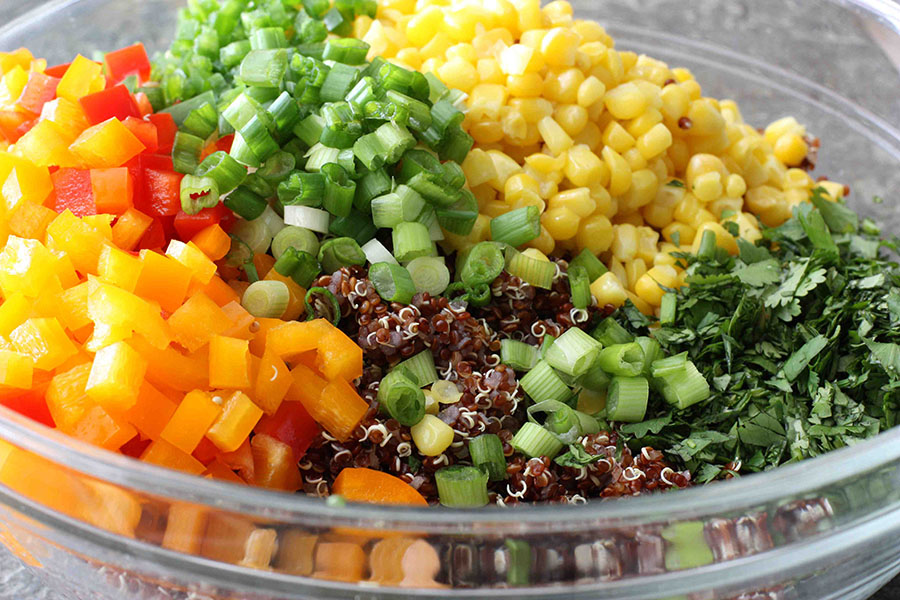
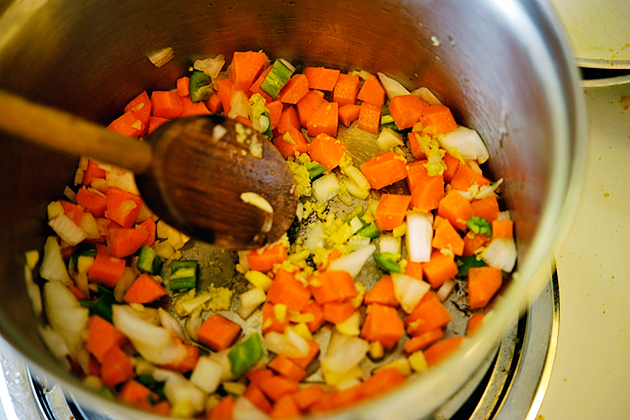
In a large bowl, combine the quinoa, black beans, corn, chopped red and orange bell peppers, jalapeno pepper, cilantro, and green onions.


Tasty Kitchen Blog: Red Quinoa and Black Bean Salad. Guest post by Dara Michalski of Cookin' Canuck, recipe submitted by TK member Kay Heritage of The Church Cook.

Toss gently with the dressing and serve at room temperature.

Thank you to Kay for this salad that quickly earned a place in our regular lunch and dinner line-ups. Be sure to check out her blog The Church Cook for many other innovative, tasty recipes.


Printable Recipe

Red Quinoa and Black Bean Salad

See post on The Church Cook (Kay Heritage)’s site!
4.81 Mitt(s) 22 Rating(s)22 votes, average: 4.81 out of 522 votes, average: 4.81 out of 522 votes, average: 4.81 out of 522 votes, average: 4.81 out of 522 votes, average: 4.81 out of 5

Prep Time:

Cook Time:

Difficulty: Intermediate

Servings: 6

6
x

Print Options

Page size Letter 3x5 4x6
Text Size Small Medium Large
Content Include description
Include prep time, etc.
Show image

Description

Healthy, delicious Red Quinoa and Black Bean Salad. Great as a side with fish tacos or as a vegetarian meal.

Ingredients

  • FOR THE DRESSING:
  • 5 Tablespoons Fresh Lime Juice
  • 1 teaspoon Salt
  • 1 whole Garlic Clove, Finely Mined
  • ¼ cups Finely Chopped Fresh Cilantro
  • 1 teaspoon Ground Cumin, Or To Taste
  • ⅓ cups Olive Oil
  • ½ teaspoons Freshly Ground Pepper, to taste
  • _____
  • FOR THE SALAD:
  • 1-½ cup Red Quinoa (sold In Health Food Stores)
  • 1 Tablespoon Table Salt, Add When Boiling Quinoa
  • 1 can (14 Oz. Can) Black Beans, Drained, Rinsed
  • 1-½ cup Corn Kernels, Fresh (cut From About 2 Large Ears)
  • 1 cup Finely Chopped Colored Sweet Bell Peppers
  • 1 whole Jalapeño Chilies, Seeded And Minced (wear Rubber Gloves)
  • ¼ cups Finely Chopped Fresh Cilantro
  • ¼ cups Finely Chopped Green Onions

Preparation Instructions

For the dressing:
In a small bowl whisk together lime juice, salt, minced garlic, chopped cilantro, and cumin and add oil in a stream, whisking. Add pepper to taste. Set aside.

For the salad:
In a large bowl wash quinoa in at least 5 changes of cold water, rubbing grains and letting them settle before pouring off most of water, until water runs clear. Drain in a large fine sieve.

In a medium size pot, add the table salt to 1-1/2 quarts of boiling water and cook quinoa 10 minutes. Prepare a colander with cheese cloth over it and drain the cooked quinoa into cheese cloth.

Add 2 inches of water into the pot and bring water to boil. Place the quinoa (still in the colander or another small pan, so you have a double boiler effect), cover cooked quinoa with the cheesecloth and put a lid on your pot. Steam for an additional 10 minutes. Do not let quinoa touch the water. Fluff quinoa with a fork and cool.

Combine in a large mixing bowl the beans, corn, remaining vegetables, herbs, and cooled quinoa. Toss gently with the dressing. Can be prepared a day ahead for flavors to combine. Serve at room temperature.


_______________________________________

Dara Michalski is a doll and a sweetheart who clearly knows her way around the kitchen. She blogs at Cookin’ Canuck, where she shares her flavor-packed recipes and fun, engaging writing. The photography’s pretty incredible, too.


Profile photo of whatsgabycooking

Red Velvet Brownies

Posted by in Baking, Step-by-Step Recipes

  I’m so obsessing over these Red Velvet Brownies. They are crazy decadent and gorgeous and sure to make your boyfriend/girlfriend/husband/wife/secret admirer super happy this coming Valentine’s Day!  You should totally make these.       First, let’s start with lining a baking pan with foil. You could also use parchment. I just…

Profile photo of Erika (TK)

Red, White and Blue

Posted by in Holidays, The Theme Is...

  Here’s a quickie 4th of July post for you. You probably already have your themed dish for the holiday but we wanted to showcase some really pretty, yummy, and show-stopping red, white and blue recipes. (TK members are just … they’re just awesome. So much talent and creativity, and I’m amazed everyday.) You can […]

Profile photo of georgiapellegrini

Red Wine and Herb Beef Stew

Posted by in Step-by-Step Recipes

  This hearty Red Wine and Herb Beef Stew recipe from TK member Anita is comforting and rich with fresh herbs and red wine. The sauce is delicious poured over polenta, rice, pasta or simple on its own. It would also lend itself well to the addition of other types of root vegetables.     […]

Profile photo of Erica Lea

Red Wine Cake

Posted by in Baking, Step-by-Step Recipes

Whenever I see a recipe that calls for wine, I must admit that I’m immediately drawn to it. It adds such a wonderfully distinct flavor that cannot adequately be replaced by fresh fruit juice. Just a splash can create depth in a quick pasta sauce. Before making this cake, I had never used wine in […]