The Pioneer Woman Tasty Kitchen
Profile photo of cookincanuck

Oatmeal Butter Tart Squares

Posted by in Baking, Step-by-Step Recipes

Tasty Kitchen Blog: Oatmeal Butter Tart Squares. Guest post by Dara Michalski of Cookin' Canuck, recipe submitted by TK member gingerbreadbagels.

There are some recipes, tastes and aromas that evoke strong memories. Memories of childhood dinners with extended family, memories of special occasions. Each Christmas, my grandmother made a batch of her butter tarts to serve alongside the flambéed plum pudding at the end of the meal. The crust was flaky and the filling was sweet, tender and buttery.

Considering my irrational fear of pastry, I always shied away from making the tarts myself. My inability to turn out a decent pie is one of the reasons I am sure that Ree would bar my entrance to her ranch. That, and the fact that I probably wouldn’t be able to stop myself from hugging Charlie her lovable basset hound every few minutes, would likely get me cattle-prodded off the property in no time.

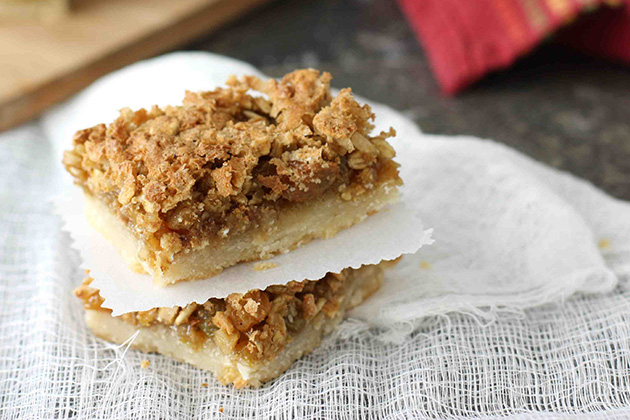
When I saw these Oatmeal Butter Tart Squares by Lindsey (gingerbreadbagels on Tasty Kitchen), complete with a caramelized filling, with raisins, oatmeal and coconut, and a simple sugar cookie crust, I knew I had to try them. At first bite, memories of my grandmother flooded back and I knew that these would become a regular treat in our house.


Tasty Kitchen Blog: Oatmeal Butter Tart Squares. Guest post by Dara Michalski of Cookin' Canuck, recipe submitted by TK member gingerbreadbagels.

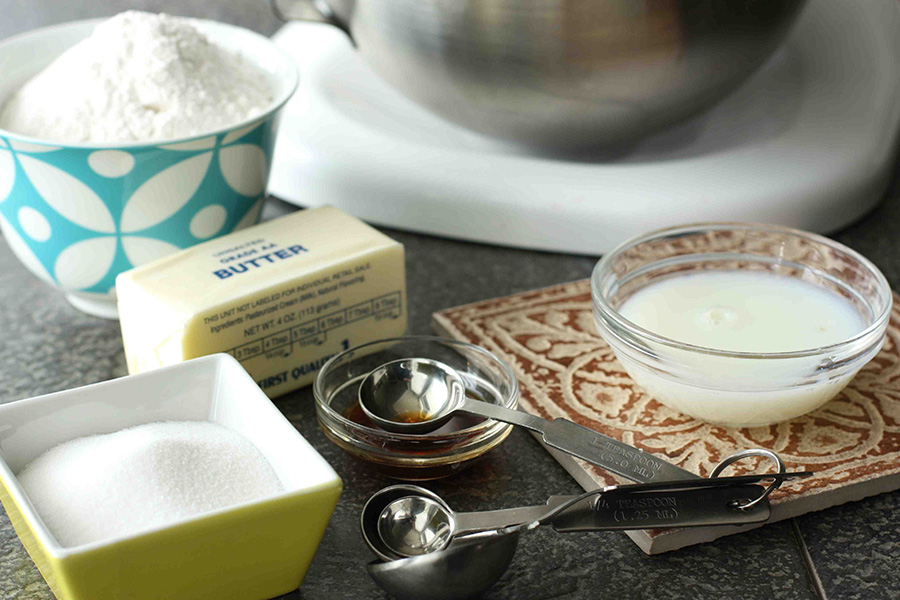
First, let’s prepare the crust. Preheat the oven to 400 degrees F and get the ingredients ready.


Tasty Kitchen Blog: Oatmeal Butter Tart Squares. Guest post by Dara Michalski of Cookin' Canuck, recipe submitted by TK member gingerbreadbagels.

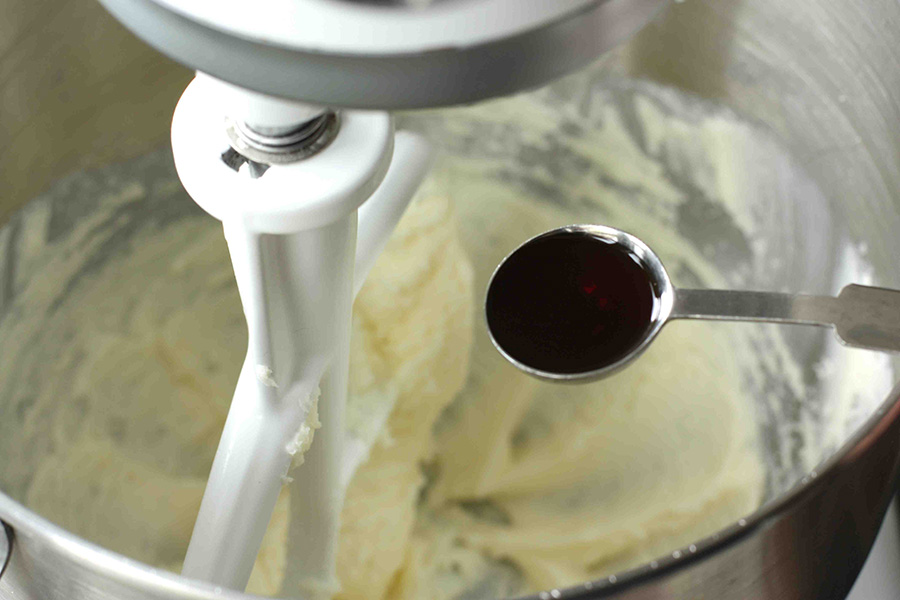
In the bowl of a stand mixer (or in a large bowl, using a handheld mixer), beat the butter and sugar until light and fluffy, 3 to 4 minutes. Add milk and vanilla extract and mix to combine.


Tasty Kitchen Blog: Oatmeal Butter Tart Squares. Guest post by Dara Michalski of Cookin' Canuck, recipe submitted by TK member gingerbreadbagels.

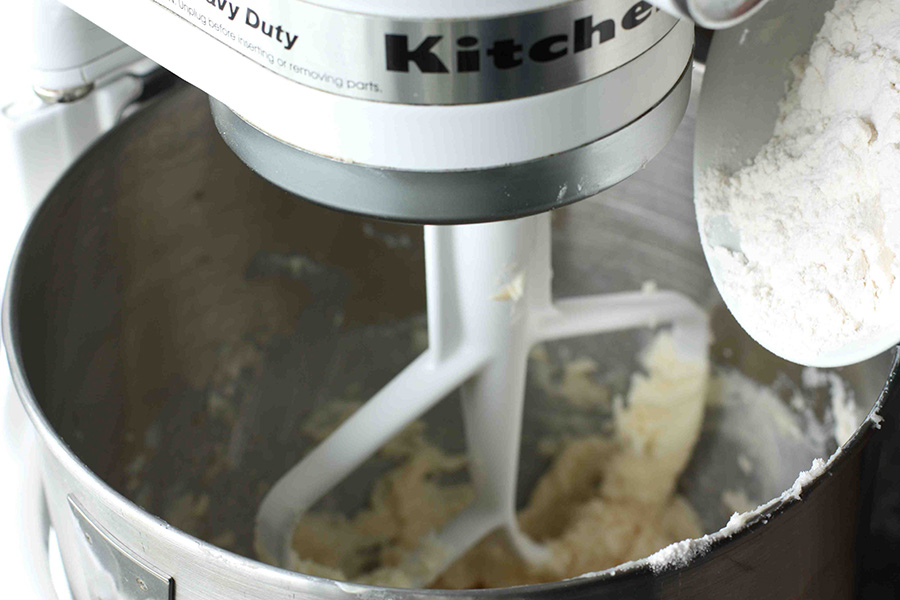
With the mixer running on low speed, gradually add in the flour and mix until almost combined.


Tasty Kitchen Blog: Oatmeal Butter Tart Squares. Guest post by Dara Michalski of Cookin' Canuck, recipe submitted by TK member gingerbreadbagels.

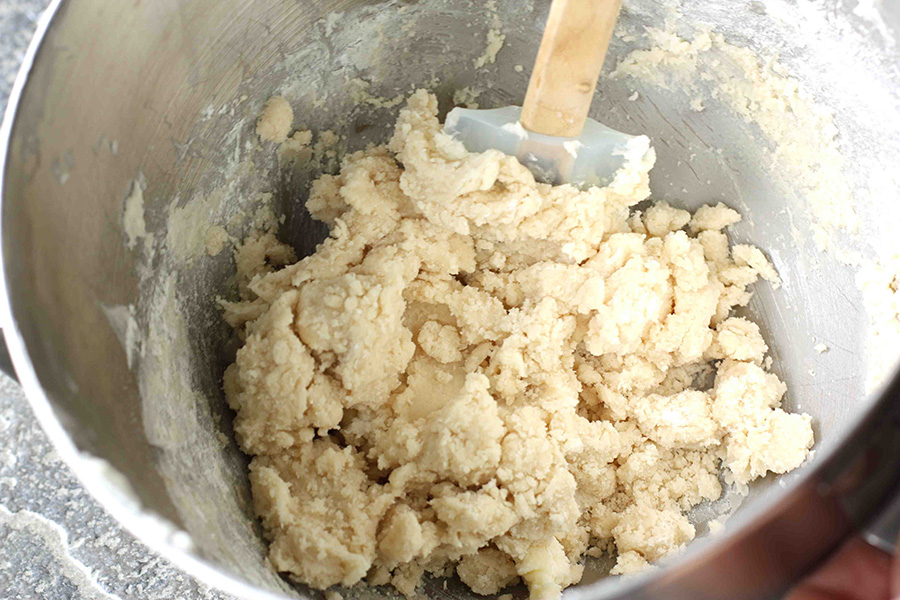
Use a spatula to mix until the sugar cookie dough comes together.


Tasty Kitchen Blog: Oatmeal Butter Tart Squares. Guest post by Dara Michalski of Cookin' Canuck, recipe submitted by TK member gingerbreadbagels.

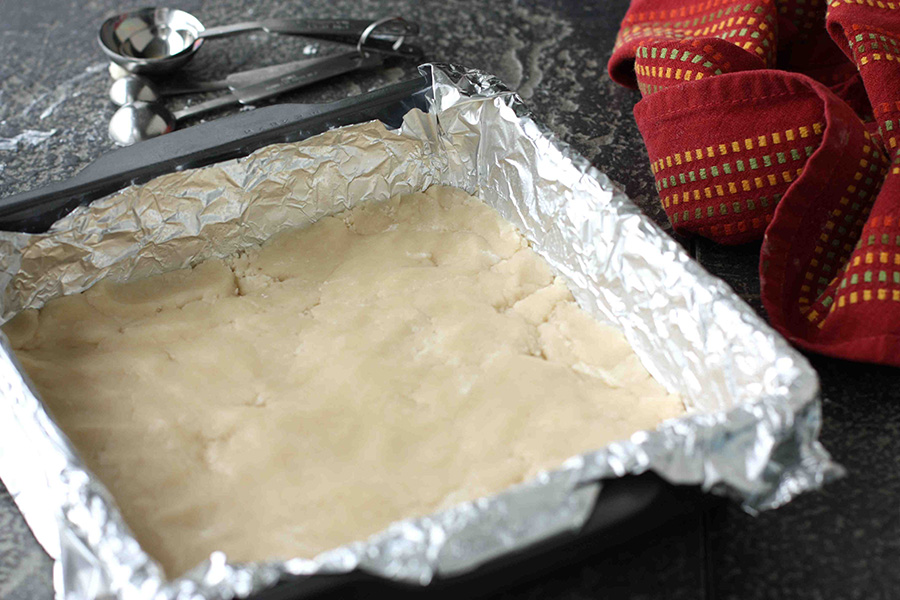
Evenly press the cookie dough into a lightly greased 8- by 8-inch pan. I used a foil liner, which was not in Lindsey’s recipe. Ignore me, and follow Lindsey’s instructions. The filling stuck to the foil and made a bit of a mess.

Bake until the edges start to turn golden brown, 12 to 15 minutes. Cool completely.

Now let’s make the the filling. Turn the oven down to 350 degrees F.


Tasty Kitchen Blog: Oatmeal Butter Tart Squares. Guest post by Dara Michalski of Cookin' Canuck, recipe submitted by TK member gingerbreadbagels.

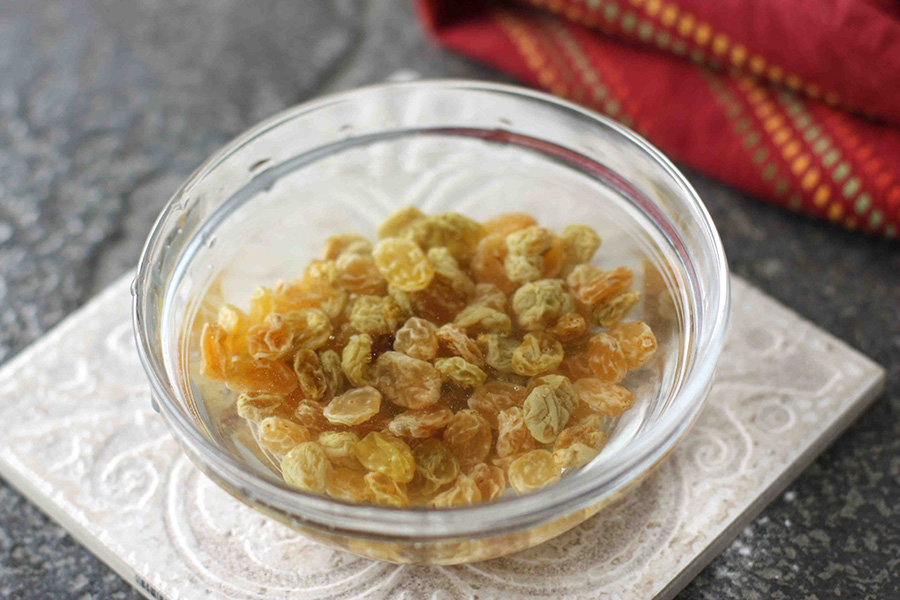
Place the raisins in a medium bowl and cover with hot water. Soak for 20 minutes. Drain raisins and set aside.

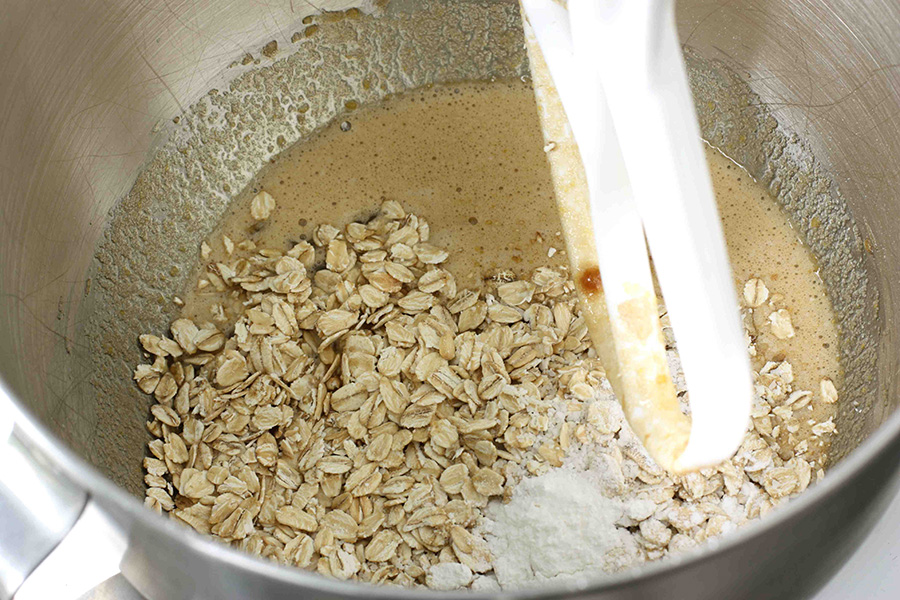
In the bowl of a stand mixer (or in a large bowl, using a handheld mixer), beat brown sugar, eggs and vanilla extract until combined.

In a large mixing bowl with the paddle attachment (a handheld mixer works fine too), mix together the brown sugar, eggs and vanilla extract.


Tasty Kitchen Blog: Oatmeal Butter Tart Squares. Guest post by Dara Michalski of Cookin' Canuck, recipe submitted by TK member gingerbreadbagels.

Add oats, baking powder and kosher salt, and mix to combine.


Tasty Kitchen Blog: Oatmeal Butter Tart Squares. Guest post by Dara Michalski of Cookin' Canuck, recipe submitted by TK member gingerbreadbagels.

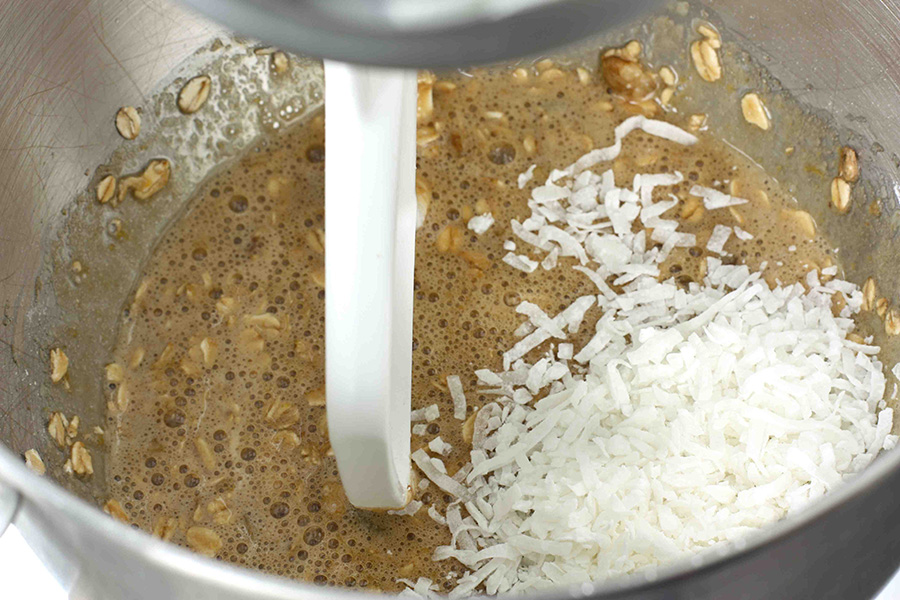
Fold in sweetened flaked coconut, raisins and chopped pecans.


Tasty Kitchen Blog: Oatmeal Butter Tart Squares. Guest post by Dara Michalski of Cookin' Canuck, recipe submitted by TK member gingerbreadbagels.

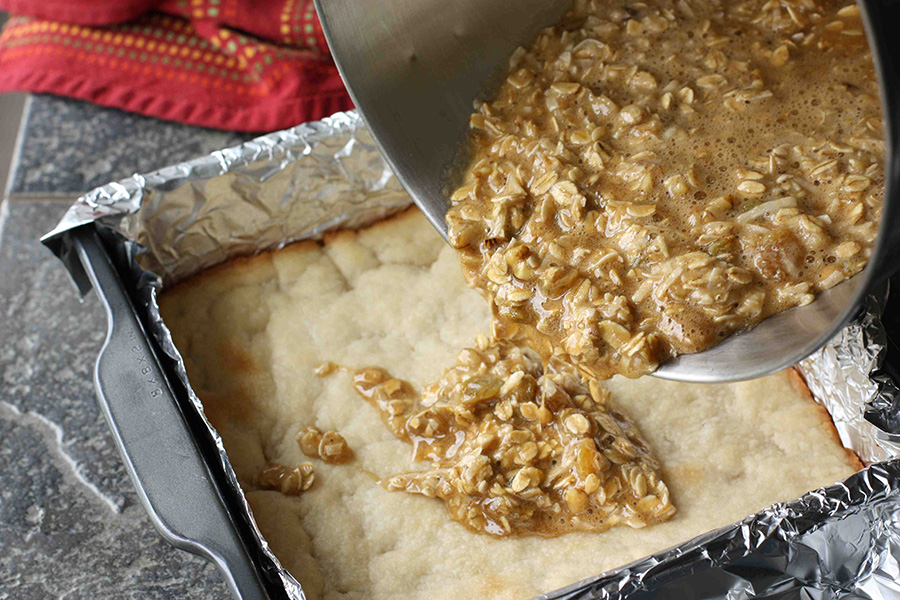
Pour the filling over the cooled sugar cookie crust.

Bake until filling is set, 30 to 35 minutes.

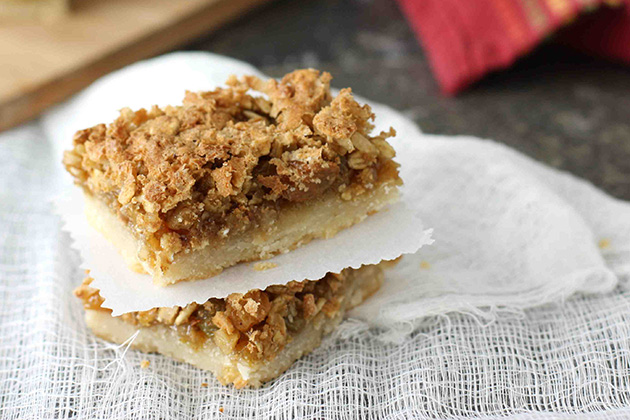
Let the squares cool completely before cutting. The squares will firm up once they are completely cooled. If you try to cut them while still warm, the filling may ooze out.

Once cool, cut into squares and enjoy!


Tasty Kitchen Blog: Oatmeal Butter Tart Squares. Guest post by Dara Michalski of Cookin' Canuck, recipe submitted by TK member gingerbreadbagels.

 
Thank you, Lindsey, for a dessert that is not only irresistible, but brought back so many fond memories for me. Be sure to check out Lindsey’s blog Gingerbread Bagels for many other wonderful recipes.

Here is the link to the printable recipe: Oatmeal Butter Tart Squares


_______________________________________

Dara Michalski is a doll and a sweetheart who clearly knows her way around the kitchen. She blogs at Cookin’ Canuck, where she shares her flavor-packed recipes and fun, engaging writing. The photography’s pretty incredible, too.


Profile photo of callimakesdo

Bow Tie Pasta with Oven Dried Tomatoes

Posted by in Step-by-Step Recipes

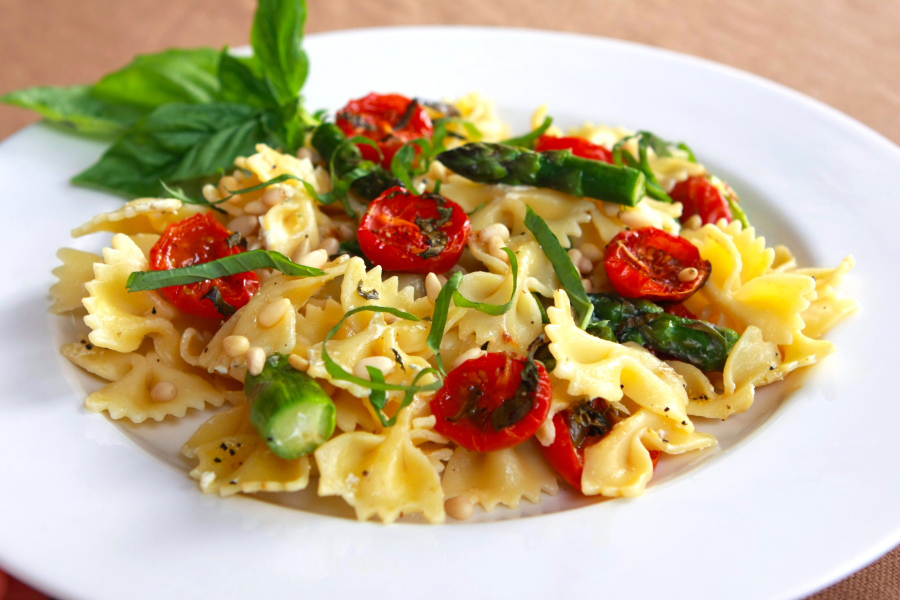
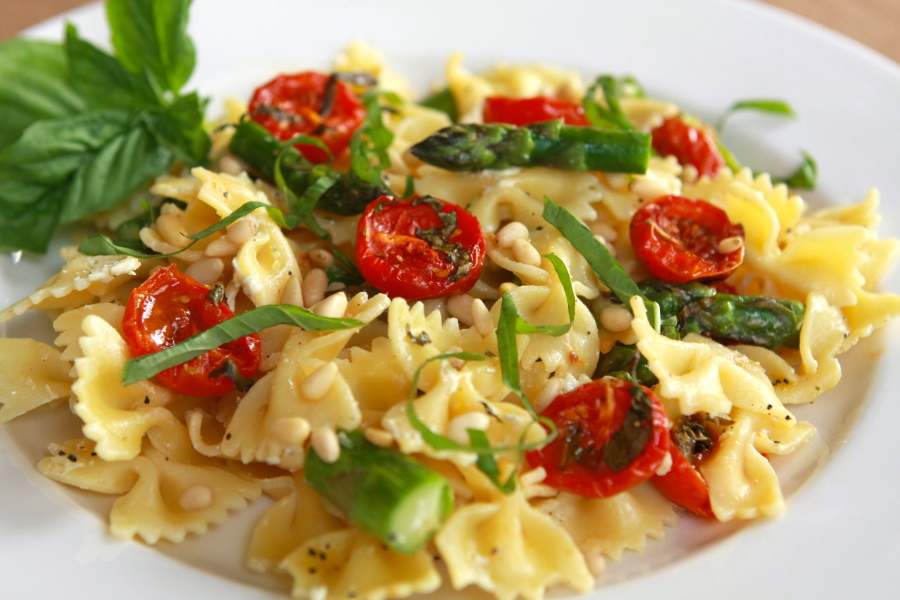
Tasty Kitchen Blog: Bowtie Pasta with Oven Dried Tomatoes Asparagus and Boursin. Guest post by Calli Taylor of Make It Do, recipe submitted by TK member Dorothy of Belle of the Kitchen.

Ask my nine-year-old daughter what she wants for dinner and nine times out of ten the answer will be, “Bow Tie Pasta.” What can I say, she is a very reliable girl.

As a mom, I find myself cooking foods that appeal to my husband and me, and I don’t cater to the kids a whole lot. I hope that doesn’t make me a bad parent. Luckily, my kids are pretty good eaters (maybe from necessity). But that doesn’t mean I don’t look out for the foods I know they love, especially when it’s something we all can agree is delicious.

Because of my daughter’s little obsession, I usually check out Bow Tie Pasta recipes when they catch my eye. When I saw the recipe for Bow Tie Pasta with Oven Dried Tomatoes, Asparagus, and Boursin from Tasty Kitchen member barefootbelle, I knew I had to give it a try.

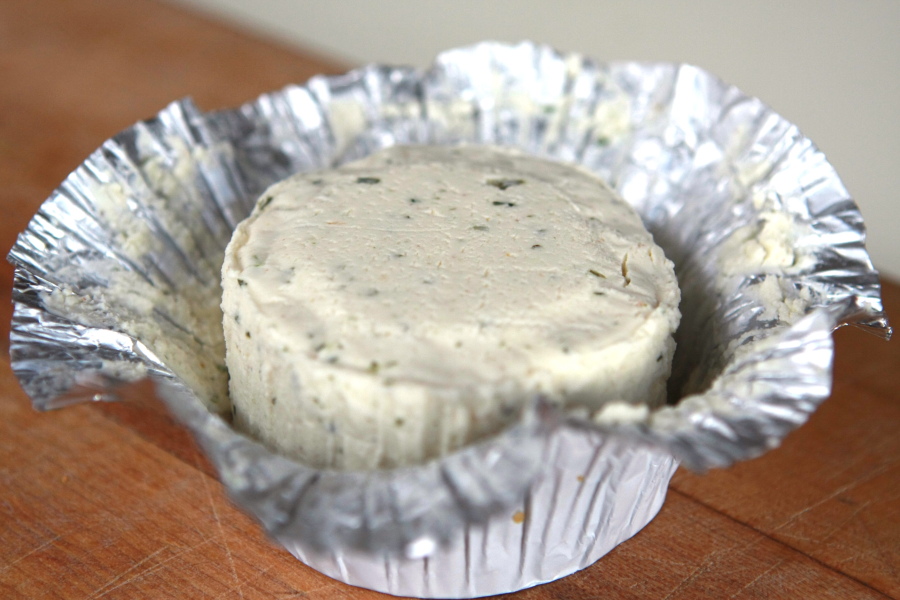
Asparagus, oven dried tomatoes, pine nuts and Boursin … hold the phone, did you it just say Boursin?


Tasty Kitchen Blog: Bowtie Pasta with Oven Dried Tomatoes Asparagus and Boursin. Guest post by Calli Taylor of Make It Do, recipe submitted by TK member Dorothy of Belle of the Kitchen.

Oh me, oh my. How I love Boursin.

“Yes sweetie, I’d be happy to make Bow Tie Pasta for dinner tonight.”

This is an easy recipe, but not one you can throw together at the last minute. The oven dried tomatoes take 3 1/2 hours. So you’ll need to plan ahead. Despite the time involved, it’s the oven dried tomatoes that totally stole the show for me. They have such a lovely sweetness and concentration of flavors.

Here’s how I made barefootbelle’s lovely Bow Tie Pasta:


Tasty Kitchen Blog: Bowtie Pasta with Oven Dried Tomatoes Asparagus and Boursin. Guest post by Calli Taylor of Make It Do, recipe submitted by TK member Dorothy of Belle of the Kitchen.

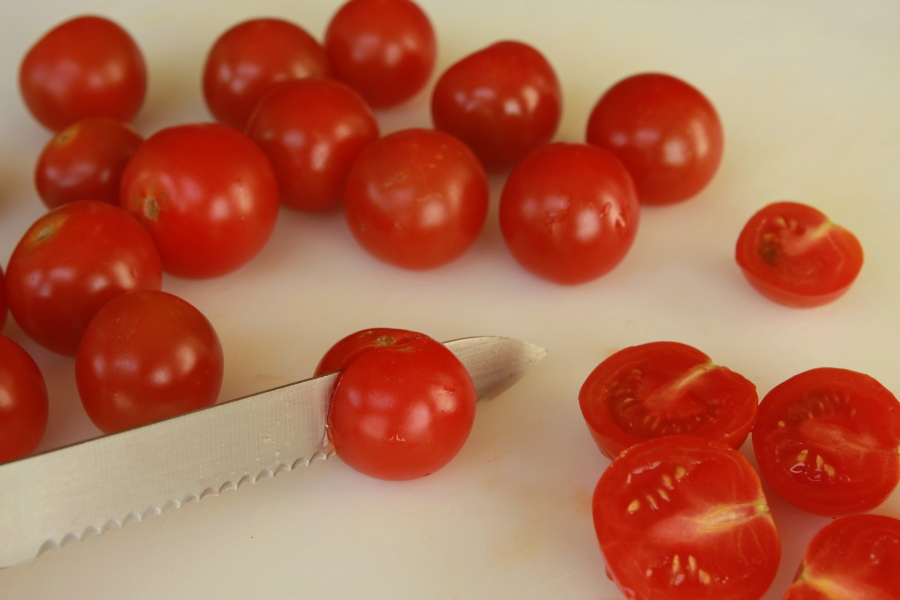
Start with cherry tomatoes. I think grape tomatoes would be delicious, too. Do yourself favor and make more than the recipe calls for. They are so yummy you’ll want some for a crostini or for crackers with cheese (Boursin anyone?), or even eaten straight off the pan.


Tasty Kitchen Blog: Bowtie Pasta with Oven Dried Tomatoes Asparagus and Boursin. Guest post by Calli Taylor of Make It Do, recipe submitted by TK member Dorothy of Belle of the Kitchen.

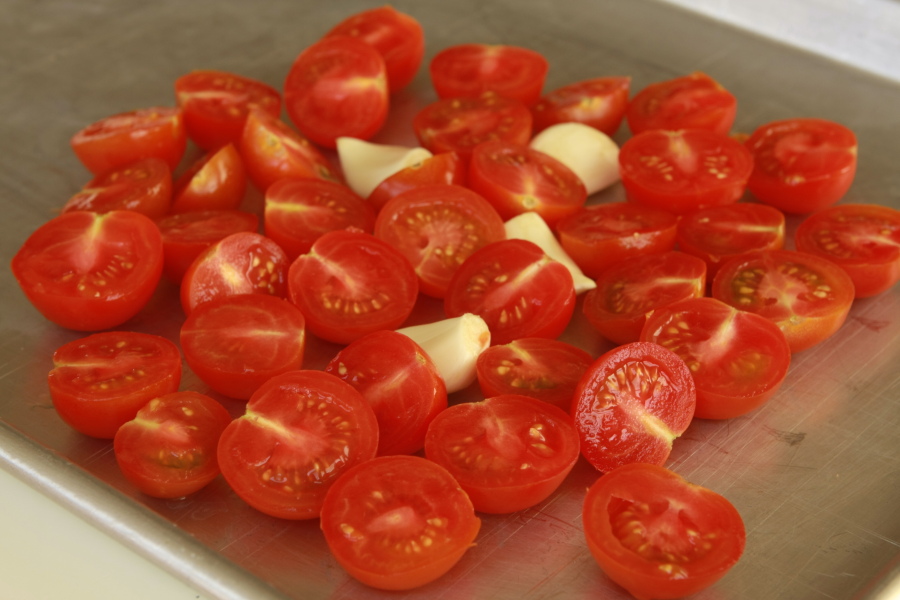
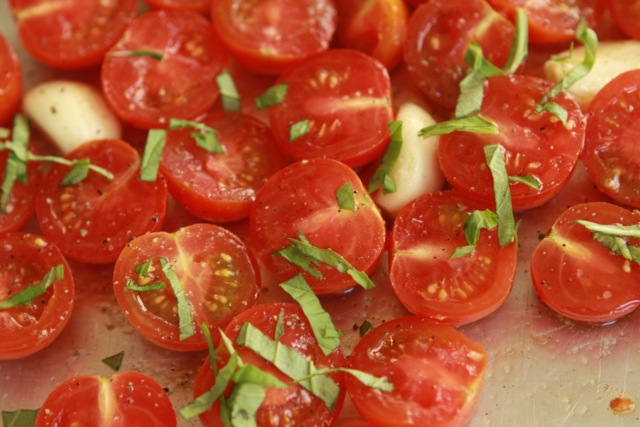
Halve the tomatoes and place them on your baking sheet facing up and tuck in the whole cloves of garlic. They slow cook until their flavor is mild, creamy and delicious.

Drizzle them with oil, pepper, a pinch of salt, and a pinch of sugar.


Tasty Kitchen Blog: Bowtie Pasta with Oven Dried Tomatoes Asparagus and Boursin. Guest post by Calli Taylor of Make It Do, recipe submitted by TK member Dorothy of Belle of the Kitchen.

Sprinkle on some fresh chopped basil.

Throw the whole thing in the oven for 3 1/2 hours. It’s a long time, but there is an upside: your kitchen will smell like a great Italian restaurant all afternoon.


Tasty Kitchen Blog: Bowtie Pasta with Oven Dried Tomatoes Asparagus and Boursin. Guest post by Calli Taylor of Make It Do, recipe submitted by TK member Dorothy of Belle of the Kitchen.

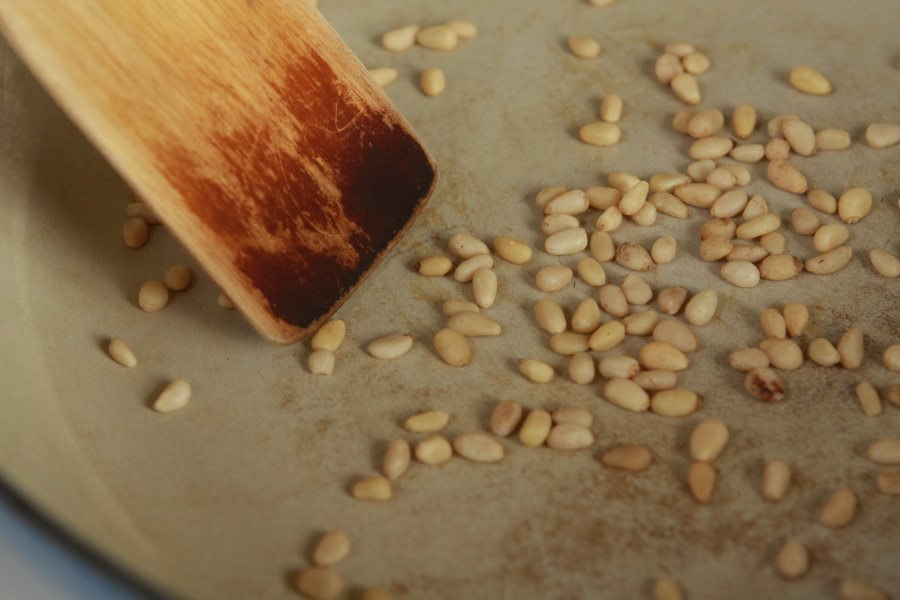
In a hot pan, toast the pine nuts until fragrant. That’s my rule of thumb with any nuts. Cook ‘em until they smell nice.


Tasty Kitchen Blog: Bowtie Pasta with Oven Dried Tomatoes Asparagus and Boursin. Guest post by Calli Taylor of Make It Do, recipe submitted by TK member Dorothy of Belle of the Kitchen.

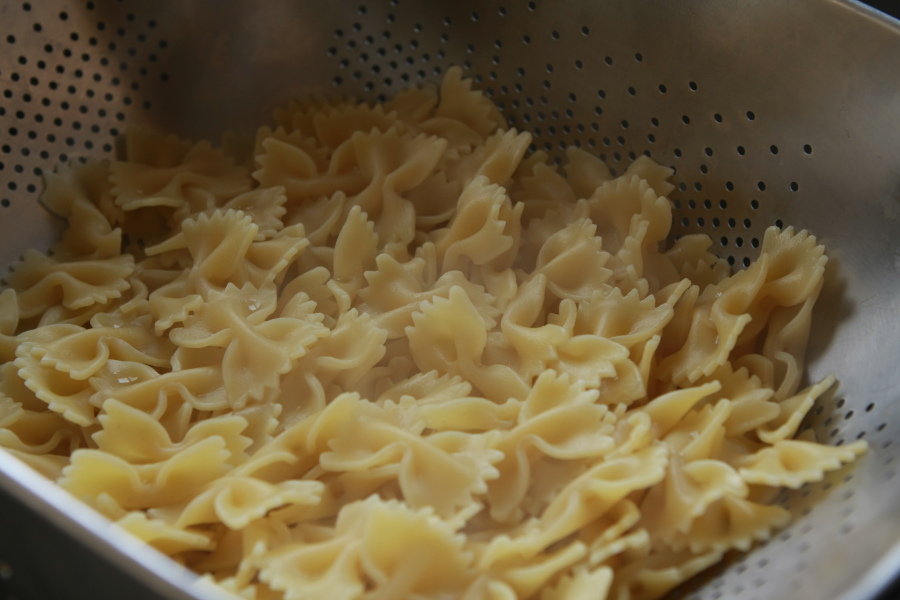
Cook your pasta in well-salted water. Since my husband doesn’t like pasta cooked TOO al dente, I cooked my pasta according to the package instructions, and not the eight minutes recommended on the recipe. I think good Italian pasta takes a little longer anyway. Even after heating everything in the pan at the end, the pasta tasted perfectly cooked and not mushy. Be sure to reserve 2/3 cup of the pasta water before you strain it all away.


Tasty Kitchen Blog: Bowtie Pasta with Oven Dried Tomatoes Asparagus and Boursin. Guest post by Calli Taylor of Make It Do, recipe submitted by TK member Dorothy of Belle of the Kitchen.

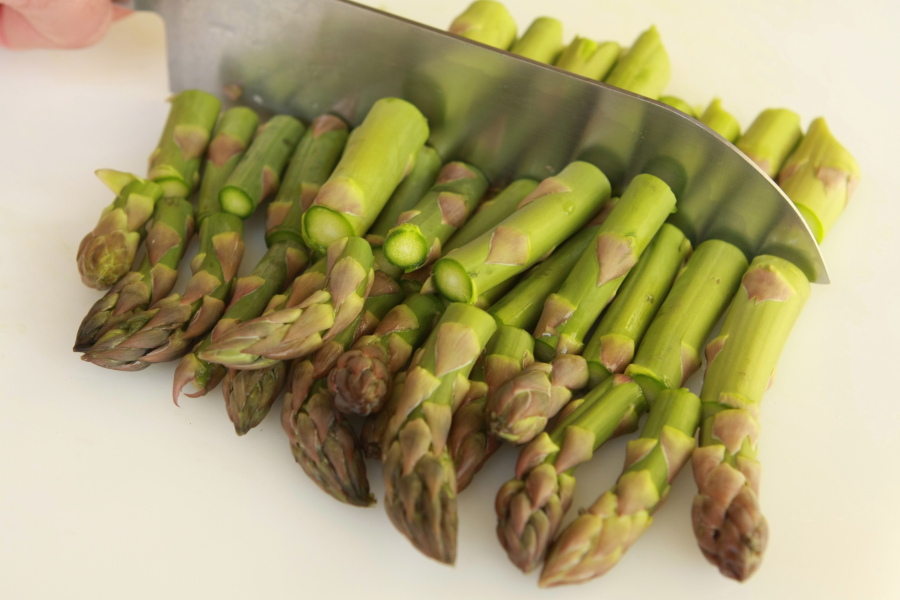
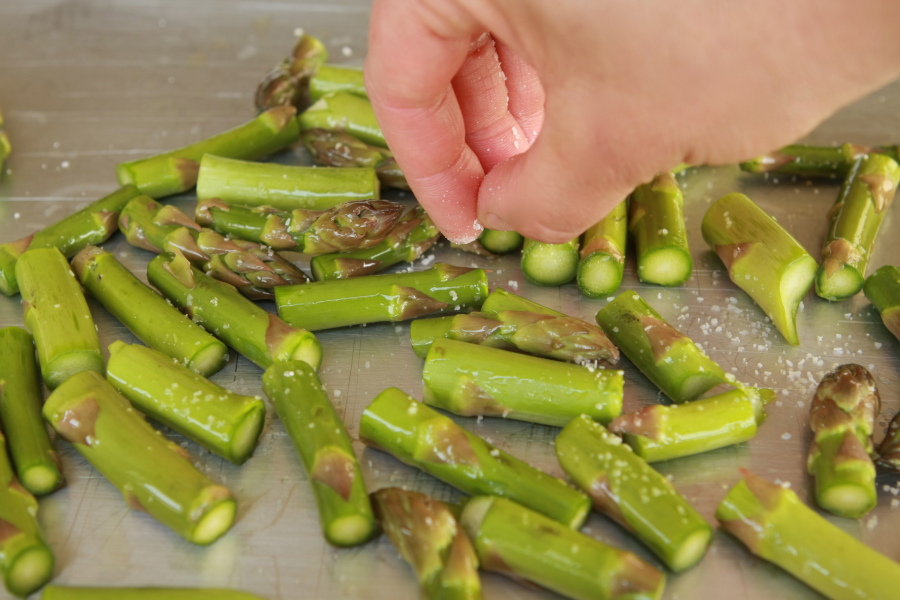
Here’s where I departed a bit from the text. The recipe calls for the asparagus to be cooked in the last two minutes, boiled with the pasta. While I’m sure that would work just great, I love the flavor of roasted asparagus, so I chopped up my asparagus into bite-sized pieces …


Tasty Kitchen Blog: Bowtie Pasta with Oven Dried Tomatoes Asparagus and Boursin. Guest post by Calli Taylor of Make It Do, recipe submitted by TK member Dorothy of Belle of the Kitchen.

And I tossed them on a baking sheet, drizzled with olive oil, salt and pepper, then roasted at 400ºF until tender crisp, about 8 minutes depending on the size of your spears.


Tasty Kitchen Blog: Bowtie Pasta with Oven Dried Tomatoes Asparagus and Boursin. Guest post by Calli Taylor of Make It Do, recipe submitted by TK member Dorothy of Belle of the Kitchen.

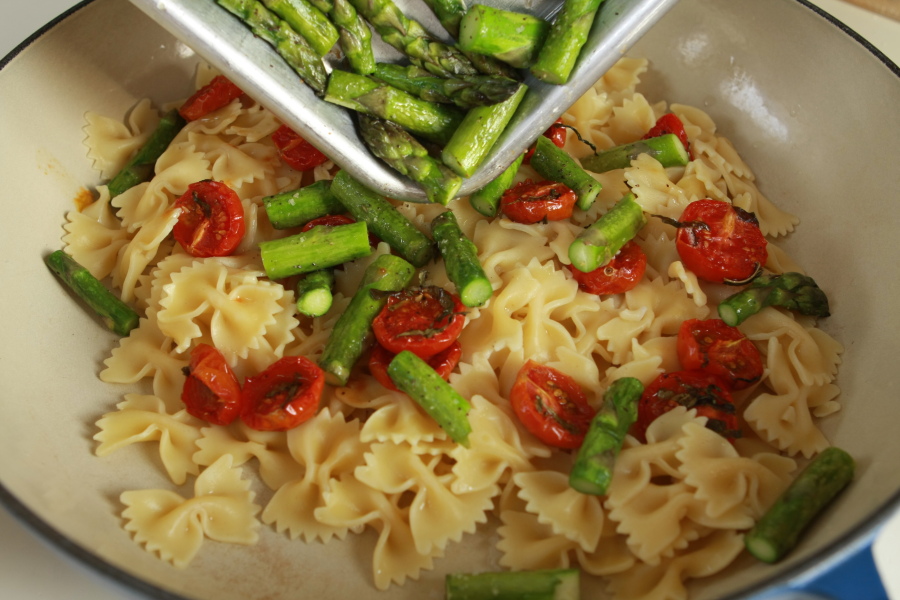
Now it’s time to toss it all together. In a large pan, heat the olive oil over medium heat. Add the garlic. The recipe doesn’t mention it, but I minced mine. Add the tomatoes to warm them. Add the pasta, asparagus and the reserved water. Toss to combine.


Tasty Kitchen Blog: Bowtie Pasta with Oven Dried Tomatoes Asparagus and Boursin. Guest post by Calli Taylor of Make It Do, recipe submitted by TK member Dorothy of Belle of the Kitchen.

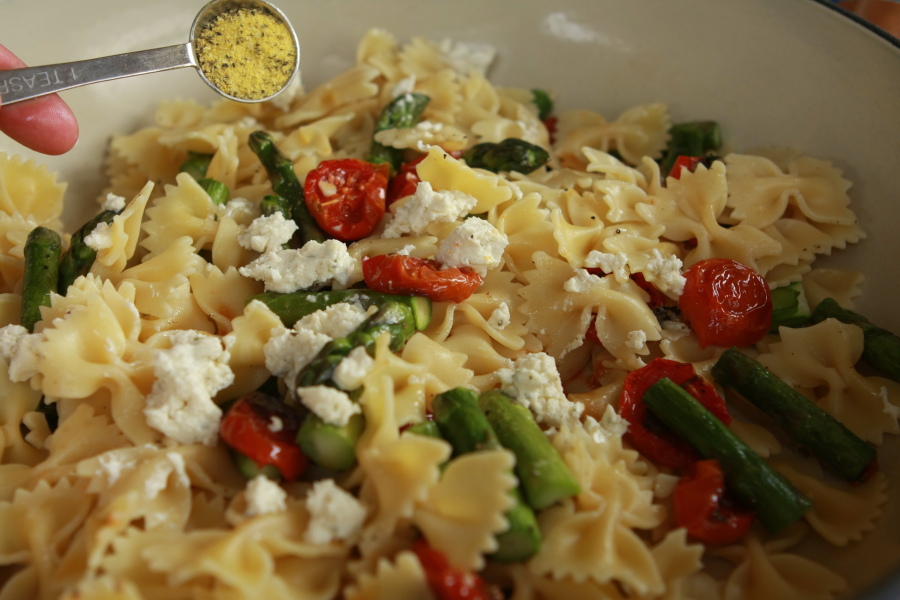
Pinch and drop the Boursin into the pan. Add the lemon pepper and pine nuts.


Tasty Kitchen Blog: Bowtie Pasta with Oven Dried Tomatoes Asparagus and Boursin. Guest post by Calli Taylor of Make It Do, recipe submitted by TK member Dorothy of Belle of the Kitchen.

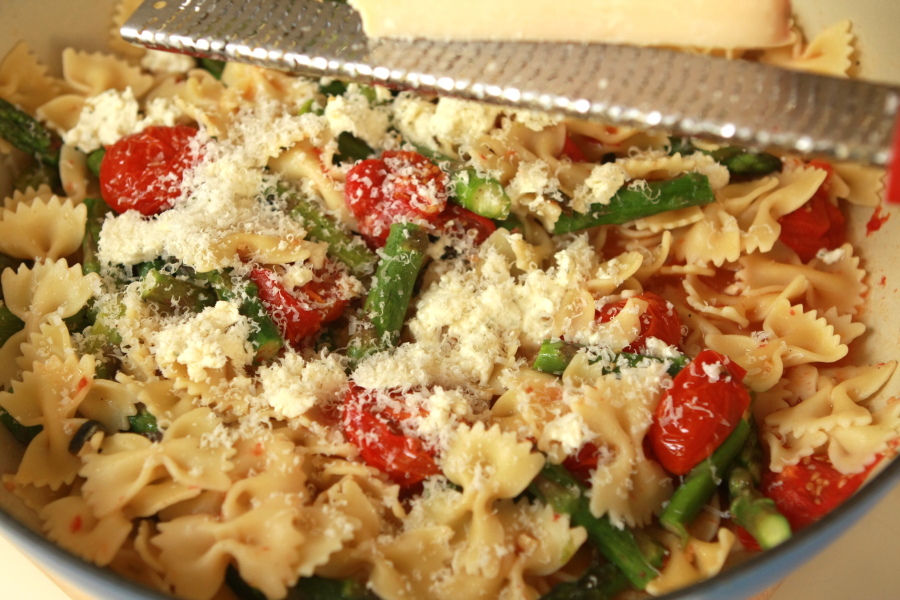
Sprinkle in the Parmesan cheese. Then season with salt and pepper to taste.


Tasty Kitchen Blog: Bowtie Pasta with Oven Dried Tomatoes Asparagus and Boursin. Guest post by Calli Taylor of Make It Do, recipe submitted by TK member Dorothy of Belle of the Kitchen.

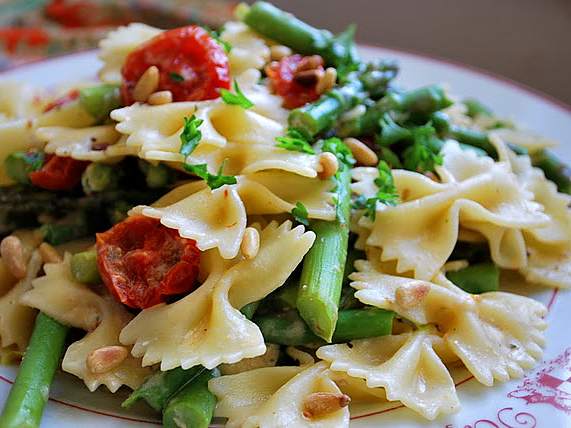
Enjoy! The pasta is great combination of flavors, and feels fresh and springy. I think I mentioned that I loved the oven dried tomatoes; they are amazing. I also love what the lemon pepper does to give the pasta a lighter zip. This is a meal that makes me and my girl very happy.

Thank you Dorothy for sharing all of your wonderful recipes! Be sure to check out Dorothy’s wonderful TK recipe box and her blog Belle of the Kitchen. And have you read her Tasty Kitchen feature yet? You’ll fall in love with her even more.


Printable Recipe

Bow Tie Pasta with Oven Dried Tomatoes, Asparagus, and Boursin

See post on barefootbelle’s site!
4.80 Mitt(s) 10 Rating(s)10 votes, average: 4.80 out of 510 votes, average: 4.80 out of 510 votes, average: 4.80 out of 510 votes, average: 4.80 out of 510 votes, average: 4.80 out of 5

Prep Time:

Cook Time:

Difficulty: Easy

Servings: 4

4
x

Print Options

Page size Letter 3x5 4x6
Text Size Small Medium Large
Content Include description
Include prep time, etc.
Show image

Description

This fresh dish hits the spot for a springtime dinner.

Ingredients

  • FOR THE OVEN DRIED TOMATOES:
  • 12 whole Cherry Tomatoes, Halved
  • 3 cloves Garlic
  • 1 teaspoon To 2 Teaspoons Olive Oil
  • 1 pinch Sugar
  • 1 pinch Kosher Salt
  • Freshly Ground Pepper
  • 4 leaves Basil, Julienned
  • _____
  • FOR THE PASTA:
  • ⅓ cups Pine Nuts
  • 8 ounces, weight Bow Tie Pasta
  • 1 bunch Asparagus, Ends Trimmed And Cut Into 2-3 Inch Pieces
  • 1 Tablespoon Olive Oil
  • 3 cloves Roasted Garlic (from The Above List), Chopped
  • 12 whole Oven Roasted Cherry Tomatoes (from The Above List)
  • 1 Tablespoon Fresh Basil, Julienned
  • ¼ cups Grated Parmesan Cheese
  • ¼ cups Garlic And Herb Boursin Cheese, Crumbled (a Good Herbed Goat Cheese Will Work, Too)
  • ¾ teaspoons Lemon Pepper
  • Kosher Salt And Pepper

Preparation Instructions

For the oven-dried tomatoes:

Preheat the oven to 225 degrees. In a small baking pan (I used a round cake pan), place the cherry tomato halves, cut side up. Drizzle with olive oil, sprinkle with sugar, salt and pepper. Sprinkle with basil. Tuck the garlic cloves in between the tomatoes. Bake for 3 1/2 hours. The tomatoes should be shriveled, but still have some moisture. Refrigerate the tomatoes and garlic until ready to use.

For the pasta:

Place a medium saucepan over medium heat. Cook the pine nuts in the dry skillet, shaking or stirring the pan constantly, until the pine nuts are slightly brown on all sides. Remove to a bowl.

In the same saucepan, bring six cups of well-salted water to a boil. Add the pasta and cook for 8 minutes. Add the asparagus and cook for two more minutes. Reserve 2/3 cups pasta water and drain the pasta and asparagus in a colander.

In the same saucepan, heat the olive oil over medium heat. Add the roasted garlic and cook for 30 seconds, then add the roasted tomatoes to warm through. Add the pasta, asparagus and reserved water, tossing to combine. Add the basil, cheeses, lemon pepper, and pine nuts. Toss everything together and taste for salt and pepper.


_______________________________________

Calli is truly a woman of many talents, from cooking, sewing, crafts, beautiful photography and gardening. Her blog, Make it Do is a treasure trove of recipes, household tips, crafts projects, sewing patterns … you name it. It’s also peppered with photos of her beautiful kids. Go visit her site, and visit it often. There’s always something new to learn there!


Profile photo of HowSweetEats

Cookies and Cream Cheesecake Bars

Posted by in Baking, Step-by-Step Recipes

Tasty Kitchen Blog: Cookies and Cream Cheesecake Bars. Guest post by Jessica Merchant of How Sweet It Is, recipe submitted by TK member Lori Lange of Recipe Girl.

 
If you asked me what my all-time favorite dessert is, the answer would most likely be cheesecake. Cheesecake is not only creamy and delightful but it can also take on almost any flavor, making the options limitless. I love every bite of the delectable treat, from chocolate ganache-topped fluffy sour cream, to the dense, cold cake in the middle, all the way down to the slightly sweet, slightly salty, always buttery crust. If we’re being honest, it doesn’t get much better than cheesecake.

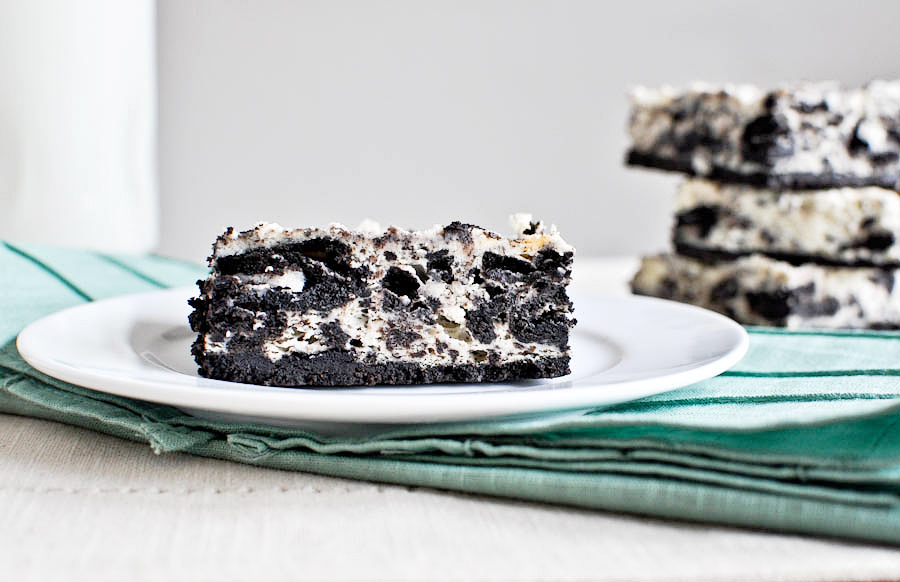
When I spied these Cookies and Cream Cheesecake Bars from Lori of Recipe Girl , my heart skipped a beat. Actually, it nearly fluttered out of my chest. Cheesecake in bar form … portable slices I could eat with my hands … sweet, chocolate crust … sold. Before I knew it, I was dragging out my stand mixer, finding the bag or Oreos that I knew I saved for a reason, and cutting my cream cheese into cubes so it could quickly come to room temperature. If you haven’t noticed, patience isn’t one of my strong points. It took everything in my being to not devour the entire pan of these incredible cheesecake slices. Check them out below.


Tasty Kitchen Blog: Cookies and Cream Cheesecake Bars. Guest post by Jessica Merchant of How Sweet It Is, recipe submitted by TK member Lori Lange of Recipe Girl.

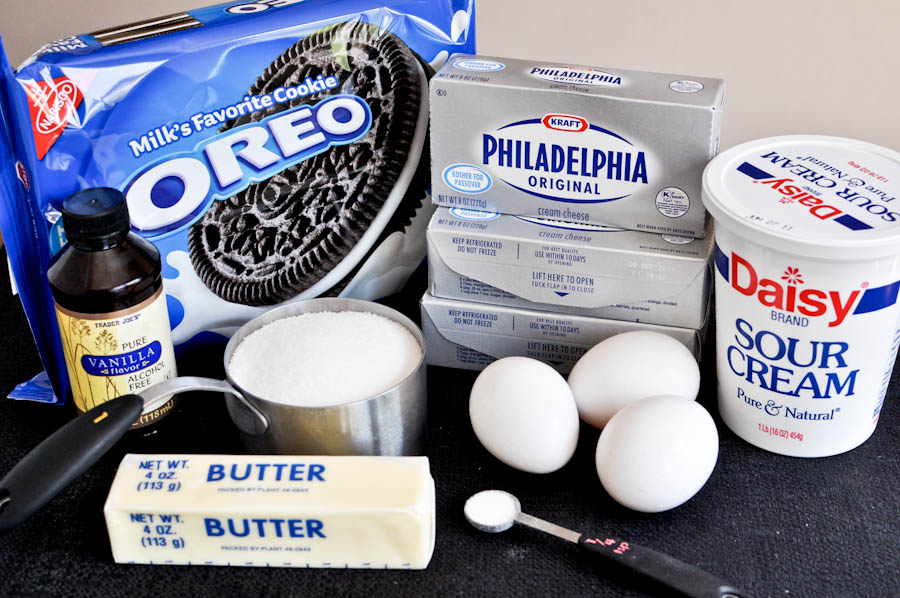
You only need a few ingredients to create these mouth watering bars: one package of Oreos, three packages of room temperature cream cheese, sour cream at room temperature, butter, room temperature eggs, sugar, salt and vanilla extract. Simple and tasty. Let’s get started!


Tasty Kitchen Blog: Cookies and Cream Cheesecake Bars. Guest post by Jessica Merchant of How Sweet It Is, recipe submitted by TK member Lori Lange of Recipe Girl.

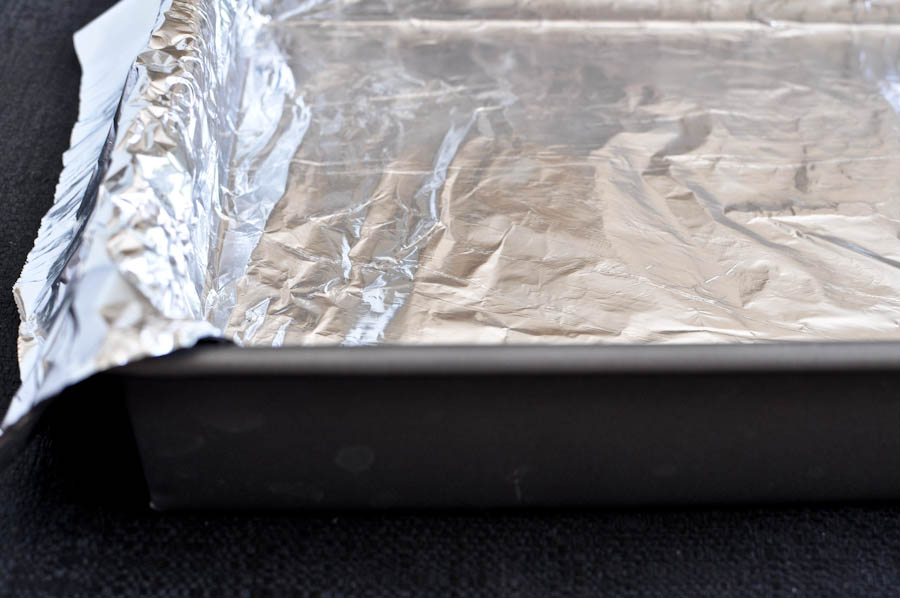
Preheat your oven to 325 degrees F. Line a 9 x 13 pan with aluminum foil and spray with non-stick spray.


Tasty Kitchen Blog: Cookies and Cream Cheesecake Bars. Guest post by Jessica Merchant of How Sweet It Is, recipe submitted by TK member Lori Lange of Recipe Girl.

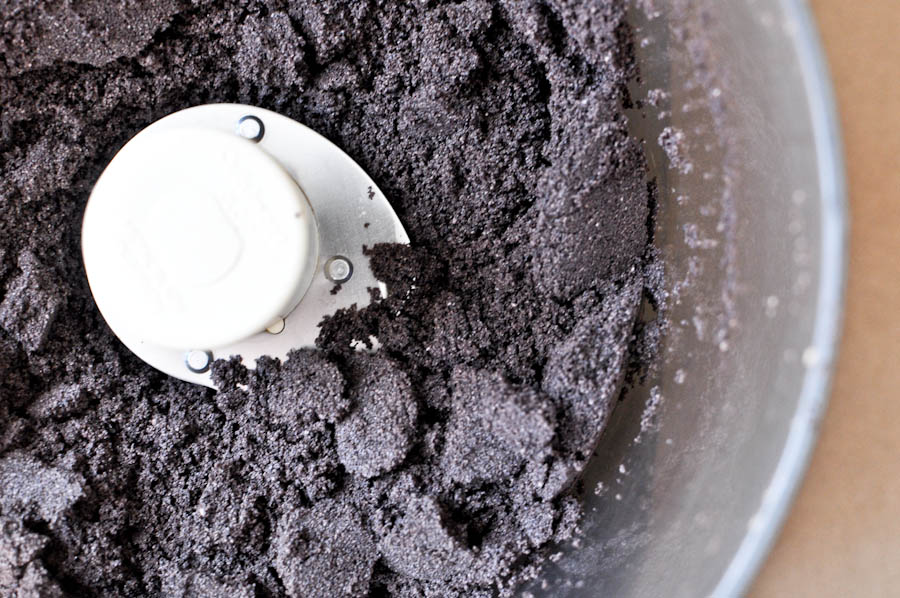
Begin with the crust. Add exactly 28 Oreos to your food processor. This is two sleeves of Oreos.


Tasty Kitchen Blog: Cookies and Cream Cheesecake Bars. Guest post by Jessica Merchant of How Sweet It Is, recipe submitted by TK member Lori Lange of Recipe Girl.

Process until the cookies become fine crumbs.


Tasty Kitchen Blog: Cookies and Cream Cheesecake Bars. Guest post by Jessica Merchant of How Sweet It Is, recipe submitted by TK member Lori Lange of Recipe Girl.

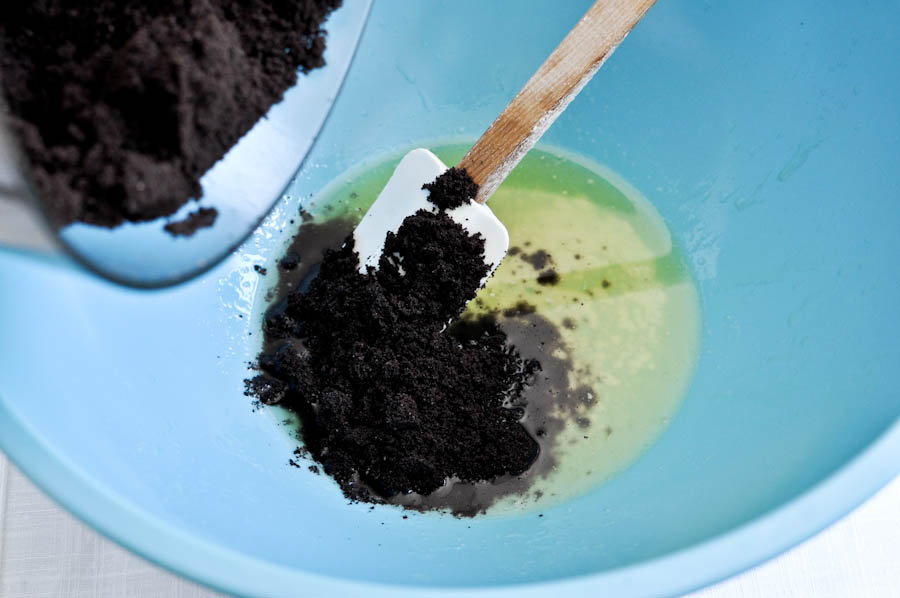
Melt four tablespoons of butter and add it to a large bowl. Pour in Oreo crumbs and using a flexible spatula, mix until moistened and combined.


Tasty Kitchen Blog: Cookies and Cream Cheesecake Bars. Guest post by Jessica Merchant of How Sweet It Is, recipe submitted by TK member Lori Lange of Recipe Girl.

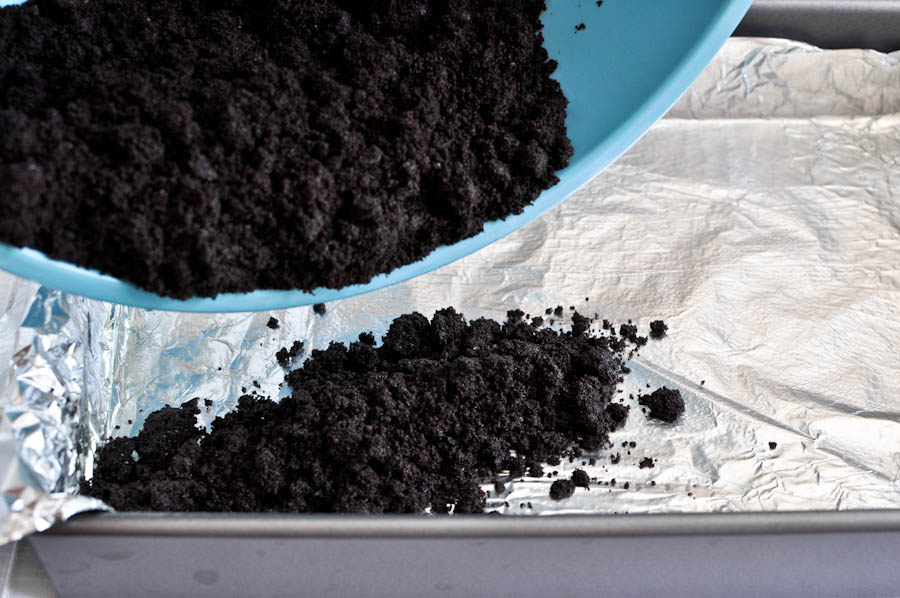
Pour the crumbs into the foil-lined pan.


Tasty Kitchen Blog: Cookies and Cream Cheesecake Bars. Guest post by Jessica Merchant of How Sweet It Is, recipe submitted by TK member Lori Lange of Recipe Girl.

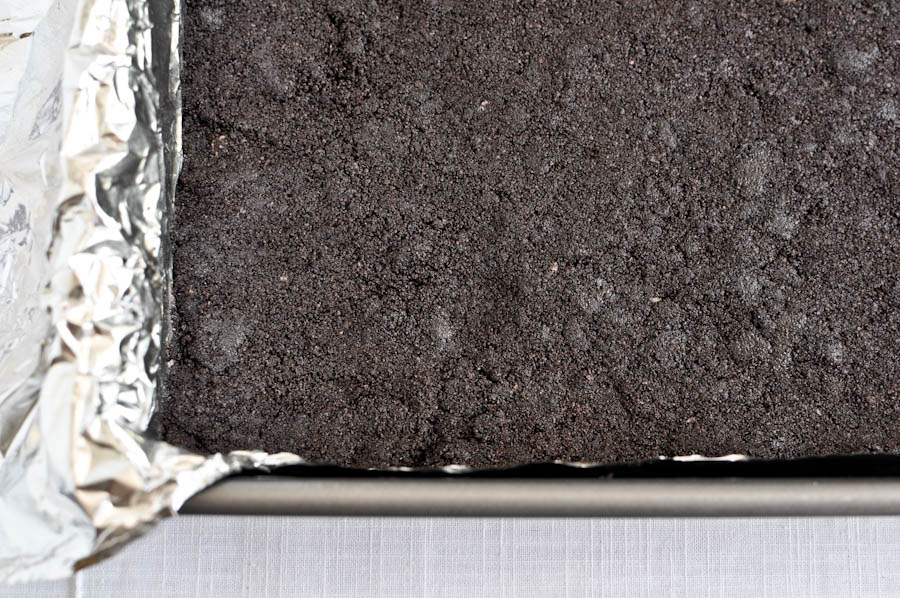
Distribute the crumbs evenly and press down with your fingers to flatten the crust. Place the pan in the oven and bake the crust for 10 minutes. After 10 minutes, remove the pan and let it cool. Leave the oven on because the cheesecake is going right back in.


Tasty Kitchen Blog: Cookies and Cream Cheesecake Bars. Guest post by Jessica Merchant of How Sweet It Is, recipe submitted by TK member Lori Lange of Recipe Girl.

While the crust is baking, start on your filling. First, break the remaining Oreos in half and add to the food processor. Pulse a few times just to break them apart; you still want some big cookie chunks. I pulsed my processor about five or six times.


Tasty Kitchen Blog: Cookies and Cream Cheesecake Bars. Guest post by Jessica Merchant of How Sweet It Is, recipe submitted by TK member Lori Lange of Recipe Girl.

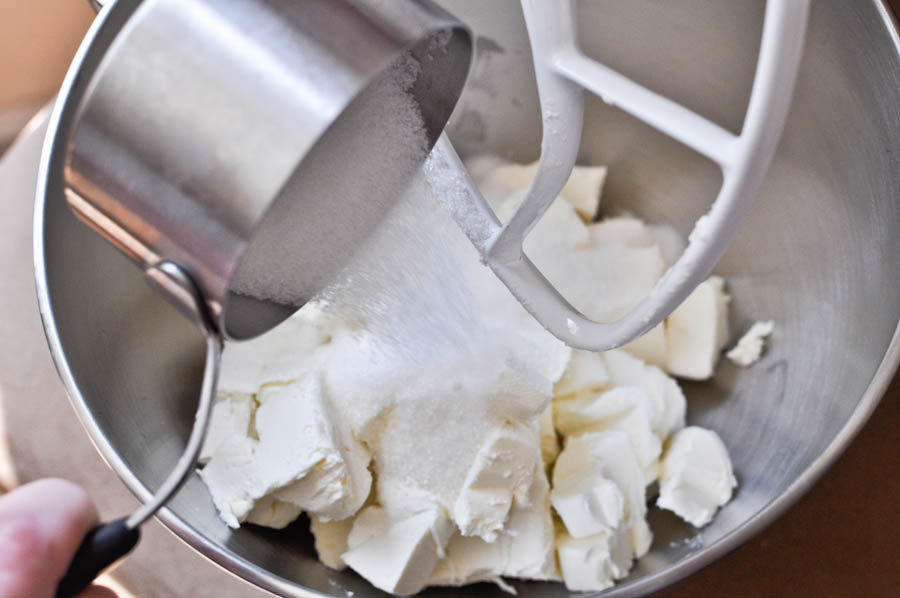
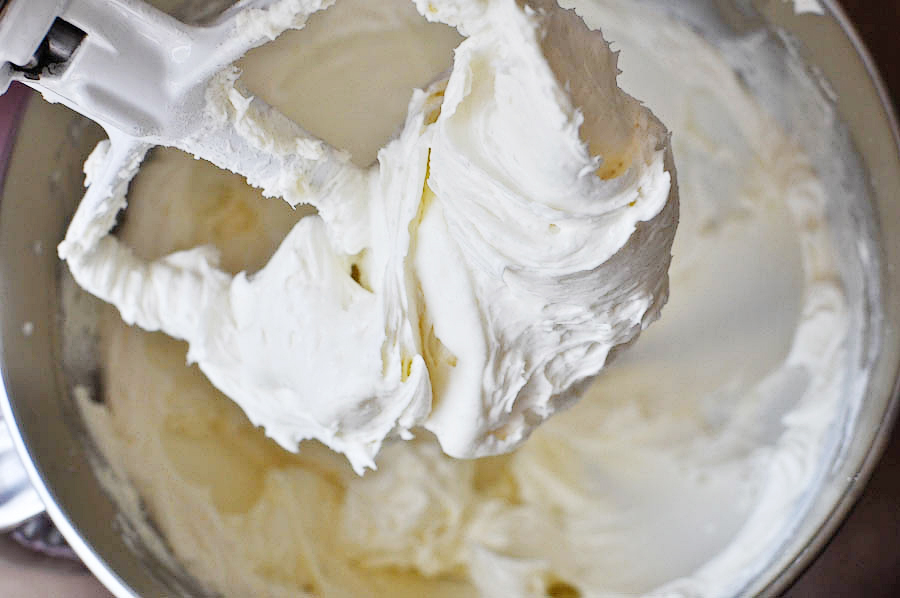
In the bowl of your electric mixer, add your softened cream cheese and sugar. Beat until the mixture is smooth and fluffy, about two minutes. Make sure to scrape down the sides and beat until it is uniformly thick.


Tasty Kitchen Blog: Cookies and Cream Cheesecake Bars. Guest post by Jessica Merchant of How Sweet It Is, recipe submitted by TK member Lori Lange of Recipe Girl.

It should look like this. Great. Now I’m hungry!


Tasty Kitchen Blog: Cookies and Cream Cheesecake Bars. Guest post by Jessica Merchant of How Sweet It Is, recipe submitted by TK member Lori Lange of Recipe Girl.

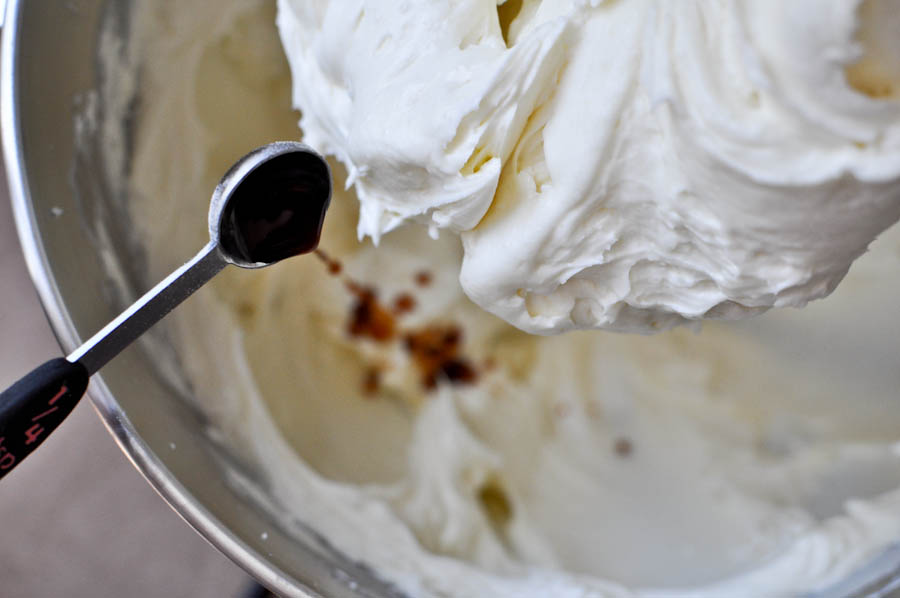
Beat in your sour cream, salt and vanilla extract, again making sure to scrape down the sides of the bowl.


Tasty Kitchen Blog: Cookies and Cream Cheesecake Bars. Guest post by Jessica Merchant of How Sweet It Is, recipe submitted by TK member Lori Lange of Recipe Girl.

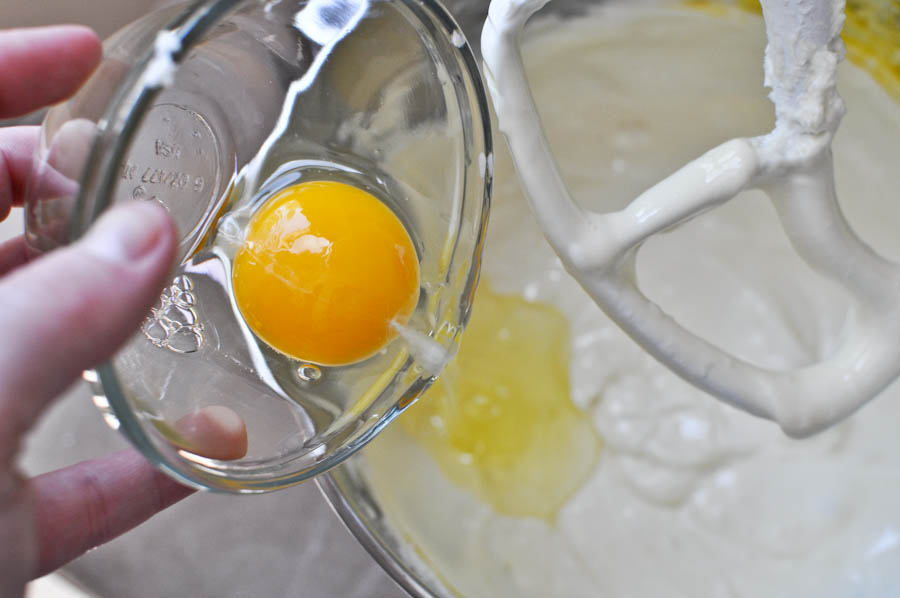
Add your eggs one at a time, beating after each addition. Make sure the eggs are completely mixed in and scrape down the sides of the bowl one last time to make sure everything is combined.


Tasty Kitchen Blog: Cookies and Cream Cheesecake Bars. Guest post by Jessica Merchant of How Sweet It Is, recipe submitted by TK member Lori Lange of Recipe Girl.

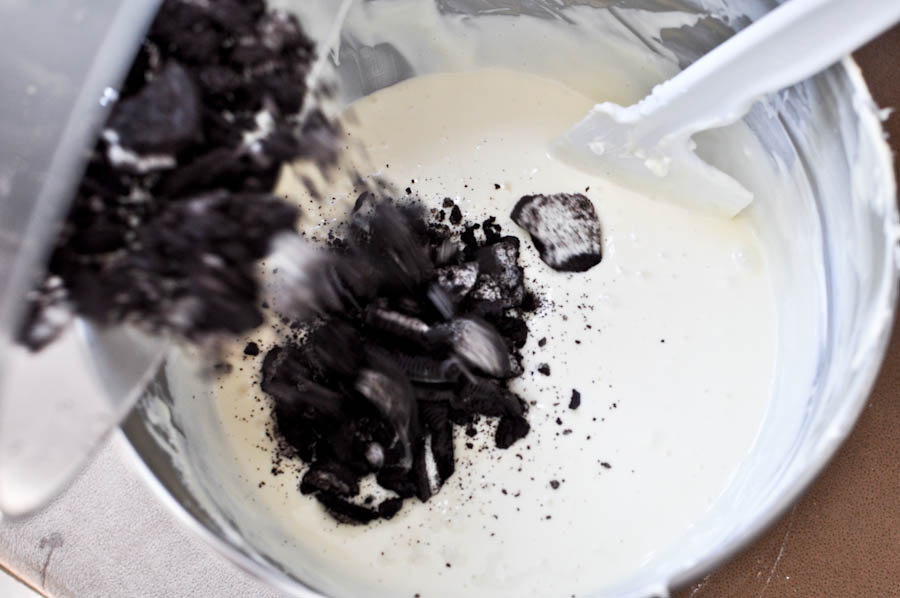
Add your chopped Oreos into the filling.


Tasty Kitchen Blog: Cookies and Cream Cheesecake Bars. Guest post by Jessica Merchant of How Sweet It Is, recipe submitted by TK member Lori Lange of Recipe Girl.

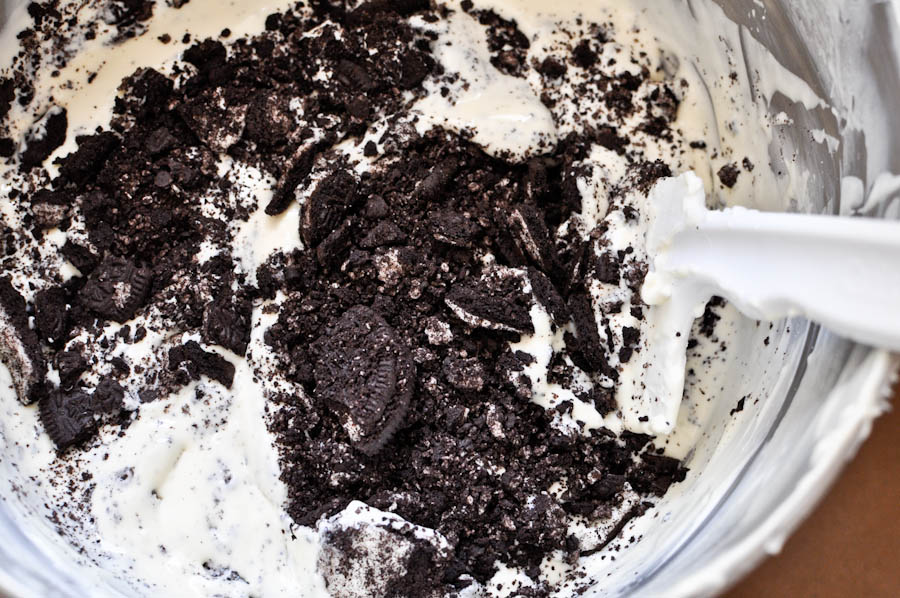
Fold the Oreos in with your spatula and try not to drool. I was unsuccessful.


Tasty Kitchen Blog: Cookies and Cream Cheesecake Bars. Guest post by Jessica Merchant of How Sweet It Is, recipe submitted by TK member Lori Lange of Recipe Girl.

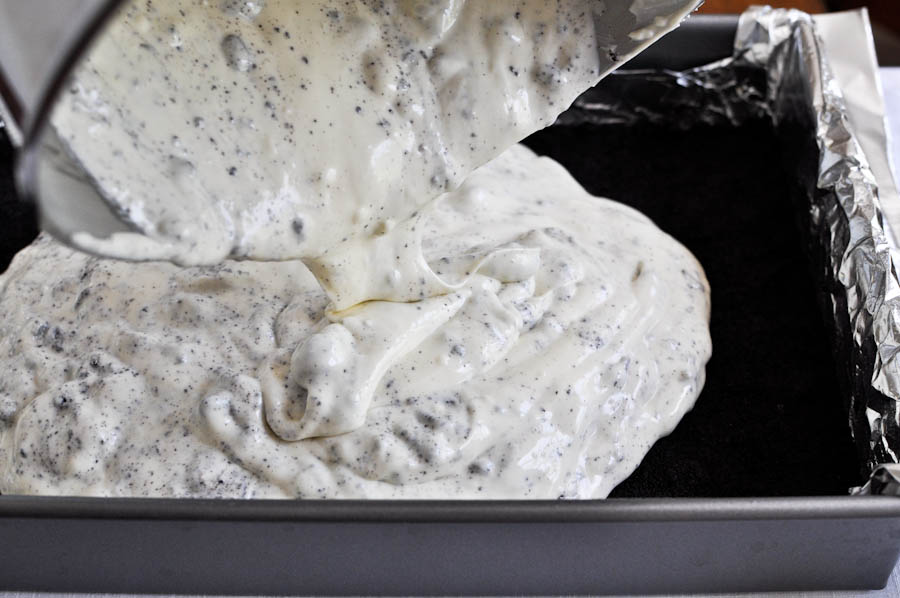
Pour the mixture on top of the crust and spread evenly with a spatula to distribute the filling.

Bake for 40 minutes, or until the outside is set but the middle is still a bit jiggly. Remove the pan and set aside on a cooling rack to cool completely. Once cool, cover it with foil and place it in the fridge to chill for a few hours, or overnight.

Wait … and wait … and wait … and dream about cookies and cream cheesecake.

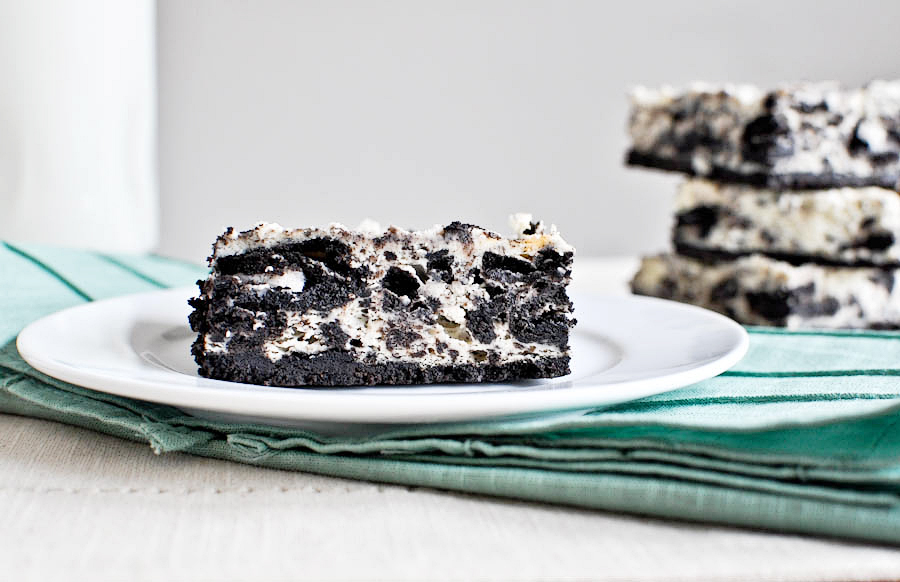
One the bars have chilled, lift the foil overhang out of the pan and place it on a cutting board. Using a large knife, cut the cheesecake into uniform squares, rinsing the knife with warm water between each slice.


Tasty Kitchen Blog: Cookies and Cream Cheesecake Bars. Guest post by Jessica Merchant of How Sweet It Is, recipe submitted by TK member Lori Lange of Recipe Girl.

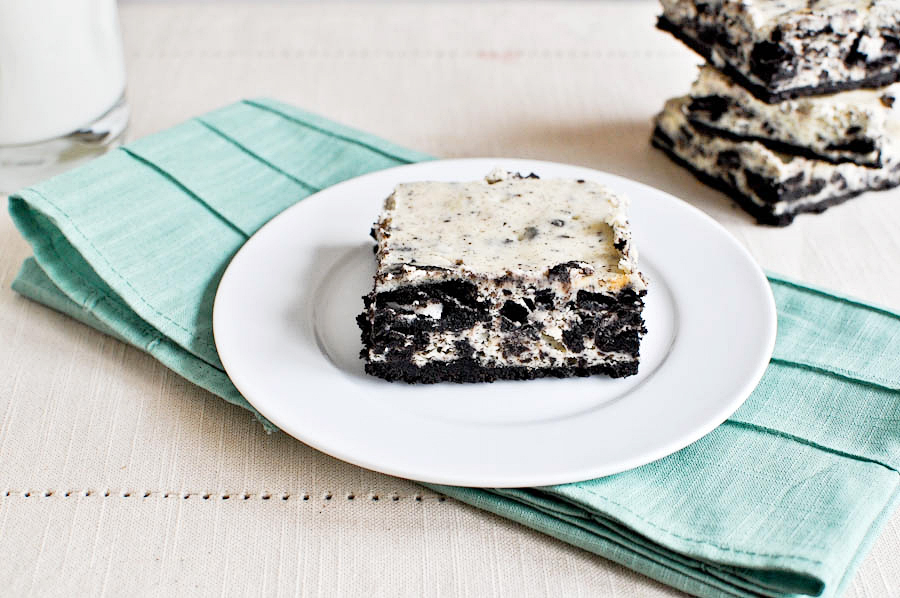
Serve yourself a big slice. Or two.


Tasty Kitchen Blog: Cookies and Cream Cheesecake Bars. Guest post by Jessica Merchant of How Sweet It Is, recipe submitted by TK member Lori Lange of Recipe Girl.
And enjoy!

These bars surpassed my expectations and tasted like heaven on a plate. I am already plotting my second go-round and can’t wait to share them at a few summer barbecues. Thanks so much for the recipe, Lori! Be sure to check out Lori’s website Recipe Girl. It’s loaded with hundreds of delicious recipes. Her site is one of my go-to sites for easy dinner ideas!


Printable Recipe

Cookies and Cream Cheesecake Bars

See post on RecipeGirl’s site!
4.75 Mitt(s) 20 Rating(s)20 votes, average: 4.75 out of 520 votes, average: 4.75 out of 520 votes, average: 4.75 out of 520 votes, average: 4.75 out of 520 votes, average: 4.75 out of 5

Prep Time:

Cook Time:

Difficulty: Intermediate

Servings: 24

24
x

Print Options

Page size Letter 3x5 4x6
Text Size Small Medium Large
Content Include description
Include prep time, etc.
Show image

Description

Oreo cookie fans everywhere will delight in these delicious cheesecake bars. :)

Ingredients

  • 1 pound Oreo Cookies
  • 4 Tablespoons Unsalted Butter, melted
  • 24 ounces, weight Cream Cheese, At Room Temperature
  • ¾ cups Granulated Sugar
  • ¾ cups Sour Cream At Room Temperature
  • 1 teaspoon Vanilla Extract
  • ½ teaspoons Salt
  • 3 whole Large Eggs, At Room Temperature

Preparation Instructions

1. Preheat oven to 325°F. Line a 9 x 13-inch pan with foil, leaving a 2-inch overhang on two sides (I spray mine with cooking spray).

2. Make the crust: place 28 Oreos in a food processor and process until finely ground. Pour into a large bowl, add the melted butter, and stir with a flexible spatula until all crumbs are moistened. Place the cookie-crumb mixture in the lined pan and, using your fingers, press the mixture firmly and evenly into the bottom. Bake for 10 minutes, then remove to a wire cooling rack (leave the oven on) while you make the filling. Snap the remaining Oreos in half, put them in the food processor, and turn on and off quickly a few times, just until the cookies are roughly chopped.

3. Make the filling: In a large bowl, using an electric mixer on medium speed, beat the cream cheese and sugar until well blended, about 2 minutes. Scrape down the sides and bottom of the bowl with a flexible spatula and beat again until uniform. Beat in sour cream, vanilla and salt. Scrape down the bowl and mix again. Add the eggs, one at a time, beating well after each. After beating in the last egg, scrape down the sides and bottom of the bowl and beat one more time, to make sure the mixture is fully combined. Stir in chopped Oreos with the same spatula.

4. Pour the cream cheese mixture over the baked cookie crust, smooth the top with the spatula, and bake for 40 minutes, until the filling is set around the edges but still slightly wobbly in the center when you gently shake the pan. Remove the pan to a wire rack to cool to room temperature, about 1 hour. When cool, cover it with foil and refrigerate until well chilled, at least 3 hours. (I chill mine overnight.)

5. To cut, use the foil overhang to lift the cheesecake out of the pan and place on a large cutting board. Use a sharp chef’s knife to cut the cheesecake into bars, rinsing off the knife with hot water and wiping it dry between each cut. Keep refrigerated until ready to serve.

Yield: 24 bars

Cooking Tips:
These work best served on flattened out cupcake papers with a fork stuck on top.


_______________________________________

Jessica Merchant is a personal trainer turned food writer and blogger. Her blog, How Sweet Eats, is where she proclaims her love for all things sweet, all things bacon, and everything else in between. She works her magic in her Pittsburgh kitchen, which she shares with her husband of 2 years.


Profile photo of georgiapellegrini

Spicy Moroccan Chickpeas

Posted by in Step-by-Step Recipes

Tasty Kitchen Blog: Spicy Moroccan Chickpeas. Guest post by Georgia Pellegrini, recipe submitted by TK member Nika of I'm Not Quite Sure What You Are Saying ...

 
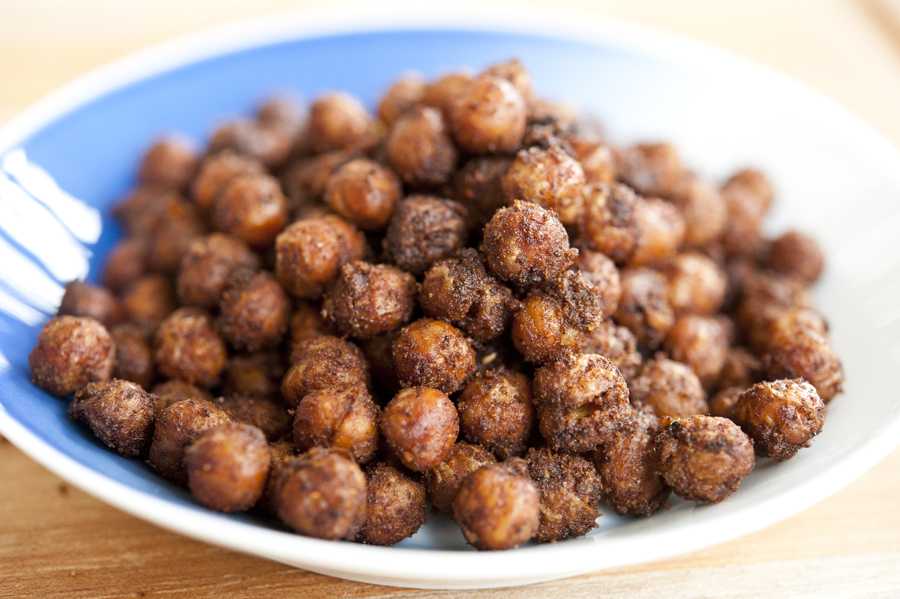
I just love chickpeas. Or is it garbanzo beans? Well, I love them either way. Sometimes, when I’m in a rush, I just empty a can of them into a bowl, add some of my favorite dressing and any herbs I can find and it’s a meal. They are so versatile. I’ve noticed that people are finding yet another great way to make them at home by turning them into a crispy snack. This spicy Moroccan style by Nika really caught my eye. Spicy, crispy, Moroccan chickpea-garbanzo beans? I’m sold.


Tasty Kitchen Blog: Spicy Moroccan Chickpeas. Guest post by Georgia Pellegrini, recipe submitted by TK member Nika of I'm Not Quite Sure What You Are Saying ...

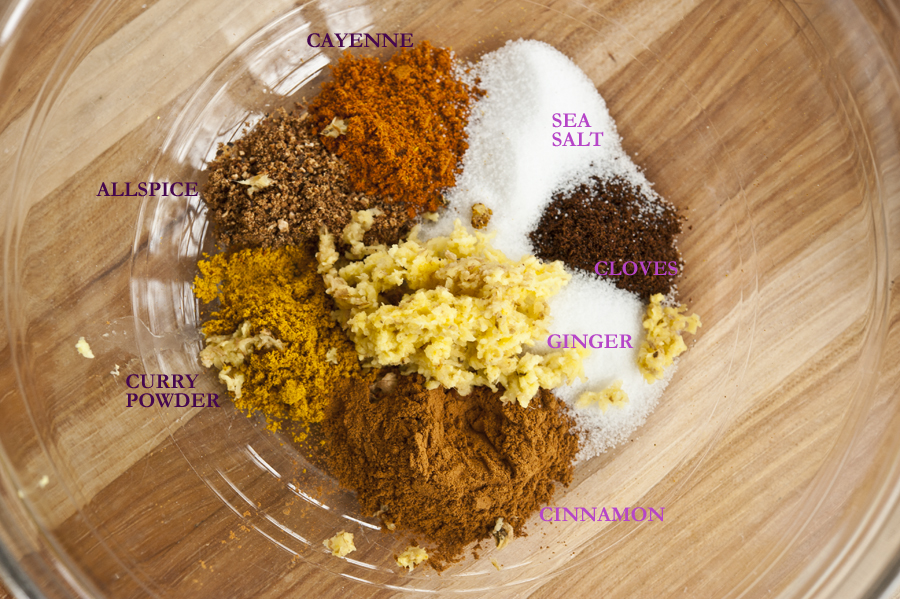
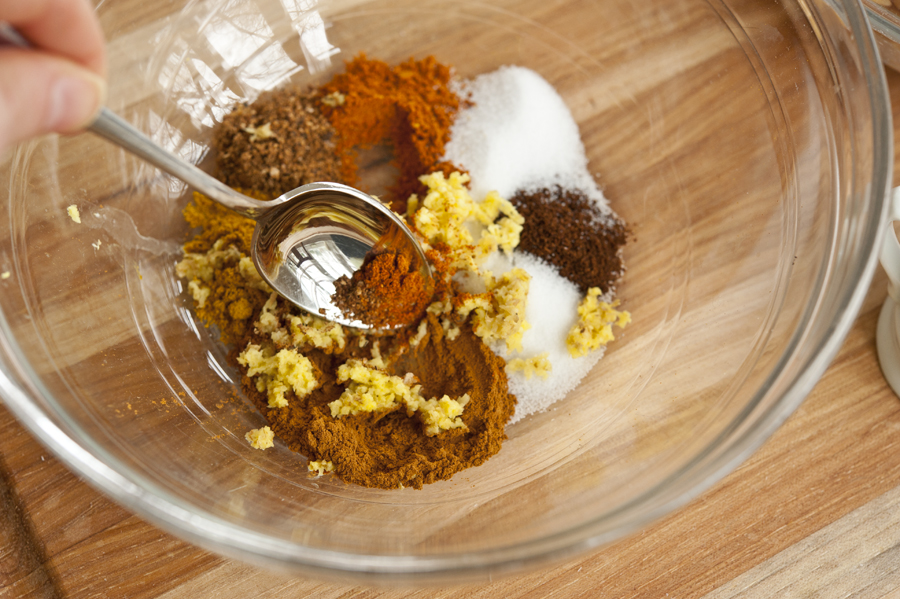
You begin by combining all of these wonderful and aromatic spices into a bowl. The fresh ginger is particularly wonderful in the way it smells. Close your eyes for a moment, inhale, and imagine yourself in the spice stalls of Morocco …


Tasty Kitchen Blog: Spicy Moroccan Chickpeas. Guest post by Georgia Pellegrini, recipe submitted by TK member Nika of I'm Not Quite Sure What You Are Saying ...

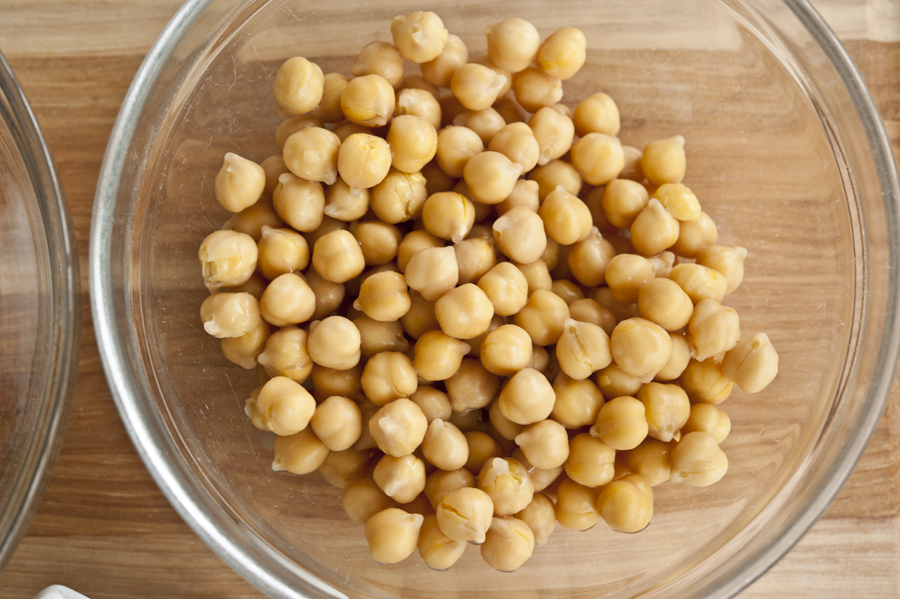
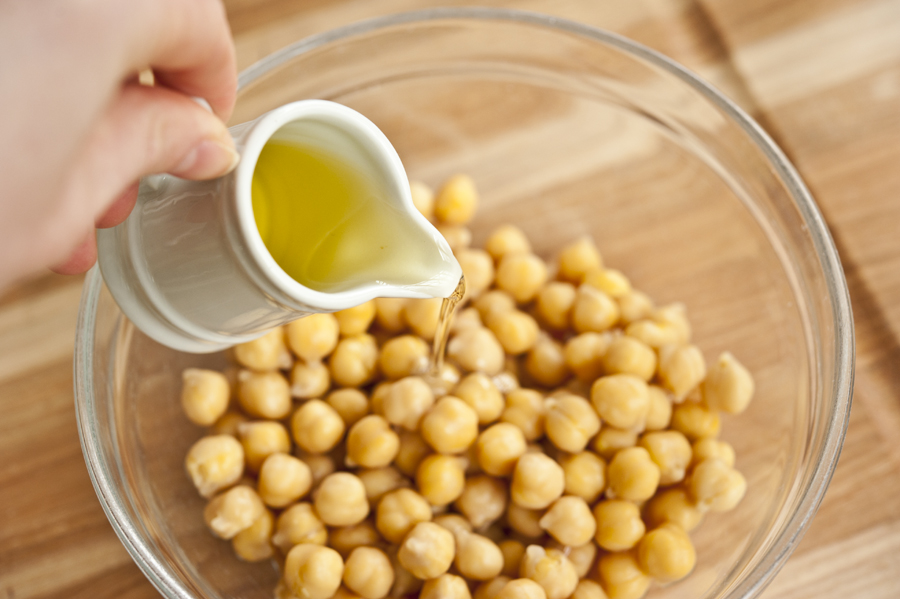
Okay, open your eyes. In a separate bowl you’ll need a can of chickpeas.


Tasty Kitchen Blog: Spicy Moroccan Chickpeas. Guest post by Georgia Pellegrini, recipe submitted by TK member Nika of I'm Not Quite Sure What You Are Saying ...

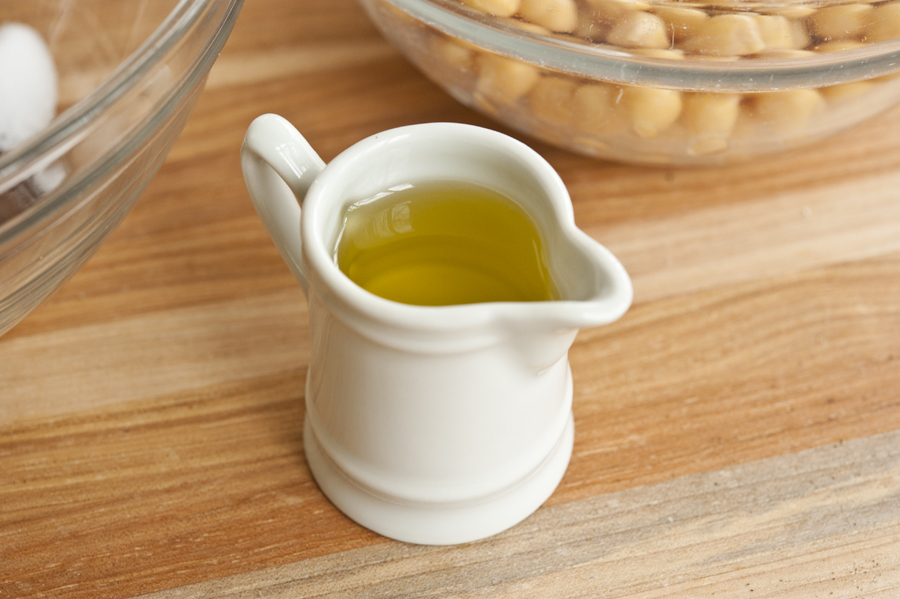
You’ll also need a bit of olive oil to help you coat the mixture onto the beans thoroughly.


Tasty Kitchen Blog: Spicy Moroccan Chickpeas. Guest post by Georgia Pellegrini, recipe submitted by TK member Nika of I'm Not Quite Sure What You Are Saying ...

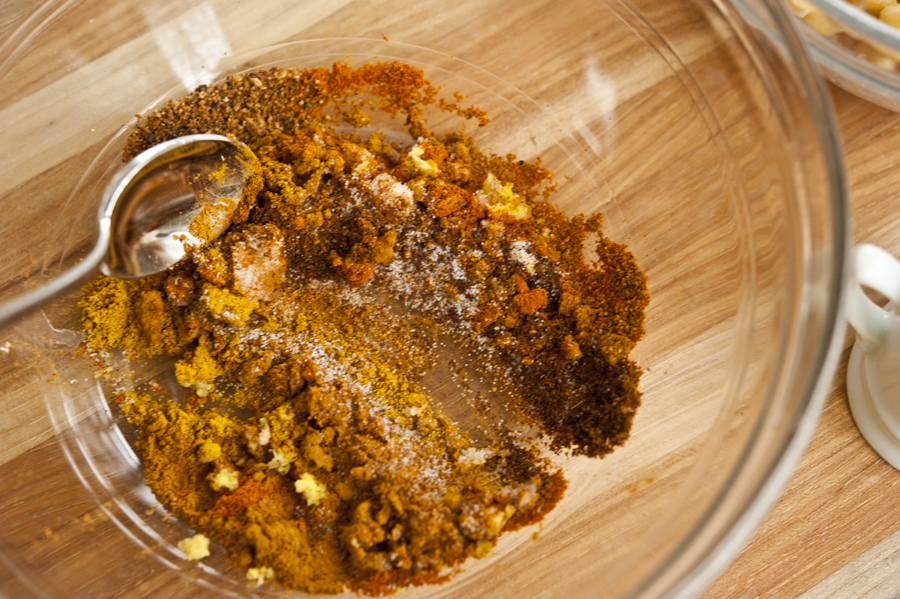
Give your spices a mix.


Tasty Kitchen Blog: Spicy Moroccan Chickpeas. Guest post by Georgia Pellegrini, recipe submitted by TK member Nika of I'm Not Quite Sure What You Are Saying ...

It looks a bit like a work of art, all of that color.


Tasty Kitchen Blog: Spicy Moroccan Chickpeas. Guest post by Georgia Pellegrini, recipe submitted by TK member Nika of I'm Not Quite Sure What You Are Saying ...

Pour the olive oil into the chickpeas and toss with a spoon.


Tasty Kitchen Blog: Spicy Moroccan Chickpeas. Guest post by Georgia Pellegrini, recipe submitted by TK member Nika of I'm Not Quite Sure What You Are Saying ...

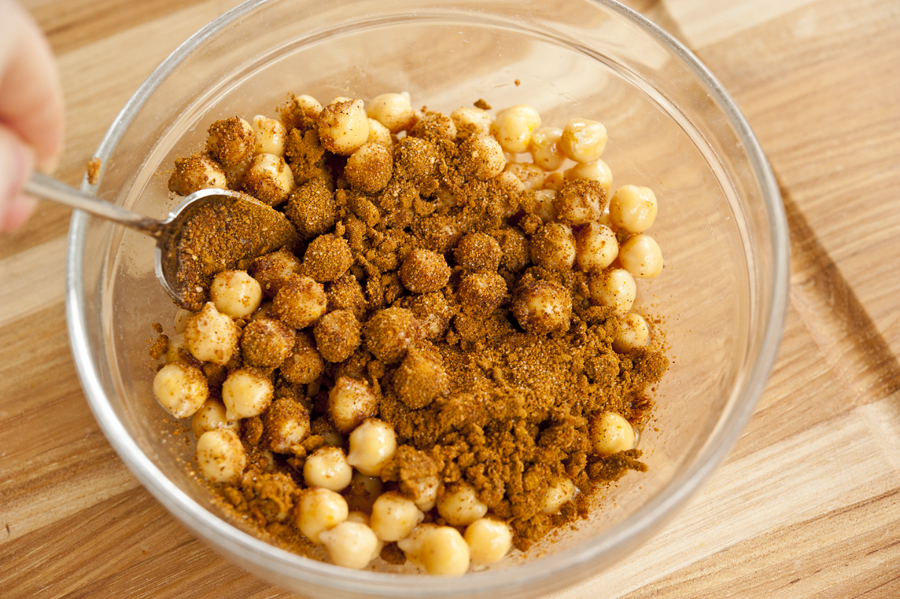
Add the spice mixture and stir it well.


Tasty Kitchen Blog: Spicy Moroccan Chickpeas. Guest post by Georgia Pellegrini, recipe submitted by TK member Nika of I'm Not Quite Sure What You Are Saying ...

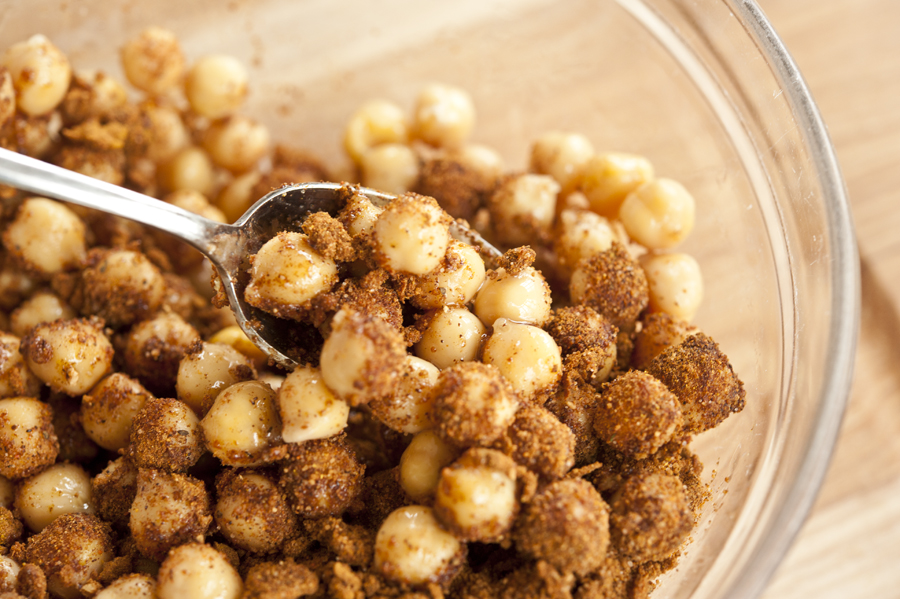
As you mix, the ingredients will go from dry to a spicy syrup and begin to coat the chickpeas evenly.


Tasty Kitchen Blog: Spicy Moroccan Chickpeas. Guest post by Georgia Pellegrini, recipe submitted by TK member Nika of I'm Not Quite Sure What You Are Saying ...

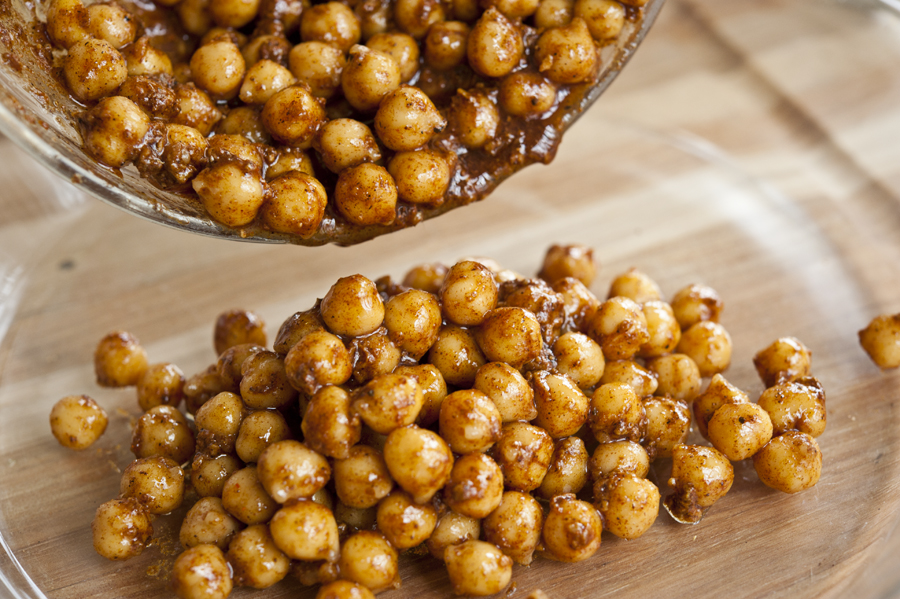
When they look well-coated, pour them all into a baking dish.


Tasty Kitchen Blog: Spicy Moroccan Chickpeas. Guest post by Georgia Pellegrini, recipe submitted by TK member Nika of I'm Not Quite Sure What You Are Saying ...

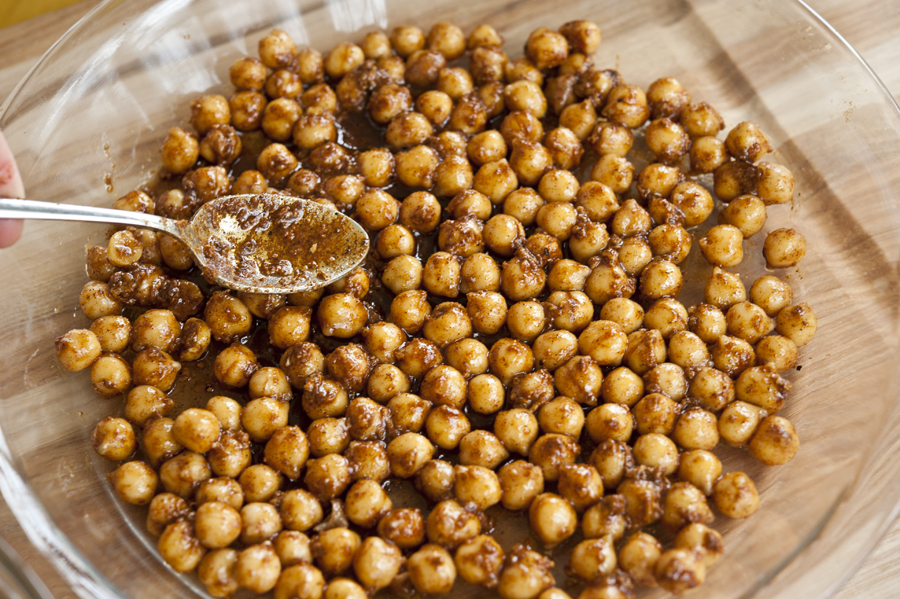
Spread them evenly with a spoon, and pop them into the oven.


Tasty Kitchen Blog: Spicy Moroccan Chickpeas. Guest post by Georgia Pellegrini, recipe submitted by TK member Nika of I'm Not Quite Sure What You Are Saying ...

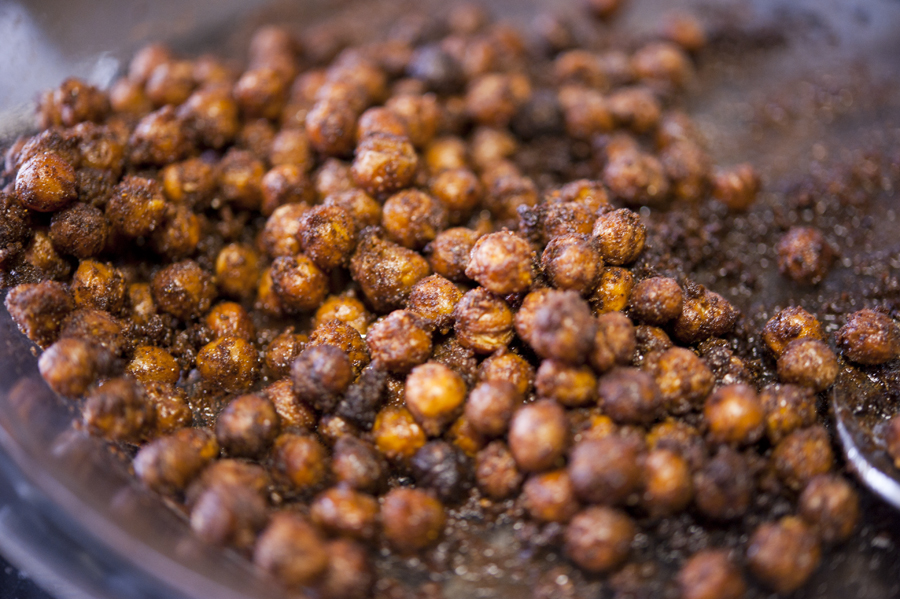
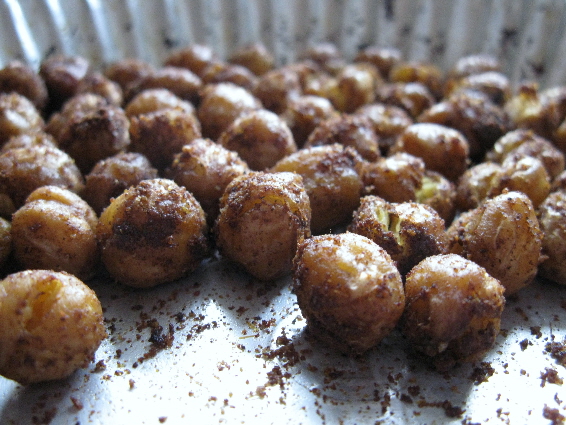
When they are ready, they will be golden brown with a vaguely soft inside, which should dry out and become crisp as they cool. If that doesn’t happen, you can pop them back in for a bit longer. I found that mine needed about 45 minutes total rather than 30. I also would suggest cutting the salt amount in half. You can always add more later, when they’re done.


Tasty Kitchen Blog: Spicy Moroccan Chickpeas. Guest post by Georgia Pellegrini, recipe submitted by TK member Nika of I'm Not Quite Sure What You Are Saying ...

They’re quite a delicious snack to have sitting at your fingertips. You could also try other favorite beans. I had toasted black-eyed peas not long ago and they were great as well.

Give these a try! And thanks to Nika (who blogs at I’m Not Quite Sure What You Are Saying) for contributing them to Tasty Kitchen.

 
Here are some other wonderful roasted chickpea recipes from TK members:


Printable Recipe

Spicy Moroccan Roasted Chickpeas

5.00 Mitt(s) 2 Rating(s)2 votes, average: 5.00 out of 52 votes, average: 5.00 out of 52 votes, average: 5.00 out of 52 votes, average: 5.00 out of 52 votes, average: 5.00 out of 5

Prep Time:

Cook Time:

Difficulty: Easy

Servings: 4

4
x

Print Options

Page size Letter 3x5 4x6
Text Size Small Medium Large
Content Include description
Include prep time, etc.
Show image

Description

This is a delicious and healthy alternative to the usual “I’m watching (insert favourite show) and need a really tasty snack.” It can be made with a combination of your favourite herbs and spices. This recipe is just one example.

Ingredients

  • 1 can (15 Oz. Can) Chickpeas
  • ¼ cups Olive Oil
  • ½ teaspoons Curry Powder
  • ½ teaspoons Allspice
  • ½ teaspoons Ground Cloves
  • ½ teaspoons Pumpkin Pie Spice (optional... If You Have It In Your Spice Rack, Use It!)
  • 2 teaspoons Cinnamon
  • ½ teaspoons Cayenne Powder (or More... If You Are The Spicy Type!)
  • 2 teaspoons Fresh Grated Ginger
  • 2 teaspoons Sea Salt

Preparation Instructions

Preheat the oven to 400ºF.

Toss the chickpeas in oil, then put them into a bowl. Combine all the spices in a separate little bowl for your spice blend. Give it a good mix, then sprinkle over the chickpeas, and toss to coat evenly.

Put the chickpeas onto a baking sheet and into the oven for about 30 minutes. About halfway through, give them a bit of a shake. At the end of the 30 minutes, taste! If they are still soft, back in they go! You want them to have just a little bit of a soft center. When they cool, they will crisp up more.


_______________________________________

There’s so much to say about Georgia, we don’t know where to start. Leaving Wall Street for the French Culinary Institute, followed by a stint at the Gramercy Tavern and La Chassagnette in France, her passion for food and food traditions are evident and inspiring. Visit her site at Georgia Pellegrini, where you’ll find more recipes, photos, learn all about her wonderful book Food Heroes, and enjoy her latest adventures.


Profile photo of twopeasandtheirpod

Chocolate Chip Waffles

Posted by in Step-by-Step Recipes

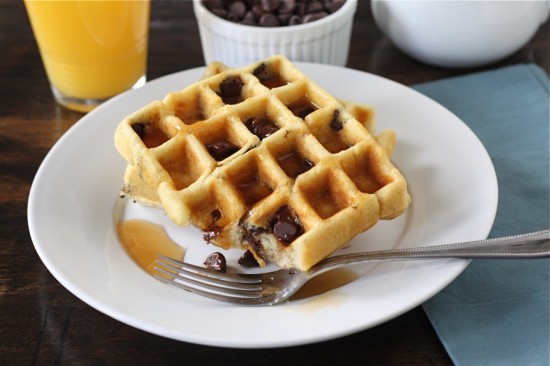
  Our breakfasts are usually simple during the week: oatmeal, toast, cereal, or yogurt and fruit. On the weekends, we like to splurge and make a special breakfast meal. We usually rotate pancakes, French toast, omelets, and waffles. When it is Josh’s turn to choose, he almost always picks waffles. He recently asked if we […]

Profile photo of missamy

Brie and Bacon Quiche

Posted by in Step-by-Step Recipes

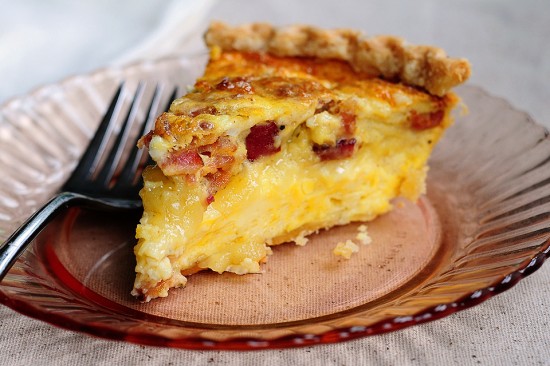
  Quiche may be considered the quintessential fare for Mother’s Day, a bridal luncheon, or any event centered around food and women. But my husband was quite swept away by this Brie and Bacon Quiche from Tasty Kitchen member Nancy in New Mexico. And, yes, he’s a real man, apparently a real man who recognizes […]

Profile photo of Erica Lea

Rosemary and Thyme Spread

Posted by in Step-by-Step Recipes

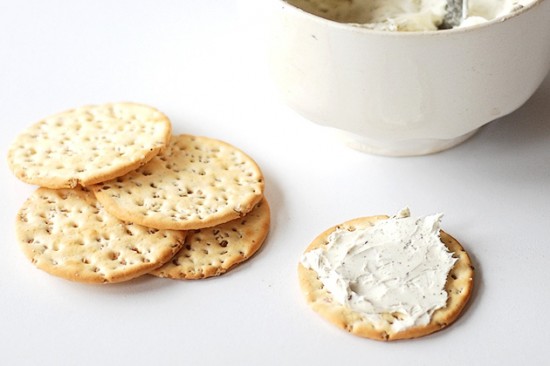
  Five. Simple. Ingredients. Seriously! That’s all that goes into this ultra-simple yet super-yummy dip. You’ll weep when you realize how easily it comes together. Okay, maybe you won’t have quite that emotional reaction, but you’re sure to be pleased at how quickly you’ll have it on the table. Let me show you how!   […]

Profile photo of Natalie | Perry's Plate

Lamb Tostadas

Posted by in Step-by-Step Recipes

  Ah, lamb. I must admit, I haven’t eaten a lot of lamb in my life. My grandpa was a sheep farmer before he passed away, and my parents ate quite a bit of mutton meals in their home during the early years of marriage. My mom always thought mutton (and lamb) smelled funny, so […]