The Pioneer Woman Tasty Kitchen
Profile photo of missamy

No-Bake Chocolate Cheesecake

Posted by in Step-by-Step Recipes

Tasty Kitchen Blog: No-Bake Chocolate Cheesecake. Guest post by Amy Johnson of She Wears Many Hats, recipe submitted by TK member Anna of Crunchy Creamy Sweet.

 
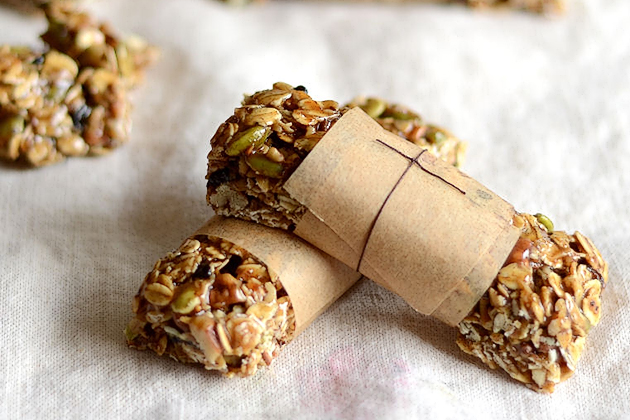
Can I tell you a secret? I’ve only made a real cheesecake once before. I was a nervous wreck waiting to see if it would crack, and wondering if I’d be able to loosen it from the pan without a total mess. It turned out just fine, but I’ve yet to make another since. I know, I’m silly. But I have been seeing a bunch of no-bake cheesecakes lately, served up in cute individual dishes. Up until last week I had yet to try a recipe for one myself, but then I discovered this recipe from Tasty Kitchen member, Anna, for a No-Bake Chocolate Cheesecake. This recipe has a little sumpin’ sumpin’ that tempted me to give it a go: a Biscoff cookie crust. Yes indeedy. Biscoff + chocolate? It had my name written all over it.

Fair warning: This is one rich and indulgent cheesecake. A small piece (about 1/12 of the whole) is the perfect serving size. My daughter said she wanted some whipped cream to top it with, but I think she’s lost her marbles. It was quite satisfying enough with a light dusting of cocoa powder. And the crust? Wow. Totally a crust that will be used for other desserts in the future.

Want to see how it goes together?


Tasty Kitchen Blog: No-Bake Chocolate Cheesecake. Guest post by Amy Johnson of She Wears Many Hats, recipe submitted by TK member Anna of Crunchy Creamy Sweet.

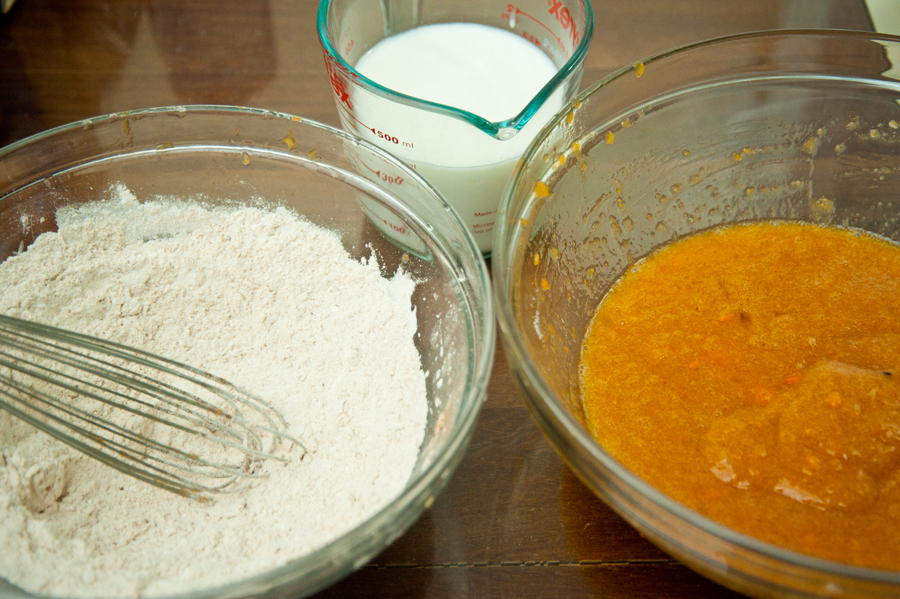
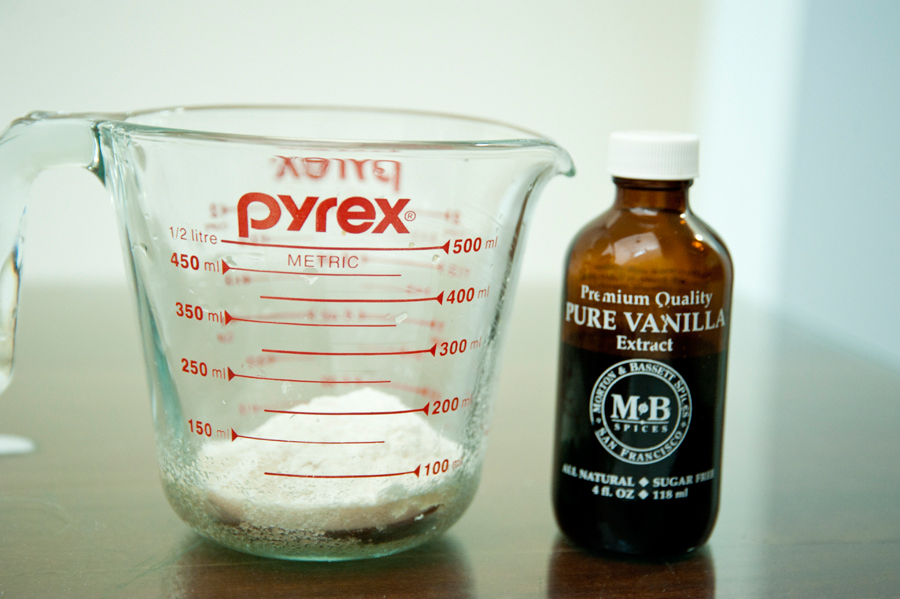
You’ll need: Biscoff cookies, cocoa powder, melted butter, cream cheese, powdered sugar, vanilla, bittersweet chocolate, semisweet chocolate, whipping cream, and more cocoa powder for dusting. (The recipe calls for chopped chocolate, but I used a combo of both bittersweet chocolate chips and semisweet chocolate chips, which worked quite nicely.)


Tasty Kitchen Blog: No-Bake Chocolate Cheesecake. Guest post by Amy Johnson of She Wears Many Hats, recipe submitted by TK member Anna of Crunchy Creamy Sweet.

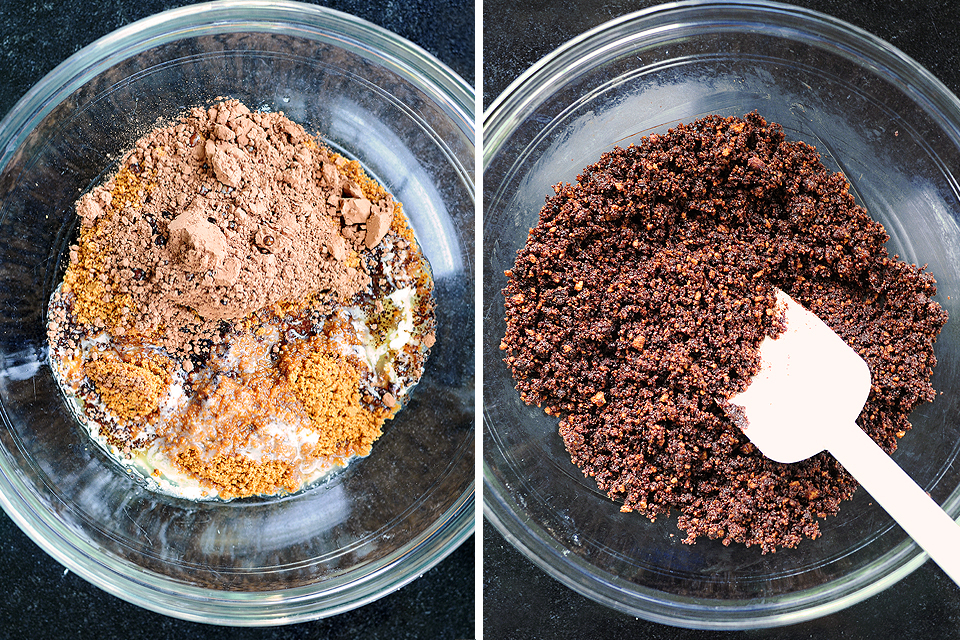
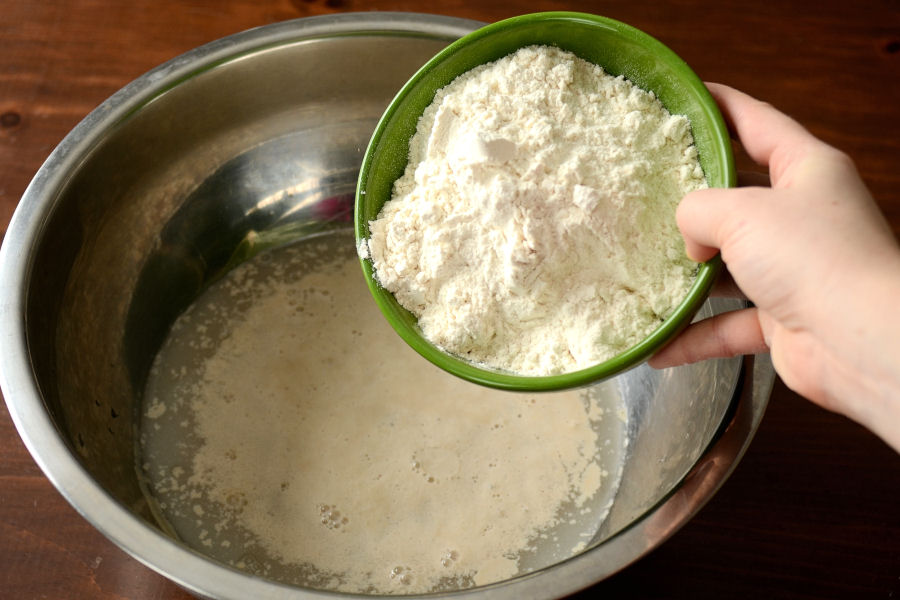
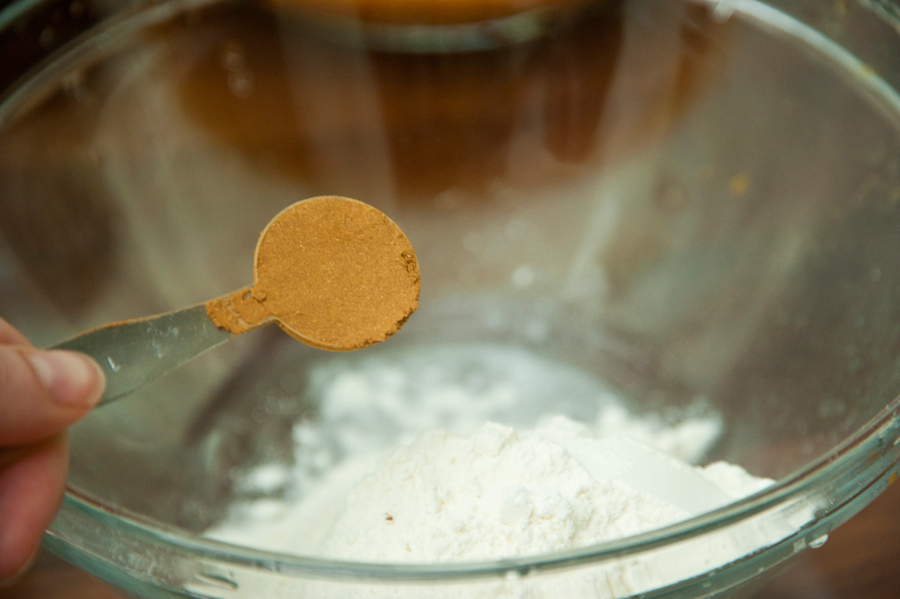
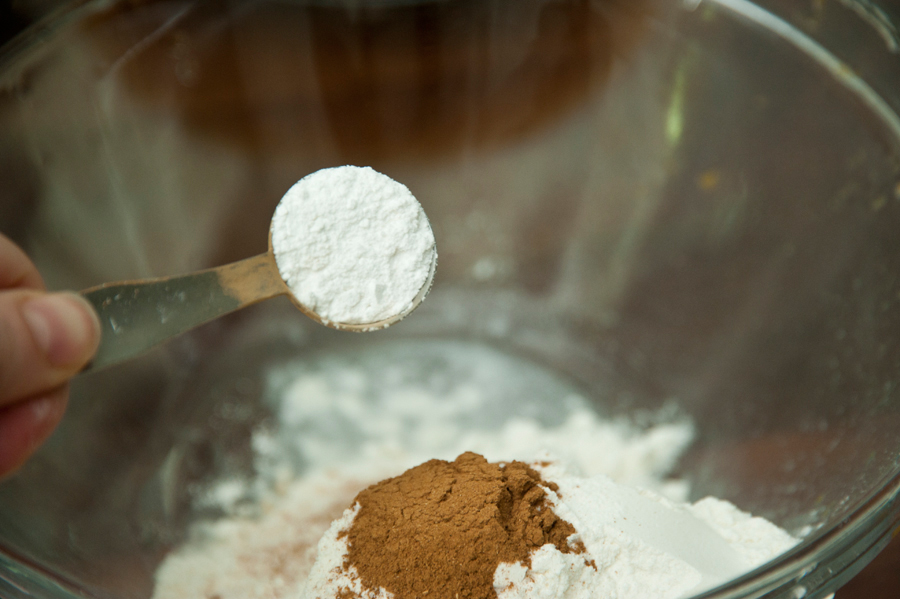
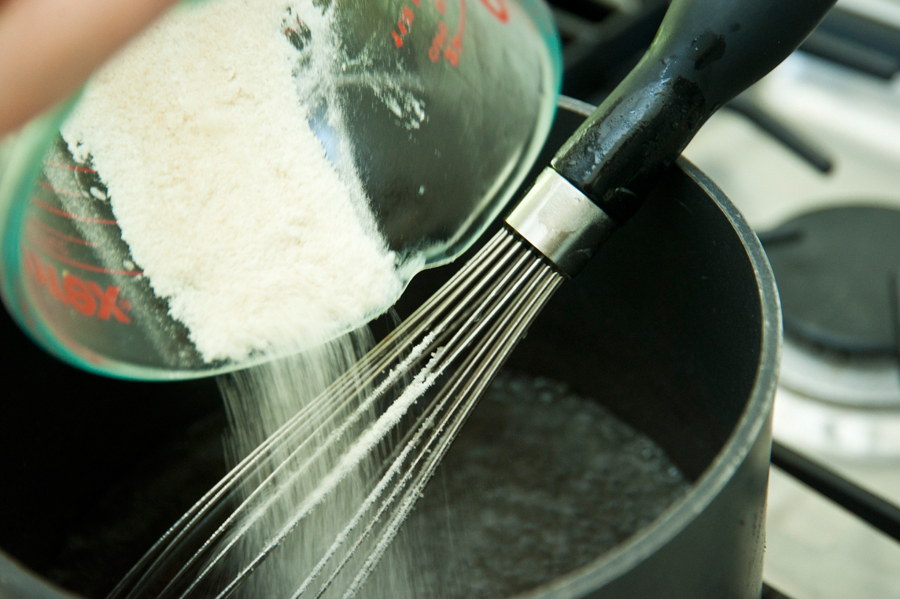
For the crust, combine the cookie crumbs, 4 tablespoons cocoa powder, and butter.


Tasty Kitchen Blog: No-Bake Chocolate Cheesecake. Guest post by Amy Johnson of She Wears Many Hats, recipe submitted by TK member Anna of Crunchy Creamy Sweet.

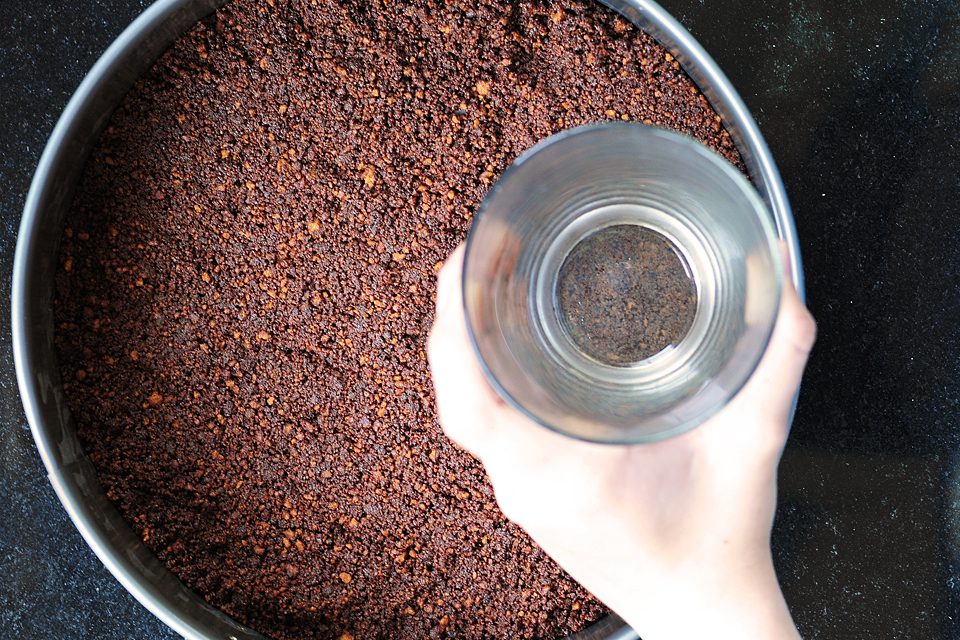
Firmly press in bottom of a springform pan. I like to use a flat-bottomed glass to evenly press the crust out. Once the crust is ready, set aside.

I almost decided on individual serving dishes to avoid the worry of whether or not it would loosen from the pan, but opted for the whole cheesecake route with no trouble whatsoever. This recipe could easily be prepared using individual servings, but just remember, it’s very rich, so you may want to make the servings on the small side.


Tasty Kitchen Blog: No-Bake Chocolate Cheesecake. Guest post by Amy Johnson of She Wears Many Hats, recipe submitted by TK member Anna of Crunchy Creamy Sweet.

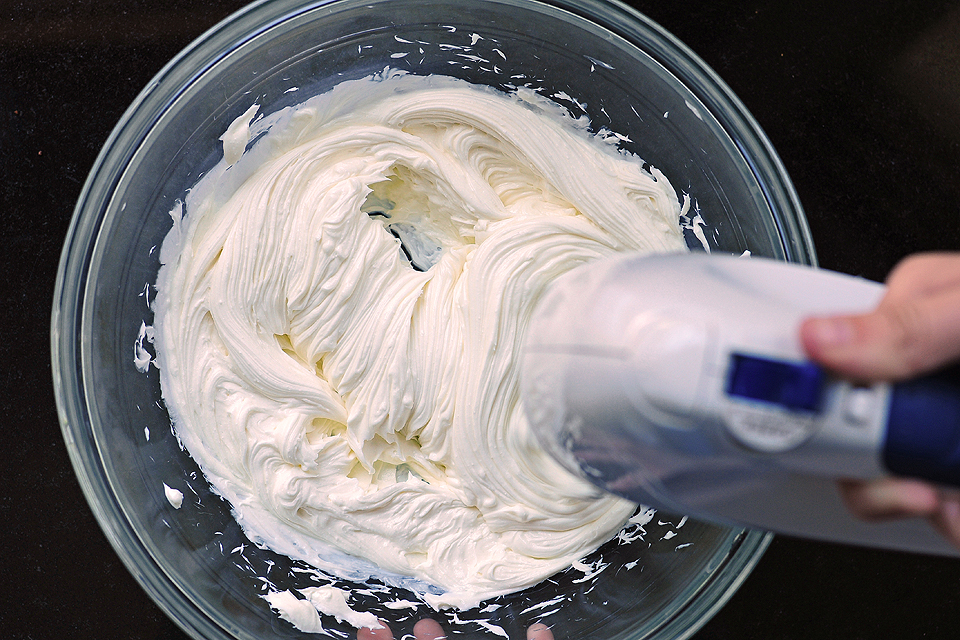
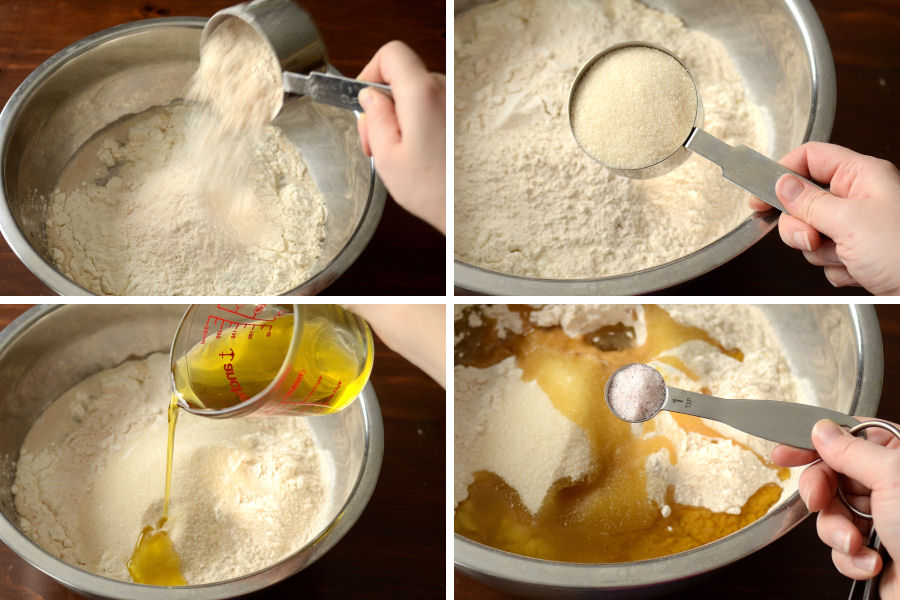
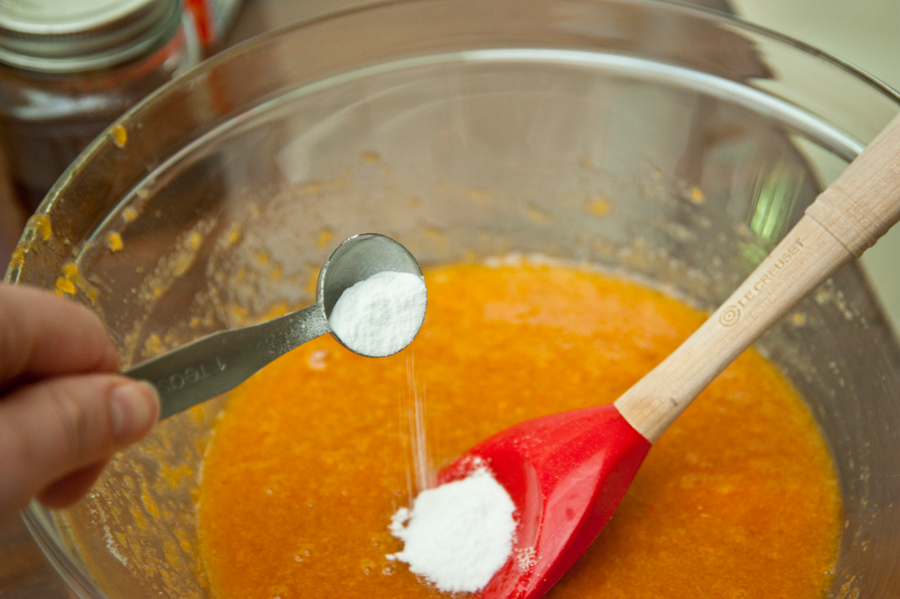
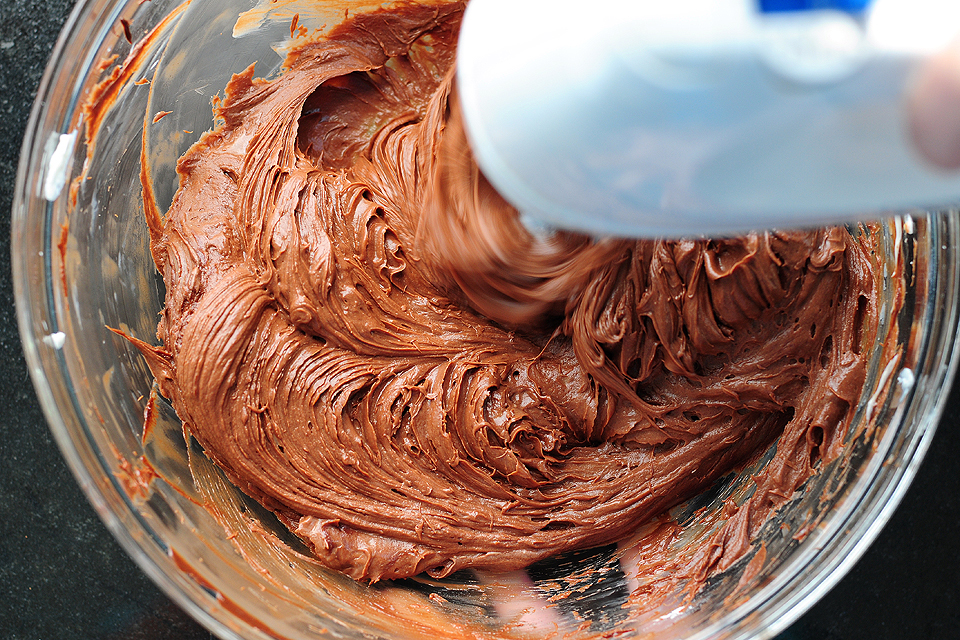
Now for the chocolate cream cheese goodness. Begin by beating the cream cheese until smooth.


Tasty Kitchen Blog: No-Bake Chocolate Cheesecake. Guest post by Amy Johnson of She Wears Many Hats, recipe submitted by TK member Anna of Crunchy Creamy Sweet.

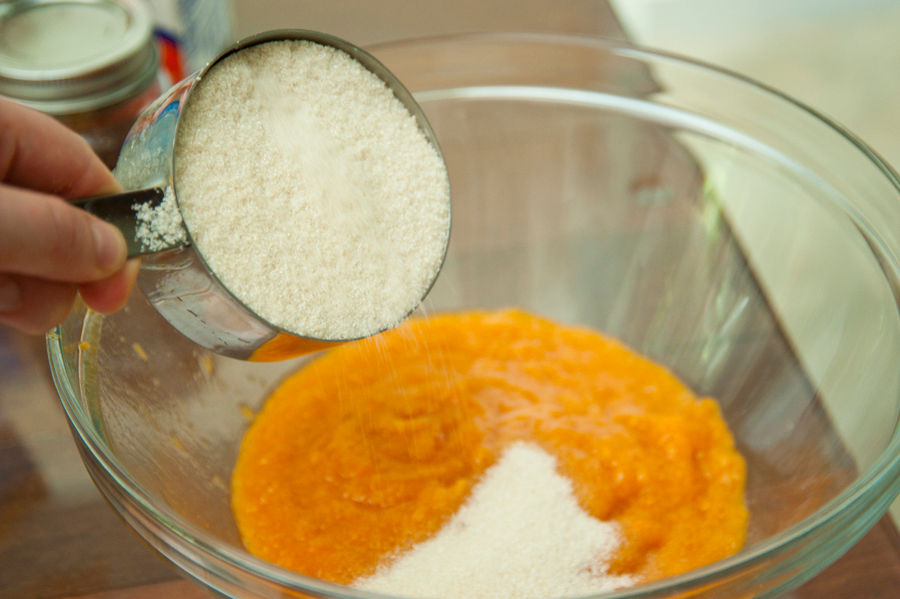
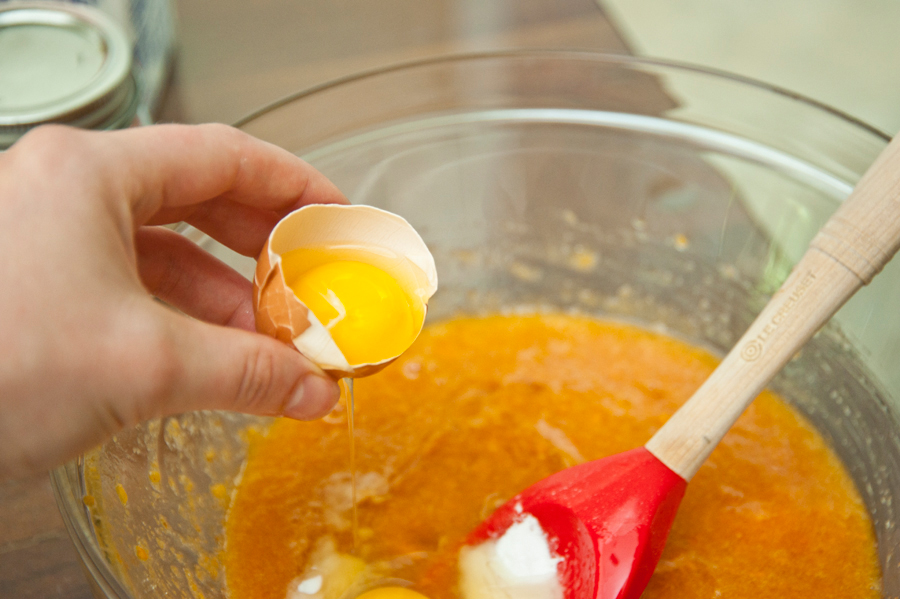
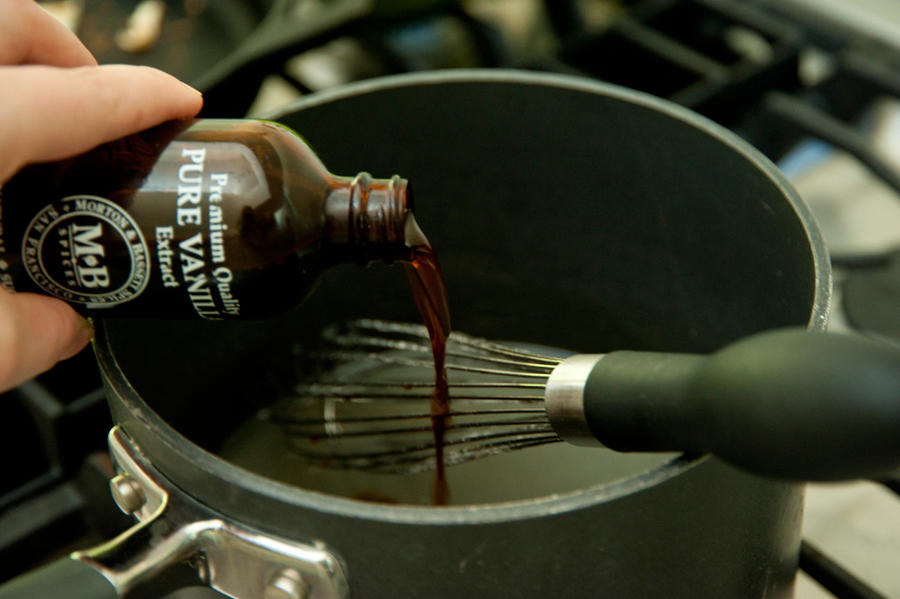
Next add the powdered sugar, beat well, and then the vanilla.


Tasty Kitchen Blog: No-Bake Chocolate Cheesecake. Guest post by Amy Johnson of She Wears Many Hats, recipe submitted by TK member Anna of Crunchy Creamy Sweet.

Combine all well until smooth.


Tasty Kitchen Blog: No-Bake Chocolate Cheesecake. Guest post by Amy Johnson of She Wears Many Hats, recipe submitted by TK member Anna of Crunchy Creamy Sweet.

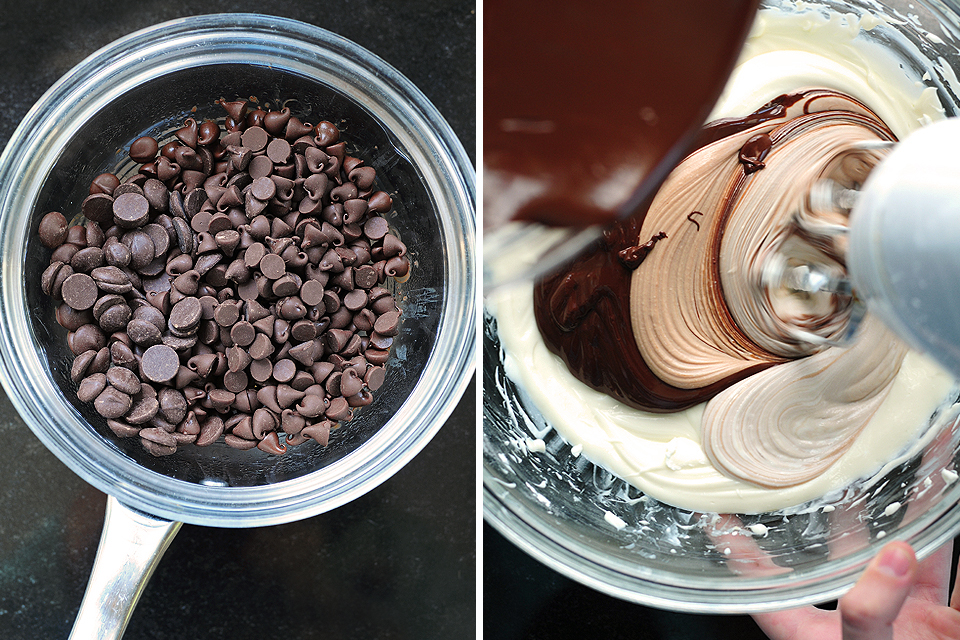
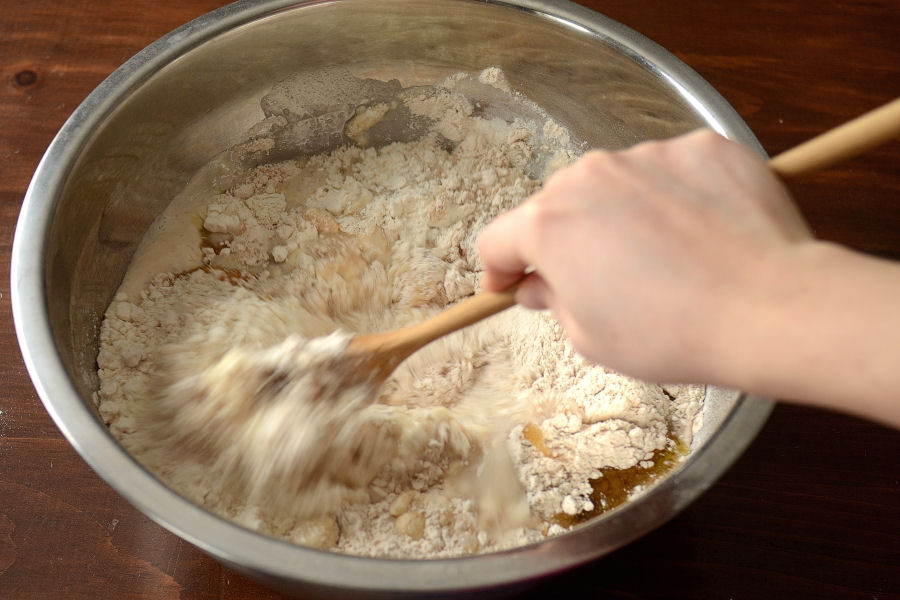
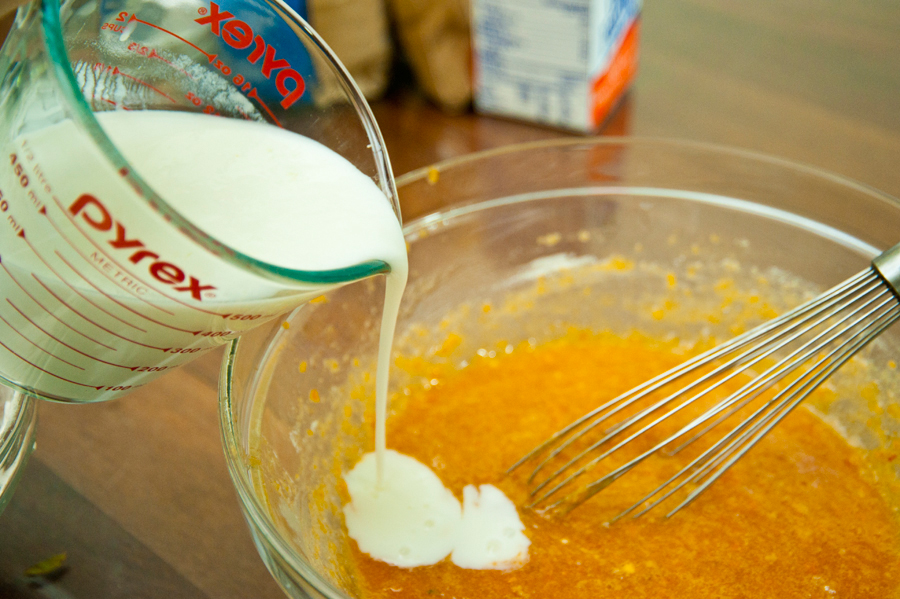
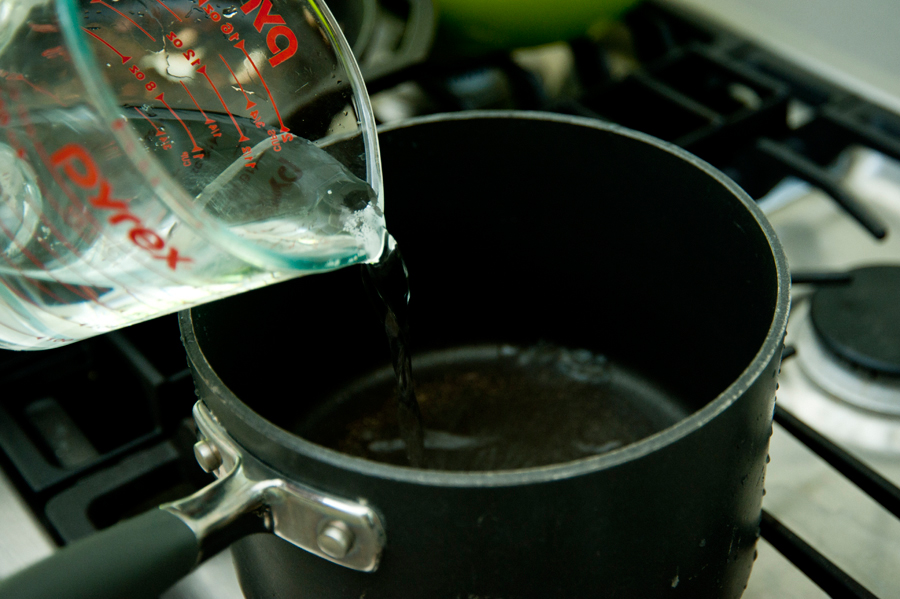
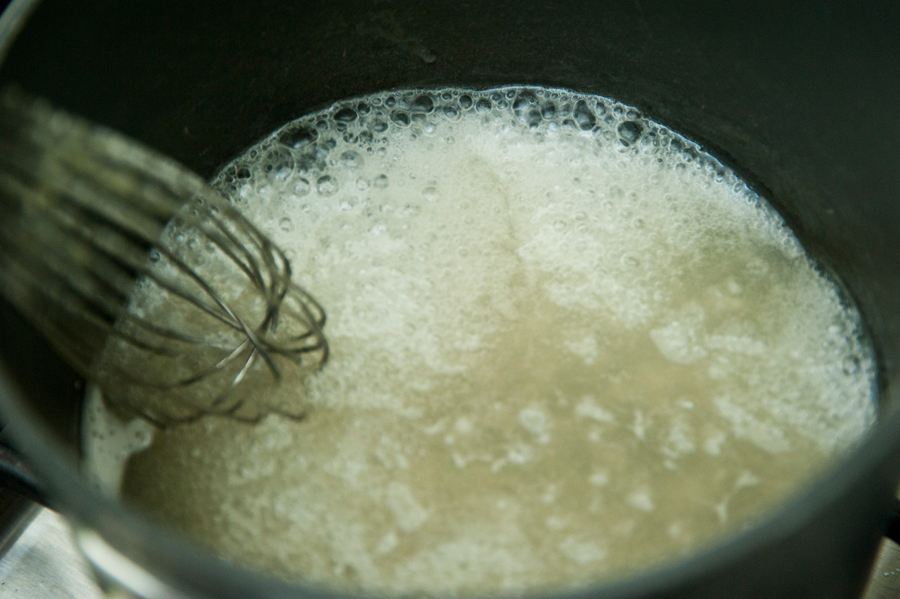
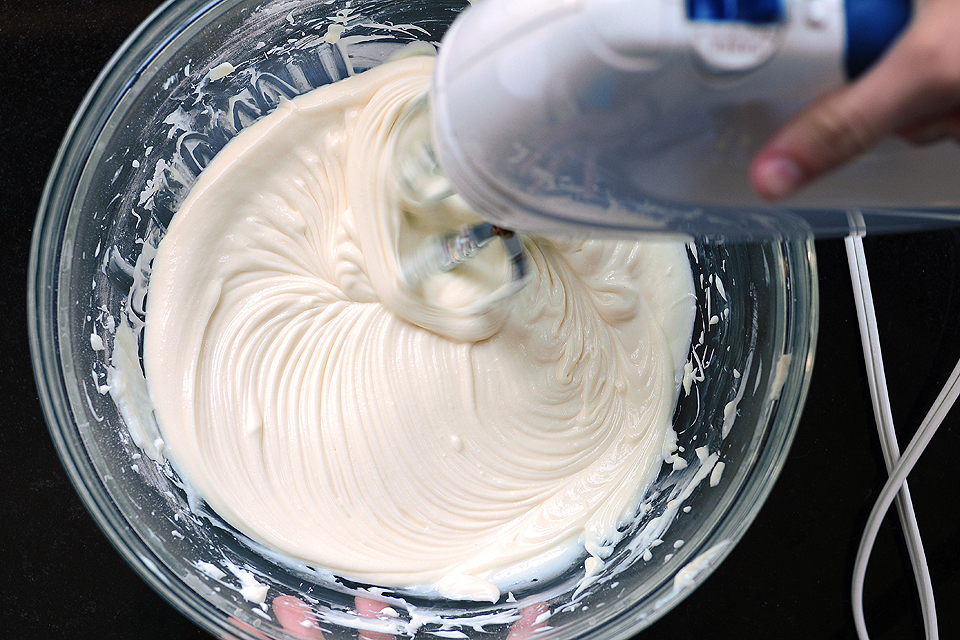
Over a double boiler (or like me, use a glass bowl that sits nicely over a pot), melt the chopped chocolate. Once the chocolate is melted (sorry, no melty chocolate picture) let it cool slightly. Once cooled, gradually stream the melted chocolate into the cream cheese mixture.


Tasty Kitchen Blog: No-Bake Chocolate Cheesecake. Guest post by Amy Johnson of She Wears Many Hats, recipe submitted by TK member Anna of Crunchy Creamy Sweet.

Mix slowly until combined well. Try not to eat it all with a spoon at this point. Restraint is a good thing.


Tasty Kitchen Blog: No-Bake Chocolate Cheesecake. Guest post by Amy Johnson of She Wears Many Hats, recipe submitted by TK member Anna of Crunchy Creamy Sweet.

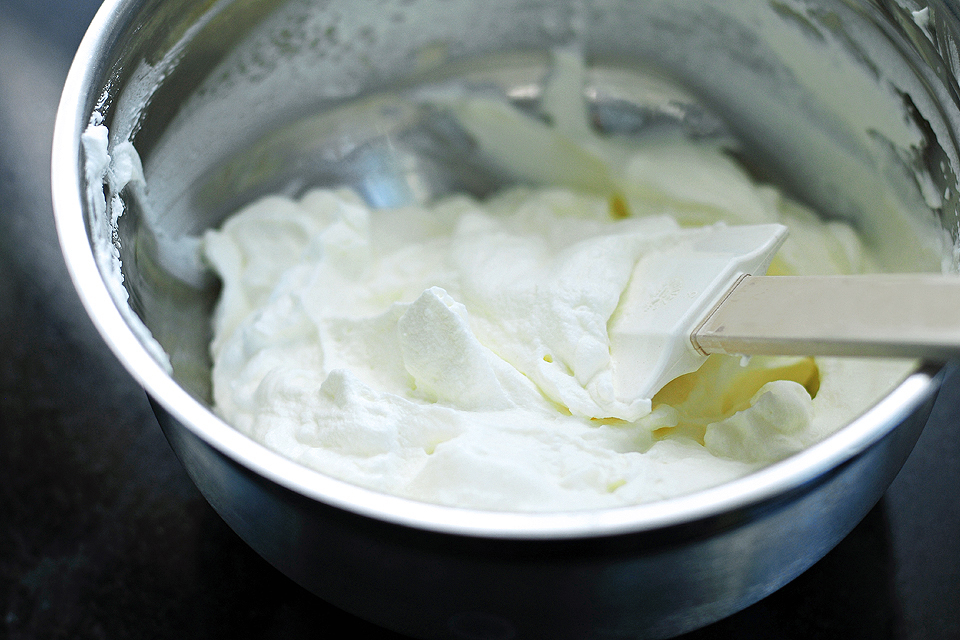
In a separate bowl, whip the cream until soft peaks form.


Tasty Kitchen Blog: No-Bake Chocolate Cheesecake. Guest post by Amy Johnson of She Wears Many Hats, recipe submitted by TK member Anna of Crunchy Creamy Sweet.

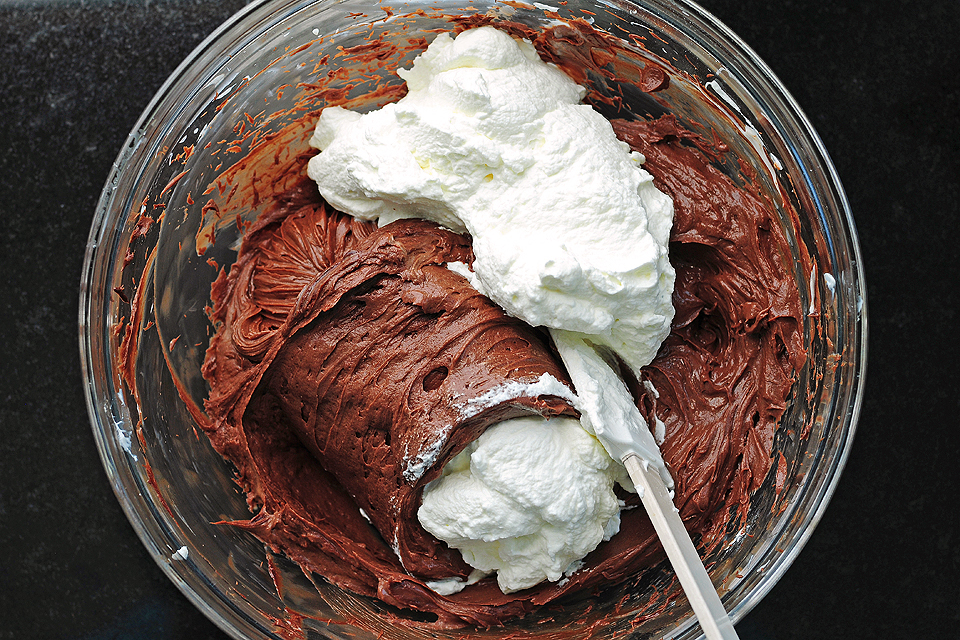
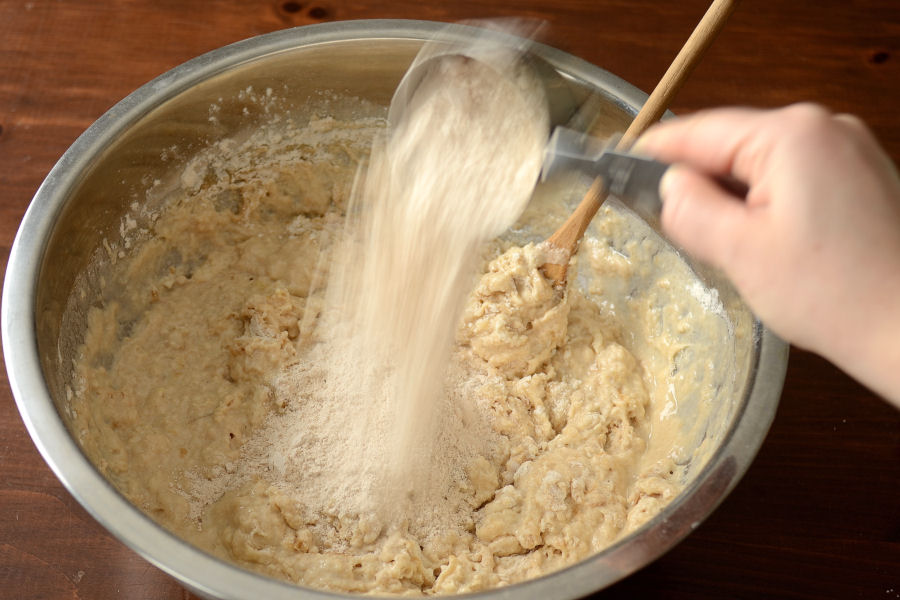
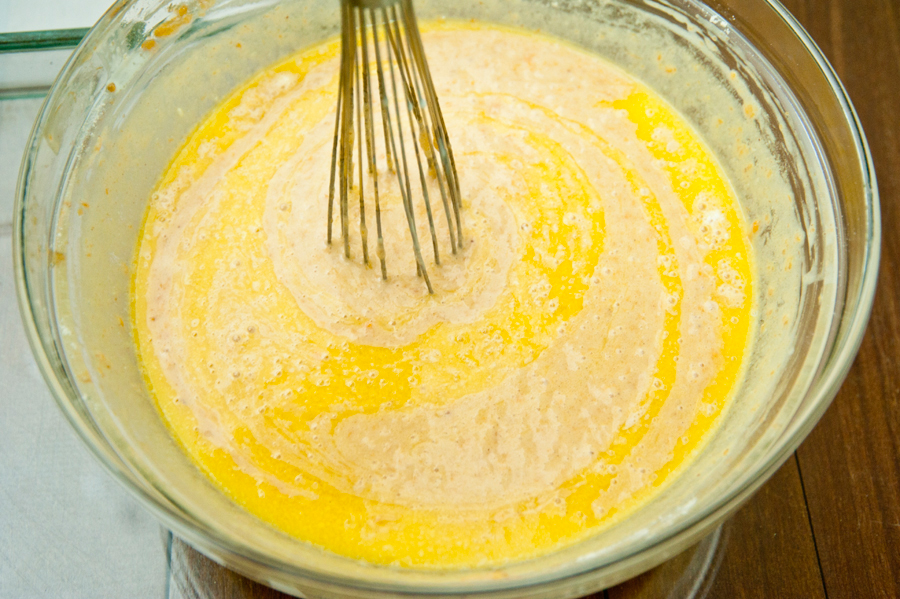
Gently fold the whipped cream into the chocolate cream cheese mixture.


Tasty Kitchen Blog: No-Bake Chocolate Cheesecake. Guest post by Amy Johnson of She Wears Many Hats, recipe submitted by TK member Anna of Crunchy Creamy Sweet.

Take your time mixing the whipped cream into the chocolate cream cheese mixture until combined. You don’t want to overbeat the mixture or the whipped cream won’t be whippy any more.


Tasty Kitchen Blog: No-Bake Chocolate Cheesecake. Guest post by Amy Johnson of She Wears Many Hats, recipe submitted by TK member Anna of Crunchy Creamy Sweet.

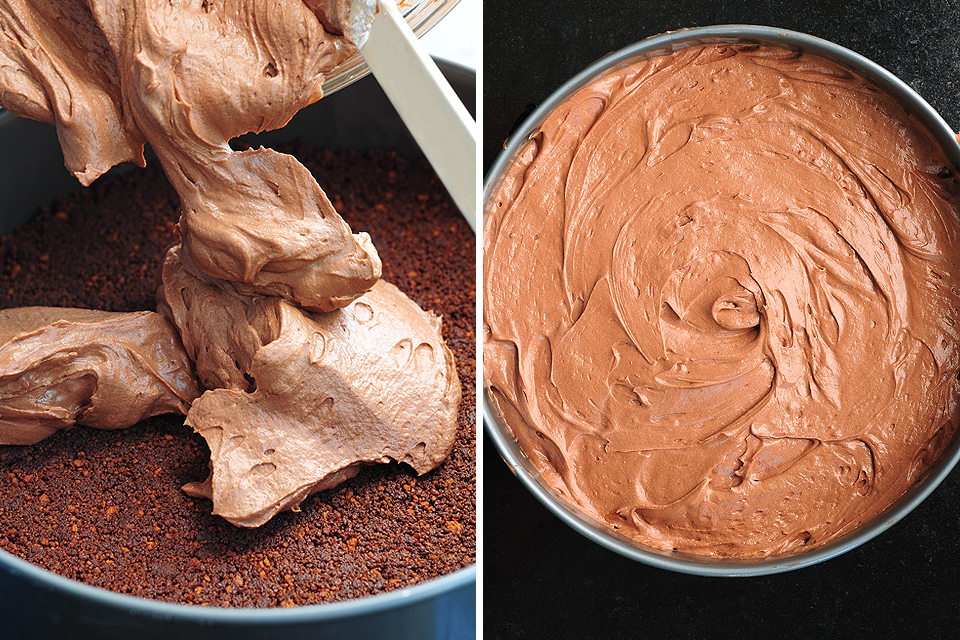
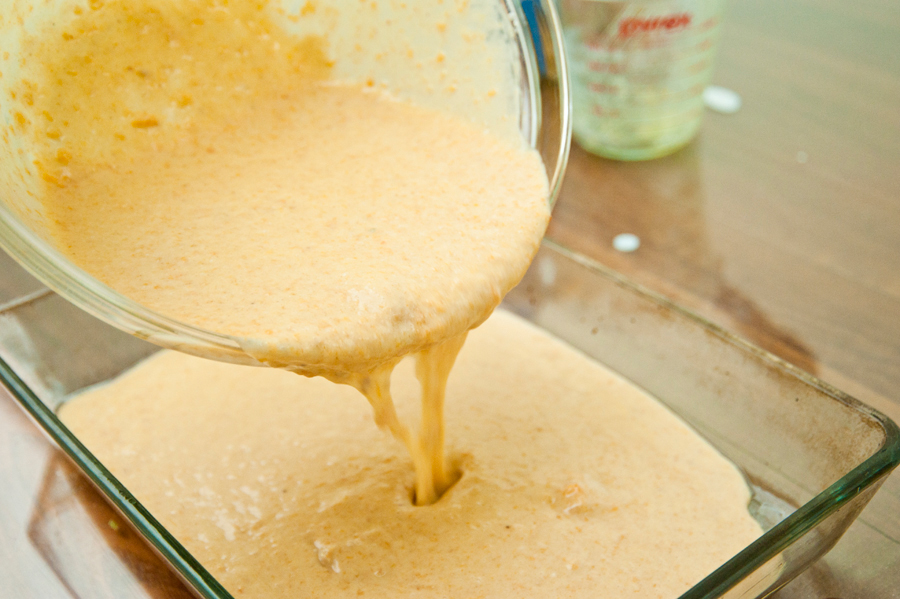
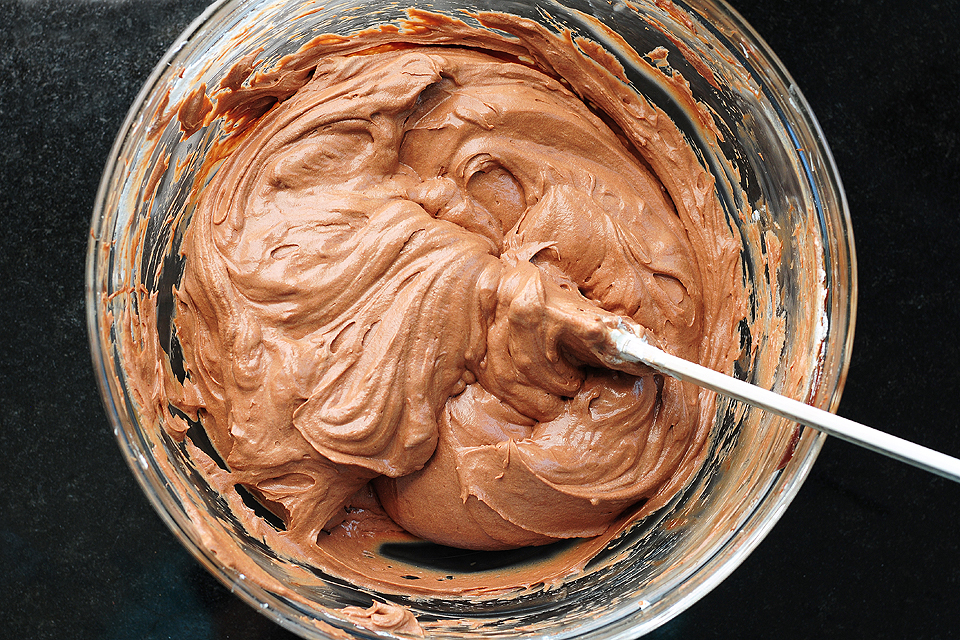
Now you’re ready to fill the springform pan. Add the chocolate cream cheese mixture to the prepared Biscoff crust and spread until smooth and even. Chill covered at least 8 hours in a refrigerator until set.


Tasty Kitchen Blog: No-Bake Chocolate Cheesecake. Guest post by Amy Johnson of She Wears Many Hats, recipe submitted by TK member Anna of Crunchy Creamy Sweet.

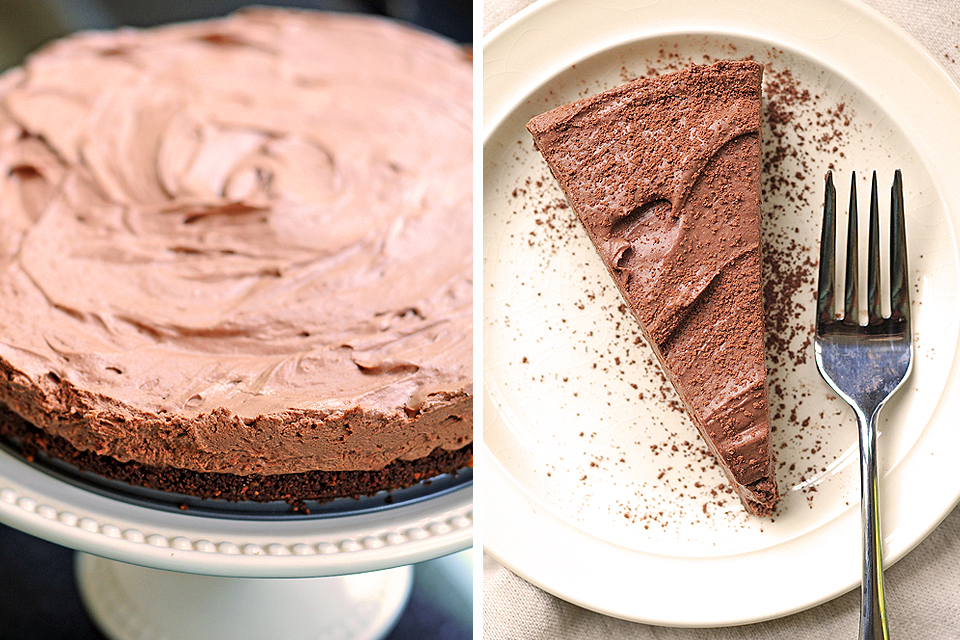
Once set, carefully loosen the springform pan to release the cake.


Tasty Kitchen Blog: No-Bake Chocolate Cheesecake. Guest post by Amy Johnson of She Wears Many Hats, recipe submitted by TK member Anna of Crunchy Creamy Sweet.

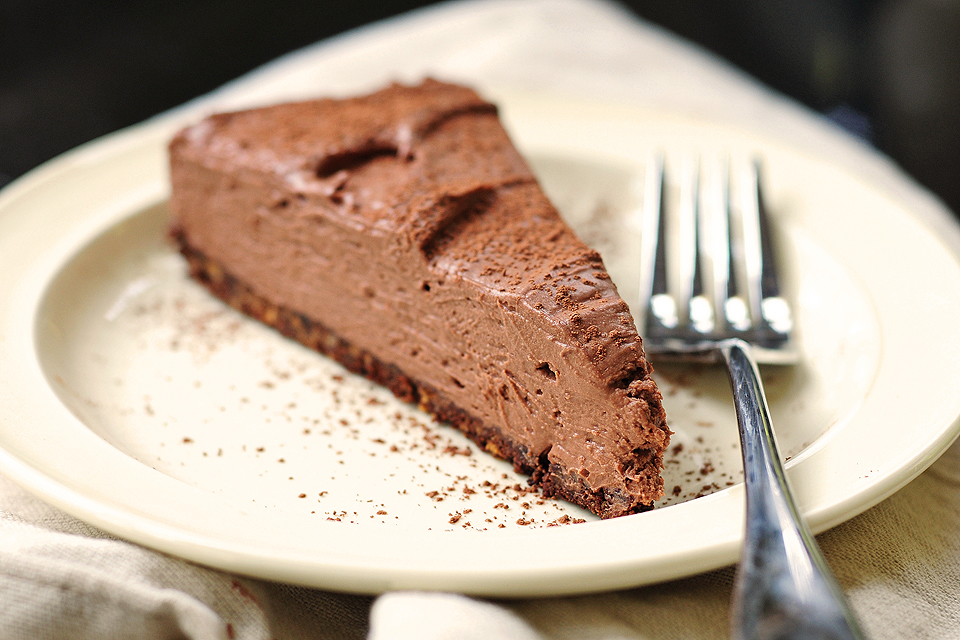
Serve, dusted lightly with remaining cocoa powder, and enjoy! And if you like Biscoff cookies and chocolate, you will most definitely enjoy.

A big thanks to Anna for introducing me to this no-bake cheesecake option. You can check out Anna’s other creations at her site, Crunchy Creamy Sweet.


Printable Recipe

No-Bake Chocolate Cheesecake

See post on Anna’s site!
5.00 Mitt(s) 4 Rating(s)4 votes, average: 5.00 out of 54 votes, average: 5.00 out of 54 votes, average: 5.00 out of 54 votes, average: 5.00 out of 54 votes, average: 5.00 out of 5

Prep Time:

Cook Time:

Difficulty: Easy

Servings: 12

12
x

Print Options

Page size Letter 3x5 4x6
Text Size Small Medium Large
Content Include description
Include prep time, etc.
Show image

Description

Biscoff cookies crust and creamy chocolate filling make this decadent dessert. No oven required, which makes it perfect for summer!

Ingredients

  • 7 ounces, weight Crushed Biscoff Cookies
  • 4 Tablespoons Unsweetened Cocoa Powder
  • ¼ cups Butter, Melted
  • 16 ounces, weight Cream Cheese, Softened
  • 3-¾ ounces, weight Powdered Sugar
  • 1 teaspoon Vanilla Extract
  • 5-¼ ounces, weight Bittersweet Chocolate, Chopped
  • 5-¼ ounces, weight Semisweet Chocolate, Chopped
  • ½ pints Whipping Cream
  • ¼ cups Unsweetened Cocoa Powder, For Dusting

Preparation Instructions

In a medium mixing bowl, stir together cookie crumbs, cocoa powder and butter. Stir until all combined. Press firmly onto the bottom of a springform pan. Set aside.

In a large mixing bowl, beat cream cheese for 1 minute, until smooth. Add powdered sugar and beat again. Add vanilla extract and mix again.

Melt chocolate over a double boiler. Let cool slightly. With your mixer on slow speed, add the chocolate into the cream cheese mixture, pouring slowly.

Whip the cream until stiff peaks form. Fold in gently to chocolate and cheese mixture.

Pour the filling over the crust. Refrigerate for at least 8 hours, preferably overnight.

When the cheesecake is set, run a sharp knife around the edge to loosen from the pan. Gently open the latch and release the cheesecake.

Before serving, dust with cocoa powder and garnish.


_______________________________________

Amy Johnson is a blogger who writes about food, travel, the home (both inside and out), and various observations and random musings about anything and everything. Visit her blog She Wears Many Hats for a dose of deliciousness, practicality, hilarity, or just plain fun. She lives in South Carolina with her husband and two children.


Profile photo of Erica Lea

No-Bake Granola Bars

Posted by in Step-by-Step Recipes

Here’s a great idea for a grab-and-go breakfast, school snack, or after-school treat. It’s no-bake too, perfect for those of you still battling summer heat. Enjoy this post from our archives!

 
Tasty Kitchen Blog: No-Bake Granola Bars. Guest post by Erica Kastner of Cooking for Seven, recipe submitted by TK member Cheri of Kitchen Simplicity.

 
I’m the type of person that, when I get hungry, I need to eat something immediately. Perhaps it’s just my imagination, but if I go too long without eating I start to feel sick. And cranky. So it helps if I stuff handy snacks into my purse to ensure I’m never in an emergency food situation.

These No-Bake Granola Bars, brought to us by Cheri, are a wonderful power snack for on-the-go. They’re filled with nutritious oats, nuts, dried fruit and honey. Plus they’re pretty tasty little treats.

Let me show you how to make them!


Tasty Kitchen Blog: No-Bake Granola Bars. Guest post by Erica Kastner of Cooking for Seven, recipe submitted by TK member Cheri of Kitchen Simplicity.

Here’s the ingredients you’ll need: rolled oats, nuts (I used pecans and pumpkin seeds), shredded coconut, dried fruit (I used raisins and figs), butter, brown sugar, cinnamon, honey and molasses.


Tasty Kitchen Blog: No-Bake Granola Bars. Guest post by Erica Kastner of Cooking for Seven, recipe submitted by TK member Cheri of Kitchen Simplicity.

Begin by chopping your nuts. The pumpkin seeds are nice and small so I didn’t chop them.


Tasty Kitchen Blog: No-Bake Granola Bars. Guest post by Erica Kastner of Cooking for Seven, recipe submitted by TK member Cheri of Kitchen Simplicity.

In a large skillet set over medium-high heat, toast the oats, nuts and coconut until fragrant. Make sure to stir often so it doesn’t burn!


Tasty Kitchen Blog: No-Bake Granola Bars. Guest post by Erica Kastner of Cooking for Seven, recipe submitted by TK member Cheri of Kitchen Simplicity.

Pour the toasted oat mixture into a large bowl.


Tasty Kitchen Blog: No-Bake Granola Bars. Guest post by Erica Kastner of Cooking for Seven, recipe submitted by TK member Cheri of Kitchen Simplicity.

If you’re using larger dried fruit you’ll want to chop it up as well.


Tasty Kitchen Blog: No-Bake Granola Bars. Guest post by Erica Kastner of Cooking for Seven, recipe submitted by TK member Cheri of Kitchen Simplicity.

Add the dried fruit to the oat mixture.


Tasty Kitchen Blog: No-Bake Granola Bars. Guest post by Erica Kastner of Cooking for Seven, recipe submitted by TK member Cheri of Kitchen Simplicity.

Stir to combine.


Tasty Kitchen Blog: No-Bake Granola Bars. Guest post by Erica Kastner of Cooking for Seven, recipe submitted by TK member Cheri of Kitchen Simplicity.

Place the butter, brown sugar, cinnamon, honey and molasses in a small saucepan.


Tasty Kitchen Blog: No-Bake Granola Bars. Guest post by Erica Kastner of Cooking for Seven, recipe submitted by TK member Cheri of Kitchen Simplicity.

Bring to a boil over medium heat, stirring occasionally.


Tasty Kitchen Blog: No-Bake Granola Bars. Guest post by Erica Kastner of Cooking for Seven, recipe submitted by TK member Cheri of Kitchen Simplicity.

Pour the butter mixture over the oat mixture.


Tasty Kitchen Blog: No-Bake Granola Bars. Guest post by Erica Kastner of Cooking for Seven, recipe submitted by TK member Cheri of Kitchen Simplicity.

Stir until the oat mixture is evenly coated with the butter mixture. Set aside to cool a little.


Tasty Kitchen Blog: No-Bake Granola Bars. Guest post by Erica Kastner of Cooking for Seven, recipe submitted by TK member Cheri of Kitchen Simplicity.

Line a dish with plastic wrap. Spoon mixture into pan and press down to compact. I used an extra piece of plastic wrap to keep my hands clean.


Tasty Kitchen Blog: No-Bake Granola Bars. Guest post by Erica Kastner of Cooking for Seven, recipe submitted by TK member Cheri of Kitchen Simplicity.

Place in the refrigerator to firm up, about 30 minutes.


Tasty Kitchen Blog: No-Bake Granola Bars. Guest post by Erica Kastner of Cooking for Seven, recipe submitted by TK member Cheri of Kitchen Simplicity.

Once firmed, turn out onto a cutting board and cut into bars.


Tasty Kitchen Blog: No-Bake Granola Bars. Guest post by Erica Kastner of Cooking for Seven, recipe submitted by TK member Cheri of Kitchen Simplicity.

Wrap the bars individually with plastic wrap, parchment paper or wax paper. Now they’re grab-and-go ready!


Tasty Kitchen Blog: No-Bake Granola Bars. Guest post by Erica Kastner of Cooking for Seven, recipe submitted by TK member Cheri of Kitchen Simplicity.

Recipe notes:

1. These bars are just a hair too sweet for my taste. I cut the amount of sugar down to 3/4 cup, so next time I’ll try going down to 1/2 cup and using a full stick of butter. If you like your treats nice and sweet, this shouldn’t be an issue for you.

2. I might add a pinch of salt next time as well.

3. I love how customizable these are. You could come up with so many different flavor combinations by switching up the nuts and fruits you use.


Tasty Kitchen Blog: No-Bake Granola Bars. Guest post by Erica Kastner of Cooking for Seven, recipe submitted by TK member Cheri of Kitchen Simplicity.

Thanks so much to Cheri for sharing her recipe with us! Make sure to check out her blog, Kitchen Simplicity, where she writes many more delicious recipes. I may have to make her Quick & Cheesy Chicken Pot Pie for supper sometime.


Printable Recipe

No-Bake Granola Bars

See post on Cheri | Kitchen Simplicity’s site!
4.50 Mitt(s) 6 Rating(s)6 votes, average: 4.50 out of 56 votes, average: 4.50 out of 56 votes, average: 4.50 out of 56 votes, average: 4.50 out of 56 votes, average: 4.50 out of 5

Prep Time:

Cook Time:

Difficulty: Easy

Servings: 16

16
x

Print Options

Page size Letter 3x5 4x6
Text Size Small Medium Large
Content Include description
Include prep time, etc.
Show image

Description

Chewy No-Bake Granola Bars that are perfect to make with the kiddos. Prepare to never buy store-bought granola bars again.

Ingredients

  • 2-½ cups Rolled Oats
  • 1-½ cup Nuts, Chopped, I Used Walnuts And Pecans
  • ¼ cups Shredded Coconut
  • ½ cups Raisins
  • 6 Tablespoons Salted Butter
  • 1 cup Brown Sugar
  • 1-½ teaspoon Ground Cinnamon
  • 6 Tablespoons Liquid Honey
  • 2 Tablespoons Molasses

Preparation Instructions

1. Toast oats, nuts and coconut in a large skillet over medium-high heat until fragrant, stirring often. Remove to a large bowl and toss with raisins.

2. Place butter, sugar, cinnamon, honey and molasses in a small saucepan. Cook over medium heat, stirring occasionally, until it comes to a boil. Remove from heat and stir into oat mixture until evenly coated. Let sit just until cool enough to handle.

3. In the meantime, line a 7×11 inch pan with plastic wrap. Spoon mixture into pan, pressing down to compact. Place in the fridge for 30 minutes to firm up. Once firmed, remove from pan, peel away plastic wrap and slice into 16 bars (half lengthwise and then into 8). Wrap individually in plastic wrap or parchment paper, if desired. Store covered at room temperature.


_______________________________________

Newly-married Erica Kastner shares her wonderful recipes and amazing food photography on her blog, Cooking for Seven. She also writes about crafts and posts more of her beautiful photography in her personal blog, EricaLea.com. There really isn’t much that this amazing young lady can’t do, and we’re thrilled she does some of it here.


Profile photo of Erica Lea

No-Knead Dinner Rolls

Posted by in Baking, Step-by-Step Recipes

Tasty Kitchen Blog: No-Knead Dinner Rolls. Guest post by Erica Kastner, recipe submitted by TK member Terri of That's Some Good Cookin'.

 
Let’s face it. There’s just nothing like fresh, homemade bread. Sure, you can get some wonderful, artisan breads at local shops, but they can’t come close to magic of the smell and taste of home-baked bread pulled from the oven and spread with butter and jam (or honey).

But here’s the problem: With busy lives, especially around the holidays, there’s precious little time to spend agonizing over kneading and rise times. And so homemade bread is often neglected.

This recipe, brought to us by Terri, is about as low-fuss as yeast bread gets. All you have to do is mix everything in a large bowl, let it rise, form into buns, and bake once they’re puffy. Still skeptical about no-knead bread? Let me assure you, it is good. Like, really good: fluffy and flavorful and soft. Let me show you!


Tasty Kitchen Blog: No-Knead Dinner Rolls. Guest post by Erica Kastner, recipe submitted by TK member Terri of That's Some Good Cookin'.

To begin, grab the few ingredients you’ll need: yeast, sugar, oil (I used olive, but if you don’t like the flavor, you could use melted butter or vegetable oil), salt, flour (I used part white, part wheat), butter, and water.


Tasty Kitchen Blog: No-Knead Dinner Rolls. Guest post by Erica Kastner, recipe submitted by TK member Terri of That's Some Good Cookin'.

Pour some warm water into a large mixing bowl and sprinkle in the yeast and 1/4 teaspoon of sugar. You can gently stir it with a fork if you wish.


Tasty Kitchen Blog: No-Knead Dinner Rolls. Guest post by Erica Kastner, recipe submitted by TK member Terri of That's Some Good Cookin'.

Let the yeast “activate” in the water (about 5 minutes). Then add the flour …


Tasty Kitchen Blog: No-Knead Dinner Rolls. Guest post by Erica Kastner, recipe submitted by TK member Terri of That's Some Good Cookin'.

… wheat flour (if using), sugar, oil and salt.


Tasty Kitchen Blog: No-Knead Dinner Rolls. Guest post by Erica Kastner, recipe submitted by TK member Terri of That's Some Good Cookin'.

Stir it all together.


Tasty Kitchen Blog: No-Knead Dinner Rolls. Guest post by Erica Kastner, recipe submitted by TK member Terri of That's Some Good Cookin'.

If the dough is too wet, you can add more flour. The right texture is soft and sticky, but not soupy.


Tasty Kitchen Blog: No-Knead Dinner Rolls. Guest post by Erica Kastner, recipe submitted by TK member Terri of That's Some Good Cookin'.

See that? That’s how it should look. Don’t stir too much! After all, these are no-knead.


Tasty Kitchen Blog: No-Knead Dinner Rolls. Guest post by Erica Kastner, recipe submitted by TK member Terri of That's Some Good Cookin'.

Cover the dough and set aside to rise until doubled. This only took about and hour for me, but it all depends on how warm your house is.


Tasty Kitchen Blog: No-Knead Dinner Rolls. Guest post by Erica Kastner, recipe submitted by TK member Terri of That's Some Good Cookin'.

Now, give that dough a punch!


Tasty Kitchen Blog: No-Knead Dinner Rolls. Guest post by Erica Kastner, recipe submitted by TK member Terri of That's Some Good Cookin'.

Ahhh … melted butter. 


Tasty Kitchen Blog: No-Knead Dinner Rolls. Guest post by Erica Kastner, recipe submitted by TK member Terri of That's Some Good Cookin'.

Pour a little onto a rimmed baking sheet.


Tasty Kitchen Blog: No-Knead Dinner Rolls. Guest post by Erica Kastner, recipe submitted by TK member Terri of That's Some Good Cookin'.

Get your hands in it and smear it around.


Tasty Kitchen Blog: No-Knead Dinner Rolls. Guest post by Erica Kastner, recipe submitted by TK member Terri of That's Some Good Cookin'.

Now it’s time to make a mess! Sprinkle your work surface generously with flour.


Tasty Kitchen Blog: No-Knead Dinner Rolls. Guest post by Erica Kastner, recipe submitted by TK member Terri of That's Some Good Cookin'.

Scoop your risen dough out onto your counter/table and sprinkle with some more flour.


Tasty Kitchen Blog: No-Knead Dinner Rolls. Guest post by Erica Kastner, recipe submitted by TK member Terri of That's Some Good Cookin'.

Roll the dough out to about a 1/2-inch thickness.


Tasty Kitchen Blog: No-Knead Dinner Rolls. Guest post by Erica Kastner, recipe submitted by TK member Terri of That's Some Good Cookin'.

Take a round cookie/biscuit cutter and stamp out circles of dough. You could get your circles closer together than mine.


Tasty Kitchen Blog: No-Knead Dinner Rolls. Guest post by Erica Kastner, recipe submitted by TK member Terri of That's Some Good Cookin'.

Grab a circle of dough …


Tasty Kitchen Blog: No-Knead Dinner Rolls. Guest post by Erica Kastner, recipe submitted by TK member Terri of That's Some Good Cookin'.

And stretch it out a bit.


Tasty Kitchen Blog: No-Knead Dinner Rolls. Guest post by Erica Kastner, recipe submitted by TK member Terri of That's Some Good Cookin'.

Dunk half of it into the melted butter …


Tasty Kitchen Blog: No-Knead Dinner Rolls. Guest post by Erica Kastner, recipe submitted by TK member Terri of That's Some Good Cookin'.

And fold it in half with the butter side up. Now you have a lovely little Parker House roll.


Tasty Kitchen Blog: No-Knead Dinner Rolls. Guest post by Erica Kastner, recipe submitted by TK member Terri of That's Some Good Cookin'.

Place on your buttered baking sheet (buttered side up). Repeat with remaining dough, placing the buns close together.


Tasty Kitchen Blog: No-Knead Dinner Rolls. Guest post by Erica Kastner, recipe submitted by TK member Terri of That's Some Good Cookin'.

Gather up your scraps and go again!


Tasty Kitchen Blog: No-Knead Dinner Rolls. Guest post by Erica Kastner, recipe submitted by TK member Terri of That's Some Good Cookin'.

Cover the buns and let rise until nice and puffy. Aren’t they beautiful?


Tasty Kitchen Blog: No-Knead Dinner Rolls. Guest post by Erica Kastner, recipe submitted by TK member Terri of That's Some Good Cookin'.

Bake at 375°F until lovely and golden brown. You can brush the tops of the buns with extra butter, if you wish.


Tasty Kitchen Blog: No-Knead Dinner Rolls. Guest post by Erica Kastner, recipe submitted by TK member Terri of That's Some Good Cookin'.

Just look at how pillowy soft they are!


Tasty Kitchen Blog: No-Knead Dinner Rolls. Guest post by Erica Kastner, recipe submitted by TK member Terri of That's Some Good Cookin'.

Recipe notes:

1. This dough can be refrigerated for up to a week. You can mix up a big batch and just pull off pieces of dough and bake them for fresh bread throughout the week!
2. You don’t have to make Parker House rolls from the dough. Terri suggests cinnamon rolls, pull-aparts and breadsticks.
3. These rolls reheat very well. Just pop them in a 350°F oven for 10 minutes.


Tasty Kitchen Blog: No-Knead Dinner Rolls. Guest post by Erica Kastner, recipe submitted by TK member Terri of That's Some Good Cookin'.

Thanks so much to Terri for sharing these buttery rolls with us. She blogs over at That’s Some Good Cookin’, where she posts many more lip-smackin’ recipes.


Printable Recipe

No Knead Dinner Rolls

See post on Terri @ that's some good cookin'’s site!
4.00 Mitt(s) 7 Rating(s)7 votes, average: 4.00 out of 57 votes, average: 4.00 out of 57 votes, average: 4.00 out of 57 votes, average: 4.00 out of 57 votes, average: 4.00 out of 5

Prep Time:

Cook Time:

Difficulty: Easy

Servings: 24

24
x

Print Options

Page size Letter 3x5 4x6
Text Size Small Medium Large
Content Include description
Include prep time, etc.
Show image

Description

I have no idea why these easy rolls work so well time after delicious time.

Ingredients

  • 3 cups Warm Water
  • 2 Tablespoons Yeast
  • ½ cups Sugar
  • ½ cups Vegetable Oil (canola Works Best)
  • 2 teaspoons Salt
  • 6 cups To 7 Cups White Flour
  • 1 stick Butter

Preparation Instructions

In a large mixing bowl dissolve yeast in warm water with 1/4 teaspoon sugar.

When the yeast has activated, add all other ingredients (except butter) and stir well with a wooden spoon until all ingredients are incorporated. Avoid over mixing and do not knead the dough. Just stir it. The dough is soft and will be somewhat sticky, not drier like other roll doughs that you may be used to using.

Cover bowl and let dough rise until doubled in bulk. Punch dough down and let it rest for a few minutes.

Melt the butter in a small bowl. Prepare a baking pan by greasing the pan with some of the melted butter.

To shape a Parker House style roll, divide the dough in half and roll out one half of the dough on a well floured counter top until about 1/2-inch thick. Using a round biscuit cutter, cut out circles of dough. Stretch the dough just a little lengthwise and dip one half into melted butter. Fold dough over in half and place on the pan. Place the rolls close to each other in rows. Repeat with remaining half of dough. Work the left-over dough from the two dough halves together to finish making your rolls. You should be able to get 32 rolls on a large baking sheet (4 rolls across and 8 rolls down).

Cover rolls and let rise again until almost doubled in size. Bake at 375ºF for 20 minutes or until the rolls are golden brown. Brush hot rolls with additional butter if desired.

Note: This dough can be kept in the refrigerator for at least a week and the dough just pulled off as you wish to use it to make cinnamon rolls, scones, pull-aparts, hot rolls or bread sticks during the week.


_______________________________________

Newly-married Erica Kastner shares her wonderful recipes and amazing food photography on her blog, Cooking for Seven. She also writes about crafts and posts more of her beautiful photography in her personal blog, EricaLea.com. There really isn’t much that this amazing young lady can’t do, and we’re thrilled she does some of it here.


Profile photo of georgiapellegrini

Nonnie’s Persimmon Pudding

Posted by in Step-by-Step Recipes

Tasty Kitchen Blog: Nonnie's Persimmon Pudding. Guest post by Georgia Pellegrini, recipe submitted by TK member Maria (mariahs).

 
There is something so comforting about recipes made by grandmothers. Why do we like them so much? I think for me it is the nostalgia that comes with a recipe from her but also those good kitchen smells and the fact that no matter how hard I try, it never comes out quite like hers. I also love that grandmas rarely cook with recipes. They just seem to know what to do. They have an intuition in the kitchen that I strive for but seems to be part of that generation’s DNA. So of course this recipe called Nonnie’s Persimmon Pudding and submitted by MariahS was one I absolutely had to try.


Tasty Kitchen Blog: Nonnie's Persimmon Pudding. Guest post by Georgia Pellegrini, recipe submitted by TK member Maria (mariahs).

You’ll need: soft ripe persimmons, eggs, butter, buttermilk, baking powder, salt, sugar, cinnamon, flour, baking soda, heavy cream, and honey.

All of the good things life is made of.


Tasty Kitchen Blog: Nonnie's Persimmon Pudding. Guest post by Georgia Pellegrini, recipe submitted by TK member Maria (mariahs).

If your persimmons are really soft you can easily peel the skin off with a paring knife and mash them with a fork.


Tasty Kitchen Blog: Nonnie's Persimmon Pudding. Guest post by Georgia Pellegrini, recipe submitted by TK member Maria (mariahs).

But some varieties of persimmons are a bit harder so it would be worthwhile to puree them in a blender for a few seconds.


Tasty Kitchen Blog: Nonnie's Persimmon Pudding. Guest post by Georgia Pellegrini, recipe submitted by TK member Maria (mariahs).

Next add your sugar.


Tasty Kitchen Blog: Nonnie's Persimmon Pudding. Guest post by Georgia Pellegrini, recipe submitted by TK member Maria (mariahs).

Then your baking soda…


Tasty Kitchen Blog: Nonnie's Persimmon Pudding. Guest post by Georgia Pellegrini, recipe submitted by TK member Maria (mariahs).

And your eggs. Now you could do it the “proper” way and beat the eggs first, but I was trying to channel my grandmother and defy the rules so I mixed mine once I added them to the puree.


Tasty Kitchen Blog: Nonnie's Persimmon Pudding. Guest post by Georgia Pellegrini, recipe submitted by TK member Maria (mariahs).

In a separate bowl combine the flour and cinnamon.


Tasty Kitchen Blog: Nonnie's Persimmon Pudding. Guest post by Georgia Pellegrini, recipe submitted by TK member Maria (mariahs).

Then add the baking powder.


Tasty Kitchen Blog: Nonnie's Persimmon Pudding. Guest post by Georgia Pellegrini, recipe submitted by TK member Maria (mariahs).

Give it a nice stir and gather your bowls side by side.


Tasty Kitchen Blog: Nonnie's Persimmon Pudding. Guest post by Georgia Pellegrini, recipe submitted by TK member Maria (mariahs).

Incorporate part of the buttermilk and whisk as you go…


Tasty Kitchen Blog: Nonnie's Persimmon Pudding. Guest post by Georgia Pellegrini, recipe submitted by TK member Maria (mariahs).

It will make a rather mesmerizing art piece as you swirl. At least it did for me but I’m easily entertained.


Tasty Kitchen Blog: Nonnie's Persimmon Pudding. Guest post by Georgia Pellegrini, recipe submitted by TK member Maria (mariahs).

Next mix in part of the dry ingredients… and go back and forth between the dry and the buttermilk until it’s all incorporated.


Tasty Kitchen Blog: Nonnie's Persimmon Pudding. Guest post by Georgia Pellegrini, recipe submitted by TK member Maria (mariahs).

Next whisk in the cream.


Tasty Kitchen Blog: Nonnie's Persimmon Pudding. Guest post by Georgia Pellegrini, recipe submitted by TK member Maria (mariahs).

Then the honey. This was the last of a batch from my honeybees!


Tasty Kitchen Blog: Nonnie's Persimmon Pudding. Guest post by Georgia Pellegrini, recipe submitted by TK member Maria (mariahs).

Next you’ll pour in the melted butter.


Tasty Kitchen Blog: Nonnie's Persimmon Pudding. Guest post by Georgia Pellegrini, recipe submitted by TK member Maria (mariahs).

Give it a good whisk until it’s well incorporated.


Tasty Kitchen Blog: Nonnie's Persimmon Pudding. Guest post by Georgia Pellegrini, recipe submitted by TK member Maria (mariahs).

Pour the batter into a greased baking pan and pop it in the oven for 1 hour.


Tasty Kitchen Blog: Nonnie's Persimmon Pudding. Guest post by Georgia Pellegrini, recipe submitted by TK member Maria (mariahs).

While it cooks you’ll make the glaze for the pudding. Get some water simmering on the stovetop.


Tasty Kitchen Blog: Nonnie's Persimmon Pudding. Guest post by Georgia Pellegrini, recipe submitted by TK member Maria (mariahs).

Then gather vanilla and a combination of sugar and flour.


Tasty Kitchen Blog: Nonnie's Persimmon Pudding. Guest post by Georgia Pellegrini, recipe submitted by TK member Maria (mariahs).

Once the water is simmering add the sugar and flour mixer a little at a time, whisking while you do.


Tasty Kitchen Blog: Nonnie's Persimmon Pudding. Guest post by Georgia Pellegrini, recipe submitted by TK member Maria (mariahs).

The mixture will begin to bubble and thicken so that it becomes viscous. Once it does you can turn the heat off and let it sit.


Tasty Kitchen Blog: Nonnie's Persimmon Pudding. Guest post by Georgia Pellegrini, recipe submitted by TK member Maria (mariahs).

After it’s cooled for a few minutes you add the vanilla and whisk it in.


Tasty Kitchen Blog: Nonnie's Persimmon Pudding. Guest post by Georgia Pellegrini, recipe submitted by TK member Maria (mariahs).

After the batter has baked, open the oven just briefly. It will be golden brown and wonderfully moist.


Tasty Kitchen Blog: Nonnie's Persimmon Pudding. Guest post by Georgia Pellegrini, recipe submitted by TK member Maria (mariahs).

But you’re going to make it even more moist by pouring the syrup all over the top!


Tasty Kitchen Blog: Nonnie's Persimmon Pudding. Guest post by Georgia Pellegrini, recipe submitted by TK member Maria (mariahs).

Look at that glossy goodness!

Close the oven door and let it all soak in while keeping it warm.

I was amazed at just how warm is stayed for hours just by leaving it in there.


Tasty Kitchen Blog: Nonnie's Persimmon Pudding. Guest post by Georgia Pellegrini, recipe submitted by TK member Maria (mariahs).

When you’re ready to eat it simply scoop it out and serve. It would be wonderful with a scoop of ice cream as well. I took this to a pumpkin carving party and it was a total hit. Everyone said it tasted like fall.

Thanks so much to Mariah for sharing this tasty recipe!


Printable Recipe

Nonnie’s Persimmon Pudding

4.00 Mitt(s) 1 Rating(s)1 vote, average: 4.00 out of 51 vote, average: 4.00 out of 51 vote, average: 4.00 out of 51 vote, average: 4.00 out of 51 vote, average: 4.00 out of 5

Prep Time:

Cook Time:

Difficulty: Intermediate

Servings: 12

12
x

Print Options

Page size Letter 3x5 4x6
Text Size Small Medium Large
Content Include description
Include prep time, etc.
Show image

Description

My husband’s grandmother, Nonnie, used to make her really unique version of Persimmon Pudding every Thanksgiving. When she wasn’t able to make it anymore, I took over making it each fall. You can serve this warm or let it cool; my family loves it both ways. Nonnie passed away this year, but you can be sure that this will be on the Thanksgiving menu. Nonnie would have loved to have her recipe shared with others.

Ingredients

  • FOR THE PUDDING:
  • 2 cups Persimmon Pulp
  • 2 cups White Sugar
  • 2  Eggs, Beaten
  • 1 teaspoon Baking Soda
  • 1 cup All-purpose Flour
  • 1 pinch Salt
  • 1 teaspoon Baking Powder
  • 1 teaspoon Ground Cinnamon
  • 1-½ cup Buttermilk
  • ¼ cups Heavy Cream
  • 1 Tablespoon Honey
  • 4 Tablespoons Butter, Melted
  • FOR THE SAUCE:
  • 1 cup Water
  • ½ cups White Sugar
  • 1 Tablespoon All-purpose Flour
  • 4 teaspoons Vanilla Extract

Preparation Instructions

Note: Prepare the sauce while the pudding is baking.

Preheat the oven to 350 degrees F (175 degrees C). Spray a 9×13 inch baking pan lightly with nonstick spray; set aside.

For the pudding, mix the persimmon pulp with the sugar in a large bowl; set aside.

Whisk together the eggs and baking soda in a small bowl. Add the egg mixture to the persimmon mixture and beat well; set aside.

Whisk together the flour, salt, baking powder, and cinnamon in a bowl. Stir 1/4 of the flour mixture into the persimmon mixture. Add 1/4 of the buttermilk and mix well. Continue alternating flour and buttermilk, adding 1/4 each time, and mixing well after each addition, until all of the flour mixture and buttermilk are incorporated. Stir in cream, honey, and melted butter until well combined. Pour the pudding batter into the prepared pan.

Bake in the preheated oven until set, about 1 hour. While baking, do not stir; Turn off the oven at the end of the baking time, but do not remove the pudding from the oven.

Meanwhile, when the pudding has about 10 minutes of baking time left, make the sauce. Boil the water in a small saucepan. Whisk the sugar and flour together, and whisk the sugar mixture into the boiling water, whisking until smooth. Boil the sauce for 5 minutes and remove from heat. Stir in vanilla.

Pour the sauce mixture evenly over the pudding and leave the pudding to cool in the warm oven for 20 more minutes, being sure that the oven is off so that the pudding does not continue to cook.


_______________________________________

There’s so much to say about Georgia, we don’t know where to start. Leaving Wall Street for the French Culinary Institute, followed by a stint at the Gramercy Tavern and La Chassagnette in France, her passion for food and food traditions are evident and inspiring. Visit her site at Georgia Pellegrini, where you’ll find more recipes, photos, learn all about her wonderful book Food Heroes, and enjoy her latest adventures.


Profile photo of savorysweetlife

Nutella and Banana Wontons

Posted by in Step-by-Step Recipes

Our good friend Alice of Sweet Savory Life is back with another fun recipe, this time from Tasty Kitchen member Miss Mischief. She also patiently shows us how to properly fill, seal and fry wontons, so you can take this idea and run with it! But please listen to Alice and don’t run where there’s […]

Profile photo of Laurie - Simply Scratch

Nutella Cheesecake Pumpkin Muffins

Posted by in Baking, Step-by-Step Recipes

  I distinctly remember the moment I fell in love with Nutella. I was sold by its creamy texture, distinct hazelnut flavor, and how well it tasted spread over a banana, then sprinkled with coconut. Ever since that very moment, I knew if there was one thing I needed to always have in my pantry, that would be Nutella. It quickly became a […]

Profile photo of missamy

Nutella Cookies

Posted by in Baking, Step-by-Step Recipes

  Who says great recipes have to have a gazillion ingredients, with complicated a process? Not me. Simple and tasty recipes are welcome any day around here. Less is best in my book. And these Nutella Cookies from Tasty Kitchen member ABusyNest are no exception. With only four ingredients, it’s easy to whip up a […]

Profile photo of Laurie - Simply Scratch

Nutella Pecan Pie

Posted by in Baking, Step-by-Step Recipes

Thanks to Megan for sharing her recipe for Nutella Pecan Pie, because I have officially died and gone to heaven. Get this: Nutella is spread on the bottom of a homemade, pre-baked pie crust before adding in the gooey pecan…