The Pioneer Woman Tasty Kitchen
Profile photo of Laurie - Simply Scratch

Nutella Cheesecake Pumpkin Muffins

Posted by in Baking, Step-by-Step Recipes

Tasty Kitchen Blog: Nutella Cheesecake Pumpkin Muffins. Guest post by Laurie McNamara of Simply Scratch, recipe submitted by TK member Amy of My Name is Snickerdoodle.

 
I distinctly remember the moment I fell in love with Nutella. I was sold by its creamy texture, distinct hazelnut flavor, and how well it tasted spread over a banana, then sprinkled with coconut. Ever since that very moment, I knew if there was one thing I needed to always have in my pantry, that would be Nutella. It quickly became a pantry staple as would peanut butter or flour for that matter. Whatever you decide to do with it, you’re sure to love it. I’m pretty sure there is simply no way to ruin any recipe that has Nutella in it.
 
So when I came upon this recipe for Nutella Cheesecake Pumpkin Muffins from TK member (Amy) mynameissnickerdoodle, I instantly knew this recipe was going to be a keeper. I could hardly wait for the cold weather to really set in so I could curl up with a cup of coffee and a plate of these muffins. I mean, the thought of Nutella cheesecake alone sounds heavenly, but Nutella cheesecake in the center of a pumpkin muffin? Only one word comes to mind: magical. And that’s exactly what they are.


Tasty Kitchen Blog: Nutella Cheesecake Pumpkin Muffins. Guest post by Laurie McNamara of Simply Scratch, recipe submitted by TK member Amy of My Name is Snickerdoodle.

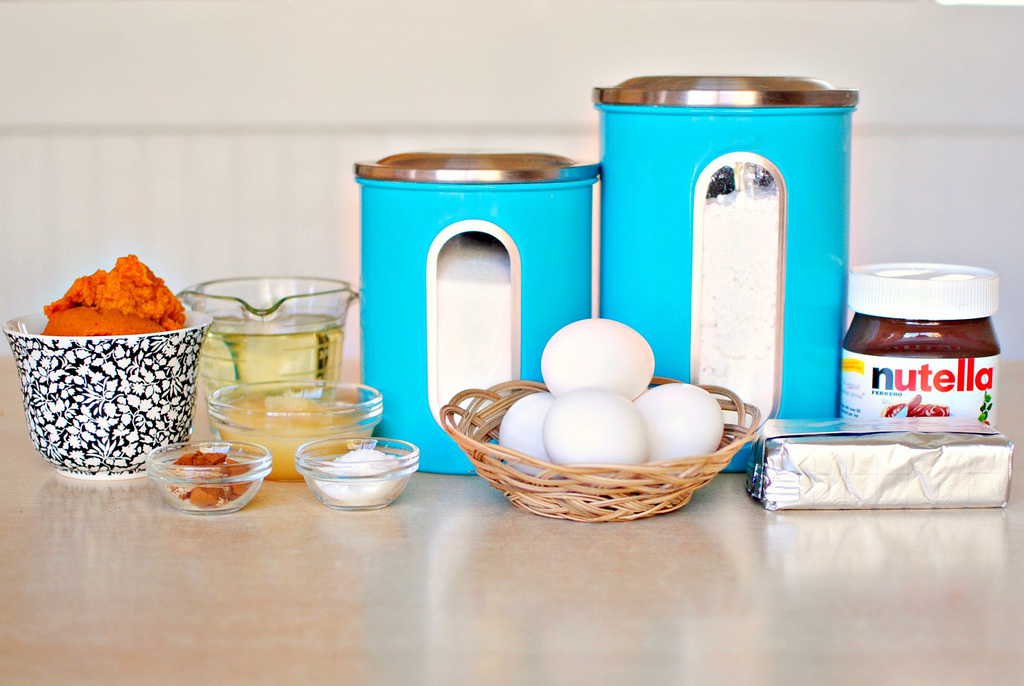
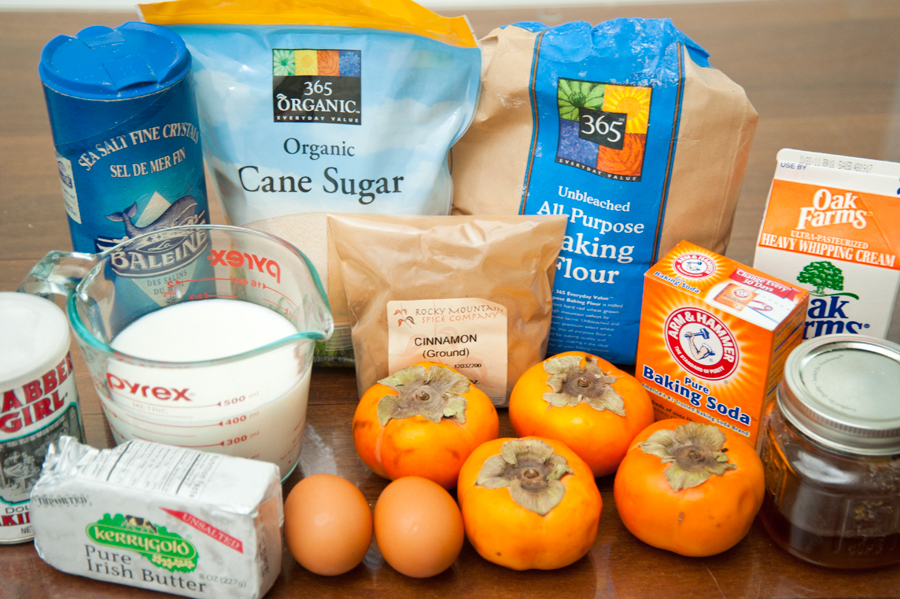
To make these delicious muffins, you’ll need eggs, sugar, pumpkin puree, oil, flour, cinnamon, nutmeg, baking soda, salt, Nutella and cream cheese. I didn’t have any vegetable oil so I just substituted 1 cup extra light olive oil and a half cup of unsweetened applesauce and it worked like a charm.


Tasty Kitchen Blog: Nutella Cheesecake Pumpkin Muffins. Guest post by Laurie McNamara of Simply Scratch, recipe submitted by TK member Amy of My Name is Snickerdoodle.

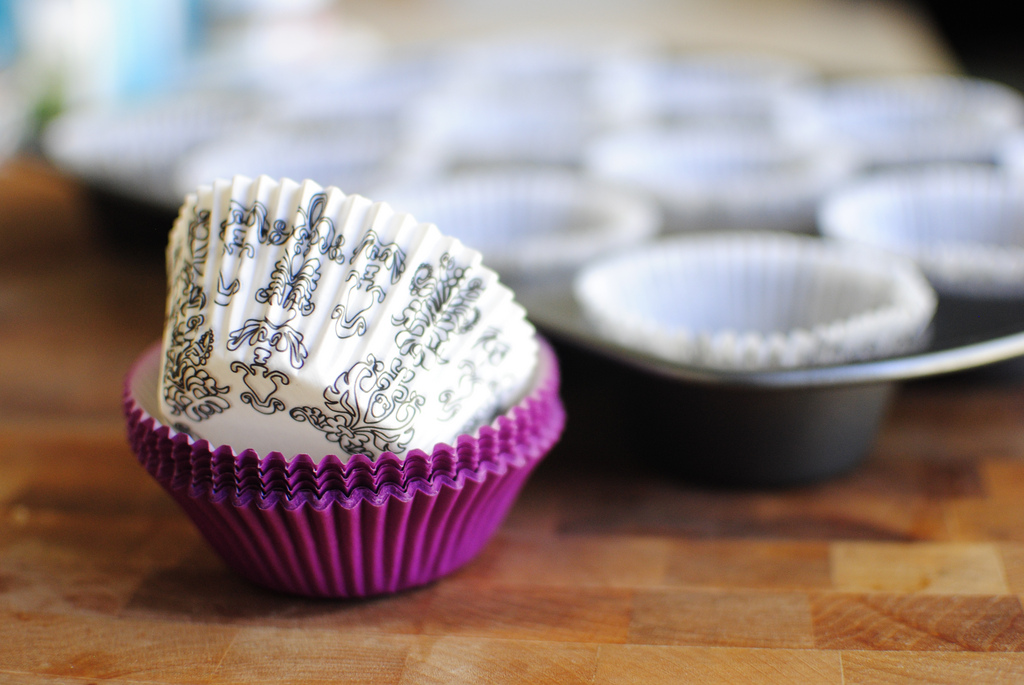
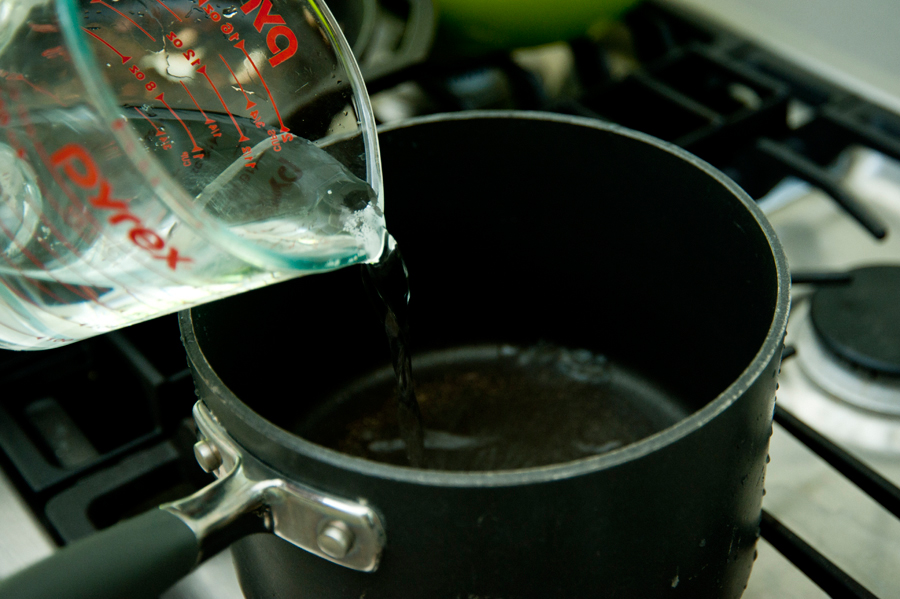
Preheat your oven to 375ºF and line a muffin tin with some baking liners. These days you can find liners in all sorts of different colors or designs, which can really add personality and dress up any cupcake or muffin.


Tasty Kitchen Blog: Nutella Cheesecake Pumpkin Muffins. Guest post by Laurie McNamara of Simply Scratch, recipe submitted by TK member Amy of My Name is Snickerdoodle.

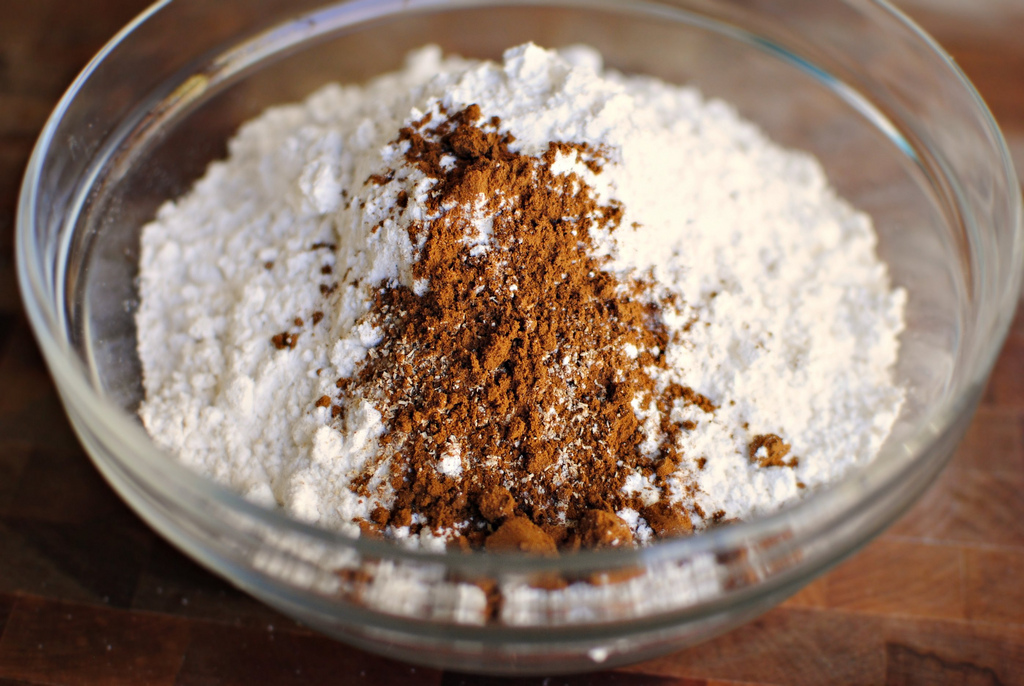
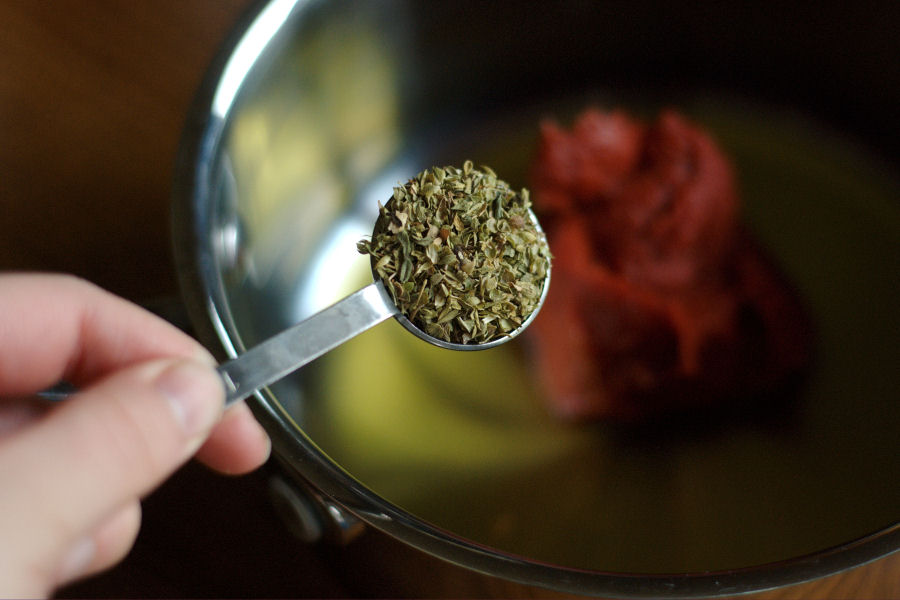
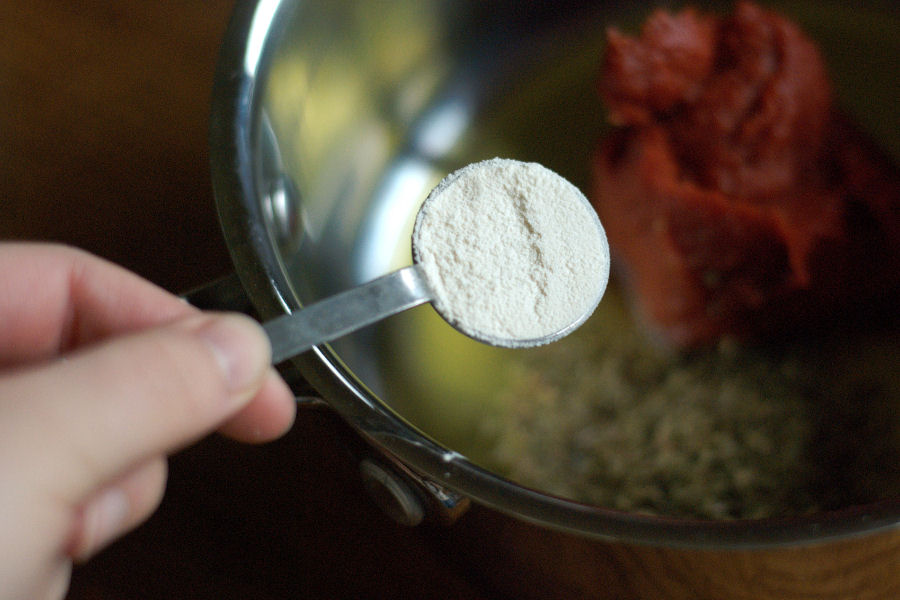
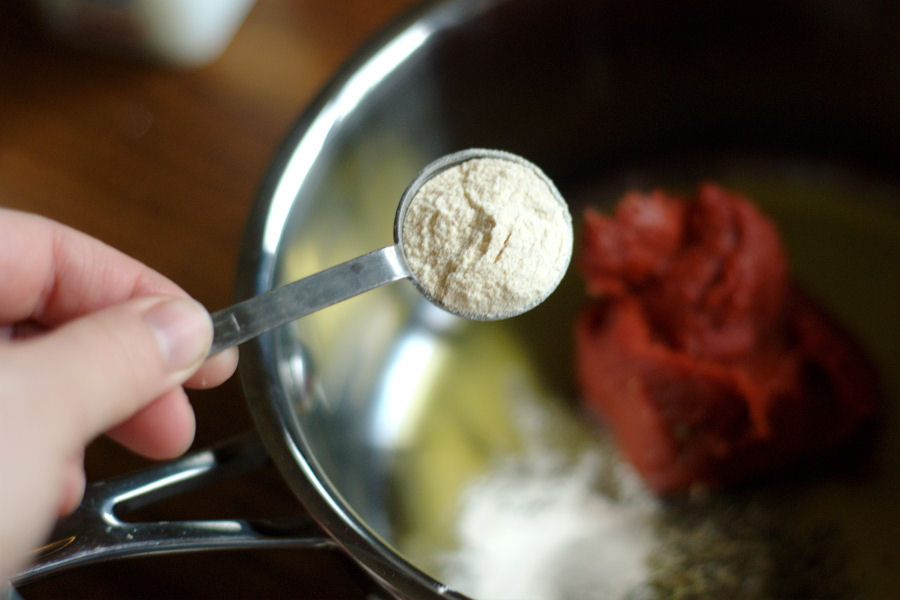
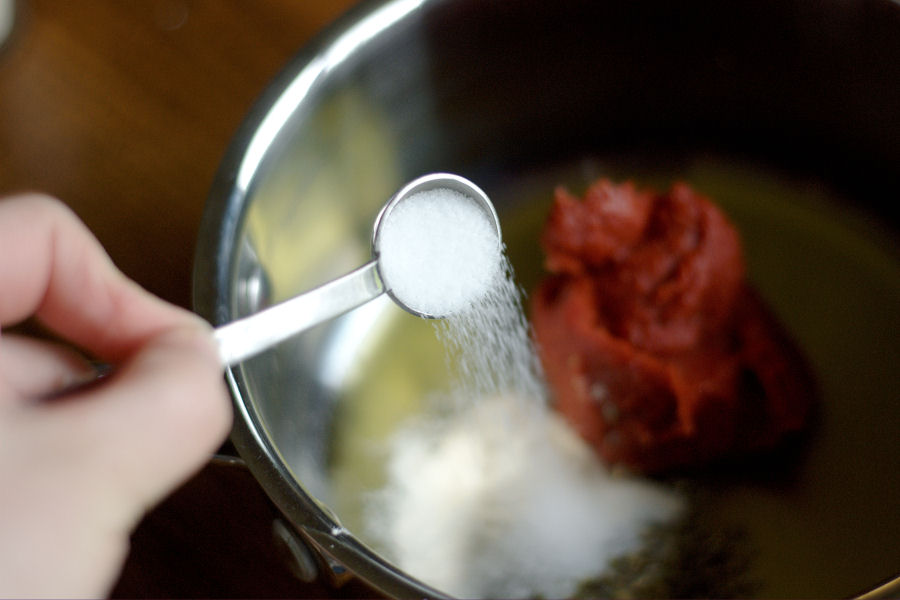
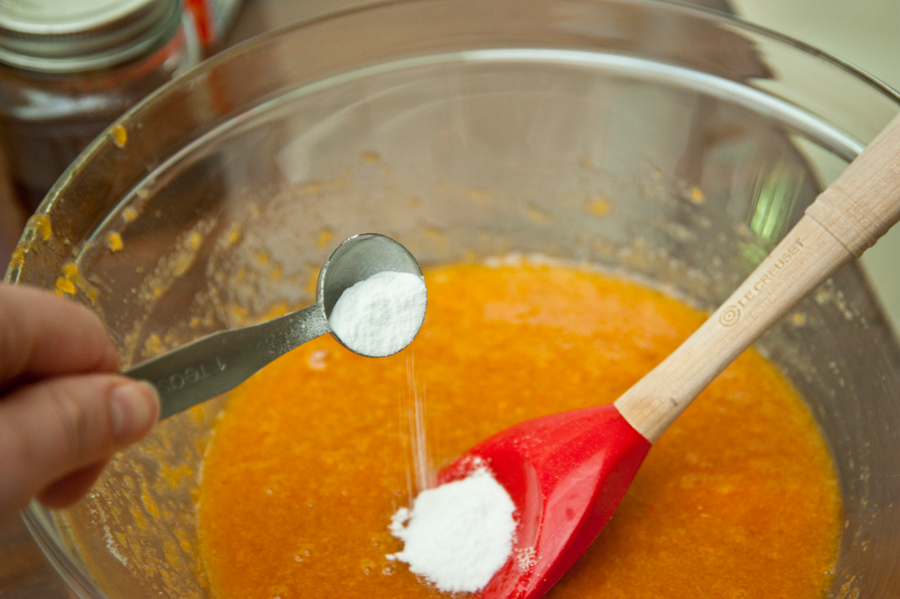
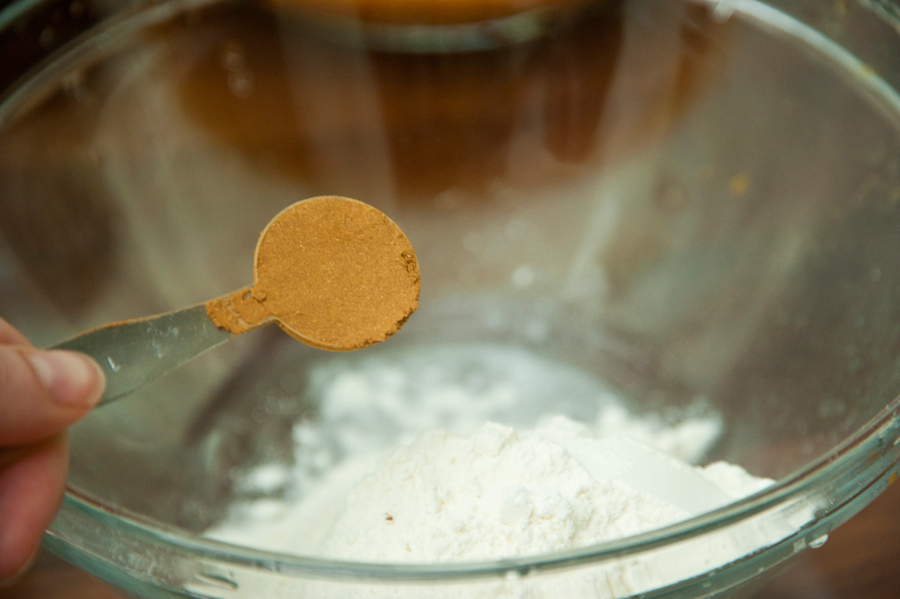
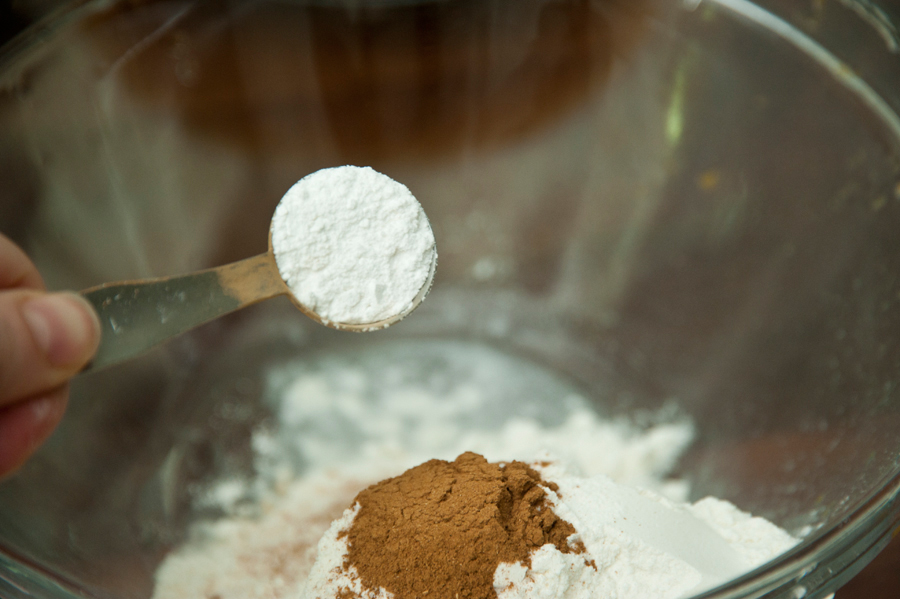
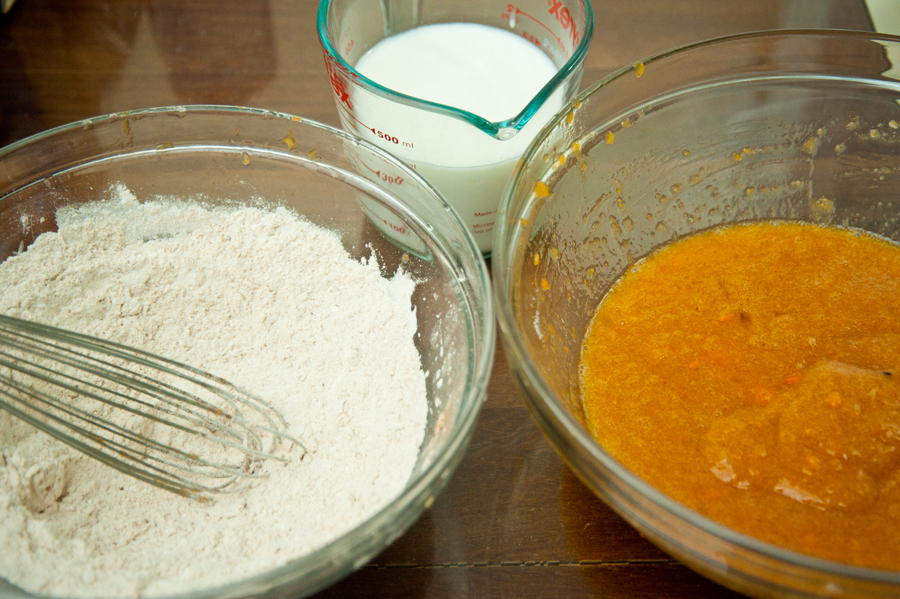
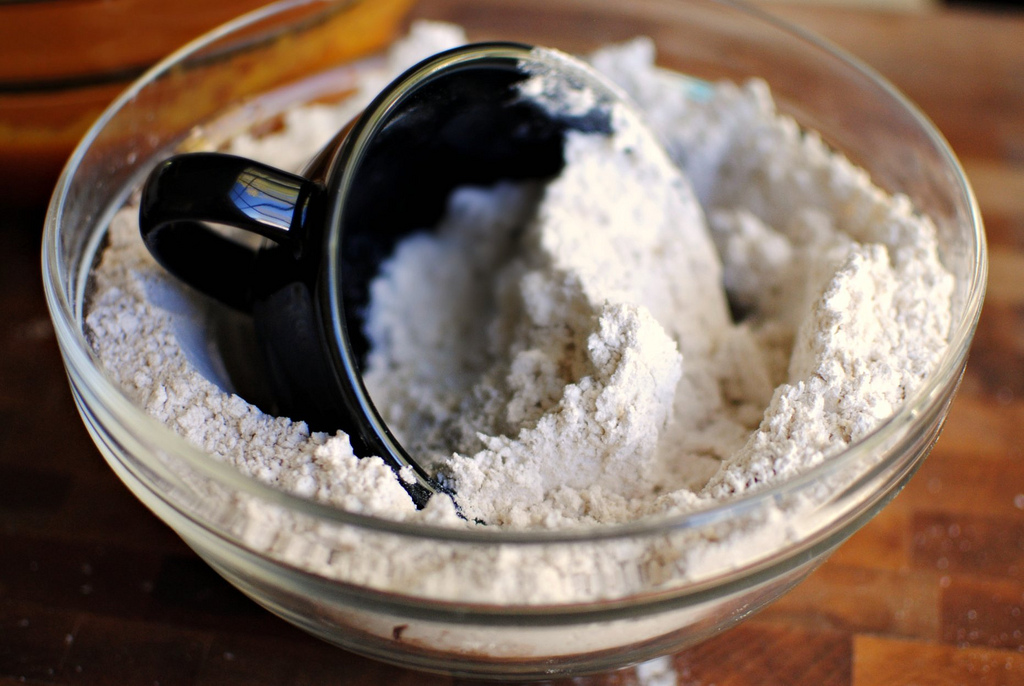
Now let’s get going with the pumpkin batter. In a bowl, add the all-purpose flour, baking soda, salt, cinnamon and nutmeg. It should start to smell good already!


Tasty Kitchen Blog: Nutella Cheesecake Pumpkin Muffins. Guest post by Laurie McNamara of Simply Scratch, recipe submitted by TK member Amy of My Name is Snickerdoodle.

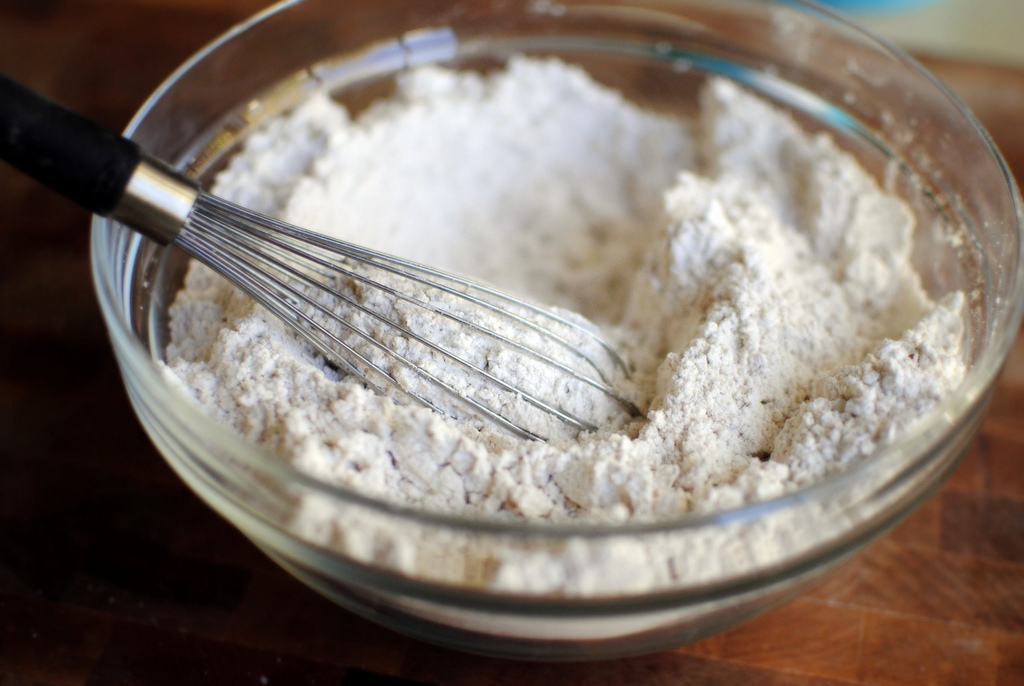
Whisk the dry ingredients together and set aside for just a moment.


Tasty Kitchen Blog: Nutella Cheesecake Pumpkin Muffins. Guest post by Laurie McNamara of Simply Scratch, recipe submitted by TK member Amy of My Name is Snickerdoodle.

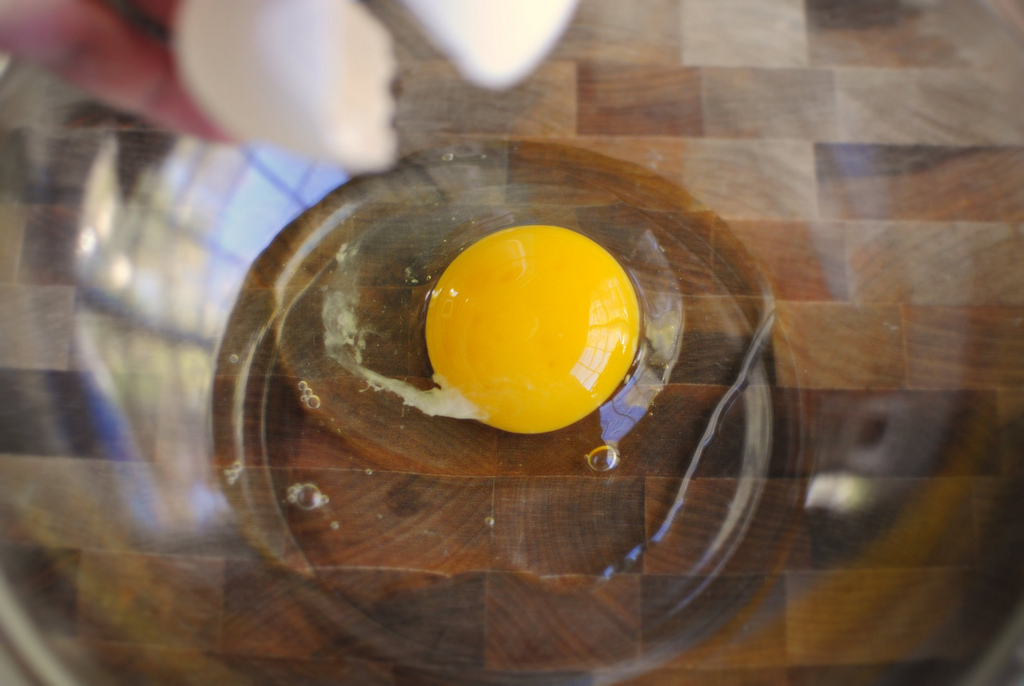
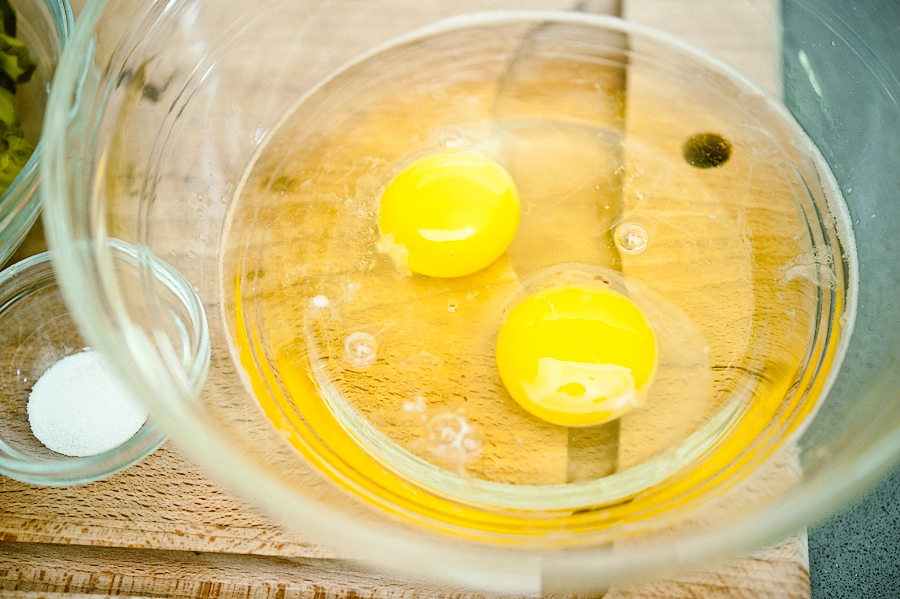
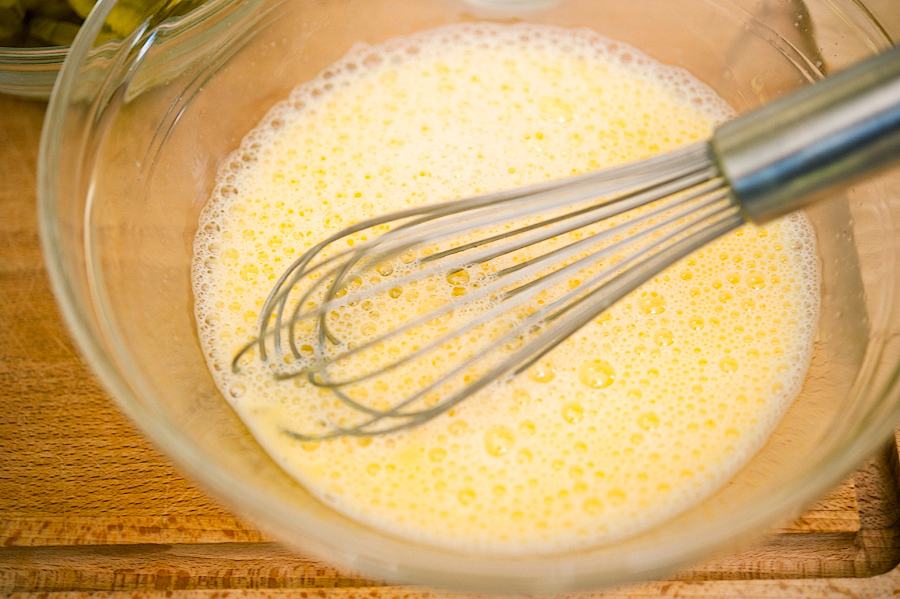
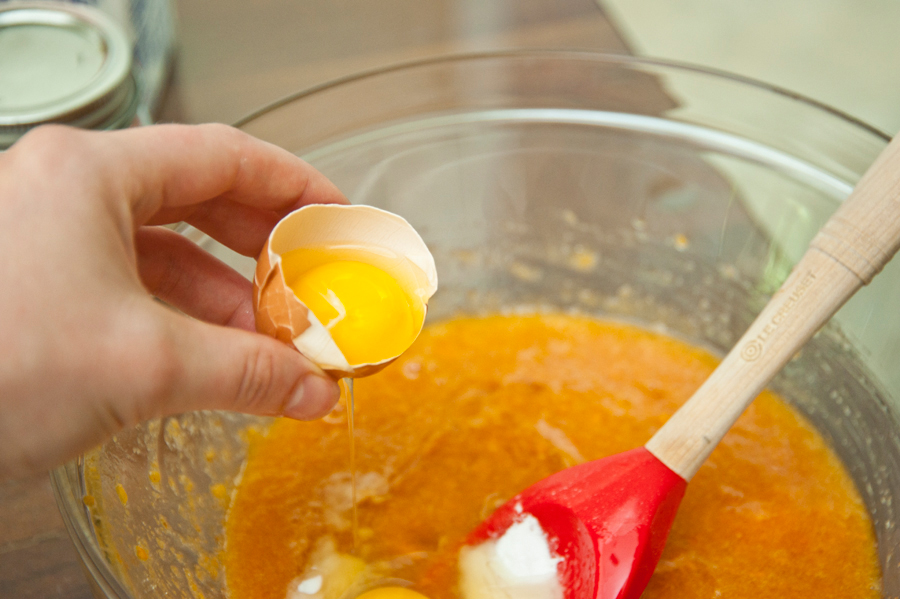
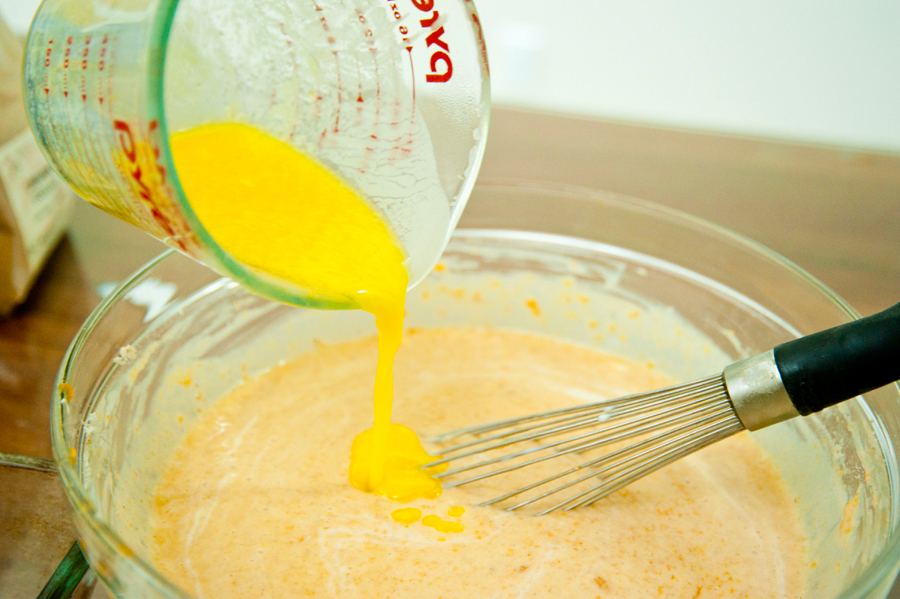
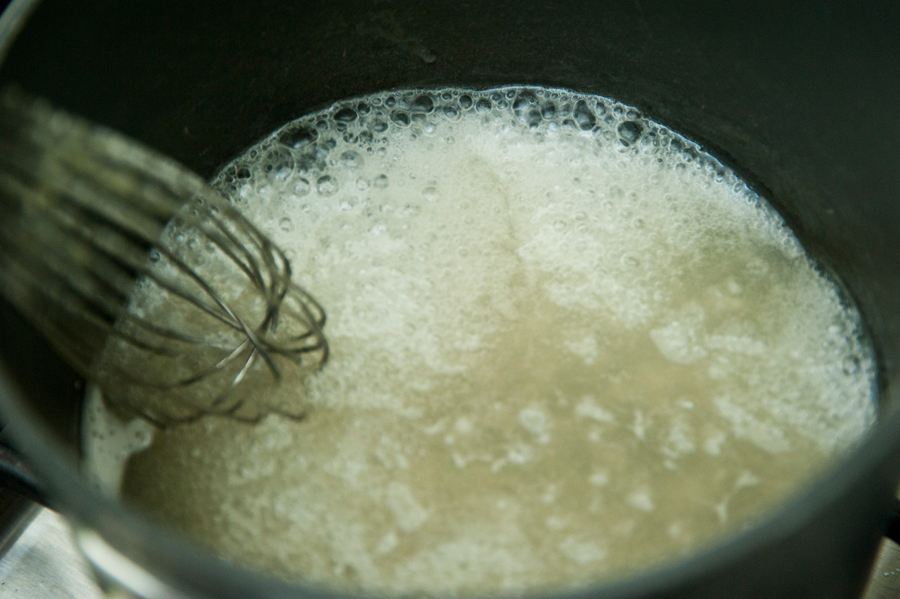
In a large bowl, crack four eggs.


Tasty Kitchen Blog: Nutella Cheesecake Pumpkin Muffins. Guest post by Laurie McNamara of Simply Scratch, recipe submitted by TK member Amy of My Name is Snickerdoodle.

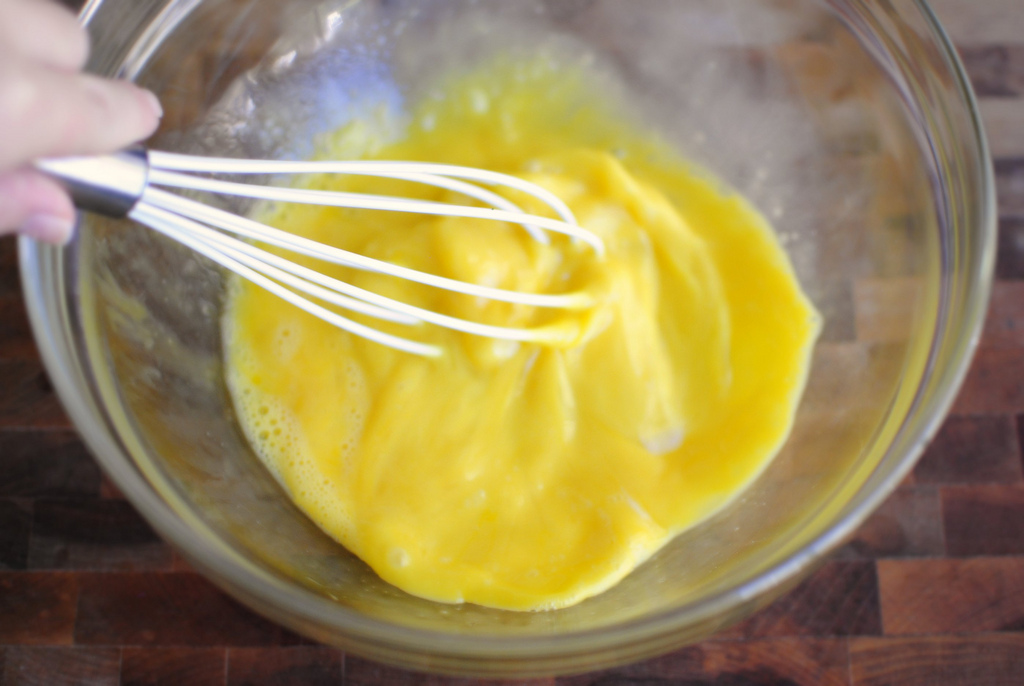
Gently whisk the eggs until they are slightly beaten.


Tasty Kitchen Blog: Nutella Cheesecake Pumpkin Muffins. Guest post by Laurie McNamara of Simply Scratch, recipe submitted by TK member Amy of My Name is Snickerdoodle.

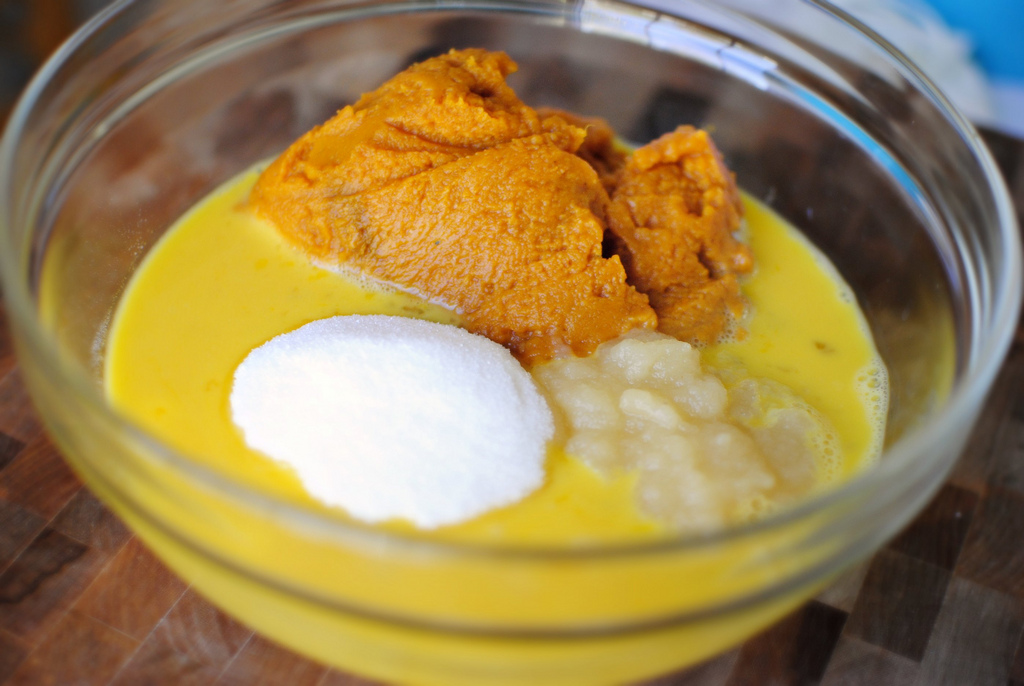
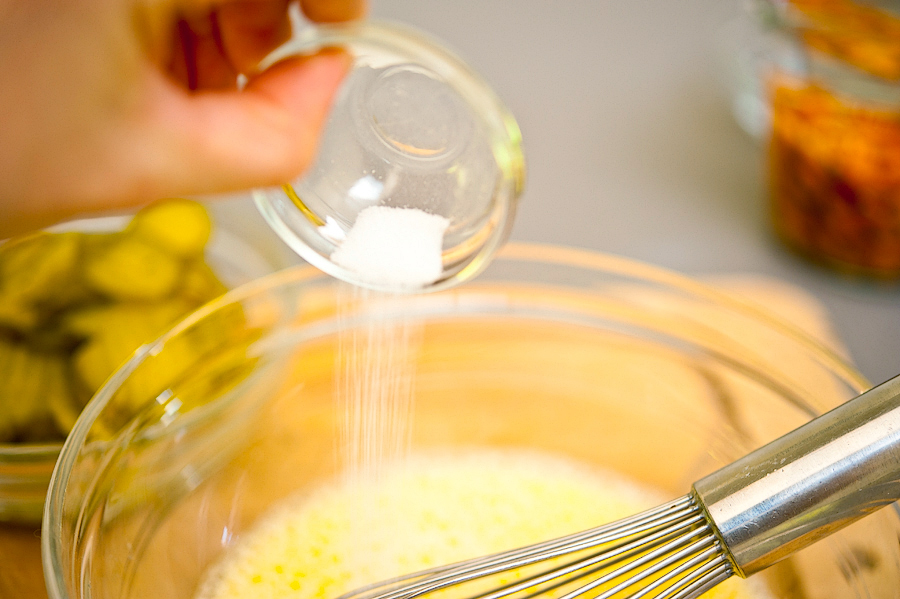
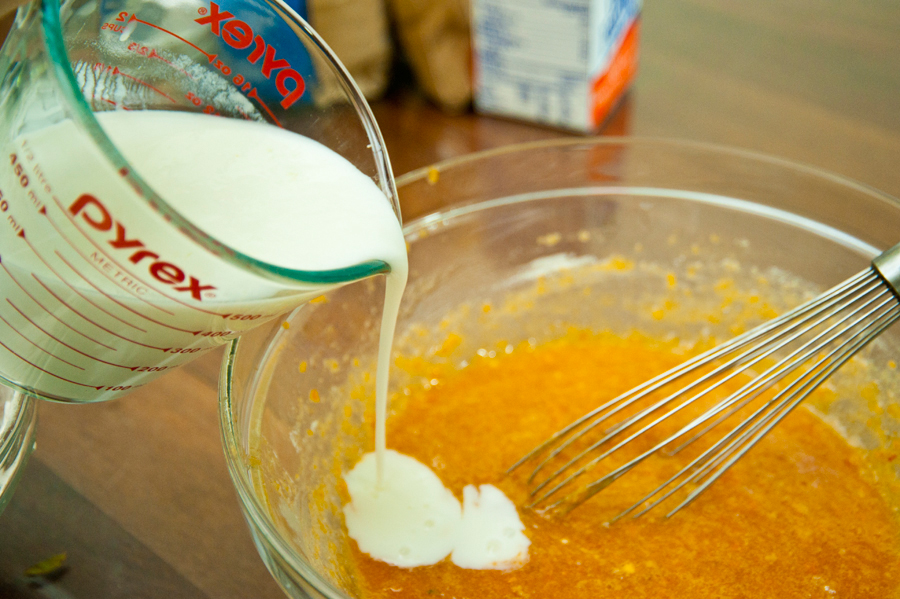
Next add in the sugar, applesauce and pumpkin puree.


Tasty Kitchen Blog: Nutella Cheesecake Pumpkin Muffins. Guest post by Laurie McNamara of Simply Scratch, recipe submitted by TK member Amy of My Name is Snickerdoodle.

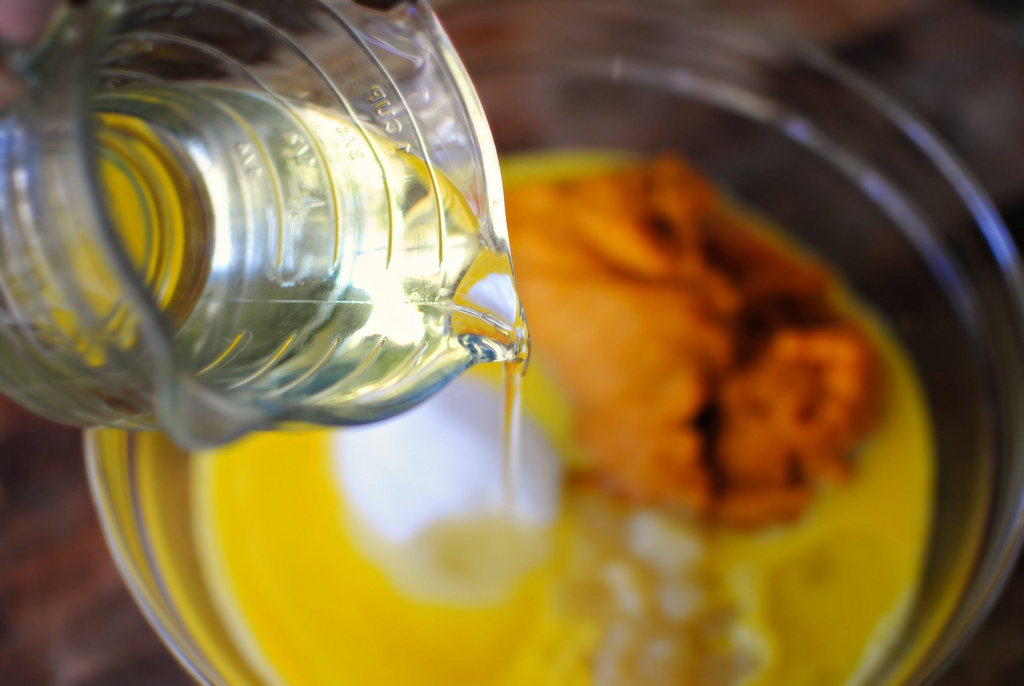
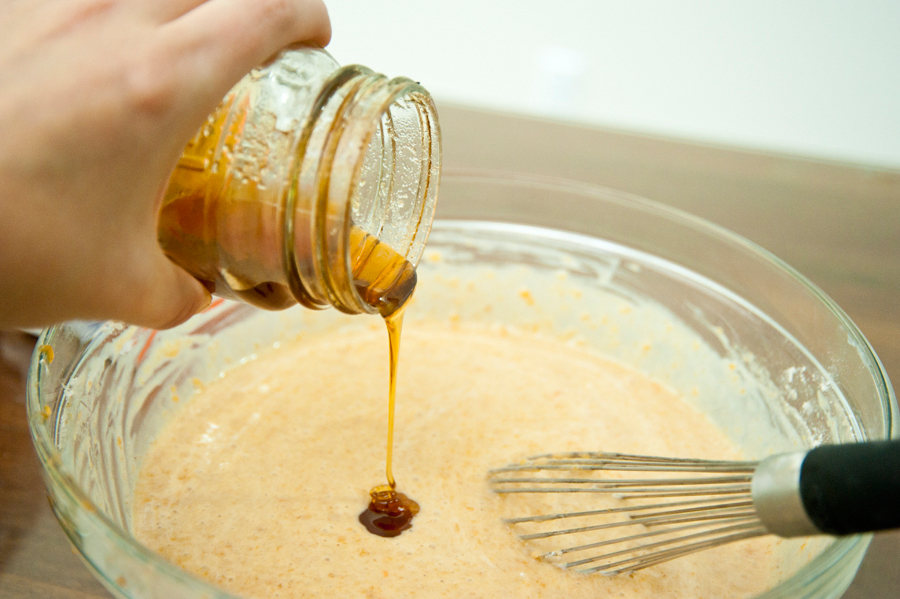
Lastly, add in the oil.


Tasty Kitchen Blog: Nutella Cheesecake Pumpkin Muffins. Guest post by Laurie McNamara of Simply Scratch, recipe submitted by TK member Amy of My Name is Snickerdoodle.

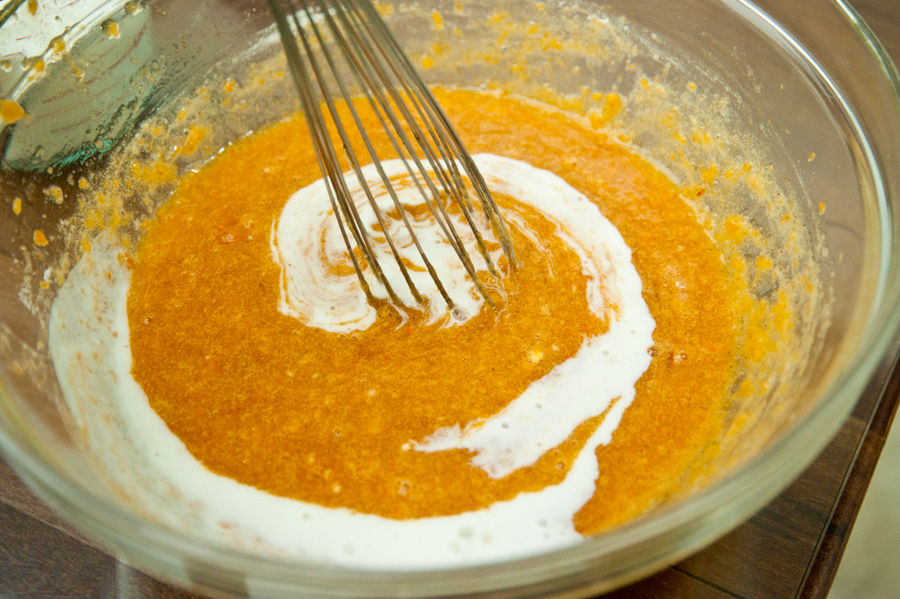
Stir until all the wet ingredients are thoroughly combined.


Tasty Kitchen Blog: Nutella Cheesecake Pumpkin Muffins. Guest post by Laurie McNamara of Simply Scratch, recipe submitted by TK member Amy of My Name is Snickerdoodle.

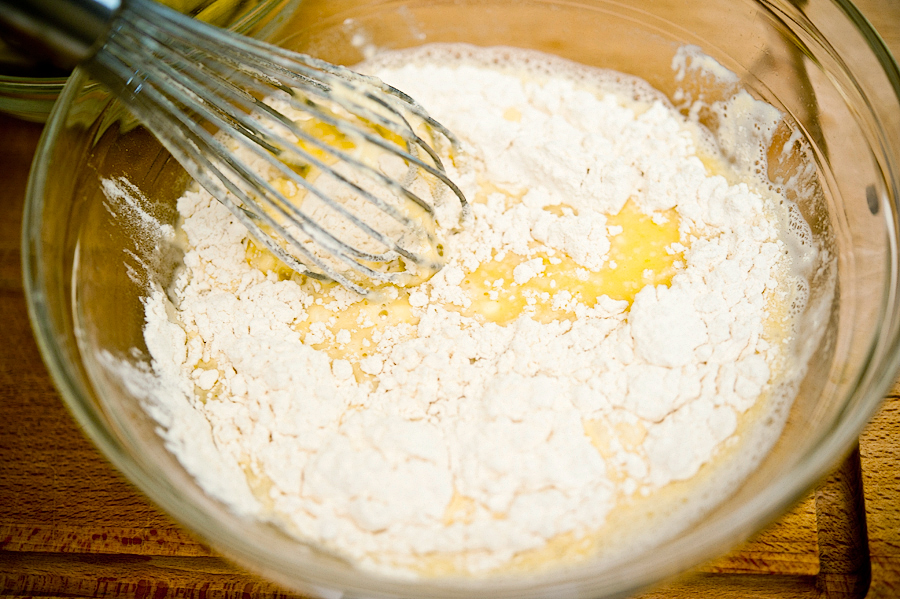
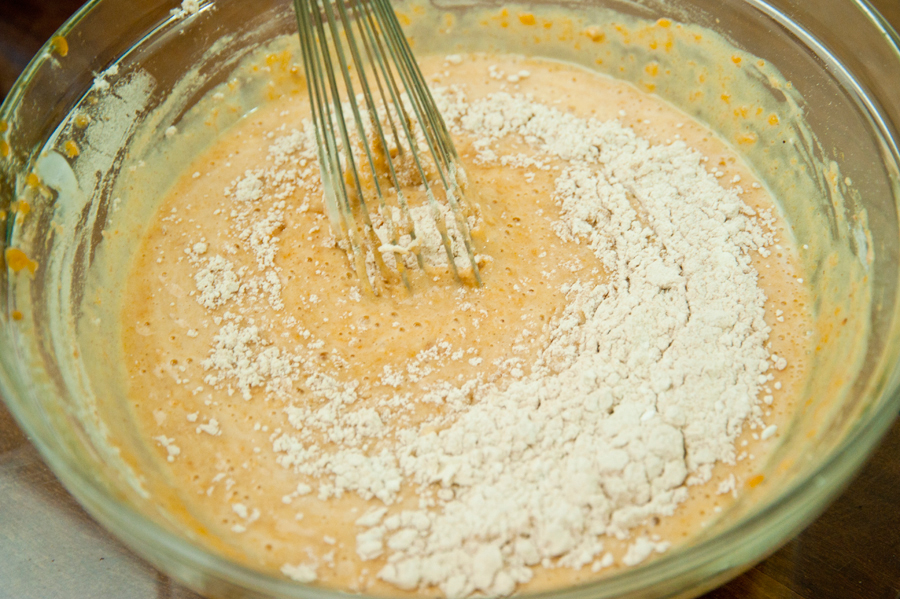
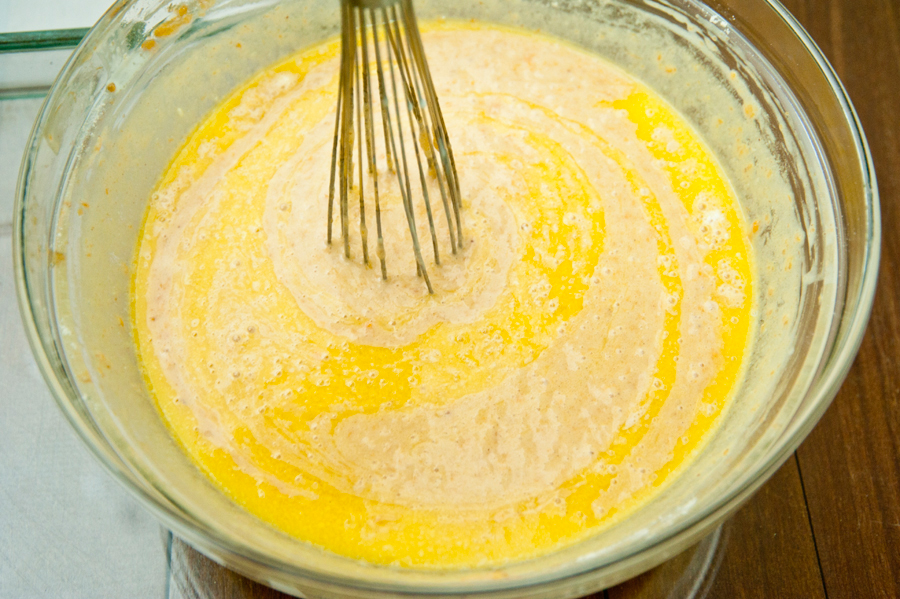
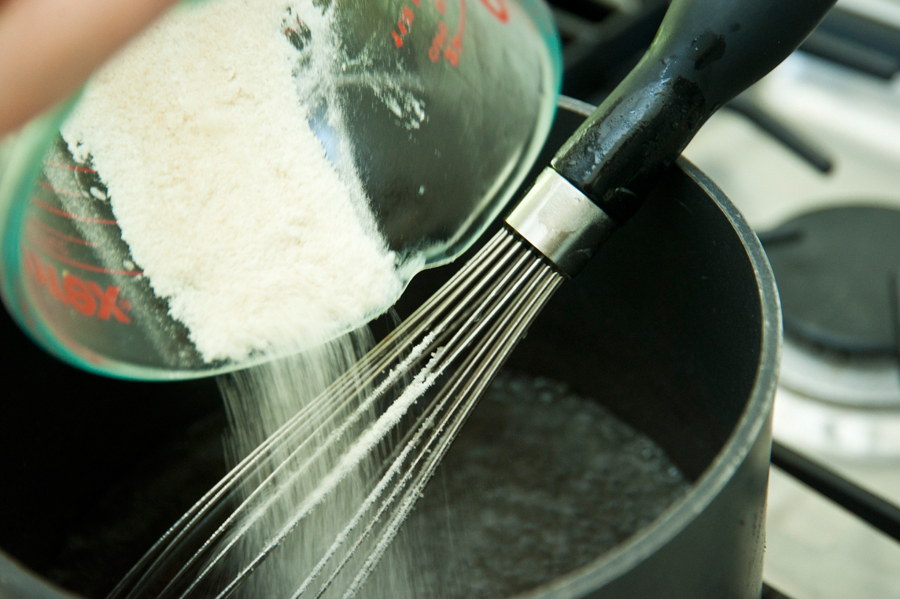
Working in batches, add a little of the flour mixture into the pumpkin batter.


Tasty Kitchen Blog: Nutella Cheesecake Pumpkin Muffins. Guest post by Laurie McNamara of Simply Scratch, recipe submitted by TK member Amy of My Name is Snickerdoodle.

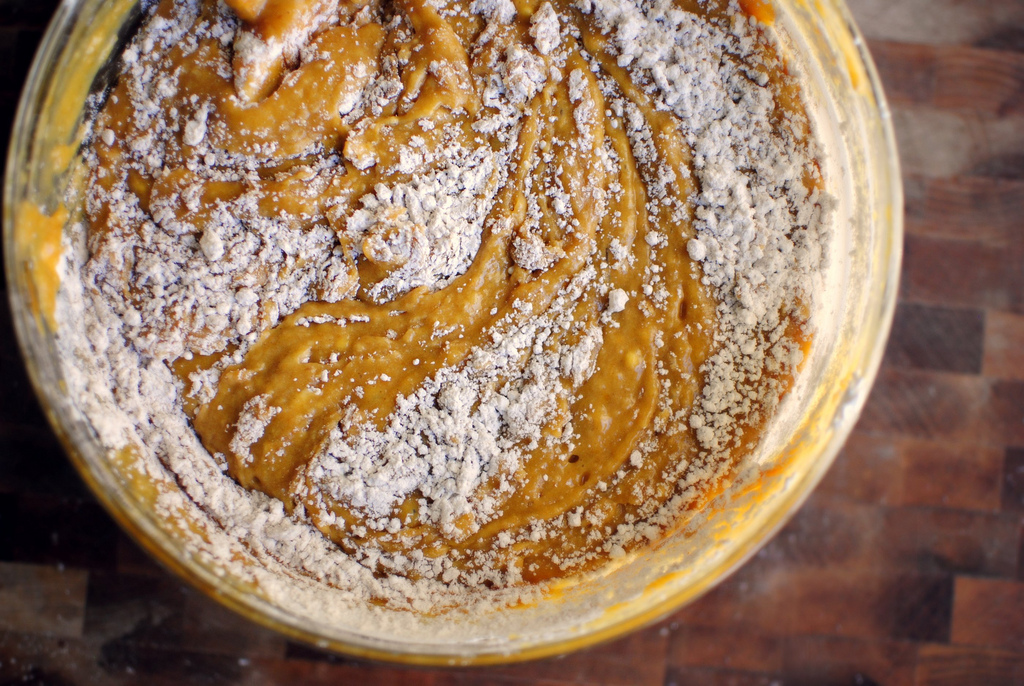
Stir until all ingredients are incorporated.


Tasty Kitchen Blog: Nutella Cheesecake Pumpkin Muffins. Guest post by Laurie McNamara of Simply Scratch, recipe submitted by TK member Amy of My Name is Snickerdoodle.

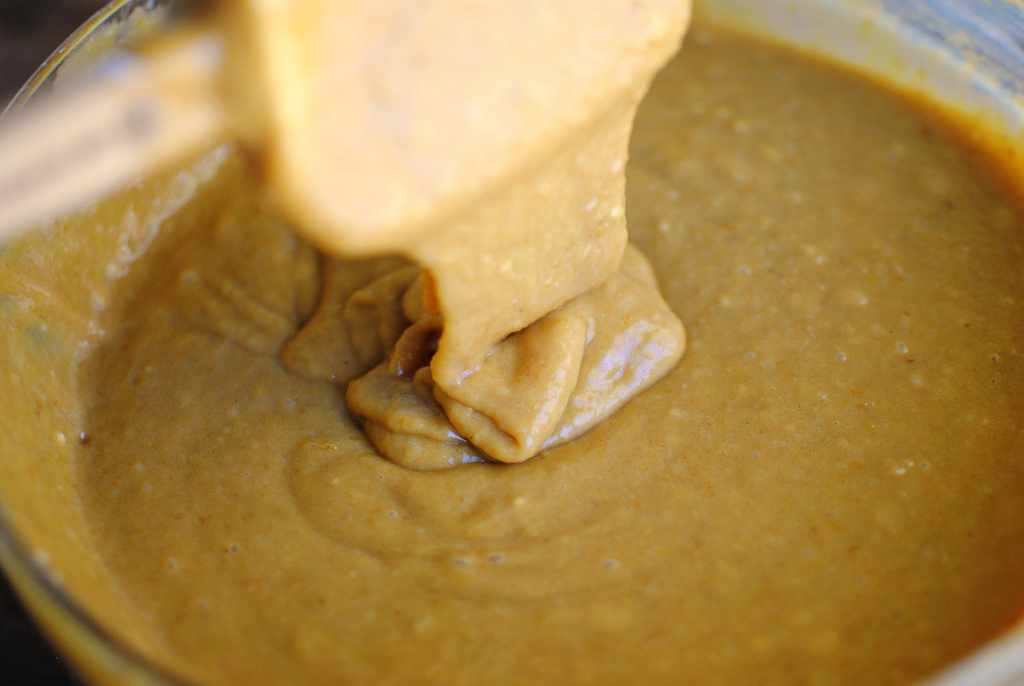
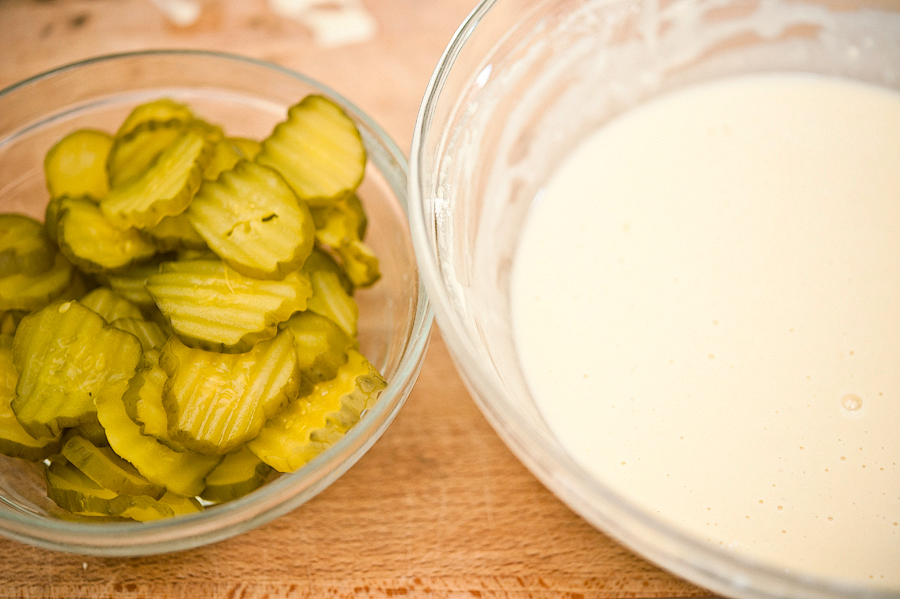
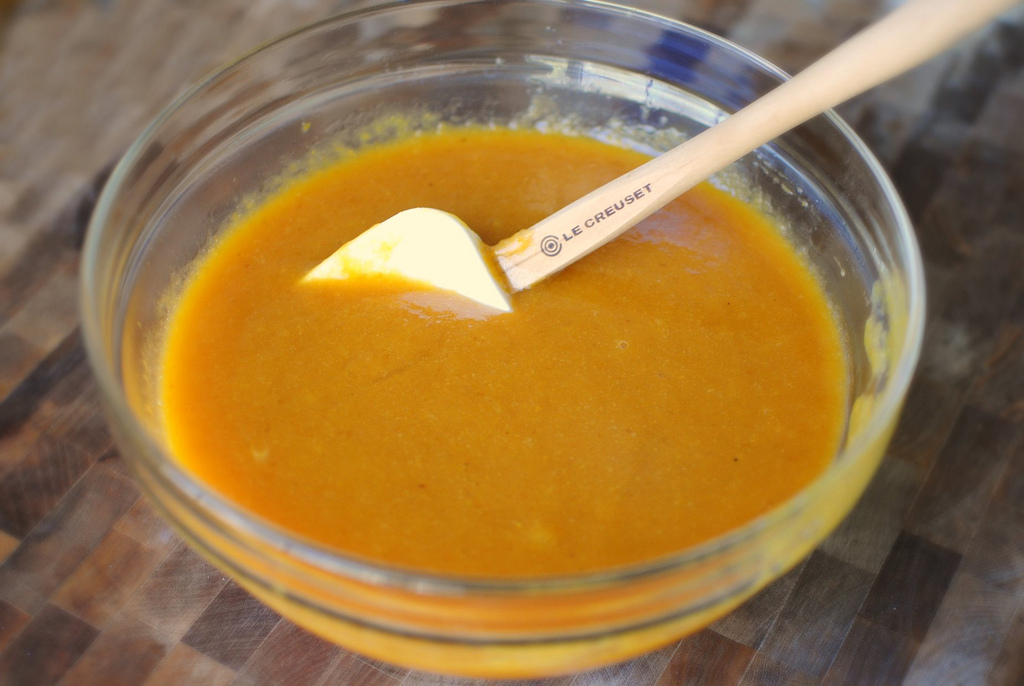
The batter should be smooth yet slightly thick. My rule of thumb: if the batter tastes amazing, so will the final baked product. And let me just tell you, the batter is absolutely fantastic! Now, if you can help it, set it aside and get started with the cheesecake filling.


Tasty Kitchen Blog: Nutella Cheesecake Pumpkin Muffins. Guest post by Laurie McNamara of Simply Scratch, recipe submitted by TK member Amy of My Name is Snickerdoodle.

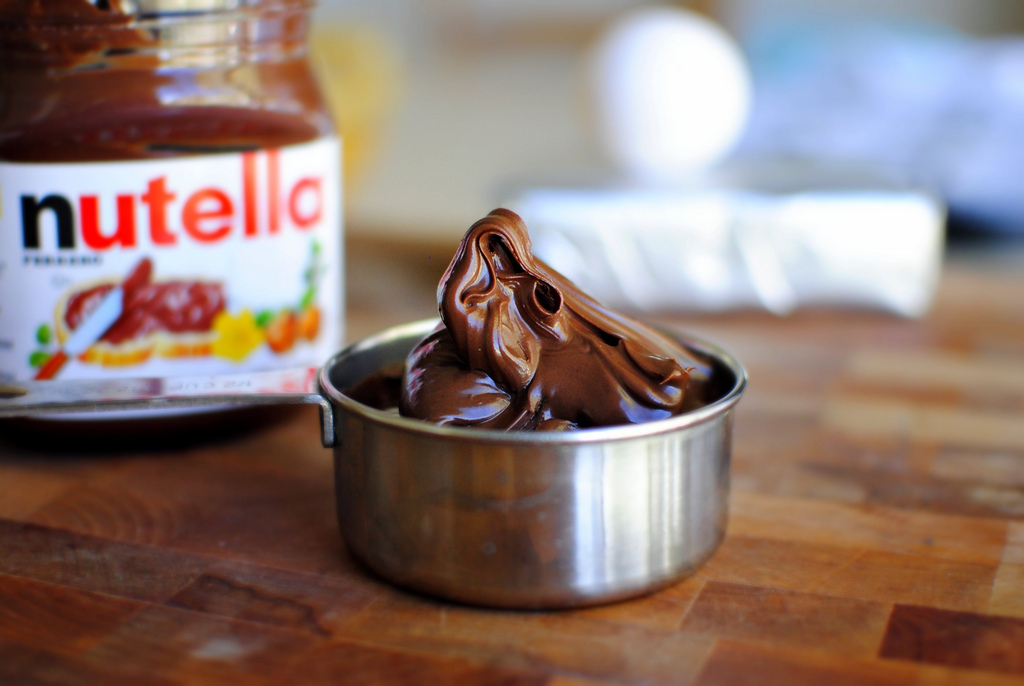
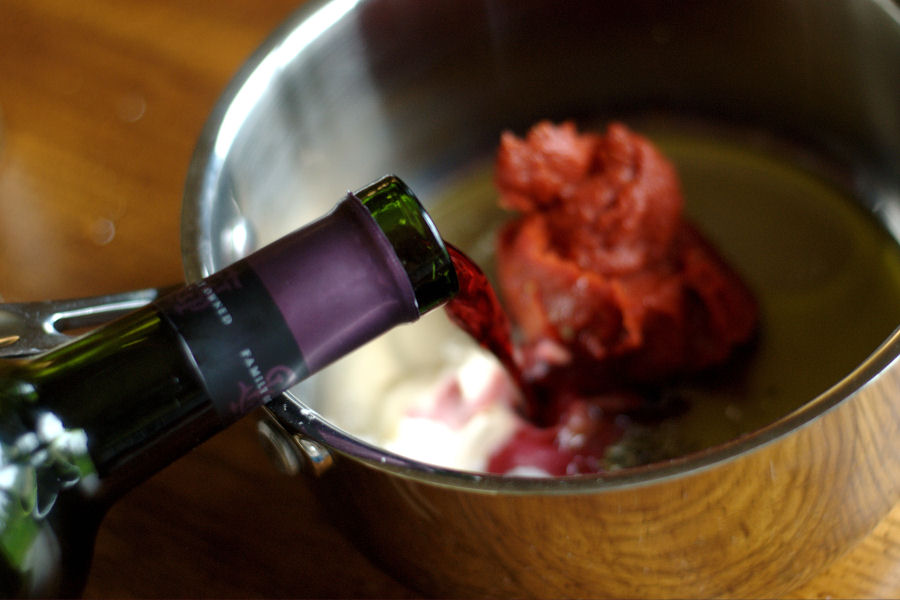
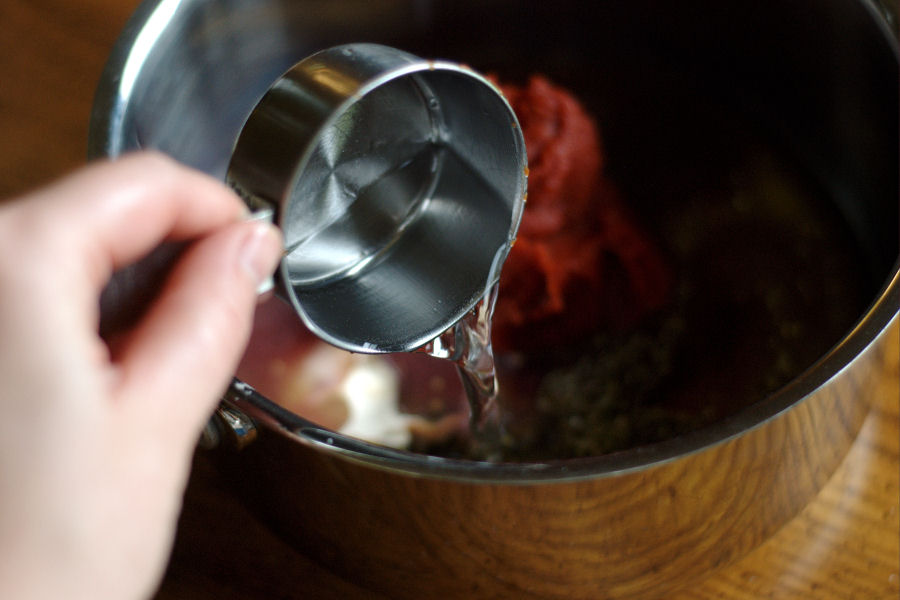
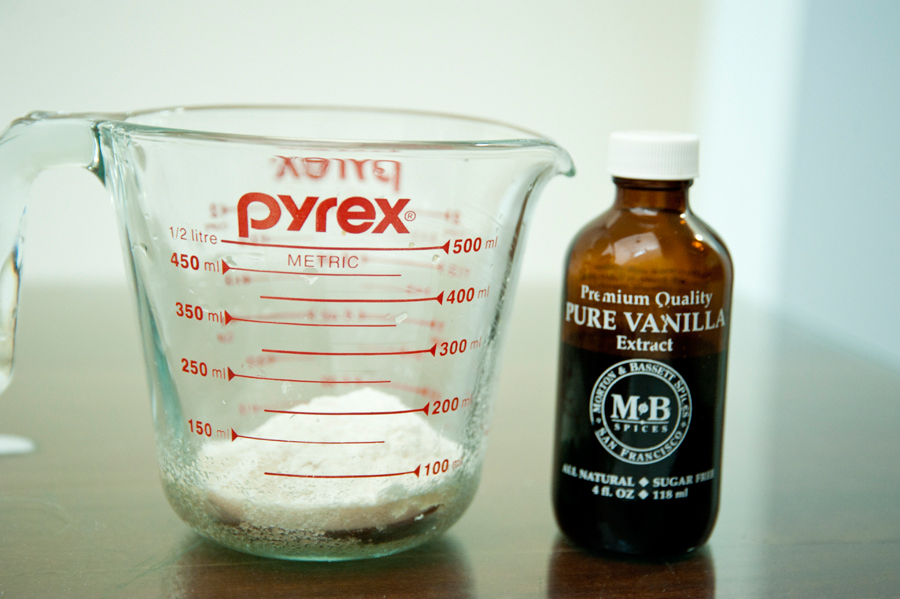
Measure out a half cup of Nutella.


Tasty Kitchen Blog: Nutella Cheesecake Pumpkin Muffins. Guest post by Laurie McNamara of Simply Scratch, recipe submitted by TK member Amy of My Name is Snickerdoodle.>

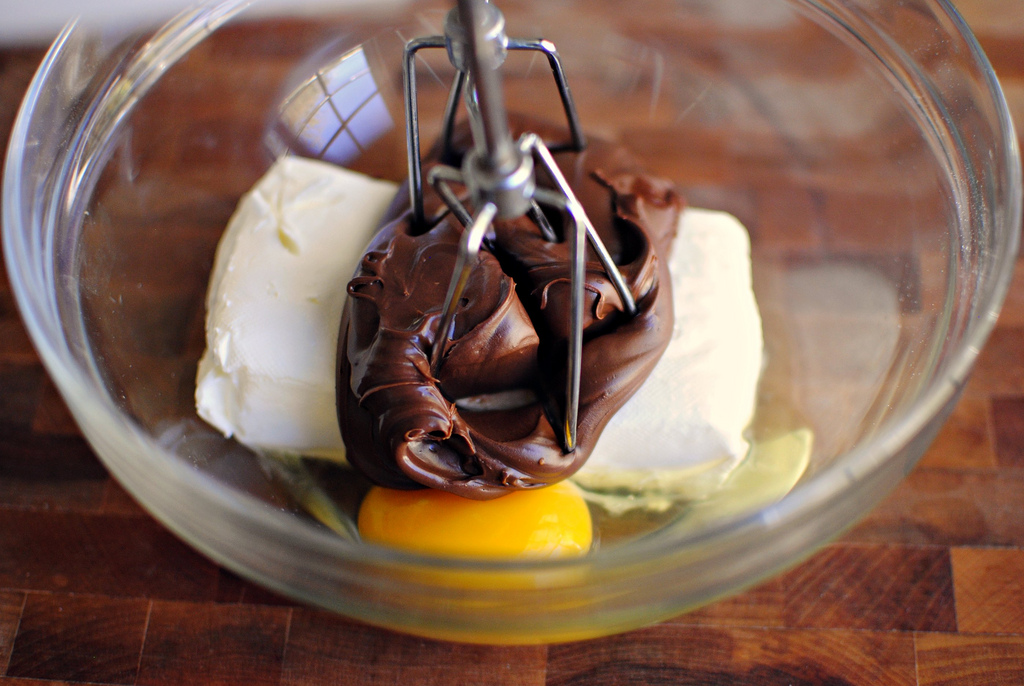
Add the Nutella, along with the 8 ounces of softened cream cheese and one whole egg into a medium bowl.


Tasty Kitchen Blog: Nutella Cheesecake Pumpkin Muffins. Guest post by Laurie McNamara of Simply Scratch, recipe submitted by TK member Amy of My Name is Snickerdoodle.

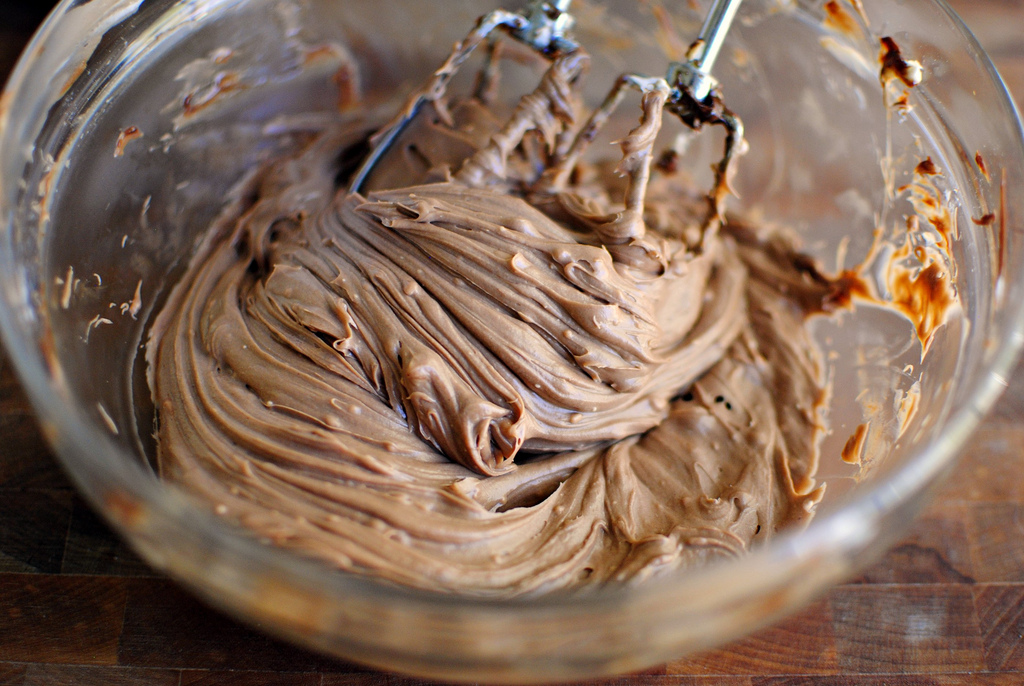
Using a hand mixer, blend until smooth.


Tasty Kitchen Blog: Nutella Cheesecake Pumpkin Muffins. Guest post by Laurie McNamara of Simply Scratch, recipe submitted by TK member Amy of My Name is Snickerdoodle.

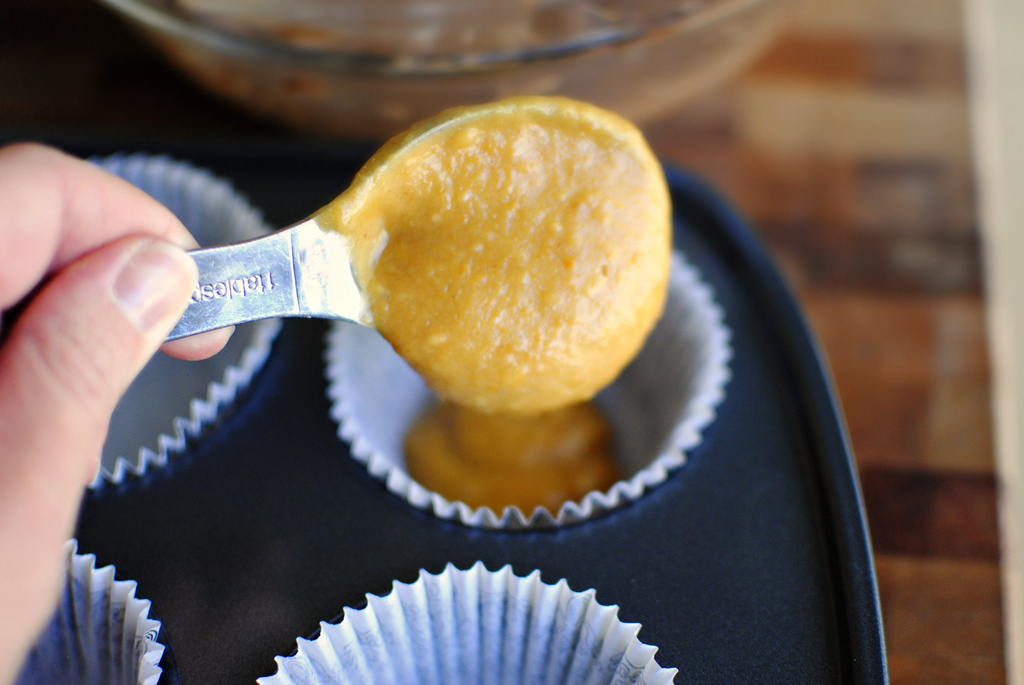
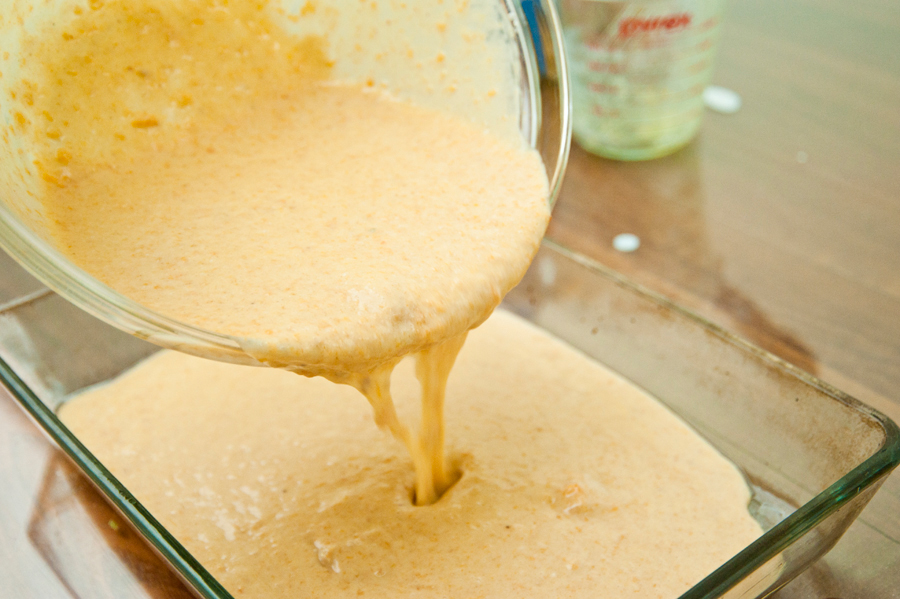
Now comes the fun part! To the lined muffin tin, add two level tablespoons of the pumpkin batter.


Tasty Kitchen Blog: Nutella Cheesecake Pumpkin Muffins. Guest post by Laurie McNamara of Simply Scratch, recipe submitted by TK member Amy of My Name is Snickerdoodle.

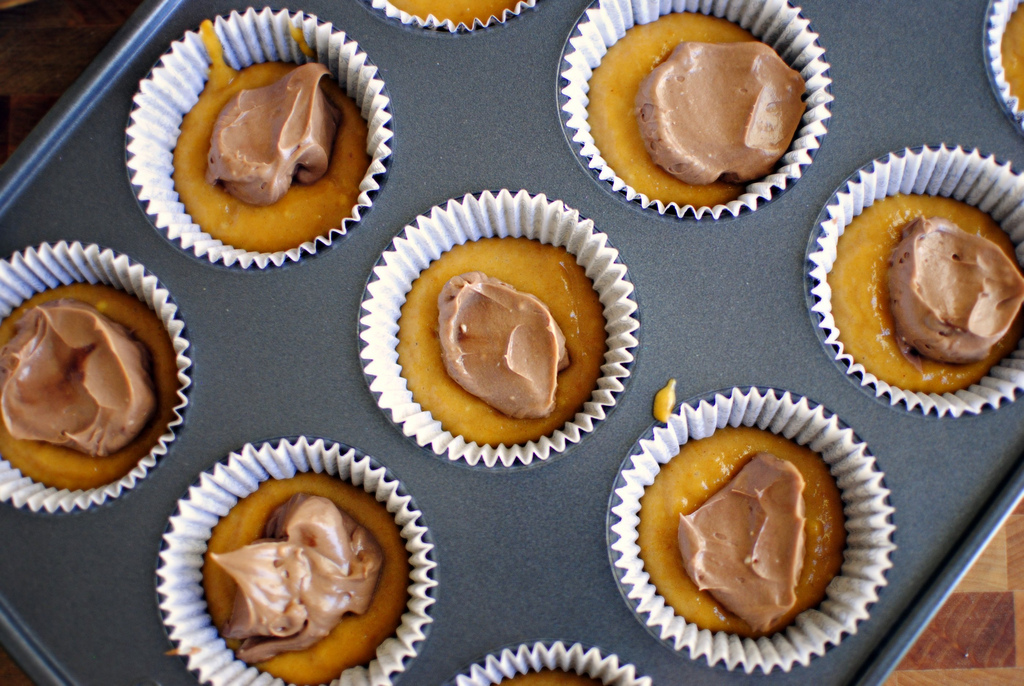
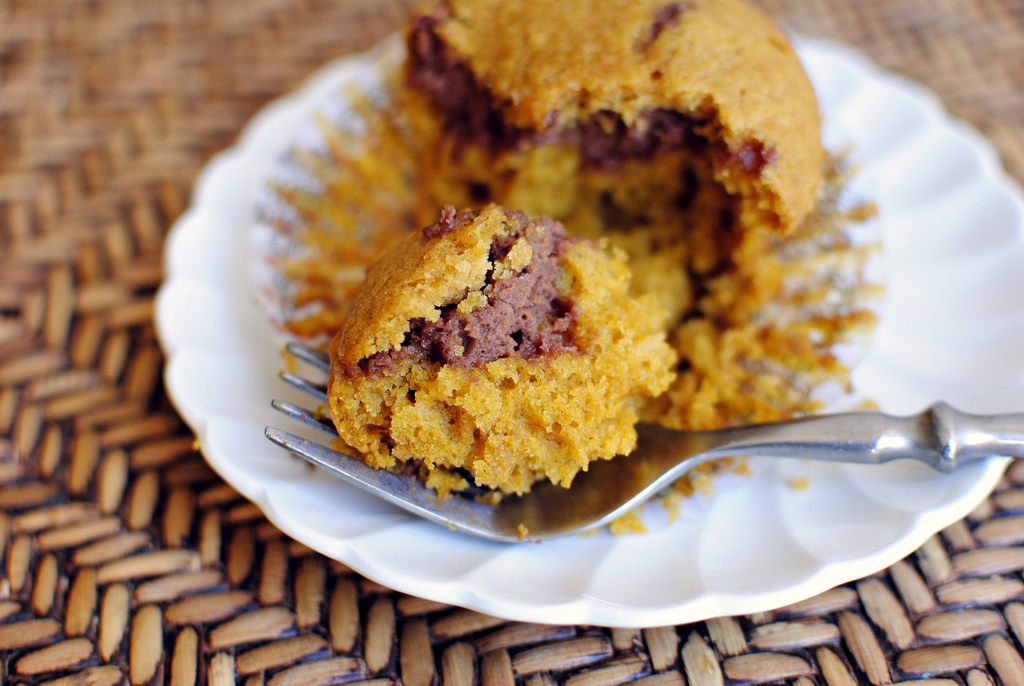
Next place a tablespoon of the Nutella cheesecake mixture on top of that.


Tasty Kitchen Blog: Nutella Cheesecake Pumpkin Muffins. Guest post by Laurie McNamara of Simply Scratch, recipe submitted by TK member Amy of My Name is Snickerdoodle.

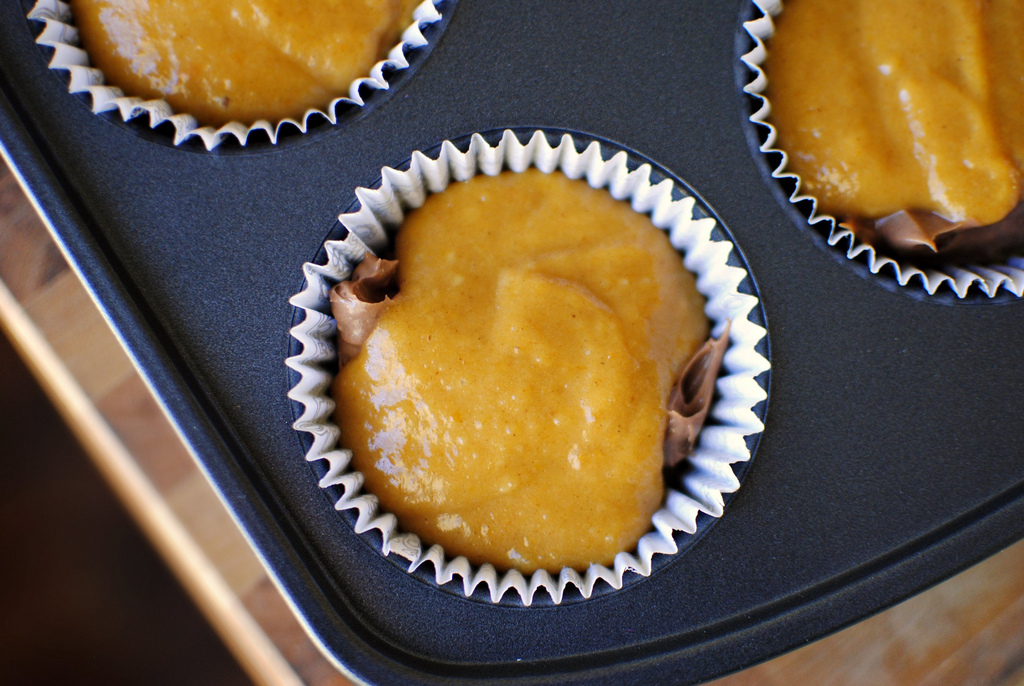
Lastly, top the Nutella mixture with two more tablespoons of the pumpkin batter. Place in your preheated oven for 18-20 minutes. See? So easy!


Tasty Kitchen Blog: Nutella Cheesecake Pumpkin Muffins. Guest post by Laurie McNamara of Simply Scratch, recipe submitted by TK member Amy of My Name is Snickerdoodle.

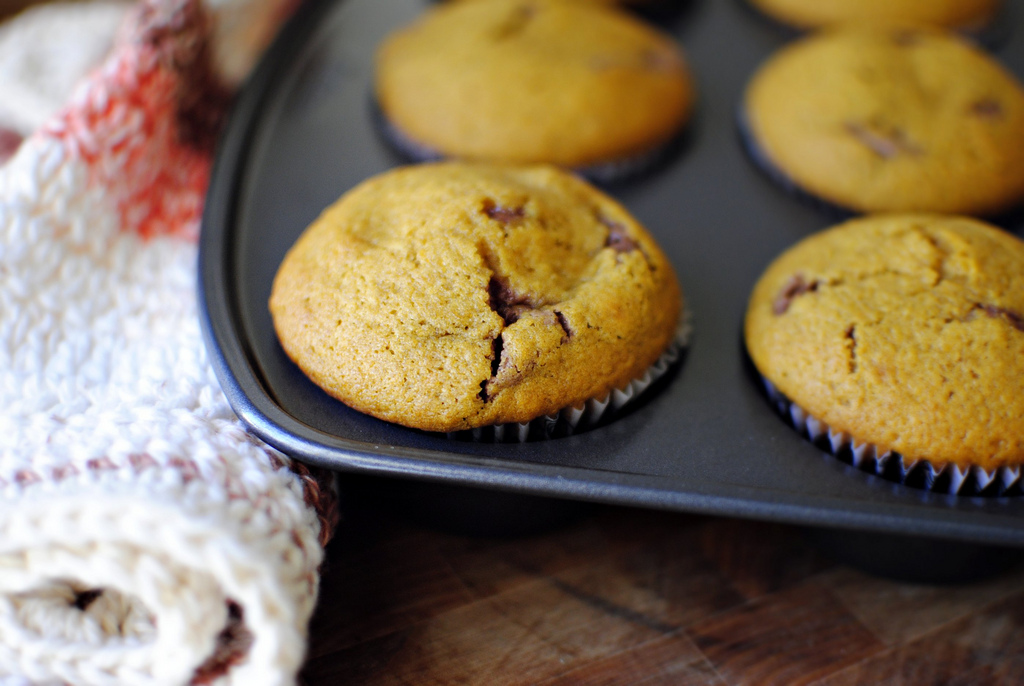
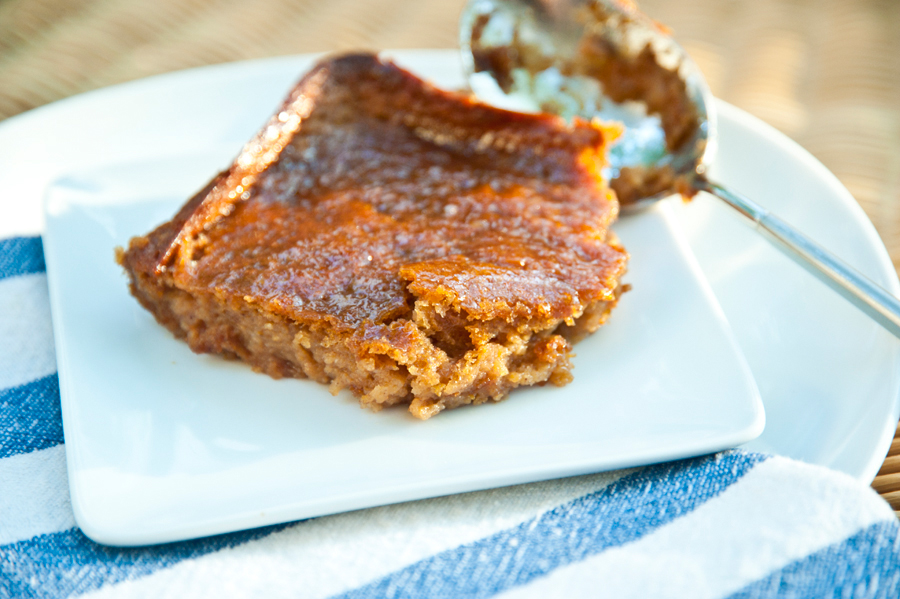
My muffins baked up perfectly in 18 minutes. They were light and fluffy and my home filled up with the smell of pumpkin. Here are some words of advice: let them cool slightly before removing from the pan and attempting to eat.


Tasty Kitchen Blog: Nutella Cheesecake Pumpkin Muffins. Guest post by Laurie McNamara of Simply Scratch, recipe submitted by TK member Amy of My Name is Snickerdoodle.

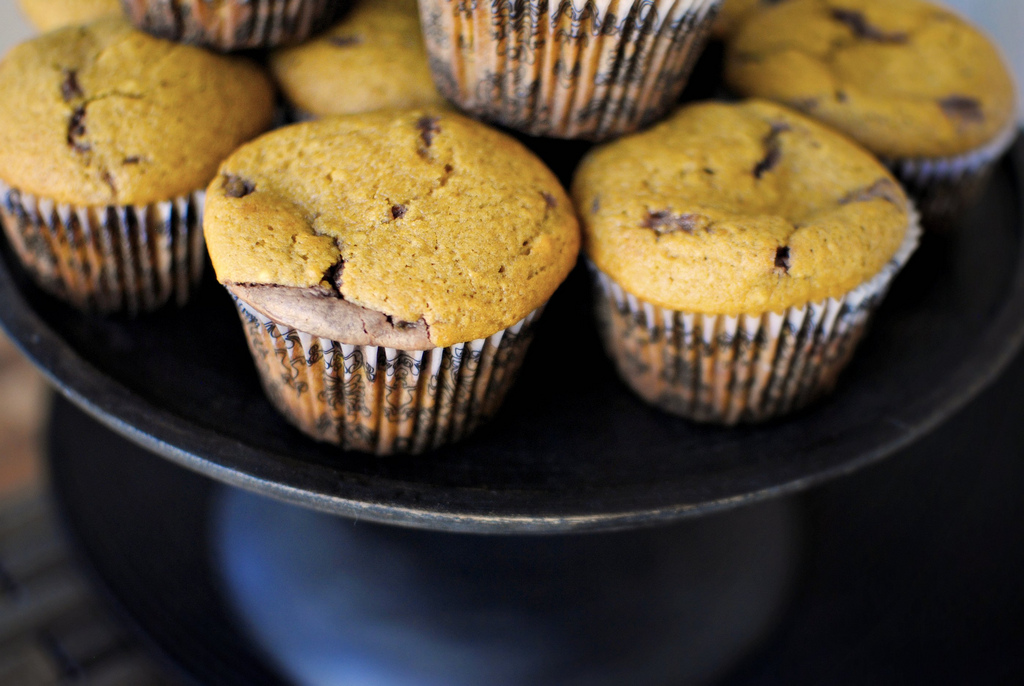
What I really liked about this recipe, besides the whole entire thing, was that the measurements are spot on. I didn’t have any leftover batter or cheesecake filling. And if you keep the muffins in an airtight container, they can last for up to a week. (If that’s even possible.)


Tasty Kitchen Blog: Nutella Cheesecake Pumpkin Muffins. Guest post by Laurie McNamara of Simply Scratch, recipe submitted by TK member Amy of My Name is Snickerdoodle.

It was pure genius of Amy to match this fluffy pumpkin cake with the silkiness of Nutella cheesecake. These muffins pack easily and are great afternoon snack or as an evening dessert. And as a Season Two Dessert Host for Real Women of Philadelphia, Amy is no stranger to creating fun and delicious treats. It’s obvious she knows her way around a kitchen. Just check out Amy’s Tasty Kitchen recipe box or stop by her fun and happy website My Name is Snickerdoodle and you’ll see just why. Thank you, Amy, for sharing such a scrumptious muffin recipe with us! This recipe will firmly hold a spot in my recipe box and I can’t wait to bake these again for the holidays.

Note: The only change to this recipe I made was to use 1 cup olive oil and a half cup unsweetened apple sauce instead of 1-1/2 cups vegetable oil.


Printable Recipe

Nutella Cheesecake Pumpkin Muffins

See post on mynameissnickerdoodle’s site!
4.60 Mitt(s) 15 Rating(s)15 votes, average: 4.60 out of 515 votes, average: 4.60 out of 515 votes, average: 4.60 out of 515 votes, average: 4.60 out of 515 votes, average: 4.60 out of 5

Prep Time:

Cook Time:

Difficulty: Easy

Servings: 20

20
x

Print Options

Page size Letter 3x5 4x6
Text Size Small Medium Large
Content Include description
Include prep time, etc.
Show image

Description

Pumpkin muffins just says fall. Adding a little Nutella cheesecake filling to pumpkin muffins just YELLS fall!

Ingredients

  • FOR THE PUMPKIN MUFFINS:
  • 4 whole Large Eggs
  • 1-½ cup Sugar
  • 1 can (15 Oz. Size) Pumpkin Puree
  • 1-½ cup Vegetable Oil
  • 3 cups All-purpose Flour
  • 2 teaspoons Cinnamon
  • 1 teaspoon Nutmeg
  • 2 teaspoons Baking Soda
  • 1 teaspoon Salt
  • FOR THE NUTELLA CHEECAKE FILLING:
  • 8 ounces, weight Cream Cheese, Softened
  • ½ cups Nutella
  • 1 whole Large Egg

Preparation Instructions

Preheat oven to 375°F. In a large bowl, beat eggs slightly. Add in sugar, pumpkin and oil and beat thoroughly. Add in remaining dry ingredients and mix until smooth.

In a small bowl, beat together cream cheese, Nutella and egg until smooth.

Place paper liners in a muffin tin. Place about 2 tablespoons of pumpkin batter into each liner, then 1 tablespoon of Nutella batter, then top with 2 more tablespoons of pumpkin batter. Bake for 18-22 minutes.

These are best served completely cooled. Makes 20 muffins.


_______________________________________

Laurie is the force behind Simply Scratch, a blog that documents her efforts to find and create recipes that are made simply from scratch. (We think it’s sweet that her mother-in-law helped her set up her blog and get started.) We love her recipes; they’re not just tried and true, but they look gorgeous as well. Check out her blog and you’ll become a fan too.


Profile photo of georgiapellegrini

Beer-Battered Fried Pickles

Posted by in Step-by-Step Recipes

Tasty Kitchen Blog: Beer-Battered Fried Pickles. Guest post by Georgia Pellegrini, recipe submitted by TK member Kelly of Live Love Pasta.

 
I’m fairly certain there is nothing more satisfying to eat than a fried pickle. The sad part is that it took me 29 years to discover this. Last year I tasted my first fried pickle in an Irish pub in California and I was forever transformed. I crossed the threshold into a new phase of life—pre-fried pickle to post-fried pickle. And I’m never looking back. Thank you to TK member Kelly from Live Love Pasta (who in turn sourced the recipe from Elizabeth’s Edible Experience) for reminding me of this glorious food and inspiring me to share it with you today!


Tasty Kitchen Blog: Beer-Battered Fried Pickles. Guest post by Georgia Pellegrini, recipe submitted by TK member Kelly of Live Love Pasta.

The best part? This is all you need: flour, pickle slices (you could also do pickle spears), vegetable oil, 2 eggs, salt, beer, and ranch dressing for dipping.


Tasty Kitchen Blog: Beer-Battered Fried Pickles. Guest post by Georgia Pellegrini, recipe submitted by TK member Kelly of Live Love Pasta.

Get out your trusty skillet and pour in a thick layer of oil. About an inch will do.


Tasty Kitchen Blog: Beer-Battered Fried Pickles. Guest post by Georgia Pellegrini, recipe submitted by TK member Kelly of Live Love Pasta.

Next, combine the eggs and the beer in a bowl.


Tasty Kitchen Blog: Beer-Battered Fried Pickles. Guest post by Georgia Pellegrini, recipe submitted by TK member Kelly of Live Love Pasta.

Whisk them up well and get them nice and frothy.


Tasty Kitchen Blog: Beer-Battered Fried Pickles. Guest post by Georgia Pellegrini, recipe submitted by TK member Kelly of Live Love Pasta.

Sprinkle in the salt…


Tasty Kitchen Blog: Beer-Battered Fried Pickles. Guest post by Georgia Pellegrini, recipe submitted by TK member Kelly of Live Love Pasta.

And then little by little add the flour to the liquid ingredients. You may not need all the flour, so keep whisking and see how thick it gets. You’ll want it to drip with the consistency of a nice thick syrup.


Tasty Kitchen Blog: Beer-Battered Fried Pickles. Guest post by Georgia Pellegrini, recipe submitted by TK member Kelly of Live Love Pasta.

Get your pickle slices close to you while the oil heats up.


Tasty Kitchen Blog: Beer-Battered Fried Pickles. Guest post by Georgia Pellegrini, recipe submitted by TK member Kelly of Live Love Pasta.

Use a pair of tongs or a fork and dip them in the batter one by one.


Tasty Kitchen Blog: Beer-Battered Fried Pickles. Guest post by Georgia Pellegrini, recipe submitted by TK member Kelly of Live Love Pasta.

They should be nicely coated. Shake off the excess and quickly drop them into the hot oil.


Tasty Kitchen Blog: Beer-Battered Fried Pickles. Guest post by Georgia Pellegrini, recipe submitted by TK member Kelly of Live Love Pasta.

The pickles will bubble and pop and after about 2 minutes …


Tasty Kitchen Blog: Beer-Battered Fried Pickles. Guest post by Georgia Pellegrini, recipe submitted by TK member Kelly of Live Love Pasta.

Flip them over so that they brown on the other side.


Tasty Kitchen Blog: Beer-Battered Fried Pickles. Guest post by Georgia Pellegrini, recipe submitted by TK member Kelly of Live Love Pasta.

You also might want to take the temperature of the oil along the way to make sure it doesn’t drop too much. The goal is to keep it hovering around 350 degrees F.


Tasty Kitchen Blog: Beer-Battered Fried Pickles. Guest post by Georgia Pellegrini, recipe submitted by TK member Kelly of Live Love Pasta.

Once they are golden brown, lay them on a wire rack and sprinkle them liberally with salt to help them crisp up.


Tasty Kitchen Blog: Beer-Battered Fried Pickles. Guest post by Georgia Pellegrini, recipe submitted by TK member Kelly of Live Love Pasta.

Then get out a little dipping bowl and pour in some ranch or your other favorite dipping sauce.


Tasty Kitchen Blog: Beer-Battered Fried Pickles. Guest post by Georgia Pellegrini, recipe submitted by TK member Kelly of Live Love Pasta.

Then you will have little golden discs of crispy, crunchy, salty, sour perfection.


Tasty Kitchen Blog: Beer-Battered Fried Pickles. Guest post by Georgia Pellegrini, recipe submitted by TK member Kelly of Live Love Pasta.

I hope you’ll make these as soon as humanly possible! And thanks to Kelly for passing along such a brilliant recipe. Check out her website Live Love Pasta for other brilliant recipes!


Printable Recipe

Beer Battered Fried Pickles

See post on kelly @ livelovepasta’s site!
5.00 Mitt(s) 2 Rating(s)2 votes, average: 5.00 out of 52 votes, average: 5.00 out of 52 votes, average: 5.00 out of 52 votes, average: 5.00 out of 52 votes, average: 5.00 out of 5

Prep Time:

Cook Time:

Difficulty: Easy

Servings: 6

6
x

Print Options

Page size Letter 3x5 4x6
Text Size Small Medium Large
Content Include description
Include prep time, etc.
Show image

Description

In honor of the Jersey Shore premiere, we decided to make Snooki’s favorite snack: Fried Pickles! They’re fun to snack on and they’re surprisingly tasty. This recipe is pretty basic—only 5 or 6 ingredients.

Ingredients

  • 20 ounces, fluid Canola Oil
  • 2 whole Dill Pickles, Sliced Into ½ Inch Rounds
  • 2 whole Eggs
  • ¾ cups Beer, Or More As Needed
  • 1 pinch Salt And Pepper, to taste
  • 2 cups Flour
  • Ranch Dressing, To Serve

Preparation Instructions

Pour enough oil in a large skillet so that the oil is about 1-2 inches up the side of the pan. Or use a deep fryer if you have one. Heat the oil to 350 degrees F.

Slice pickles into ½-inch slices. Set aside.

In a mixing bowl, whisk the eggs and beer. Season the mixture with salt and pepper. Whisk in enough flour to form a batter. If the batter is too thick, add up to 1/4 cup additional beer to thin the batter.

Using tongs, dip pickles one at a time into the batter and then place in the heated oil. Fry pickles for about 2 minutes, flipping the pickle after about 1 minute.

Place pickles on a plate lined with paper towels and season with salt. Serve with ranch dressing.


_______________________________________

There’s so much to say about Georgia, we don’t know where to start. Leaving Wall Street for the French Culinary Institute, followed by a stint at the Gramercy Tavern and La Chassagnette in France, her passion for food and food traditions are evident and inspiring. Visit her site at Georgia Pellegrini, where you’ll find more recipes, photos, learn all about her wonderful book Food Heroes, and enjoy her latest adventures.


Profile photo of Erica Lea

Homemade Pizza Sauce

Posted by in Step-by-Step Recipes

Tasty Kitchen Blog: Homemade Pizza Sauce. Guest post and recipe from Erica Kastner of Cooking for Seven.

 
There’s nothing like homemade pizza—being able to choose exactly which ingredients you want on your pizza, adding just the right amount of cheese, cooking it until the crust is crispy or soft. Making your own sauce is just another way of personalizing your pizza. Sure, it’s easy to pick a can of pizza sauce off the grocery store shelf, but the list of ingredients is generally either long and confusing or disgusting. It is so quick and easy to make your own sauce. Let me show you how!


Tasty Kitchen Blog: Homemade Pizza Sauce. Guest post and recipe from Erica Kastner of Cooking for Seven.

Here’s what you’ll need: tomato paste, olive oil, dried oregano, garlic powder, onion powder, salt, maple syrup, red wine, and water.


Tasty Kitchen Blog: Homemade Pizza Sauce. Guest post and recipe from Erica Kastner of Cooking for Seven.

Put the tomato paste in a small saucepan.


Tasty Kitchen Blog: Homemade Pizza Sauce. Guest post and recipe from Erica Kastner of Cooking for Seven.

Add the olive oil …


Tasty Kitchen Blog: Homemade Pizza Sauce. Guest post and recipe from Erica Kastner of Cooking for Seven.

Oregano …


Tasty Kitchen Blog: Homemade Pizza Sauce. Guest post and recipe from Erica Kastner of Cooking for Seven.

Onion powder …


Tasty Kitchen Blog: Homemade Pizza Sauce. Guest post and recipe from Erica Kastner of Cooking for Seven.

Garlic powder …


Tasty Kitchen Blog: Homemade Pizza Sauce. Guest post and recipe from Erica Kastner of Cooking for Seven.

Salt …


Tasty Kitchen Blog: Homemade Pizza Sauce. Guest post and recipe from Erica Kastner of Cooking for Seven.

Maple syrup …


Tasty Kitchen Blog: Homemade Pizza Sauce. Guest post and recipe from Erica Kastner of Cooking for Seven.

Red wine …


Tasty Kitchen Blog: Homemade Pizza Sauce. Guest post and recipe from Erica Kastner of Cooking for Seven.

And water.


Tasty Kitchen Blog: Homemade Pizza Sauce. Guest post and recipe from Erica Kastner of Cooking for Seven.

Whisk it all together with a fork.


Tasty Kitchen Blog: Homemade Pizza Sauce. Guest post and recipe from Erica Kastner of Cooking for Seven.

Bring to a boil and simmer a few minutes.


Tasty Kitchen Blog: Homemade Pizza Sauce. Guest post and recipe from Erica Kastner of Cooking for Seven.

And there you have it! The quickest, yummiest homemade pizza sauce ever. Don’t quote me on that.


Tasty Kitchen Blog: Homemade Pizza Sauce. Guest post and recipe from Erica Kastner of Cooking for Seven.

 
Notes:

1. If you don’t have any tomato paste on hand, you can substitute 1/2 cup plus 2 tablespoons of tomato puree or tomato sauce for the tomato paste and water. If using sauce, you may need to adjust the other seasonings.

2. Looking for a pizza crust recipe? Check out my Whole Wheat Pizza Dough recipe. You can also find the pizza dough printable recipe on Tasty Kitchen.

3. Want to learn how to grill pizza? Check out my step-by-step instructions.


Printable Recipe

Homemade Pizza Sauce

See post on Erica Lea’s site!
4.93 Mitt(s) 15 Rating(s)15 votes, average: 4.93 out of 515 votes, average: 4.93 out of 515 votes, average: 4.93 out of 515 votes, average: 4.93 out of 515 votes, average: 4.93 out of 5

Prep Time:

Cook Time:

Difficulty: Easy

Servings: 8

8
x

Print Options

Page size Letter 3x5 4x6
Text Size Small Medium Large
Content Include description
Include prep time, etc.
Show image

Description

A quick and easy recipe with loads of flavor.

Ingredients

  • 6 Tablespoons Tomato Paste
  • 2 Tablespoons Extra Virgin Olive Oil
  • 1 teaspoon Garlic Powder
  • 1 teaspoon Onion Powder
  • 2 teaspoons Dried Oregano
  • ½ teaspoons Sea Salt
  • 1-½ teaspoon Pure Maple Syrup
  • 2 Tablespoons Red Cooking Wine (optional But Very Good)
  • ¼ cups Water

Preparation Instructions

Place all ingredients in a small saucepan. Whisk together until well combined. Place over low heat and cook until heated through. Taste and adjust seasonings if necessary.


_______________________________________

Erica Berge shares her wonderful recipes and amazing food photography on her blog, Cooking for Seven. She also writes about crafts and posts more of her beautiful photography in her personal blog, EricaLea.com. There really isn’t much that this amazing young lady can’t do, and we’re thrilled she does some of it here.


Profile photo of georgiapellegrini

Nonnie’s Persimmon Pudding

Posted by in Step-by-Step Recipes

Tasty Kitchen Blog: Nonnie's Persimmon Pudding. Guest post by Georgia Pellegrini, recipe submitted by TK member Maria (mariahs).

 
There is something so comforting about recipes made by grandmothers. Why do we like them so much? I think for me it is the nostalgia that comes with a recipe from her but also those good kitchen smells and the fact that no matter how hard I try, it never comes out quite like hers. I also love that grandmas rarely cook with recipes. They just seem to know what to do. They have an intuition in the kitchen that I strive for but seems to be part of that generation’s DNA. So of course this recipe called Nonnie’s Persimmon Pudding and submitted by MariahS was one I absolutely had to try.


Tasty Kitchen Blog: Nonnie's Persimmon Pudding. Guest post by Georgia Pellegrini, recipe submitted by TK member Maria (mariahs).

You’ll need: soft ripe persimmons, eggs, butter, buttermilk, baking powder, salt, sugar, cinnamon, flour, baking soda, heavy cream, and honey.

All of the good things life is made of.


Tasty Kitchen Blog: Nonnie's Persimmon Pudding. Guest post by Georgia Pellegrini, recipe submitted by TK member Maria (mariahs).

If your persimmons are really soft you can easily peel the skin off with a paring knife and mash them with a fork.


Tasty Kitchen Blog: Nonnie's Persimmon Pudding. Guest post by Georgia Pellegrini, recipe submitted by TK member Maria (mariahs).

But some varieties of persimmons are a bit harder so it would be worthwhile to puree them in a blender for a few seconds.


Tasty Kitchen Blog: Nonnie's Persimmon Pudding. Guest post by Georgia Pellegrini, recipe submitted by TK member Maria (mariahs).

Next add your sugar.


Tasty Kitchen Blog: Nonnie's Persimmon Pudding. Guest post by Georgia Pellegrini, recipe submitted by TK member Maria (mariahs).

Then your baking soda…


Tasty Kitchen Blog: Nonnie's Persimmon Pudding. Guest post by Georgia Pellegrini, recipe submitted by TK member Maria (mariahs).

And your eggs. Now you could do it the “proper” way and beat the eggs first, but I was trying to channel my grandmother and defy the rules so I mixed mine once I added them to the puree.


Tasty Kitchen Blog: Nonnie's Persimmon Pudding. Guest post by Georgia Pellegrini, recipe submitted by TK member Maria (mariahs).

In a separate bowl combine the flour and cinnamon.


Tasty Kitchen Blog: Nonnie's Persimmon Pudding. Guest post by Georgia Pellegrini, recipe submitted by TK member Maria (mariahs).

Then add the baking powder.


Tasty Kitchen Blog: Nonnie's Persimmon Pudding. Guest post by Georgia Pellegrini, recipe submitted by TK member Maria (mariahs).

Give it a nice stir and gather your bowls side by side.


Tasty Kitchen Blog: Nonnie's Persimmon Pudding. Guest post by Georgia Pellegrini, recipe submitted by TK member Maria (mariahs).

Incorporate part of the buttermilk and whisk as you go…


Tasty Kitchen Blog: Nonnie's Persimmon Pudding. Guest post by Georgia Pellegrini, recipe submitted by TK member Maria (mariahs).

It will make a rather mesmerizing art piece as you swirl. At least it did for me but I’m easily entertained.


Tasty Kitchen Blog: Nonnie's Persimmon Pudding. Guest post by Georgia Pellegrini, recipe submitted by TK member Maria (mariahs).

Next mix in part of the dry ingredients… and go back and forth between the dry and the buttermilk until it’s all incorporated.


Tasty Kitchen Blog: Nonnie's Persimmon Pudding. Guest post by Georgia Pellegrini, recipe submitted by TK member Maria (mariahs).

Next whisk in the cream.


Tasty Kitchen Blog: Nonnie's Persimmon Pudding. Guest post by Georgia Pellegrini, recipe submitted by TK member Maria (mariahs).

Then the honey. This was the last of a batch from my honeybees!


Tasty Kitchen Blog: Nonnie's Persimmon Pudding. Guest post by Georgia Pellegrini, recipe submitted by TK member Maria (mariahs).

Next you’ll pour in the melted butter.


Tasty Kitchen Blog: Nonnie's Persimmon Pudding. Guest post by Georgia Pellegrini, recipe submitted by TK member Maria (mariahs).

Give it a good whisk until it’s well incorporated.


Tasty Kitchen Blog: Nonnie's Persimmon Pudding. Guest post by Georgia Pellegrini, recipe submitted by TK member Maria (mariahs).

Pour the batter into a greased baking pan and pop it in the oven for 1 hour.


Tasty Kitchen Blog: Nonnie's Persimmon Pudding. Guest post by Georgia Pellegrini, recipe submitted by TK member Maria (mariahs).

While it cooks you’ll make the glaze for the pudding. Get some water simmering on the stovetop.


Tasty Kitchen Blog: Nonnie's Persimmon Pudding. Guest post by Georgia Pellegrini, recipe submitted by TK member Maria (mariahs).

Then gather vanilla and a combination of sugar and flour.


Tasty Kitchen Blog: Nonnie's Persimmon Pudding. Guest post by Georgia Pellegrini, recipe submitted by TK member Maria (mariahs).

Once the water is simmering add the sugar and flour mixer a little at a time, whisking while you do.


Tasty Kitchen Blog: Nonnie's Persimmon Pudding. Guest post by Georgia Pellegrini, recipe submitted by TK member Maria (mariahs).

The mixture will begin to bubble and thicken so that it becomes viscous. Once it does you can turn the heat off and let it sit.


Tasty Kitchen Blog: Nonnie's Persimmon Pudding. Guest post by Georgia Pellegrini, recipe submitted by TK member Maria (mariahs).

After it’s cooled for a few minutes you add the vanilla and whisk it in.


Tasty Kitchen Blog: Nonnie's Persimmon Pudding. Guest post by Georgia Pellegrini, recipe submitted by TK member Maria (mariahs).

After the batter has baked, open the oven just briefly. It will be golden brown and wonderfully moist.


Tasty Kitchen Blog: Nonnie's Persimmon Pudding. Guest post by Georgia Pellegrini, recipe submitted by TK member Maria (mariahs).

But you’re going to make it even more moist by pouring the syrup all over the top!


Tasty Kitchen Blog: Nonnie's Persimmon Pudding. Guest post by Georgia Pellegrini, recipe submitted by TK member Maria (mariahs).

Look at that glossy goodness!

Close the oven door and let it all soak in while keeping it warm.

I was amazed at just how warm is stayed for hours just by leaving it in there.


Tasty Kitchen Blog: Nonnie's Persimmon Pudding. Guest post by Georgia Pellegrini, recipe submitted by TK member Maria (mariahs).

When you’re ready to eat it simply scoop it out and serve. It would be wonderful with a scoop of ice cream as well. I took this to a pumpkin carving party and it was a total hit. Everyone said it tasted like fall.

Thanks so much to Mariah for sharing this tasty recipe!


Printable Recipe

Nonnie’s Persimmon Pudding

4.00 Mitt(s) 1 Rating(s)1 vote, average: 4.00 out of 51 vote, average: 4.00 out of 51 vote, average: 4.00 out of 51 vote, average: 4.00 out of 51 vote, average: 4.00 out of 5

Prep Time:

Cook Time:

Difficulty: Intermediate

Servings: 12

12
x

Print Options

Page size Letter 3x5 4x6
Text Size Small Medium Large
Content Include description
Include prep time, etc.
Show image

Description

My husband’s grandmother, Nonnie, used to make her really unique version of Persimmon Pudding every Thanksgiving. When she wasn’t able to make it anymore, I took over making it each fall. You can serve this warm or let it cool; my family loves it both ways. Nonnie passed away this year, but you can be sure that this will be on the Thanksgiving menu. Nonnie would have loved to have her recipe shared with others.

Ingredients

  • FOR THE PUDDING:
  • 2 cups Persimmon Pulp
  • 2 cups White Sugar
  • 2  Eggs, Beaten
  • 1 teaspoon Baking Soda
  • 1 cup All-purpose Flour
  • 1 pinch Salt
  • 1 teaspoon Baking Powder
  • 1 teaspoon Ground Cinnamon
  • 1-½ cup Buttermilk
  • ¼ cups Heavy Cream
  • 1 Tablespoon Honey
  • 4 Tablespoons Butter, Melted
  • FOR THE SAUCE:
  • 1 cup Water
  • ½ cups White Sugar
  • 1 Tablespoon All-purpose Flour
  • 4 teaspoons Vanilla Extract

Preparation Instructions

Note: Prepare the sauce while the pudding is baking.

Preheat the oven to 350 degrees F (175 degrees C). Spray a 9×13 inch baking pan lightly with nonstick spray; set aside.

For the pudding, mix the persimmon pulp with the sugar in a large bowl; set aside.

Whisk together the eggs and baking soda in a small bowl. Add the egg mixture to the persimmon mixture and beat well; set aside.

Whisk together the flour, salt, baking powder, and cinnamon in a bowl. Stir 1/4 of the flour mixture into the persimmon mixture. Add 1/4 of the buttermilk and mix well. Continue alternating flour and buttermilk, adding 1/4 each time, and mixing well after each addition, until all of the flour mixture and buttermilk are incorporated. Stir in cream, honey, and melted butter until well combined. Pour the pudding batter into the prepared pan.

Bake in the preheated oven until set, about 1 hour. While baking, do not stir; Turn off the oven at the end of the baking time, but do not remove the pudding from the oven.

Meanwhile, when the pudding has about 10 minutes of baking time left, make the sauce. Boil the water in a small saucepan. Whisk the sugar and flour together, and whisk the sugar mixture into the boiling water, whisking until smooth. Boil the sauce for 5 minutes and remove from heat. Stir in vanilla.

Pour the sauce mixture evenly over the pudding and leave the pudding to cool in the warm oven for 20 more minutes, being sure that the oven is off so that the pudding does not continue to cook.


_______________________________________

There’s so much to say about Georgia, we don’t know where to start. Leaving Wall Street for the French Culinary Institute, followed by a stint at the Gramercy Tavern and La Chassagnette in France, her passion for food and food traditions are evident and inspiring. Visit her site at Georgia Pellegrini, where you’ll find more recipes, photos, learn all about her wonderful book Food Heroes, and enjoy her latest adventures.


Profile photo of twopeasandtheirpod

Chocolate Chip Cookie Bars with a Salty Pretzel Crust

Posted by in Baking, Step-by-Step Recipes

  When it comes to snacking, I am usually a sweet kind of gal, but once in awhile I do get a mad craving for something salty. There are also times when I crave both, it just depends on the day and my mood. Laurie (Tasty Kitchen user and fellow blog contributor Simply Scratch) created […]

Profile photo of Erika (TK)

Thanksgiving: The Supporting Cast

Posted by in Holidays, The Theme Is...

  While your holiday spread may already have its main star (who is probably already defrosting and maybe brining in your refrigerator right now), let’s take a moment to show some love to its supporting cast. We’ll do this quickly, too, before some big ol’ bird gets wise and starts crashing this post. Turkeys. They […]

Profile photo of HowSweetEats

Pretzel Rolls

Posted by in Baking, Step-by-Step Recipes

  From the moment I took a big bite of a soft pretzel at a baseball game when I was seven years old, I’ve been in love. That also happened to be the same baseball game where I sat in a bowl full of nacho cheese sauce and ruined my favorite white jean shorts that […]

Profile photo of Natalie | Perry's Plate

Shaved Asparagus Pizza

Posted by in Step-by-Step Recipes

  Asparagus and I haven’t had the best relationship over the years. I think it was mostly a misunderstanding on my part. Because I really wanted to like asparagus, I did what I usually do with foods I’m trying to get used to: combine it with a food that I absolutely adore. In this case, […]