The Pioneer Woman Tasty Kitchen
Profile photo of HowSweetEats

Pumpkin Coffee Cake

Posted by in Baking, Step-by-Step Recipes

Tasty Kitchen Blog Pumpkin Coffee Cake with Brown Sugar Glaze. Guest post by Jessica Merchant of How Sweet It Is, recipe submitted by TK member Heather of Heather's Dish.

 
It seems that I wait all year for pumpkin. Come May, I am already craving pumpkin cookies, pumpkin roll, and pumpkin pie, and can hardly imagine waiting another four or five months to get in on that goodness. And with the recent pumpkin shortages that have been happening around the country, I sort of bought every can at my store. Like, every single can. My downstairs pantry now has a dedicated pumpkin shelf and I couldn’t be happier. And hungrier.

I’ve had Heather’s recipe saved for Pumpkin Coffee Cake with Brown Sugar Glaze since last autumn, so you know exactly what came first on my to-make list. If I’m being honest, it’s the brown sugar glaze that sold me. I have a weird thing for brown sugar and for glazes, so I knew it would be a winner. I could practically taste it through through the screen. And it’s easy too!


Tasty Kitchen Blog Pumpkin Coffee Cake with Brown Sugar Glaze. Guest post by Jessica Merchant of How Sweet It Is, recipe submitted by TK member Heather of Heather's Dish.

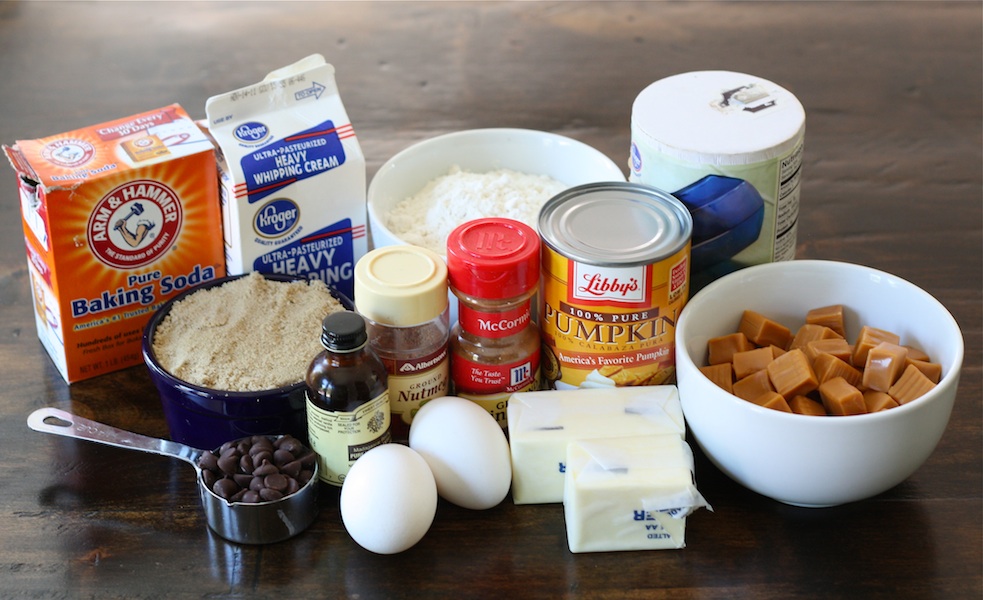
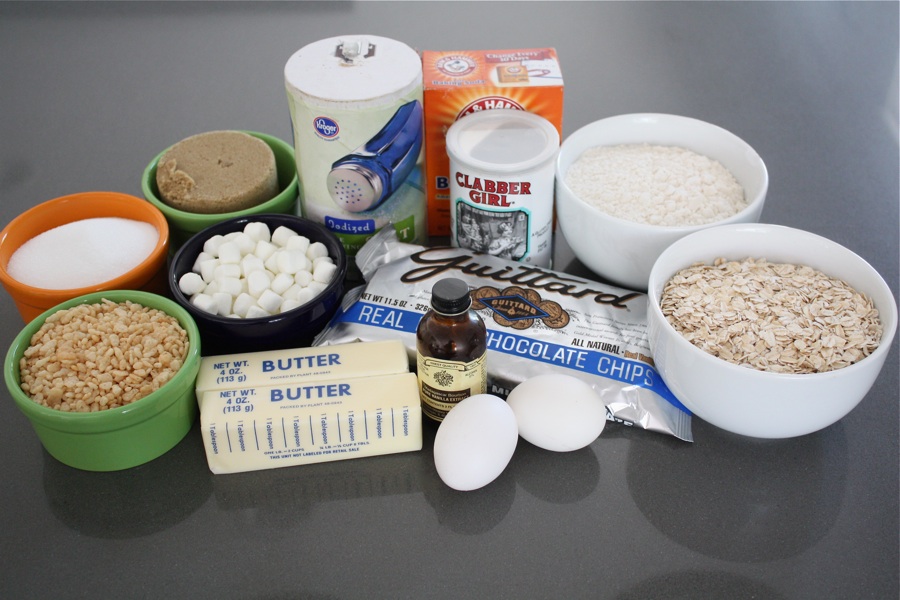
You need a can of pumpkin puree, a box of yellow cake mix, pumpkin pie spice, baking soda, vanilla extract, heavy cream, flour, granulated sugar, brown sugar, butter, eggs and water. Heather’s recipe called for walnuts, and as I much as I love them, I’m a firm believer in nutless baked goods. Feel free to add them if you wish!


Tasty Kitchen Blog Pumpkin Coffee Cake with Brown Sugar Glaze. Guest post by Jessica Merchant of How Sweet It Is, recipe submitted by TK member Heather of Heather's Dish.

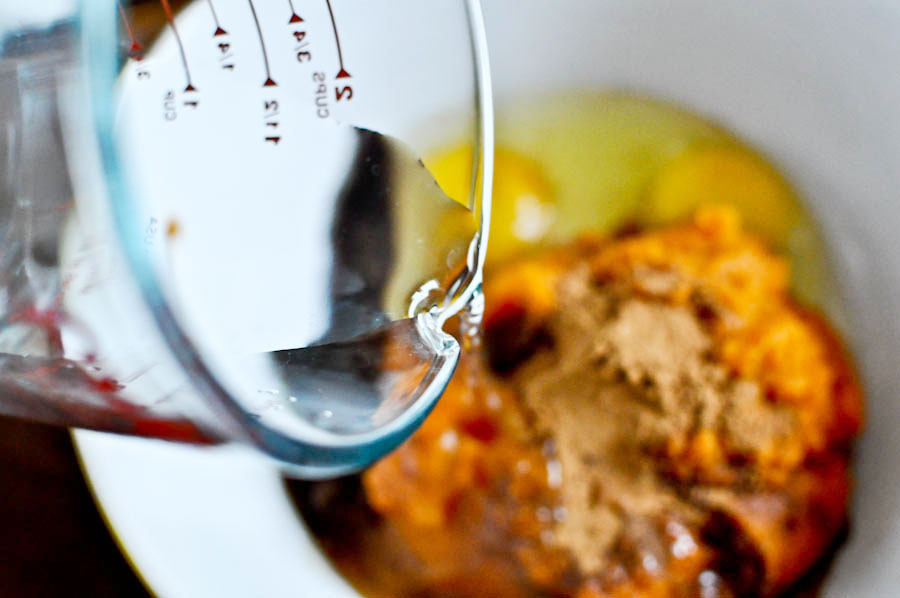
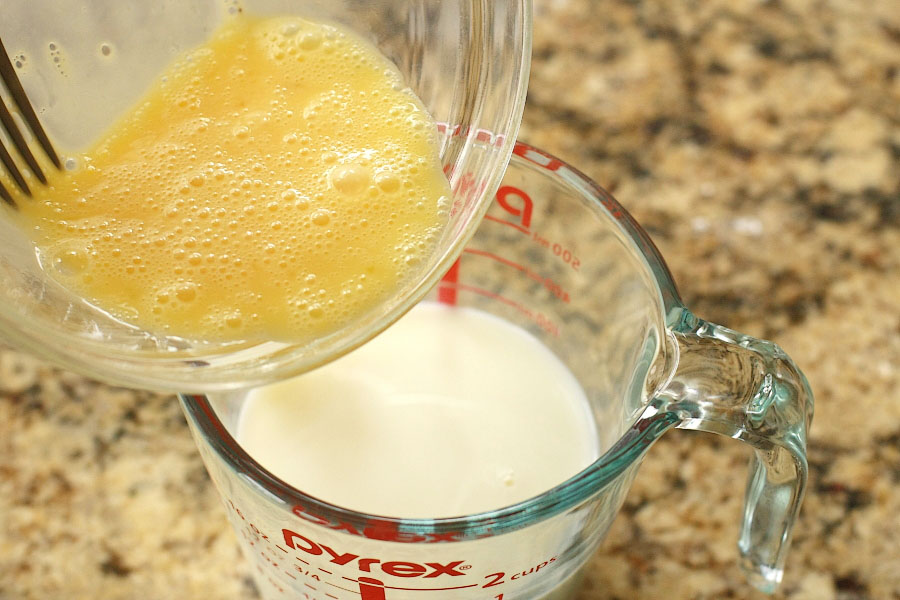
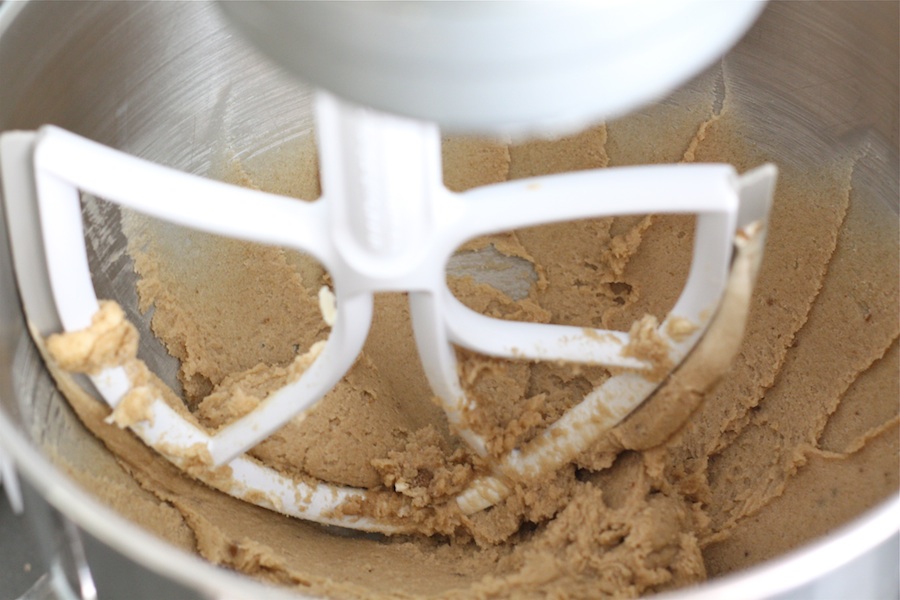
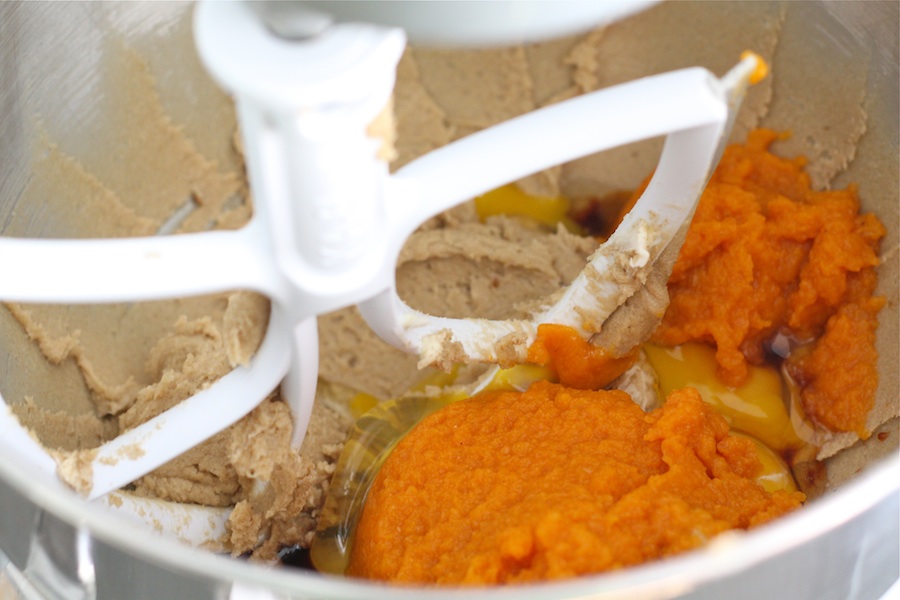
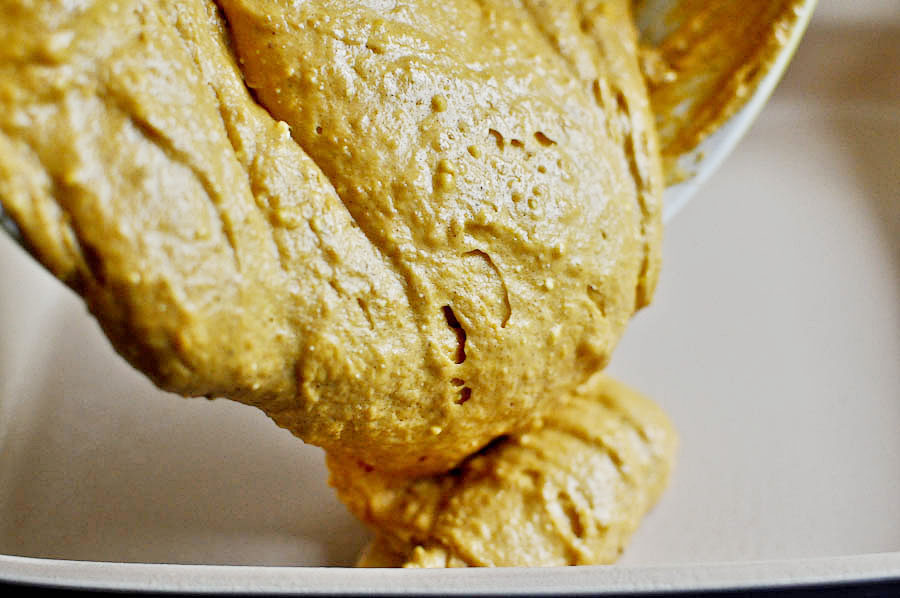
Begin by adding the pumpkin, eggs, vanilla extract, water and pumpkin pie spice together in a bowl.


Tasty Kitchen Blog Pumpkin Coffee Cake with Brown Sugar Glaze. Guest post by Jessica Merchant of How Sweet It Is, recipe submitted by TK member Heather of Heather's Dish.

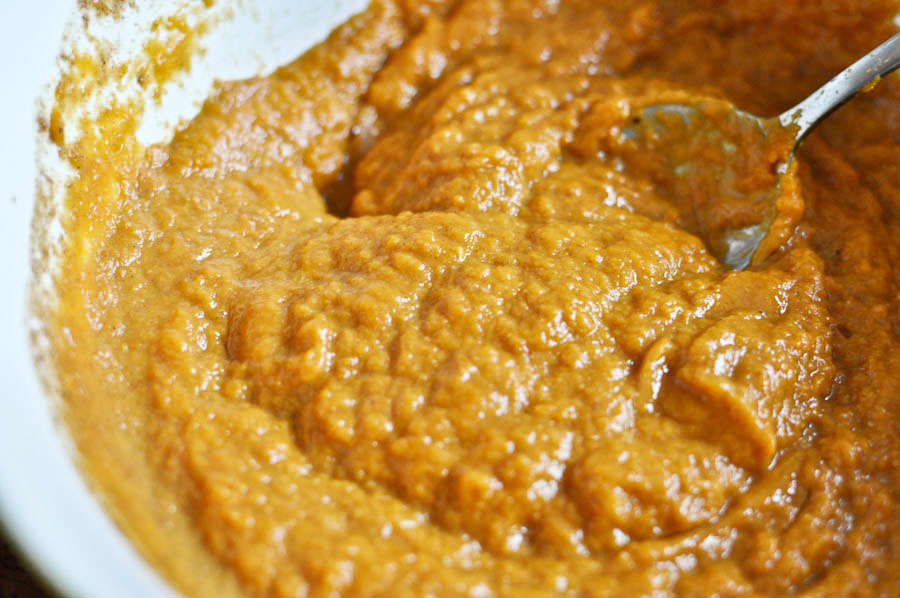
Mix it up until it looks pumpkin-y … or, you know, sort of like baby food.


Tasty Kitchen Blog Pumpkin Coffee Cake with Brown Sugar Glaze. Guest post by Jessica Merchant of How Sweet It Is, recipe submitted by TK member Heather of Heather's Dish.

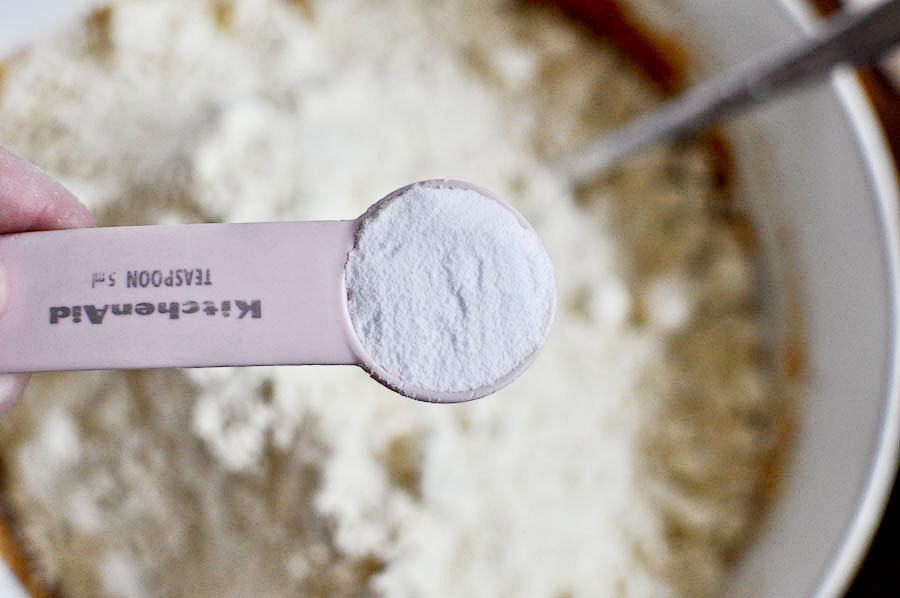
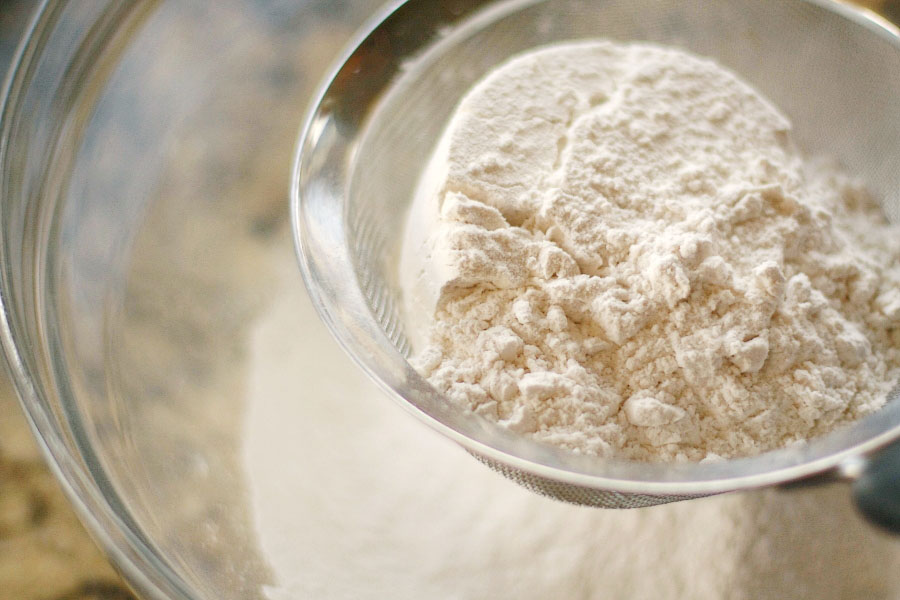
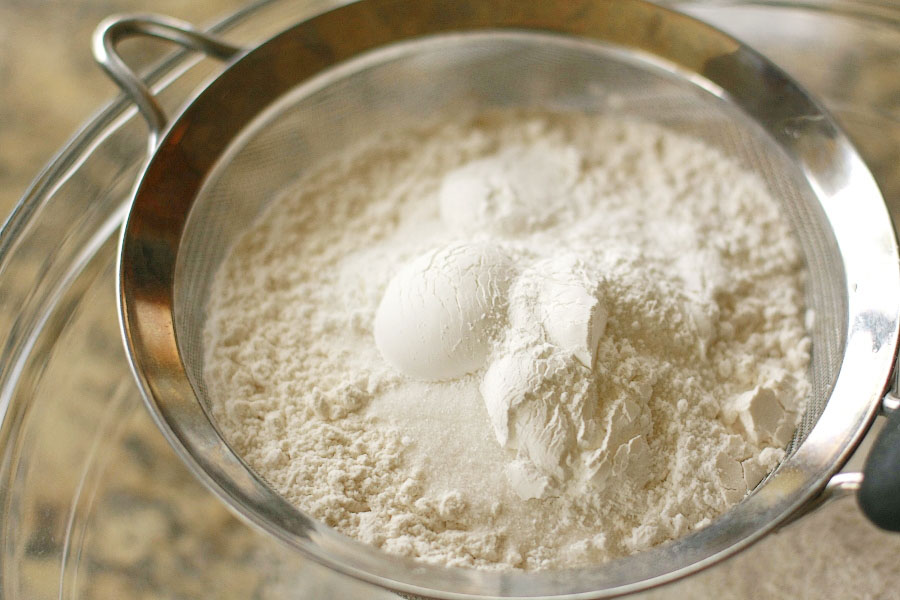
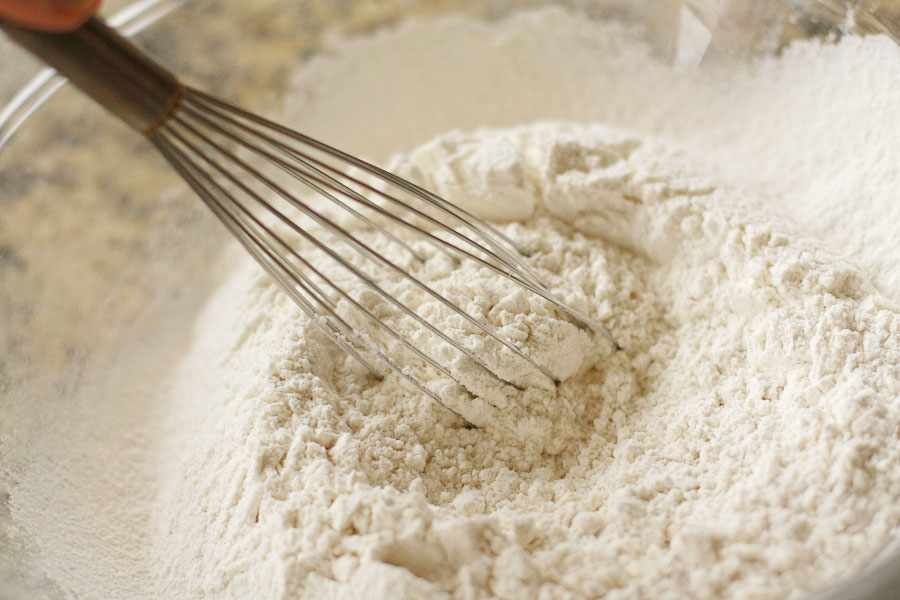
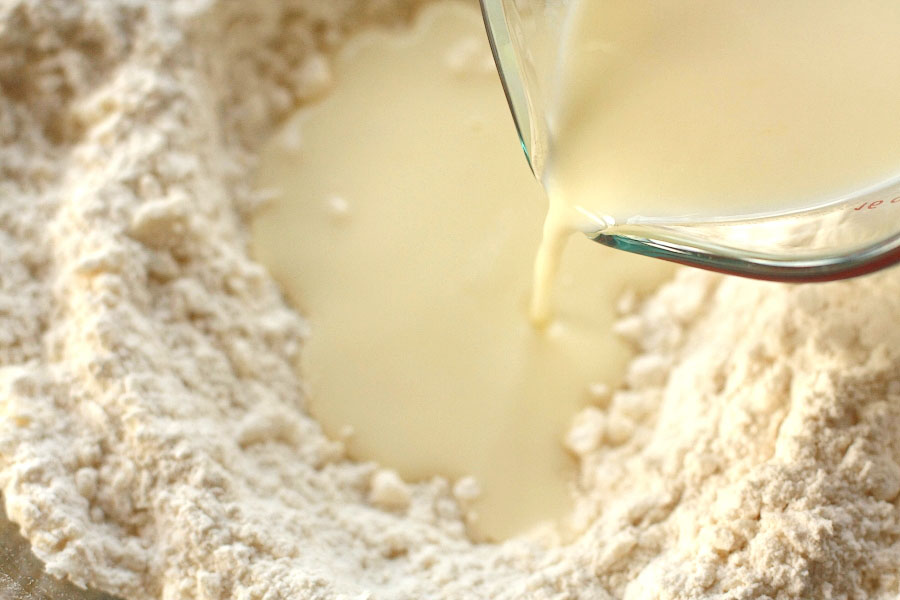
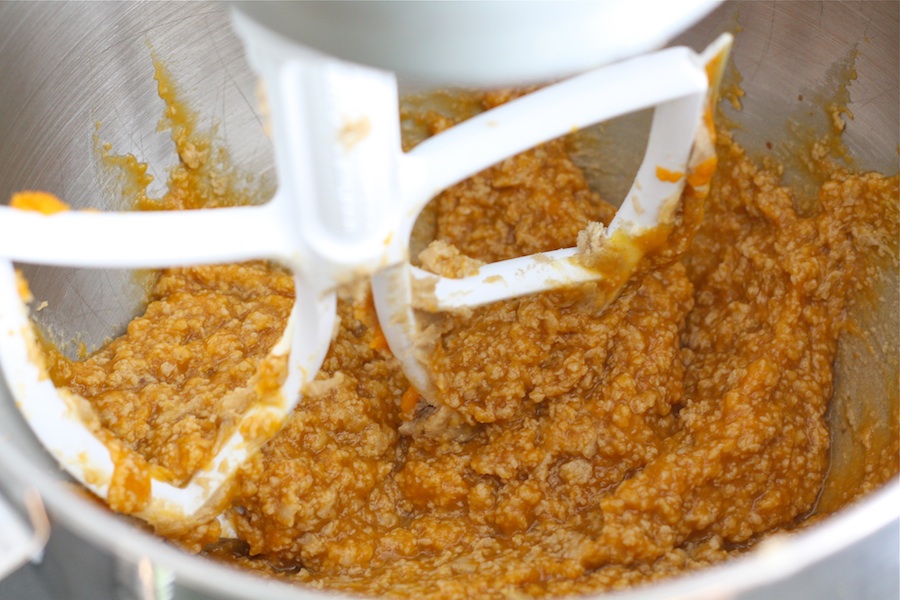
Add in the cake mix and baking soda, and mix with a spoon until combined and minimal lumps remain. It’s okay if you have a few small lumps left.


Tasty Kitchen Blog Pumpkin Coffee Cake with Brown Sugar Glaze. Guest post by Jessica Merchant of How Sweet It Is, recipe submitted by TK member Heather of Heather's Dish.

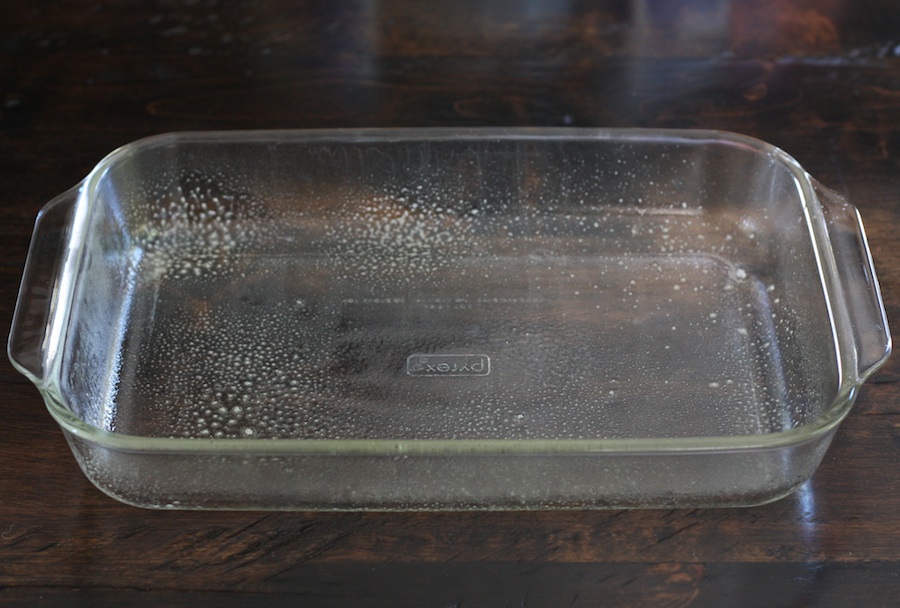
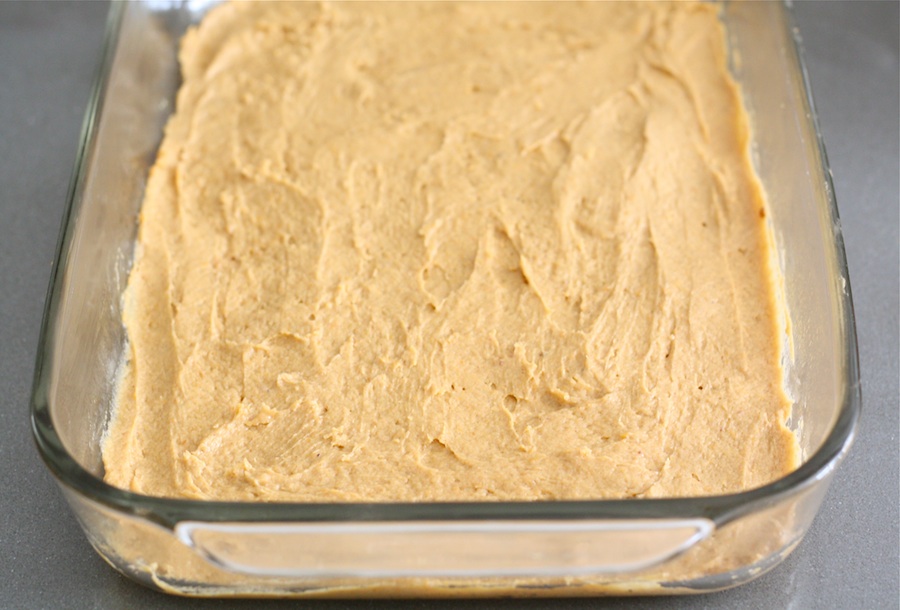
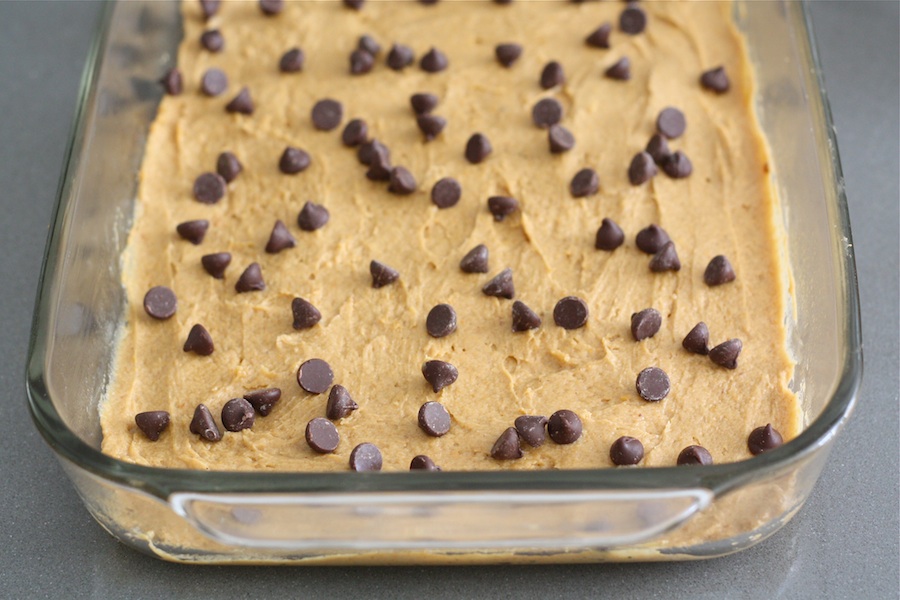
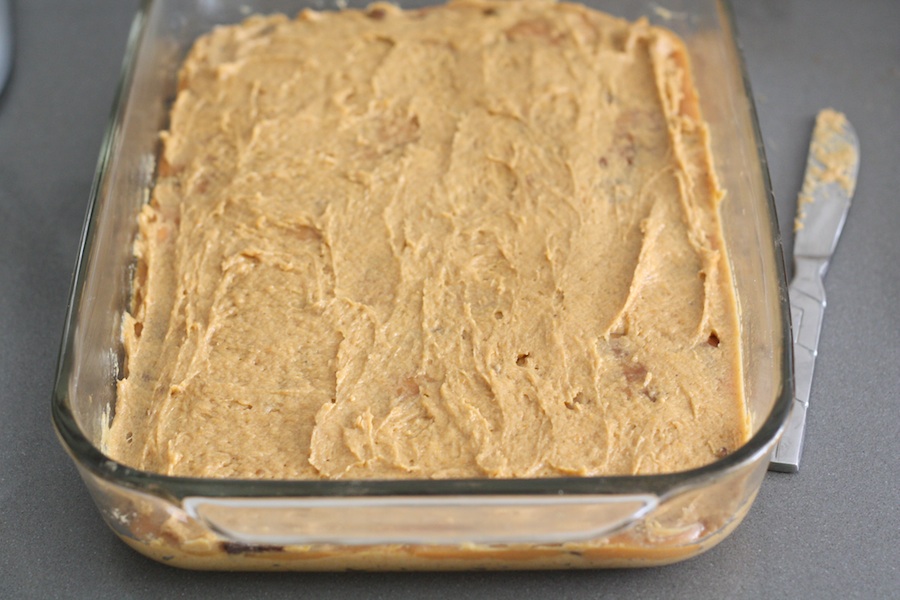
Pour batter into a 9×13 greased baking dish.


Tasty Kitchen Blog Pumpkin Coffee Cake with Brown Sugar Glaze. Guest post by Jessica Merchant of How Sweet It Is, recipe submitted by TK member Heather of Heather's Dish.

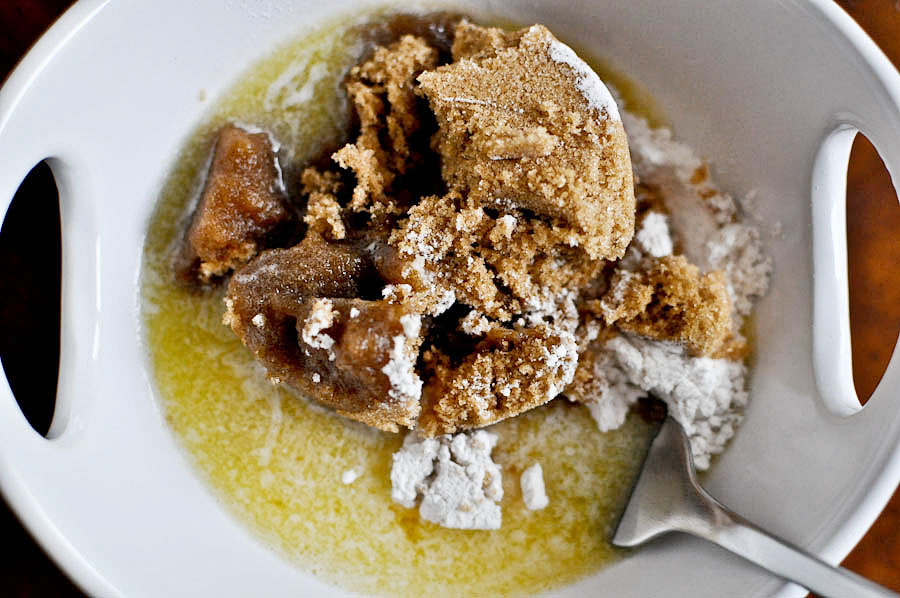
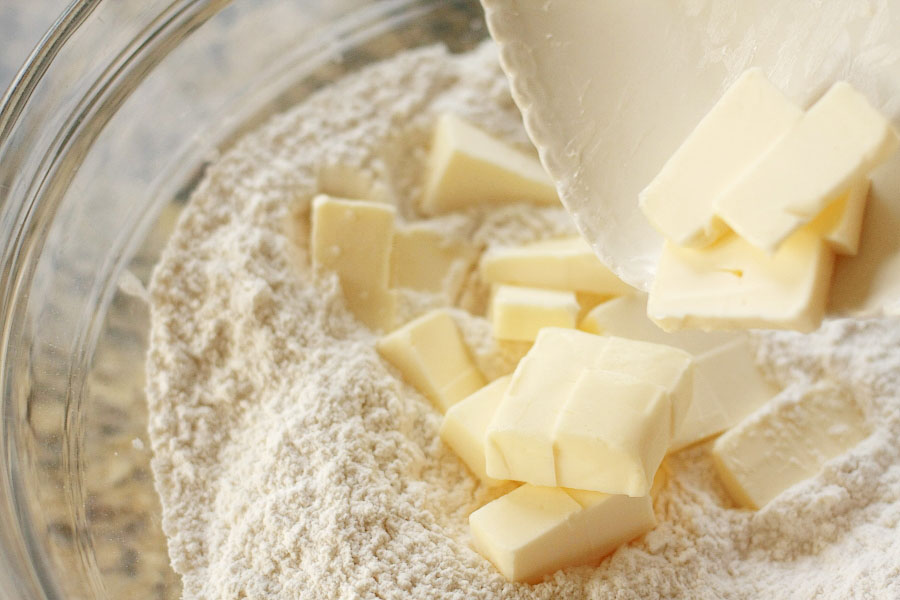
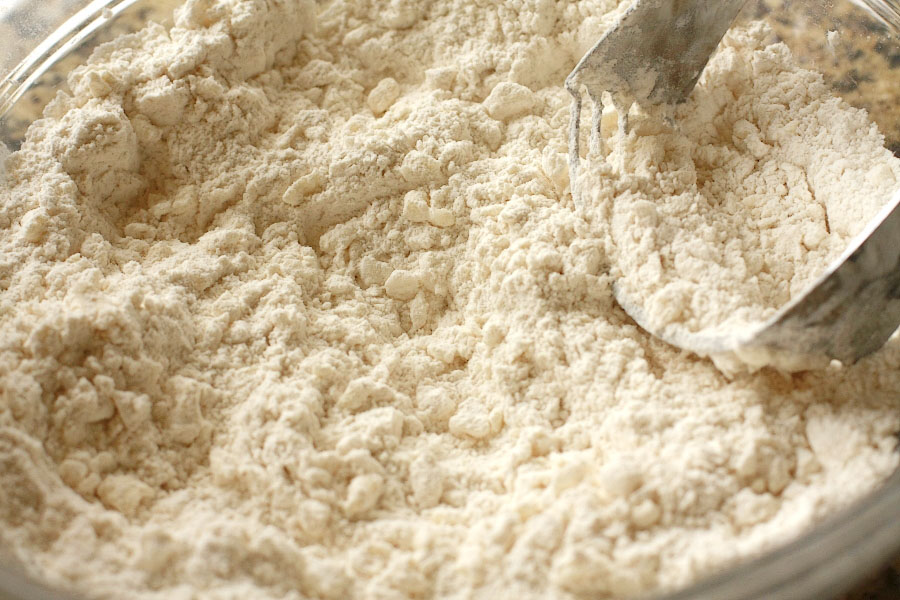
In a small bowl, mix together half of the brown sugar, flour and melted butter. If you are using walnuts, this is where they would go. Pecans would add a nice touch too.


Tasty Kitchen Blog Pumpkin Coffee Cake with Brown Sugar Glaze. Guest post by Jessica Merchant of How Sweet It Is, recipe submitted by TK member Heather of Heather's Dish.

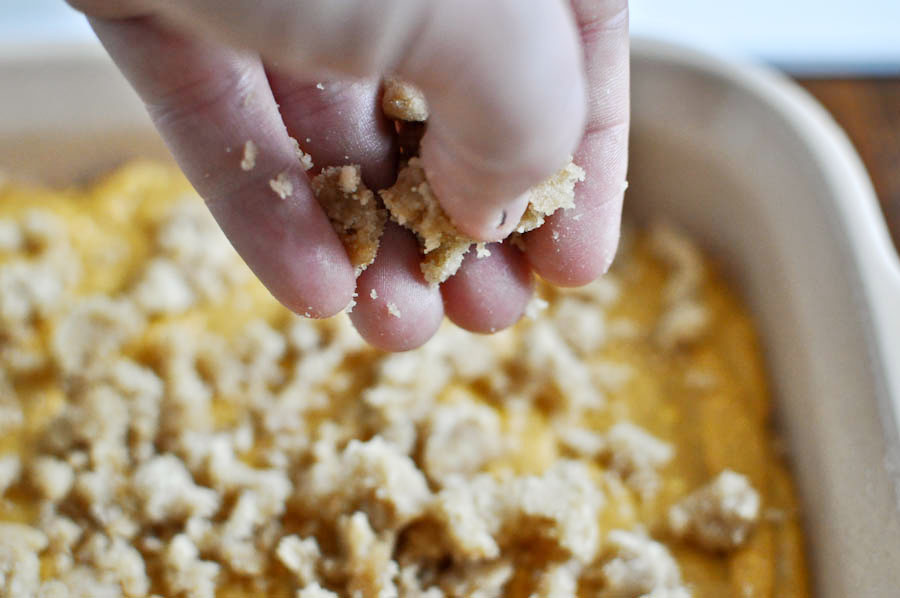
Crumble the brown sugar mixture over the pumpkin cake batter with your fingers.


Tasty Kitchen Blog Pumpkin Coffee Cake with Brown Sugar Glaze. Guest post by Jessica Merchant of How Sweet It Is, recipe submitted by TK member Heather of Heather's Dish.

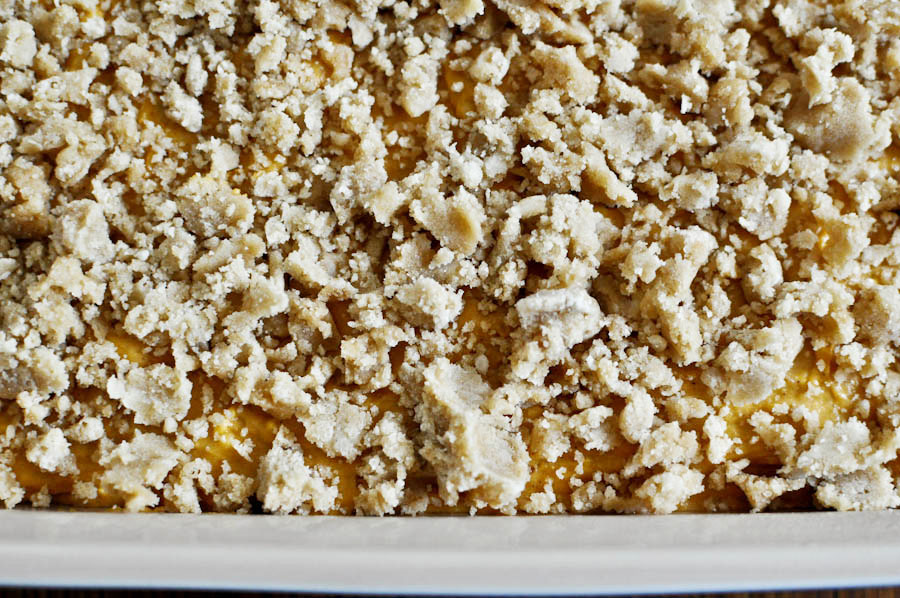
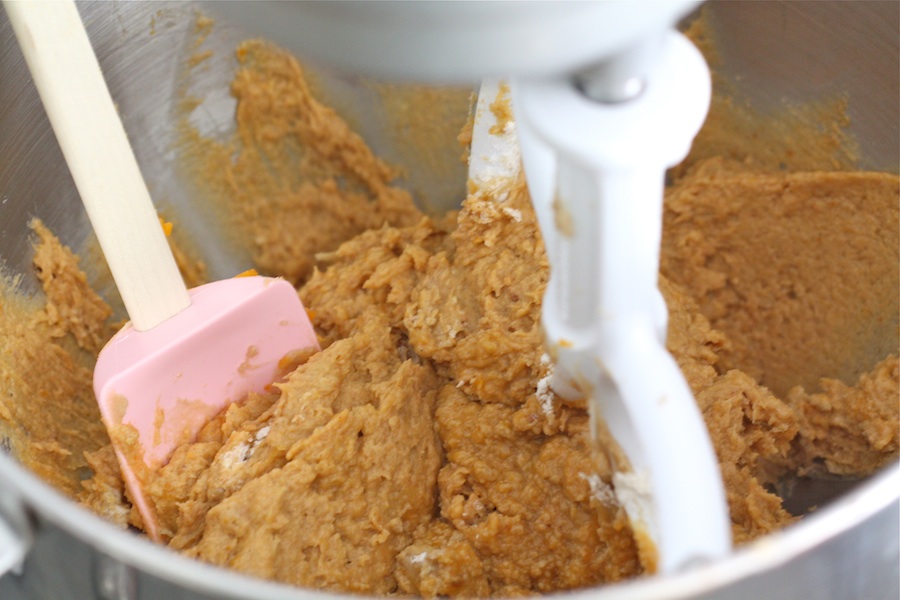
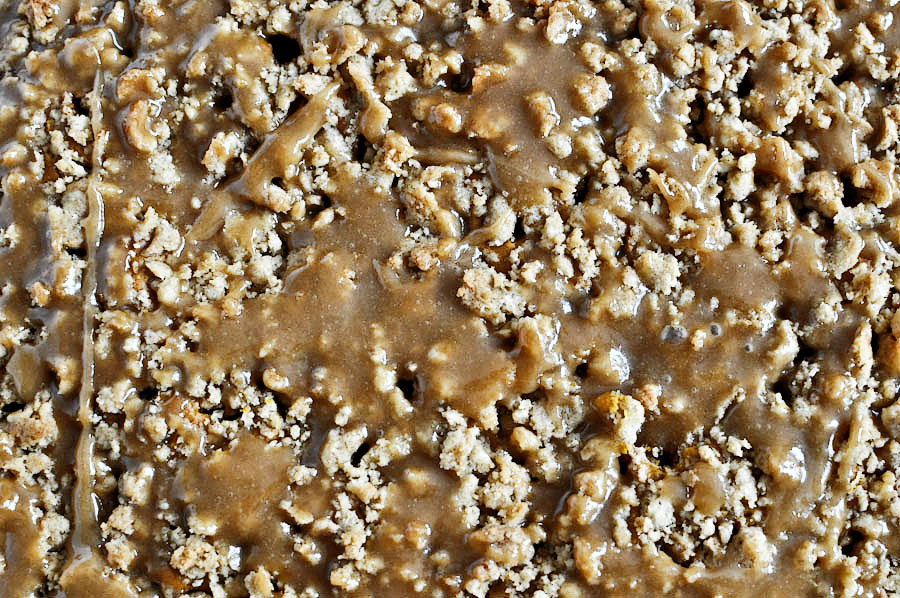
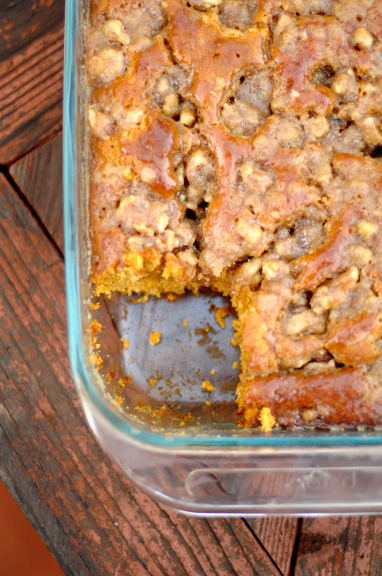
It should look like this. Absolutely devour-able.

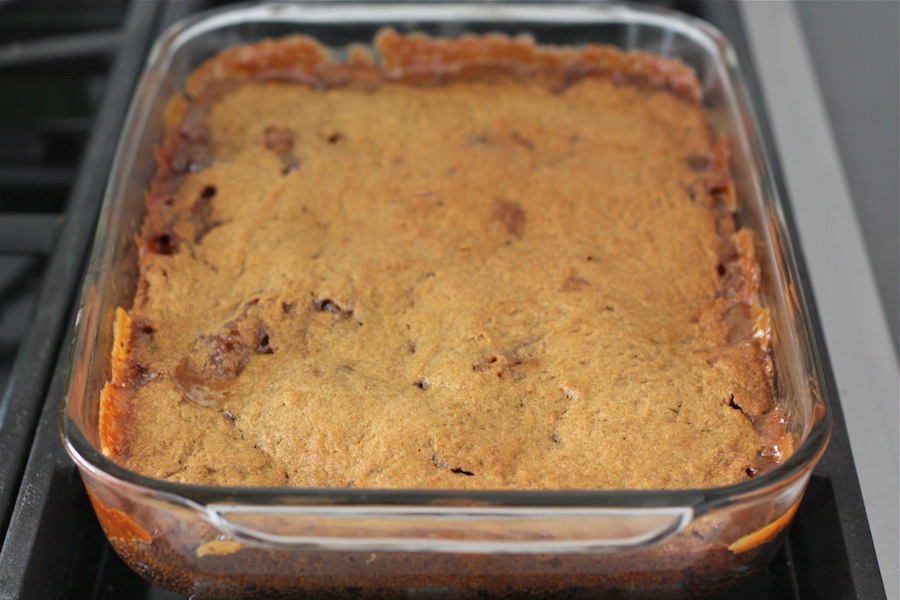
The cake heads into a 350ºF oven and bakes for about 30 minutes, or until a toothpick inserted comes out clean.


Tasty Kitchen Blog Pumpkin Coffee Cake with Brown Sugar Glaze. Guest post by Jessica Merchant of How Sweet It Is, recipe submitted by TK member Heather of Heather's Dish.

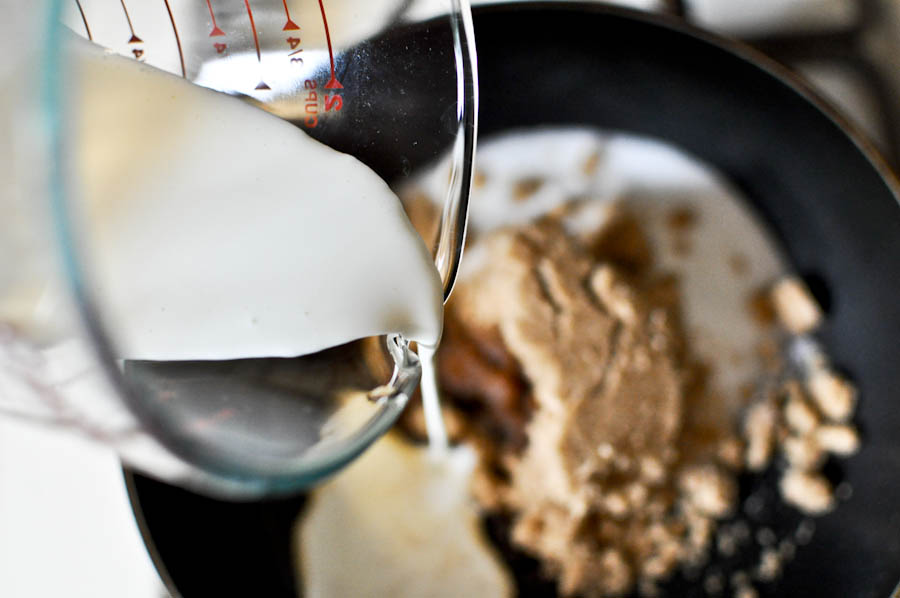
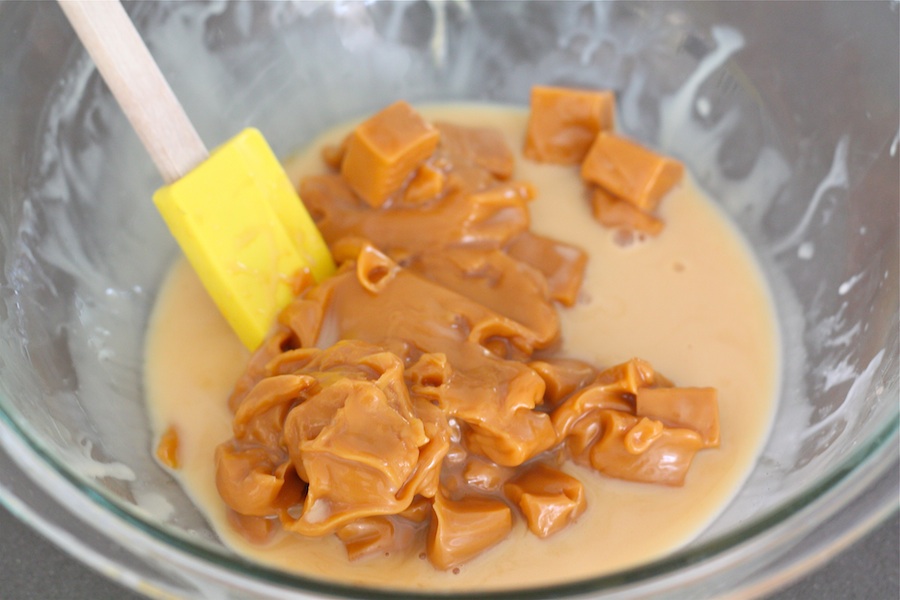
While the cake is baking, combine heavy cream, brown sugar, granulated sugar and vanilla extract in a small saucepan.


Tasty Kitchen Blog Pumpkin Coffee Cake with Brown Sugar Glaze. Guest post by Jessica Merchant of How Sweet It Is, recipe submitted by TK member Heather of Heather's Dish.

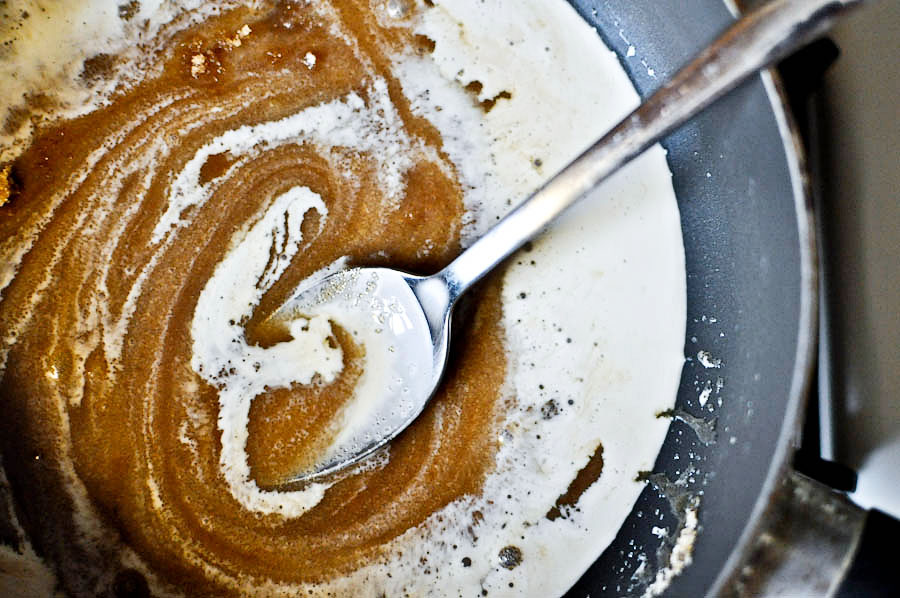
Mix to combine and bring it to a simmer, then remove from heat and continuously stir until all of the sugar has dissolved. Set it aside until ready to use.


Tasty Kitchen Blog Pumpkin Coffee Cake with Brown Sugar Glaze. Guest post by Jessica Merchant of How Sweet It Is, recipe submitted by TK member Heather of Heather's Dish.

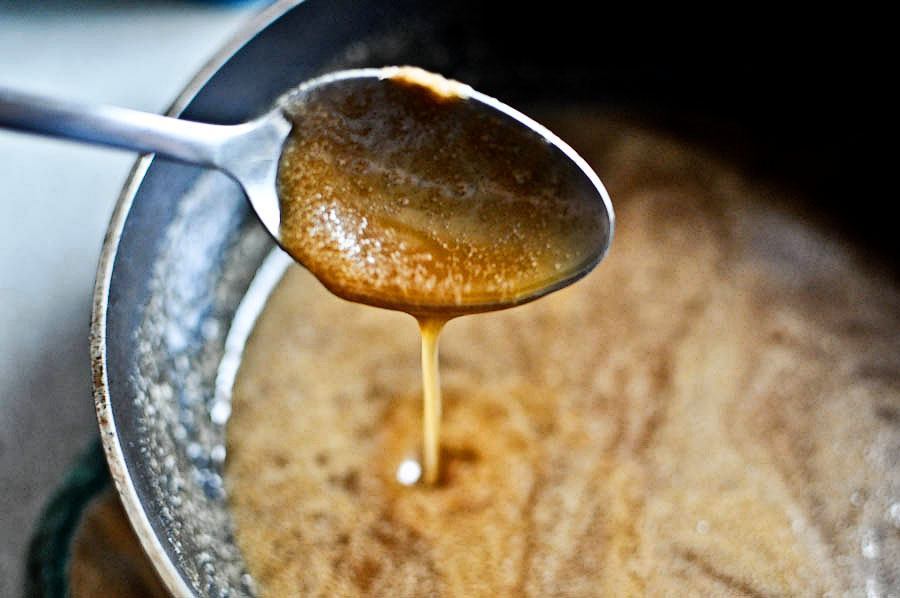
It will become all glazy and be nearly impossible to stay away from. I wanted to pour it in a mug and drink it.


Tasty Kitchen Blog Pumpkin Coffee Cake with Brown Sugar Glaze. Guest post by Jessica Merchant of How Sweet It Is, recipe submitted by TK member Heather of Heather's Dish.

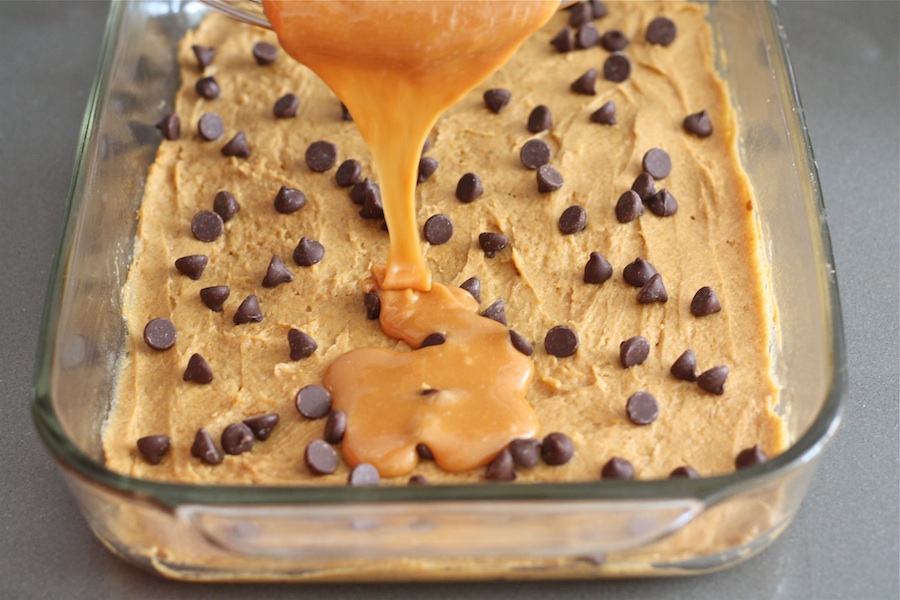
Once the cake comes out of the oven, poke holes all over the top with a toothpick. Or in my case, a fondue sticker thingy. You can also use a fork.


Tasty Kitchen Blog Pumpkin Coffee Cake with Brown Sugar Glaze. Guest post by Jessica Merchant of How Sweet It Is, recipe submitted by TK member Heather of Heather's Dish.

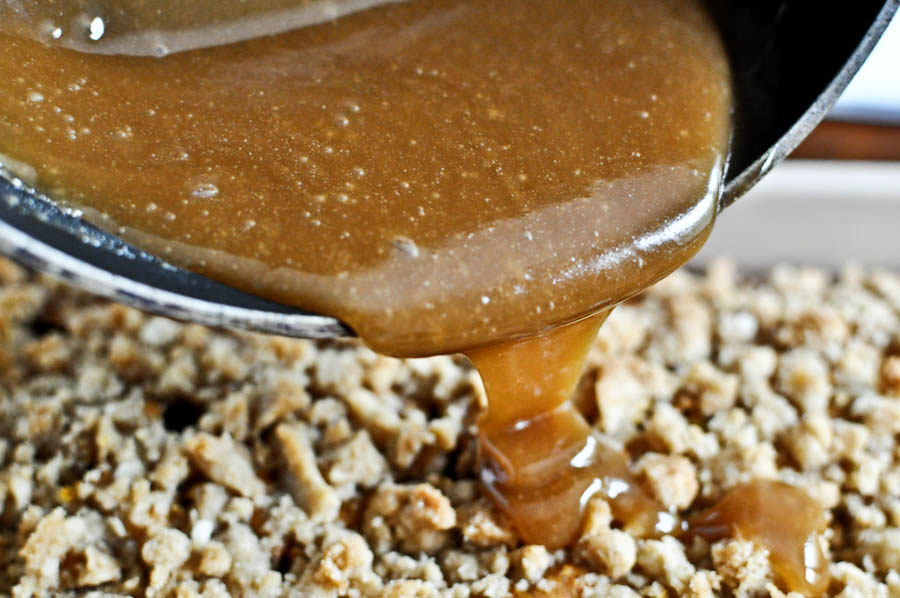
Drizzle glaze over cake evenly…


Tasty Kitchen Blog Pumpkin Coffee Cake with Brown Sugar Glaze. Guest post by Jessica Merchant of How Sweet It Is, recipe submitted by TK member Heather of Heather's Dish.

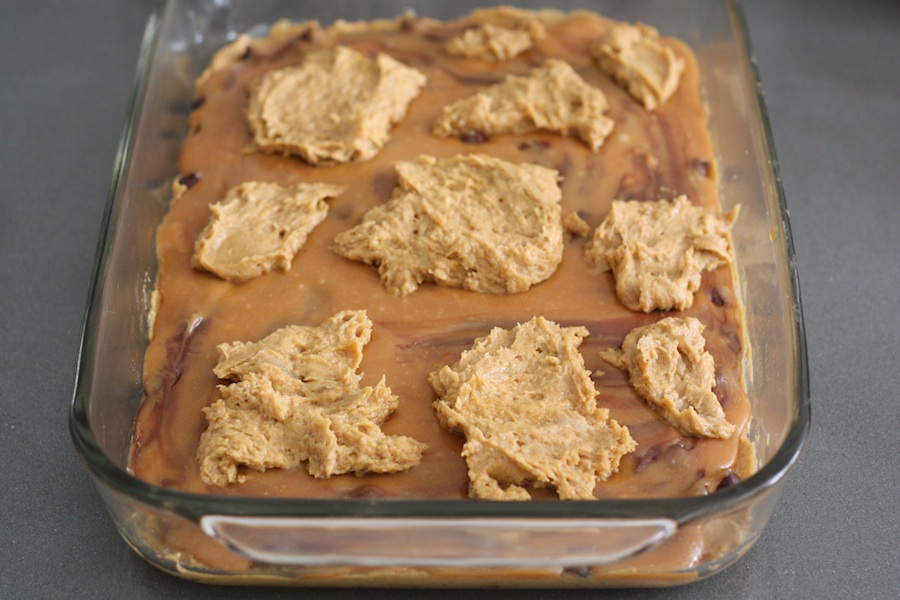
Then let cool for about 20-30 minutes, or until just slightly warm. It tastes best warm, trust me.


Tasty Kitchen Blog Pumpkin Coffee Cake with Brown Sugar Glaze. Guest post by Jessica Merchant of How Sweet It Is, recipe submitted by TK member Heather of Heather's Dish.

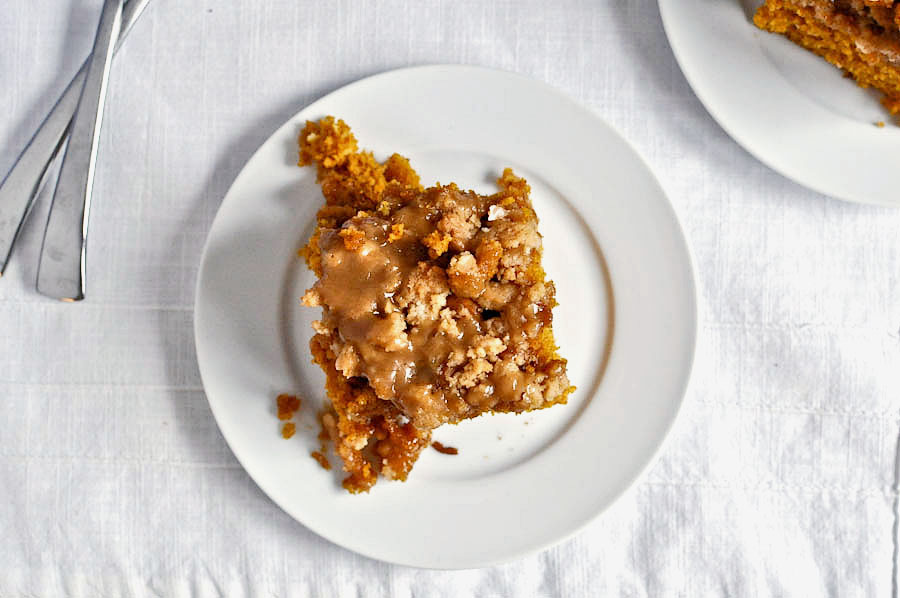
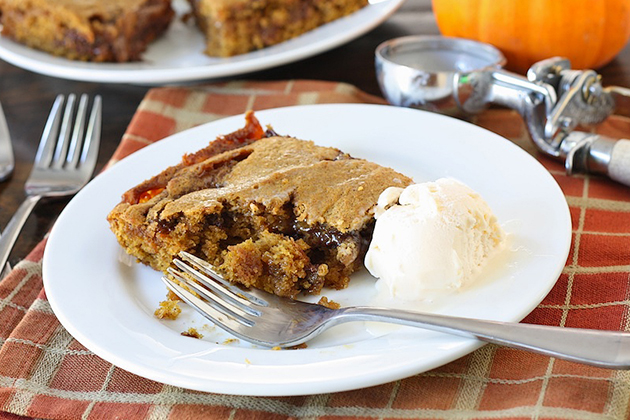
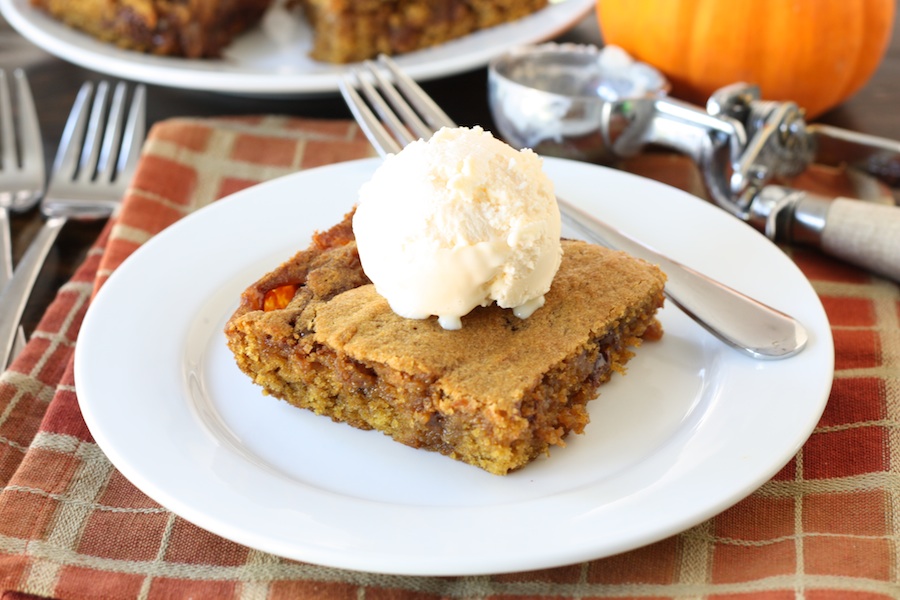
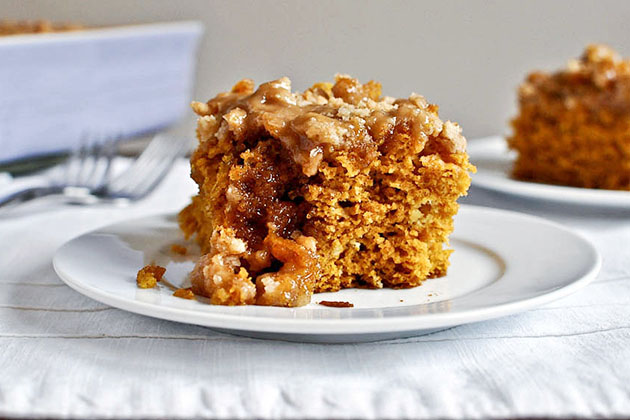
Serve yourself (and um, your guests?) a big square slice …


Tasty Kitchen Blog Pumpkin Coffee Cake with Brown Sugar Glaze. Guest post by Jessica Merchant of How Sweet It Is, recipe submitted by TK member Heather of Heather's Dish.

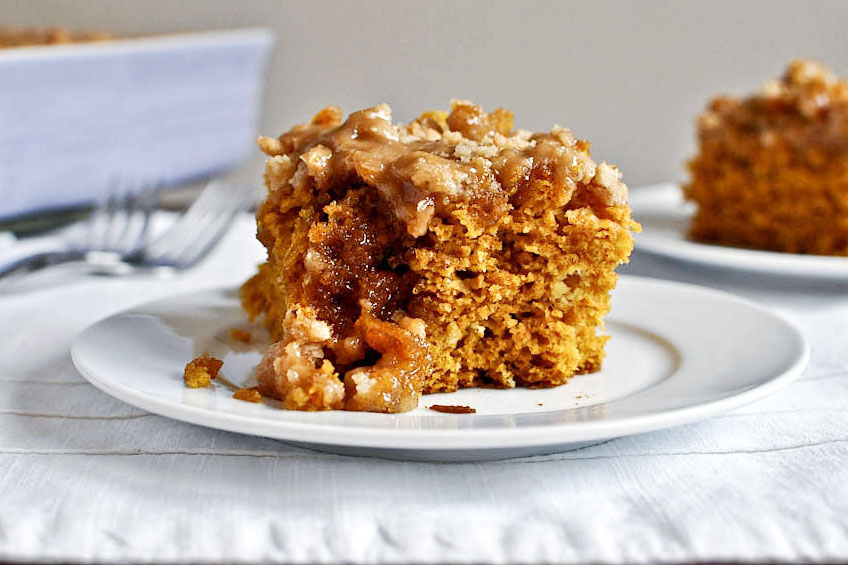
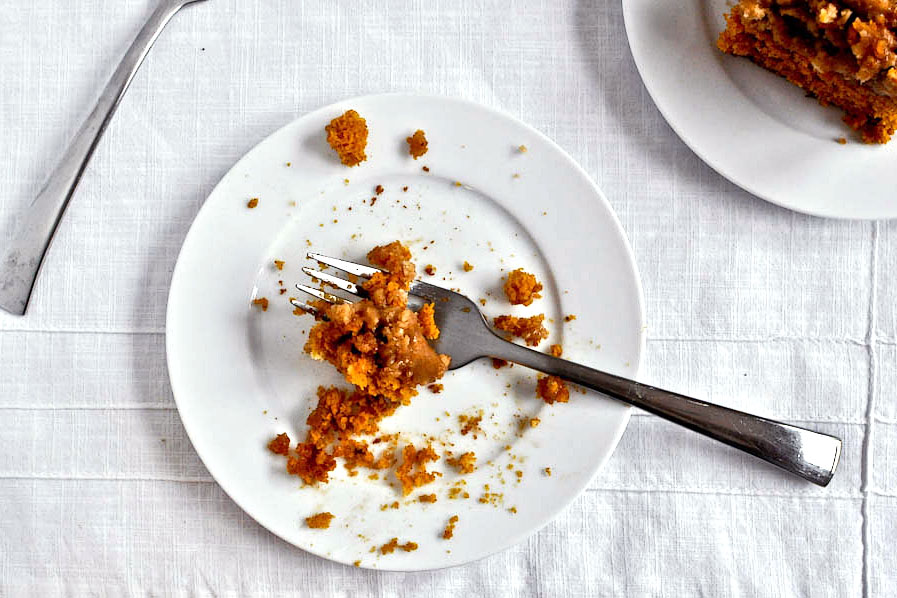
And go to town. Oh man. This cake is unreal.


Tasty Kitchen Blog Pumpkin Coffee Cake with Brown Sugar Glaze. Guest post by Jessica Merchant of How Sweet It Is, recipe submitted by TK member Heather of Heather's Dish.

You won’t believe how delicious it is, and it fits the bill for breakfast and dessert. The crunchy, gooey top is my favorite part and I can’t imagine a better treat for fall.

Thanks so much to Heather for the fabulous recipe! Be sure to check out her blog, Heather’s Dish, where she serves up delectable food with a side of humor and love.


Printable Recipe

Pumpkin Coffee Cake with Brown Sugar Glaze

See post on Heather Disarro’s site!
4.90 Mitt(s) 29 Rating(s)29 votes, average: 4.90 out of 529 votes, average: 4.90 out of 529 votes, average: 4.90 out of 529 votes, average: 4.90 out of 529 votes, average: 4.90 out of 5

Prep Time:

Cook Time:

Difficulty: Easy

Servings: 18

18
x

Print Options

Page size Letter 3x5 4x6
Text Size Small Medium Large
Content Include description
Include prep time, etc.
Show image

Description

Light and fluffy coffee cake made the decadent way with a cream-and-butter brown sugar glaze. Feel free to thank me for the sugar coma later.

Ingredients

  • ⅓ cups Water
  • 1 can Pureed Pumpkin (15 Oz)
  • 2 whole Eggs
  • 1 Tablespoon Vanilla Extract
  • 2 teaspoons Pumpkin Pie Spice
  • 1 box Yellow Cake Mix (18 Ounce Box)
  • 1 teaspoon Baking Soda
  • 1 cup Brown Sugar, Divided
  • ½ cups Flour
  • ⅓ cups Walnuts, Chopped
  • 4 Tablespoons Butter, Melted
  • ¼ cups Granulated Sugar
  • 1 teaspoon Vanilla Extract
  • ¼ cups Heavy Whipping Cream

Preparation Instructions

Preheat the oven to 350F.

In a large bowl mix together the water, pumpkin, eggs, 1 Tablespoon of vanilla, and pumpkin pie spice until well combined. Add the cake mix and baking soda and mix until just combined.

Grease a 9×13 pan with butter and pour batter into pan.

In a small bowl mix together 1/2 cup of brown sugar, 1/2 cup flour, walnuts, and melted butter. Use fingers to sprinkle over the top of the cake. Bake at 350 for 25-30 minutes, or until a toothpick inserted comes out clean.

For the glaze, combine the other 1/2 cup brown sugar, granulated sugar, 1 teaspoon vanilla, and heavy cream in a saucepan and bring to a simmer. Remove from heat and stir until all sugar is dissolved.

When cake is finished baking, poke holes in the top with a toothpick. Pour glaze over the cake, making sure to cover all surfaces. Serve cake warm or at room temperature.


_______________________________________

Jessica Merchant is a personal trainer turned food writer and blogger. Her blog, How Sweet Eats, is where she proclaims her love for all things sweet, all things bacon, and everything else in between. She works her magic in her Pittsburgh kitchen, which she shares with her husband of 2 years.


Profile photo of callimakesdo

Easy Flaky Buttery Biscuits

Posted by in Baking, Step-by-Step Recipes

Tasty Kitchen Blog: Easy Flaky Buttery Biscuits. Guest post by Calli Taylor of Make It Do, recipe submitted by TK member ranchinmom2five.

 
A warm biscuit is comfort food, plain and simple.

Being from the Mountain West, biscuits aren’t exactly a staple at our dinner table. (My mom did make homemade buttermilk biscuits occasionally, to accompany cabbage rolls—one of my favorite childhood dinners.)

But my husband is half Southern; his mother’s family is from Tennessee, and some things must be in the blood. He loves a good biscuit.

Happy to oblige his craving, I was supremely confident the first time I ever attempted biscuits. I loved mixing and rolling them and especially cutting them out with my brand new biscuit cutter.

But when my biscuits came out of the oven, they looked alarmingly flat. To my dismay (and shock), my biscuits tasted more like hockey pucks than the light, buttery biscuits I’d expected.

I’m not the sort to give up easily, so I tried several different recipes … and got varying degrees of the same result.

Biscuits are my nemesis, I decided, and I’d be better off with biscuits from a pop can, if I ever made them again.

But my failure niggled at me. It’s just a biscuit after all, made from simple ingredients and simple tools. So when I spotted the recipe for Easy, Flaky, Buttery Biscuits from ranchinmom2five on Tasty Kitchen, I thought I’d attempt to make my husband happy and conquer my biscuit challenge.

The “easy” in the recipe sounded encouraging. So did the great reviews.

Here’s how I finally made a biscuit worthy of serving to my family instead of the garbage pail.


Tasty Kitchen Blog: Easy Flaky Buttery Biscuits. Guest post by Calli Taylor of Make It Do, recipe submitted by TK member ranchinmom2five.

Start with all-purpose flour. The recipe does not specify sifting, but sifted flour is lighter, and I was aiming to avoid my infamous hockey pucks.


Tasty Kitchen Blog: Easy Flaky Buttery Biscuits. Guest post by Calli Taylor of Make It Do, recipe submitted by TK member ranchinmom2five.

Add baking powder, sugar, cream of tartar and salt.


Tasty Kitchen Blog: Easy Flaky Buttery Biscuits. Guest post by Calli Taylor of Make It Do, recipe submitted by TK member ranchinmom2five.

Give the mixture a good stir to make sure the ingredients are well incorporated.


Tasty Kitchen Blog: Easy Flaky Buttery Biscuits. Guest post by Calli Taylor of Make It Do, recipe submitted by TK member ranchinmom2five.

The recipe calls for cold butter. I like to cube it to make the cutting in easier. I’ve made this recipe several times and the last time, I substituted half of the butter for lard. It made a great recipe even better. They were my lightest, tallest, flakiest biscuits ever. If you have lard on hand, give it a try.


Tasty Kitchen Blog: Easy Flaky Buttery Biscuits. Guest post by Calli Taylor of Make It Do, recipe submitted by TK member ranchinmom2five.

Using a pastry cutter or your hand, cut the butter into the flour until pea-sized pieces of butter remain. Don’t overwork the cutting in. Just like with pie dough, this is the key to a flaky biscuit.


Tasty Kitchen Blog: Easy Flaky Buttery Biscuits. Guest post by Calli Taylor of Make It Do, recipe submitted by TK member ranchinmom2five.

The recipe calls for milk, but I love the flavor of buttermilk. So, I substituted 1-1/4 cup buttermilk (since buttermilk is thicker than milk) for the milk.

In a small separate bowl, whisk the egg into the milk.


Tasty Kitchen Blog: Easy Flaky Buttery Biscuits. Guest post by Calli Taylor of Make It Do, recipe submitted by TK member ranchinmom2five.

Pour the milk into the flour mixture.


Tasty Kitchen Blog: Easy Flaky Buttery Biscuits. Guest post by Calli Taylor of Make It Do, recipe submitted by TK member ranchinmom2five.

Stir together with a fork just until the mixture forms a loose ball. Again, don’t over stir here. It’s okay if all the flour isn’t incorporated, it’s going to be messy.


Tasty Kitchen Blog: Easy Flaky Buttery Biscuits. Guest post by Calli Taylor of Make It Do, recipe submitted by TK member ranchinmom2five.

Turn your dough onto a floured counter. I’m using my favorite pastry frame instead of the counter. Knead lightly just a couple of times to form a round.


Tasty Kitchen Blog: Easy Flaky Buttery Biscuits. Guest post by Calli Taylor of Make It Do, recipe submitted by TK member ranchinmom2five.

Pat down till the dough is 3/4″ thick. The recipe advises against using a rolling pin, since the biscuits will be less flaky.


Tasty Kitchen Blog: Easy Flaky Buttery Biscuits. Guest post by Calli Taylor of Make It Do, recipe submitted by TK member ranchinmom2five.

Using a biscuit cutter, cut rounds out. Here’s a tip: As hard as it is to resist, don’t twist the cutter when cutting your rounds. Pressing straight down without twisting helps your biscuit rise easier in the oven and keeps them light.


Tasty Kitchen Blog: Easy Flaky Buttery Biscuits. Guest post by Calli Taylor of Make It Do, recipe submitted by TK member ranchinmom2five.

Place on an ungreased cookie sheet. The other trick I’ve found, after making this recipe a few times, is to crowd them a bit when placing them on the pan. They spread more when they are spaced out and are taller when more crowded.


Tasty Kitchen Blog: Easy Flaky Buttery Biscuits. Guest post by Calli Taylor of Make It Do, recipe submitted by TK member ranchinmom2five.

Bake at 450ºF. The recipe says for 10 -14 minutes. I cooked them for 15 -16 minutes in my oven, until they were golden brown. Rub the tops with a little butter if you are feeling sassy.


Tasty Kitchen Blog: Easy Flaky Buttery Biscuits. Guest post by Calli Taylor of Make It Do, recipe submitted by TK member ranchinmom2five.

Finally I have a recipe for biscuits that I can be proud to serve! They are everything the name promises: light, buttery, flaky, EASY and good.


Tasty Kitchen Blog: Easy Flaky Buttery Biscuits. Guest post by Calli Taylor of Make It Do, recipe submitted by TK member ranchinmom2five.

Biscuits are so quick and easy, you can whip them up in no time. They are perfect for breakfast with gravy or with butter and homemade jam. They are so fast, you can even whip them up on a weeknight.

Thank you ranchinmom2five for rescuing my baking reputation and sharing this wonderful recipe with us.


Printable Recipe

Easy, Flaky, Buttery Biscuits

4.96 Mitt(s) 45 Rating(s)45 votes, average: 4.96 out of 545 votes, average: 4.96 out of 545 votes, average: 4.96 out of 545 votes, average: 4.96 out of 545 votes, average: 4.96 out of 5

Prep Time:

Cook Time:

Difficulty: Easy

Servings: 6

6
x

Print Options

Page size Letter 3x5 4x6
Text Size Small Medium Large
Content Include description
Include prep time, etc.
Show image

Description

These super easy biscuits are sure to please any picky crowd. Great without any toppings, or the perfect sausage gravy in the morning, or just some fresh, homemade jam!

Ingredients

  • 3 cups Flour
  • 4-½ teaspoons Baking Powder
  • 2 Tablespoons Sugar
  • ¾ teaspoons Cream Of Tartar
  • ½ teaspoons Salt
  • ¾ cups Butter, Cold
  • 1 whole Egg, Slightly Beaten
  • 1 cup Milk

Preparation Instructions

Preheat oven to 450 F.

Mix dry ingredients together in a large bowl. Cut in cold butter, until it is pea-sized. Mix egg and milk in a small bowl then pour into the dry mix. Stir together with a fork. Combine all the dry mix with the wet mixture until it forms a soft ball.

Turn out onto a floured counter. Pat down until it’s about 3/4″ thick (rolling will keep it from being flaky so use your hands). Using a biscuit cutter (or whatever you have handy), cut biscuits out and place on an ungreased pan.

Bake for 10-12 minutes until golden and beautiful. Perfect for soups, breakfast, or just a yummy snack! Enjoy!

Please note: we live at 8500 feet, so I do add a little more flour—just enough for a soft dough—than the recipe calls for, and bake these closer to 14 minutes.


_______________________________________

Calli is truly a woman of many talents, from cooking, sewing, crafts, beautiful photography and gardening. Her blog, Make it Do is a treasure trove of recipes, household tips, crafts projects, sewing patterns … you name it. It’s also peppered with photos of her beautiful kids. Go visit her site, and visit it often. There’s always something new to learn there!


Profile photo of twopeasandtheirpod

Ooey Gooey Caramel Pumpkin Blondies

Posted by in Baking, Step-by-Step Recipes

Tasty Kitchen Blog: Ooey Gooey Caramel Pumpkin Blondies with Chocolate and Walnuts. Guest post by Maria Lichty of Two Peas and Their Pod, recipe submitted by TK member Lauren of Lauren's Latest.

 
I’ve been on a pumpkin kick lately. I told myself I was going to stop, it is becoming an addiction, but then I saw Lauren’s (TK member Lauren’s Latest) recipe for Ooey Gooey Caramel Pumpkin Blondies with Chocolate and Walnuts on Tasty Kitchen. Anything with Ooey and Gooey in the title catches my attention and there was also pumpkin and chocolate in the mix. Heaven! I knew I had to try this recipe. Who cares if I have a pumpkin addiction, at least it only lasts during the fall season. I got out my trusty can of pumpkin and started baking. 


Tasty Kitchen Blog: Ooey Gooey Caramel Pumpkin Blondies with Chocolate and Walnuts. Guest post by Maria Lichty of Two Peas and Their Pod, recipe submitted by TK member Lauren of Lauren's Latest.

To make this recipe you will need the following ingredients: butter, brown sugar, eggs, vanilla extract, pumpkin puree, cinnamon, nutmeg, flour, baking soda, salt, walnuts (I omitted the nuts because my husband is allergic), chocolate chips, caramels, and heavy cream. 


Tasty Kitchen Blog: Ooey Gooey Caramel Pumpkin Blondies with Chocolate and Walnuts. Guest post by Maria Lichty of Two Peas and Their Pod, recipe submitted by TK member Lauren of Lauren's Latest.

First, preheat the oven to 350 degrees F and lightly grease a 9×13 pan with cooking spray. Set aside. 


Tasty Kitchen Blog: Ooey Gooey Caramel Pumpkin Blondies with Chocolate and Walnuts. Guest post by Maria Lichty of Two Peas and Their Pod, recipe submitted by TK member Lauren of Lauren's Latest.

Cream together the butter and sugar until light and fluffy. 


Tasty Kitchen Blog: Ooey Gooey Caramel Pumpkin Blondies with Chocolate and Walnuts. Guest post by Maria Lichty of Two Peas and Their Pod, recipe submitted by TK member Lauren of Lauren's Latest.

Stir in the eggs, vanilla, and pumpkin.


Tasty Kitchen Blog: Ooey Gooey Caramel Pumpkin Blondies with Chocolate and Walnuts. Guest post by Maria Lichty of Two Peas and Their Pod, recipe submitted by TK member Lauren of Lauren's Latest.

Mix until combined. 


Tasty Kitchen Blog: Ooey Gooey Caramel Pumpkin Blondies with Chocolate and Walnuts. Guest post by Maria Lichty of Two Peas and Their Pod, recipe submitted by TK member Lauren of Lauren's Latest.

Slowly incorporate the remaining blondie ingredients. Scrape down the sides of the bowl and mix again until you have a smooth batter. 


Tasty Kitchen Blog: Ooey Gooey Caramel Pumpkin Blondies with Chocolate and Walnuts. Guest post by Maria Lichty of Two Peas and Their Pod, recipe submitted by TK member Lauren of Lauren's Latest.

Spread about 2/3 of the batter into the prepared pan. 


Tasty Kitchen Blog: Ooey Gooey Caramel Pumpkin Blondies with Chocolate and Walnuts. Guest post by Maria Lichty of Two Peas and Their Pod, recipe submitted by TK member Lauren of Lauren's Latest.

Sprinkle nuts and chocolate chips evenly over the batter. (Remember that I omitted the walnuts because my husband is allergic.) 


Tasty Kitchen Blog: Ooey Gooey Caramel Pumpkin Blondies with Chocolate and Walnuts. Guest post by Maria Lichty of Two Peas and Their Pod, recipe submitted by TK member Lauren of Lauren's Latest.

Place caramels and heavy cream in a microwave-safe bowl. Heat until the caramel is smooth. You will need to stir the caramel every 20 seconds to prevent it from burning. 


Tasty Kitchen Blog: Ooey Gooey Caramel Pumpkin Blondies with Chocolate and Walnuts. Guest post by Maria Lichty of Two Peas and Their Pod, recipe submitted by TK member Lauren of Lauren's Latest.

Pour melted caramel over the batter and spread gently with a knife so the caramel covers the pan. 


Tasty Kitchen Blog: Ooey Gooey Caramel Pumpkin Blondies with Chocolate and Walnuts. Guest post by Maria Lichty of Two Peas and Their Pod, recipe submitted by TK member Lauren of Lauren's Latest.

Place dollops of the remaining batter over the caramel layer.


Tasty Kitchen Blog: Ooey Gooey Caramel Pumpkin Blondies with Chocolate and Walnuts. Guest post by Maria Lichty of Two Peas and Their Pod, recipe submitted by TK member Lauren of Lauren's Latest.

Spread the dollops with a knife until the batter evenly covers the pan. It is okay if a little caramel peeks through. 


Tasty Kitchen Blog: Ooey Gooey Caramel Pumpkin Blondies with Chocolate and Walnuts. Guest post by Maria Lichty of Two Peas and Their Pod, recipe submitted by TK member Lauren of Lauren's Latest.

Bake for 25 minutes or until the edges are golden brown and a toothpick comes out clean. Let the blondies cool completely before cutting and serving. 


Tasty Kitchen Blog: Ooey Gooey Caramel Pumpkin Blondies with Chocolate and Walnuts. Guest post by Maria Lichty of Two Peas and Their Pod, recipe submitted by TK member Lauren of Lauren's Latest.

Serve blondies with vanilla ice cream or whipped cream. 


Tasty Kitchen Blog: Ooey Gooey Caramel Pumpkin Blondies with Chocolate and Walnuts. Guest post by Maria Lichty of Two Peas and Their Pod, recipe submitted by TK member Lauren of Lauren's Latest.

I loved everything about these blondies. They are the ultimate pumpkin dessert. They are soft, moist, and the caramel and chocolate layer is divine. Ooey and gooey definitely deserves to be in this recipe title. If you are looking for one pumpkin recipe to make this fall—I don’t know how you could make just one, but if you do, make these blondies. Pumpkin perfection indeed! The only problem is you will want to eat the entire pan. I’m okay with it if you do, but if you are feeling generous, share with your family and friends. They will love you even more after tasting these Ooey Gooey Caramel Pumpkin Blondies with Chocolate and Walnuts. Okay, enough already, go make these blondies! 

Thanks Lauren for a most excellent recipe. Make sure you visit Lauren’s blog, Lauren’s Latest, for other delicious recipes and drool-worthy photos. 


Printable Recipe

Ooey Gooey Caramel Pumpkin Blondies with Chocolate and Walnuts

See post on Lauren's Latest’s site!
4.72 Mitt(s) 11 Rating(s)11 votes, average: 4.72 out of 511 votes, average: 4.72 out of 511 votes, average: 4.72 out of 511 votes, average: 4.72 out of 511 votes, average: 4.72 out of 5

Prep Time:

Cook Time:

Difficulty: Easy

Servings: 16

16
x

Print Options

Page size Letter 3x5 4x6
Text Size Small Medium Large
Content Include description
Include prep time, etc.
Show image

Description

Addictive. Festive. Heaven in your mouth.

Ingredients

  • FOR THE BLONDIES:
  • ¾ cups Butter, Softened
  • 1 cup Packed Brown Sugar
  • 2 whole Eggs
  • 1 teaspoon Vanilla Extract
  • 1 cup Pumpkin Puree
  • 1 teaspoon Cinnamon
  • ½ teaspoons Nutmeg
  • 1-¾ cup All-purpose Flour
  • 1 teaspoon Baking Soda
  • ¼ teaspoons Salt
  • FOR THE FILLING:
  • ½ cups Chopped Walnuts
  • ¼ cups Semi-Sweet Chocolate Chips
  • 14 ounces, weight Caramels, Unwrapped (1 Bag)
  • ¼ cups Heavy Cream

Preparation Instructions

Preheat oven to 350 degrees F. Lightly grease a 9×13 pan with non stick cooking spray and set aside.

In a large bowl, cream butter and sugar until light and fluffy. Stir in eggs, vanilla and pumpkin until combined. Slowly incorporate the remaining ‘blondies’ ingredients into the batter. Scrape sides of bowl and mix again briefly to ensure a smooth batter. Spread about 2/3 of the batter evenly into the prepared pan.

For the filling: Sprinkle nuts and chocolate chips over top of the batter.

Place caramels and cream into a heat-proof bowl. Microwave on high until caramel is smooth and completely melted, being sure to stir every 20 seconds. Stop as soon as it’s melted and smooth.

Pour melted caramel over chocolate and nuts. Spread around evenly with a butter knife or spoon. Place dollops of the remaining batter over the top of the caramel layer. Spread those dollops out to try and get a smooth layer of batter over top. (It’s fine if some of the caramel layer is peeking through.)

Bake for 25 minutes or until edges are golden and a toothpick comes out clean when inserted. (It might come out with a little caramel on it which is fine. You don’t want batter on the toothpick.)

Cool completely before serving. Or be prepared to get a whole lot of oozing caramel if you serve it warm.

Serve with vanilla ice cream or whipped cream.


_______________________________________

Maria and her husband Josh (who she affectionately refers to as her “dough boy”) blog at Two Peas and Their Pod. They’ve been featured on Saveur, Eatocracy, Gourmet Live, Glamour, and the Los Angeles Times, to name just a few. They’d also just recently added a little pea to their pod. We’re so glad to have them here!


Profile photo of twopeasandtheirpod

Toffee Crunch Cookies

Posted by in Baking, Step-by-Step Recipes

Tasty Kitchen Blog: Toffee Crunch Cookies. Guest post by Maria Lichty of Two Peas and Their Pod, recipe submitted by TK member Aimee of Shugary Sweets.

It is no secret that I have an obsession with cookies. We have over 100 cookie recipes on our food blog. I love baking, eating, and sharing cookies. They make me happy. I told myself I wasn’t going to bake any cookies this week because it is so hot outside. I didn’t want to turn the oven on to heat up the house, but I was browsing Tasty Kitchen and came across Aimee’s recipe for Toffee Crunch Cookies. I knew I was in trouble. The cookies are loaded with oats, crisp rice cereal, marshmallows, and chocolate chips. All of my favorites in one cookie! I jumped out of my chair and turned the oven on. Sorry summer heat, my love for cookies always comes first.


Tasty Kitchen Blog: Toffee Crunch Cookies. Guest post by Maria Lichty of Two Peas and Their Pod, recipe submitted by TK member Aimee of Shugary Sweets.

To make the cookies you will need: butter, granulated sugar, brown sugar, eggs, vanilla extract, flour, baking soda, baking powder, oats, crispy rice cereal, milk chocolate chips, and mini marshmallows. 


Tasty Kitchen Blog: Toffee Crunch Cookies. Guest post by Maria Lichty of Two Peas and Their Pod, recipe submitted by TK member Aimee of Shugary Sweets.

Combine butter and sugars in a large mixing bowl. 


Tasty Kitchen Blog: Toffee Crunch Cookies. Guest post by Maria Lichty of Two Peas and Their Pod, recipe submitted by TK member Aimee of Shugary Sweets.

Mix until butter and sugars are creamy and smooth. 


Tasty Kitchen Blog: Toffee Crunch Cookies. Guest post by Maria Lichty of Two Peas and Their Pod, recipe submitted by TK member Aimee of Shugary Sweets.

Add eggs, one at a time and mix until combined. 


Tasty Kitchen Blog: Toffee Crunch Cookies. Guest post by Maria Lichty of Two Peas and Their Pod, recipe submitted by TK member Aimee of Shugary Sweets.

Add in the vanilla extract. 


Tasty Kitchen Blog: Toffee Crunch Cookies. Guest post by Maria Lichty of Two Peas and Their Pod, recipe submitted by TK member Aimee of Shugary Sweets.

Add the flour, baking soda, and baking powder. 


Tasty Kitchen Blog: Toffee Crunch Cookies. Guest post by Maria Lichty of Two Peas and Their Pod, recipe submitted by TK member Aimee of Shugary Sweets.

Slowly mix the dry ingredients into the wet ingredients. 


Tasty Kitchen Blog: Toffee Crunch Cookies. Guest post by Maria Lichty of Two Peas and Their Pod, recipe submitted by TK member Aimee of Shugary Sweets.

Fold in the oats, crispy rice cereal, chocolate chips, and mini marshmallows. 


Tasty Kitchen Blog: Toffee Crunch Cookies. Guest post by Maria Lichty of Two Peas and Their Pod, recipe submitted by TK member Aimee of Shugary Sweets.

Form cookie dough into rounded tablespoons and place on parchment-lined baking sheets, about 2 inches apart. 


Tasty Kitchen Blog: Toffee Crunch Cookies. Guest post by Maria Lichty of Two Peas and Their Pod, recipe submitted by TK member Aimee of Shugary Sweets.

Bake in a 350ºF oven for 10-12 minutes. 


Tasty Kitchen Blog: Toffee Crunch Cookies. Guest post by Maria Lichty of Two Peas and Their Pod, recipe submitted by TK member Aimee of Shugary Sweets.

Let cookies cool on the parchment paper for about 5 minutes. 


Tasty Kitchen Blog: Toffee Crunch Cookies. Guest post by Maria Lichty of Two Peas and Their Pod, recipe submitted by TK member Aimee of Shugary Sweets.

I am so glad I turned on the oven to make these cookies. They are insanely delicious. The marshmallows melt while baking, creating a sweet chewy cookie. The cookies kind of taste like a rice crispy treat, but with oats and chocolate chips … and in cookie form.


Tasty Kitchen Blog: Toffee Crunch Cookies. Guest post by Maria Lichty of Two Peas and Their Pod, recipe submitted by TK member Aimee of Shugary Sweets.

If you are looking for a new cookie recipe to bake, I highly recommend these Toffee Crunch Cookies. I am a cookie connoisseur and I give these cookies two big thumbs up. Thanks Aimee for sharing your wonderful cookie recipe. Make sure you check out Amiee’s blog, Shugary Sweets for other tasty recipes. 


Printable Recipe

Toffee Crunch Cookies

See post on Shugary Sweets’s site!
4.58 Mitt(s) 17 Rating(s)17 votes, average: 4.58 out of 517 votes, average: 4.58 out of 517 votes, average: 4.58 out of 517 votes, average: 4.58 out of 517 votes, average: 4.58 out of 5

Prep Time:

Cook Time:

Difficulty: Easy

Servings: 36

36
x

Print Options

Page size Letter 3x5 4x6
Text Size Small Medium Large
Content Include description
Include prep time, etc.
Show image

Description

Chewy, crunchy, and chocolate goodness all in one bite!

Ingredients

  • 2 sticks Butter, Softened
  • 1 cup Granulated Sugar
  • 1 cup Brown Sugar
  • 2 whole Eggs
  • 1 Tablespoon Vanilla Extract
  • 2 cups Flour
  • ½ teaspoons Baking Soda
  • 1 teaspoon Baking Powder
  • 2 cups Quick Oats
  • 1 cup Crispy Rice Cereal
  • 1-¼ cup Milk Chocolate Morsels
  • 1 cup Mini Marshmallows

Preparation Instructions

Beat butter with sugars. Add eggs one at a time, then add vanilla. Beat in flour, baking soda and baking powder. Fold in oats, cereal, morsels and marshmallows.

Drop by 1-2 tablespoonfuls onto a parchment-lined cookie sheet. Bake in a 350ºF oven for 10-12 minutes. Enjoy!


_______________________________________

Maria and her husband Josh (who she affectionately refers to as her “dough boy”) blog at Two Peas and Their Pod. They’ve been featured on Saveur, Eatocracy, Gourmet Live, Glamour, and the Los Angeles Times, to name just a few. We’re so glad to have them here!


Profile photo of Erica Lea

Snickerdoodle Cheesecake Bites

Posted by in Baking, Step-by-Step Recipes

  In these fall months, I gravitate towards sweets with a kick of spice. Cinnamon, ginger, cloves, nutmeg … they speak of autumn and cozy evenings. Today’s recipe, brought to us by Amy (MonkeyDudesMom), adds a dash of cinnamon to cheesecake. “Cinnamon on cheesecake?!” you say? Hold your horses. Believe me, it’s a wonderful flavor…

Profile photo of cookincanuck

Mocha Brandy Frappe

Posted by in Step-by-Step Recipes

When I was in my early twenties and my waistline could handle this sort of thing, I made daily trips to one of the many coffee houses in my hometown. You’d be hard-pressed to walk two blocks in Vancouver without finding some sort of specialty coffee store. Yes, we are a highly caffeinated, but friendly […]

Profile photo of Erika (TK)

An Ode to the Sweet Potato

Posted by in The Theme Is...

  Ah, sweet potato. Dear, dear sweet potato. How do I love thee? Let me count the ways. I love you in the morning, when I can start my day with you in my belly. You singlehandedly (singlespudly?) arm me with—wait for it—769% of my daily recommended value of vitamin A, which helps me see […]

Profile photo of Natalie | Perry's Plate

Gluten-Free Apple, Ginger and Spice Scones

Posted by in Baking, Step-by-Step Recipes

  As far as gluten-free baked goods go, these are seriously the bomb. We’re not an entirely gluten-free household, but occasionally I like to play with almond meal in baked goods. I love the rich, nutty (but not too nutty) flavor it imparts. And you can’t beat the nutritional benefits of almonds. These Gluten-Free Apple, […]