The Pioneer Woman Tasty Kitchen
Profile photo of Laurie - Simply Scratch

Bacon, Pear & Raspberry Grilled Cheese

Posted by in Step-by-Step Recipes

Tasty Kitchen Blog: Bacon, Pear & Raspberry Grilled Cheese. Guest post by Laurie McNamara of Simply Scratch, recipe submitted by TK member Lindsay of Pinch of Yum.

 
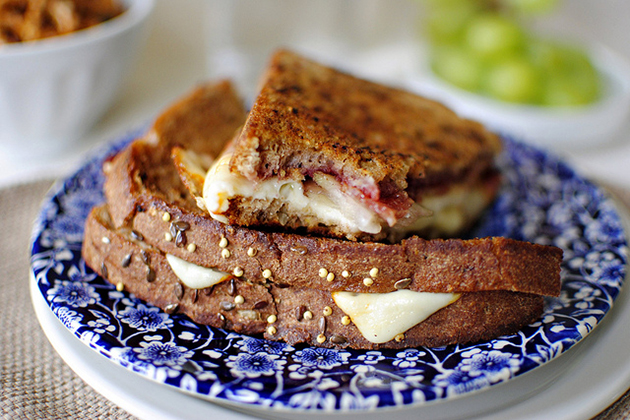
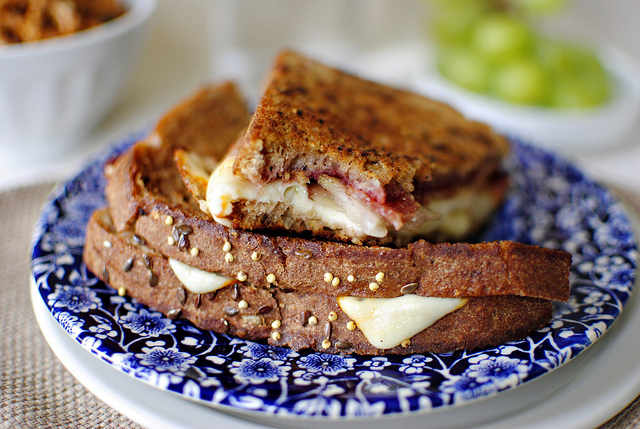
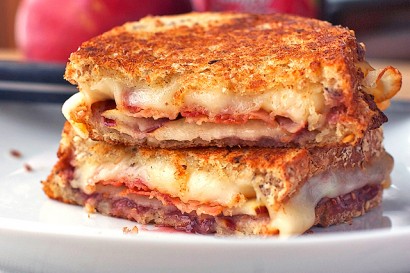
April is National Grilled Cheese Month!  So what better way to celebrate than with a newly discovered and loved grilled cheese sandwich? I’ve had my eye on Lindsay’s recipe since I saw it first on her blog Pinch of Yum. I was intrigued by all the flavors and placed it in my TK recipe box for safekeeping. The first chance that I had, I whipped these up for my Mom for lunch. And after we finished our sandwiches I knew I had to spotlight this fantastic Bacon, Pear and Raspberry Grilled Cheese on the TK Blog.
 
I take the whole grilled-cheese-making process very seriously. So seriously in fact that I broke it all down and came up with a game plan on just how this sandwich should be built. Crazy? Maybe. For example, I placed the bacon by the raspberry preserves for the whole salty-meets-sweet thing, then the sliced pear on the bacon, leaving the cheese to melt all over the pear. But however you decide to stack it, all of you fellow grilled cheese lovers should  make this ASAP (it is a holiday after all)!


Tasty Kitchen Blog: Bacon, Pear & Raspberry Grilled Cheese. Guest post by Laurie McNamara of Simply Scratch, recipe submitted by TK member Lindsay of Pinch of Yum.

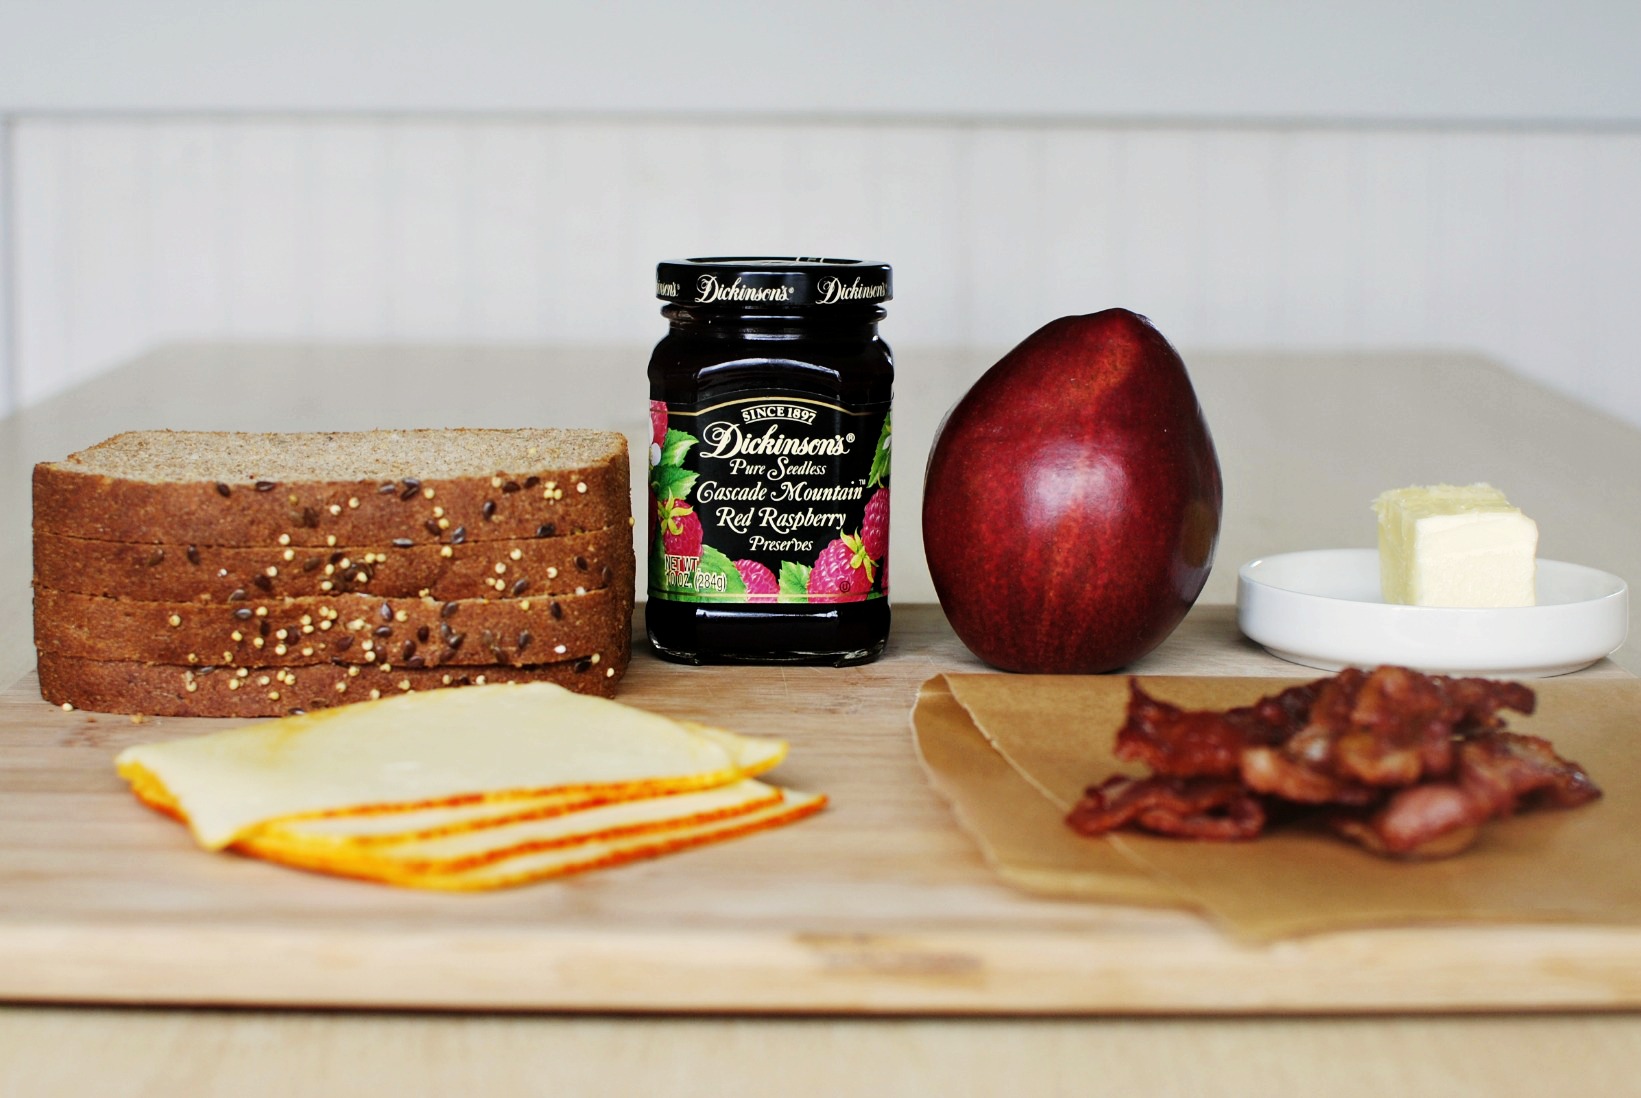
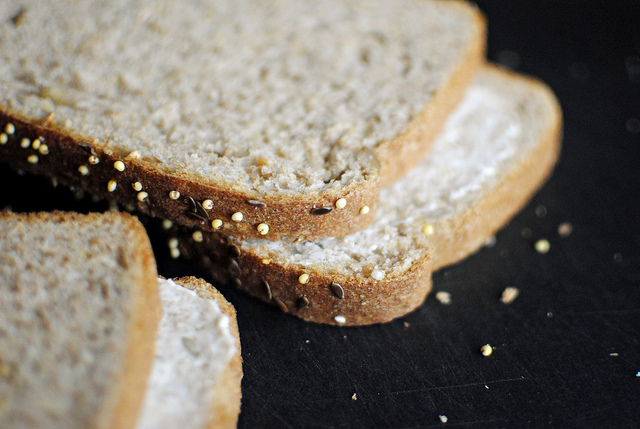
To make these sandwiches you’ll need 4 slices of sturdy whole wheat bread. Because of the weight from all these toppings you definitely want bread that can stand up to the challenge. Not only does the earthiness of the whole wheat bread round out this sammie, but it’s good for you too!


Tasty Kitchen Blog: Bacon, Pear & Raspberry Grilled Cheese. Guest post by Laurie McNamara of Simply Scratch, recipe submitted by TK member Lindsay of Pinch of Yum.

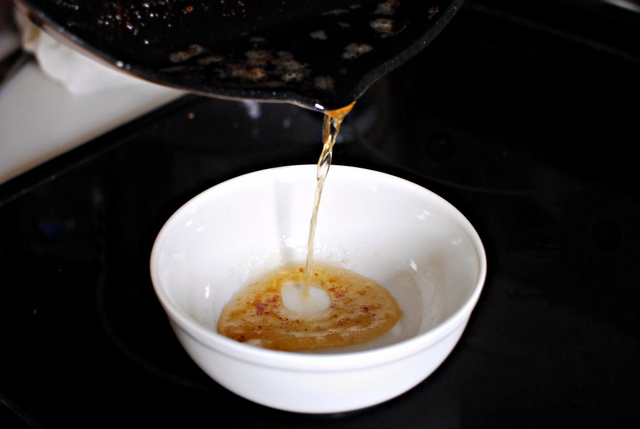
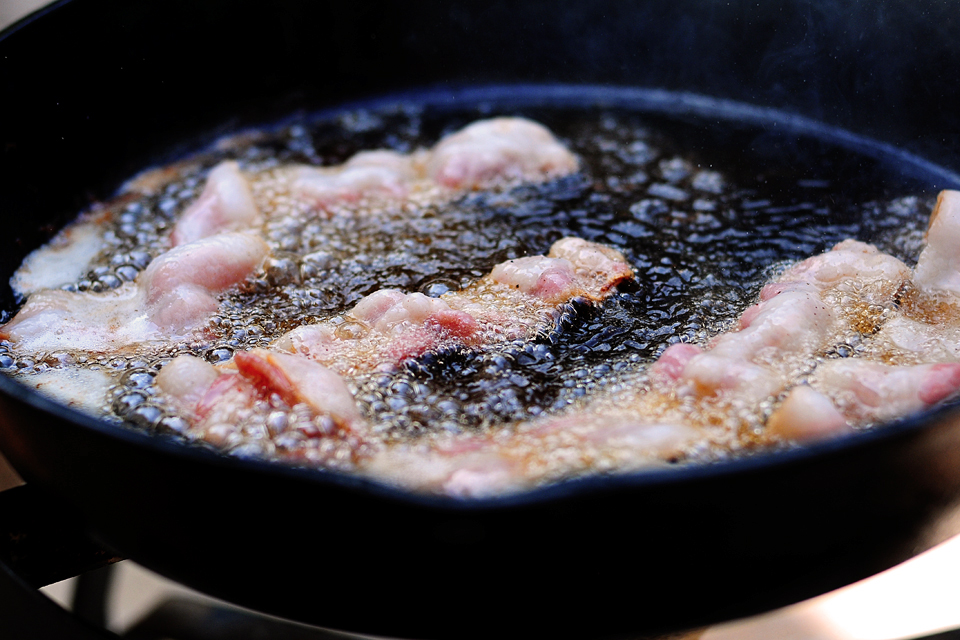
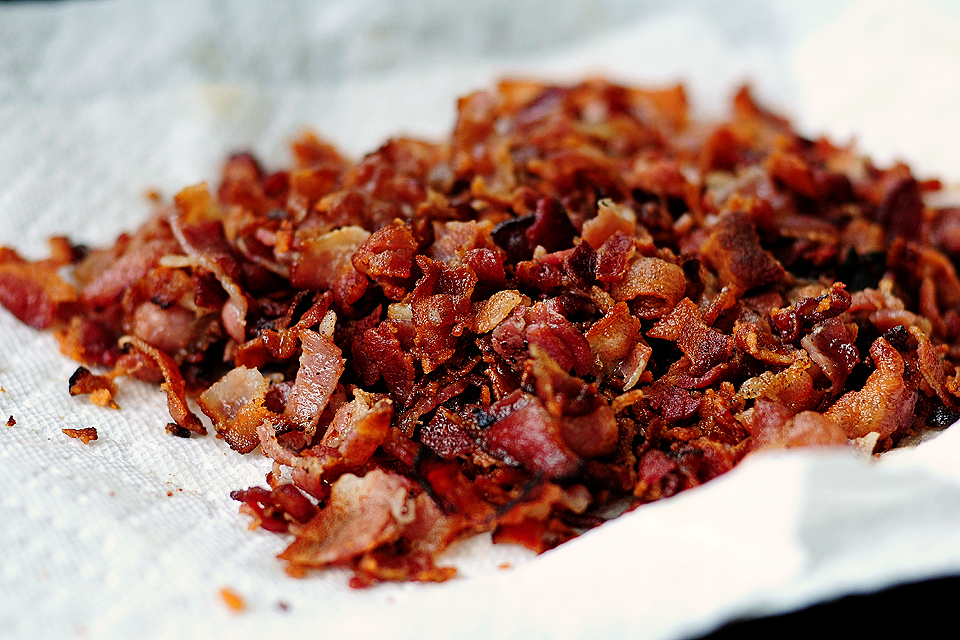
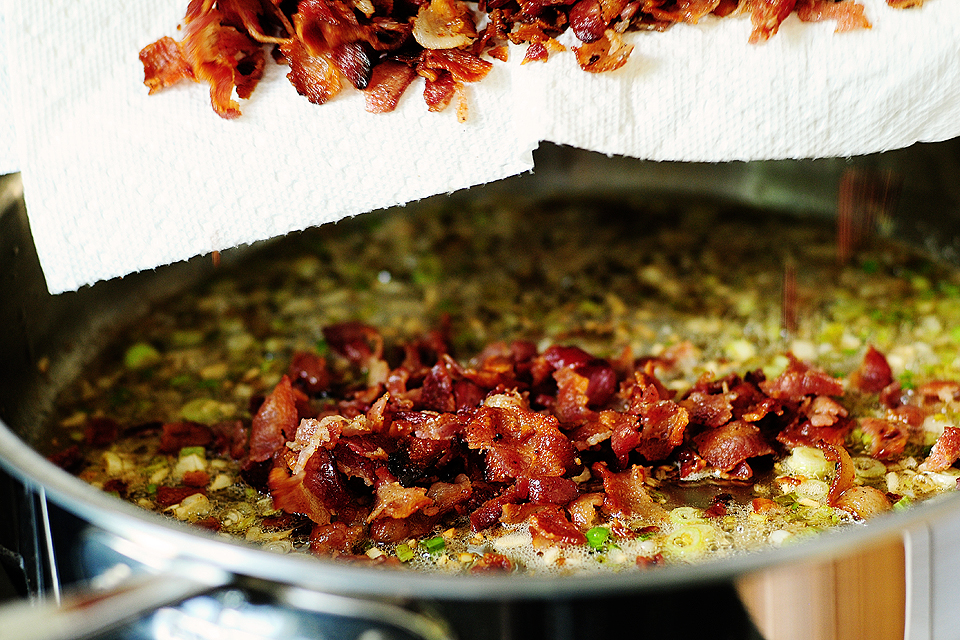
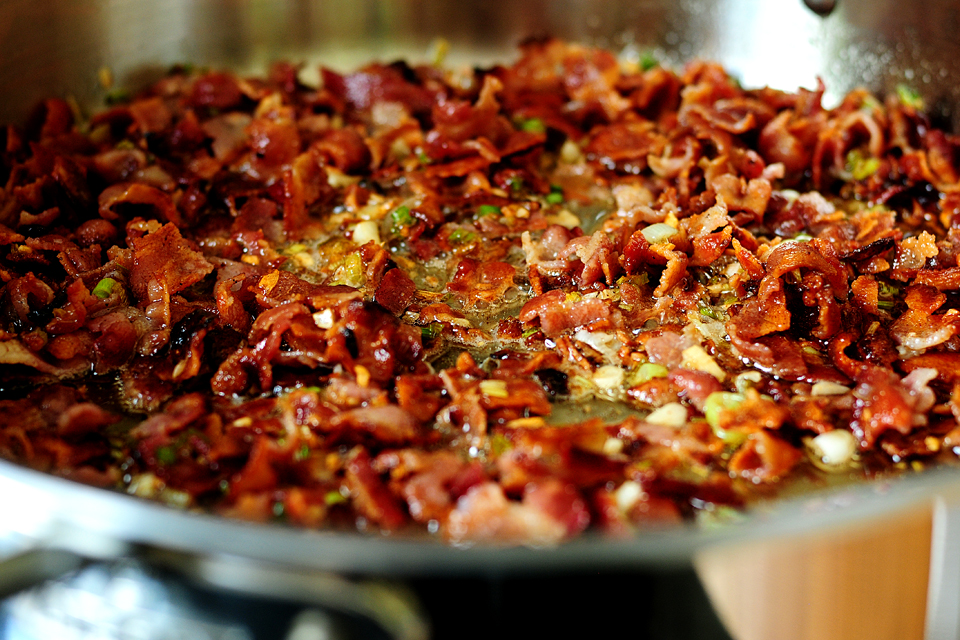
I’m using the same skillet I used to fry up the bacon so I drained off all of the bacon fat.


Tasty Kitchen Blog: Bacon, Pear & Raspberry Grilled Cheese. Guest post by Laurie McNamara of Simply Scratch, recipe submitted by TK member Lindsay of Pinch of Yum.

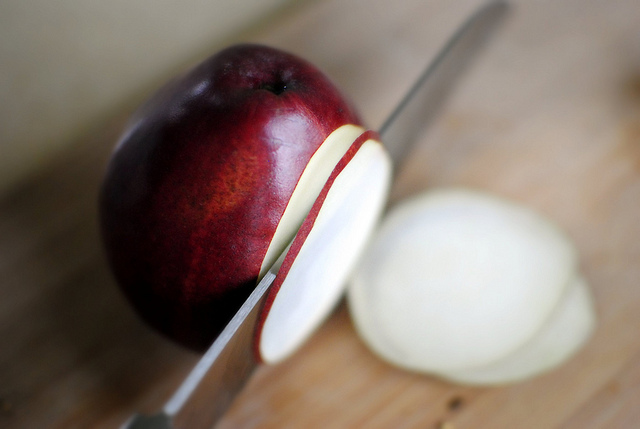
Then with a sharp knife, thinly slice the pear.


Tasty Kitchen Blog: Bacon, Pear & Raspberry Grilled Cheese. Guest post by Laurie McNamara of Simply Scratch, recipe submitted by TK member Lindsay of Pinch of Yum.

You’ll need about 3 to 4 slices per sandwich so one pear should do the trick for two.


Tasty Kitchen Blog: Bacon, Pear & Raspberry Grilled Cheese. Guest post by Laurie McNamara of Simply Scratch, recipe submitted by TK member Lindsay of Pinch of Yum.

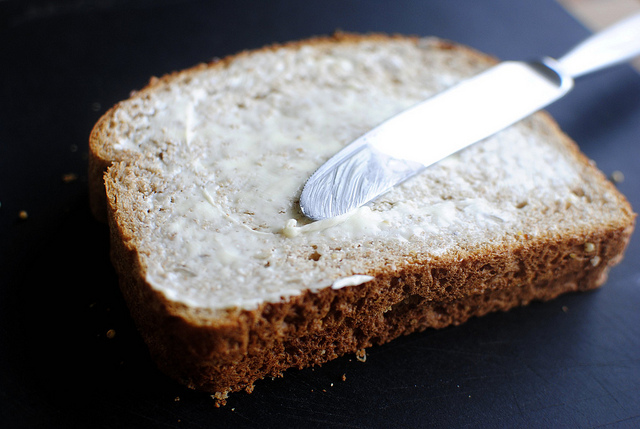
Now let’s assemble the sandwiches. Start by spreading a thin layer of butter on one side of each piece of bread. I’ve found that the thinner the layer of butter, the crispier the grilled cheese!


Tasty Kitchen Blog: Bacon, Pear & Raspberry Grilled Cheese. Guest post by Laurie McNamara of Simply Scratch, recipe submitted by TK member Lindsay of Pinch of Yum.

I place the buttered sides together and start piling on the toppings.


Tasty Kitchen Blog: Bacon, Pear & Raspberry Grilled Cheese. Guest post by Laurie McNamara of Simply Scratch, recipe submitted by TK member Lindsay of Pinch of Yum.

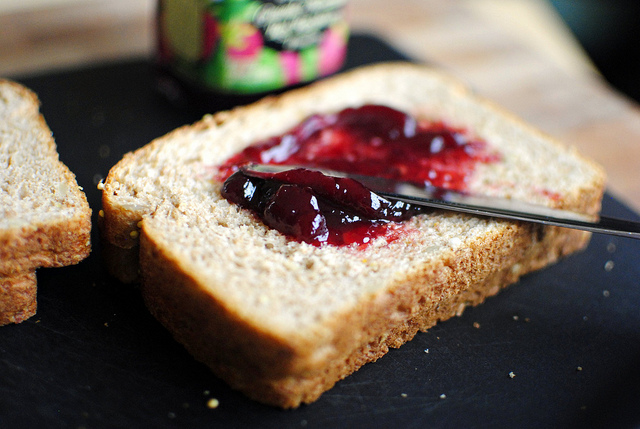
First, the raspberry preserves, the seedless kind.


Tasty Kitchen Blog: Bacon, Pear & Raspberry Grilled Cheese. Guest post by Laurie McNamara of Simply Scratch, recipe submitted by TK member Lindsay of Pinch of Yum.

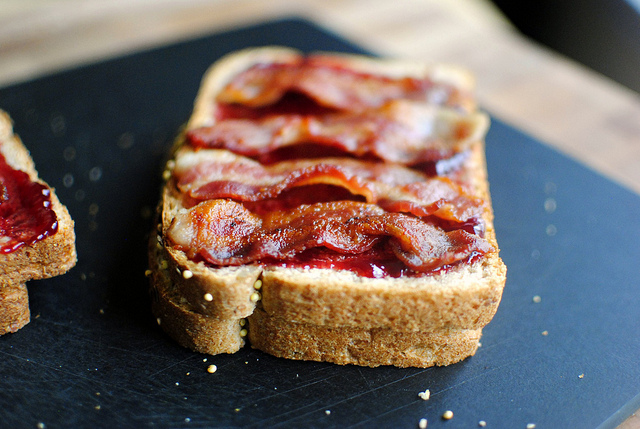
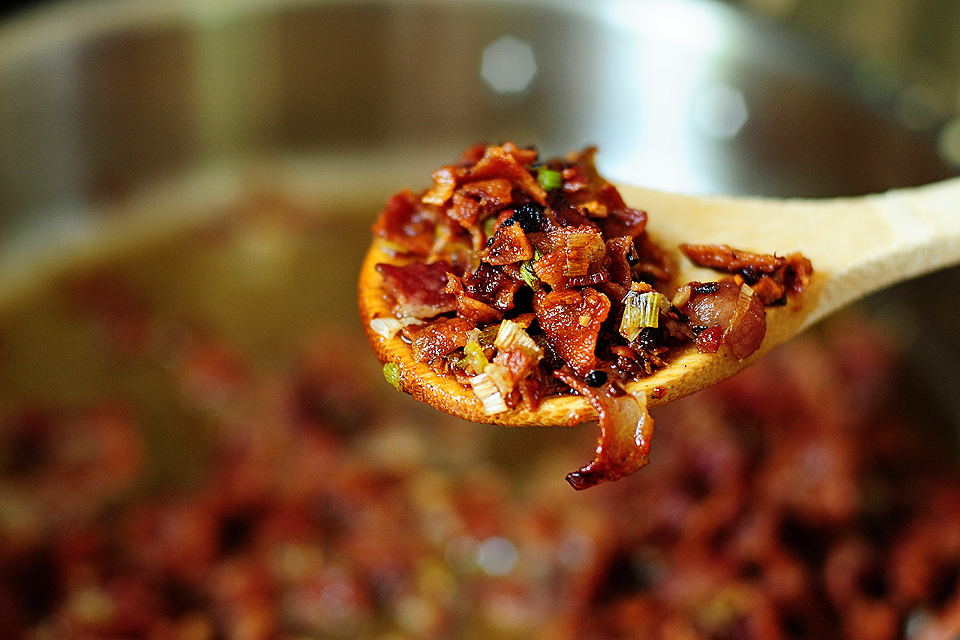
On top of the preserves lay down four half-strips of bacon or more if that’s how you like to roll.


Tasty Kitchen Blog: Bacon, Pear & Raspberry Grilled Cheese. Guest post by Laurie McNamara of Simply Scratch, recipe submitted by TK member Lindsay of Pinch of Yum.

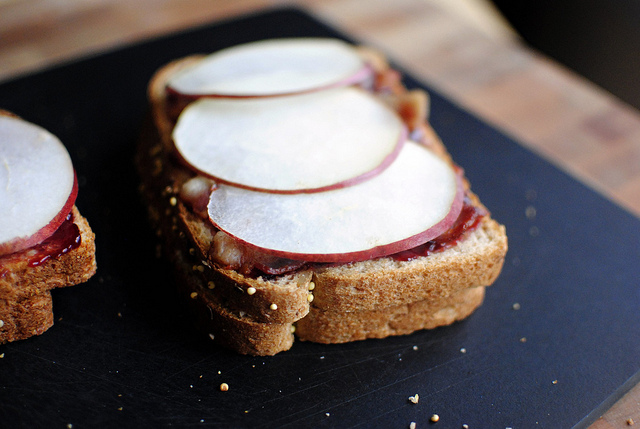
Top with the thinly sliced pear.


Tasty Kitchen Blog: Bacon, Pear & Raspberry Grilled Cheese. Guest post by Laurie McNamara of Simply Scratch, recipe submitted by TK member Lindsay of Pinch of Yum.

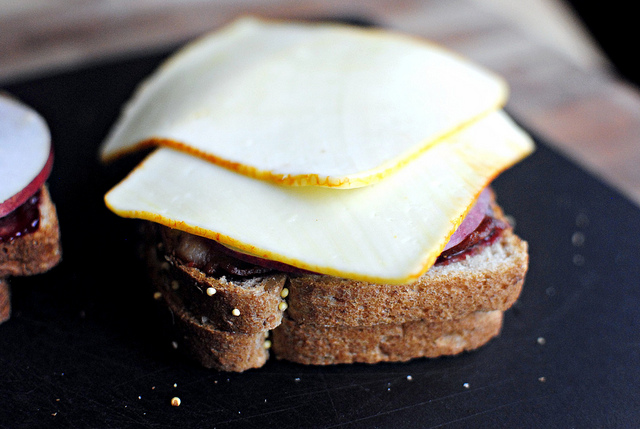
And of course two slices of Munster cheese (because you deserve it).


Tasty Kitchen Blog: Bacon, Pear & Raspberry Grilled Cheese. Guest post by Laurie McNamara of Simply Scratch, recipe submitted by TK member Lindsay of Pinch of Yum.

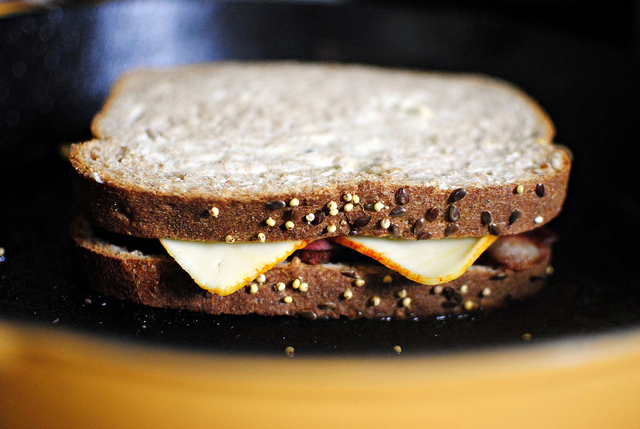
Place the stacked sandwich, butter-side down, in your skillet preheated on medium and top with the second slice of bread, butter-side up (naturally). Grill the sandwich until it reaches the golden-ness you prefer. I like mine a little on the darker side. 
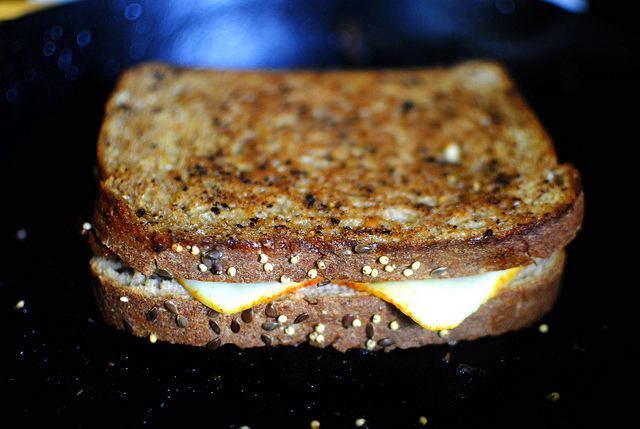


Tasty Kitchen Blog: Bacon, Pear & Raspberry Grilled Cheese. Guest post by Laurie McNamara of Simply Scratch, recipe submitted by TK member Lindsay of Pinch of Yum.

Flip and repeat.


Tasty Kitchen Blog: Bacon, Pear & Raspberry Grilled Cheese. Guest post by Laurie McNamara of Simply Scratch, recipe submitted by TK member Lindsay of Pinch of Yum.

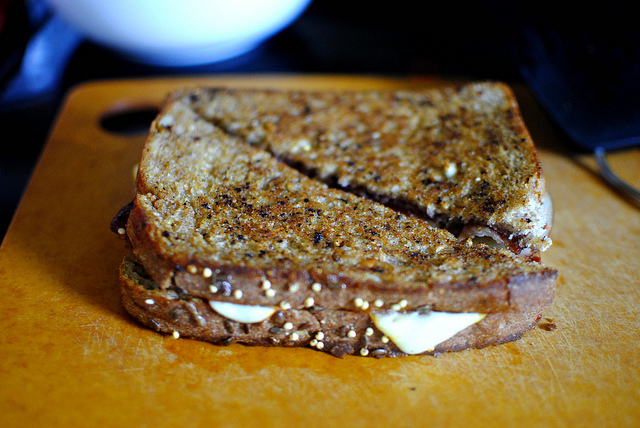
Cut the grilled cheese in half and serve.


Tasty Kitchen Blog: Bacon, Pear & Raspberry Grilled Cheese. Guest post by Laurie McNamara of Simply Scratch, recipe submitted by TK member Lindsay of Pinch of Yum.

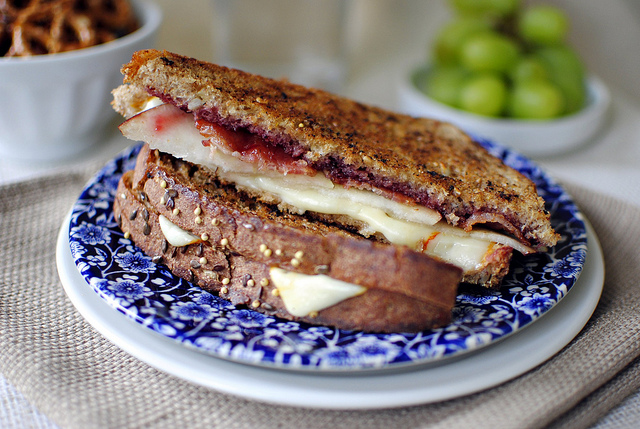
This is one gourmet grilled cheese, one that I’d gladly pay a pretty price for in any cafe. The flavors meld perfectly, and I love the subtlety of the raspberry jam.  


Tasty Kitchen Blog: Bacon, Pear & Raspberry Grilled Cheese. Guest post by Laurie McNamara of Simply Scratch, recipe submitted by TK member Lindsay of Pinch of Yum.

This is a grilled cheese that will definitely grace my kitchen table time and time again, and I have a feeling you’re going to love it as well. Thank you Lindsay for dreaming up this sandwich and sharing it with us! 
 
Be sure to head over to Lindsay’s blog for gorgeous photos, good laughs and a generous “Pinch of Yum.” You can of course find many of her delicious recipes here on Tasty Kitchen as well, in her recipe box!


Printable Recipe

Bacon, Pear & Raspberry Grilled Cheese

See post on Lindsay’s site!
5.00 Mitt(s) 7 Rating(s)7 votes, average: 5.00 out of 57 votes, average: 5.00 out of 57 votes, average: 5.00 out of 57 votes, average: 5.00 out of 57 votes, average: 5.00 out of 5

Prep Time:

Cook Time:

Difficulty: Easy

Servings: 2

2
x

Print Options

Page size Letter 3x5 4x6
Text Size Small Medium Large
Content Include description
Include prep time, etc.
Show image

Description

Sweet, salty, and very, very cheesy.

Ingredients

  • 4 slices Sturdy, Grainy Wheat Bread
  • 3 Tablespoons Raspberry Preserves
  • 8 slices Red Pear, Thinly Sliced
  • 8 slices Cooked Bacon
  • 4 slices Muenster Cheese
  • 1 Tablespoon Butter

Preparation Instructions

Preheat griddle or panini press to medium-high heat.

Assemble 2 sandwiches in this order: bread, 1 1/2 tablespoons preserves, 4 slices pear, 4 slices bacon, 2 slices cheese, bread.

Spread butter on the top and bottom of the sandwich and grill for 4-8 minutes, or until cheese is melted and top is golden brown.

Note: my slices of bacon were pretty small and thin, which is why I used 4 on each sandwich (gulp). I think 2 regular slices per sandwich would be plenty.


_______________________________________

Laurie is the force behind Simply Scratch, a blog that documents her efforts to find and create recipes that are made simply from scratch. (We think it’s sweet that her mother-in-law helped her set up her blog and get started.) We love her recipes; they’re not just tried and true, but they look gorgeous as well. Check out her blog and you’ll become a fan too.


Profile photo of Natalie | Perry's Plate

Bacon Stuffed Roasted Chicken with Cauliflower

Posted by in Step-by-Step Recipes

Tasty Kitchen Blog: Bacon Stuffed Whole Roasted Chicken with Cauliflower. Guest post by Natalie Perry of Perry's Plate, recipe submitted by TK member Jennifer of Mama Schelle Says.

 
I’ve been dying to share this with you. This recipe for Bacon Stuffed Roasted Chicken with Caulflower comes from TK member Mama Schell. But I really think it came from angels. Or maybe Mama Schell is actually an angel herself. Wouldn’t surprise me. 

A roasted chicken with bacon stuffed under the skin cooking over pieces of cauliflower and fresh garlic can only be heaven-sent. You’ll never look at chicken the same way again. Or cauliflower.

You’ll never believe how simple this is, too! Let’s get started.


Tasty Kitchen Blog: Bacon Stuffed Whole Roasted Chicken with Cauliflower. Guest post by Natalie Perry of Perry's Plate, recipe submitted by TK member Jennifer of Mama Schelle Says.

You only need a few things: a whole chicken, some bacon, a head of cauliflower, and a head of garlic. Oh, and some heat-safe oil (I used grapeseed), salt, and black pepper.


Tasty Kitchen Blog: Bacon Stuffed Whole Roasted Chicken with Cauliflower. Guest post by Natalie Perry of Perry's Plate, recipe submitted by TK member Jennifer of Mama Schelle Says.

Start preheating your oven while you get the chicken prepped. Once you remove the packaging and the creepy sack of organs (sorry, but it creeps me out), lift the skin and separate the skin from the breasts with your fingers. You can also use the end of a wooden spoon, but try not to rip the skin.


Tasty Kitchen Blog: Bacon Stuffed Whole Roasted Chicken with Cauliflower. Guest post by Natalie Perry of Perry's Plate, recipe submitted by TK member Jennifer of Mama Schelle Says.

Now stuff two slices of bacon into each side. I folded mine in half and shoved them in there.


Tasty Kitchen Blog: Bacon Stuffed Whole Roasted Chicken with Cauliflower. Guest post by Natalie Perry of Perry's Plate, recipe submitted by TK member Jennifer of Mama Schelle Says.

I made the mistake of using thick-cut bacon, and you’ll see why it was a mistake in a minute.


Tasty Kitchen Blog: Bacon Stuffed Whole Roasted Chicken with Cauliflower. Guest post by Natalie Perry of Perry's Plate, recipe submitted by TK member Jennifer of Mama Schelle Says.

Place the chicken in a roasting pan or a rimmed metal baking sheet. I used a baking sheet because I wanted more of the cauliflower to have contact with the pan. Drizzle the chicken with oil and sprinkle with a generous amount of freshly ground black pepper and salt.


Tasty Kitchen Blog: Bacon Stuffed Whole Roasted Chicken with Cauliflower. Guest post by Natalie Perry of Perry's Plate, recipe submitted by TK member Jennifer of Mama Schelle Says. 

While the chicken is roasting away, start prepping the cauliflower! Cut away all of the greens and the tough stem, cut it into florets and rinse them off.


Tasty Kitchen Blog: Bacon Stuffed Whole Roasted Chicken with Cauliflower. Guest post by Natalie Perry of Perry's Plate, recipe submitted by TK member Jennifer of Mama Schelle Says.

Then take the head of garlic, place it root-side up and press hard on it with the palm of your hand. Lots easier than trying to pick apart those blasted cloves.


Tasty Kitchen Blog: Bacon Stuffed Whole Roasted Chicken with Cauliflower. Guest post by Natalie Perry of Perry's Plate, recipe submitted by TK member Jennifer of Mama Schelle Says.

Here comes the fun part. Ok, not really. Just slightly annoying, but completely worth it in the end.

To make this go quickly, smash each clove with the side of your knife (and the palm of your hand), then the skin should fall off the clove easily. Most of the time.


Tasty Kitchen Blog: Bacon Stuffed Whole Roasted Chicken with Cauliflower. Guest post by Natalie Perry of Perry's Plate, recipe submitted by TK member Jennifer of Mama Schelle Says.

Put the cloves in a bowl with the washed cauliflower and drizzle with heat-safe oil (again, I used grapeseed).


Tasty Kitchen Blog: Bacon Stuffed Whole Roasted Chicken with Cauliflower. Guest post by Natalie Perry of Perry's Plate, recipe submitted by TK member Jennifer of Mama Schelle Says.

Hello again, salt and pepper. Set the cauliflower aside for a few minutes.


Tasty Kitchen Blog: Bacon Stuffed Whole Roasted Chicken with Cauliflower. Guest post by Natalie Perry of Perry's Plate, recipe submitted by TK member Jennifer of Mama Schelle Says.

About halfway through roasting the chicken should look like this. Remember how I said I shouldn’t have used thick-cut bacon? I think that may be the reason why the chicken skin split. I wasn’t too concerned, though, because my entire house smelled like bacon and roasted chicken. That’s enough to take all your cares away. 


Tasty Kitchen Blog: Bacon Stuffed Whole Roasted Chicken with Cauliflower. Guest post by Natalie Perry of Perry's Plate, recipe submitted by TK member Jennifer of Mama Schelle Says.

Spread the cauliflower and garlic around the chicken. Like I said, I prefer using a rimmed baking sheet for this because more of the cauliflower ends up having those dark, caramelized crispy bits on it. And because I don’t own a roasting pan. (Seriously, what’s wrong with me?)


Tasty Kitchen Blog: Bacon Stuffed Whole Roasted Chicken with Cauliflower. Guest post by Natalie Perry of Perry's Plate, recipe submitted by TK member Jennifer of Mama Schelle Says.

Stir the cauliflower around a couple of times while the chicken finishes up and this is what you end up with. I can hardly stand it. I’m salivating again just thinking about it.


Tasty Kitchen Blog: Bacon Stuffed Whole Roasted Chicken with Cauliflower. Guest post by Natalie Perry of Perry's Plate, recipe submitted by TK member Jennifer of Mama Schelle Says.

THIS is why you need to make this as soon as possible. I like cauliflower, but I never knew it could taste this good. Just about any vegetable roasted in bacon and chicken drippings will be palatable to any vegetable hater, but if you happen to love vegetables to begin with, you’ll be craving this every. single. day.


Tasty Kitchen Blog: Bacon Stuffed Whole Roasted Chicken with Cauliflower. Guest post by Natalie Perry of Perry's Plate, recipe submitted by TK member Jennifer of Mama Schelle Says.

Oh ya, the chicken was excellent as well. The breast meat that the bacon oozed on had this incredibly smoky flavor. And I kind of like that the skin split because it made some of the bacon crispy!

Thank you, Jennifer, for this recipe! Check out her TK Recipe Box and her blog, Mama Schell Says for more recipes and beautiful photography.

You’ll find the complete recipe and instructions in the handy printable below!


Printable Recipe

Bacon Stuffed Whole Roasted Chicken with Cauliflower

5.00 Mitt(s) 2 Rating(s)2 votes, average: 5.00 out of 52 votes, average: 5.00 out of 52 votes, average: 5.00 out of 52 votes, average: 5.00 out of 52 votes, average: 5.00 out of 5

Prep Time:

Cook Time:

Difficulty: Easy

Servings: 6

6
x

Print Options

Page size Letter 3x5 4x6
Text Size Small Medium Large
Content Include description
Include prep time, etc.
Show image

Description

Bacon Stuffed Whole Roasted Chicken with Cauliflower and garlic, or the only way to get my son and husband to eat cauliflower!

Ingredients

  • 1 whole Chicken
  • 4 slices Bacon
  • 1 head Cauliflower
  • 1 bulb Garlic (10-15 Cloves)
  • Salt And Pepper, To Taste
  • 3 Tablespoons Olive Oil

Preparation Instructions

Preheat oven to 450 degrees.

Clean 1 whole roasting chicken. Gently pull skin away from the breast and insert the four slices of bacon between the skin and breast of the chicken.

Place whole chicken (breast side up) in a roasting pan. Spray with cooking spray and sprinkle with salt and pepper or any other seasonings you may like.

Bake chicken in the oven at 450 degrees for 30 minutes.

While chicken is baking, cut up cauliflower into bite-sized pieces. Peel garlic cloves, leaving them whole, and place cauliflower and peeled garlic into a bowl. Toss with olive oil and season with salt and pepper.

Add cauliflower and garlic to the roasting pan with the chicken. Reduce heat to 400 degrees and cook for 30 more minutes, or until chicken is done.

Serve and enjoy!


_______________________________________

Be sure to check out Natalie’s own beautiful food blog, Perrys’ Plate, where you can see her growing collection of lovely recipes. There’s always something new to see there. Go visit now!


Profile photo of missamy

Bacon Tomato Capellini

Posted by in Step-by-Step Recipes

Tasty Kitchen Blog: Bacon Tomato Capellini. Guest post by Amy Johnson of She Wears Many Hats, recipe submitted by TK member PlanoSheila (sheilajfoster).

 
As I was perusing the Tasty Kitchen offerings, this Bacon Tomato Capellini recipe jumped out at me. It actually jumped out of the screen, grabbed me by the neck, and forced me to make it. Bacon has that way about it, a mysterious, addicting, intoxicating way that grips you at the core and won’t let go. Plus pasta is involved. Pasta and bacon? What’s not to like?

A big thanks to PlanoSheila for sharing the love on this one. It turned out just like she said it would: “unbelievable.” Magnificent, really. It’s an easy recipe to throw together. Six simple ingredients (salt is optional, and the bacon grease is a by-product of the bacon) are all you’ll need to create a dinner that folks within sniffing distance will be flocking to. So barricade your door, get the bacon, and let’s get to it.


Tasty Kitchen Blog: Bacon Tomato Capellini. Guest post by Amy Johnson of She Wears Many Hats, recipe submitted by TK member PlanoSheila (sheilajfoster).

Here’s what you’ll need: bacon, of course, bacon grease, fresh basil, green onion, garlic, diced tomatoes, salt (optional), and capellini or angel hair pasta.


Tasty Kitchen Blog: Bacon Tomato Capellini. Guest post by Amy Johnson of She Wears Many Hats, recipe submitted by TK member PlanoSheila (sheilajfoster).

Start by chopping the produce. Give the basil a quick rough chop.


Tasty Kitchen Blog: Bacon Tomato Capellini. Guest post by Amy Johnson of She Wears Many Hats, recipe submitted by TK member PlanoSheila (sheilajfoster).

Then the green onion and garlic.


Tasty Kitchen Blog: Bacon Tomato Capellini. Guest post by Amy Johnson of She Wears Many Hats, recipe submitted by TK member PlanoSheila (sheilajfoster).

Next, begin frying the bacon. Not too crispy, though.


Tasty Kitchen Blog: Bacon Tomato Capellini. Guest post by Amy Johnson of She Wears Many Hats, recipe submitted by TK member PlanoSheila (sheilajfoster).

While the bacon is frying, pour the diced tomatoes in a bowl.


Tasty Kitchen Blog: Bacon Tomato Capellini. Guest post by Amy Johnson of She Wears Many Hats, recipe submitted by TK member PlanoSheila (sheilajfoster).

Add the the chopped basil.


Tasty Kitchen Blog: Bacon Tomato Capellini. Guest post by Amy Johnson of She Wears Many Hats, recipe submitted by TK member PlanoSheila (sheilajfoster).

Mix tomato and basil together and set aside to mingle.


Tasty Kitchen Blog: Bacon Tomato Capellini. Guest post by Amy Johnson of She Wears Many Hats, recipe submitted by TK member PlanoSheila (sheilajfoster).

Finish frying the bacon, remove it from the pan and let cool.


Tasty Kitchen Blog: Bacon Tomato Capellini. Guest post by Amy Johnson of She Wears Many Hats, recipe submitted by TK member PlanoSheila (sheilajfoster).

Reserve 1/2 cup of the bacon grease.


Tasty Kitchen Blog: Bacon Tomato Capellini. Guest post by Amy Johnson of She Wears Many Hats, recipe submitted by TK member PlanoSheila (sheilajfoster).

Pour the 1/2 cup of bacon grease in a large sauté pan. If you’d like, you can use the same pan that you fried the bacon in—you don’t even need to clean it!


Tasty Kitchen Blog: Bacon Tomato Capellini. Guest post by Amy Johnson of She Wears Many Hats, recipe submitted by TK member PlanoSheila (sheilajfoster).

Look at all of that bacon goodness, just waiting to make friends with the rest of the bunch. Warm the bacon grease over medium heat.


Tasty Kitchen Blog: Bacon Tomato Capellini. Guest post by Amy Johnson of She Wears Many Hats, recipe submitted by TK member PlanoSheila (sheilajfoster).

When the bacon grease is ready, add the green onion and garlic. Sauté for a few minutes, until just beginning to brown. Be careful to watch closely so you don’t burn the garlic. Burnt garlic will make you sad. And this is happy cooking here on Tasty Kitchen.


Tasty Kitchen Blog: Bacon Tomato Capellini. Guest post by Amy Johnson of She Wears Many Hats, recipe submitted by TK member PlanoSheila (sheilajfoster).

While the onion and garlic are sautéing, crumble the bacon.


Tasty Kitchen Blog: Bacon Tomato Capellini. Guest post by Amy Johnson of She Wears Many Hats, recipe submitted by TK member PlanoSheila (sheilajfoster).

Add all of the crumbled bacon to the pan, except maybe two pieces. Okay, three, but who’s counting?


Tasty Kitchen Blog: Bacon Tomato Capellini. Guest post by Amy Johnson of She Wears Many Hats, recipe submitted by TK member PlanoSheila (sheilajfoster).

Combine well, and sauté the bacon, onions and garlic over low heat for about 10 minutes.


Tasty Kitchen Blog: Bacon Tomato Capellini. Guest post by Amy Johnson of She Wears Many Hats, recipe submitted by TK member PlanoSheila (sheilajfoster).

The temptation. Doesn’t it look like the perfect appetizer? Be strong. Put the spoon down. Keep going.


Tasty Kitchen Blog: Bacon Tomato Capellini. Guest post by Amy Johnson of She Wears Many Hats, recipe submitted by TK member PlanoSheila (sheilajfoster).

The tomato/basil mixture goes in next.


Tasty Kitchen Blog: Bacon Tomato Capellini. Guest post by Amy Johnson of She Wears Many Hats, recipe submitted by TK member PlanoSheila (sheilajfoster).

Combine well, bring to a simmer, cover and cook for about 20 minutes, stirring occasionally.


Tasty Kitchen Blog: Bacon Tomato Capellini. Guest post by Amy Johnson of She Wears Many Hats, recipe submitted by TK member PlanoSheila (sheilajfoster).

It will cook down and thicken a bit.


Tasty Kitchen Blog: Bacon Tomato Capellini. Guest post by Amy Johnson of She Wears Many Hats, recipe submitted by TK member PlanoSheila (sheilajfoster).

Cook the pasta according to packaging directions (don’t forget to salt your pasta water!) and drain.

You’re almost there! Bacon, pasta dreamland awaits! Can you smell it?


Tasty Kitchen Blog: Bacon Tomato Capellini. Guest post by Amy Johnson of She Wears Many Hats, recipe submitted by TK member PlanoSheila (sheilajfoster).

I like to combine the pasta directly in the pan with the sauce, but you can always combine it all together in your favorite large serving dish.


Tasty Kitchen Blog: Bacon Tomato Capellini. Guest post by Amy Johnson of She Wears Many Hats, recipe submitted by TK member PlanoSheila (sheilajfoster).

Gently toss the pasta with the sauce, making sure to coat pasta well. Taste and add salt if needed. I didn’t add any as the bacon seemed to add enough saltiness to the dish.


Tasty Kitchen Blog: Bacon Tomato Capellini. Guest post by Amy Johnson of She Wears Many Hats, recipe submitted by TK member PlanoSheila (sheilajfoster).

Again, thanks Sheila for the recipe. My family wanted to call you to thank you in person. This one is definitely going to be a regular around here. I don’t think I have a choice.


Tasty Kitchen Blog: Bacon Tomato Capellini. Guest post by Amy Johnson of She Wears Many Hats, recipe submitted by TK member PlanoSheila (sheilajfoster).


Printable Recipe

Bacon Tomato Capellini

4.72 Mitt(s) 29 Rating(s)29 votes, average: 4.72 out of 529 votes, average: 4.72 out of 529 votes, average: 4.72 out of 529 votes, average: 4.72 out of 529 votes, average: 4.72 out of 5

Prep Time:

Cook Time:

Difficulty: Intermediate

Servings: 8

8
x

Print Options

Page size Letter 3x5 4x6
Text Size Small Medium Large
Content Include description
Include prep time, etc.
Show image

Description

The flavor of this pasta dish is unbelievable! When I’m having someone for dinner for the first time, this is what I make. My kids have gotten mad at me for making it when they’re not home, and my husband LOVES this dish!

Ingredients

  • 2 packages (16 Oz. Package) Bacon, Naturally Flavored
  • ½ cups Bacon Grease, From The Bacon You're Cooking
  • 2 cans (28 Oz. Cans) Diced Tomatoes, Nothing Added
  • ½ cups Chopped Fresh Basil
  • 2 cloves Fresh Garlic, Minced
  • 1 bunch Chopped Green Onions
  • 2 teaspoons Salt (optional)
  • 1 box (16 Oz. Box) Capellini Or Angel Hair Pasta

Preparation Instructions

Fry bacon in a large frying pan, making sure it’s cooked thoroughly but not too crispy. Drain cooked bacon on paper towels, but don’t throw away the grease in the pan! You want to reserve 1/2 cup bacon grease. Dump the rest of the bacon grease out, then put the skillet back on the stove without cleaning it. Trust me. When the bacon is cool, use your fingers to tear it into small pieces. (Please, don’t ever use store bought bacon bits in this recipe.) Set your cooked, crumbled bacon aside.

Now, open your tomato cans and dump them into a large bowl. Throw in the chopped fresh basil and stir. You want to be able to see the basil, distributed evenly in the tomatoes, so if you have to add more, you can. Set this bowl aside and let the flavors mingle while you do the next step.

Dice your garlic, and chop your green onions. Pour your 1/2 cup of bacon grease back into the skillet and heat it to medium. Throw in and saute your garlic and onions. When they’re getting a nice tan from the color of the bacon grease, add your bacon. On low heat, saute the bacon together with the garlic and onions for around ten minutes. When you start getting high from the smell in your kitchen, pour in the bowl of tomatoes and basil. Stir together really well, bring to a boil and then cover and simmer 20 minutes, stirring occasionally. Taste and add salt if necessary.

Meanwhile, in a large pot, cook your pasta according the directions on the package. Drain noodles and set aside. Right before serving, in a very large bowl, add the bacon/tomato sauce to the noodles and mix well.

This stuff is also pretty amazing reheated the next day. I usually just pop it into the microwave for a minute or two.


_______________________________________

Amy Johnson is a blogger who writes about food, travel, the home (both inside and out), and various observations and random musings about anything and everything. Visit her blog She Wears Many Hats for a dose of deliciousness, practicality, hilarity, or just plain fun. She lives in South Carolina with her husband and two children.


Profile photo of Megan {Country Cleaver}

Baked Blueberry Pecan French Toast

Posted by in Baking

Tasty Kitchen Blog: Baked Blueberry Pecan French Toast. Guest post by Megan Keno of Country Cleaver, recipe submitted by TK member Melanie of Mel’s Kitchen Cafe.

Baked French toast, or bread pudding, always reminds me of my mom. She loves it. And so do I! It’s comforting, warm, and best of all, full of carbs. When I found Mel’s recipe for Baked Blueberry Pecan French Toast, that was it—I had to share it.


Tasty Kitchen Blog: Baked Blueberry Pecan French Toast. Guest post by Megan Keno of Country Cleaver, recipe submitted by TK member Melanie of Mel’s Kitchen Cafe.

Slice your loaf of baguette or French bread into 1 1/2 inch slices.


Tasty Kitchen Blog: Baked Blueberry Pecan French Toast. Guest post by Megan Keno of Country Cleaver, recipe submitted by TK member Melanie of Mel’s Kitchen Cafe.

Lay the slices on the bottom of a 13×9 baking dish.


Tasty Kitchen Blog: Baked Blueberry Pecan French Toast. Guest post by Megan Keno of Country Cleaver, recipe submitted by TK member Melanie of Mel’s Kitchen Cafe.

Into a large bowl, crack the six eggs. This is what makes this baked French toast really custardy.


Tasty Kitchen Blog: Baked Blueberry Pecan French Toast. Guest post by Megan Keno of Country Cleaver, recipe submitted by TK member Melanie of Mel’s Kitchen Cafe.

Add in the vanilla, nutmeg and 1/2 cup of brown sugar.


Tasty Kitchen Blog: Baked Blueberry Pecan French Toast. Guest post by Megan Keno of Country Cleaver, recipe submitted by TK member Melanie of Mel’s Kitchen Cafe.

Next, pour in the milk.


Tasty Kitchen Blog: Baked Blueberry Pecan French Toast. Guest post by Megan Keno of Country Cleaver, recipe submitted by TK member Melanie of Mel’s Kitchen Cafe.

Whisk together the egg and milk mixture until the brown sugar is mixed in and evenly distributed.


Tasty Kitchen Blog: Baked Blueberry Pecan French Toast. Guest post by Megan Keno of Country Cleaver, recipe submitted by TK member Melanie of Mel’s Kitchen Cafe.

Pour the egg and milk mix over the top of the bread in the baking dish.


Tasty Kitchen Blog: Baked Blueberry Pecan French Toast. Guest post by Megan Keno of Country Cleaver, recipe submitted by TK member Melanie of Mel’s Kitchen Cafe.

Cover the bread with foil and place in the fridge to let the bread soak in the eggs overnight.


Tasty Kitchen Blog: Baked Blueberry Pecan French Toast. Guest post by Megan Keno of Country Cleaver, recipe submitted by TK member Melanie of Mel’s Kitchen Cafe.

Mel suggests toasting the pecans the night before baking, while the French toast is resting in the fridge. This will save you time the morning you bake your French toast. In a skillet or pan, toast the chopped pecans over medium heat until they become fragrant. Add in the butter and coat the pecans. Remove them from the heat and set aside.


Tasty Kitchen Blog: Baked Blueberry Pecan French Toast. Guest post by Megan Keno of Country Cleaver, recipe submitted by TK member Melanie of Mel’s Kitchen Cafe.

The morning you bake your French toast, preheat your oven to 350ºF. Uncover the French toast and top with the buttered pecans and blueberries. I had two gallons of frozen blueberries that my husband and I picked from last summer. They worked just great since we didn’t have fresh berries on hand.


Tasty Kitchen Blog: Baked Blueberry Pecan French Toast. Guest post by Megan Keno of Country Cleaver, recipe submitted by TK member Melanie of Mel’s Kitchen Cafe.

In a saucepan, cut the remaining butter into cubes and mix in the remaining brown sugar. Bring the butter and sugar to a simmer and stir until the sugar has dissolved. Pour it over the top of the French toast. Now, you’re ready to bake! Bake the French toast for 30-40 minutes. It will be the longest 30-40 minutes of your life, because this smells so good!


Tasty Kitchen Blog: Baked Blueberry Pecan French Toast. Guest post by Megan Keno of Country Cleaver, recipe submitted by TK member Melanie of Mel’s Kitchen Cafe.

Remove from the oven and dig in!

Thanks, Mel, for this gorgeous recipe! Be sure to check out Mel’s TK recipe box and her site Mel’s Kitchen Cafe for more home cooked comfort food. Next on my must-make list is Mel’s Slow Cooker Beef Barley Soup.


Printable Recipe

Baked Blueberry Pecan French Toast

See post on Melanie - Mel's Kitchen Cafe’s site!
5.00 Mitt(s) 4 Rating(s)4 votes, average: 5.00 out of 54 votes, average: 5.00 out of 54 votes, average: 5.00 out of 54 votes, average: 5.00 out of 54 votes, average: 5.00 out of 5

Prep Time:

Cook Time:

Difficulty: Easy

Servings: 8

8
x

Print Options

Page size Letter 3x5 4x6
Text Size Small Medium Large
Content Include description
Include prep time, etc.
Show image

Description

While blueberries are in their prime, you must try this!
The pecans are toasted and tossed with a smidgen of butter – giving them a delicious, buttery flavor. The french baguette slices soak in an egg/milk/brown sugar mixture overnight and it all bakes to glorious perfection with fresh, tart blueberries and a brown sugar caramel drizzled atop. It is very glorious and makes a perfect Saturday morning breakfast.

Ingredients

  • 1 loaf Baguette
  • 6 whole Eggs
  • 1 cup Milk
  • ½ teaspoons Nutmeg
  • 1 teaspoon Vanilla
  • ¾ cups Brown Sugar, Divided
  • 1 cup Pecans, Chopped
  • 1 teaspoon Butter
  • ½ cubes Butter
  • 2 cups Fresh Blueberries

Preparation Instructions

Butter a 9×13 baking dish. Cut 1 1/2 inch slices from the baguette and arrange flat in one layer in the dish (about 6-8 slices).

Whisk together eggs, milk, nutmeg, vanilla, and 1/2 cup brown sugar in a large bowl and pour evenly over the bread. Refrigerate mixture, covered, until all liquid is absorbed by the bread, at least 8 hours and up to 1 day.

When you are ready to bake and serve, preheat oven to 350 F.

Spread pecans evenly in a shallow baking pan and toast in middle of oven until fragrant, about 4 minutes. Toss pecans with 1 teaspoon butter.

Alternately (and this is what I did), toast the pecans in a skillet in one layer over medium heat, stirring often. Toss with 1 teaspoon butter. (I did this the night before to save time the morning of.)

Sprinkle pecans and blueberries evenly over bread mixture.

Cut remaining 1/2 stick butter into pieces and heat with remaining 1/4 cup brown sugar in a small saucepan, stirring, until butter is melted and sugar is dissolved.

Drizzle butter mixture over bread and bake mixture 30 – 40 minutes or until any liquid from blueberries is bubbling.


_______________________________________

Megan Keno is the writer and photographer of Country Cleaver, a food blog fueled by Nutella and images of June Cleaver—if June wore cowboy boots and flannel, that is. A self-proclaimed country bum, Megan creates from-scratch recipes that range from simple to sublime and how-to’s to build your cooking repertoire. But she couldn’t do it without the help of her trusty—and furry—sous chef, Huckleberry. He’s a world class floor cleaner.


Profile photo of A Cozy Kitchen

Baked Eggs in Spicy Tomato Sauce

Posted by in Step-by-Step Recipes

I’m a firm believer that a runny egg goes with everything. Whether it’s a bowl of pasta, atop a piece of toast, or accompanied by a drizzle of Hollandaise sauce, it’s simply perfect. Is there anything more attractive than a runny egg? I think not.  That’s why when I saw this Baked Eggs in Spicy […]

Profile photo of ThreeManyCooks

Baked Falafel Pita

Posted by in Step-by-Step Recipes

  As I’m eating less meat these days, I’m always on the look-out for recipes that use beans and legumes. They’re healthy, filling, and full of protein and fiber. But when I think falafel, I think fried and weekend project, too. But Tasty Kitchen member janecooks offers a baked version of the fried favorite that’s […]

Profile photo of Natalie | Perry's Plate

Baked Hushpuppies

Posted by in Baking, Step-by-Step Recipes

  Have you ever had a hushpuppy? A true hushpuppy is a cornmeal-based dough that’s fried into little balls. Sometimes onions and peppers are added, but that’s basically it. Hushpuppies have very strong ties to the American South, like fried dill pickles and fried okra (two more of my favorite fried goodies) and are commonly […]

Profile photo of Megan {Country Cleaver}

Baked Sausage Fontina Sandwiches

Posted by in Step-by-Step Recipes

Football Sunday is sacrosanct around this household. My husband flips between the channels, I make the food. It is the perfect system for us. To gear up for this season, tuck these Baked Sausage Fontina Sandwiches from TK member