The Pioneer Woman Tasty Kitchen
Profile photo of georgiapellegrini

Avocado and Cilantro Dressing

Posted by in Step-by-Step Recipes

Tasty Kitchen Blog: Avocado and Cilantro Dressing. Guest post by Georgia Pellegrini, recipe submitted by TK member Elizabeth of Guilty Kitchen.

 
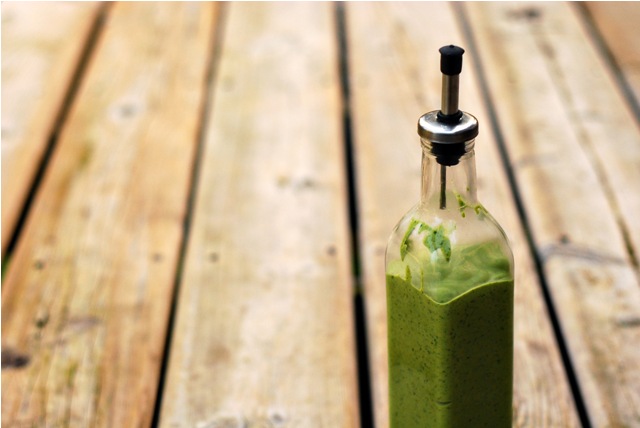
This Avocado and Cilantro Dressing from TK member Guilty Kitchen is light and fluffy and so versatile. And the dressing can be used for so many purposes. I could also just eat it by the spoonful. That’s enough of a purpose for me! What is also nice is that it stores well for several days because of all of the acid in the ingredients and it holds its color very well.


Tasty Kitchen Blog: Avocado and Cilantro Dressing. Guest post by Georgia Pellegrini, recipe submitted by TK member Elizabeth of Guilty Kitchen.

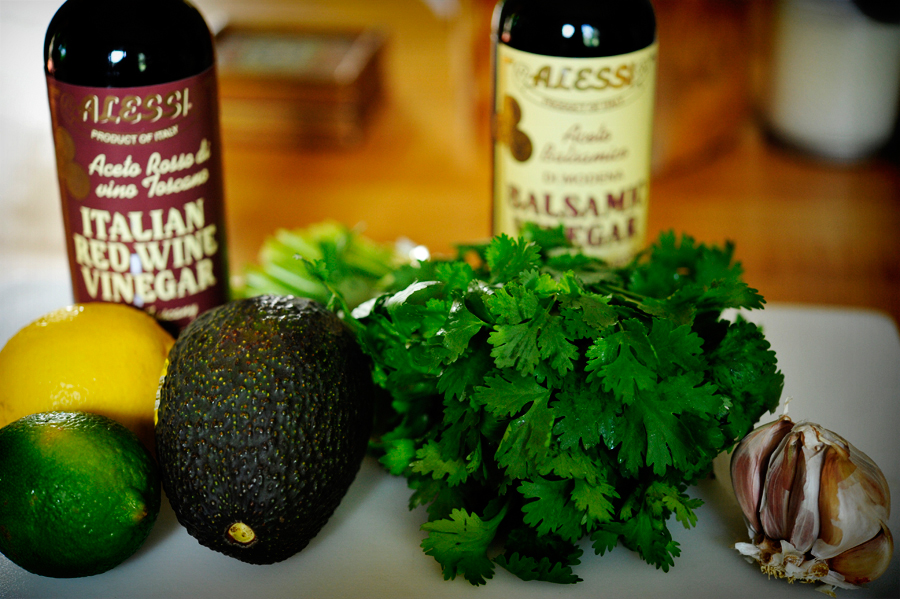
To make it you will need: avocado, cilantro, lemon, lime, red wine vinegar, balsamic vinegar, olive oil and garlic.


Tasty Kitchen Blog: Avocado and Cilantro Dressing. Guest post by Georgia Pellegrini, recipe submitted by TK member Elizabeth of Guilty Kitchen.

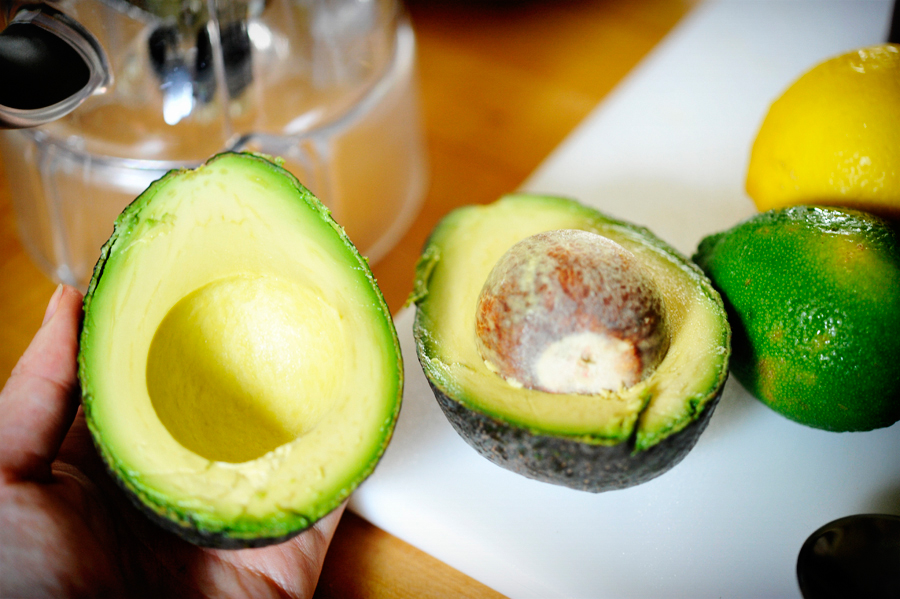
Start by cutting open your avocados.


Tasty Kitchen Blog: Avocado and Cilantro Dressing. Guest post by Georgia Pellegrini, recipe submitted by TK member Elizabeth of Guilty Kitchen.

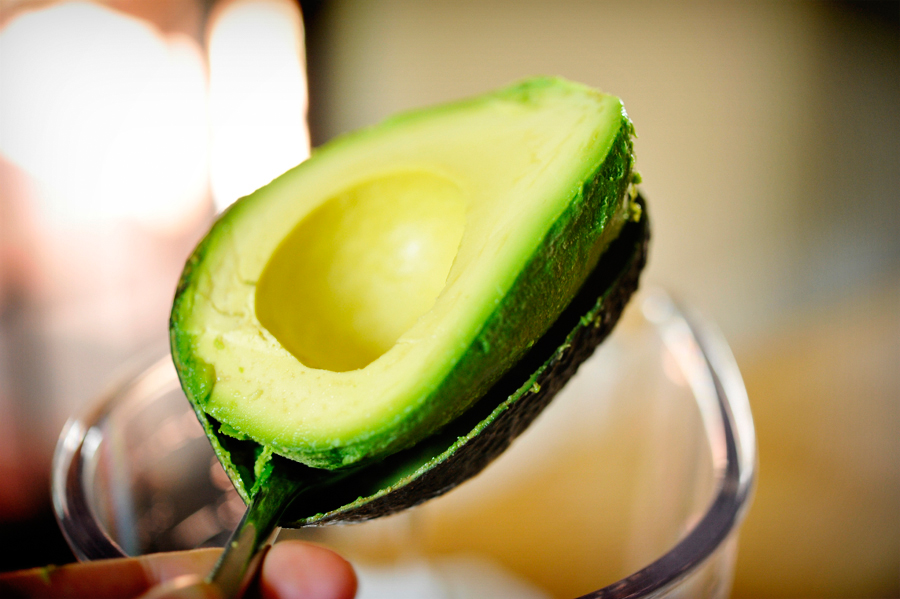
Scoop out the flesh with a big spoon and drop it all in your blender.


Tasty Kitchen Blog: Avocado and Cilantro Dressing. Guest post by Georgia Pellegrini, recipe submitted by TK member Elizabeth of Guilty Kitchen.

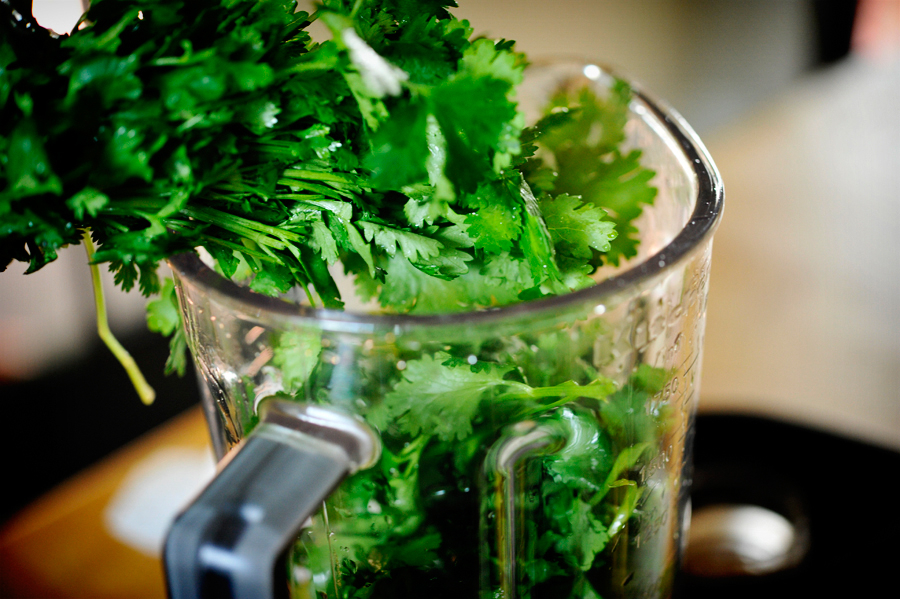
Next add your washed cilantro leaves. Squeeze in some lemon juice too.


Tasty Kitchen Blog: Avocado and Cilantro Dressing. Guest post by Georgia Pellegrini, recipe submitted by TK member Elizabeth of Guilty Kitchen.

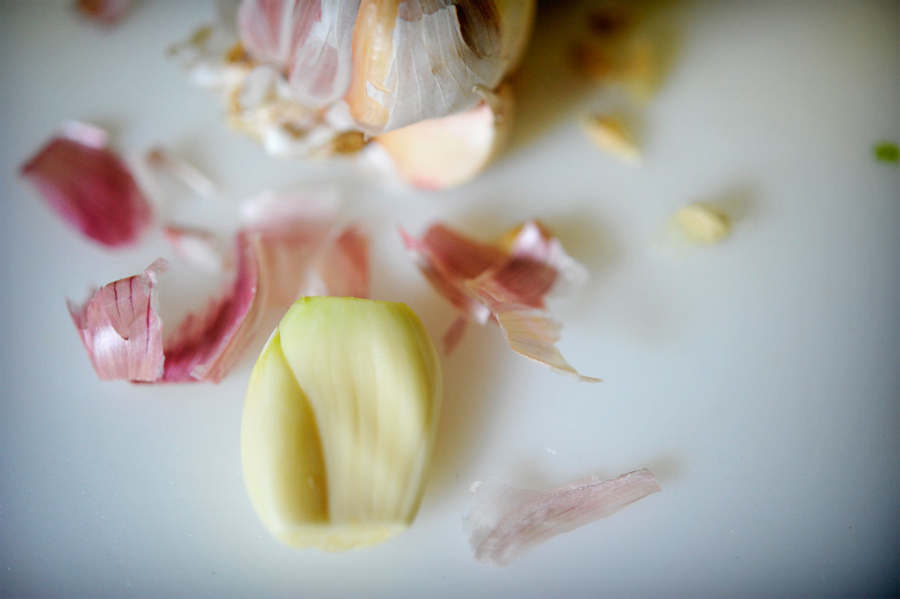
Drop in your garlic cloves. Mmm, garlic. It gets better with time in this dressing as it sits and the flavors develop.


Tasty Kitchen Blog: Avocado and Cilantro Dressing. Guest post by Georgia Pellegrini, recipe submitted by TK member Elizabeth of Guilty Kitchen.

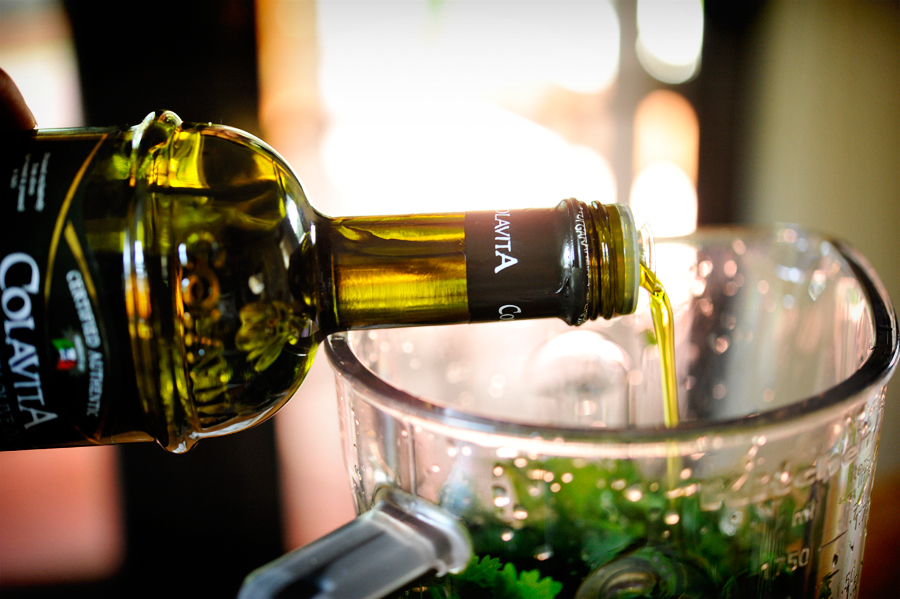
Drizzle in some olive oil.


Tasty Kitchen Blog: Avocado and Cilantro Dressing. Guest post by Georgia Pellegrini, recipe submitted by TK member Elizabeth of Guilty Kitchen.

And the vinegar! Red wine…


Tasty Kitchen Blog: Avocado and Cilantro Dressing. Guest post by Georgia Pellegrini, recipe submitted by TK member Elizabeth of Guilty Kitchen.

And then white or red balsamic. White will be a little sweeter and keep the color lighter.


Tasty Kitchen Blog: Avocado and Cilantro Dressing. Guest post by Georgia Pellegrini, recipe submitted by TK member Elizabeth of Guilty Kitchen.

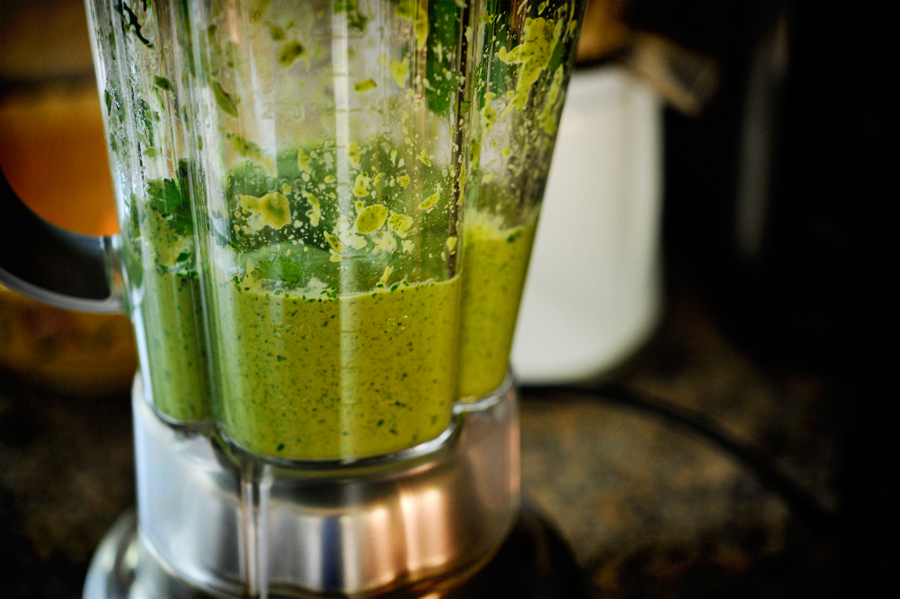
Blend it all together well until it is uniform in texture.


Tasty Kitchen Blog: Avocado and Cilantro Dressing. Guest post by Georgia Pellegrini, recipe submitted by TK member Elizabeth of Guilty Kitchen.

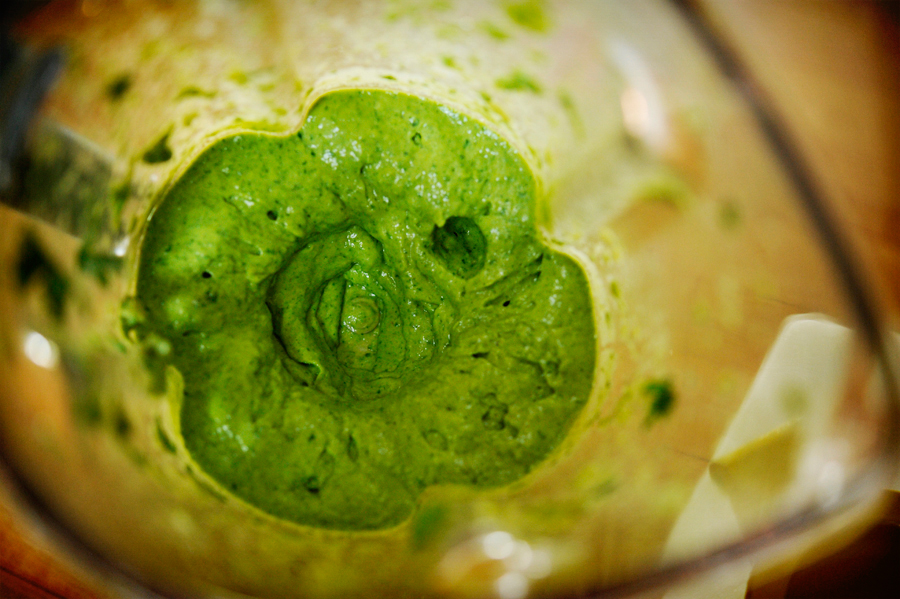
It will be thick, almost like a dip. You can continue to thin it out by adding a dash of water if you’d like. But the thick and fluffy texture is one of its best parts.


Tasty Kitchen Blog: Avocado and Cilantro Dressing. Guest post by Georgia Pellegrini, recipe submitted by TK member Elizabeth of Guilty Kitchen.

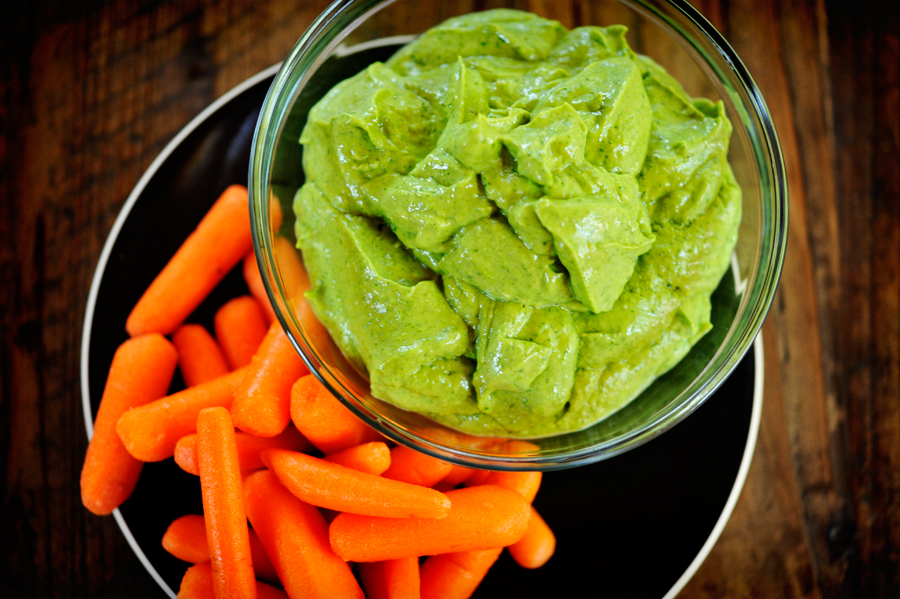
This recipe could also be more than a dressing; it could be a fabulous dip for crudites or you can fold it into a pasta salad. It is tangy and fluffy and light and it gets better as the flavors sit and meld together.

Thanks to Elizabeth for this intoxicating recipe! Visit her blog Guilty Kitchen for more delicious recipes from her Canadian kitchen.


Printable Recipe

Avocado & Cilantro Dressing

See post on guiltykitchen’s site!
2.50 Mitt(s) 2 Rating(s)2 votes, average: 2.50 out of 52 votes, average: 2.50 out of 52 votes, average: 2.50 out of 52 votes, average: 2.50 out of 52 votes, average: 2.50 out of 5

Prep Time:

Cook Time:

Difficulty: Easy

Servings: 12

12
x

Print Options

Page size Letter 3x5 4x6
Text Size Small Medium Large
Content Include description
Include prep time, etc.
Show image

Description

A thick and smooth dressing or dip marrying together cilantro and avocado.

Ingredients

  • 1 whole Large Avocado
  • 1 cup Cilantro; Loosely Packed
  • 1 whole Lime, Juice Only
  • 1 whole Lemon, Juice Only
  • 1 whole Clove Garlic, Grated Or Minced
  • 1 Tablespoon Red Wine Vinegar
  • ¼ cups Extra Virgin Olive Oil
  • ¼ cups White Balsamic Vinegar

Preparation Instructions

1. Scoop out the flesh of the avocado and place in a blender or food processor.
2. Add cilantro, citrus juices, garlic, red wine vinegar and olive oil.
3. Blend on low, adding up to 1 more tablespoon of the red wine vinegar and white balsamic vinegar to taste as you go, until emulsified. You may want to add more olive oil and vinegar/citrus juices to thin out. This dressing is quite thick, but if you add too much liquid, it does take away from the delicate flavour of the avocado.

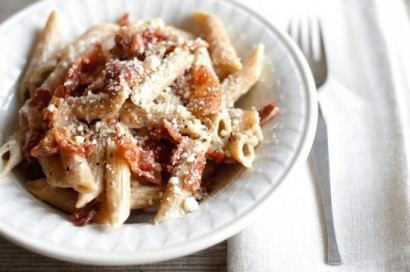
That this dressing is FANTASTIC on pasta salad too.


_______________________________________

There’s so much to say about Georgia, we don’t know where to start. Leaving Wall Street for the French Culinary Institute, followed by a stint at the Gramercy Tavern and La Chassagnette in France, her passion for food and food traditions are evident and inspiring. Visit her site at Georgia Pellegrini, where you’ll find more recipes, photos, learn all about her wonderful books Girl Hunter and Food Heroes, and enjoy her latest adventures.


Profile photo of Betsy (TK)

Back to School Granola Bites and a Lunch Box Giveaway (Winner Announced!)

Posted by in Miscellaneous

The winners of the Pottery Barn Kids lunch boxes are:

#38 Kelley HJ: “My girl loves turkey sausage in her lunch.”
#66 Lynne R: “My grandchildren would love new lunch boxes and they, of course, like anything mommie makes. In theory..”
#183 feistyfilly: “He’s such a good kid, he’d take carrots and apples every day. And pizza if I’d allow it, ha!”

Congratulations! You each win a lunch box in your choice of color and style. Contact [email protected] to claim your sweet loot!

 
Tasty Kitchen Blog: Back to School Granola Bites and a Lunch Box Giveaway!

School is starting! How is that possible? It’s sad to say good-bye to summer, but most of us actually welcome the return to school and a little more routine in our lives. We also start off the year with good intentions for lunch packing organization. We want to keep it interesting but also pack food the kids will actually eat! We love these No-Bake Healthy Granola Bites from TK Member Mel. They’re the perfect addition to a tasty lunch or a great after-school snack. And a little bit of chocolate never hurts!


Tasty Kitchen Blog: Back to School Granola Bites and a Lunch Box Giveaway!

To celebrate the start of school and our grand plans for lunch packing success this year, we’re giving away three (3) lunch bags from Pottery Barn Kids. Winners choice of color and style.

 
TO ENTER

To enter this giveaway, just answer the following question in the Comments section of this post:

“What is your child’s (or your own) favorite thing to take for lunch?”

Shout out your answer below and you’ll automatically be entered to win!

 
THE RULES

One entry per person, please. Contest ends tomorrow at 12PM PST.

Winners will be chosen randomly and announced Sunday.

 
Giveaway sponsored by Tasty Kitchen.


Profile photo of HowSweetEats

Bacon and Blue Cheeseburger Potato Skins

Posted by in Step-by-Step Recipes

Tasty Kitchen Blog: Bacon and Blue Cheeseburger Potato Skins. Guest post by Jessica Merchant of How Sweet It Is, recipe submitted by TK member Dax Phillips of Simple Comfort Food.

 
Oh boy. Do I have a treat for you.

Have you ever had a fabulous bacon and blue cheeseburger? Please say yes. If not, please imagine that you have. Thick and crunchy bacon. Covered in gooey Gorgonzola or Stilton or your blue of choice. And now, imagine that entire combination stuffed into a crispy potato skin. YES. Just like that.

This recipe is like one giant explosion of flavor in your face. It’s fabulous. It’s perfect for a twist on a game day favorite but it also makes for an awesome weekend dinner. And maybe even … a quick breakfast. On the weekend of course. Because you know, calories don’t count on the weekend.

Let’s get started!


Tasty Kitchen Blog: Bacon and Blue Cheeseburger Potato Skins. Guest post by Jessica Merchant of How Sweet It Is, recipe submitted by TK member Dax Phillips of Simple Comfort Food.

While complex in flavor, these are actually super simple. All you need are four potatoes, a bit of butter, bacon, browned ground beef and blue cheese. Oh, and some good old salt and pepper.

First up, poke the tops of each potato with a fork a few times and bake for about one hour. Do something fun during that time, like paint your nails! Or clean. Whatever.


Tasty Kitchen Blog: Bacon and Blue Cheeseburger Potato Skins. Guest post by Jessica Merchant of How Sweet It Is, recipe submitted by TK member Dax Phillips of Simple Comfort Food.

After the potatoes have baked, let them cool until you can touch them. In the meantime, you can fry up some bacon. Never heard any complaints about that one …


Tasty Kitchen Blog: Bacon and Blue Cheeseburger Potato Skins. Guest post by Jessica Merchant of How Sweet It Is, recipe submitted by TK member Dax Phillips of Simple Comfort Food.

Afterwards, let it drain and cool on a paper towel, then crumble it up. You know the drill: Make a few extra slices because you know you’re going to be eating it. I hope.


Tasty Kitchen Blog: Bacon and Blue Cheeseburger Potato Skins. Guest post by Jessica Merchant of How Sweet It Is, recipe submitted by TK member Dax Phillips of Simple Comfort Food.

Once the potatoes are cool, you are going to cut them into thirds. Slice them lengthwise and discard the centers. Save all that extra starch for breakfast or something. You are going to have some bacon grease anyway.


Tasty Kitchen Blog: Bacon and Blue Cheeseburger Potato Skins. Guest post by Jessica Merchant of How Sweet It Is, recipe submitted by TK member Dax Phillips of Simple Comfort Food.

Once you have the ends of each potato, you want to scoop out some of the flesh. FYI, if you have a serrated spoon (like a grapefruit spoon), I find that these work so well. Love ‘em!


Tasty Kitchen Blog: Bacon and Blue Cheeseburger Potato Skins. Guest post by Jessica Merchant of How Sweet It Is, recipe submitted by TK member Dax Phillips of Simple Comfort Food.

Brush the tops and bottoms of each ‘tater skin with melted butter, then cover in a little salt and pepper. Place on a baking sheet and throw under the broiler for close to 10 minutes, until they get all crispy.


Tasty Kitchen Blog: Bacon and Blue Cheeseburger Potato Skins. Guest post by Jessica Merchant of How Sweet It Is, recipe submitted by TK member Dax Phillips of Simple Comfort Food.

When you remove them, the butter will be bubbling and it’s almost like a giant potato chip. Ugh. So hard to resist.


Tasty Kitchen Blog: Bacon and Blue Cheeseburger Potato Skins. Guest post by Jessica Merchant of How Sweet It Is, recipe submitted by TK member Dax Phillips of Simple Comfort Food.

Now comes the fun part. Fill each skin with a few spoonfuls of ground beef.


Tasty Kitchen Blog: Bacon and Blue Cheeseburger Potato Skins. Guest post by Jessica Merchant of How Sweet It Is, recipe submitted by TK member Dax Phillips of Simple Comfort Food.

Then top that off with some bacon.


Tasty Kitchen Blog: Bacon and Blue Cheeseburger Potato Skins. Guest post by Jessica Merchant of How Sweet It Is, recipe submitted by TK member Dax Phillips of Simple Comfort Food.

And finally, a few handfuls of crumbled blue.


Tasty Kitchen Blog: Bacon and Blue Cheeseburger Potato Skins. Guest post by Jessica Merchant of How Sweet It Is, recipe submitted by TK member Dax Phillips of Simple Comfort Food.

Back under the broiler they go!


Tasty Kitchen Blog: Bacon and Blue Cheeseburger Potato Skins. Guest post by Jessica Merchant of How Sweet It Is, recipe submitted by TK member Dax Phillips of Simple Comfort Food.

After a few minutes under the heat, remove the baking sheet. Oh my gosh. Not gonna lie. I scraped that baking sheet clean.


Tasty Kitchen Blog: Bacon and Blue Cheeseburger Potato Skins. Guest post by Jessica Merchant of How Sweet It Is, recipe submitted by TK member Dax Phillips of Simple Comfort Food.

Top with a bit more crumbled blue …


Tasty Kitchen Blog: Bacon and Blue Cheeseburger Potato Skins. Guest post by Jessica Merchant of How Sweet It Is, recipe submitted by TK member Dax Phillips of Simple Comfort Food.

And go to town.

As you can imagine, these were truly insane. So few ingredients but so much flavor. Potato skins have always been a huge favorite of mine, albeit if only for nostalgic reasons, given it was one of my grandmother’s favorite treats. This was SUCH a fun twist on the original. Thanks so much to Dax for the fun recipe! Be sure to check out his blog, Simple Comfort Food, where he features tons of other mouthwatering meals.


Printable Recipe

Bacon and Blue Cheeseburger Potato Skins

See post on Dax Phillips’s site!
0.00 Mitt(s) 0 Rating(s)0 votes, average: 0.00 out of 50 votes, average: 0.00 out of 50 votes, average: 0.00 out of 50 votes, average: 0.00 out of 50 votes, average: 0.00 out of 5

Prep Time:

Cook Time:

Difficulty: Easy

Servings: 6

6
x

Print Options

Page size Letter 3x5 4x6
Text Size Small Medium Large
Content Include description
Include prep time, etc.
Show image

Description

A simple twist on a classic loaded potato skin. Introducing a bit of ground beef and double cream blue cheese puts this one over the top.

Ingredients

  • 4 whole Russet Potatoes, Cleaned
  • 6 slices Nueske’s (or Your Favorite) Bacon
  • 3 Tablespoons Unsalted Butter, melted
  • 1 teaspoon Salt To Taste
  • 1 teaspoon Cracked Black Pepper, To Taste
  • ¼ pounds Ground Beef, Browned
  • ½ cups Great Blue Cheese, I Used Hook’s Blue Paradise

Preparation Instructions

Begin by preheating your oven to 400 F. Poke the top of each potato with a fork and place on a baking sheet. Cook in the oven for 1 hour. Once cooked, remove potatoes from the baking sheet and place them on a plate to cool for about 15 minutes.

Cook your bacon in a skillet on low heat for about 15-20 minutes. The low and slow process, in my opinion, is the only way to cook bacon as it really yields perfect bacon every time. Remove the bacon from the skillet and drain it on some paper towels before you crumble it.

Once your potatoes are cooled, use a sharp bread knife and cut them lengthwise. For each potato you’ll have three long segments—two nice rounded sections, one from each side for the skins and one thin cutout from the center. Place the middle slice in a bowl for later use, such as breakfast the following morning. Or heck for that matter, add some butter, salt, and cream, and make some rustic mashed potatoes.

Continue this cutting process with the rest of the potatoes. You should then have 8 skins. With a small spoon, carefully scoop out about 70 percent of the potato. You still want some potato near the skin, to hold the structure of your boat.

Next, melt your butter in the microwave. Get your broiler heated to high. Brush the butter on the inside and outside of each potato skin and place them back onto the baking sheet. Season the inside of each skin with salt and pepper.

Place them under the broiler for 8-10 minutes until the insides get a bit crispy from the melted butter. Pull them out of the oven and place generous amounts of the cooked ground beef into each skin, topping with bacon pieces and about one tablespoon of blue cheese for each skin. Place these back under the broiler for about 3-4 minutes until the cheese is nice and bubbly. Carefully remove from the oven, top with just a bit more blue cheese, and get ready for a flavor of explosion.

Serve on a platter and have your guests dig in. The subtle crisp from the exterior of the potato skin, with the tenderness of the potato on the inside will satisfy your french fry craving. Then your burger fix comes in with just the right balance of bacon and sharp creaminess from the blue cheese. Small in size and packed with flavor, these skins definitely satisfied my craving for a burger. If you are a fan of blue cheese on your burger, definitely make these. You will be happy you did!


_______________________________________

Jessica Merchant is a personal trainer turned food writer and blogger. Her blog, How Sweet Eats, is where she proclaims her love for all things sweet, all things bacon, and everything else in between. She works her magic in her Pittsburgh kitchen, which she shares with her husband of 2 years.


Profile photo of Erica Lea

Bacon and Parmesan Pasta

Posted by in Step-by-Step Recipes

Tasty Kitchen Blog: Bacon and Parmesan Pasta. Guest post by Erica Kastner of Cooking for Seven, recipe submitted by TK member Trish Boese.

 
Bacon. Parmesan cheese. Cream cheese. Heavy cream. Oh yes. This stuff is good. This recipe, brought to us by Trish Boese, brings together some of the most enticing ingredients known to man into an easy, irresistible dish.

It was hard to keep my fork out of the pot before serving the pasta. Even my little brother, who dislikes bacon, loved it. Let me show you how it’s done:


Tasty Kitchen Blog: Bacon and Parmesan Pasta. Guest post by Erica Kastner of Cooking for Seven, recipe submitted by TK member Trish Boese.

Here’s what you’ll need: bacon (yes, a whole pound) crushed red pepper flakes, penne pasta (I used whole wheat), heavy cream, cream cheese, grated Parmesan, eggs, and freshly ground black pepper.


Tasty Kitchen Blog: Bacon and Parmesan Pasta. Guest post by Erica Kastner of Cooking for Seven, recipe submitted by TK member Trish Boese.

Begin by frying the bacon. Sprinkle with the crushed red pepper flakes. When the bacon is cooked (I like mine just on this side of crispy), roughly chop and set aside.


Tasty Kitchen Blog: Bacon and Parmesan Pasta. Guest post by Erica Kastner of Cooking for Seven, recipe submitted by TK member Trish Boese.

Bring a pot of water to boil. Salt the water.


Tasty Kitchen Blog: Bacon and Parmesan Pasta. Guest post by Erica Kastner of Cooking for Seven, recipe submitted by TK member Trish Boese.

Add the pasta and cook until done (it took about 12 minutes for the whole wheat Penne to cook to al dente).


Tasty Kitchen Blog: Bacon and Parmesan Pasta. Guest post by Erica Kastner of Cooking for Seven, recipe submitted by TK member Trish Boese.

Meanwhile, place the cream cheese and cream in a small saucepan.


Tasty Kitchen Blog: Bacon and Parmesan Pasta. Guest post by Erica Kastner of Cooking for Seven, recipe submitted by TK member Trish Boese.

Heat over low until the cream cheese is melted. Whisk until smooth.


Tasty Kitchen Blog: Bacon and Parmesan Pasta. Guest post by Erica Kastner of Cooking for Seven, recipe submitted by TK member Trish Boese.

Remove from heat. Add the parmesan, eggs, and pepper. Whisk.


Tasty Kitchen Blog: Bacon and Parmesan Pasta. Guest post by Erica Kastner of Cooking for Seven, recipe submitted by TK member Trish Boese.

Drain the pasta and reserve 1/2 cup of the water. Place pasta in a large bowl (or return to the pot). Immediately add the white sauce and toss. The hot pasta will cook the eggs. Add the bacon and toss. Add a little pasta water, if needed, to loosen the sauce.


Tasty Kitchen Blog: Bacon and Parmesan Pasta. Guest post by Erica Kastner of Cooking for Seven, recipe submitted by TK member Trish Boese.

Serve with extra Parmesan cheese and freshly ground black pepper.


Tasty Kitchen Blog: Bacon and Parmesan Pasta. Guest post by Erica Kastner of Cooking for Seven, recipe submitted by TK member Trish Boese.

Notes: The flavors in this recipe were excellent and even improved the next day. Next time I will probably make more sauce. I didn’t serve the pasta immediately, so it soaked up quite a bit of the sauce. Also, I thought it could use a tad more salt.


Tasty Kitchen Blog: Bacon and Parmesan Pasta. Guest post by Erica Kastner of Cooking for Seven, recipe submitted by TK member Trish Boese.

Thank you, Trish, for sharing this delicious recipe.


Printable Recipe

Bacon and Parmesan Pasta

4.56 Mitt(s) 30 Rating(s)30 votes, average: 4.56 out of 530 votes, average: 4.56 out of 530 votes, average: 4.56 out of 530 votes, average: 4.56 out of 530 votes, average: 4.56 out of 5

Prep Time:

Cook Time:

Difficulty: Easy

Servings: 4

4
x

Print Options

Page size Letter 3x5 4x6
Text Size Small Medium Large
Content Include description
Include prep time, etc.
Show image

Description

A break from the standard tomato or creamy white sauce – ingredients can be added depending on what you have in the kitchen.

Ingredients

  • 1 pound Bacon
  • ¼ teaspoons Crushed Red Pepper Flakes
  • 1 pound Rigatoni Or Penne Pasta
  • ½ cups Heavy Cream
  • ¼ cups Cream Cheese
  • ¼ cups Grated Parmesan Cheese
  • 2 whole Eggs
  • ¼ teaspoons Freshly Ground Black Pepper

Preparation Instructions

In a skillet, fry the bacon. Sprinkle with red pepper flakes. When done, remove bacon until cool enough to handle and roughly chop.

Meanwhile, cook the pasta in boiling salted water until done (according to package instructions).

Place cream and cream cheese in a small saucepan. Heat over low until cream cheese is melted, and whisk until smooth. Remove from heat. Add the parmesan cheese, eggs, and pepper and whisk until blended.

Drain pasta (reserving 1/2 cup of hot water) and return to pot. Immediately add the white sauce and toss to coat. The hot pasta will cook the eggs. Stir in the bacon, and add some reserved pasta water if needed to loosen the sauce.


_______________________________________

Erica Berge shares her wonderful recipes and amazing food photography on her blog, Cooking for Seven. She also writes about crafts and posts more of her beautiful photography in her personal blog, EricaLea.com. There really isn’t much that this amazing young lady can’t do, and we’re thrilled she does some of it here.


Profile photo of Erica Lea

Bacon, Cheddar and Chive Scones

Posted by in Baking, Step-by-Step Recipes

  Oh boy. You’re in for a real treat. Bacon. Cheddar cheese. Fresh chives. Heavy cream. Today’s recipe (brought to us by Tasty Kitchen member  Schnoodle Soup via King Arthur Flour) is comfort food with a hint of sophisticated flare. I was expecting these scones to be good; perhaps great. But they are more than that—they’re simply…

Profile photo of HowSweetEats

Bacon Cheddar Bubble Bread

Posted by in Baking, Step-by-Step Recipes

With one look at this title, I knew the recipe would be a winner. Let's be honest: bacon + cheddar + bread? Who in the world could go wrong with that? I couldn't have found this at a more perfect time with the start of football season and knew it would be a great game day snack. I also had so much success with Rebecca's General Tso's Chicken that I was already…

Profile photo of georgiapellegrini

Bacon Horseradish Deviled Eggs

Posted by in Step-by-Step Recipes

  I am kind of a sucker for deviled eggs. Eggs in general I love, but I especially like the possibilities for flavoring and filling the yolks. Deviled eggs are little bites of bliss and a great party food. These Bacon Horseradish Deviled Eggs from TK member Carrie were spectacular. The smokiness from the bacon […]

Profile photo of Laurie - Simply Scratch

Bacon Jam (Ooh Mommy!)

Posted by in Step-by-Step Recipes

Did someone say International Bacon Day? You mean that’s just one special day and not every single pork-loving day? Celebrate with this blast from the past: Bacon Jam. It’s spreadable bacon, friends. Yes. We know. You’re welcome.     From the very second my eyes laid upon Rebecca’s recipe for Bacon Jam aka “Ooh Mommy”…