The Pioneer Woman Tasty Kitchen
Profile photo of cookincanuck

Banana, Peanut Butter and Honey Muffins

Posted by in Baking, Step-by-Step Recipes

Tasty Kitchen Blog: Banana, Peanut Butter and Honey Muffins. Guest post by Dara Michalski of Cookin' Canuck, recipe submitted by TK member Laura of Tutti Dolci.

 
When I was a kid, my mum carefully tucked a sandwich into my lunchbox each day. Often it was turkey and cucumber, ham and cheese, or the always-dreaded tuna fish. Not that I didn’t like tuna fish; I just didn’t enjoy sitting in the lunchroom version of Siberia with my odiferous sandwich. If I wanted to sit with the popular kids, peanut butter was where it was at. However, I wasn’t a peanut butter and jelly kind of gal. My favorite combination was peanut butter and banana, with a drizzle of honey.

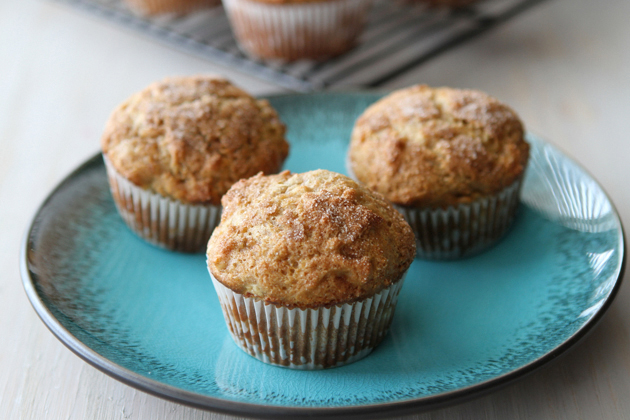
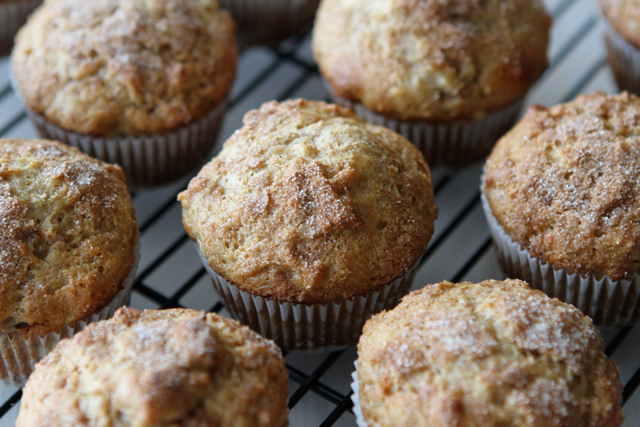
When I saw this recipe for Banana, Peanut Butter and Honey Muffins by Tasty Kitchen member Laura, I was whisked back to childhood. These muffins are moist, flavorful and lightly sweetened. These would definitely keep me at the popular table in the lunchroom.

Let’s move on to the recipe.


Tasty Kitchen Blog: Banana, Peanut Butter and Honey Muffins. Guest post by Dara Michalski of Cookin' Canuck, recipe submitted by TK member Laura of Tutti Dolci.

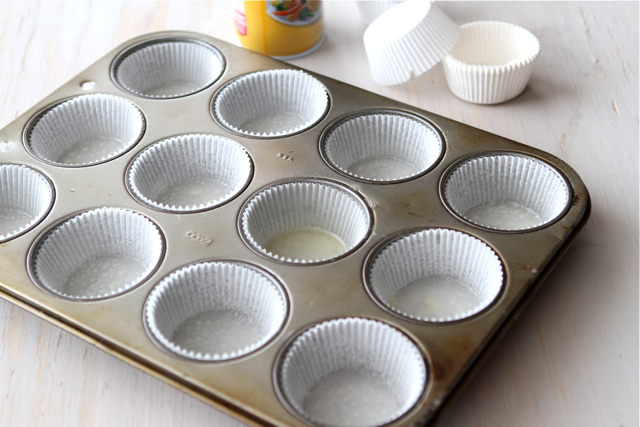
Preheat oven to 375ºF. Line a 12-cup muffin tin with baking cups and coat each baking cup lightly with cooking spray. Set aside.


Tasty Kitchen Blog: Banana, Peanut Butter and Honey Muffins. Guest post by Dara Michalski of Cookin' Canuck, recipe submitted by TK member Laura of Tutti Dolci.

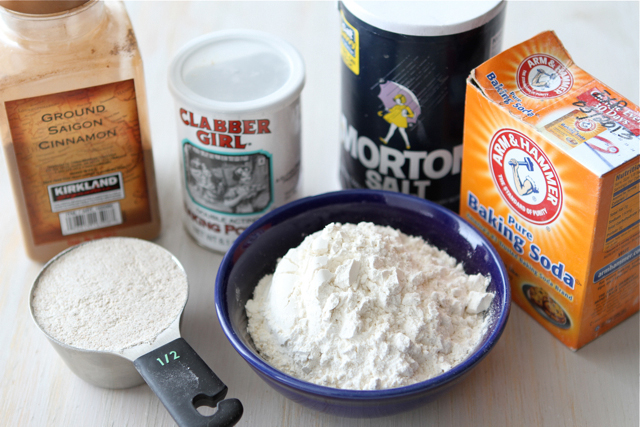
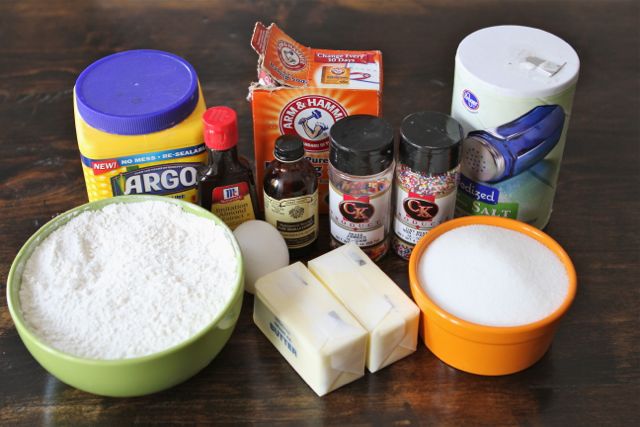
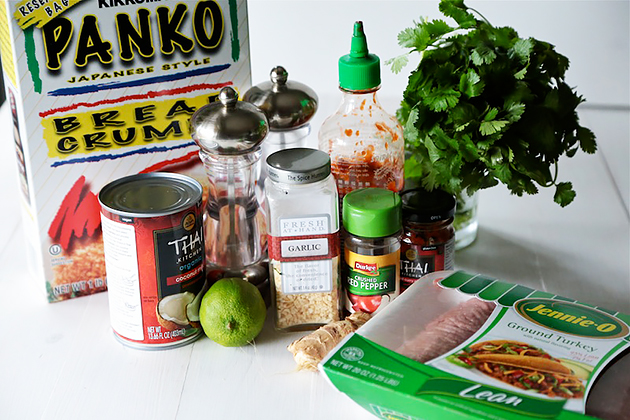
These are the ingredients you’ll need for the first step.


Tasty Kitchen Blog: Banana, Peanut Butter and Honey Muffins. Guest post by Dara Michalski of Cookin' Canuck, recipe submitted by TK member Laura of Tutti Dolci.

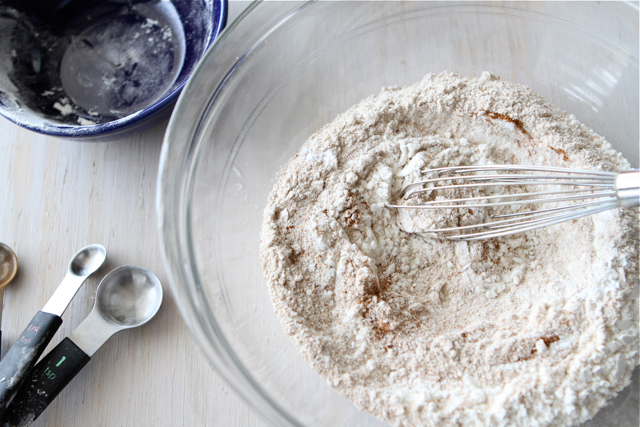
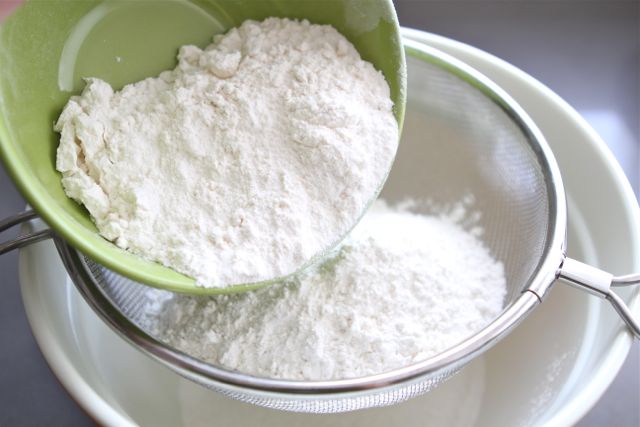
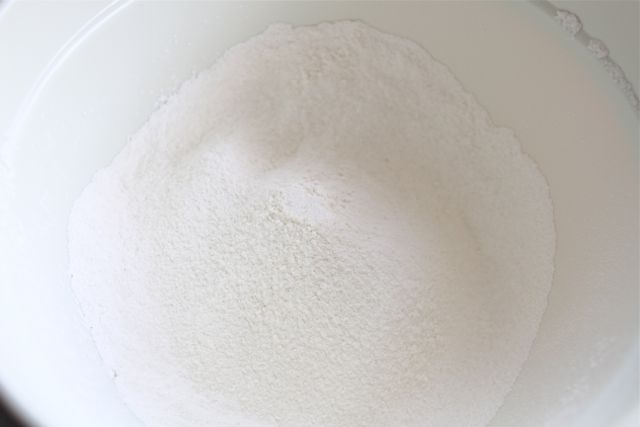
In a large bowl, whisk together all-purpose flour, whole wheat flour, baking powder, baking soda and ½ teaspoon cinnamon. Make a well in the center of the mixture.


Tasty Kitchen Blog: Banana, Peanut Butter and Honey Muffins. Guest post by Dara Michalski of Cookin' Canuck, recipe submitted by TK member Laura of Tutti Dolci.

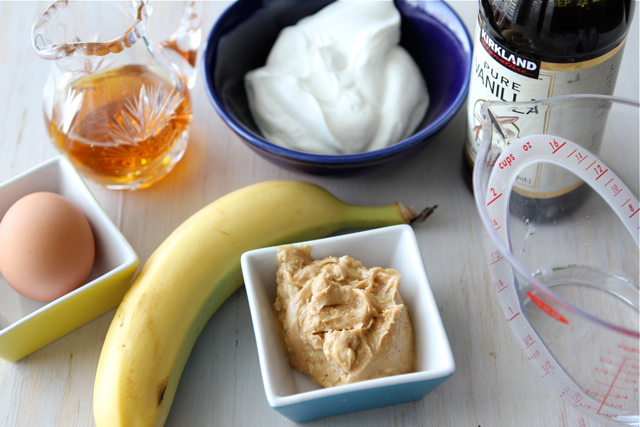
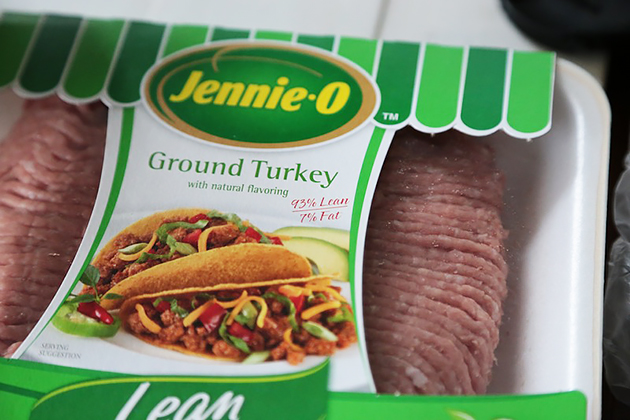
And these are the ingredients you’ll need for the next step.


Tasty Kitchen Blog: Banana, Peanut Butter and Honey Muffins. Guest post by Dara Michalski of Cookin' Canuck, recipe submitted by TK member Laura of Tutti Dolci.

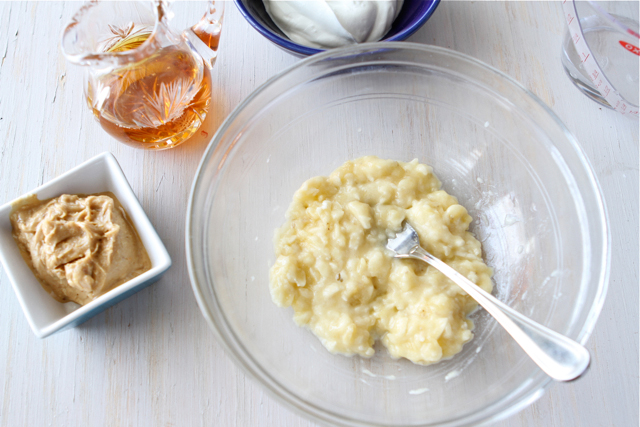
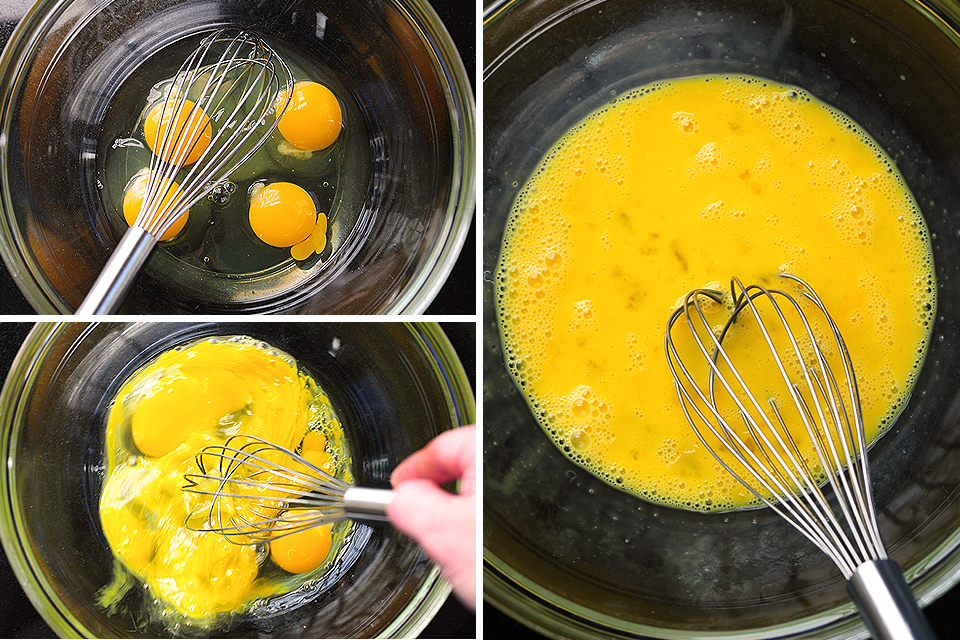
In a medium bowl, mash the banana with the back of a fork.


Tasty Kitchen Blog: Banana, Peanut Butter and Honey Muffins. Guest post by Dara Michalski of Cookin' Canuck, recipe submitted by TK member Laura of Tutti Dolci.

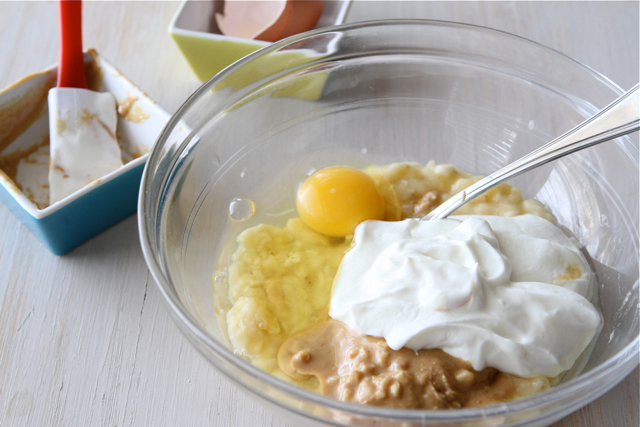
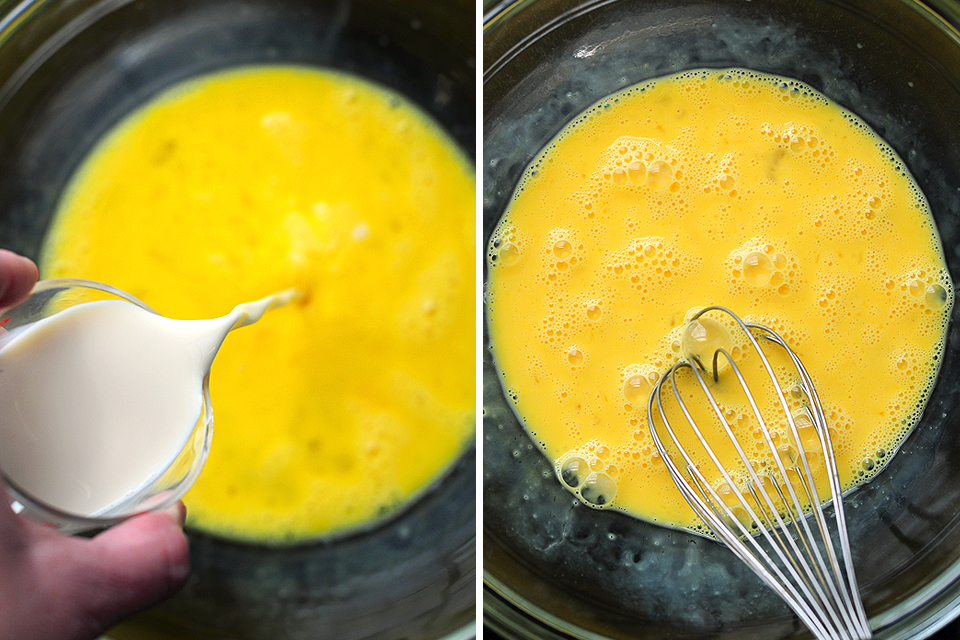
Add yogurt, egg, water and peanut butter.


Tasty Kitchen Blog: Banana, Peanut Butter and Honey Muffins. Guest post by Dara Michalski of Cookin' Canuck, recipe submitted by TK member Laura of Tutti Dolci.

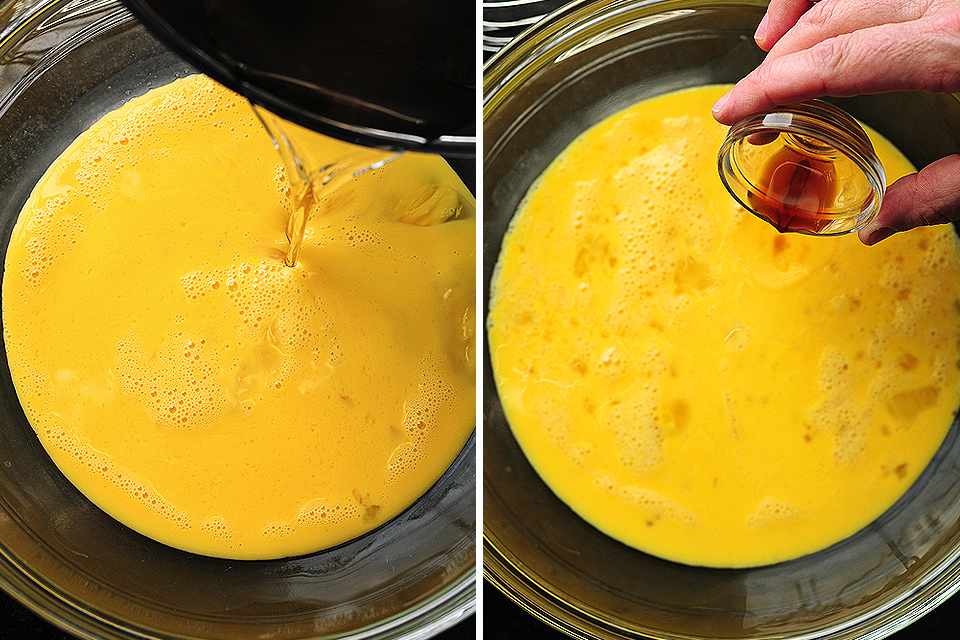
Add honey and vanilla, and stir until combined. Pour the yogurt mixture into the well of the flour mixture.


Tasty Kitchen Blog: Banana, Peanut Butter and Honey Muffins. Guest post by Dara Michalski of Cookin' Canuck, recipe submitted by TK member Laura of Tutti Dolci.

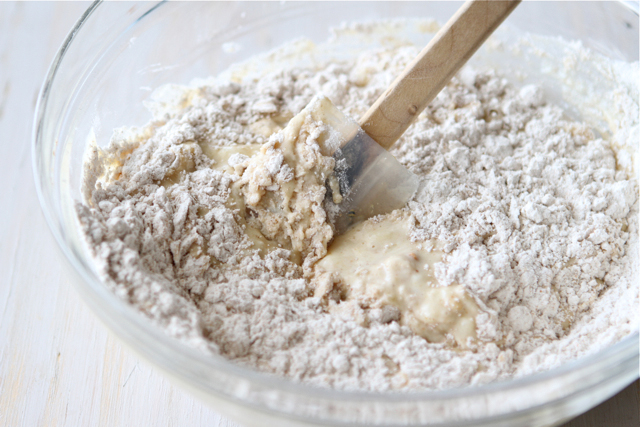
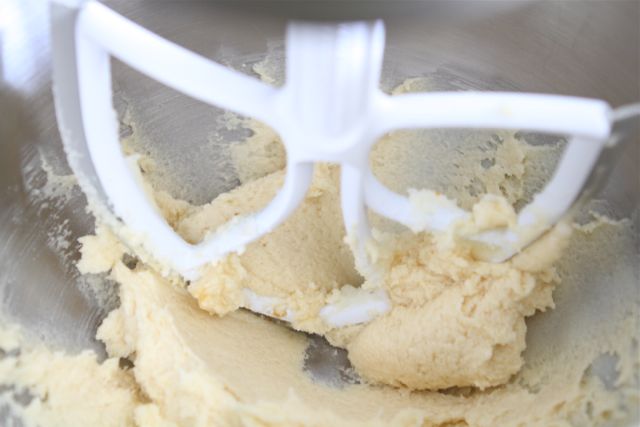
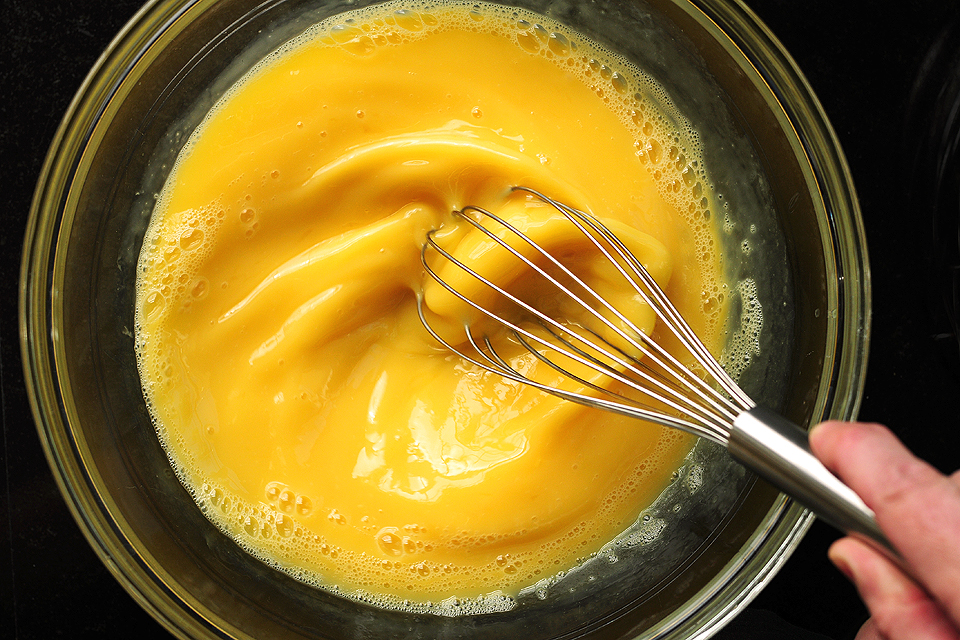
Mix together until just combined. Do not overmix or the muffins will be tough. Nobody likes tough muffins. The batter will be thick.


Tasty Kitchen Blog: Banana, Peanut Butter and Honey Muffins. Guest post by Dara Michalski of Cookin' Canuck, recipe submitted by TK member Laura of Tutti Dolci.

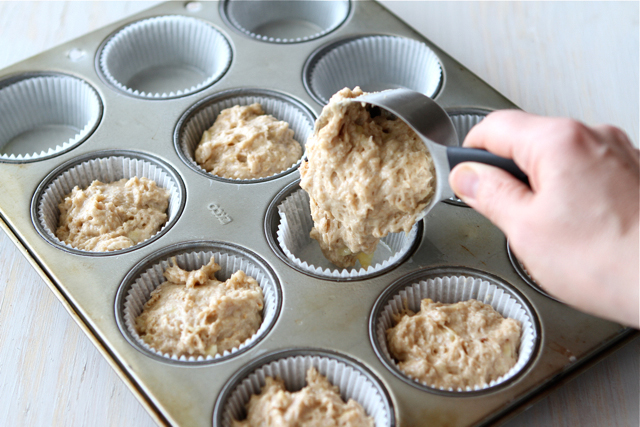
Fill each muffin cup 3/4 full of batter.


Tasty Kitchen Blog: Banana, Peanut Butter and Honey Muffins. Guest post by Dara Michalski of Cookin' Canuck, recipe submitted by TK member Laura of Tutti Dolci.

In a small bowl, mix together granulated sugar and the remaining cinnamon.


Tasty Kitchen Blog: Banana, Peanut Butter and Honey Muffins. Guest post by Dara Michalski of Cookin' Canuck, recipe submitted by TK member Laura of Tutti Dolci.

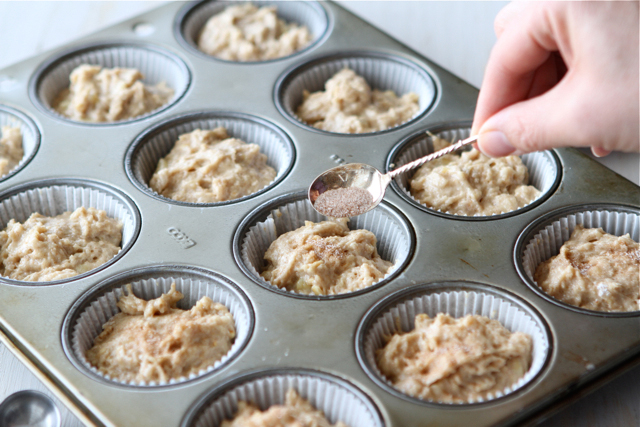
Sprinkle the cinnamon sugar mixture on the tops of the muffins.


Tasty Kitchen Blog: Banana, Peanut Butter and Honey Muffins. Guest post by Dara Michalski of Cookin' Canuck, recipe submitted by TK member Laura of Tutti Dolci.

Bake until a toothpick inserted in the center comes out clean, about 15 minutes.

Set the muffin tin on a wire rack and let the muffins cool in the pan for a few minutes. Remove from the pan and let cool completely. If you can’t wait, eat one warm. I highly recommend this!


Tasty Kitchen Blog: Banana, Peanut Butter and Honey Muffins. Guest post by Dara Michalski of Cookin' Canuck, recipe submitted by TK member Laura of Tutti Dolci.

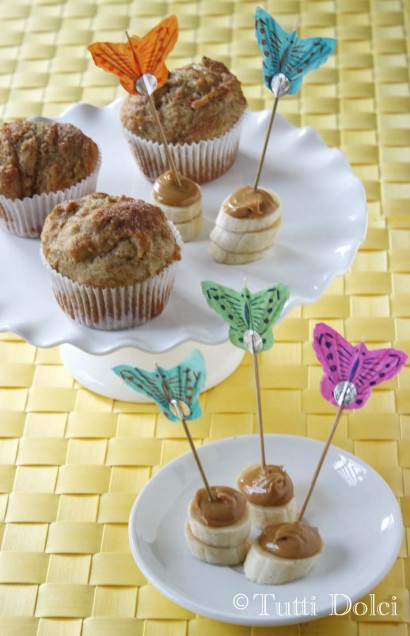
Thanks so much to Laura for this recipe. Be sure to check out Laura’s blog, Tutti Dolci. As the title suggests, it is filled with all sorts of delectable sweets.


Printable Recipe

Banana, Peanut Butter & Honey Muffins

See post on Laura | Tutti Dolci’s site!
4.50 Mitt(s) 4 Rating(s)4 votes, average: 4.50 out of 54 votes, average: 4.50 out of 54 votes, average: 4.50 out of 54 votes, average: 4.50 out of 54 votes, average: 4.50 out of 5

Prep Time:

Cook Time:

Difficulty: Easy

Servings: 12

12
x

Print Options

Page size Letter 3x5 4x6
Text Size Small Medium Large
Content Include description
Include prep time, etc.
Show image

Description

All the elements of an open-faced peanut butter and honey sandwich, in muffin form!

Ingredients

  • 1-¼ cup Flour
  • ½ cups Whole Wheat Flour
  • 1 teaspoon Baking Powder
  • 1 teaspoon Baking Soda
  • ¼ teaspoons Salt
  • ½ teaspoons Cinnamon
  • 1 whole Ripe Banana, Mashed
  • ⅔ cups Plain Fat Free Yogurt
  • 1 whole Large Egg, Lightly Beaten
  • ¼ cups Water
  • ⅓ cups Creamy Peanut Butter
  • ⅓ cups Honey
  • 1 teaspoon Vanilla
  • 2 teaspoons Sugar
  • ¼ teaspoons Cinnamon

Preparation Instructions

Preheat oven to 375°F and line a 12-cup standard muffin pan with baking cups then coat baking cups with cooking spray. Set aside.

Whisk together flours, baking powder, baking soda, salt and 1/2 teaspoon of cinnamon in a large bowl. Make a well in the center of the mixture.

Combine banana, yogurt, egg, water, peanut butter, honey and vanilla in a medium-sized bowl. Whisk to combine. Add this wet mixture into the well that you made in the center of the flour mixture and stir just until combined. The batter will be thick.

Fill each baking cup 3/4 full of batter. In a small bowl, mix together the sugar and 1/4 teaspoon of cinnamon. Sprinkle evenly over the top of the muffins.

Bake for 15 minutes, until a toothpick inserted in the center comes out clean. Let muffins cool in pan set on a wire rack for 2 minutes before removing them from the pan to serve warm or cool completely. Store muffins in an airtight container at room temperature up to 2 days.


_______________________________________

Dara Michalski is a doll and a sweetheart who clearly knows her way around the kitchen. She blogs at Cookin’ Canuck, where she shares her flavor-packed recipes and fun, engaging writing. The photography’s pretty incredible, too.


Profile photo of twopeasandtheirpod

Funfetti Cookies

Posted by in Baking, Step-by-Step Recipes

Tasty Kitchen Blog: Funfetti Cookies. Guest post by Maria Lichty of Two Peas and Their Pod, recipe submitted by TK member Julia of Fat Girl Trapped in a Skinny Body.

 
If I am asked to bring a food item to a party, I always sign up for dessert. I usually choose to make cookies, because they are my life and everyone likes cookies. When I saw these Funfetti Cookies (recipe adapted from Yammie’s Noshery’s Funfetti Whoopie Pies) pop up on Tasty Kitchen from member Julia, I knew they would be perfect cookies for my friend’s baby shower. Funfetti Cookies are perfect for any party and I love that these cookies are made from scratch. No box mix is involved, but they are still easy peasy! 


Tasty Kitchen Blog: Funfetti Cookies. Guest post by Maria Lichty of Two Peas and Their Pod, recipe submitted by TK member Julia of Fat Girl Trapped in a Skinny Body.

To make the cookies, you need the following ingredients: butter, sugar, vanilla and almond extract, egg, flour, cornstarch, baking soda, salt, rainbow Jimmie sprinkles, and nonpareil sprinkles. 


Tasty Kitchen Blog: Funfetti Cookies. Guest post by Maria Lichty of Two Peas and Their Pod, recipe submitted by TK member Julia of Fat Girl Trapped in a Skinny Body.

Preheat the oven to 375ºF. Using a mixer, cream the butter and sugar together until fluffy. Add the vanilla, almond extract, and egg. Beat until combined. 


Tasty Kitchen Blog: Funfetti Cookies. Guest post by Maria Lichty of Two Peas and Their Pod, recipe submitted by TK member Julia of Fat Girl Trapped in a Skinny Body.

In a separate bowl, sift together the flour, cornstarch, baking soda, and salt. 


Tasty Kitchen Blog: Funfetti Cookies. Guest post by Maria Lichty of Two Peas and Their Pod, recipe submitted by TK member Julia of Fat Girl Trapped in a Skinny Body.

Whisk to combine.


Tasty Kitchen Blog: Funfetti Cookies. Guest post by Maria Lichty of Two Peas and Their Pod, recipe submitted by TK member Julia of Fat Girl Trapped in a Skinny Body.

Slowly add the flour mixture to the butter mixture. Mix on low speed until just combined. 


Tasty Kitchen Blog: Funfetti Cookies. Guest post by Maria Lichty of Two Peas and Their Pod, recipe submitted by TK member Julia of Fat Girl Trapped in a Skinny Body.

Add in the sprinkles. 


Tasty Kitchen Blog: Funfetti Cookies. Guest post by Maria Lichty of Two Peas and Their Pod, recipe submitted by TK member Julia of Fat Girl Trapped in a Skinny Body.

Carefully stir in the sprinkles, making sure they don’t bleed into the cookie dough. 


Tasty Kitchen Blog: Funfetti Cookies. Guest post by Maria Lichty of Two Peas and Their Pod, recipe submitted by TK member Julia of Fat Girl Trapped in a Skinny Body.

Using an ice cream scoop, scoop cookie dough onto cookie sheets, about 1 1/2 inches apart. Bake for about 15 minutes. 


Tasty Kitchen Blog: Funfetti Cookies. Guest post by Maria Lichty of Two Peas and Their Pod, recipe submitted by TK member Julia of Fat Girl Trapped in a Skinny Body.

Cool cookies on a wire rack. 


Tasty Kitchen Blog: Funfetti Cookies. Guest post by Maria Lichty of Two Peas and Their Pod, recipe submitted by TK member Julia of Fat Girl Trapped in a Skinny Body.

Store cookies in an airtight container.


Tasty Kitchen Blog: Funfetti Cookies. Guest post by Maria Lichty of Two Peas and Their Pod, recipe submitted by TK member Julia of Fat Girl Trapped in a Skinny Body.

Funfetti cookies sure are fun to make and eat! The sugar cookies are soft and filled with colorful sprinkles. I loved the slight sweet crunch the sprinkles added. They are delicious right out of the oven, but keep well too. So if you need to make them in advance for a party, you can. They will keep in an airtight container for up to four days. 


Tasty Kitchen Blog: Funfetti Cookies. Guest post by Maria Lichty of Two Peas and Their Pod, recipe submitted by TK member Julia of Fat Girl Trapped in a Skinny Body.

These cookies are perfect for any celebration: birthday parties, showers, summer barbecues, etc. Everyone loves them! And if you don’t have a party to go to, don’t worry, you can still bake these cookies. A freshly baked batch of Funfetti Cookies is sure to get a party started!  

Thanks Julia for sharing this recipe. These cookies are my new go-to party cookies! Make sure you visit Julia’s blog, Fat Girl Trapped in a Skinny Body, for other mouthwatering recipes! 


Printable Recipe

Funfetti Cookies

See post on Julia Mestas’s site!
4.76 Mitt(s) 50 Rating(s)50 votes, average: 4.76 out of 550 votes, average: 4.76 out of 550 votes, average: 4.76 out of 550 votes, average: 4.76 out of 550 votes, average: 4.76 out of 5

Prep Time:

Cook Time:

Difficulty: Easy

Servings: 14

14
x

Print Options

Page size Letter 3x5 4x6
Text Size Small Medium Large
Content Include description
Include prep time, etc.
Show image

Description

Funfetti Cookies from scratch. No cake mix, and I even made cake flour at home!

Ingredients

  • 1 cup Butter, Room Temperature
  • 1-¼ cup Sugar
  • 2 teaspoons Vanilla Extract
  • 1 teaspoon Almond Extract
  • 1 whole Egg
  • 2-½ cups Flour
  • ¼ cups Cornstarch
  • ¾ teaspoons Baking Soda
  • ½ teaspoons Salt
  • ½ cups Rainbow Jimmie Sprinkles
  • 2 Tablespoons Nonpareil Sprinkles

Preparation Instructions

Preheat the oven to 375ºF.

Cream the butter and sugar in your stand mixer (or hand mixer) for about 2 minutes, until fluffy. Add the vanilla, almond, and egg. Beat until well combined.

In a separate bowl, sift in the flour, cornstarch, soda, and salt. Slowly add the flour mixture to the butter mixture, and continue on low speed until it’s all added and combined. Mix in the sprinkles (don’t overmix or the sprinkles will start to bleed into the dough).

Using an ice cream scoop, scoop cookie dough onto cookie sheets, about 1 1/2 inches apart (fits 8 cookies per sheet). Bake for about 15 minutes. (Note: Only bake until they very slightly start to turn light golden brown just on the edges. You don’t want them to totally turn golden or they’ll be crisp cookies. Check them around 10 minutes, then 12, and so on.)

Cool on a wire rack. Store in an airtight container up to 4 days.

Recipe adapted from Yammie’s Noshery’s Funfetti Whoopie Pies.


_______________________________________

Maria and her husband Josh (who she affectionately refers to as her “dough boy”) blog at Two Peas and Their Pod. They’ve been featured on Saveur, Eatocracy, Gourmet Live, Glamour, and the Los Angeles Times, to name just a few. They’d also just recently added a little pea to their pod. We’re so glad to have them here!


Profile photo of Megan {Country Cleaver}

Thai Red Curry Meatballs

Posted by in Step-by-Step Recipes

Tasty Kitchen Blog: Thai Red Curry Chicken Meatballs. Guest post by Megan Keno of Wanna Be a Country Cleaver, recipe submitted by TK member Kelley of Chef Savvy.

Super Bowl season is about two things: the commercials and the food. Maybe the game, if your hometown team is in contention for the title. My hometown team (and current world champ, go Seahawks!) surely gets me in the spirit, and so does the food. So you know I’ll be parked in front of the TV hoping to see them go all the way! If not, I know one thing is for sure: the food is always going to be the winner!

If you want to elevate your game day grub just a bit, go for these Thai Red Curry Chicken Meatballs from TK member Kelley. One of my favorite foods is Thai cuisine, so as soon as my eyes gazed upon these, I was hooked. They were out of this world! If you want to serve something exotic for game day, or any day, put these on the menu!


Tasty Kitchen Blog: Thai Red Curry Chicken Meatballs. Guest post by Megan Keno of Wanna Be a Country Cleaver, recipe submitted by TK member Kelley of Chef Savvy.

The list of ingredients for this recipe isn’t super crazy—just a few things that can be easily found at most groceries with an Asian food aisle, including panko bread crumbs, coconut milk, lime, garlic, red curry paste, Sriracha chili sauce, cilantro, ground chicken (or turkey, which I used), and salt and pepper. All of these ingredients go into both the meatballs and the sauce. The flavors are so vibrant and fresh, you’ll go wild!


Tasty Kitchen Blog: Thai Red Curry Chicken Meatballs. Guest post by Megan Keno of Wanna Be a Country Cleaver, recipe submitted by TK member Kelley of Chef Savvy.

Into a bowl, add the ground turkey. I used ground turkey that was 93% lean, so it’ll have some sticking power and won’t dry out.


Tasty Kitchen Blog: Thai Red Curry Chicken Meatballs. Guest post by Megan Keno of Wanna Be a Country Cleaver, recipe submitted by TK member Kelley of Chef Savvy.

Next, add your garlic. I keep freeze-dried garlic on hand so I can just pour and go. It plumps right up when cooking, yields great flavor, and saves me some time. Also add some minced or grated ginger. I used a microplane to get it really fine.


Tasty Kitchen Blog: Thai Red Curry Chicken Meatballs. Guest post by Megan Keno of Wanna Be a Country Cleaver, recipe submitted by TK member Kelley of Chef Savvy.

Red pepper flakes and minced cilantro go in next, according to the directions. But guess what? Yours truly is a total dingbat and didn’t realize she forgot the cilantro until she had rolled the meatballs. So let’s use our imagination and pretend there are little flakes of wondrous green cilantro in there, okay? Okay!


Tasty Kitchen Blog: Thai Red Curry Chicken Meatballs. Guest post by Megan Keno of Wanna Be a Country Cleaver, recipe submitted by TK member Kelley of Chef Savvy.

To add to the meatball sticking power, add an egg to the ground turkey mixture. Using a spatula or your hands, mix the batch together until everything is uniform and just combined, but do not over-mix.


Tasty Kitchen Blog: Thai Red Curry Chicken Meatballs. Guest post by Megan Keno of Wanna Be a Country Cleaver, recipe submitted by TK member Kelley of Chef Savvy.

To make the meatballs a uniform size, I used a 1-inch cookie scoop, then rolled them between my hands to make them a little more round. These will make them perfectly bite-sized meatballs, though Kelley’s original recipe says she made them into 12! That would be massive, though I’m not complaining. They are so good, I would tackle one of those in a heartbeat!

Place the meatballs into a preheated oven and bake for 15–20 minutes (or until the temperature reaches at least 165ºF), turning the meatballs halfway through cooking. While they are in the oven, move on to the sauce!


Tasty Kitchen Blog: Thai Red Curry Chicken Meatballs. Guest post by Megan Keno of Wanna Be a Country Cleaver, recipe submitted by TK member Kelley of Chef Savvy.

In a sauté pan, heat olive oil until simmering, and plop in your garlic and ginger, stirring until fragrant.


Tasty Kitchen Blog: Thai Red Curry Chicken Meatballs. Guest post by Megan Keno of Wanna Be a Country Cleaver, recipe submitted by TK member Kelley of Chef Savvy.

Add the red curry paste. Man, we are cooking here!


Tasty Kitchen Blog: Thai Red Curry Chicken Meatballs. Guest post by Megan Keno of Wanna Be a Country Cleaver, recipe submitted by TK member Kelley of Chef Savvy.

Whisk in the coconut milk and stir until smooth.


Tasty Kitchen Blog: Thai Red Curry Chicken Meatballs. Guest post by Megan Keno of Wanna Be a Country Cleaver, recipe submitted by TK member Kelley of Chef Savvy.

Add in the remaining red pepper flakes, Sriracha sauce, lime, and of course the cilantro! If you’re like me, the more cilantro the better. Allow the sauce to thicken slightly, and once the meatballs are out of the oven and ready to go, place on a platter or in a serving dish and pour the sauce over the top.

If you want to keep these hot for game day, I suggest putting them in a slow cooker set to “warm” and they will be ready all day long!


Tasty Kitchen Blog: Thai Red Curry Chicken Meatballs. Guest post by Megan Keno of Wanna Be a Country Cleaver, recipe submitted by TK member Kelley of Chef Savvy.

I fell in love with these meatballs. Next up on my list of recipes to make? Kelley’s 5-Ingredient Peanut Butter Energy Bites. Be sure to stop by her blog, Chef Savvy, for more delicious creations.

What are your game day must-haves? How do you prepare for the big day? Share them in the comments so we can serve up sure winners on the big day and cheer on our favorite team!


Printable Recipe

Thai Red Curry Chicken Meatballs

See post on Kelley Simmons @ Chef Savvy’s site!
5.00 Mitt(s) 1 Rating(s)1 vote, average: 5.00 out of 51 vote, average: 5.00 out of 51 vote, average: 5.00 out of 51 vote, average: 5.00 out of 51 vote, average: 5.00 out of 5

Prep Time:

Cook Time:

Difficulty: Easy

Servings: 4

4
x

Print Options

Page size Letter 3x5 4x6
Text Size Small Medium Large
Content Include description
Include prep time, etc.
Show image

Description

A quick weeknight dinner that takes less than 30 minutes to make.

Ingredients

  • FOR THE MEATBALLS:
  • 16 ounces, weight Ground Chicken
  • ½ cups Panko Breadcrumbs
  • 2 cloves Garlic, Minced
  • 1 teaspoon Ginger, Minced
  • 1 whole Egg
  • ⅛ teaspoons Salt
  • ⅛ teaspoons Pepper
  • ⅛ teaspoons Crushed Red Pepper Flakes
  • 1 Tablespoon Cilantro, Chopped
  • FOR THE THAI CURRY SAUCE:
  • ½ Tablespoons Extra Virgin Olive Oil
  • 1 teaspoon Ground Ginger, Minced
  • 2 cloves Garlic, Minced
  • 2 Tablespoons Concentrated Red Curry Paste
  • ¾ cups Coconut Milk
  • 1 teaspoon Sriracha
  • ⅛ teaspoons Pepper
  • ⅛ teaspoons Salt
  • ⅛ teaspoons Red Pepper Flakes
  • 1 Tablespoon Cilantro, Chopped
  • 1 Tablespoon Lime Juice

Preparation Instructions

For the Thai red curry chicken meatballs:
Preheat oven to 400 F. Lightly grease a rimmed baking sheet with oil.

In a large bowl add all of the meatball ingredients. Mix to combine. Make sure not to over mix. Portion out 12 equal-sized large meatballs. Working with slightly wet hands helps the meatballs from sticking to your hands. Place meatballs on the oiled baking sheet and cook for 15-20 minutes or until caramelized on the outside and cooked through, flipping them halfway through cooking (prepare the sauce while they bake).

When done, take meatballs out of the oven and toss them in the Thai red curry sauce. Garnish with extra cilantro if desired. Serve immediately.

Note: If you are freezing the meatballs do not toss with sauce until ready to serve.

For the Thai curry sauce:
Heat oil in small saucepan over medium heat. Add garlic and ginger and cook for 1 minute. Add the curry paste and cook for an additional minute. Whisk in coconut milk and continue whisking until thick. Take pan off the heat. Stir in Sriracha, pepper, salt, red pepper flakes, cilantro and lime juice. Set aside until ready to toss with meatballs.


_______________________________________

Megan Keno is the writer and photographer of Country Cleaver, a food blog fueled by Nutella and images of June Cleaver—if June wore cowboy boots and flannel, that is. A self-proclaimed country bum, Megan creates from-scratch recipes that range from simple to sublime and how-to’s to build your cooking repertoire. But she couldn’t do it without the help of her trusty—and furry—sous chef, Huckleberry. He’s a world class floor cleaner.


Profile photo of missamy

Hong Kong Egg Tarts

Posted by in Baking, Step-by-Step Recipes

Tasty Kitchen Blog: Hong Kong Egg Tarts. Guest post by Amy Johnson of She Wears Many Hats, recipe submitted by TK member Kristy of Eat, Play, Love.

 
Do you pass by recipes that look like they’re too much to mess with? I do it all the time, often finding out later how easy many of those recipes really are. Take these Hong Kong Egg Tarts submitted by Kristy of eatplaylove, for example. At first glance, I thought they’d be more involved, with water baths, tempering cream and eggs, or the like. Thankfully, a friend—who happens to have excellent tastes—mentioned that they were one of her favorite desserts when she frequents Chinese restaurants. Kristy also mentions in the recipe that they’re listed on The World’s 50 Most Delicious Foods as compiled by CNN Go.

I’d never heard of them before but I was intrigued to see what the fuss was all about. I was happy to find them quite easy to make. So easy that I made two batches in two days, and for the second batch I dropped the crust for a gluten-free version. Of course they’re tasty, or I wouldn’t have made the second batch. They kind of remind me of a custard pie my grandmother used to make.


Tasty Kitchen Blog: Hong Kong Egg Tarts. Guest post by Amy Johnson of She Wears Many Hats, recipe submitted by TK member Kristy of Eat, Play, Love.

This ingredient list is short. Begin with water, sugar, eggs, evaporated milk, vanilla, and prepared tart shells. Use your favorite pie crust recipe, or take a shortcut and use pre-made like I did. I found frozen mini tart shells at our local grocer. For the gluten-free version, I used small ramekins (see the end of this post) sprayed with cooking spray.


Tasty Kitchen Blog: Hong Kong Egg Tarts. Guest post by Amy Johnson of She Wears Many Hats, recipe submitted by TK member Kristy of Eat, Play, Love.

Start by combining the water and sugar in a sauce pan and heating it to a boil. Set aside to let cool.


Tasty Kitchen Blog: Hong Kong Egg Tarts. Guest post by Amy Johnson of She Wears Many Hats, recipe submitted by TK member Kristy of Eat, Play, Love.

Next, in a large mixing bowl, beat the eggs together.


Tasty Kitchen Blog: Hong Kong Egg Tarts. Guest post by Amy Johnson of She Wears Many Hats, recipe submitted by TK member Kristy of Eat, Play, Love.

Add in the evaporated milk and combine well.


Tasty Kitchen Blog: Hong Kong Egg Tarts. Guest post by Amy Johnson of She Wears Many Hats, recipe submitted by TK member Kristy of Eat, Play, Love.

Once the sugar water mixture has cooled a bit, gradually add it into the egg/milk mixture, as well as the vanilla.


Tasty Kitchen Blog: Hong Kong Egg Tarts. Guest post by Amy Johnson of She Wears Many Hats, recipe submitted by TK member Kristy of Eat, Play, Love.

Mix it all up! See? How easy is that! Almost finished.


Tasty Kitchen Blog: Hong Kong Egg Tarts. Guest post by Amy Johnson of She Wears Many Hats, recipe submitted by TK member Kristy of Eat, Play, Love.

To avoid any clumps, pour the custard into the individual tart shells (or ramekins) through a sieve.


Tasty Kitchen Blog: Hong Kong Egg Tarts. Guest post by Amy Johnson of She Wears Many Hats, recipe submitted by TK member Kristy of Eat, Play, Love.

Bake according to recipe below. The egg mixture will slightly rise and set, and the crust should be golden brown.


Tasty Kitchen Blog: Hong Kong Egg Tarts. Guest post by Amy Johnson of She Wears Many Hats, recipe submitted by TK member Kristy of Eat, Play, Love.

If going with a gluten-free version, again, pour the egg mixture through a sieve into coated ramekins. Bake for the same time as stated in recipe below.


Tasty Kitchen Blog: Hong Kong Egg Tarts. Guest post by Amy Johnson of She Wears Many Hats, recipe submitted by TK member Kristy of Eat, Play, Love.

I sprinkled a little cinnamon on top for a nice addition.


Tasty Kitchen Blog: Hong Kong Egg Tarts. Guest post by Amy Johnson of She Wears Many Hats, recipe submitted by TK member Kristy of Eat, Play, Love.

Such an easy recipe, but with simple additions, like berries, coconut, or chocolate, you could easily change this basic recipe for year-round goodness.

Thanks to Kristy for bringing this delightful (and easy!) recipe to our attention. It’s a keeper. And be sure to check her site Eat, Play, Love for this recipe (what a cutie patootie she has assisting on this one) and other wonderful offerings.


Printable Recipe

Hong Kong Egg Tarts

See post on eatplaylove’s site!
4.50 Mitt(s) 2 Rating(s)2 votes, average: 4.50 out of 52 votes, average: 4.50 out of 52 votes, average: 4.50 out of 52 votes, average: 4.50 out of 52 votes, average: 4.50 out of 5

Prep Time:

Cook Time:

Difficulty: Easy

Servings: 24

24
x

Print Options

Page size Letter 3x5 4x6
Text Size Small Medium Large
Content Include description
Include prep time, etc.
Show image

Description

A traditional egg tart served in Hong Kong. It’s listed as #16 on The World’s 50 Most Delicious Foods as compiled by CNN Go.

Ingredients

  • 1-½ cup Water
  • ¾ cups Sugar
  • 4 whole Eggs
  • ¼ cups Evaporated Milk
  • ½ teaspoons Vanilla
  • 24 whole 3-inch Prepared Tart Shells

Preparation Instructions

Preheat the oven to 425ºF. Bring the water and sugar to a boil in a medium saucepan. Remove from the heat and set it aside to cool.

Next beat the eggs in a large bowl and add the evaporated milk. Pour in the sugar water and mix thoroughly. Finally, mix in the vanilla.

Place the tart shells on a baking sheet. Pour the custard through a sieve into the shells.

Bake the tarts at 425ºF for 20 to 25 minutes, or until the egg mixture has risen and the crust is golden brown.


_______________________________________

Amy Johnson is a blogger who writes about food, travel, the home (both inside and out), and various observations and random musings about anything and everything. Visit her blog She Wears Many Hats for a dose of deliciousness, practicality, hilarity, or just plain fun. She lives in South Carolina with her husband and two children.


Profile photo of Megan {Country Cleaver}

Sweet Potato Waffles

Posted by in Step-by-Step Recipes

These require just a few basic ingredients that you probably already have on hand. The most time-consuming part may be roasting the sweet potatoes, so I suggest doing that beforehand to save some time when you make these Saturday morning.

Profile photo of Laurie - Simply Scratch

Easy Chocolate Pie

Posted by in Baking, Step-by-Step Recipes

  This pie had me at the word easy. Okay, it really had me at chocolate and pie. I was looking for a quick and fancy pie to serve after dinner to celebrate some fantastic report cards, so when I typed the words “easy pie” into the Tasty Kitchen search engine and voilà! I found Sissy’s recipe for Easy Chocolate Pie.   […]

Profile photo of HowSweetEats

Dark Chocolate Chunk Skillet Cookie

Posted by in Baking, Step-by-Step Recipes

  Everyone loves a chocolate chip cookie, right? And do you know what’s better than a chocolate chip cookie? A GIANT chocolate chip cookie. Massive. We are talking huge. I think chocolate chip cookies—warm and gooey—are one of life’s greatest comfort foods. They usually have a time and a place: rainy days, snowy nights, summer […]

Profile photo of ThreeManyCooks

Baked Falafel Pita

Posted by in Step-by-Step Recipes

  As I’m eating less meat these days, I’m always on the look-out for recipes that use beans and legumes. They’re healthy, filling, and full of protein and fiber. But when I think falafel, I think fried and weekend project, too. But Tasty Kitchen member janecooks offers a baked version of the fried favorite that’s […]