The Pioneer Woman Tasty Kitchen
Profile photo of georgiapellegrini

Homemade Grape Nuts

Posted by in Step-by-Step Recipes

Tasty Kitchen Blog: Homemade Grape Nuts. Guest post by Georgia Pellegrini, recipe submitted by TK member Zoe Dawn of Whole Eats & Whole Treats.

 
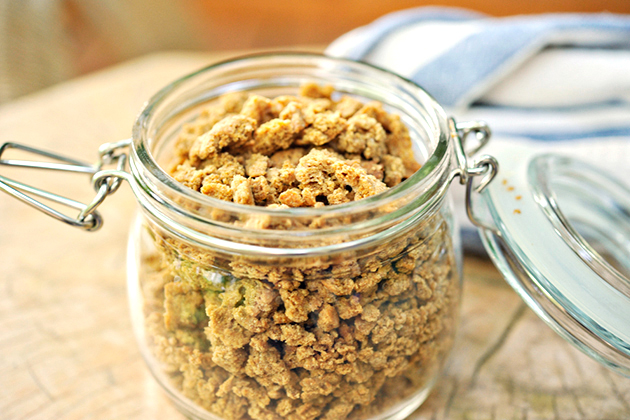
Homemade cereal, what a revelation! Zoe Dawn’s recipe for homemade grape nuts thrilled me. I’ve made homemade granola before, but never grape nuts. So I was excited to give this a try. And I have to say, I liked it even more than the kind you get in the store.


Tasty Kitchen Blog: Homemade Grape Nuts. Guest post by Georgia Pellegrini, recipe submitted by TK member Zoe Dawn of Whole Eats & Whole Treats.

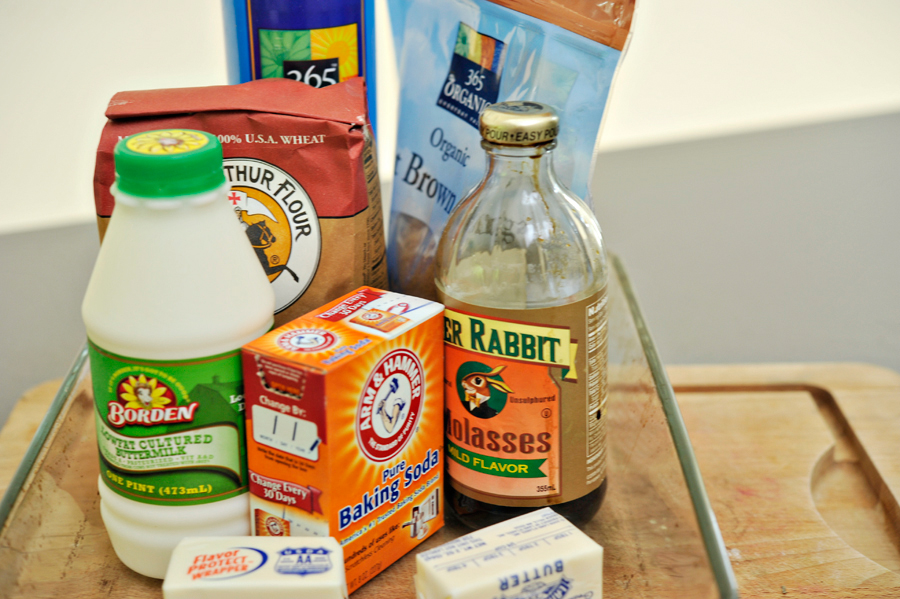
You will need the following things: sprouted whole wheat pastry flour (I used regular whole wheat flour and it worked well!), light brown sugar, baking soda, salt, molasses, buttermilk, and butter.


Tasty Kitchen Blog: Homemade Grape Nuts. Guest post by Georgia Pellegrini, recipe submitted by TK member Zoe Dawn of Whole Eats & Whole Treats.

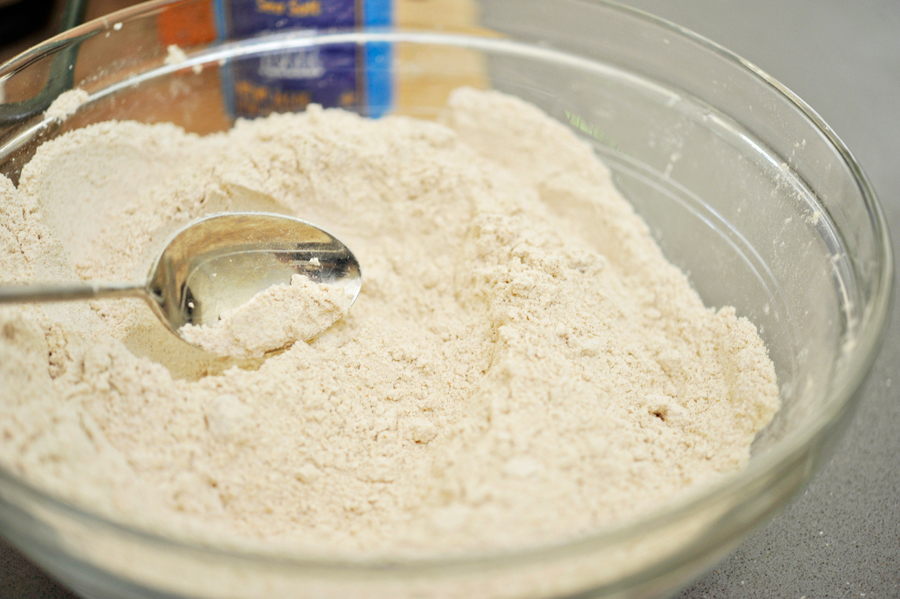
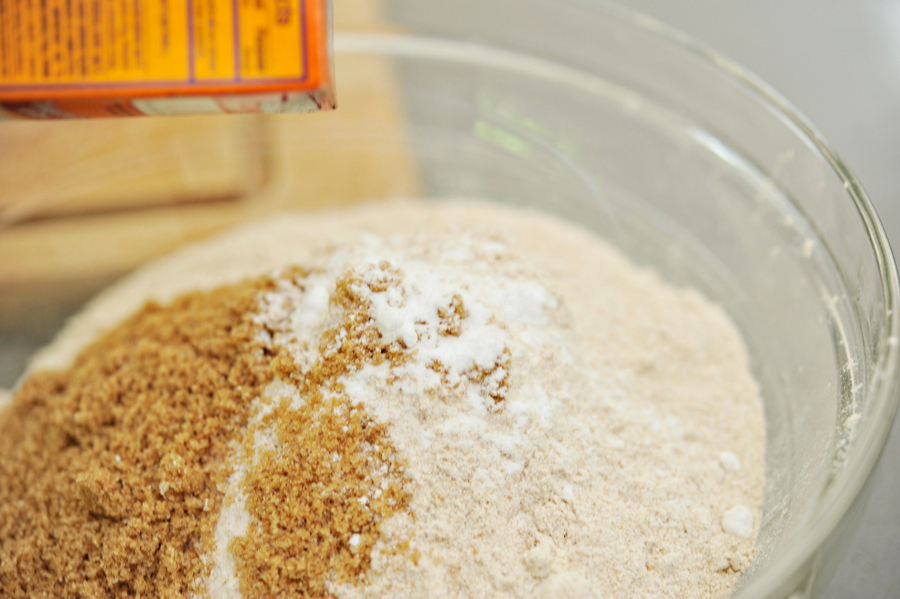
Start by combining the dry ingredients in a bowl, including baking soda …


Tasty Kitchen Blog: Homemade Grape Nuts. Guest post by Georgia Pellegrini, recipe submitted by TK member Zoe Dawn of Whole Eats & Whole Treats.

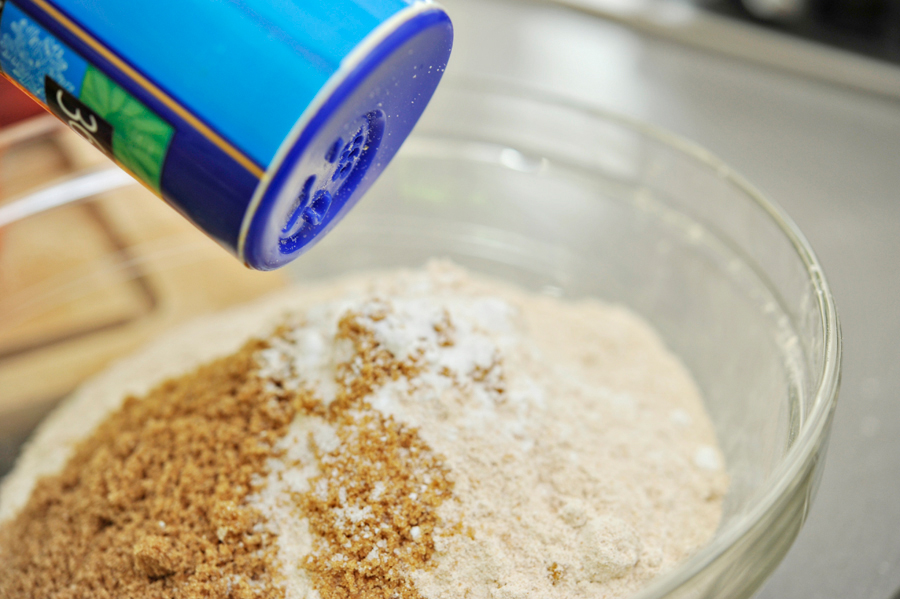
And a good dash of sea salt.


Tasty Kitchen Blog: Homemade Grape Nuts. Guest post by Georgia Pellegrini, recipe submitted by TK member Zoe Dawn of Whole Eats & Whole Treats.

Combine it all together well.


Tasty Kitchen Blog: Homemade Grape Nuts. Guest post by Georgia Pellegrini, recipe submitted by TK member Zoe Dawn of Whole Eats & Whole Treats.

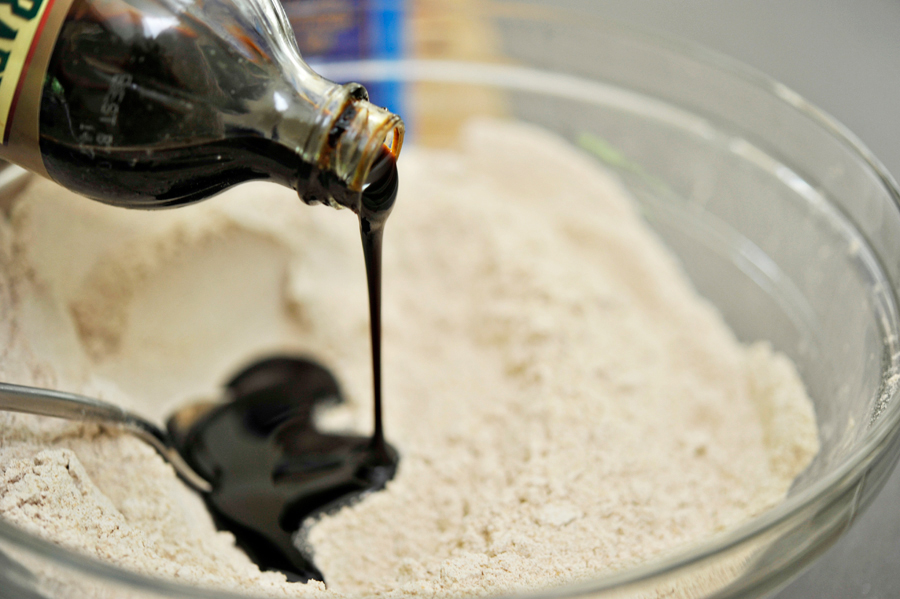
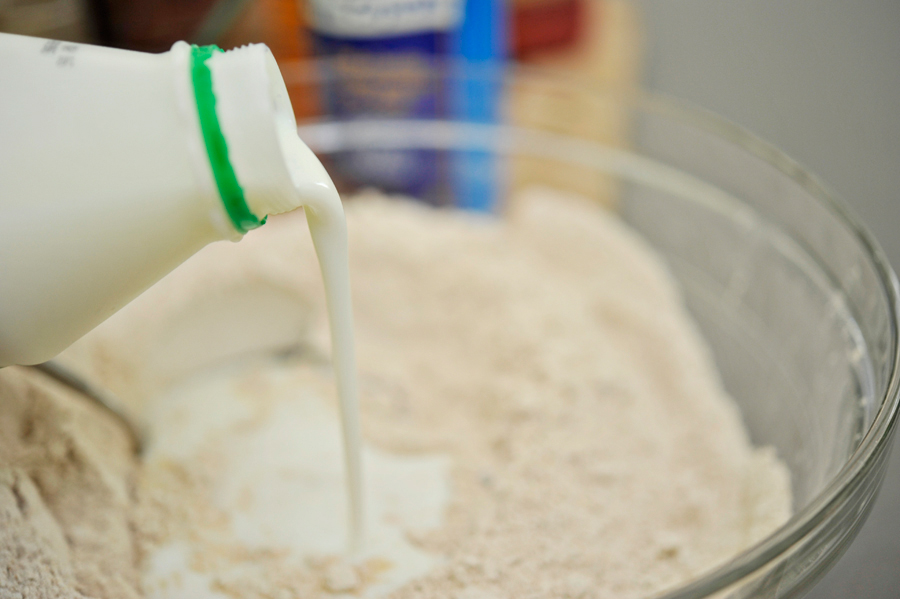
Then begin to pour in the wet ingredients. First the molasses …


Tasty Kitchen Blog: Homemade Grape Nuts. Guest post by Georgia Pellegrini, recipe submitted by TK member Zoe Dawn of Whole Eats & Whole Treats.

Then the buttermilk …


Tasty Kitchen Blog: Homemade Grape Nuts. Guest post by Georgia Pellegrini, recipe submitted by TK member Zoe Dawn of Whole Eats & Whole Treats.

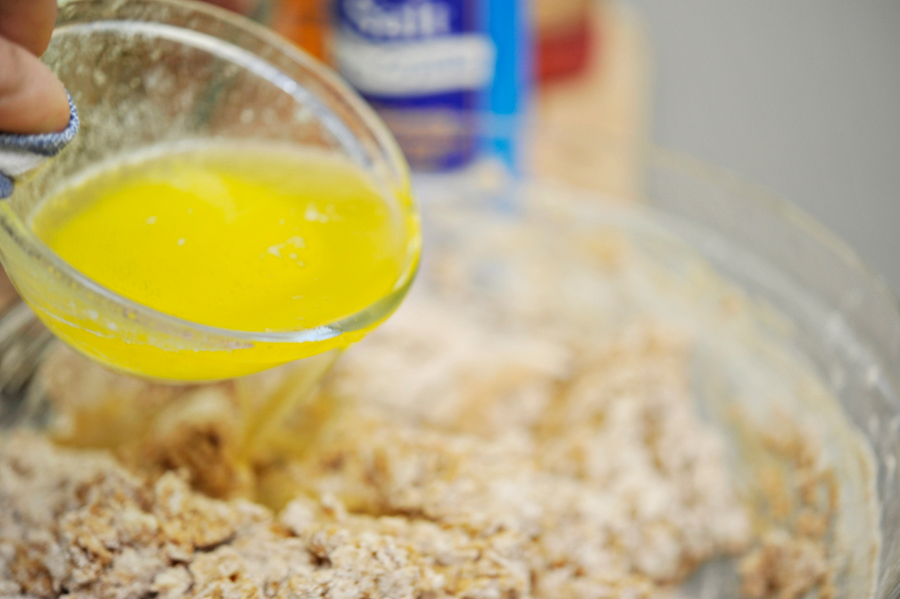
Then the melted butter.


Tasty Kitchen Blog: Homemade Grape Nuts. Guest post by Georgia Pellegrini, recipe submitted by TK member Zoe Dawn of Whole Eats & Whole Treats.

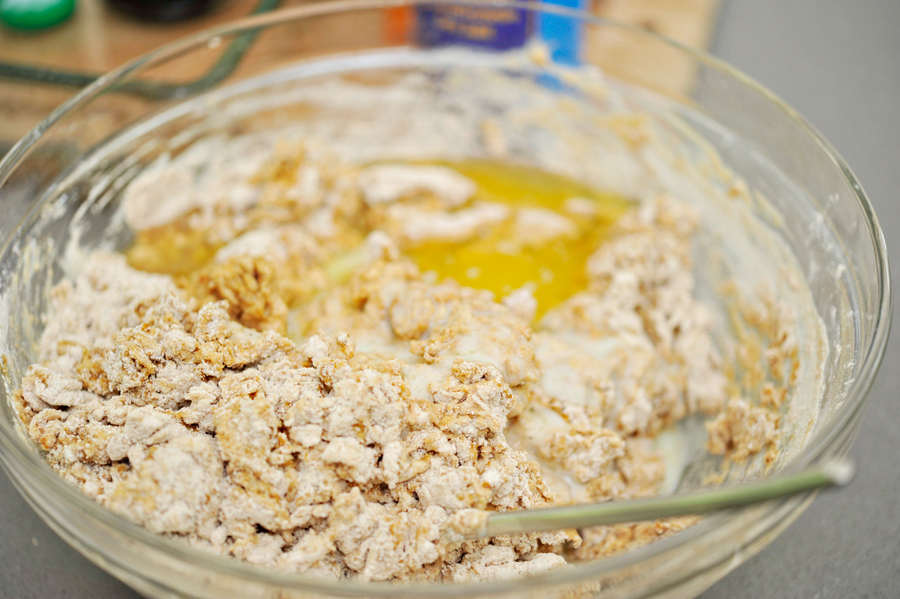
Give it a nice stir.


Tasty Kitchen Blog: Homemade Grape Nuts. Guest post by Georgia Pellegrini, recipe submitted by TK member Zoe Dawn of Whole Eats & Whole Treats.

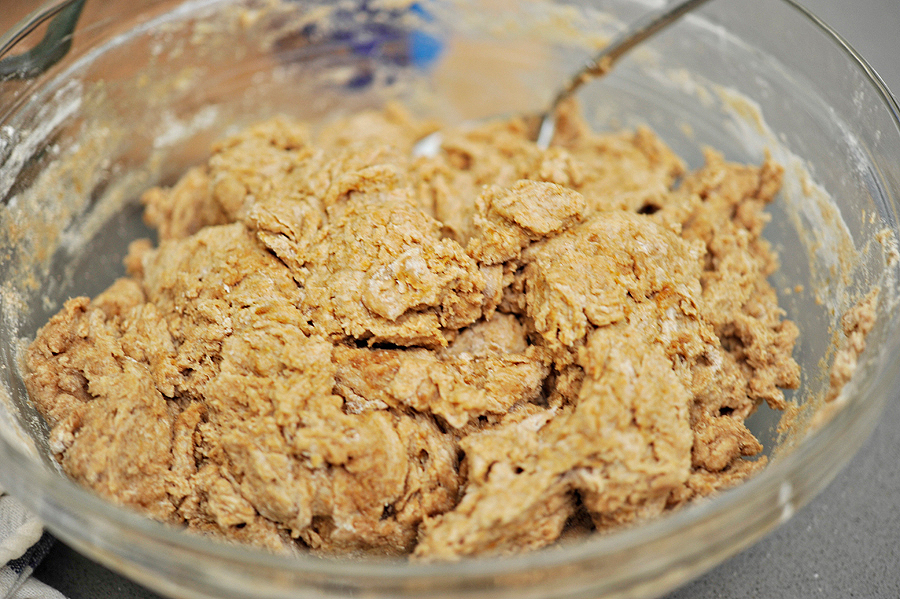
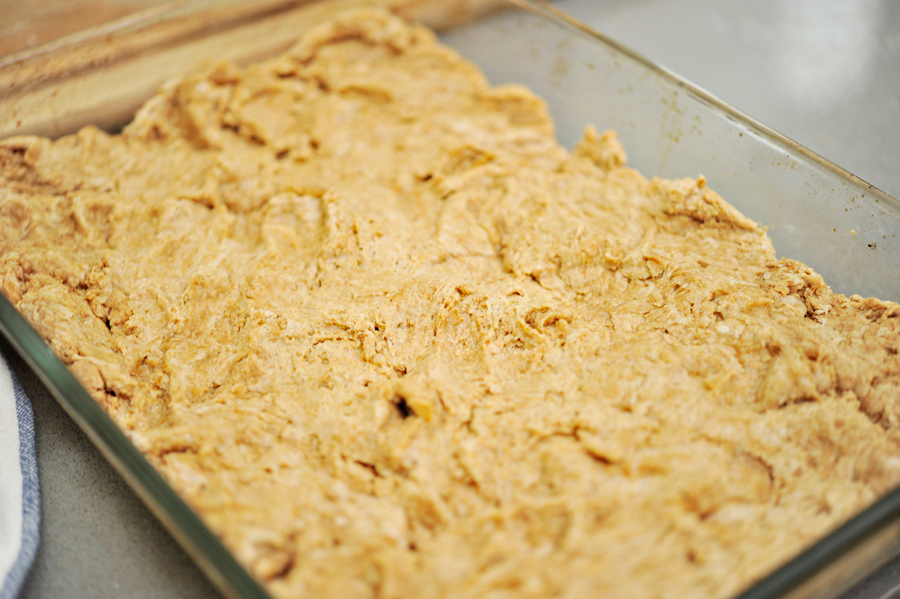
It will start to come together until it is uniform in color and texture but not especially wet.


Tasty Kitchen Blog: Homemade Grape Nuts. Guest post by Georgia Pellegrini, recipe submitted by TK member Zoe Dawn of Whole Eats & Whole Treats.

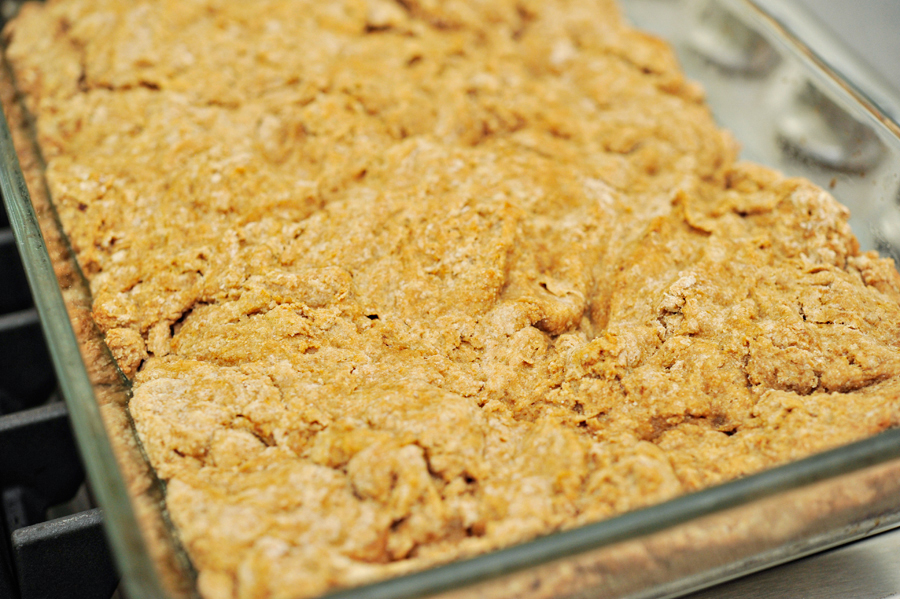
Press it into a baking dish and put it in the oven to bake.


Tasty Kitchen Blog: Homemade Grape Nuts. Guest post by Georgia Pellegrini, recipe submitted by TK member Zoe Dawn of Whole Eats & Whole Treats.

Once it comes out of the oven, let it cool completely in your baking dish.


Tasty Kitchen Blog: Homemade Grape Nuts. Guest post by Georgia Pellegrini, recipe submitted by TK member Zoe Dawn of Whole Eats & Whole Treats.

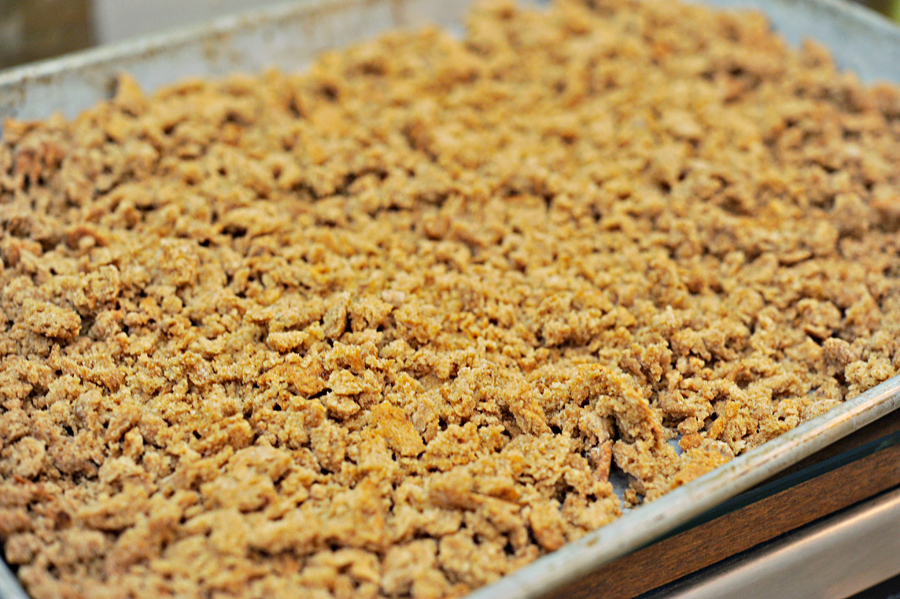
Once it’s cool, preheat the oven to 275ºF and crumble the mixture with your hands as fine or coarse as you would like your grape nuts to be. You will need several trays for this. Or you could cut this recipe in half to begin with if you don’t want quite so much on hand!
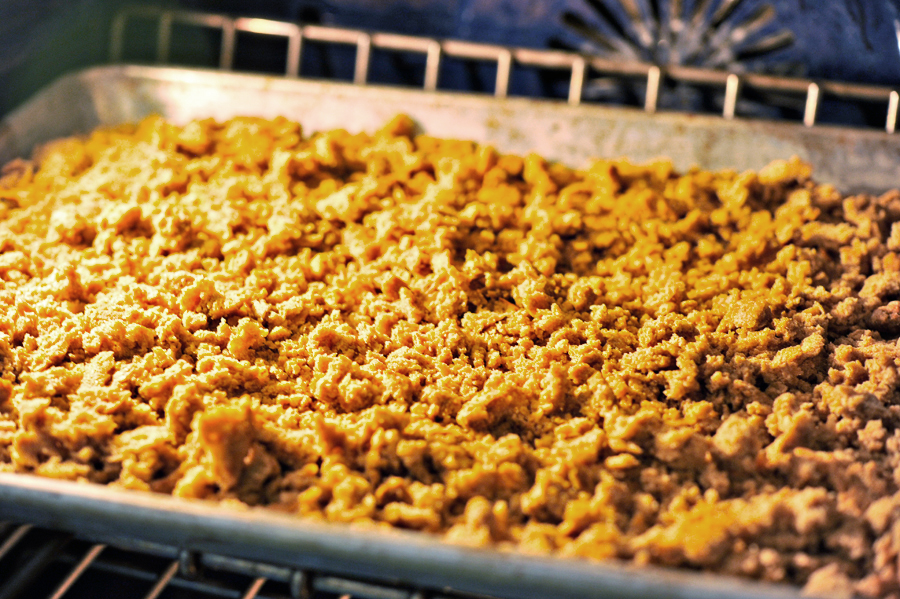


Tasty Kitchen Blog: Homemade Grape Nuts. Guest post by Georgia Pellegrini, recipe submitted by TK member Zoe Dawn of Whole Eats & Whole Treats.

Place the sheet trays in the oven so that the coarse mixture dries out slowly.
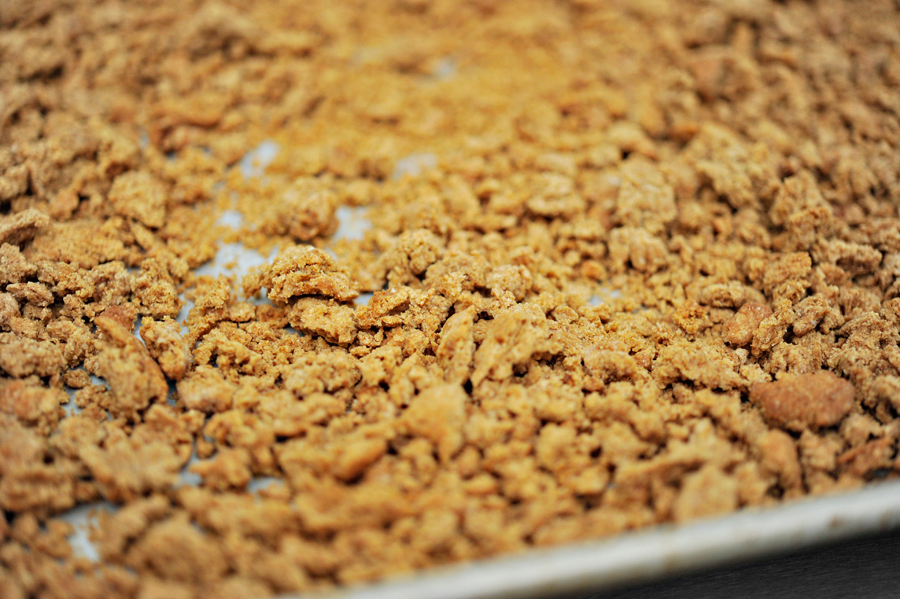


Tasty Kitchen Blog: Homemade Grape Nuts. Guest post by Georgia Pellegrini, recipe submitted by TK member Zoe Dawn of Whole Eats & Whole Treats.

Let it cool out of the oven once it is firm, and once cool, store it in airtight containers.


Tasty Kitchen Blog: Homemade Grape Nuts. Guest post by Georgia Pellegrini, recipe submitted by TK member Zoe Dawn of Whole Eats & Whole Treats.

This was so much better than grape nuts from the store. It had a better texture and the flavor was fabulous. Thank you so much to Zoe Dawn’s for this homemade breakfast cereal idea!


Printable Recipe
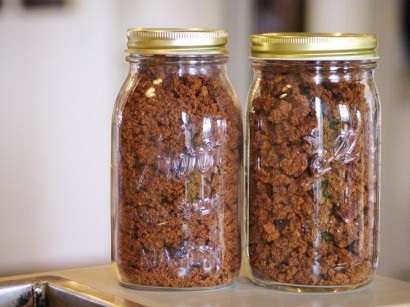
Grape Nuts

See post on zoedawn’s site!
5.00 Mitt(s) 1 Rating(s)1 vote, average: 5.00 out of 51 vote, average: 5.00 out of 51 vote, average: 5.00 out of 51 vote, average: 5.00 out of 51 vote, average: 5.00 out of 5

Prep Time:

Cook Time:

Difficulty: Easy

Servings: 12

12
x

Print Options

Page size Letter 3x5 4x6
Text Size Small Medium Large
Content Include description
Include prep time, etc.
Show image

Description

Mmmm. Everything you want in a breakfast cereal: crunchy, hearty, lightly sweet, and healthy! The cook time is long but for the most part, you don’t have to do much to it.

Ingredients

  • 4-½ cups Sprouted Whole Wheat Pastry Flour
  • ½ cups Scant, Light Brown Sugar
  • 1-½ teaspoon Baking Soda
  • 1 teaspoon Salt
  • ½ cups Molasses
  • 2 cups Buttermilk
  • ½ cups Butter, Melted

Preparation Instructions

Mix the dry ingredients together. Stir in the wet ingredients. Spread in a greased 9 x 13 inch baking dish. Bake at 350ºF for about 30 minutes or until a toothpick inserted near the center comes out clean. Cool completely.

Cut the cake into squares and crumble with your fingers. If you prefer a finer, less chunky grape nut, grate the squares on a cheese grater. Put the crumbles onto two large baking sheets with sides. Bake at 275ºF, stirring every 15 minutes, for a total of 60 to 90 minutes, or until grape nuts are dry. The timing will depend on the size of your little pieces. Cool on the baking sheets and then transfer to jars for storage. Will keep for several weeks. I’m sure they would freeze, too, if you want to try it.

Yield: about 3 quarts, depending on the size of your grape nuts.


_______________________________________

There’s so much to say about Georgia, we don’t know where to start. Leaving Wall Street for the French Culinary Institute, followed by a stint at the Gramercy Tavern and La Chassagnette in France, her passion for food and food traditions are evident and inspiring. Visit her site at Georgia Pellegrini, where you’ll find more recipes, photos, learn all about her wonderful books Girl Hunter and Food Heroes, and enjoy her latest adventures.


Profile photo of Erika (TK)

Quiche!

Posted by in The Theme Is...

Tasty Kitchen Blog: Quiche!

 
Quiche. It’s a peculiar word, isn’t it? Sort of like a cross between kiss and kitsch. And eesh. Since I tend of fixate on how some words sound funny when you say them over and over again (I’m real mature like that), my head exploded with all sorts of quiche-related puns, most of them really bad or pathetically lame. For example, I almost called this post, “Quiche On My List.” Then I had visions of Hall and Oates barging into my house and mercilessly hitting me on the head with a club that looked a lot like a keytar, so I stopped myself.

But I digress.

A quiche is basically a savory custard tart, the custard formed by baking a mixture of eggs, milk or cream, and any other add-ins of your choice. Spinach seems to be a popular choice of filling, but mushrooms aren’t too far behind. Now that spring is upon us, there are so many great fresh local veggies available, so you can pick your favorites!

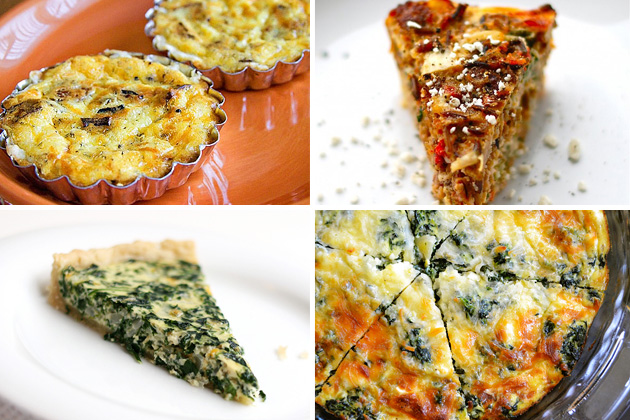
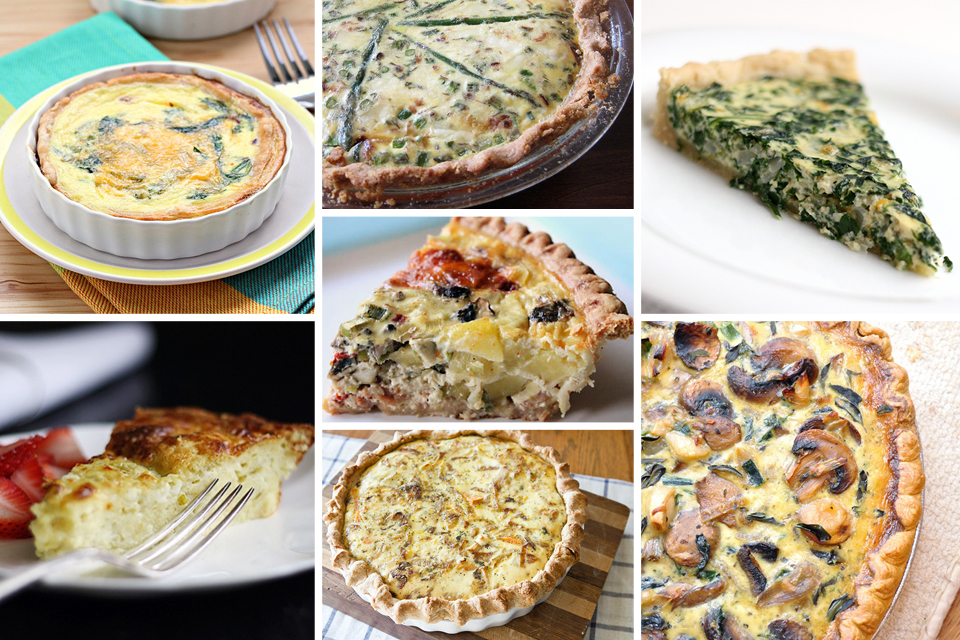
Tasty Kitchen Blog: Quiche! (Vegetarian)

Low Fat Spinach Cheddar Quiche with Oat Crust by Stephanie Mexican Quiche by Wenderly Asparagus and Caramelized Onion Quiche by florasfoodforay Potato, Leek, and Mushroom Quiche by Dax Phillips Roasted Sweet Potato, Caramelized Onion, and Gorgonzola Quiche by Erin Spinach Quiche by The Fauxmartha Healthy Mushroom and Shallot Quiche by kitchenlovenest


As much as I love my veggies, I think it can’t hurt to throw a little bit of meat in there, too. Maybe it’s because the first really good quiche I ever had was filled with ham and cheese, or maybe it’s because growing up, one of my favorite things for breakfast was a ground beef frittata. For me, eggs and meat have always been a perfect match. And hey, it doesn’t have to be red meat either. Check out the smoked salmon quiche below!

Tasty Kitchen Blog: Quiche! (For Meat Lovers)

Sausage and Red Pepper Quiche by Lindsay Smoked Salmon Quiche by missinthekitchen Potato-Crusted Quiche with Pancetta, Sun-Dried Tomatoes & Spinach by cookincanuck Hearty Sausage, Kale & Pepper Quiche by acher Sausage, Cheese and Caramelized Onion Quiche by cookingdunkinstyle Boudin and Green Pepper Quiche by Kelly @ Evil Shenanigans Leftover Pizza Quiche by jodiecoston


A quiche typically uses a pastry crust but if you need to forgo the crust, we’ve got some crustless versions to show you. I’m pretty sure you could also just omit the crust in any of the other recipes. Or do the opposite and add a crust to the recipes below if you want one! Looking for a good pie crust recipe? You can’t go wrong with this perfect pie crust. And if you need some guidance, Calli has a really great step-by-step tutorial for rolling out beautiful pie crusts.
Don’t forget, you can also get creative and replace the crust with something else unexpected. Spaghetti squash crust, anyone? Or how about the potato crust from cookincanuck’s quiche above? Genius, I tell you.
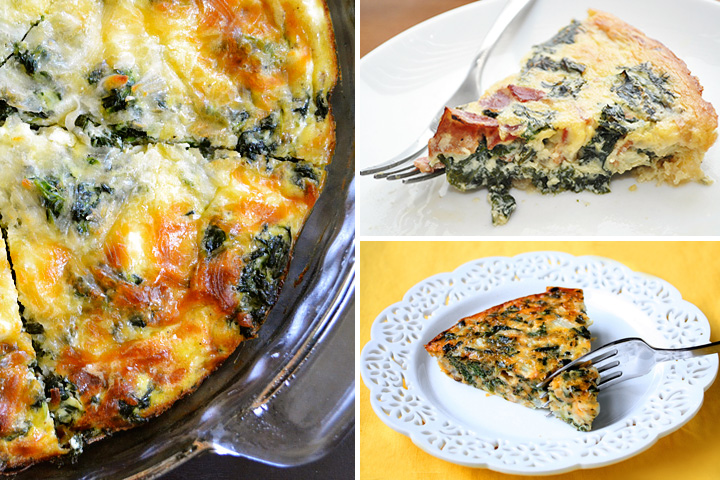
Tasty Kitchen Blog: Quiche! (Crustless)

Spinach, Mushroom & Feta Crustless Quiche by Laura Dairy-Free Crustless Quiche with Bacon and Kale by kitchenlovenest Crustless Spinach Quiche by Ali @ gimmesomeoven


If you can’t decide what kind of filing to make, why not make them all? You can create individual-sized quiches in tartlet pans, muffin pans, or ramekins. Then your guests can choose their favorite. Or, if you’re like me, you can pretend you can’t decide and pick one of each. I just tell people I work in culinary research and then start taking photos of my food. At that point, they pretty much just shrug their shoulders and leave me alone. (I sometimes hear them whispering to each other as they point in my direction but I’m usually too busy chewing to hear what they’re saying.)

Tasty Kitchen Blog: Quiche! (Individual Size)

Mini Spinach & Turkey Bacon Quiche by claireg12 Quiche Lorraine Tartlets by Tracy (sugarcrafter) Tomato Florentine Quiche Cups by Wanna Be A Country Cleaver Quiche Muffins by drue Fried Garlic, Spinach and Goat Cheese Quiche by whatsgabycooking


And last but not least, there’s this quiche, with a photo taken by TK member and TK Blog contributor missamy that pretty much speaks for itself.

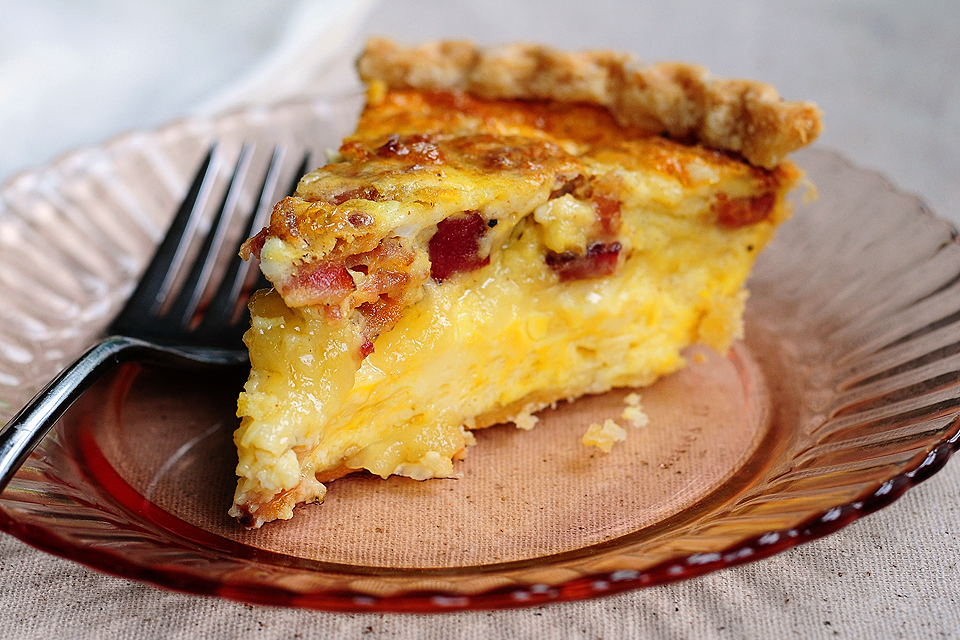
Tasty Kitchen Blog: Quiche! Photo by Amy Johnson of She Wears Many Hats; Bacon and Brie Quiche recipe submitted by TK member Nancy (nancyinnewmexico).

Amy did a step-by-step blog post of this recipe by Nancy in New Mexico here in the Tasty Kitchen Blog, and I’m telling you, I never get tired of looking at this. In fact, every time I have the photo up on my screen and some random cable/appliance repair/heating guy walks by, he always—and I mean ALWAYS—stops in his tracks, gazes at the photo, and then I swear, a barely-audible sigh escapes his lips. And I’m talking big, burly guys here. One of them even has a tattoo and all.

Which pretty much proves that real mean do eat quiche, especially when it’s loaded with bacon and cheese.

So this weekend, whether you’re cooking for Mom or Mr. Mom, or just for yourself (because we all deserve something special sometimes), why not try something different? I’ve had very little quiche-eating experience in my life, and my quiche-making experience is almost non-existent. But I know that after putting this roundup together, I’m excited to try making my very first quiche. Hey, I might even sing some Hall and Oates while I’m at it!

But only if I find a helmet first.


Profile photo of HowSweetEats

Pizza Stuffed Mushrooms

Posted by in Step-by-Step Recipes

Tasty Kitchen Blog: Pizza Stuffed Mushrooms. Guest post by Jessica Merchant of How Sweet It Is, recipe submitted by TK member Lauren of Lauren's Latest.

 
Once upon a time I loathed mushrooms. I mean, really. I wouldn’t even consider eating them—I didn’t care if they were on pizza or piled high atop a filet. Didn’t matter. It wasn’t happening.

Then I got married.

My husband goes through these huge phases with different foods (I once caramelized onions every day for what was probably three or four months) and sure enough, mushrooms made the list. For a few weeks he wanted soft and juicy sauteed mushrooms in every meal that I could fit them. And one day? Well, I got hungry and took a bite.

Pleasantly surprised, I kept on eating. My aversion quickly turned to love and soon enough, I was the one who couldn’t get enough of mushrooms. These days I find myself including them in grilled sandwiches, pasta dishes and even grains. Sometimes I eat them (gasp!) plain as a side dish. It gets pretty crazy over here.

And then … then I saw Lauren’s recipe for Pizza Stuffed Mushrooms. Seriously? Could my life get any better? I knew they’d be happening—like, immediately. And they did. And they were to die for. And now I want to eat more. For breakfast.

Here’s how you make ‘em!


Tasty Kitchen Blog: Pizza Stuffed Mushrooms. Guest post by Jessica Merchant of How Sweet It Is, recipe submitted by TK member Lauren of Lauren's Latest.

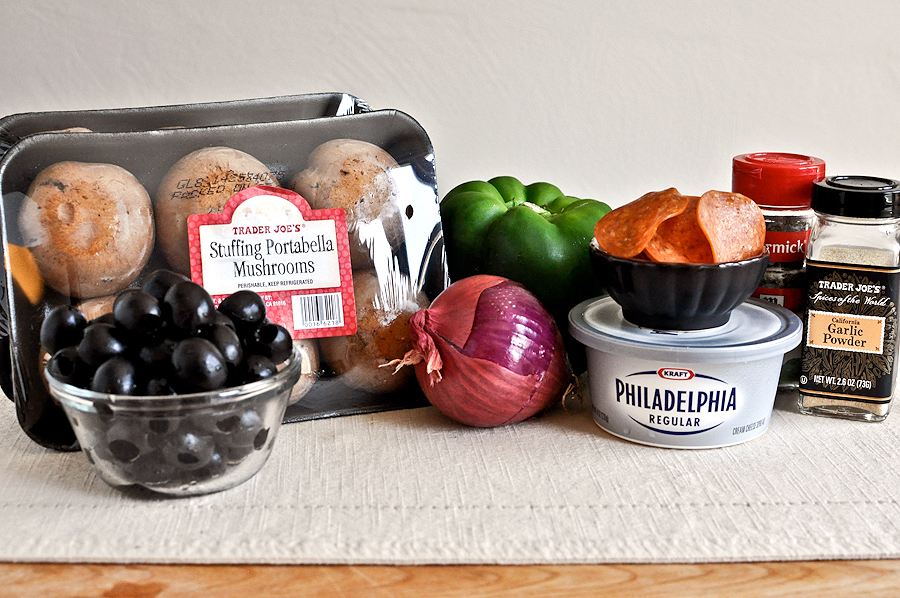
You need: baby bella stuffing mushrooms, cream cheese, green pepper, red onion, pepperoni, black olives, garlic salt or powder, dried basil and oregano and black pepper. And also some grated Parmesan or mozzarella cheese!


Tasty Kitchen Blog: Pizza Stuffed Mushrooms. Guest post by Jessica Merchant of How Sweet It Is, recipe submitted by TK member Lauren of Lauren's Latest.

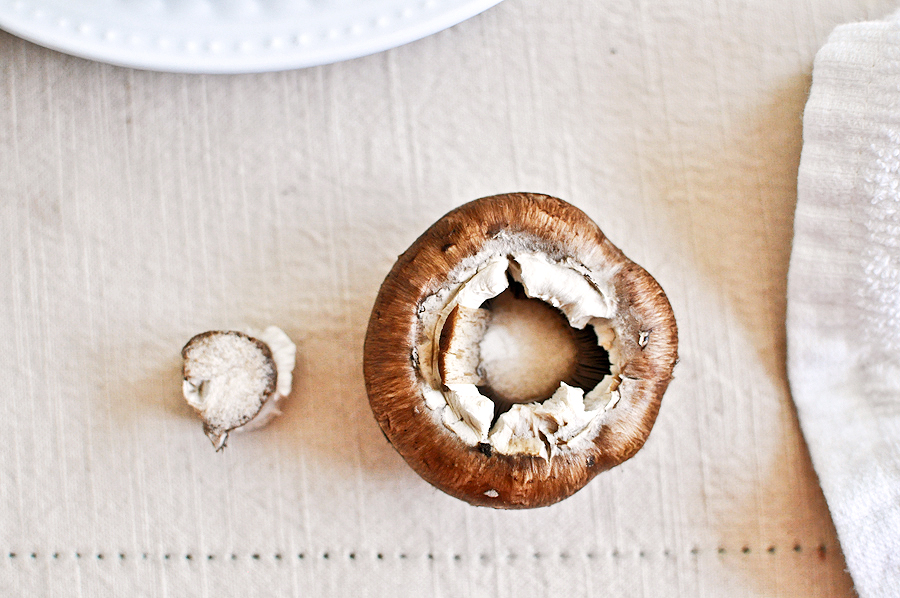
First up, clean those mushrooms. Using a damp rag or paper towel, simply wipe the dirt off each. Then remove the stem. It should pop right out.


Tasty Kitchen Blog: Pizza Stuffed Mushrooms. Guest post by Jessica Merchant of How Sweet It Is, recipe submitted by TK member Lauren of Lauren's Latest.

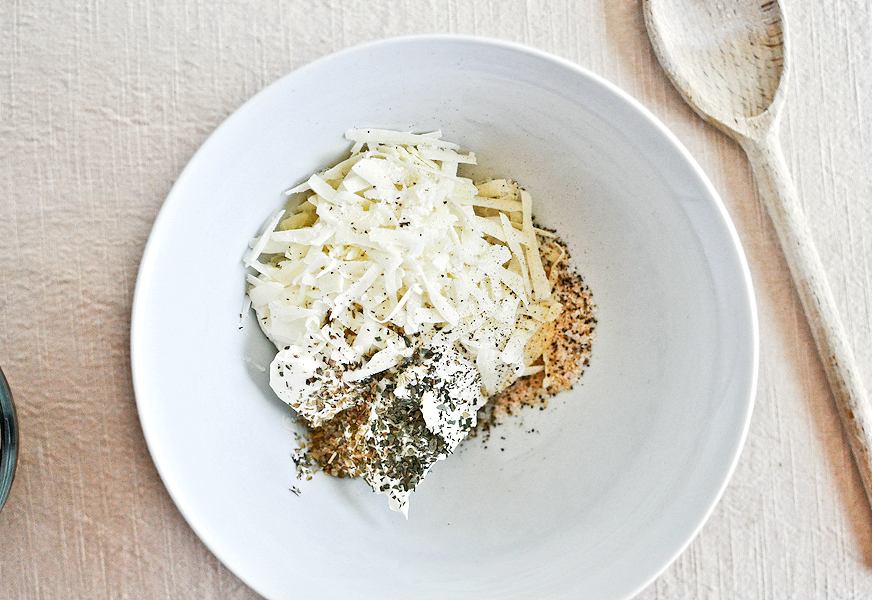
In a bowl, mix together the cream cheese, grated cheese, garlic powder, basil, oregano, salt and pepper.


Tasty Kitchen Blog: Pizza Stuffed Mushrooms. Guest post by Jessica Merchant of How Sweet It Is, recipe submitted by TK member Lauren of Lauren's Latest.

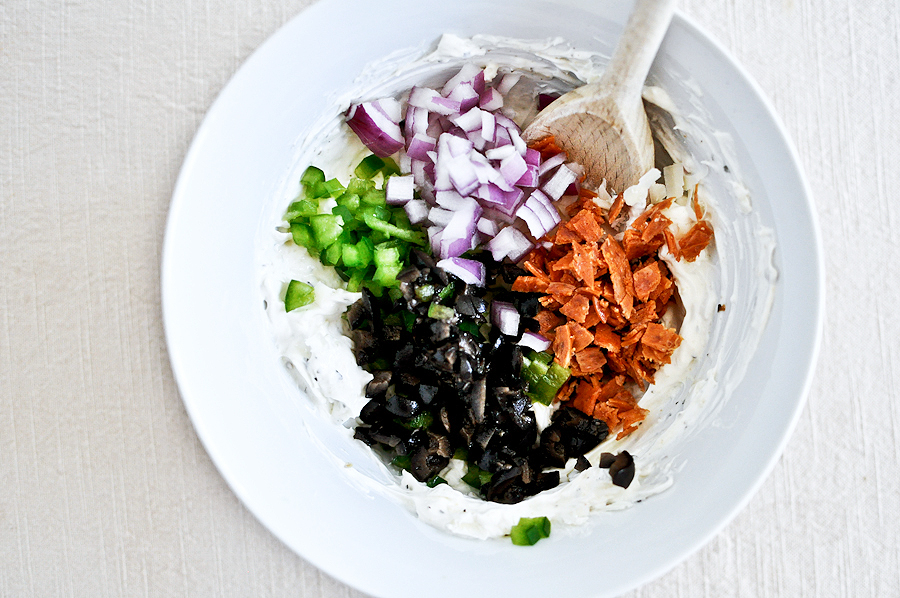
Add in the chopped green peppers, olives, pepperoni and red onion. Mix it together well.


Tasty Kitchen Blog: Pizza Stuffed Mushrooms. Guest post by Jessica Merchant of How Sweet It Is, recipe submitted by TK member Lauren of Lauren's Latest.

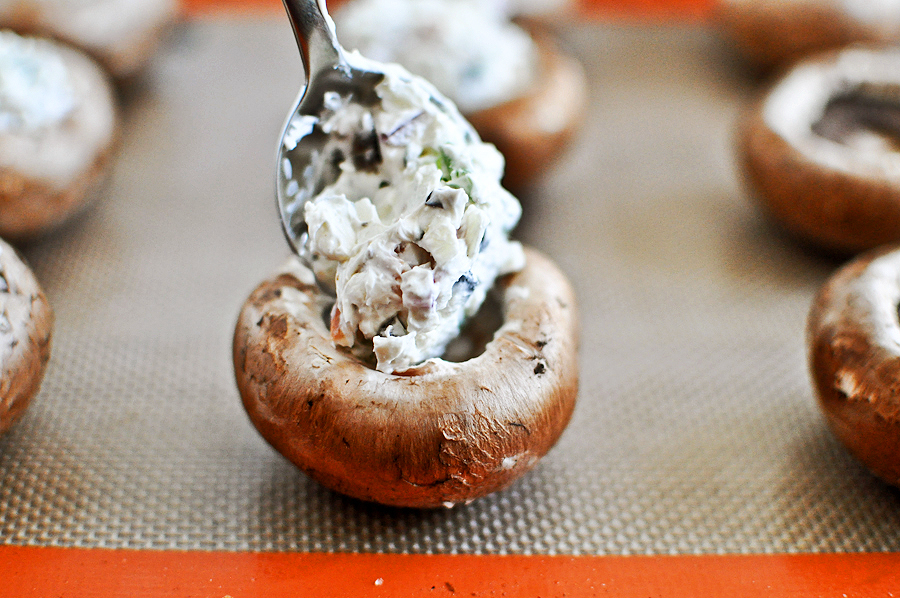
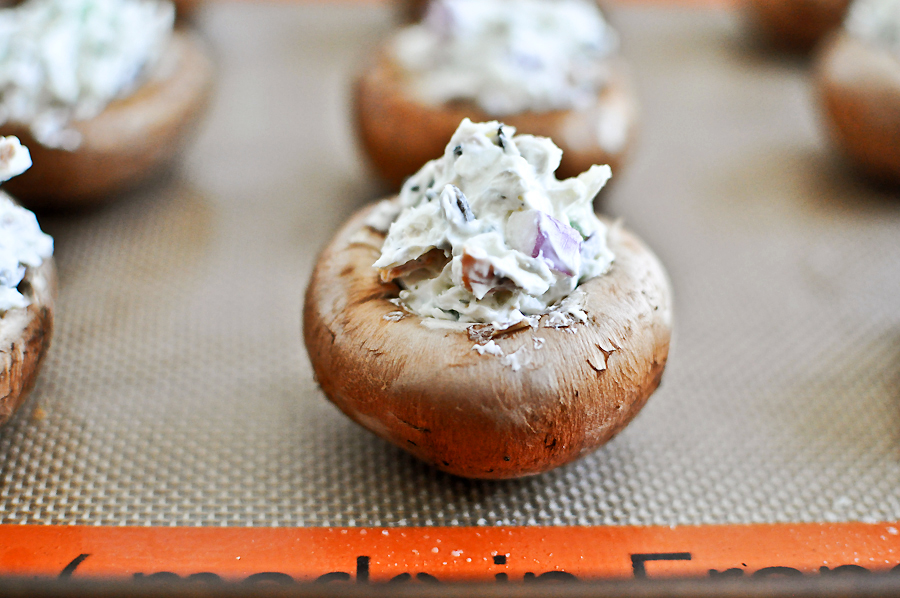
Stuff about a teaspoon or so of the cheesy mix into each mushroom.


Tasty Kitchen Blog: Pizza Stuffed Mushrooms. Guest post by Jessica Merchant of How Sweet It Is, recipe submitted by TK member Lauren of Lauren's Latest.

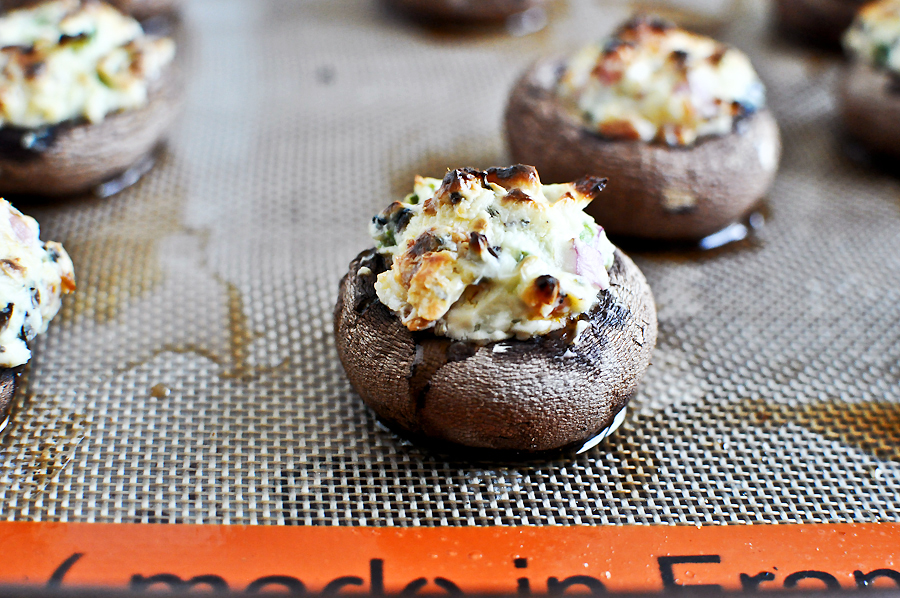
After every mushroom is stuffed, you want to bake them for 20 minutes. When 20 minutes has passed, switch on the broiler and broil until the cheese is golden and bubbly …


Tasty Kitchen Blog: Pizza Stuffed Mushrooms. Guest post by Jessica Merchant of How Sweet It Is, recipe submitted by TK member Lauren of Lauren's Latest.

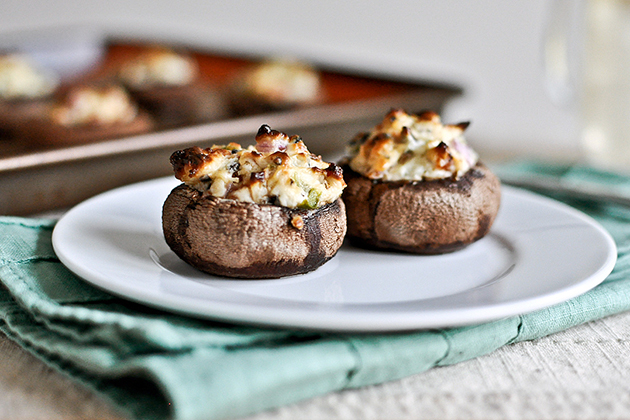
Just like this.


Tasty Kitchen Blog: Pizza Stuffed Mushrooms. Guest post by Jessica Merchant of How Sweet It Is, recipe submitted by TK member Lauren of Lauren's Latest.

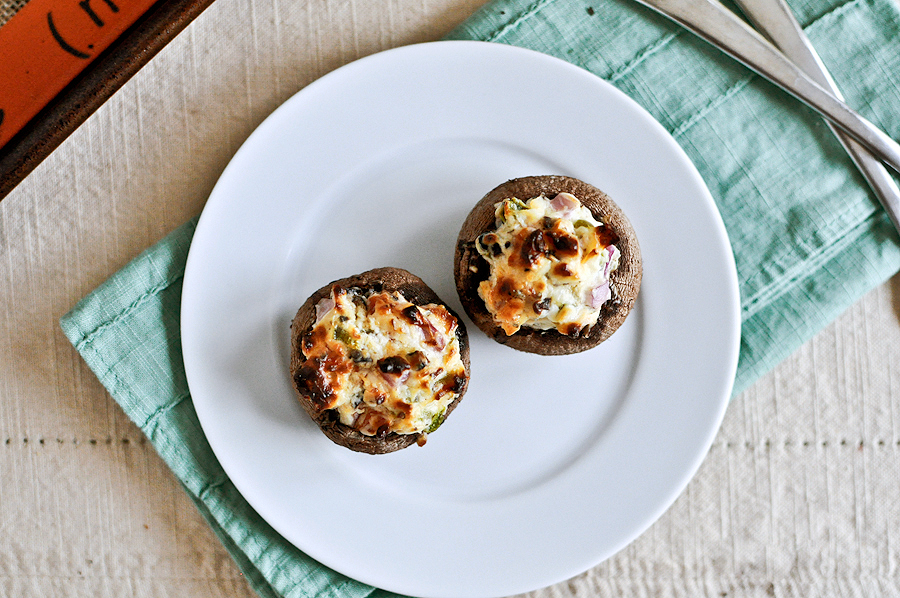
Serve warm, so the cheese is melty and creamy. Like a mini portable pizza!


Tasty Kitchen Blog: Pizza Stuffed Mushrooms. Guest post by Jessica Merchant of How Sweet It Is, recipe submitted by TK member Lauren of Lauren's Latest.

We couldn’t believe how much the mushrooms really did taste like pizza. Even my husband, who isn’t a huge fan of black olives, scarfed three right out of the oven, searing his taste buds out of existence. These are truly fantastic and will surely be one of my go-to appetizers.

Thanks so much to Lauren’s for the recipe. Check out her fabulous blog Lauren’s Latest where she shares her incredible culinary creativity.


Printable Recipe

Pizza Stuffed Mushrooms

See post on Lauren's Latest’s site!
4.66 Mitt(s) 3 Rating(s)3 votes, average: 4.66 out of 53 votes, average: 4.66 out of 53 votes, average: 4.66 out of 53 votes, average: 4.66 out of 53 votes, average: 4.66 out of 5

Prep Time:

Cook Time:

Difficulty: Easy

Servings: 2

2
x

Print Options

Page size Letter 3x5 4x6
Text Size Small Medium Large
Content Include description
Include prep time, etc.
Show image

Description

A great way to turn mushroom haters into lovers!

Ingredients

  • 10 whole Baby Bella Or Crimini Mushrooms
  • 4 ounces, weight Cream Cheese, Softened
  • ¼ cups Grated Parmesan Or Mozzarella Cheese
  • ¼ teaspoons Dried Basil
  • ⅛ teaspoons Dried Oregano
  • Garlic Salt And Pepper, To Taste
  • ¼ cups Finely Diced Pepperoni
  • 2 Tablespoons Finely Chopped Green Pepper
  • 2 Tablespoons Finely Chopped Red Onion
  • 2 Tablespoons Finely Chopped Black Olives

Preparation Instructions

Preheat oven to 350ºF. Spray two mini iron skillets with non stick cooking spray and set aside. (A sheet tray will work just fine, too!)

Wash mushrooms with a damp cloth and remove stems. (They should just pop out!) Set aside.

In a small bowl, stir cream cheese, parmesan, basil, oregano, garlic salt and pepper together until combined. Stir in remaining ingredients, excluding the mushrooms.

Spoon into prepared mushroom caps by the heaping teaspoonful. Place 5 in each skillet and bake 20 minutes. After 20 minutes, switch your oven from bake to broil and brown the tops of each mushroom. Remove and serve hot.


_______________________________________

Jessica Merchant is a personal trainer turned food writer and blogger. Her blog, How Sweet Eats, is where she proclaims her love for all things sweet, all things bacon, and everything else in between. She works her magic in her Pittsburgh kitchen, which she shares with her husband of 2 years.


Profile photo of ThreeManyCooks

Enfrijoladas

Posted by in Step-by-Step Recipes

Tasty Kitchen Blog: Enfrijoladas. Guest post by Maggy Keet of Three Many Cooks, recipe submitted by TK member Caroline of Pink Basil.


A simple alternative to fajitas and enchiladas, enfrijoladas make a fun weeknight pantry supper that also works for Meatless Monday. You can serve these enfrijoladas topped with sour cream, cilantro, and salsa. I’ve highlighted the simplest version, but there are other great recipes that include meat, vegetables, and even eggs! For fans of spicy food, add a little heat to the bean mixture or serve hot sauce with the other toppings.

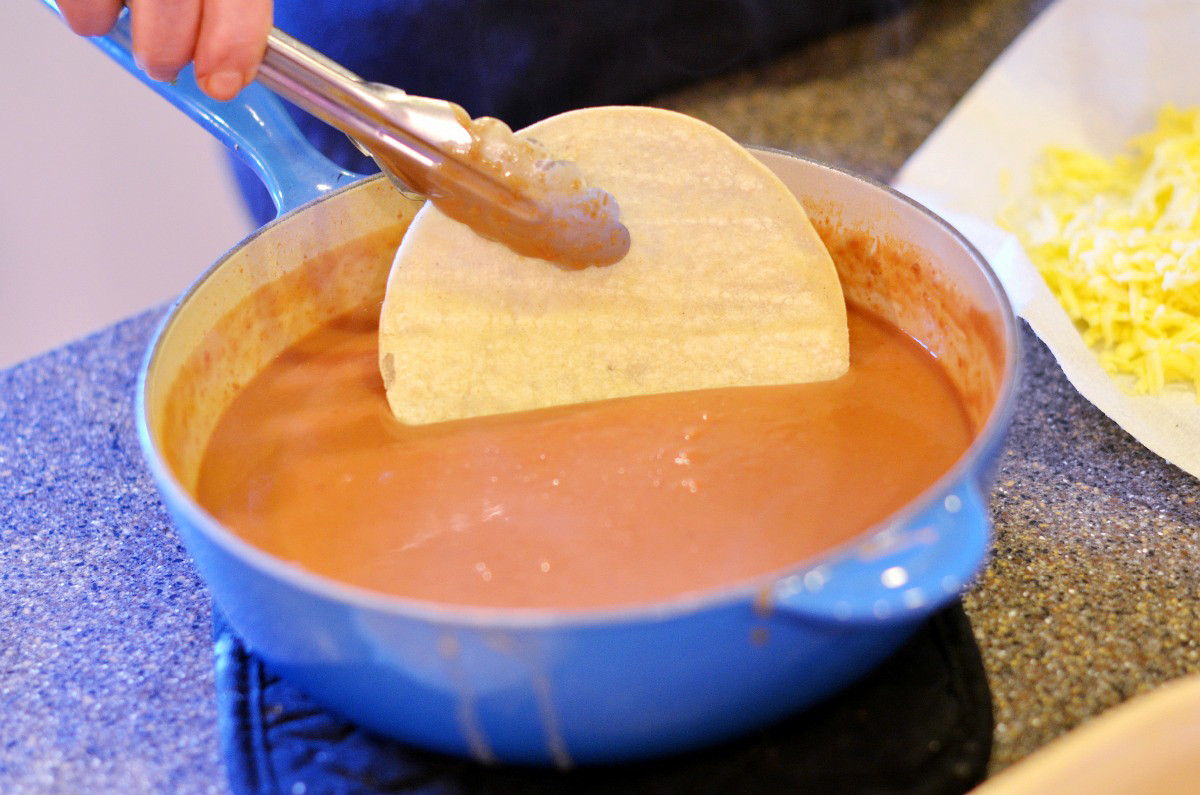
Big tip: microwaving the corn tortillas before dipping them into the refried beans keeps them pliable enough to fold without breaking. Another bit of good news: there was enough sauce and room in the pan for eight tortillas, making it a perfect dinner for four.


Tasty Kitchen Blog: Enfrijoladas. Guest post by Maggy Keet of Three Many Cooks, recipe submitted by TK member Caroline of Pink Basil.

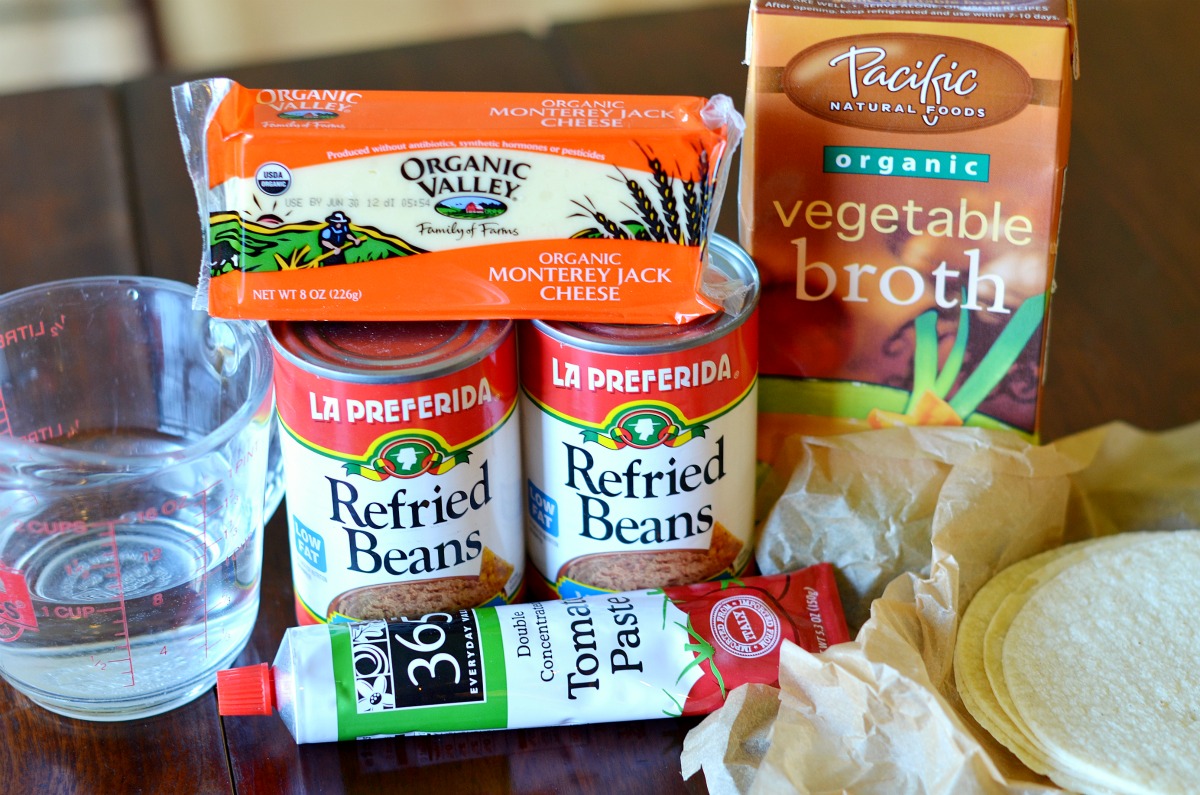
Start with these ingredients.


Tasty Kitchen Blog: Enfrijoladas. Guest post by Maggy Keet of Three Many Cooks, recipe submitted by TK member Caroline of Pink Basil.

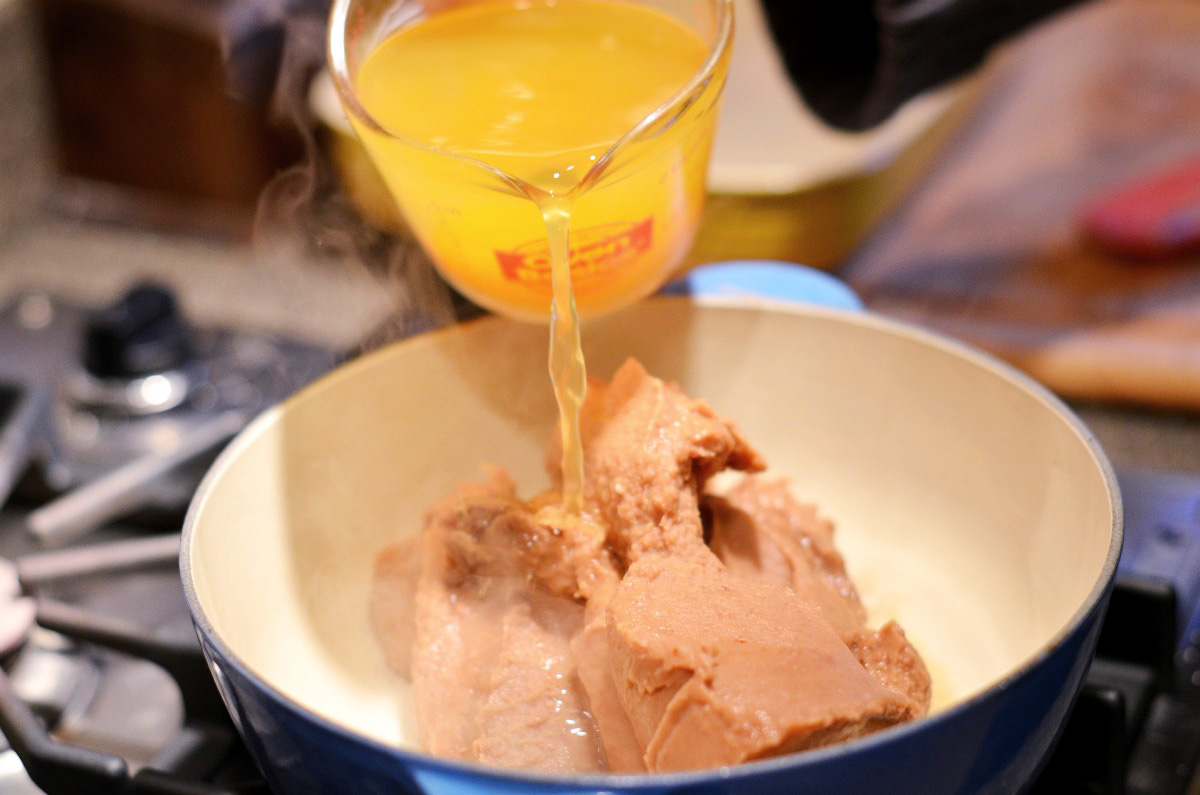
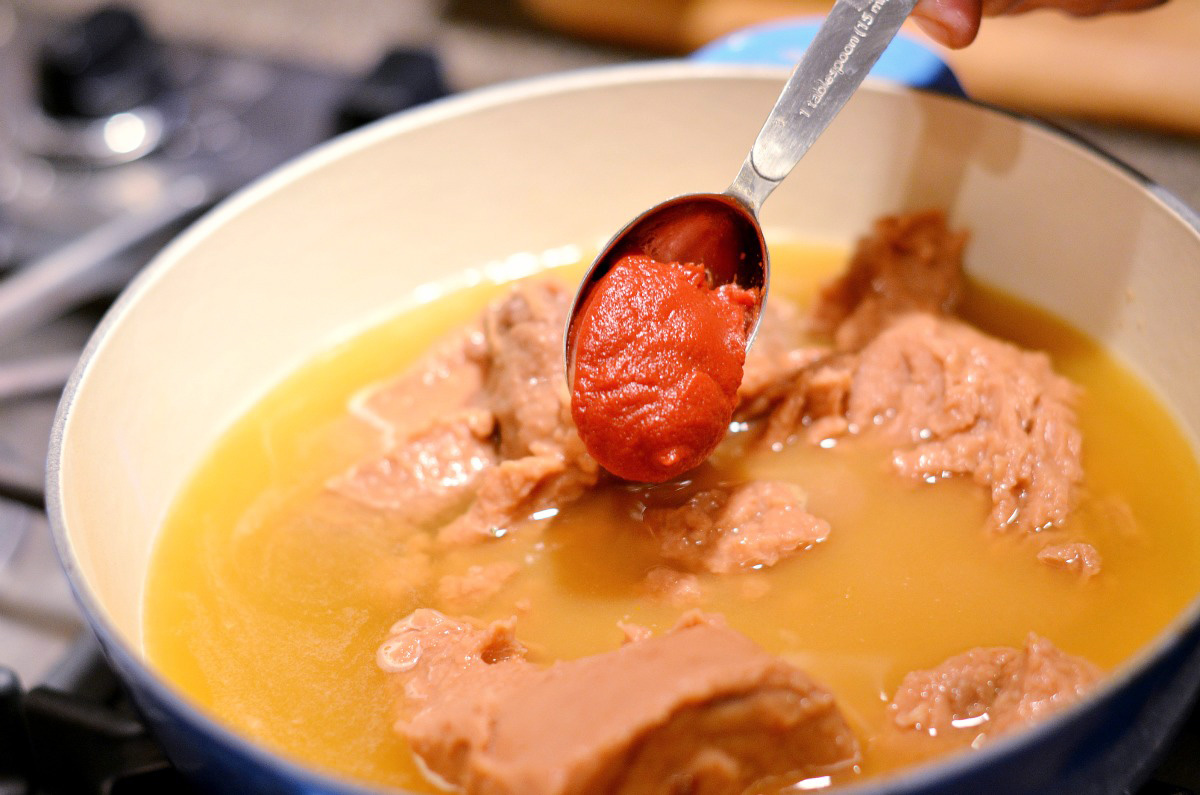
Heat the refried beans, broth, and water in a large pot. Note: I measured and mixed the broth and water in the Pyrex measuring cup and poured it all in at one time.


Tasty Kitchen Blog: Enfrijoladas. Guest post by Maggy Keet of Three Many Cooks, recipe submitted by TK member Caroline of Pink Basil.

Then add the tomato paste.


Tasty Kitchen Blog: Enfrijoladas. Guest post by Maggy Keet of Three Many Cooks, recipe submitted by TK member Caroline of Pink Basil.

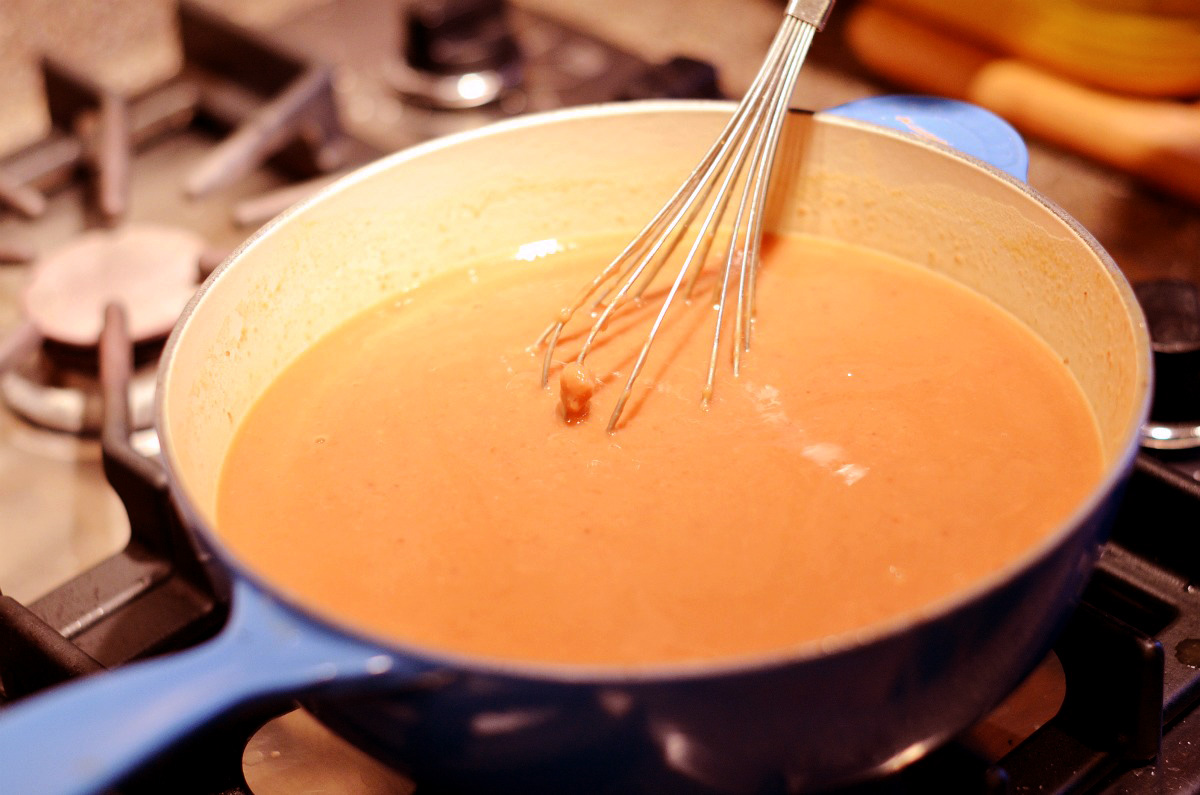
Whisk until thoroughly mixed. The texture should be pretty soupy! While the sauce is mixing and heating, microwave the corn tortillas until hot.


Tasty Kitchen Blog: Enfrijoladas. Guest post by Maggy Keet of Three Many Cooks, recipe submitted by TK member Caroline of Pink Basil.

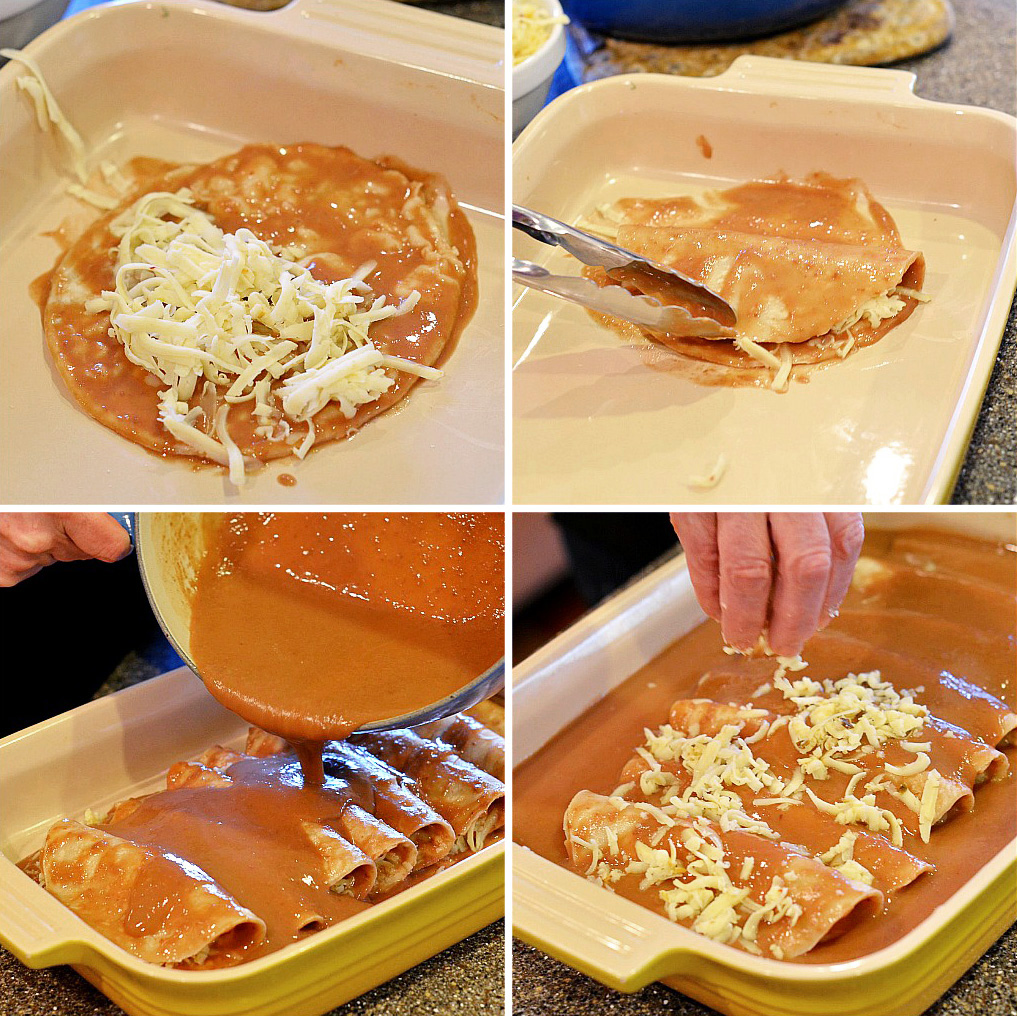
Now get set up with your baking dish, grated cheese, tortillas, and the bean mixture. Using a pair of tongs, dip the tortilla into the bean mixture and allow it to soak for just a moment.


Tasty Kitchen Blog: Enfrijoladas. Guest post by Maggy Keet of Three Many Cooks, recipe submitted by TK member Caroline of Pink Basil.

Place the bean mixture-coated tortilla in the baking dish, add a portion of cheese to one half, and then fold over. Repeat with the remaining seven tortillas, then top the dish with the remaining bean mixture and cheese.


Tasty Kitchen Blog: Enfrijoladas. Guest post by Maggy Keet of Three Many Cooks, recipe submitted by TK member Caroline of Pink Basil.

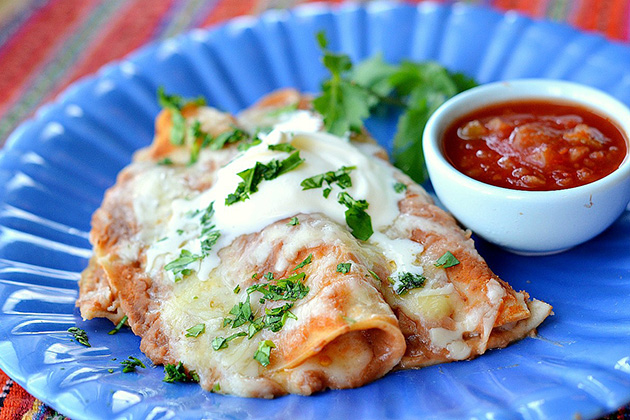
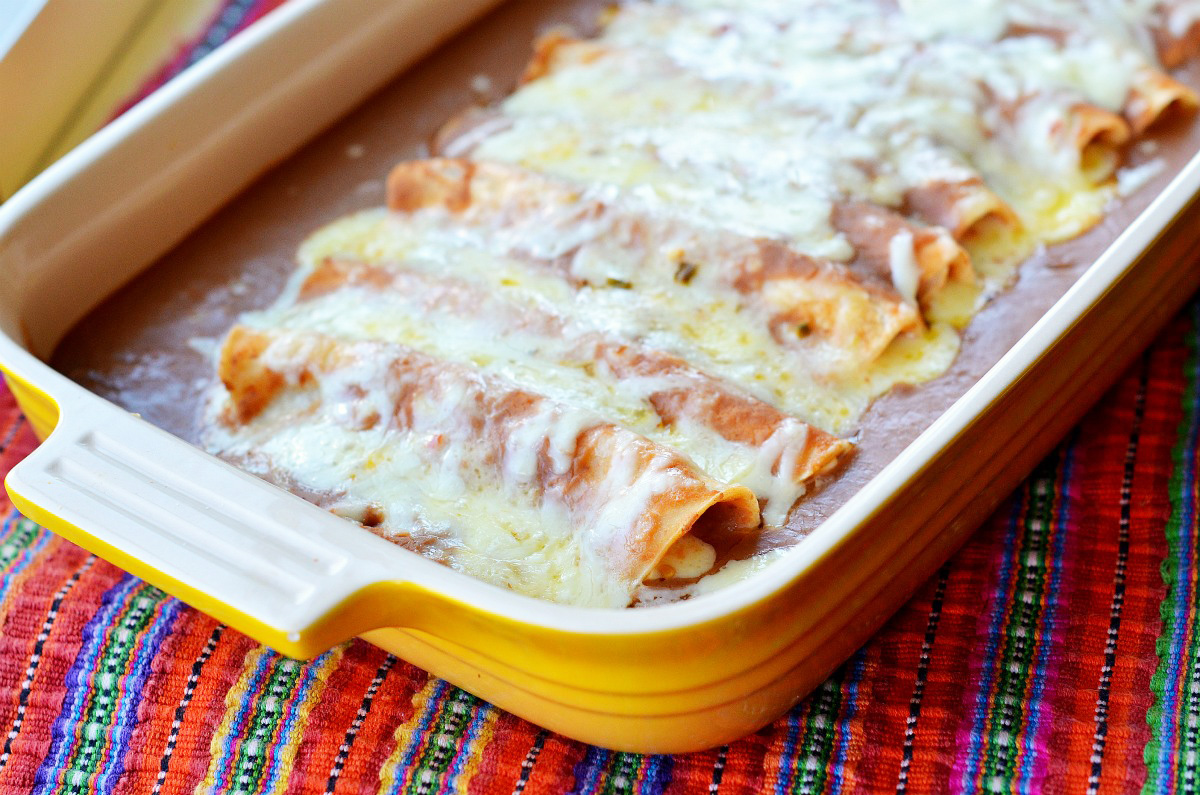
Bake at 350ºF for 10-15 minutes or until the cheese has melted and it looks like this! It took everything inside me not to dig into that dish with a spoon.


Tasty Kitchen Blog: Enfrijoladas. Guest post by Maggy Keet of Three Many Cooks, recipe submitted by TK member Caroline of Pink Basil.

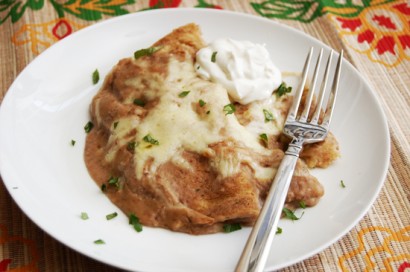
Serve with a dollop of sour cream, salsa, and chopped fresh cilantro!

Thank you, Caroline, for introducing me to this classic Mexican recipe. I will certainly be stocking refried beans in my pantry from now on so that I can make these again! Visit her blog, Pink Basil, for more recipes, thoughtful writing, and great photography.


Printable Recipe

Enfrijoladas

See post on Pink Basil’s site!
4.62 Mitt(s) 8 Rating(s)8 votes, average: 4.62 out of 58 votes, average: 4.62 out of 58 votes, average: 4.62 out of 58 votes, average: 4.62 out of 58 votes, average: 4.62 out of 5

Prep Time:

Cook Time:

Difficulty: Easy

Servings: 4

4
x

Print Options

Page size Letter 3x5 4x6
Text Size Small Medium Large
Content Include description
Include prep time, etc.
Show image

Description

Enfrijoladas: delicious Mexican comfort food!

Ingredients

  • 4 cups Refried Beans
  • 1 cup Vegetable Stock
  • 1 cup Water
  • 1 Tablespoon Tomato Paste
  • 6 whole Small Or Medium Size Tortillas
  • 3 cups Shredded Monterey Jack Cheese

Preparation Instructions

Heat up the refried beans in a large pan. Add in the vegetable stock, water and tomato paste and blend until smooth. You want the sauce to be very thin, so add more liquid if necessary. If the sauce is too thick it will weigh down the tortillas and tear them. Using tongs, take a tortilla and dip in the sauce. This is a bit of an art—you want them to soak through enough that they are pliable and won’t tear, but soak them for too long and they’ll come apart when you lift them out.

Lay the tortilla dipped in bean sauce flat in a small baking dish. Sprinkle some cheese on one side of the tortilla, and then fold it in half like a quesadilla. Repeat this with each tortilla until the baking dish is full. Pour the remainder of the bean sauce into the pan and sprinkle with remaining cheese.

Bake at 350ºF for about 10 to 15 minutes, or until the cheese has melted.


_______________________________________

Three Many Cooks is the always-entertaining food blog of Pam Anderson and her two daughters, Maggy and Sharon. Pam is a well-known and much-respected food writer and author, Maggy is a “hippy adventurer meets 1950s housewife,” and Sharon refers to herself as a recovering food snob learning to survive on a graduate student’s budget. Theirs is a strong relationship both inside and outside the kitchen, and it shows in the food they create and the stories they tell.


Profile photo of Erika (TK)

Cinco de Mayo, Baby!

Posted by in Holidays, The Theme Is...

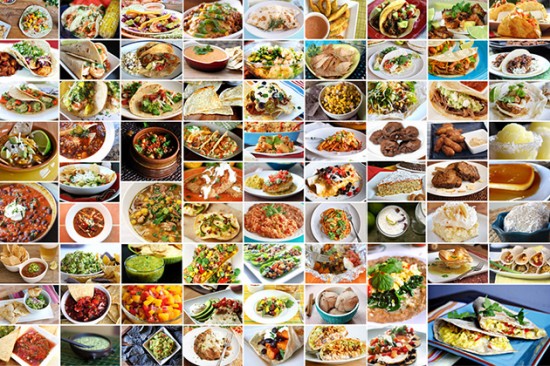
  When I set out to gather recipes for this post, I had no idea what I was getting into. Not a clue. Not even the thinnest sliver of an inkling. Nada. Nevertheless, I approached the task with a great deal of trepidation, primarily because I’m by no means an authority on Mexican food. So […]

Profile photo of EatLiveRun

Spicy Tequila Lime Chicken Marinade

Posted by in Step-by-Step Recipes

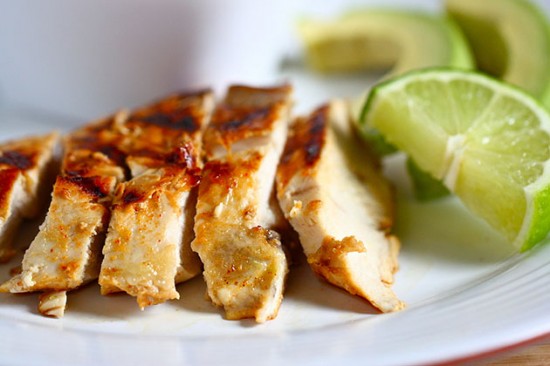
  I don’t know about you, but I’m always on the lookout for a new chicken marinade recipe. It seems like throwing a marinade together would be easy, but for some reason the idea of creating my own stresses me out. Which is why I was so excited when I found this recipe for Spicy […]

Profile photo of Amber {Sprinkled With Flour}

Skillet Asparagus Tart

Posted by in Step-by-Step Recipes

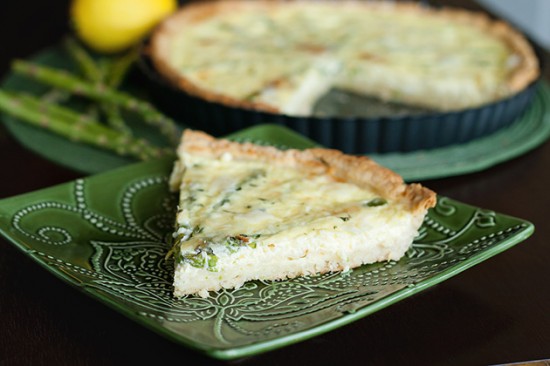
  I love asparagus. Serve it to me any way: grilled, roasted, pureed in a soup … thrown across the room while I catch it like a seal. Yes, I am slightly weird. Yes, I love it that much. With spring in full bloom, it’s the perfect season to enjoy my favorite vegetable. So when […]

Profile photo of georgiapellegrini

Coconut Honey Rice Pudding

Posted by in Step-by-Step Recipes

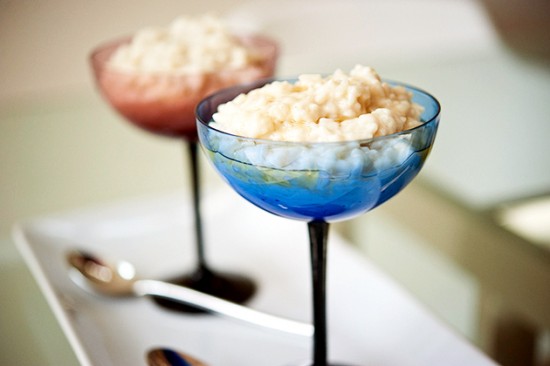
  This dairy-free Coconut Honey Rice Pudding from Fuji Mama rocked my world. It had the traditional creaminess of rice pudding but with the extra richness that only coconut milk can offer. My kitchen also smelled amazing for many hours, which was an added bonus.       To make it, you will need: soy […]