The Pioneer Woman Tasty Kitchen
Profile photo of Erica Lea

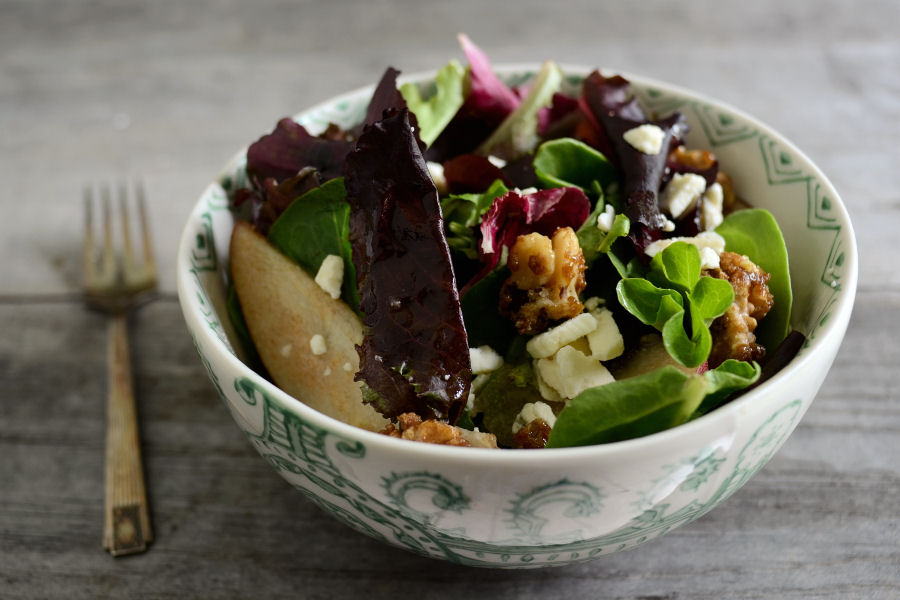
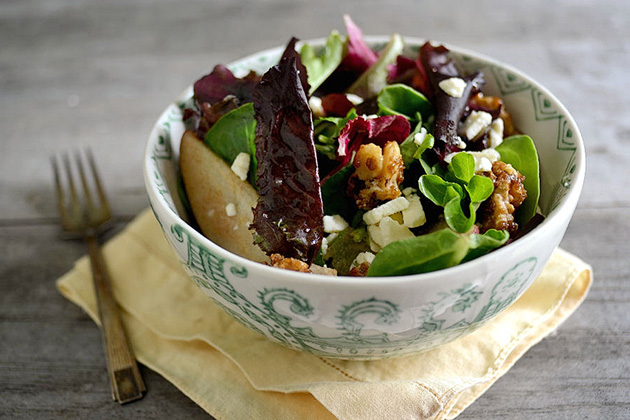
Spring Greens with Pears, Sugared Walnuts & Gorgonzola

Posted by in Step-by-Step Recipes

Tasty Kitchen Blog: Spring Greens with Pears, Sugared Walnuts & Gorgonzola. Guest post by Erica Kastner, recipe submitted by TK member Jennifer of Jennifer Cooks.

 
I don’t know about you guys, but to me an iceberg + ranch dressing salad is so blasé. I prefer my salad with a bit of pizzazz.

Thus, when I saw Jennifer’s recipe for a mix of spring greens, pears, sugared walnuts and gorgonzola, I was very much excited to give it a go. The list of ingredients was just different enough to make it interesting but familiar enough to make it appetizing.

Let me show you how to throw (or toss) it together!


Tasty Kitchen Blog: Spring Greens with Pears, Sugared Walnuts & Gorgonzola. Guest post by Erica Kastner, recipe submitted by TK member Jennifer of Jennifer Cooks.

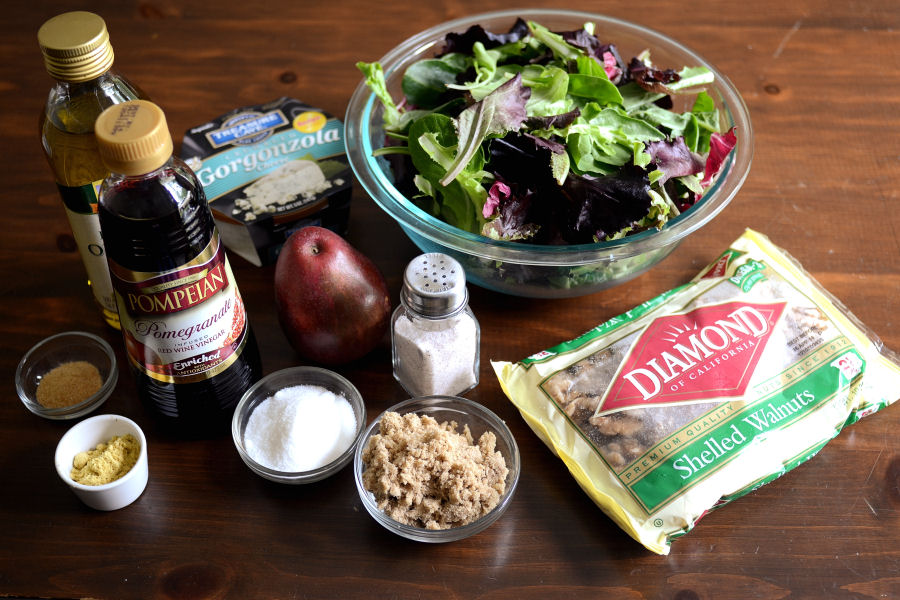
First off, these are the things you’ll need: spring salad greens (or any type of lettuce you prefer), red pear, fresh herbs of choice (I left these out), gorgonzola, walnut halves, white sugar, brown sugar, extra virgin olive oil, red wine vinegar (I used pomegranate-infused), ground mustard, salt and garlic powder.


Tasty Kitchen Blog: Spring Greens with Pears, Sugared Walnuts & Gorgonzola. Guest post by Erica Kastner, recipe submitted by TK member Jennifer of Jennifer Cooks.

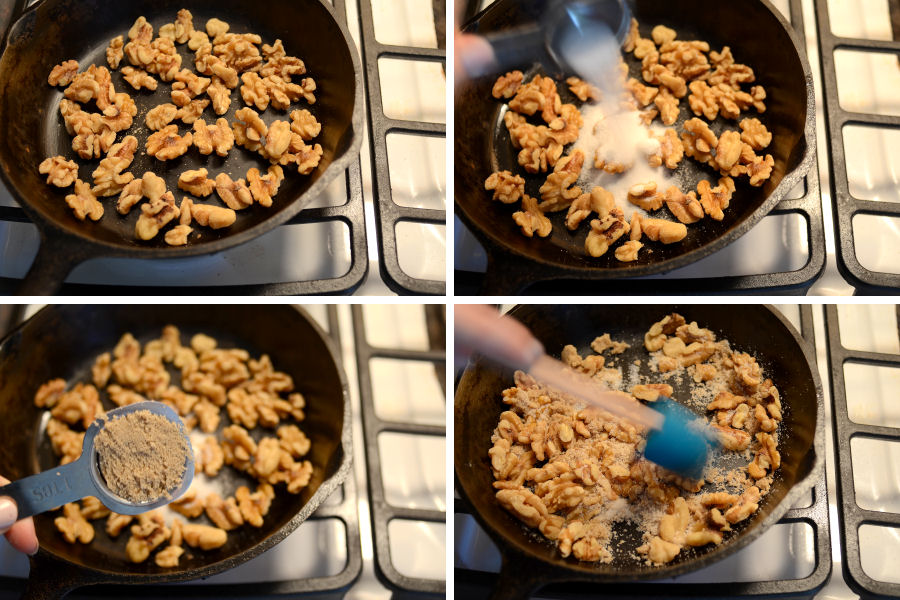
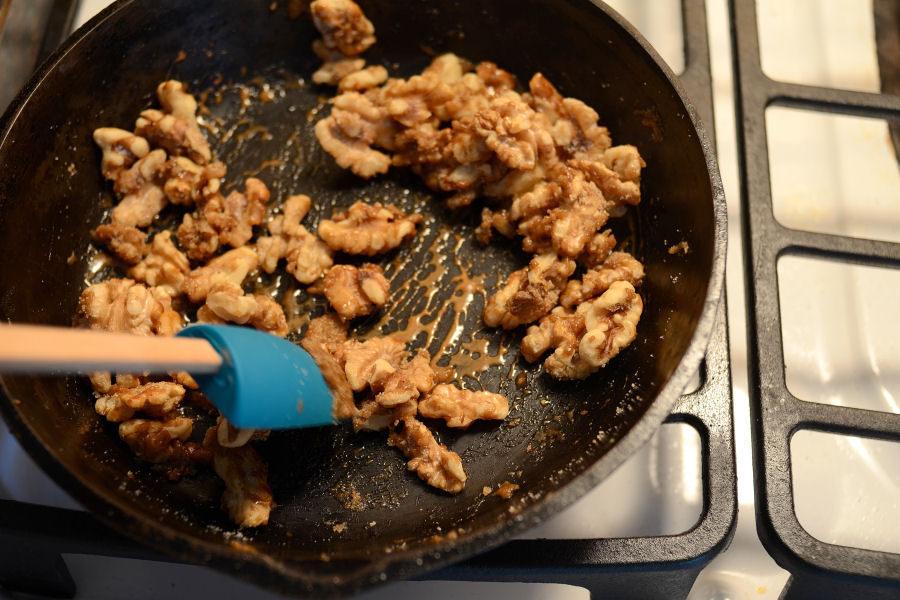
Begin by sugaring the walnuts: Over medium heat, sauté the walnuts with white and brown sugars. Stir often.


Tasty Kitchen Blog: Spring Greens with Pears, Sugared Walnuts & Gorgonzola. Guest post by Erica Kastner, recipe submitted by TK member Jennifer of Jennifer Cooks.

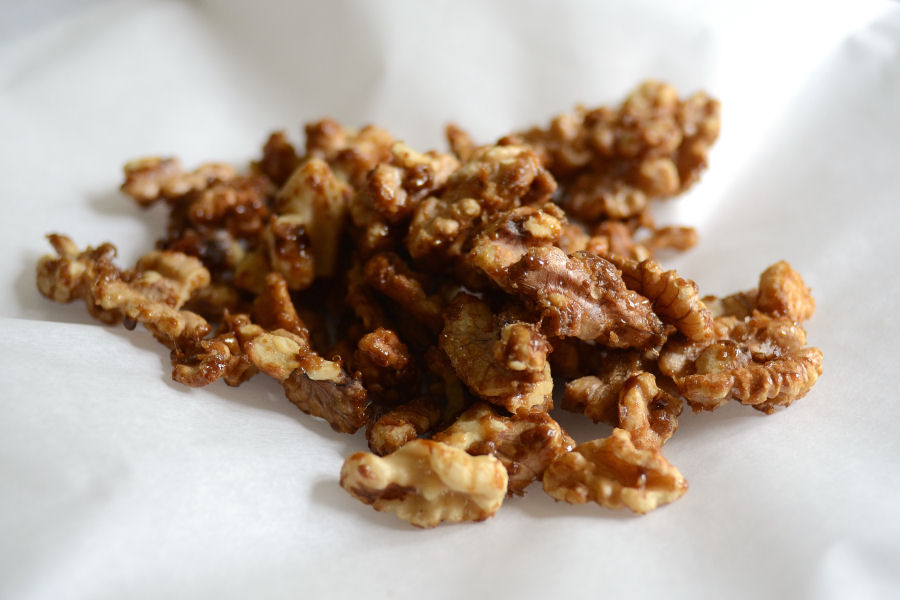
The sugars will begin to melt after a few minutes. When the walnuts are toasty, light brown and covered with the melted sugar, they’re done.


Tasty Kitchen Blog: Spring Greens with Pears, Sugared Walnuts & Gorgonzola. Guest post by Erica Kastner, recipe submitted by TK member Jennifer of Jennifer Cooks.

Remove to wax paper (I used parchment) and allow to cool.


Tasty Kitchen Blog: Spring Greens with Pears, Sugared Walnuts & Gorgonzola. Guest post by Erica Kastner, recipe submitted by TK member Jennifer of Jennifer Cooks.

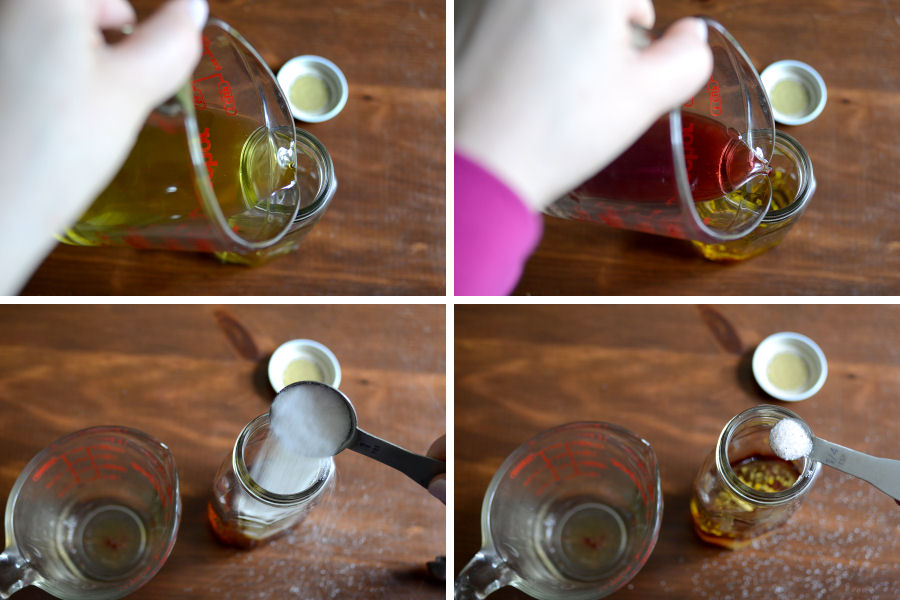
Now make the salad dressing: In a small jar place the olive oil, red wine vinegar, sugar, salt …


Tasty Kitchen Blog: Spring Greens with Pears, Sugared Walnuts & Gorgonzola. Guest post by Erica Kastner, recipe submitted by TK member Jennifer of Jennifer Cooks.

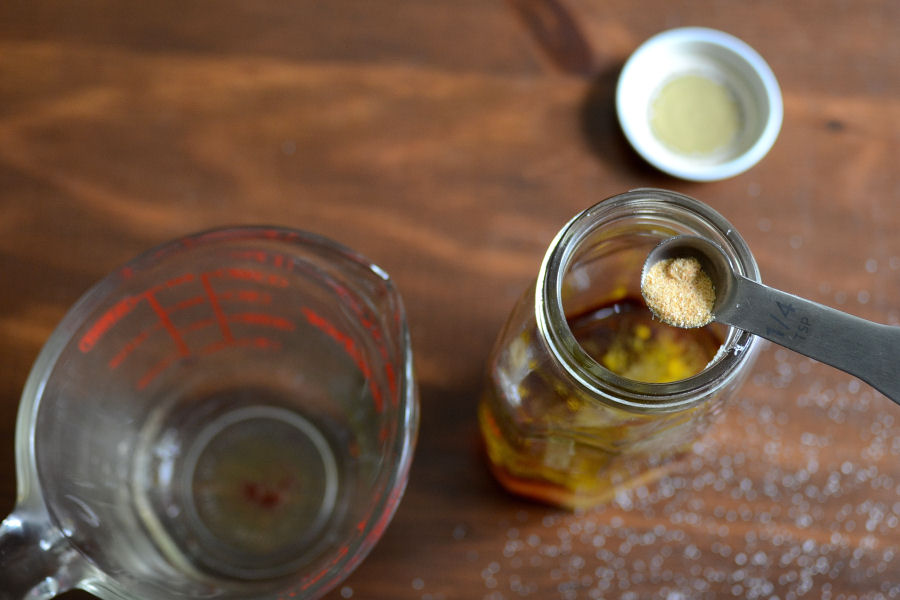
And garlic powder.


Tasty Kitchen Blog: Spring Greens with Pears, Sugared Walnuts & Gorgonzola. Guest post by Erica Kastner, recipe submitted by TK member Jennifer of Jennifer Cooks.

Screw on the lid and shake like mad until well combined.
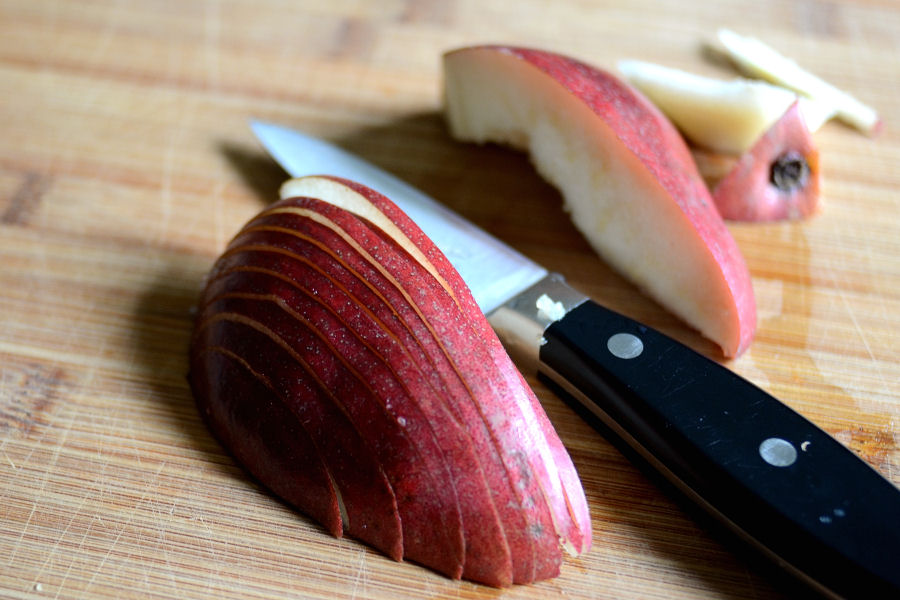


Tasty Kitchen Blog: Spring Greens with Pears, Sugared Walnuts & Gorgonzola. Guest post by Erica Kastner, recipe submitted by TK member Jennifer of Jennifer Cooks.

Thinly slice your pear.


Tasty Kitchen Blog: Spring Greens with Pears, Sugared Walnuts & Gorgonzola. Guest post by Erica Kastner, recipe submitted by TK member Jennifer of Jennifer Cooks.

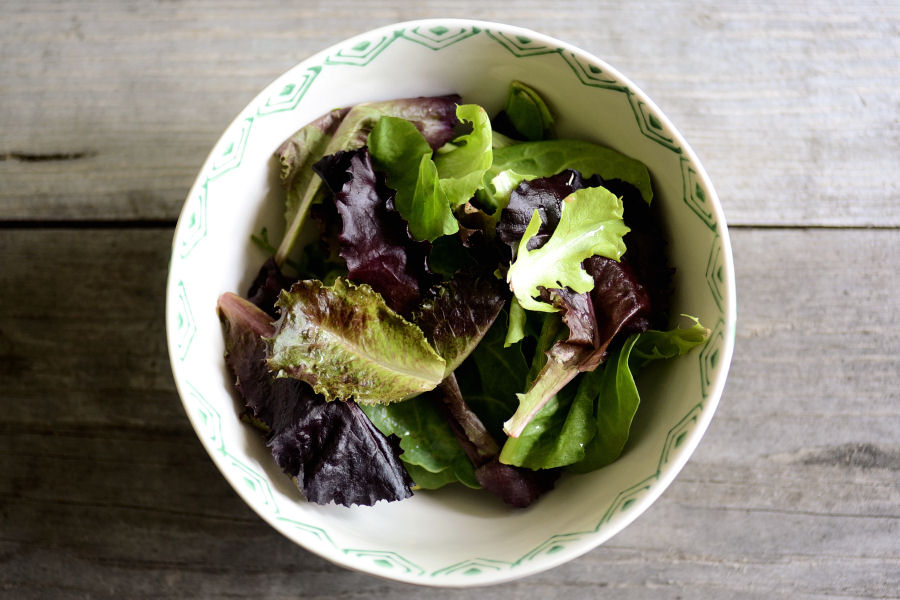
Now it’s time to assemble your salad. Put your greens in a bowl.
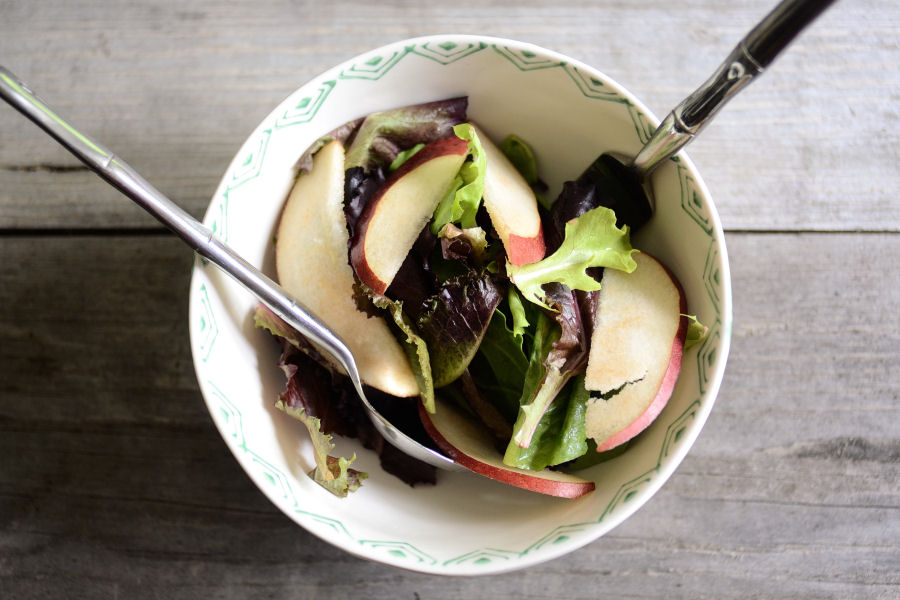


Tasty Kitchen Blog: Spring Greens with Pears, Sugared Walnuts & Gorgonzola. Guest post by Erica Kastner, recipe submitted by TK member Jennifer of Jennifer Cooks.

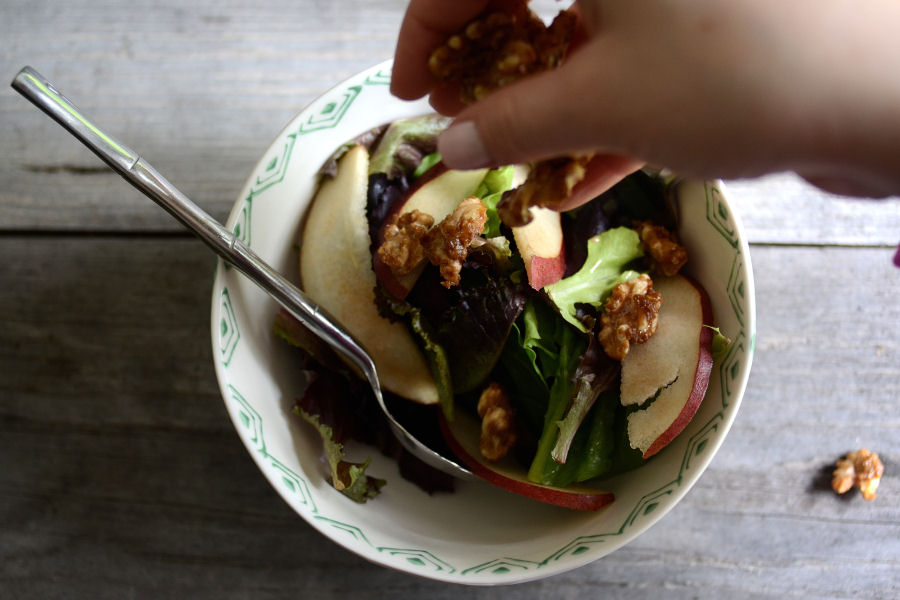
Add the sliced pears …


Tasty Kitchen Blog: Spring Greens with Pears, Sugared Walnuts & Gorgonzola. Guest post by Erica Kastner, recipe submitted by TK member Jennifer of Jennifer Cooks.

Sugared walnuts …


Tasty Kitchen Blog: Spring Greens with Pears, Sugared Walnuts & Gorgonzola. Guest post by Erica Kastner, recipe submitted by TK member Jennifer of Jennifer Cooks.

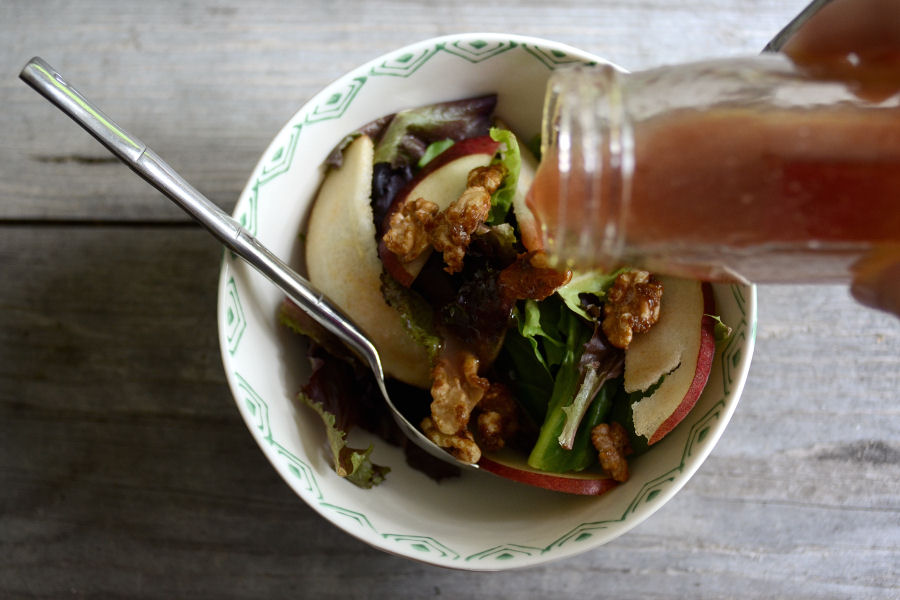
Homemade salad dressing …


Tasty Kitchen Blog: Spring Greens with Pears, Sugared Walnuts & Gorgonzola. Guest post by Erica Kastner, recipe submitted by TK member Jennifer of Jennifer Cooks.

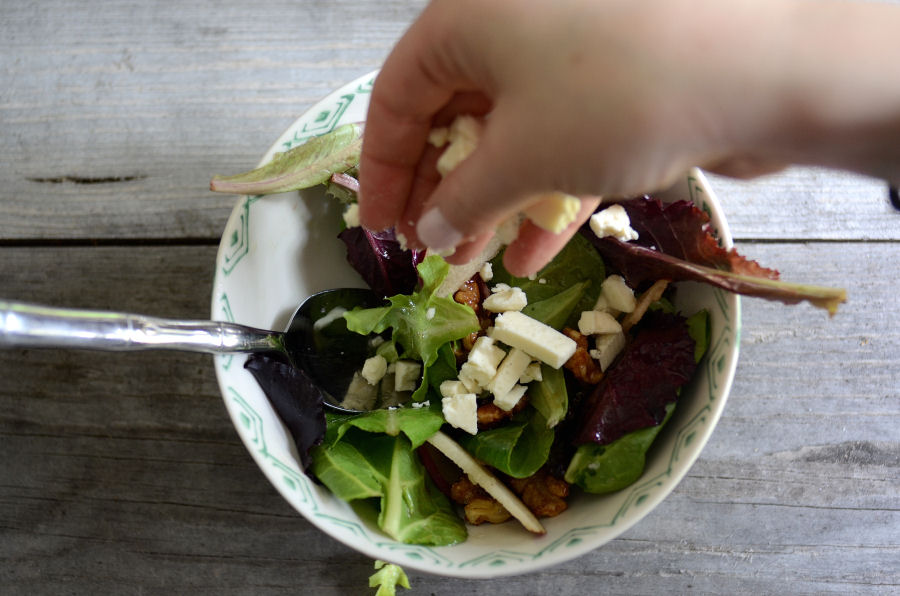
And gorgonzola cheese.


Tasty Kitchen Blog: Spring Greens with Pears, Sugared Walnuts & Gorgonzola. Guest post by Erica Kastner, recipe submitted by TK member Jennifer of Jennifer Cooks.

Isn’t that prettiest thing you ever did see?
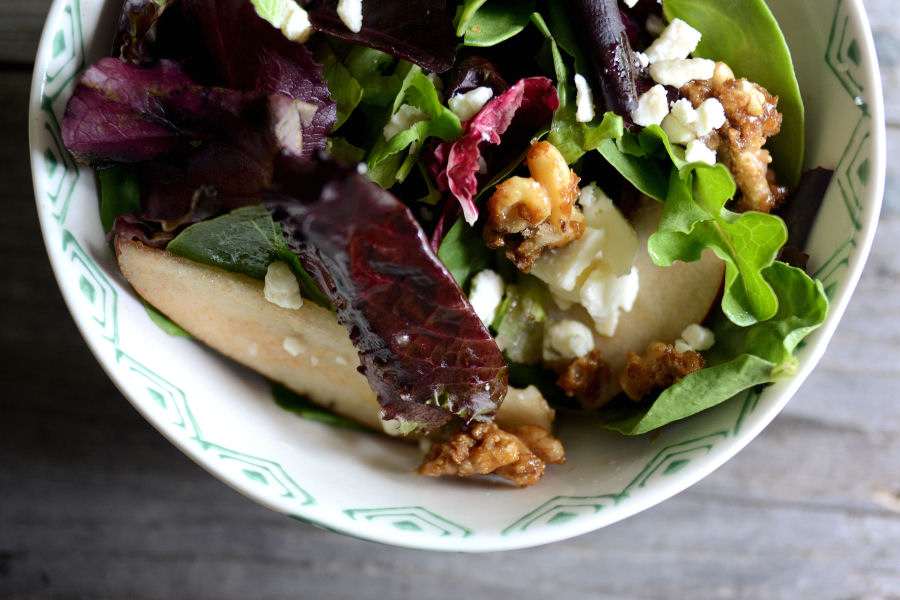


Tasty Kitchen Blog: Spring Greens with Pears, Sugared Walnuts & Gorgonzola. Guest post by Erica Kastner, recipe submitted by TK member Jennifer of Jennifer Cooks.

Recipe Notes:

1. Because I wasn’t taking this salad to a large gathering, I only fixed myself a small bowl. If you want to mix up a big bowl, I would suggest not adding the toppings until just before serving.
2. I thought the vinaigrette was lovely, but Reuben thought it was a bit sour. You could decrease the amount of vinegar if you prefer a milder dressing. 

 
Thanks so much to Jennifer for sharing this lovely recipe with us. Make sure to check out her blog, Jennifer Cooks, for many more recipes. Her Greek Tostados have my mouth watering.


Printable Recipe
See post on Jennifer | JenniferCooks.com’s site!
5.00 Mitt(s) 8 Rating(s)8 votes, average: 5.00 out of 58 votes, average: 5.00 out of 58 votes, average: 5.00 out of 58 votes, average: 5.00 out of 58 votes, average: 5.00 out of 5

Prep Time:

Cook Time:

Difficulty: Easy

Servings: 4

4
x

Print Options

Page size Letter 3x5 4x6
Text Size Small Medium Large
Content Include description
Include prep time, etc.
Show image

Description

I love all kinds of salad and this one is no exception! I also love gorgonzola and bleu cheese.

Ingredients

  • 6 cups Spring Mix Salad Greens
  • 2 whole Red Pears, Cored And Thinly Sliced
  • Your Choice Of Fresh Herbs, To Taste (optional)
  • 8 ounces, weight Gorgonzola Cheese, Coarsely Crumbled
  • 1 cup Walnut Halves
  • 2 Tablespoons White Sugar
  • 2 Tablespoons Brown Sugar
  • _____
  • FOR THE DRESSING:
  • ½ cups Oil
  • ⅓ cups Red Wine Vinegar
  • 2 Tablespoons Sugar
  • ½ teaspoons Ground Mustard
  • ½ teaspoons Salt
  • ¼ teaspoons Garlic Powder

Preparation Instructions

Salad: Combine spring greens, pears and herbs (if desired) in a large salad bowl. Top with cooled sugared walnuts.

Right before serving, toss salad with desired amount of dressing. Add gorgonzola crumbles at the very last, tossing lightly to incorporate into the salad.

Sugared walnuts: In a small pan, saute walnuts and white and brown sugar over medium heat until walnuts are caramelized, stirring often (they will be light brown and coated with melted sugar), approximately 4-6 minutes. Spread the walnuts on foil or waxed paper. After they cool, break apart.

For the dressing: Combine oil, vinegar, sugar, mustard, salt and garlic powder in a jar or container with a lid and shake well. Pour the dressing over the salad and toss.


_______________________________________

Newly-married Erica Kastner shares her wonderful recipes and amazing food photography on her blog, Cooking for Seven. She also writes about crafts and posts more of her beautiful photography in her personal blog, EricaLea.com. There really isn’t much that this amazing young lady can’t do, and we’re thrilled she does some of it here.


Profile photo of twopeasandtheirpod

Chocolate Chunk Cookie Dough Frozen Yogurt

Posted by in Step-by-Step Recipes

Tasty Kitchen Blog: Chocolate Chunk Cookie Dough Frozen Yogurt. Guest post by Maria Lichty of Two Peas and Their Pod, recipe submitted by TK member Anna of Crunchy Creamy Sweet.

 
Cookies are my all time favorite dessert, that is no secret. Well, my second favorite dessert is frozen yogurt. So when I saw Anna’s recipe for Chocolate Chunk Cookie Dough Frozen Yogurt my eyes almost popped out of my head. My two favorite treats combined in one recipe—a dream come true! And the best part? You don’t even need an ice cream maker to make this dreamy frozen yogurt. It is so easy to make! The hardest part is letting it chill in the freezer. I am not patient, especially when desserts are involved. But I promise this Chocolate Chunk Cookie Dough Frozen Yogurt is well worth the wait! 


Tasty Kitchen Blog: Chocolate Chunk Cookie Dough Frozen Yogurt. Guest post by Maria Lichty of Two Peas and Their Pod, recipe submitted by TK member Anna of Crunchy Creamy Sweet.

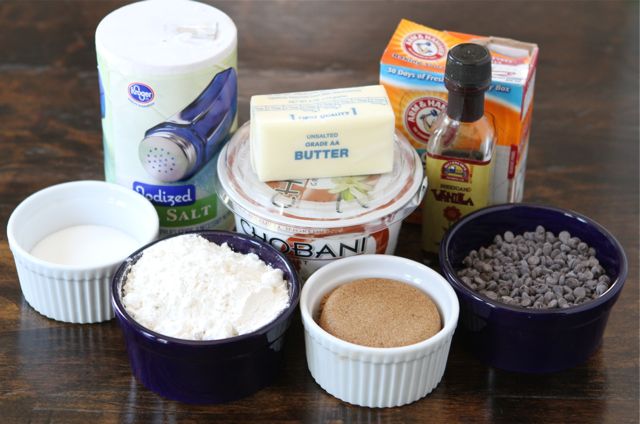
Let’s get started! To make it, you will need: butter, dark brown sugar, granulated sugar, vanilla extract, flour, baking soda, salt, chocolate chips or chunks, and vanilla yogurt. 


Tasty Kitchen Blog: Chocolate Chunk Cookie Dough Frozen Yogurt. Guest post by Maria Lichty of Two Peas and Their Pod, recipe submitted by TK member Anna of Crunchy Creamy Sweet.

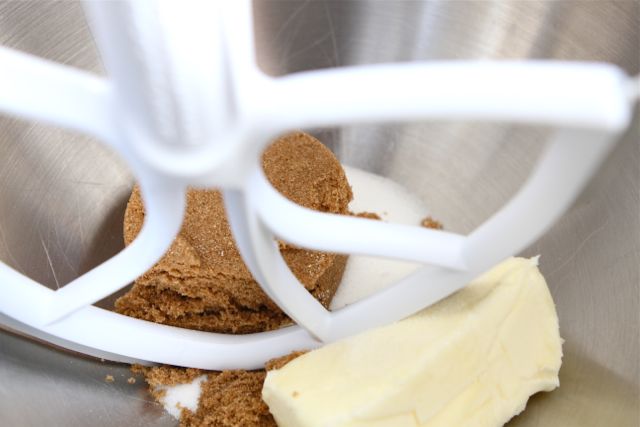
In the bowl of a stand mixer, combine the butter and sugars. 


Tasty Kitchen Blog: Chocolate Chunk Cookie Dough Frozen Yogurt. Guest post by Maria Lichty of Two Peas and Their Pod, recipe submitted by TK member Anna of Crunchy Creamy Sweet.

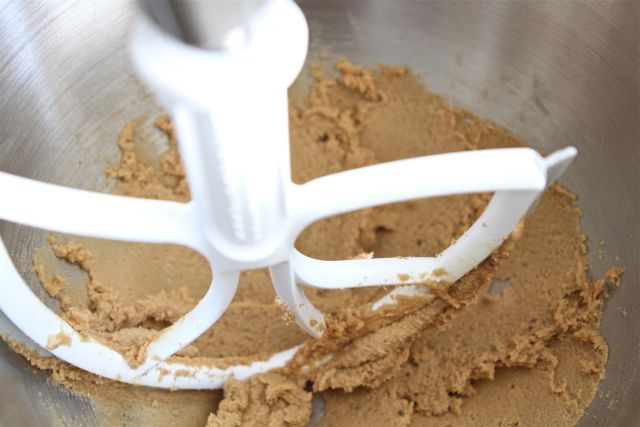
Beat until light and fluffy. 


Tasty Kitchen Blog: Chocolate Chunk Cookie Dough Frozen Yogurt. Guest post by Maria Lichty of Two Peas and Their Pod, recipe submitted by TK member Anna of Crunchy Creamy Sweet.

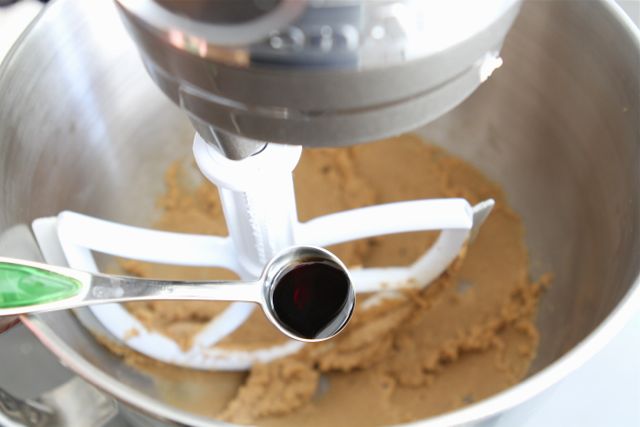
Add the vanilla extract and mix until smooth.


Tasty Kitchen Blog: Chocolate Chunk Cookie Dough Frozen Yogurt. Guest post by Maria Lichty of Two Peas and Their Pod, recipe submitted by TK member Anna of Crunchy Creamy Sweet.

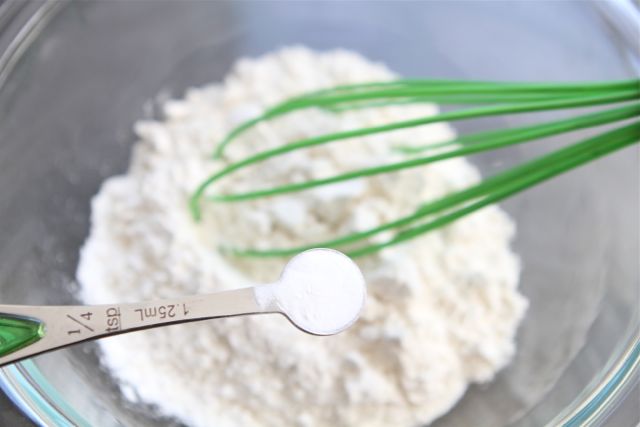
In a small mixing bowl, combine flour and baking soda.


Tasty Kitchen Blog: Chocolate Chunk Cookie Dough Frozen Yogurt. Guest post by Maria Lichty of Two Peas and Their Pod, recipe submitted by TK member Anna of Crunchy Creamy Sweet.

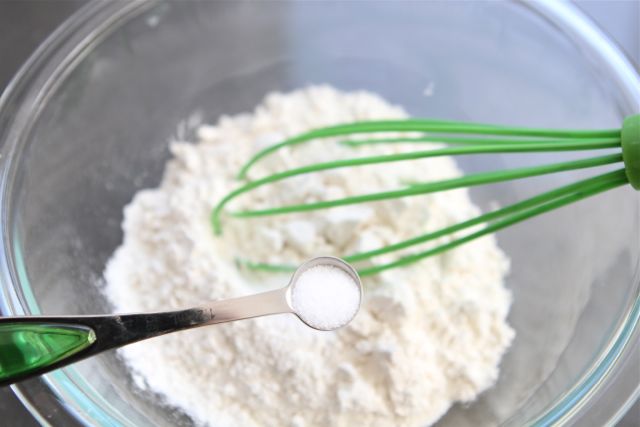
Add in the salt. 


Tasty Kitchen Blog: Chocolate Chunk Cookie Dough Frozen Yogurt. Guest post by Maria Lichty of Two Peas and Their Pod, recipe submitted by TK member Anna of Crunchy Creamy Sweet.

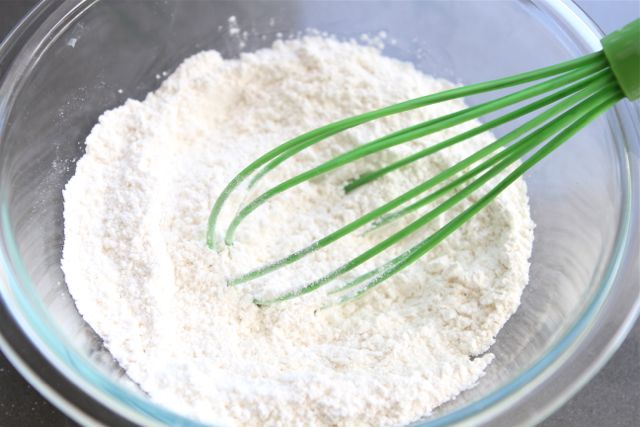
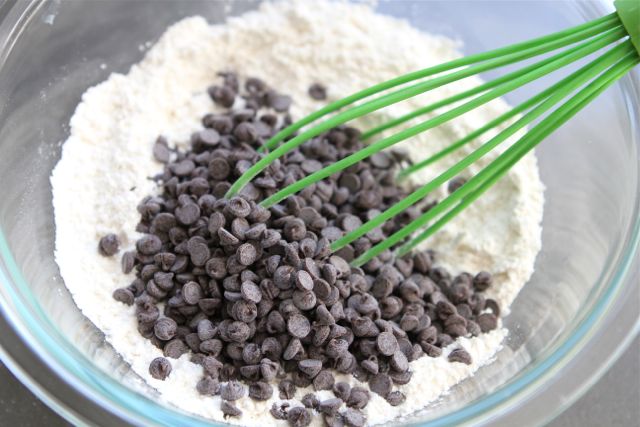
Whisk all of the dry ingredients together. 


Tasty Kitchen Blog: Chocolate Chunk Cookie Dough Frozen Yogurt. Guest post by Maria Lichty of Two Peas and Their Pod, recipe submitted by TK member Anna of Crunchy Creamy Sweet.

Add the chocolate chips and stir. 


Tasty Kitchen Blog: Chocolate Chunk Cookie Dough Frozen Yogurt. Guest post by Maria Lichty of Two Peas and Their Pod, recipe submitted by TK member Anna of Crunchy Creamy Sweet.

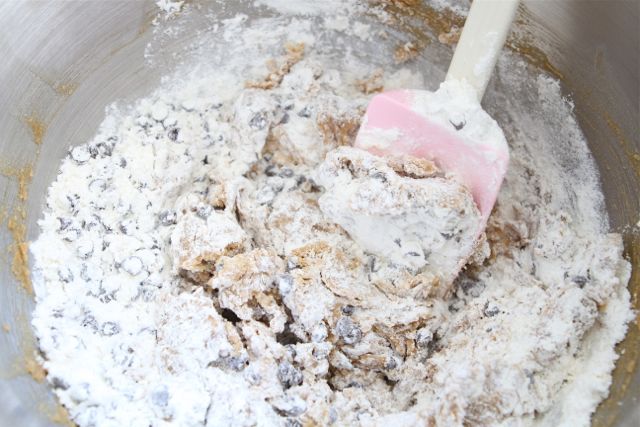
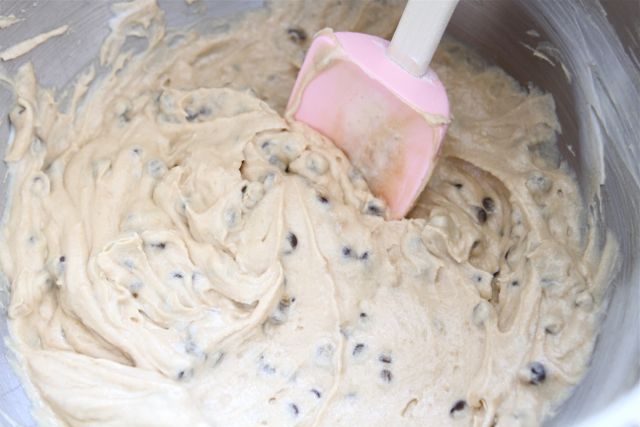
Add the flour and chocolate chip mixture to the butter mixture and fold gently. 


Tasty Kitchen Blog: Chocolate Chunk Cookie Dough Frozen Yogurt. Guest post by Maria Lichty of Two Peas and Their Pod, recipe submitted by TK member Anna of Crunchy Creamy Sweet.

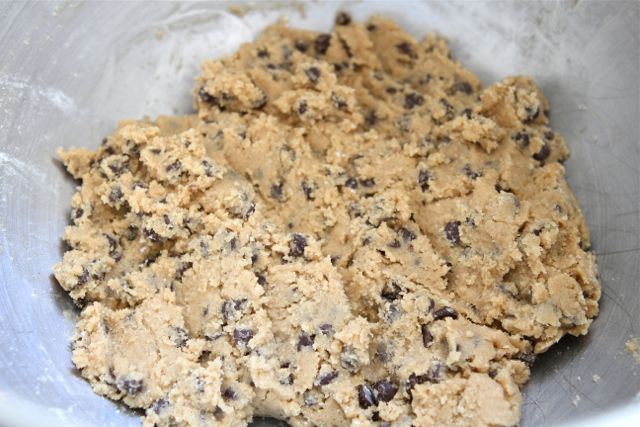
Stir until combined. 


Tasty Kitchen Blog: Chocolate Chunk Cookie Dough Frozen Yogurt. Guest post by Maria Lichty of Two Peas and Their Pod, recipe submitted by TK member Anna of Crunchy Creamy Sweet.

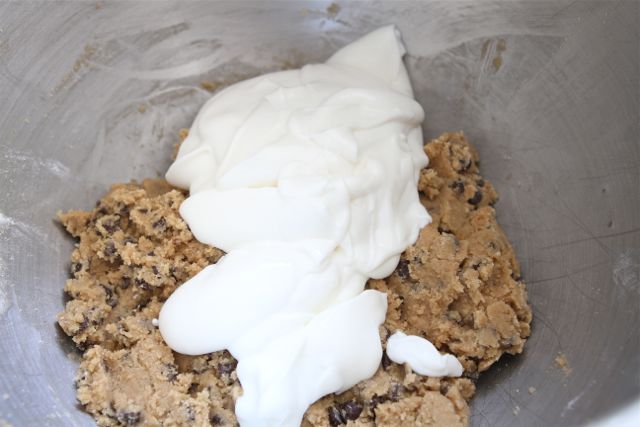
Add the yogurt. 


Tasty Kitchen Blog: Chocolate Chunk Cookie Dough Frozen Yogurt. Guest post by Maria Lichty of Two Peas and Their Pod, recipe submitted by TK member Anna of Crunchy Creamy Sweet.

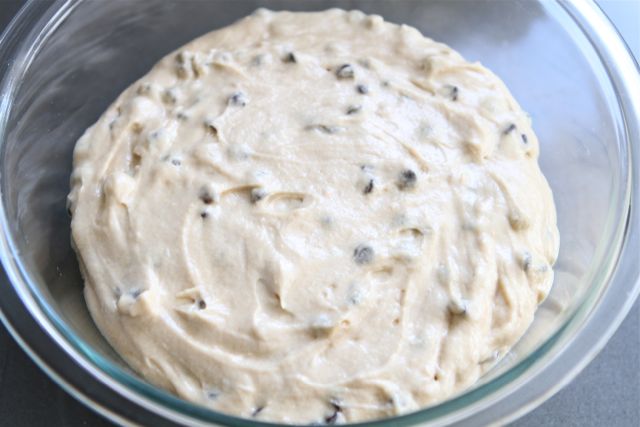
Stir until smooth. 


Tasty Kitchen Blog: Chocolate Chunk Cookie Dough Frozen Yogurt. Guest post by Maria Lichty of Two Peas and Their Pod, recipe submitted by TK member Anna of Crunchy Creamy Sweet.

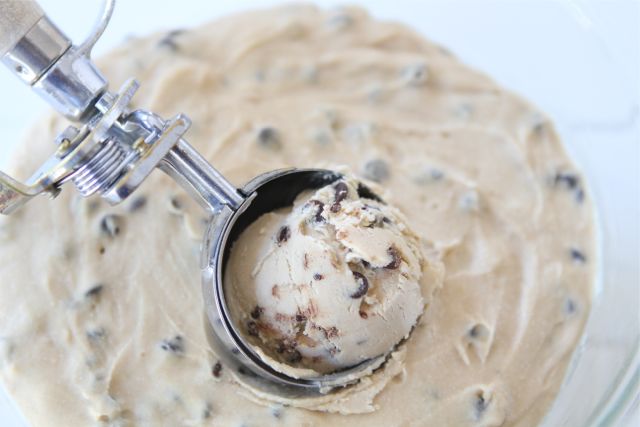
Place in a container and cover with a lid. Freeze until set, preferably overnight. 


Tasty Kitchen Blog: Chocolate Chunk Cookie Dough Frozen Yogurt. Guest post by Maria Lichty of Two Peas and Their Pod, recipe submitted by TK member Anna of Crunchy Creamy Sweet.

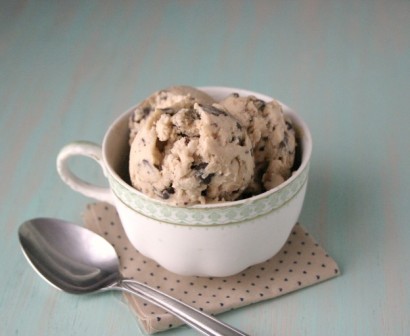
Remove from the freezer and serve. 


Tasty Kitchen Blog: Chocolate Chunk Cookie Dough Frozen Yogurt. Guest post by Maria Lichty of Two Peas and Their Pod, recipe submitted by TK member Anna of Crunchy Creamy Sweet.

Enjoy! 


Tasty Kitchen Blog: Chocolate Chunk Cookie Dough Frozen Yogurt. Guest post by Maria Lichty of Two Peas and Their Pod, recipe submitted by TK member Anna of Crunchy Creamy Sweet.

The frozen yogurt is rich, creamy, and oh so sweet. It tastes just like cookie dough but in frozen form. I love how simple it is to make. I am going to have to keep our freezer stocked with this frozen yogurt! It is the perfect cool-down treat for a hot summer day. 

Thanks Anna for sharing your Chocolate Chunk Cookie Dough Frozen Yogurt. I am off to eat another scoop now! Make sure you visit Anna’s blog Crunchy Creamy Sweet for other fun and delicious recipes!


Printable Recipe

Chocolate Chunk Cookie Dough Frozen Yogurt

See post on Anna’s site!
5.00 Mitt(s) 8 Rating(s)8 votes, average: 5.00 out of 58 votes, average: 5.00 out of 58 votes, average: 5.00 out of 58 votes, average: 5.00 out of 58 votes, average: 5.00 out of 5

Prep Time:

Cook Time:

Difficulty: Easy

Servings: 4

4
x

Print Options

Page size Letter 3x5 4x6
Text Size Small Medium Large
Content Include description
Include prep time, etc.
Show image

Description

Your favorite cookie dough meets frozen yogurt for a perfect treat on a hot day!

Ingredients

  • ½ cups Unsalted Butter, Softened
  • ½ cups Packed Dark Brown Sugar
  • ¼ cups Granulated Sugar
  • 2 teaspoons Vanilla Extract
  • 1 cup All-purpose Flour
  • ¼ teaspoons Baking Soda
  • ¼ teaspoons Salt
  • ¾ cups Mini Chocolate Chips Or Chunks
  • 1 cup Vanilla Yogurt

Preparation Instructions

In a mixing bowl of a stand mixer, beat the butter and both sugars together until light and fluffy. Add vanilla and beat until combined.

In a small mixing bowl, whisk together the flour, soda and salt. Add the chocolate chips or chunks and stir.

Add the flour and chocolate mixture to butter mixture and fold in gently. Add yogurt and stir again.

Place in a container and cover with lid. Freeze until set, preferably overnight.

Cookie dough recipe adapted from Better Homes and Gardens Bridal Edition Cookbook.

Makes about 2 cups.


_______________________________________

Maria and her husband Josh (who she affectionately refers to as her “dough boy”) blog at Two Peas and Their Pod. They’ve been featured on Saveur, Eatocracy, Gourmet Live, Glamour, and the Los Angeles Times, to name just a few. They’d also just recently added a little pea to their pod. We’re so glad to have them here!


Profile photo of missamy

Lime Olive Oil Muffins

Posted by in Baking, Step-by-Step Recipes

Tasty Kitchen Blog: Lime Olive Oil Muffins. Guest post by Amy Johnson of She Wears Many Hats, recipe submitted by TK member Rachel of Studio Cuisine.

 
When I saw the recipe for these Lime Olive Oil Muffins from Tasty Kitchen member Rachel, I thought it sounded interesting. Having never baked with olive oil before, I wasn’t quite sure what to expect. But I was pleasantly surprised that there was no hint of olive oil in the taste, and as a bonus, the olive oil helped produce a not-dried-out goody. So if you’re looking for a grain-free, gluten-free or just a healthier option for a morning or snack muffin, look no further. These muffins are tasty and filling, which make for the perfect breakfast muffin in my book. They’re not overly sweet, so they lend themselves well to the addition of jams, jellies, or my favorite, honey. Or for a dessert option, maybe create a coconut lime glaze? Yum.

The cast of characters and process are straightforward.


Tasty Kitchen Blog: Lime Olive Oil Muffins. Guest post by Amy Johnson of She Wears Many Hats, recipe submitted by TK member Rachel of Studio Cuisine.

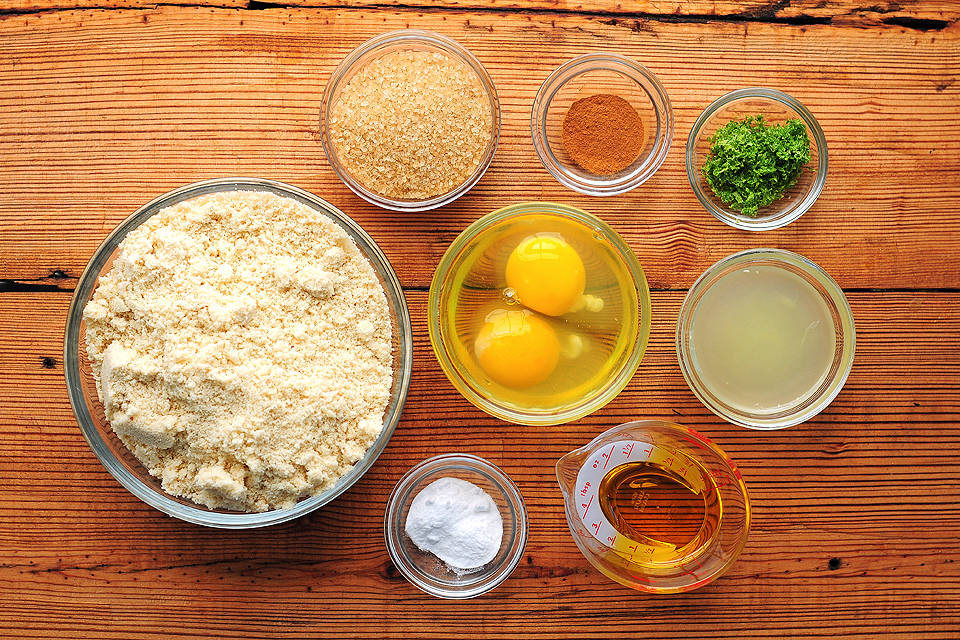
To get started you’ll need: blanched almond flour, baking soda, salt (not shown), cinnamon, turbinado sugar (I used demerara), eggs, extra virgin olive oil, vanilla, fresh lime juice, and lime zest.


Tasty Kitchen Blog: Lime Olive Oil Muffins. Guest post by Amy Johnson of She Wears Many Hats, recipe submitted by TK member Rachel of Studio Cuisine.

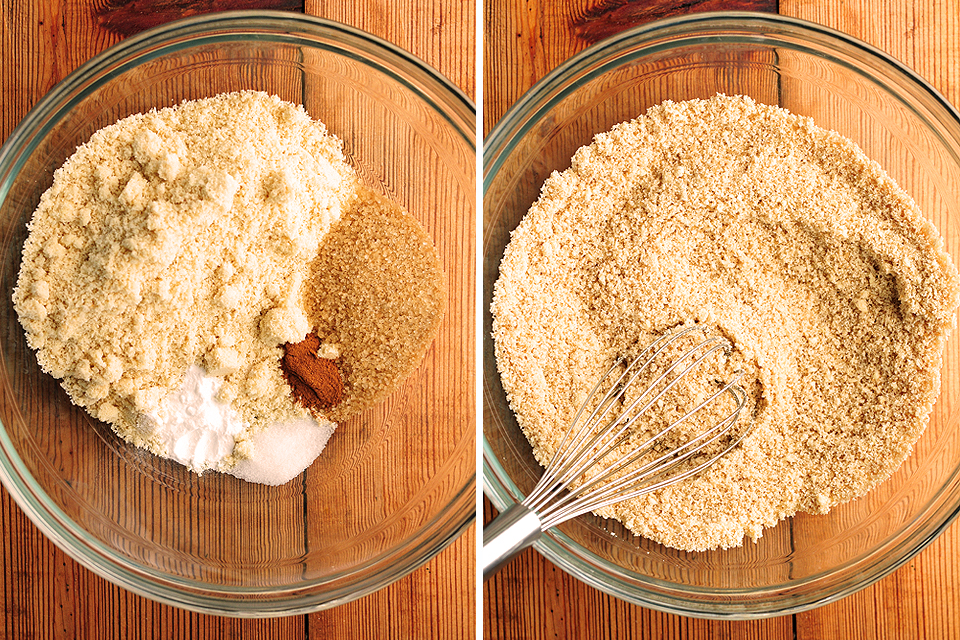
Begin by combining the dry ingredients (almond flour, baking soda, salt, cinnamon, and sugar) together.


Tasty Kitchen Blog: Lime Olive Oil Muffins. Guest post by Amy Johnson of She Wears Many Hats, recipe submitted by TK member Rachel of Studio Cuisine.

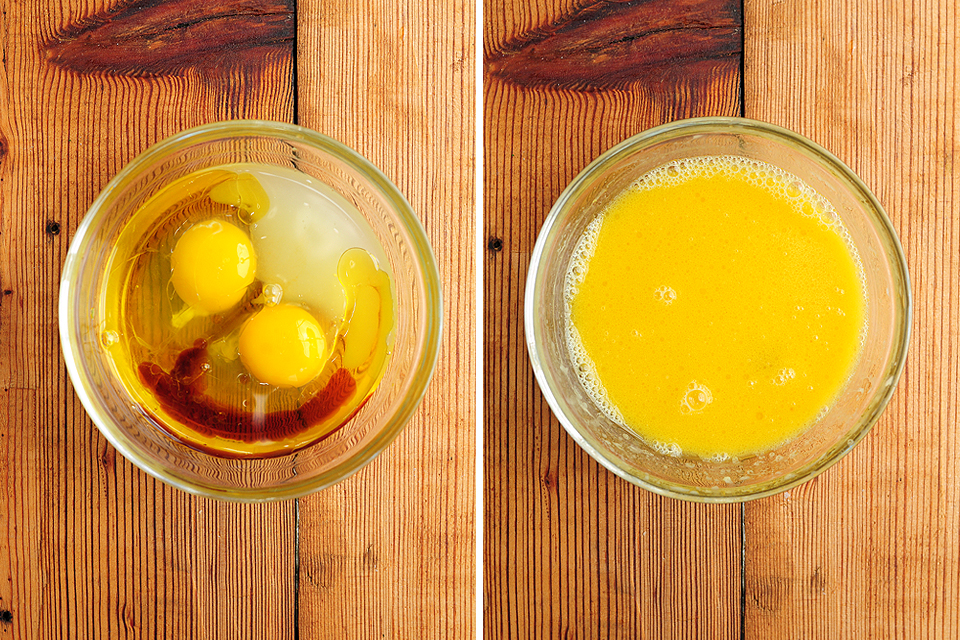
In a separate bowl combine the wet ingredients (eggs, olive oil, vanilla, and lime juice) together.


Tasty Kitchen Blog: Lime Olive Oil Muffins. Guest post by Amy Johnson of She Wears Many Hats, recipe submitted by TK member Rachel of Studio Cuisine.

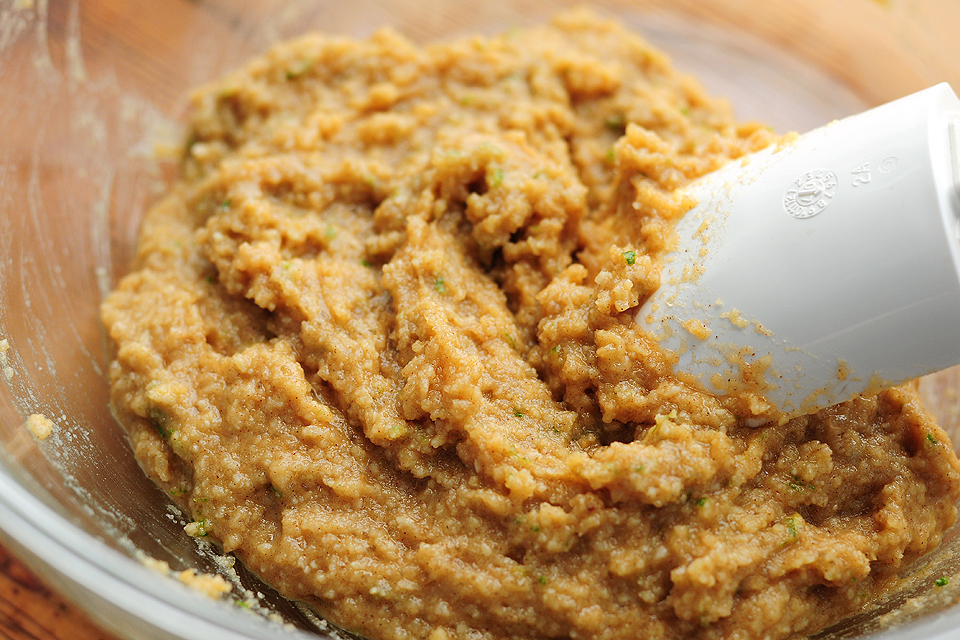
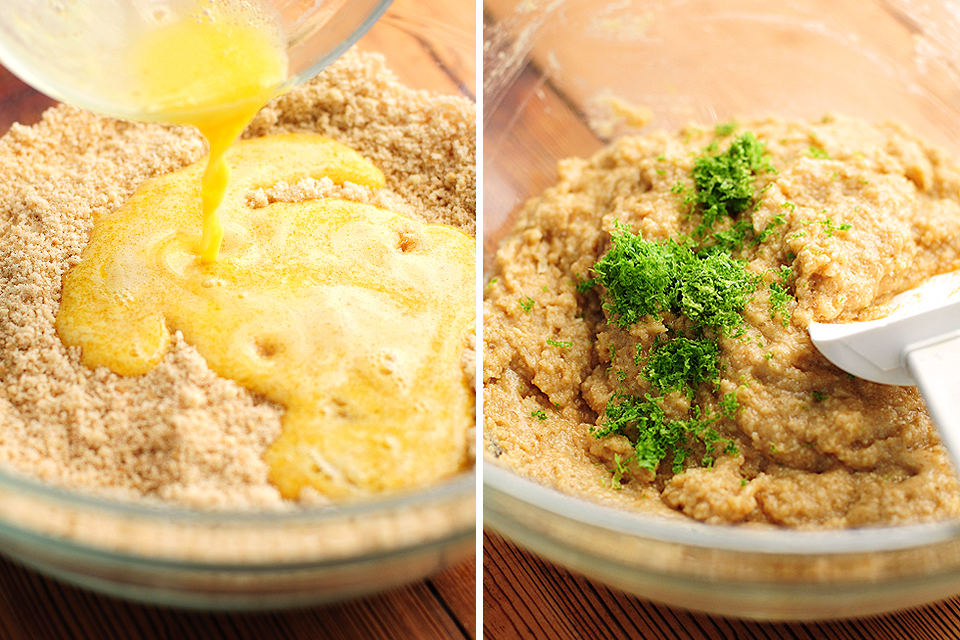
Add the wet mixture into the dry mixture and combine well. Add the lime zest.


Tasty Kitchen Blog: Lime Olive Oil Muffins. Guest post by Amy Johnson of She Wears Many Hats, recipe submitted by TK member Rachel of Studio Cuisine.

Finish the batter by folding in the lime zest.


Tasty Kitchen Blog: Lime Olive Oil Muffins. Guest post by Amy Johnson of She Wears Many Hats, recipe submitted by TK member Rachel of Studio Cuisine.

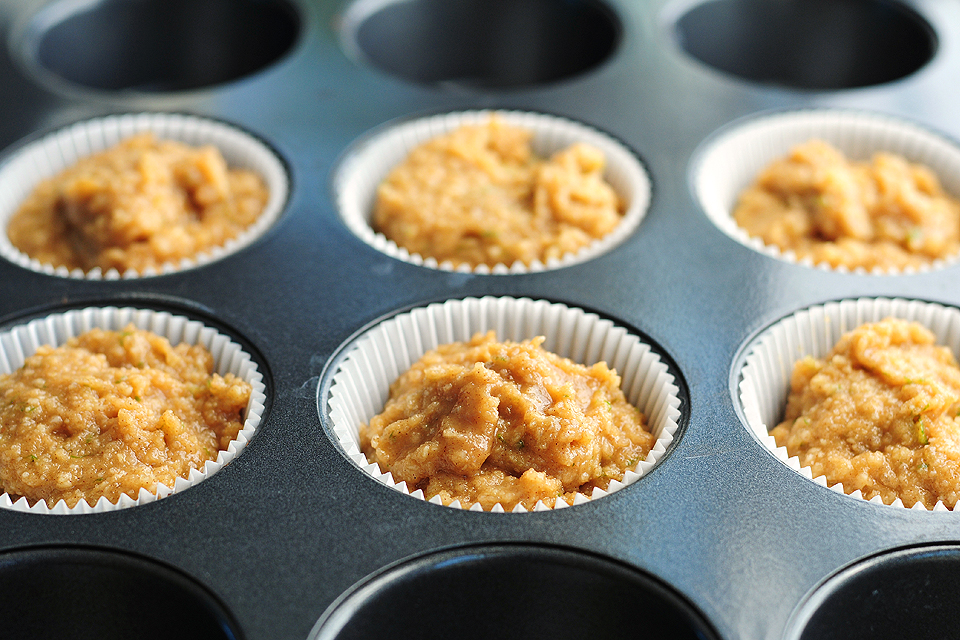
In a muffin tin coated with cooking spray or lined with paper liners, distribute batter evenly among 6 muffin tins.

Rachel says she used some techniques learned from Sally’s Baking Addiction for baking the muffins. Begin by baking the muffins for a short period of time at 425°F, then the remaining baking time at 350°F. I think this must help create more of a crunchy top on the muffins.


Tasty Kitchen Blog: Lime Olive Oil Muffins. Guest post by Amy Johnson of She Wears Many Hats, recipe submitted by TK member Rachel of Studio Cuisine.

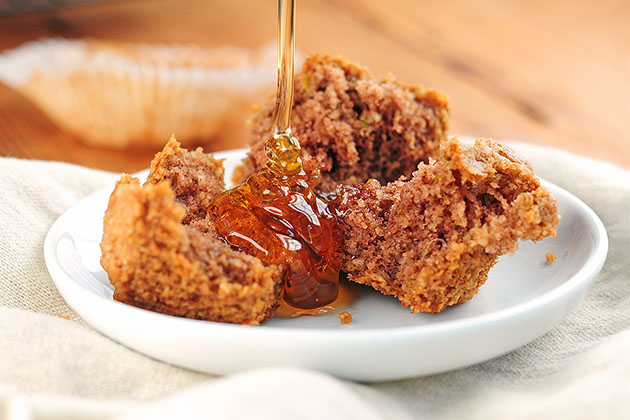
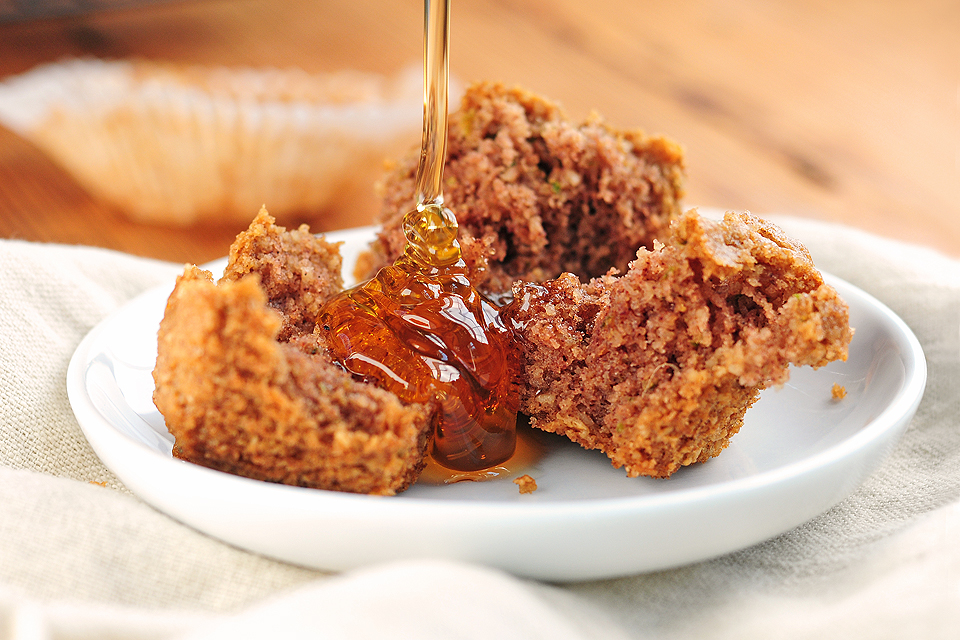
They did turn out perfectly cooked. Moist but firm on the top.


Tasty Kitchen Blog: Lime Olive Oil Muffins. Guest post by Amy Johnson of She Wears Many Hats, recipe submitted by TK member Rachel of Studio Cuisine.

Quite the excellent recipient for a drizzling of honey.

Thanks Rachel for helping me try something new and for sharing a good baking tip, too! For more cooking inspiration from Rachel, be sure to visit her food blog, Studio Cuisine.


Printable Recipe

Lime Olive Oil Muffins

See post on Rachel {Studio Cuisine}’s site!
0.00 Mitt(s) 0 Rating(s)0 votes, average: 0.00 out of 50 votes, average: 0.00 out of 50 votes, average: 0.00 out of 50 votes, average: 0.00 out of 50 votes, average: 0.00 out of 5

Prep Time:

Cook Time:

Difficulty: Easy

Servings: 6

6
x

Print Options

Page size Letter 3x5 4x6
Text Size Small Medium Large
Content Include description
Include prep time, etc.
Show image

Description

A citrusy, puffy muffin. Great for an on-the-go breakfast.

Ingredients

  • 2 cups Blanched Almond Flour
  • 1 teaspoon Baking Soda
  • ½ teaspoons Salt
  • ½ teaspoons Cinnamon
  • ¼ cups Raw Turbinado Sugar
  • 2 whole Eggs
  • 2 Tablespoons Extra Virgin Olive Oil
  • 1 teaspoon Vanilla
  • 2 Tablespoons Fresh Lime Juice (from 1 Lime)
  • 1-½ teaspoon Lime Zest (from 2 Limes)

Preparation Instructions

Preheat oven to 425ºF. Spray muffin tin with cooking spray or line with paper liners.

Combine almond flour, baking soda, salt, cinnamon, and sugar in a large bowl. Set aside.

In a small bowl, combine eggs, olive oil, vanilla, and lime juice.

Add wet ingredients to dry, and stir well. Fold in lime zest.

Distribute mixture evenly between 6 muffin tins, filling each one all the way to the brim.

Bake at 425 for 5 minutes, then turn the oven down to 350ºF and bake for another 15-20 minutes until an inserted toothpick comes out clean.


_______________________________________

Amy Johnson is a blogger who writes about food, travel, the home (both inside and out), and various observations and random musings about anything and everything. Visit her blog She Wears Many Hats for a dose of deliciousness, practicality, hilarity, or just plain fun. She lives in South Carolina with her husband and two children.


Profile photo of EatLiveRun

Apricot Strudel

Posted by in Baking, Step-by-Step Recipes

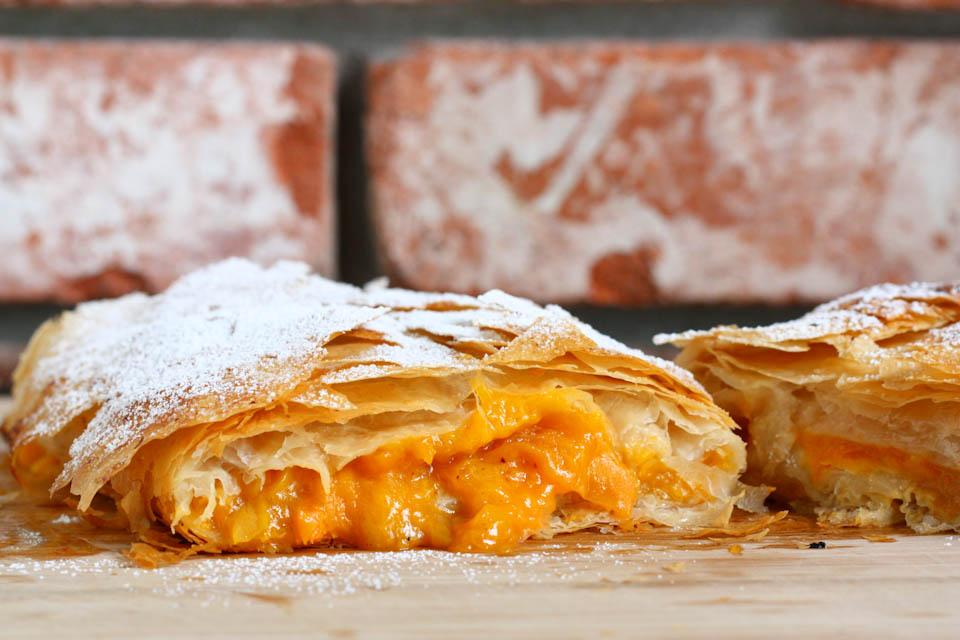
Tasty Kitchen Blog: Apricot Strudel. Guest post by Jenna Weber of Eat, Live, Run; recipe submitted by Heather of Heather Christ Cooks.

 
Holy strudel! The moment I saw Heather Christo’s mouth-watering recipe for Apricot Strudel, I knew I had to make it as soon as possible. Apricots are in season now, and these sweet little gems are just flooding the farmers market. I hadn’t made a strudel in years (and never an apricot one!), and was looking forward to playing with some fillo dough. Heather’s strudel turned out a little prettier than mine (I credit her fillo dough handling abilities to the fact that she married a Greek), but wow, was it ever delicious! The apricots could have easily been mistaken for peaches in this flaky strudel, and it was the perfect summer dessert. But don’t believe me—try it yourself! I guarantee it will make an apricot fan out of you for life.


Tasty Kitchen Blog: Apricot Strudel. Guest post by Jenna Weber of Eat, Live, Run; recipe submitted by Heather of Heather Christ Cooks.

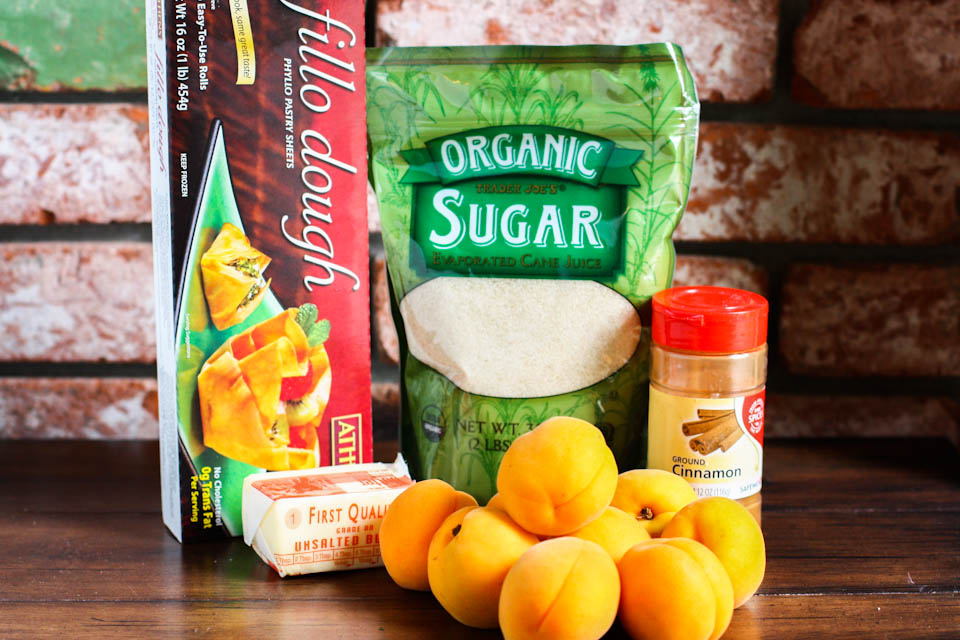
Here’s what you need! Actually, you need all this plus all-purpose flour. I realized I forgot the flour right after I uploaded this photo.

Simple ingredients, really. Just make sure you leave yourself enough time to defrost your fillo dough before starting! Fillo dough defrosts at room temperature in about two hours and trust me, you don’t want to attempt working with this stuff until it has defrosted—-these tissue paper-thin pastry sheets tear easily.


Tasty Kitchen Blog: Apricot Strudel. Guest post by Jenna Weber of Eat, Live, Run; recipe submitted by Heather of Heather Christ Cooks.

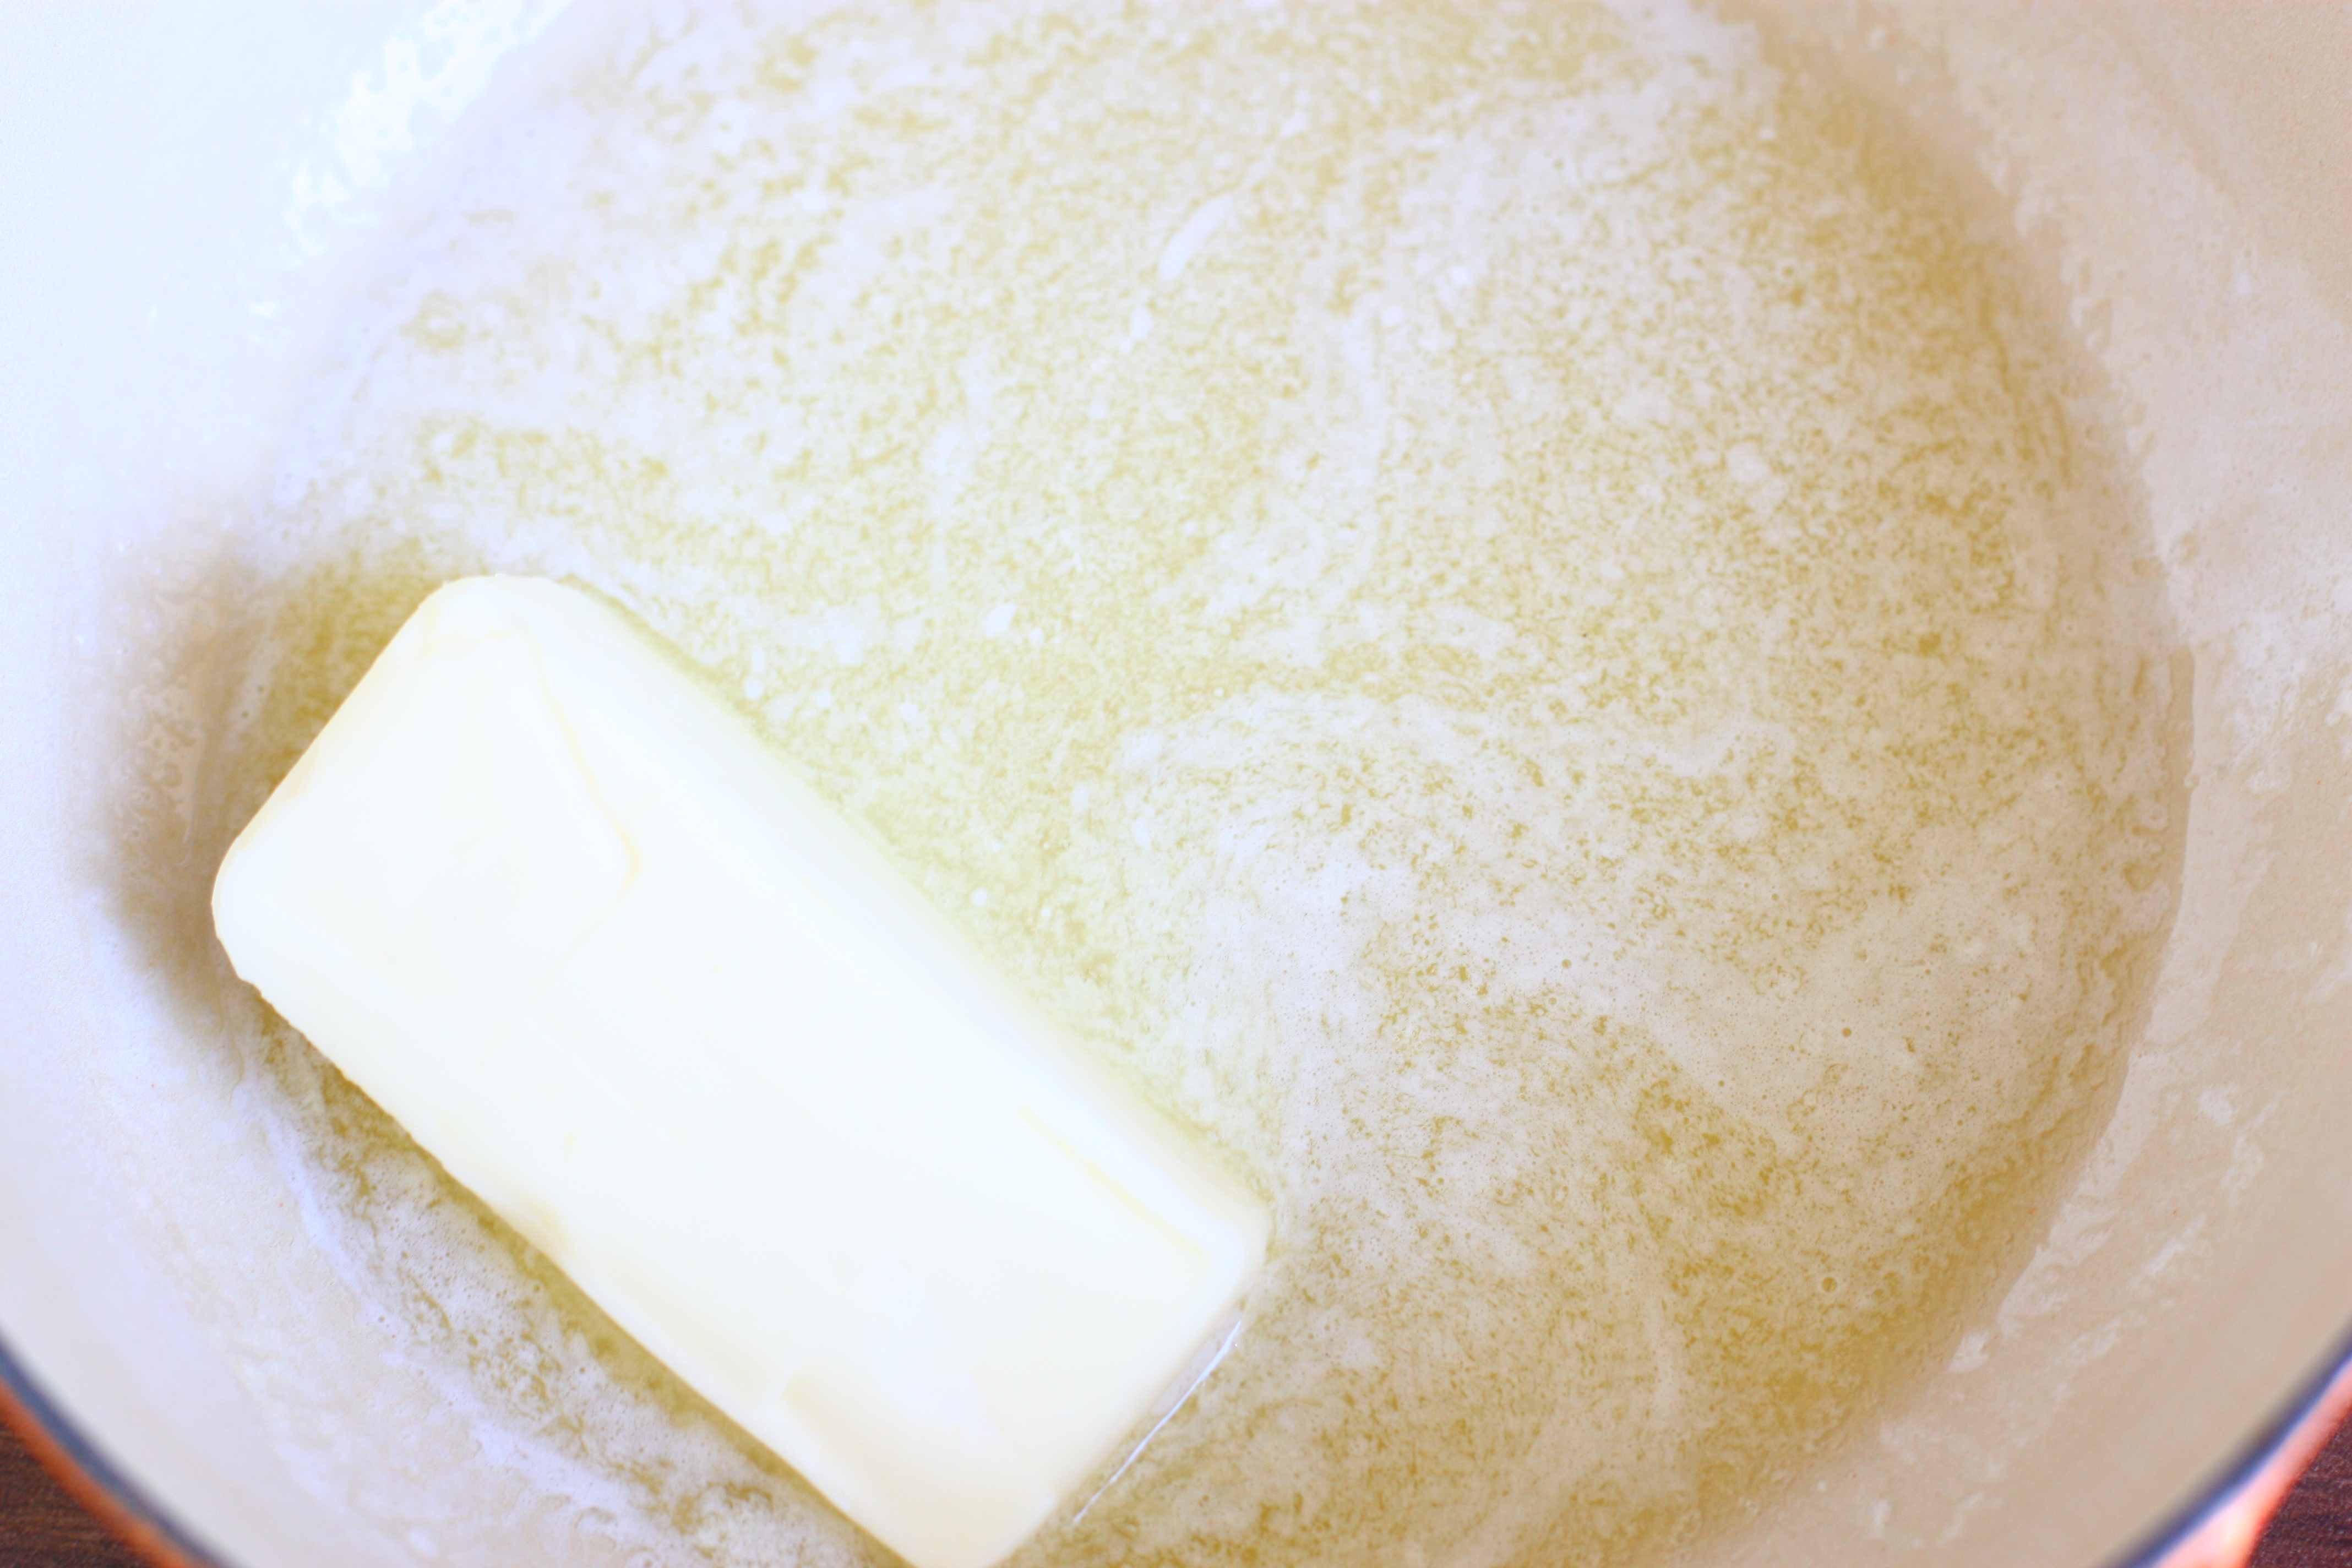
First, melt a stick of butter. You’ll need every bit of this stick for brushing on the fillo dough. This is what will make your strudel so perfectly crisp and golden. After your butter has melted, set it aside.


Tasty Kitchen Blog: Apricot Strudel. Guest post by Jenna Weber of Eat, Live, Run; recipe submitted by Heather of Heather Christ Cooks.

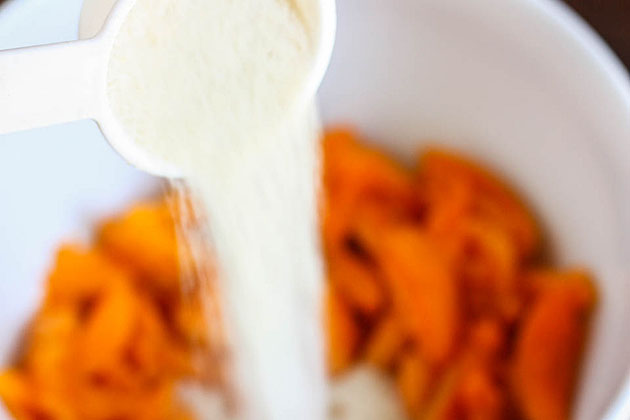
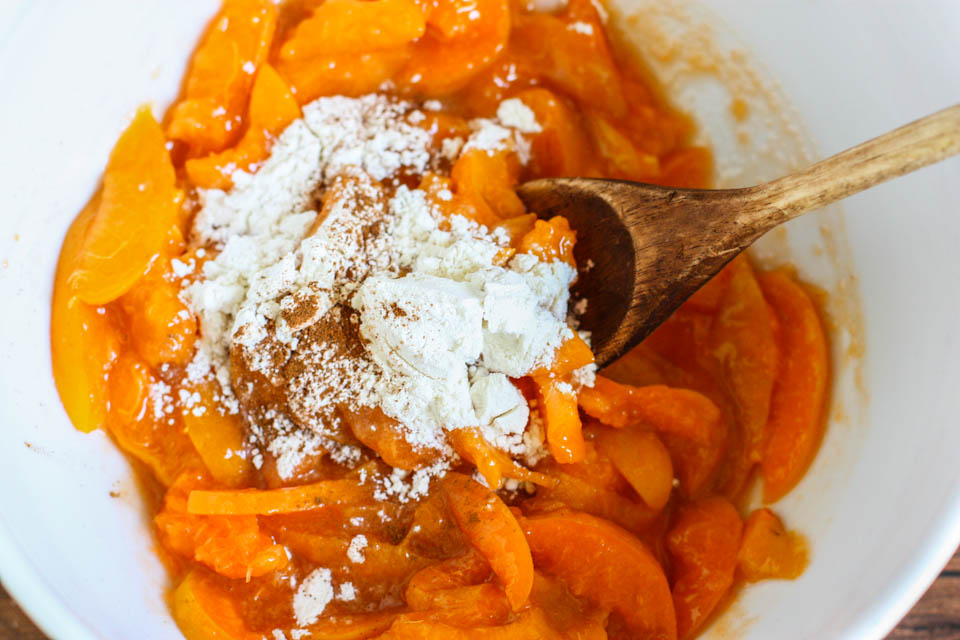
Slice your apricots and toss them into a bowl with 1/4 cup of granulated sugar.


Tasty Kitchen Blog: Apricot Strudel. Guest post by Jenna Weber of Eat, Live, Run; recipe submitted by Heather of Heather Christ Cooks.

Then add two tablespoons of flour and a pinch of cinnamon. It should look all delicious and juicy—just like a pie filling.


Tasty Kitchen Blog: Apricot Strudel. Guest post by Jenna Weber of Eat, Live, Run; recipe submitted by Heather of Heather Christ Cooks.

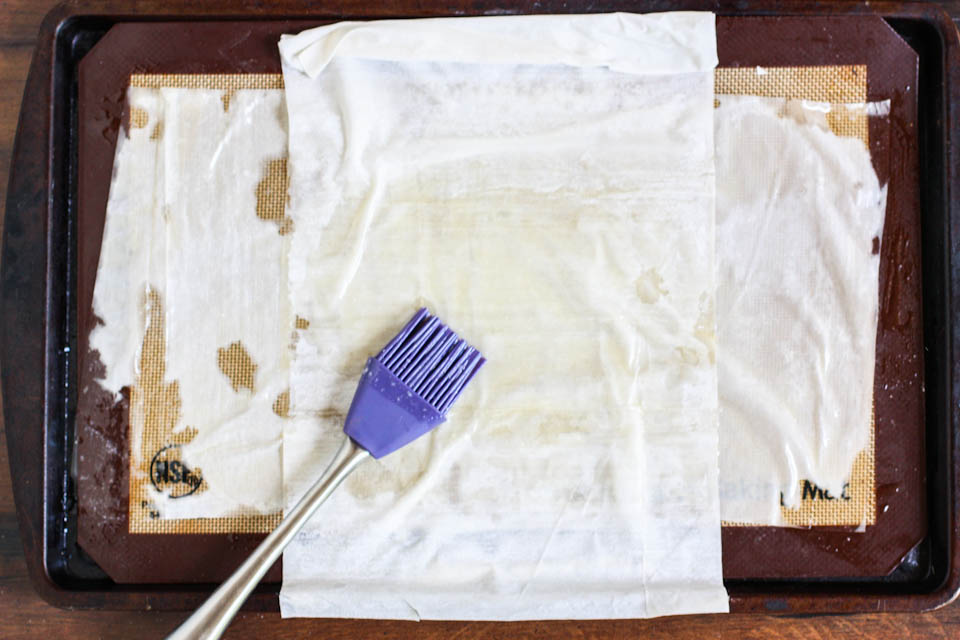
Now here is where things could get a little complicated … but not really. You’ll see! Open your box of defrosted fillo dough and place ONE super-thin sheet on a parchment paper (or Silpat-lined) baking sheet. Brush that sheet well with the melted butter.

A great tip here is to cover the fillo dough with a wet paper towel while you work. This will prevent it from drying out and cracking.


Tasty Kitchen Blog: Apricot Strudel. Guest post by Jenna Weber of Eat, Live, Run; recipe submitted by Heather of Heather Christ Cooks.

After you have brushed the butter on your sheet of fillo, carefully grab two more sheets from the package (remember to cover the remaining up with the wet paper towel!). Place these two sheets on top of the buttery sheet, the opposite way.

Proceed to drench in butter.

Repeat this process (laying one sheet down, brushing with butter, then topping with two sheets going the opposite way) until you have eight buttery fillo layers, or until you use up your box of fillo. I did the latter.


Tasty Kitchen Blog: Apricot Strudel. Guest post by Jenna Weber of Eat, Live, Run; recipe submitted by Heather of Heather Christ Cooks.

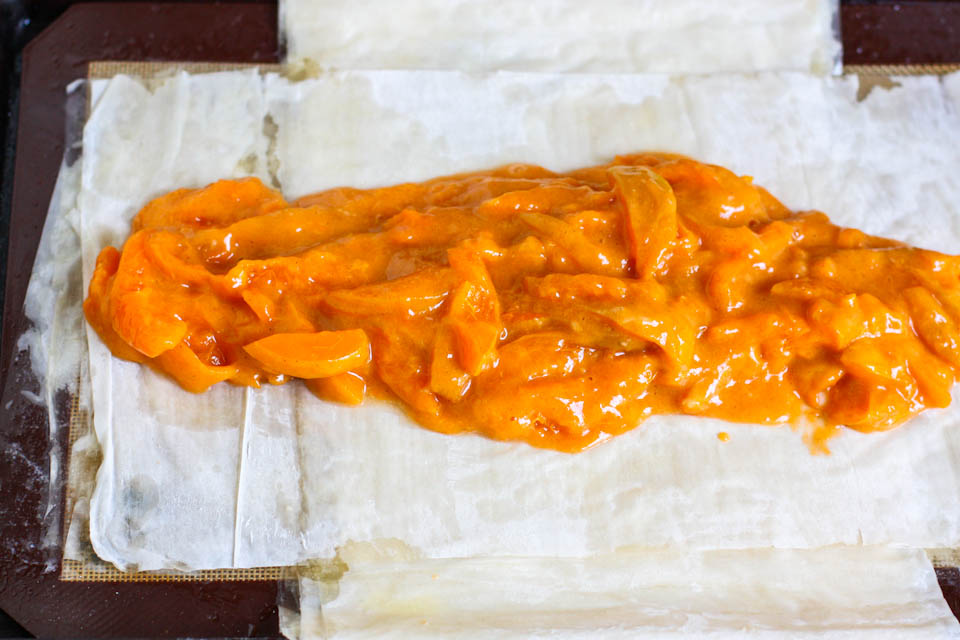
Pour the sugary apricots down the center of the fillo dough in as skinny of a line as you can make.


Tasty Kitchen Blog: Apricot Strudel. Guest post by Jenna Weber of Eat, Live, Run; recipe submitted by Heather of Heather Christ Cooks.

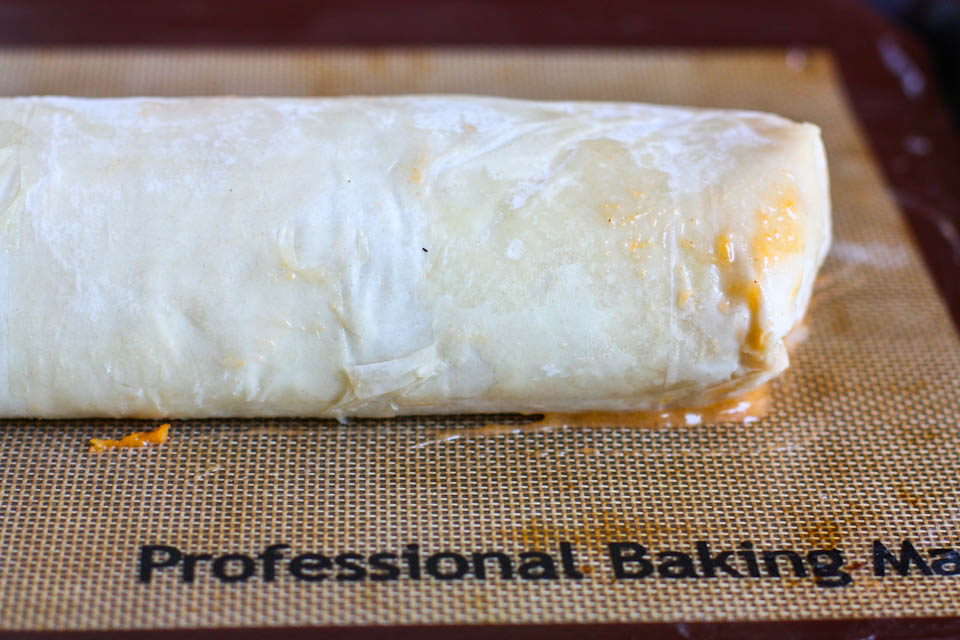
Then, fold the outer “wings” of dough in and start rolling up your strudel like you would roll up an egg roll. You want the ends of the strudel to be as tucked in as you can get so none of that beautiful apricot filling escapes. (See Heather’s blog post for photos of how she did hers!)

Brush your strudel with the remaining melted butter then stick her in a 400ºF oven for half an hour.


Tasty Kitchen Blog: Apricot Strudel. Guest post by Jenna Weber of Eat, Live, Run; recipe submitted by Heather of Heather Christ Cooks.

And there ya go! She’s a beauty all right, and you can’t even (really) tell that I tore some of the fillo dough accidently.

Serve this warm with powdered sugar dusted on top of with a scoop of vanilla ice cream.

Thank you, Heather, for this lovely recipe! It’s a keeper, for sure. Check out her blog, Heather Christo Cooks, for more of her great recipes. (You can find the strudel recipe below for printing, so you don’t splatter that melted butter on your laptop like I just did. Oops.)


Printable Recipe

Apricot Strudel

See post on Heather Christo’s site!
0.00 Mitt(s) 0 Rating(s)0 votes, average: 0.00 out of 50 votes, average: 0.00 out of 50 votes, average: 0.00 out of 50 votes, average: 0.00 out of 50 votes, average: 0.00 out of 5

Prep Time:

Cook Time:

Difficulty: Easy

Servings: 8

8
x

Print Options

Page size Letter 3x5 4x6
Text Size Small Medium Large
Content Include description
Include prep time, etc.
Show image

Description

Tender, sweet and tart apricots wrapped in buttery, flaky filo dough make a fast and easy strudel!

Ingredients

  • 1 stick Butter
  • 8  Apricots, Sliced
  • ¼ cups Sugar
  • 2 Tablespoons Flour
  • 1 pinch Cinnamon
  • ½ packages (16 Oz. Size) Filo Dough

Preparation Instructions

1. Preheat the oven to 400ºF. Prepare a sheet pan with a Silpat or parchment paper.
2. In a small pan, melt the butter over low heat. Set aside.
3. Slice the apricots into thin wedges and set them in a bowl.
4. Sprinkle the apricots with sugar, flour and cinnamon. Gently toss everything to coat.
5. Lay a single sheet of filo down in the pan. Brush the sheet with butter.
6. Then lay 2 sheets of filo dough in the opposite direction, overlapping. Brush them with butter.
7. Continue this process of 1 sheet followed by 2 sheets until you have 8 layers of filo dough.
8. Spread the apricots out on the filo dough in a line.
9. Pull the filo dough up and over the apricots and then roll it like a spring roll until the edge of the filo dough is tucked under the strudel.
10. Tuck the ends under. Brush the whole outside of the streudel generously with the rest of the melted butter.
11. Bake the strudel at 400ºF for 30 minutes or until the fruit is soft and the pastry is golden brown.


_______________________________________

Jenna is a food writer who has worked as a pastry chef and bread baker. Her blog Eat, Live, Run has great recipes, travel stories, and the perfect slogan: “Celebrating life, one crumb at a time.”


Profile photo of cookincanuck

Grilled Pasta Packets

Posted by in Step-by-Step Recipes

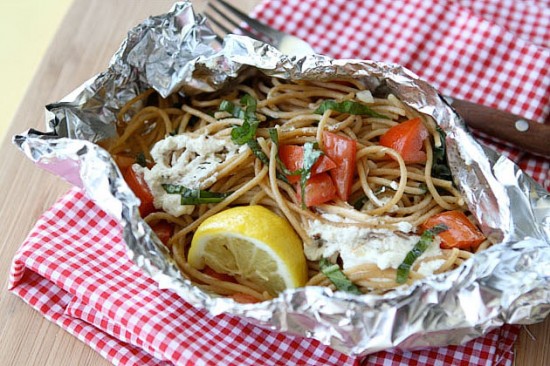
  As soon as summertime hits, my boys want to know one thing: When are we going camping? The local mountains and lakes are filled with campsites, tucked away amongst the trees, offering endless hours of exploration for curious minds and a reprieve from the valley heat for everyone. Cooking around a campfire is always […]

Profile photo of georgiapellegrini

Raw Vegan Chocolate Mousse

Posted by in Step-by-Step Recipes

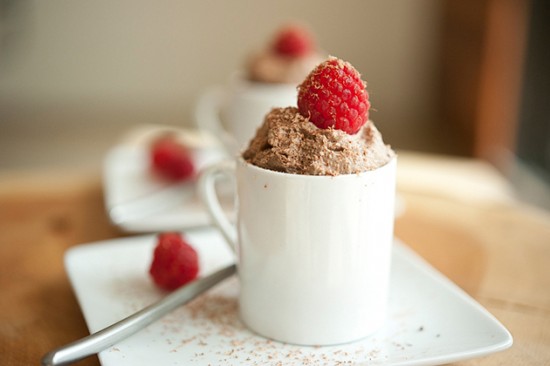
  I’m making a national appeal to everyone to make this pudding as soon as possible. It really has something for everyone—it’s beyond delicious, but is also perfect for anyone trying to curb their sweet tooth. I’m so, so glad I stumbled upon this Raw Vegan Chocolate Mousserecipe from Spontaneous Hausfrau and had the opportunity […]

Profile photo of ThreeManyCooks

Thai Coconut Mussels

Posted by in Step-by-Step Recipes

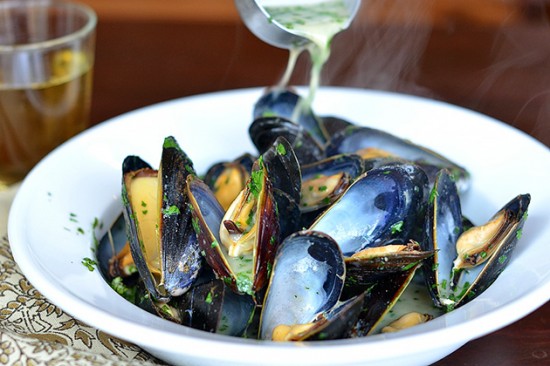
  Years ago my husband and I started a tradition with our good friends called ‘Mussels Night.’ Every so often we’d get together at one house or the other and make two giant pots of mussels—one in a creamy white sauce, the other in a spicy marinara. We cherished those evenings not only for the […]

Profile photo of HowSweetEats

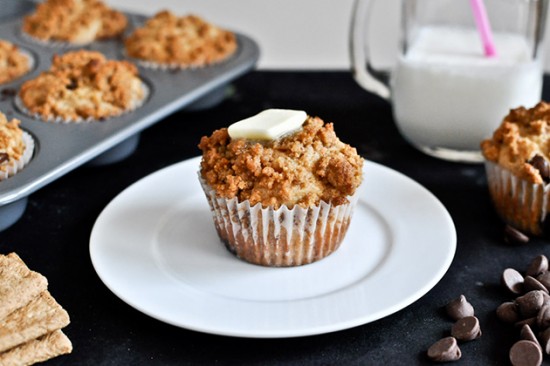
Graham Cracker Chocolate Chip Muffins

Posted by in Baking, Step-by-Step Recipes

  If there is anything I love, it’s a warm muffin topped with butter. If there is anything I love more than that, it’s a warm muffin topped with butter and studded with melty chocolate chips. And if there is anything I love even more than THAT? It’s a muffin, with the butter and the […]