The Pioneer Woman Tasty Kitchen
Profile photo of georgiapellegrini

Strawberry Coconut Macaroons

Posted by in Step-by-Step Recipes

Tasty Kitchen Blog: Strawberry Coconut Macaroons. Guest post by Georgia Pellegrini, recipe submitted by TK member Chelsy of Mangia.

 
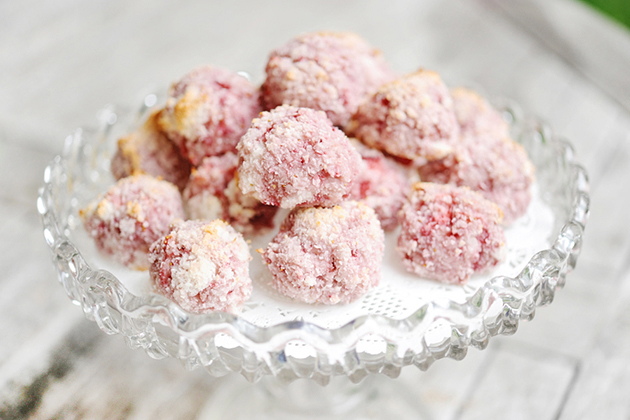
I don’t have a particularly intense sweet tooth, but I do like a sweet bite once in a while. These Strawberry Coconut Macaroons from TK member Chelsy, which is slightly adapted from Smitten Kitchen, totally hit the spot. It wasn’t too sweet but definitely sweet enough and it was full of strawberry chunks and chewy coconut. I was in heaven! And they lasted less than a day. Oops.


Tasty Kitchen Blog: Strawberry Coconut Macaroons. Guest post by Georgia Pellegrini, recipe submitted by TK member Chelsy of Mangia.

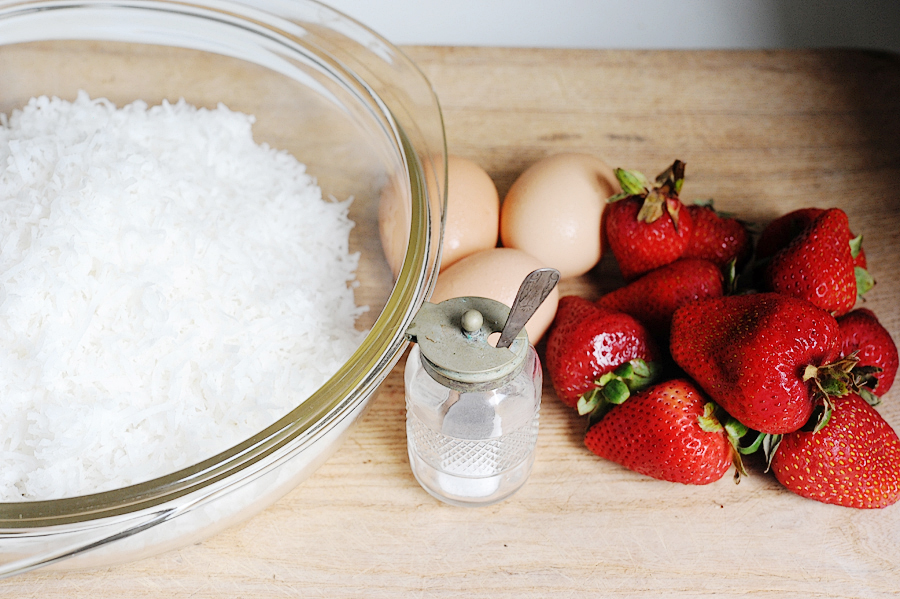
You will need: sweetened shredded coconut, egg whites, sea salt, fresh strawberries, and granulated sugar. I actually left the sugar out because the coconut was sweetened and they still turned out wonderfully sweet. You could also use unsweetened coconut and add in sugar yourself.


Tasty Kitchen Blog: Strawberry Coconut Macaroons. Guest post by Georgia Pellegrini, recipe submitted by TK member Chelsy of Mangia.

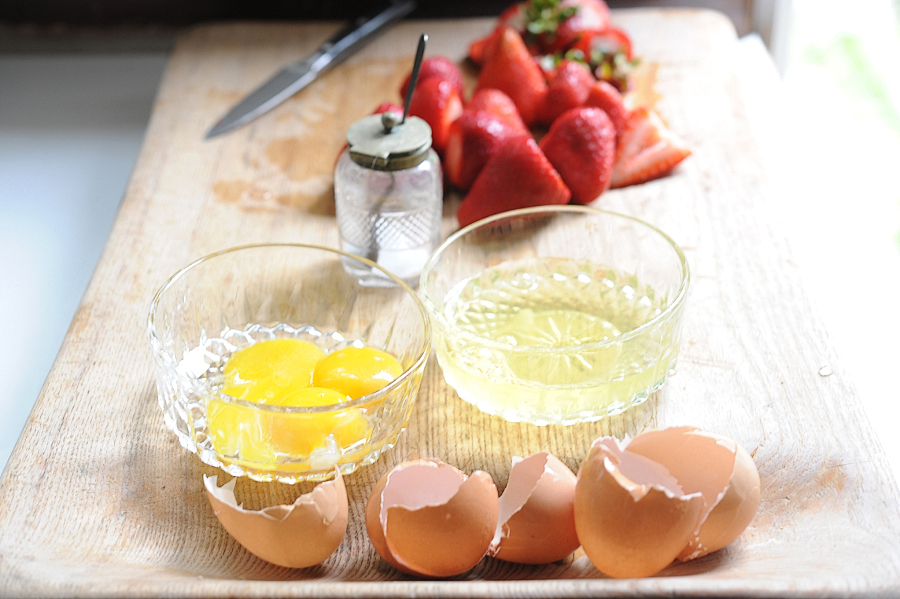
Preheat the oven to 325ºF. Line a baking sheet with parchment paper and get all of your ingredients in order.


Tasty Kitchen Blog: Strawberry Coconut Macaroons. Guest post by Georgia Pellegrini, recipe submitted by TK member Chelsy of Mangia.


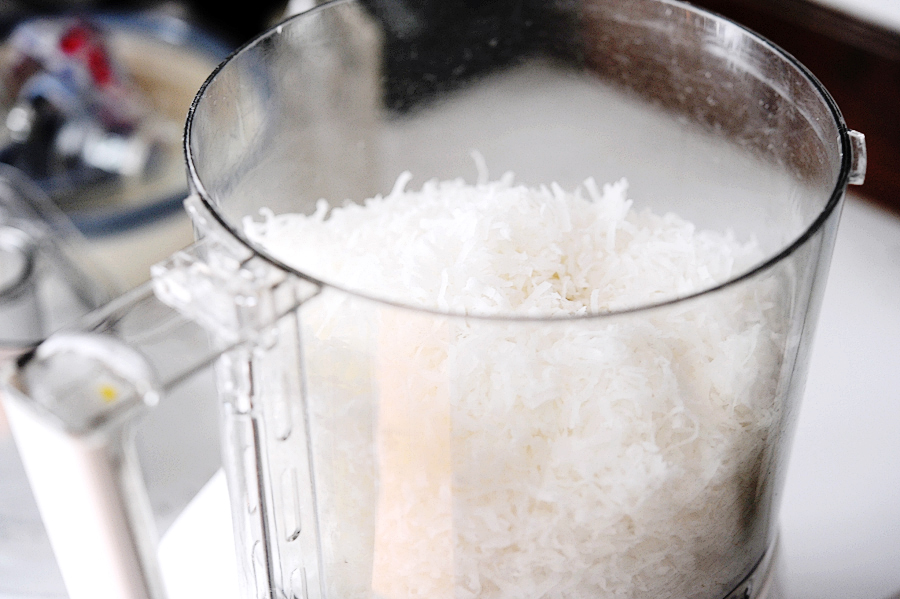
In the bowl of a food processor, blend the coconut for 1 minute. Here is where you’ll add the sugar and blend for another minute, if you decide to use sugar. When I make this recipe again, I’m going to definitely use my own sweetener and opt for unsweetened coconut. Things will taste fresher that way.


Tasty Kitchen Blog: Strawberry Coconut Macaroons. Guest post by Georgia Pellegrini, recipe submitted by TK member Chelsy of Mangia.

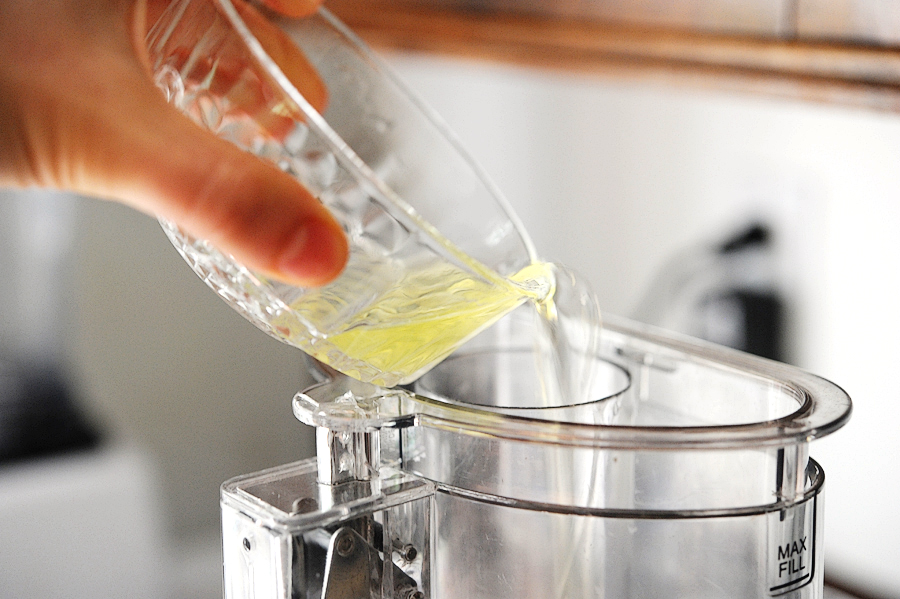
Add the egg whites …


Tasty Kitchen Blog: Strawberry Coconut Macaroons. Guest post by Georgia Pellegrini, recipe submitted by TK member Chelsy of Mangia.

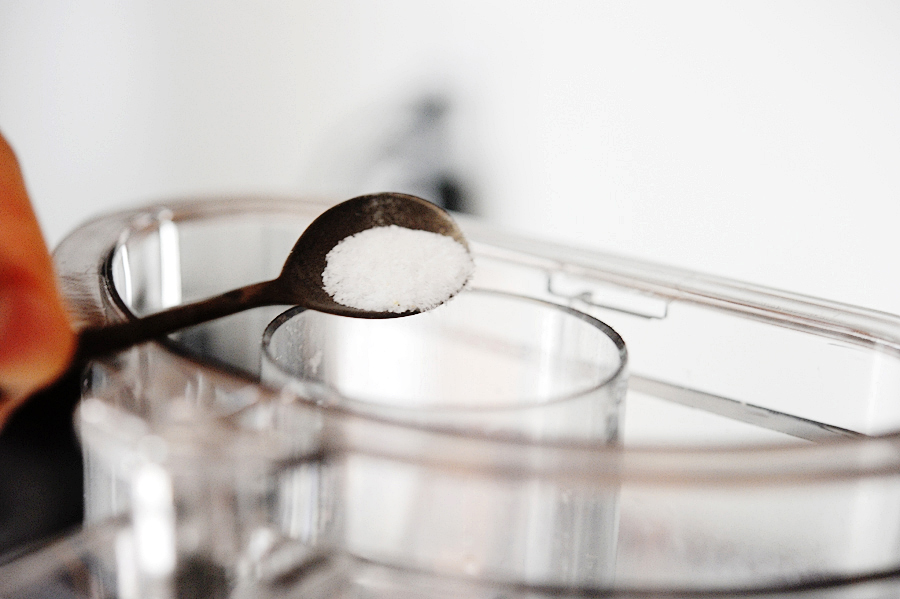
And the sea salt. Blend for 1 minute more.


Tasty Kitchen Blog: Strawberry Coconut Macaroons. Guest post by Georgia Pellegrini, recipe submitted by TK member Chelsy of Mangia.

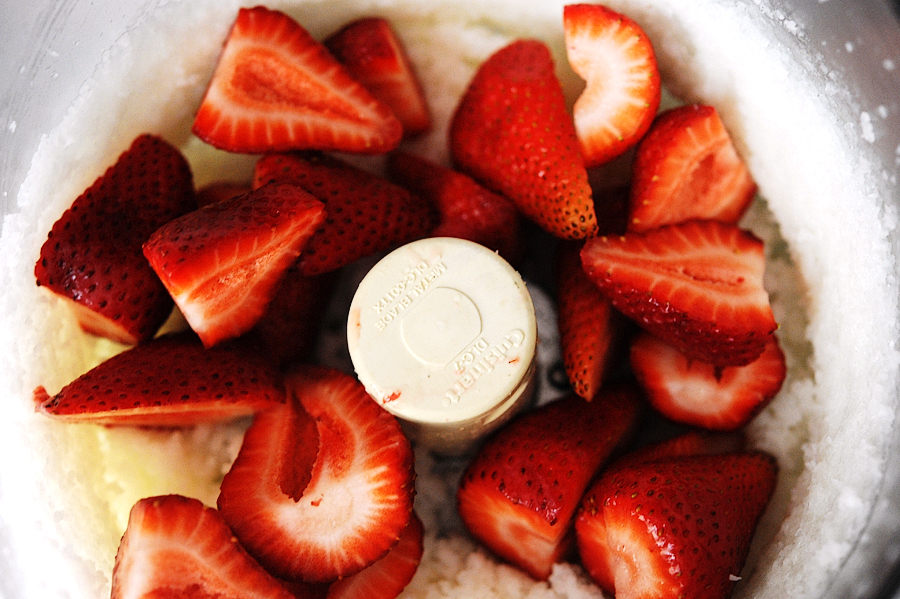
Pulse in the strawberries but leave them still chunky.


Tasty Kitchen Blog: Strawberry Coconut Macaroons. Guest post by Georgia Pellegrini, recipe submitted by TK member Chelsy of Mangia.

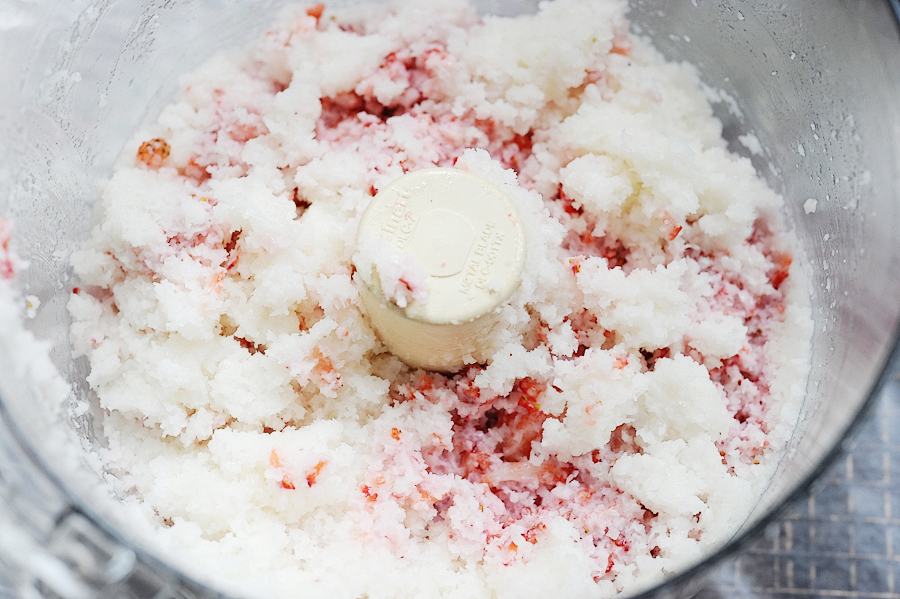
The mixture will be white and pink in places and doesn’t need to be fully blended.
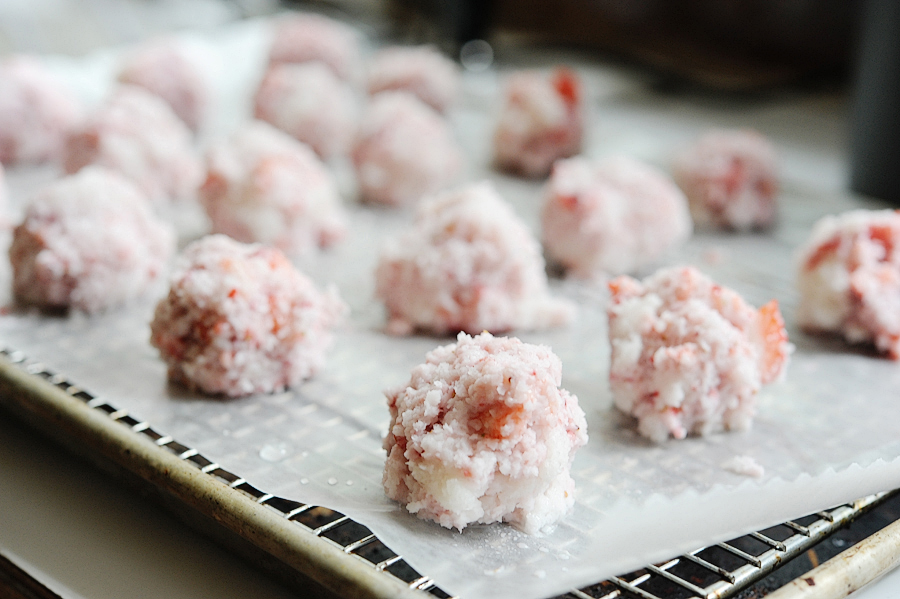


Tasty Kitchen Blog: Strawberry Coconut Macaroons. Guest post by Georgia Pellegrini, recipe submitted by TK member Chelsy of Mangia.

Scoop up the mixture with a spoon or your hands and then roll into 1-inch balls. Place them onto a baking sheet and pop them in the oven.
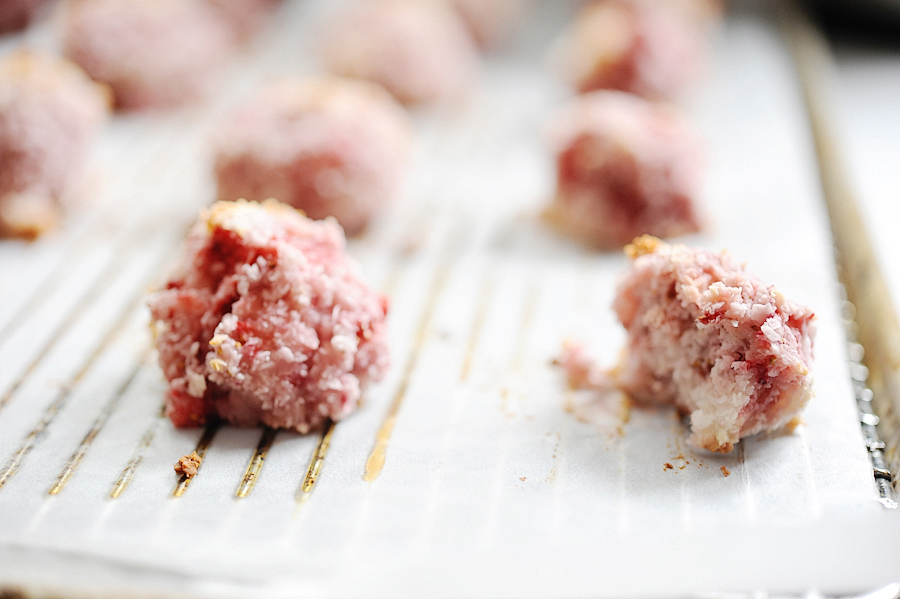


Tasty Kitchen Blog: Strawberry Coconut Macaroons. Guest post by Georgia Pellegrini, recipe submitted by TK member Chelsy of Mangia.

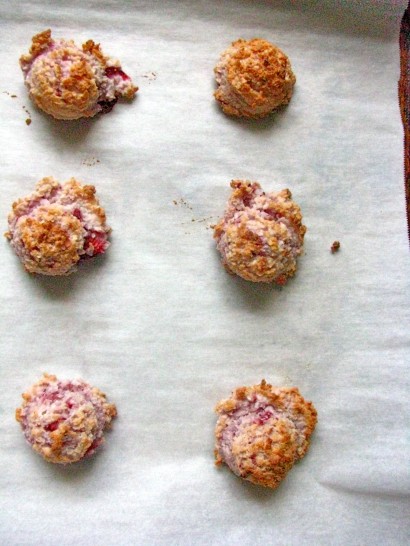
When they’re ready, they’ll still be soft but slightly golden brown on the outside.
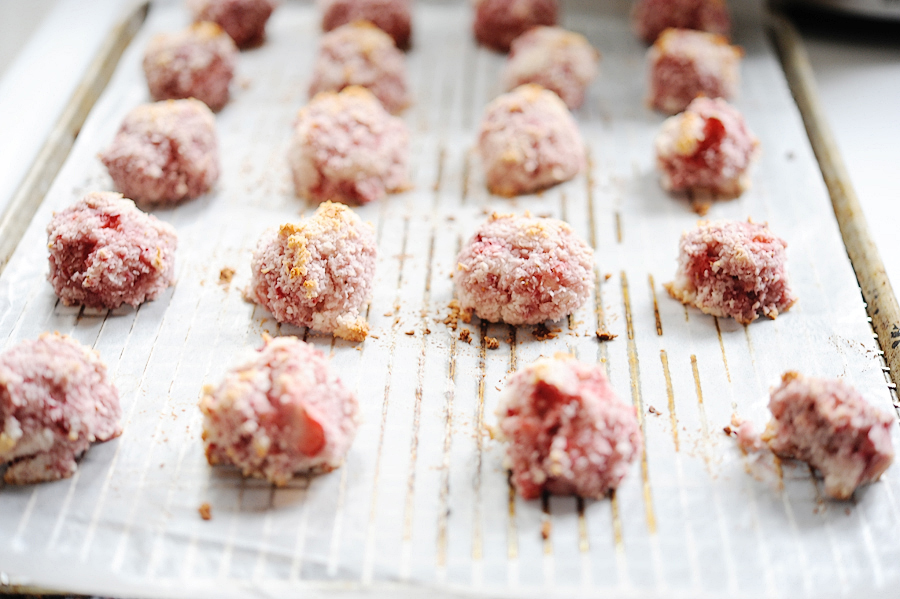


Tasty Kitchen Blog: Strawberry Coconut Macaroons. Guest post by Georgia Pellegrini, recipe submitted by TK member Chelsy of Mangia.

As they cool, they will be crispy on the outside and soft on the inside.
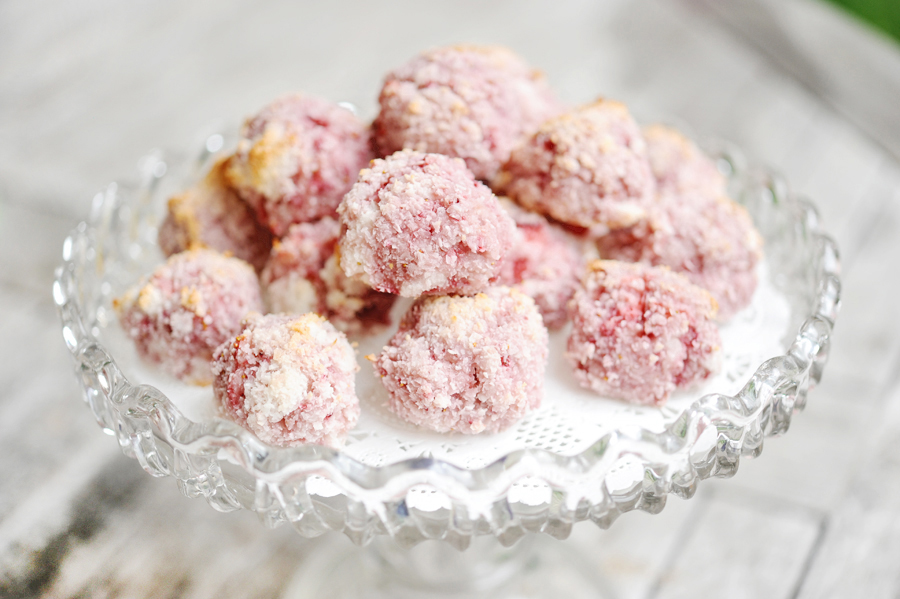


Tasty Kitchen Blog: Strawberry Coconut Macaroons. Guest post by Georgia Pellegrini, recipe submitted by TK member Chelsy of Mangia.

They are absolutely delicious! And so pretty too, perfect for a summer tea party. Make these! You’ll love ‘em. Thanks to Chelsy for sharing this recipe! Take a look at her website Mangia for more juicy treats.


Printable Recipe
Strawberry Coconut Macaroons

See post on misschels’s site!
5.00 Mitt(s) 2 Rating(s)2 votes, average: 5.00 out of 52 votes, average: 5.00 out of 52 votes, average: 5.00 out of 52 votes, average: 5.00 out of 52 votes, average: 5.00 out of 5

Prep Time:

Cook Time:

Difficulty: Easy

Servings: 27

27
x

Print Options

Page size Letter 3x5 4x6
Text Size Small Medium Large
Content Include description
Include prep time, etc.
Show image

Description

These macaroons are perfect for summer, chock full of tropical coconut and sweet strawberries!

Ingredients

  • 14 ounces, weight Sweetened Shredded Coconut
  • ⅔ cups Granulated Sugar
  • 3  Large Egg Whites
  • ¼ teaspoons Sea Salt
  • 1 cup Fresh Strawberries, Hulled, Sliced In Half Lengthwise

Preparation Instructions

1. Preheat the oven to 325ºF. Line a baking sheet with parchment paper.
2. In the bowl of a food processor, blend the coconut for 1 minute.
3. Add the sugar and blend for another minute.
4. Add the egg whites and sea salt and blend for another minute.
5. Pulse in the strawberries until they are largely but not fully broken down. Some of the batter will be white, and other parts will be red. Resist stirring them together.
6. Using a melon ball scooper, or a tablespoon, scoop batter into 1-inch mounds, place on the prepared baking sheet.
7. Bake for 25-30 minutes (time will vary with different ovens; I clocked mine at about 32 minutes), or until slightly golden on top.
8. Let them rest on the baking sheet for 10 minutes before serving. They will firm up as they cool, but will remain soft and gooey on the inside, crispy on the outside.

Recipe slightly adapted from Smitten Kitchen.


_______________________________________

There’s so much to say about Georgia, we don’t know where to start. Leaving Wall Street for the French Culinary Institute, followed by a stint at the Gramercy Tavern and La Chassagnette in France, her passion for food and food traditions are evident and inspiring. Visit her site at Georgia Pellegrini, where you’ll find more recipes, photos, learn all about her wonderful books Girl Hunter and Food Heroes, and enjoy her latest adventures.


Profile photo of twopeasandtheirpod

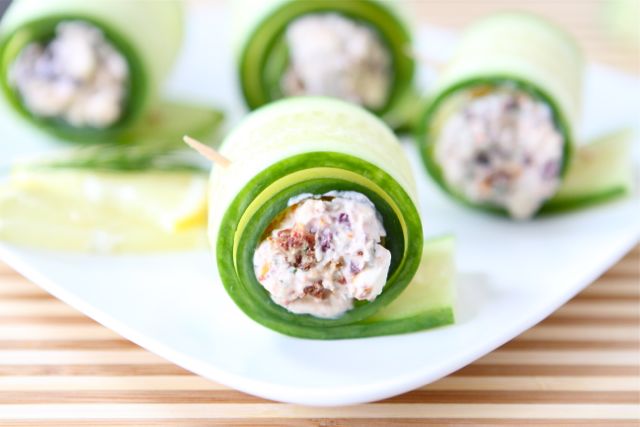
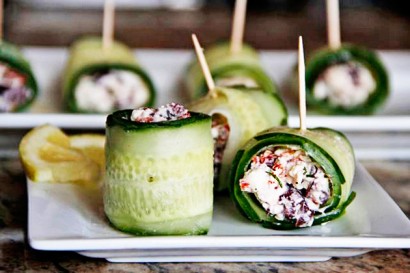
Cucumber Feta Rolls

Posted by in Step-by-Step Recipes

Tasty Kitchen Blog: Cucumber Feta Rolls. Guest post by Maria Lichty of Two Peas and Their Pod, recipe submitted by TK member Traci of Lotta Madness.

 
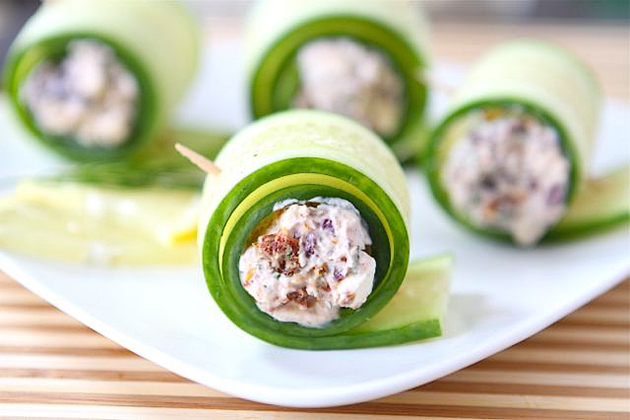
I love a good Greek salad. It is one of my favorite salads to make and to order when we dine out. When I saw Lotta Maddness’s recipe for Cucumber Feta Rolls on Tasty Kitchen, I immediately thought: Genius! Why didn’t I think of that! The rolls have all of the fabulous flavors of a Greek salad, but in a cute little cucumber roll. I knew I had to make them. 


Tasty Kitchen Blog: Cucumber Feta Rolls. Guest post by Maria Lichty of Two Peas and Their Pod, recipe submitted by TK member Traci of Lotta Madness.

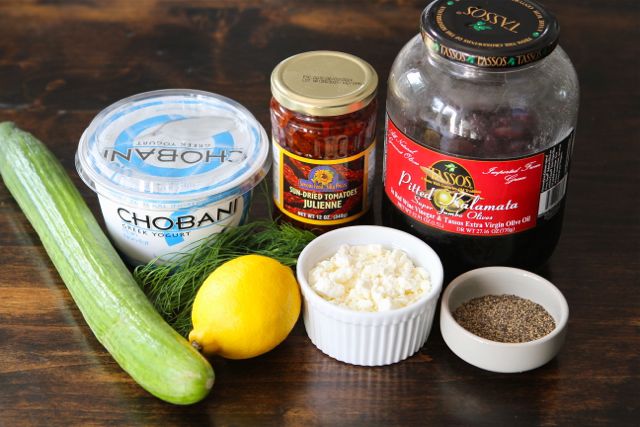
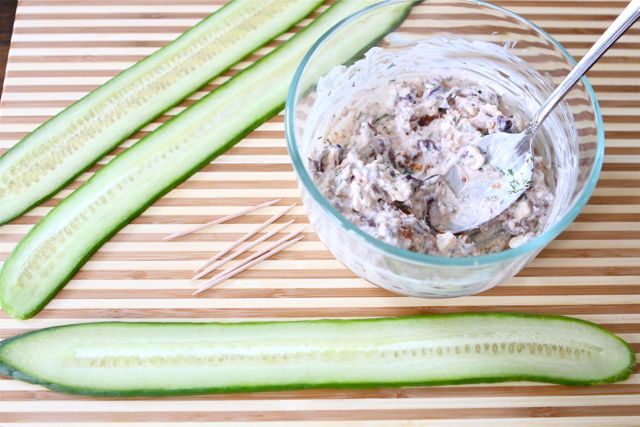
To make the rolls, you will need: an English cucumber, dill, sun-dried tomatoes, kalamata olives, Greek yogurt, feta cheese, lemon juice, and black pepper. Simple, right? 


Tasty Kitchen Blog: Cucumber Feta Rolls. Guest post by Maria Lichty of Two Peas and Their Pod, recipe submitted by TK member Traci of Lotta Madness.

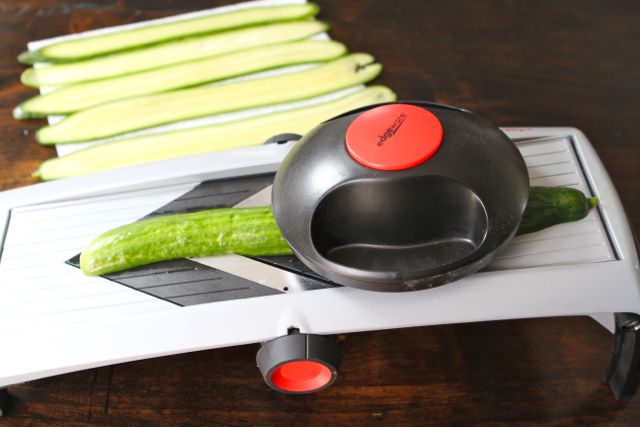
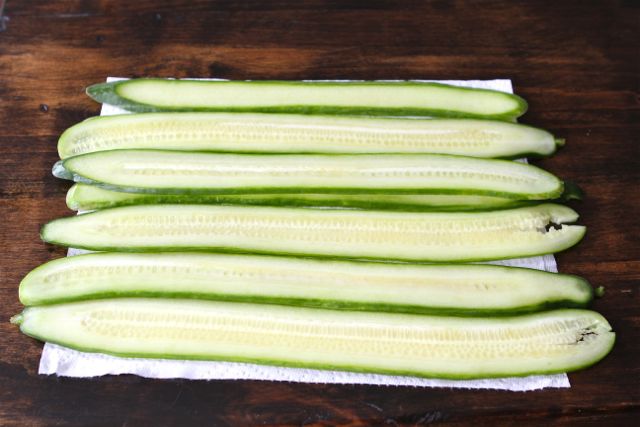
Using a mandoline (or a sharp vegetable peeler), slice the cucumber lengthwise into long thin strips. 


Tasty Kitchen Blog: Cucumber Feta Rolls. Guest post by Maria Lichty of Two Peas and Their Pod, recipe submitted by TK member Traci of Lotta Madness.

Place the cucumber strips on a towel to absorb the liquid.


Tasty Kitchen Blog: Cucumber Feta Rolls. Guest post by Maria Lichty of Two Peas and Their Pod, recipe submitted by TK member Traci of Lotta Madness.

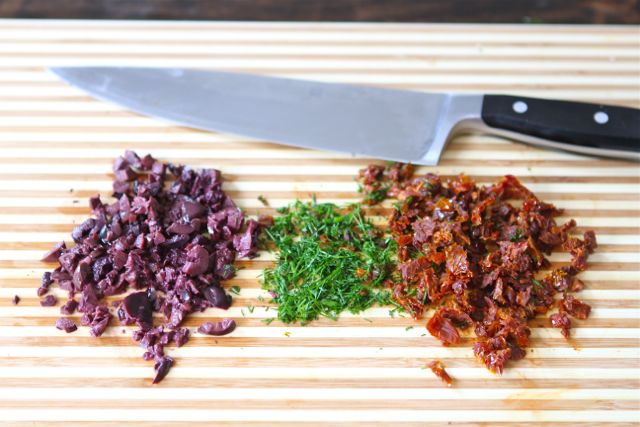
Chop the dill, sun-dried tomatoes and olives (make sure you remove the pits) into smaller pieces. 


Tasty Kitchen Blog: Cucumber Feta Rolls. Guest post by Maria Lichty of Two Peas and Their Pod, recipe submitted by TK member Traci of Lotta Madness.

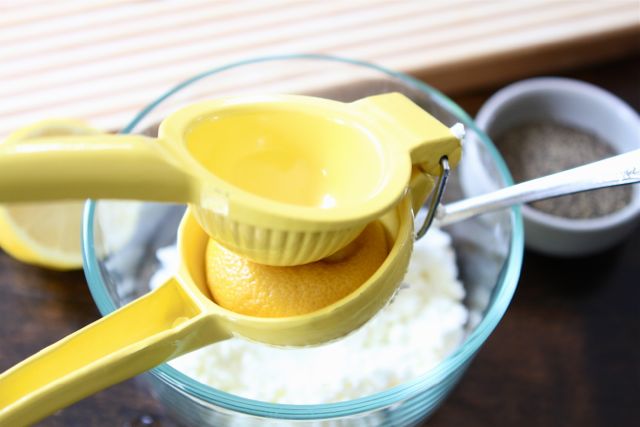
Mix together the Greek yoghurt, feta and lemon juice in a bowl until blended.


Tasty Kitchen Blog: Cucumber Feta Rolls. Guest post by Maria Lichty of Two Peas and Their Pod, recipe submitted by TK member Traci of Lotta Madness.

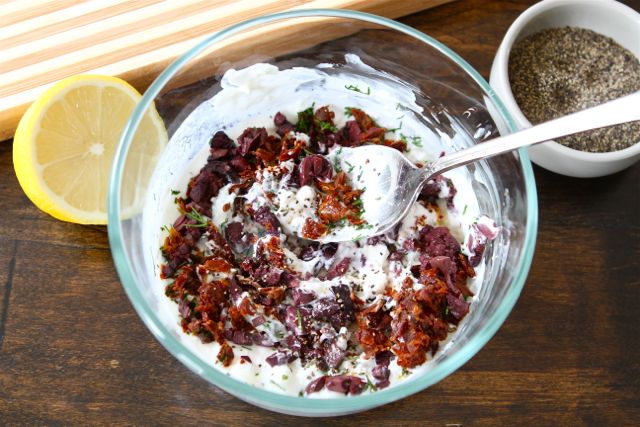
Next, add the dill, sun-dried tomatoes and olives to the feta mixture and season with pepper.


Tasty Kitchen Blog: Cucumber Feta Rolls. Guest post by Maria Lichty of Two Peas and Their Pod, recipe submitted by TK member Traci of Lotta Madness.

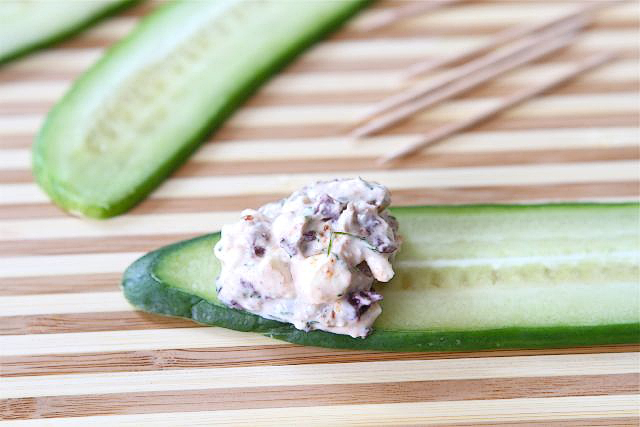
Place one strip of cucumber on a cutting board. 


Tasty Kitchen Blog: Cucumber Feta Rolls. Guest post by Maria Lichty of Two Peas and Their Pod, recipe submitted by TK member Traci of Lotta Madness.

Place about a teaspoon of the feta mixture onto one end of the cucumber strip. 


Tasty Kitchen Blog: Cucumber Feta Rolls. Guest post by Maria Lichty of Two Peas and Their Pod, recipe submitted by TK member Traci of Lotta Madness.

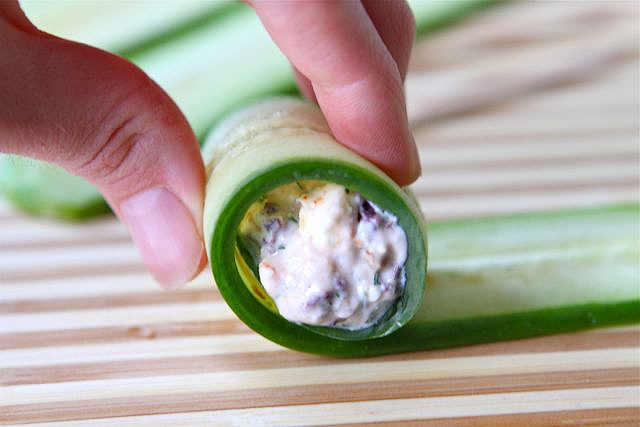
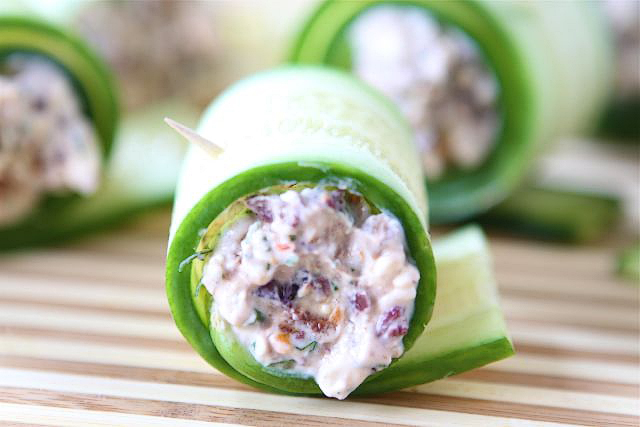
Roll up the cucumber strip and secure with a toothpick. 


Tasty Kitchen Blog: Cucumber Feta Rolls. Guest post by Maria Lichty of Two Peas and Their Pod, recipe submitted by TK member Traci of Lotta Madness.

Chill until ready to serve. 


Tasty Kitchen Blog: Cucumber Feta Rolls. Guest post by Maria Lichty of Two Peas and Their Pod, recipe submitted by TK member Traci of Lotta Madness.

I had so much fun making these rolls! And the best part, you get to eat them when you are finished playing! I loved the creamy Greek yogurt and feta filling. The kalamata olives, sun-dried tomatoes, dill, and lemon gave the rolls the perfect punch of flavor. The cucumber wrapped everything up nicely and provided a nice crunch. These Cucumber Feta Rolls make a great party appetizer. Not in the mood to party? Make them for yourself! I made them for lunch and served pita bread on the side. So tasty! 

Thanks Traci for sharing your creative recipe! Visit Lotta Maddness for other delicious recipes, travel tips, DIY projects, and more! 


Printable Recipe

Cucumber Feta Rolls

See post on LottaMadness’s site!
3.50 Mitt(s) 2 Rating(s)2 votes, average: 3.50 out of 52 votes, average: 3.50 out of 52 votes, average: 3.50 out of 52 votes, average: 3.50 out of 52 votes, average: 3.50 out of 5

Prep Time:

Cook Time:

Difficulty: Easy

Servings: 5

5
x

Print Options

Page size Letter 3x5 4x6
Text Size Small Medium Large
Content Include description
Include prep time, etc.
Show image

Description

Greek salad in a rolled up cucumber strip.

Ingredients

  • 1 whole English Cucumber
  • 2 sprigs Dill
  • 2 Tablespoons Sun Dried Tomatoes
  • 8 whole Kalamata Olives
  • 4 Tablespoons Greek Yoghurt
  • 1 ounce, weight Feta Cheese
  • 1 teaspoon Lemon Juice
  • 1 pinch Black Pepper

Preparation Instructions

Start by slicing the cucumber in half lengthwise. Then, using a mandoline (or a sharp vegetable peeler), slice the cucumber lengthwise into long thin strips. Place the cucumber strips on a kitchen towel to absorb the liquid.

Chop the dill, sun-dried tomatoes and olives into smaller pieces. Mix together the Greek yoghurt, feta and lemon juice in a bowl until blended. Next, add the dill, sun-dried tomatoes and olives to the feta mixture and season with pepper.

Place one strip of cucumber on a chopping board. Place a teaspoon of the feta mixture onto one end of the cucumber strip. Roll up the cucumber strip and secure with a toothpick. Chill until ready to serve.


_______________________________________

Maris Callahan is the author of In Good Taste, where she writes fresh, simple recipes for young professionals and busy cooks. When she isn’t working on her next recipe she is usually reading, writing, eating—or doing a combination of all three.


Profile photo of georgiapellegrini

Sun-dried Tomato Tuna Melts

Posted by in Step-by-Step Recipes

Tasty Kitchen Blog: Sun-dried Tomato Tuna Melts. Guest post by Georgia Pellegrini, recipe submitted by TK member Natalie Perry of Perry's Plate.

 
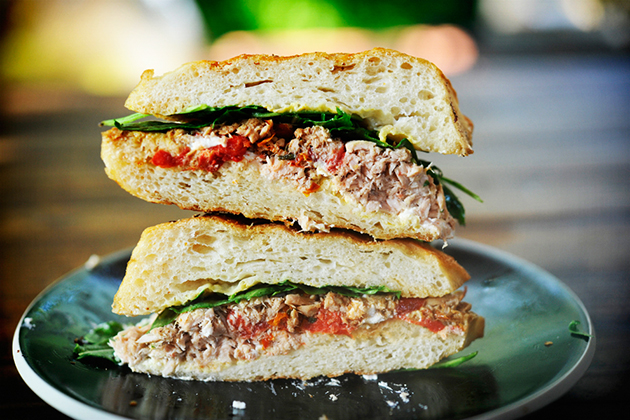
Natalie from Perry’s Plate always has such wonderful recipes that spice up my life. Recently, I have been cooking just for myself and this recipe for Sun-dried Tomato Tuna Melts really made my afternoon. It is a wonderful rendition of the classic tuna melt but it is so much more than that. It’s a luscious version filled with fun ingredients and I think you’ll love it.


Tasty Kitchen Blog: Sun-dried Tomato Tuna Melts. Guest post by Georgia Pellegrini, recipe submitted by TK member Natalie Perry of Perry's Plate.

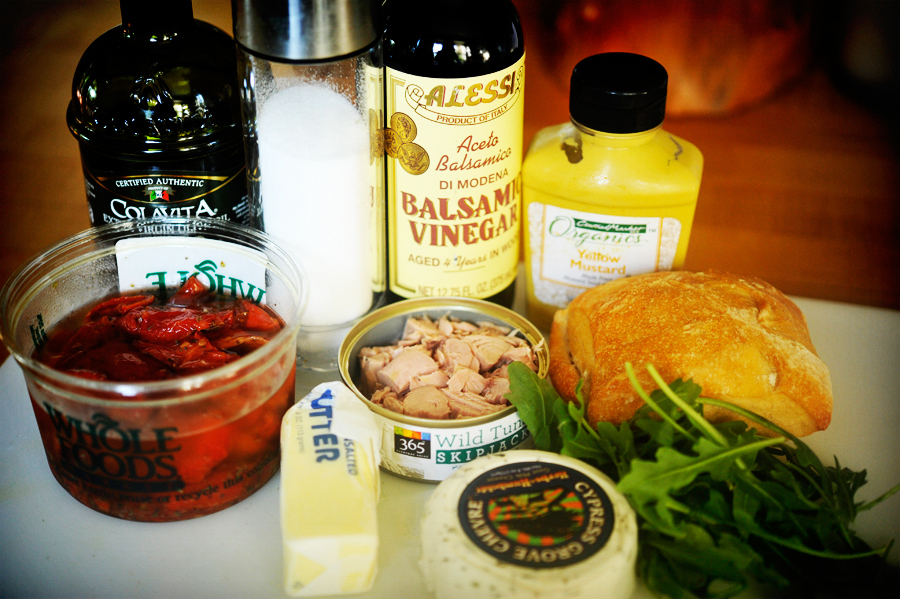
You will need: sun-dried tomatoes in oil, olive oil, salt and pepper, red wine (or balsamic) vinegar, mustard, tuna, good bread, spinach (or arugula), goat cheese, and butter!


Tasty Kitchen Blog: Sun-dried Tomato Tuna Melts. Guest post by Georgia Pellegrini, recipe submitted by TK member Natalie Perry of Perry's Plate.

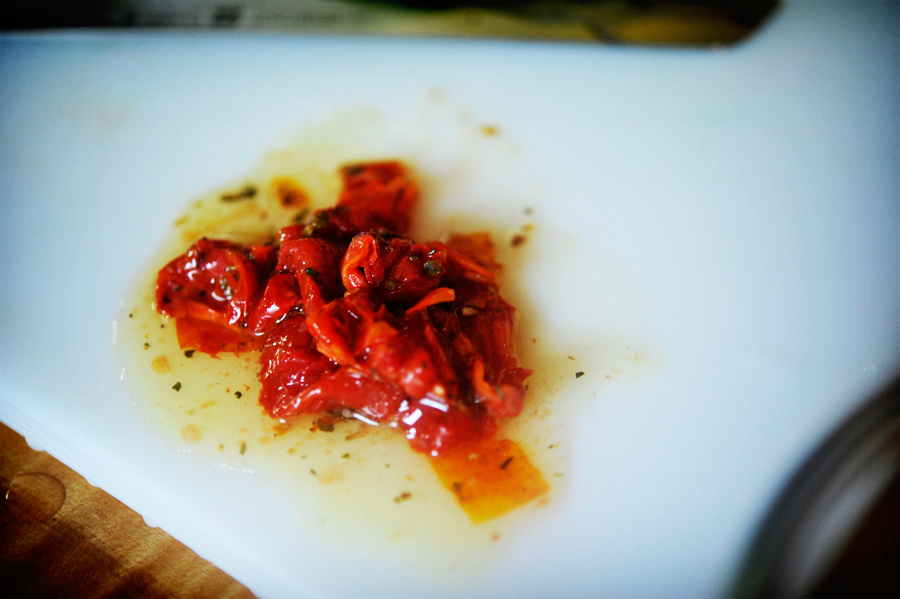
Give your sun-dried tomatoes a nice chop.


Tasty Kitchen Blog: Sun-dried Tomato Tuna Melts. Guest post by Georgia Pellegrini, recipe submitted by TK member Natalie Perry of Perry's Plate.

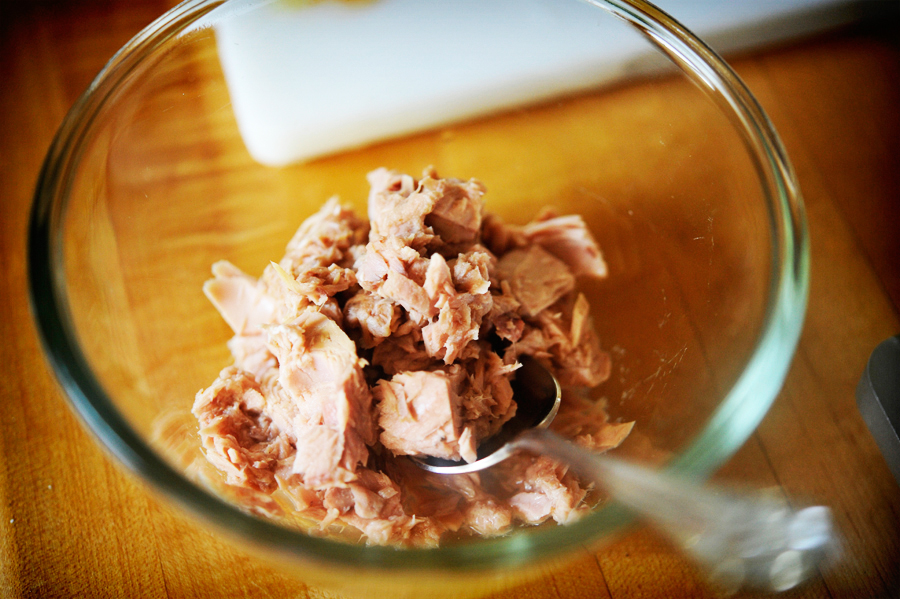
Place your tuna in a small bowl.


Tasty Kitchen Blog: Sun-dried Tomato Tuna Melts. Guest post by Georgia Pellegrini, recipe submitted by TK member Natalie Perry of Perry's Plate.

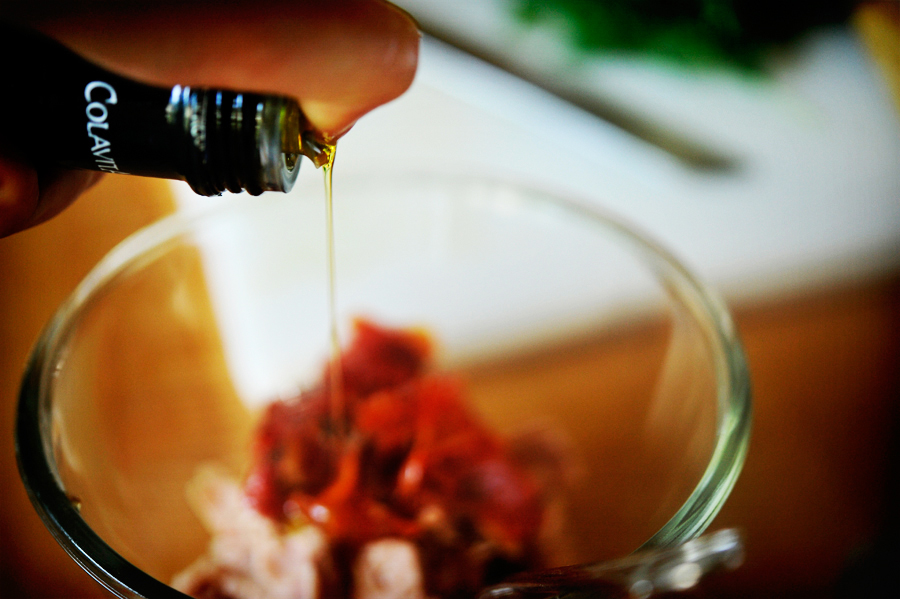
Add the tomatoes and olive oil and salt n’ peppa and mix it all together.


Tasty Kitchen Blog: Sun-dried Tomato Tuna Melts. Guest post by Georgia Pellegrini, recipe submitted by TK member Natalie Perry of Perry's Plate.

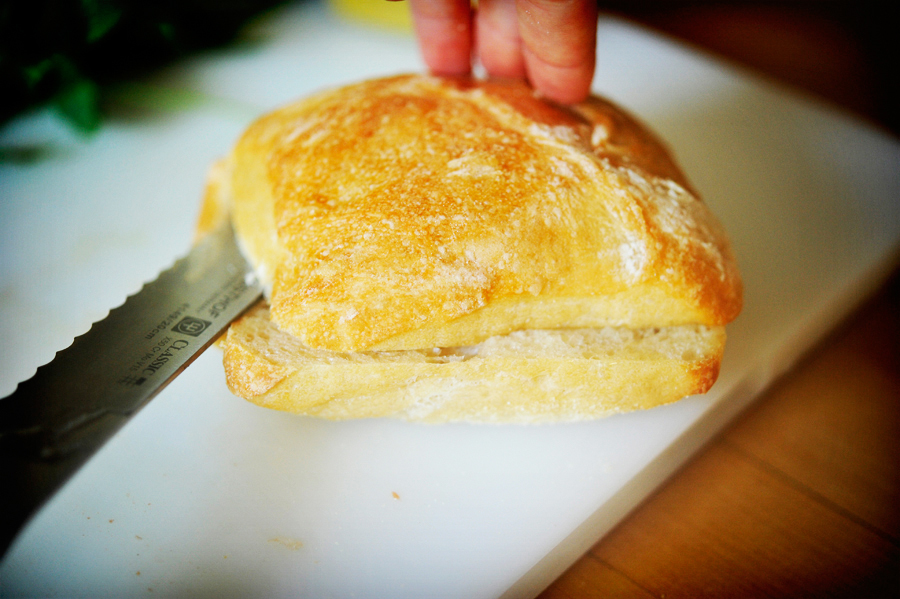
And get your bread ready!


Tasty Kitchen Blog: Sun-dried Tomato Tuna Melts. Guest post by Georgia Pellegrini, recipe submitted by TK member Natalie Perry of Perry's Plate.

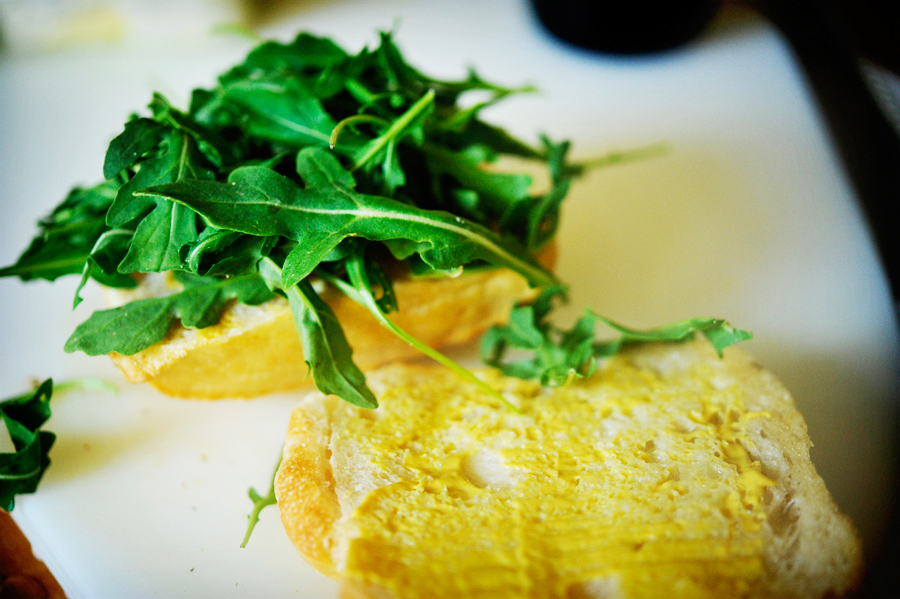
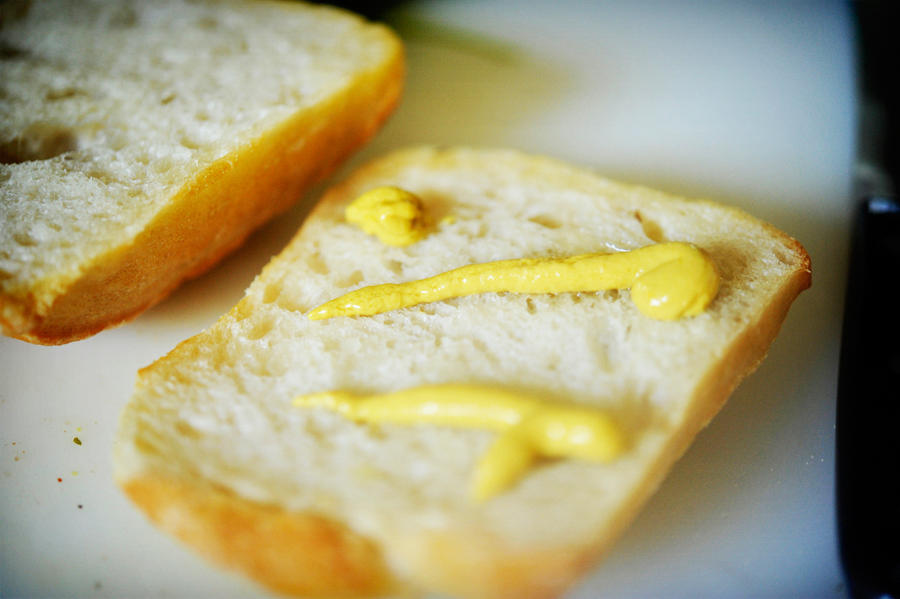
Smother each half with a good dose of mustard.


Tasty Kitchen Blog: Sun-dried Tomato Tuna Melts. Guest post by Georgia Pellegrini, recipe submitted by TK member Natalie Perry of Perry's Plate.

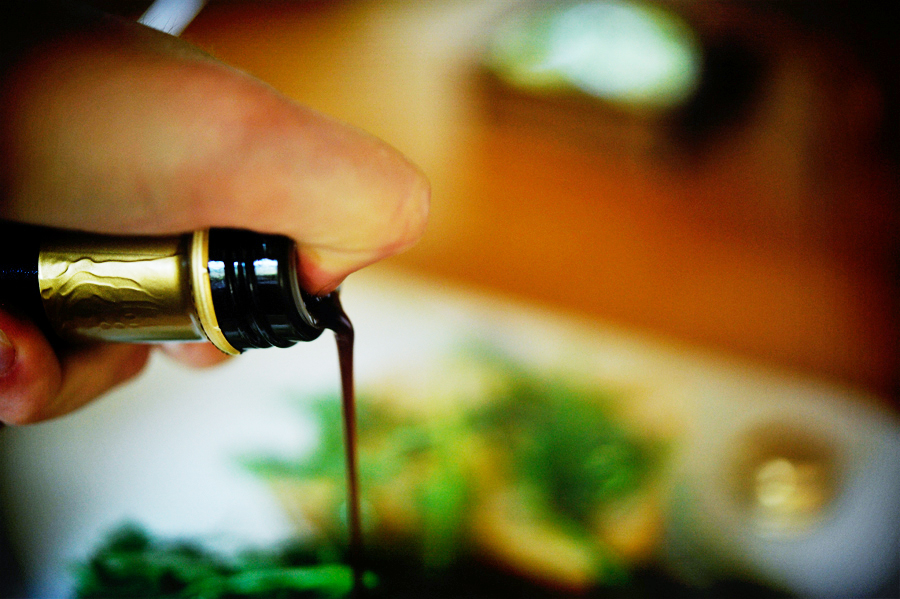
Drizzle on some vinegar to give your bread some tang.


Tasty Kitchen Blog: Sun-dried Tomato Tuna Melts. Guest post by Georgia Pellegrini, recipe submitted by TK member Natalie Perry of Perry's Plate.

Place your greens on there in a heaping pile. Natalie calls for spinach, which would be lovely, but I was in an arugula mood. I like the peppery-ness.


Tasty Kitchen Blog: Sun-dried Tomato Tuna Melts. Guest post by Georgia Pellegrini, recipe submitted by TK member Natalie Perry of Perry's Plate.

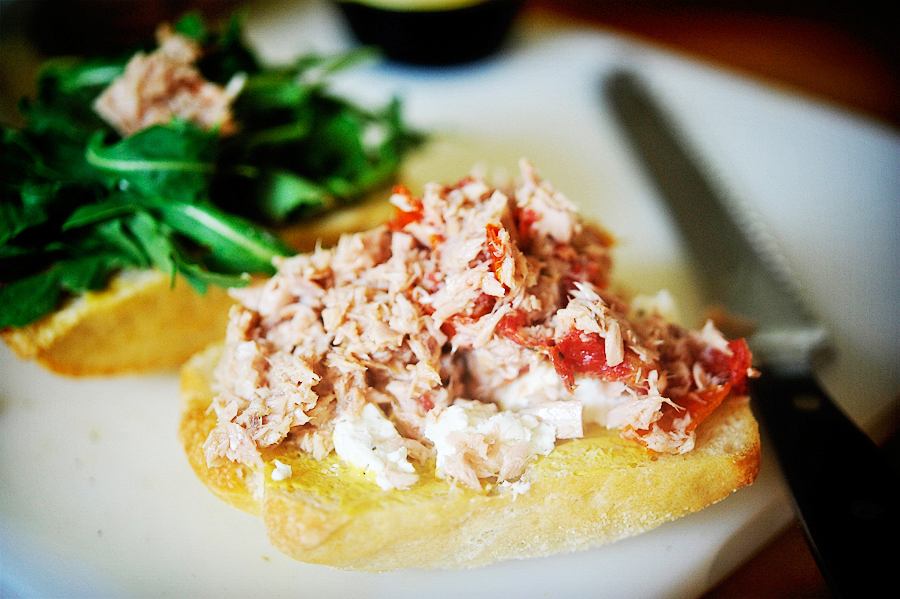
Place the goat cheese and tuna mixture in a nice pile on the other bread half.


Tasty Kitchen Blog: Sun-dried Tomato Tuna Melts. Guest post by Georgia Pellegrini, recipe submitted by TK member Natalie Perry of Perry's Plate.

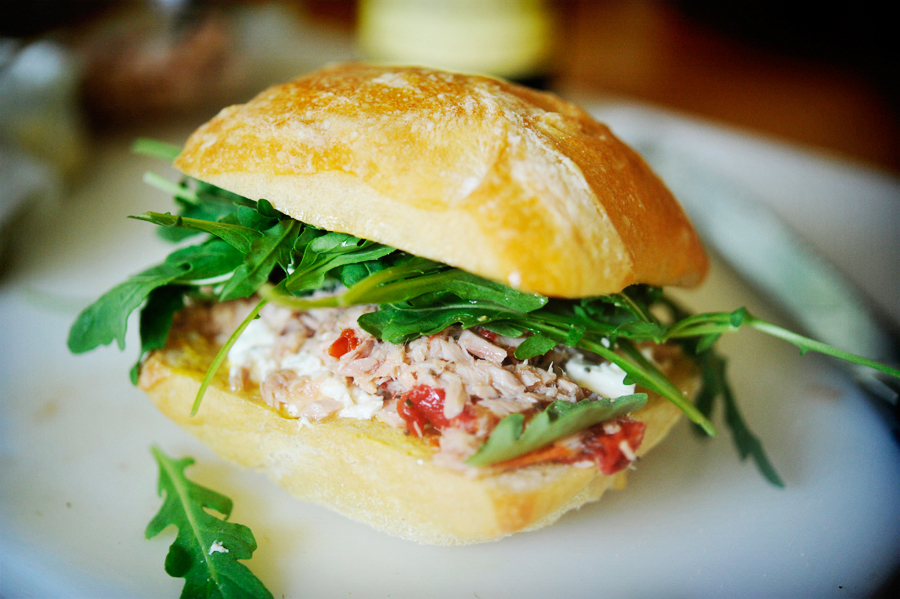
Then squish your halves together.


Tasty Kitchen Blog: Sun-dried Tomato Tuna Melts. Guest post by Georgia Pellegrini, recipe submitted by TK member Natalie Perry of Perry's Plate.

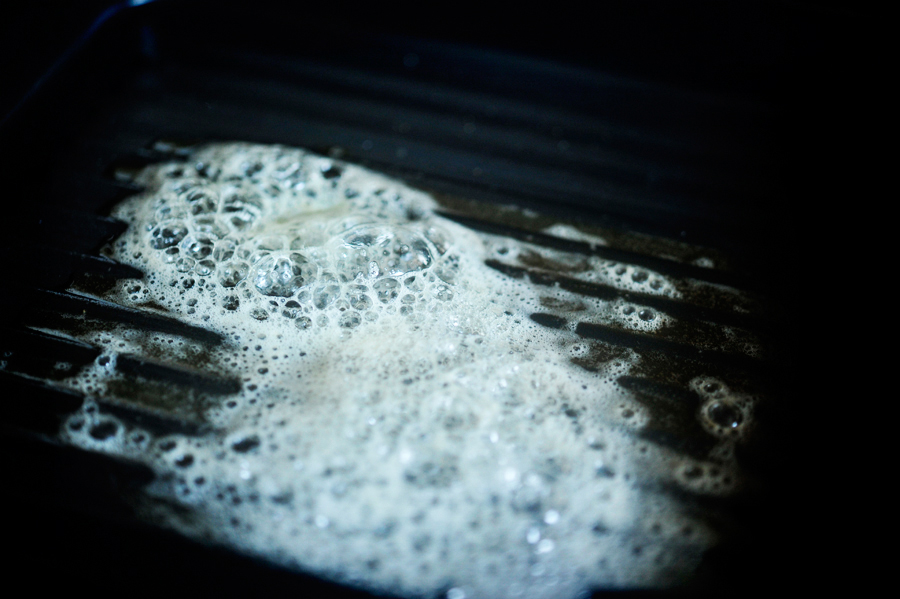
Get a cast iron skillet nice and hot with some good butter.


Tasty Kitchen Blog: Sun-dried Tomato Tuna Melts. Guest post by Georgia Pellegrini, recipe submitted by TK member Natalie Perry of Perry's Plate.

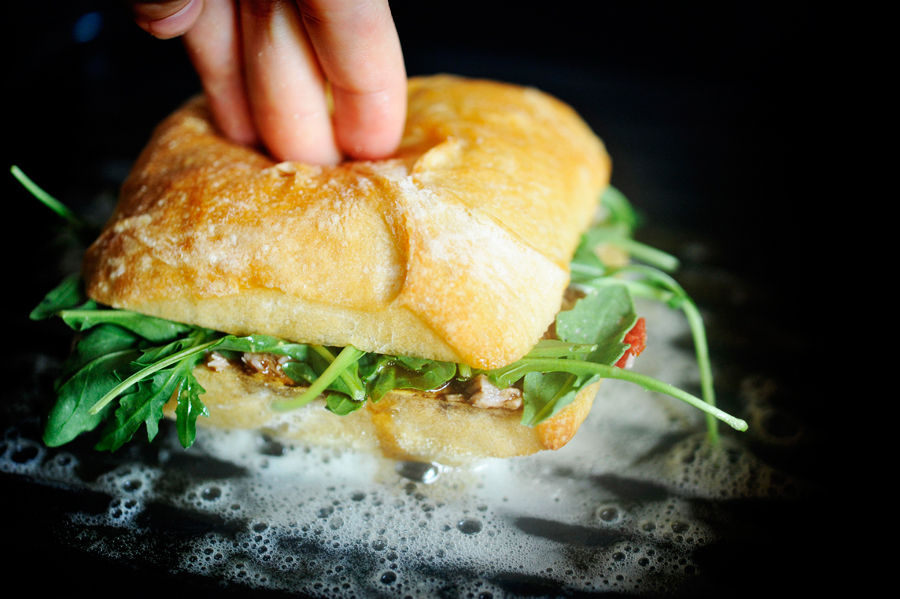
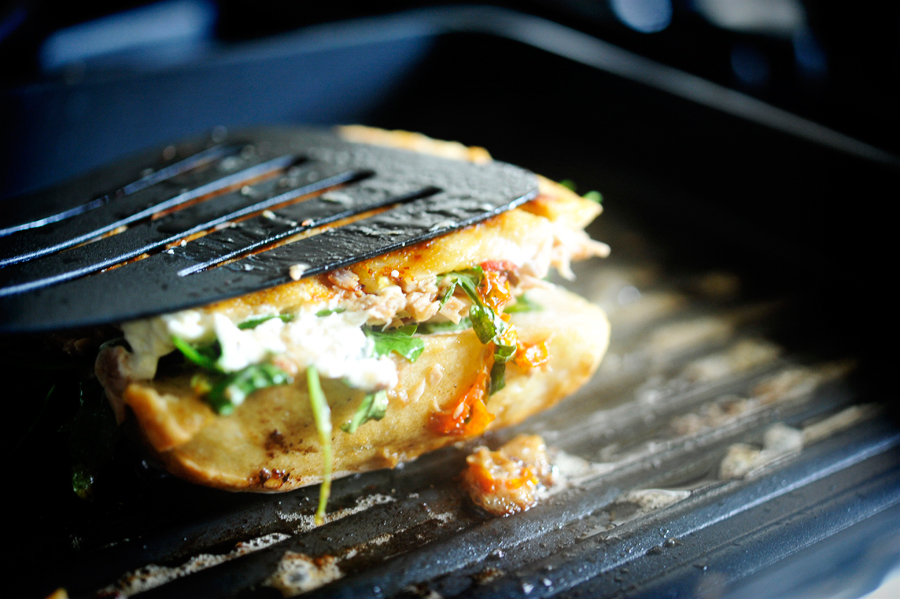
Press your sandwich down well.


Tasty Kitchen Blog: Sun-dried Tomato Tuna Melts. Guest post by Georgia Pellegrini, recipe submitted by TK member Natalie Perry of Perry's Plate.

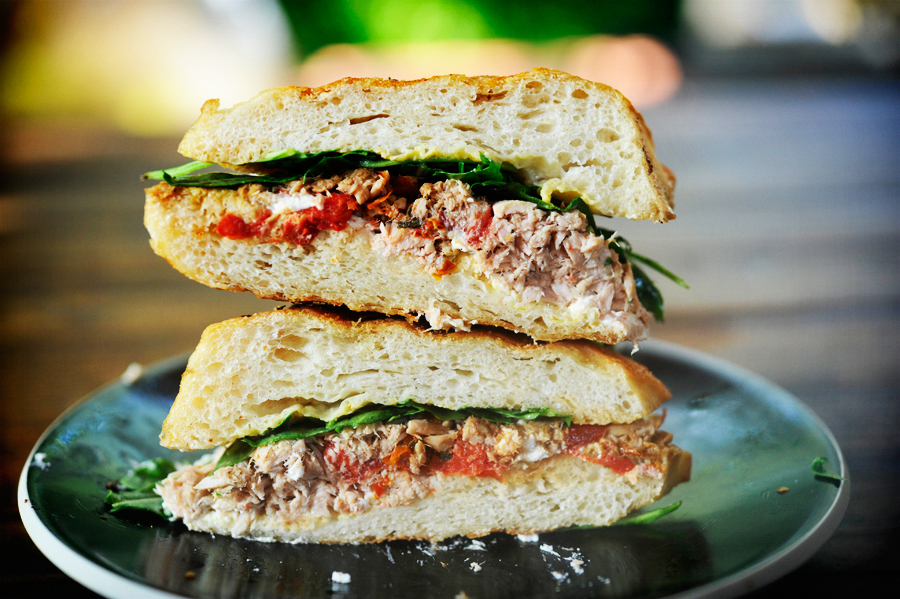
Use a spatula or another skillet to weight it down and get it a bit flat and toasty. If you use thinner bread, it will be even easier. Brown it on both sides until the insides are melty and the bread is toasted.


Tasty Kitchen Blog: Sun-dried Tomato Tuna Melts. Guest post by Georgia Pellegrini, recipe submitted by TK member Natalie Perry of Perry's Plate.

This will be a heavenly lunch to enjoy on your own or share if you can bear it. Thank you to Natalie from Perry’s Plate for this absolute winner! She’s a fellow TK Blog contributor and her posts are simply amazing. Don’t forget to visit her blog Perry’s Plate too. It’s packed with so many delicious recipes, and she has the cutest little girls you’ll ever see!


Printable Recipe

Sun-Dried Tomato Tuna Melts

See post on Natalie | Perry's Plate’s site!
5.00 Mitt(s) 3 Rating(s)3 votes, average: 5.00 out of 53 votes, average: 5.00 out of 53 votes, average: 5.00 out of 53 votes, average: 5.00 out of 53 votes, average: 5.00 out of 5

Prep Time:

Cook Time:

Difficulty: Easy

Servings: 2

2
x

Print Options

Page size Letter 3x5 4x6
Text Size Small Medium Large
Content Include description
Include prep time, etc.
Show image

Description

I’ve come to love tuna dressed up in a vinaigrette rather than laden down with mayo. This is a sandwich that’s much more exciting than it looks.

Ingredients

  • 1 can Tuna, Drained, 6-7 Ounce Can
  • 1 Tablespoon Sun-dried Tomato Pesto (in My Recipe Box) Or Minced Oil-packed Sun-dried Tomatoes
  • 2 teaspoons Red Wine Vinegar
  • 2 teaspoons Extra Virgin Olive Oil
  • 1 pinch Salt And Pepper, to taste
  • 2 teaspoons Dijon Mustard (or To Taste)
  • ⅓ cups Goat Cheese Crumbles
  • 1 ounce, weight Fresh Baby Spinach Leaves (about A Handful)
  • 4 slices Sandwich Bread
  • 2 Tablespoons Butter

Preparation Instructions

Combine the tuna, pesto, vinegar, olive oil, salt & pepper in a small bowl; mix well.

Spread a little Dijon mustard (to your liking) on one slice of bread (or both). Top with a few spinach leaves, half of the goat cheese, and half of the tuna mixture. Place another slice of bread on top and repeat with the other sandwich.

Melt a tablespoon of butter in a large skillet over medium heat. Once melted, tilt the pan around to spread the butter. Lay sandwiches in the skillet and put a lid on the pan. Turn heat down to medium-low and cook for 3-4 minutes or until bread turns golden brown and the filling becomes warm. Remove sandwiches from the pan, place remaining 1 Tablespoon of butter in the skillet and cook the other sides of the sandwiches, covered, for 2-3 minutes until golden brown and the filling is hot.

Remove from pan, slice in half (like your mom did – I always slice it into rectangles because she did), and serve.

Makes 2 sandwiches.

Notes:
1. If you wanted it more “melty”, try using a different type of cheese. I bet gouda, gruyere, or Swiss would be good, too.


_______________________________________

There’s so much to say about Georgia, we don’t know where to start. Leaving Wall Street for the French Culinary Institute, followed by a stint at the Gramercy Tavern and La Chassagnette in France, her passion for food and food traditions are evident and inspiring. Visit her site at Georgia Pellegrini, where you’ll find more recipes, photos, learn all about her wonderful books Girl Hunter and Food Heroes, and enjoy her latest adventures.


Profile photo of Erica Lea

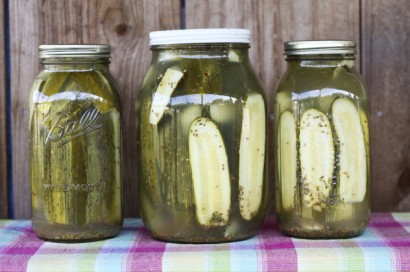
Refrigerator Pickles

Posted by in Step-by-Step Recipes

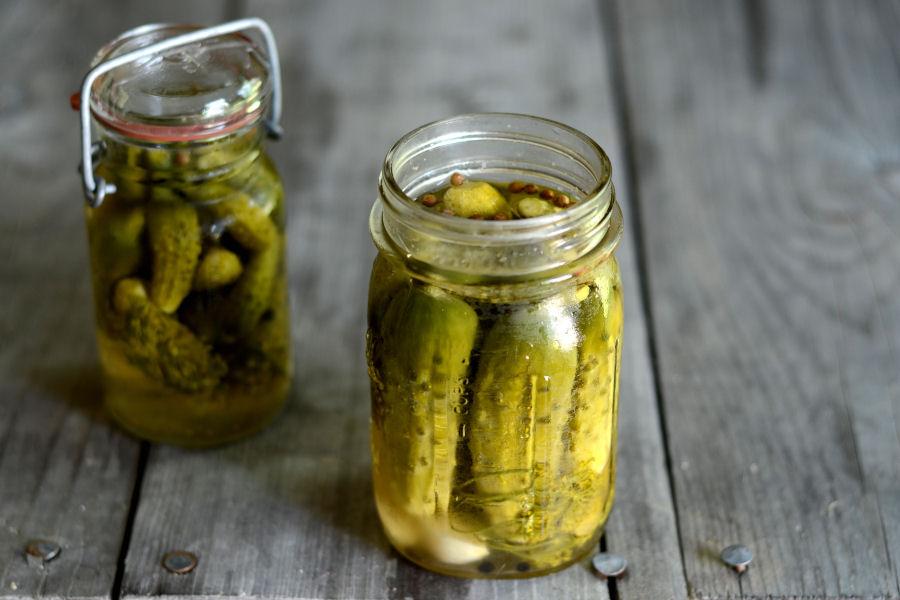
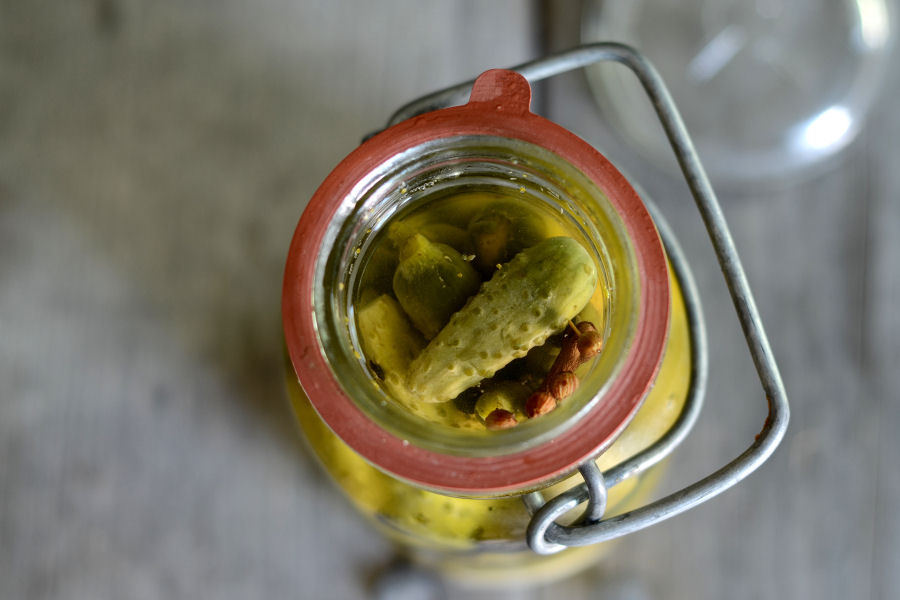
Tasty Kitchen Blog: Homemade Claussen Knock-Off Pickles. Guest post by Erica Kastner of Cooking for Seven, recipe submitted by TK member Rebecca of Foodie with Family.
 
When it comes to pickles, I’m just a tad finicky. Sorry to all you sweet pickle lovers, but when talking about cucumbers, I like them dilly, salty and sour. Hold the yellow 5 and polysorbate 80.

Rebecca’s recipe for Homemade Claussen Knock-Off Pickles seemed perfect to me: natural ingredients and (best of all) no canning required. You simply pour a brine over your cucumbers and let sit until soured.

Sounds too easy, eh? Let me show you how it’s done.


Tasty Kitchen Blog: Homemade Claussen Knock-Off Pickles. Guest post by Erica Kastner of Cooking for Seven, recipe submitted by TK member Rebecca of Foodie with Family.
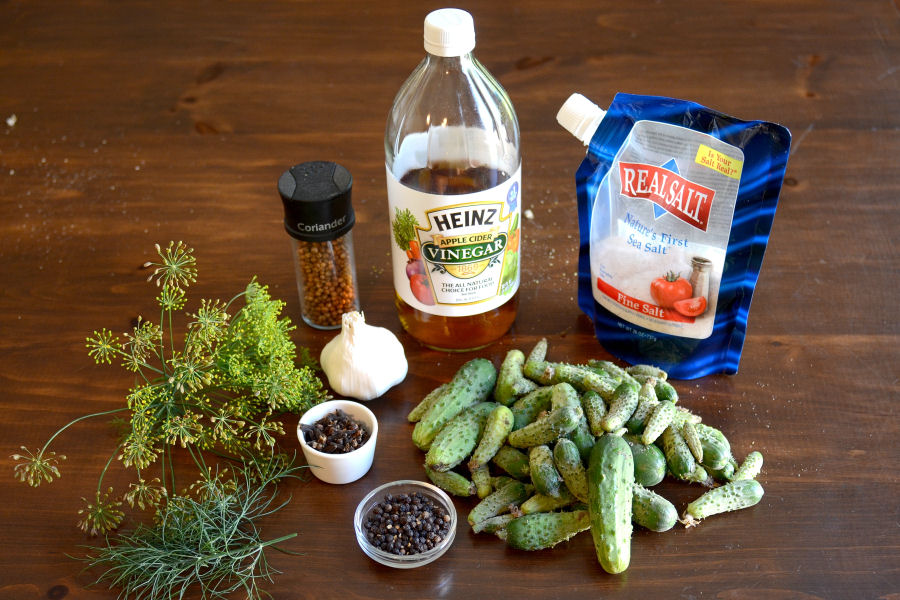
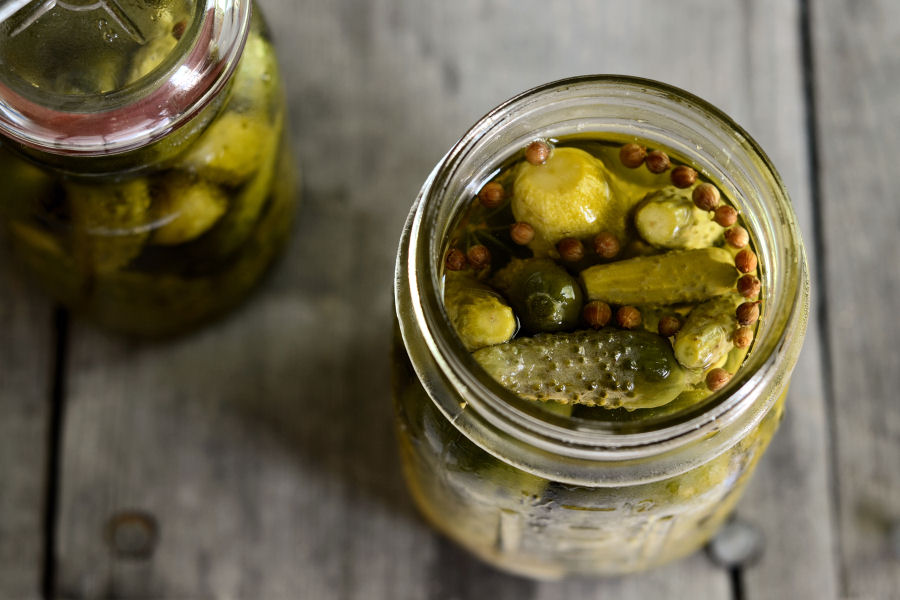
Start with some awesome ingredients: pickling cucumbers (I grew them myself. *proud moment*), fresh dill heads or dried dill seeds, garlic, cold water (not shown), cider vinegar, canning or kosher salt (I used sea salt—don’t use iodized salt!) and mixed pickling spices.


Tasty Kitchen Blog: Homemade Claussen Knock-Off Pickles. Guest post by Erica Kastner of Cooking for Seven, recipe submitted by TK member Rebecca of Foodie with Family.

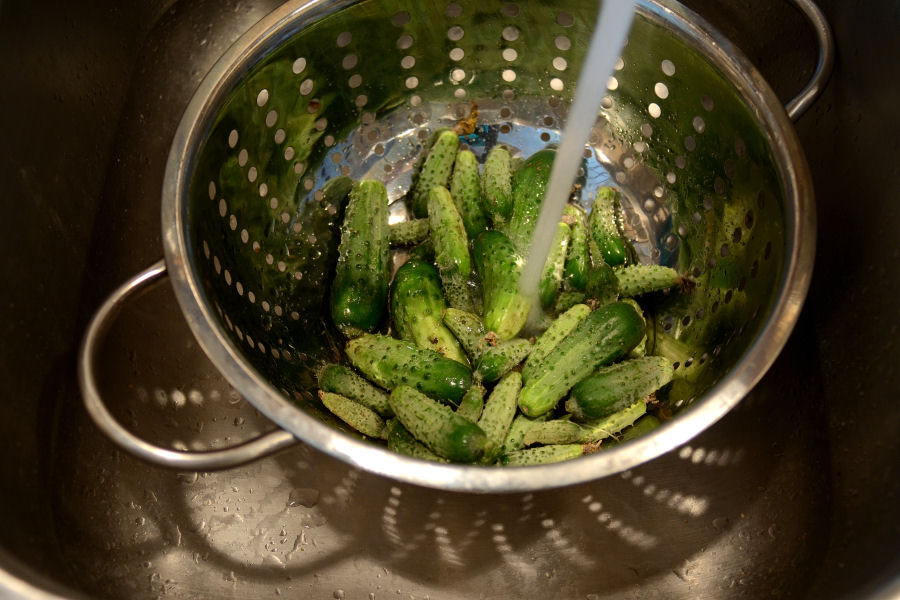
Wash your cucumbers—I like crunchy pickles, but not crunchy with dirt.


Tasty Kitchen Blog: Homemade Claussen Knock-Off Pickles. Guest post by Erica Kastner of Cooking for Seven, recipe submitted by TK member Rebecca of Foodie with Family.
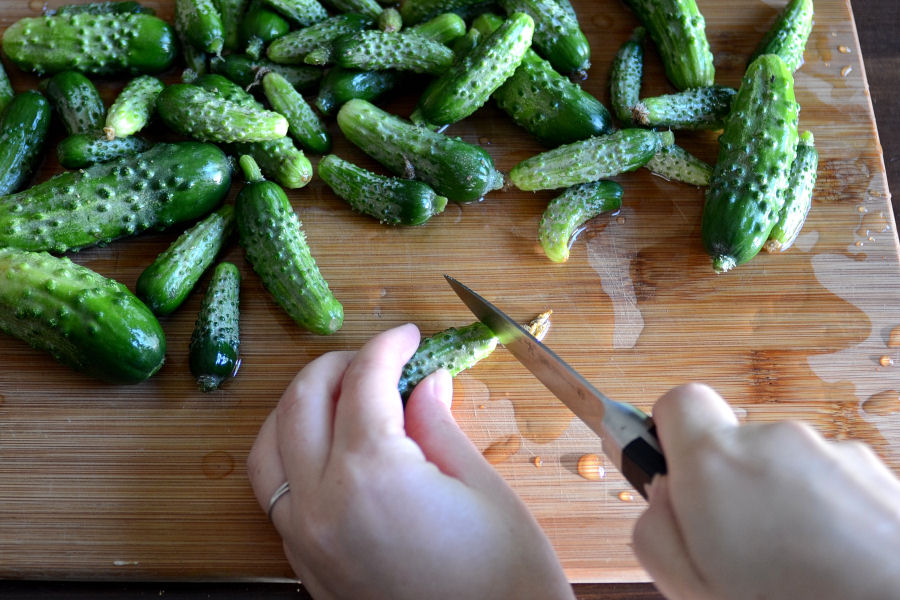
Cut a bit off of the blossom end.


Tasty Kitchen Blog: Homemade Claussen Knock-Off Pickles. Guest post by Erica Kastner of Cooking for Seven, recipe submitted by TK member Rebecca of Foodie with Family.

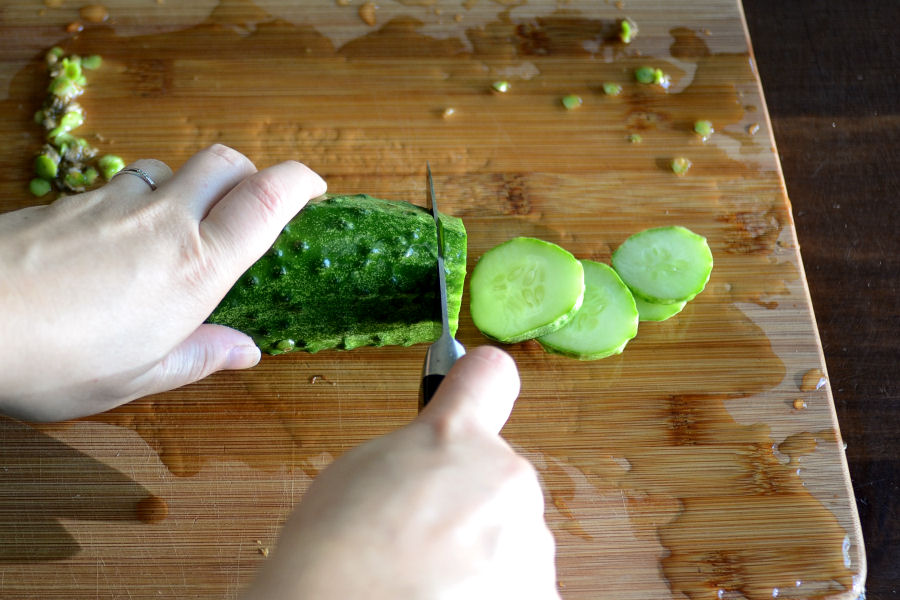
If you let some of your cucumbers grow too long, no worries. Simply slice them crosswise—perfect for sandwiches!


Tasty Kitchen Blog: Homemade Claussen Knock-Off Pickles. Guest post by Erica Kastner of Cooking for Seven, recipe submitted by TK member Rebecca of Foodie with Family.

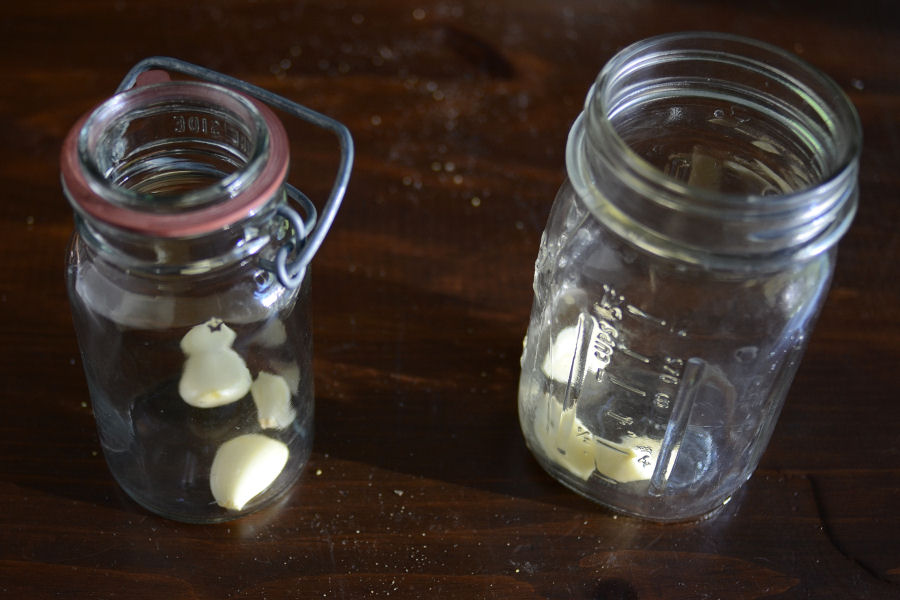
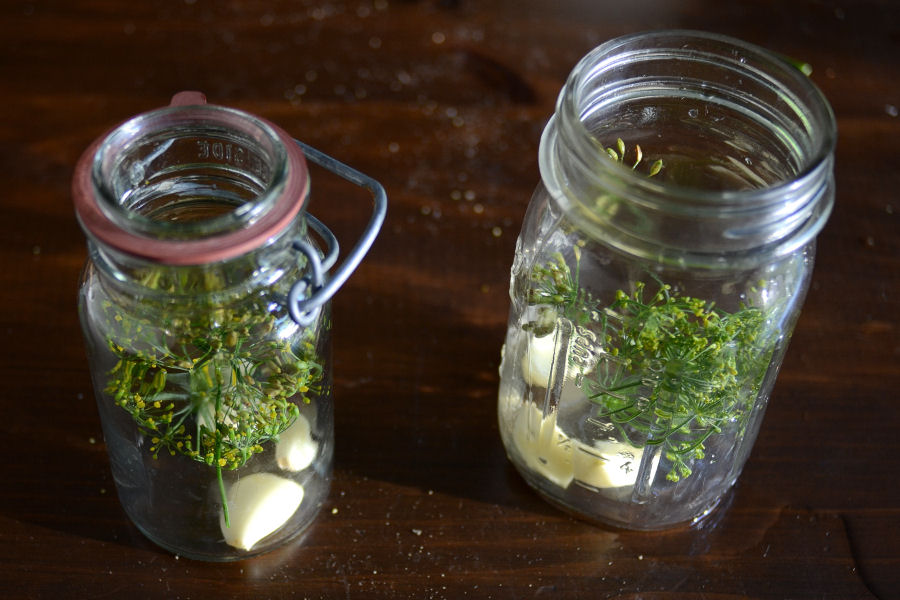
Layer the garlic …


Tasty Kitchen Blog: Homemade Claussen Knock-Off Pickles. Guest post by Erica Kastner of Cooking for Seven, recipe submitted by TK member Rebecca of Foodie with Family.

Dill heads …


Tasty Kitchen Blog: Homemade Claussen Knock-Off Pickles. Guest post by Erica Kastner of Cooking for Seven, recipe submitted by TK member Rebecca of Foodie with Family.

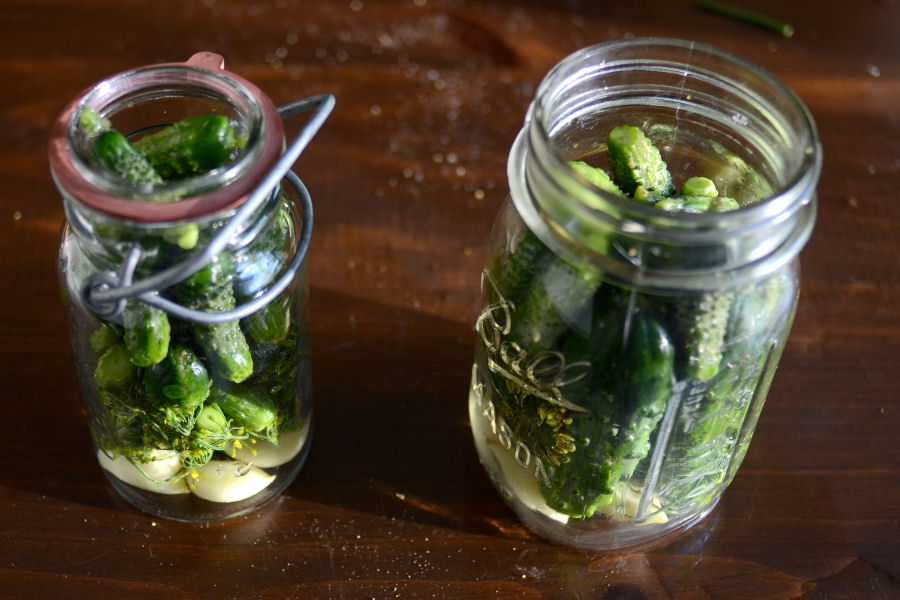
And cucumbers in jars.


Tasty Kitchen Blog: Homemade Claussen Knock-Off Pickles. Guest post by Erica Kastner of Cooking for Seven, recipe submitted by TK member Rebecca of Foodie with Family.

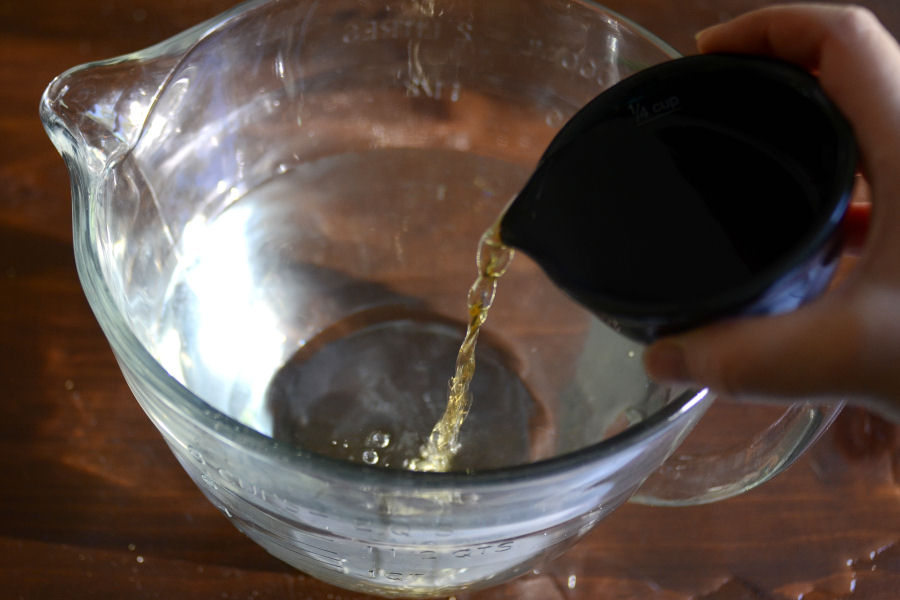
Now make your brine: pour your water into a big measuring cup. Add the vinegar …


Tasty Kitchen Blog: Homemade Claussen Knock-Off Pickles. Guest post by Erica Kastner of Cooking for Seven, recipe submitted by TK member Rebecca of Foodie with Family.

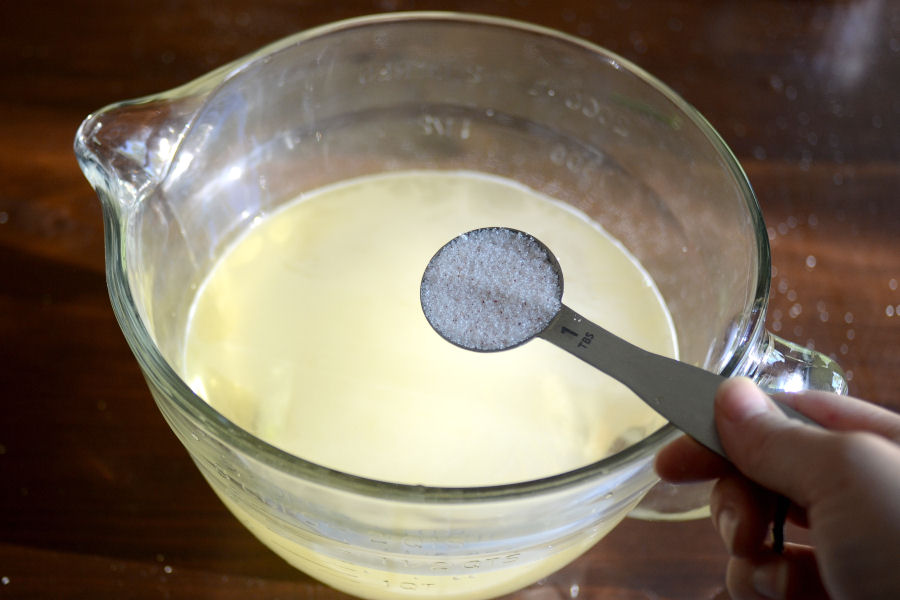
Salt …


Tasty Kitchen Blog: Homemade Claussen Knock-Off Pickles. Guest post by Erica Kastner of Cooking for Seven, recipe submitted by TK member Rebecca of Foodie with Family.
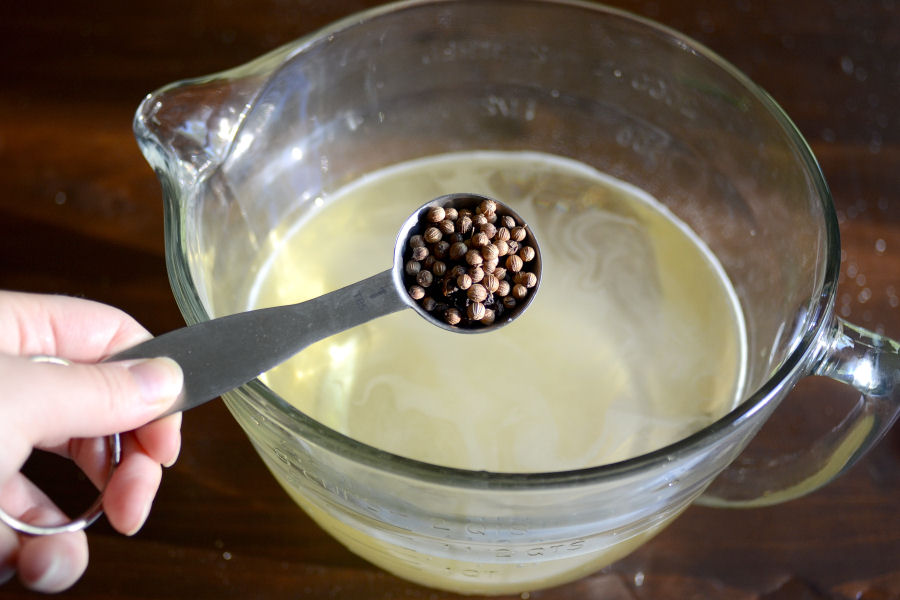
And pickling spices.


Tasty Kitchen Blog: Homemade Claussen Knock-Off Pickles. Guest post by Erica Kastner of Cooking for Seven, recipe submitted by TK member Rebecca of Foodie with Family.

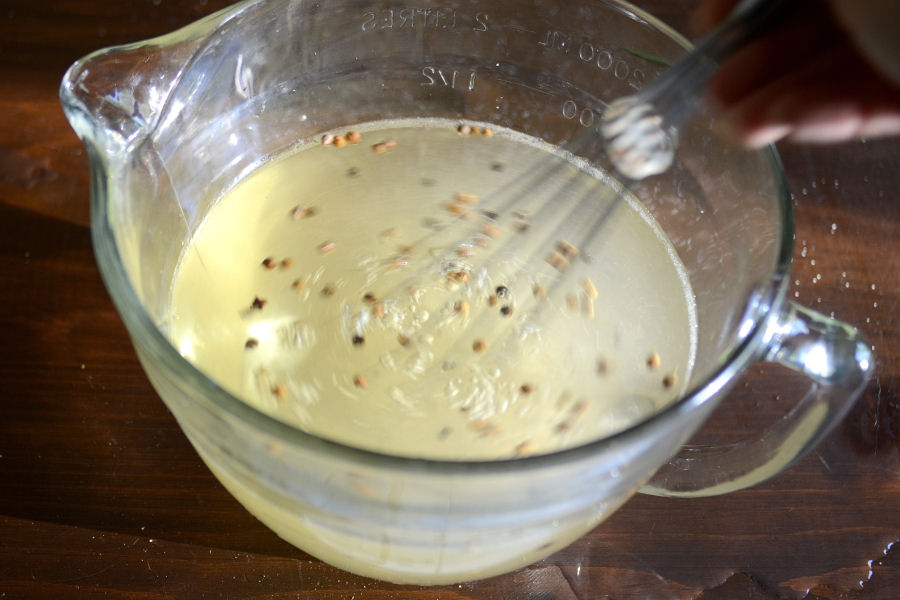
Whisk until the salt is dissolved.


Tasty Kitchen Blog: Homemade Claussen Knock-Off Pickles. Guest post by Erica Kastner of Cooking for Seven, recipe submitted by TK member Rebecca of Foodie with Family.

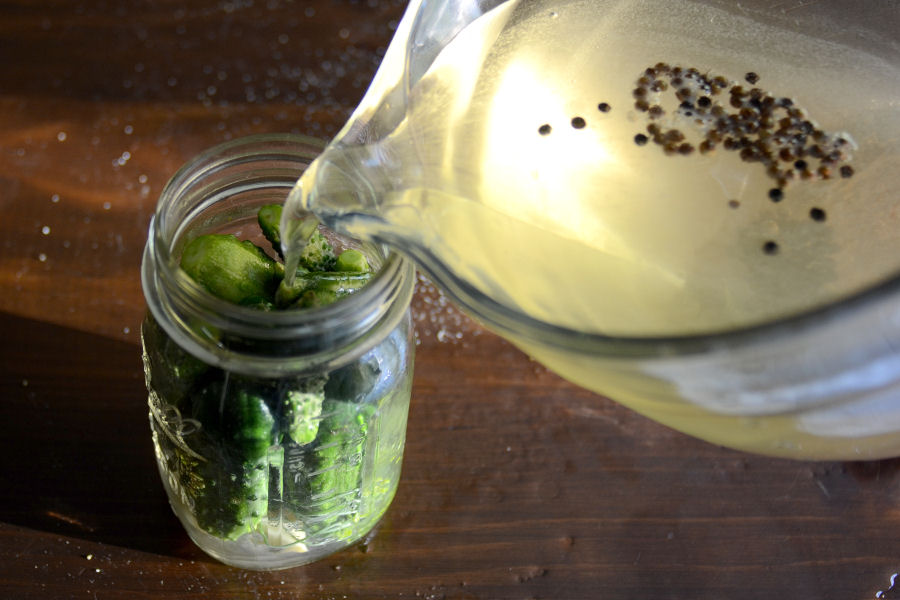
Pour the brine over the cucumbers. Make sure you get some of the pickling spices in each jar!


Tasty Kitchen Blog: Homemade Claussen Knock-Off Pickles. Guest post by Erica Kastner of Cooking for Seven, recipe submitted by TK member Rebecca of Foodie with Family.

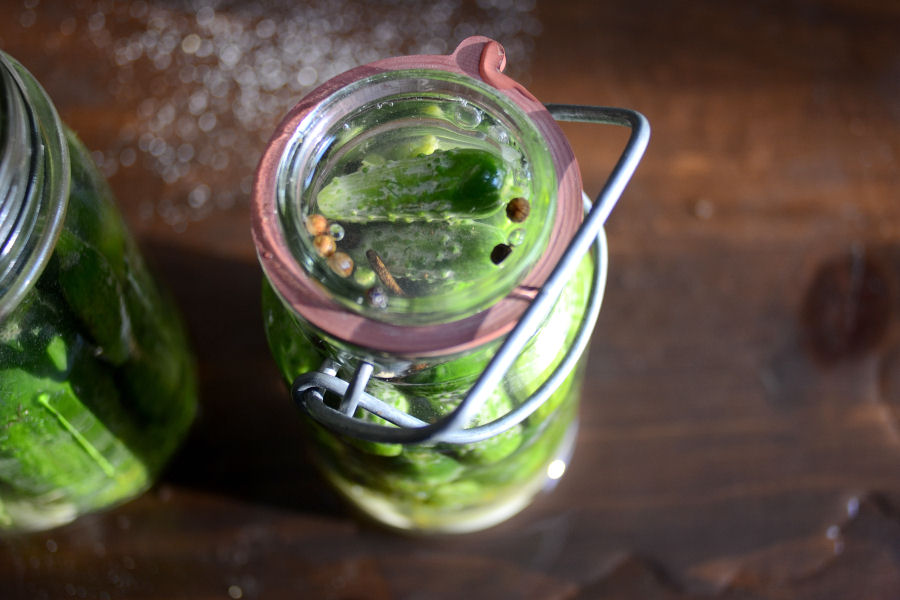
Cover lightly with the jar lid and place a piece of cheesecloth over the top (secured with a rubber band) so no pesky fruit flies can get to your precious pickles.


Tasty Kitchen Blog: Homemade Claussen Knock-Off Pickles. Guest post by Erica Kastner of Cooking for Seven, recipe submitted by TK member Rebecca of Foodie with Family.

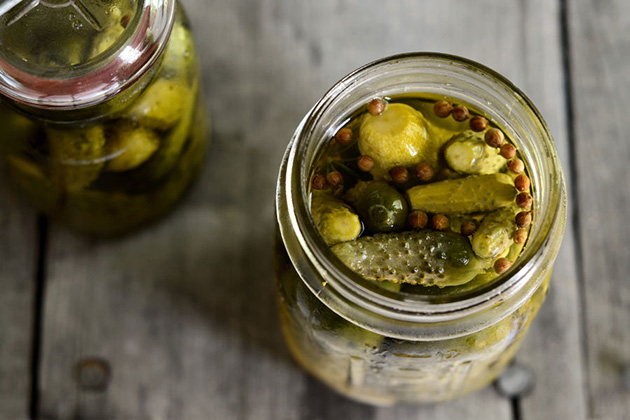
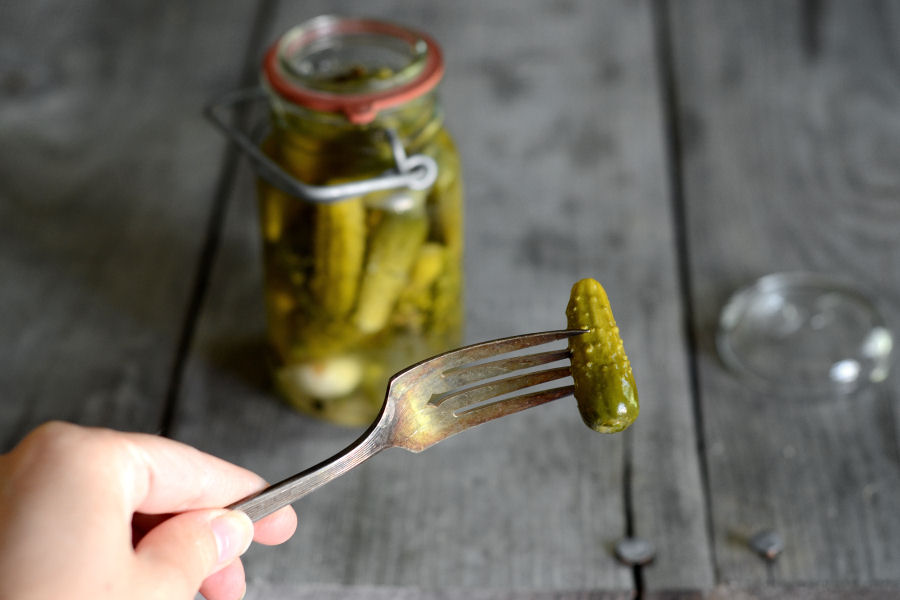
Leave on the counter, out of direct sunlight, for 2-4 days, or until the cucumbers taste like pickles!


Tasty Kitchen Blog: Homemade Claussen Knock-Off Pickles. Guest post by Erica Kastner of Cooking for Seven, recipe submitted by TK member Rebecca of Foodie with Family.

Cover tightly with lids and refrigerate. These will keep, chilled, for up to six months.


Tasty Kitchen Blog: Homemade Claussen Knock-Off Pickles. Guest post by Erica Kastner of Cooking for Seven, recipe submitted by TK member Rebecca of Foodie with Family.

Recipe Notes:

1. I love these pickles – so much more fresh tasting than canned! And way more affordable than those yummy ones you get at the healthfood store.

2. Reuben thinks these are great, but when my brother-in-law tasted them, he didn’t like them at all. Refrigerator pickles should be sweet, in his book. To each his own.

3. Don’t worry if your pickles develop “fuzz”—simply scoop any fuzz off of the brine and get rid of any pickles that are affected. No need to throw out the whole jar!


Tasty Kitchen Blog: Homemade Claussen Knock-Off Pickles. Guest post by Erica Kastner of Cooking for Seven, recipe submitted by TK member Rebecca of Foodie with Family.

Thanks so much to Rebecca for sharing these tasty little treats with us. You should also check out her blog, Foodie with Family, where she shares many more awesome recipes. These Grilled Spare Ribs look ah-mazing.


Printable Recipe

Homemade Claussen Knock-Off Pickles

See post on Rebecca’s site!
5.00 Mitt(s) 3 Rating(s)3 votes, average: 5.00 out of 53 votes, average: 5.00 out of 53 votes, average: 5.00 out of 53 votes, average: 5.00 out of 53 votes, average: 5.00 out of 5

Prep Time:

Cook Time:

Difficulty: Easy

Servings: 24

24
x

Print Options

Page size Letter 3x5 4x6
Text Size Small Medium Large
Content Include description
Include prep time, etc.
Show image

Description

Always crunchy and garlicky, this perfect homemade pickle requires no special equipment, no canning experience and tastes just like Claussen’s refrigerated kosher dill pickles.

Ingredients

  • 35 whole To 45 Whole Small To Medium Sized Pickling Cucumbers
  • 4 heads Fresh Dill Or 4 Tablespoons Dried Dill Seed (not Weed!)
  • 4 cloves Garlic, Or More To Taste (I Usually Use Double The Amount)
  • 1 gallon Cold Water
  • 1 cup Cider Vinegar
  • ⅔ cups Canning Or Kosher Salt (do Not Use Iodized Salt!)
  • 2 Tablespoons Mixed Pickling Spices

Preparation Instructions

Wash cucumbers but do not scrub them. Trim 1/8-inch from the blossom end of each cucumber and slice in half lengthwise or into quarters, depending on how large your cucumbers are and how big you want them to be when they’re done.

In a gallon jar (or large, wide-mouth, food-safe container) layer the dill heads or seed, garlic cloves and sliced cucumbers.

In a separate pitcher or bowl, stir together the remaining ingredients until the salt is dissolved.

Pour the brine over the cucumbers, taking care to make sure all of them are fully submerged. If needed, place a plate or mug or other non-reactive heavy item on top of the cucumbers to weigh them down and keep them under the brine!

Cover lightly with a lid just perched on top or secure a piece of cheesecloth over the jar with a rubber band to keep fruit flies away.

Leave out of direct sunlight on the counter for two to four days*, or until the cucumbers taste like pickles throughout.

Then, fix your lid onto your jar or container and chill the pickles. These can be stored in the refrigerator for up to six months provided you keep them covered with brine.

Note: If at any point in the proceedings “fuzz” or “foam” develops on top of the brine, use a spoon to remove it. If there is “fuzz” attached to any of the cucumbers, remove the ones affected and be sure the others are still fully submerged.

Cover the jar lightly but do not screw a lid into place!


_______________________________________

Newly-married Erica Kastner shares her wonderful recipes and amazing food photography on her blog, Cooking for Seven. She also writes about crafts and posts more of her beautiful photography in her personal blog, EricaLea.com. There really isn’t much that this amazing young lady can’t do, and we’re thrilled she does some of it here.


Profile photo of HowSweetEats

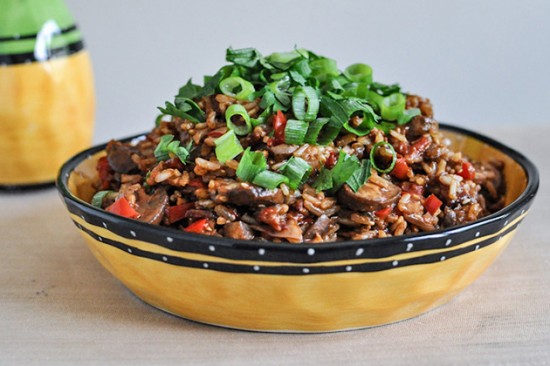
Mole Rice

Posted by in Step-by-Step Recipes

  If ever there was a recipe made for me, this would be it. Bacon, chocolate AND a savory dish? I’m all over this. Before trying it, I never even tasted mole rice. I’ve heard delicious things about it and of course, had multiple people suggest it to me since it has—duh—chocolate in it. But […]

Profile photo of georgiapellegrini

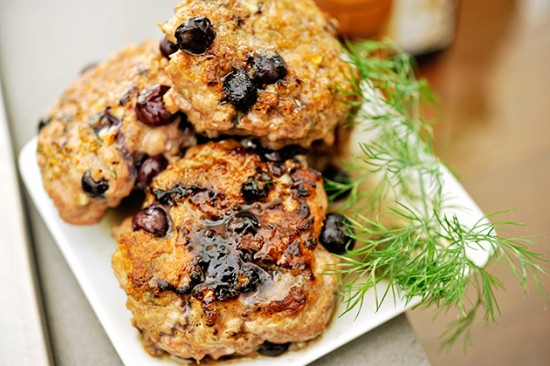
Maple Blueberry Breakfast Sausage

Posted by in Step-by-Step Recipes

  This Maple Blueberry Breakfast Sausage recipe from Hailey was such a treat and so simple to put together. It is also very versatile so you can substitute the fruit or ground meat for another that you have on hand.       You will need: fresh sage, fresh thyme, garlic salt (you could also […]

Profile photo of cookincanuck

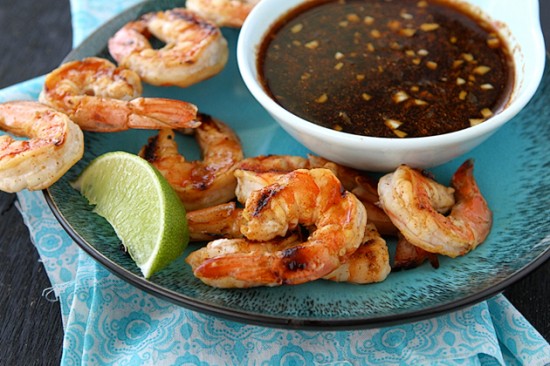
Sweet and Spicy Shrimp

Posted by in Step-by-Step Recipes

  When it comes to grilling, I follow pretty closely the motto of the U.S. Postal Service: “Neither snow nor rain nor heat nor gloom of night…” Well, okay, I actually draw the line at snow, but strap a headlamp on my head (yeah, it’s a really good look) or hold an umbrella over me […]

Profile photo of Laurie - Simply Scratch

Roasted Red Pepper Pizza Sauce

Posted by in Step-by-Step Recipes

  It all started when I went off searching for a pizza sauce. I wanted, no needed a sauce with flavor, flair … and with roasted red peppers. So I typed in the words “roasted red pepper pizza sauce” into the Google search bar on my desktop, and wouldn’t you know it, up popped the […]