The Pioneer Woman Tasty Kitchen
Profile photo of ThreeManyCooks

Enfrijoladas

Posted by in Step-by-Step Recipes

Tasty Kitchen Blog: Enfrijoladas. Guest post by Maggy Keet of Three Many Cooks, recipe submitted by TK member Caroline of Pink Basil.


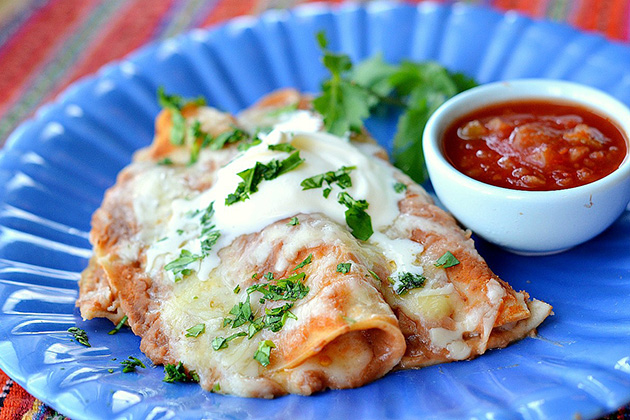
A simple alternative to fajitas and enchiladas, enfrijoladas make a fun weeknight pantry supper that also works for Meatless Monday. You can serve these enfrijoladas topped with sour cream, cilantro, and salsa. I’ve highlighted the simplest version, but there are other great recipes that include meat, vegetables, and even eggs! For fans of spicy food, add a little heat to the bean mixture or serve hot sauce with the other toppings.

Big tip: microwaving the corn tortillas before dipping them into the refried beans keeps them pliable enough to fold without breaking. Another bit of good news: there was enough sauce and room in the pan for eight tortillas, making it a perfect dinner for four.


Tasty Kitchen Blog: Enfrijoladas. Guest post by Maggy Keet of Three Many Cooks, recipe submitted by TK member Caroline of Pink Basil.

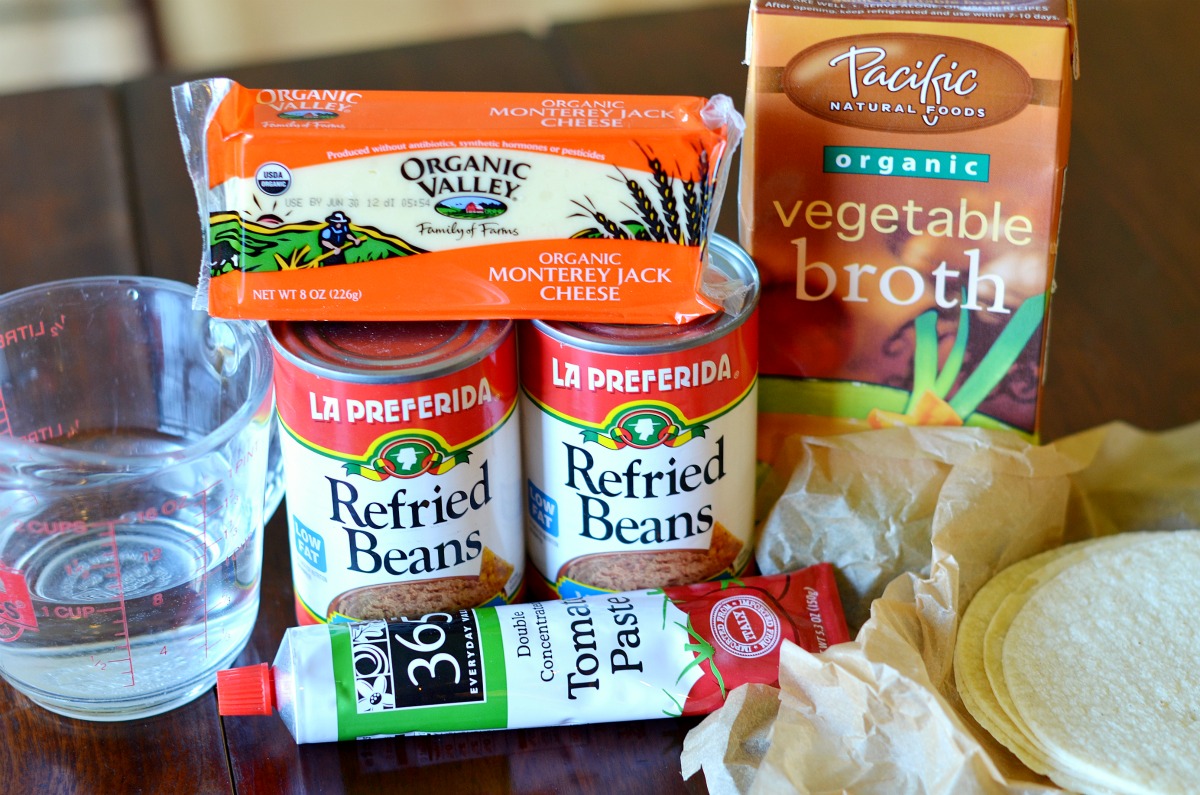
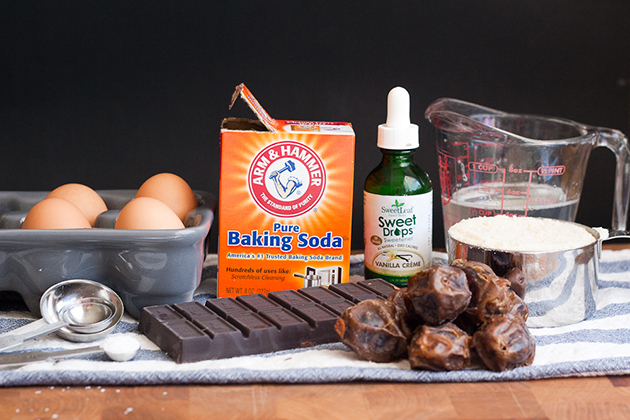
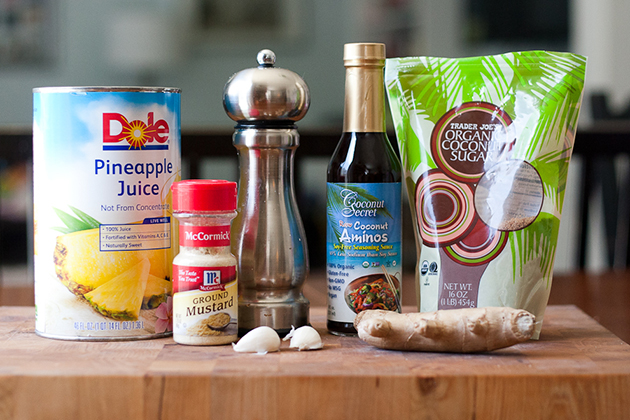
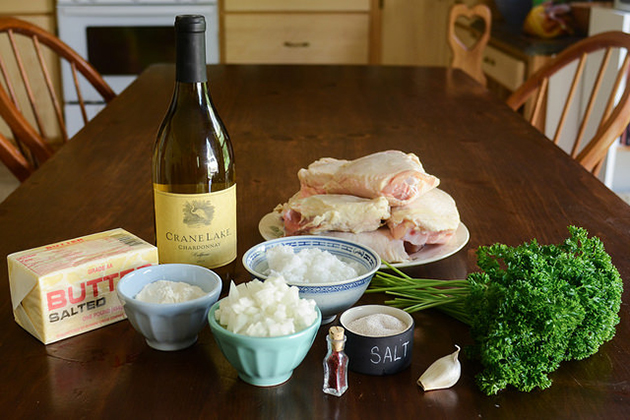
Start with these ingredients.


Tasty Kitchen Blog: Enfrijoladas. Guest post by Maggy Keet of Three Many Cooks, recipe submitted by TK member Caroline of Pink Basil.

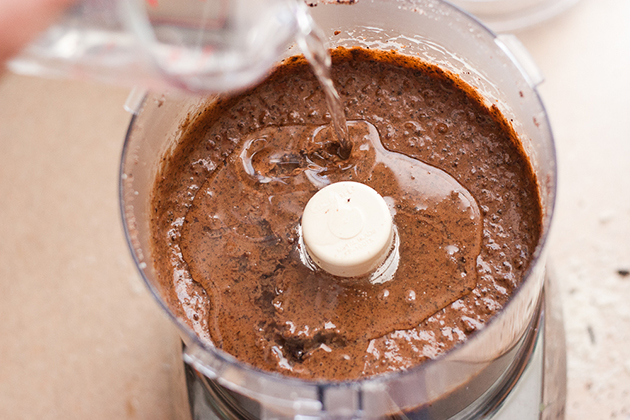
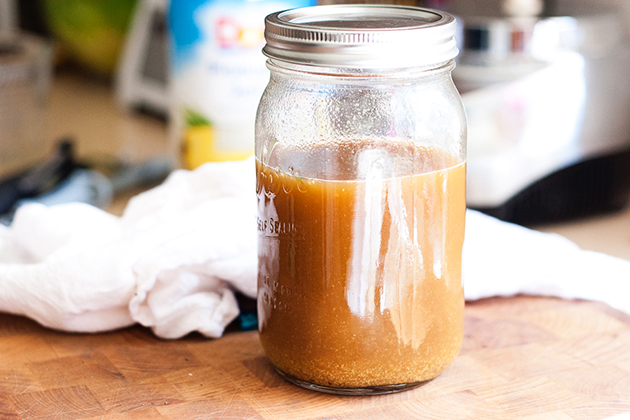
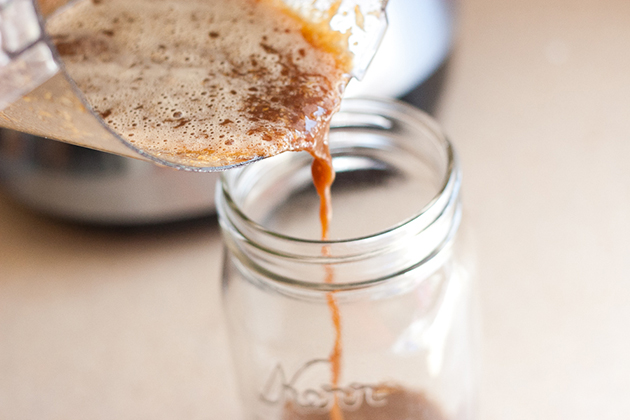
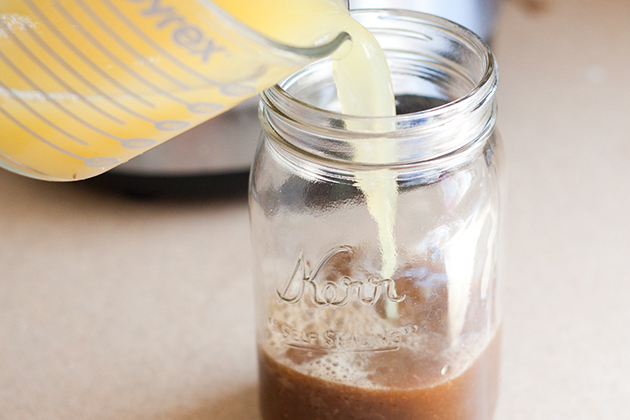
Heat the refried beans, broth, and water in a large pot. Note: I measured and mixed the broth and water in the Pyrex measuring cup and poured it all in at one time.


Tasty Kitchen Blog: Enfrijoladas. Guest post by Maggy Keet of Three Many Cooks, recipe submitted by TK member Caroline of Pink Basil.

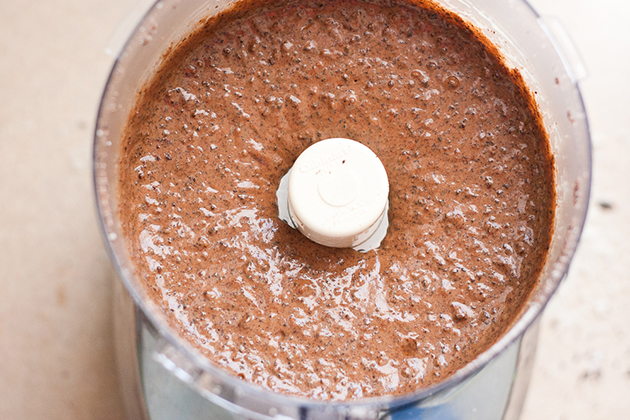
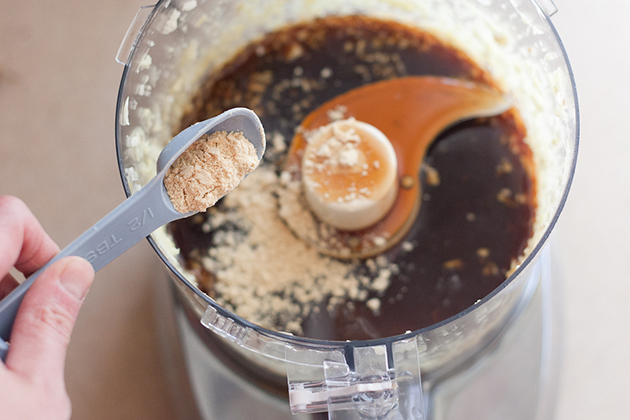
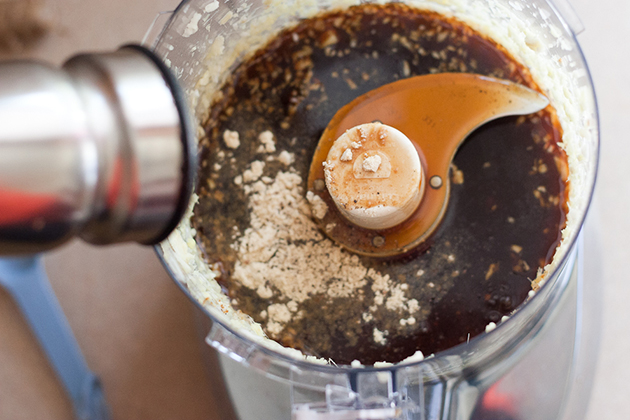
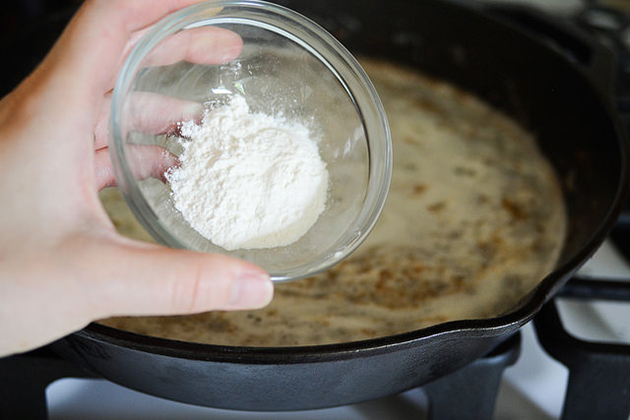
Then add the tomato paste.


Tasty Kitchen Blog: Enfrijoladas. Guest post by Maggy Keet of Three Many Cooks, recipe submitted by TK member Caroline of Pink Basil.

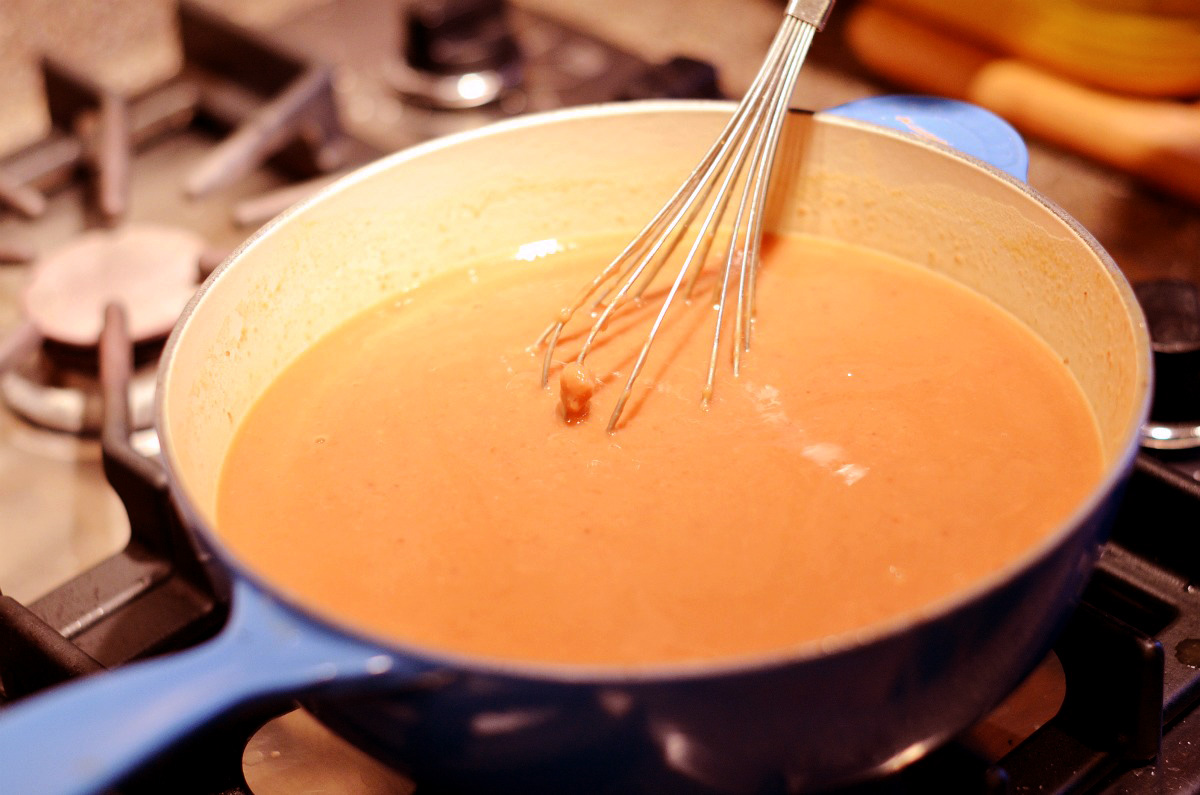
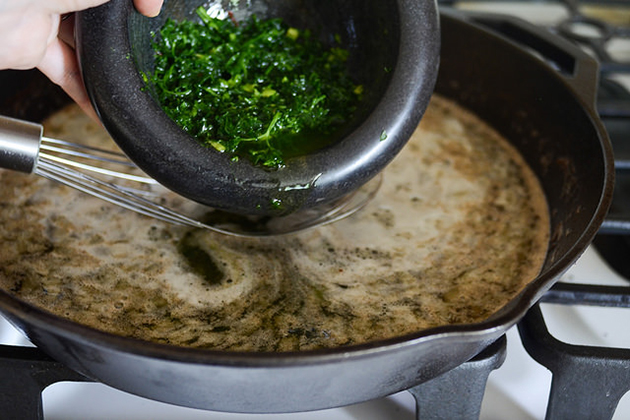
Whisk until thoroughly mixed. The texture should be pretty soupy! While the sauce is mixing and heating, microwave the corn tortillas until hot.


Tasty Kitchen Blog: Enfrijoladas. Guest post by Maggy Keet of Three Many Cooks, recipe submitted by TK member Caroline of Pink Basil.

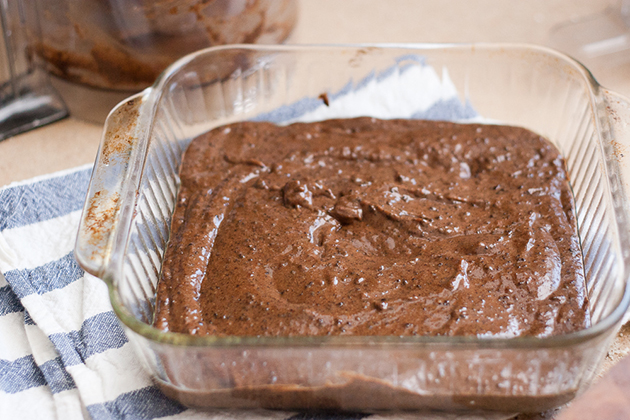
Now get set up with your baking dish, grated cheese, tortillas, and the bean mixture. Using a pair of tongs, dip the tortilla into the bean mixture and allow it to soak for just a moment.


Tasty Kitchen Blog: Enfrijoladas. Guest post by Maggy Keet of Three Many Cooks, recipe submitted by TK member Caroline of Pink Basil.

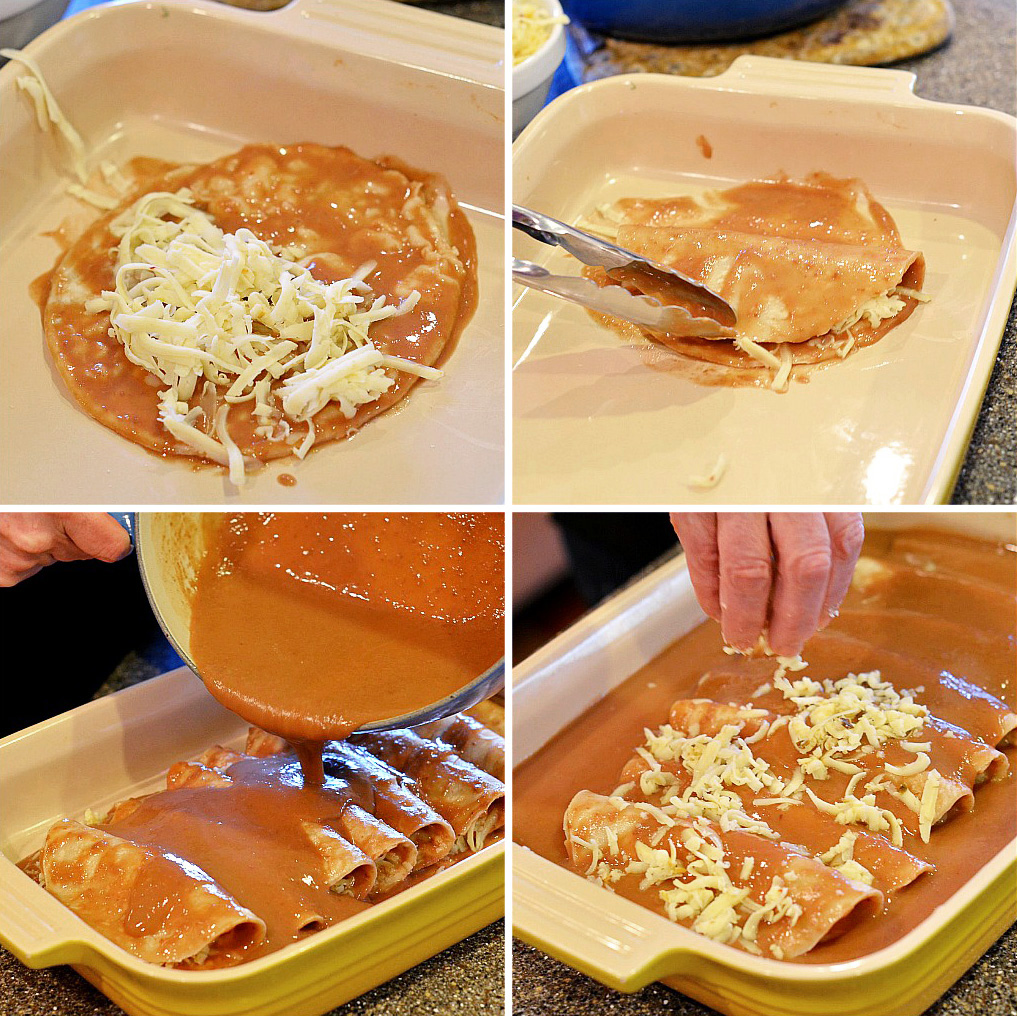
Place the bean mixture-coated tortilla in the baking dish, add a portion of cheese to one half, and then fold over. Repeat with the remaining seven tortillas, then top the dish with the remaining bean mixture and cheese.


Tasty Kitchen Blog: Enfrijoladas. Guest post by Maggy Keet of Three Many Cooks, recipe submitted by TK member Caroline of Pink Basil.

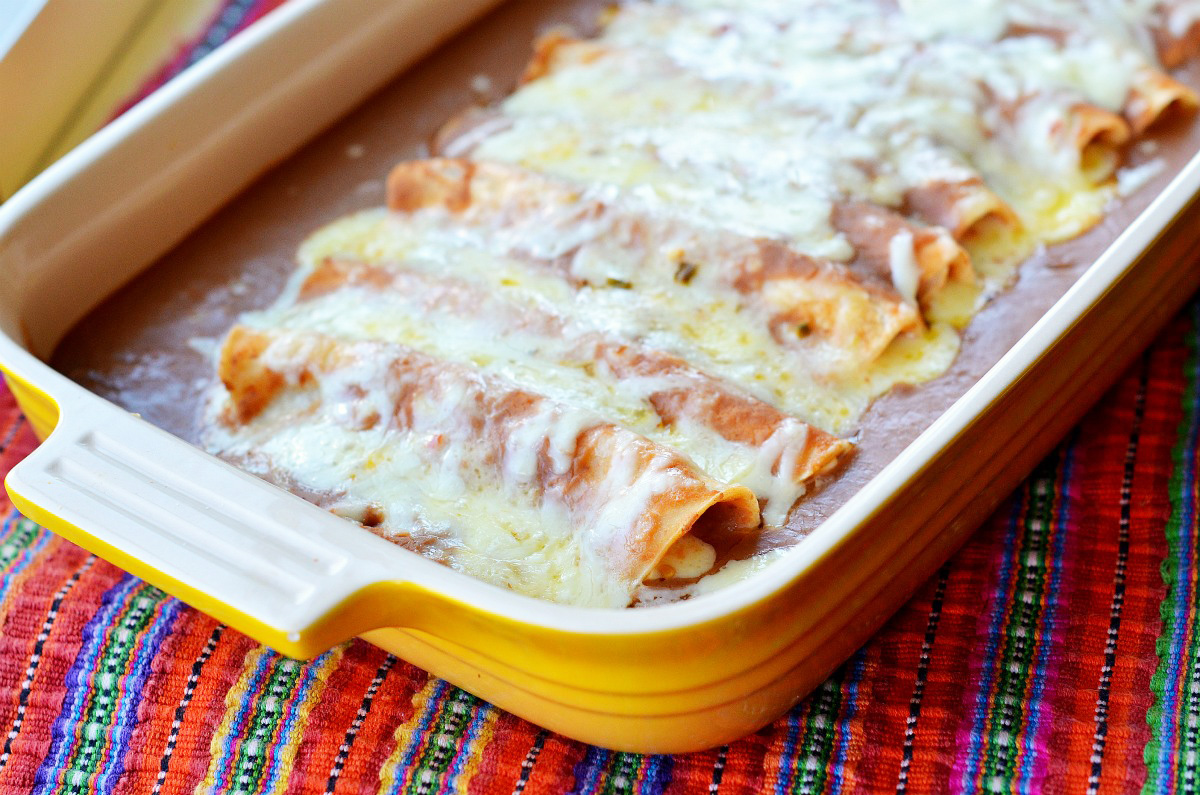
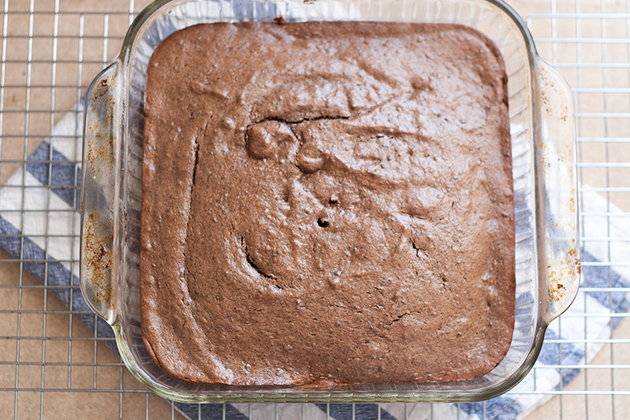
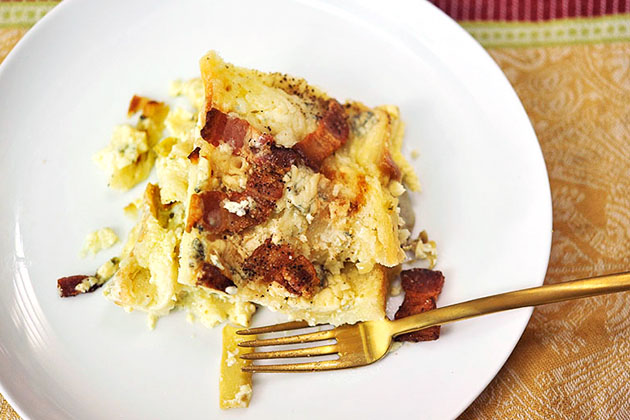
Bake at 350ºF for 10-15 minutes or until the cheese has melted and it looks like this! It took everything inside me not to dig into that dish with a spoon.


Tasty Kitchen Blog: Enfrijoladas. Guest post by Maggy Keet of Three Many Cooks, recipe submitted by TK member Caroline of Pink Basil.

Serve with a dollop of sour cream, salsa, and chopped fresh cilantro!

Thank you, Caroline, for introducing me to this classic Mexican recipe. I will certainly be stocking refried beans in my pantry from now on so that I can make these again! Visit her blog, Pink Basil, for more recipes, thoughtful writing, and great photography.


Printable Recipe

Enfrijoladas

See post on Pink Basil’s site!
4.62 Mitt(s) 8 Rating(s)8 votes, average: 4.62 out of 58 votes, average: 4.62 out of 58 votes, average: 4.62 out of 58 votes, average: 4.62 out of 58 votes, average: 4.62 out of 5

Prep Time:

Cook Time:

Difficulty: Easy

Servings: 4

4
x

Print Options

Page size Letter 3x5 4x6
Text Size Small Medium Large
Content Include description
Include prep time, etc.
Show image

Description

Enfrijoladas: delicious Mexican comfort food!

Ingredients

  • 4 cups Refried Beans
  • 1 cup Vegetable Stock
  • 1 cup Water
  • 1 Tablespoon Tomato Paste
  • 6 whole Small Or Medium Size Tortillas
  • 3 cups Shredded Monterey Jack Cheese

Preparation Instructions

Heat up the refried beans in a large pan. Add in the vegetable stock, water and tomato paste and blend until smooth. You want the sauce to be very thin, so add more liquid if necessary. If the sauce is too thick it will weigh down the tortillas and tear them. Using tongs, take a tortilla and dip in the sauce. This is a bit of an art—you want them to soak through enough that they are pliable and won’t tear, but soak them for too long and they’ll come apart when you lift them out.

Lay the tortilla dipped in bean sauce flat in a small baking dish. Sprinkle some cheese on one side of the tortilla, and then fold it in half like a quesadilla. Repeat this with each tortilla until the baking dish is full. Pour the remainder of the bean sauce into the pan and sprinkle with remaining cheese.

Bake at 350ºF for about 10 to 15 minutes, or until the cheese has melted.


_______________________________________

Three Many Cooks is the always-entertaining food blog of Pam Anderson and her two daughters, Maggy and Sharon. Pam is a well-known and much-respected food writer and author, Maggy is a “hippy adventurer meets 1950s housewife,” and Sharon refers to herself as a recovering food snob learning to survive on a graduate student’s budget. Theirs is a strong relationship both inside and outside the kitchen, and it shows in the food they create and the stories they tell.


Profile photo of Natalie | Perry's Plate

Paleo Brownies

Posted by in Baking

Tasty Kitchen Blog: Paleo Brownies. Guest post by Natalie Perry of Perry's Plate, recipe submitted by TK member Elana of Elana's Pantry.

Some days I really want a brownie. Okay, most days I really want a brownie, but making brownies all the time would be a dangerous thing for me. I have very little self-control when there are baked goods sitting on my counter, and I end up eating them for breakfast.

No bueno.

Enter: Paleo Brownies by TK member elanaspantry. Elana is known for her almond flour recipes and paleo-focused blog and cookbooks. I’ve been reading her blog for several years and have had a lot of luck with her recipes. I think she has magical powers.

These chocolatey bites were just the thing to curb my brownie cravings without completely falling off the healthy wagon. They’re naturally sweetened, grain-free, and dairy-free. Can’t get much better than that.

Plus, they have a rich, dark, chocolate flavor. I like my chocolate (and my brownies) dark.

Let’s get started!


Tasty Kitchen Blog: Paleo Brownies. Guest post by Natalie Perry of Perry's Plate, recipe submitted by TK member Elana of Elana's Pantry.

You’ll need eggs, baking soda, vanilla stevia, coconut oil, blanched almond flour, dates, 100% cacao baking chocolate, and salt.


Tasty Kitchen Blog: Paleo Brownies. Guest post by Natalie Perry of Perry's Plate, recipe submitted by TK member Elana of Elana's Pantry.

First, put the almond flour, salt, and baking soda in the work bowl of a food processor. My food processor has a 9-cup bowl. You may be able to get away with a 7-cup bowl but I wouldn’t go smaller than that.

Did I mention all of this is done in a food processor? No other dishes or pots and pans needed! If you don’t have a food processor, go buy one.

Joking. (Kinda.)

You can make it without a food processor, but you’ll have to tweak the instructions a bit. I’ll help you out when we get to that point.


Tasty Kitchen Blog: Paleo Brownies. Guest post by Natalie Perry of Perry's Plate, recipe submitted by TK member Elana of Elana's Pantry.

Chop the chocolate into smaller pieces and add them to the food processor.

If you don’t have a food processor, melt the chocolate over low heat and stir it into the almond flour mixture.


Tasty Kitchen Blog: Paleo Brownies. Guest post by Natalie Perry of Perry's Plate, recipe submitted by TK member Elana of Elana's Pantry.

Pulse the mixture until it resembles wet sand and all of the large chocolate chunks have been broken down.


Tasty Kitchen Blog: Paleo Brownies. Guest post by Natalie Perry of Perry's Plate, recipe submitted by TK member Elana of Elana's Pantry.

Now for the dates. If your dates aren’t pitted, you’ll need to remove the pits. It’s super easy. Just rip them in half and pull the pits out.


Tasty Kitchen Blog: Paleo Brownies. Guest post by Natalie Perry of Perry's Plate, recipe submitted by TK member Elana of Elana's Pantry.

Add the date halves to the food processor.

If you (still) don’t have a food processor, jump in your car and grab one. I’ll wait.


Tasty Kitchen Blog: Paleo Brownies. Guest post by Natalie Perry of Perry's Plate, recipe submitted by TK member Elana of Elana's Pantry.

Pulse the mixture until (again) it looks like wet sand and the dates are broken up well.

No processor, still? You’ll need to chop those babies up really small. As in, mince. Then stir them into the mixture.


Tasty Kitchen Blog: Paleo Brownies. Guest post by Natalie Perry of Perry's Plate, recipe submitted by TK member Elana of Elana's Pantry.

Time for eggs! The recipe suggested three eggs, but my eggs were on the small side, so I used four. Blend the mixture again!


Tasty Kitchen Blog: Paleo Brownies. Guest post by Natalie Perry of Perry's Plate, recipe submitted by TK member Elana of Elana's Pantry.

Add the vanilla stevia.


Tasty Kitchen Blog: Paleo Brownies. Guest post by Natalie Perry of Perry's Plate, recipe submitted by TK member Elana of Elana's Pantry.

And coconut oil. I’ve made this with coconut oil in both liquid and solid form. It didn’t make a difference in the end.


Tasty Kitchen Blog: Paleo Brownies. Guest post by Natalie Perry of Perry's Plate, recipe submitted by TK member Elana of Elana's Pantry.

After the last blend, it should be thick and look something like this.


Tasty Kitchen Blog: Paleo Brownies. Guest post by Natalie Perry of Perry's Plate, recipe submitted by TK member Elana of Elana's Pantry.

Transfer the mixture into a greased 8 or 9-inch square baking pan. I used coconut oil spray to grease my pan.

Bake as directed in the recipe until an inserted toothpick comes out clean.


Tasty Kitchen Blog: Paleo Brownies. Guest post by Natalie Perry of Perry's Plate, recipe submitted by TK member Elana of Elana's Pantry.

Here they are after baking! I was ready to dive into these when I read, “Allow brownies to cool for 2 hours, then serve.”

DEVASTATION.

After making these a few times, I trust Elana. They taste much better after they’ve been sitting around a while. I thought the flavor was even better the next day. So wait, if you can. If you can’t, I won’t judge.


Tasty Kitchen Blog: Paleo Brownies. Guest post by Natalie Perry of Perry's Plate, recipe submitted by TK member Elana of Elana's Pantry.

They come out of the pan and slice so well, too!


Tasty Kitchen Blog: Paleo Brownies. Guest post by Natalie Perry of Perry's Plate, recipe submitted by TK member Elana of Elana's Pantry.

Thanks so much, Elana, for a healthier alternative to one of my favorite treats!

Go check out Elana’s TK Recipe Box as well as her blog, Elana’s Pantry for more paleo recipes and naturally-sweetened grain-free treats!

Notes:
These were slightly more cakey than I like my brownies to be, so I decided three eggs was better, even if said eggs were small. Also, if you reduce the baking time by a few minutes the texture is even more fudgy—which is my favorite.


Printable Recipe

Paleo Brownies

See post on elanaspantry’s site!
5.00 Mitt(s) 1 Rating(s)1 vote, average: 5.00 out of 51 vote, average: 5.00 out of 51 vote, average: 5.00 out of 51 vote, average: 5.00 out of 51 vote, average: 5.00 out of 5

Prep Time:

Cook Time:

Difficulty: Easy

Servings: 16

16
x

Print Options

Page size Letter 3x5 4x6
Text Size Small Medium Large
Content Include description
Include prep time, etc.
Show image

Description

These dark chocolate brownies are lightly-sweetened with dates and packed with other Paleo perks such as coconut oil.

Ingredients

  • 1 cup Blanched Almond Flour
  • ¼ teaspoons Celtic Sea Salt
  • ¼ teaspoons Baking Soda
  • 4 ounces, weight Baking Chocolate, 100% Cacao
  • 7  Medjool Dates
  • 3  Eggs
  • ½ cups Coconut Oil
  • ½ teaspoons Vanilla Stevia

Preparation Instructions

Preheat oven to 350°.

In a food processor, pulse together almond flour, salt and baking soda. Add the squares of dark chocolate and pulse until you reach the texture of coarse sand. Add the dates and pulse until you reach the texture of coarse sand. Add eggs and pulse to combine. Add coconut oil and stevia and pulse until mixture is smooth.

Transfer mixture to a greased 8 x 8 inch baking dish. Mixture will be very thick so you’ll need to smooth it with a spatula.

Bake at 350°F for 18-22 minutes. Remove from oven and set dish on a rack. Allow brownies to cool for 2 hours, then serve.


_______________________________________

Be sure to check out Natalie’s own beautiful food blog, Perrys’ Plate, where you can see her growing collection of lovely recipes. There’s always something new to see there. Go visit now!


Profile photo of Natalie | Perry's Plate

Homemade Teriyaki Sauce

Posted by in Step-by-Step Recipes

Tasty Kitchen Blog: Homemade Teriyaki Sauce. Guest post by Natalie Perry of Perry's Plate, recipe submitted by TK member Laurie of Simply Scratch.

I don’t know about you, but I love making things from scratch—especially things that you’d normally buy at the grocery store. It tends to be a lot less expensive and more healthy when you do this. And it almost always tastes better. 

But it can also be a big pain in the rear. Once I ran out of homemade taco seasoning, curry powder, ranch dressing mix, chicken broth, marinara, and pancake mix. 

All in the same week.

After I spent a couple of days restocking, I decided I’d love to hire someone to keep my kitchen stocked with homemade staples. If I had to choose, I’d probably pick Tasty Kitchen member Laurie for the job. Cooking and baking from scratch is her gig! Plus, she’s super nice. (And she’d be fun to hang out with.)

Laurie’s recipe for Homemade Teriyaki Sauce caught my eye one day while browsing around Tasty Kitchen. I’m not a big fan of commercial teriyaki sauce because I find it way too sweet and full of other “stuff” I’d rather not eat, so making some from scratch really appealed to me.

I’m so glad I tried it! Laurie’s version is light and perfectly sweet. Luckily, it’s super easy. Here, I’ll show you.


Tasty Kitchen Blog: Homemade Teriyaki Sauce. Guest post by Natalie Perry of Perry's Plate, recipe submitted by TK member Laurie of Simply Scratch.

You’ll need pineapple juice, ground mustard, pepper, fresh garlic, fresh ginger, soy sauce, and a sweetener.

If you happen to have allergies or avoid certain types of foods, you can do some substitution here. Because we avoid soy products and refined sugar, I used coconut aminos (a milder alternative to soy sauce) and coconut sugar (a less processed sweetener that has a similar taste to brown sugar). 

Also, if you can’t have pineapple juice, then Laurie suggests white grape juice as a good alternative. 

Just be sure to use fresh ginger and garlic!


Tasty Kitchen Blog: Homemade Teriyaki Sauce. Guest post by Natalie Perry of Perry's Plate, recipe submitted by TK member Laurie of Simply Scratch.

First, peel the garlic and ginger and mince it in your food processor. You can also use a knife if you like. Just make sure the pieces are really small.


Tasty Kitchen Blog: Homemade Teriyaki Sauce. Guest post by Natalie Perry of Perry's Plate, recipe submitted by TK member Laurie of Simply Scratch.

Add the sugar. 


Tasty Kitchen Blog: Homemade Teriyaki Sauce. Guest post by Natalie Perry of Perry's Plate, recipe submitted by TK member Laurie of Simply Scratch.

Add the soy sauce. 


Tasty Kitchen Blog: Homemade Teriyaki Sauce. Guest post by Natalie Perry of Perry's Plate, recipe submitted by TK member Laurie of Simply Scratch.

And the ground mustard. 


Tasty Kitchen Blog: Homemade Teriyaki Sauce. Guest post by Natalie Perry of Perry's Plate, recipe submitted by TK member Laurie of Simply Scratch.

And the pepper. Then give the whole thing a thorough buzz.


Tasty Kitchen Blog: Homemade Teriyaki Sauce. Guest post by Natalie Perry of Perry's Plate, recipe submitted by TK member Laurie of Simply Scratch.

Pour it into a quart-sized jar. I used a Mason jar because I’m in love with them.

Seriously. I have a drawer in my kitchen dedicated to mason jar lids and rings. You’d think that I also do my fair share of preserving, but I don’t. I’m just a weirdo.


Tasty Kitchen Blog: Homemade Teriyaki Sauce. Guest post by Natalie Perry of Perry's Plate, recipe submitted by TK member Laurie of Simply Scratch.

Now pour in the pineapple sauce and give it a good shake.


Tasty Kitchen Blog: Homemade Teriyaki Sauce. Guest post by Natalie Perry of Perry's Plate, recipe submitted by TK member Laurie of Simply Scratch.

Aaand … that’s it. Voilà! Teriyaki sauce. It’s ready to use!

I noticed that mine is considerably lighter in color than Laurie’s. I think it’s because coconut aminos is lighter in color than soy sauce.


Tasty Kitchen Blog: Homemade Teriyaki Sauce. Guest post by Natalie Perry of Perry's Plate, recipe submitted by TK member Laurie of Simply Scratch.

You can use this like you would regular teriyaki sauce.

One night I had some naked drumsticks staring at me and begging for a marinade. 


Tasty Kitchen Blog: Homemade Teriyaki Sauce. Guest post by Natalie Perry of Perry's Plate, recipe submitted by TK member Laurie of Simply Scratch.

After a good salt and pepper shower, I poured about a cup of the teriyaki sauce on them and let them sit for a while. (It really wasn’t that long, and I’d definitely let them marinate for several hours next time.)


Tasty Kitchen Blog: Homemade Teriyaki Sauce. Guest post by Natalie Perry of Perry's Plate, recipe submitted by TK member Laurie of Simply Scratch.

After baking for about 40 minutes, we ended up with this: juicy, tender, flavorful chicken and some CRAZY good pan sauce that my kids practically licked off their plates! 

(Did you know pineapple juice is a natural meat tenderizer? It has something to do with the enzymes in the fruit, but don’t ask me how. That’s as scientific as I get.)

I’ve also used it in a vegetable and pineapple stir-fry and on some foil-packet grilled salmon. I think it’s safe to say that this will be a regular pantry staple. Luckily it keeps for about a month in the fridge!

Thanks so much, Laurie! Be sure to check out Laurie’s TK recipe box as well as her own beautiful blog, Simply Scratch, for more from-scratch recipe inspiration.


Printable Recipe

Homemade Teriyaki Sauce

See post on Laurie - Simply Scratch’s site!
5.00 Mitt(s) 1 Rating(s)1 vote, average: 5.00 out of 51 vote, average: 5.00 out of 51 vote, average: 5.00 out of 51 vote, average: 5.00 out of 51 vote, average: 5.00 out of 5

Prep Time:

Cook Time:

Difficulty: Easy

Servings: 8

8
x

Print Options

Page size Letter 3x5 4x6
Text Size Small Medium Large
Content Include description
Include prep time, etc.
Show image

Description

Who knew making your own teriyaki sauce was THIS easy?

Ingredients

  • 2 cloves Fresh Garlic, Smashed, Peeled And Roughly Chopped
  • 1 Tablespoon To 2 Tablespoons Fresh Ginger, Peeled And Roughly Chopped
  • ¼ cups Dark Brown Sugar
  • ½ cups Tamari Or Soy Sauce
  • ½ Tablespoons Dry Mustard
  • ¼ teaspoons White Pepper
  • 2 cups Pineapple Juice

Preparation Instructions

Place the chopped garlic and ginger in a blender or food processor and pulse to mince.

Add the brown sugar, tamari, dry mustard and white pepper into the food processor with the garlic and ginger and pulse until combined and the sugar is dissolved.

Pour the tamari/garlic/ginger mixture into a large jar and add in the juice. Shake and store in the fridge for a month (maybe longer)!

Note: Use tamari instead of soy sauce to keep this gluten free. Also white grape juice can be substituted for the pineapple juice if in a pinch!


_______________________________________

Be sure to check out Natalie’s own beautiful food blog, Perrys’ Plate, where you can see her growing collection of lovely recipes. There’s always something new to see there. Go visit now!


Profile photo of Erica Lea

Pollo en Salsa al Horno (Roasted Chicken in Sauce)

Posted by in Step-by-Step Recipes

Tasty Kitchen Blog: Pollo en Salsa al Horno (Roasted Chicken in Sauce). Guest post by Erica Kastner of Buttered Side Up, recipe submitted by TK member Tammy of San Pasqual's Kitchen.

I like to think of this dish as fancy fried chicken. It looks (and sounds) like it took some major slaving in the kitchen to achieve, when in reality it’s super simple.

Today’s recipe for Pollo en Salsa al Horno (Roasted Chicken in Sauce), brought to us by Tammy (aka San Pasqual’s Kitchen here on Tasty Kitchen), was one of firsts for me. I can’t remember having cooked traditional Spanish food before. What a lovely introduction! This was also my first time cooking with saffron. I am so glad that I did. The flavor is subtle but adds a beautiful touch of distinction.

Here are the step-by-step instructions so you can see just how easy it is to make:


Tasty Kitchen Blog: Pollo en Salsa al Horno (Roasted Chicken in Sauce). Guest post by Erica Kastner of Buttered Side Up, recipe submitted by TK member Tammy of San Pasqual's Kitchen.

These are all the ingredients that you’ll need: Chicken (I used thighs), wine, butter, flour onion, oil (I used coconut oil), saffron, salt, garlic and parsley.


Tasty Kitchen Blog: Pollo en Salsa al Horno (Roasted Chicken in Sauce). Guest post by Erica Kastner of Buttered Side Up, recipe submitted by TK member Tammy of San Pasqual's Kitchen.

First of all you’ll want to season your chicken with salt. Nobody wants to eat bland chicken.


Tasty Kitchen Blog: Pollo en Salsa al Horno (Roasted Chicken in Sauce). Guest post by Erica Kastner of Buttered Side Up, recipe submitted by TK member Tammy of San Pasqual's Kitchen.

Nest, coat it with the flour.


Tasty Kitchen Blog: Pollo en Salsa al Horno (Roasted Chicken in Sauce). Guest post by Erica Kastner of Buttered Side Up, recipe submitted by TK member Tammy of San Pasqual's Kitchen.

Heat your butter and oil in a large skillet.


Tasty Kitchen Blog: Pollo en Salsa al Horno (Roasted Chicken in Sauce). Guest post by Erica Kastner of Buttered Side Up, recipe submitted by TK member Tammy of San Pasqual's Kitchen.

Once your oil is hot, add the chicken. Careful! It’s gonna sizzle.


Tasty Kitchen Blog: Pollo en Salsa al Horno (Roasted Chicken in Sauce). Guest post by Erica Kastner of Buttered Side Up, recipe submitted by TK member Tammy of San Pasqual's Kitchen.

Cook until the chicken is nice and crispy and browned.


Tasty Kitchen Blog: Pollo en Salsa al Horno (Roasted Chicken in Sauce). Guest post by Erica Kastner of Buttered Side Up, recipe submitted by TK member Tammy of San Pasqual's Kitchen.

Transfer the chicken to a baking dish and preheat your oven to 350ºF.


Tasty Kitchen Blog: Pollo en Salsa al Horno (Roasted Chicken in Sauce). Guest post by Erica Kastner of Buttered Side Up, recipe submitted by TK member Tammy of San Pasqual's Kitchen.

Add the onion to the now-empty skillet of oil.


Tasty Kitchen Blog: Pollo en Salsa al Horno (Roasted Chicken in Sauce). Guest post by Erica Kastner of Buttered Side Up, recipe submitted by TK member Tammy of San Pasqual's Kitchen.

Meanwhile, as the onion is cooking, combine the parsley, garlic and saffron in a mortar.


Tasty Kitchen Blog: Pollo en Salsa al Horno (Roasted Chicken in Sauce). Guest post by Erica Kastner of Buttered Side Up, recipe submitted by TK member Tammy of San Pasqual's Kitchen.

Crush them all together.


Tasty Kitchen Blog: Pollo en Salsa al Horno (Roasted Chicken in Sauce). Guest post by Erica Kastner of Buttered Side Up, recipe submitted by TK member Tammy of San Pasqual's Kitchen.

Add the white wine and give it a stir.


Tasty Kitchen Blog: Pollo en Salsa al Horno (Roasted Chicken in Sauce). Guest post by Erica Kastner of Buttered Side Up, recipe submitted by TK member Tammy of San Pasqual's Kitchen.

Once the onions are nice and tender, stir in the flour and cook, stirring constantly, for another 2 minutes. Nobody wants to eat raw flour.


Tasty Kitchen Blog: Pollo en Salsa al Horno (Roasted Chicken in Sauce). Guest post by Erica Kastner of Buttered Side Up, recipe submitted by TK member Tammy of San Pasqual's Kitchen.

Add the wine mixture to the skillet and bring it all to a boil.


Tasty Kitchen Blog: Pollo en Salsa al Horno (Roasted Chicken in Sauce). Guest post by Erica Kastner of Buttered Side Up, recipe submitted by TK member Tammy of San Pasqual's Kitchen.

Pour the sauce over the chicken in the pan. I switched to a larger pan so that the sauce would more evenly cover the chicken.


Tasty Kitchen Blog: Pollo en Salsa al Horno (Roasted Chicken in Sauce). Guest post by Erica Kastner of Buttered Side Up, recipe submitted by TK member Tammy of San Pasqual's Kitchen.

Bake in the preheated oven for about 35-45 minutes, or until the chicken is cooked through.


Tasty Kitchen Blog: Pollo en Salsa al Horno (Roasted Chicken in Sauce). Guest post by Erica Kastner of Buttered Side Up, recipe submitted by TK member Tammy of San Pasqual's Kitchen.

Make sure you serve with lots of the flavorful sauce! I cooked up some couscous as an accompaniment (I know it’s not traditionally Spanish, but it sure was delicious and perfect for soaking up the sauce).

Note: I used virgin coconut oil to fry the chicken. I would recommend using expeller pressed coconut oil or some other less flavorful oil so that the saffron will shine through more clearly.


Tasty Kitchen Blog: Pollo en Salsa al Horno (Roasted Chicken in Sauce). Guest post by Erica Kastner of Buttered Side Up, recipe submitted by TK member Tammy of San Pasqual's Kitchen.

Thank you so much to Tammy for sharing this recipe with us. Stop by her blog, San Pasqual’s Kitchen, for more international recipes. Her Arrosto All’arancia (Roasted Pork with Orange Sauce) looks heavenly.


Printable Recipe

Pollo en Salsa al Horno (Roasted Chicken in Sauce)

See post on San Pasqual's Kitchen’s site!
0.00 Mitt(s) 0 Rating(s)0 votes, average: 0.00 out of 50 votes, average: 0.00 out of 50 votes, average: 0.00 out of 50 votes, average: 0.00 out of 50 votes, average: 0.00 out of 5

Prep Time:

Cook Time:

Difficulty: Intermediate

Servings: 4

4
x

Print Options

Page size Letter 3x5 4x6
Text Size Small Medium Large
Content Include description
Include prep time, etc.
Show image

Description

A remarkably tender chicken roasted in a saffron wine sauce. A Spanish wonder.

Ingredients

  • ⅓ cups All-purpose Flour, Divided
  • 4 pounds Chicken Parts
  • Salt
  • 1 cup Sunflower Oil
  • 2-½ Tablespoons Butter
  • 1  Small Onion
  • 1 clove Garlic, Peeled
  • 2  Sprigs Fresh Parsley
  • 1 pinch Saffron Threads
  • ¾ cups White Wine

Preparation Instructions

Reserve 1 tablespoon of the flour.

Season the chicken pieces with salt and coat them with the remaining flour.

Heat the oil with the butter in a skillet. Add the pieces of chicken and cook over medium heat until browned. Transfer to an ovenproof casserole.

Preheat oven to 350º.

Add the onion to the skillet and cook over low heat, stirring occasionally for about 10 minutes. While the onion is cooking, crush the garlic, parsley and saffron in a mortar and mix in the wine.

Stir the reserved flour into the onions and stir continuously for 2 minutes. Add in the wine mixture and bring to a boil, stirring continuously, then pour over the chicken.

Put the casserole in the oven and cook for 35 to 45 minutes until chicken is cooked through and tender.

¡Que aproveche! Enjoy!


_______________________________________

Erica Kastner has always been one of our most cherished members of the Tasty Kitchen community. She shares her wonderful recipes and amazing food photography on her blog, Buttered Side Up, and she also writes about crafts and posts more of her beautiful photography in her personal blog, Simple Days. There really isn’t much that this amazing young wife and mother can’t do, and we’re thrilled she does some of it here.


Profile photo of Natalie | Perry's Plate

Singapore Noodles (Singapore Mei Fun)

Posted by in Step-by-Step Recipes

Having small children definitely helps with the temptation to eat out frequently. So does finding popular restaurant or take out recipes to prepare at home. Enter: Singapore Noodles (Singapore Mei Fun) from Tasty Kitchen member

Profile photo of Natalie | Perry's Plate

Grilled Brie with Grilled Corn and Mango Salsa

Posted by in Step-by-Step Recipes

It never occurred to me to grill brie. Or pair it with a salsa. Or put bacon in mango salsa. The whole thing almost made my head explode---in the best way possible. It's brilliant. And it was like summertime on a platter. Luckily it's not hard, either. Here, I'll show you!

Profile photo of cookincanuck

Chocolate-Dipped Tahini Cookies

Posted by in Step-by-Step Recipes

When autumn hits and school starts, I start scrambling for cookie and snack ideas to surprise my kids with when they come home from school. These cookies taste like indulgent treats, but are actually packed with goodness. The kids will never suspect a thing!

Profile photo of georgiapellegrini

Artichoke Bread Pudding with Bacon and Gorgonzola

Posted by in Step-by-Step Recipes

I am always looking for new and interesting dishes to add to my lists of favorites. This creative recipe is full of bold and exciting flavors that work wonderfully together. Lauren’s recipe for a filling and satisfying Artichoke Bread Pudding from is inexpensive to make and…