The Pioneer Woman Tasty Kitchen
Profile photo of steamykitchen

How to Open An Avocado and Keep All 10 Fingers!

Posted by in Kitchen Talk

Tasty Kitchen Blog: How To Open An Avocado and Keep All 10 Fingers. Guest post by Jaden Hair of Steamy Kitchen.

 
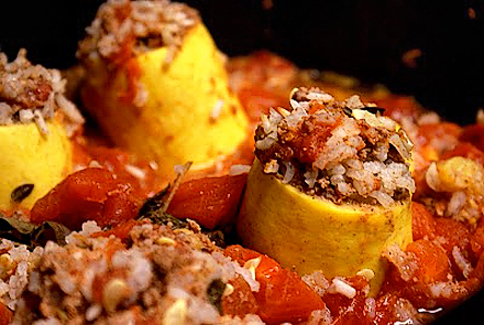
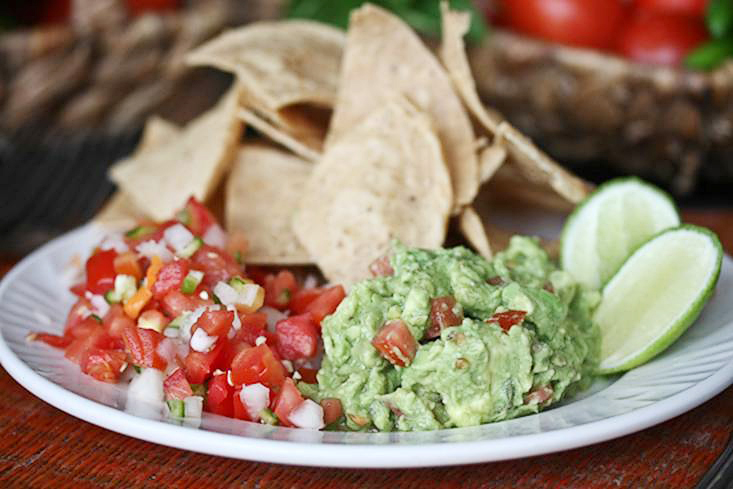
I love my guac! And if a big bowl is in front of me with fresh tortilla chips, I can eat the entire thing in one sitting. Just don’t expect me to share any of it!

To make a big bowl of guacamole (I love saying that word), you have to start with lots of perfectly ripe avocados. Not too soft, not too hard, with just that perfect give. I’ve been known to fondle every avocado in the store before selecting one. Notice I didn’t say squeeze, abuse or push … just a light pressure with the hands.

The first time I ever opened an avocado, I tried dislodging the pit the way that I saw fancy chefs do it on television. But thwacking a sharp chef’s knife into the center of the pit and then wrestling the slippery pit off the knife’s edge is a dangerous activity. I’m not going to go into detail on how that ended, other than we didn’t have guacamole that night.


Tasty Kitchen Blog: How To Open An Avocado and Keep All 10 Fingers. Guest post by Jaden Hair of Steamy Kitchen.

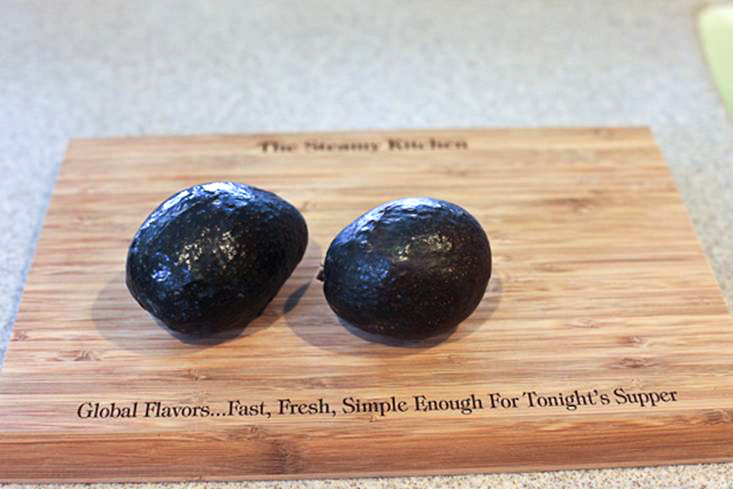
Let’s start with these two lovelies.


Tasty Kitchen Blog: How To Open An Avocado and Keep All 10 Fingers. Guest post by Jaden Hair of Steamy Kitchen.

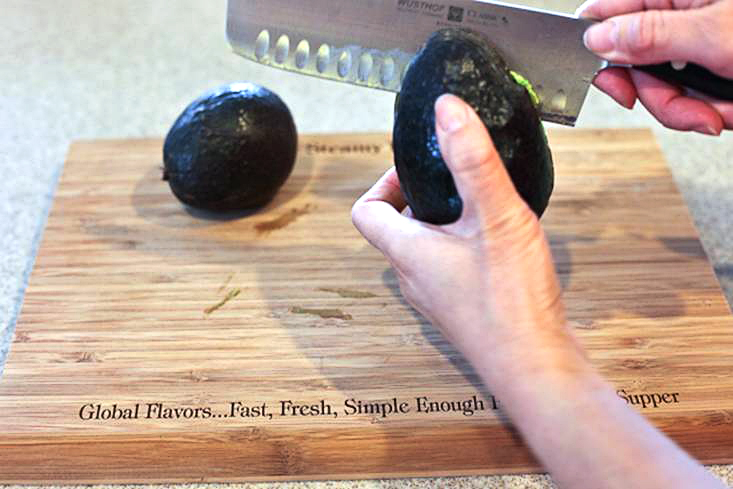
Go ahead and make that first cut into the avocado. Have your hand resting on the cutting board to steady the avocado.


Tasty Kitchen Blog: How To Open An Avocado and Keep All 10 Fingers. Guest post by Jaden Hair of Steamy Kitchen.

Go all the way around the avocado.


Tasty Kitchen Blog: How To Open An Avocado and Keep All 10 Fingers. Guest post by Jaden Hair of Steamy Kitchen.

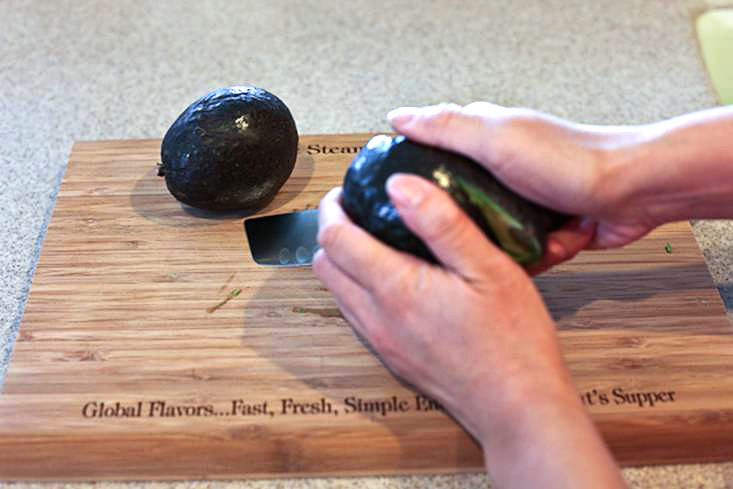
Now sing with me: “Twist! Twist! Let’s do the twist!”


Tasty Kitchen Blog: How To Open An Avocado and Keep All 10 Fingers. Guest post by Jaden Hair of Steamy Kitchen.

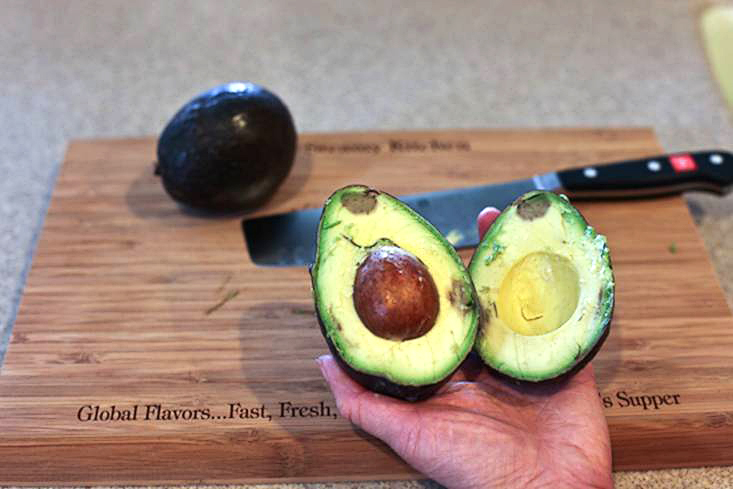
And open! Okay, this avocado has a couple of brown spots. But that’s okay, you can either spoon out that portion or just leave it. When you mash it up for guac, no one will notice, I promise.


Tasty Kitchen Blog: How To Open An Avocado and Keep All 10 Fingers. Guest post by Jaden Hair of Steamy Kitchen.

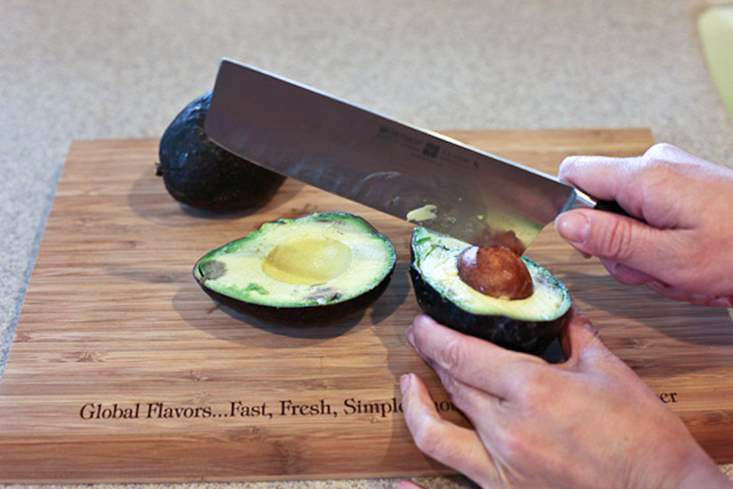
You can hold it like this and thwack the end of the knife in the pit of the avocado—but it’s dangerous. What if you MISS??? The pit is slippery and round. The bottom of the avocado is curved. There’s lots of room for error.


Tasty Kitchen Blog: How To Open An Avocado and Keep All 10 Fingers. Guest post by Jaden Hair of Steamy Kitchen.

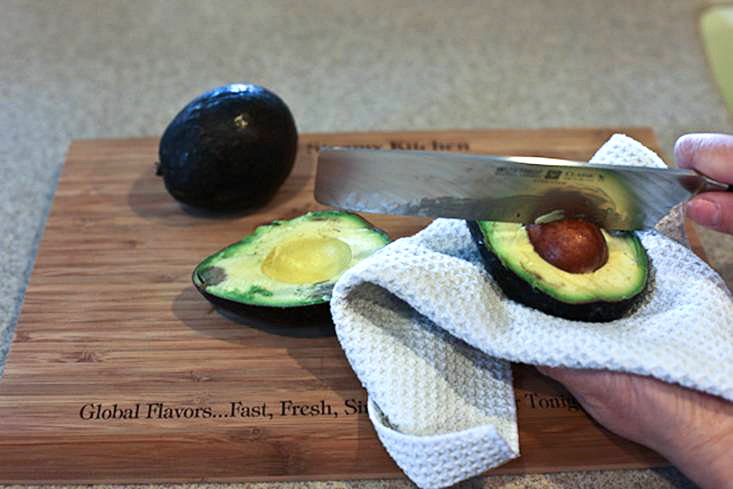
Instead, hold the avocado in a thick towel and then thwack. You want the edge of the blade to lodge in the pit.


Tasty Kitchen Blog: How To Open An Avocado and Keep All 10 Fingers. Guest post by Jaden Hair of Steamy Kitchen.

Twist again …


Tasty Kitchen Blog: How To Open An Avocado and Keep All 10 Fingers. Guest post by Jaden Hair of Steamy Kitchen.

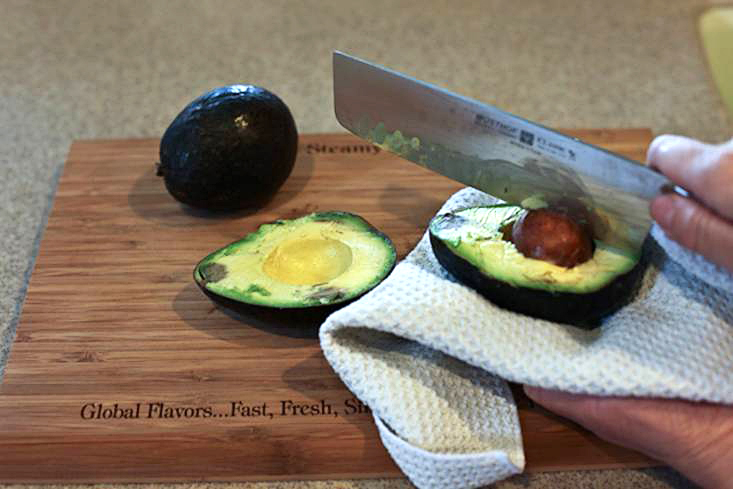
And pull out the pit. But how do ya get the sucker off your knife? The pit is lodged in there! Chefs will show you to use your thumb and push the pit away and off the blade. I’ve also seen people try to PRY the darn pit off with their bare hands. Yikes! I don’t know about you, but that seems mighty dangerous to me. Here’s a better and safer way.


Tasty Kitchen Blog: How To Open An Avocado and Keep All 10 Fingers. Guest post by Jaden Hair of Steamy Kitchen.

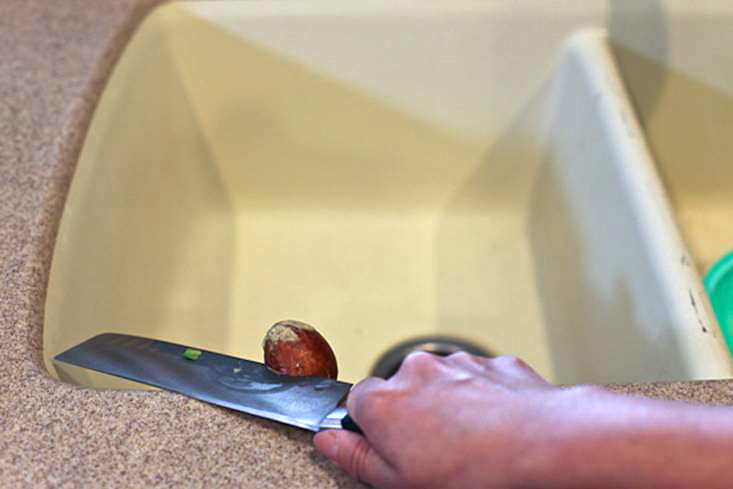
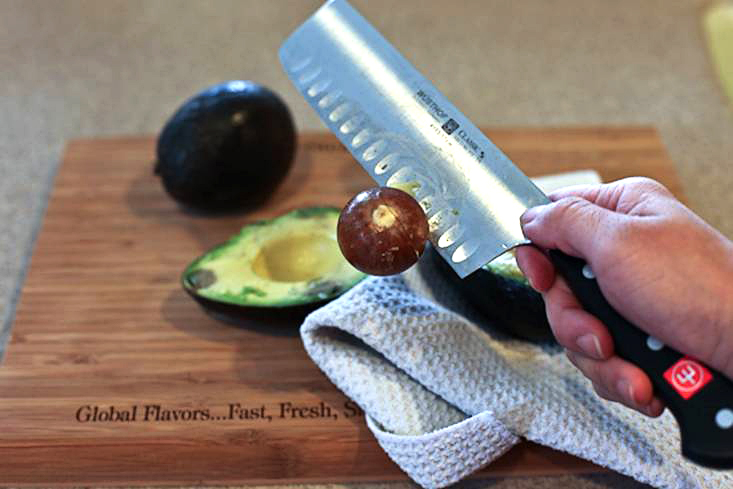
Hold your knife just like so at the edge of your kitchen sink.


Tasty Kitchen Blog: How To Open An Avocado and Keep All 10 Fingers. Guest post by Jaden Hair of Steamy Kitchen.

Put your thumb on the outside edge of the counter top.


Tasty Kitchen Blog: How To Open An Avocado and Keep All 10 Fingers. Guest post by Jaden Hair of Steamy Kitchen.

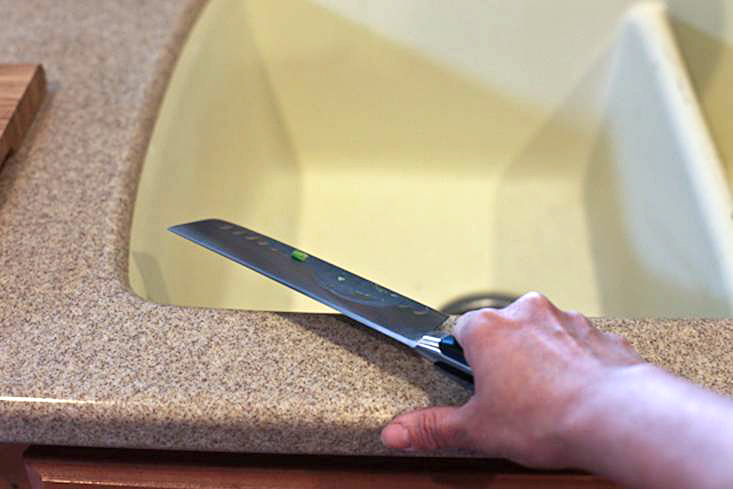
And PUSH using your thumb as leverage! The pit should pop right off.


Tasty Kitchen Blog: How To Open An Avocado and Keep All 10 Fingers. Guest post by Jaden Hair of Steamy Kitchen.

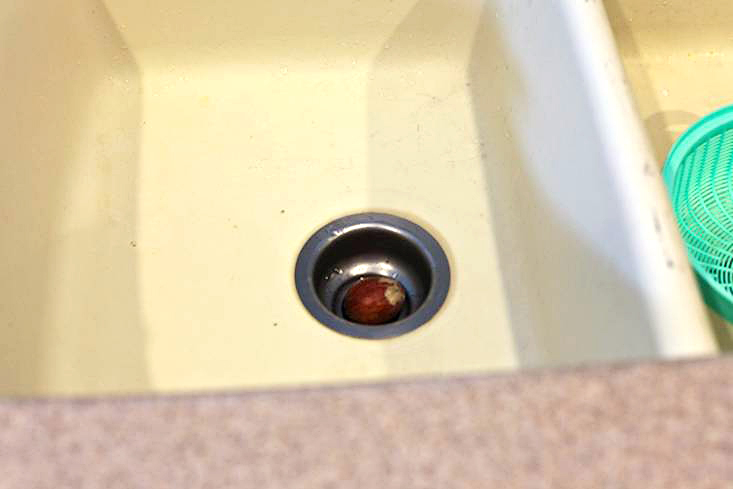
Score! 2 points right in the basket.

This is a great method to teach kids, too. Anyways, that’s the way that I do it!

So, tell me, what’s your favorite recipe using avocados? Gimme some ideas! Send me links to your blogs if you have one or links to recipes here on Tasty Kitchen!


_______________________________________

Jaden Hair is a food writer, television personality, and food photographer based in Tampa Bay, Florida. Find more of her recipes on her blog, Steamy Kitchen, where you can also read more about Jaden’s new book, The Steamy Kitchen Cookbook, and the rave reviews it’s received!


Profile photo of Natalie | Perry's Plate

Ice Cream in a Bag

Posted by in Step-by-Step Recipes

Tasty Kitchen Blog: Ice Cream in a Bag. Guest post by Natalie Perry of Perry's Plate, recipe submitted by TK member Donna of What the Dog Ate.

 
Really quick ice cream. Like, zero to sweet, frozen goodness in under 15 minutes. NOT too good to be true!

When I saw Ice Cream in a Bag by Tasty Kitchen member whatthedogate (Donna) I wondered why I had never tried this before. I thought it might be a fun project to do with my kids, so I gathered up the troops and got started.


Tasty Kitchen Blog: Ice Cream in a Bag. Guest post by Natalie Perry of Perry's Plate, recipe submitted by TK member Donna of What the Dog Ate.

To make two servings of ice cream you’ll need two pint-sized zip top baggies, two bowls, and two willing helpers.


Tasty Kitchen Blog: Ice Cream in a Bag. Guest post by Natalie Perry of Perry's Plate, recipe submitted by TK member Donna of What the Dog Ate.

Pour a cup of half-and-half into each baggie. The bowl is there to help the little ones from spilling it all over the place.


Tasty Kitchen Blog: Ice Cream in a Bag. Guest post by Natalie Perry of Perry's Plate, recipe submitted by TK member Donna of What the Dog Ate.

In each bag, add a tablespoon or two of sugar, depending on how sweet you want it. I used raw sugar, which worked nicely.


Tasty Kitchen Blog: Ice Cream in a Bag. Guest post by Natalie Perry of Perry's Plate, recipe submitted by TK member Donna of What the Dog Ate.

Now pull out all of your fancy extracts and flavorings. Let the kids pick whatever flavor their little hearts desire. (Only to have them both pick vanilla. I swear my kids have more personality than that.)


Tasty Kitchen Blog: Ice Cream in a Bag. Guest post by Natalie Perry of Perry's Plate, recipe submitted by TK member Donna of What the Dog Ate.

Add about two teaspoons of vanilla extract to the bag. (Measurements may differ depending on the flavor you use.)


Tasty Kitchen Blog: Ice Cream in a Bag. Guest post by Natalie Perry of Perry's Plate, recipe submitted by TK member Donna of What the Dog Ate.

Zip it up tight! (Very important.)


Tasty Kitchen Blog: Ice Cream in a Bag. Guest post by Natalie Perry of Perry's Plate, recipe submitted by TK member Donna of What the Dog Ate.

Next pull out a giant bowl of ice and some rock salt. You know, the kind you use in them old-fangled ice cream makers.


Tasty Kitchen Blog: Ice Cream in a Bag. Guest post by Natalie Perry of Perry's Plate, recipe submitted by TK member Donna of What the Dog Ate.

Grab a gallon-sized zip top bag for each small bag and fill them about 1/3 full of ice. (The recipe says 4 cups for each bag.)


Tasty Kitchen Blog: Ice Cream in a Bag. Guest post by Natalie Perry of Perry's Plate, recipe submitted by TK member Donna of What the Dog Ate.

Add 1/2 cup of rock salt to each bag of ice.


Tasty Kitchen Blog: Ice Cream in a Bag. Guest post by Natalie Perry of Perry's Plate, recipe submitted by TK member Donna of What the Dog Ate.

Now place one pint-sized bag into each gallon-sized bag. To go one step further, place that whole thing into another gallon-sized bag. If that seems a little wasteful, I’m sure they can be easily rinsed out and re-used.


Tasty Kitchen Blog: Ice Cream in a Bag. Guest post by Natalie Perry of Perry's Plate, recipe submitted by TK member Donna of What the Dog Ate.

Now let those kids earn their ice cream. Shake, shake, shake! Or carefully kick it around on the floor.

May I take a moment to leave you with a mommy comment? I love my kids. A lot. Becoming a mother is one of the best decisions I’ve ever made. But motherhood has absolutely crushed my pre-baby dreams of being in charge and doing what I want all day long. Oh, and dressing my kids up everyday to look like Gap models. I have very little say in what they wear and how (or if) I do their hair. Luckily you caught them on a good day.

Back to the ice cream. The bag needs to be shaken for about 5 minutes straight.


Tasty Kitchen Blog: Ice Cream in a Bag. Guest post by Natalie Perry of Perry's Plate, recipe submitted by TK member Donna of What the Dog Ate.

If after 45 seconds you start getting looks like this, you might want to step in and help. The recipe suggests sticking the bags in the washing machine through a couple of spin cycles. I tried it and it actually works!


Tasty Kitchen Blog: Ice Cream in a Bag. Guest post by Natalie Perry of Perry's Plate, recipe submitted by TK member Donna of What the Dog Ate.

The result? Sweet, creamy, frozen goodness.

If you’re expecting Ben & Jerry’s to come out of that bag, you may be slightly disappointed. The ice cream isn’t gourmet quality, but it’s made with fresh ingredients and tastes like homemade ice cream (which is more than most store-bought brands can claim).

Plus, I have never met a kid who was picky about their ice cream.


Tasty Kitchen Blog: Ice Cream in a Bag. Guest post by Natalie Perry of Perry's Plate, recipe submitted by TK member Donna of What the Dog Ate.

Thank you Donna for a great activity to do with my kids! Check out Donna’s blog What the Dog Ate as well as her recipe box for more great recipes, including Edible Ice Cream Bowls and Homemade Microwave Popcorn!

One note about the recipe: If possible, use freezer bags for the ice cream. Both of my bags leaked a little, and I don’t know if it was due to my daughter kicking it around on the floor, putting it in the washer, or using a flimsy pint-sized bag.


Printable Recipe

Ice Cream in a Bag

See post on whatthedogate’s site!
4.00 Mitt(s) 1 Rating(s)1 vote, average: 4.00 out of 51 vote, average: 4.00 out of 51 vote, average: 4.00 out of 51 vote, average: 4.00 out of 51 vote, average: 4.00 out of 5

Prep Time:

Cook Time:

Difficulty: Easy

Servings: 4

4
x

Print Options

Page size Letter 3x5 4x6
Text Size Small Medium Large
Content Include description
Include prep time, etc.
Show image

Description

In honor of summer, you must, must try Ice Cream in a Bag. It is such a fun, kid friendly activity. And it’s so yummy!

Ingredients

  • 4 cups Half-and-half
  • 8 Tablespoons Sugar
  • 2 teaspoons Vanilla Extract
  • 4 whole Pint Sized Zip Lock Baggies
  • 16 cups Ice
  • 8 whole Gallon Sized Zip Lock Type Baggies
  • 2 cups Salt, Rock Salt Type

Preparation Instructions

Measure out 1 cup half and half into a pint sized baggie. Add 2 tablespoons of sugar and 1/2 teaspoon vanilla extract. Repeat for the remaining three pint sized baggies. I used a loaf pan to hold the baggies while I added the ingredients. No spills! Seal the baggies and place them in the freezer while you assemble the gallon sized baggies.

Fill each of four gallon sized baggies half-way full of ice. For me this was about 4 cups of ice for each of the four gallon sized baggies. Add 1/2 cup of ice cream salt to each gallon sized baggie of ice. Now double bag those puppies. That’s where you get the 8 gallon sized baggies from.

Remove the ice cream mixtures from the freezer. Recheck the seal on the ice cream mixture to make sure they are well sealed, and place one pint sized baggie into one gallon sized ice set up. Seal each of the gallon baggies.

Shake, shake, shake for at least 5 minutes. For my little ones, this proved to be a little challenging, so I helped out. Then it got a bit cold for my hands. You could try wearing oven mitts to insulate your hands from the cold. Me? I put all four set-ups in my front-loader washing machine and set it to spin. Three minutes did the trick!

This project would make a great summer time scientific inquiry for the kiddos. “Which agitation method produces an ice-cream like consistency in the fastest time?” I fully expect everyone to try this out and report your results in the comments section. Now get shakin’!


_______________________________________

Be sure to check out Natalie’s own beautiful food blog, Perrys’ Plate, where you can see her growing collection of lovely recipes. There’s always something new to see there. Go visit now!


Profile photo of Ree | The Pioneer Woman

In Case You Missed Them

Posted by in Looks Delicious!

Tasty Kitchen Blog: Scallops 'n Pasta. Photo and recipe from TK member Jaden Hair of Steamy Kitchen

Jaden’s step-by-step Scallops ‘n Pasta. I want this for breakfast right now.


Tasty Kitchen Blog: Magical Butter Sauce. Photo and recipe from TK member Jaden Hair of Steamy Kitchen

Magical Butter Sauce. This makes me want to cry, it looks so good.


Tasty Kitchen Blog: Funnel Cakes. Photo and post by Ree Drummond, recipe submitted by TK member HeatherD

Don’t forget to try these delicious Funnel Cakes, especially if you’ve never tried a Funnel Cake in your life. It’s an experience.


Tasty Kitchen Blog: That's The Best Frosting I've Ever Had. Photo and post by Ree Drummond, recipe submitted by TK member missydew

And finally, another from this past week: The Best Frosting I’ve Ever Had.


Profile photo of steamykitchen

In Season!

Posted by in Looks Delicious!

Tasty Kitchen Blog: In Season! Guest post by Jaden Hair of Steamy Kitchen.

 
This week, I’d like to celebrate the bounty of produce in season this summer. Loads of colorful fruits and veggies means recipes that are vibrant and happy! I’ve joined a CSA for the first time, and am having fun cooking based on what’s delivered, not what’s on sale or catches my eye at the supermarket.

It’s certainly helped me spend less money on groceries. See, I have a bad habit of loading up the grocery cart with everything and anything that looks and smells good. I know what you’re gonna say: “Don’t go grocery shopping hungry!” But ladies and gents … I’m always hungry.

Let’s start with summer fruit! Blueberries, pineapple, mango and raspberries: Laurie of Simply Scratch shows us that when it comes to sweet, ripe fruit, simple is best. I love that Laurie adds lemon zest to this Summer Fruit Salad!

Tasty Kitchen: Blog In Season! (Summer Fruit Salad, from TK member Laurie of Simply Scratch)


Apricot and cherries: Julie of Bananas for Bourbon makes a beautiful, boozy cake with her Brandy Buttermilk Apricot Cherry Upside Down Cake.

Tasty Kitchen Blog: In Season! (Brandy Buttermilk Apricot Cherry Upside Down Cake, from TK member Julie of Bananas for Bourbon)


Eggplant and tomato: It’s not quite eggplant and tomato season here in too-hot Florida, but late June-July marks the beginning of the eggplant and tomato season in many other areas. Here’s a great twist to the Caprese Salad—add slices of eggplant! Inspired Taste makes Eggplant and Tomato Napoleons.

Tasty Kitchen: Blog In Season! (Eggplant and Tomato Napoleons, from TK member Inspired Taste)


Summer squash: A Busy Nest makes a Lebanese Stuffed Squash that I can’t wait to make.

Tasty Kitchen: Blog In Season! (Lebanese Stuffed Squash, from TK member A Busy Nest)


Corn: Siggy Spice reveals her secret to Best Corn Ever. Can you guess what she boils her corn in?

Tasty Kitchen Blog: In Season! (Best Corn Ever, from TK member Siggy Spice)


Basil and red pepper: Multiply Delicious makes these cutie Pesto Cheese Phyllo Bites. I love using the pre-made baby phyllo cups. They are simple to use and inexpensive as well. Find them in the freezer section, right where you’d normally find the regular frozen phyllo sheets.

Tasty Kitchen Blog: In Season! (Pesto Cheese Phyllo Bites, from TK member Heather of Multiply Delicious)


_______________________________________

Jaden Hair is a food writer, television personality, and food photographer based in Tampa Bay, Florida. Find more of her recipes in her blog, Steamy Kitchen, where you can also read more about Jaden’s new book, The Steamy Kitchen Cookbook, and the rave reviews it’s received!


Profile photo of georgiapellegrini

Incredible 10-Minute Garlic Shrimp

Posted by in Step-by-Step Recipes

  Colleen is my new recipe hero. This Incredible 10-Minute Garlic Shrimp will hardly make it to the table; it is filled with such flavor, you’ll be eating it from the pan. It is also great served room temperature or cold the next day on salads.       To make it you will need: […]

Profile photo of Ree | The Pioneer Woman

Individual Scalloped Potatoes with Ham!

Posted by in Step-by-Step Recipes

I first made Tasty Kitchen member The Noshery’s Individual Scalloped Potatoes during a day last year when I had some guests over to cook. We selected two Tasty Kitchen recipes to make together (you can read about the fun here) and wound up loving these nifty little layered potato dish, made in muffin tins. So […]

Profile photo of Erika (TK)

It’s Pancake Day!

Posted by in The Theme Is...

  The day before Ash Wednesday is Shrove Tuesday, also known as Pancake Tuesday. It’s also called Fat Tuesday (Mardi Gras) in some regions of the world, but for some reason that phrase makes me giggle. Or defensive, depending on how many helpings of mac and cheese I just had. Ash Wednesday marks the beginning […]

Profile photo of fujimama

Itadakimasu! Okinawan Takoraisu (Taco Rice)

Posted by in Step-by-Step Recipes

Welcome to Fujimama, longtime Tasty Kitchen member and new contributor to the TK Blog. So happy to see you here! (And I’ve never wanted taco rice as much as I do right now. And it’s 6:53 am.) Take it away, Fujimama! –PW     When you hear the words “Taco Rice” I suspect that Japan […]