The Pioneer Woman Tasty Kitchen
Profile photo of Erica Lea

Figgy Piggy Pizza

Posted by in Step-by-Step Recipes

Tasty Kitchen Blog: Figgy Piggy Pizza. Guest post by Erica Kastner of Buttered Side Up, recipe submitted by TK member Christina of Dessert for Two.

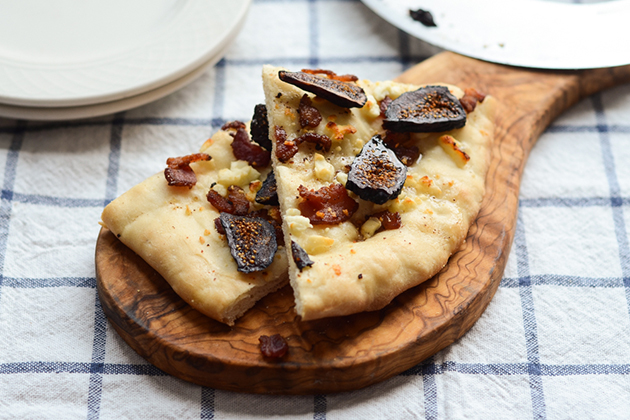
First of all, the name of this recipe (brought to us by the lovely Christina) is just ridiculously fun to say. I have to admit that it influenced my decision to make this pizza. It also involves bacon, so I was basically obliged to cook it.

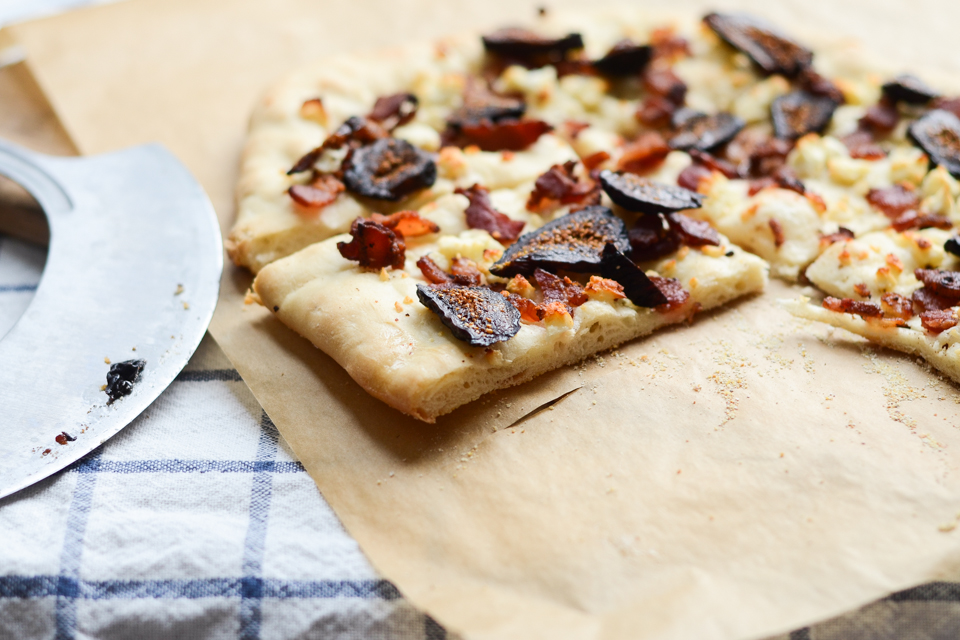
I loved the mix of flavors: the savory bacon, the tangy feta, and the sweet figs to balance it all out.

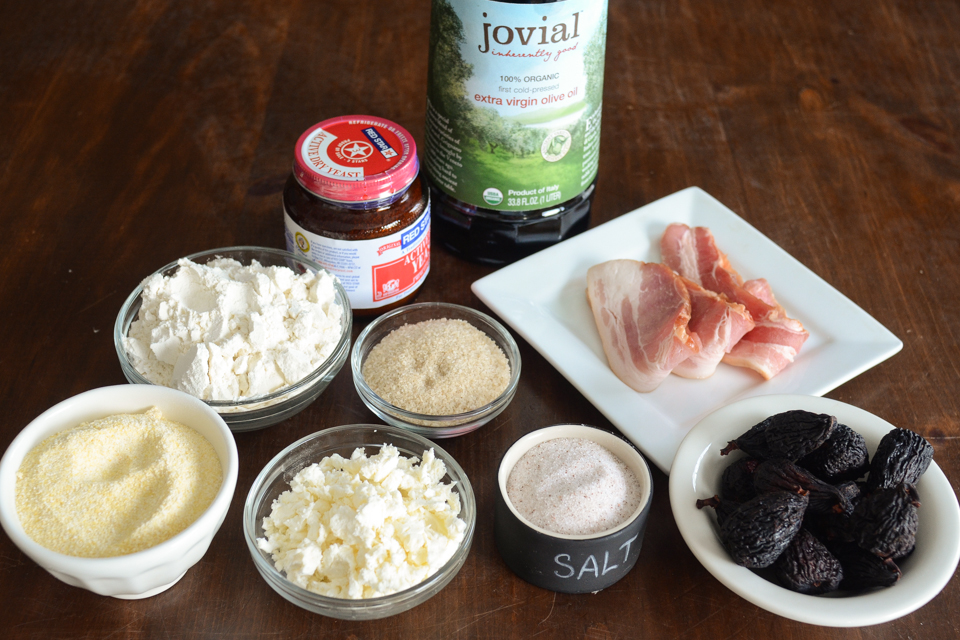
This little pizza would make a fantastic (fancy) appetizer for a dinner party. Granted, it will take some time and create a bit of a mess. But it IS surprisingly easy to make, and the list of (just ten) ingredients is actually quite reasonable:


Tasty Kitchen Blog: Figgy Piggy Pizza. Guest post by Erica Kastner of Buttered Side Up, recipe submitted by TK member Christina of Dessert for Two.

Water (not shown), sugar, yeast, flour, salt, olive oil, cornmeal, bacon, feta cheese, and dried mission figs.



Tasty Kitchen Blog: Figgy Piggy Pizza. Guest post by Erica Kastner of Buttered Side Up, recipe submitted by TK member Christina of Dessert for Two.

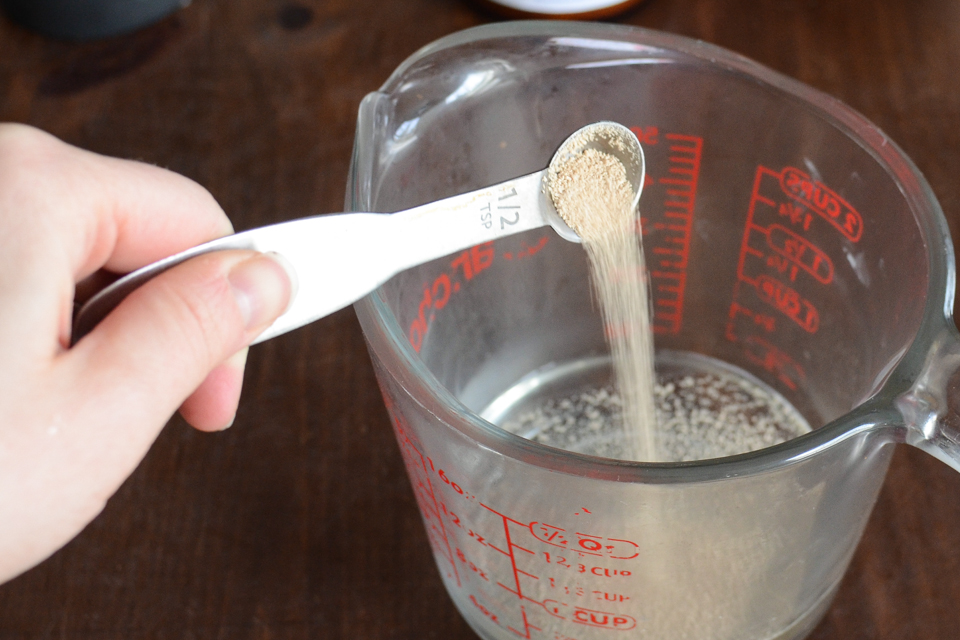
Place five tablespoons of water in a measuring cup.


Tasty Kitchen Blog: Figgy Piggy Pizza. Guest post by Erica Kastner of Buttered Side Up, recipe submitted by TK member Christina of Dessert for Two.

Add the yeast and sugar. Give it a gentle stir and allow it to sit for a few minutes.


Tasty Kitchen Blog: Figgy Piggy Pizza. Guest post by Erica Kastner of Buttered Side Up, recipe submitted by TK member Christina of Dessert for Two.

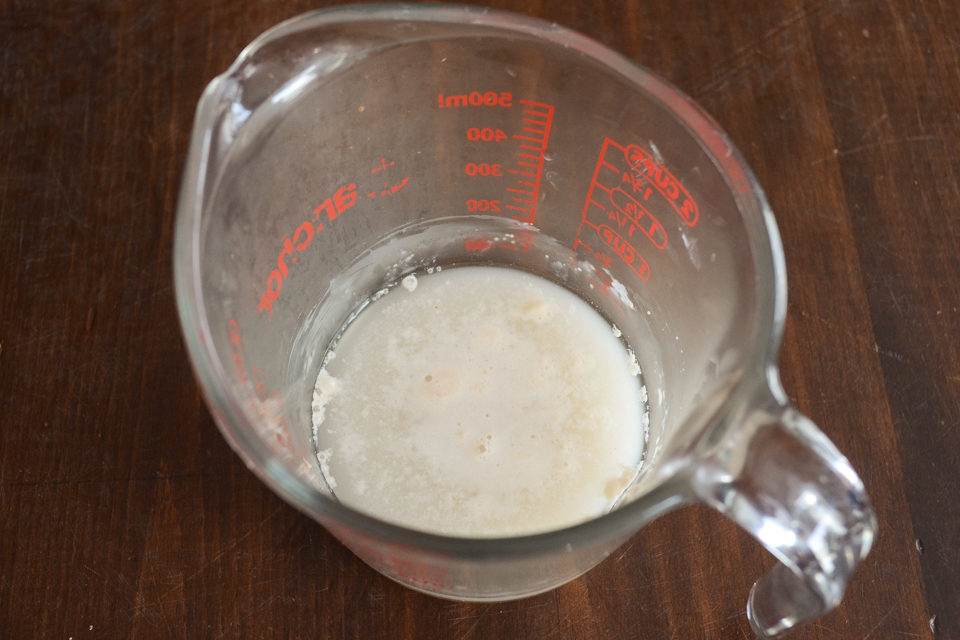
Once it starts to get foamy, you’re good to go. This could take anywhere from 5 to 15 minutes, depending on the temperature of your kitchen.


Tasty Kitchen Blog: Figgy Piggy Pizza. Guest post by Erica Kastner of Buttered Side Up, recipe submitted by TK member Christina of Dessert for Two.

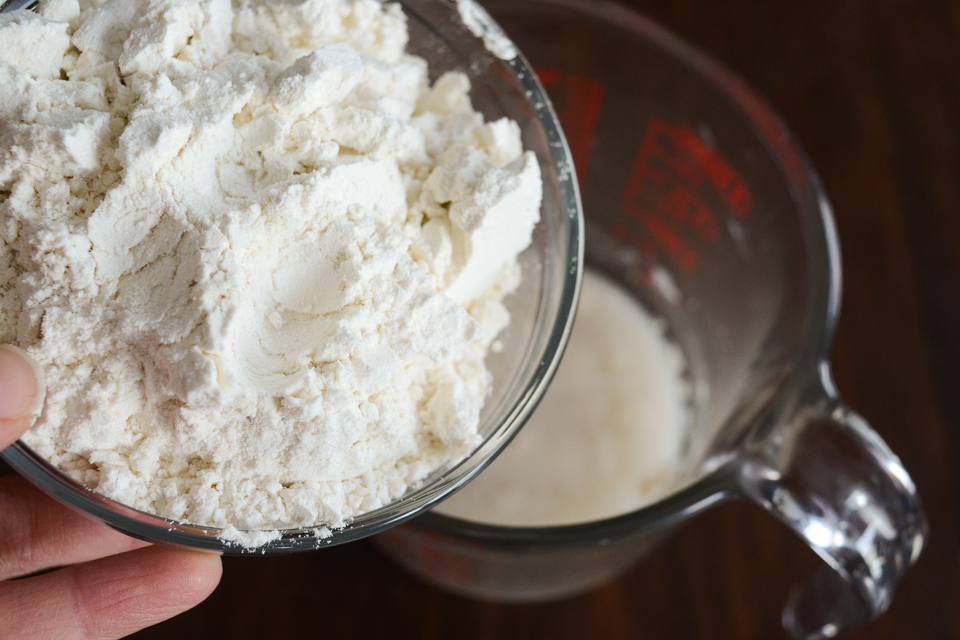
Now add your flour.


Tasty Kitchen Blog: Figgy Piggy Pizza. Guest post by Erica Kastner of Buttered Side Up, recipe submitted by TK member Christina of Dessert for Two.

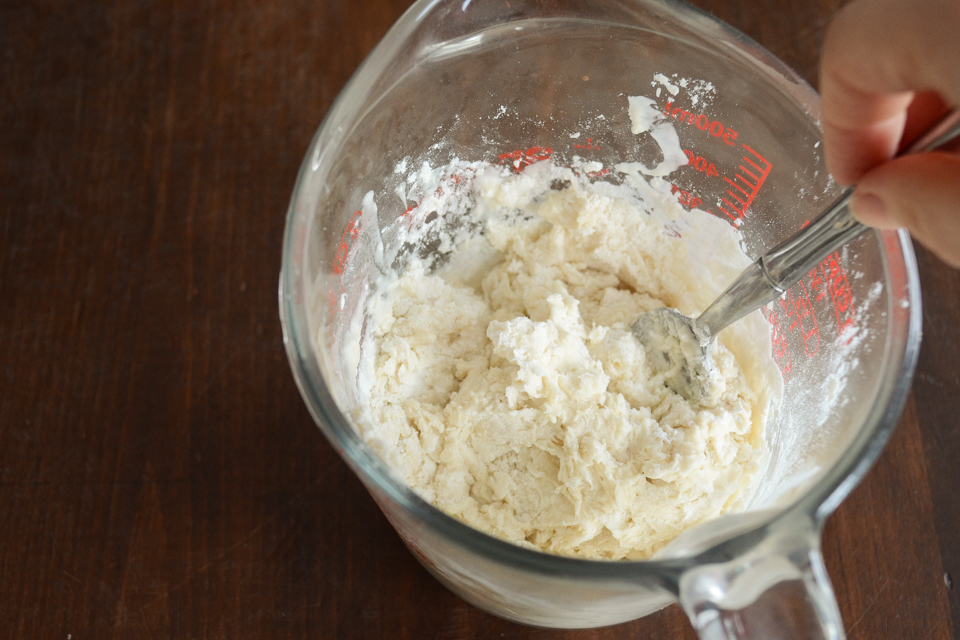
Give it a good stir.


Tasty Kitchen Blog: Figgy Piggy Pizza. Guest post by Erica Kastner of Buttered Side Up, recipe submitted by TK member Christina of Dessert for Two.

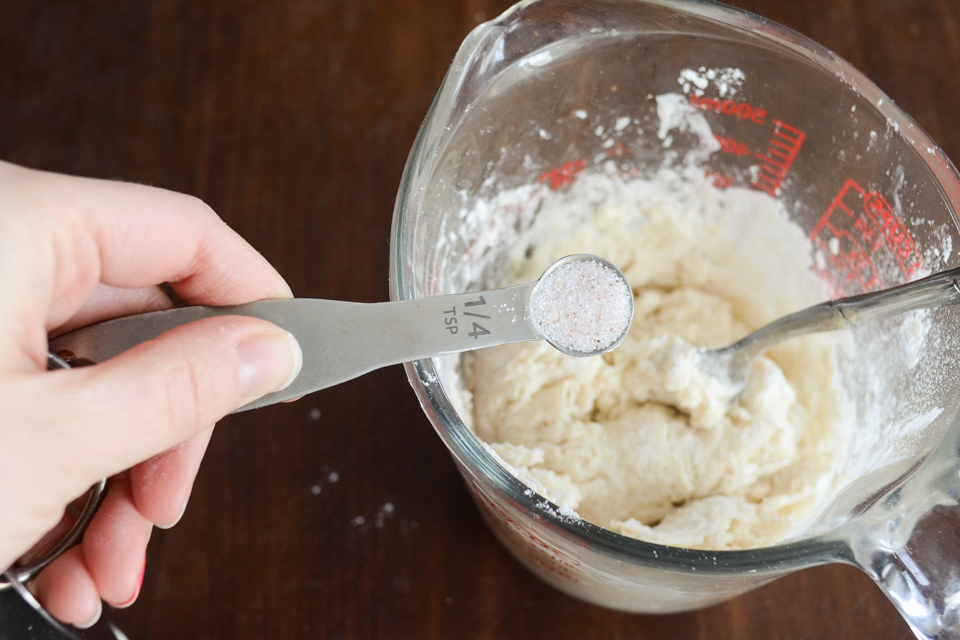
Dump in the salt …


Tasty Kitchen Blog: Figgy Piggy Pizza. Guest post by Erica Kastner of Buttered Side Up, recipe submitted by TK member Christina of Dessert for Two.

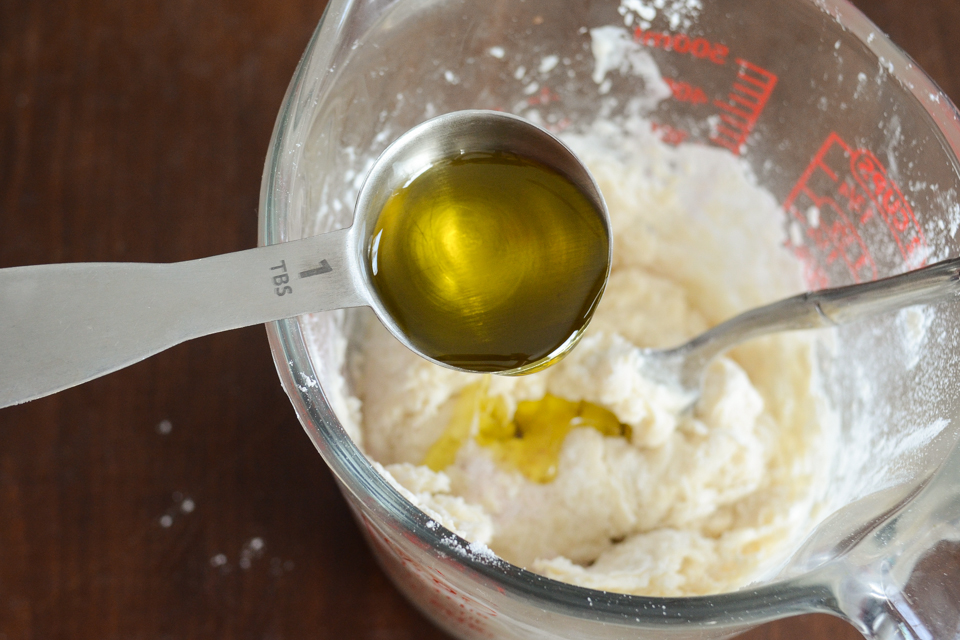
… and the olive oil.


Tasty Kitchen Blog: Figgy Piggy Pizza. Guest post by Erica Kastner of Buttered Side Up, recipe submitted by TK member Christina of Dessert for Two.

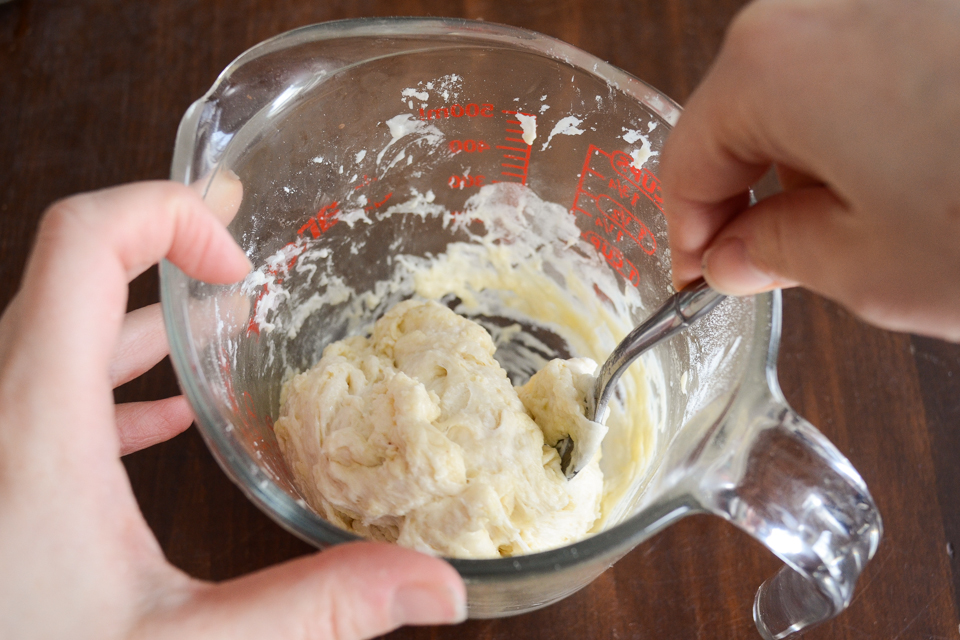
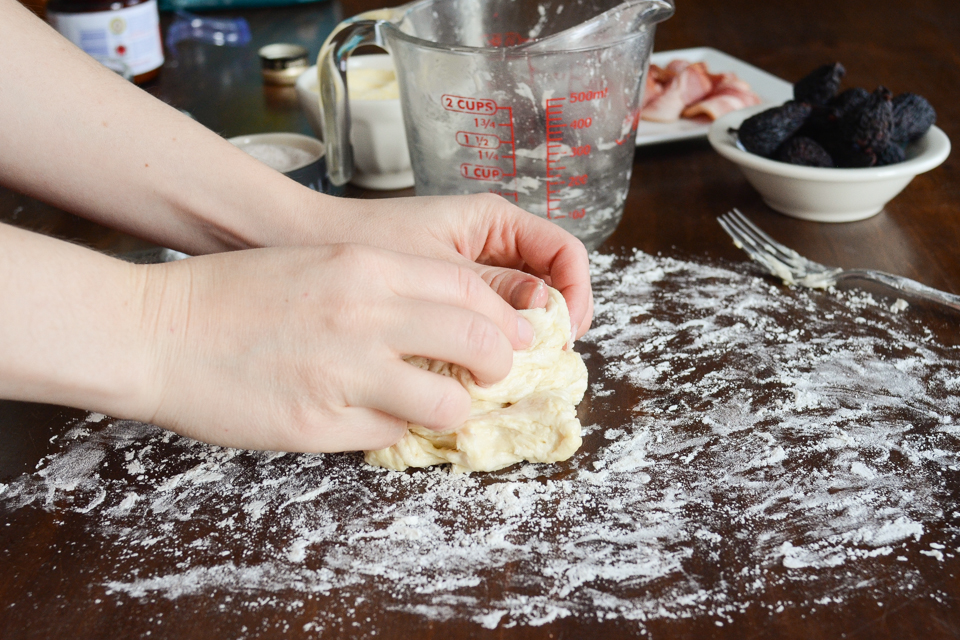
Stir it all together until you have a shaggy dough. It will seem somewhat sticky.


Tasty Kitchen Blog: Figgy Piggy Pizza. Guest post by Erica Kastner of Buttered Side Up, recipe submitted by TK member Christina of Dessert for Two.

Now place the dough on a floured surface and knead for about a minute.


Tasty Kitchen Blog: Figgy Piggy Pizza. Guest post by Erica Kastner of Buttered Side Up, recipe submitted by TK member Christina of Dessert for Two.

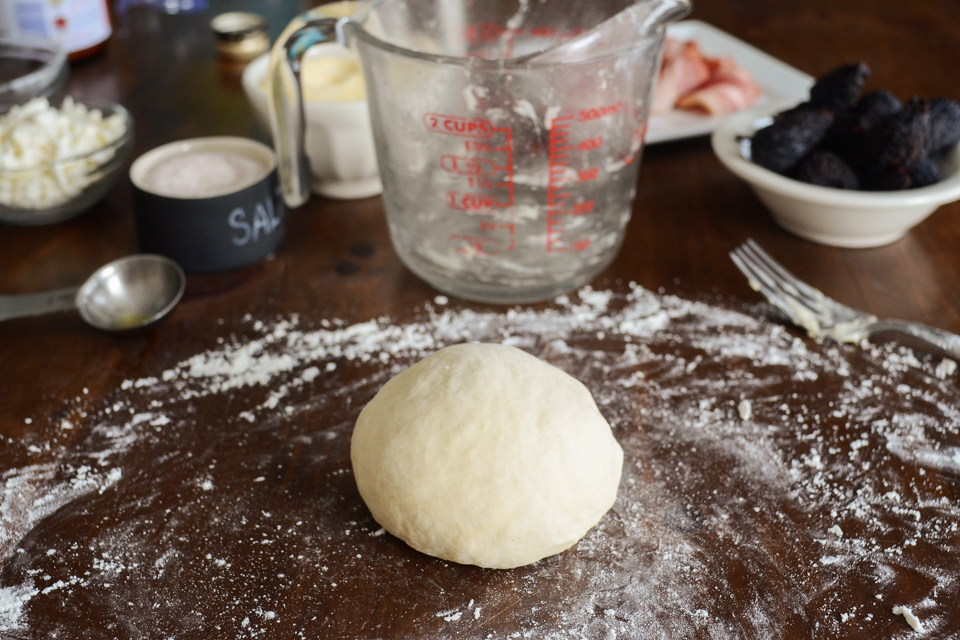
What you have now is a ball of dough that’s no longer sticky.


Tasty Kitchen Blog: Figgy Piggy Pizza. Guest post by Erica Kastner of Buttered Side Up, recipe submitted by TK member Christina of Dessert for Two.

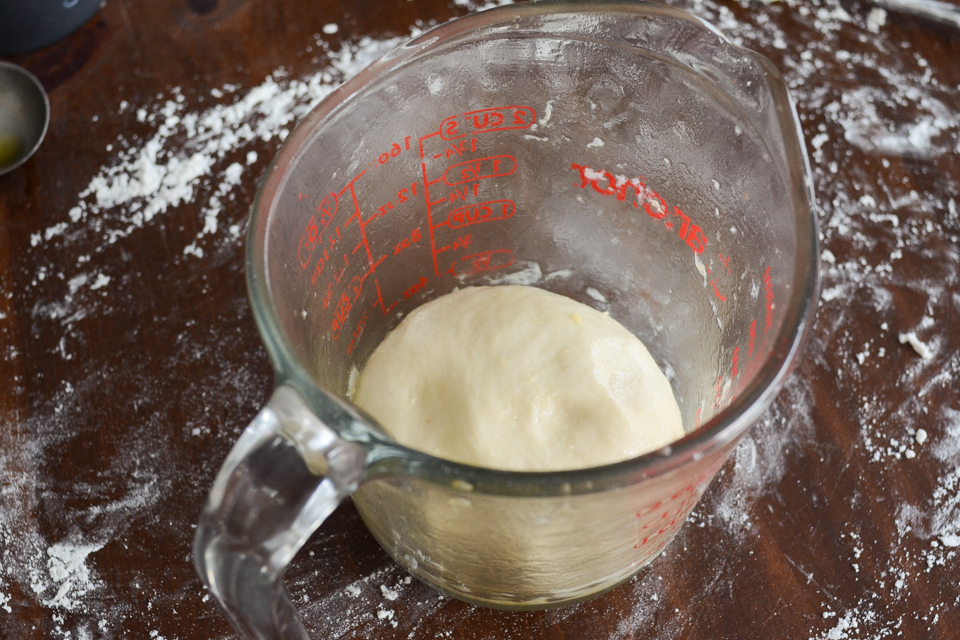
Rub your measuring cup with some olive oil and plop the dough inside. Flip it so it’s coated with the oil. Leave in a warm spot of your kitchen until it has doubled in size, about 1 hour.


Tasty Kitchen Blog: Figgy Piggy Pizza. Guest post by Erica Kastner of Buttered Side Up, recipe submitted by TK member Christina of Dessert for Two.

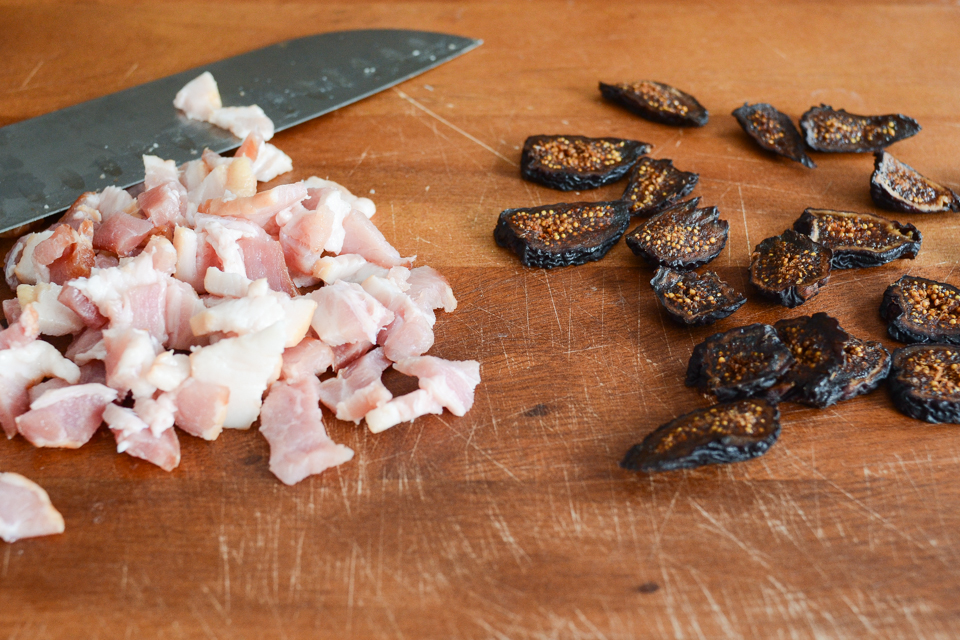
Now it’s time to prep your topping ingredients. Chop up the bacon and thinly slice the figs.


Tasty Kitchen Blog: Figgy Piggy Pizza. Guest post by Erica Kastner of Buttered Side Up, recipe submitted by TK member Christina of Dessert for Two.

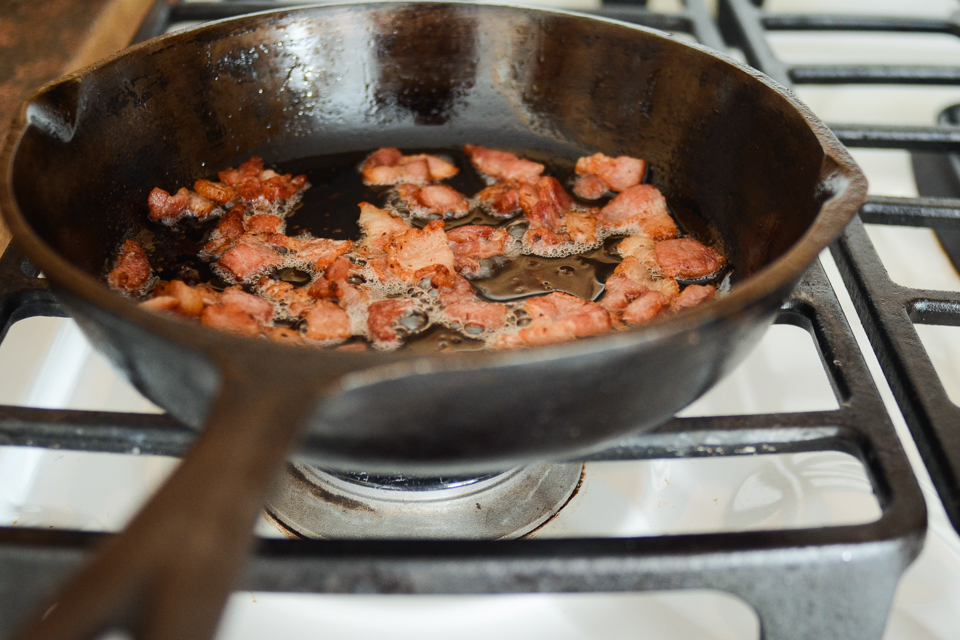
Cook the bacon in a skillet until it’s not quite as crispy as you’d like. It will cook longer in the oven on the pizza. Make sure you reserve the bacon grease!


Tasty Kitchen Blog: Figgy Piggy Pizza. Guest post by Erica Kastner of Buttered Side Up, recipe submitted by TK member Christina of Dessert for Two.

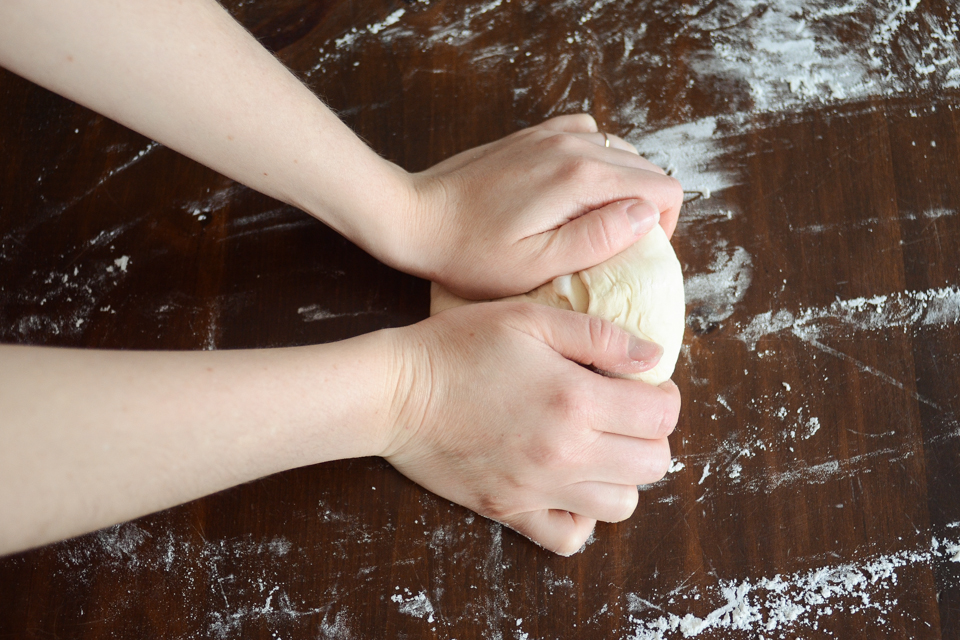
Once your dough has risen, turn it out onto your work surface a knead if for another minute.


Tasty Kitchen Blog: Figgy Piggy Pizza. Guest post by Erica Kastner of Buttered Side Up, recipe submitted by TK member Christina of Dessert for Two.

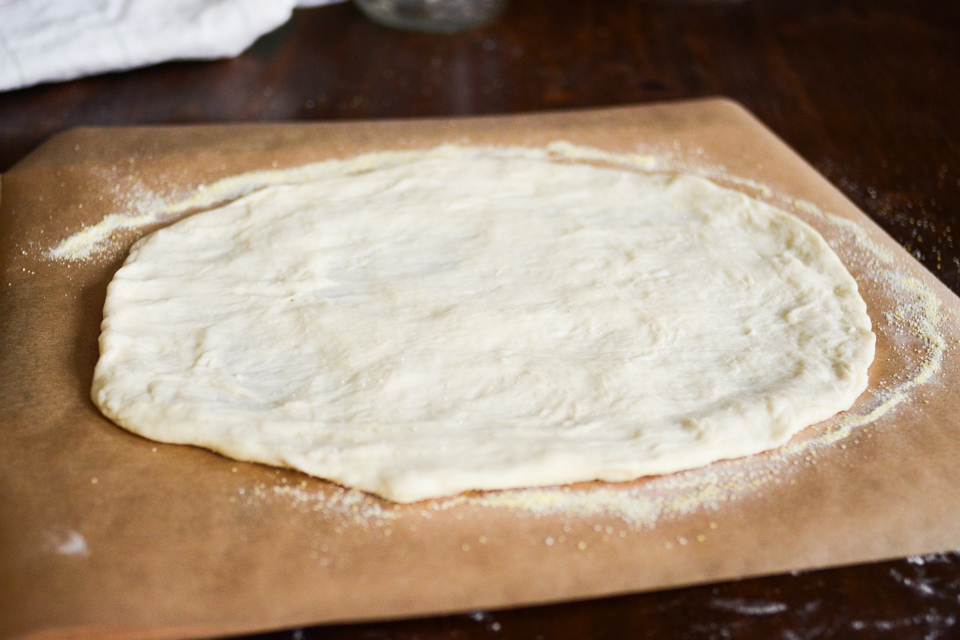
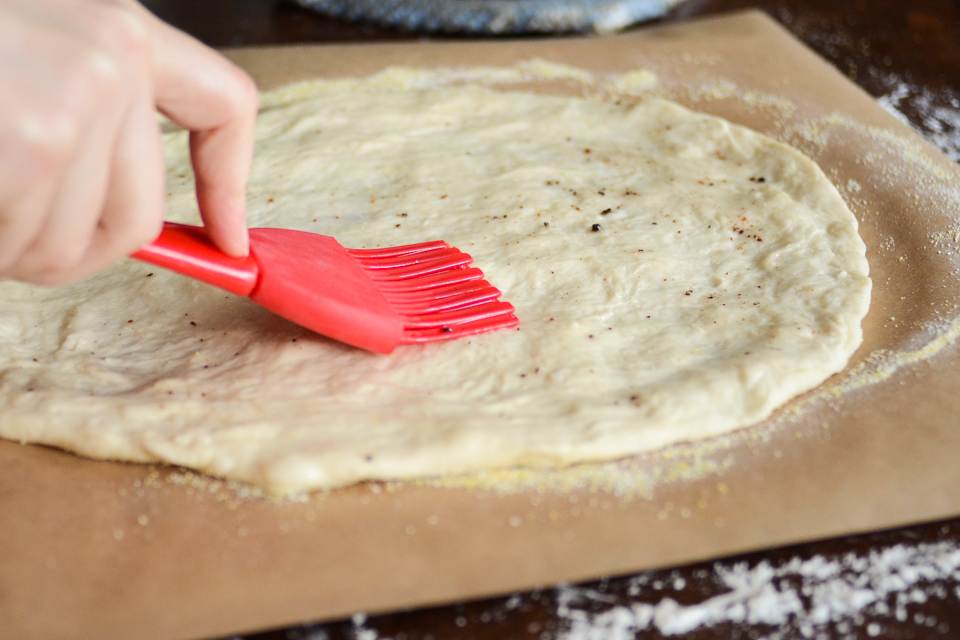
Shape the dough (I used a combination of letting it drape over my fists and patting it out) and place it on a cornmeal-dusted piece of parchment paper. You can also just put it on a cornmeal-dusted pizza peel or cookie sheet, but I find it’s much easier to transfer the pizza to the oven if it’s on top of parchment.


Tasty Kitchen Blog: Figgy Piggy Pizza. Guest post by Erica Kastner of Buttered Side Up, recipe submitted by TK member Christina of Dessert for Two.

Brush the pizza crust with some of the bacon grease you saved earlier.


Tasty Kitchen Blog: Figgy Piggy Pizza. Guest post by Erica Kastner of Buttered Side Up, recipe submitted by TK member Christina of Dessert for Two.

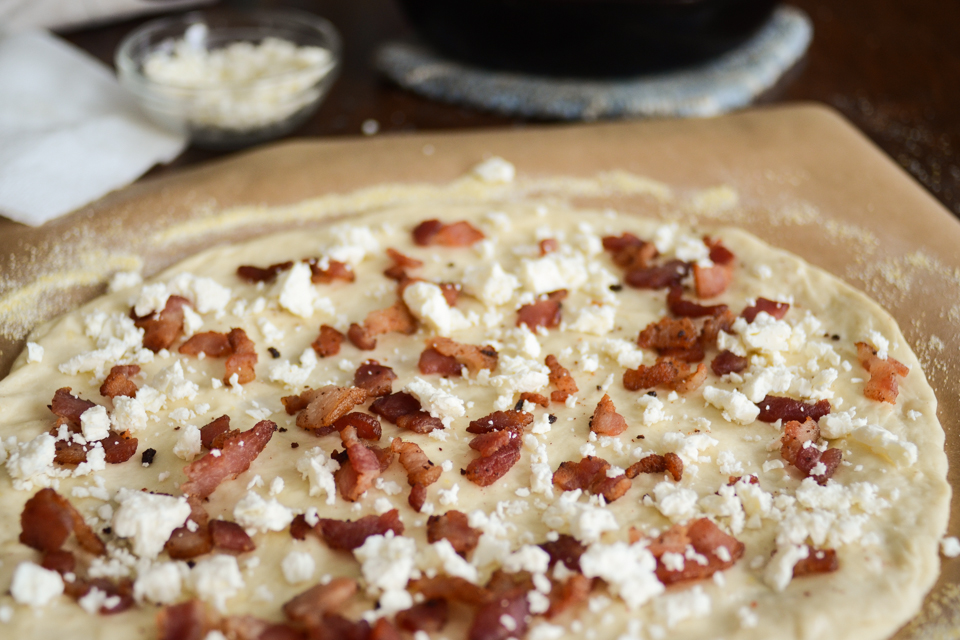
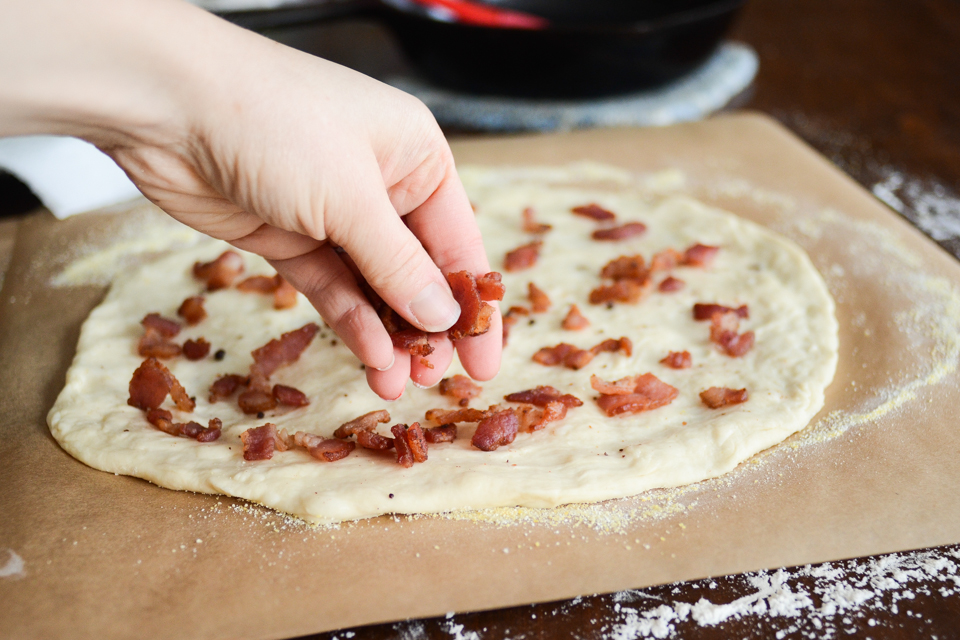
Add the bacon.


Tasty Kitchen Blog: Figgy Piggy Pizza. Guest post by Erica Kastner of Buttered Side Up, recipe submitted by TK member Christina of Dessert for Two.

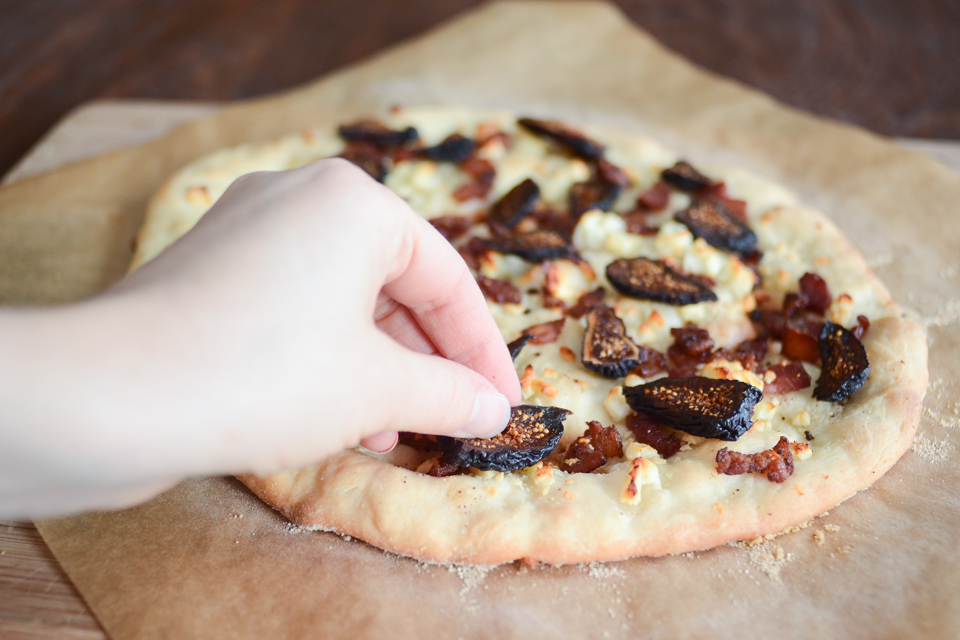
Sprinkle on the feta cheese and pop that baby into a (very) hot oven until the crust turns golden brown.


Tasty Kitchen Blog: Figgy Piggy Pizza. Guest post by Erica Kastner of Buttered Side Up, recipe submitted by TK member Christina of Dessert for Two.

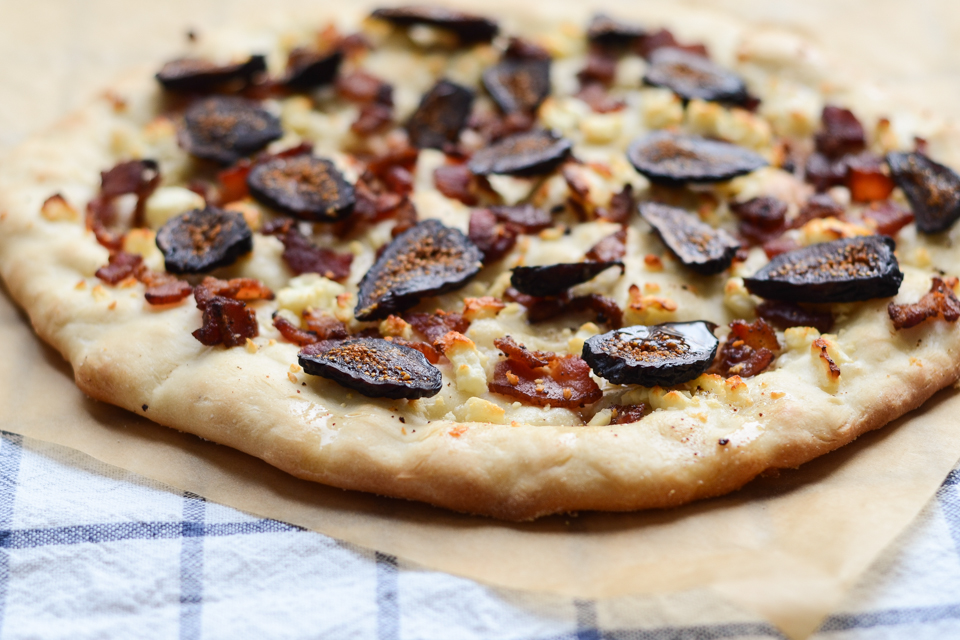
Once the pizza is cooked to your liking, add the fig slices.


Tasty Kitchen Blog: Figgy Piggy Pizza. Guest post by Erica Kastner of Buttered Side Up, recipe submitted by TK member Christina of Dessert for Two.

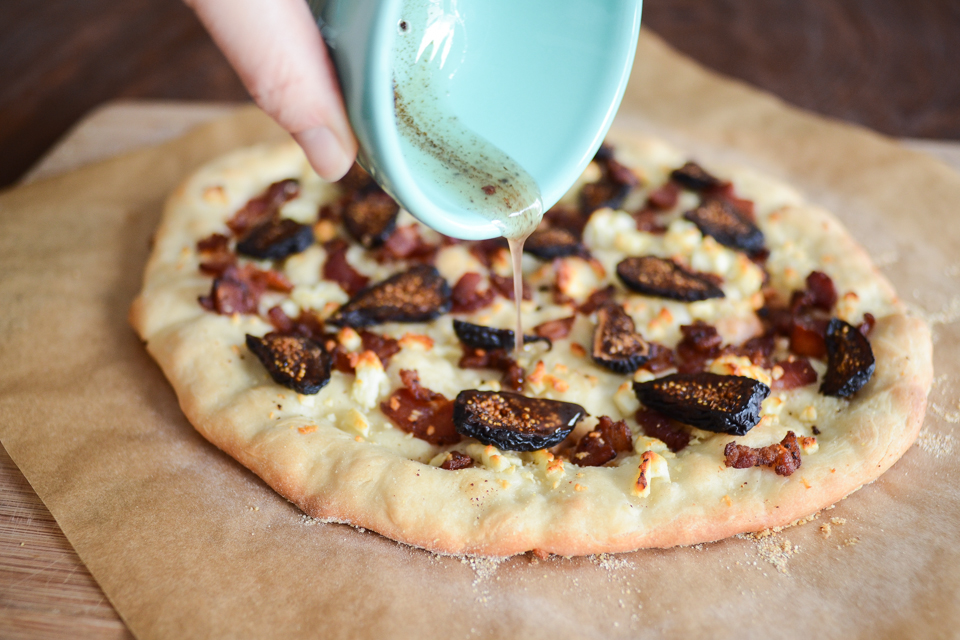
Pour any leftover bacon grease all over the pizza. Serve immediately.


Tasty Kitchen Blog: Figgy Piggy Pizza. Guest post by Erica Kastner of Buttered Side Up, recipe submitted by TK member Christina of Dessert for Two.

Notes: 

1. I held back on the feta because I thought it would be overpowering. We ended up adding more once the pizza was done. I would recommend being liberal with the cheese.

2. My husband was thinking of this as a traditional pizza, not an appetizer. So he thought that, while there were some awesome flavors going on, it was a tad dry. I think a drizzle of olive oil or balsamic reduction would be awesome.

3. If you really want to make this a speedy appetizer, you could make the dough beforehand, have the bacon cooked up and the figs sliced. Then you can slide it into the oven at the last minute and serve it piping hot to your guests.


Tasty Kitchen Blog: Figgy Piggy Pizza. Guest post by Erica Kastner of Buttered Side Up, recipe submitted by TK member Christina of Dessert for Two.

Many thanks to fellow TKB contributor Christina for submitting this pizza. You’ve probably heard of her lovely blog, Dessert for Two. If you haven’t, make sure to check it out! She has lots of delicious-looking recipes.


Printable Recipe

Figgy Piggy Pizza

See post on DessertForTwo’s site!
4.00 Mitt(s) 1 Rating(s)1 vote, average: 4.00 out of 51 vote, average: 4.00 out of 51 vote, average: 4.00 out of 51 vote, average: 4.00 out of 51 vote, average: 4.00 out of 5

Prep Time:

Cook Time:

Difficulty: Easy

Servings: 2

2
x

Print Options

Page size Letter 3x5 4x6
Text Size Small Medium Large
Content Include description
Include prep time, etc.
Show image

Description

Homemade pizza for two topped with bacon, figs, and feta!

Ingredients

  • FOR THE DOUGH:
  • 5 Tablespoons Warm Water (105-110 Degrees F)
  • ½ teaspoons Sugar
  • ½ teaspoons Dry Active Yeast
  • ¾ cups Flour
  • ¼ teaspoons Salt
  • 1 Tablespoon Olive Oil, Plus More For Bowl
  • Cornmeal For The Baking Sheet
  • FOR THE PIZZA:
  • 2 slices Thick Cut Bacon
  • 3 Tablespoons Crumbled Feta Cheese
  • 4 whole Dried Mission Figs, Sliced

Preparation Instructions

First, make the dough: In a 2-cup measuring cup, combine the warm water, sugar and yeast. Stir to dissolve. Let it sit for 5 minutes, or until foamy. If the yeast does not foam, it’s dead and you’ll need to start over.

Next, add the flour and stir. Then, add the salt and olive oil. Stir with a fork until a shaggy dough forms. Remove the dough from the cup and knead it a few times on a floured surface. As soon as you start kneading, the dough will come together and lose all the stickiness. Knead for about 1 minute. The dough should be easy to work with, pliable, and not sticky. Grease the measuring cup with a bit of extra oil, and plop the dough back in it. Turn the dough over once to coat it in oil, then let it rise in a warm place until doubled in bulk, about 1 hour.

Meanwhile, slice the bacon into lardons and fry in a dry skillet over medium heat until almost crispy. Don’t let it crisp all the way, because it will continue cooking in the oven. Drain the bacon on a paper towel. Reserve the bacon grease!

Preheat the oven to 400 F and place a pizza stone in the oven (if you have one). Alternatively, you could use a baking sheet coated lightly with cornmeal.

Flour your hands, and remove the dough from the measuring cup. Lightly flour the counter and knead the dough for 1 minute. Then, pat the dough out into a circle. Pick up the dough (just like you see them do in pizzerias) and let it drape over your two fists. Slowly start stretching the dough out in a circular motion around the edges to a diameter of 6″. You could also make an oblong shape, like I did for the photos.

Next, sprinkle cornmeal on a pizza stone or baking sheet. Place the dough on top of the cornmeal. Brush some of the leftover bacon grease on the top of the pizza, then top with the cooked bacon and feta.

Bake for 10 minutes, until the dough starts to brown. Cooking time will vary if you’re using a baking sheet versus pizza stone. Keep an eye on it. When it’s ready remove pizza from the oven. Top the cooked pizza with the fig slices, drizzle with a smidge more bacon grease, and serve immediately.


_______________________________________

Erica Kastner has always been one of our most cherished members of the Tasty Kitchen community. She shares her wonderful recipes and amazing food photography on her blog, Buttered Side Up, and she also writes about crafts and posts more of her beautiful photography in her personal blog, Simple Days. There really isn’t much that this amazing young wife and mother can’t do, and we’re thrilled she does some of it here.

Profile photo of Betsy (TK)

Looks Delicious! Sticky BBQ Slow-Cooker Meatballs

Posted by in Looks Delicious!

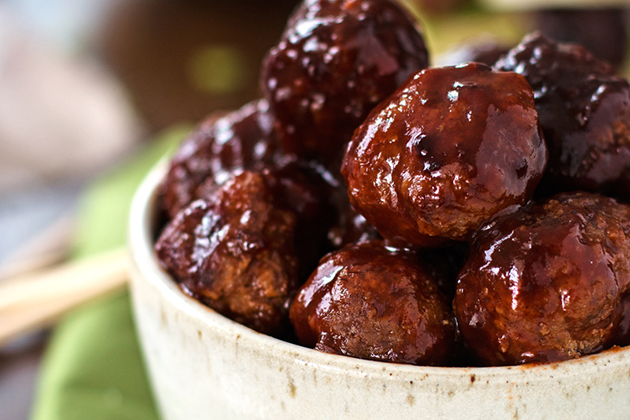
Tasty Kitchen Blog: Looks Delicious! (Sticky BBQ Slow-Cooker Meatballs, submitted by TK member Nora Rusev of Savory Nothings)

Are you ready for some football this weekend? Or are you planning to go catch up on some Oscar movies? Maybe you’re just ready to relax around the house. All great options! Regardless of the plans, though, we’ve all gotta eat, right? These Sticky BBQ Slow-Cooker Meatballs from TK member Nora Rusev are perfect game day grub but are really just all around weekend-friendly food. Get them in the slow cooker and let things happen while you fit in all your activities. You’ll be rewarded with sticky, barbecue deliciousness. We think you’ll love ‘em!

Happy weekending!


Profile photo of Erika (TK)

Let’s Talk Slow Cookers

Posted by in Kitchen Talk

Tasty Kitchen Blog: Kitchen Talk (Slow Cooker Tips)

Slow cookers are sometimes the forgotten heroes of the kitchen. They’re either stashed on the top shelf of the cupboard above the refrigerator (you know, the one you almost never open), or in the basement, or behind the waffle maker and panini press. Out of sight, out of mind.

But they shouldn’t be. They’re workhorses, those slow cookers. Just check out all the great recipes in our slow cooker category. They’ll cook amazing meals for you with very little assistance, slaving away while you’re busy working or running errands. And few things are as comforting as coming home to a warm, hearty meal, your kitchen filled with the enticing aroma of a satisfying home-cooked meal.

So let’s talk slow cookers today! We want to know:

What are your favorite tips for cooking with a slow cooker?

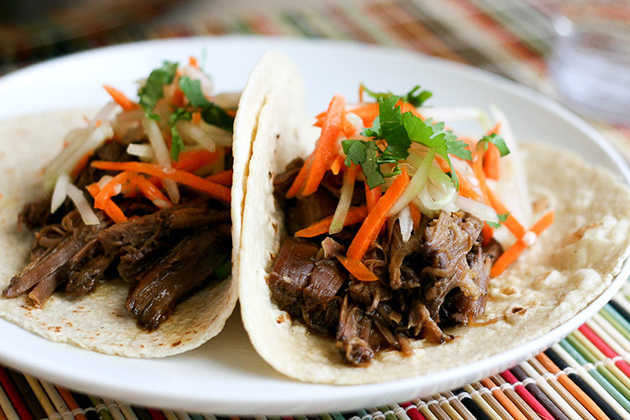
We’re leaving this wide open. Do you have a favorite brand or model of slow cooker? A favorite recipe or technique? (The Slow Cooker Korean Short Rib Tacos you see above is one of my favorites.) Any special tips or tricks you’ve learned? We want to hear them all!

Happy Wednesday! Stay warm, cozy, and nourished, friends!


Profile photo of Natalie | Perry's Plate

Moroccan Eggs

Posted by in Step-by-Step Recipes

Tasty Kitchen Blog: Moroccan Eggs. Guest post by Natalie Perry of Perry's Plate, recipe submitted by TK member Katie of 24 Carrot Life.

Pregnancy makes me super lazy and undisciplined. We’re usually pretty health-conscious around here, but we’ve gone out to eat more times in the last few months than I’d like to admit. (I also have an aversion to doing dishes.)

When I find quick, simple, yet healthy meals to feed our little family (that my girls like!), I do a little dance of joy. This recipe for Moroccan Eggs submitted by TK member Katie is exactly that.

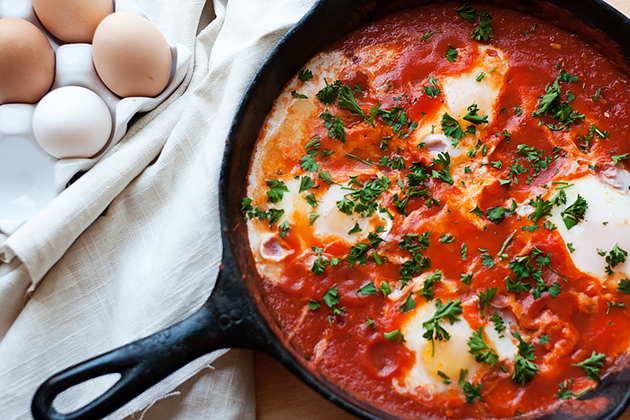
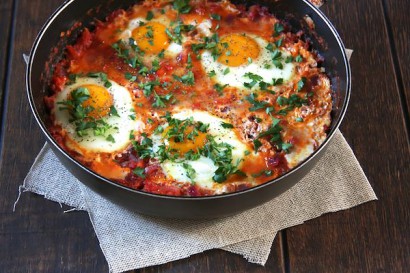
This is basically a recipe for shakshuka, which is eggs cooked in a spicy tomato sauce. This version is very simple, but very delicious. If you wanted to spice it up even more, you could add a Moroccan-style spice blend or some spicy sausage. I quite liked the simplicity of only using a handful of ingredients. Here, I’ll show you.


Tasty Kitchen Blog: Moroccan Eggs. Guest post by Natalie Perry of Perry's Plate, recipe submitted by TK member Katie of 24 Carrot Life.

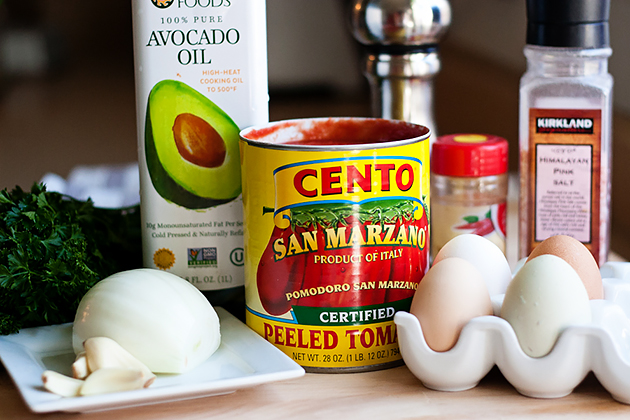
You’ll only need a large can of tomatoes, a sweet onion, garlic, parsley, eggs, cooking oil (I used avocado oil), cayenne, and salt and pepper. And perhaps something to accompany the eggs, such as crusty bread, rice, or roasted vegetables. (More on that later.)

The recipe calls for diced tomatoes, but I happened to have these San Marzano tomatoes on hand and decided to blend them up for a smoother consistency. Whatever floats your boat.


Tasty Kitchen Blog: Moroccan Eggs. Guest post by Natalie Perry of Perry's Plate, recipe submitted by TK member Katie of 24 Carrot Life.

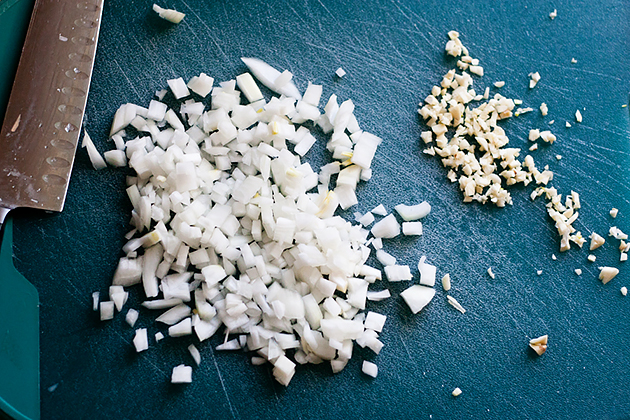
Yes, you’ll need to break out that knife and cutting board, but just for a minute! Dice that onion and give those cloves a good mincing.


Tasty Kitchen Blog: Moroccan Eggs. Guest post by Natalie Perry of Perry's Plate, recipe submitted by TK member Katie of 24 Carrot Life.

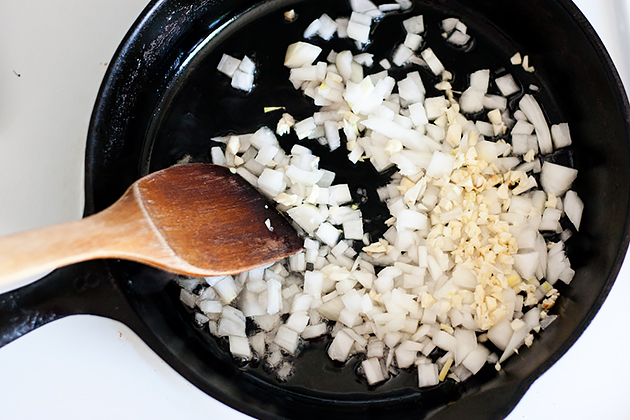
Heat the oil in a medium-sized skillet and cook the onion and garlic until the onion is somewhat translucent and soft.


Tasty Kitchen Blog: Moroccan Eggs. Guest post by Natalie Perry of Perry's Plate, recipe submitted by TK member Katie of 24 Carrot Life.

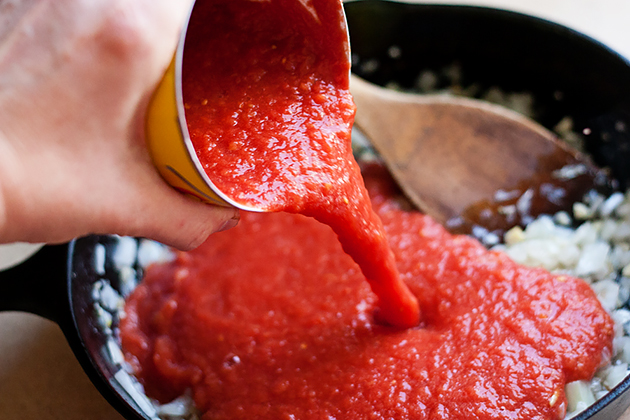
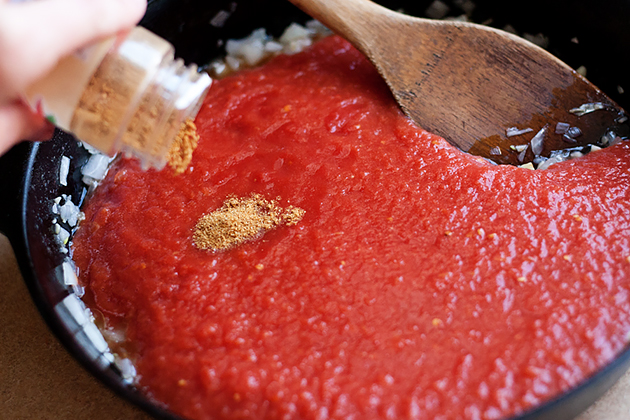
Add the tomatoes!


Tasty Kitchen Blog: Moroccan Eggs. Guest post by Natalie Perry of Perry's Plate, recipe submitted by TK member Katie of 24 Carrot Life.

And however much cayenne you prefer. This little dusting was enough for me.


Tasty Kitchen Blog: Moroccan Eggs. Guest post by Natalie Perry of Perry's Plate, recipe submitted by TK member Katie of 24 Carrot Life.

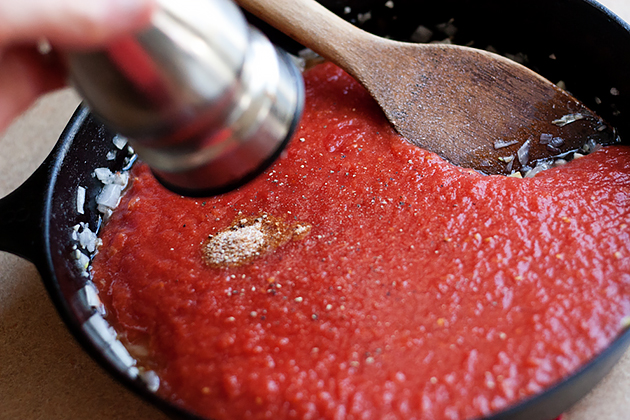
Don’t forget the salt and pepper.


Tasty Kitchen Blog: Moroccan Eggs. Guest post by Natalie Perry of Perry's Plate, recipe submitted by TK member Katie of 24 Carrot Life.

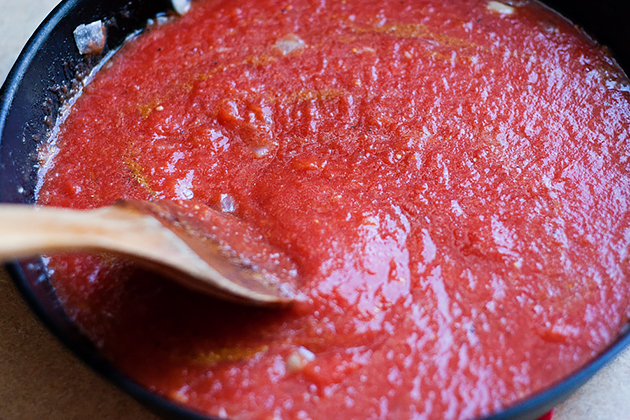
Give it a stir. Notice how watery it is? We’re going to fix that.


Tasty Kitchen Blog: Moroccan Eggs. Guest post by Natalie Perry of Perry's Plate, recipe submitted by TK member Katie of 24 Carrot Life.

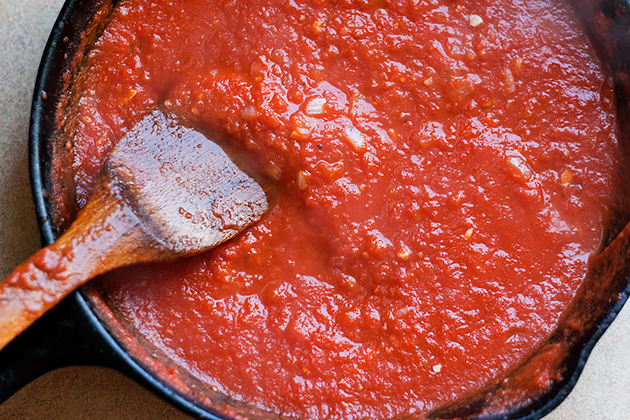
Let the sauce simmer over medium-high heat for about 10 minutes or until some of that water has cooked off. Bubbling tomato sauce is a stovetop’s worst nightmare. You can partially cover the skillet with some foil so it doesn’t splatter everywhere and steam can still escape.


Tasty Kitchen Blog: Moroccan Eggs. Guest post by Natalie Perry of Perry's Plate, recipe submitted by TK member Katie of 24 Carrot Life.

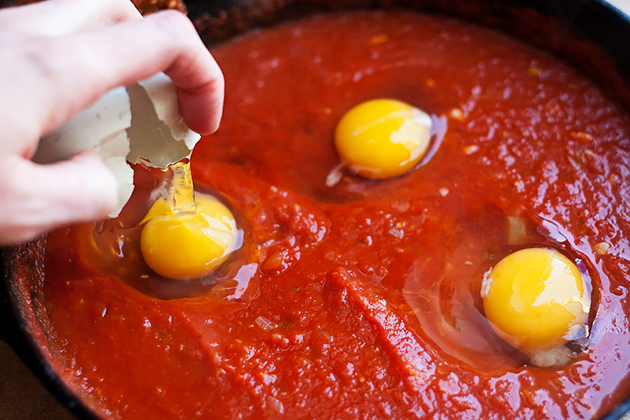
Now for the fun part. If your sauce is thick enough, make little divots in the sauce and add the eggs. The recipe suggests cracking them into a small bowl first, but I like living on the edge.


Tasty Kitchen Blog: Moroccan Eggs. Guest post by Natalie Perry of Perry's Plate, recipe submitted by TK member Katie of 24 Carrot Life.

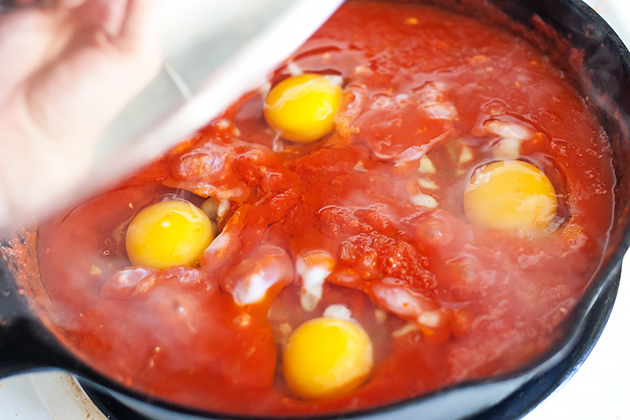
Bring the heat down to about medium-low and cover the skillet, allowing the eggs to cook. The whites should be cooked and the yolks should be a little runny.


Tasty Kitchen Blog: Moroccan Eggs. Guest post by Natalie Perry of Perry's Plate, recipe submitted by TK member Katie of 24 Carrot Life.

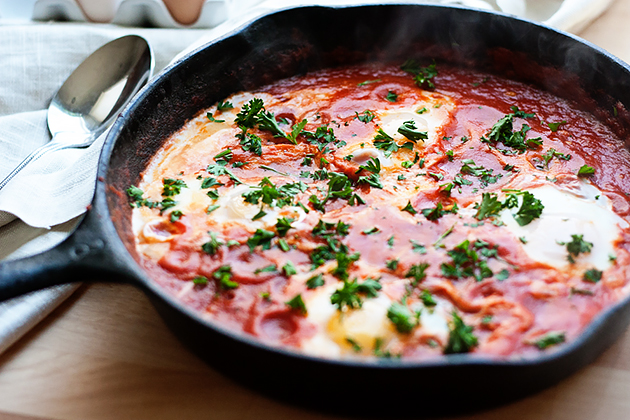
Chop a little parsley and sprinkle it over the top. And you’re done! Easy, huh?


Tasty Kitchen Blog: Moroccan Eggs. Guest post by Natalie Perry of Perry's Plate, recipe submitted by TK member Katie of 24 Carrot Life.

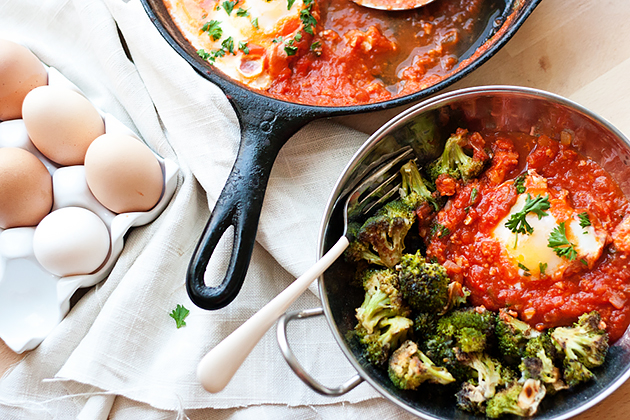
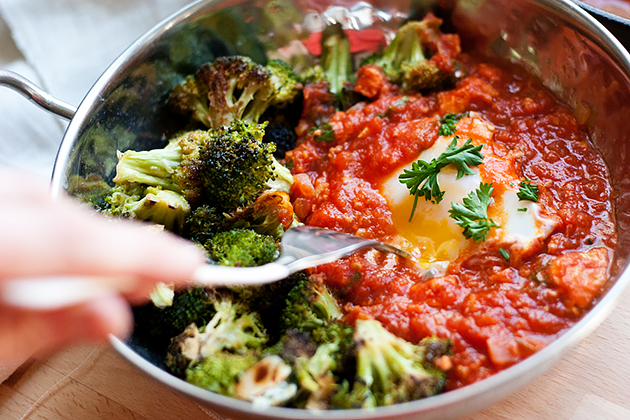
I try to avoid eating grains, except when I’m pregnant (see comment above about being undisciplined), but I made a valiant effort for you guys. So, I pushed thoughts of crusty bread out of my head and warmed up some leftover roasted Parmesan broccoli.


Tasty Kitchen Blog: Moroccan Eggs. Guest post by Natalie Perry of Perry's Plate, recipe submitted by TK member Katie of 24 Carrot Life.

It was a PERFECT vehicle for those eggs and spicy sauce! Thank you, Katie, for a deliciously simple meal that may save us from grabbing a pizza!

Be sure to check out Katie’s TK recipe box and her blog, 24 Carrot Life for more tasty and healthy recipes!


Printable Recipe

Moroccan Eggs

See post on 24 Carrot Life’s site!
5.00 Mitt(s) 1 Rating(s)1 vote, average: 5.00 out of 51 vote, average: 5.00 out of 51 vote, average: 5.00 out of 51 vote, average: 5.00 out of 51 vote, average: 5.00 out of 5

Prep Time:

Cook Time:

Difficulty: Easy

Servings: 4

4
x

Print Options

Page size Letter 3x5 4x6
Text Size Small Medium Large
Content Include description
Include prep time, etc.
Show image

Description

These Moroccan Eggs are made with just a few natural ingredients and taste so great with toasted crusty bread.

Ingredients

  • 1 Tablespoon Olive Oil
  • 1 whole Red Onion, Chopped
  • 4 cloves Garlic, Minced
  • 28 ounces, weight Canned Chopped Tomatoes
  • ¼ teaspoons Cayenne Pepper
  • Salt And Pepper, to taste
  • 4 whole Large Eggs
  • Chopped Parsley For Garnish
  • Crusty Bread, Toasted, To Serve

Preparation Instructions

Add olive oil to a pan over medium heat. Once hot, add onion and garlic and cook for about 4 minutes, or until translucent.

Add tomatoes and cook on medium high heat for about 10 minutes. Once tomato juice has cooked off, add cayenne pepper, salt, and pepper. Stir to combine.

Using the back of a large cooking spoon, make a divot for each egg. Crack eggs one by one into a separate bowl to make sure there are no shell pieces. Slowly add one egg into each divet, repeating separately with each egg.

Cover the skillet and cook on low heat until the egg whites are cooked, about 5 minutes.

Garnish with parsley and serve with toasted bread for dipping.


_______________________________________

Be sure to check out Natalie’s own beautiful food blog, Perrys’ Plate, where you can see her growing collection of lovely recipes. There’s always something new to see there. Go visit now!
 

Profile photo of Betsy (TK)

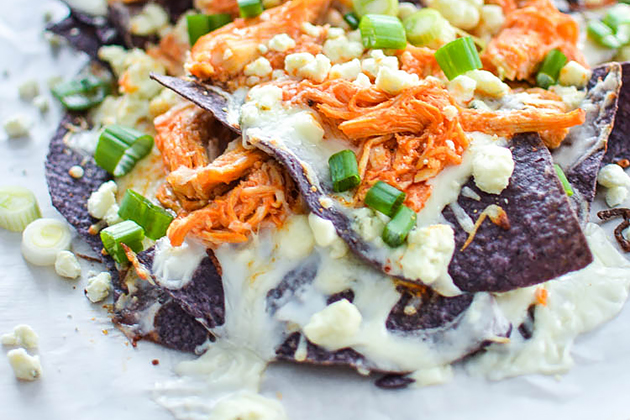
Looks Delicious! Buffalo Chicken Nachos

Posted by in Looks Delicious!

If this isn't game day food, then nothing is. Everybody loves nachos, and we all know hot wings make for great football snacking.

Profile photo of Erika (TK)

Comfort Food for the Winter

Posted by in Kitchen Talk

I'm pretty sure I'm not alone in my wintry reverie, and it looks like the cold spell isn't going anywhere soon for most of the country. So let's huddle up and keep each other warm! Tell us:

What are some of your favorite cold weather comfort foods?

Profile photo of Megan {Country Cleaver}

Quinoa Pilaf with Apples and Cranberries

Posted by in Step-by-Step Recipes

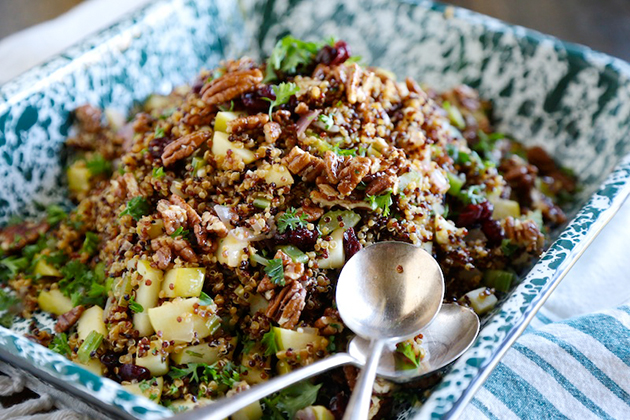
This Quinoa Pilaf with Green Apples, Dried Cranberries and Pecans is totally sinless, but oh so flavorful.

Profile photo of Natalie | Perry's Plate

Scalloped Hasselback Sweet Potatoes

Posted by in Holidays

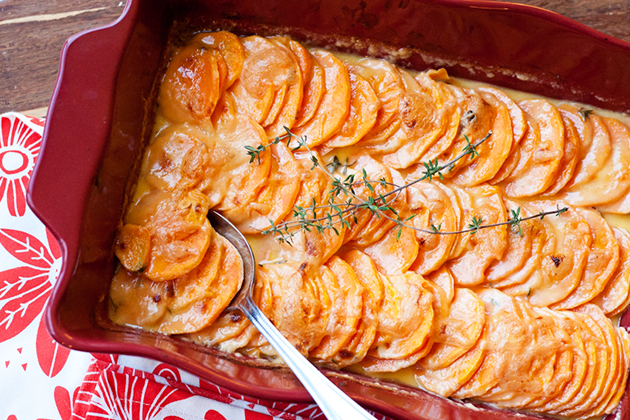
This Scalloped Hasselback Sweet Potatoes recipe submitted by TK member Tove is the newest addition to my special occasion recipe file.