The Pioneer Woman Tasty Kitchen
Profile photo of cookincanuck

Sweet and Spicy Shrimp

Posted by in Step-by-Step Recipes

Tasty Kitchen Blog: Sweet and Spicy Shrimp. Guest post by Dara Michalski of Cookin' Canuck, recipe submitted by Colleen of Souffle Bombay.

 
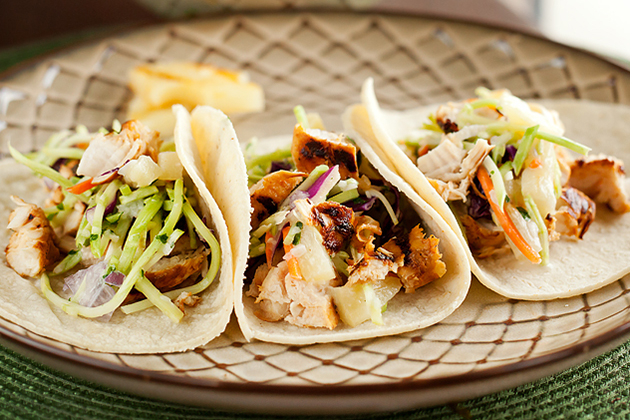
When it comes to grilling, I follow pretty closely the motto of the U.S. Postal Service: “Neither snow nor rain nor heat nor gloom of night…” Well, okay, I actually draw the line at snow, but strap a headlamp on my head (yeah, it’s a really good look) or hold an umbrella over me as the rain pelts down, and I’ll happily grill up a juicy burger or a quick appetizer like these sweet and spicy shrimp. The summer may be coming to a close, but I will grill on until I see that first piece of white stuff falling from the sky.

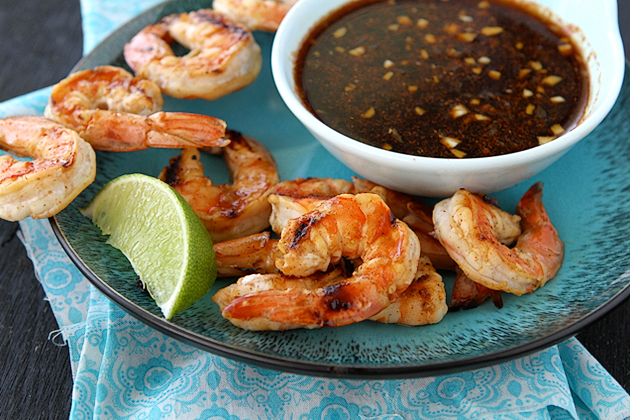
This savory and sweet recipe from Tasty Kitchen member soufflebombay couldn’t be any easier. Simply whisk together the sauce ingredients, give them a quick turn in the microwave, baste and skewer the shrimp and toss them on the grill for a few minutes. Serve the shrimp as an appetizer, along with the dipping sauce, or pile them on top of a plate of steaming rice with a side of stir-fried vegetables for an easy weeknight meal.

Now, let’s get cooking.


Tasty Kitchen Blog: Sweet and Spicy Shrimp. Guest post by Dara Michalski of Cookin' Canuck, recipe submitted by Colleen of Souffle Bombay.

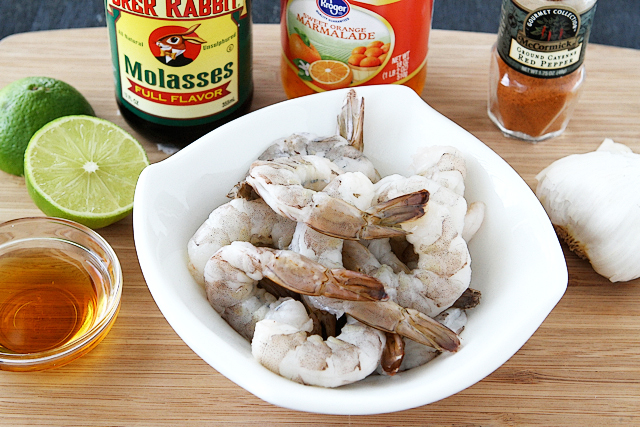
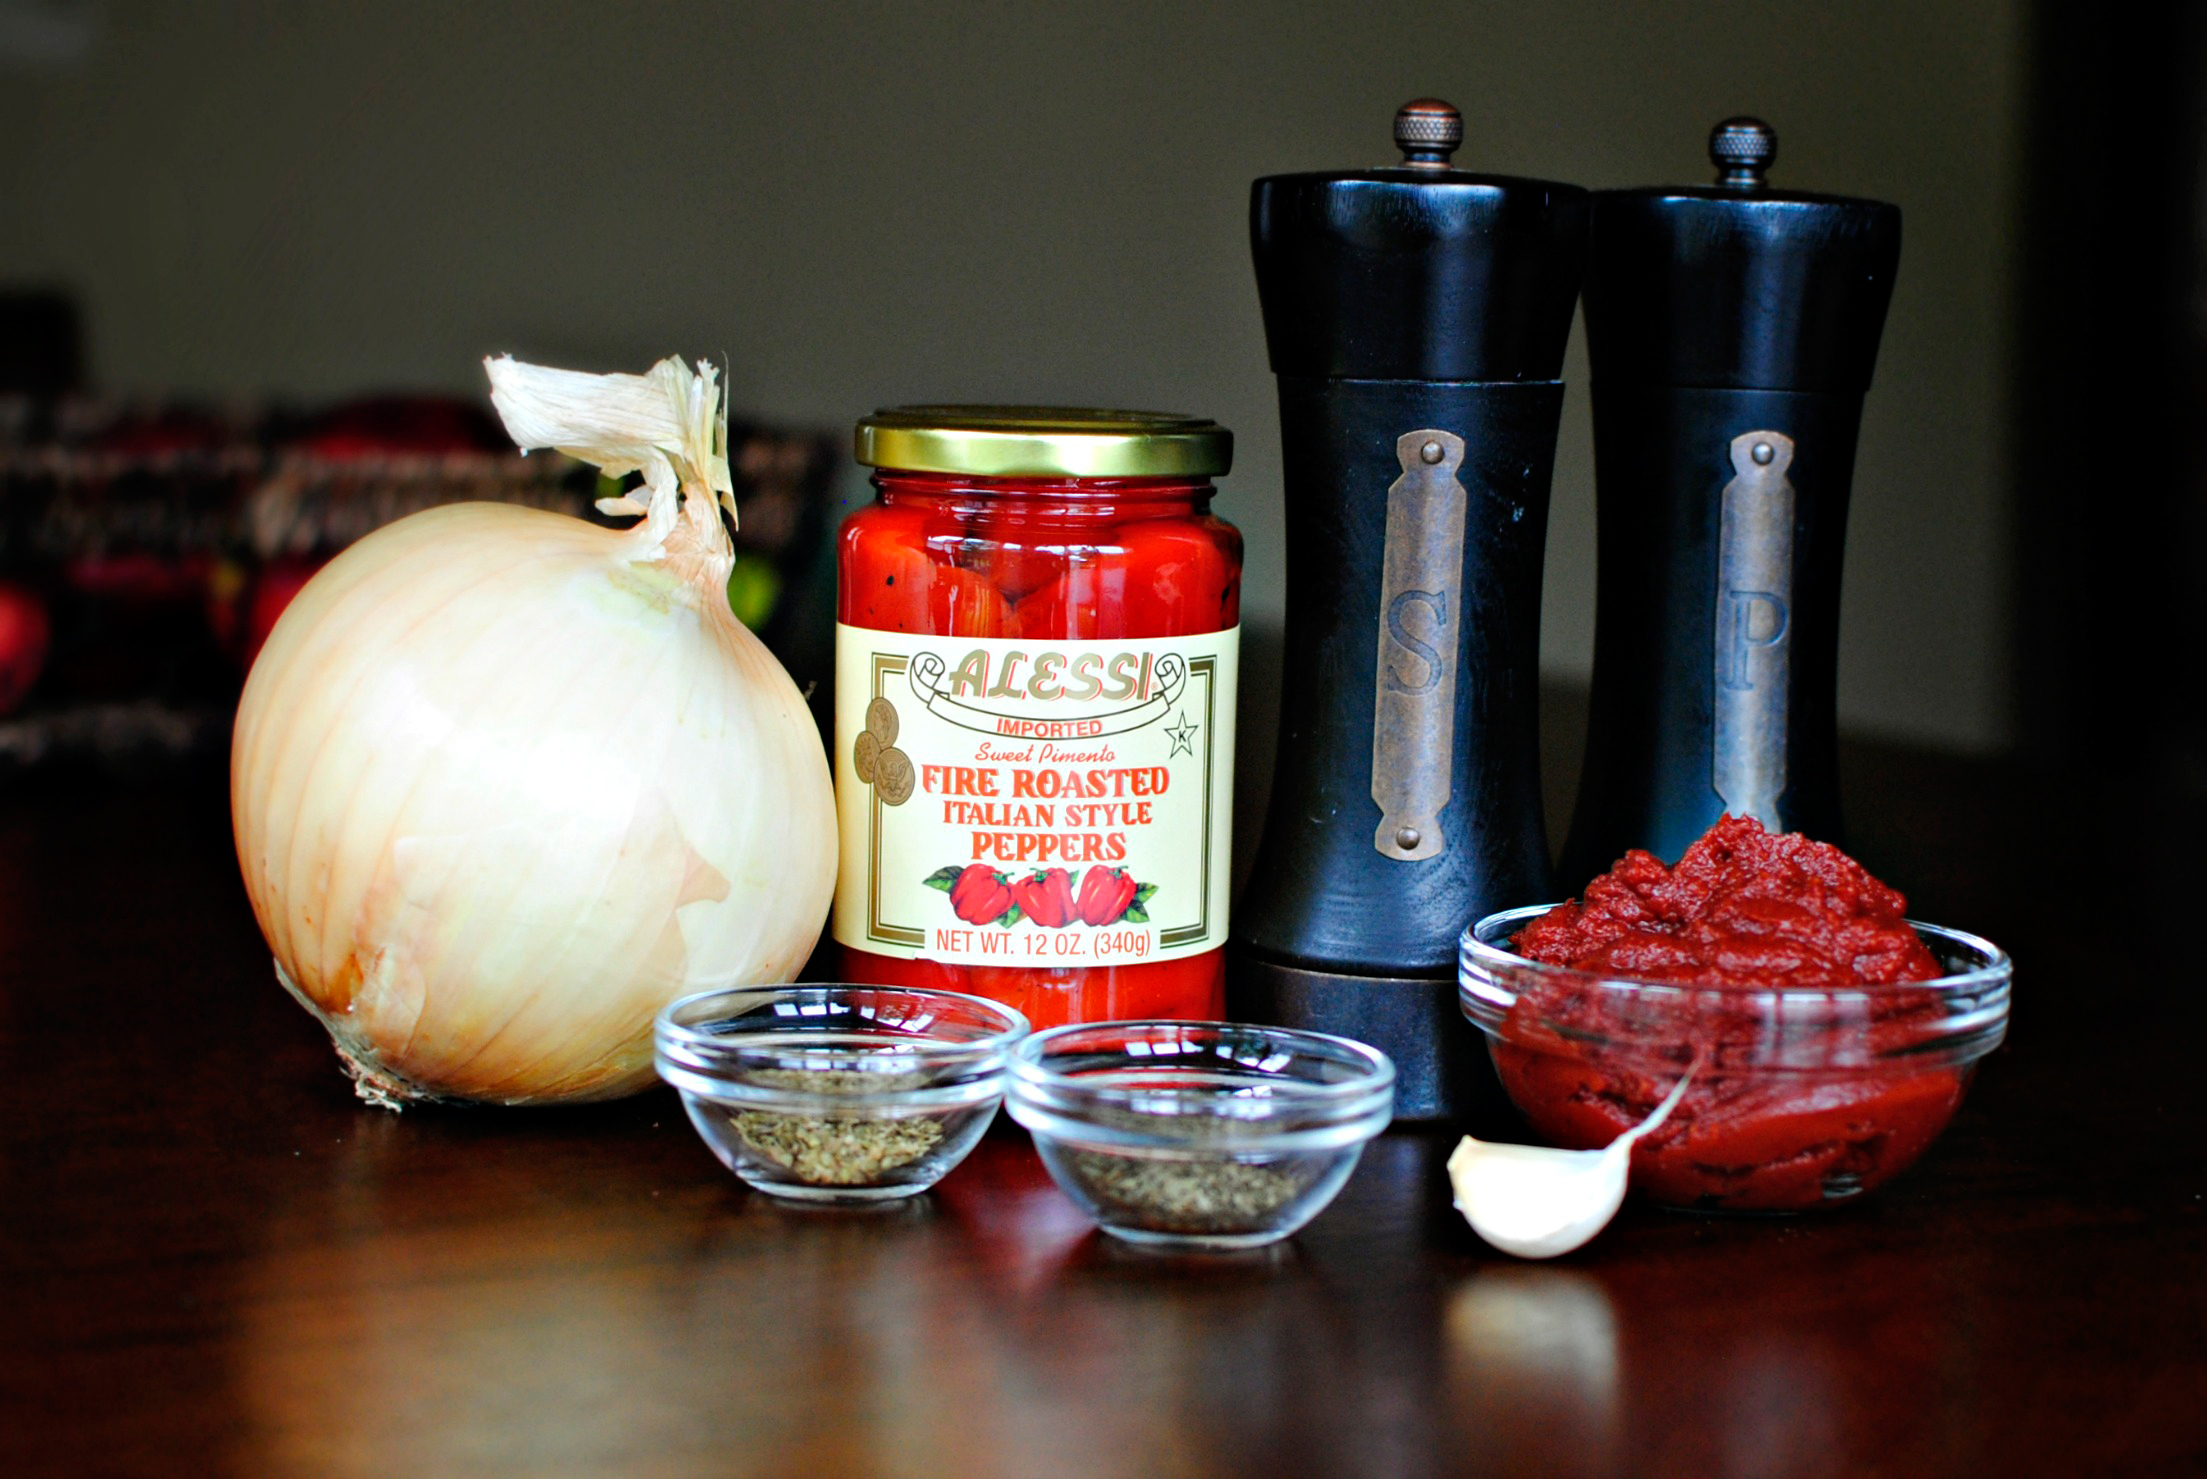
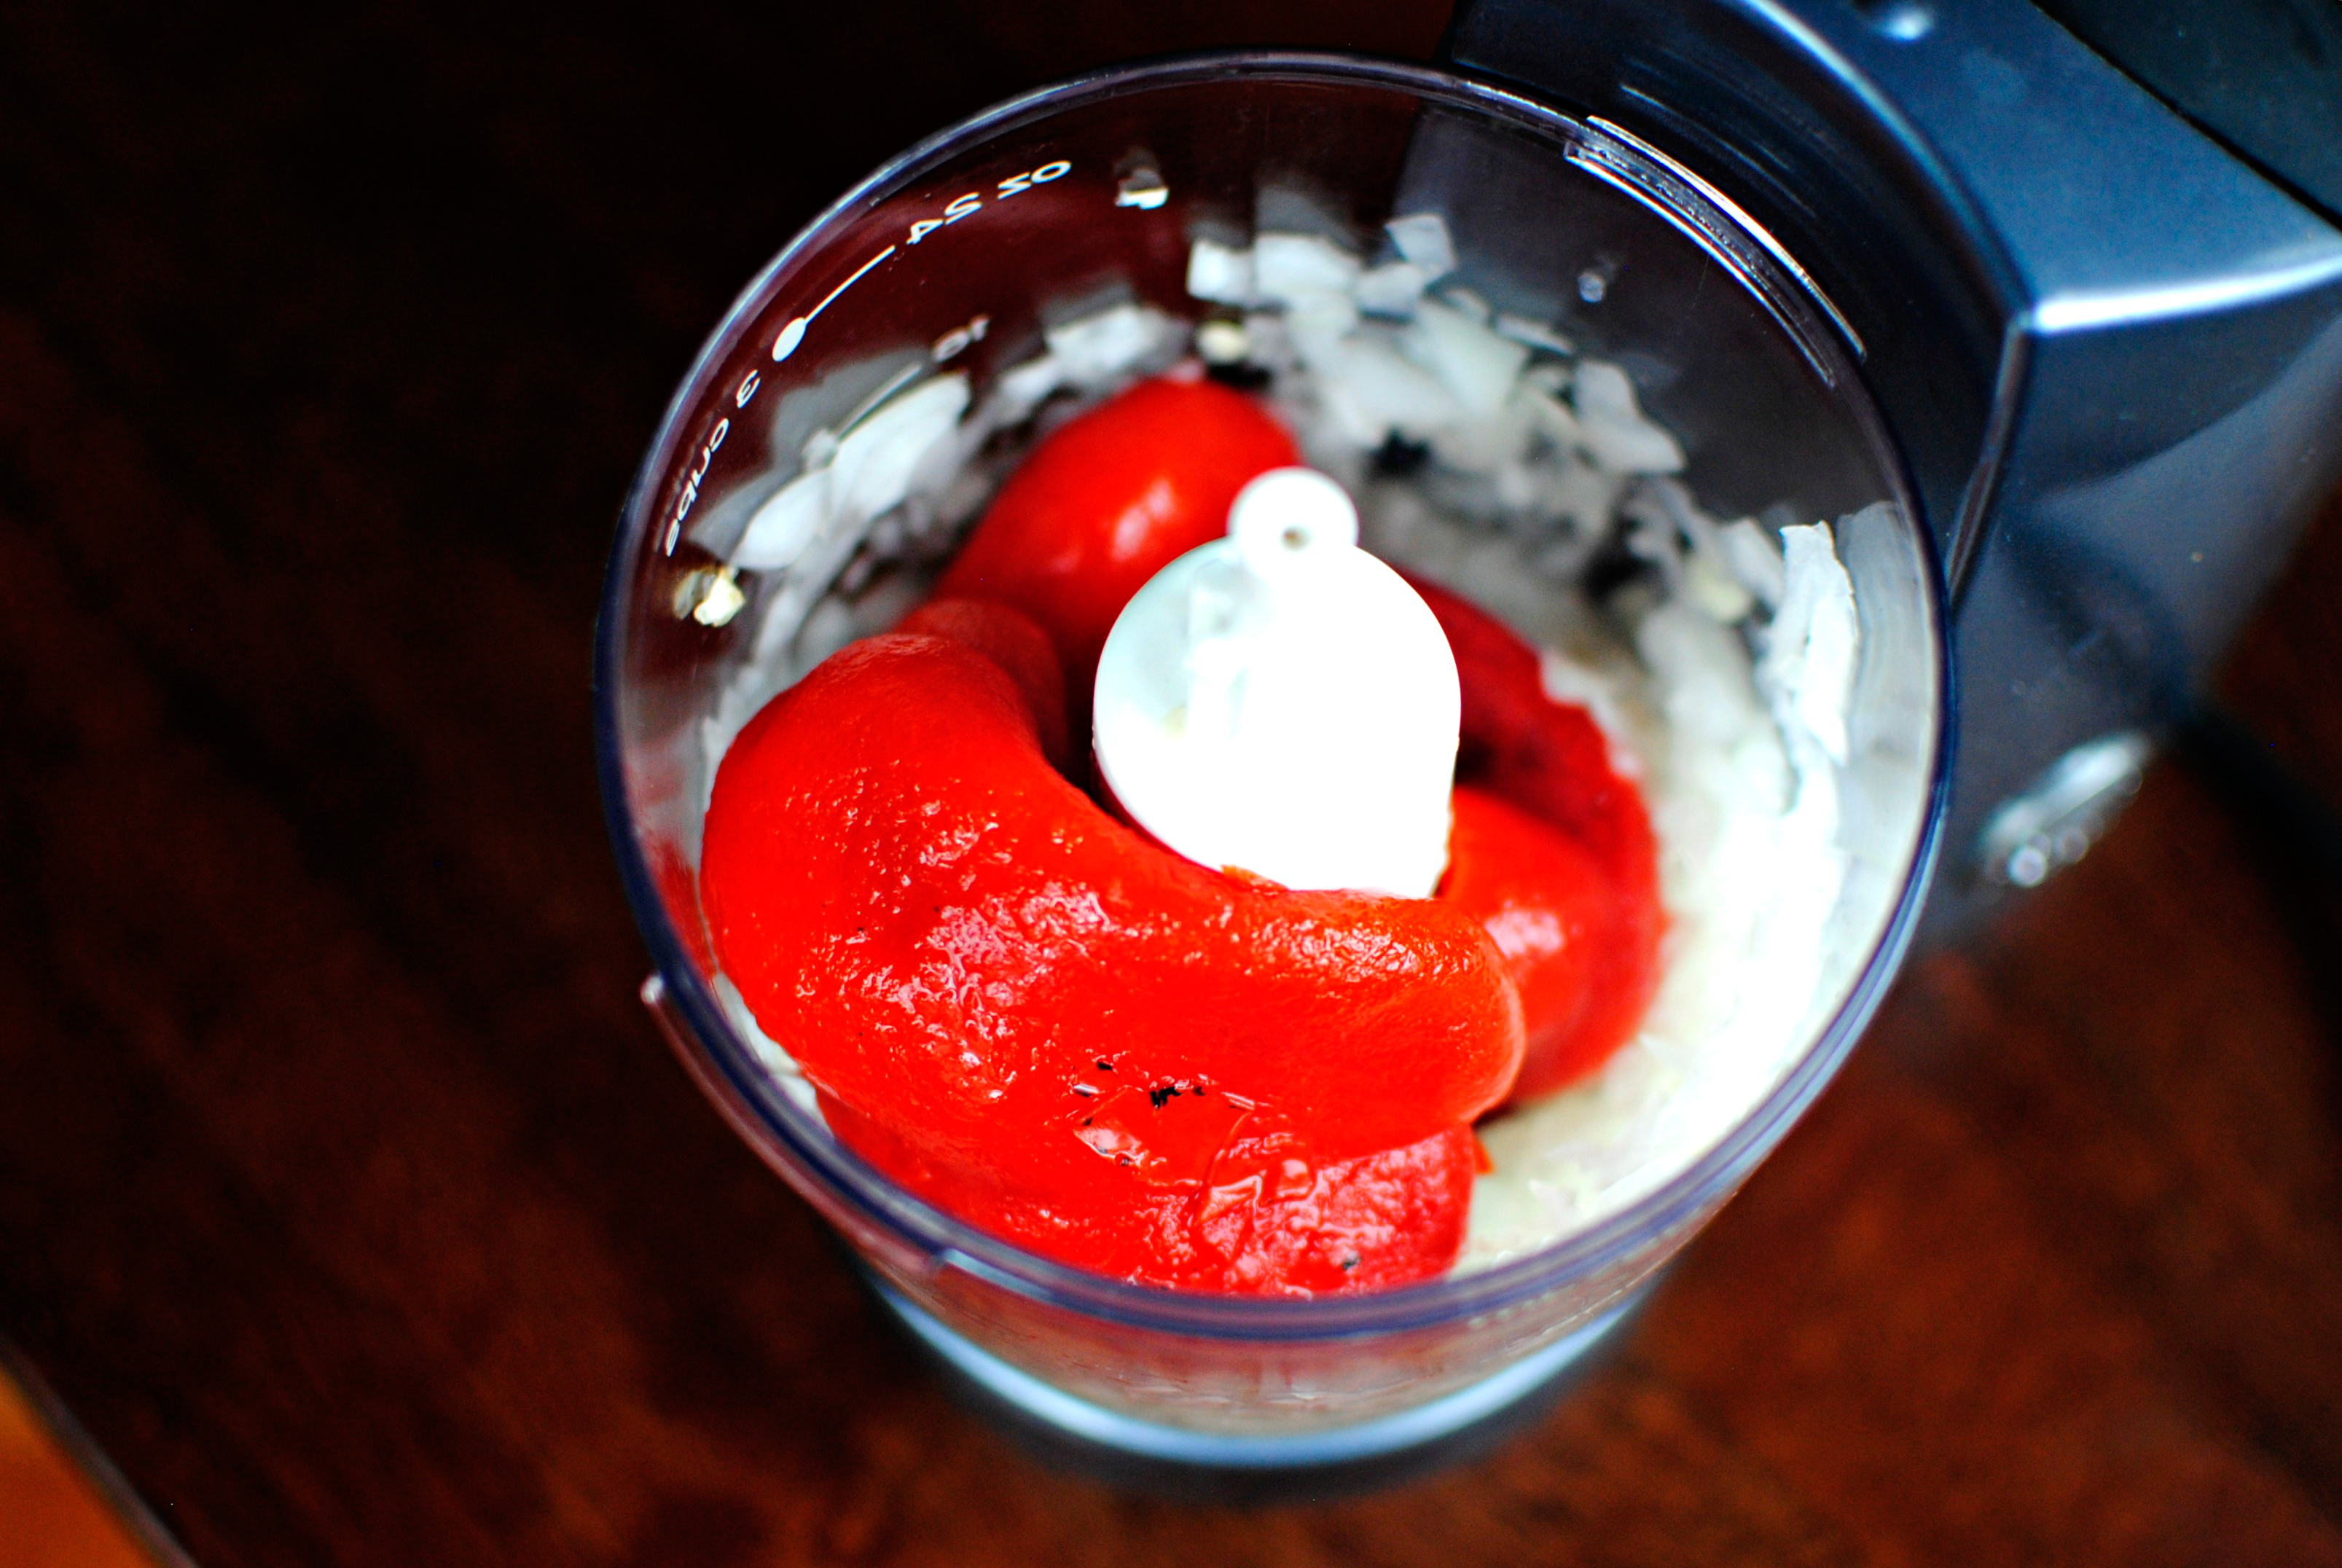
Here’s everything you’re going to need for this recipe: shrimp, orange marmalade, molasses, fresh lime juice, honey, garlic and cayenne pepper. Even though the recipe didn’t call for it, I added a dash of salt for a little more “savory.”


Tasty Kitchen Blog: Sweet and Spicy Shrimp. Guest post by Dara Michalski of Cookin' Canuck, recipe submitted by Colleen of Souffle Bombay.

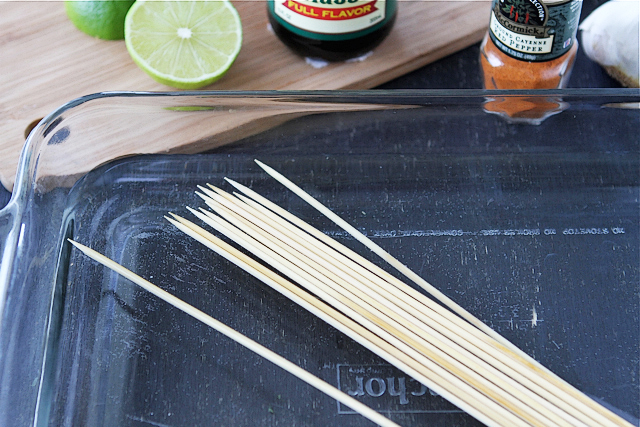
If you’re using wooden skewers, be sure to soak them in warm water for about 30 minutes before threading on the shrimp. Otherwise, those babies will go up in flames once them hit the grill.

Preheat the grill to medium-high heat.


Tasty Kitchen Blog: Sweet and Spicy Shrimp. Guest post by Dara Michalski of Cookin' Canuck, recipe submitted by Colleen of Souffle Bombay.

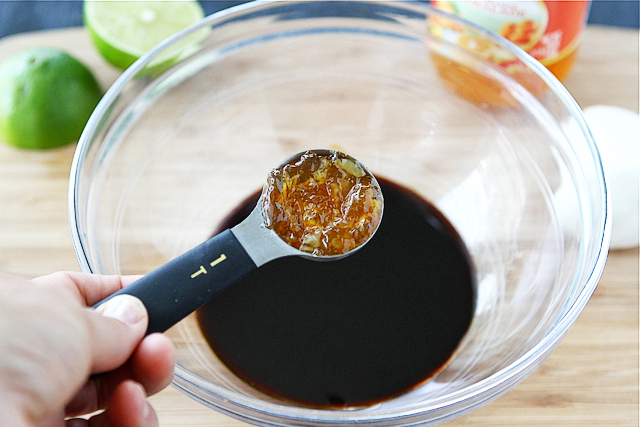
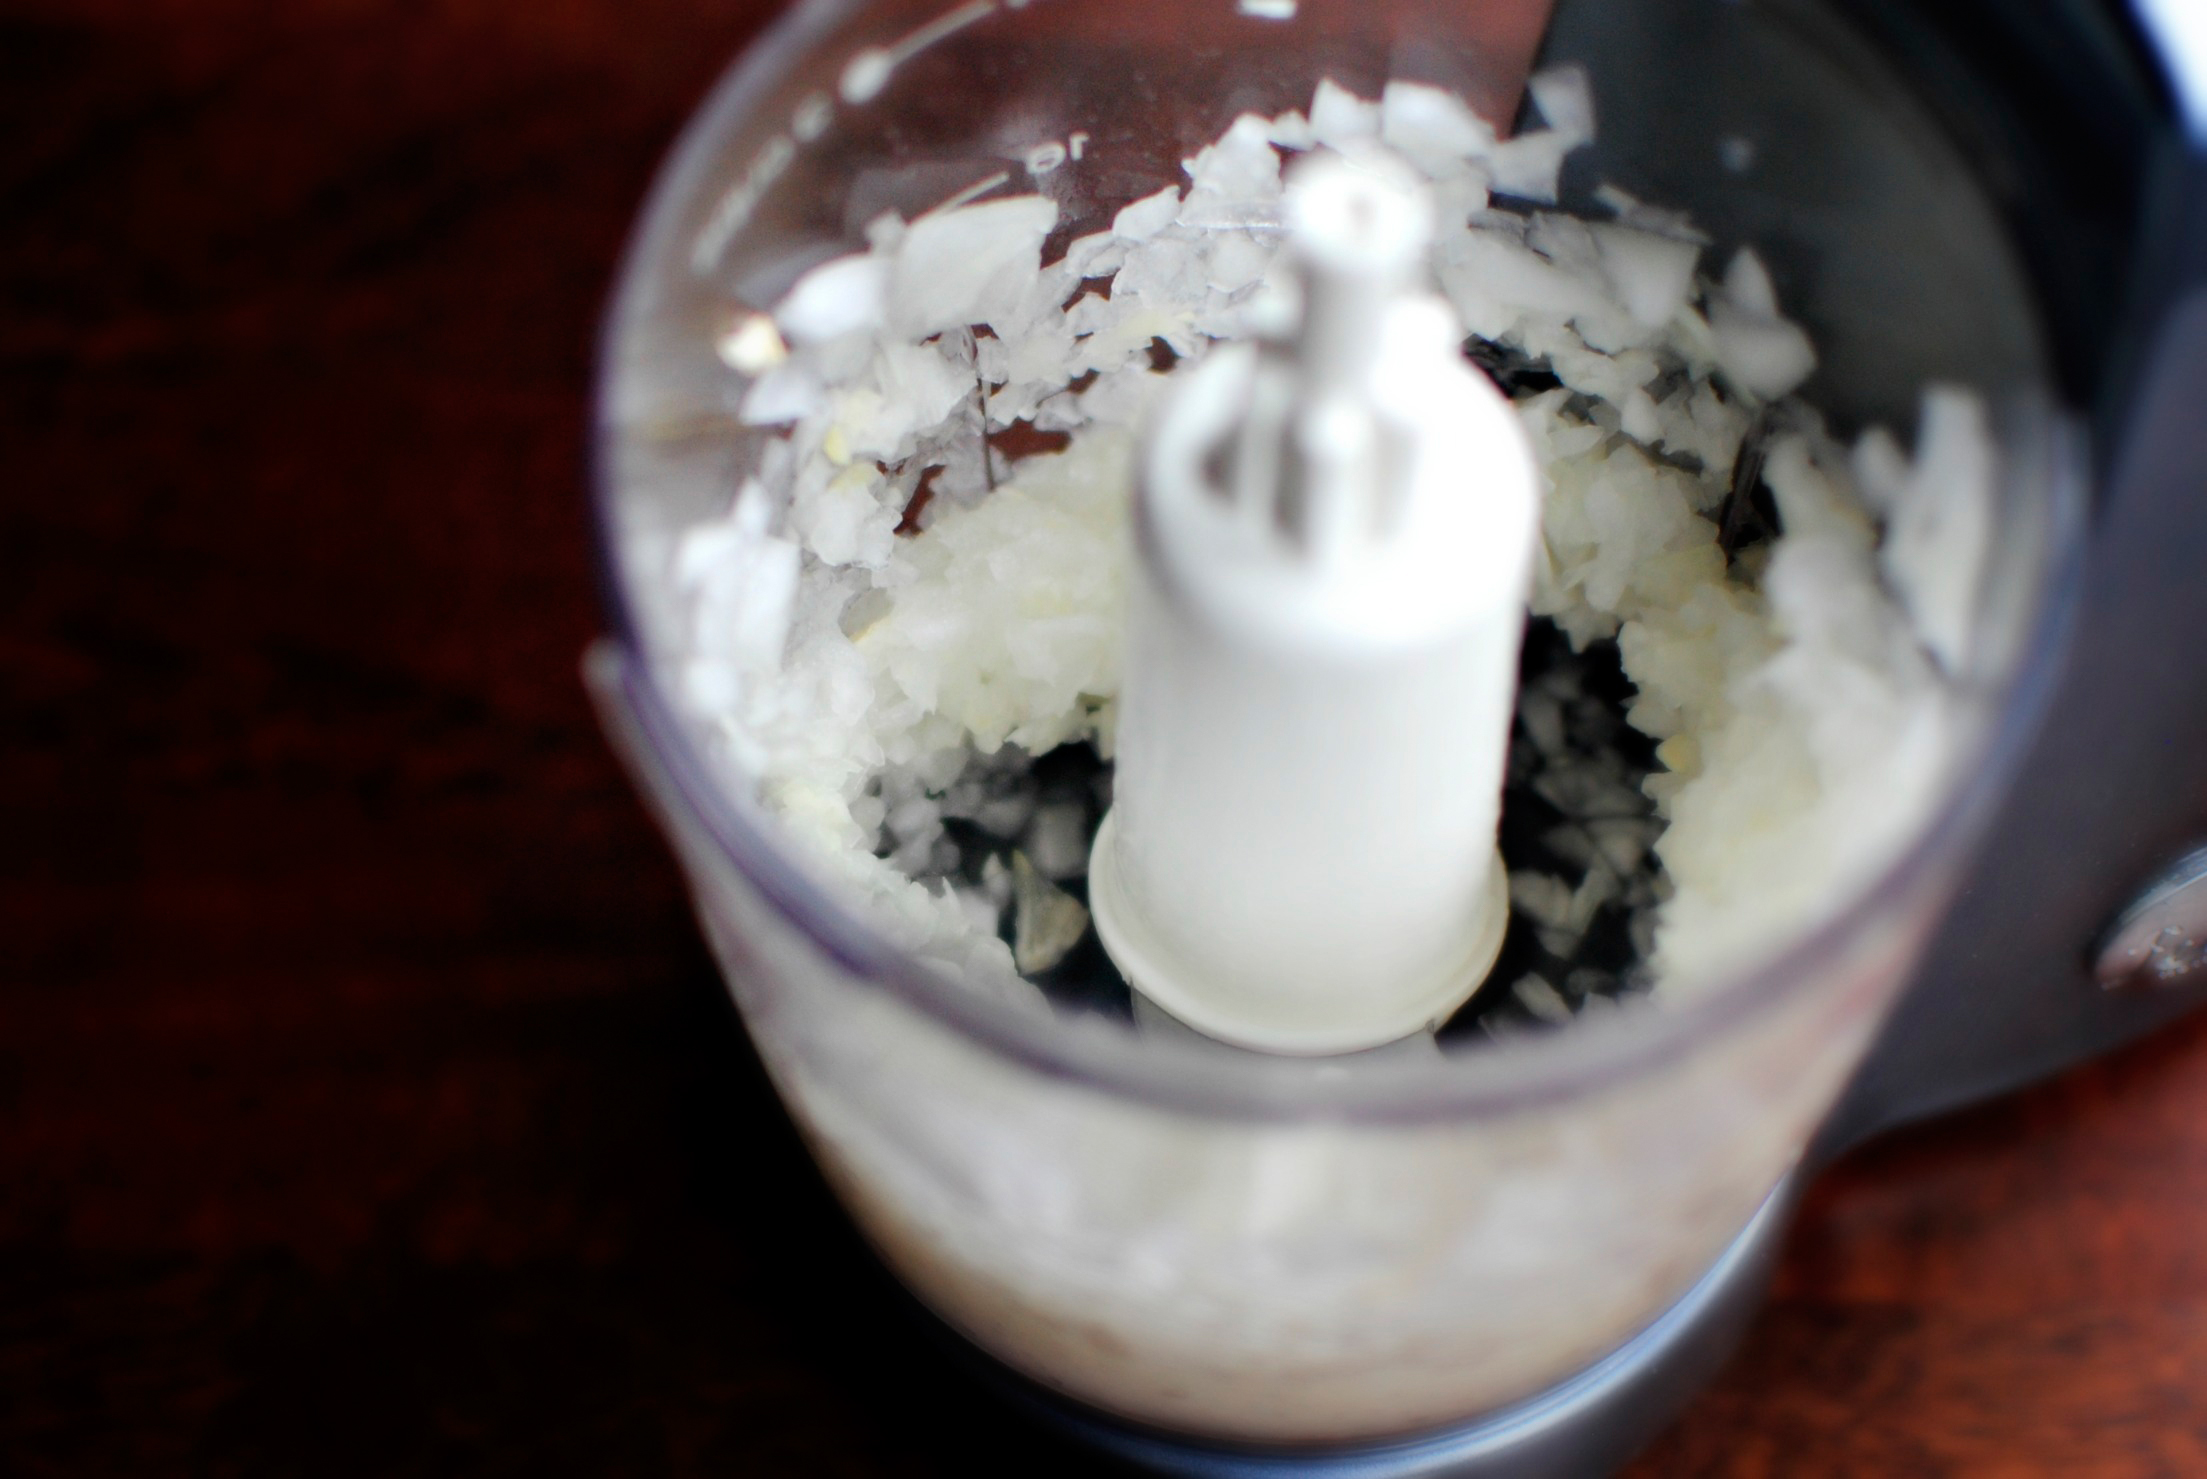
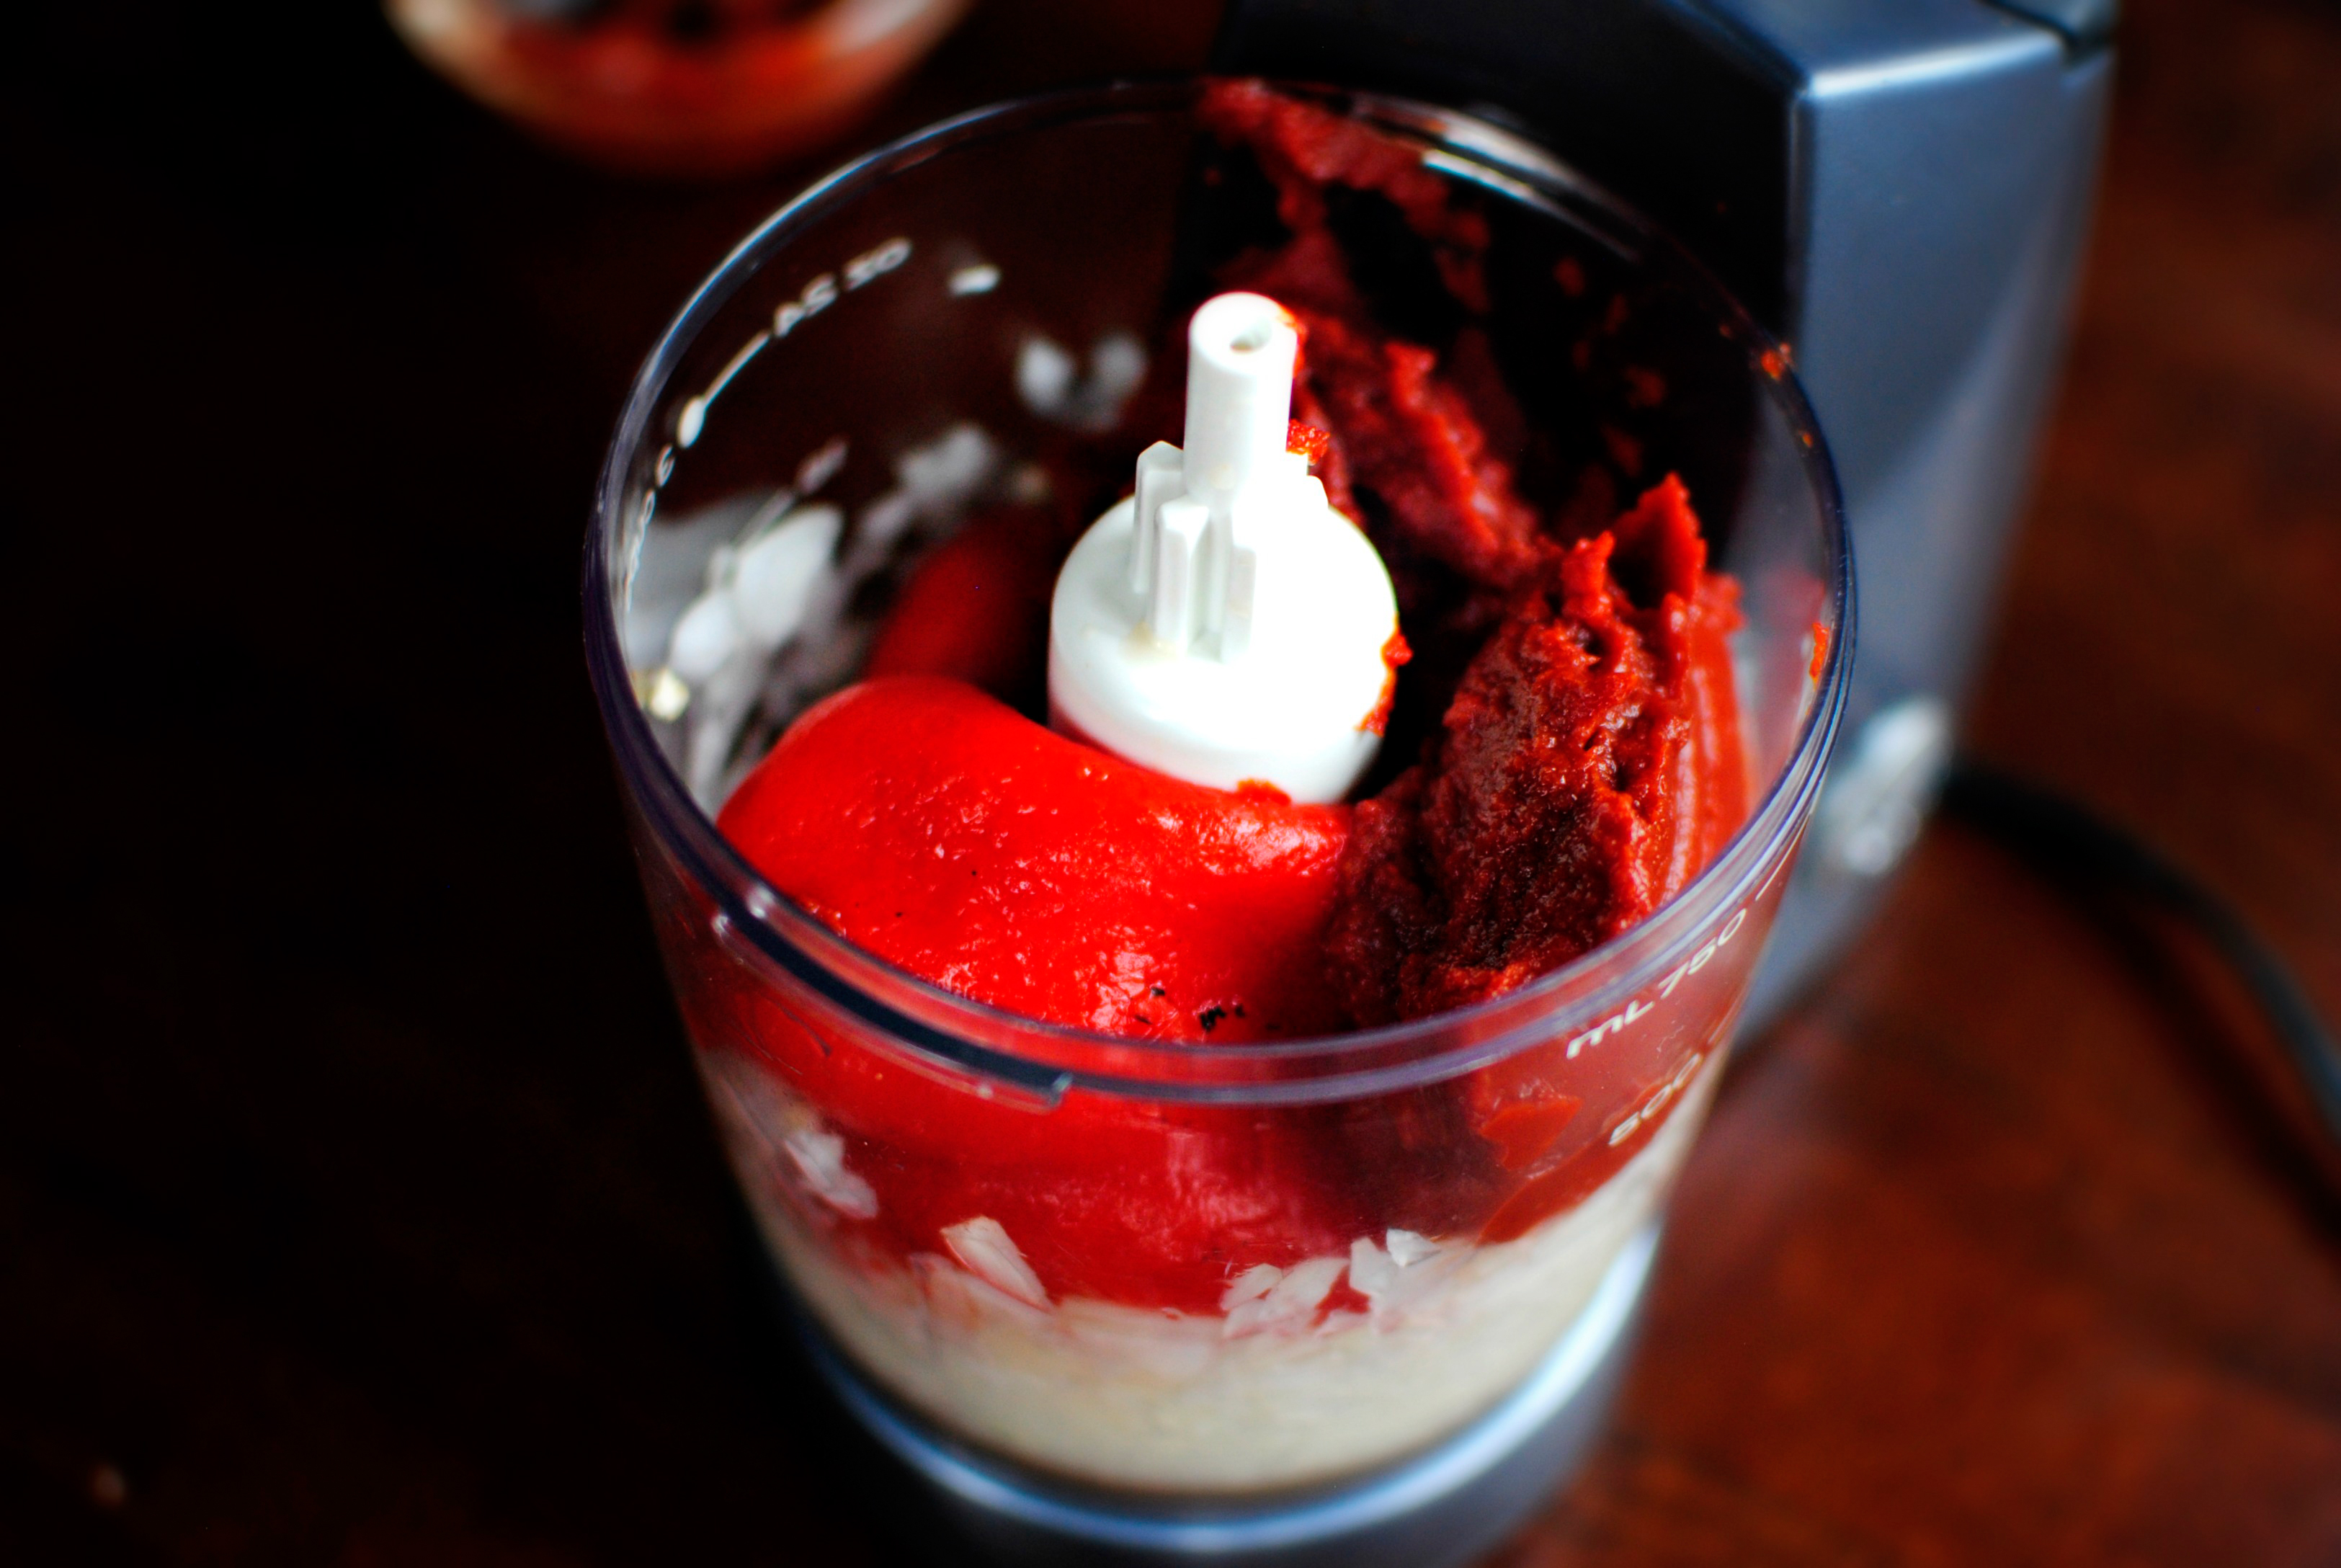
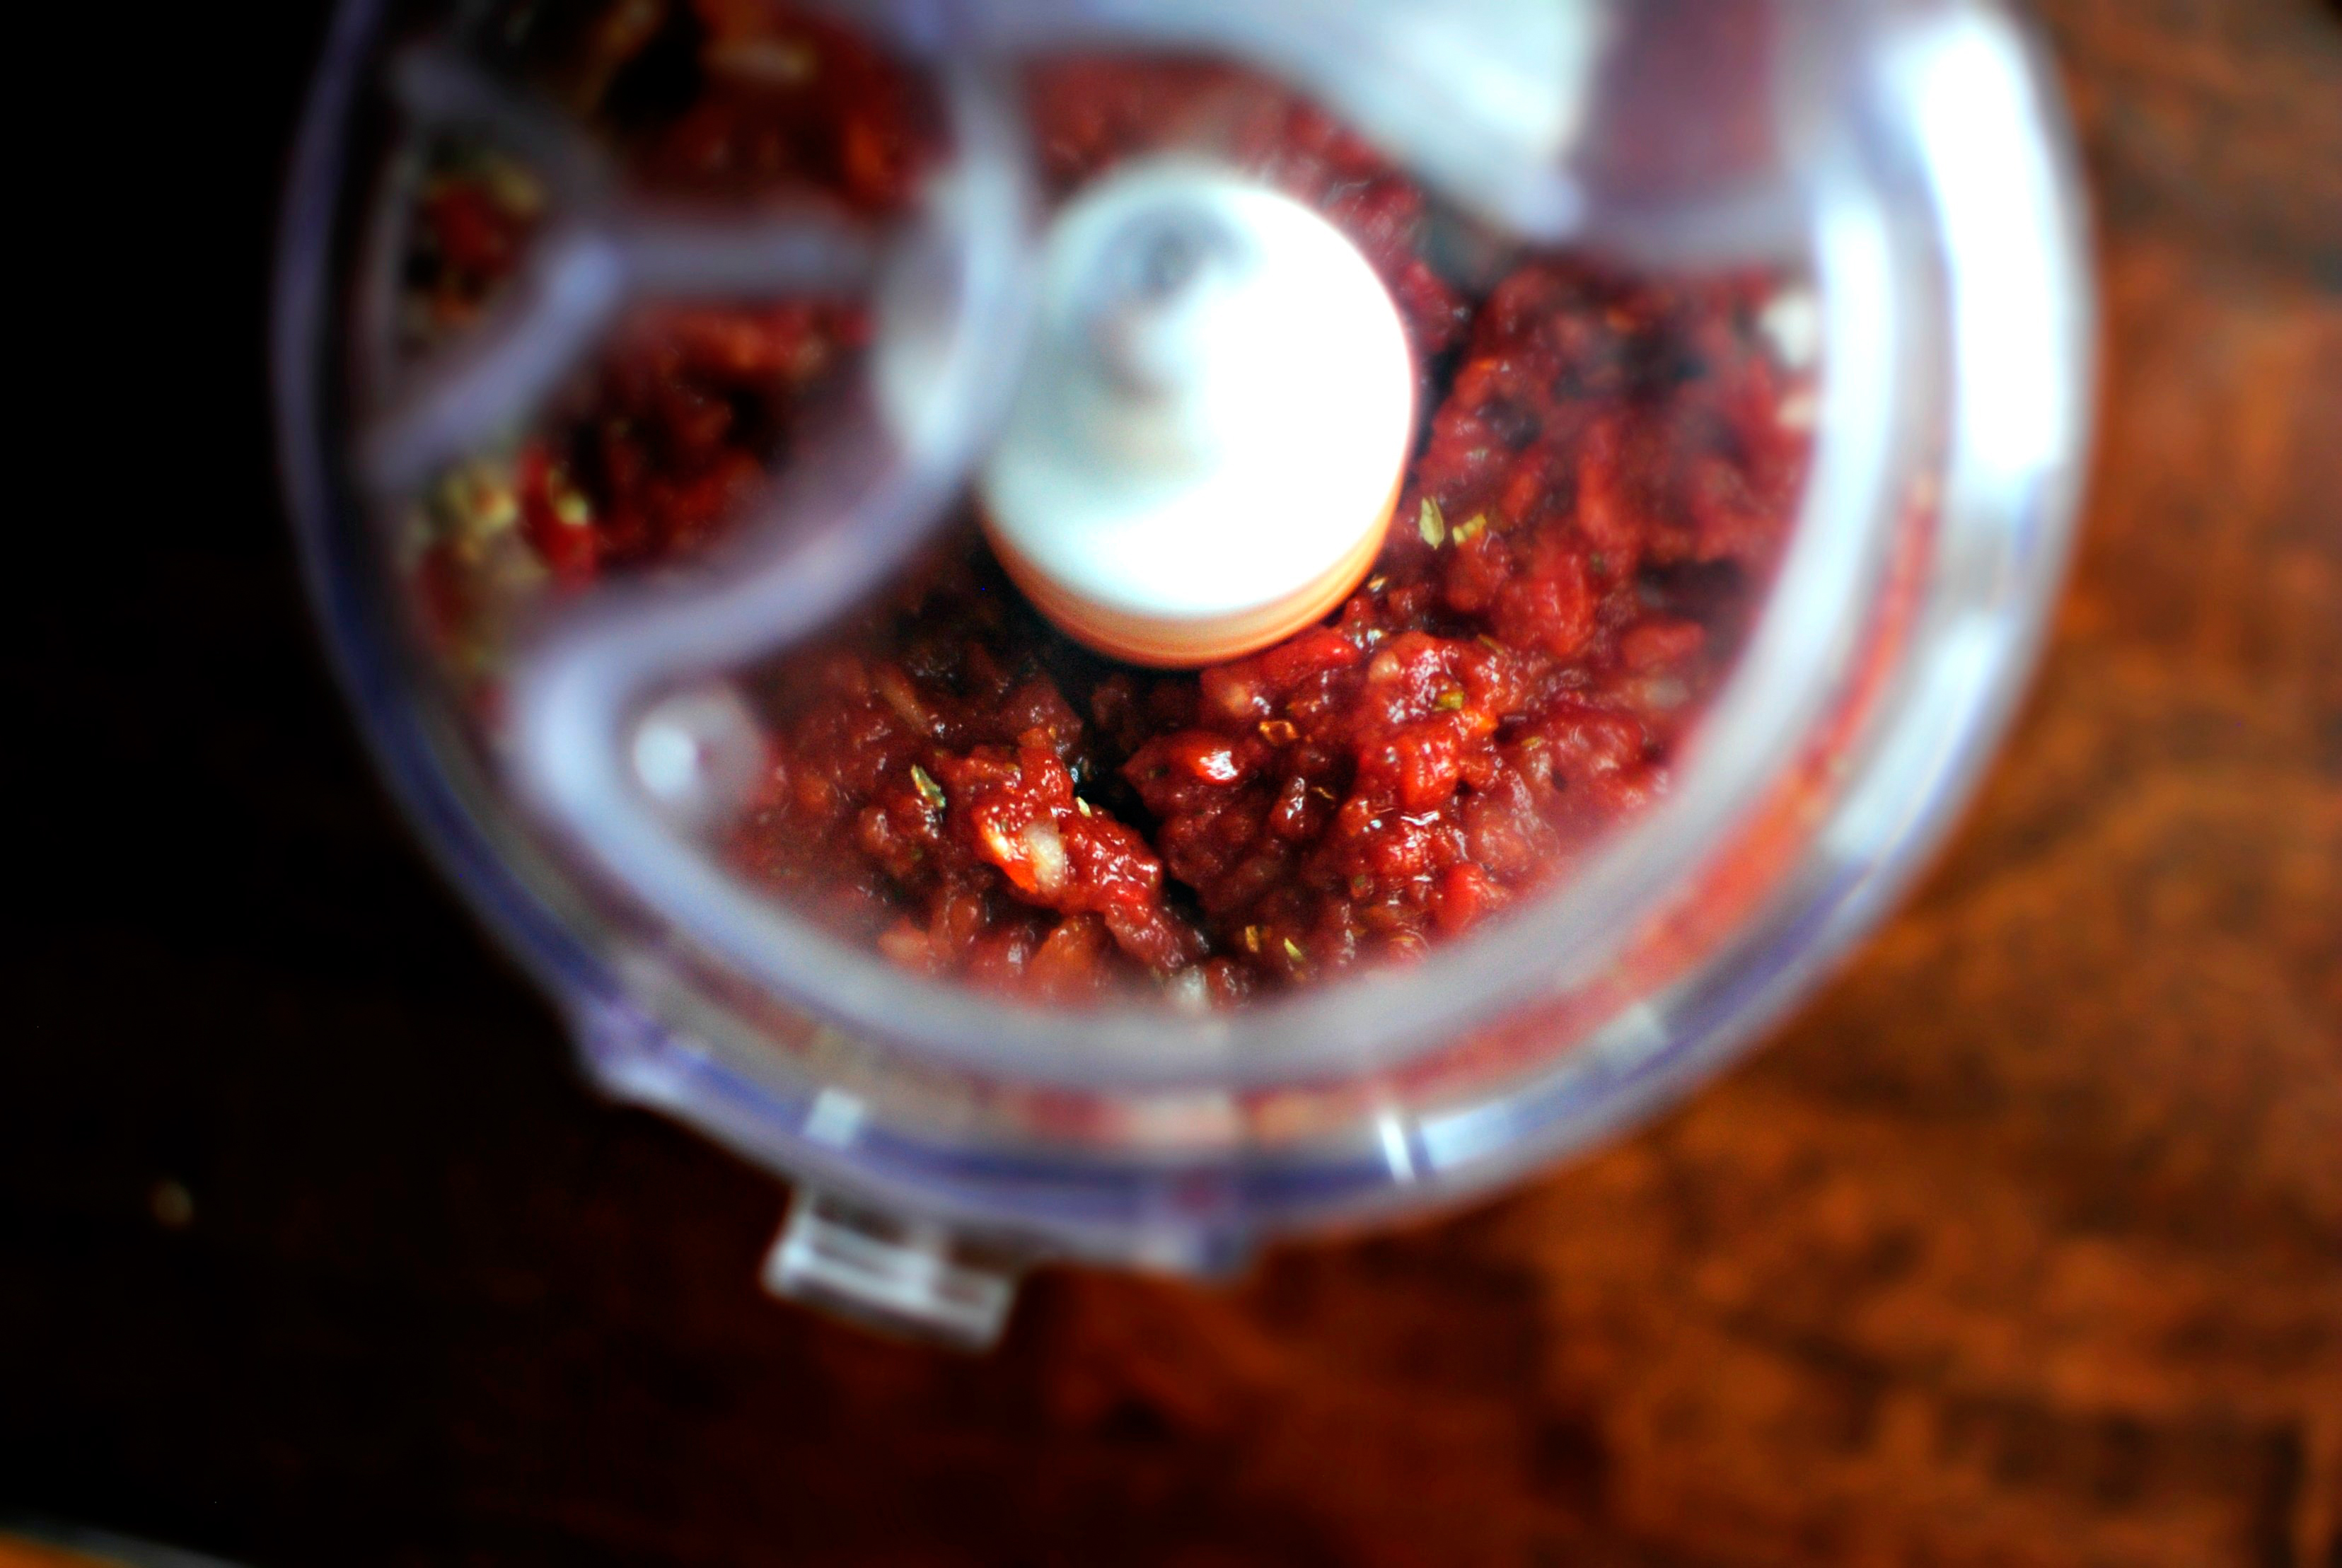
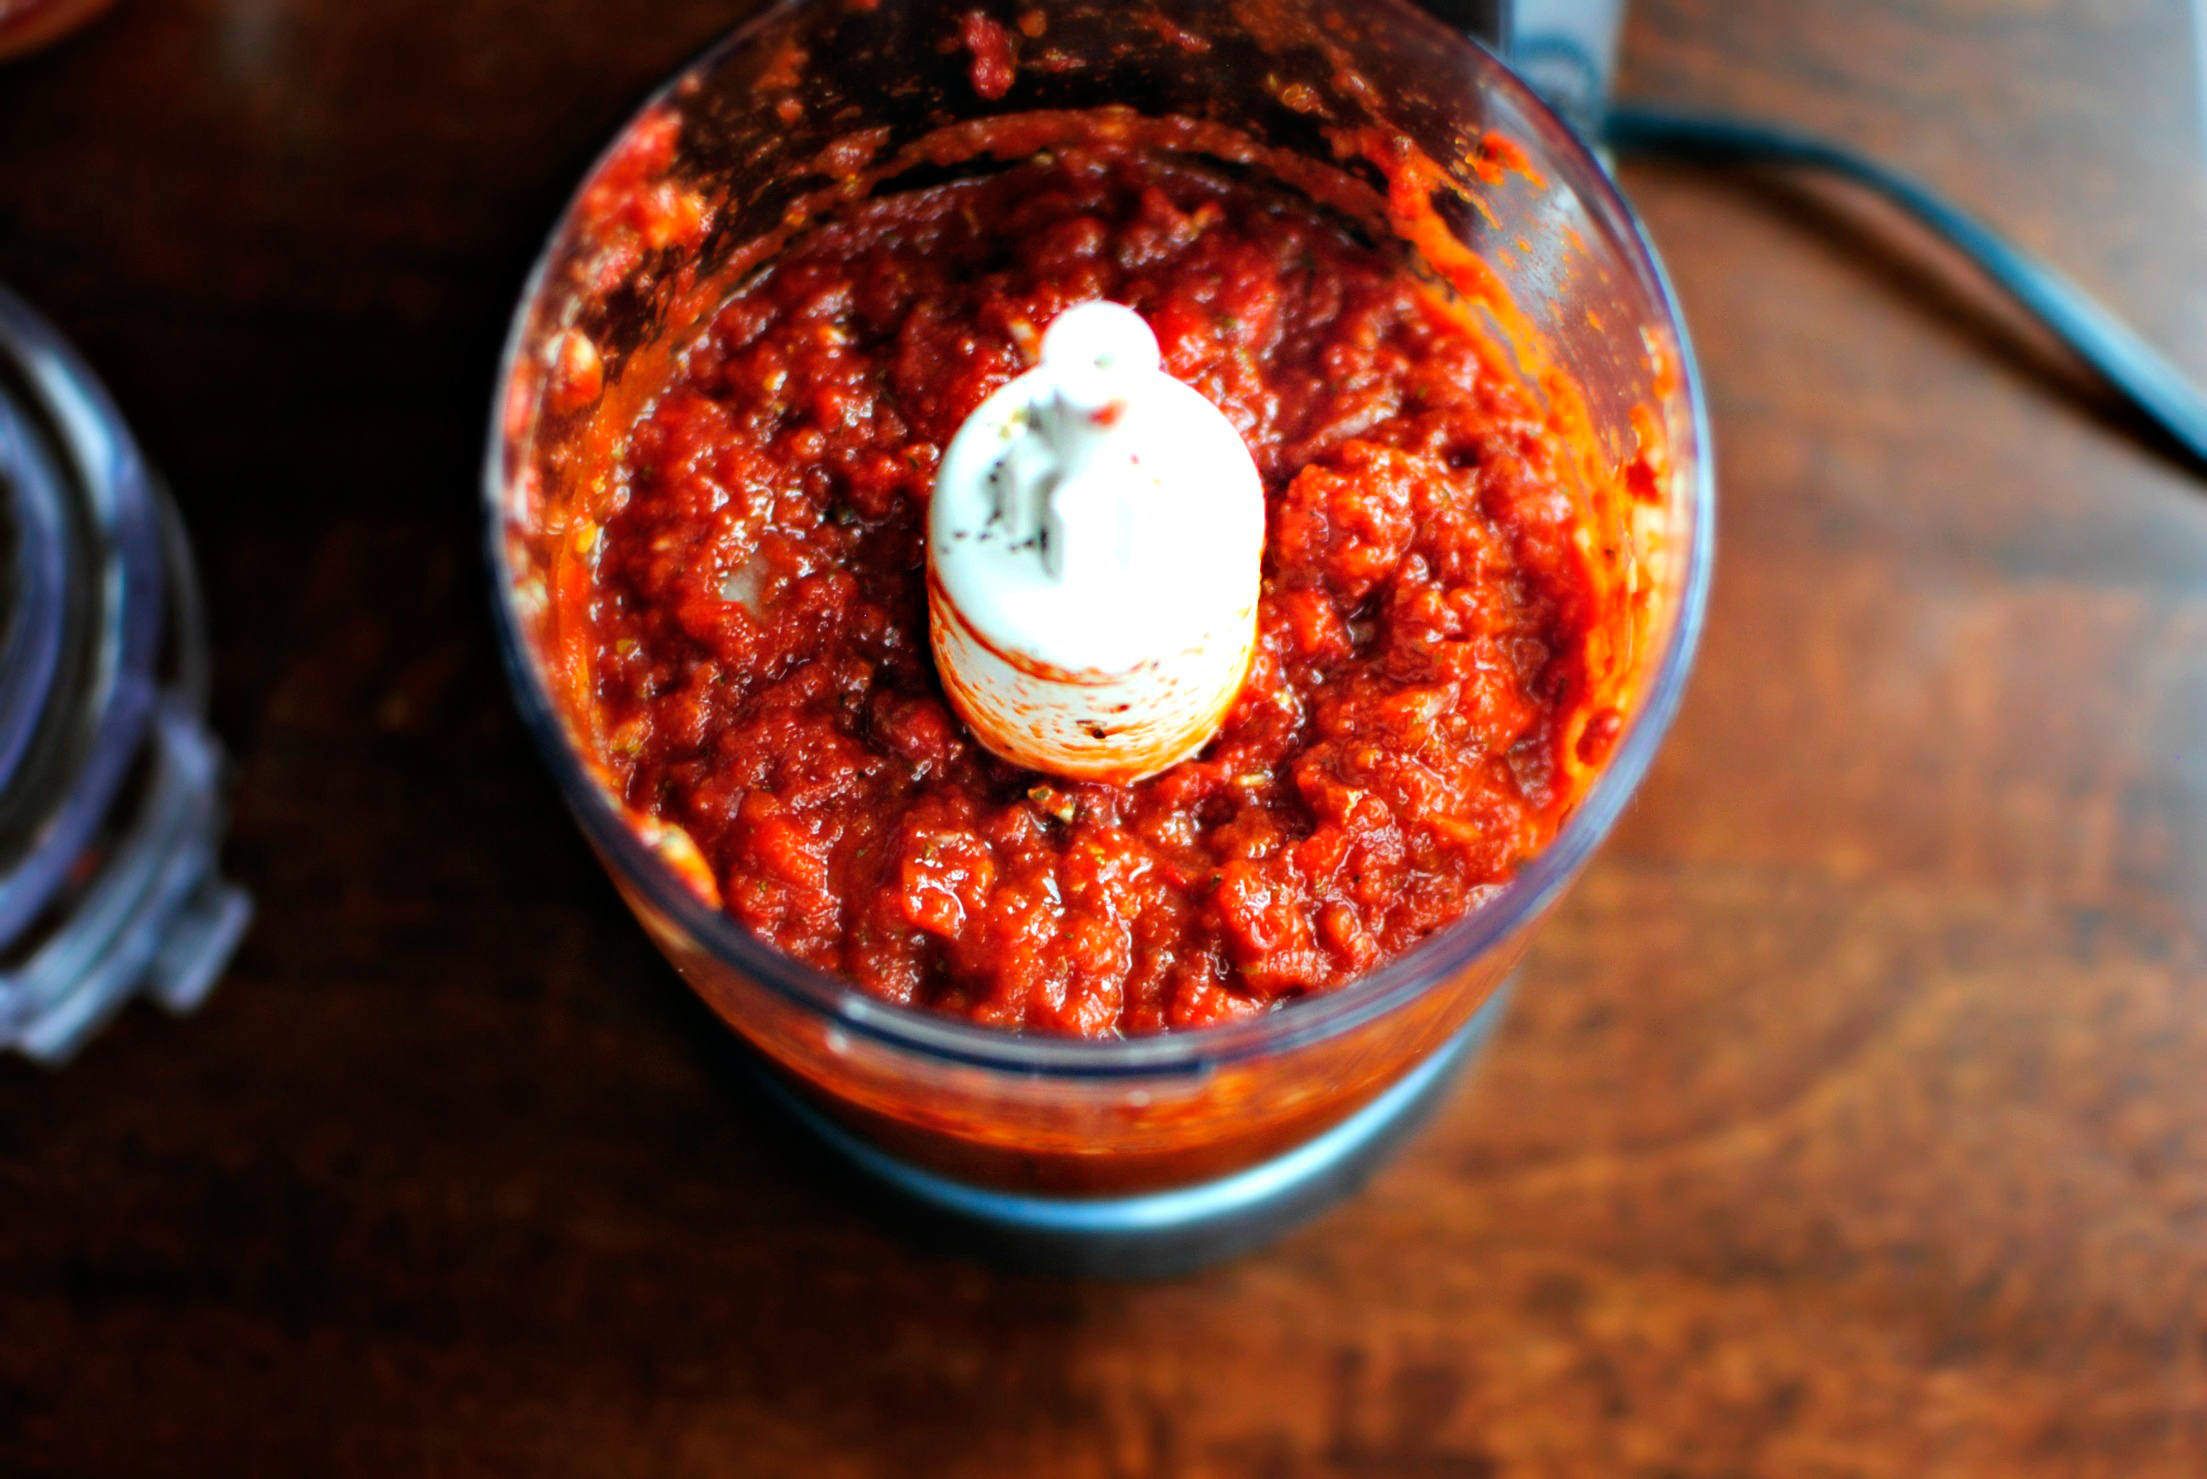
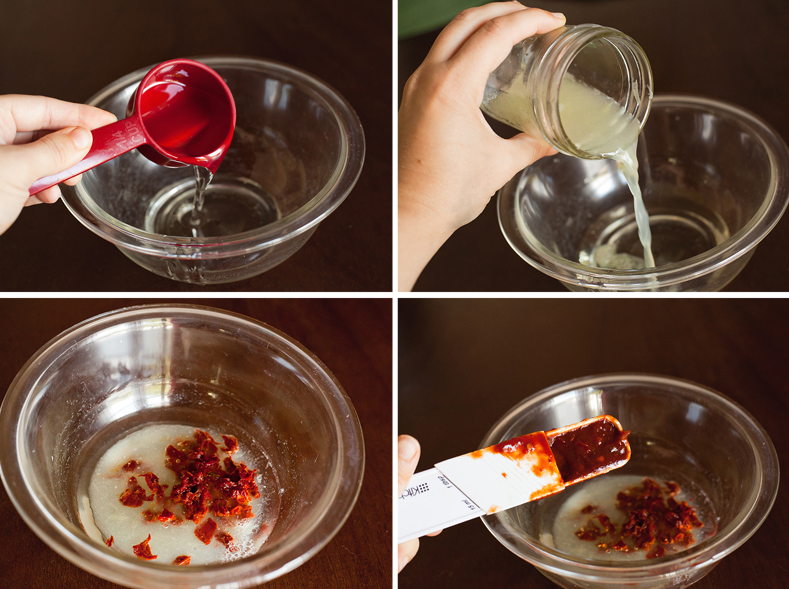
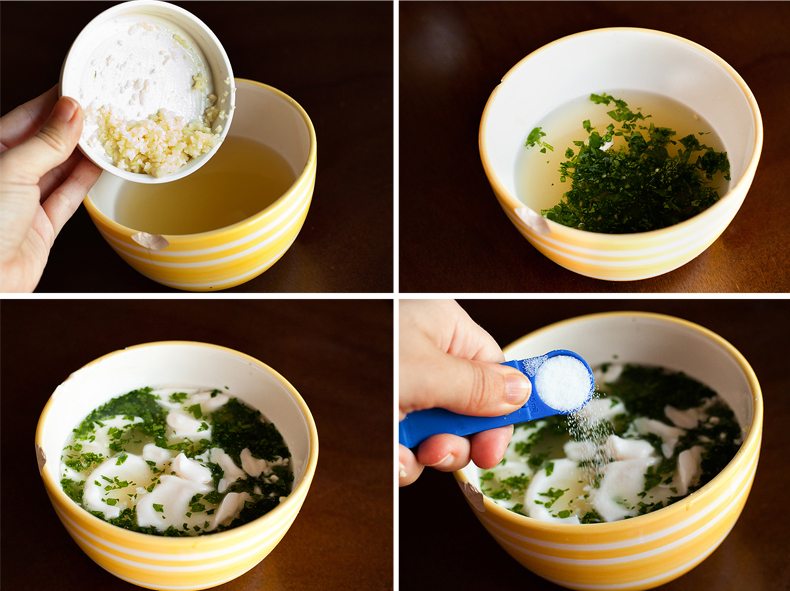
In a medium-sized bowl, combine the molasses, orange marmalade …


Tasty Kitchen Blog: Sweet and Spicy Shrimp. Guest post by Dara Michalski of Cookin' Canuck, recipe submitted by Colleen of Souffle Bombay.

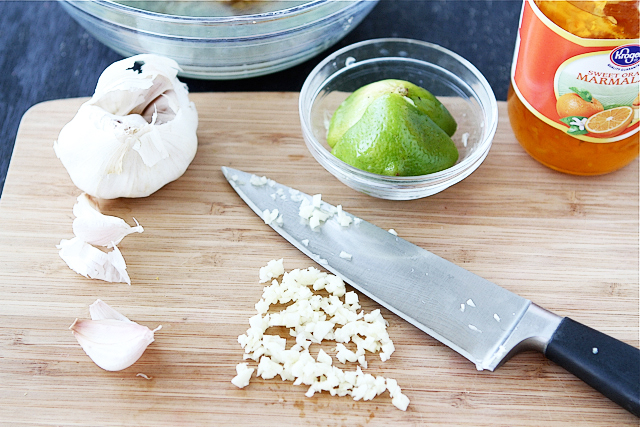
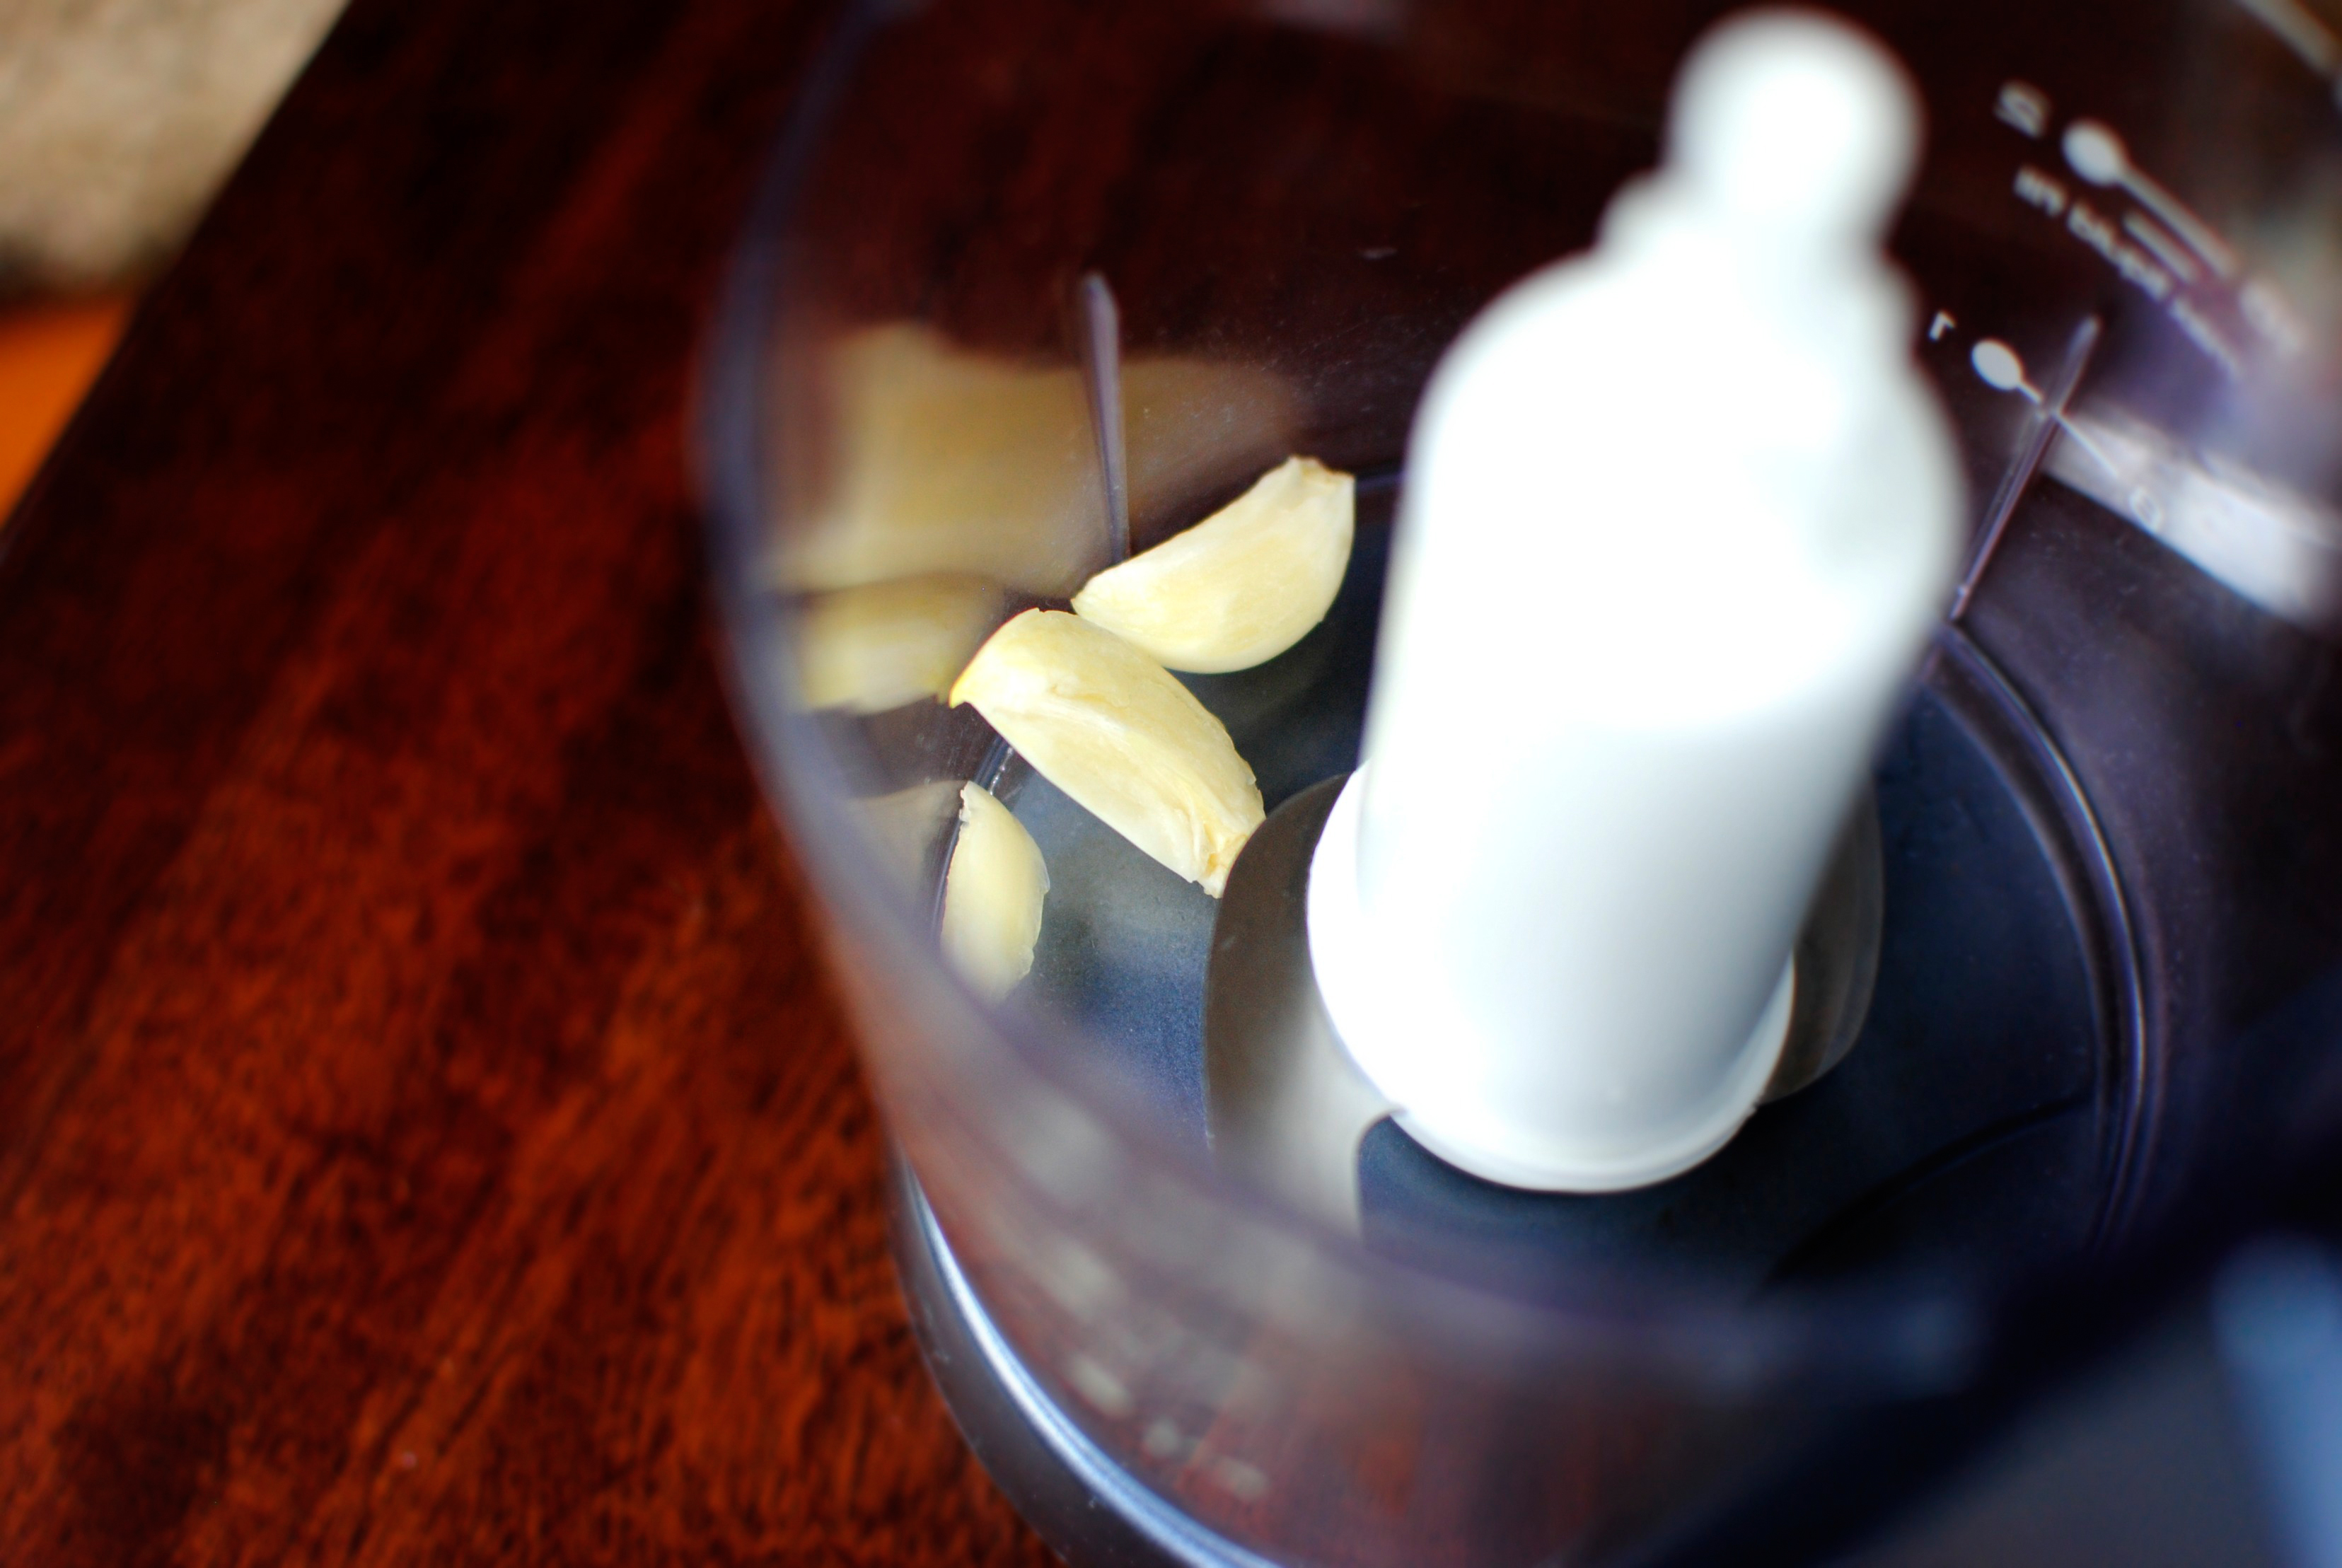
Fresh lime juice, minced garlic (oh yeah, that’s always a good thing) …


Tasty Kitchen Blog: Sweet and Spicy Shrimp. Guest post by Dara Michalski of Cookin' Canuck, recipe submitted by Colleen of Souffle Bombay.

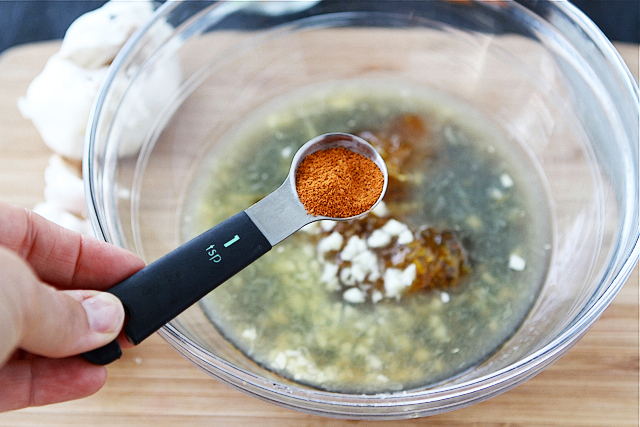
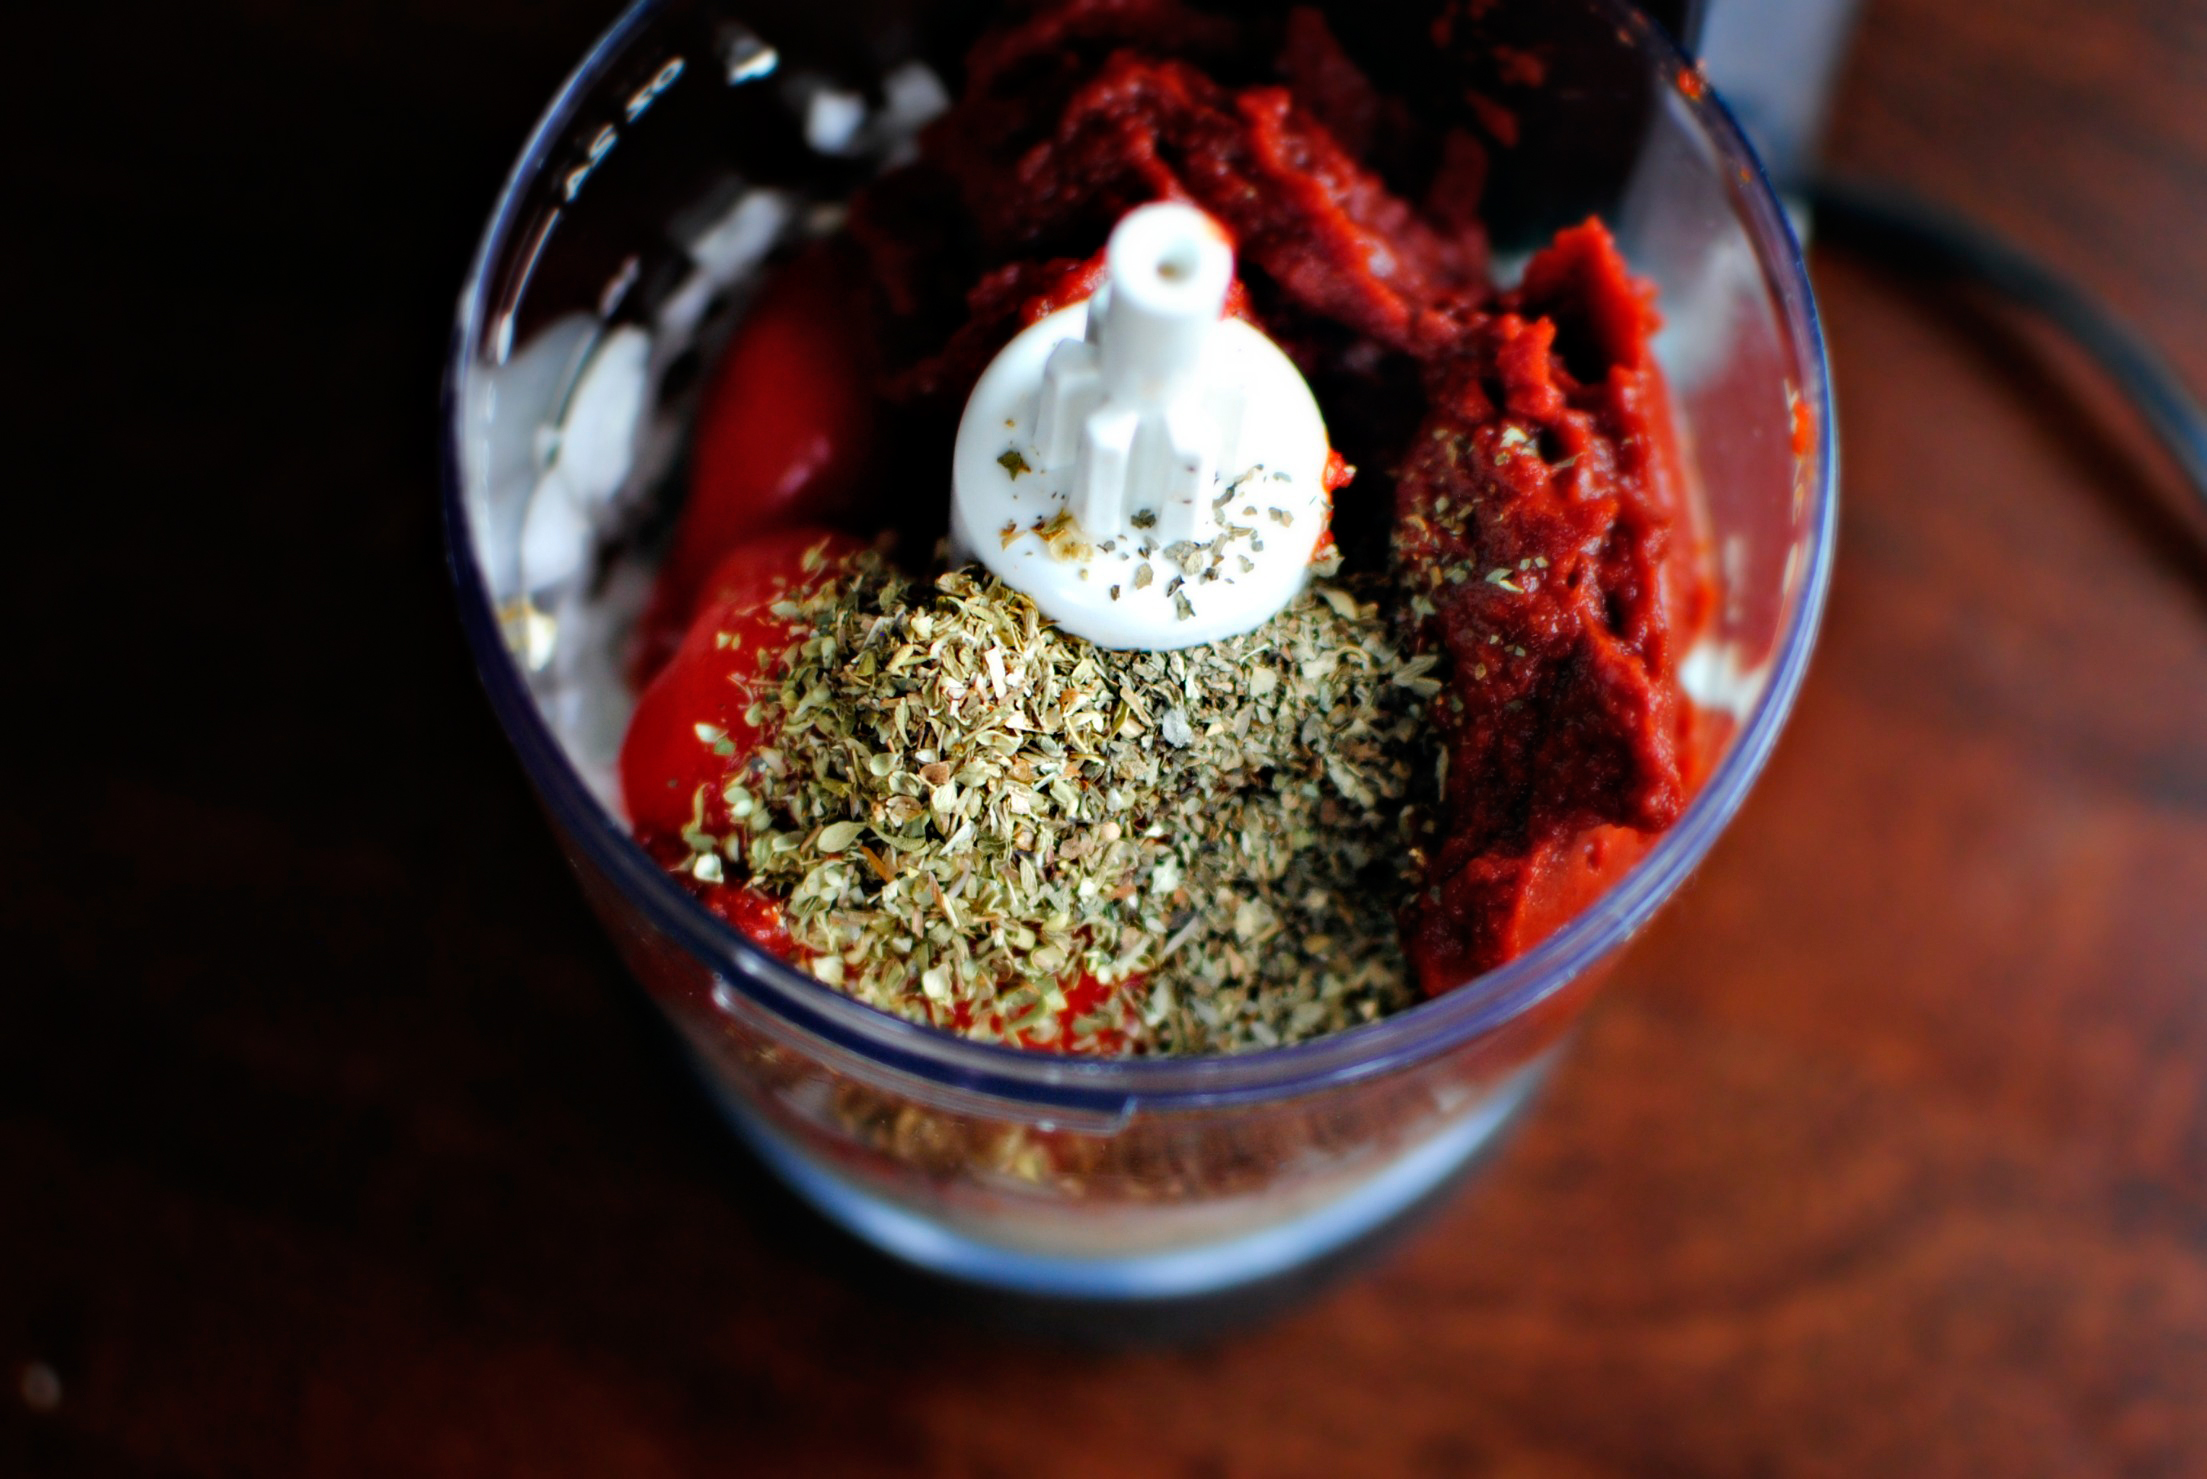
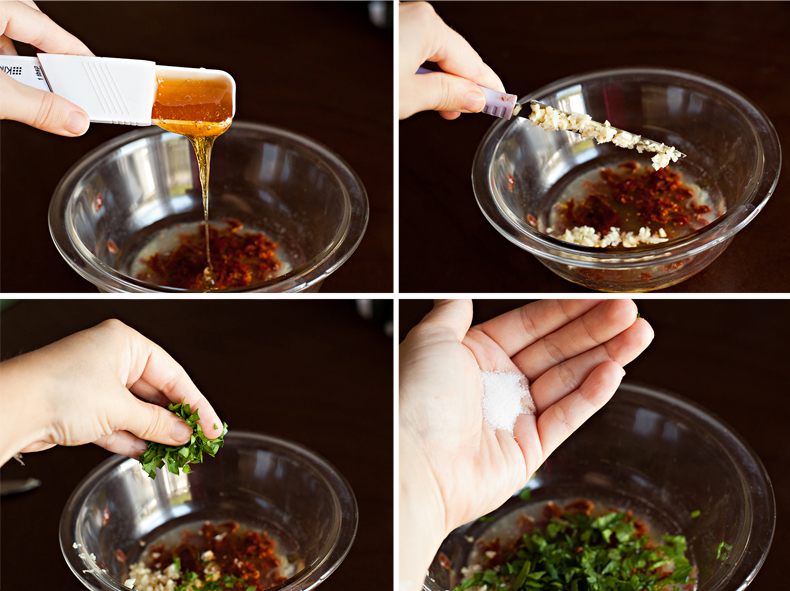
And cayenne pepper. Colleen suggests you start with 1 teaspoon cayenne, taste the sauce, then add more cayenne if you’re into heat.

I also added a pinch of salt.


Tasty Kitchen Blog: Sweet and Spicy Shrimp. Guest post by Dara Michalski of Cookin' Canuck, recipe submitted by Colleen of Souffle Bombay.

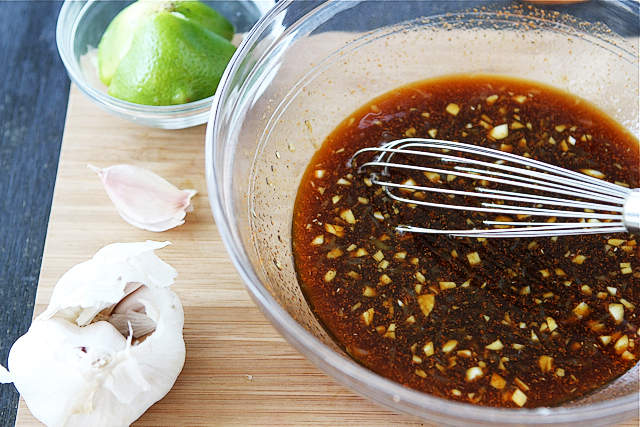
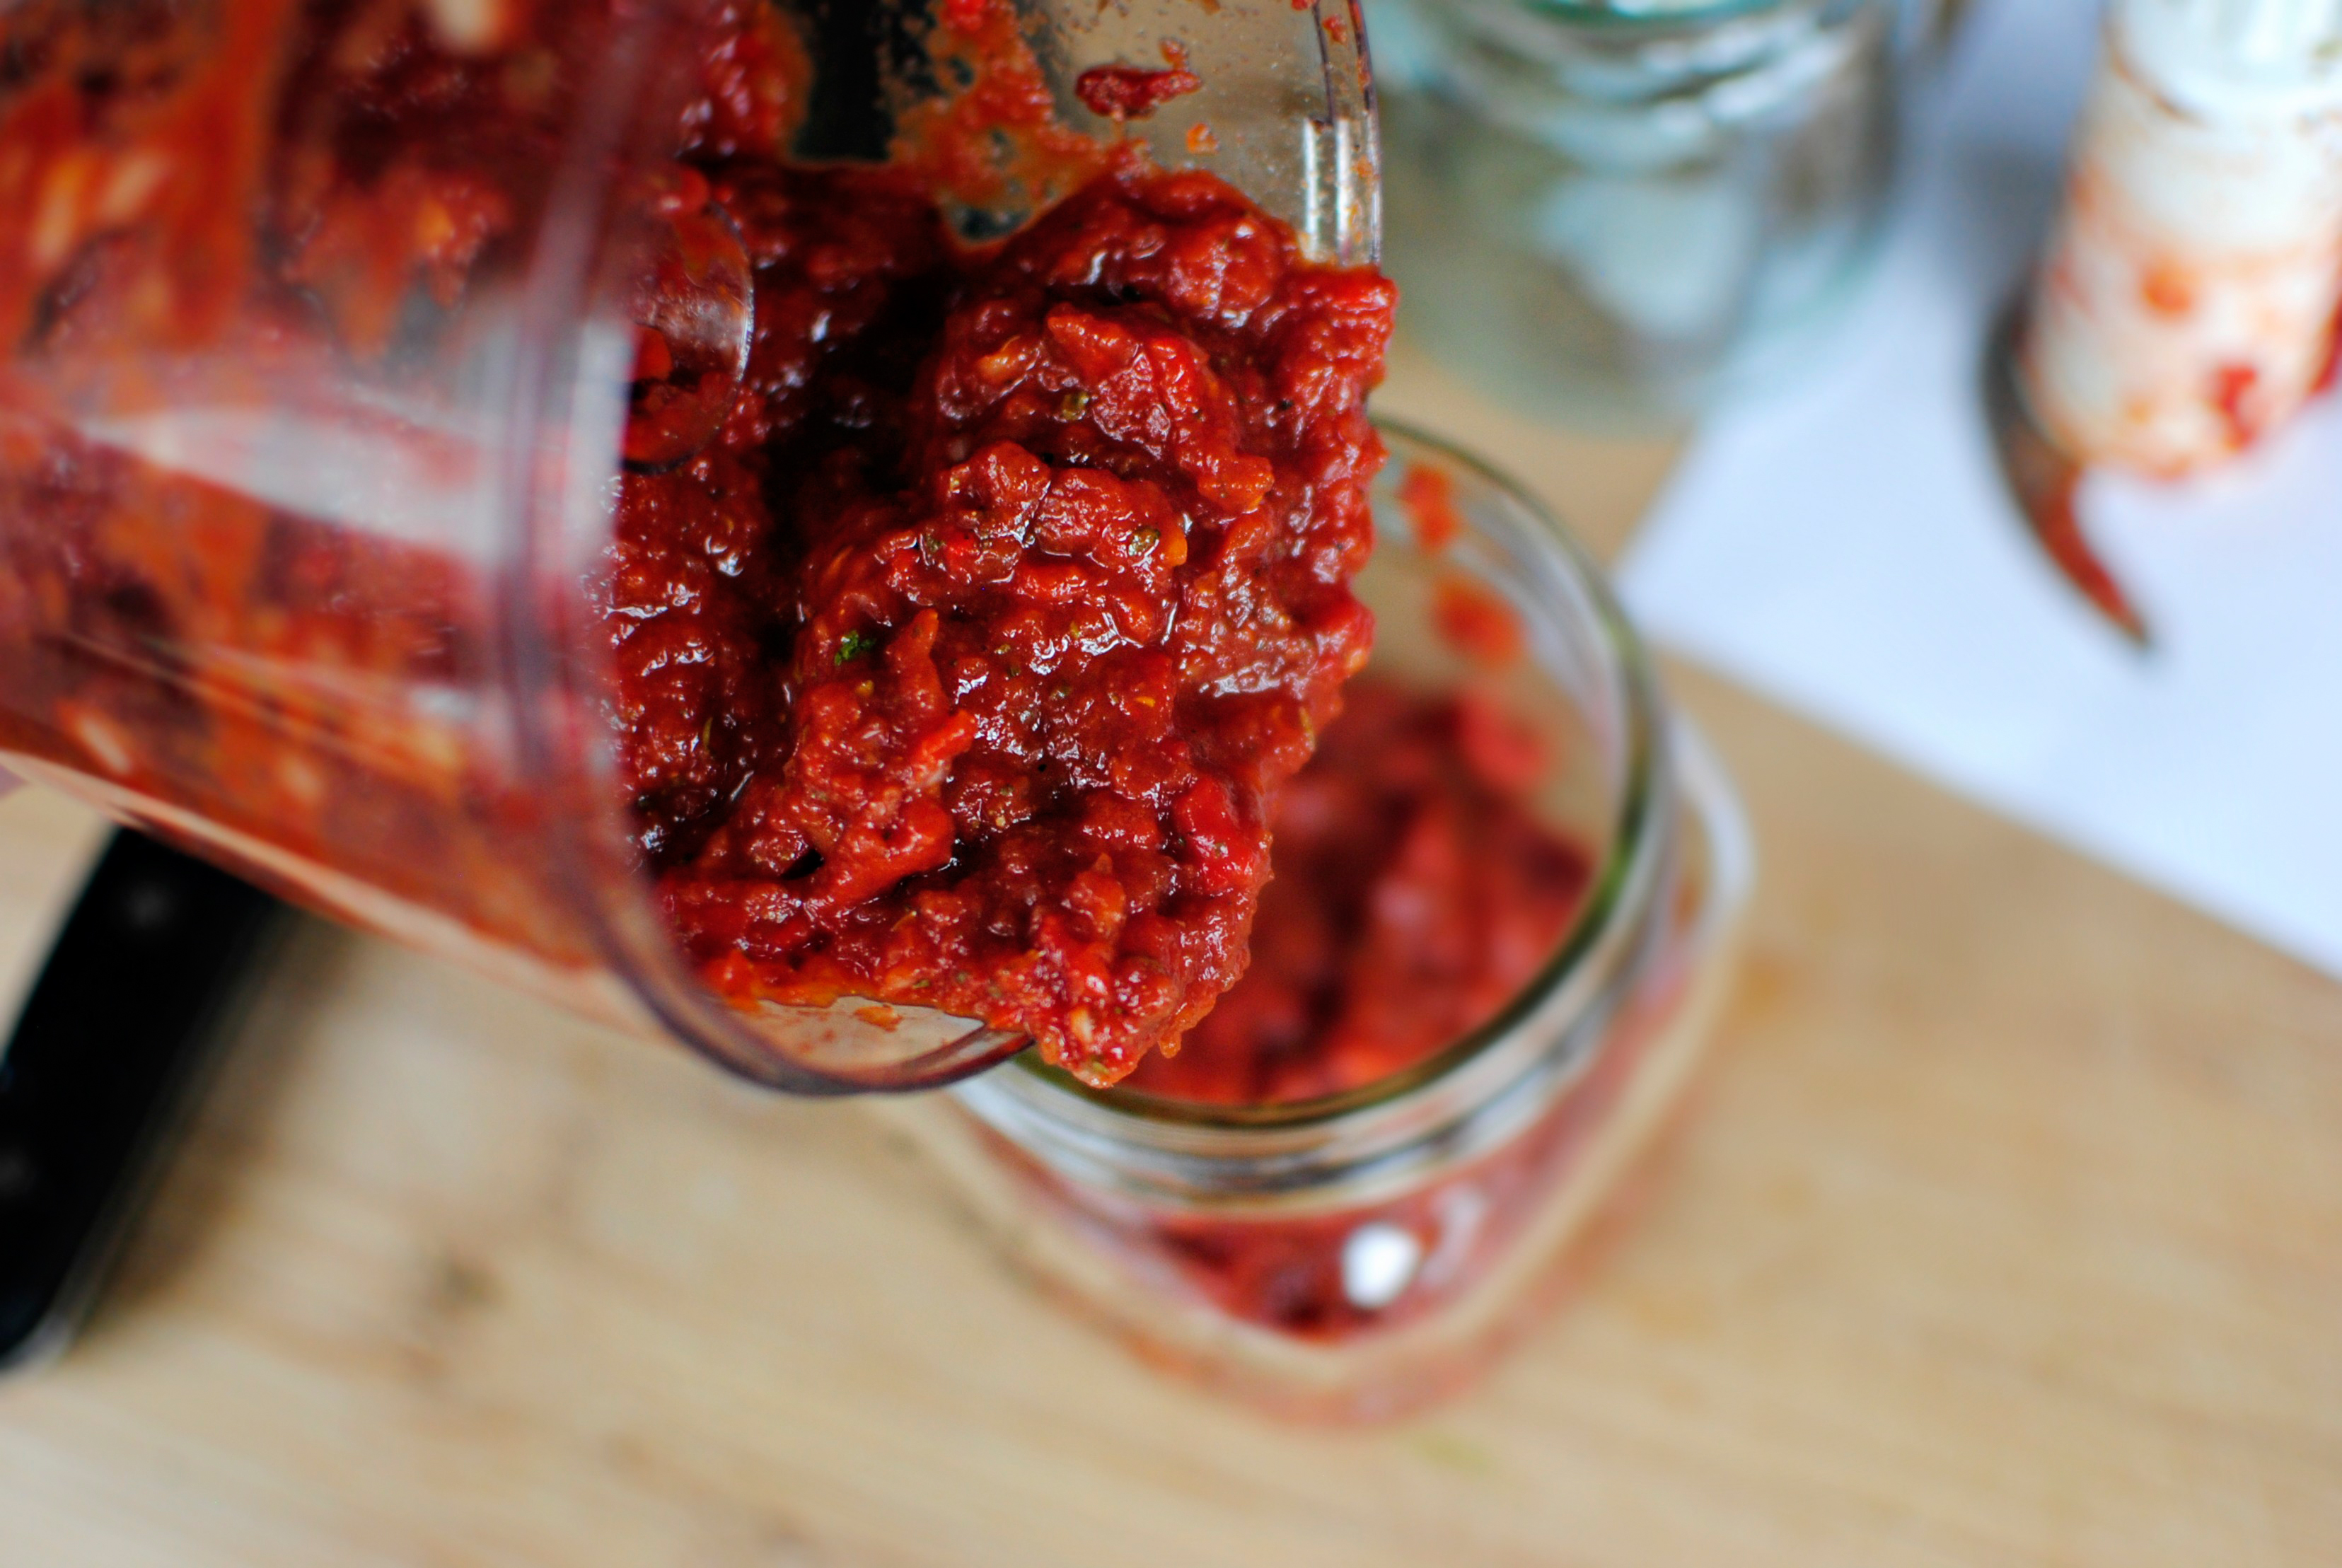
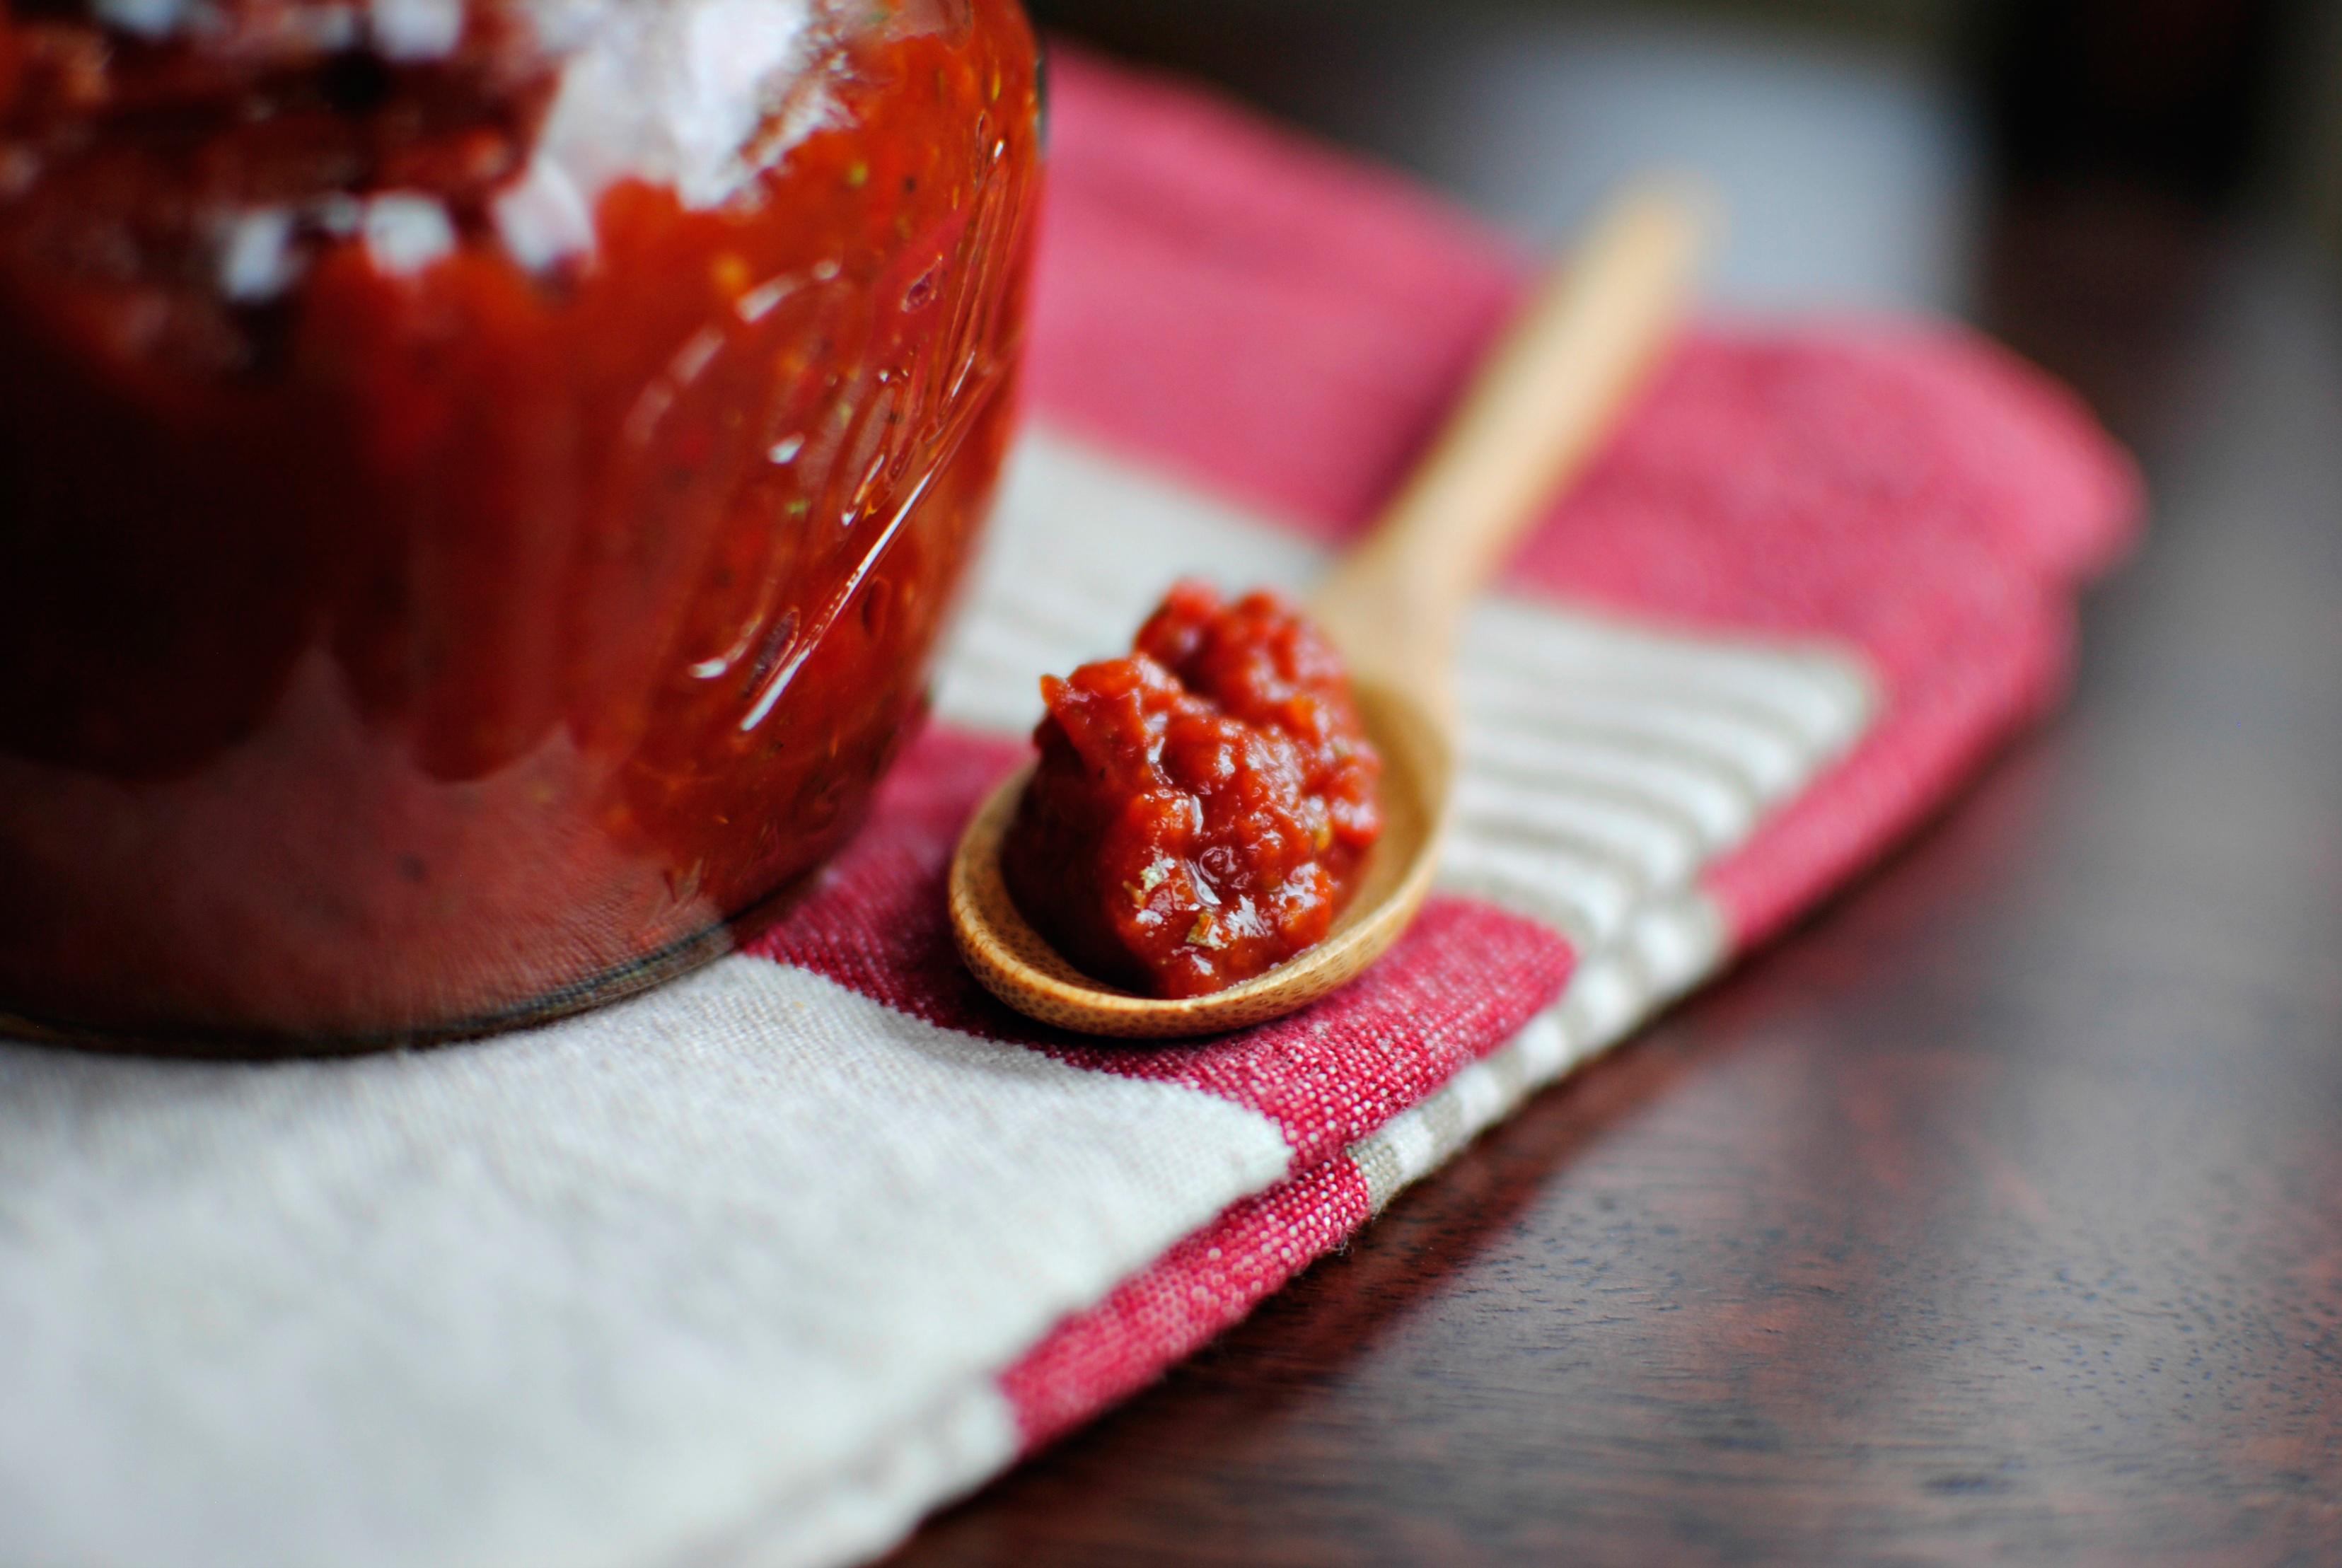
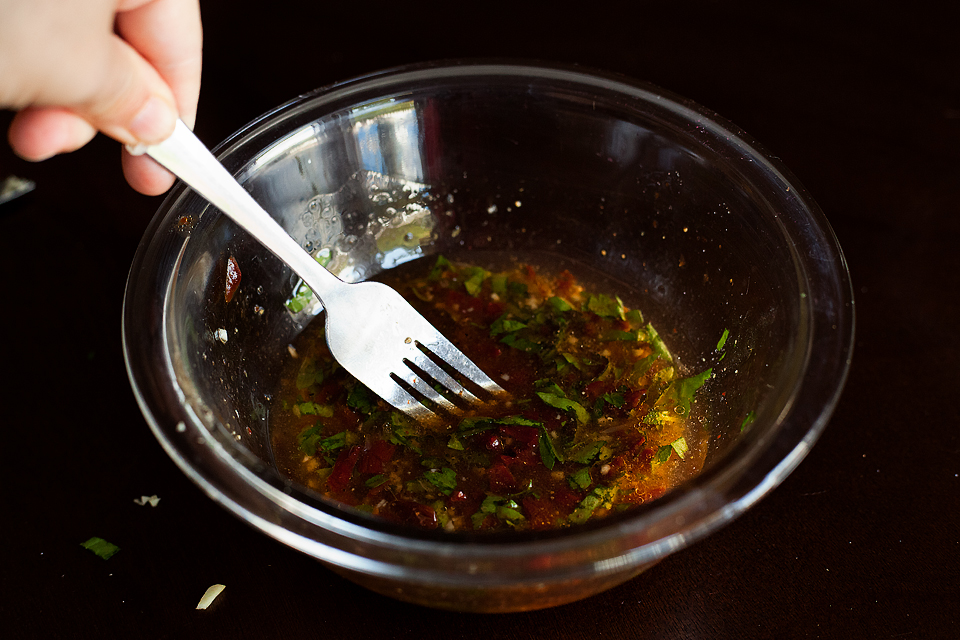
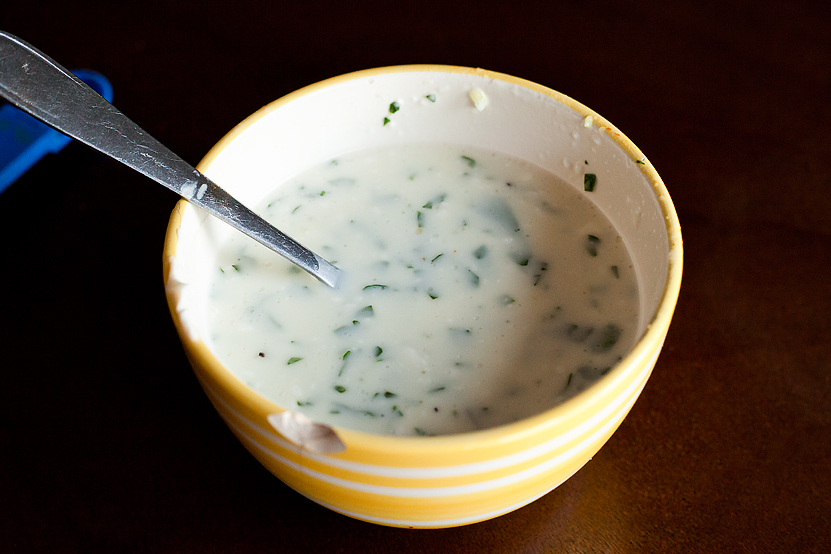
Whisk it all together until well combined. Heat the sauce in the microwave for about 45 seconds. Divide the sauce into two bowls, one for basting the shrimp and one for dipping the shrimp in later. That’s it for the sauce!


Tasty Kitchen Blog: Sweet and Spicy Shrimp. Guest post by Dara Michalski of Cookin' Canuck, recipe submitted by Colleen of Souffle Bombay.

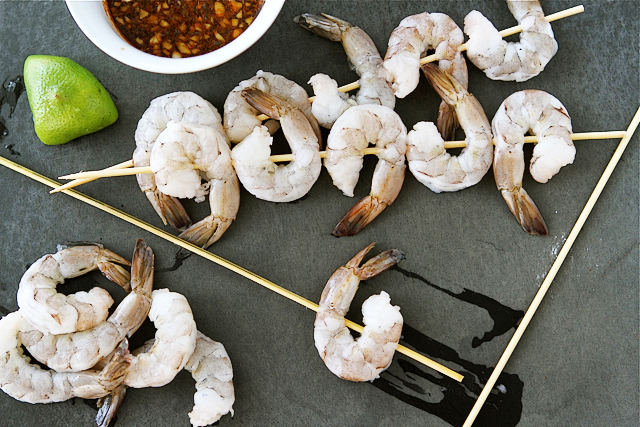
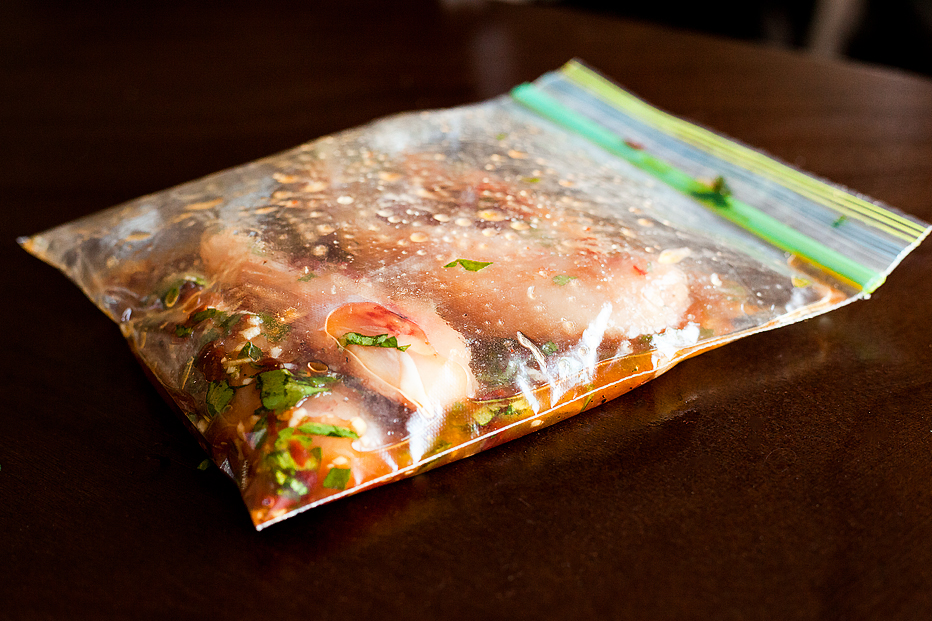
Pull the skewers out of the water and thread the shrimp onto the skewers. Sometimes, those little suckers will just twirl around the skewers, making it difficult to flip them on the grill. To combat this problem, use two skewers instead of one.

The recipe calls for pulling off the tails, but I left them so I could use the tail for picking up the shrimp when I was dipping them into the leftover sauce.


Tasty Kitchen Blog: Sweet and Spicy Shrimp. Guest post by Dara Michalski of Cookin' Canuck, recipe submitted by Colleen of Souffle Bombay.

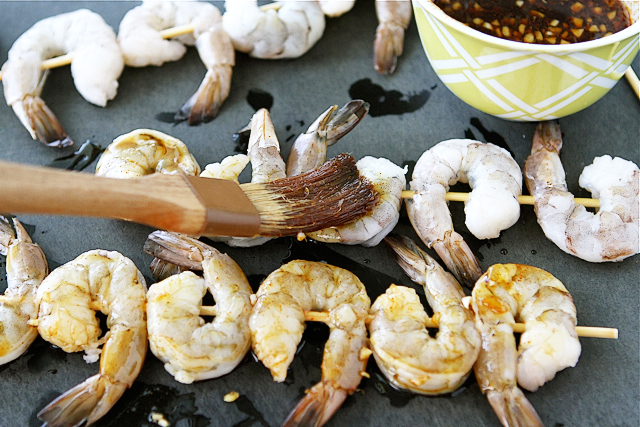
Use half of the sauce to baste the shrimp on both sides.


Tasty Kitchen Blog: Sweet and Spicy Shrimp. Guest post by Dara Michalski of Cookin' Canuck, recipe submitted by Colleen of Souffle Bombay.

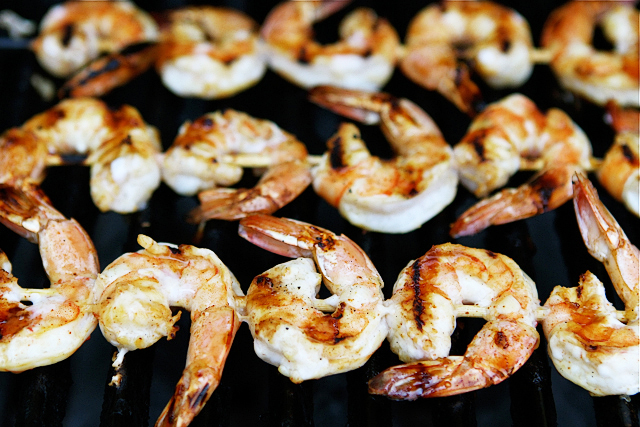
Place the shrimp on the grill and sear until just cooked through. The recipe calls for 2-3 minutes for side, but my grill was feeling pretty fiery, so it only took 1-2 minutes per side. Just watch them closely so they don’t overcook.

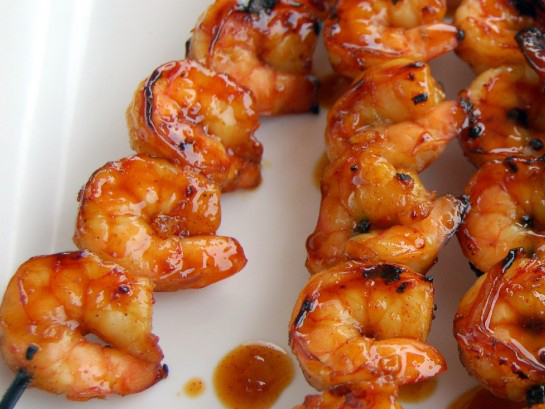
Heat the second half of the sauce in the microwave and serve it with the shrimp skewers.


Tasty Kitchen Blog: Sweet and Spicy Shrimp. Guest post by Dara Michalski of Cookin' Canuck, recipe submitted by Colleen of Souffle Bombay.

Oh, so good!

Thanks so much to Colleen for this recipe. Be sure to check out Colleen’s blog, Souffle Bombay. It’s full of recipes family-friendly sweet and savory recipes. The zucchini parmesan cakes and banana cupcakes with vanilla frosting caught my eye and have been on my mind ever since!


Printable Recipe

Sweet and Spicy Shrimp

See post on soufflebombay’s site!
4.80 Mitt(s) 5 Rating(s)5 votes, average: 4.80 out of 55 votes, average: 4.80 out of 55 votes, average: 4.80 out of 55 votes, average: 4.80 out of 55 votes, average: 4.80 out of 5

Prep Time:

Cook Time:

Difficulty: Easy

Servings: 8

8
x

Print Options

Page size Letter 3x5 4x6
Text Size Small Medium Large
Content Include description
Include prep time, etc.
Show image

Description

An easy summer crowd pleaser that hits the spot!

Ingredients

  • 6 Tablespoons Molasses
  • 6 Tablespoons Orange Marmalade
  • 6 Tablespoons Lime Juice
  • 2 Tablespoons Honey
  • 1 Tablespoon Garlic, Minced
  • 1 Tablespoon Red Pepper Or Cayenne Pepper (start With 1 Teaspoon And Work Your Way Up According To Your Taste)
  • 2 pounds Large Or Extra Large Raw Shrimp, Shell And Tails Removed

Preparation Instructions

Note: If you are big into dipping shrimp in sauce, make extra sauce—increase the recipe by 50% and dip away!

Combine all ingredients except the shrimp in a microwave safe bowl, stir until fully incorporated. Cover with a plate and heat for 40 seconds or up to a minute, depending on your microwave. Stir well, taste and adjust spiciness to your liking.

Split the sauce into 2 small bowls. One for the grill and one for dipping (you may want to reheat the dipping sauce when serving).

Skewer the shrimp, brush with some of the sauce, then grill over medium-high heat, continuing to baste the shrimp with the sauce until cooked. Depending on the size of shrimp you use, you’ll cook for about 2-3 minutes per side. Watch for flare ups—the honey and molasses will excite your grill!

Serve with the remaining sauce. You can serve as an appetizer or over white rice for an entree.

Enjoy!


_______________________________________

Dara Michalski is a doll and a sweetheart who clearly knows her way around the kitchen. She blogs at Cookin’ Canuck, where she shares her flavor-packed recipes and fun, engaging writing. The photography’s pretty incredible, too.


Profile photo of Laurie - Simply Scratch

Roasted Red Pepper Pizza Sauce

Posted by in Step-by-Step Recipes

Tasty Kitchen Blog: Roasted Red Pepper Pizza Sauce. Guest post by Laurie McNamara of Simply Scratch, recipe submitted by TK member Leanne.

 
It all started when I went off searching for a pizza sauce. I wanted, no needed a sauce with flavor, flair … and with roasted red peppers. So I typed in the words “roasted red pepper pizza sauce” into the Google search bar on my desktop, and wouldn’t you know it, up popped the link to Leanne’s recipe in Tasty Kitchen. Call it luck or call it fate, I’ll call it all that AND I’ll call it the best pizza sauce I’ve ever had. Period.

You know as well as I do that homemade pizza sauce is always a key factor when making a great pizza. But homemade pizza sauce that calls for roasted red peppers is not only brilliant but amazing and it’s so easy to make too! Just throw it all in a food processor and you’ll have a thick and flavorful sauce for your pizza in seconds. 


Tasty Kitchen Blog: Roasted Red Pepper Pizza Sauce. Guest post by Laurie McNamara of Simply Scratch, recipe submitted by TK member Leanne.

The ingredients are simple enough: an onion, a jar of roasted red peppers, tomato paste, a garlic clove, oregano, basil and the ever important salt and black pepper. You could make this 100% from scratch by roasting and peeling your own red bell peppers (I’d say you would need about 2 large or 3 small) but who wouldn’t like a little help in the kitchen every now and again?


Tasty Kitchen Blog: Roasted Red Pepper Pizza Sauce. Guest post by Laurie McNamara of Simply Scratch, recipe submitted by TK member Leanne.

Start by smashing and peeling one garlic clove.


Tasty Kitchen Blog: Roasted Red Pepper Pizza Sauce. Guest post by Laurie McNamara of Simply Scratch, recipe submitted by TK member Leanne.

Toss the garlic into a food processor. If you have a mini one then that will be just the perfect size for this recipe.


Tasty Kitchen Blog: Roasted Red Pepper Pizza Sauce. Guest post by Laurie McNamara of Simply Scratch, recipe submitted by TK member Leanne.

The original recipe calls for white onion, and since all I had on hand was the Spanish variety, I made a slight alteration. Also, since the Spanish onion was the size of a softball on steroids, I only used a third of that big guy.


Tasty Kitchen Blog: Roasted Red Pepper Pizza Sauce. Guest post by Laurie McNamara of Simply Scratch, recipe submitted by TK member Leanne.

Next just give the onion a rough chop. Nothing perfect or pretty, it just helps the food processor out a tad.


Tasty Kitchen Blog: Roasted Red Pepper Pizza Sauce. Guest post by Laurie McNamara of Simply Scratch, recipe submitted by TK member Leanne.

Add in the diced onion and secure the lid. Give it a quick pulse to mince up both the garlic and onion.


Tasty Kitchen Blog: Roasted Red Pepper Pizza Sauce. Guest post by Laurie McNamara of Simply Scratch, recipe submitted by TK member Leanne.

I only had a 12-ounce jar of peppers in my pantry, so I used what looked like 6 ounces to me and added it into the food processor. 


Tasty Kitchen Blog: Roasted Red Pepper Pizza Sauce. Guest post by Laurie McNamara of Simply Scratch, recipe submitted by TK member Leanne.

Whether you end up adding 6 or 8 ounces of peppers, it shouldn’t matter. You really can’t screw this up.

(P. S. Charred bits make me happy.)


Tasty Kitchen Blog: Roasted Red Pepper Pizza Sauce. Guest post by Laurie McNamara of Simply Scratch, recipe submitted by TK member Leanne.

All that’s left to do is add in the 6 ounces of tomato paste.


Tasty Kitchen Blog: Roasted Red Pepper Pizza Sauce. Guest post by Laurie McNamara of Simply Scratch, recipe submitted by TK member Leanne.

Then the black pepper, a dash of salt and a teaspoon of both dried basil and dried oregano.


Tasty Kitchen Blog: Roasted Red Pepper Pizza Sauce. Guest post by Laurie McNamara of Simply Scratch, recipe submitted by TK member Leanne.

Secure the lid one last time and give it a go on high speed until completely blended.


Tasty Kitchen Blog: Roasted Red Pepper Pizza Sauce. Guest post by Laurie McNamara of Simply Scratch, recipe submitted by TK member Leanne.

It should still be thick and a little on the chunky side, where you can still see flecks of the spices and a little bits of onion. And if you wanted to add a little heat, just throw in a pinch or two or three of red pepper flakes and your mouth will be happy.


Tasty Kitchen Blog: Roasted Red Pepper Pizza Sauce. Guest post by Laurie McNamara of Simply Scratch, recipe submitted by TK member Leanne.

Pour the pizza sauce into a container that has a snug fitting lid and refrigerate until ready to use. This recipe makes a little over a cup of pizza sauce.


Tasty Kitchen Blog: Roasted Red Pepper Pizza Sauce. Guest post by Laurie McNamara of Simply Scratch, recipe submitted by TK member Leanne.

I, of course, had to make pizza right away. After a finger-swipe tasting of the sauce, I simply could not wait.


Tasty Kitchen Blog: Roasted Red Pepper Pizza Sauce. Guest post by Laurie McNamara of Simply Scratch, recipe submitted by TK member Leanne.

And as I smeared the tasty sauce on the un-baked pizza dough, I admired its color and texture. It really is a thing of beauty!


Tasty Kitchen Blog: Roasted Red Pepper Pizza Sauce. Guest post by Laurie McNamara of Simply Scratch, recipe submitted by TK member Leanne.

Now, since you’ve seen this scrumptious sauce, I’m guessing you’re craving pizza. So don’t wait another minute! Make it for lunch, make it for dinner! I just know it’ll be a huge hit in your home as it was in mine.

A big “thank you” goes out to Leanne for sharing this recipe with us. I know I’ll be making this pizza sauce for years to come; in fact, I’m sure I’ll never go back to making regular pizza sauce ever again. It’s hands down one of the best I’ve had the pleasure of making (and eating)!


Printable Recipe

Roasted Red Pepper Pizza Sauce

See post on funfoodlove’s site!
5.00 Mitt(s) 1 Rating(s)1 vote, average: 5.00 out of 51 vote, average: 5.00 out of 51 vote, average: 5.00 out of 51 vote, average: 5.00 out of 51 vote, average: 5.00 out of 5

Prep Time:

Cook Time:

Difficulty: Easy

Servings: 3

3
x

Print Options

Page size Letter 3x5 4x6
Text Size Small Medium Large
Content Include description
Include prep time, etc.
Show image

Description

The roasted red peppers add just the right flavor to the sauce, making it more interesting than your basic tomato sauce. We used this on our grilled pizzas with fresh mozzarella and chicken. It was the perfect combination.

Ingredients

  • 6 ounces, weight Tomato Paste
  • 6 ounces, weight Jar Of Roasted Red Peppers
  • 1 clove Garlic
  • ½ whole White Onion
  • 1 teaspoon Fresh Ground Pepper
  • 1 dash Salt
  • 1 teaspoon Basil
  • 1 teaspoon Oregano

Preparation Instructions

Mix all sauce ingredients in a food processecor. I use my Tupperware Quick Chef.

To use, spread sauce mixture over grilled pizza dough. Use toppings of choice on pizza. We used slices of fresh mozzerella and grilled chicken. Put pizza back on the grill to melt cheese, about 5 minutes in a 450-degree grill.


_______________________________________

Laurie is the force behind Simply Scratch, a blog that documents her efforts to find and create recipes that are made simply from scratch. (We think it’s sweet that her mother-in-law helped her set up her blog and get started.) We love her recipes; they’re not just tried and true, but they look gorgeous as well. Check out her blog and you’ll become a fan too.


Profile photo of georgiapellegrini

Grilled Hanger Steak with Chimichurri

Posted by in Step-by-Step Recipes

Tasty Kitchen Blog: Grilled Hanger Steak with Cilantro Mint Chimichurri. Guest post by Georgia Pellegrini, recipe submitted by TK member Sommer of A Spicy Perspective.

 
There’s nothing like a big piece of meat grilled on a summer afternoon, all juicy and salty, with a lovely tangy sauce on the side to complement it. The sauce in this Grilled Hanger Steak with Cilantro Mint Chimichurri recipe from Sommer> (TK member aspicyperspective) was just so wonderful that I would eat it with any meat I put on the grill. And it’s such a wonderful thing to make in advance and have on hand; it will dress any dish up.


Tasty Kitchen Blog: Grilled Hanger Steak with Cilantro Mint Chimichurri. Guest post by Georgia Pellegrini, recipe submitted by TK member Sommer of A Spicy Perspective.

You will need: hanger steak, salt and pepper, fresh cilantro, fresh mint, garlic, red wine vinegar (I used sherry vinegar and it was great), ground cumin, honey, crushed red pepper, and olive oil.


Tasty Kitchen Blog: Grilled Hanger Steak with Cilantro Mint Chimichurri. Guest post by Georgia Pellegrini, recipe submitted by TK member Sommer of A Spicy Perspective.

Get the grill nice and hot. With a thin steak you’re only going to give it a quick sear so the grill will need to be sizzling. Season the steaks with salt and pepper on both sides.


Tasty Kitchen Blog: Grilled Hanger Steak with Cilantro Mint Chimichurri. Guest post by Georgia Pellegrini, recipe submitted by TK member Sommer of A Spicy Perspective.

Sear them on both sides, about 2-minutes on each for medium rare. And by the way, you can use a skillet instead of a grill if that’s what you have. It will still be delicious!


Tasty Kitchen Blog: Grilled Hanger Steak with Cilantro Mint Chimichurri. Guest post by Georgia Pellegrini, recipe submitted by TK member Sommer of A Spicy Perspective.

Once you give them a quick sear on both sides, remove from the heat and cover with foil to rest for 5-10 minutes so the juiciness stays within the meat.


Tasty Kitchen Blog: Grilled Hanger Steak with Cilantro Mint Chimichurri. Guest post by Georgia Pellegrini, recipe submitted by TK member Sommer of A Spicy Perspective.

Meanwhile, get your sauce ready by combining all of the ingredients in a food processor. First the cilantro and mint …


Tasty Kitchen Blog: Grilled Hanger Steak with Cilantro Mint Chimichurri. Guest post by Georgia Pellegrini, recipe submitted by TK member Sommer of A Spicy Perspective.

Then the vinegar …


Tasty Kitchen Blog: Grilled Hanger Steak with Cilantro Mint Chimichurri. Guest post by Georgia Pellegrini, recipe submitted by TK member Sommer of A Spicy Perspective.

Red pepper flakes for some spice …


Tasty Kitchen Blog: Grilled Hanger Steak with Cilantro Mint Chimichurri. Guest post by Georgia Pellegrini, recipe submitted by TK member Sommer of A Spicy Perspective.

Cumin for some earthiness …


Tasty Kitchen Blog: Grilled Hanger Steak with Cilantro Mint Chimichurri. Guest post by Georgia Pellegrini, recipe submitted by TK member Sommer of A Spicy Perspective.

Honey for some sweetness …


Tasty Kitchen Blog: Grilled Hanger Steak with Cilantro Mint Chimichurri. Guest post by Georgia Pellegrini, recipe submitted by TK member Sommer of A Spicy Perspective.

And some olive oil to make it all smooth and luscious.


Tasty Kitchen Blog: Grilled Hanger Steak with Cilantro Mint Chimichurri. Guest post by Georgia Pellegrini, recipe submitted by TK member Sommer of A Spicy Perspective.

Puree it until mostly smooth, but still full of lumps, herbs and flavor.


Tasty Kitchen Blog: Grilled Hanger Steak with Cilantro Mint Chimichurri. Guest post by Georgia Pellegrini, recipe submitted by TK member Sommer of A Spicy Perspective.

Slice the hanger steak or serve it in big strips with a good dose of this amazing sauce.

Thank you to Sommer for this killer sauce! Take a peek at her website A Spicy Perspective for more deliciousness.


Printable Recipe

Grilled Hanger Steak with Cilantro Mint Chimichurri

See post on aspicyperspective’s site!
4.00 Mitt(s) 2 Rating(s)2 votes, average: 4.00 out of 52 votes, average: 4.00 out of 52 votes, average: 4.00 out of 52 votes, average: 4.00 out of 52 votes, average: 4.00 out of 5

Prep Time:

Cook Time:

Difficulty: Easy

Servings: 4

4
x

Print Options

Page size Letter 3x5 4x6
Text Size Small Medium Large
Content Include description
Include prep time, etc.
Show image

Description

Charred juicy hanger steak with a bold and tangy sauce!

Ingredients

  • FOR THE HANGER STEAK:
  • 2 pounds Hanger Steak
  • Salt And Pepper
  • FOR THE CHIMICHURRI:
  • 1 bunch Fresh Cilantro
  • 1 bunch Fresh Mint
  • 3 cloves Garlic, Peeled
  • 3 Tablespoons Red Wine Vinegar
  • 1 Tablespoon Ground Cumin
  • 1 teaspoon Honey
  • 1 teaspoon Salt
  • ½ teaspoons Crushed Red Pepper
  • ¾ cups Olive Oil

Preparation Instructions

Preheat the grill to high heat.

Sprinkle the hanger steaks with salt and pepper on all sides. Grill the steaks for 2-3 minutes per side for medium-rare, just over 3 minutes per side for medium.

Remove the steak from the heat and cover with foil to rest. (Never cut into to a steak before it’s had time to rest 5-10 minutes to redistribute all the juices.)

Meanwhile, place all the ingredients for the chimichurri in the food processor. Puree until mostly smooth.

Slice the hanger steak into 1/2 inch pieces and serve warm with chimichurri sauce drizzled over the top with side of Bush’s Texas Ranchero Grillin’ Beans.


_______________________________________

There’s so much to say about Georgia, we don’t know where to start. Leaving Wall Street for the French Culinary Institute, followed by a stint at the Gramercy Tavern and La Chassagnette in France, her passion for food and food traditions are evident and inspiring. Visit her site at Georgia Pellegrini, where you’ll find more recipes, photos, learn all about her wonderful books Girl Hunter and Food Heroes, and enjoy her latest adventures.


Profile photo of Amber {Sprinkled With Flour}

Chipotle Grilled Chicken Tacos

Posted by in Step-by-Step Recipes

Tasty Kitchen Blog: Chipotle Grilled Chicken Tacos with Pineapple Slaw. Guest post by Amber Potter of Sprinkled with Flour, recipe submitted by TK member Kim of Sunflower Supper Club.

 
I have a sweet tooth, let’s call her … Shugar (with an h). Shugar frequently compels me to make all manner of cakes, cookies, pies—you get the drift. However, I also have a spicy tooth. (Is that a real term? I’m not sure, but I’m going with it.) Let’s call him … Pepper Jack. You’ll just as soon find a bottle of spicy sauce next to my plate as you would a bottle of ketchup. I’m known to pour the stuff on pretty much anything.

Some call that weird. I call it delicious.

Now Pepper Jack (my spicy tooth—you’re still with me right?), he gets me dreaming of things like spice-laden grilled meats, like Kim’s recipe for Chipotle Grilled Chicken Tacos with Pineapple Slaw. When I found this recipe, I’m pretty sure I could hear the faint sound of the Hallelujah chorus being sung from above. When Pepper Jack and Shugar get to hang out together in one dish, you know a party is about to happen.

These tacos are filled with spicy chipotle grilled chicken and then slathered in a sweet pineapple slaw that’s drenched in flavor. You’ll need a few things for these puppies, so let’s get started, shall we?


Tasty Kitchen Blog: Chipotle Grilled Chicken Tacos with Pineapple Slaw. Guest post by Amber Potter of Sprinkled with Flour, recipe submitted by TK member Kim of Sunflower Supper Club.

You’ll need olive oil, limes, chipotle chiles in adobe sauce, honey, garlic, cilantro, salt, pepper, chicken breasts, pineapple rings with juice, mayonnaise, green onions (optional), red onion, and coleslaw mix.


Tasty Kitchen Blog: Chipotle Grilled Chicken Tacos with Pineapple Slaw. Guest post by Amber Potter of Sprinkled with Flour, recipe submitted by TK member Kim of Sunflower Supper Club.

In a small bowl, whisk together the olive oil (or whatever oil you have on hand), lime juice, chipotle peppers, adobo sauce … 


Tasty Kitchen Blog: Chipotle Grilled Chicken Tacos with Pineapple Slaw. Guest post by Amber Potter of Sprinkled with Flour, recipe submitted by TK member Kim of Sunflower Supper Club.

And the honey, garlic, cilantro, kosher salt and pepper.


Tasty Kitchen Blog: Chipotle Grilled Chicken Tacos with Pineapple Slaw. Guest post by Amber Potter of Sprinkled with Flour, recipe submitted by TK member Kim of Sunflower Supper Club.

Stir to combine.


Tasty Kitchen Blog: Chipotle Grilled Chicken Tacos with Pineapple Slaw. Guest post by Amber Potter of Sprinkled with Flour, recipe submitted by TK member Kim of Sunflower Supper Club.

Place the chicken breasts in a Ziploc bag and pour in the marinade. Seal and marinate for 2 hours.


Tasty Kitchen Blog: Chipotle Grilled Chicken Tacos with Pineapple Slaw. Guest post by Amber Potter of Sprinkled with Flour, recipe submitted by TK member Kim of Sunflower Supper Club.

Drain the pineapple rings and set aside. Reserve about 1/3 cup of the pineapple juice.


Tasty Kitchen Blog: Chipotle Grilled Chicken Tacos with Pineapple Slaw. Guest post by Amber Potter of Sprinkled with Flour, recipe submitted by TK member Kim of Sunflower Supper Club.

In a small bowl, whisk the reserved pineapple juice, mayo, cilantro, garlic and salt. Set aside. 


Tasty Kitchen Blog: Chipotle Grilled Chicken Tacos with Pineapple Slaw. Guest post by Amber Potter of Sprinkled with Flour, recipe submitted by TK member Kim of Sunflower Supper Club.

Mix well.


Tasty Kitchen Blog: Chipotle Grilled Chicken Tacos with Pineapple Slaw. Guest post by Amber Potter of Sprinkled with Flour, recipe submitted by TK member Kim of Sunflower Supper Club.

In a large bowl, combine the red onion and coleslaw mix. If you’re using green onions (I left these out), add them in as well. Pour the dressing mixture over the coleslaw and combine.


Tasty Kitchen Blog: Chipotle Grilled Chicken Tacos with Pineapple Slaw. Guest post by Amber Potter of Sprinkled with Flour, recipe submitted by TK member Kim of Sunflower Supper Club.

Remove chicken from marinade.


Tasty Kitchen Blog: Chipotle Grilled Chicken Tacos with Pineapple Slaw. Guest post by Amber Potter of Sprinkled with Flour, recipe submitted by TK member Kim of Sunflower Supper Club.

Grill the pineapple slices about 3-4 minutes each side. Watch carefully, they can burn easily. When done, remove to a platter and set aside to cool for a few minutes while you cook the chicken. When the chicken is cooked through, remove from grill and set aside to rest.


Tasty Kitchen Blog: Chipotle Grilled Chicken Tacos with Pineapple Slaw. Guest post by Amber Potter of Sprinkled with Flour, recipe submitted by TK member Kim of Sunflower Supper Club.

While the chicken is resting, cut the grilled pineapple slices into bite size pieces and mix into the coleslaw. You can transfer slaw to a serving dish, don’t forget to get all of the “special sauce”.


Tasty Kitchen Blog: Chipotle Grilled Chicken Tacos with Pineapple Slaw. Guest post by Amber Potter of Sprinkled with Flour, recipe submitted by TK member Kim of Sunflower Supper Club.

Warm tortillas on the grill or in the oven, and cut chicken into slices.


Tasty Kitchen Blog: Chipotle Grilled Chicken Tacos with Pineapple Slaw. Guest post by Amber Potter of Sprinkled with Flour, recipe submitted by TK member Kim of Sunflower Supper Club.

Serve on corn tortillas topped with the grilled pineapple slaw. Any leftover slaw is delicious eaten on its own.


Tasty Kitchen Blog: Chipotle Grilled Chicken Tacos with Pineapple Slaw. Guest post by Amber Potter of Sprinkled with Flour, recipe submitted by TK member Kim of Sunflower Supper Club.

Wow, are these tacos good! I’m so glad Kim shared her recipe with us. You can find more mouthwatering dishes in the blog Sunflower Supper Club, which she shares with her friend Julie.

Note: While the chicken marinade itself is spicy, the chicken is not too spicy once it is grilled. My son was able to eat it without any problem. 


Printable Recipe

See post on Kim (SunflowerSupperClub)’s site!
4.50 Mitt(s) 6 Rating(s)6 votes, average: 4.50 out of 56 votes, average: 4.50 out of 56 votes, average: 4.50 out of 56 votes, average: 4.50 out of 56 votes, average: 4.50 out of 5

Prep Time:

Cook Time:

Difficulty: Easy

Servings: 6

6
x

Print Options

Page size Letter 3x5 4x6
Text Size Small Medium Large
Content Include description
Include prep time, etc.
Show image

Description

Spicy grilled chicken paired with a sweet slaw. Summer fare at its best!

Ingredients

  • FOR THE CHICKEN TACOS:
  • ¼ cups Olive Oil
  • 2 whole Limes, Juiced
  • 4 whole Chipotle Chiles In Adobo Sauce, Minced
  • 2 Tablespoons Adobo Sauce From Can Of Chipotle Chiles
  • 1 Tablespoon Honey
  • 2 cloves Garlic, Minced
  • 2 Tablespoons Minced Cilantro
  • ½ teaspoons Kosher Salt
  • ¼ teaspoons Black Pepper
  • 1-½ pound To 2 Pounds Boneless Skinless Chicken Breasts
  • 12 whole Corn Tortillas
  • FOR THE PINEAPPLE SLAW:
  • 1 can (20 Oz. Size) Pineapple Rings, Juice Reserved
  • ⅓ cups Pineapple Juice (reserved From Can)
  • ½ cups Mayonnaise (or Plain Yogurt)
  • 6 cloves Garlic, Minced
  • ⅓ cups Cilantro, Chopped
  • 1 teaspoon Kosher Salt
  • 1 bunch Green Onions, Sliced
  • ⅓ cups Red Onion, Finely Diced
  • 1 bag (16 Oz. Size) Coleslaw Mix

Preparation Instructions

For the chicken tacos:
In a small bowl, whisk together the olive oil, lime juice, chipotle peppers, adobo sauce, honey, garlic, cilantro, kosher salt and pepper. Place the chicken breasts in a ziplock bag and pour in the marinade. Seal and marinate for 2 hours.

For the pineapple slaw:
Drain the pineapple rings and set aside on a plate lined with paper towels. In a small bowl, whisk the reserved pineapple juice, mayo, cilantro, garlic and salt. Set aside. In a large bowl, combine the green onions, red onion and coleslaw mix. Pour the dressing mixture over the coleslaw and combine.

Remove chicken from marinade and place on a lightly oiled hot grill with the pineapple slices. Grill the pineapple slices about 3-4 minutes a side. Watch carefully, they can burn easily. When done, remove to a platter and set aside to cool for a few minutes while the chicken finishes cooking. When the chicken is cooked through, remove from grill and set aside to rest.

While the chicken is resting, cut the grilled pineapple slices into bite size pieces and mix into the coleslaw.

Warm tortillas on the grill or in the oven. Cut chicken into slices and serve on corn tortillas topped with the grilled pineapple slaw. Any leftover slaw is delicious eaten on its own.

Yields 12 tacos.

Enjoy!


_______________________________________

Amber is a stay at home mom who lives in the heart of the Missouri Ozarks. It’s a long way from where she grew up, in Wales (yes, way over in the U.K.). The recipes in her blog Sprinkled with Flour include her original creations as well as her family recipes. Go check them out!


Profile photo of EatLiveRun

Tomato, Roasted Pepper and Arugula Pasta

Posted by in Step-by-Step Recipes

  I love a good pasta dish, and this Smoky Tomato, Roasted Red Pepper and Arugula Pasta by Cassie (Tasty Kitchen member BakeYourDay) is just perfect for a delicious late-summer meal! It contains pretty much all my favorite things (besides chocolate). I seriously cannot get enough of this pasta! After you try it, you too, […]

Profile photo of Natalie | Perry's Plate

Melon Salad

Posted by in Step-by-Step Recipes

  My heart goes out to everyone without air conditioning this summer. Being hot is right up there on my list of “most unpleasant sensations” between having a cavity drilled and discovering my husband finished off the Nutella without telling me. The only redeeming quality to hot summers is the abundance of fresh fruit—especially melons.…

Profile photo of A Cozy Kitchen

Lemon Ricotta Stuffed Zucchini Blossoms

Posted by in Step-by-Step Recipes

  The markets are overflowing with summer squash and zucchini right now. With their arrival, you’ll also find their pretty and delicate flower: the squash blossom. I love them on everything from pizzas to inside quesadillas with melty cheese. But my favorite way to consume them, hands down, is fried. While I’ve had them prepared […]

Profile photo of georgiapellegrini

Chipotle and Lime Roasted Potatoes

Posted by in Step-by-Step Recipes

  In summertime, when the temperatures are especially hot, I’m always looking for dishes that work well at room temperature, as well as recipes that offer a twist on your classic summer dishes. This bowl of Chipotle and Lime Roasted Potatoes from Tasty Kitchen member Meredith of Cooking In Sock Monkey Slippers was just that. […]