The Pioneer Woman Tasty Kitchen
Profile photo of EatLiveRun

Beet Risotto with Goat Cheese

Posted by in Step-by-Step Recipes

Tasty Kitchen Blog: Beet Risotto with Goat Cheese. Guest post by Jenna Weber of Eat, Live, Run; recipe submitted by TK member Amanda of Once Upon a Recipe.

Hi, my names Jenna and I love beets. Like, I really love beets. When I was little, I remember going to visit my grandma and she would boil beets for me then sprinkle them with sugar for an afternoon treat. I must have been one of the only six-year-olds that actually asked for beets. Then, I grew up and discovered beet and goat cheese salads. Beets and soft, creamy goat cheese? A match made in heaven. That’s why, when I saw Tasty Kitchen member Amanda’s recipe for Beet Risotto with Goat Cheese (adapted from Bon Appetit), I knew I had to make it as soon as humanely possible.

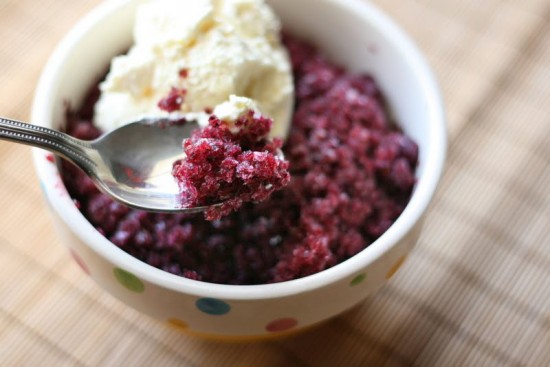
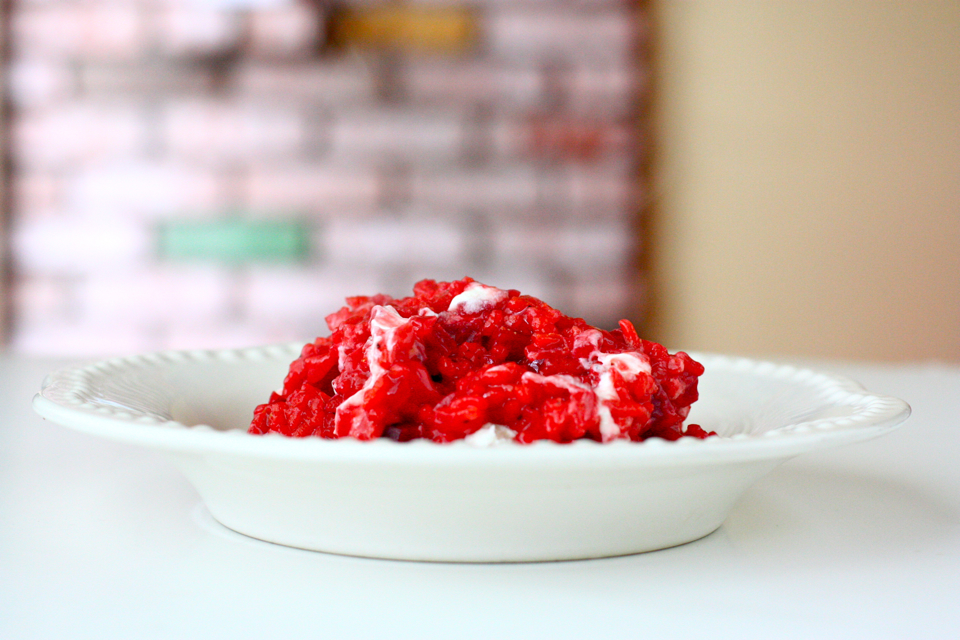
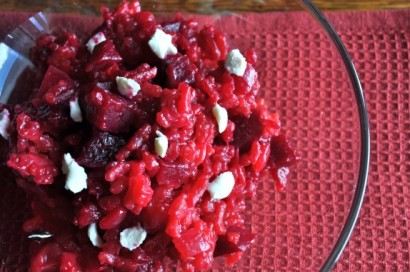
The end result was absolutely fantastic! Imagine super creamy, jewel-colored risotto studded with beets and big chunks of melting goat cheese. I think the day I made it, I ate a bowl for lunch and dinner. I just couldn’t get enough—and neither will you!

 
Tasty Kitchen Blog: Beet Risotto with Goat Cheese. Guest post by Jenna Weber of Eat, Live, Run; recipe submitted by TK member Amanda of Once Upon a Recipe.

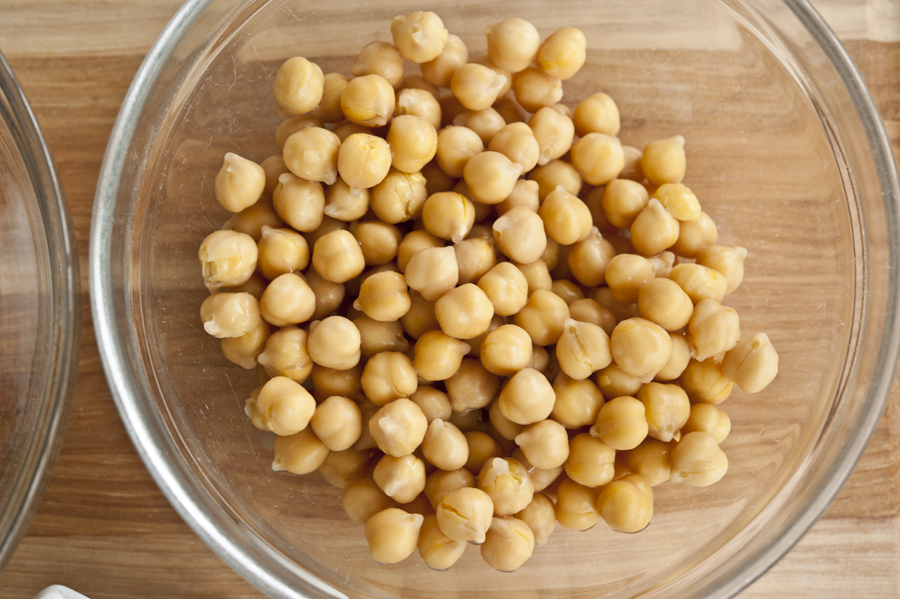
Amanda doesn’t specify if you can use canned beets for this (I’m sure you can), but since beets are in season right now anyway, I grabbed two bushy ones from the produce section of my local grocery store.


Tasty Kitchen Blog: Beet Risotto with Goat Cheese. Guest post by Jenna Weber of Eat, Live, Run; recipe submitted by TK member Amanda of Once Upon a Recipe.

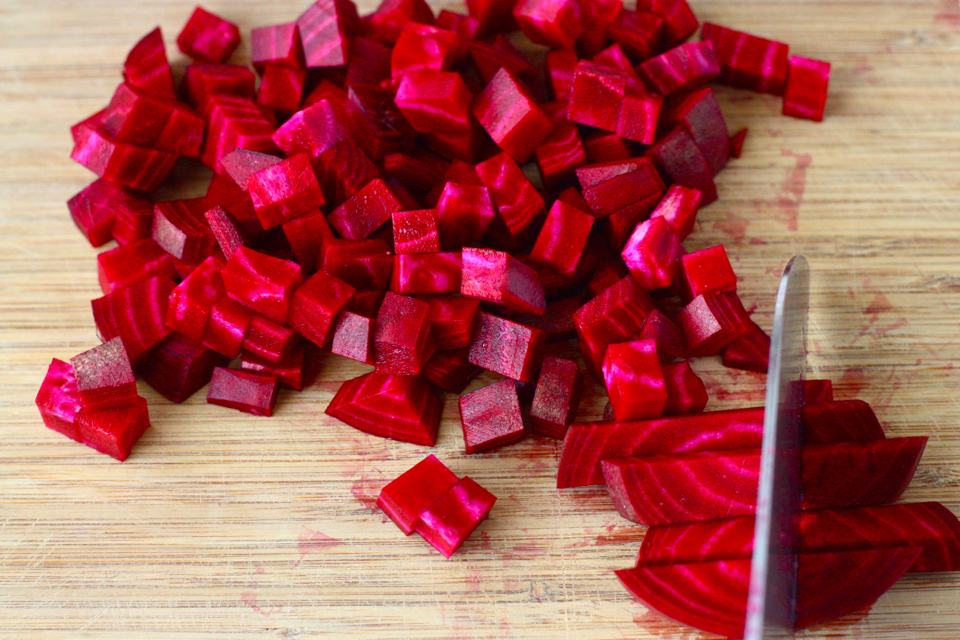
So, first things first: dice your beets. I didn’t peel these—I just scrubbed them under cold water.


Tasty Kitchen Blog: Beet Risotto with Goat Cheese. Guest post by Jenna Weber of Eat, Live, Run; recipe submitted by TK member Amanda of Once Upon a Recipe.

Look ma! Red hands!


Tasty Kitchen Blog: Beet Risotto with Goat Cheese. Guest post by Jenna Weber of Eat, Live, Run; recipe submitted by TK member Amanda of Once Upon a Recipe.

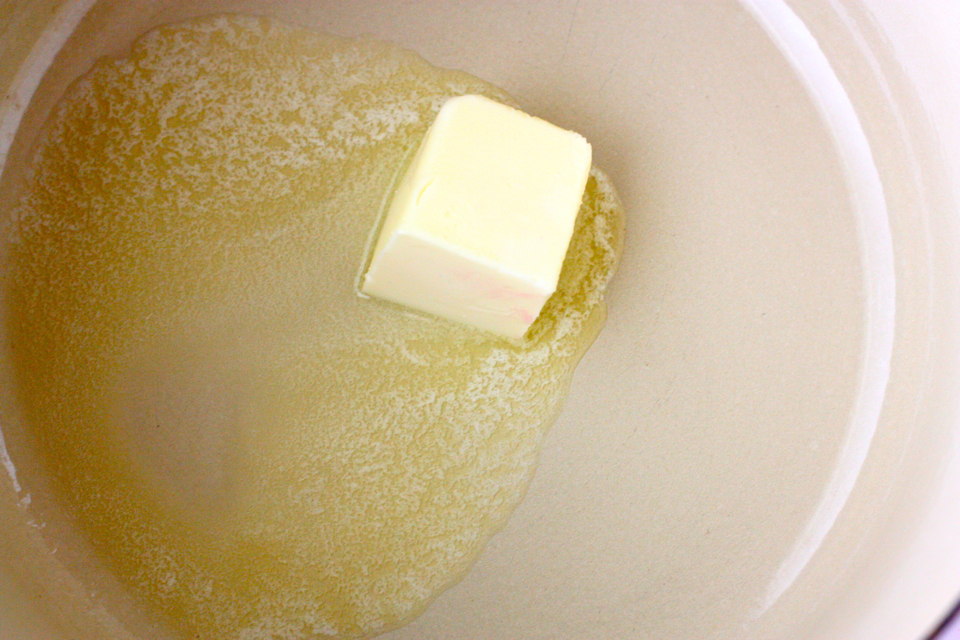
Next, melt four tablespoons of butter in a heavy-bottomed pot.


Tasty Kitchen Blog: Beet Risotto with Goat Cheese. Guest post by Jenna Weber of Eat, Live, Run; recipe submitted by TK member Amanda of Once Upon a Recipe.

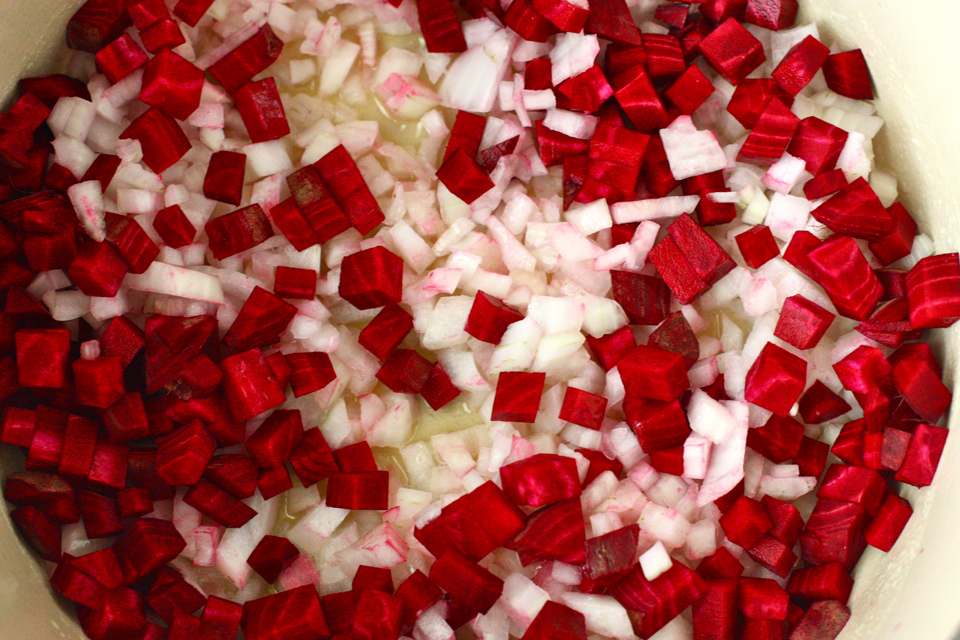
Then, add your diced beets and onion.


Tasty Kitchen Blog: Beet Risotto with Goat Cheese. Guest post by Jenna Weber of Eat, Live, Run; recipe submitted by TK member Amanda of Once Upon a Recipe.

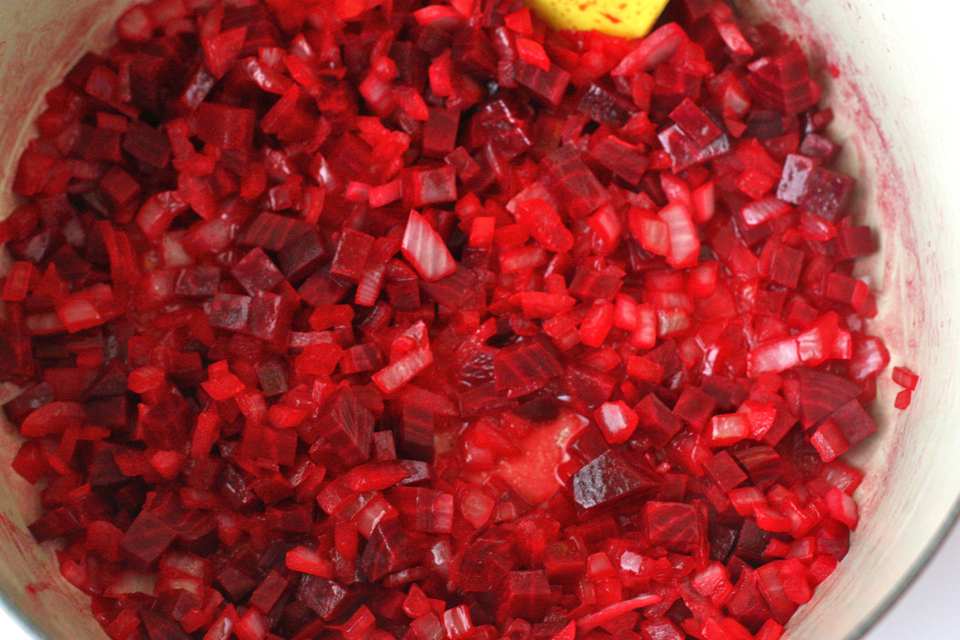
Sauté for about eight minutes, until both beets and onions are tender.


Tasty Kitchen Blog: Beet Risotto with Goat Cheese. Guest post by Jenna Weber of Eat, Live, Run; recipe submitted by TK member Amanda of Once Upon a Recipe.

Add your arborio rice (risotto rice!). You can find arborio rice in the rice section of your local store. It’s super yummy and creamy!


Tasty Kitchen Blog: Beet Risotto with Goat Cheese. Guest post by Jenna Weber of Eat, Live, Run; recipe submitted by TK member Amanda of Once Upon a Recipe.

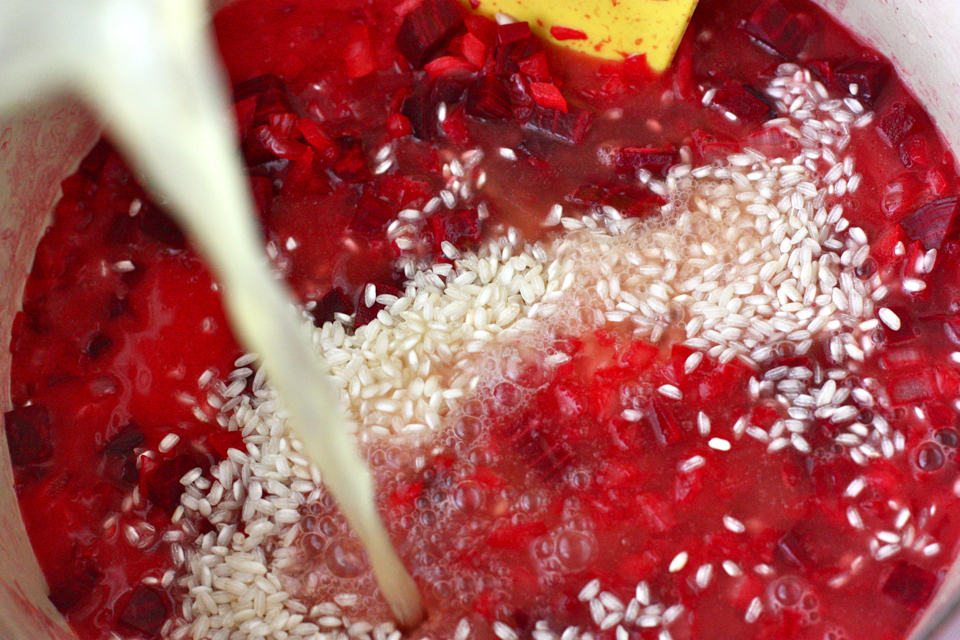
Pour in three cups of chicken stock. In most traditional risotto recipes, you’ll gradually add the hot stock over a period of about 45 minutes, but in this recipe you just add it all at once … and it works! How awesome and easy is that?


Tasty Kitchen Blog: Beet Risotto with Goat Cheese. Guest post by Jenna Weber of Eat, Live, Run; recipe submitted by TK member Amanda of Once Upon a Recipe.

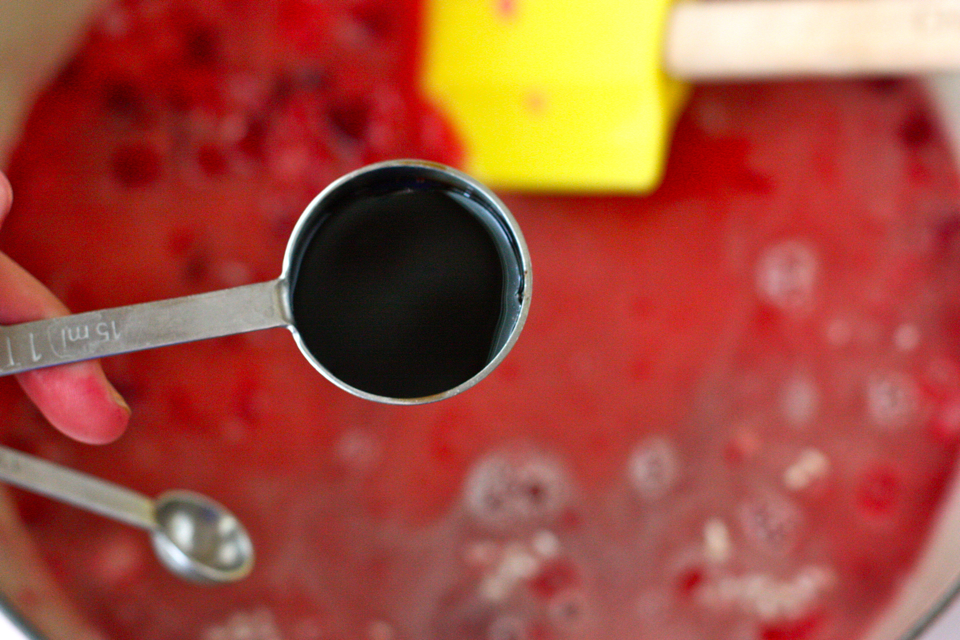
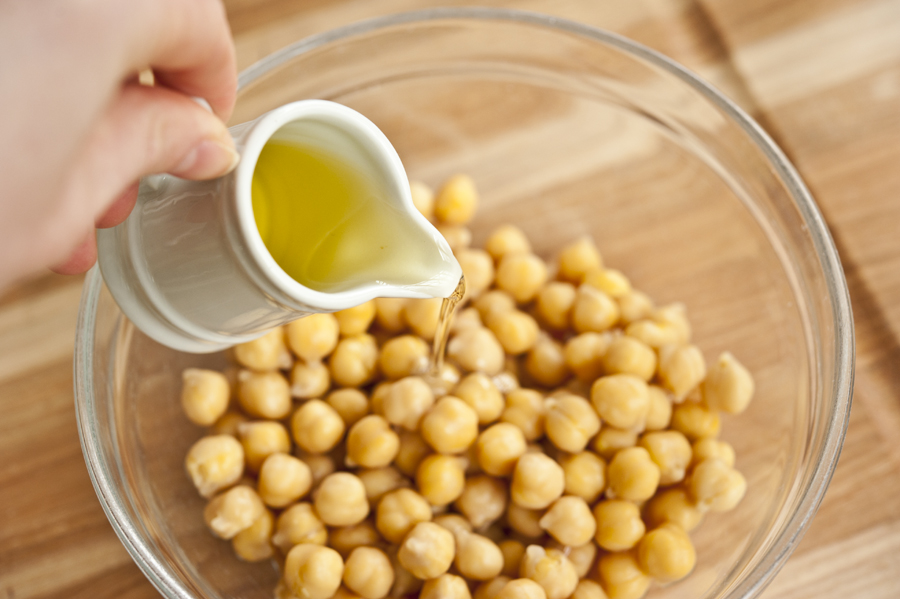
Finally, drizzle in a little balsamic vinegar.


Tasty Kitchen Blog: Beet Risotto with Goat Cheese. Guest post by Jenna Weber of Eat, Live, Run; recipe submitted by TK member Amanda of Once Upon a Recipe.

Bring risotto to a boil then cover, reduce heat and simmer for about 15 minutes. You’ll want to stir this occasionally. The risotto is done when the rice has soaked up all the stock.


Tasty Kitchen Blog: Beet Risotto with Goat Cheese. Guest post by Jenna Weber of Eat, Live, Run; recipe submitted by TK member Amanda of Once Upon a Recipe.

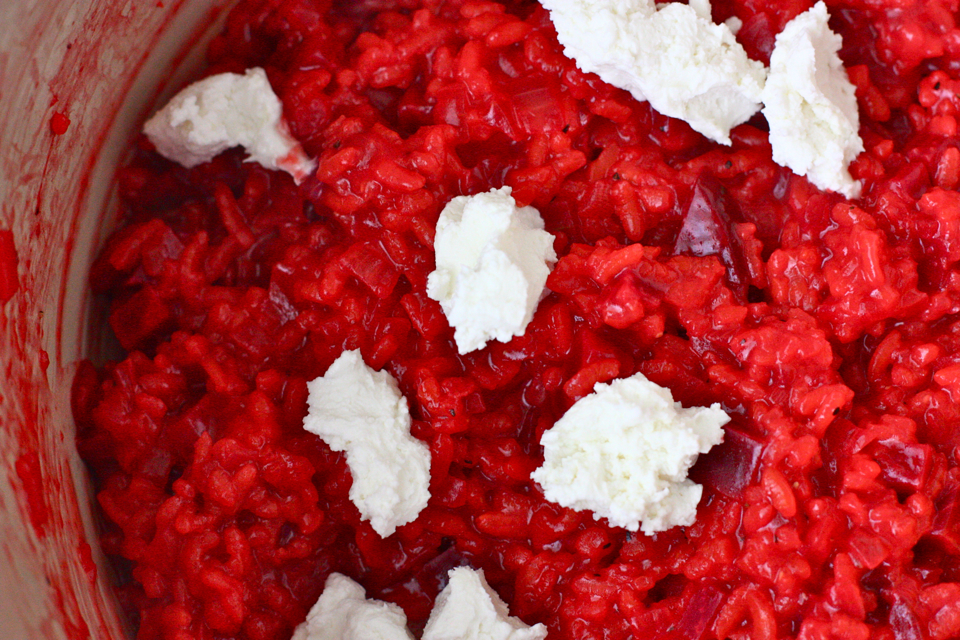
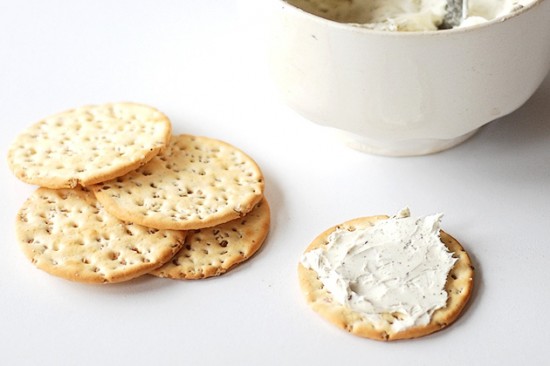
Season with salt and pepper and add the goat cheese—the best part!

Just look at those huge melting chunks of cheese. Are you drooling yet?


Tasty Kitchen Blog: Beet Risotto with Goat Cheese. Guest post by Jenna Weber of Eat, Live, Run; recipe submitted by TK member Amanda of Once Upon a Recipe.

This would be the perfect side dish to a roast chicken (I especially love TK member Nicole’s Best Roast Chicken. Period.). It’s creamy, hearty and delicious! A big thank you to Amanda for providing such an easy recipe. Visit her blog Once Upon a Recipe for more of her creations!


Printable Recipe

Beet Risotto with Goat Cheese

See post on Amanda (onceuponarecipe)’s site!
4.87 Mitt(s) 8 Rating(s)8 votes, average: 4.87 out of 58 votes, average: 4.87 out of 58 votes, average: 4.87 out of 58 votes, average: 4.87 out of 58 votes, average: 4.87 out of 5

Prep Time:

Cook Time:

Difficulty: Easy

Servings: 6

6
x

Print Options

Page size Letter 3x5 4x6
Text Size Small Medium Large
Content Include description
Include prep time, etc.
Show image

Description

Creamy beet risotto topped with goat cheese makes for a delicious and gourmet accompaniment to a meal!
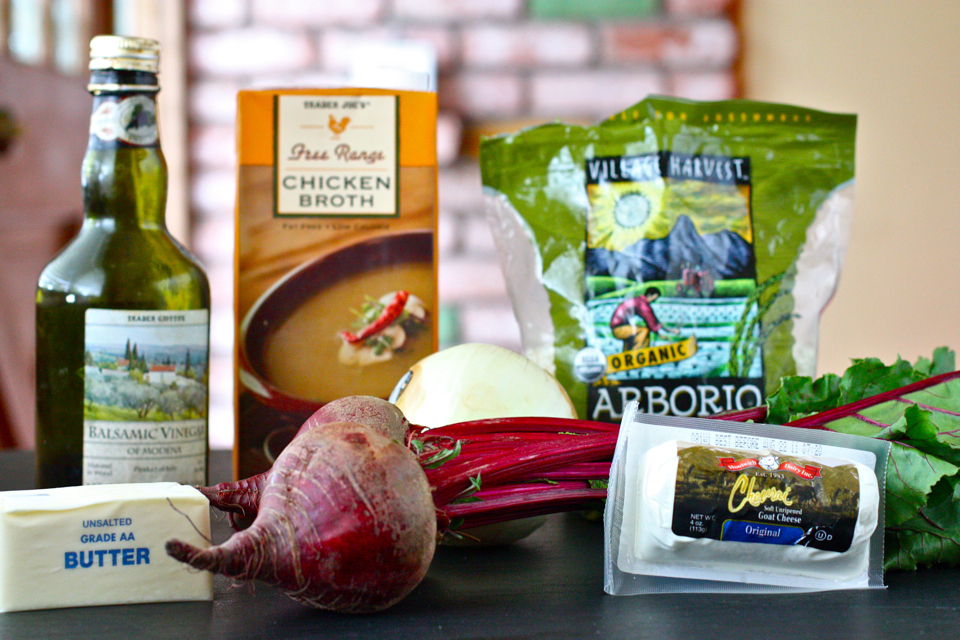
Ingredients

  • ¼ cups Butter
  • 2 whole Beets, Chopped Small
  • 1 whole Onion, Chopped Small
  • 1 cup Arborio Rice
  • 3 cups Stock (Chicken Or Vegetable)
  • 1 Tablespoon Balsamic Vinegar
  • Salt And Pepper, to taste
  • ½ cups Goat Cheese

Preparation Instructions

Melt the butter over medium heat in a heavy-bottomed saucepan. Add the beets and onion, and cook for 8 minutes (stir to allow the onion to caramelize). Mix in the rice, broth, and balsamic vinegar. Increase the heat. Bring to a boil, and then reduce the heat to medium-low. Cover and simmer until the rice is tender and the risotto is creamy, stirring occasionally (about 15 minutes). Season with salt and pepper. Sprinkle with the goat cheese. If you are not a goat cheese fan, you could substitute feta cheese, but trust me, the goat cheese really enhances the flavor of the beets. Enjoy!


_______________________________________

Jenna is a food writer who has worked as a pastry chef and bread baker. Her blog Eat, Live, Run has great recipes, travel stories, and the perfect slogan: “Celebrating life, one crumb at a time.”


Profile photo of cookincanuck

Oatmeal Butter Tart Squares

Posted by in Baking, Step-by-Step Recipes

Tasty Kitchen Blog: Oatmeal Butter Tart Squares. Guest post by Dara Michalski of Cookin' Canuck, recipe submitted by TK member gingerbreadbagels.

There are some recipes, tastes and aromas that evoke strong memories. Memories of childhood dinners with extended family, memories of special occasions. Each Christmas, my grandmother made a batch of her butter tarts to serve alongside the flambéed plum pudding at the end of the meal. The crust was flaky and the filling was sweet, tender and buttery.

Considering my irrational fear of pastry, I always shied away from making the tarts myself. My inability to turn out a decent pie is one of the reasons I am sure that Ree would bar my entrance to her ranch. That, and the fact that I probably wouldn’t be able to stop myself from hugging Charlie her lovable basset hound every few minutes, would likely get me cattle-prodded off the property in no time.

When I saw these Oatmeal Butter Tart Squares by Lindsey (gingerbreadbagels on Tasty Kitchen), complete with a caramelized filling, with raisins, oatmeal and coconut, and a simple sugar cookie crust, I knew I had to try them. At first bite, memories of my grandmother flooded back and I knew that these would become a regular treat in our house.


Tasty Kitchen Blog: Oatmeal Butter Tart Squares. Guest post by Dara Michalski of Cookin' Canuck, recipe submitted by TK member gingerbreadbagels.

First, let’s prepare the crust. Preheat the oven to 400 degrees F and get the ingredients ready.


Tasty Kitchen Blog: Oatmeal Butter Tart Squares. Guest post by Dara Michalski of Cookin' Canuck, recipe submitted by TK member gingerbreadbagels.

In the bowl of a stand mixer (or in a large bowl, using a handheld mixer), beat the butter and sugar until light and fluffy, 3 to 4 minutes. Add milk and vanilla extract and mix to combine.


Tasty Kitchen Blog: Oatmeal Butter Tart Squares. Guest post by Dara Michalski of Cookin' Canuck, recipe submitted by TK member gingerbreadbagels.

With the mixer running on low speed, gradually add in the flour and mix until almost combined.


Tasty Kitchen Blog: Oatmeal Butter Tart Squares. Guest post by Dara Michalski of Cookin' Canuck, recipe submitted by TK member gingerbreadbagels.

Use a spatula to mix until the sugar cookie dough comes together.


Tasty Kitchen Blog: Oatmeal Butter Tart Squares. Guest post by Dara Michalski of Cookin' Canuck, recipe submitted by TK member gingerbreadbagels.

Evenly press the cookie dough into a lightly greased 8- by 8-inch pan. I used a foil liner, which was not in Lindsey’s recipe. Ignore me, and follow Lindsey’s instructions. The filling stuck to the foil and made a bit of a mess.

Bake until the edges start to turn golden brown, 12 to 15 minutes. Cool completely.

Now let’s make the the filling. Turn the oven down to 350 degrees F.


Tasty Kitchen Blog: Oatmeal Butter Tart Squares. Guest post by Dara Michalski of Cookin' Canuck, recipe submitted by TK member gingerbreadbagels.

Place the raisins in a medium bowl and cover with hot water. Soak for 20 minutes. Drain raisins and set aside.

In the bowl of a stand mixer (or in a large bowl, using a handheld mixer), beat brown sugar, eggs and vanilla extract until combined.

In a large mixing bowl with the paddle attachment (a handheld mixer works fine too), mix together the brown sugar, eggs and vanilla extract.


Tasty Kitchen Blog: Oatmeal Butter Tart Squares. Guest post by Dara Michalski of Cookin' Canuck, recipe submitted by TK member gingerbreadbagels.

Add oats, baking powder and kosher salt, and mix to combine.


Tasty Kitchen Blog: Oatmeal Butter Tart Squares. Guest post by Dara Michalski of Cookin' Canuck, recipe submitted by TK member gingerbreadbagels.

Fold in sweetened flaked coconut, raisins and chopped pecans.


Tasty Kitchen Blog: Oatmeal Butter Tart Squares. Guest post by Dara Michalski of Cookin' Canuck, recipe submitted by TK member gingerbreadbagels.

Pour the filling over the cooled sugar cookie crust.

Bake until filling is set, 30 to 35 minutes.

Let the squares cool completely before cutting. The squares will firm up once they are completely cooled. If you try to cut them while still warm, the filling may ooze out.

Once cool, cut into squares and enjoy!


Tasty Kitchen Blog: Oatmeal Butter Tart Squares. Guest post by Dara Michalski of Cookin' Canuck, recipe submitted by TK member gingerbreadbagels.

 
Thank you, Lindsey, for a dessert that is not only irresistible, but brought back so many fond memories for me. Be sure to check out Lindsey’s blog Gingerbread Bagels for many other wonderful recipes.

Here is the link to the printable recipe: Oatmeal Butter Tart Squares


_______________________________________

Dara Michalski is a doll and a sweetheart who clearly knows her way around the kitchen. She blogs at Cookin’ Canuck, where she shares her flavor-packed recipes and fun, engaging writing. The photography’s pretty incredible, too.


Profile photo of georgiapellegrini

Spicy Moroccan Chickpeas

Posted by in Step-by-Step Recipes

Tasty Kitchen Blog: Spicy Moroccan Chickpeas. Guest post by Georgia Pellegrini, recipe submitted by TK member Nika of I'm Not Quite Sure What You Are Saying ...

 
I just love chickpeas. Or is it garbanzo beans? Well, I love them either way. Sometimes, when I’m in a rush, I just empty a can of them into a bowl, add some of my favorite dressing and any herbs I can find and it’s a meal. They are so versatile. I’ve noticed that people are finding yet another great way to make them at home by turning them into a crispy snack. This spicy Moroccan style by Nika really caught my eye. Spicy, crispy, Moroccan chickpea-garbanzo beans? I’m sold.


Tasty Kitchen Blog: Spicy Moroccan Chickpeas. Guest post by Georgia Pellegrini, recipe submitted by TK member Nika of I'm Not Quite Sure What You Are Saying ...

You begin by combining all of these wonderful and aromatic spices into a bowl. The fresh ginger is particularly wonderful in the way it smells. Close your eyes for a moment, inhale, and imagine yourself in the spice stalls of Morocco …


Tasty Kitchen Blog: Spicy Moroccan Chickpeas. Guest post by Georgia Pellegrini, recipe submitted by TK member Nika of I'm Not Quite Sure What You Are Saying ...

Okay, open your eyes. In a separate bowl you’ll need a can of chickpeas.


Tasty Kitchen Blog: Spicy Moroccan Chickpeas. Guest post by Georgia Pellegrini, recipe submitted by TK member Nika of I'm Not Quite Sure What You Are Saying ...

You’ll also need a bit of olive oil to help you coat the mixture onto the beans thoroughly.


Tasty Kitchen Blog: Spicy Moroccan Chickpeas. Guest post by Georgia Pellegrini, recipe submitted by TK member Nika of I'm Not Quite Sure What You Are Saying ...

Give your spices a mix.


Tasty Kitchen Blog: Spicy Moroccan Chickpeas. Guest post by Georgia Pellegrini, recipe submitted by TK member Nika of I'm Not Quite Sure What You Are Saying ...

It looks a bit like a work of art, all of that color.


Tasty Kitchen Blog: Spicy Moroccan Chickpeas. Guest post by Georgia Pellegrini, recipe submitted by TK member Nika of I'm Not Quite Sure What You Are Saying ...

Pour the olive oil into the chickpeas and toss with a spoon.


Tasty Kitchen Blog: Spicy Moroccan Chickpeas. Guest post by Georgia Pellegrini, recipe submitted by TK member Nika of I'm Not Quite Sure What You Are Saying ...

Add the spice mixture and stir it well.


Tasty Kitchen Blog: Spicy Moroccan Chickpeas. Guest post by Georgia Pellegrini, recipe submitted by TK member Nika of I'm Not Quite Sure What You Are Saying ...

As you mix, the ingredients will go from dry to a spicy syrup and begin to coat the chickpeas evenly.


Tasty Kitchen Blog: Spicy Moroccan Chickpeas. Guest post by Georgia Pellegrini, recipe submitted by TK member Nika of I'm Not Quite Sure What You Are Saying ...

When they look well-coated, pour them all into a baking dish.


Tasty Kitchen Blog: Spicy Moroccan Chickpeas. Guest post by Georgia Pellegrini, recipe submitted by TK member Nika of I'm Not Quite Sure What You Are Saying ...

Spread them evenly with a spoon, and pop them into the oven.


Tasty Kitchen Blog: Spicy Moroccan Chickpeas. Guest post by Georgia Pellegrini, recipe submitted by TK member Nika of I'm Not Quite Sure What You Are Saying ...

When they are ready, they will be golden brown with a vaguely soft inside, which should dry out and become crisp as they cool. If that doesn’t happen, you can pop them back in for a bit longer. I found that mine needed about 45 minutes total rather than 30. I also would suggest cutting the salt amount in half. You can always add more later, when they’re done.


Tasty Kitchen Blog: Spicy Moroccan Chickpeas. Guest post by Georgia Pellegrini, recipe submitted by TK member Nika of I'm Not Quite Sure What You Are Saying ...

They’re quite a delicious snack to have sitting at your fingertips. You could also try other favorite beans. I had toasted black-eyed peas not long ago and they were great as well.

Give these a try! And thanks to Nika (who blogs at I’m Not Quite Sure What You Are Saying) for contributing them to Tasty Kitchen.

 
Here are some other wonderful roasted chickpea recipes from TK members:


Printable Recipe

Spicy Moroccan Roasted Chickpeas

5.00 Mitt(s) 2 Rating(s)2 votes, average: 5.00 out of 52 votes, average: 5.00 out of 52 votes, average: 5.00 out of 52 votes, average: 5.00 out of 52 votes, average: 5.00 out of 5

Prep Time:

Cook Time:

Difficulty: Easy

Servings: 4

4
x

Print Options

Page size Letter 3x5 4x6
Text Size Small Medium Large
Content Include description
Include prep time, etc.
Show image

Description

This is a delicious and healthy alternative to the usual “I’m watching (insert favourite show) and need a really tasty snack.” It can be made with a combination of your favourite herbs and spices. This recipe is just one example.

Ingredients

  • 1 can (15 Oz. Can) Chickpeas
  • ¼ cups Olive Oil
  • ½ teaspoons Curry Powder
  • ½ teaspoons Allspice
  • ½ teaspoons Ground Cloves
  • ½ teaspoons Pumpkin Pie Spice (optional... If You Have It In Your Spice Rack, Use It!)
  • 2 teaspoons Cinnamon
  • ½ teaspoons Cayenne Powder (or More... If You Are The Spicy Type!)
  • 2 teaspoons Fresh Grated Ginger
  • 2 teaspoons Sea Salt

Preparation Instructions

Preheat the oven to 400ºF.

Toss the chickpeas in oil, then put them into a bowl. Combine all the spices in a separate little bowl for your spice blend. Give it a good mix, then sprinkle over the chickpeas, and toss to coat evenly.

Put the chickpeas onto a baking sheet and into the oven for about 30 minutes. About halfway through, give them a bit of a shake. At the end of the 30 minutes, taste! If they are still soft, back in they go! You want them to have just a little bit of a soft center. When they cool, they will crisp up more.


_______________________________________

There’s so much to say about Georgia, we don’t know where to start. Leaving Wall Street for the French Culinary Institute, followed by a stint at the Gramercy Tavern and La Chassagnette in France, her passion for food and food traditions are evident and inspiring. Visit her site at Georgia Pellegrini, where you’ll find more recipes, photos, learn all about her wonderful book Food Heroes, and enjoy her latest adventures.


Profile photo of twopeasandtheirpod

Chocolate Chip Waffles

Posted by in Step-by-Step Recipes

Tasty Kitchen Blog: Chocolate Chip Waffles. Guest post by Maria Lichty of Two Peas and Their Pod, recipe submitted by TK member Robyn Stone of Add A Pinch.

 
Our breakfasts are usually simple during the week: oatmeal, toast, cereal, or yogurt and fruit. On the weekends, we like to splurge and make a special breakfast meal. We usually rotate pancakes, French toast, omelets, and waffles. When it is Josh’s turn to choose, he almost always picks waffles. He recently asked if we could make Chocolate Chip Waffles for breakfast and of course I said yes. Chocolate for breakfast? Count me in!

We searched Tasty Kitchen for a recipe and found Tasty Kitchen member Add a Pinch’s recipe for Chocolate Chip Waffles. I love Robyn’s blog, so I knew these waffles were going to be good. 


Tasty Kitchen Blog: Chocolate Chip Waffles. Guest post by Maria Lichty of Two Peas and Their Pod, recipe submitted by TK member Robyn Stone of Add A Pinch.

To make the waffles, you will need flour, salt, sugar, baking soda, chocolate chips, buttermilk, eggs, butter, and vanilla extract. Note: we halved the recipe because there are only two of us. 


Tasty Kitchen Blog: Chocolate Chip Waffles. Guest post by Maria Lichty of Two Peas and Their Pod, recipe submitted by TK member Robyn Stone of Add A Pinch.

In a large bowl, whisk together flour, salt, sugar, and baking soda. 


Tasty Kitchen Blog: Chocolate Chip Waffles. Guest post by Maria Lichty of Two Peas and Their Pod, recipe submitted by TK member Robyn Stone of Add A Pinch.

Add in the chocolate chips and coat well with the flour mixture. 


Tasty Kitchen Blog: Chocolate Chip Waffles. Guest post by Maria Lichty of Two Peas and Their Pod, recipe submitted by TK member Robyn Stone of Add A Pinch.

In a small bowl or glass measuring cup, mix together buttermilk, eggs, butter, and vanilla extract. 


Tasty Kitchen Blog: Chocolate Chip Waffles. Guest post by Maria Lichty of Two Peas and Their Pod, recipe submitted by TK member Robyn Stone of Add A Pinch.

Pour liquid ingredients over dry ingredients. 


Tasty Kitchen Blog: Chocolate Chip Waffles. Guest post by Maria Lichty of Two Peas and Their Pod, recipe submitted by TK member Robyn Stone of Add A Pinch.

Mix until just combined. 


Tasty Kitchen Blog: Chocolate Chip Waffles. Guest post by Maria Lichty of Two Peas and Their Pod, recipe submitted by TK member Robyn Stone of Add A Pinch.

Pour batter onto a hot waffle iron.


Tasty Kitchen Blog: Chocolate Chip Waffles. Guest post by Maria Lichty of Two Peas and Their Pod, recipe submitted by TK member Robyn Stone of Add A Pinch.

Cook according to manufacturer’s instructions. 


Tasty Kitchen Blog: Chocolate Chip Waffles. Guest post by Maria Lichty of Two Peas and Their Pod, recipe submitted by TK member Robyn Stone of Add A Pinch.

Serve warm with your favorite syrup and toppings. 


Tasty Kitchen Blog: Chocolate Chip Waffles. Guest post by Maria Lichty of Two Peas and Their Pod, recipe submitted by TK member Robyn Stone of Add A Pinch.

 
The waffles made our kitchen smell like chocolate chip cookies. The waffles are light, fluffy, and dotted with chocolate chips. We both devoured our plate of waffles. Next time, I am going to make them for dessert. I think they would be delicious with a scoop of vanilla ice cream on top. Mmmm!

Thanks Robyn for a fantastic recipe! Chocolate Chip Waffles are the perfect breakfast treat. Visit her blog, Add A Pinch, for more of her great recipes and photography!


Printable Recipe

Chocolate Chip Waffles

See post on addapinch | Robyn Stone’s site!
5.00 Mitt(s) 5 Rating(s)5 votes, average: 5.00 out of 55 votes, average: 5.00 out of 55 votes, average: 5.00 out of 55 votes, average: 5.00 out of 55 votes, average: 5.00 out of 5

Prep Time:

Cook Time:

Difficulty: Easy

Servings: 8

8
x

Print Options

Page size Letter 3x5 4x6
Text Size Small Medium Large
Content Include description
Include prep time, etc.
Show image

Description

America’s favorite cookie comes to breakfast!

Ingredients

  • 4 cups Flour, All Purpose
  • 1 teaspoon Salt
  • 3 Tablespoons Sugar
  • 3 teaspoons Baking Soda
  • 1-½ cup Chocolate Chips
  • 4 cups Buttermilk
  • 4 whole Eggs
  • 1 stick Butter, Melted
  • 1 teaspoon Vanilla

Preparation Instructions

1. Whisk together flour, salt, sugar, and baking soda. Toss in chocolate chips and coat well with flour mixture.

2. Mix together buttermilk, eggs, butter, and vanilla. Pour into dry mixture and stir together just until combined. Pour batter into a waffle iron and cook to your iron’s instructions.

3. Serve immediately with your favorite syrup.


_______________________________________

Maria and her husband Josh (who she affectionately refers to as her “dough boy”) blog at Two Peas and Their Pod. They’ve been featured on Saveur, Eatocracy, Gourmet Live, Glamour, and the Los Angeles Times, to name just a few. We’re so glad to have them here!


Profile photo of Erica Lea

Rosemary and Thyme Spread

Posted by in Step-by-Step Recipes

  Five. Simple. Ingredients. Seriously! That’s all that goes into this ultra-simple yet super-yummy dip. You’ll weep when you realize how easily it comes together. Okay, maybe you won’t have quite that emotional reaction, but you’re sure to be pleased at how quickly you’ll have it on the table. Let me show you how!   […]

Profile photo of Erika (TK)

Put Some Irish In Your Dessert!

Posted by in Holidays, Looks Delicious!

  Looking for ways to celebrate today’s holiday without wearing green from head to toe? (Did you know that originally, blue was the color associated with St. Patrick?) If you’re up for a blast from the past, here’s an Irish food theme post we put up last time. Spoiler alert: Chocolate Stout Cupcakes. That’s all […]

Profile photo of Erika (TK)

Looks Delicious! Blueberry-Pomegranate Granita

Posted by in Looks Delicious!

  This Blueberry-Pomegranate Granita from our dear friend Natalie (she of the wonderful Perrys’ Plate blog) has a fresh and tart flavor that’s perfect at the end of a hearty meal. Or as a quick, guilt-free snack. And look at that color! You only need 5 or 6 ingredients, a blender, and a container in […]

Profile photo of Erika (TK)

Looks Delicious! Light and Creamy Asparagus Soup

Posted by in Looks Delicious!

  This Light and Creamy Asparagus Soup from aspicyperspective has so much going for it: asparagus for spring, warm comforting soup for the lingering chill, and crispy bacon bits for happiness. Sommer is a cooking instructor and food writer who blogs at A Spicy Perspective. She’s based in Asheville, North Carolina, and if you check […]