The Pioneer Woman Tasty Kitchen
Profile photo of Laurie - Simply Scratch

Roasted Red Pepper Pizza Sauce

Posted by in Step-by-Step Recipes

Tasty Kitchen Blog: Roasted Red Pepper Pizza Sauce. Guest post by Laurie McNamara of Simply Scratch, recipe submitted by TK member Leanne.

 
It all started when I went off searching for a pizza sauce. I wanted, no needed a sauce with flavor, flair … and with roasted red peppers. So I typed in the words “roasted red pepper pizza sauce” into the Google search bar on my desktop, and wouldn’t you know it, up popped the link to Leanne’s recipe in Tasty Kitchen. Call it luck or call it fate, I’ll call it all that AND I’ll call it the best pizza sauce I’ve ever had. Period.

You know as well as I do that homemade pizza sauce is always a key factor when making a great pizza. But homemade pizza sauce that calls for roasted red peppers is not only brilliant but amazing and it’s so easy to make too! Just throw it all in a food processor and you’ll have a thick and flavorful sauce for your pizza in seconds. 


Tasty Kitchen Blog: Roasted Red Pepper Pizza Sauce. Guest post by Laurie McNamara of Simply Scratch, recipe submitted by TK member Leanne.

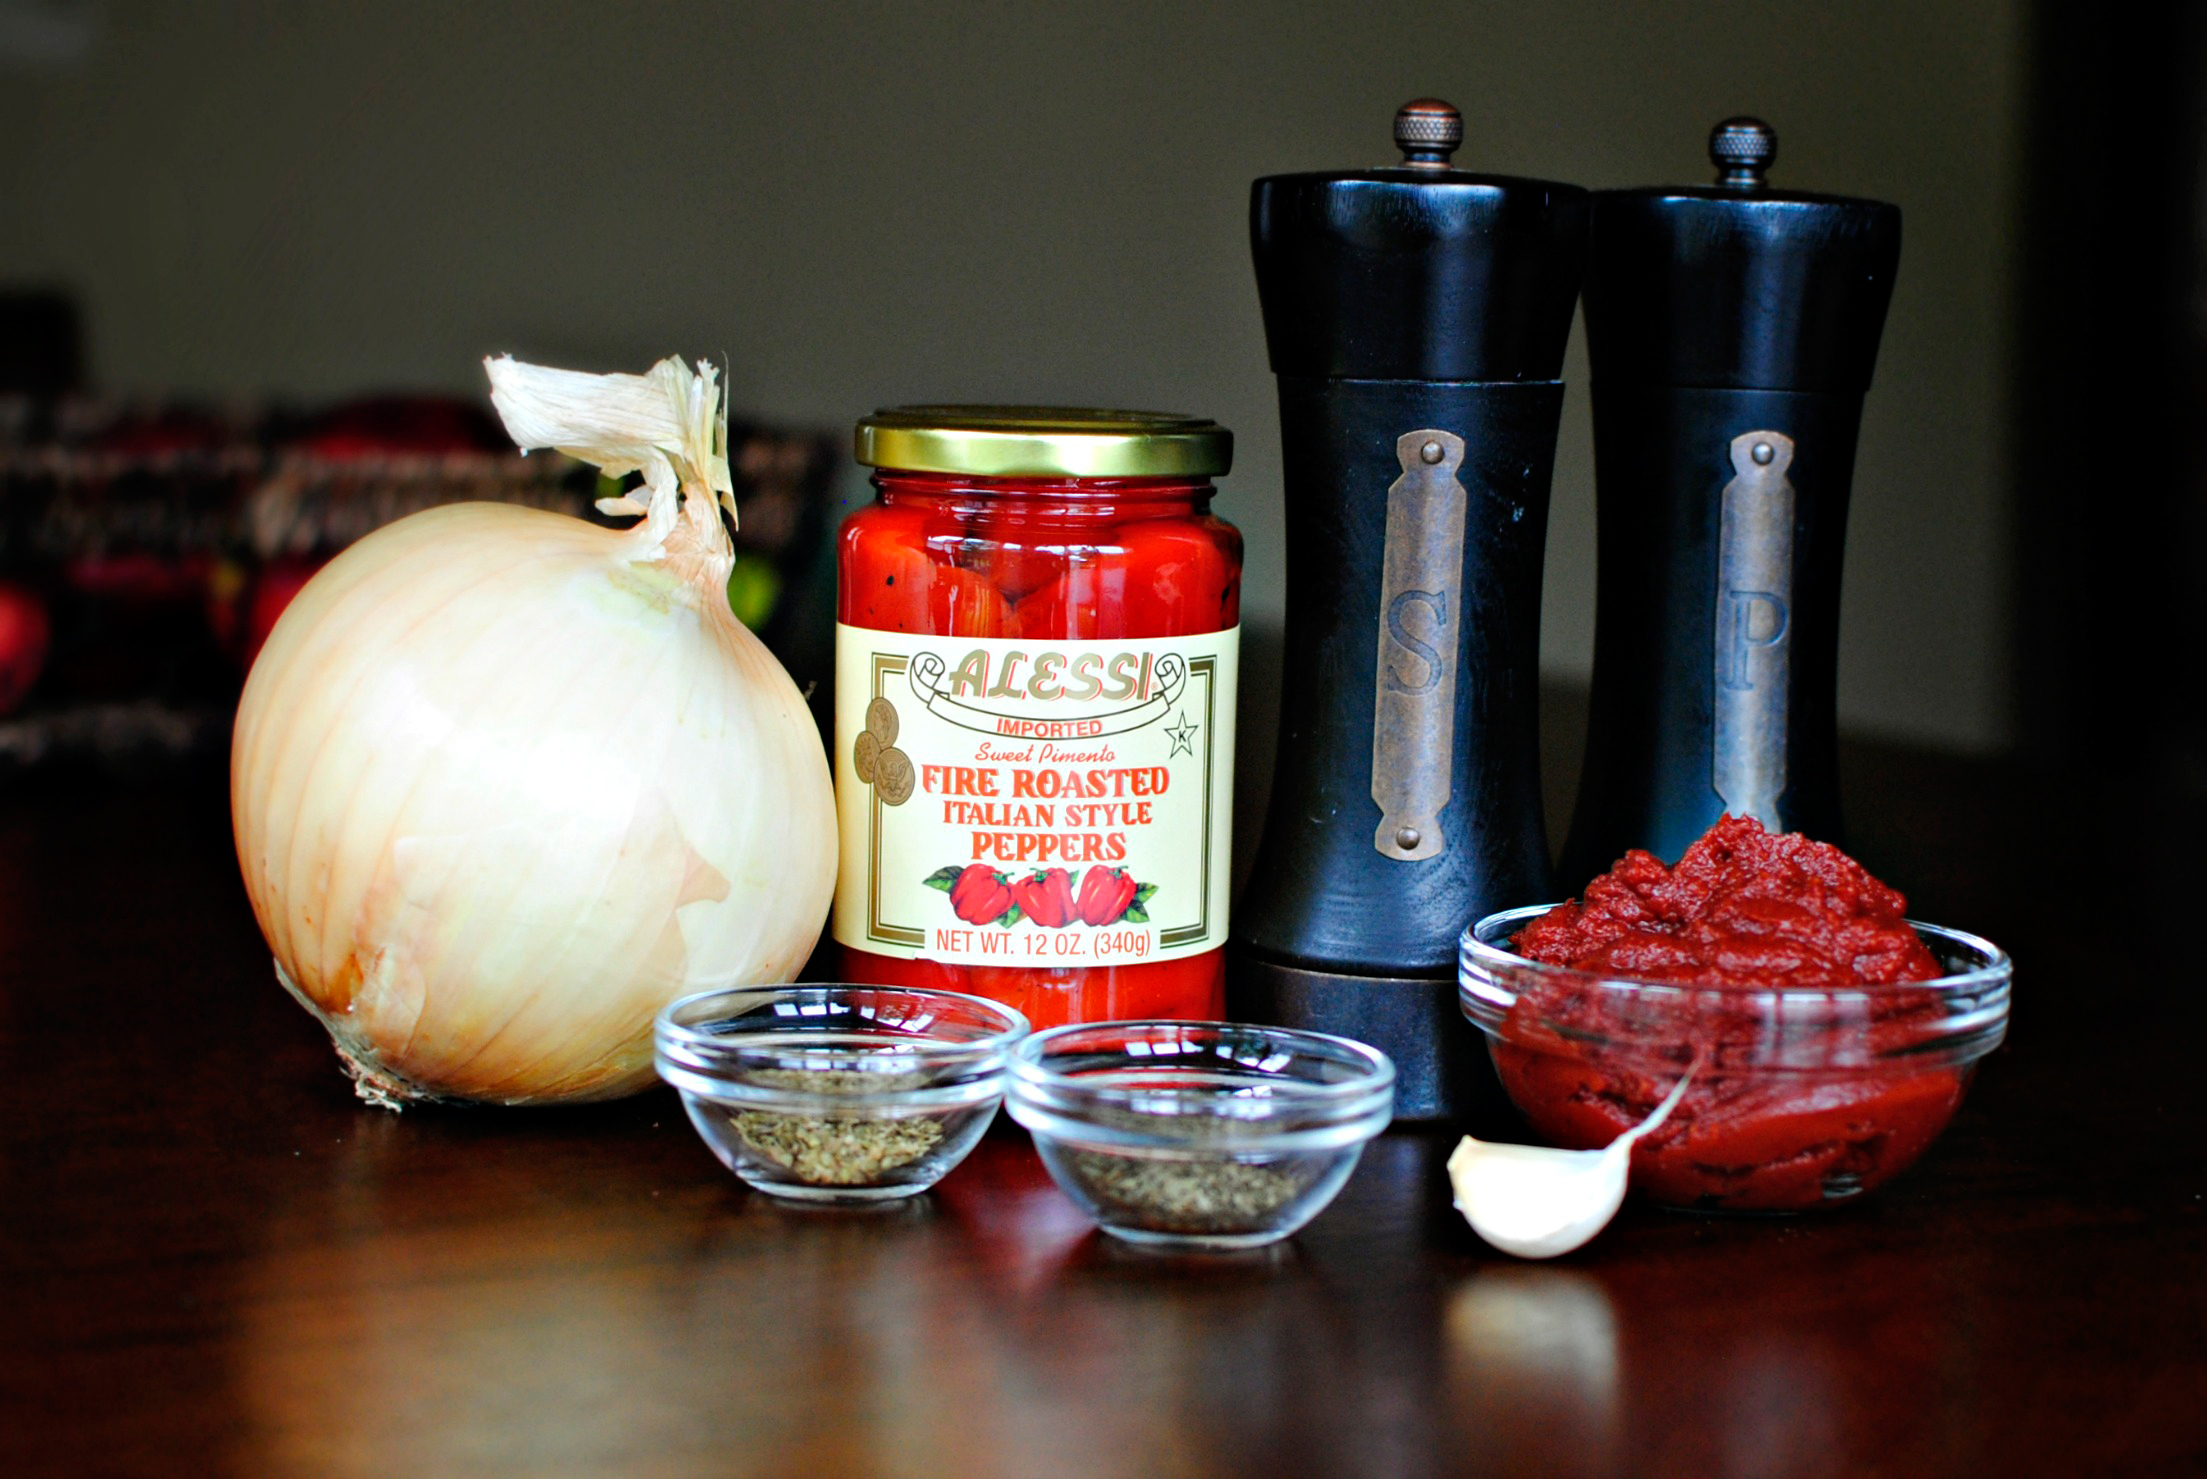
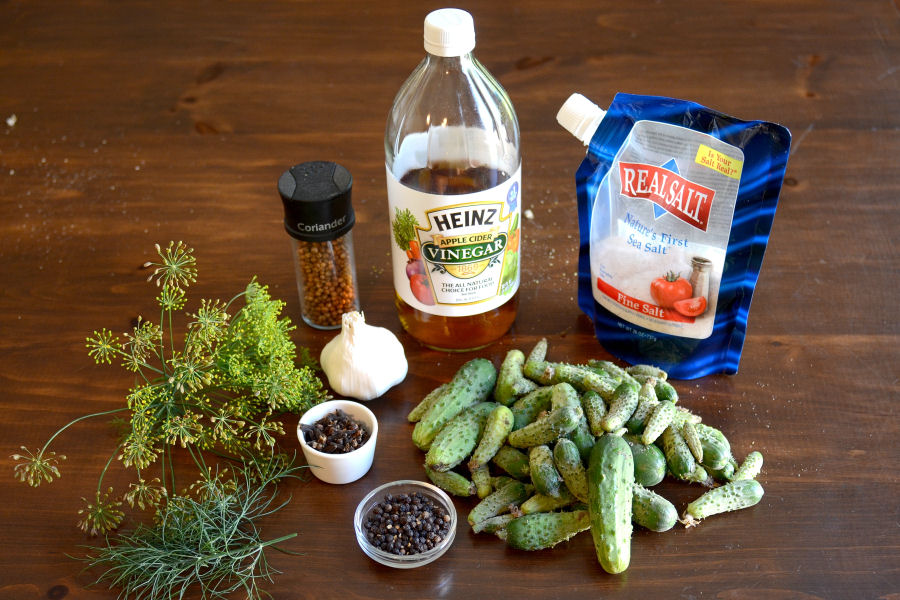
The ingredients are simple enough: an onion, a jar of roasted red peppers, tomato paste, a garlic clove, oregano, basil and the ever important salt and black pepper. You could make this 100% from scratch by roasting and peeling your own red bell peppers (I’d say you would need about 2 large or 3 small) but who wouldn’t like a little help in the kitchen every now and again?


Tasty Kitchen Blog: Roasted Red Pepper Pizza Sauce. Guest post by Laurie McNamara of Simply Scratch, recipe submitted by TK member Leanne.

Start by smashing and peeling one garlic clove.


Tasty Kitchen Blog: Roasted Red Pepper Pizza Sauce. Guest post by Laurie McNamara of Simply Scratch, recipe submitted by TK member Leanne.

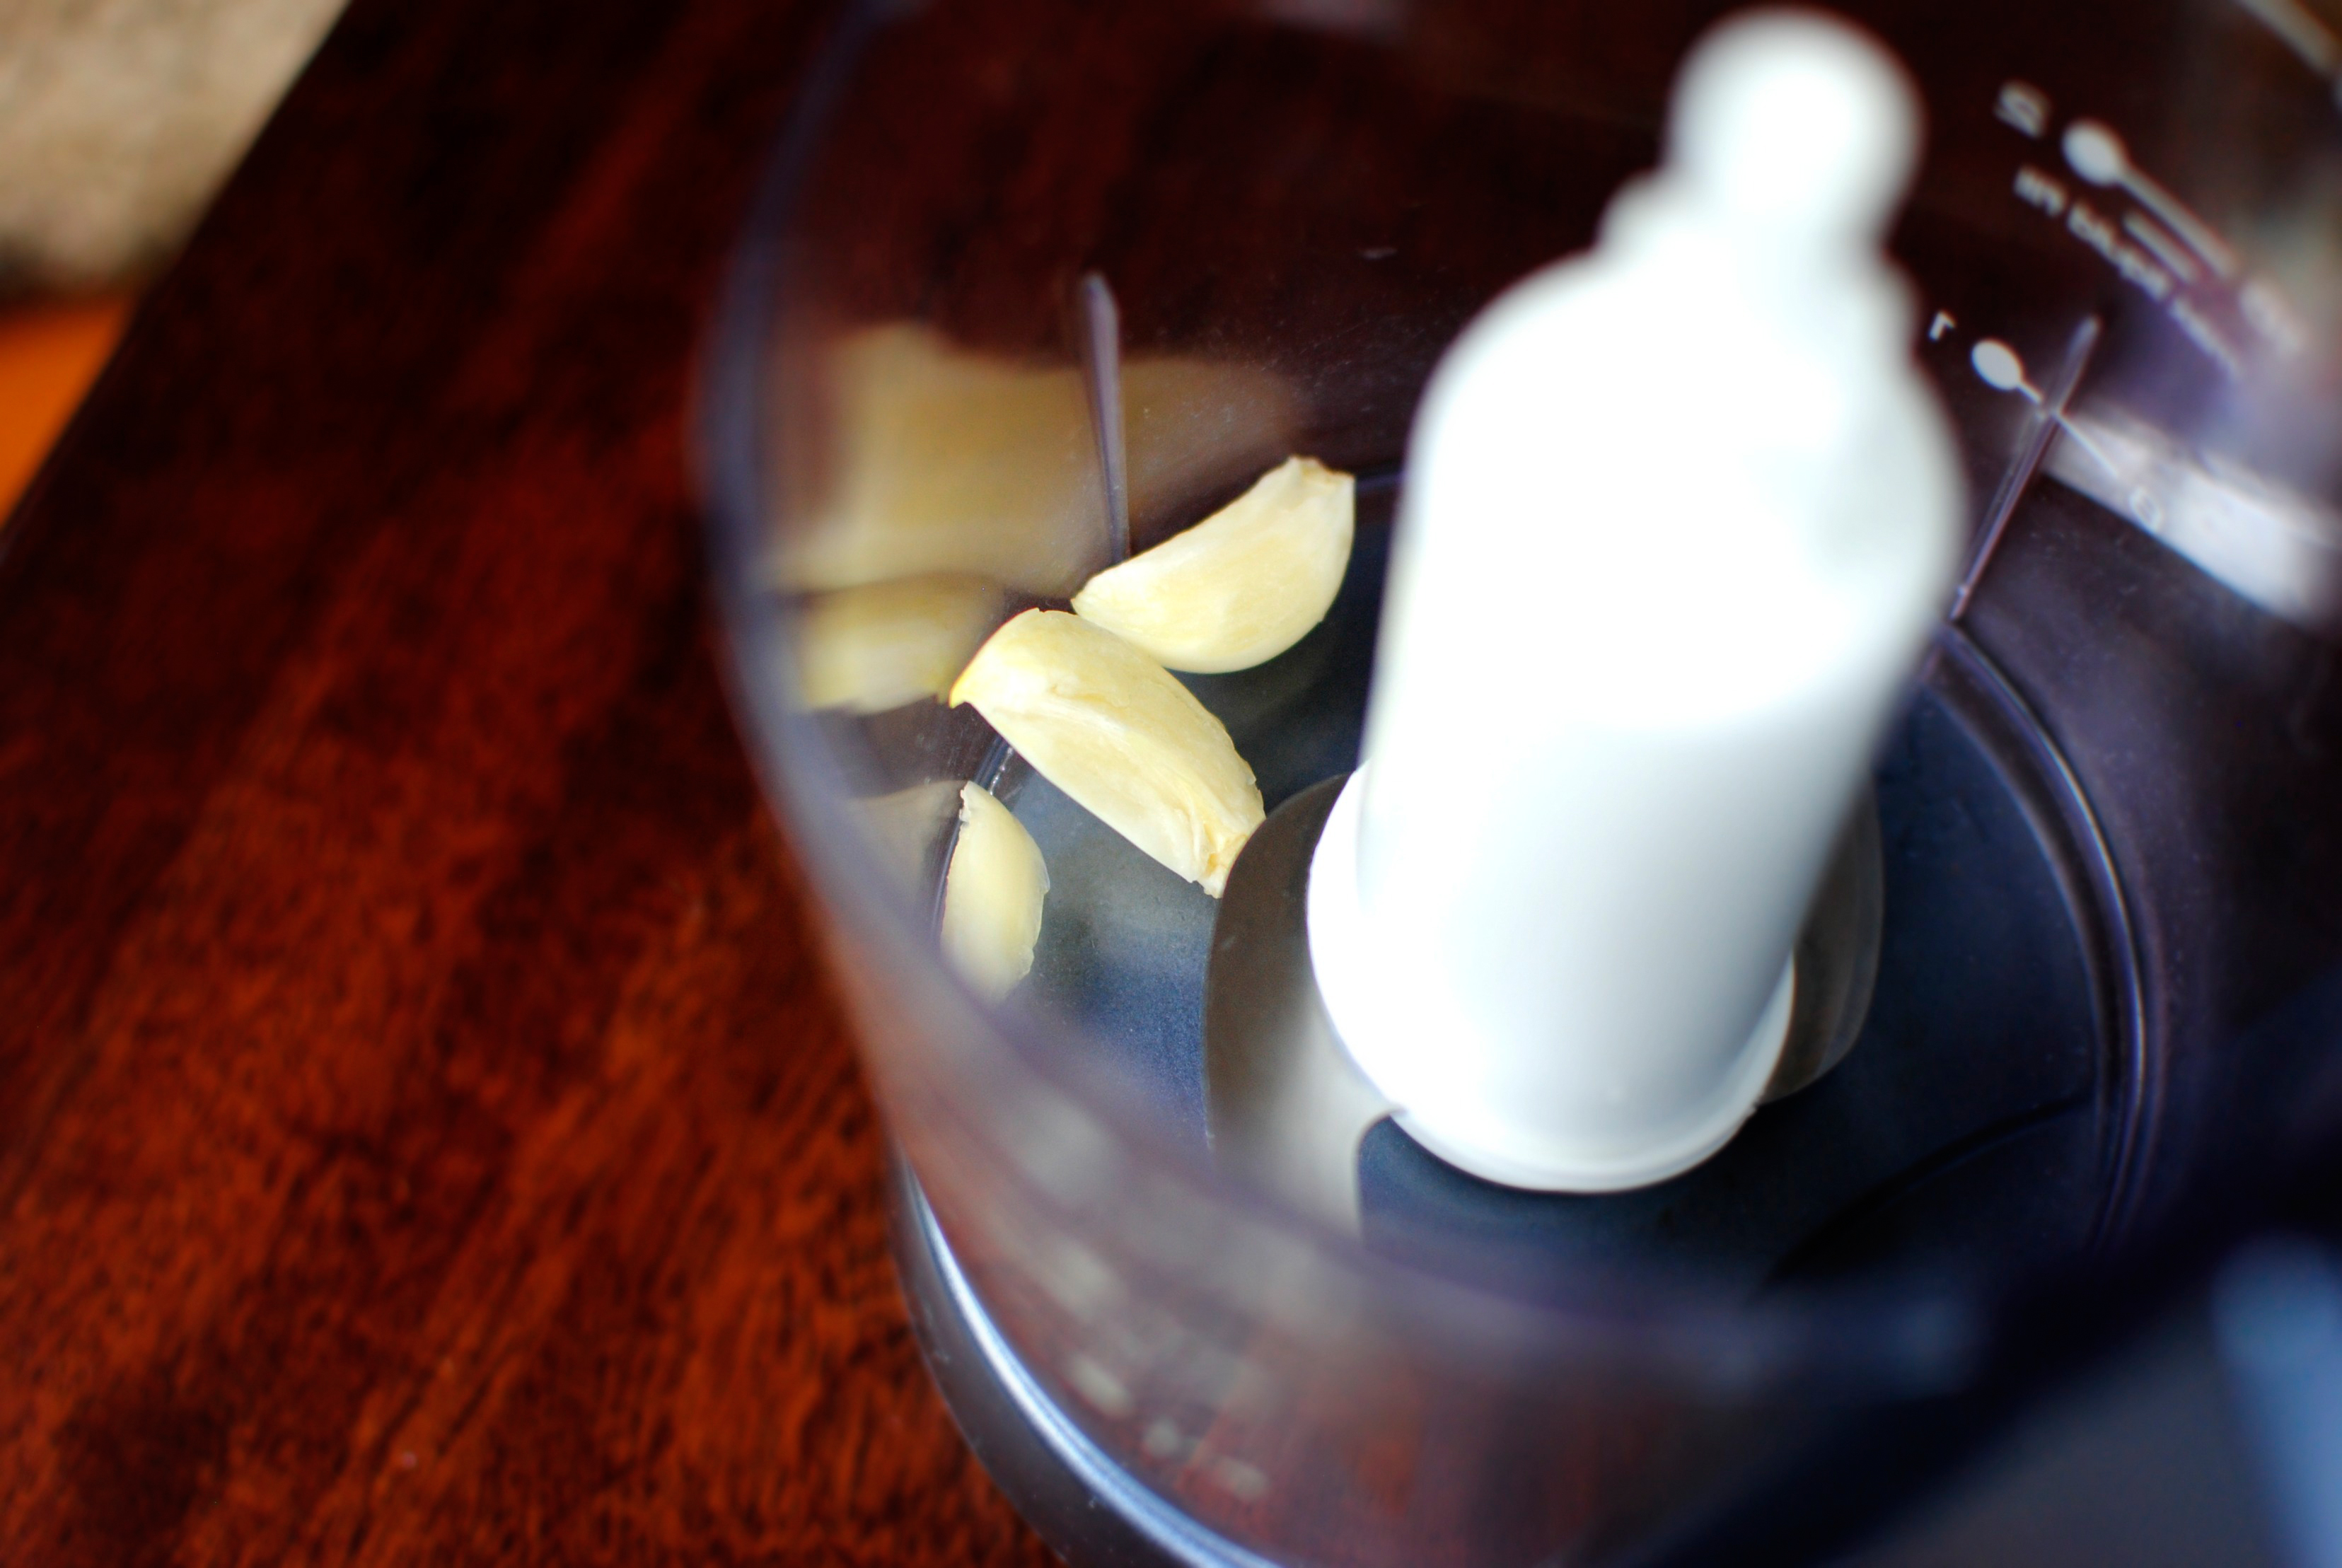
Toss the garlic into a food processor. If you have a mini one then that will be just the perfect size for this recipe.


Tasty Kitchen Blog: Roasted Red Pepper Pizza Sauce. Guest post by Laurie McNamara of Simply Scratch, recipe submitted by TK member Leanne.

The original recipe calls for white onion, and since all I had on hand was the Spanish variety, I made a slight alteration. Also, since the Spanish onion was the size of a softball on steroids, I only used a third of that big guy.


Tasty Kitchen Blog: Roasted Red Pepper Pizza Sauce. Guest post by Laurie McNamara of Simply Scratch, recipe submitted by TK member Leanne.

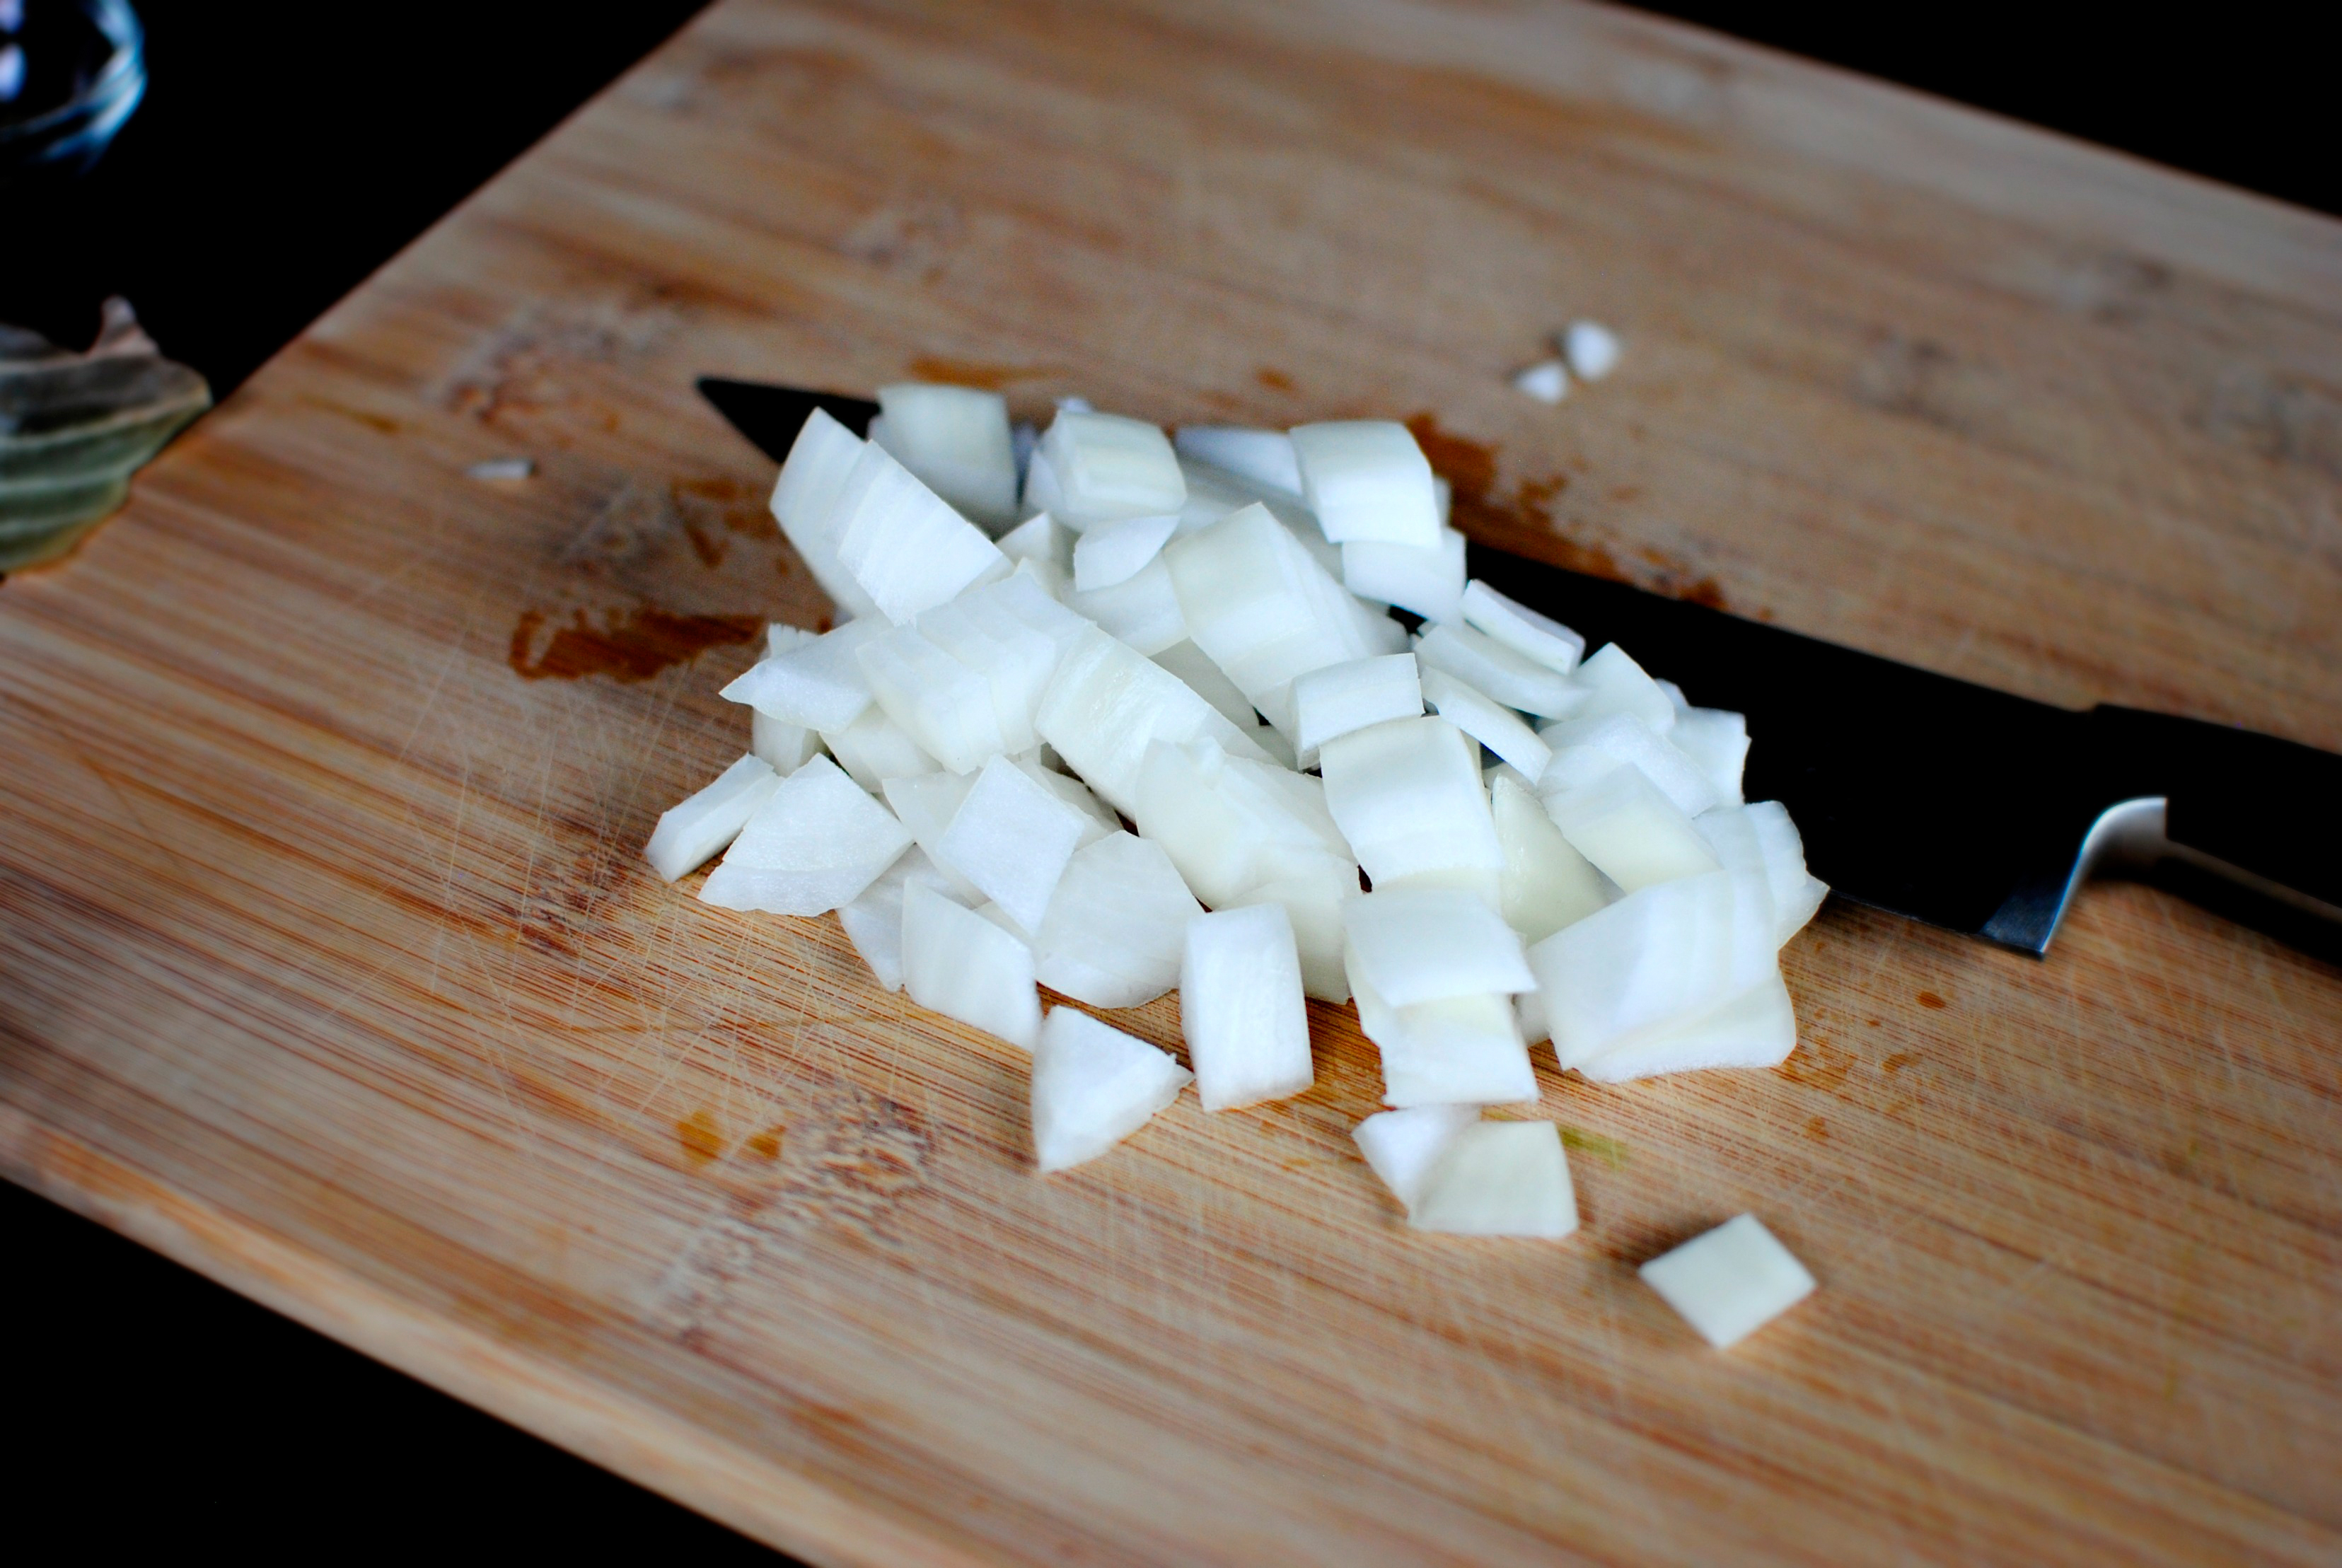
Next just give the onion a rough chop. Nothing perfect or pretty, it just helps the food processor out a tad.


Tasty Kitchen Blog: Roasted Red Pepper Pizza Sauce. Guest post by Laurie McNamara of Simply Scratch, recipe submitted by TK member Leanne.

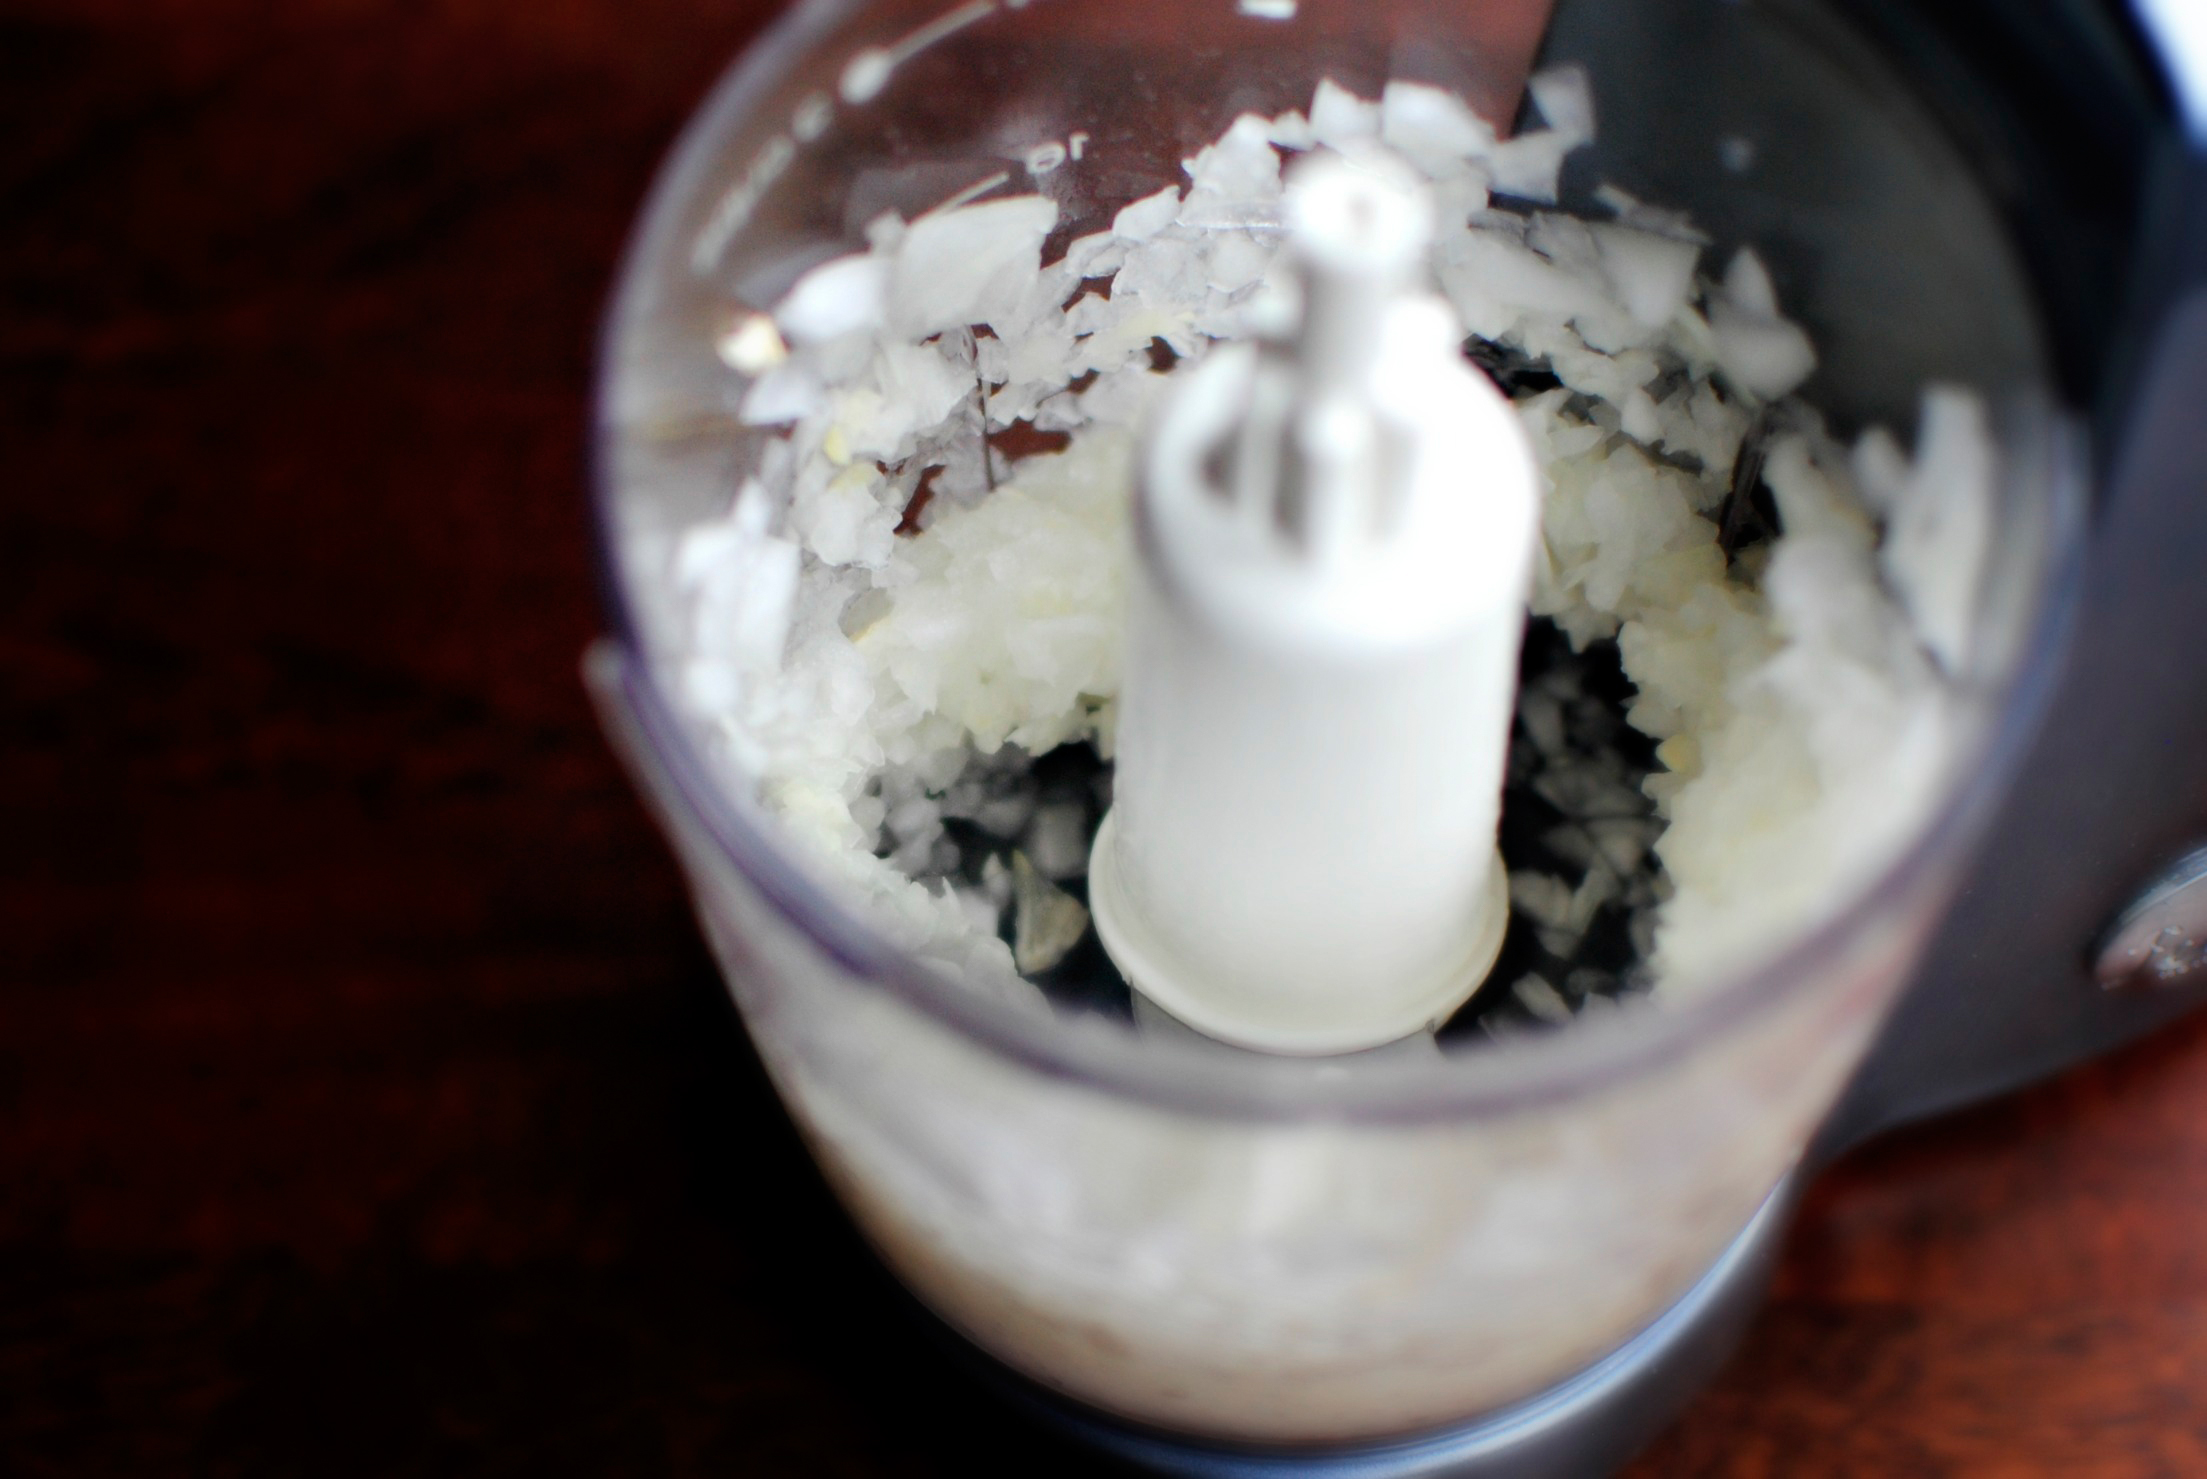
Add in the diced onion and secure the lid. Give it a quick pulse to mince up both the garlic and onion.


Tasty Kitchen Blog: Roasted Red Pepper Pizza Sauce. Guest post by Laurie McNamara of Simply Scratch, recipe submitted by TK member Leanne.

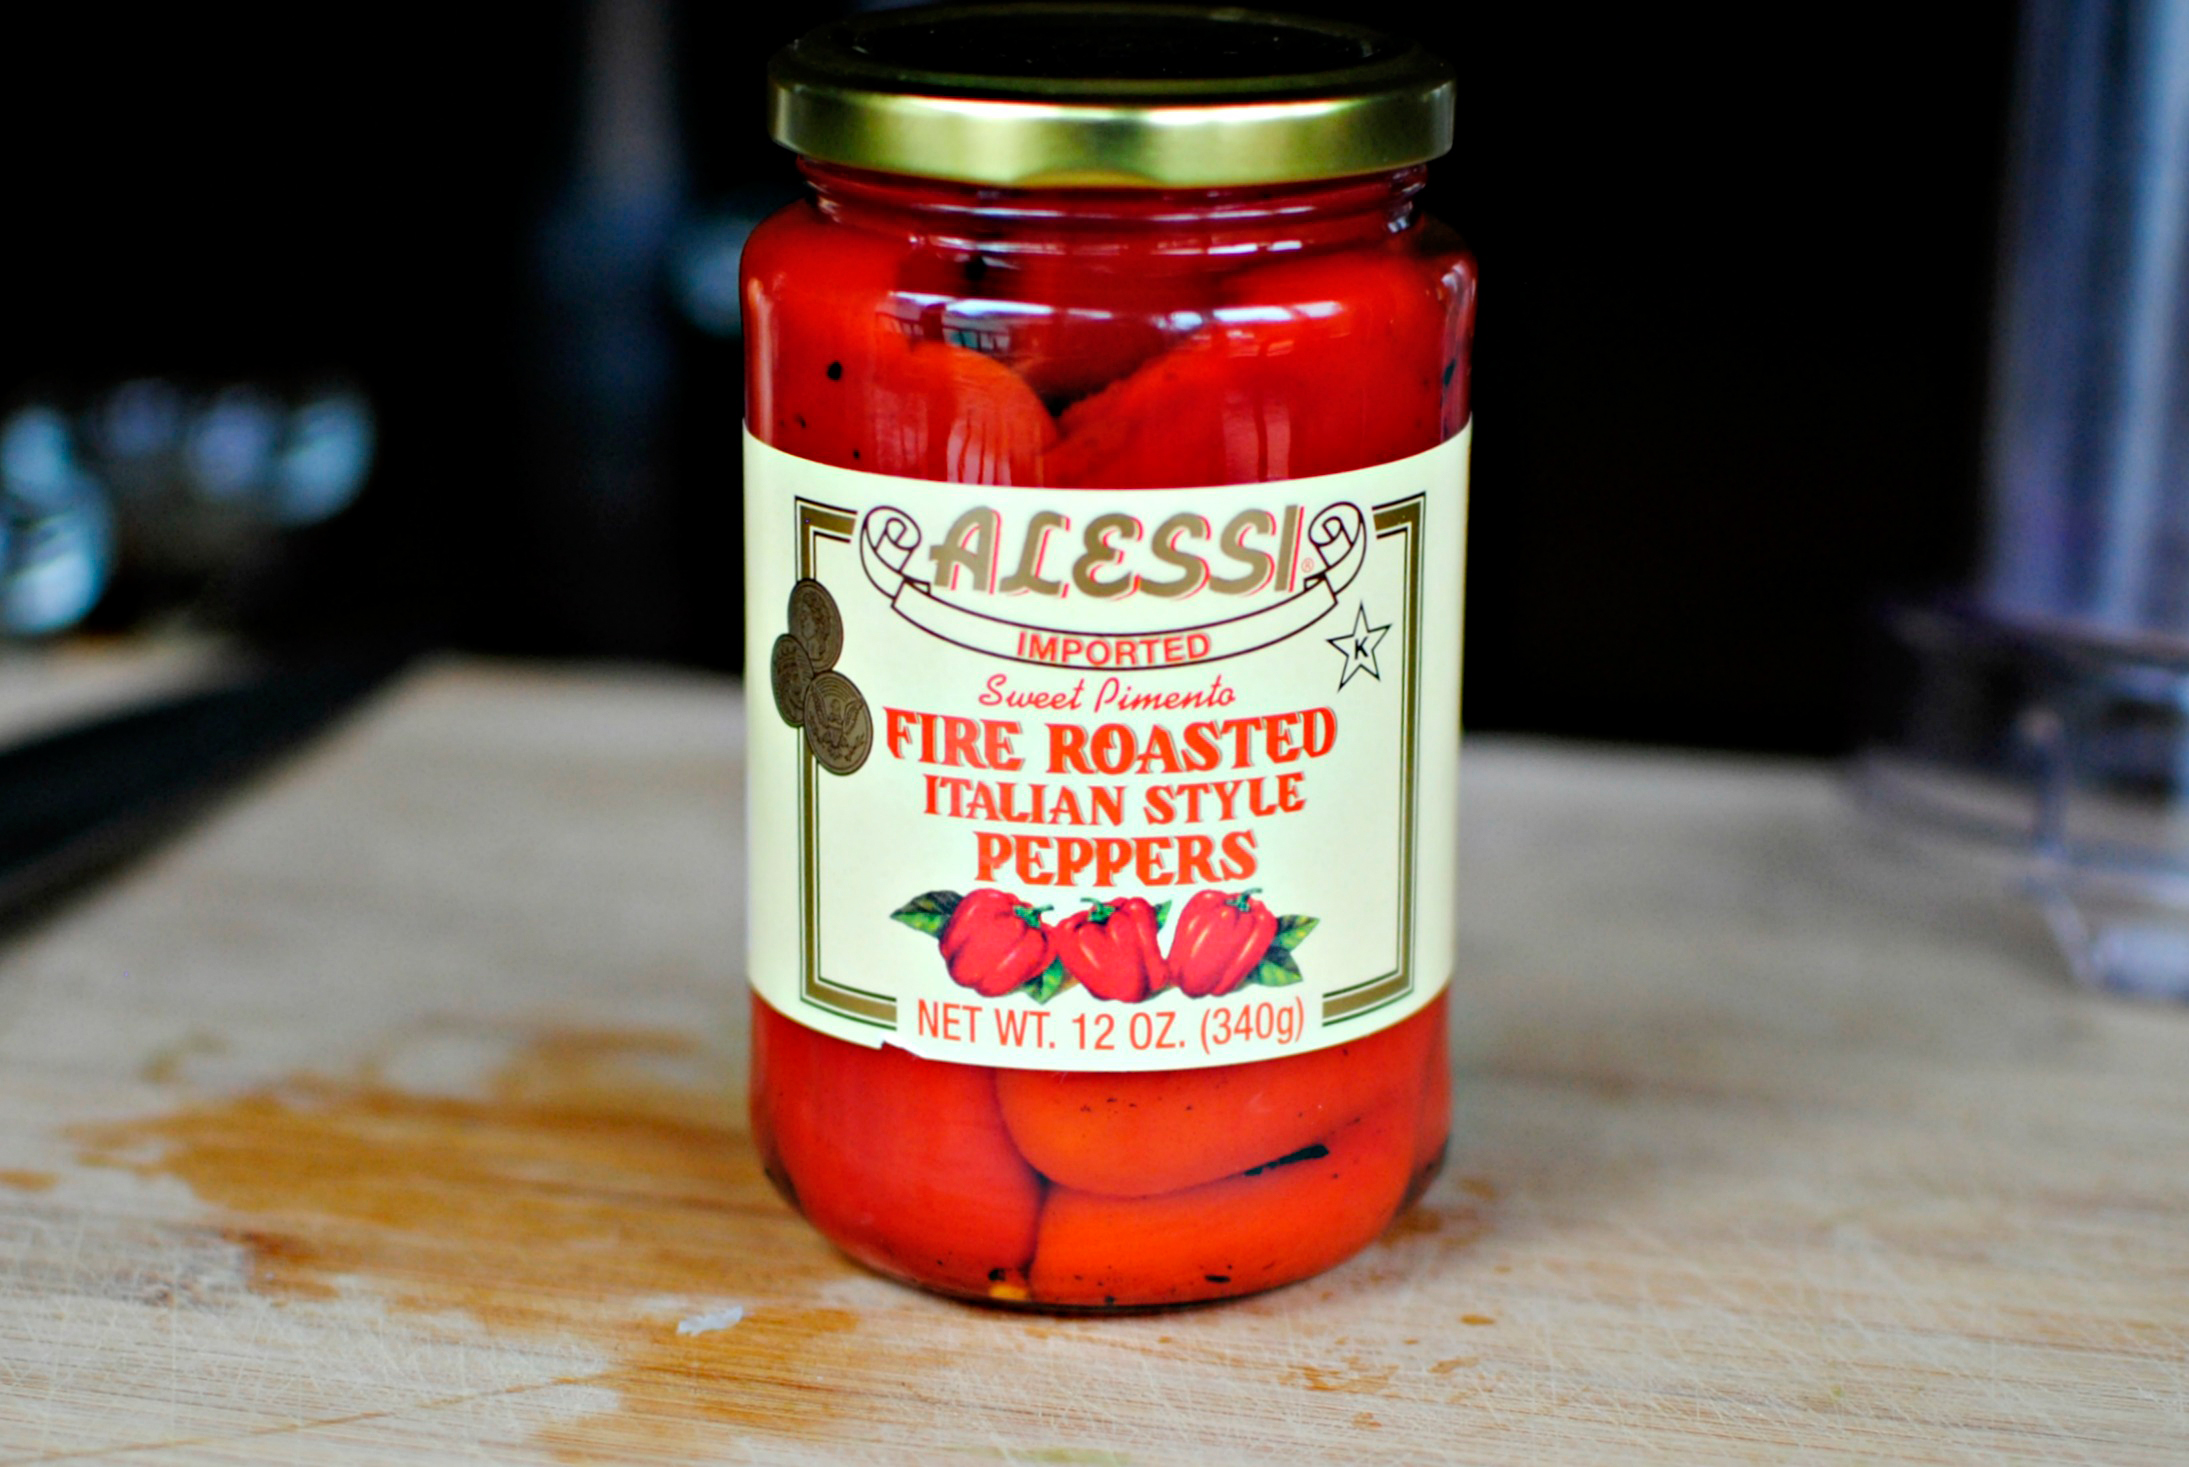
I only had a 12-ounce jar of peppers in my pantry, so I used what looked like 6 ounces to me and added it into the food processor. 


Tasty Kitchen Blog: Roasted Red Pepper Pizza Sauce. Guest post by Laurie McNamara of Simply Scratch, recipe submitted by TK member Leanne.

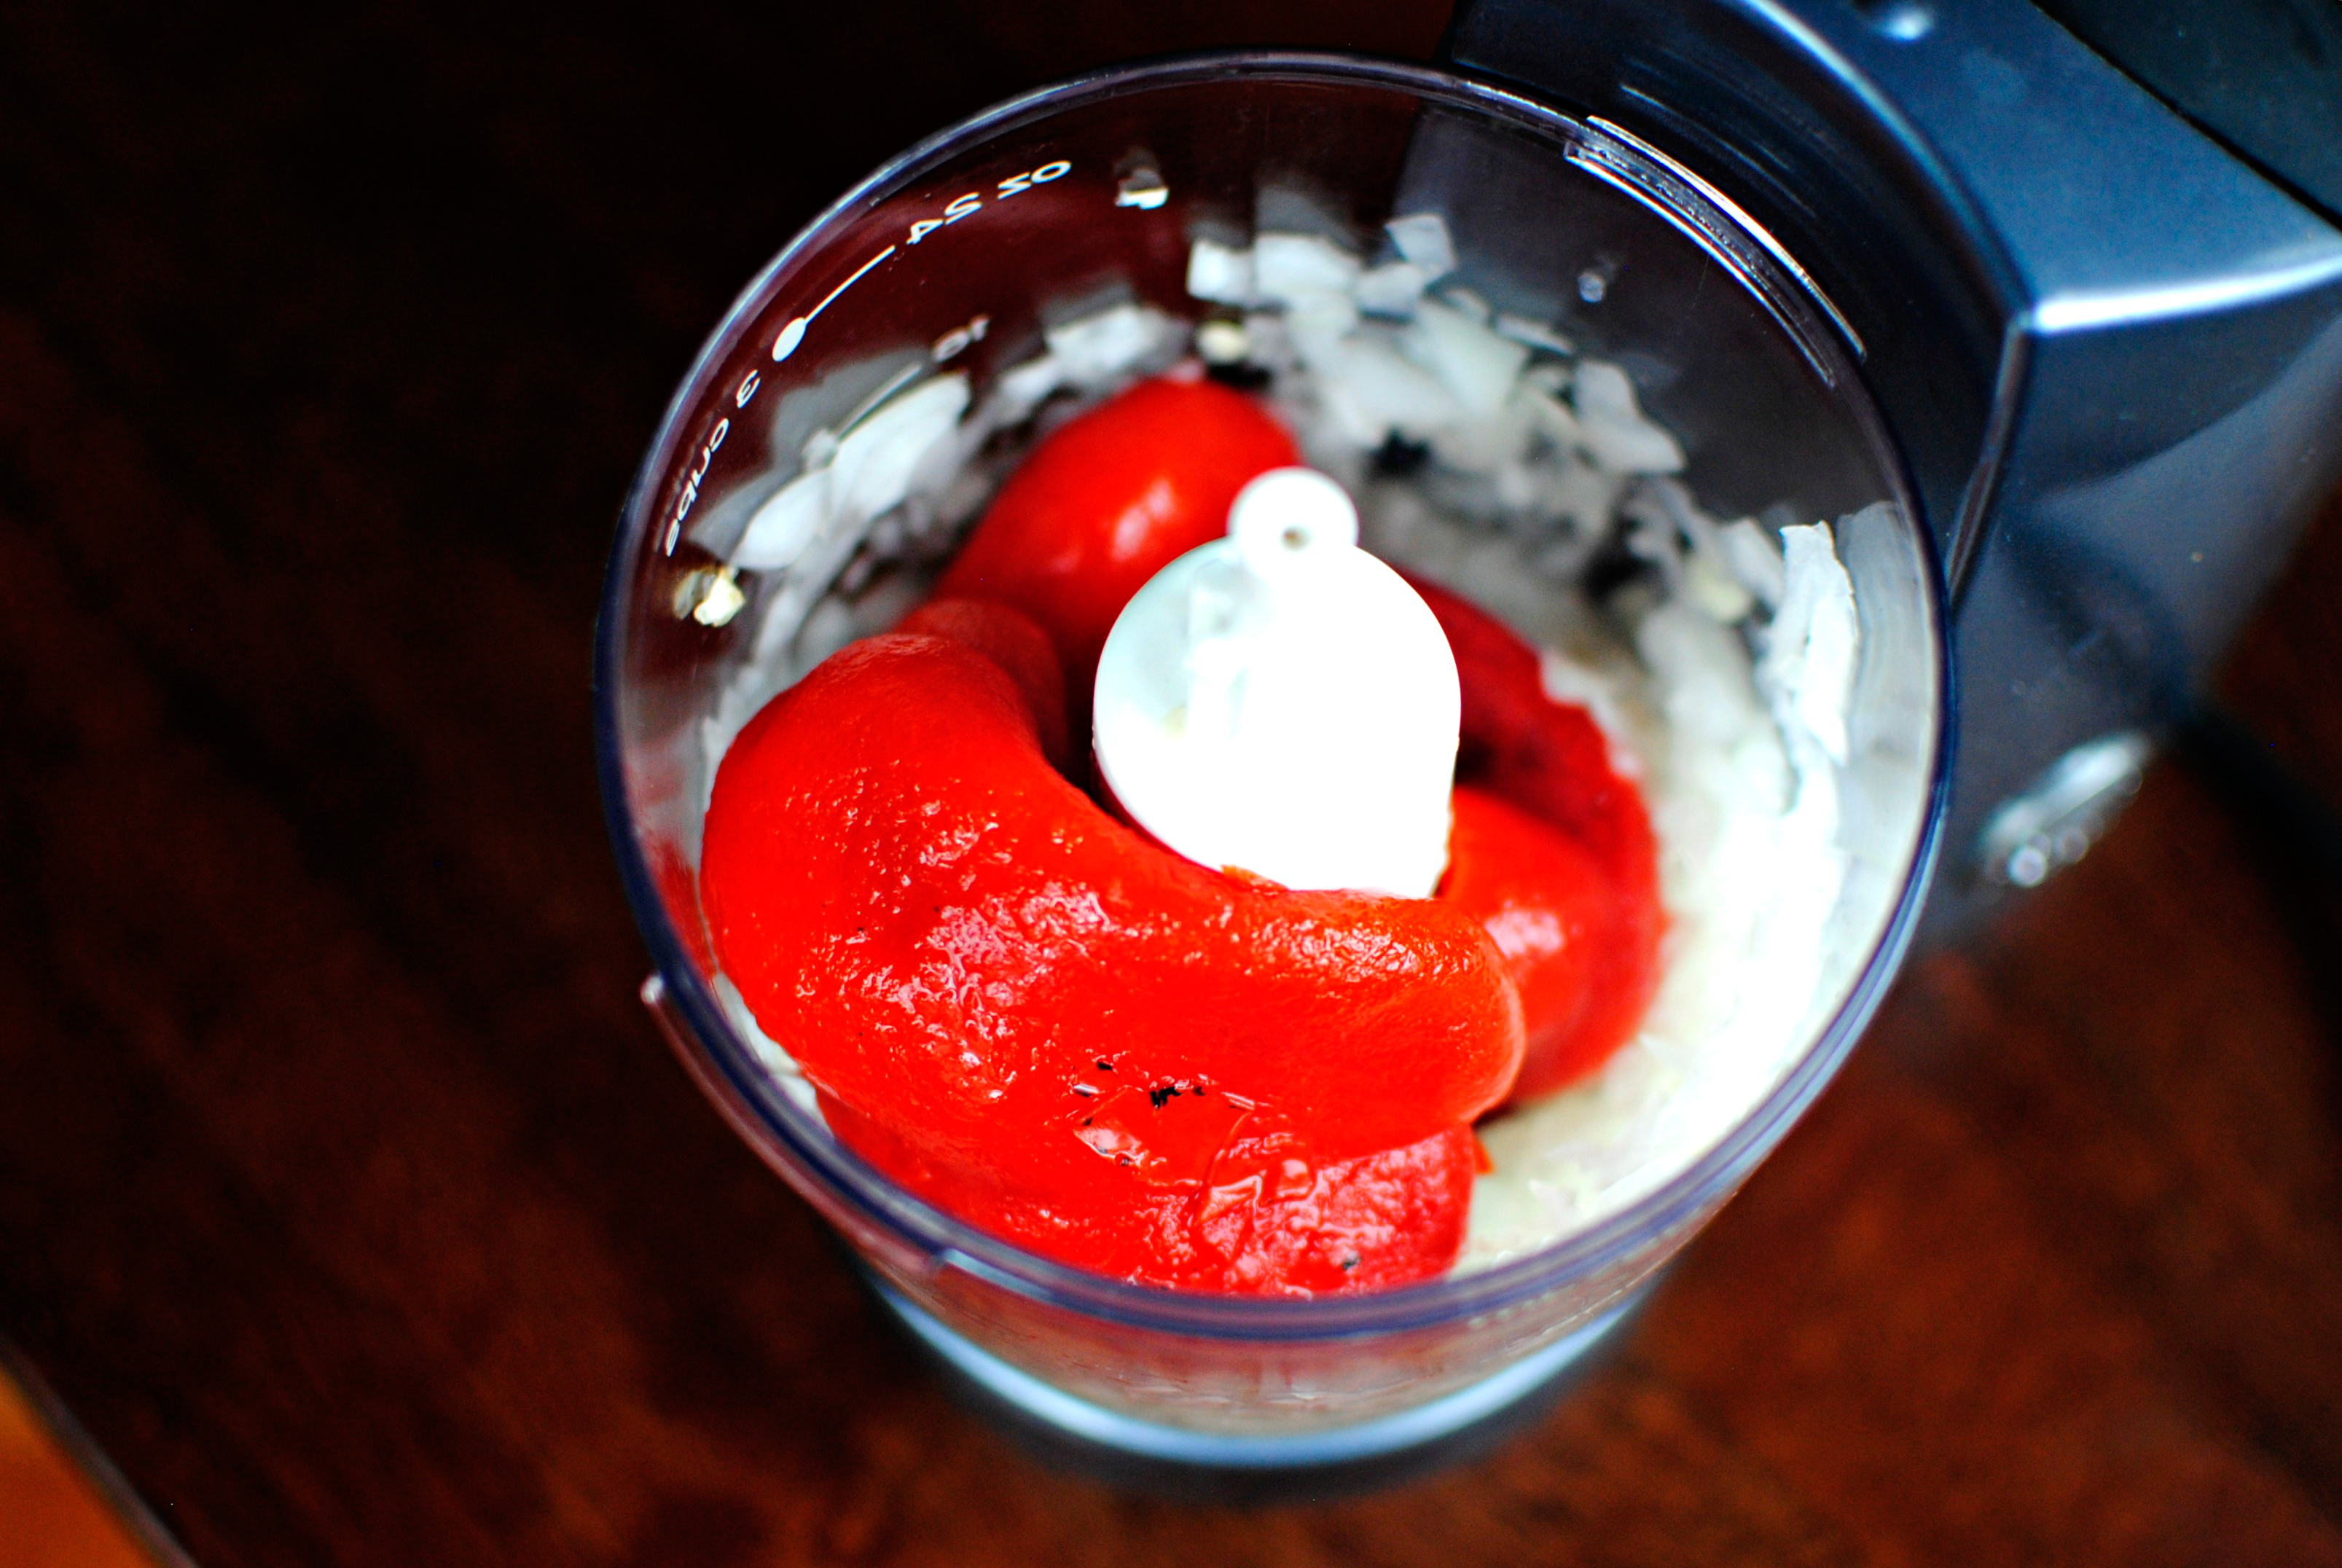
Whether you end up adding 6 or 8 ounces of peppers, it shouldn’t matter. You really can’t screw this up.

(P. S. Charred bits make me happy.)


Tasty Kitchen Blog: Roasted Red Pepper Pizza Sauce. Guest post by Laurie McNamara of Simply Scratch, recipe submitted by TK member Leanne.

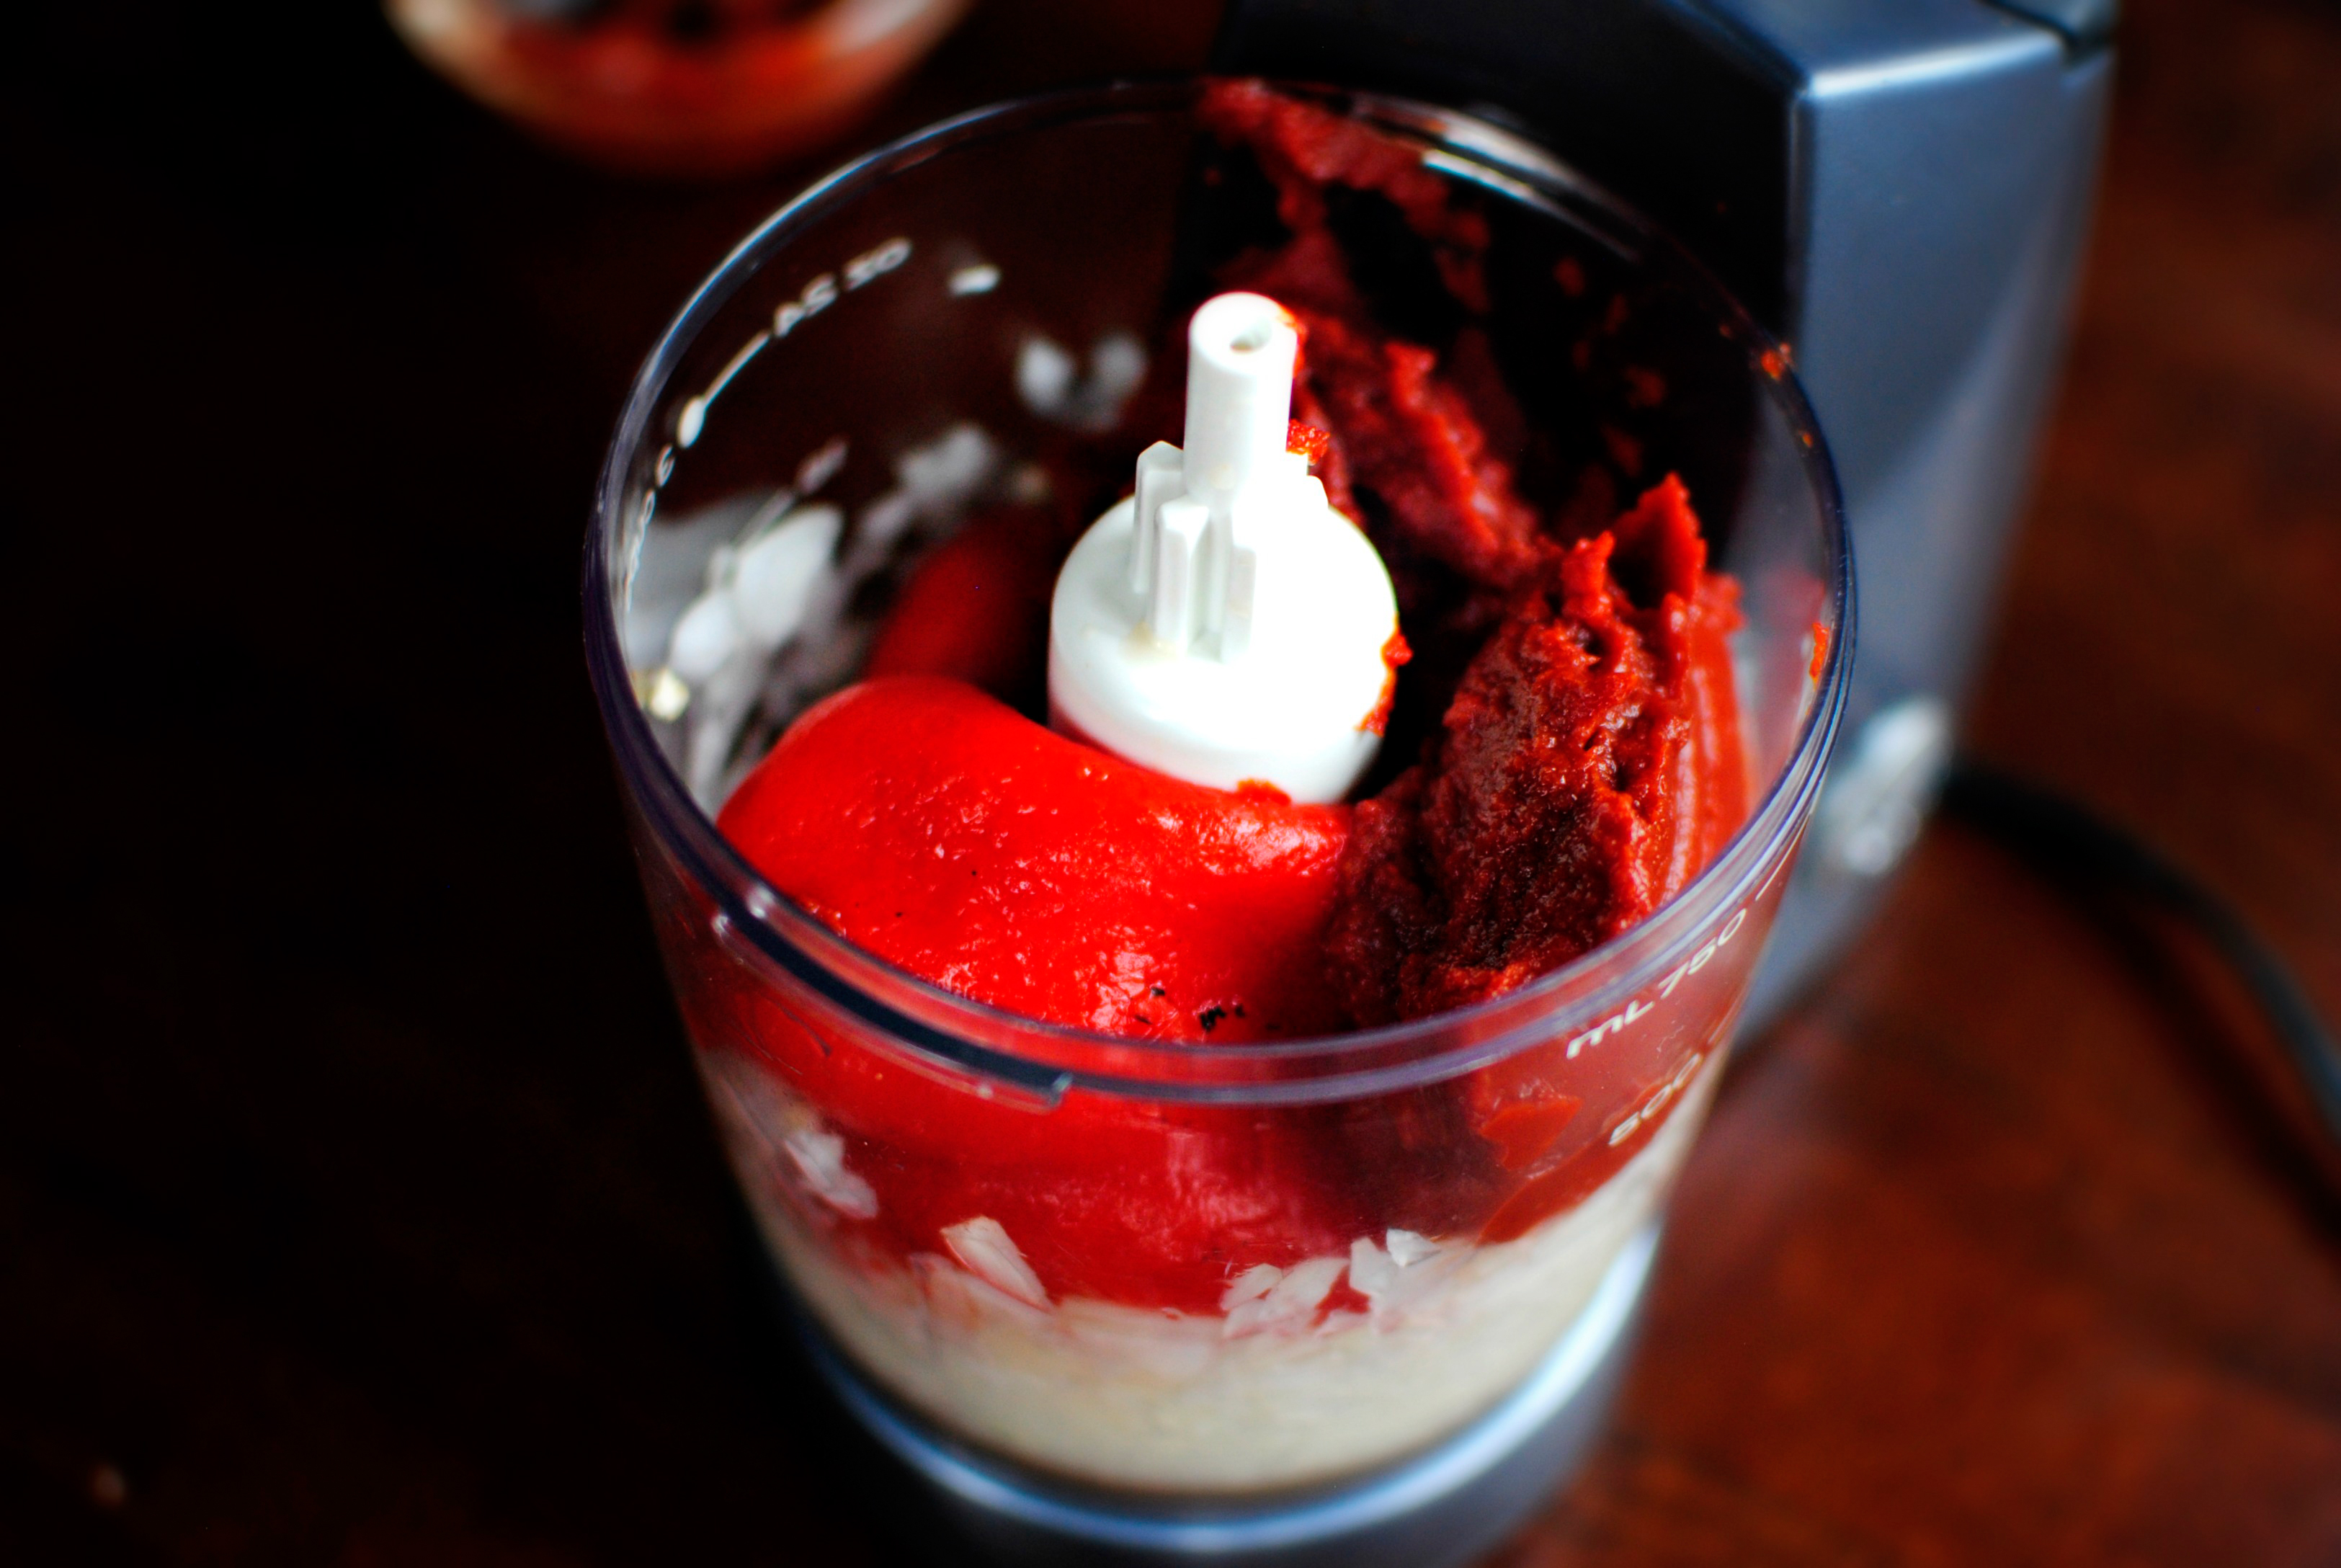
All that’s left to do is add in the 6 ounces of tomato paste.


Tasty Kitchen Blog: Roasted Red Pepper Pizza Sauce. Guest post by Laurie McNamara of Simply Scratch, recipe submitted by TK member Leanne.

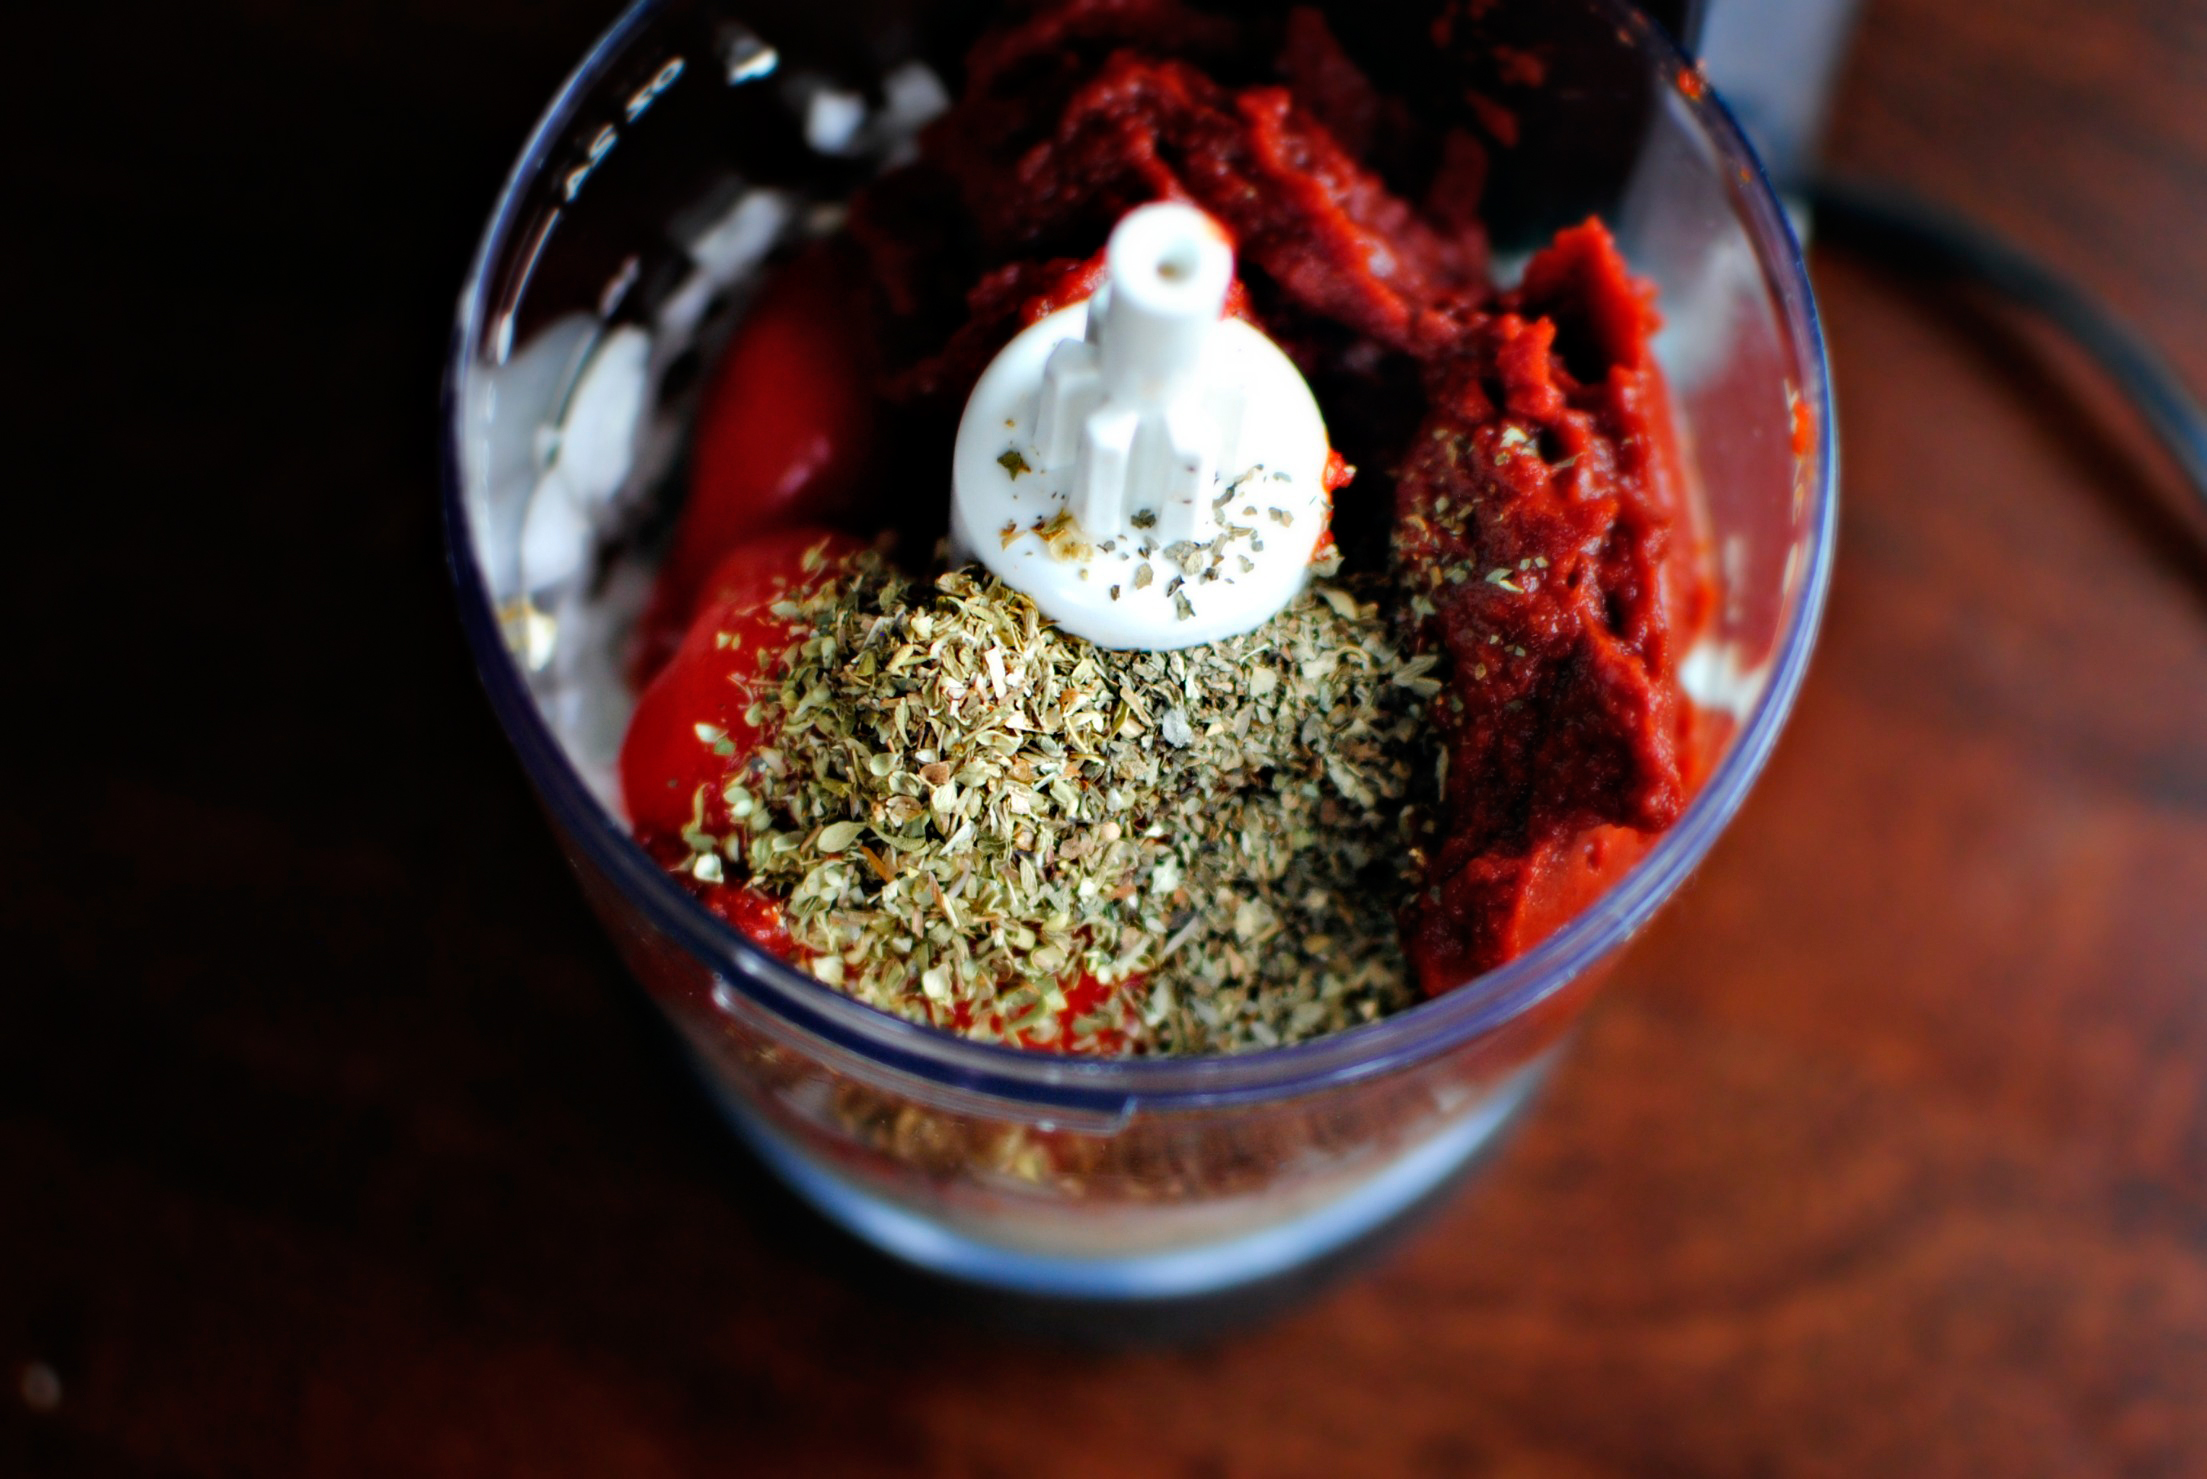
Then the black pepper, a dash of salt and a teaspoon of both dried basil and dried oregano.


Tasty Kitchen Blog: Roasted Red Pepper Pizza Sauce. Guest post by Laurie McNamara of Simply Scratch, recipe submitted by TK member Leanne.

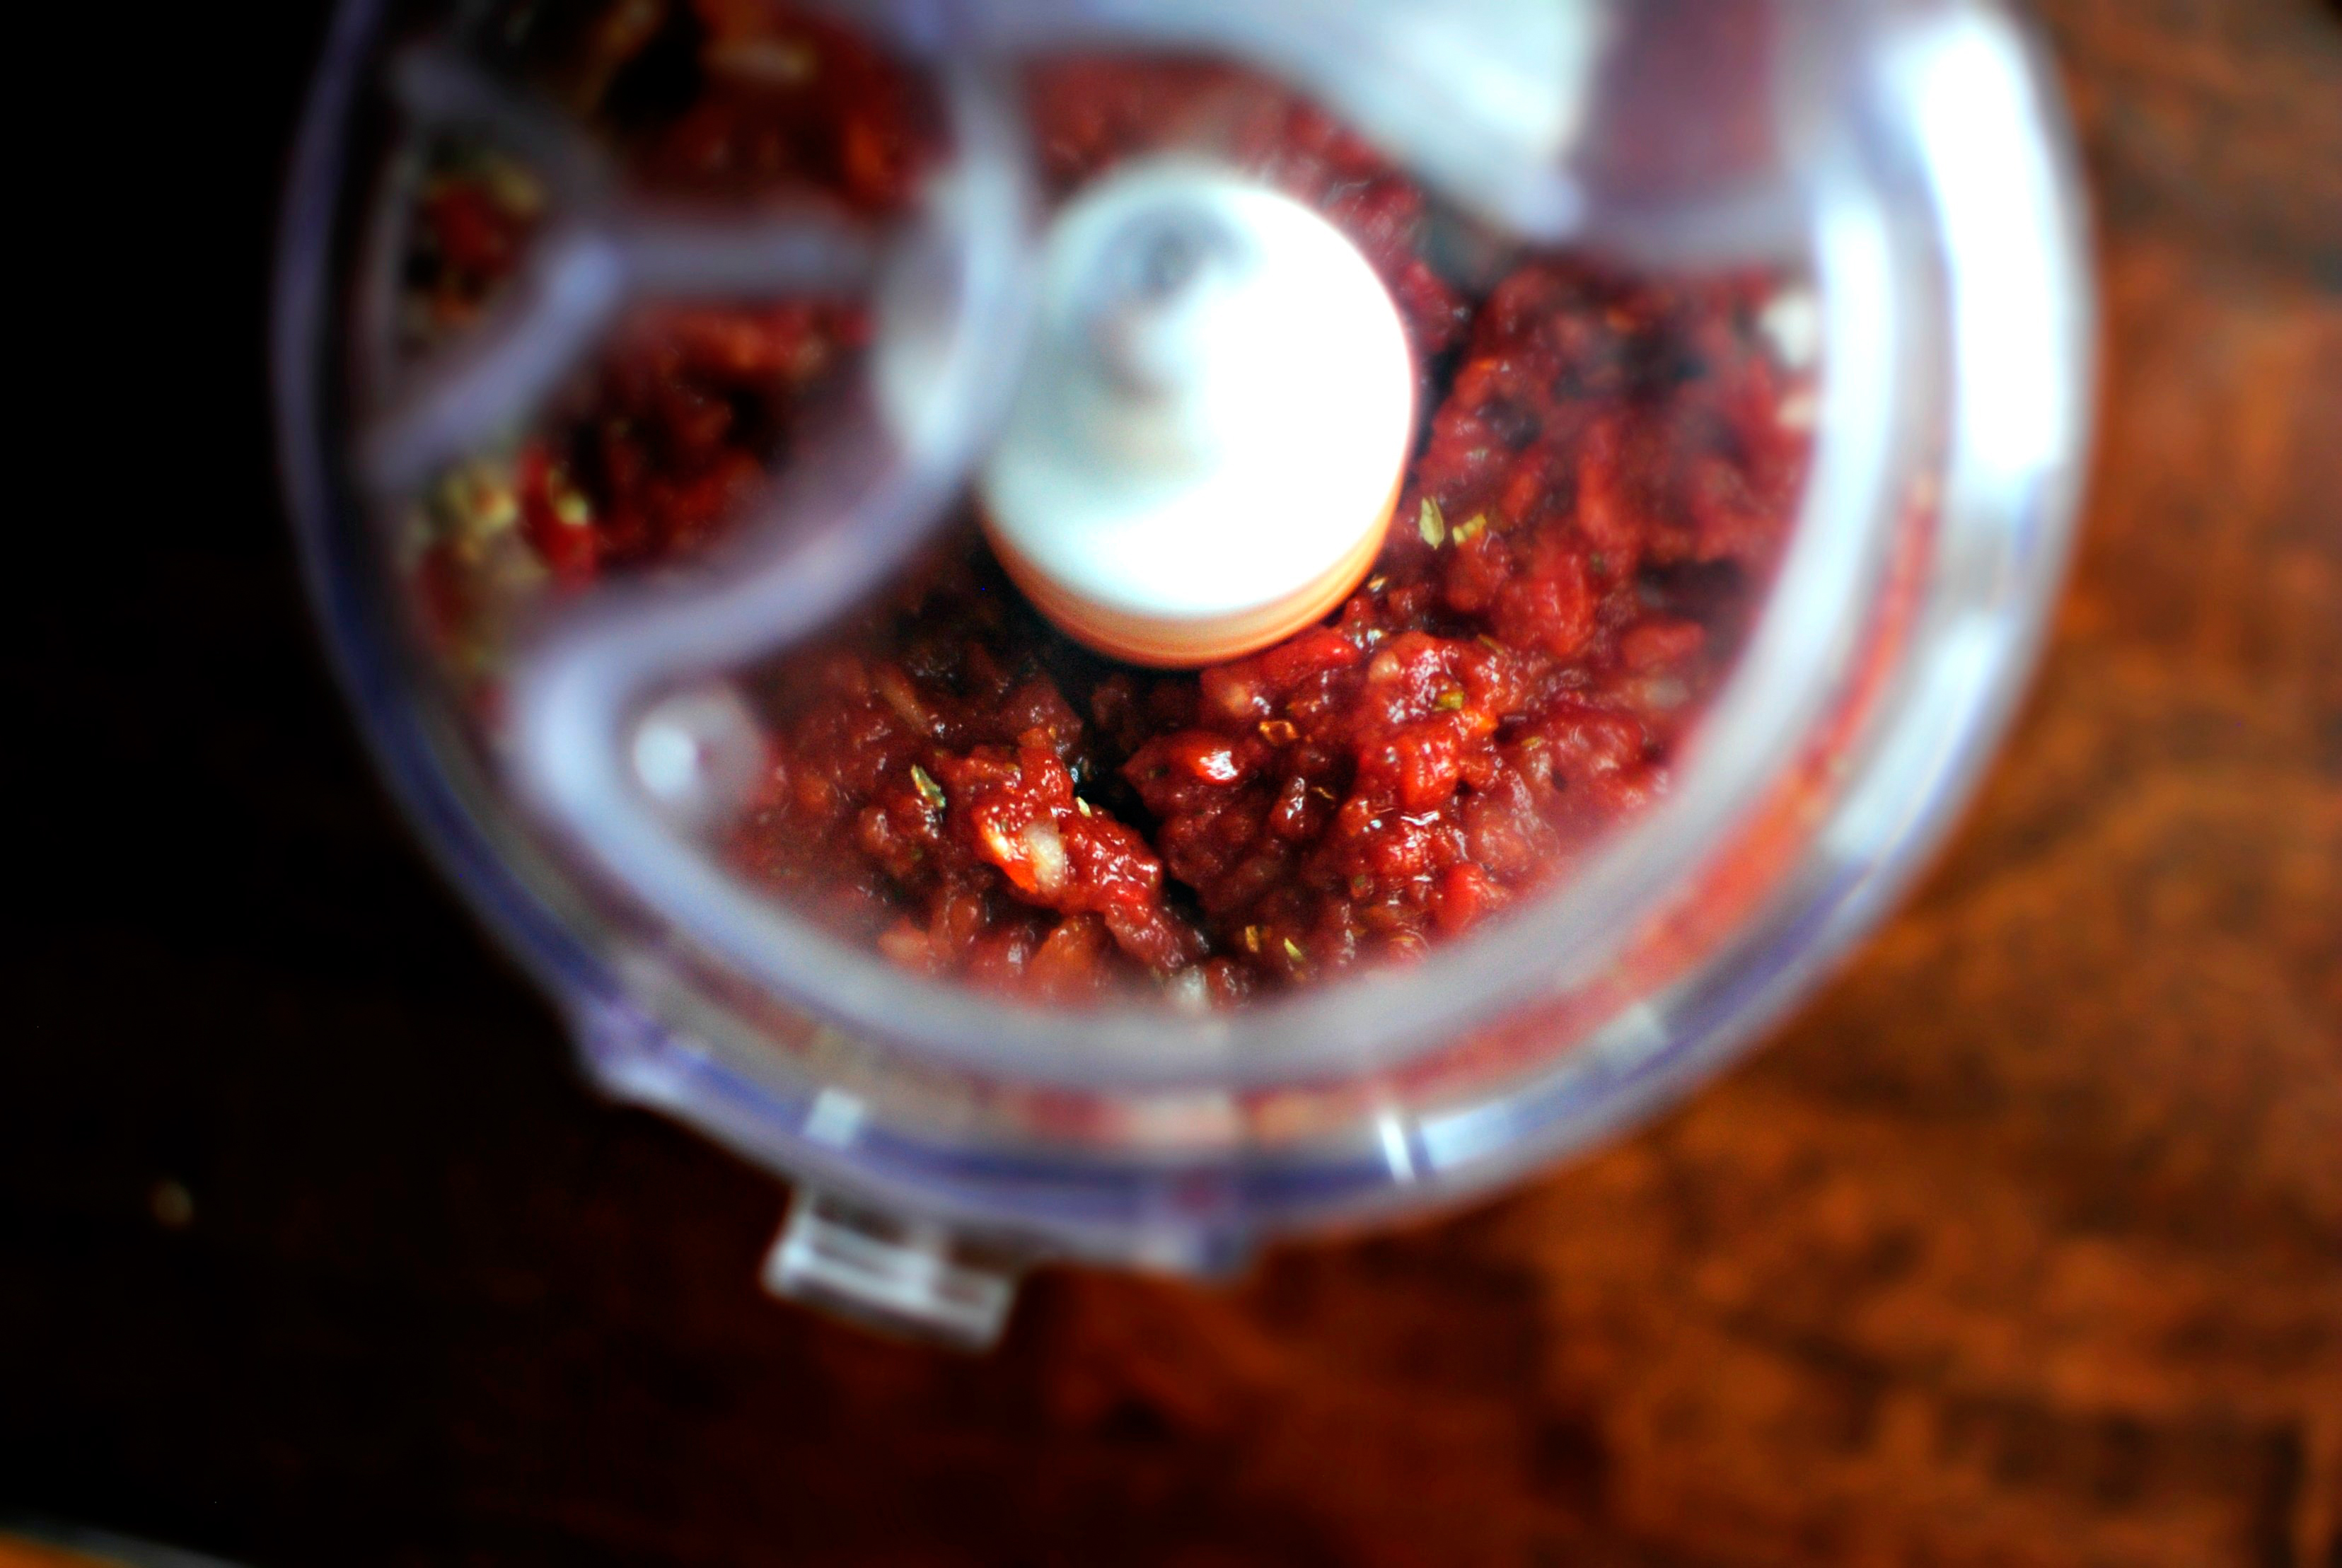
Secure the lid one last time and give it a go on high speed until completely blended.


Tasty Kitchen Blog: Roasted Red Pepper Pizza Sauce. Guest post by Laurie McNamara of Simply Scratch, recipe submitted by TK member Leanne.

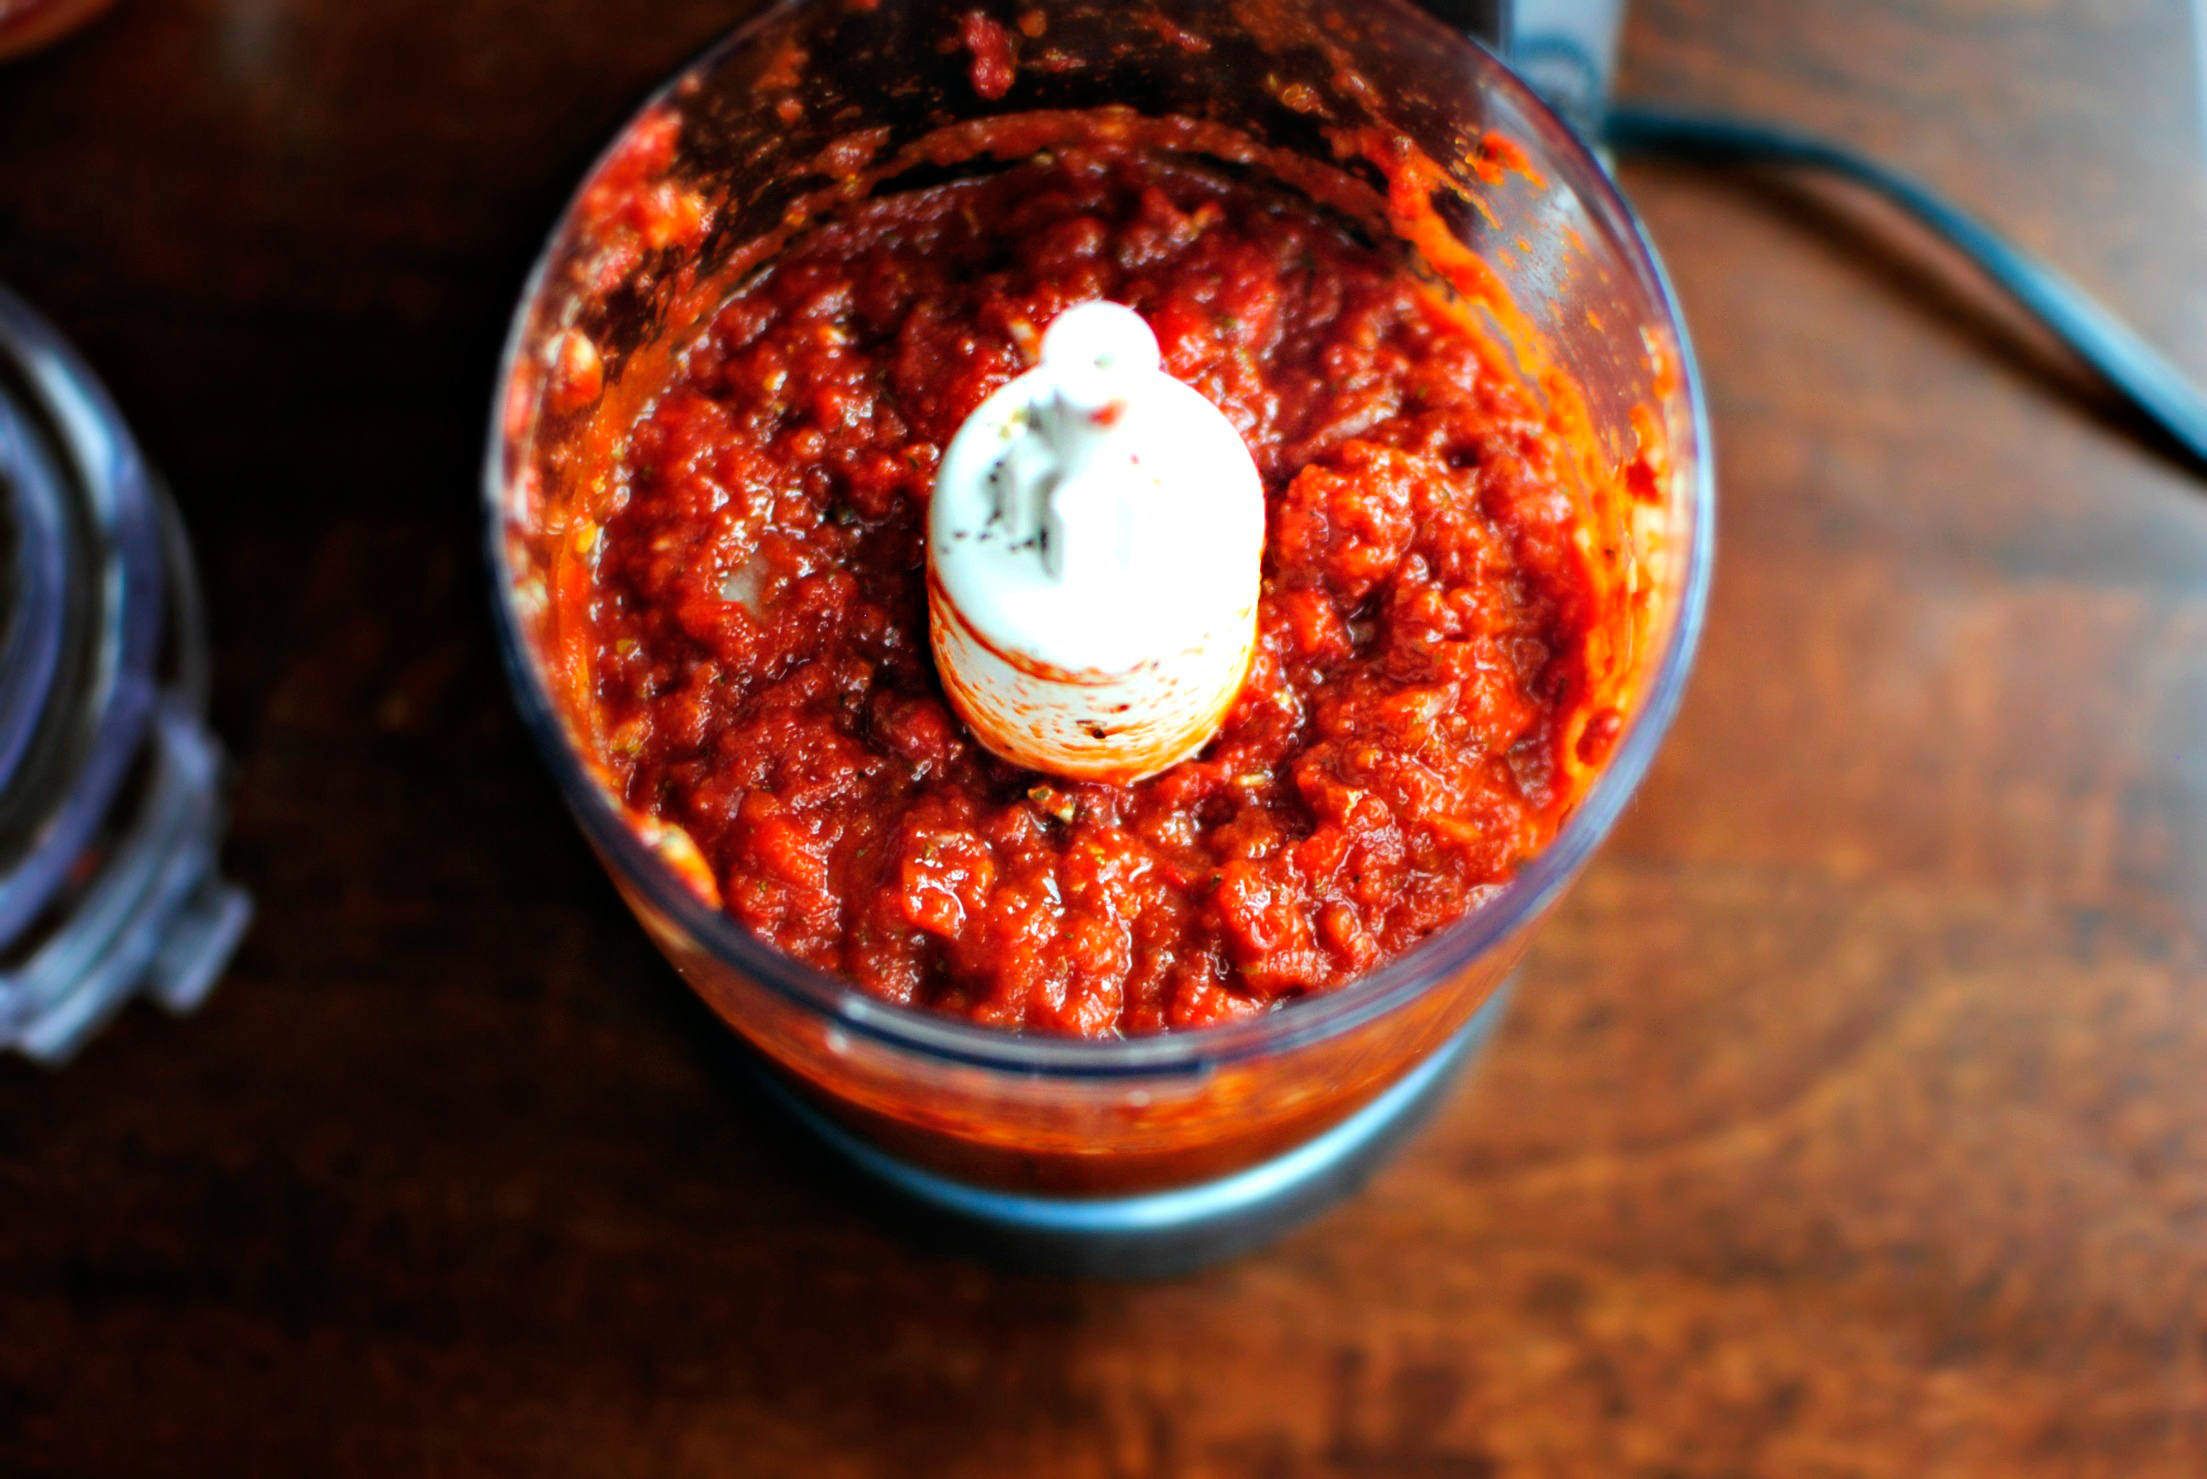
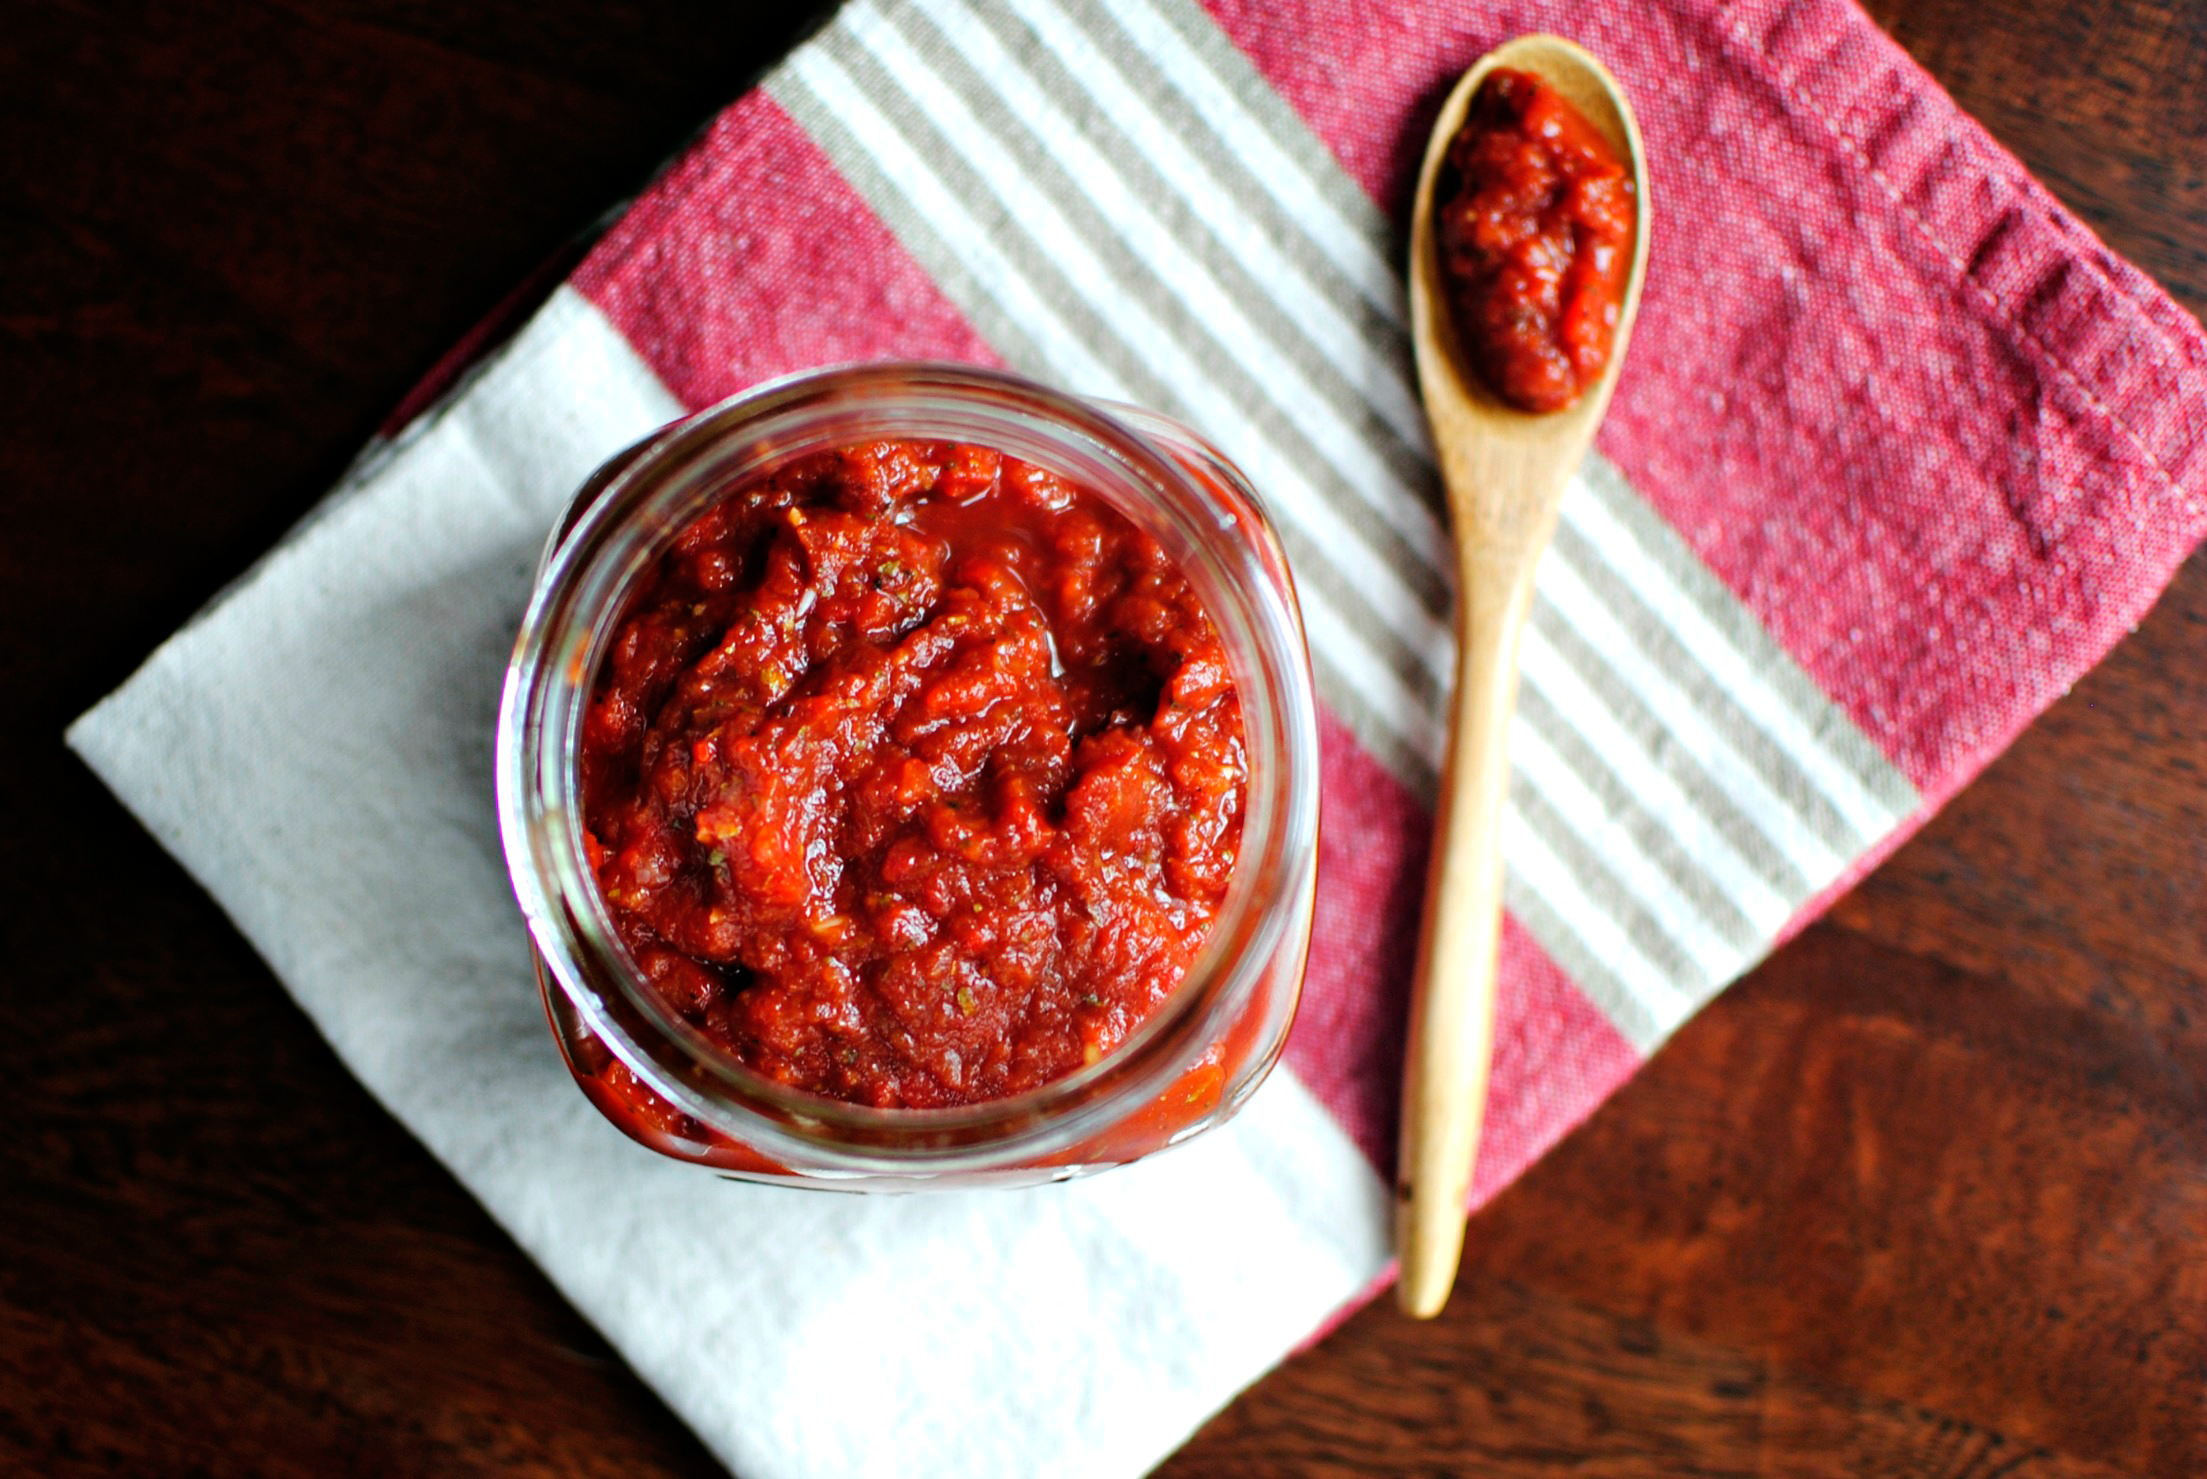
It should still be thick and a little on the chunky side, where you can still see flecks of the spices and a little bits of onion. And if you wanted to add a little heat, just throw in a pinch or two or three of red pepper flakes and your mouth will be happy.


Tasty Kitchen Blog: Roasted Red Pepper Pizza Sauce. Guest post by Laurie McNamara of Simply Scratch, recipe submitted by TK member Leanne.

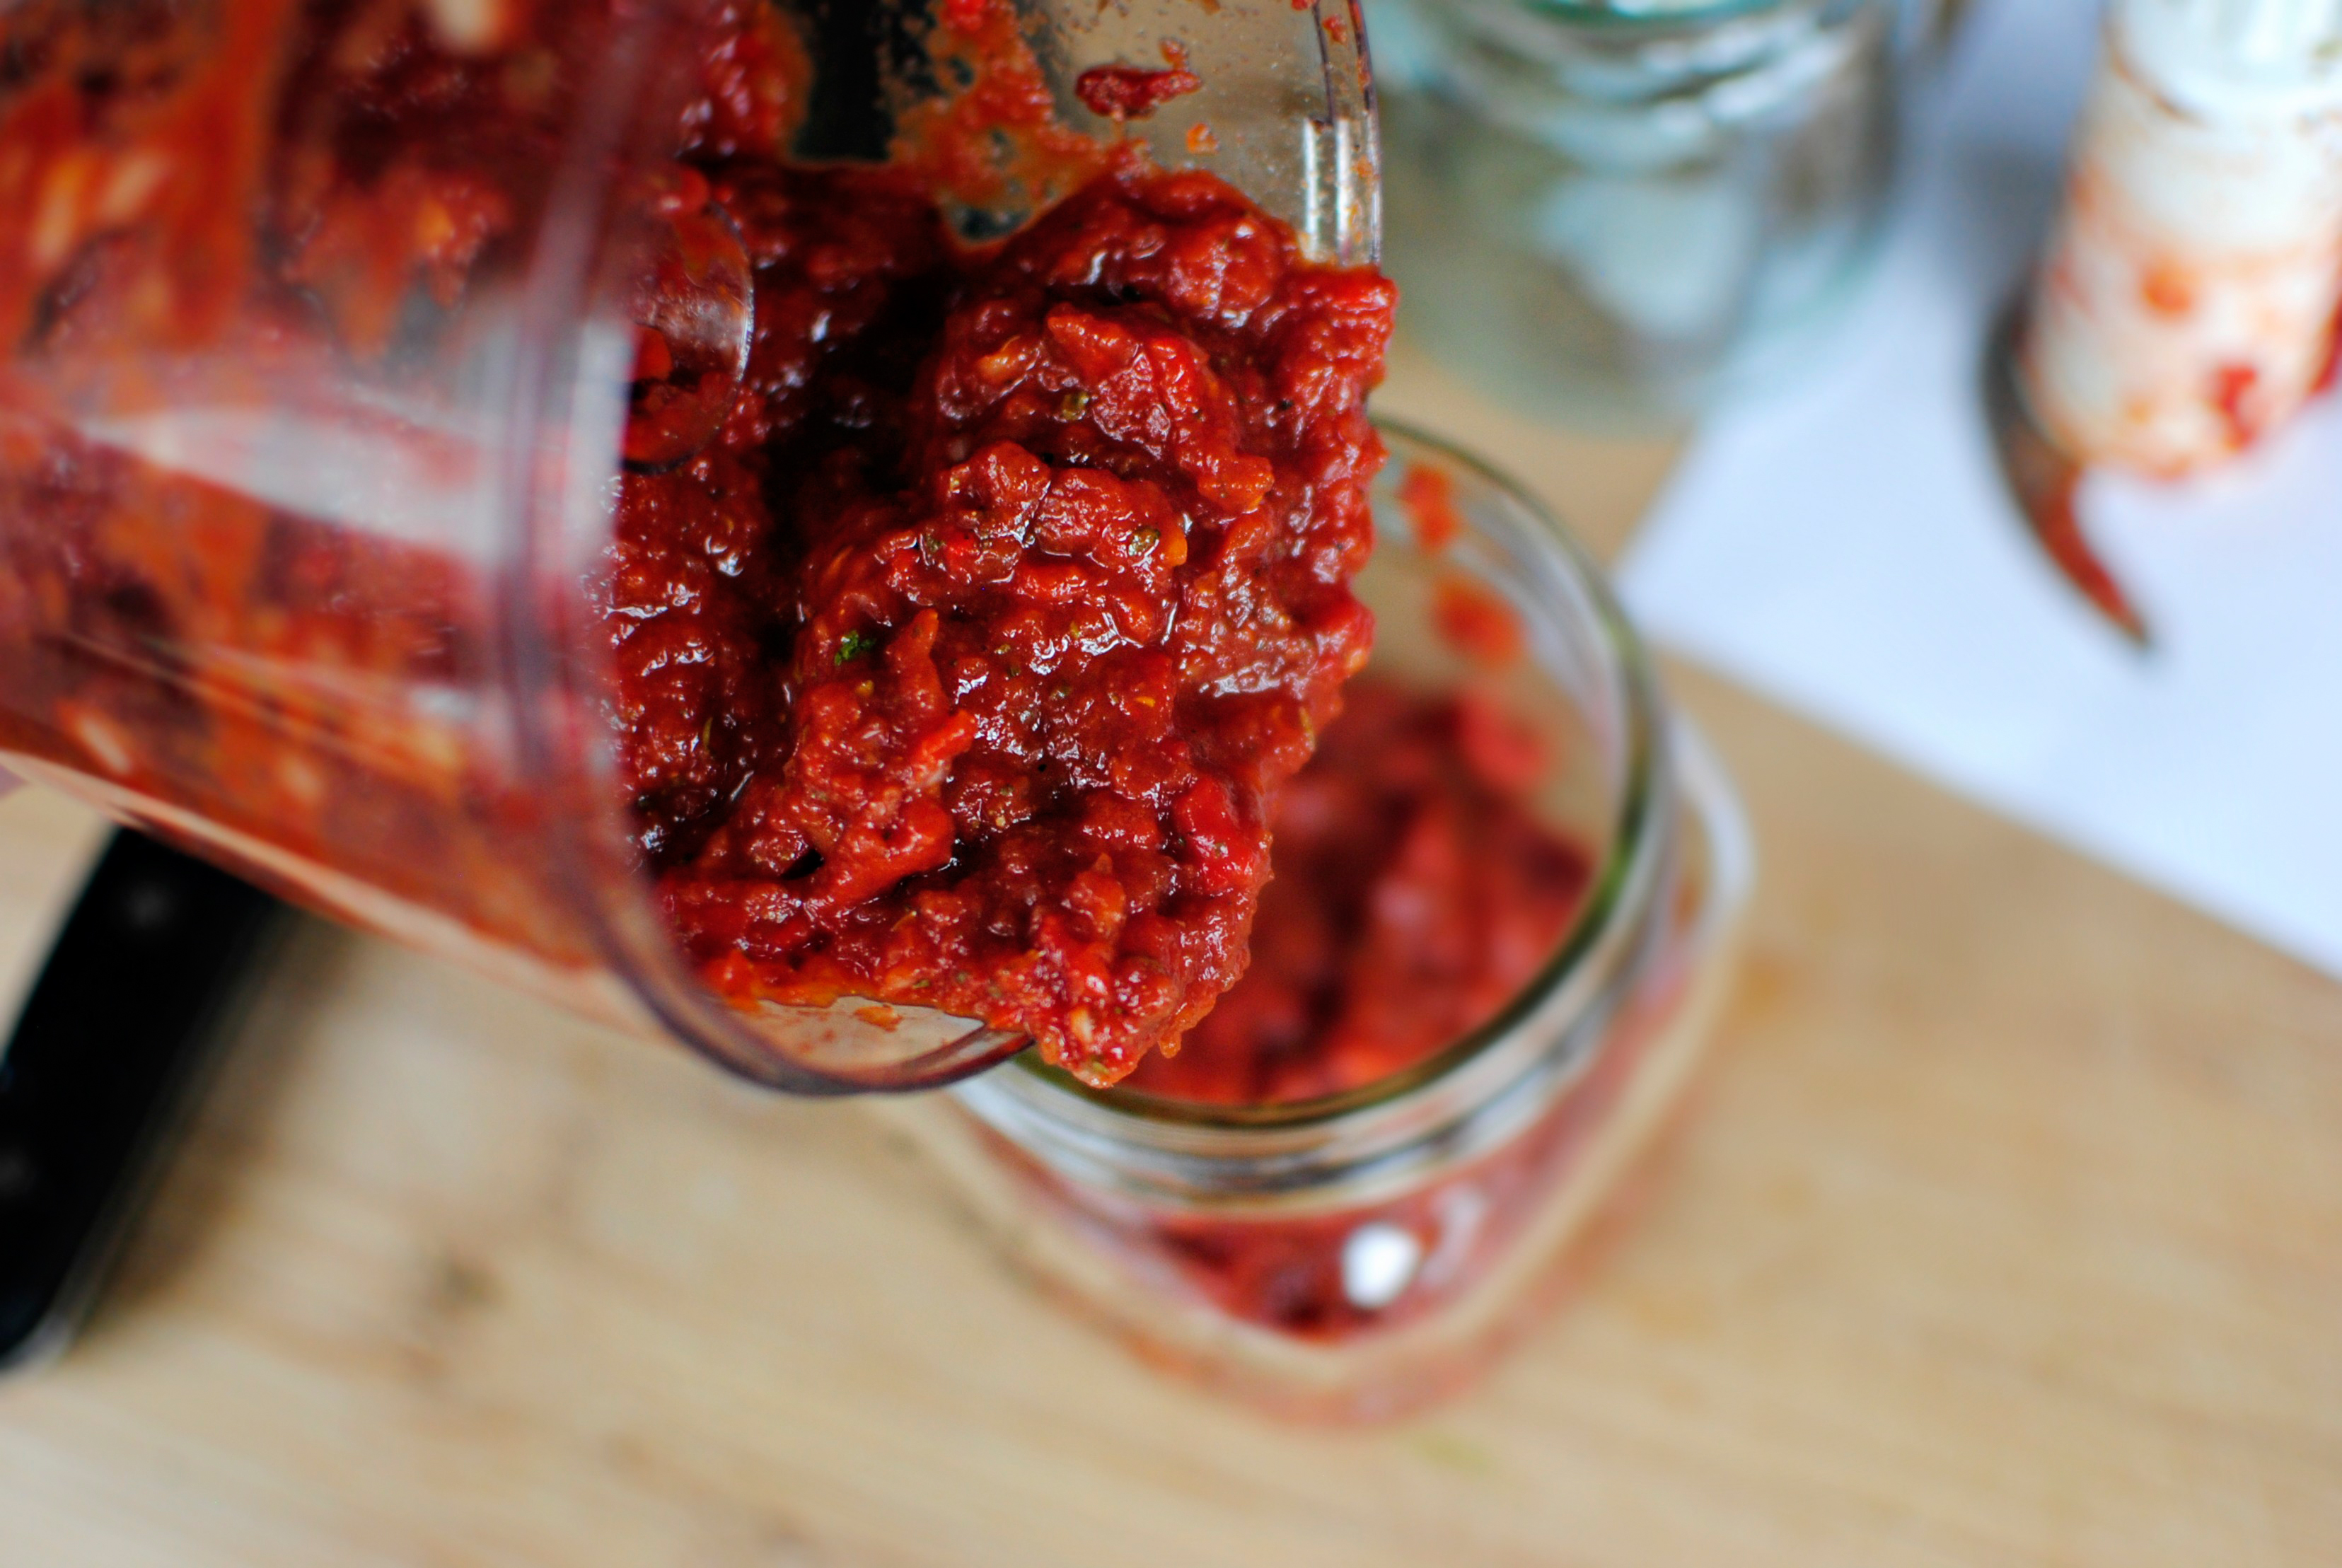
Pour the pizza sauce into a container that has a snug fitting lid and refrigerate until ready to use. This recipe makes a little over a cup of pizza sauce.


Tasty Kitchen Blog: Roasted Red Pepper Pizza Sauce. Guest post by Laurie McNamara of Simply Scratch, recipe submitted by TK member Leanne.

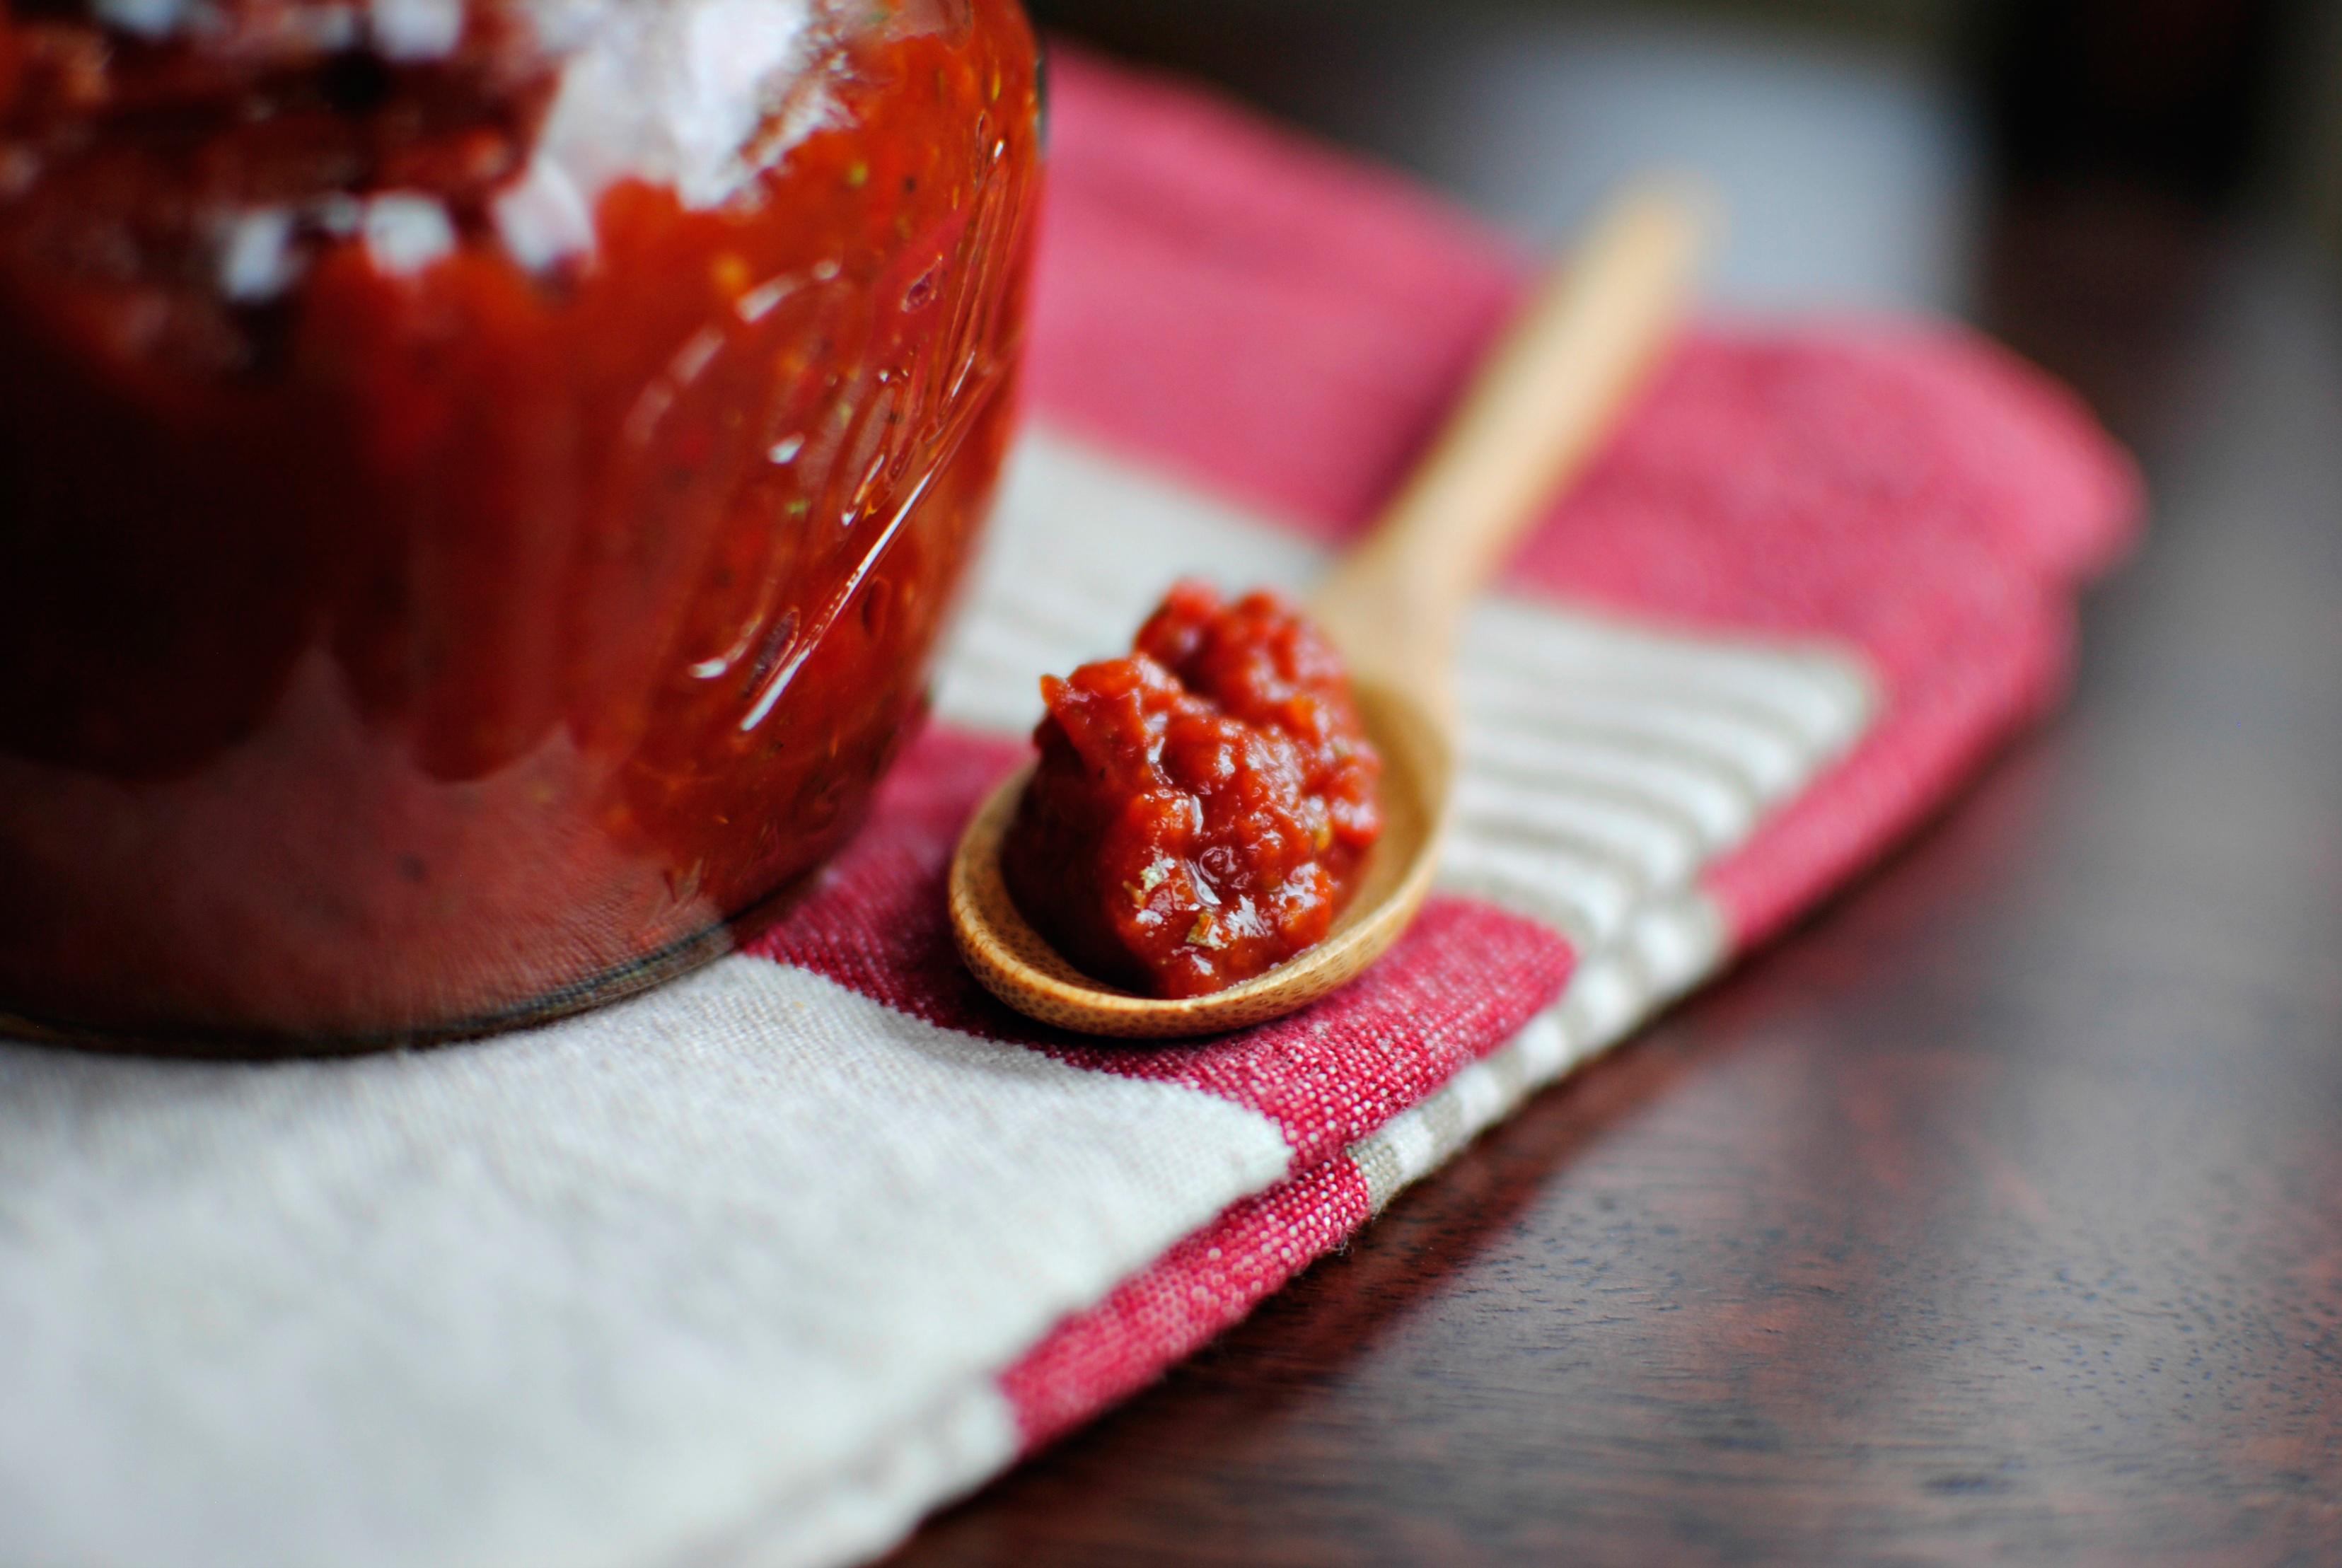
I, of course, had to make pizza right away. After a finger-swipe tasting of the sauce, I simply could not wait.


Tasty Kitchen Blog: Roasted Red Pepper Pizza Sauce. Guest post by Laurie McNamara of Simply Scratch, recipe submitted by TK member Leanne.

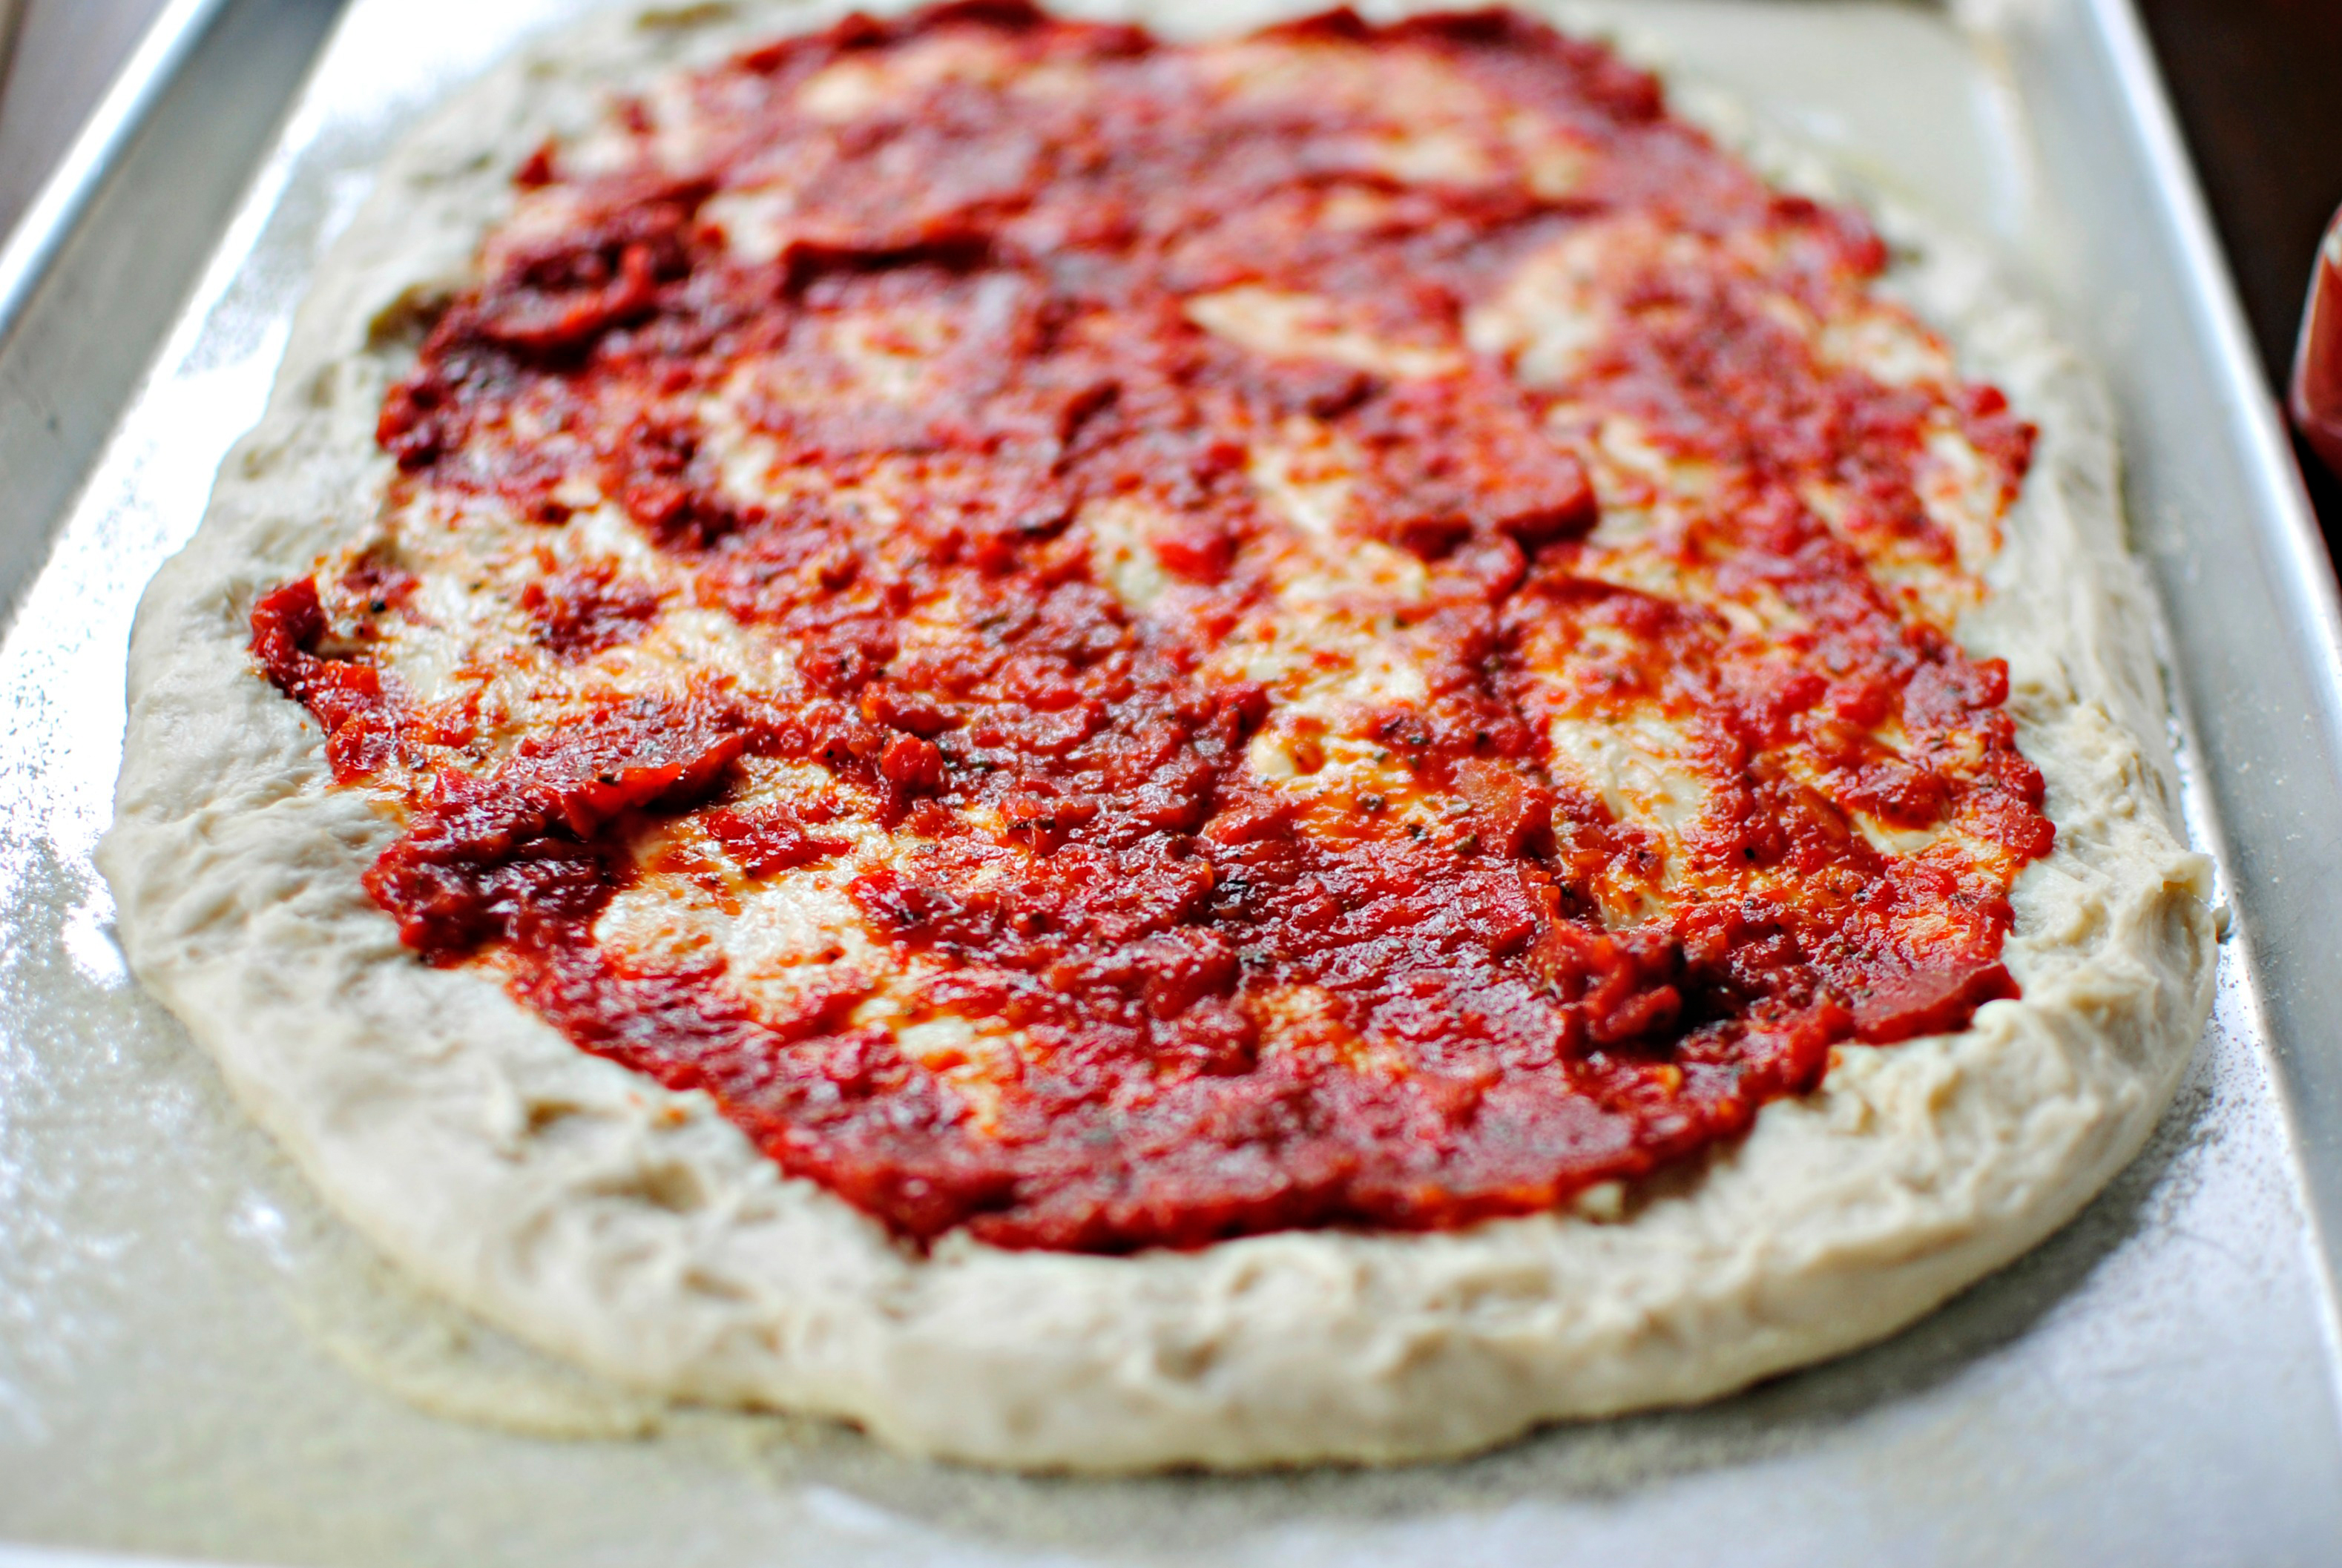
And as I smeared the tasty sauce on the un-baked pizza dough, I admired its color and texture. It really is a thing of beauty!


Tasty Kitchen Blog: Roasted Red Pepper Pizza Sauce. Guest post by Laurie McNamara of Simply Scratch, recipe submitted by TK member Leanne.

Now, since you’ve seen this scrumptious sauce, I’m guessing you’re craving pizza. So don’t wait another minute! Make it for lunch, make it for dinner! I just know it’ll be a huge hit in your home as it was in mine.

A big “thank you” goes out to Leanne for sharing this recipe with us. I know I’ll be making this pizza sauce for years to come; in fact, I’m sure I’ll never go back to making regular pizza sauce ever again. It’s hands down one of the best I’ve had the pleasure of making (and eating)!


Printable Recipe

Roasted Red Pepper Pizza Sauce

See post on funfoodlove’s site!
5.00 Mitt(s) 1 Rating(s)1 vote, average: 5.00 out of 51 vote, average: 5.00 out of 51 vote, average: 5.00 out of 51 vote, average: 5.00 out of 51 vote, average: 5.00 out of 5

Prep Time:

Cook Time:

Difficulty: Easy

Servings: 3

3
x

Print Options

Page size Letter 3x5 4x6
Text Size Small Medium Large
Content Include description
Include prep time, etc.
Show image

Description

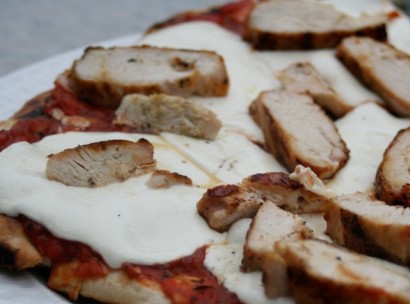
The roasted red peppers add just the right flavor to the sauce, making it more interesting than your basic tomato sauce. We used this on our grilled pizzas with fresh mozzarella and chicken. It was the perfect combination.

Ingredients

  • 6 ounces, weight Tomato Paste
  • 6 ounces, weight Jar Of Roasted Red Peppers
  • 1 clove Garlic
  • ½ whole White Onion
  • 1 teaspoon Fresh Ground Pepper
  • 1 dash Salt
  • 1 teaspoon Basil
  • 1 teaspoon Oregano

Preparation Instructions

Mix all sauce ingredients in a food processecor. I use my Tupperware Quick Chef.

To use, spread sauce mixture over grilled pizza dough. Use toppings of choice on pizza. We used slices of fresh mozzerella and grilled chicken. Put pizza back on the grill to melt cheese, about 5 minutes in a 450-degree grill.


_______________________________________

Laurie is the force behind Simply Scratch, a blog that documents her efforts to find and create recipes that are made simply from scratch. (We think it’s sweet that her mother-in-law helped her set up her blog and get started.) We love her recipes; they’re not just tried and true, but they look gorgeous as well. Check out her blog and you’ll become a fan too.


Profile photo of missamy

Apple Bourbon French Toast Casserole

Posted by in Baking, Step-by-Step Recipes

Tasty Kitchen Blog: Apple Bourbon French Toast Casserole. Guest post by Amy Johnson of She Wears Many Hats, recipe submitted by TK member Courtney of Bake. Eat. Repeat.

 
Holidays are here and while we’re all planning for the big meals, what about breakfast? I don’t know about you, but I think about lunch and supper menus and then totally forget about breakfast until the last minute. And breakfast is important, especially if your family tends to eat a late lunch like mine does. This Apple Bourbon French Toast Casserole recipe, submitted by Tasty Kitchen member Courtney, caught my eye as perfect breakfast option for those busy holiday mornings, because it can easily be made ahead and popped in the oven when the sun comes up.

It’s a wonderful mix of apples, brown sugar, cinnamon, with a splash of bourbon. Quite honestly though, it would make a perfect dessert. Or just think, leftovers from breakfast can be enjoyed for dessert later that evening. So is it breakfast or dessert? Breakfast? Or dessert? Or maybe a new Tasty Kitchen category altogether: Bressert. I’m going to talk to those in charge around here about it. I think Ree would agree. Bressert. It’s a good thing.

So let’s get started on this bressert thing.


Tasty Kitchen Blog: Apple Bourbon French Toast Casserole. Guest post by Amy Johnson of She Wears Many Hats, recipe submitted by TK member Courtney of Bake. Eat. Repeat.

You’ll need butter, brown sugar, bourbon, apples, thick, day old bread, eggs, milk, vanilla, cinnamon, and nutmeg. Courtney’s recipe calls for 6 thick slices of day old bread, but I substituted a crusty French baguette and sliced them thick.


Tasty Kitchen Blog: Apple Bourbon French Toast Casserole. Guest post by Amy Johnson of She Wears Many Hats, recipe submitted by TK member Courtney of Bake. Eat. Repeat.

Begin by melting the butter and sugar together in a small pan.


Tasty Kitchen Blog: Apple Bourbon French Toast Casserole. Guest post by Amy Johnson of She Wears Many Hats, recipe submitted by TK member Courtney of Bake. Eat. Repeat.

Whisk it together to combine. Whisk in the bourbon and cook until slightly thickened.


Tasty Kitchen Blog: Apple Bourbon French Toast Casserole. Guest post by Amy Johnson of She Wears Many Hats, recipe submitted by TK member Courtney of Bake. Eat. Repeat.

Pour the butter/bourbon mixture (otherwise known as delicious goodness) into a baking pan.


Tasty Kitchen Blog: Apple Bourbon French Toast Casserole. Guest post by Amy Johnson of She Wears Many Hats, recipe submitted by TK member Courtney of Bake. Eat. Repeat.

Top with sliced apples. I cut my apples pretty thin, but you can do whatever you like. Diced apples would be nice too. Add the sliced bread in a single layer on top of the apples.

Almost finished!


Tasty Kitchen Blog: Apple Bourbon French Toast Casserole. Guest post by Amy Johnson of She Wears Many Hats, recipe submitted by TK member Courtney of Bake. Eat. Repeat.

Beat together the eggs, milk, vanilla, cinnamon and nutmeg. Pour the egg mixture evenly over the bread and let it soak in.

You can either cover the dish and refrigerate it overnight. Or, if you are not making it ahead of time, dip bread slices in the egg mixture before laying them in the pan, then pour the remaining egg mixture over the casserole.


Tasty Kitchen Blog: Apple Bourbon French Toast Casserole. Guest post by Amy Johnson of She Wears Many Hats, recipe submitted by TK member Courtney of Bake. Eat. Repeat.

Bake it up! It turns a lovely golden brown, with a crusty top, and an ooey, gooey, sweet bottom.


Tasty Kitchen Blog: Apple Bourbon French Toast Casserole. Guest post by Amy Johnson of She Wears Many Hats, recipe submitted by TK member Courtney of Bake. Eat. Repeat.

Look at the delicious goodness at the bottom. YUM! What better way to start—or end—the day. The perfect bressert, I’d say.


Tasty Kitchen Blog: Apple Bourbon French Toast Casserole. Guest post by Amy Johnson of She Wears Many Hats, recipe submitted by TK member Courtney of Bake. Eat. Repeat.

A big thanks to Courtney for submitting this recipe. It’s going in my bressert file for ever and ever. Which pretty much is in keeping with the name of Courtney’s blog: Bake. Eat. Repeat.


Printable Recipe

Apple Bourbon French Toast Casserole

See post on Courtney’s site!
4.75 Mitt(s) 4 Rating(s)4 votes, average: 4.75 out of 54 votes, average: 4.75 out of 54 votes, average: 4.75 out of 54 votes, average: 4.75 out of 54 votes, average: 4.75 out of 5

Prep Time:

Cook Time:

Difficulty: Easy

Servings: 6

6
x

Print Options

Page size Letter 3x5 4x6
Text Size Small Medium Large
Content Include description
Include prep time, etc.
Show image

Description

Bourbon caramel coated apples and cinnamon spiked French toast make for a quick and decadent make-ahead breakfast!

Ingredients

  • ½ cups Butter
  • 1 cup Brown Sugar
  • 2 Tablespoons Bourbon
  • 3  Large Baking Apples, Cored, Peeled, And Sliced
  • 6 slices Day Old Bread, Sliced Thick
  • 4  Eggs
  • 1 cup Milk
  • 1 Tablespoon Vanilla Extract
  • 1-½ teaspoon Cinnamon
  • 1 dash Nutmeg

Preparation Instructions

1. In a small pan melt butter and sugar together. Whisk to combine. Cook until slightly thickened. Add bourbon and whisk again. Continue to cook for about 1 minute.
2. Pour butter mixture into a 9″ x13″ pan. Arrange sliced apples on top.
3. Arrange slices of bread on top of apples.
4. In a large bowl, beat together eggs, milk, vanilla, cinnamon, and nutmeg. Pour mixture over bread.
5. Cover dish and refrigerate overnight (see note below). In the morning, place casserole dish in the oven. Heat to 350ºF. Bake for 45 minutes to 1 hour, or until apple slices have softened and bread is golden brown.

Note: If you are preparing the casserole the morning you are serving it, dip bread slices in egg mixture before putting them in the pan. Pour remaining egg mixture over the top of bread slices. Bake at 350ºF for 40-45 minutes.


_______________________________________

Amy Johnson is a blogger who writes about food, travel, the home (both inside and out), and various observations and random musings about anything and everything. Visit her blog She Wears Many Hats for a dose of deliciousness, practicality, hilarity, or just plain fun. She lives in South Carolina with her husband and two children.


Profile photo of Erica Lea

Refrigerator Pickles

Posted by in Step-by-Step Recipes

Tasty Kitchen Blog: Homemade Claussen Knock-Off Pickles. Guest post by Erica Kastner of Cooking for Seven, recipe submitted by TK member Rebecca of Foodie with Family.

 
When it comes to pickles, I’m just a tad finicky. Sorry to all you sweet pickle lovers, but when talking about cucumbers, I like them dilly, salty and sour. Hold the yellow 5 and polysorbate 80.

Rebecca’s recipe for Homemade Claussen Knock-Off Pickles seemed perfect to me: natural ingredients and (best of all) no canning required. You simply pour a brine over your cucumbers and let sit until soured.

Sounds too easy, eh? Let me show you how it’s done.


Tasty Kitchen Blog: Homemade Claussen Knock-Off Pickles. Guest post by Erica Kastner of Cooking for Seven, recipe submitted by TK member Rebecca of Foodie with Family.

Start with some awesome ingredients: pickling cucumbers (I grew them myself. *proud moment*), fresh dill heads or dried dill seeds, garlic, cold water (not shown), cider vinegar, canning or kosher salt (I used sea salt—don’t use iodized salt!) and mixed pickling spices.


Tasty Kitchen Blog: Homemade Claussen Knock-Off Pickles. Guest post by Erica Kastner of Cooking for Seven, recipe submitted by TK member Rebecca of Foodie with Family.

Wash your cucumbers—I like crunchy pickles, but not crunchy with dirt.


Tasty Kitchen Blog: Homemade Claussen Knock-Off Pickles. Guest post by Erica Kastner of Cooking for Seven, recipe submitted by TK member Rebecca of Foodie with Family.
Cut a bit off of the blossom end.


Tasty Kitchen Blog: Homemade Claussen Knock-Off Pickles. Guest post by Erica Kastner of Cooking for Seven, recipe submitted by TK member Rebecca of Foodie with Family.

If you let some of your cucumbers grow too long, no worries. Simply slice them crosswise—perfect for sandwiches!


Tasty Kitchen Blog: Homemade Claussen Knock-Off Pickles. Guest post by Erica Kastner of Cooking for Seven, recipe submitted by TK member Rebecca of Foodie with Family.

Layer the garlic …


Tasty Kitchen Blog: Homemade Claussen Knock-Off Pickles. Guest post by Erica Kastner of Cooking for Seven, recipe submitted by TK member Rebecca of Foodie with Family.

Dill heads …


Tasty Kitchen Blog: Homemade Claussen Knock-Off Pickles. Guest post by Erica Kastner of Cooking for Seven, recipe submitted by TK member Rebecca of Foodie with Family.

And cucumbers in jars.


Tasty Kitchen Blog: Homemade Claussen Knock-Off Pickles. Guest post by Erica Kastner of Cooking for Seven, recipe submitted by TK member Rebecca of Foodie with Family.

Now make your brine: pour your water into a big measuring cup. Add the vinegar …


Tasty Kitchen Blog: Homemade Claussen Knock-Off Pickles. Guest post by Erica Kastner of Cooking for Seven, recipe submitted by TK member Rebecca of Foodie with Family.

Salt …


Tasty Kitchen Blog: Homemade Claussen Knock-Off Pickles. Guest post by Erica Kastner of Cooking for Seven, recipe submitted by TK member Rebecca of Foodie with Family.
And pickling spices.


Tasty Kitchen Blog: Homemade Claussen Knock-Off Pickles. Guest post by Erica Kastner of Cooking for Seven, recipe submitted by TK member Rebecca of Foodie with Family.

Whisk until the salt is dissolved.


Tasty Kitchen Blog: Homemade Claussen Knock-Off Pickles. Guest post by Erica Kastner of Cooking for Seven, recipe submitted by TK member Rebecca of Foodie with Family.

Pour the brine over the cucumbers. Make sure you get some of the pickling spices in each jar!


Tasty Kitchen Blog: Homemade Claussen Knock-Off Pickles. Guest post by Erica Kastner of Cooking for Seven, recipe submitted by TK member Rebecca of Foodie with Family.

Cover lightly with the jar lid and place a piece of cheesecloth over the top (secured with a rubber band) so no pesky fruit flies can get to your precious pickles.


Tasty Kitchen Blog: Homemade Claussen Knock-Off Pickles. Guest post by Erica Kastner of Cooking for Seven, recipe submitted by TK member Rebecca of Foodie with Family.

Leave on the counter, out of direct sunlight, for 2-4 days, or until the cucumbers taste like pickles!


Tasty Kitchen Blog: Homemade Claussen Knock-Off Pickles. Guest post by Erica Kastner of Cooking for Seven, recipe submitted by TK member Rebecca of Foodie with Family.

Cover tightly with lids and refrigerate. These will keep, chilled, for up to six months.


Tasty Kitchen Blog: Homemade Claussen Knock-Off Pickles. Guest post by Erica Kastner of Cooking for Seven, recipe submitted by TK member Rebecca of Foodie with Family.

Recipe Notes:

1. I love these pickles – so much more fresh tasting than canned! And way more affordable than those yummy ones you get at the healthfood store.

2. Reuben thinks these are great, but when my brother-in-law tasted them, he didn’t like them at all. Refrigerator pickles should be sweet, in his book. To each his own.

3. Don’t worry if your pickles develop “fuzz”—simply scoop any fuzz off of the brine and get rid of any pickles that are affected. No need to throw out the whole jar!


Tasty Kitchen Blog: Homemade Claussen Knock-Off Pickles. Guest post by Erica Kastner of Cooking for Seven, recipe submitted by TK member Rebecca of Foodie with Family.

Thanks so much to Rebecca for sharing these tasty little treats with us. You should also check out her blog, Foodie with Family, where she shares many more awesome recipes. These Grilled Spare Ribs look ah-mazing.


Printable Recipe

Homemade Claussen Knock-Off Pickles

See post on Rebecca’s site!
5.00 Mitt(s) 3 Rating(s)3 votes, average: 5.00 out of 53 votes, average: 5.00 out of 53 votes, average: 5.00 out of 53 votes, average: 5.00 out of 53 votes, average: 5.00 out of 5

Prep Time:

Cook Time:

Difficulty: Easy

Servings: 24

24
x

Print Options

Page size Letter 3x5 4x6
Text Size Small Medium Large
Content Include description
Include prep time, etc.
Show image

Description

Always crunchy and garlicky, this perfect homemade pickle requires no special equipment, no canning experience and tastes just like Claussen’s refrigerated kosher dill pickles.

Ingredients

  • 35 whole To 45 Whole Small To Medium Sized Pickling Cucumbers
  • 4 heads Fresh Dill Or 4 Tablespoons Dried Dill Seed (not Weed!)
  • 4 cloves Garlic, Or More To Taste (I Usually Use Double The Amount)
  • 1 gallon Cold Water
  • 1 cup Cider Vinegar
  • ⅔ cups Canning Or Kosher Salt (do Not Use Iodized Salt!)
  • 2 Tablespoons Mixed Pickling Spices

Preparation Instructions

Wash cucumbers but do not scrub them. Trim 1/8-inch from the blossom end of each cucumber and slice in half lengthwise or into quarters, depending on how large your cucumbers are and how big you want them to be when they’re done.

In a gallon jar (or large, wide-mouth, food-safe container) layer the dill heads or seed, garlic cloves and sliced cucumbers.

In a separate pitcher or bowl, stir together the remaining ingredients until the salt is dissolved.

Pour the brine over the cucumbers, taking care to make sure all of them are fully submerged. If needed, place a plate or mug or other non-reactive heavy item on top of the cucumbers to weigh them down and keep them under the brine!

Cover lightly with a lid just perched on top or secure a piece of cheesecloth over the jar with a rubber band to keep fruit flies away.

Leave out of direct sunlight on the counter for two to four days*, or until the cucumbers taste like pickles throughout.

Then, fix your lid onto your jar or container and chill the pickles. These can be stored in the refrigerator for up to six months provided you keep them covered with brine.

Note: If at any point in the proceedings “fuzz” or “foam” develops on top of the brine, use a spoon to remove it. If there is “fuzz” attached to any of the cucumbers, remove the ones affected and be sure the others are still fully submerged.

Cover the jar lightly but do not screw a lid into place!


_______________________________________

Newly-married Erica Kastner shares her wonderful recipes and amazing food photography on her blog, Cooking for Seven. She also writes about crafts and posts more of her beautiful photography in her personal blog, EricaLea.com. There really isn’t much that this amazing young lady can’t do, and we’re thrilled she does some of it here.


Profile photo of Natalie | Perry's Plate

Peaches and Cream Crumble Bars

Posted by in Baking, Step-by-Step Recipes

Tasty Kitchen Blog: Peaches and Cream Crumble Bars. Guest post by Natalie Perry of Perry's Plate, recipe submitted by TK member Courtney of Bake, Eat, Repeat.

 
I think I should come clean before I start telling you about this recipe.

Confession: I really don’t like peaches. Like, despise them. I like peaches about as much as Ree likes bananas.

What business did I have making a dessert with peaches? Well, it was all about love, people. The rest of my family loves peaches, and I love my family. I had a few peaches from my last farmers’ market trip that needed to be used ASAP on a day when I needed to make a potluck dessert. It was destiny, I suppose.

This recipe is a combination of a cheesecake and a crumble, and I think you may even substitute a different kind of fruit for the peaches (pears, apples, berries, etc.). Thank you TK member Courtney (who blogs at Bake, Eat, Repeat) for posting these Peaches and Cream Crumble Bars!


Tasty Kitchen Blog: Peaches and Cream Crumble Bars. Guest post by Natalie Perry of Perry's Plate, recipe submitted by TK member Courtney of Bake, Eat, Repeat.

Let’s begin by making a few preparations. Oven at 350ºF? Check. Baking dish lined with foil and greased? Check.


Tasty Kitchen Blog: Peaches and Cream Crumble Bars. Guest post by Natalie Perry of Perry's Plate, recipe submitted by TK member Courtney of Bake, Eat, Repeat.

To make the crust you only need three things: flour, brown sugar, and butter. (If you use unsalted butter, you’ll need to add a bit of salt.)


Tasty Kitchen Blog: Peaches and Cream Crumble Bars. Guest post by Natalie Perry of Perry's Plate, recipe submitted by TK member Courtney of Bake, Eat, Repeat.

Add the butter to a medium-sized mixing bowl. (Or the work bowl of your best friend—er, I mean stand mixer. Please tell me you named yours, too?)


Tasty Kitchen Blog: Peaches and Cream Crumble Bars. Guest post by Natalie Perry of Perry's Plate, recipe submitted by TK member Courtney of Bake, Eat, Repeat.

Add the brown sugar, then beat it to soften the butter and incorporate the sugar.


Tasty Kitchen Blog: Peaches and Cream Crumble Bars. Guest post by Natalie Perry of Perry's Plate, recipe submitted by TK member Courtney of Bake, Eat, Repeat.

Add the flour.


Tasty Kitchen Blog: Peaches and Cream Crumble Bars. Guest post by Natalie Perry of Perry's Plate, recipe submitted by TK member Courtney of Bake, Eat, Repeat.

Mix well, scraping down the sides. At first it’ll look really crumbly. Then it will look like …


Tasty Kitchen Blog: Peaches and Cream Crumble Bars. Guest post by Natalie Perry of Perry's Plate, recipe submitted by TK member Courtney of Bake, Eat, Repeat.

This. A beautiful, somewhat-sticky mass about the consistency of cookie dough.


Tasty Kitchen Blog: Peaches and Cream Crumble Bars. Guest post by Natalie Perry of Perry's Plate, recipe submitted by TK member Courtney of Bake, Eat, Repeat.

Press the dough evenly into the prepared baking dish and bake it for about 20 minutes. It should begin to turn golden brown on the edges and the middle should be set.


Tasty Kitchen Blog: Peaches and Cream Crumble Bars. Guest post by Natalie Perry of Perry's Plate, recipe submitted by TK member Courtney of Bake, Eat, Repeat.

Meanwhile you can start on the other components. First, the filling. You’ll need three ripe peaches, eggs, peach jam (thanks Grandma!), cream cheese, sour cream, flour, and vanilla.

You’ll need some sugar, too. Just pretend it’s in the photo, snuggled in between the sour cream and cream cheese. Yep, right there.


Tasty Kitchen Blog: Peaches and Cream Crumble Bars. Guest post by Natalie Perry of Perry's Plate, recipe submitted by TK member Courtney of Bake, Eat, Repeat.

Put the cream cheese and sour cream into a mixing bowl.


Tasty Kitchen Blog: Peaches and Cream Crumble Bars. Guest post by Natalie Perry of Perry's Plate, recipe submitted by TK member Courtney of Bake, Eat, Repeat.

Beat the daylights out of it until you have a relatively lump-free mixture. Be sure to scrape down the sides a few times to get those tricky parts in the bottom.


Tasty Kitchen Blog: Peaches and Cream Crumble Bars. Guest post by Natalie Perry of Perry's Plate, recipe submitted by TK member Courtney of Bake, Eat, Repeat.

Add the sugar and the flour …


Tasty Kitchen Blog: Peaches and Cream Crumble Bars. Guest post by Natalie Perry of Perry's Plate, recipe submitted by TK member Courtney of Bake, Eat, Repeat.

And the eggs and vanilla.


Tasty Kitchen Blog: Peaches and Cream Crumble Bars. Guest post by Natalie Perry of Perry's Plate, recipe submitted by TK member Courtney of Bake, Eat, Repeat.

Like before, beat the daylights out of it until you have a silky-smooth batter. (Scrape down the sides again!)


Tasty Kitchen Blog: Peaches and Cream Crumble Bars. Guest post by Natalie Perry of Perry's Plate, recipe submitted by TK member Courtney of Bake, Eat, Repeat.

Next, let’s get the topping done. In a small bowl, add the flour, brown sugar, cinnamon, and ginger. (If you use unsalted butter, add 1/4 teaspoon of salt.)


Tasty Kitchen Blog: Peaches and Cream Crumble Bars. Guest post by Natalie Perry of Perry's Plate, recipe submitted by TK member Courtney of Bake, Eat, Repeat.

You’ll need to add a stick of melted butter to this mixture, but you might want to whisk it together first. I didn’t. My daughters (3 and 5) were glued to me asking, “CAN I HELP NOW?” “CAN I TASTE IT?” “CAN I STIR IT UP?” “WHEN ARE YOU GOING TO BE DONE?!” “CAN I HELP NOW?” And somehow I forgot to whisk it. It happens.

I think they have a built-in radar that tells them I’m making a dessert. They usually aren’t glued to me when I make dinner.


Tasty Kitchen Blog: Peaches and Cream Crumble Bars. Guest post by Natalie Perry of Perry's Plate, recipe submitted by TK member Courtney of Bake, Eat, Repeat.

But, see? It all turned out well in the end. The crumble was wetter than I anticipated, but it was easily broken apart with my fingers.


Tasty Kitchen Blog: Peaches and Cream Crumble Bars. Guest post by Natalie Perry of Perry's Plate, recipe submitted by TK member Courtney of Bake, Eat, Repeat.

One last thing: Slice up the peaches. Aren’t they pretty?


Tasty Kitchen Blog: Peaches and Cream Crumble Bars. Guest post by Natalie Perry of Perry's Plate, recipe submitted by TK member Courtney of Bake, Eat, Repeat.

Alright. Assembly time. Grab the baked crust and smear some peach jam over it.


Tasty Kitchen Blog: Peaches and Cream Crumble Bars. Guest post by Natalie Perry of Perry's Plate, recipe submitted by TK member Courtney of Bake, Eat, Repeat.

Grab some helpers (or your own two hands) and lay the peaches on top.


Tasty Kitchen Blog: Peaches and Cream Crumble Bars. Guest post by Natalie Perry of Perry's Plate, recipe submitted by TK member Courtney of Bake, Eat, Repeat.

My 5-year-old enjoys lining things up in nice, even rows. (Ahem. She gets that from her mother.) This is how ours turned out. We used two yellow peaches and one white one.


Tasty Kitchen Blog: Peaches and Cream Crumble Bars. Guest post by Natalie Perry of Perry's Plate, recipe submitted by TK member Courtney of Bake, Eat, Repeat.

You know that batter you’d like to put your face in? Pour that over the peaches. Then lick that bowl clean. I didn’t make it into the closet in time so I had to share with my minions.


Tasty Kitchen Blog: Peaches and Cream Crumble Bars. Guest post by Natalie Perry of Perry's Plate, recipe submitted by TK member Courtney of Bake, Eat, Repeat.

Speaking of minions, they’re awfully good at sprinkling the crumble mixture over the cheesecake batter.


Tasty Kitchen Blog: Peaches and Cream Crumble Bars. Guest post by Natalie Perry of Perry's Plate, recipe submitted by TK member Courtney of Bake, Eat, Repeat.

My younger one ate more than she sprinkled, but we had enough to cover the whole thing.

Time to bake! Throw it in the oven for 30-40 minutes or until the middle sets up.


Tasty Kitchen Blog: Peaches and Cream Crumble Bars. Guest post by Natalie Perry of Perry's Plate, recipe submitted by TK member Courtney of Bake, Eat, Repeat.

Let it cool for 15-20 minutes before you dig in. I was able to lift the foil and slide the whole thing onto a cutting board.


Tasty Kitchen Blog: Peaches and Cream Crumble Bars. Guest post by Natalie Perry of Perry's Plate, recipe submitted by TK member Courtney of Bake, Eat, Repeat.

I love how beautiful the layers are in these!


Tasty Kitchen Blog: Peaches and Cream Crumble Bars. Guest post by Natalie Perry of Perry's Plate, recipe submitted by TK member Courtney of Bake, Eat, Repeat.

And I even liked how they tasted. Yes, even the peach-hater liked them! Like cheesecake, they get even better when they sit in the fridge and cool for several hours.

Thanks again Courtney! Be sure to check out Courtney’s TK recipe box and her recipes over on her blog, Bake, Eat, Repeat.

Recipe alterations: I replaced all of the flour with whole wheat pastry flour, reduced all of the sugars by half, used salted butter and omitted the added salt, and omitted the step of brushing the crust with melted butter. (I didn’t think that last one was necessary.)


Printable Recipe

Peaches and Cream Crumble Bars

See post on Courtney’s site!
4.75 Mitt(s) 4 Rating(s)4 votes, average: 4.75 out of 54 votes, average: 4.75 out of 54 votes, average: 4.75 out of 54 votes, average: 4.75 out of 54 votes, average: 4.75 out of 5

Prep Time:

Cook Time:

Difficulty: Easy

Servings: 24

24
x

Print Options

Page size Letter 3x5 4x6
Text Size Small Medium Large
Content Include description
Include prep time, etc.
Show image

Description

Sweet juicy peaches paired with tender shortbread, rich custard and spiced crumble. It’s summer in a bar.

Ingredients

  • FOR THE SHORTBREAD:
  • 2 sticks Unsalted Butter, Cut Into Small Chunks
  • ¼ cups Brown Sugar
  • ½ teaspoons Kosher Salt
  • 2 cups Flour
  • FOR THE FILLING:
  • 1 Tablespoon Butter
  • ½ cups Peach Jam
  • 3  Large Peaches, Pitted And Thinly Sliced
  • 12 ounces, weight Cream Cheese, Softened
  • ¼ cups Sour Cream
  • ½ cups Sugar
  • 1 Tablespoon Flour
  • 2  Eggs
  • 1 teaspoon Vanilla
  • FOR THE CRUMB TOPPING:
  • 1 cup Flour
  • ¼ cups Sugar
  • ¼ cups Brown Sugar
  • ½ teaspoons Ginger
  • 1 teaspoon Cinnamon
  • ¼ teaspoons Salt
  • 1 stick Unsalted Butter, melted

Preparation Instructions

1. For the shortbread crust: Preheat the oven to 350 F. Line a 13 x 9 inch baking dish with foil, then grease the foil on all sides. Set the dish aside. In the bowl of an electric mixer, beat the butter until it begins to soften, about 30 seconds. Add sugar and salt and beat on low speed until just combined. Add the flour and beat on low speed until incorporated then increase to high speed and beat until a cohesive dough is formed. Using your fingers, press the dough into the baking dish and bake for 20 minutes or until puffy and golden brown. When it’s done remove it from the oven and start the next step.

2. For the filling: Brush shortbread crust with 1 tablespoon of melted butter. Spread peach jam evenly over the crust, then layer with sliced peaches. To make the cream layer, put the cream cheese and sour cream in a bowl and beat on high speed until smooth. Add sugar and 1 tablespoon flour and beat another 30 seconds. Add eggs and vanilla and beat until smooth and thoroughly combined. Pour cheesecake mixture over peach slices. Set aside.

3. For the topping: In a small bowl, combine flour, sugars, ginger, cinnamon, and salt. Pour melted butter over all of it and use your fingers to mix everything together until coarse crumbles form. Sprinkle over the top of the cheesecake layer. Bake again at 350 F for 30 minutes or until crumbles are golden brown and center is set.


_______________________________________

Be sure to check out Natalie’s own beautiful food blog, Perrys’ Plate, where you can see her growing collection of lovely recipes. There’s always something new to see there. Go visit now!


Profile photo of Natalie | Perry's Plate

Slow Cooker Korean Short Rib Tacos

Posted by in Step-by-Step Recipes

  We recently bought half of an organic, grass-fed cow. That’s, like, a whole freezer full of meat, and my mind is reeling at all of the unfamiliar cuts. (My meat selection growing up was limited to ground beef, steak, roasts, and boneless, skinless chicken breasts. I’ve come a long way!) Beef short ribs is […]

Profile photo of missamy

French Coconut Pie

Posted by in Baking, Step-by-Step Recipes

  I think when you hear “easy as pie” it’s in reference to this pie—this very pie, French Coconut Pie, submitted by eastmemphismama. This pie is as easy as is it gets, and mighty, mighty good too. I mean real, real, good. Like “slap your pappy, call the news, hide in the closet to eat […]

Profile photo of Erica Lea

Pumpkin Spice Latte Cupcakes

Posted by in Baking, Step-by-Step Recipes

  Fall is, hands down, my favorite season. Who’s with me? This is our excuse to put pumpkin, apples and spices in whatever recipe we can! While I was browsing through the Tasty Kitchen database looking for something fall-ish to make, and I stumbled across these Pumpkin Spice Latte Cupcakes from TK member annmarsh. Pumpkin + […]

Profile photo of whatsgabycooking

Fully Loaded Baked Potato Soup

Posted by in Step-by-Step Recipes

  Hi! Oh my goodness, I’ve missed you guys over here on Tasty Kitchen! The last few months have been a whirlwind, with getting married and finishing a super fun project that’s due out next month. I’m so jazzed to be back and I’m kicking things off with basically the most amazing soup to ever […]