The Pioneer Woman Tasty Kitchen
Profile photo of Jennifer (Savor the Thyme)

Pesto, Olives and Tomato Grilled Cheese

Posted by in Step-by-Step Recipes

Feet have growing pains, you know. It’s true because our 5-year-said so. I asked him to put away his toys and his response was, “I cannot walk as I have too many growing pains in my feet.”

I get those around my waist. Odd.


Tasty Kitchen Blog: Pesto, Olives and Tomato Grilled Cheese. Guest post and recipe from Jennifer Leal of Savor the Thyme.

Well, no need to expand your waist or feel any guilt with this grilled cheese recipe. After all, it’s made with some extra nutrients.


Tasty Kitchen Blog Pesto, Olives and Tomato Grilled Cheese

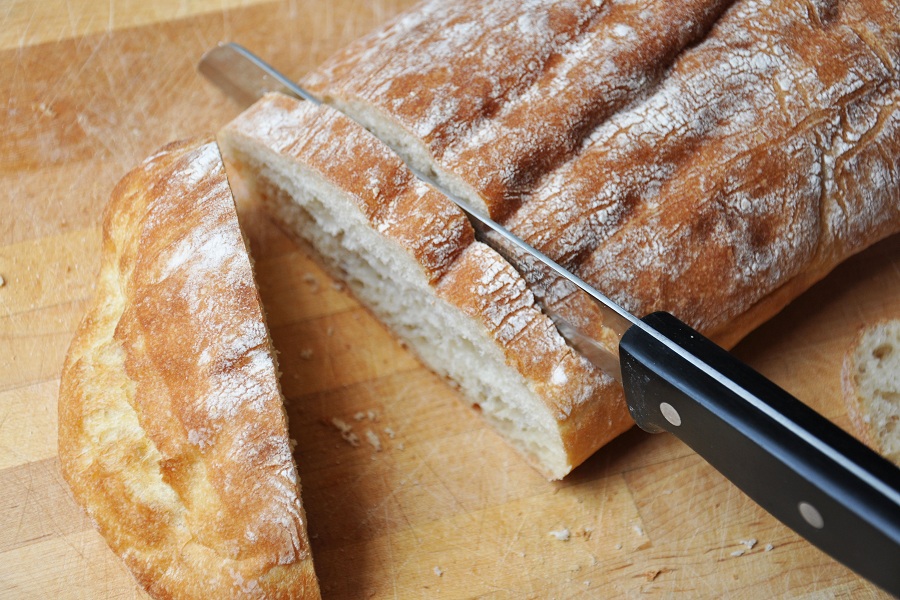
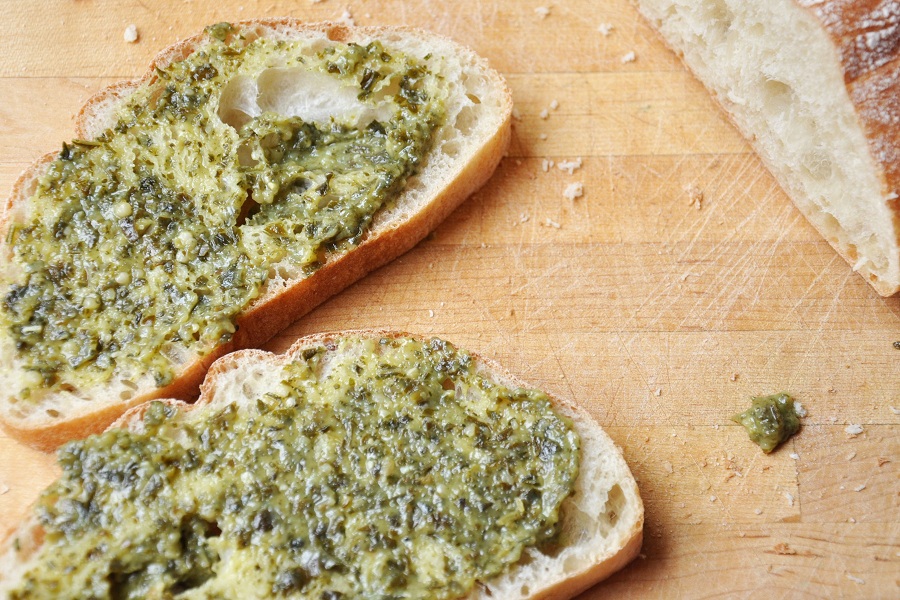
Start with fresh ciabatta or your favorite bread. Cut two slices (per sandwich) about 1/2 inch thick.


Tasty Kitchen Blog Pesto, Olives and Tomato Grilled Cheese

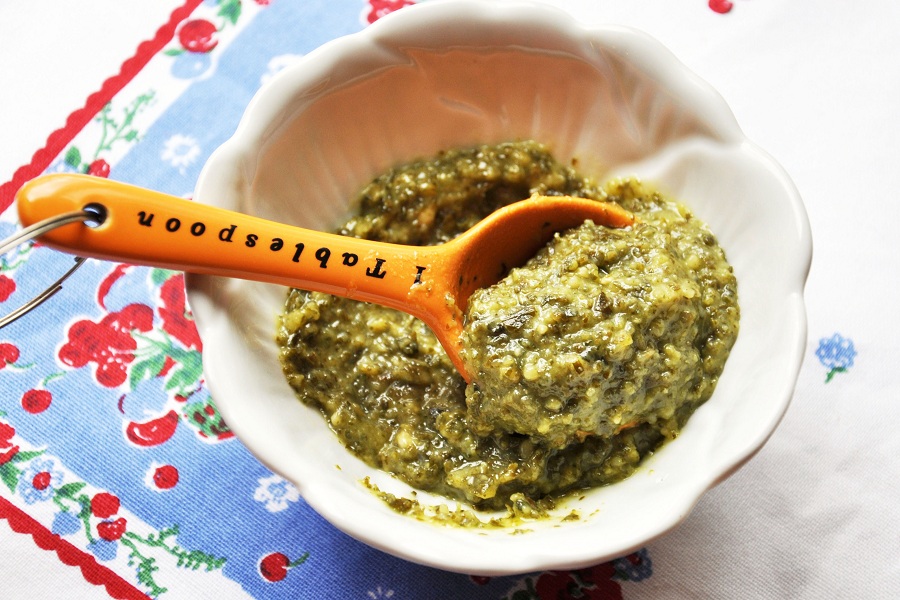
Grab your favorite prepared pesto or make your own.


Tasty Kitchen Blog Pesto, Olives and Tomato Grilled Cheese

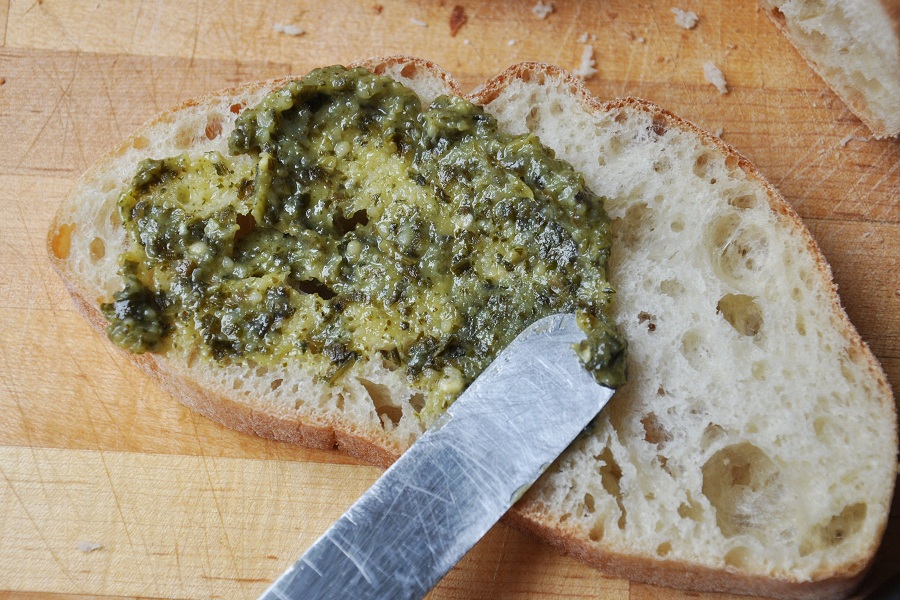
Let the schmearing begin.


Tasty Kitchen Blog Pesto, Olives and Tomato Grilled Cheese

Did you schmear the pesto all over both pieces of bread? Please do so.


Tasty Kitchen Blog Pesto, Olives and Tomato Grilled Cheese

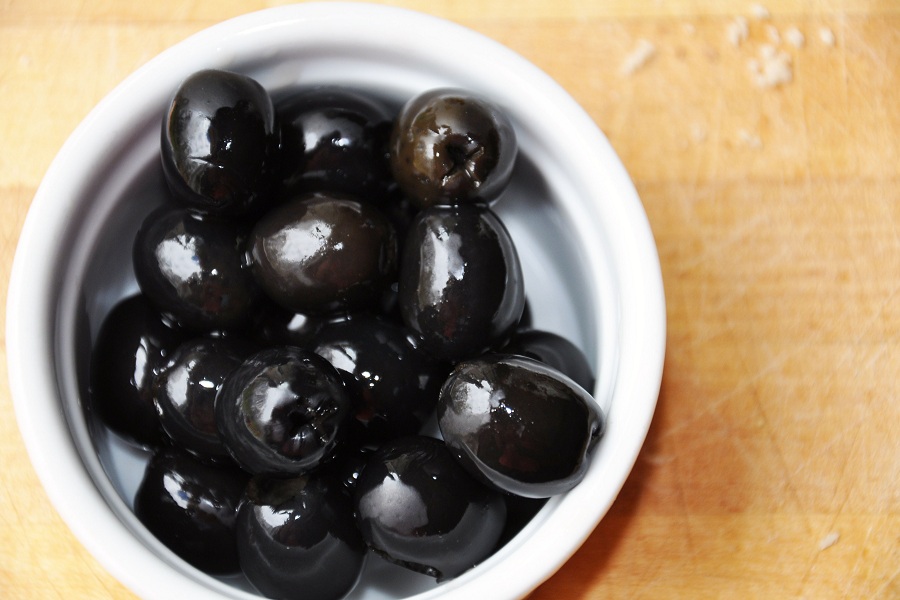
Grab your favorite type of olives and prepare to chop them up.


Tasty Kitchen Blog Pesto, Olives and Tomato Grilled Cheese

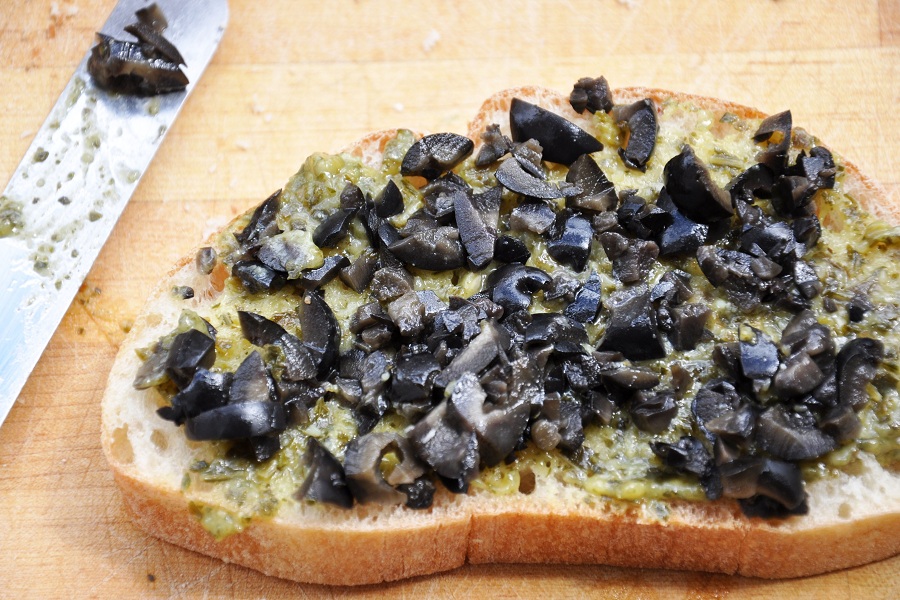
Chop up to your preferred size and scatter over the pesto on one of the slices of bread.


Tasty Kitchen Blog Pesto, Olives and Tomato Grilled Cheese

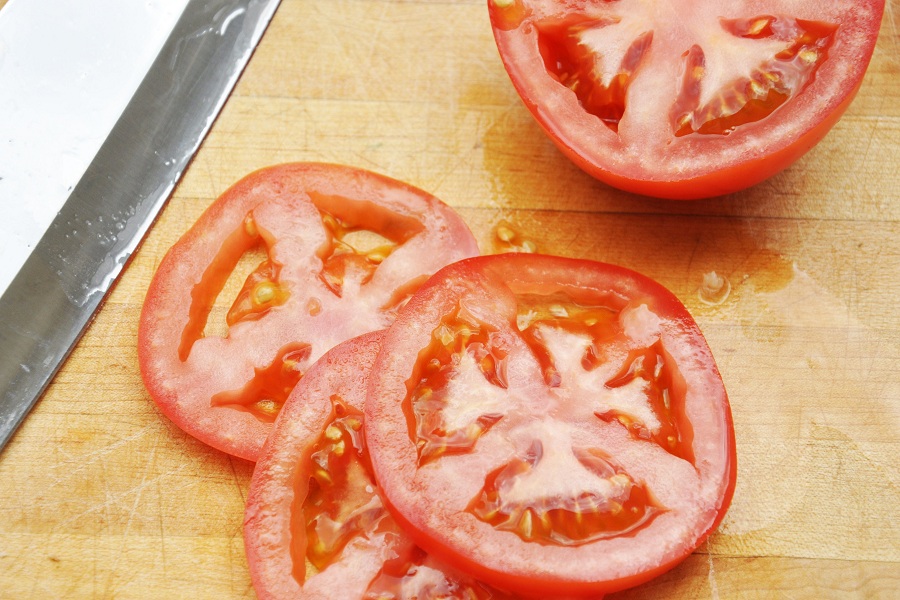
Now slice up that gor-gee-ous tomato into two or three slices, depending on the width of the bread, and layer over the olives.


Tasty Kitchen Blog Pesto, Olives and Tomato Grilled Cheese

Slice up your favorite cheese. Instead of staring at it on a super pretty plate, go ahead and stack them on top of the olives.


Tasty Kitchen Blog Pesto, Olives and Tomato Grilled Cheese

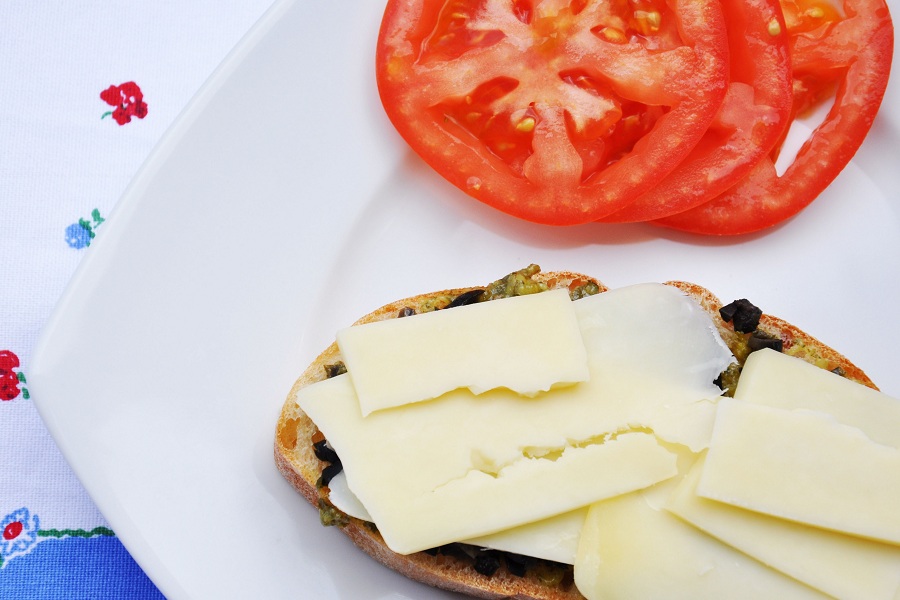
Still staring, eh? Please place them on the sandwich. (I know. It’s a pretty vision.)


Tasty Kitchen Blog Pesto, Olives and Tomato Grilled Cheese

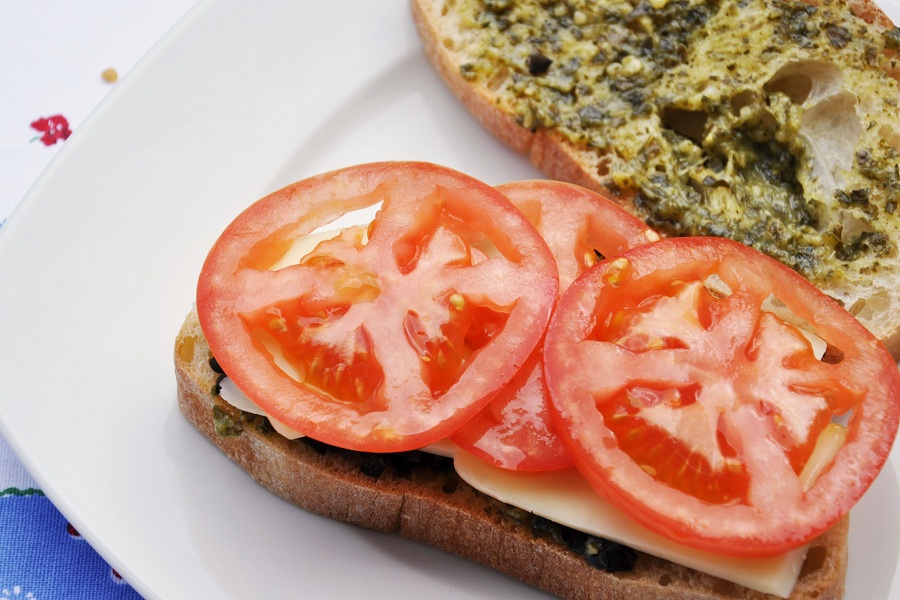
That’s better. Top with the slices of tomato, then go ahead and heat up your panini press or indoor grill.


Tasty Kitchen Blog Pesto, Olives and Tomato Grilled Cheese

Spray both sides of the sandwich with olive oil or butter-flavored nonstick spray. Place that sweet sandwich on the press/grill and listen to the music-like sizzle. Allow to toast up until the sandwich is nice and brown.


Tasty Kitchen Blog Pesto, Olives and Tomato Grilled Cheese

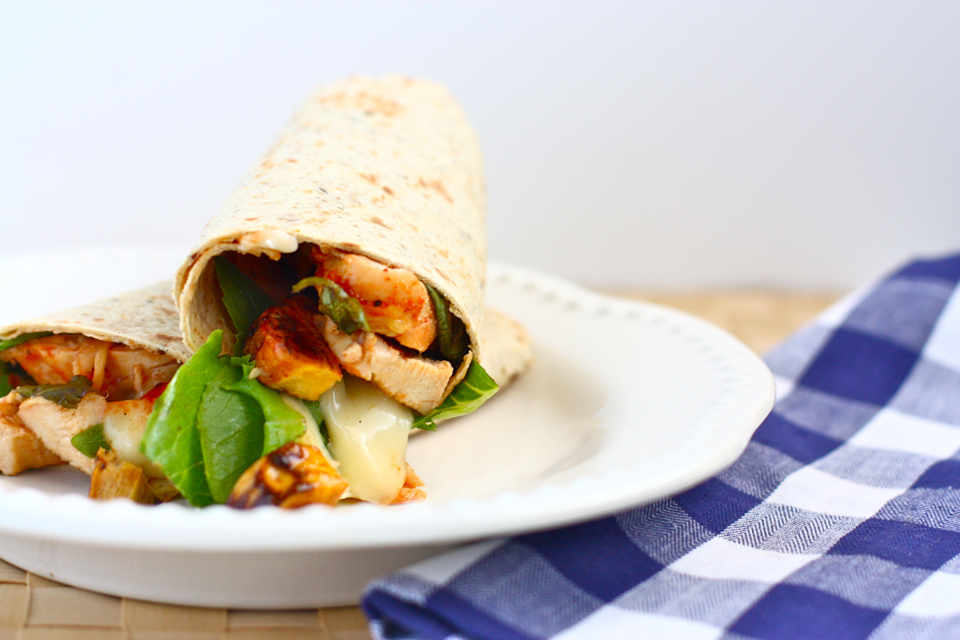
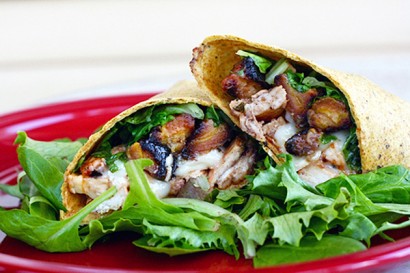
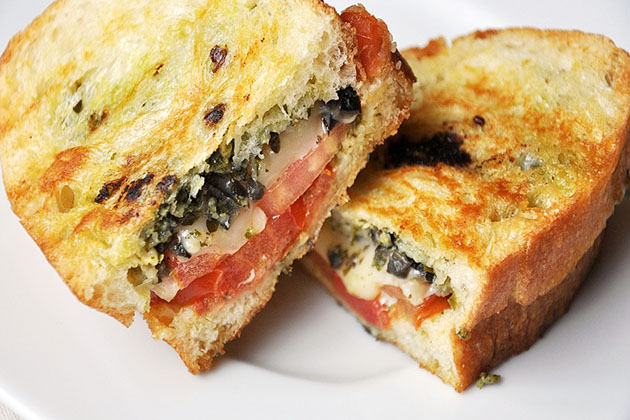
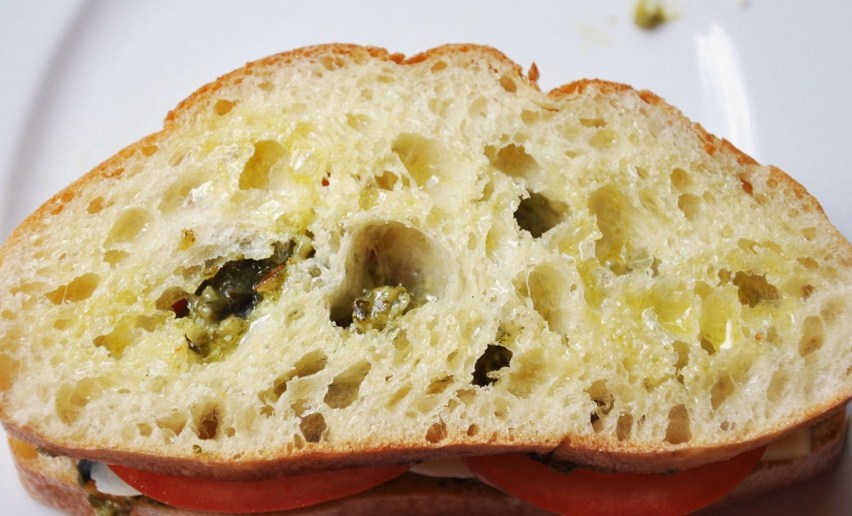
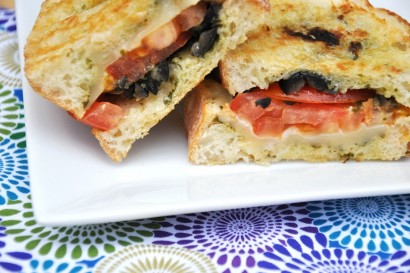
Place the sandwich on the plate, cut in half and prepare to dig in.


Tasty Kitchen Blog Pesto, Olives and Tomato Grilled Cheese

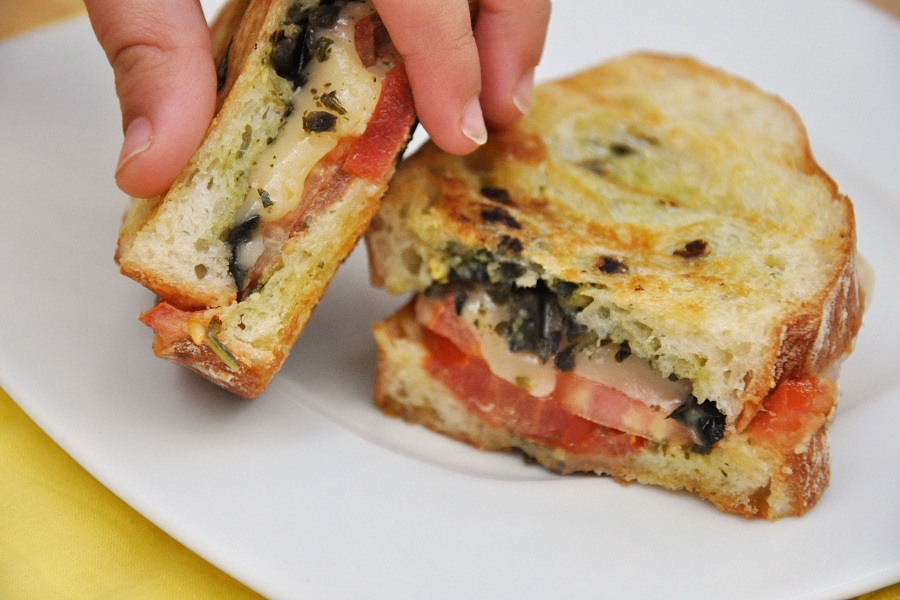
Dang it, the little hands beat me to it.


Printable Recipe

Pesto, Olives & Tomato Grilled Cheese

See post on Jennifer (Savor the Thyme)’s site!
4.60 Mitt(s) 5 Rating(s)5 votes, average: 4.60 out of 55 votes, average: 4.60 out of 55 votes, average: 4.60 out of 55 votes, average: 4.60 out of 55 votes, average: 4.60 out of 5

Prep Time:

Cook Time:

Difficulty: Easy

Servings: 1

1
x

Print Options

Page size Letter 3x5 4x6
Text Size Small Medium Large
Content Include description
Include prep time, etc.
Show image

Description

This is a less-guilt comfort food because you gain nutrients from the tomatoes and olives (but don’t tell anyone). Hal-le-lu-jah!

Ingredients

  • 2 slices Ciabatta/Bread
  • 1 Tablespoon Pesto
  • 1 Tablespoon Olives, Chopped
  • 2 slices Tomato
  • 5 slices Fontina Cheese

Preparation Instructions

Plug in/turn on your indoor grill or panini press.

Slice the ciabatta (or your favorite bread) into approximately 1/2-inch slices. Spread the pesto (make your own or use your favorite prepared pesto) all over one slice of the bread.

Chop up the olives (or buy them already chopped) and scatter them over the pesto. Lay the tomatoes on top of the olives and finish up the sandwich by placing the cheese over the tomatoes and top with the remaining slices of bread.

Spritz one side of the sandwich with olive oil spray, flip carefully and repeat. Place the sandwich on the grill/press and let the magic happen. Allow to cook until the bread gets all crispy and brown and the cheese is gooey. Flip and repeat if not using a panini press.


_______________________________________

Jennifer Leal is a mom of two children ages 5 and 7. She lives in Rhode Island with her family and is the creator of the blog Savor the Thyme, which focuses on celebrating healthier food and family togetherness, all peppered with personality.


Profile photo of EatLiveRun

BBQ Chicken, Brie and Plantain Wraps

Posted by in Step-by-Step Recipes

Tasty Kitchen Blog: BBQ Chicken, Brie and Plantain Wraps. Guest post by Jenna Weber of Eat, Live, Run; recipe submitted by TK member Tina of My Life as a Mrs.

 
I have a thing for plantains. Specifically, crunchy fried, golden sweet plantains that are just dripping with caramelized brown sugar. Just hand me a plate of sweet plantains and I’m in heaven. So, when I saw Tina’s recipe for BBQ Chicken, Brie and Plantain Wraps I knew it would be a winner. Spicy barbecue chicken with gooey brie cheese and sweet crunchy plantains? Sign me up!


Tasty Kitchen Blog: BBQ Chicken, Brie and Plantain Wraps. Guest post by Jenna Weber of Eat, Live, Run; recipe submitted by TK member Tina of My Life as a Mrs.

Tina’s recipe calls for a box of frozen sweet plantains, but after searching five grocery stores to no avail, I decided to take matters into my own hands and make my own. I found this easy Tasty Kitchen recipe for Sweet Plantains submitted by Stephanie. It only took about ten minutes and the end result was delicious! (I’ll include that recipe at the bottom of this post.)


Tasty Kitchen Blog: BBQ Chicken, Brie and Plantain Wraps. Guest post by Jenna Weber of Eat, Live, Run; recipe submitted by TK member Tina of My Life as a Mrs.

Since I skipped a step by not getting packaged plantains, after frying them I sliced them in half to prep them for my yummy wrap!


Tasty Kitchen Blog: BBQ Chicken, Brie and Plantain Wraps. Guest post by Jenna Weber of Eat, Live, Run; recipe submitted by TK member Tina of My Life as a Mrs.

Then, I set the plantains aside and got to work on my barbecue chicken! Tina used a grill, but I decided to go the grill pan route in my oven instead for convenience. I also used garlic powder plus salt instead of garlic salt. So I sprinkled these guys with a little garlic powder first…


Tasty Kitchen Blog: BBQ Chicken, Brie and Plantain Wraps. Guest post by Jenna Weber of Eat, Live, Run; recipe submitted by TK member Tina of My Life as a Mrs.

Then I gave them a good pinch of sea salt.


Tasty Kitchen Blog: BBQ Chicken, Brie and Plantain Wraps. Guest post by Jenna Weber of Eat, Live, Run; recipe submitted by TK member Tina of My Life as a Mrs.

Followed by a healthy dash of cayenne—my favorite!


Tasty Kitchen Blog: BBQ Chicken, Brie and Plantain Wraps. Guest post by Jenna Weber of Eat, Live, Run; recipe submitted by TK member Tina of My Life as a Mrs.

I cooked my chicken breasts for 25 minutes at 375ºF.


Tasty Kitchen Blog: BBQ Chicken, Brie and Plantain Wraps. Guest post by Jenna Weber of Eat, Live, Run; recipe submitted by TK member Tina of My Life as a Mrs.

Then poured on my favorite BBQ sauce during the last five minutes of the cooking process.


Tasty Kitchen Blog: BBQ Chicken, Brie and Plantain Wraps. Guest post by Jenna Weber of Eat, Live, Run; recipe submitted by TK member Tina of My Life as a Mrs.

Once the chicken was done and juicy, it was time to assemble the wraps! I thinly sliced my barbecue sauce-laden chicken breast and placed it on top of my wrap and mixed greens.


Tasty Kitchen Blog: BBQ Chicken, Brie and Plantain Wraps. Guest post by Jenna Weber of Eat, Live, Run; recipe submitted by TK member Tina of My Life as a Mrs.

Followed by chunks of brie cheese. Doesn’t that look delicious?! Just you wait.


Tasty Kitchen Blog: BBQ Chicken, Brie and Plantain Wraps. Guest post by Jenna Weber of Eat, Live, Run; recipe submitted by TK member Tina of My Life as a Mrs.

Lastly, I scattered my sweet plantains on top of everything. I’m getting hungry again just looking at this!


Tasty Kitchen Blog: BBQ Chicken, Brie and Plantain Wraps. Guest post by Jenna Weber of Eat, Live, Run; recipe submitted by TK member Tina of My Life as a Mrs.

The hardest part of the whole thing was rolling the wrap up! But that’s probably just because I have a history of overstuffing my tortillas.


Tasty Kitchen Blog: BBQ Chicken, Brie and Plantain Wraps. Guest post by Jenna Weber of Eat, Live, Run; recipe submitted by TK member Tina of My Life as a Mrs.

There you have it—lunch is served! I absolutely loved the flavor combination here and have a feeling these will now be my go-to lunch. Thanks, Tina, for this awesome recipe! It was cheesy, smoky, sweet and delicious! (Check out Tina’s blog My Life As A Mrs. for more of her delicious recipes!)


Printable Recipe

BBQ Chicken, Brie, and Plantain Wraps

See post on Tina (My Life as a Mrs)’s site!
5.00 Mitt(s) 2 Rating(s)2 votes, average: 5.00 out of 52 votes, average: 5.00 out of 52 votes, average: 5.00 out of 52 votes, average: 5.00 out of 52 votes, average: 5.00 out of 5

Prep Time:

Cook Time:

Difficulty: Easy

Servings: 4

4
x

Print Options

Page size Letter 3x5 4x6
Text Size Small Medium Large
Content Include description
Include prep time, etc.
Show image

Description

Smokey BBQ, creamy brie, and sweet plantain wrap = party in your mouth!

Ingredients

  • 1 box (about 11 Oz.. Size) Frozen Sweet Plantains
  • 4 whole Boneless, Skinless Chicken Breasts
  • 1 teaspoon Garlic Salt
  • ½ teaspoons Cayenne
  • ¾ cups BBQ Sauce Of Choice
  • 4 whole Spinach Wraps
  • 1 cup Mixed Greens
  • 6 ounces, weight Brie Cheese

Preparation Instructions

Ignore the cooking instructions on the box/bag your plantains. Preheat oven to 400°F. Line a baking sheet with foil and spray with nonstick cooking spray. Lay frozen plantains out in a single layer (make sure none of them are overlapping).

Bake for a good 20–30 minutes, allowing them to caramalize and get that gorgeous chewy edge! They are done when they are nice and golden with dark brown edges. Remove from the oven and allow to cool slightly. When cool enough to handle, slice each piece in half lengthwise, and set aside until ready to use.

Season each piece of chicken with a sprinkling of garlic salt and cayenne pepper on both sides and throw them on the grill until cooked completely through (flipping halfway through). Baste both sides with BBQ sauce in the last 5 minutes or so of cooking. Remove from the grill and slice into thin strips.

To assemble, lay a wrap flat and add a small amount of mixed greens. Top with a few slices of chicken, some brie, and a some of the plantains (I like mine with lots of plantains!). If you want to get REALLY crazy, go ahead and add an extra drizzle of BBQ!

Carefully wrap the wrap up (burrito style), place on a baking sheet (seam side down), and put back into the 400°F oven for just a few minutes (3–5 minutes). This allows the cheese to melt a little and the outside of the tortilla to crisp up slightly. Remove from the oven, slice in half, and serve!


Printable Recipe

Sweet Plantains

See post on Stephanie Deal’s site!
5.00 Mitt(s) 2 Rating(s)2 votes, average: 5.00 out of 52 votes, average: 5.00 out of 52 votes, average: 5.00 out of 52 votes, average: 5.00 out of 52 votes, average: 5.00 out of 5

Prep Time:

Cook Time:

Difficulty: Easy

Servings: 4

4
x

Print Options

Page size Letter 3x5 4x6
Text Size Small Medium Large
Content Include description
Include prep time, etc.
Show image

Description

This tasty dish is really easy to prepare and tastes great with pork chops, etc. It can also just be eaten as a snack.

Ingredients

  • 3 whole Plantains, Very Ripe
  • 3 Tablespoons Brown Sugar
  • ¼ cups Peanut Oil
  • 2 Tablespoons Butter
  • ¼ teaspoons Salt

Preparation Instructions

Slice plantains into 1-inch slices, put in a bowl and gently toss plantain slices with brown sugar.

Heat peanut oil and butter in a large skillet over medium-high heat until the butter begins to sizzle. Put plaintain slices into the skillet and fry until the plantains begin to turn golden brown, then turn over, and continue frying until they have caramelized, about 2–3 minutes per side.

Remove slices from the skillet and dab onto paper towels. Do not put slices onto paper towels as they will stick to the paper due to the caramelization. Put on a plate and sprinkle with salt before serving.


_______________________________________

Jenna is a food writer who has worked as a pastry chef and bread baker. Her blog Eat, Live, Run has great recipes, travel stories, and the perfect slogan: “Celebrating life, one crumb at a time.”


Profile photo of Natalie | Perry's Plate

Mango Frozen Yogurt

Posted by in Step-by-Step Recipes

Tasty Kitchen Blog: Frozen Mango Yogurt. Guest post by Natalie Perry of Perry's Plate, recipe submitted by TK member Lauren of Healthy Food for Living.

My summertime needs are pretty simple:

1. Flip flops
2. Air-conditioning
3. Lots of fresh fruit
4. An ice cream maker

There’s also grilling about 75% of our meals, attempting to tan without burning, and gardening (me=brown, shriveled thumb), but the ones above are absolutely essential.

Luckily I was able to combine #3 and #4 to make a fantastic Mango Frozen Yogurt submitted by Lauren who blogs at Healthy Food for Living. I’ve been blurking Lauren’s blog for a while and love all of the healthy, delicious food she posts!


Tasty Kitchen Blog: Frozen Mango Yogurt. Guest post by Natalie Perry of Perry's Plate, recipe submitted by TK member Lauren of Healthy Food for Living.

You only need a few ingredients to make this: very ripe mangoes, Greek yogurt (I used whole instead of low-fat), vanilla, and agave. After I got everything mixed together, I also added the juice from a lemon to make the flavors pop a bit more.

(See notes at the bottom of post for all recipe adjustments.)


Tasty Kitchen Blog: Frozen Mango Yogurt. Guest post by Natalie Perry of Perry's Plate, recipe submitted by TK member Lauren of Healthy Food for Living.

You’ll want all of the mangoes to be very ripe so they’ll be a great natural sweetener and the mango meat will be easier to cut off of the pit.

Getting several mangoes to ripen all at once is like trying to get four 2-year-olds to sit and be quiet all at the same time. Seriously. A couple of mine had started to shrivel a bit by the time the others caught up. It turned out alright in the end, though.


Tasty Kitchen Blog: Frozen Mango Yogurt. Guest post by Natalie Perry of Perry's Plate, recipe submitted by TK member Lauren of Healthy Food for Living.

There are a lot of ways to cut mangoes. Because it ends up as a puree, I wasn’t concerned about getting cute little cubes. This is the way I usually cut them and it’s also the way America’s Test Kitchen recommends. (Did I ever tell you I’m a PBS nerd?)

First, peel the mango. I used a sharp knife, but you can also use a vegetable peeler.


Tasty Kitchen Blog: Frozen Mango Yogurt. Guest post by Natalie Perry of Perry's Plate, recipe submitted by TK member Lauren of Healthy Food for Living.

Hold the mango so you’re looking at the stem end. You’ll notice that it’s an oblong shape. The pit is also that shape, so imagine the shape of the pit as you slice around it. Begin by cutting off the large “cheeks” on either side.

And please don’t cut yourself. (Voice of experience and a lot of stitches.)


Tasty Kitchen Blog: Frozen Mango Yogurt. Guest post by Natalie Perry of Perry's Plate, recipe submitted by TK member Lauren of Healthy Food for Living.

Once you get those off, cut off the smaller pieces on the other sides.


Tasty Kitchen Blog: Frozen Mango Yogurt. Guest post by Natalie Perry of Perry's Plate, recipe submitted by TK member Lauren of Healthy Food for Living.

See? Not so hard.

Now, cut the mango chunks into smaller pieces…


Tasty Kitchen Blog: Frozen Mango Yogurt. Guest post by Natalie Perry of Perry's Plate, recipe submitted by TK member Lauren of Healthy Food for Living.

And put them in a food processor.


Tasty Kitchen Blog: Frozen Mango Yogurt. Guest post by Natalie Perry of Perry's Plate, recipe submitted by TK member Lauren of Healthy Food for Living.

Pulse several times and let it run until the mango is smooth, without chunks.


Tasty Kitchen Blog: Frozen Mango Yogurt. Guest post by Natalie Perry of Perry's Plate, recipe submitted by TK member Lauren of Healthy Food for Living.

Because my food processor is small, I transferred the mango puree to a large bowl to add the remaining ingredients. If you have a large processor, please box it up and send it to me.

Um. I mean, if you have a large processor that will hold the rest of the ingredients, you’ll save the trouble of washing an extra bowl.

If you really want to send me yours, I’m completely on board. Just sayin’.


Tasty Kitchen Blog: Frozen Mango Yogurt. Guest post by Natalie Perry of Perry's Plate, recipe submitted by TK member Lauren of Healthy Food for Living.

Add the yogurt, vanilla, and agave. I added only half of the agave at first, mixed it up, and then tasted it. Because my mangoes were super sweet I didn’t feel like it needed any more. Taste as you go and adjust the sweetness to your liking.


Tasty Kitchen Blog: Frozen Mango Yogurt. Guest post by Natalie Perry of Perry's Plate, recipe submitted by TK member Lauren of Healthy Food for Living.

I thought the mixture needed a little more pop, so I added the juice from 1 lemon to brighten the flavors.

I also have utensil indecision. Whisk or rubber spatula? I usually have both in the bowl. Just in case.


Tasty Kitchen Blog: Frozen Mango Yogurt. Guest post by Natalie Perry of Perry's Plate, recipe submitted by TK member Lauren of Healthy Food for Living.

I transferred the mixture (once again) to a large measuring cup. This step is optional, but it makes it easier to pour the mixture into the ice cream machine later.

The mixture will need to chill for a few hours before it goes in the ice cream machine. Why? The colder the mixture is when it goes in, the creamier the consistency will be. True story.


Tasty Kitchen Blog: Frozen Mango Yogurt. Guest post by Natalie Perry of Perry's Plate, recipe submitted by TK member Lauren of Healthy Food for Living.

When it’s nice and chilled, pour it into your machine according to the manufacturer’s instructions. I doubled the recipe and it fit nicely in my little Cuisinart 1.5-quart ice cream maker.


Tasty Kitchen Blog: Frozen Mango Yogurt. Guest post by Natalie Perry of Perry's Plate, recipe submitted by TK member Lauren of Healthy Food for Living.

This is my favorite moment of ice cream/frozen yogurt/sorbet making. Pulling out that paddle thingy and finally tasting the results of the long wait. I think I could have let it run longer, but I was getting antsy.

At this point you can spoon it into bowls and eat it like soft-serve or immediately (like, really fast—don’t let it melt) transfer it into a freezer-safe container to finish freezing for several hours or overnight. It’s almost too much to bear, I know.


Tasty Kitchen Blog: Frozen Mango Yogurt. Guest post by Natalie Perry of Perry's Plate, recipe submitted by TK member Lauren of Healthy Food for Living.

The wait is well worth it. This beautifully frozen concoction is nothing like the sugary, artificially-flavored stuff in yogurt shops. It actually tastes like yogurt. And mangoes. What a concept!

Thank you Lauren for a new addition to my frozen treat repertoire! Be sure to check out her TK recipe box and her blog Healthy Food for Living for more delicious, good-for-you eats!

Recipe adjustments: I doubled this recipe, using whole Greek yogurt, only 1/4 cup agave nectar (because my mangoes were really sweet), omitting the vodka, and adding the juice from 1 lemon. If you don’t have agave, you can substitute a smaller amount of honey or plain white sugar. Limes would also work equally well.


Printable Recipe

Mango Frozen Yogurt

See post on Lauren’s site!
4.75 Mitt(s) 4 Rating(s)4 votes, average: 4.75 out of 54 votes, average: 4.75 out of 54 votes, average: 4.75 out of 54 votes, average: 4.75 out of 54 votes, average: 4.75 out of 5

Prep Time:

Cook Time:

Difficulty: Easy

Servings: 4

4
x

Print Options

Page size Letter 3x5 4x6
Text Size Small Medium Large
Content Include description
Include prep time, etc.
Show image

Description

Tangy Greek yogurt is combined with sweet ripe mangoes in this light & refreshing springtime dessert.

Ingredients

  • 2 cups Peeled, Pitted And Chopped Very Ripe Mango
  • 1-½ cup 2% Greek Yogurt
  • ¼ cups Agave Nectar
  • ¼ teaspoons Pure Vanilla Extract
  • ½ Tablespoons Vodka, Optional (to Keep The Frozen Yogurt A Bit Softer In The Freezer)

Preparation Instructions

Yields four 1/2 cup servings.

Place the chopped mango into a food processor and puree until smooth. Add in the remaining ingredients and puree until well-mixed. Chill mixture in the refrigerator until cold.

Then freeze according to your ice cream maker manufacturer’s instructions.

Serve immediately as soft serve, or spoon into a freezer-safe container and place in freezer until “ripened” (hardened).


_______________________________________

Be sure to check out Natalie’s own beautiful food blog, Perrys’ Plate, where you can see her growing collection of lovely recipes. There’s always something new to see there. Go visit now!


Profile photo of Erica Lea

Red Wine Cake

Posted by in Baking, Step-by-Step Recipes

Tasty Kitchen Blog: Red Wine Cake. Guest post by Erica Kastner of Cooking for Seven, recipe submitted by TK member cyniczora.

Whenever I see a recipe that calls for wine, I must admit that I’m immediately drawn to it. It adds such a wonderfully distinct flavor that cannot adequately be replaced by fresh fruit juice. Just a splash can create depth in a quick pasta sauce.

Before making this cake, I had never used wine in baking. I was a bit apprehensive about how it would turn out, but I was quite pleased with the results. The red wine lends a different taste that is quite pleasant and makes you want to carefully observe the flavors. The bit of chocolate and cinnamon complement the wine perfectly.

Today’s recipe, brought to us by cyniczora, would be a wonderful end to a sophisticated or even a hearty meal. Add some ice cream or wine-infused whipped cream, and you have scrumptious dessert.


Tasty Kitchen Blog: Red Wine Cake. Guest post by Erica Kastner of Cooking for Seven, recipe submitted by TK member cyniczora.

Here’s what you’ll need: butter, sugar, eggs, vanilla, cocoa powder, cinnamon, baking powder, flour, red wine, and salt (the original recipe didn’t call for salt, but I decided to add a pinch for added flavor).


Tasty Kitchen Blog: Red Wine Cake. Guest post by Erica Kastner of Cooking for Seven, recipe submitted by TK member cyniczora.

Begin by buttering and flouring a bundt pan. Make sure you grease and coat with flour EVERY INCH of the pan. You’ll thank me later.


Tasty Kitchen Blog: Red Wine Cake. Guest post by Erica Kastner of Cooking for Seven, recipe submitted by TK member cyniczora.

Melt the butter.


Tasty Kitchen Blog: Red Wine Cake. Guest post by Erica Kastner of Cooking for Seven, recipe submitted by TK member cyniczora.

Pour the butter into a large bowl and add the eggs and sugar. Stir.


Tasty Kitchen Blog: Red Wine Cake. Guest post by Erica Kastner of Cooking for Seven, recipe submitted by TK member cyniczora.

Add the vanilla. (Only use pure vanilla, never imitation. Ahem.)


Tasty Kitchen Blog: Red Wine Cake. Guest post by Erica Kastner of Cooking for Seven, recipe submitted by TK member cyniczora.

Pour in the red wine. Stir to combine.


Tasty Kitchen Blog: Red Wine Cake. Guest post by Erica Kastner of Cooking for Seven, recipe submitted by TK member cyniczora.

In a separate bowl, whisk together the dry ingredients.


Tasty Kitchen Blog: Red Wine Cake. Guest post by Erica Kastner of Cooking for Seven, recipe submitted by TK member cyniczora.

Add the dry ingredients to the wet ingredients and stir to combine.


Tasty Kitchen Blog: Red Wine Cake. Guest post by Erica Kastner of Cooking for Seven, recipe submitted by TK member cyniczora.

Scrape into your prepared bundt pan. Bake in a preheated 350°F oven for 40-45 minutes. Remove from oven and let cool in pan on a rack for 10-15 minutes. Invert onto the rack to cool completely.


Tasty Kitchen Blog: Red Wine Cake. Guest post by Erica Kastner of Cooking for Seven, recipe submitted by TK member cyniczora.

Serve with good vanilla ice cream or homemade whipped cream. Enjoy!


Tasty Kitchen Blog: Red Wine Cake. Guest post by Erica Kastner of Cooking for Seven, recipe submitted by TK member cyniczora.

Notes:

1. As mentioned, the original recipe did not call for salt, but I added a pinch so it wouldn’t be too bland.
2. My only quarrel with this recipe is that the cake is a bit dense or heavy. Another time I would probably add more wine or decrease the amount of flour.
3. I made wine-infused whipped cream to serve with the cake by adding a bit of red wine to the cream before I whipped it. It nicely complemented the flavors in the cake.


Tasty Kitchen Blog: Red Wine Cake. Guest post by Erica Kastner of Cooking for Seven, recipe submitted by TK member cyniczora.

Thank you, cyniczora, for bringing us this awesome recipe.


Printable Recipe

Red Wine Cake

4.00 Mitt(s) 1 Rating(s)1 vote, average: 4.00 out of 51 vote, average: 4.00 out of 51 vote, average: 4.00 out of 51 vote, average: 4.00 out of 51 vote, average: 4.00 out of 5

Prep Time:

Cook Time:

Difficulty: Easy

Servings: 12

12
x

Print Options

Page size Letter 3x5 4x6
Text Size Small Medium Large
Content Include description
Include prep time, etc.
Show image

Description

I haven’t met anyone so far who didn’t like this cake.

Ingredients

  • ½ pounds, ⅞ ounces, weight Butter
  • ½ pounds, ⅞ ounces, weight Sugar
  • 3 whole Eggs
  • 1 teaspoon Vanilla
  • 2 Tablespoons Cocoa Powder, Unsweetened
  • 1 teaspoon Cinnamon, Ground
  • 1 teaspoon Baking Powder
  • ¾ pounds, 2-⅛ ounces, weight Flour
  • 8 tablespoons, 1 teaspoon, 5-⅞ pinches Red Wine

Preparation Instructions

Melt the butter in the microwave, then mix it with sugar and eggs. Add all the other ingredients. (It doesn’t really matter in what order.) Mix it all together.

Preheat the oven to 350 degrees F.

Put the batter in a greased bundt cake pan and bake it 40 – 45 minutes.

I live in high altitude and therefore use 150 milliliters red wine.


_______________________________________

Erica Berge shares her wonderful recipes and amazing food photography on her blog, Cooking for Seven. She also writes about crafts and posts more of her beautiful photography in her personal blog, EricaLea.com. There really isn’t much that this amazing young lady can’t do, and we’re thrilled she does some of it here.


Profile photo of twopeasandtheirpod

Cinnamon Raisin Almond Butter

Posted by in Step-by-Step Recipes

I am a huge fan of peanut butter, but unfortunately my husband is allergic to nuts. I try not to eat nuts around him because even the smell bothers him. I found this out when we were dating and I made peanut butter cookies. He said it would be fine but he was just being […]

Profile photo of Erika (TK)

The Theme Is … Rhubarb!

Posted by in The Theme Is...

  The season for rhubarb is upon us, and I can tell not so much by the appearance of these crimson stalks in my grocery as by the number of new recipes coming in featuring this vegetable. Or fruit (according to the US courts). The rhubarb has an interesting history. It was originally cultivated in […]

Profile photo of Amber {Sprinkled With Flour}

Grandma’s Sugar Cream Pie

Posted by in Step-by-Step Recipes

Join us in welcoming Amber of Sprinkled with Flour to the TK Blog. We’re thrilled to have her! She picked a mighty fine Sugar Cream Pie recipe to share with us today, courtesy of Tasty Kitchen member sturgismama68. My goodness, does that look good. Take it away, Amber! _______________________________________     There are certain things […]

Profile photo of callimakesdo

Essential Buttermilk Syrup

Posted by in Step-by-Step Recipes

Do you ever wonder what recipes you’ll be known for? When I saw the recipe for Essential Buttermilk Syrup from TK member lizaskitchen, I couldn’t help but think of my mom. She makes the most amazing Scones served with Homemade Buttermilk Syrup. You might think scones and syrup are an odd combination. But here in […]