The Pioneer Woman Tasty Kitchen
Profile photo of georgiapellegrini

Scottish Oat Cakes

Posted by in Baking, Step-by-Step Recipes

Tasty Kitchen Blog: Scottish Oat Cakes. Guest post by Georgia Pellegrini, recipe submitted by TK member Movita Beaucoup.

 
This is my second recipe post here inspired by someone’s grandmother. I just love it, I could cook this way all day long. Before I realized these Scottish Oat Cakes were from Movita’s grammie, I thought to myself, “These remind me so much of my great-aunt’s cookies.” It is simple rolled oats combined with that very simple texture and crunch—the pure, understated oat cookie of that generation. I was so excited to make these.


Tasty Kitchen Blog: Scottish Oat Cakes. Guest post by Georgia Pellegrini, recipe submitted by TK member Movita Beaucoup.

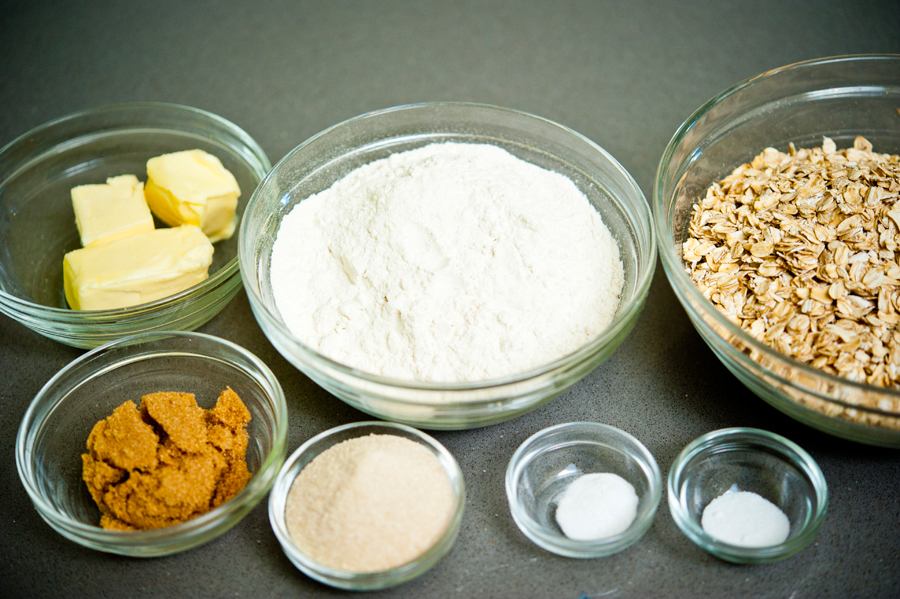
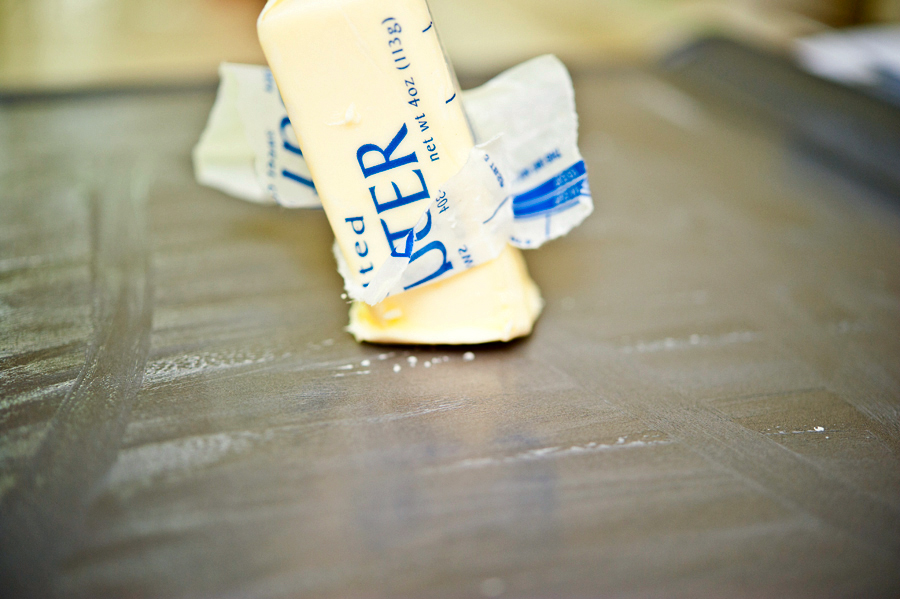
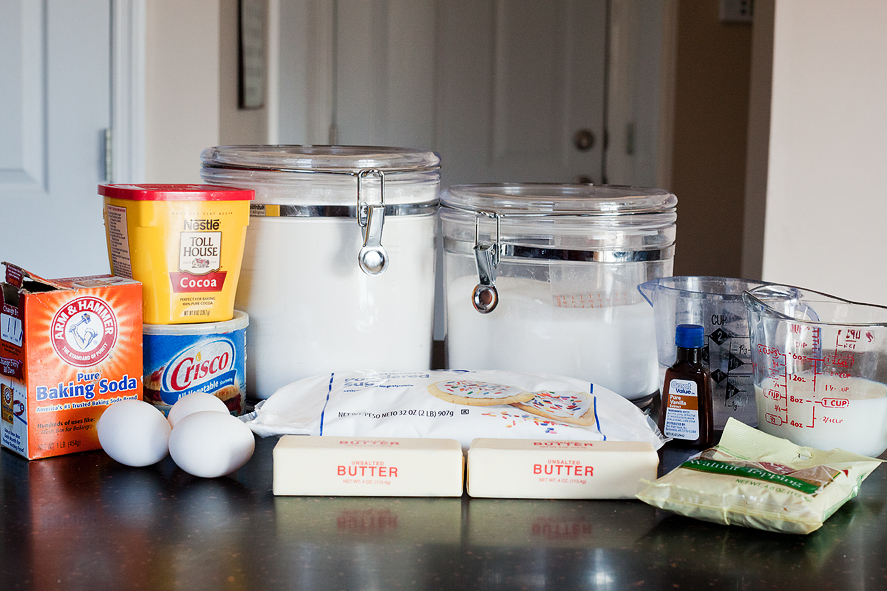
To make these yourself, you’ll need: flour, rolled oats, baking soda, salt, white sugar, brown sugar, and cold butter (or lard! Mmm).


Tasty Kitchen Blog: Scottish Oat Cakes. Guest post by Georgia Pellegrini, recipe submitted by TK member Movita Beaucoup.

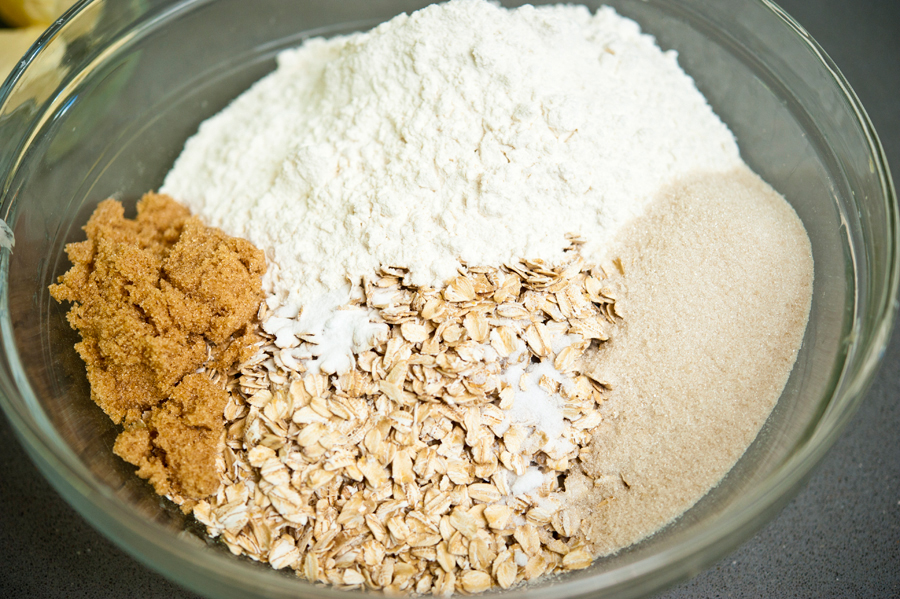
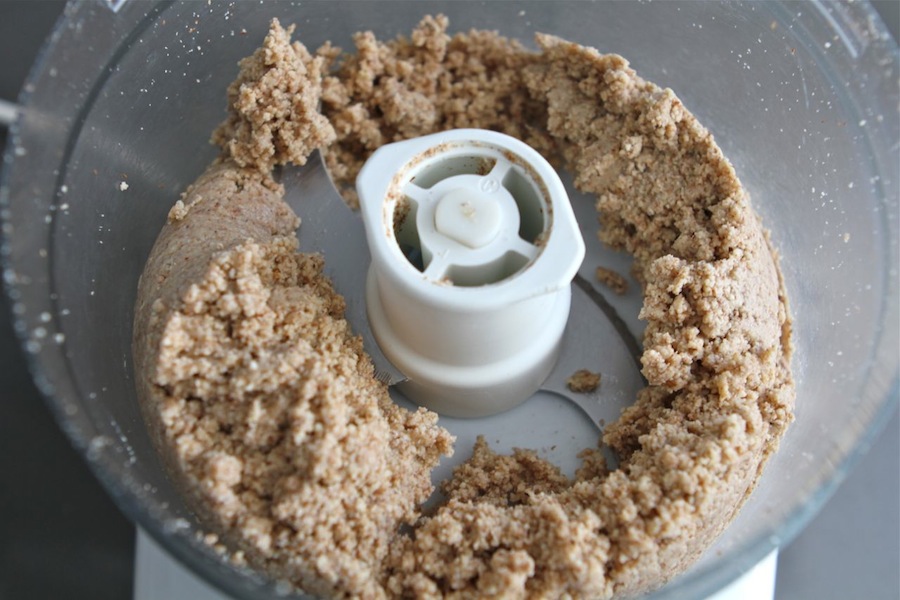
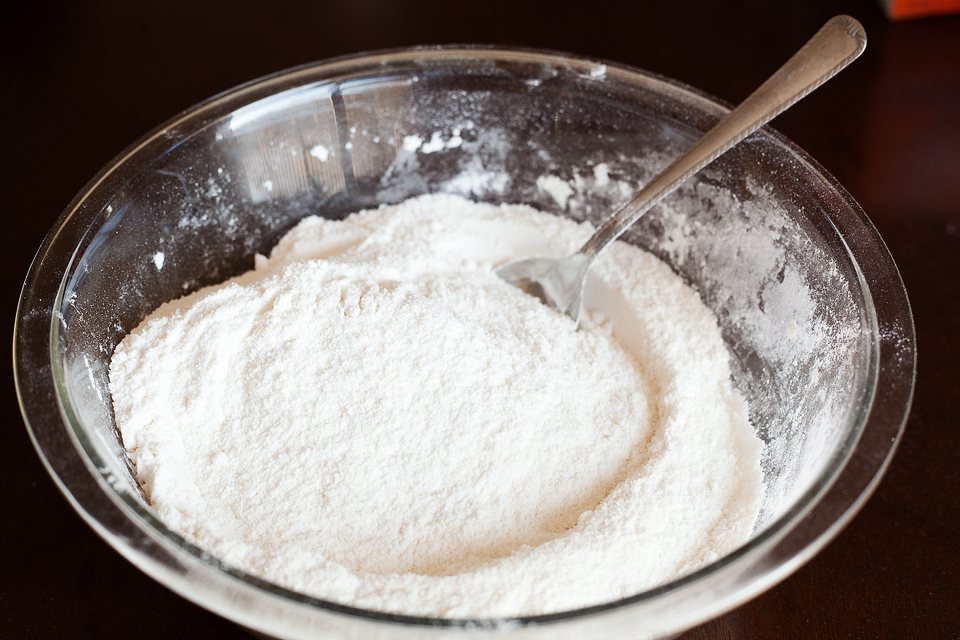
Start by combining all of the dry ingredients in a bowl, everything but the butter.


Tasty Kitchen Blog: Scottish Oat Cakes. Guest post by Georgia Pellegrini, recipe submitted by TK member Movita Beaucoup.

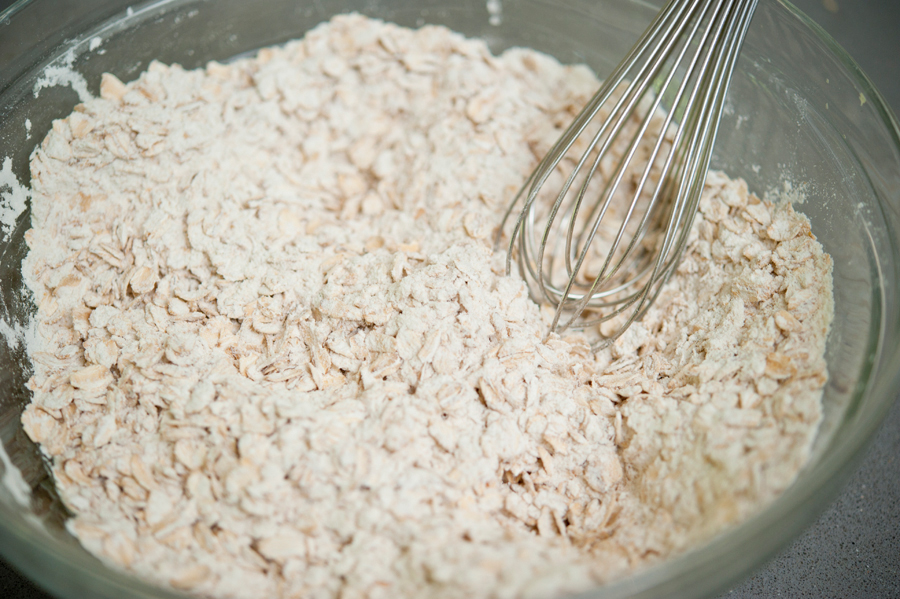
Mix it thoroughly with a whisk, or my favorite tool: your hands!


Tasty Kitchen Blog: Scottish Oat Cakes. Guest post by Georgia Pellegrini, recipe submitted by TK member Movita Beaucoup.

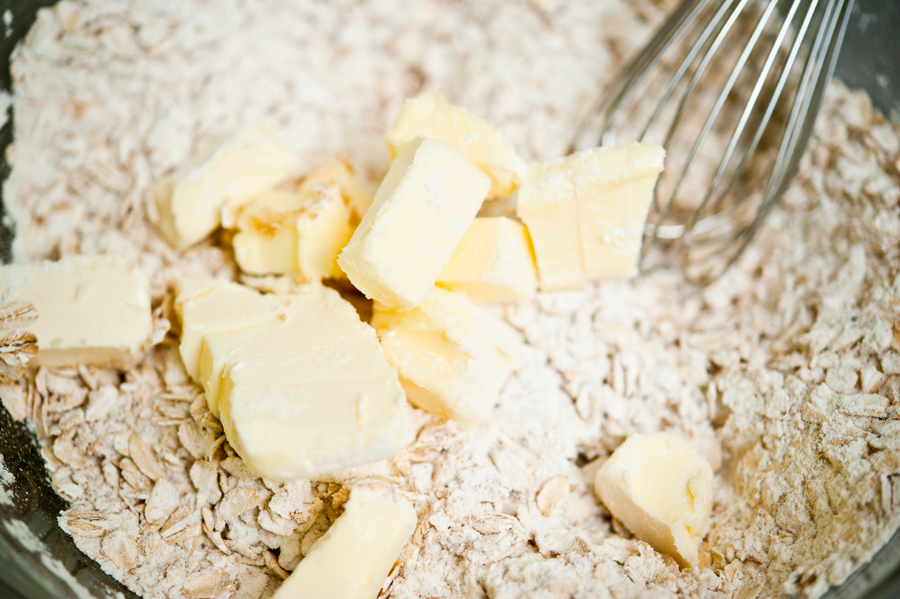
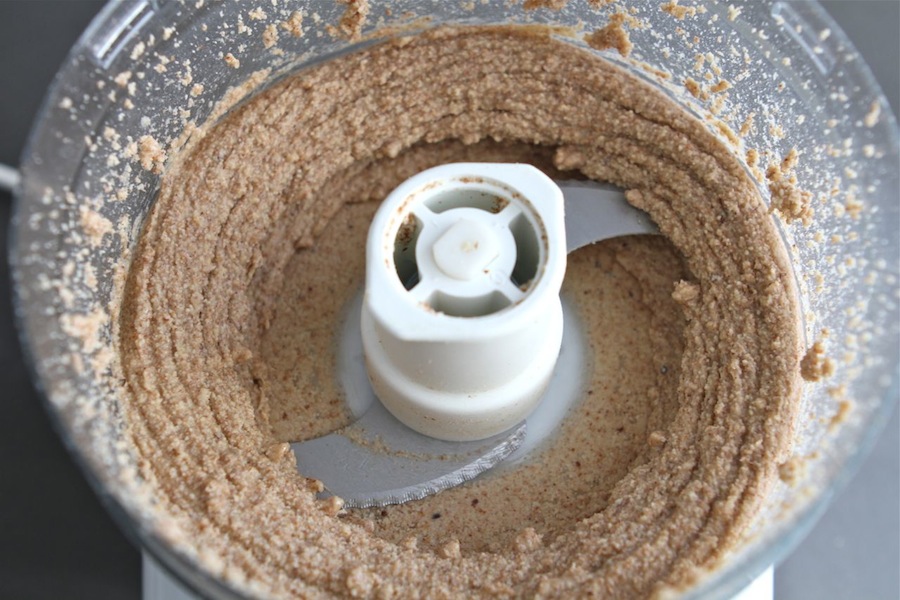
Add the butter and incorporate that as well.


Tasty Kitchen Blog: Scottish Oat Cakes. Guest post by Georgia Pellegrini, recipe submitted by TK member Movita Beaucoup.

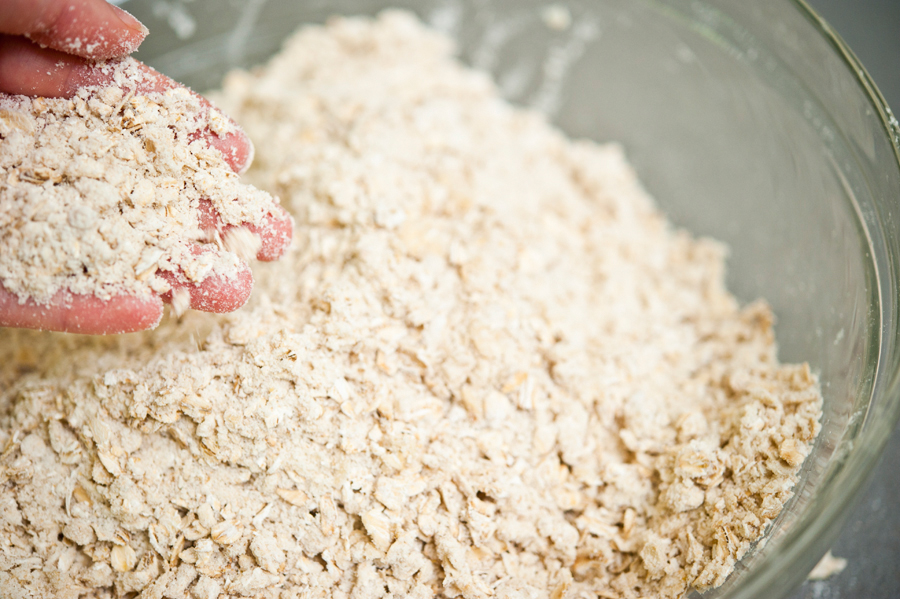
This is where your hands are especially useful because you want to mix this butter in quickly and create a sandy texture.


Tasty Kitchen Blog: Scottish Oat Cakes. Guest post by Georgia Pellegrini, recipe submitted by TK member Movita Beaucoup.

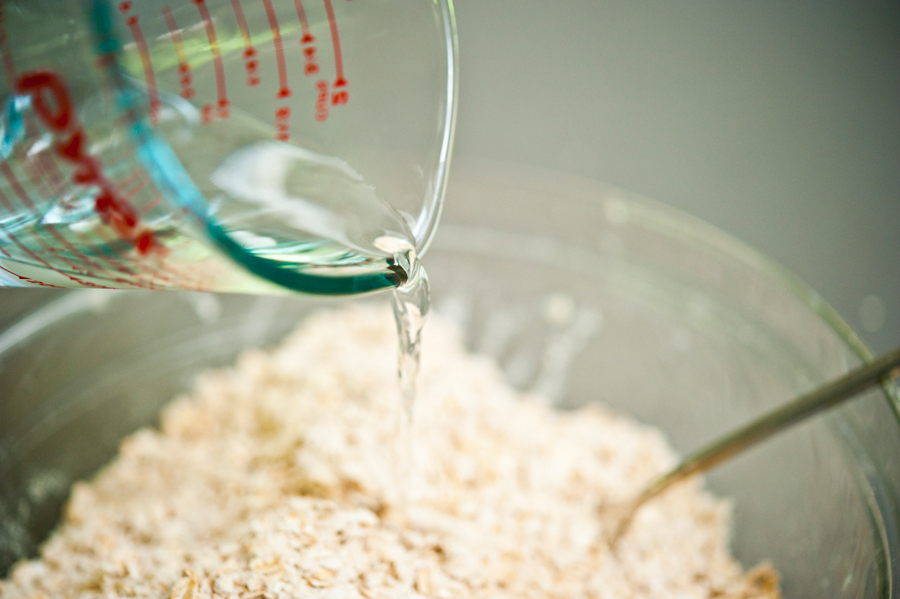
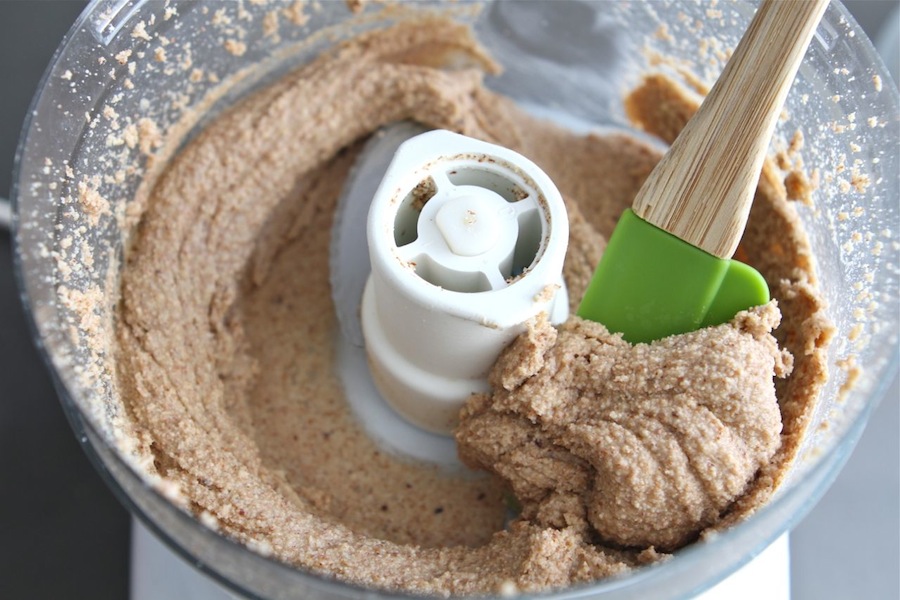
Once that is nice and sandy, pour in water a little at a time, about 1/2 cup.


Tasty Kitchen Blog: Scottish Oat Cakes. Guest post by Georgia Pellegrini, recipe submitted by TK member Movita Beaucoup.

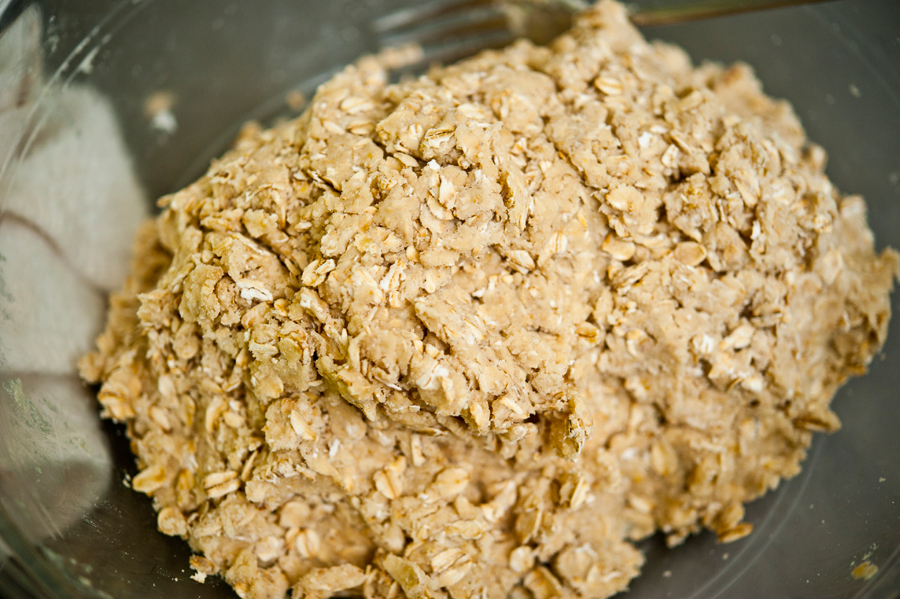
You just want to moisten it enough until it gathers together and there isn’t any dry matter on the bottom of the bowl straggling behind.


Tasty Kitchen Blog: Scottish Oat Cakes. Guest post by Georgia Pellegrini, recipe submitted by TK member Movita Beaucoup.

Grease a baking sheet with spray or be like me—smear around a big stick of butter. I’m very precise that way.


Tasty Kitchen Blog: Scottish Oat Cakes. Guest post by Georgia Pellegrini, recipe submitted by TK member Movita Beaucoup.

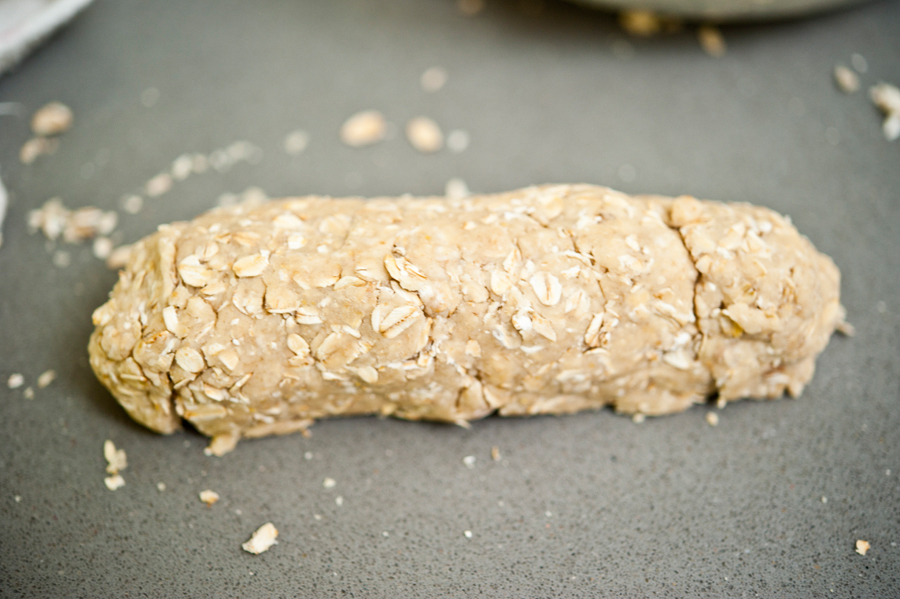
Then on a clean, lightly floured surface, separate the dough into smaller batches.
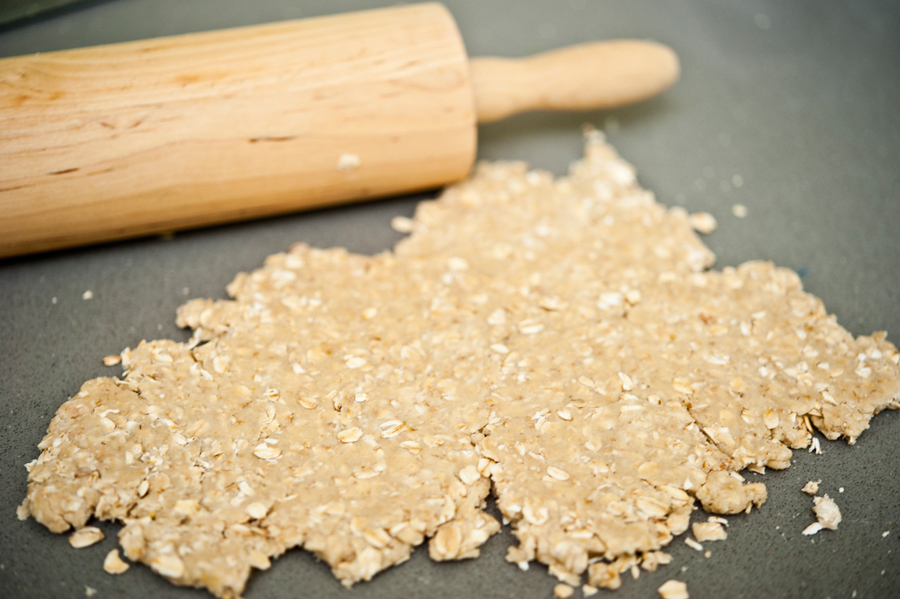


Tasty Kitchen Blog: Scottish Oat Cakes. Guest post by Georgia Pellegrini, recipe submitted by TK member Movita Beaucoup.

Roll out the dough.


Tasty Kitchen Blog: Scottish Oat Cakes. Guest post by Georgia Pellegrini, recipe submitted by TK member Movita Beaucoup.

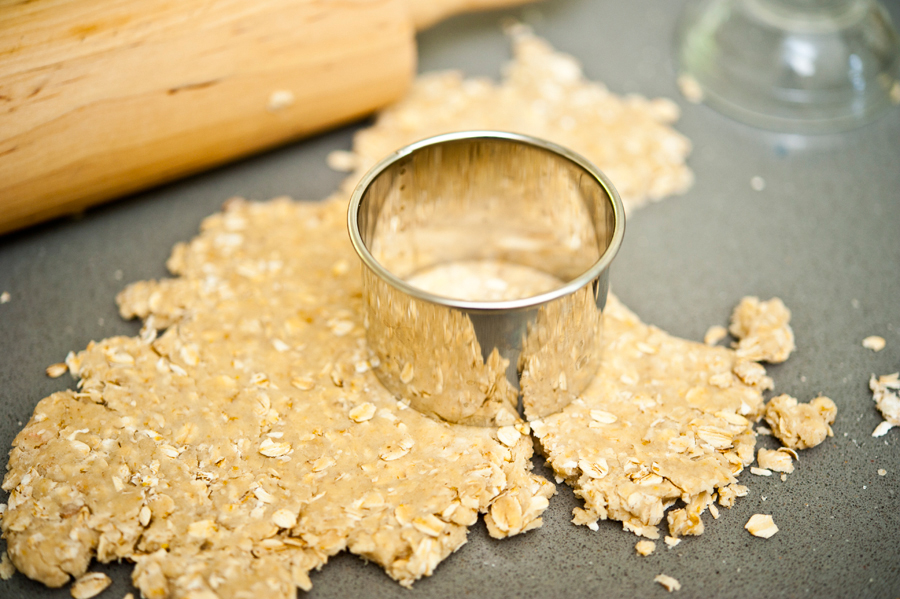
Use a ring cutter or the rim of a glass to cut ¼ inch thick circles.


Tasty Kitchen Blog: Scottish Oat Cakes. Guest post by Georgia Pellegrini, recipe submitted by TK member Movita Beaucoup.

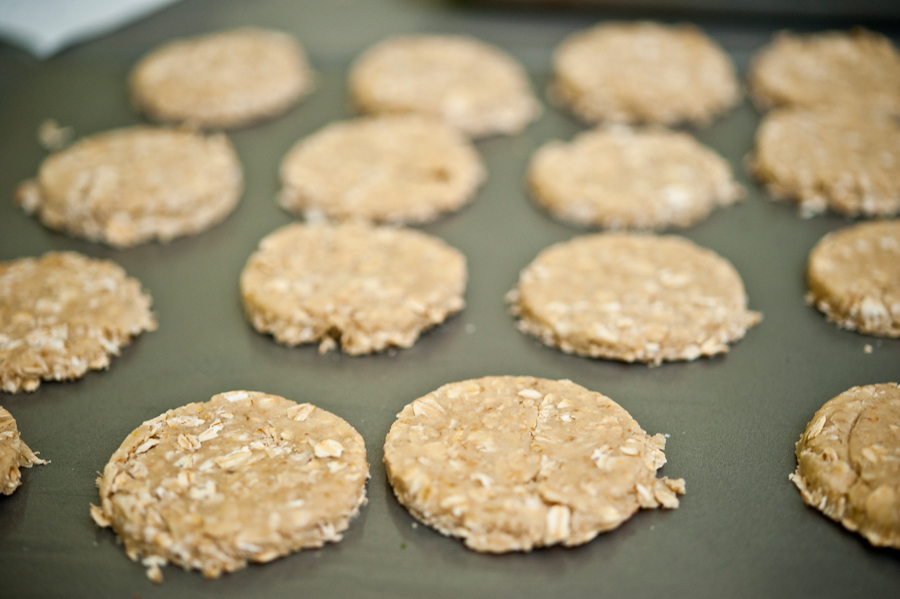
Lay them in rows on a baking sheet and pop them in the oven!


Tasty Kitchen Blog: Scottish Oat Cakes. Guest post by Georgia Pellegrini, recipe submitted by TK member Movita Beaucoup.

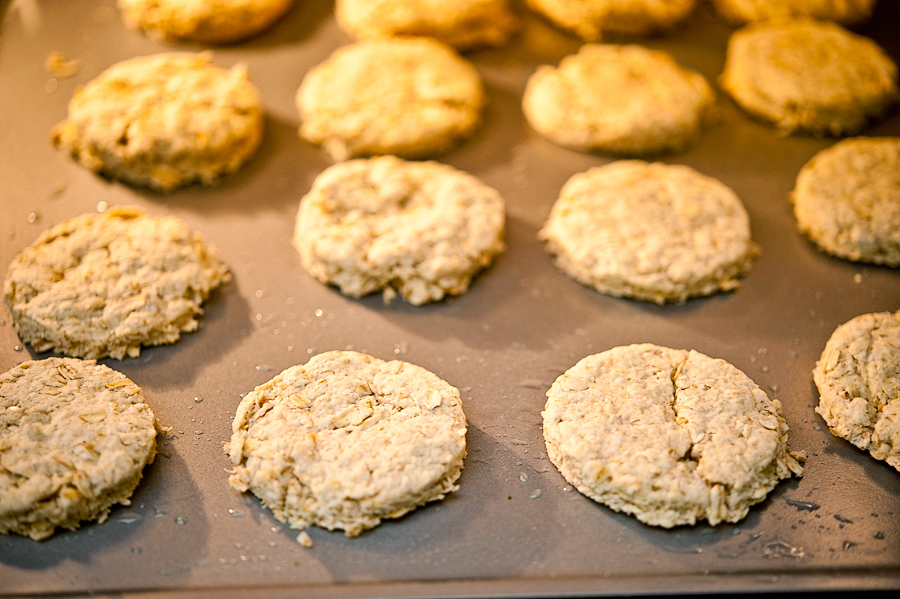
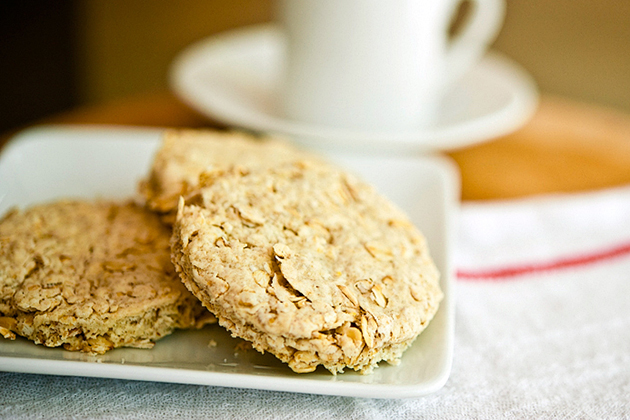
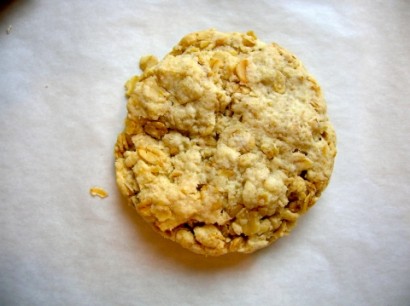
What is interesting about these is that they don’t change their shape much. They just simply firm up a bit. It’s a fun combination between a true cookie and a scone.


Tasty Kitchen Blog: Scottish Oat Cakes. Guest post by Georgia Pellegrini, recipe submitted by TK member Movita Beaucoup.

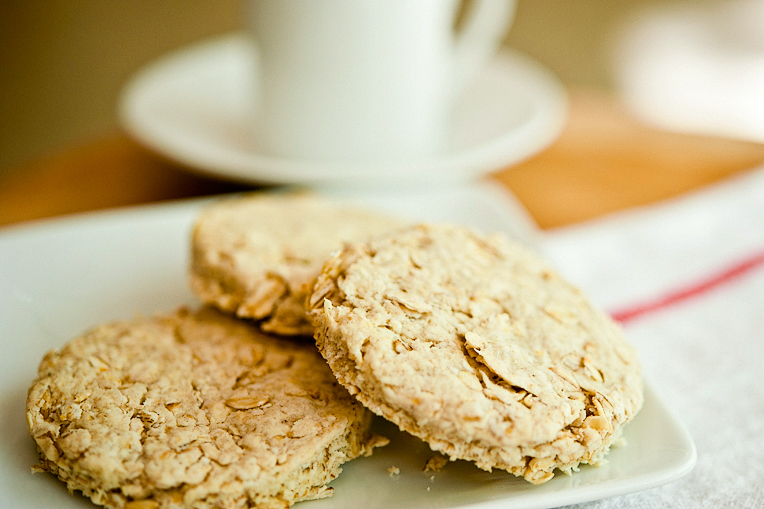
In fact, they seemed very British to me … or Scottish. They would be so perfect for a traditional afternoon tea. And they made me want to have a tea party instantly. Thank you to Movita for this wonderful recipe and for making me want to have a tea party! Be sure to check out her website Movita Beaucoup for more inspiration.


Printable Recipe

Elsa’s Scottish Oat Cakes

See post on movita beaucoup’s site!
5.00 Mitt(s) 1 Rating(s)1 vote, average: 5.00 out of 51 vote, average: 5.00 out of 51 vote, average: 5.00 out of 51 vote, average: 5.00 out of 51 vote, average: 5.00 out of 5

Prep Time:

Cook Time:

Difficulty: Easy

Servings: 24

24
x

Print Options

Page size Letter 3x5 4x6
Text Size Small Medium Large
Content Include description
Include prep time, etc.
Show image

Description

A yummy family favourite.

Ingredients

  • 2 cups Flour, All Purpose
  • 3 cups Rolled Oats
  • ¼ cups Brown Sugar
  • ¼ cups White Sugar
  • ½ teaspoons Salt
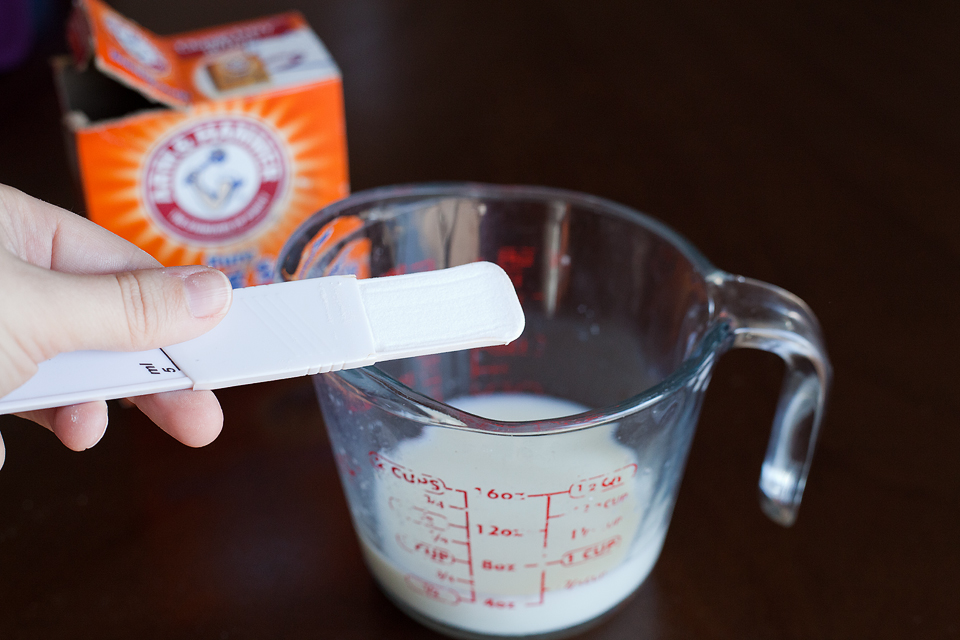
  • ½ teaspoons Baking Soda
  • ½ cups Lard Or Butter
  • ½ cups Ice Cold Water

Preparation Instructions

Combine dry ingredients in large bowl. Cut in butter with a knife or pastry cutter until coarse, mealy crumbs form. Add the ice cold water and stir vigorously with a fork until dough comes together. (The process is very similar to making biscuits, shortcakes and the like—don’t overwork the dough.) Transfer to a lightly floured surface, and shape dough into a ball. Take about a quarter of the dough from the ball, and roll it out to be 1/4 to 1/2 inch thick. (Grammie emphasized that you don’t want to over-handle the dough, thus she only rolled and cut a quarter of the dough at a time.) Cut into circles with a biscuit/cookie cutter or inverted drinking glass, or cut into strips with a pizza cutter. Place on parchment-lined baking sheets for baking. Repeat with remaining dough.

Bake at 350°F until golden (check at 8 minutes). Makes about 2 dozen.

Adapted from a family recipe handed down to me by Elsa and Christy Hodder.


_______________________________________

There’s so much to say about Georgia, we don’t know where to start. Leaving Wall Street for the French Culinary Institute, followed by a stint at the Gramercy Tavern and La Chassagnette in France, her passion for food and food traditions are evident and inspiring. Visit her site at Georgia Pellegrini, where you’ll find more recipes, photos, learn all about her wonderful book Food Heroes, and enjoy her latest adventures.


Profile photo of twopeasandtheirpod

Sea Salt and Honey Almond Butter

Posted by in Step-by-Step Recipes

Tasty Kitchen Blog: Sea Salt and Honey Almond Butter. Guest post by Maria Lichty of Two Peas and Their Pod, recipe submitted by TK member Erin of Naturally Ella.

 
Have you ever made nut butter at home? If not, what are you waiting for? It is so easy and much cheaper than buying at the store. I make homemade peanut butter and almond butter all of the time. I like to try new variations of my favorite nut butters, so when I saw Erin’s (Naturally Ella) recipe for Sea Salt and Honey Almond Butter I knew I was in for a special treat. I had everything in my pantry so I busted out my food processor and got started. 


Tasty Kitchen Blog: Sea Salt and Honey Almond Butter. Guest post by Maria Lichty of Two Peas and Their Pod, recipe submitted by TK member Erin of Naturally Ella.

To make it you will need: almonds, honey, and sea salt. Yes, there are only three ingredients involved in making this delicious almond butter. Big time bonus, huh? 


Tasty Kitchen Blog: Sea Salt and Honey Almond Butter. Guest post by Maria Lichty of Two Peas and Their Pod, recipe submitted by TK member Erin of Naturally Ella.

Place the almonds in the food processor. 


Tasty Kitchen Blog: Sea Salt and Honey Almond Butter. Guest post by Maria Lichty of Two Peas and Their Pod, recipe submitted by TK member Erin of Naturally Ella.

Turn on the food processor and let it work its magic. 


Tasty Kitchen Blog: Sea Salt and Honey Almond Butter. Guest post by Maria Lichty of Two Peas and Their Pod, recipe submitted by TK member Erin of Naturally Ella.

The almonds will go through different stages. Keep the food processor going until the almonds release their oils. 


Tasty Kitchen Blog: Sea Salt and Honey Almond Butter. Guest post by Maria Lichty of Two Peas and Their Pod, recipe submitted by TK member Erin of Naturally Ella.

The almonds will start to ball up right before it is ready. 


Tasty Kitchen Blog: Sea Salt and Honey Almond Butter. Guest post by Maria Lichty of Two Peas and Their Pod, recipe submitted by TK member Erin of Naturally Ella.

Then the almonds will turn into a smooth and creamy butter. When you get to this stage, you are good to go. 


Tasty Kitchen Blog: Sea Salt and Honey Almond Butter. Guest post by Maria Lichty of Two Peas and Their Pod, recipe submitted by TK member Erin of Naturally Ella.

Turn off the food processor and scrape the almond butter into a large jar. 


Tasty Kitchen Blog: Sea Salt and Honey Almond Butter. Guest post by Maria Lichty of Two Peas and Their Pod, recipe submitted by TK member Erin of Naturally Ella.

Sprinkle in sea salt. 


Tasty Kitchen Blog: Sea Salt and Honey Almond Butter. Guest post by Maria Lichty of Two Peas and Their Pod, recipe submitted by TK member Erin of Naturally Ella.

Add in the honey. Stir until combined. Taste the almond butter and adjust sweet/salty combination to your liking. 


Tasty Kitchen Blog: Sea Salt and Honey Almond Butter. Guest post by Maria Lichty of Two Peas and Their Pod, recipe submitted by TK member Erin of Naturally Ella.

Cover the jar with a lid and store in the refrigerator. 


Tasty Kitchen Blog: Sea Salt and Honey Almond Butter. Guest post by Maria Lichty of Two Peas and Their Pod, recipe submitted by TK member Erin of Naturally Ella.

Homemade nut butter in under ten minutes, with only three ingredients—you’ve got to get in on this! It’s so easy and so good! I am in love with the sweet and salty combo. I could eat it straight from the jar, but I try to control myself. I love to eat it on apple slices, toast, or crackers. It is great for breakfast or a healthy snack. 

Thanks Erin for sharing your Sea Salt and Honey Almond Butter recipe. My jar is already half empty and it’s only been a few days. I guess I will be whipping up another batch soon. For other delicious and healthy recipes, visit Erin’s beautiful blog, Naturally Ella


Printable Recipe

Sea Salt and Honey Almond Butter

See post on Erin’s site!
5.00 Mitt(s) 2 Rating(s)2 votes, average: 5.00 out of 52 votes, average: 5.00 out of 52 votes, average: 5.00 out of 52 votes, average: 5.00 out of 52 votes, average: 5.00 out of 5

Prep Time:

Cook Time:

Difficulty: Easy

Servings: 12

12
x

Print Options

Page size Letter 3x5 4x6
Text Size Small Medium Large
Content Include description
Include prep time, etc.
Show image

Description

Homemade almond butter that beats out store bought any day!

Ingredients

  • 2 cups Dry Roasted Almonds
  • 1 teaspoon Sea Salt
  • 2 Tablespoons Honey

Preparation Instructions

Place almonds in a food processor and turn on. Almonds will go through different stages but you will want to let your food processor run until the oil has released and almond butter has smoothed out (it will ball up right before this happens). Turn off food processor and transfer to a mason jar.

Stir in salt and honey; taste. Adjust sweet/salty combination to your liking. Cover with an airtight lid and keep in the refrigerator.


_______________________________________

Maria and her husband Josh (who she affectionately refers to as her “dough boy”) blog at Two Peas and Their Pod. They’ve been featured on Saveur, Eatocracy, Gourmet Live, Glamour, and the Los Angeles Times, to name just a few. They’d also just recently added a little pea to their pod. We’re so glad to have them here!


Profile photo of Amber {Sprinkled With Flour}

Secret Cake

Posted by in Baking, Step-by-Step Recipes

Tasty Kitchen Blog: Secret Cake. Guest post by Amber Potter of Sprinkled with Flour, recipe submitted by TK member Patti Roberson.

 
There’s two things that will automatically make a girls day: chocolate and cake. When you put the two together, you have a recipe for the worlds best pick-me-up that rivals those absurdly cute kitty emails.

Yes, that kitty wearing a cowboy outfit while balancing on a tightrope singing Gangnam Style may bring a smile to your face. But one bite of a super moist, decadently rich, frosting slathered piece of chocolate cake wins hands down. Like this recipe from Patti for Secret Cake. I’m not sure why its called secret cake. Maybe because it’s so good you’ll want to keep it a secret. All I know is I’m glad she didn’t keep her recipe a secret from us!


Tasty Kitchen Blog: Secret Cake. Guest post by Amber Potter of Sprinkled with Flour, recipe submitted by TK member Patti Roberson.

You’ll need: buttermilk, baking soda, self-rising flour, sugar, vegetable shortening, butter, water, cocoa, eggs, vanilla, powdered sugar, and walnuts.


Tasty Kitchen Blog: Secret Cake. Guest post by Amber Potter of Sprinkled with Flour, recipe submitted by TK member Patti Roberson.

Preheat oven to 400ºF. Spray a 9 x 13 pan with cooking spray. Pour 1/2 cup buttermilk into a 1 cup measuring cup, add baking soda and stir. Set aside.


Tasty Kitchen Blog: Secret Cake. Guest post by Amber Potter of Sprinkled with Flour, recipe submitted by TK member Patti Roberson.

In a large mixing bowl sift together the flour and sugar and set aside.


Tasty Kitchen Blog: Secret Cake. Guest post by Amber Potter of Sprinkled with Flour, recipe submitted by TK member Patti Roberson.

In a medium saucepan over medium heat, combine the water, vegetable shortening, cocoa, and 1 stick of butter. Stir until combined and the butter and shortening have melted. Cook until this mixture comes to a slight boil. Remove from heat.


Tasty Kitchen Blog: Secret Cake. Guest post by Amber Potter of Sprinkled with Flour, recipe submitted by TK member Patti Roberson.

Pour the cocoa mixture into the dry ingredients and mix until combined. Add the buttermilk/soda mixture and scrape to get all of the mixture into the bowl. 


Tasty Kitchen Blog: Secret Cake. Guest post by Amber Potter of Sprinkled with Flour, recipe submitted by TK member Patti Roberson.

Mix at medium speed using an electric mixer and continue until well combined. 


Tasty Kitchen Blog: Secret Cake. Guest post by Amber Potter of Sprinkled with Flour, recipe submitted by TK member Patti Roberson.

Add eggs, one at a time and mix well after each addition. 


Tasty Kitchen Blog: Secret Cake. Guest post by Amber Potter of Sprinkled with Flour, recipe submitted by TK member Patti Roberson.

Add 1 teaspoon vanilla and mix well. 


Tasty Kitchen Blog: Secret Cake. Guest post by Amber Potter of Sprinkled with Flour, recipe submitted by TK member Patti Roberson.

Pour into prepared pan. 


Tasty Kitchen Blog: Secret Cake. Guest post by Amber Potter of Sprinkled with Flour, recipe submitted by TK member Patti Roberson.

Bake at 400ºF for 20-22 minutes.


Tasty Kitchen Blog: Secret Cake. Guest post by Amber Potter of Sprinkled with Flour, recipe submitted by TK member Patti Roberson.

With about 5 minutes left on the baking time, make the frosting: In a medium saucepan combine 1/3 cup buttermilk, 1/3 cup cocoa and 1 stick of butter over medium low heat and stir as butter melts. Once it’s melted and combined stir constantly while cooking for about 3 minutes longer. Don’t worry if it starts to separate and looks like a curdled mess, it will be fine.


Tasty Kitchen Blog: Secret Cake. Guest post by Amber Potter of Sprinkled with Flour, recipe submitted by TK member Patti Roberson.

Remove pan from heat and add the powdered sugar. Mix well using an electric mixer. Once combined add 1 teaspoon vanilla and chopped nuts, mix well. 


Tasty Kitchen Blog: Secret Cake. Guest post by Amber Potter of Sprinkled with Flour, recipe submitted by TK member Patti Roberson.

Now pour over the hot cake.


Tasty Kitchen Blog: Secret Cake. Guest post by Amber Potter of Sprinkled with Flour, recipe submitted by TK member Patti Roberson.

This cake is really moist and has great flavor, and the frosting is so smooth and as satiny I could eat it by itself.


Tasty Kitchen Blog: Secret Cake. Guest post by Amber Potter of Sprinkled with Flour, recipe submitted by TK member Patti Roberson.

Okay, I did eat it by itself—a lot. Thanks Patti for sharing this recipe with us. It’s an awesome secret!


Printable Recipe

Secret Cake

4.75 Mitt(s) 4 Rating(s)4 votes, average: 4.75 out of 54 votes, average: 4.75 out of 54 votes, average: 4.75 out of 54 votes, average: 4.75 out of 54 votes, average: 4.75 out of 5

Prep Time:

Cook Time:

Difficulty: Easy

Servings: 16

16
x

Print Options

Page size Letter 3x5 4x6
Text Size Small Medium Large
Content Include description
Include prep time, etc.
Show image

Description

The most wonderful chocolate cake. This recipe is a keeper. This recipe was given to me more than 30 years ago by my Mom’s neighbor, Sharon Kelley. I have changed the nuts over the years and have even made it without nuts for my son-in-law and my K-3 class at work. Baking it in the jelly roll pan gives more slices but in a brownie like piece which is easier for kids to handle.

Ingredients

  • FOR THE CAKE:
  • ½ cups Buttermilk
  • 1 teaspoon Baking Soda
  • 2 cups Self-Rising Flour
  • 2 cups Sugar
  • 1 cup Water
  • ½ cups Crisco - Solid Shortening
  • ¼ cups Cocoa Powder
  • 1 stick Butter
  • 3  Eggs
  • 1 teaspoon Vanilla
  • FOR THE FROSTING:
  • ⅓ cups Buttermilk
  • ⅓ cups Cocoa Powder
  • 1 stick Butter
  • 16 ounces, weight Powdered Sugar
  • 1 teaspoon Vanilla
  • 1 cup Chopped Walnuts

Preparation Instructions

Note: All ingredients need to be at room temperature.

Preheat oven to 400 F. Spray a 9 x 13 pan with cooking spray.

Pour 1/2 cup buttermilk into a 1 cup measuring cup, add baking soda and stir. Set aside.

In a large mixing bowl sift together flour and sugar and set aside.

In a medium sauce pan over medium heat combine the following: water, Crisco, 1/4 cup cocoa and 1 stick butter. Stir until combined and butter and crisco are melted. Cook until this mixture comes to a slight boil. Remove from heat and pour into the dry ingredients and mix until combined. Add buttermilk/soda mixture and scrape to get all of the mixture into the bowl. Mix at medium speed using an electric mixer and continue until well combined. Add eggs, one at a time and mix well after each addition. Add 1 teaspoon vanilla and mix well.

Pour into prepared pan and bake at 400 F for 20-22 minutes.

With about 5 minutes left on the baking time make the frosting: In a medium saucepan combine 1/3 cup buttermilk, 1/3 cup cocoa and 1 stick of butter over medium low heat and stir as butter melts. Once melted and combined stir constantly while cooking for about 3 minutes longer. Remove pan from heat and add powdered sugar. Mix well using an electric mixer. Once combined add 1 teaspoon vanilla and chopped nuts, mix well. Pour over the hot cake.

This can also be baked in a jelly roll pan, just reduce baking time to 15 minutes. Do not substitute margarine for butter. You may also use different nuts.


_______________________________________

Amber is a stay at home mom who lives in the heart of the Missouri Ozarks. It’s a long way from where she grew up, in Wales (yes, way over in the U.K.). The recipes in her blog Sprinkled with Flour include her original creations as well as her family recipes. Go check them out!


Profile photo of steamykitchen

Secret Tricks to Skirt Steak

Posted by in Kitchen Talk, Step-by-Step Recipes

Tasty Kitchen Blog: Secret Tricks to Skirt Steak. Guest post by Jaden Hair of Steamy Kitchen.

 
Say hello to one of my favorite cuts of beef of all time: The Skirt Steak. Yes, even more than filet mignon (which, in fact, is my least favorite cut of steak because, though buttah-tender, I think it has the least flavor). So now that you know I’m all about the flavor, it’s no surprise that skirt steak has one of the fullest beefy flavors. It’s the cut favored in fajitas and tacos.


Tasty Kitchen Blog: Secret Tricks to Skirt Steak. Guest post by Jaden Hair of Steamy Kitchen.

Skirt steak can be a tricky little devil if you don’t know the secret tricks to preparing and slicing the cut. Handle it wrong, and you’re left with the shoe leather that takes five years to chew through. But just two simple secrets turn it into tender ribbons of beef.

I bet most people know that slicing across the grain does the trick, but I’ve got another one up my sleeve.


Tasty Kitchen Blog: Secret Tricks to Skirt Steak. Guest post by Jaden Hair of Steamy Kitchen.

Here is a fine piece of skirt steak. See the striations running up and down the steak? That’s the grain. Take note, we’ll get back to that later.


Tasty Kitchen Blog: Secret Tricks to Skirt Steak. Guest post by Jaden Hair of Steamy Kitchen.

Okay, now turn that piece of steak over. Oh, what’s that membrane!? That’s called a great way to ruin tender steak! You don’t want that.


Tasty Kitchen Blog: Secret Tricks to Skirt Steak. Guest post by Jaden Hair of Steamy Kitchen.

Luckily, it’s easy to remove. Just use your fingers to peel it away and discard. That’s your first trick.


Tasty Kitchen Blog: Secret Tricks to Skirt Steak. Guest post by Jaden Hair of Steamy Kitchen.

We normally like to cook skirt steak on our outdoor grill, but if it’s cold or raining outside (like this day), you’re welcome to come indoors. One thing’s for sure, you want super high heat. You want the steak to sear on both sides like nobody’s business. The searing creates flavor, and because the steak is so thin, you’ve got to get that pan superhot. You’ve only got minutes each side.


Tasty Kitchen Blog: Secret Tricks to Skirt Steak. Guest post by Jaden Hair of Steamy Kitchen.

Notice that when I flipped the steak, I put it on a new section of the frying pan, where it’s hotter. Most people, when searing, flip over the piece of meat and put it right back on the same spot. If there’s plenty of room in the pan, why not use a new, hot spot?!


Tasty Kitchen Blog: Secret Tricks to Skirt Steak. Guest post by Jaden Hair of Steamy Kitchen.

Grill for a few minutes on each side until it reaches your desired temperature, and then let it rest. This is a fine time to pour yourself a drink.


Tasty Kitchen Blog: Secret Tricks to Skirt Steak. Guest post by Jaden Hair of Steamy Kitchen.

Okay, remember the grain? It’s running vertically. We want to cut across the grain so that we don’t get stringy stripes of meat.


Tasty Kitchen Blog: Secret Tricks to Skirt Steak. Guest post by Jaden Hair of Steamy Kitchen.

In addition to slicing across the grain, I also like to cut at an angle. See how my knife is at a pretty sharp angle? That’s what I want.


Tasty Kitchen Blog: Secret Tricks to Skirt Steak. Guest post by Jaden Hair of Steamy Kitchen.

Let’s start slicing!


Tasty Kitchen Blog: Secret Tricks to Skirt Steak. Guest post by Jaden Hair of Steamy Kitchen.

I like my skirt steak sliced very thinly.


Tasty Kitchen Blog: Secret Tricks to Skirt Steak. Guest post by Jaden Hair of Steamy Kitchen.

Like this thin!


Tasty Kitchen Blog: Secret Tricks to Skirt Steak. Guest post by Jaden Hair of Steamy Kitchen.

Yummmm skirt steak for my tacos!

 
Ready to try your hand at skirt steak? Lookie what I found on Tasty Kitchen!

Clockwise from top left: Spicy Orange Glazed Skirt Steak Lettuce Wraps from Bob, Steak Sandwiches from calliemakesdo, Triple Citrus Skirt Steak from Kelly @ EvilShenanigans, and Ginger Steak Salad from Ree.


_______________________________________

Jaden Hair is a food writer, television personality, and food photographer based in Tampa Bay, Florida. Find more of her recipes in her blog, Steamy Kitchen, where you can also read more about Jaden’s new book, The Steamy Kitchen Cookbook, and the rave reviews it’s received!


Profile photo of ThreeManyCooks

Shamrock Blizzard

Posted by in Step-by-Step Recipes

  Since its debut in the 1970s, McDonald’s Shamrock Shake has garnered something of a cult following. I’m certain part of its popularity stems from very limited availability. You might be interested to know the Shamrock Shake has its own website pointing devoted fans to selected serving locations. I love a good milkshake, but this seems a […]

Profile photo of Erika (TK)

Share Your Breakfast Ideas

Posted by in Kitchen Talk

The first day of school is just around the corner, and some have already started (sorry!). Back in my school days, that meant my mornings were spent trying to linger in bed for as long as I could get away with, milking it for every last minute of sleep possible. Which, in turn, often meant rushing out the door without so much of a hint of breakfast. Not a crumb or…

Profile photo of Erika (TK)

Share Your Cast Iron Tips

Posted by in Kitchen Talk

What are some of your favorite cast iron tips? We'd love to hear your tips or even your challenges when it comes to cast iron cookware. Share your thoughts and let's help each other out!

Profile photo of Erika (TK)

Share Your Cookie Tips and Tricks

Posted by in Kitchen Talk

This Kitchen Talk post is specifically for all your cookie lovers out there. (We'll talk about pies soon, I promise.) If you love baking or even just eating cookies, tell us:

What are your favorite cookie tips and tricks?