The Pioneer Woman Tasty Kitchen
Profile photo of Erica Lea

Homemade Hot Chocolate

Posted by in Step-by-Step Recipes

Tasty Kitchen Blog: Homemade Hot Chocolate. Guest post and recipe from Erica Kastner of Cooking for Seven.

 
This is hot chocolate (or drinking chocolate), not hot cocoa. What’s the difference, you ask? Hot cocoa is made by adding hot water or hot milk to a powdered mix of cocoa, often containing sweeteners, dried milk, and flavoring. Hot chocolate is created by melting chocolate (either from a bar or chips) in milk.

The difference between hot chocolate and hot cocoa is not only in the method and ingredients, it’s in the flavor and texture as well. I find many of the hot cocoa mixes to be quite sweet and lacking in good flavor and somewhat thin. Hot chocolate, on the other hand, is rich and creamy and deep. The chocolate flavor takes center stage, not the sweetener or artificial flavorings. It’s so rich that I find that I can’t drink very much of it! Granted, you can make some excellent hot cocoa by mixing it yourself. But it lacks the depth of flavor and wonderful texture of hot chocolate.

Last winter I tried hot chocolate for the first time. I was won over instantly. It was so thick and smooth that it felt like I was drinking chocolate pudding.

Now get into your kitchen and try it out! It’s so easy to make.


Tasty Kitchen Blog: Homemade Hot Chocolate. Guest post and recipe from Erica Kastner of Cooking for Seven.

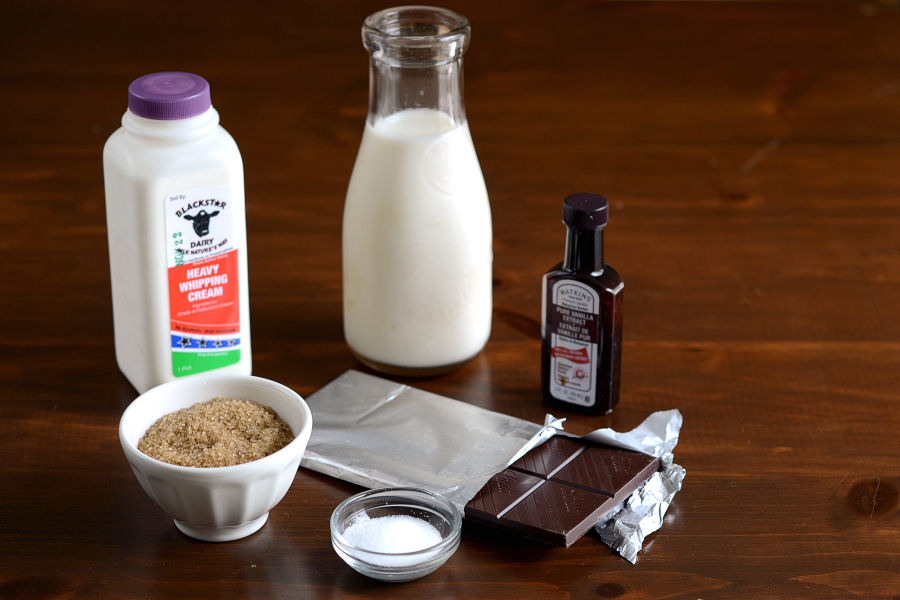
You’ll need 6 simple ingredients: whole milk, cream, a little sweetener (I used demerara, but you can use anything you like), a bit of salt, pure vanilla extract, and some good-quality chocolate (I used 70% cacao, but you could use something sweeter if you prefer).


Tasty Kitchen Blog: Homemade Hot Chocolate. Guest post and recipe from Erica Kastner of Cooking for Seven.

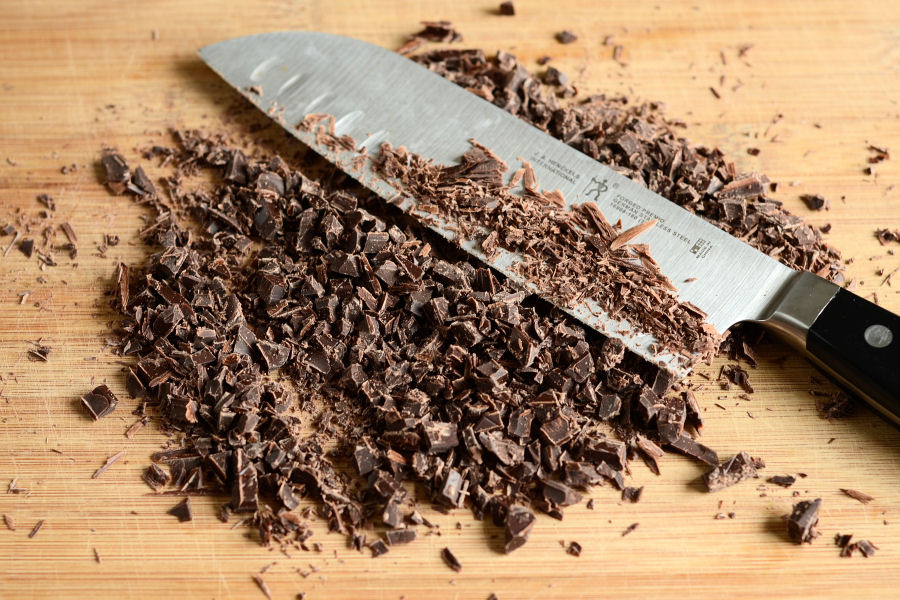
Begin by chopping up your favorite chocolate nice and fine. You want to chop it up quite a bit so it melts easily.


Tasty Kitchen Blog: Homemade Hot Chocolate. Guest post and recipe from Erica Kastner of Cooking for Seven.

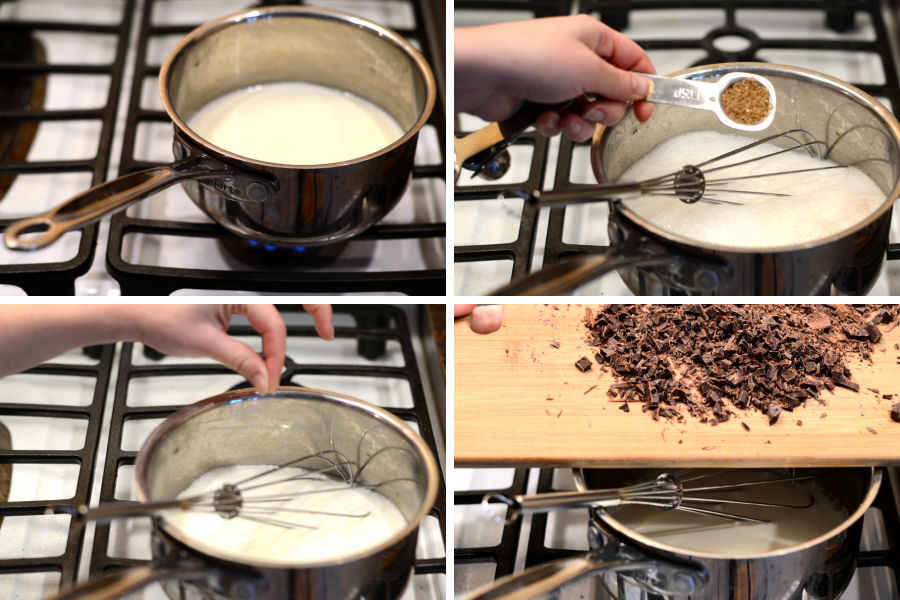
Heat the milk and cream to a low simmer, whisking occasionally. You don’t want to scorch your milk. Add your sweetener, salt, and chocolate.


Tasty Kitchen Blog: Homemade Hot Chocolate. Guest post and recipe from Erica Kastner of Cooking for Seven.

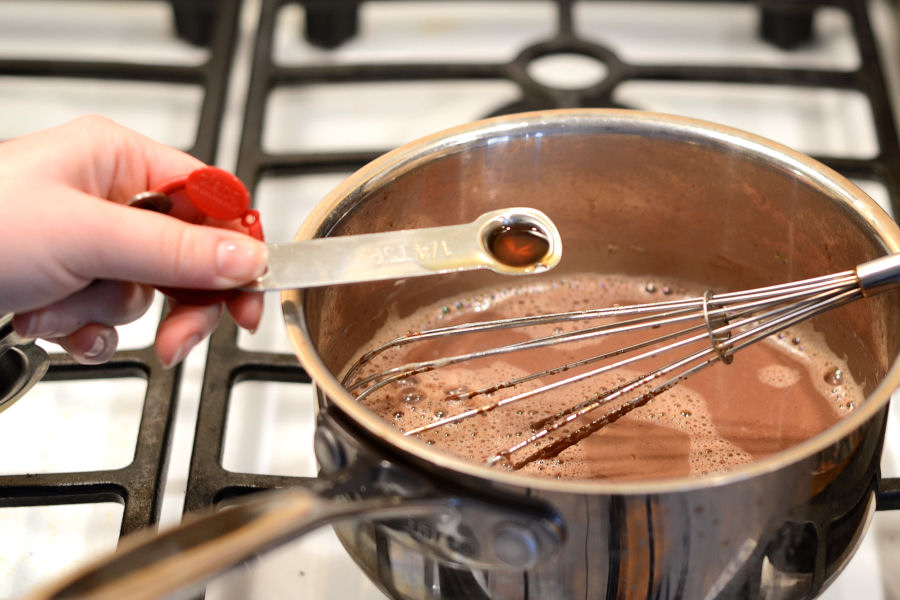
Whisk in the vanilla extract.


Tasty Kitchen Blog: Homemade Hot Chocolate. Guest post and recipe from Erica Kastner of Cooking for Seven.

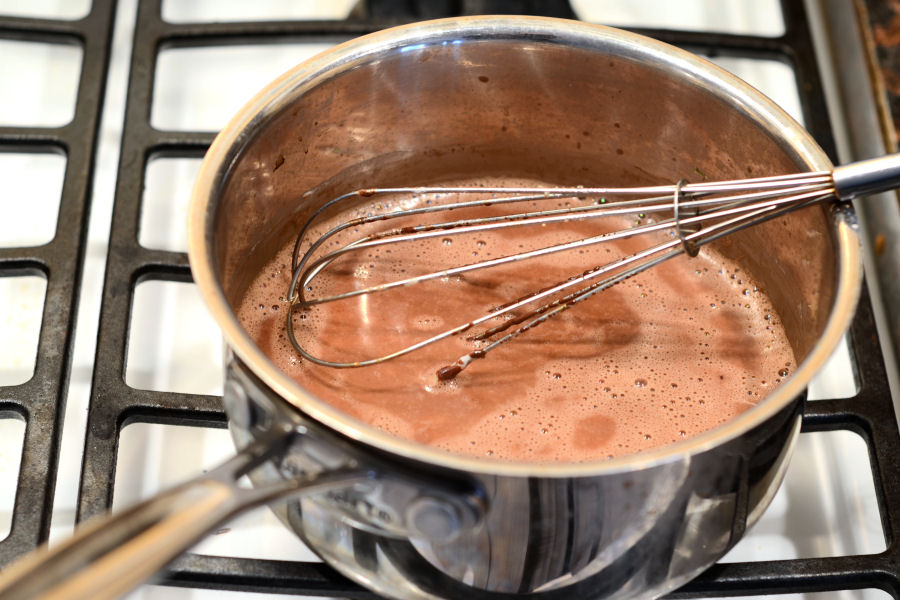
Whisk vigorously until all of the chocolate has melted. Cook for an additional 4 minutes, whisking constantly. The hot chocolate will thicken a bit as it cooks.
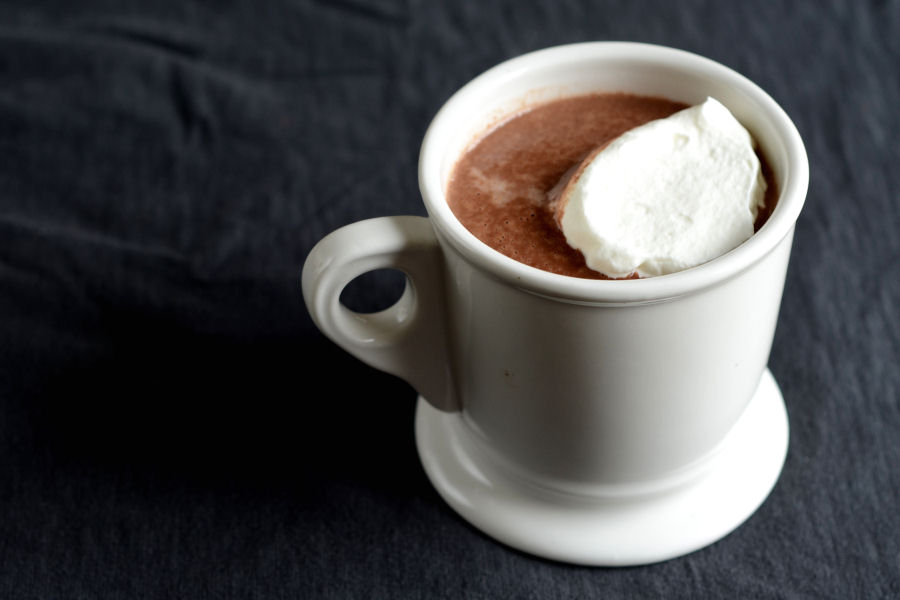


Tasty Kitchen Blog: Homemade Hot Chocolate. Guest post and recipe from Erica Kastner of Cooking for Seven.

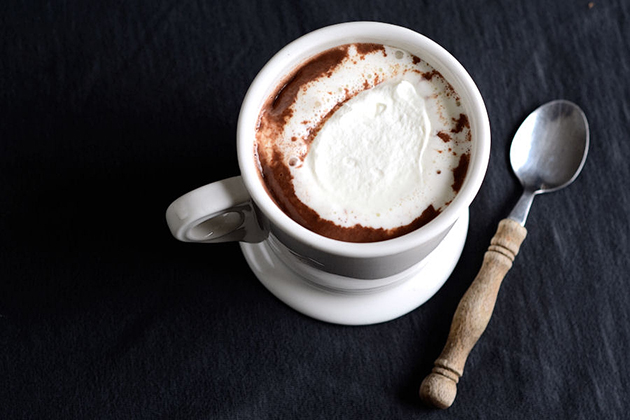
Pour into your favorite mug and enjoy all by itself or with a dollop of whipped cream or some good marshmallows. Prepare for some major enjoyment!

Note: If you find this hot chocolate to be too rich, you could try replacing the cream with milk.

You can check out my original post on my blog, or view the recipe below.


Printable Recipe
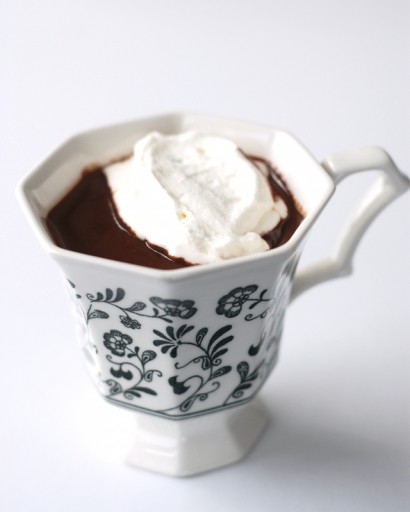
Homemade Hot Chocolate

See post on Erica Lea’s site!
4.66 Mitt(s) 3 Rating(s)3 votes, average: 4.66 out of 53 votes, average: 4.66 out of 53 votes, average: 4.66 out of 53 votes, average: 4.66 out of 53 votes, average: 4.66 out of 5

Prep Time:

Cook Time:

Difficulty: Easy

Servings: 4

4
x

Print Options

Page size Letter 3x5 4x6
Text Size Small Medium Large
Content Include description
Include prep time, etc.
Show image

Description

Real hot chocolate, made with dark chocolate and whole milk. It’s like drinking chocolate pudding.

Ingredients

  • 8 ounces, weight Chocolate (preferably Dark)
  • 3-½ cups Whole Milk
  • ½ cups Heavy Cream
  • 3 teaspoons Maple Syrup Or Natural Sweetener Of Choice
  • 1 teaspoon Vanilla Extract
  • ⅛ teaspoons Salt

Preparation Instructions

1. Chop chocolate very finely.

2. In a medium saucepan, bring milk and cream to a low simmer over medium heat, whisking occasionally.

3. Add chocolate, maple syrup, vanilla, and salt. Whisk vigorously until all of the chocolate has melted. Cook for an additional 4 minutes, whisking constantly.

4. Serve with whipped cream, if desired.


_______________________________________

Newly-married Erica Kastner shares her wonderful recipes and amazing food photography on her blog, Cooking for Seven. She also writes about crafts and posts more of her beautiful photography in her personal blog, EricaLea.com. There really isn’t much that this amazing young lady can’t do, and we’re thrilled she does some of it here.


Profile photo of EatLiveRun

Homemade Chicken and Dumplings

Posted by in Step-by-Step Recipes

Tasty Kitchen Blog: Homemade Chicken and Dumplings. Guest post by Jenna Weber of Eat, Live, Run; recipe submitted by TK member Tiffany of Eat at Home.
 
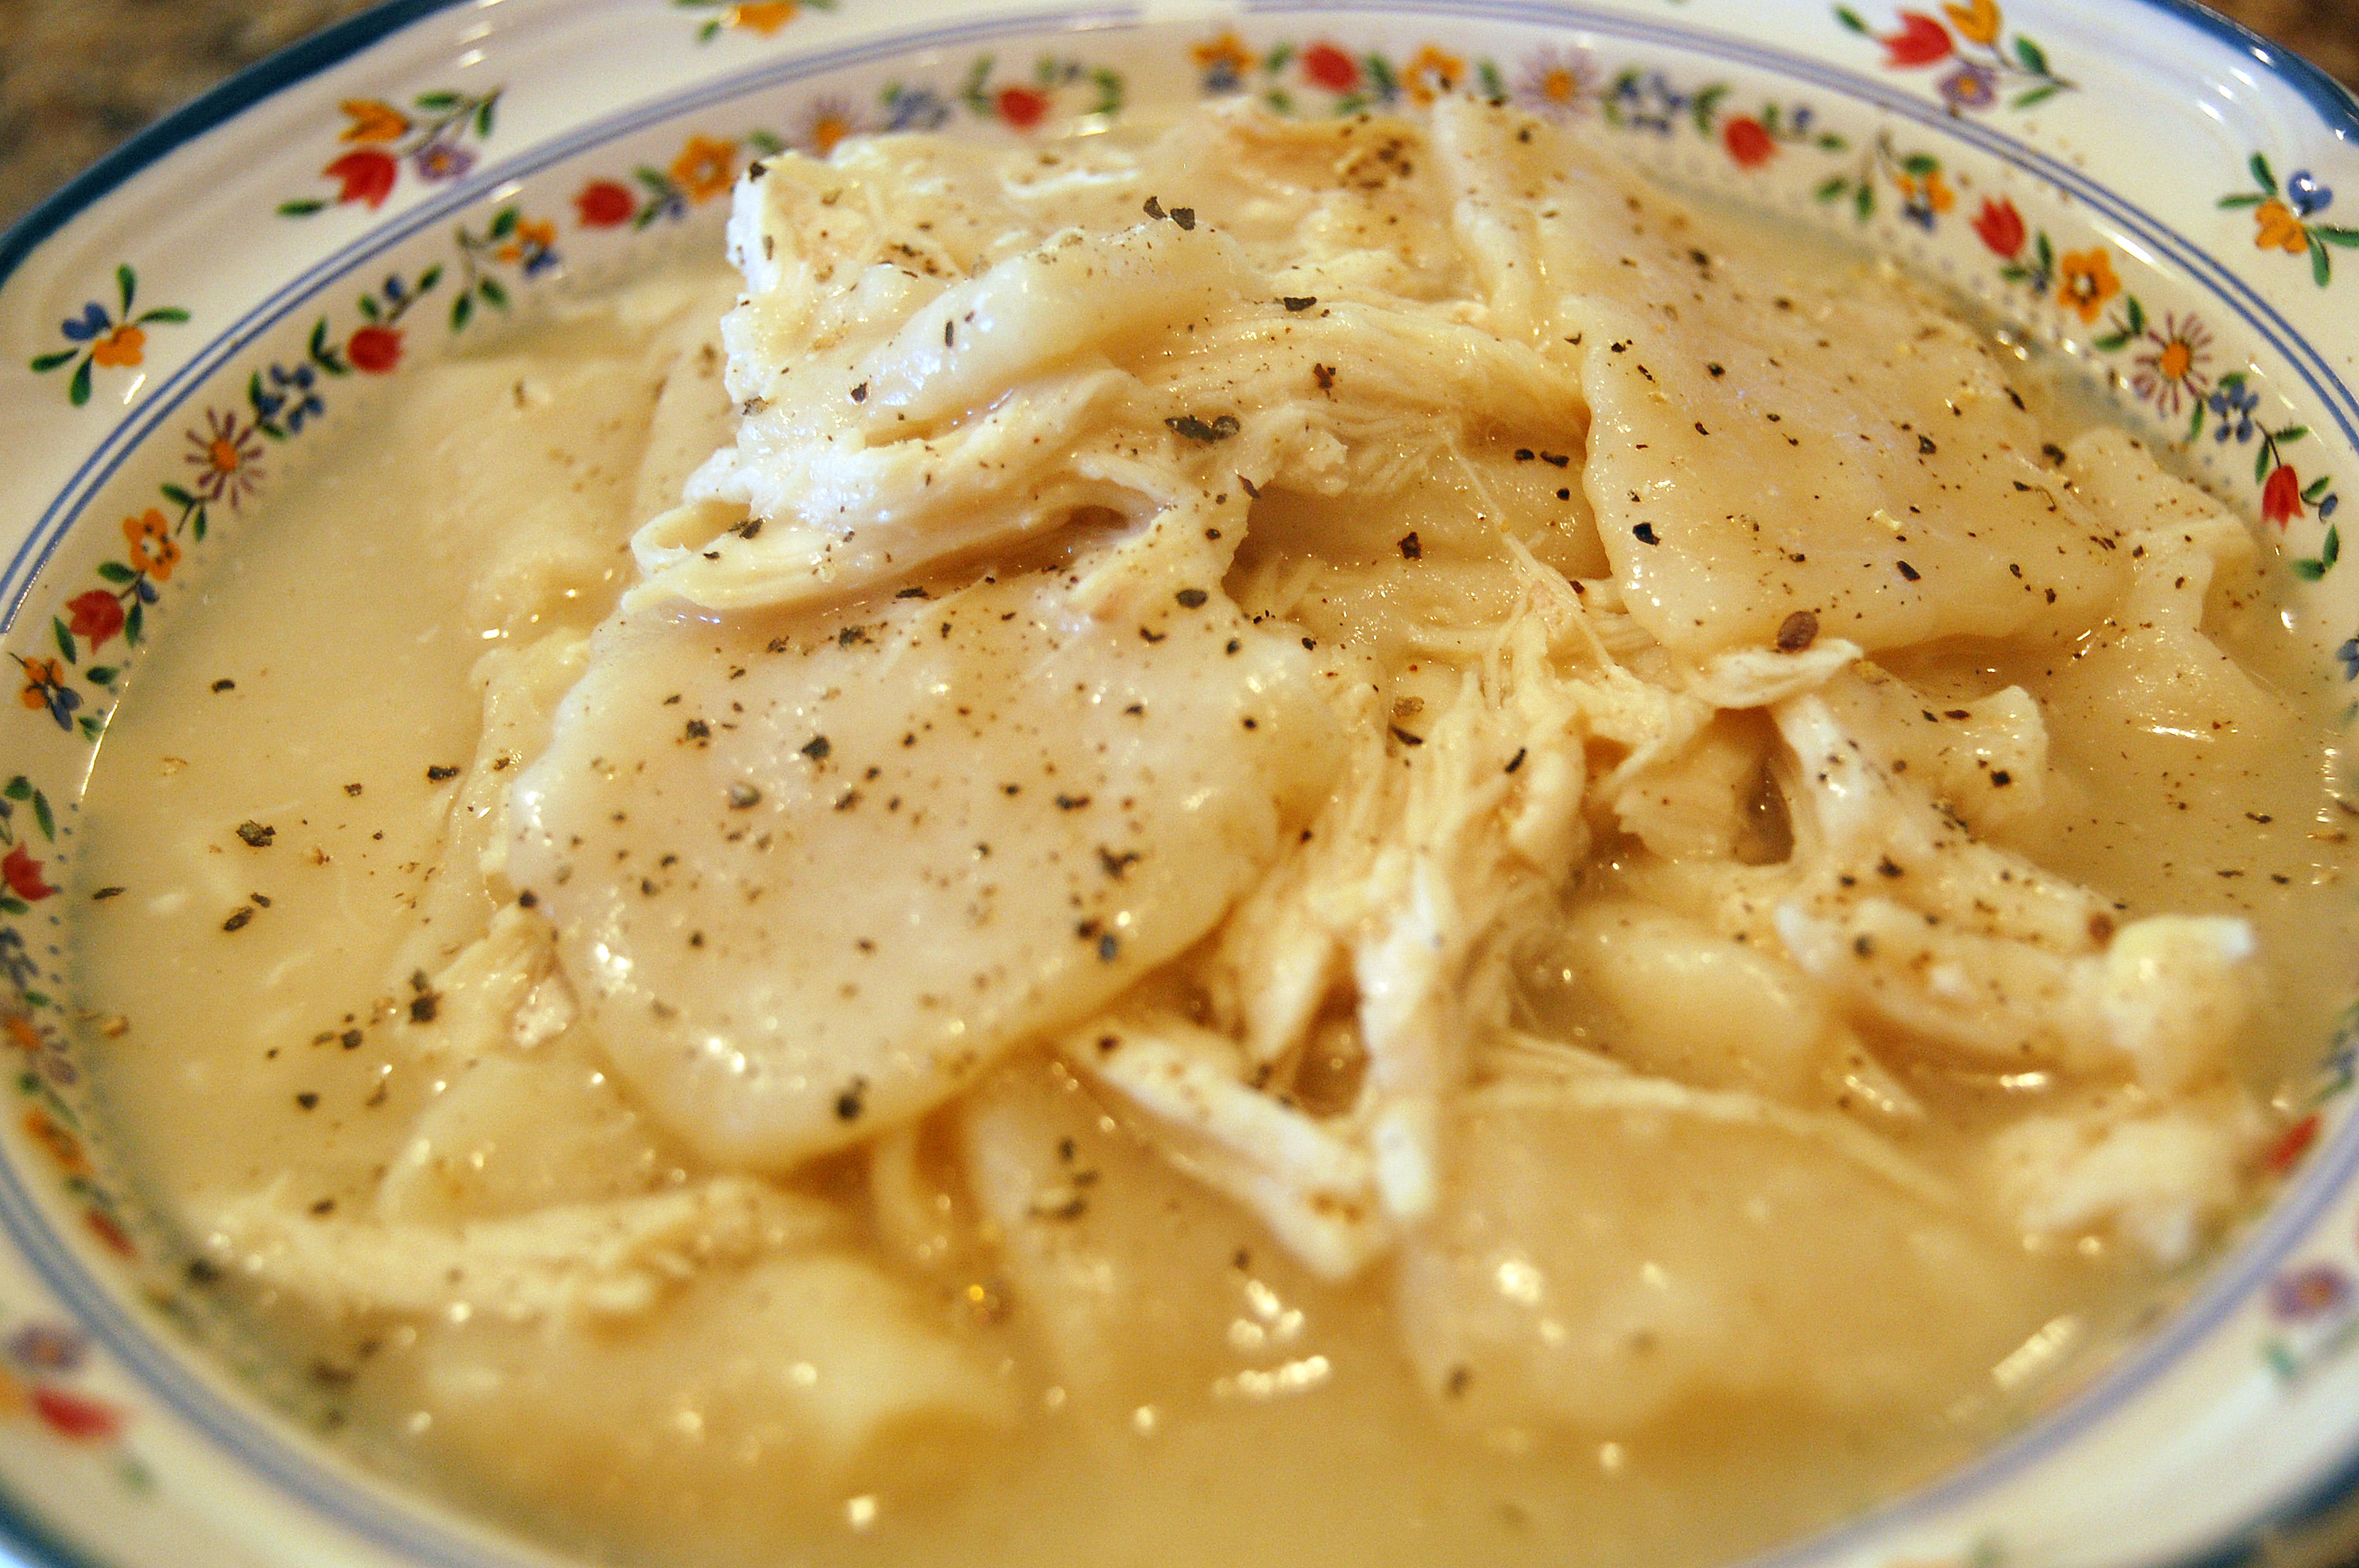
Homemade chicken and dumplings. Or, chicken n’ dumplins’ rather, as we like to say in the South. I had been eagerly searching for a recipe like the kind I enjoyed so much growing up and this one, from TIffany (TK member Eat at Home), nailed it.
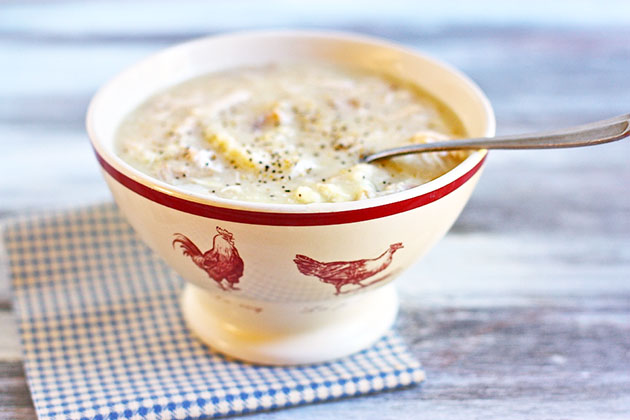
There are many different versions of chicken and dumplings and this is definitely the one that reminds me of home. For this version, the dumplings are rolled out thin and sliced, rather than dropped biscuit-style into the bubbling chicken stock. The result is a creamy, thick chicken stew that is just perfect for chilly nights! Try it and be converted to a dumplin’ lover forever.


Tasty Kitchen Blog: Homemade Chicken and Dumplings. Guest post by Jenna Weber of Eat, Live, Run; recipe submitted by TK member Tiffany of Eat at Home.

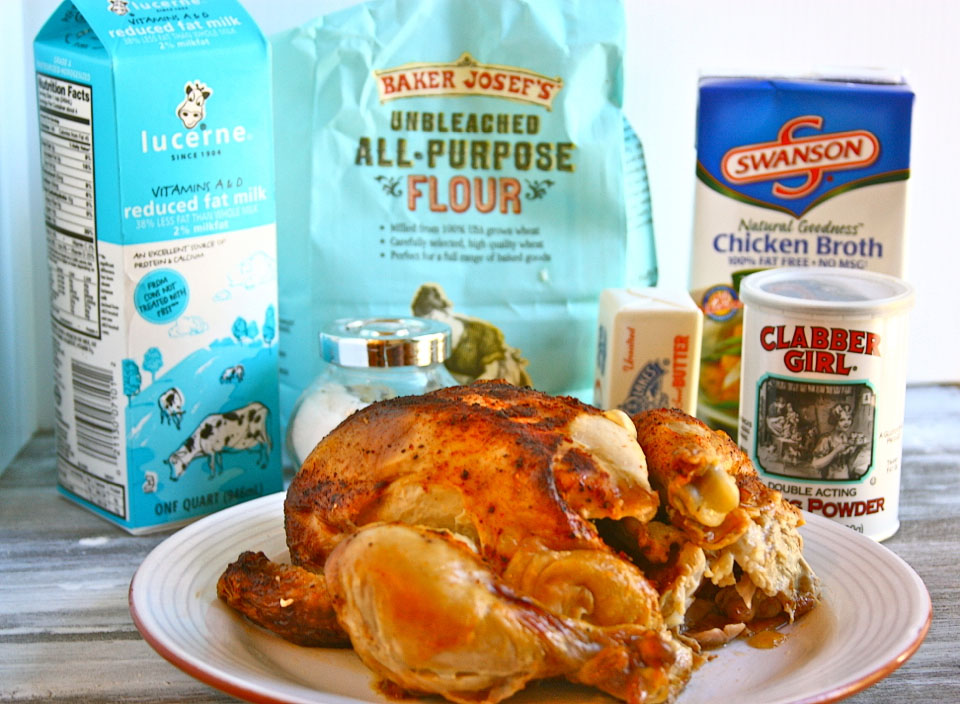
Another reason I love this dish so much? Look how simple it is! You don’t need anything fancy—just cooked chicken, flour, milk, butter, salt, baking powder and broth. The recipe said to use cooked chicken and I had just finished roasting one, so it turned out perfect! I highly recommend using a roast chicken (either roasted at home or rotisserie for this!).


Tasty Kitchen Blog: Homemade Chicken and Dumplings. Guest post by Jenna Weber of Eat, Live, Run; recipe submitted by TK member Tiffany of Eat at Home.

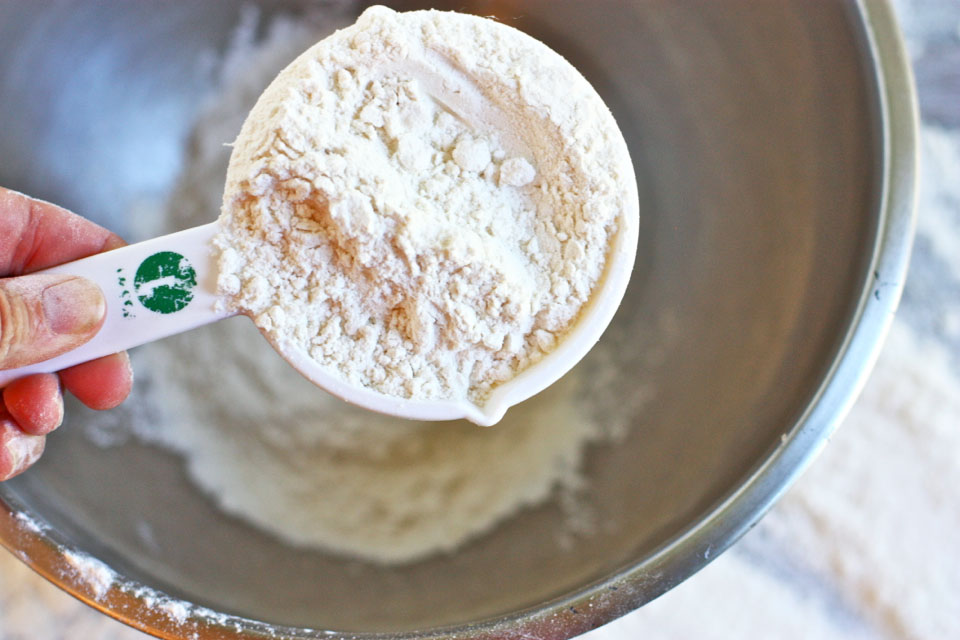
To make the dumplings, in a large bowl measure out 2 cups of flour …


Tasty Kitchen Blog: Homemade Chicken and Dumplings. Guest post by Jenna Weber of Eat, Live, Run; recipe submitted by TK member Tiffany of Eat at Home.

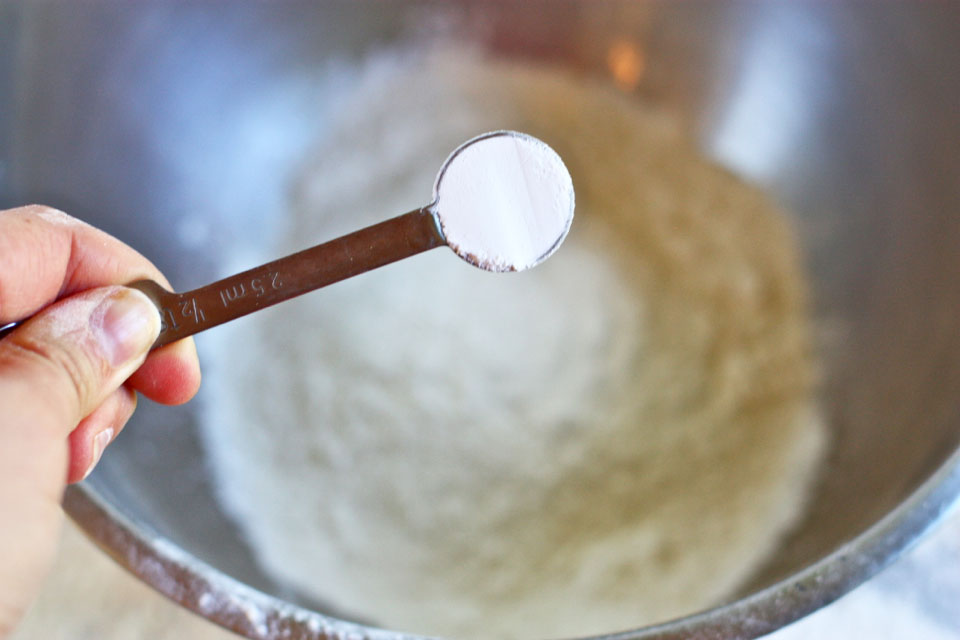
A half teaspoon of baking powder …


Tasty Kitchen Blog: Homemade Chicken and Dumplings. Guest post by Jenna Weber of Eat, Live, Run; recipe submitted by TK member Tiffany of Eat at Home.


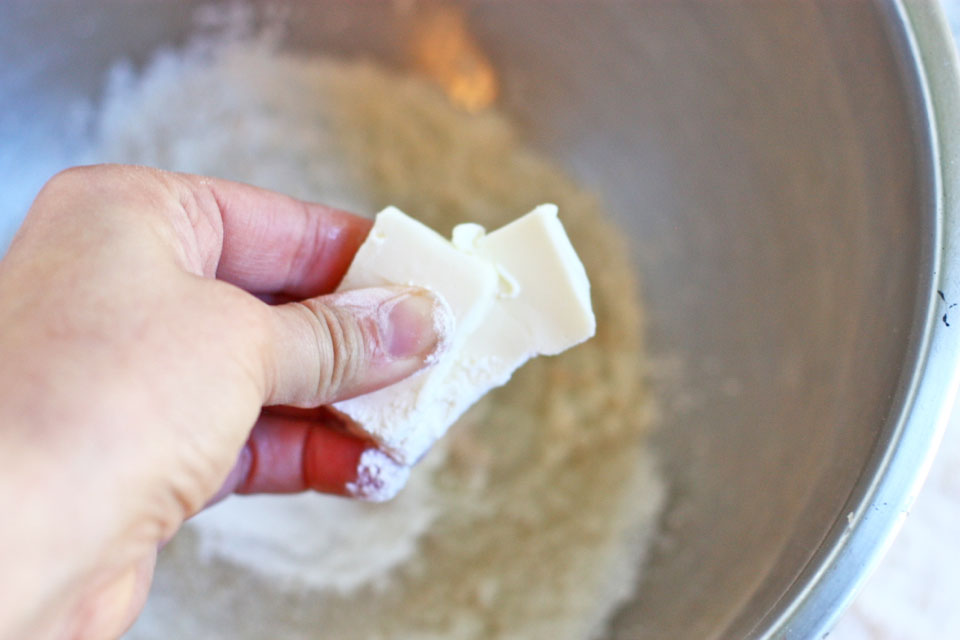
And some butter! Cut this in with your fingers and mix until the dough looks crumbly, sort of like making pie dough!


Tasty Kitchen Blog: Homemade Chicken and Dumplings. Guest post by Jenna Weber of Eat, Live, Run; recipe submitted by TK member Tiffany of Eat at Home.

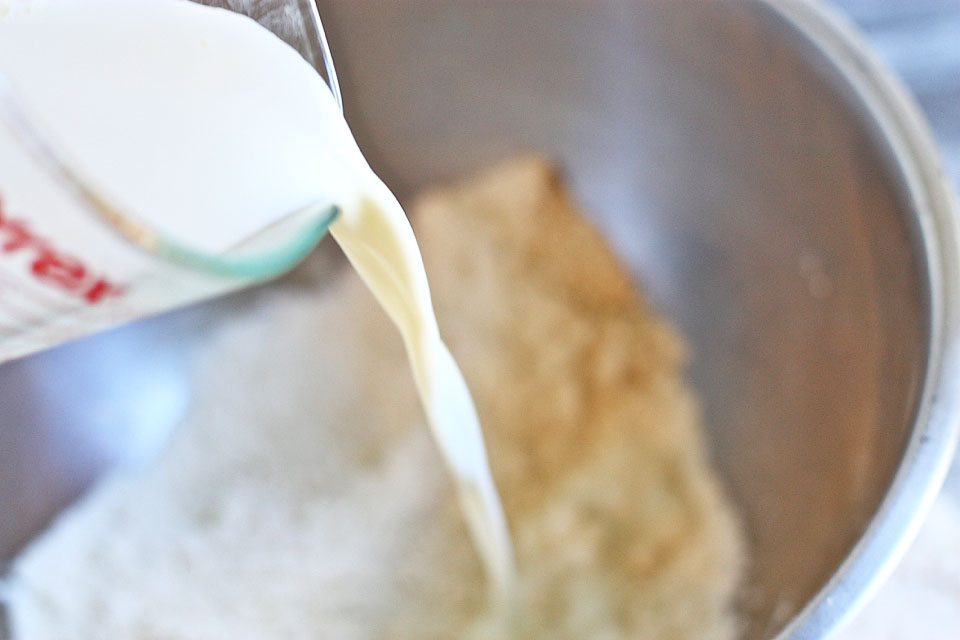
Then add a little less than a cup of milk and a pinch of salt.


Tasty Kitchen Blog: Homemade Chicken and Dumplings. Guest post by Jenna Weber of Eat, Live, Run; recipe submitted by TK member Tiffany of Eat at Home.

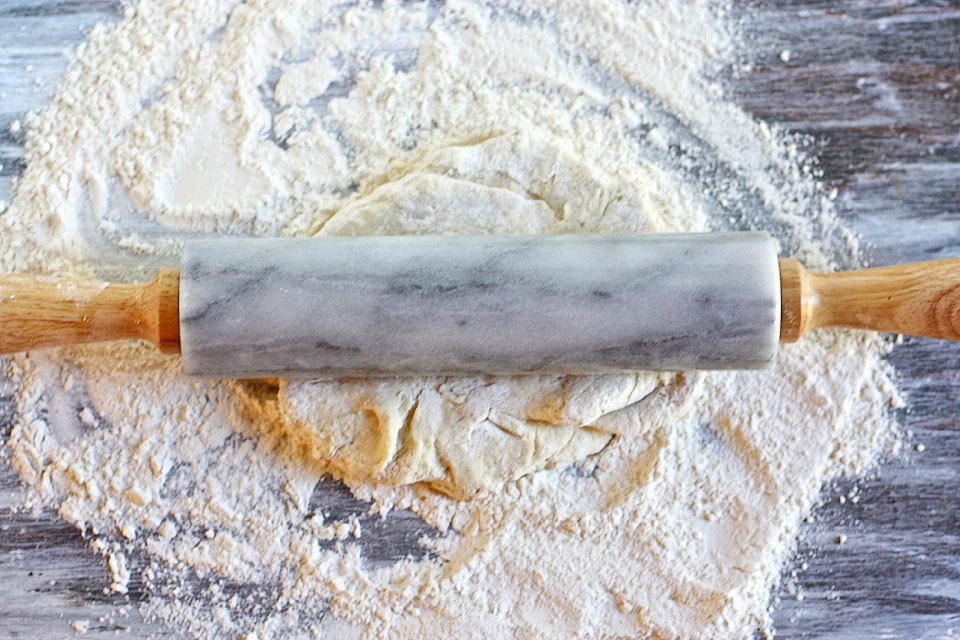
Mix the dough together and then roll out on a heavily floured surface. You definitely don’t want to go easy on the flour—using a lot of flour here is what will make the broth thicken later!


Tasty Kitchen Blog: Homemade Chicken and Dumplings. Guest post by Jenna Weber of Eat, Live, Run; recipe submitted by TK member Tiffany of Eat at Home.

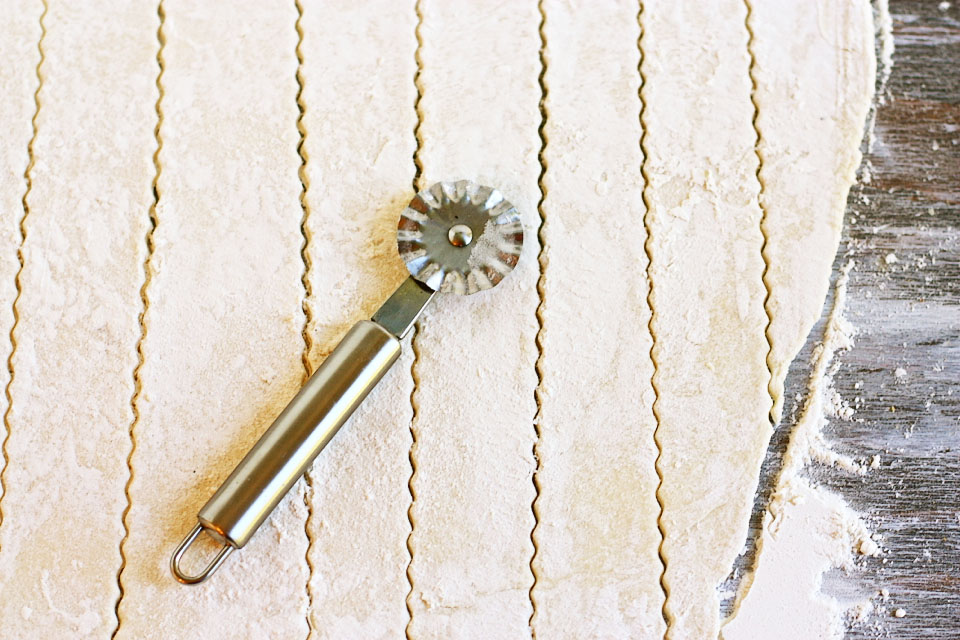
Once you have the dough rolled out, make long slices either using a pizza cutter, a pastry cutter or just a plain ol’ knife.


Tasty Kitchen Blog: Homemade Chicken and Dumplings. Guest post by Jenna Weber of Eat, Live, Run; recipe submitted by TK member Tiffany of Eat at Home.

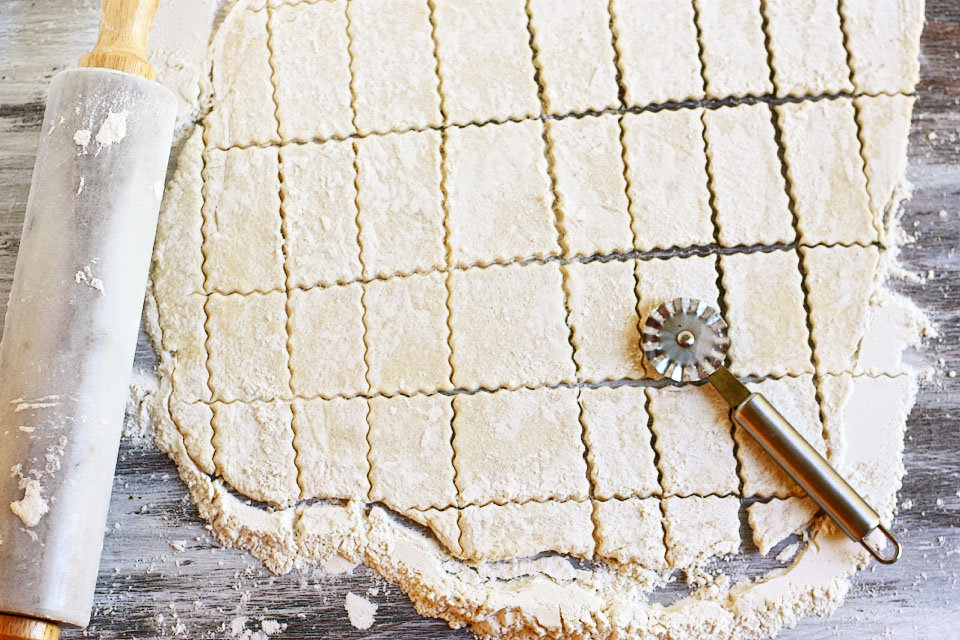
Then make criss-crosses so you have lots of cute little dumpling squares. Remember to keep everything covered in flour!


Tasty Kitchen Blog: Homemade Chicken and Dumplings. Guest post by Jenna Weber of Eat, Live, Run; recipe submitted by TK member Tiffany of Eat at Home.

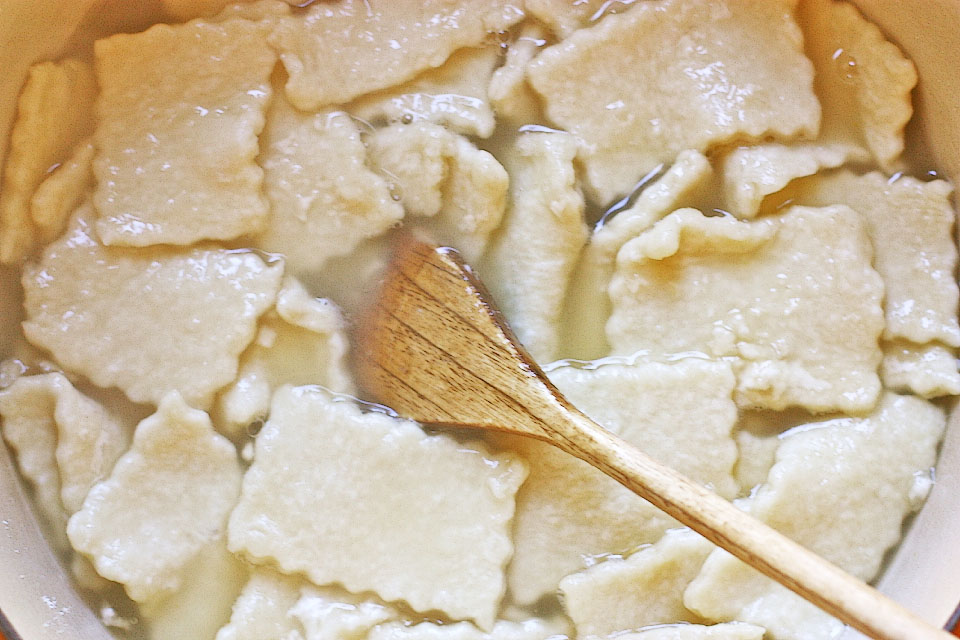
Bring your broth or stock to a boil and drop the dumplings in, along with any extra flour on the table. Gently stir but be careful not to mash them.


Tasty Kitchen Blog: Homemade Chicken and Dumplings. Guest post by Jenna Weber of Eat, Live, Run; recipe submitted by TK member Tiffany of Eat at Home.

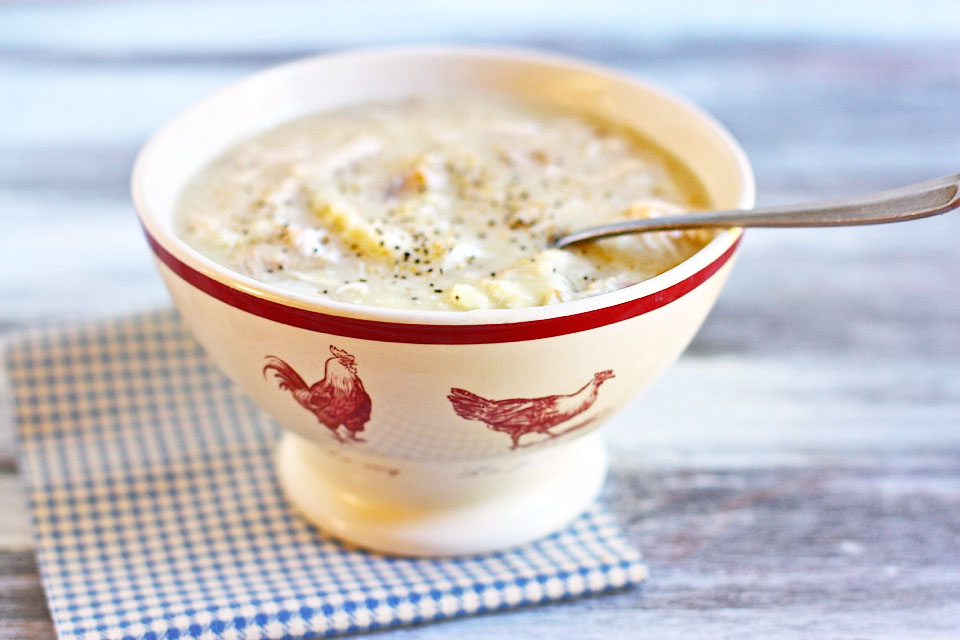
Finally, add your cooked chicken to the pot and serve. So, so, so easy! When I served this to my boyfriend for dinner, I slyly asked him how long he thought I spent making it. He guessed four hours (four hours, people!) and couldn’t believe it when I told him it took me only 30 minutes. Amazing.

You’ll want to make this recipe, asap. Thank you so much Tiffany for such a nostalgic treat! Be sure to check out her blog Eat at Home for more of her delicious recipes.


Printable Recipe

Homemade Chicken and Dumplings

See post on Eat at Home’s site!
4.95 Mitt(s) 44 Rating(s)44 votes, average: 4.95 out of 544 votes, average: 4.95 out of 544 votes, average: 4.95 out of 544 votes, average: 4.95 out of 544 votes, average: 4.95 out of 5

Prep Time:

Cook Time:

Difficulty: Easy

Servings: 8

8
x

Print Options

Page size Letter 3x5 4x6
Text Size Small Medium Large
Content Include description
Include prep time, etc.
Show image

Description

A bowl of chicken and dumplings. A glass of sweet tea. It’s a meal any Kentuckian would be proud to fix and danged happy to sit down to. And it’s not hard to make. Come on, I’ll show you how.

Ingredients

  • 2 cups Flour
  • ½ teaspoons Baking Powder
  • 1 pinch Salt
  • 2 Tablespoons Butter
  • 1 cup Milk, A Bit Less Than A Full Cup
  • 2 quarts Chicken Broth
  • 3 cups Cooked Chicken

Preparation Instructions

In a bowl, combine the flour, baking powder and salt. Cut the butter into the dry ingredients with a fork or pastry blender. Stir in the milk, mixing with a fork until the dough forms a ball.

Heavily flour a work surface. You’ll need a rolling pin and something to cut the dumplings with. I like to use a pizza cutter. I also like to use a small spatula to lift the dumplings off the cutting surface.

Roll the dough out thin with a heavily floured rolling pin. Dip your cutter in flour and cut the dumplings in squares about 2″x2″. It’s okay for them not to be exact. Just eye ball it. Some will be bigger, some smaller, some shaped funny.

Use the floured spatula to put them on a heavily floured plate. Just keep flouring between the layers of dumplings.

To cook them, bring the broth to a boil. Drop the dumplings in one at a time, stirring while you add them. The extra flour on them will help thicken the broth. Cook them for about 15-20 minutes or until they not doughy tasting. Add the cooked chicken to the pot and you’re done!

For more pictures and instructions, see the related link above!


_______________________________________

Jenna is a food writer who has worked as a pastry chef and bread baker. Her blog Eat, Live, Run has great recipes, travel stories, and the perfect slogan: “Celebrating life, one crumb at a time.”


Profile photo of Erika (TK)

Thanksgiving: The Supporting Cast

Posted by in Holidays, The Theme Is...

Tasty Kitchen Blog: Thanksgiving Supporting Cast!

 
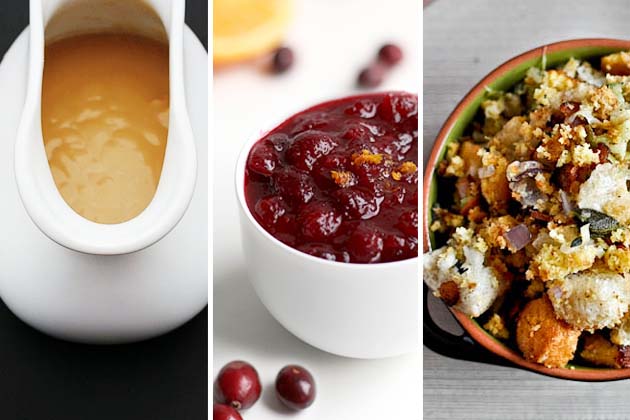
While your holiday spread may already have its main star (who is probably already defrosting and maybe brining in your refrigerator right now), let’s take a moment to show some love to its supporting cast. We’ll do this quickly, too, before some big ol’ bird gets wise and starts crashing this post.

Turkeys. They can be such divas sometimes.

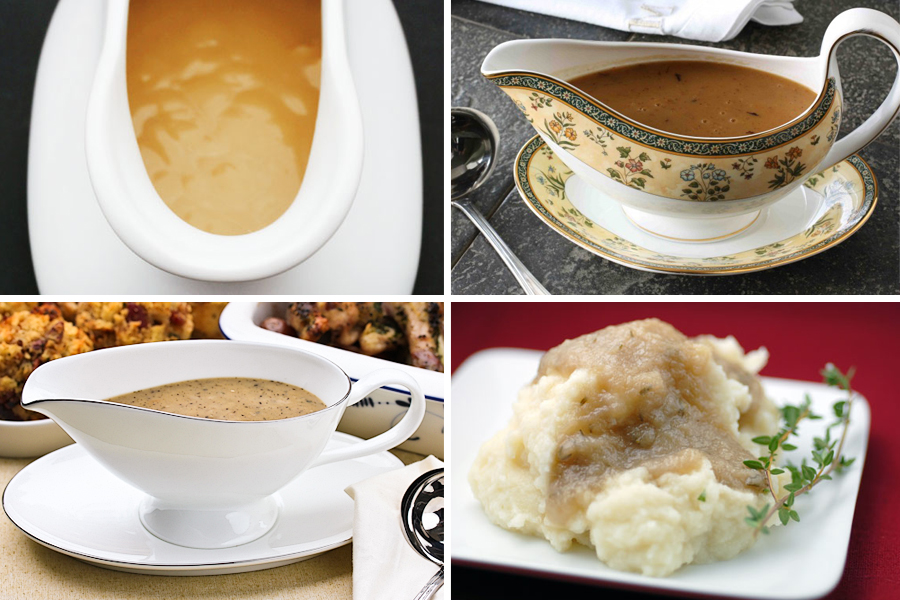
First up: gravy. Because let’s face it, sometimes that bird needs a little help. And even the moistest of turkeys never hurt from a bit of gravy slathered over it. Member and culinary expert sallypv says that the question she gets the most on turkey day has to do with making gravy, and she shares her Spare the Angst Classic Turkey Gravy to help those of us who share that gravy stress. Want a quick tip on how to kick up your gravy from the get-go? Check out Amanda’s neat trick below. Hint: the turkey gets wrapped in something that makes everything better.

Tasty Kitchen Blog: Thanksgiving Supporting Cast! (Gravy)

The Best Turkey Gravy Ever by manda2177, i am baker, i am mommy How to Make Turkey Gravy: Recipe & Troubleshooting by cookincanuck Herb Gravy by elanaspantry Apple Cider Turkey Gravy by aspicyperspective


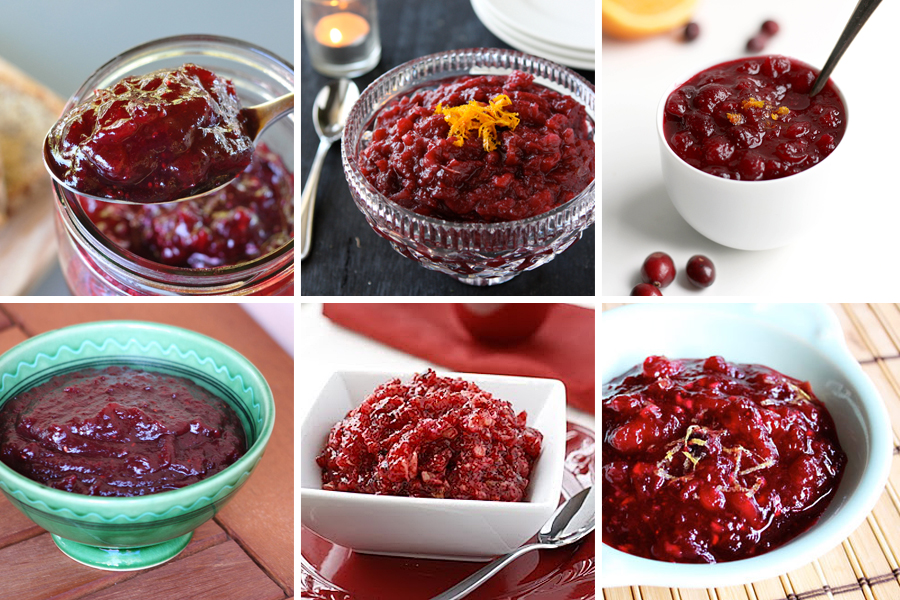
Next, let’s make some cranberry sauce or relish. It does double and triple duty, too. Aside from its usual turkey responsibilities, you can also slather it on your biscuits, eat it plain, or serve the extra sauce with dessert. Plus, it adds such a beautiful color to your spread. It’s a hard-working berry, that one.

Tasty Kitchen Blog: Thanksgiving Supporting Cast! (Cranberry Sauce)

Spreadable Red Wine Cranberry Sauce by Beau of SomethingEdible.com Crockpot Apple & Cranberry Sauce with Orange & Crystallized Ginger by cookincanuck Cranberry Sauce by The Fauxmartha Cranberry Sauce by tomatotomata Cranberry Relish by whatmegansmaking Thanksgiving Cranberry Sauce by daxphillips


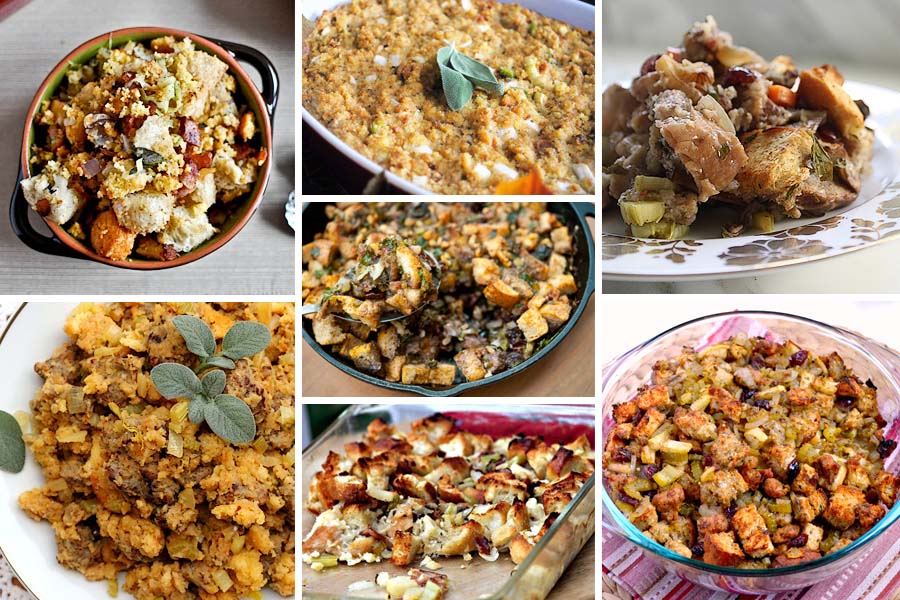
And of course, there’s stuffing. Which, in many cases, ought to get equal billing with the bird. I mean, seriously. I could make a meal of stuffing and gravy and be perfectly content. (Uh-oh. I heard an ominous gobble behind me. Wait … false alarm. That was me. Hmm. That should probably scare me more, right?)

Tasty Kitchen Blog: Thanksgiving Supporting Cast! (Stuffing)

Double Bread Stuffing with Brown Butter, Bacon and Sage by HowSweetEats Sage Sausage Stuffing by CouponClippingCook Southern-style Cornbread Dressing by Terri of that's some good cookin' Skillet Stuffing by georgiapellegrini Bacon, Feta and Pear Stuffing by Schnoodle Soup Stuffing by Heather Christo Turkey Sausage, Apple, and Cranberry Stuffing by kandktestkitchen


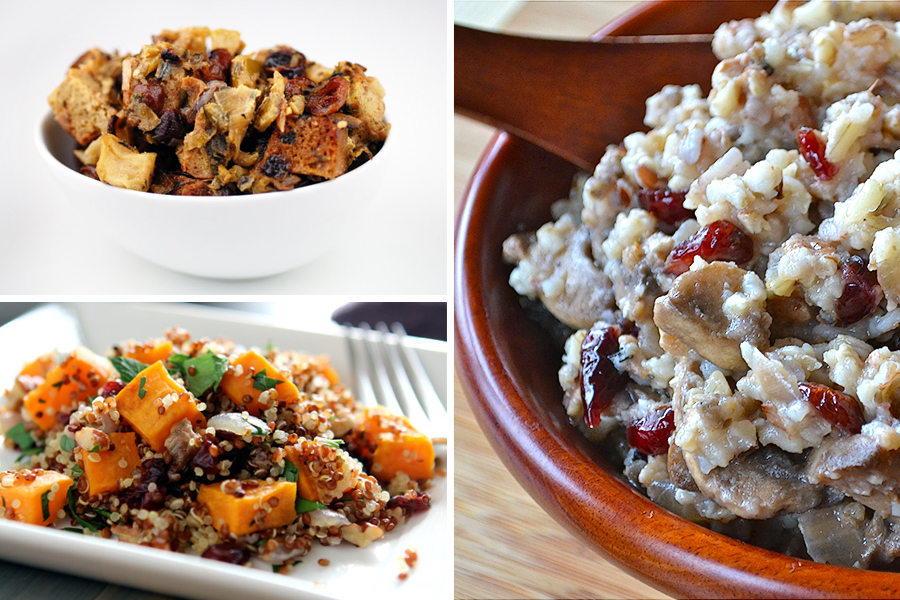
If you need to avoid gluten, you can certainly make the necessary substitutes for any of the recipes above. Or check out a few more options that are already gluten-free.

Tasty Kitchen Blog: Thanksgiving Supporting Cast! (Gluten-Free Stuffing)

Cranberry Apple Stuffing by elanaspantry Gluten-free Quinoa with Sweet Potatoes and Dried Cranberry Stuffing by With Style and Grace Wild Rice and Cranberry Stuffing by Jennifer @ Mother Thyme


Now that I think about it, with sides like these, I almost think I won’t miss the bird. (Did you see that? I think the turkey just gave me the evil eye.)

So while that diva is bathing and prepping herself (or himself—guys can be divas, too) for the big day, have some fun browsing the great recipes we have here and fill your table with all kinds of holiday goodness. Who knows, you just might discover your newest holiday favorite!


Profile photo of missamy

Apple Bourbon French Toast Casserole

Posted by in Baking, Step-by-Step Recipes

Tasty Kitchen Blog: Apple Bourbon French Toast Casserole. Guest post by Amy Johnson of She Wears Many Hats, recipe submitted by TK member Courtney of Bake. Eat. Repeat.

 
Holidays are here and while we’re all planning for the big meals, what about breakfast? I don’t know about you, but I think about lunch and supper menus and then totally forget about breakfast until the last minute. And breakfast is important, especially if your family tends to eat a late lunch like mine does. This Apple Bourbon French Toast Casserole recipe, submitted by Tasty Kitchen member Courtney, caught my eye as perfect breakfast option for those busy holiday mornings, because it can easily be made ahead and popped in the oven when the sun comes up.

It’s a wonderful mix of apples, brown sugar, cinnamon, with a splash of bourbon. Quite honestly though, it would make a perfect dessert. Or just think, leftovers from breakfast can be enjoyed for dessert later that evening. So is it breakfast or dessert? Breakfast? Or dessert? Or maybe a new Tasty Kitchen category altogether: Bressert. I’m going to talk to those in charge around here about it. I think Ree would agree. Bressert. It’s a good thing.

So let’s get started on this bressert thing.


Tasty Kitchen Blog: Apple Bourbon French Toast Casserole. Guest post by Amy Johnson of She Wears Many Hats, recipe submitted by TK member Courtney of Bake. Eat. Repeat.

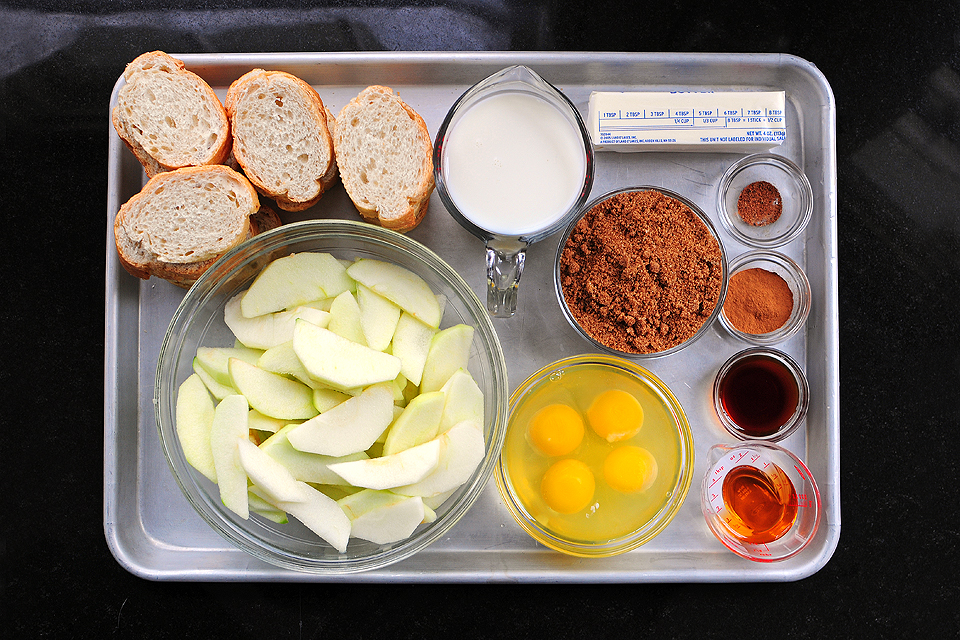
You’ll need butter, brown sugar, bourbon, apples, thick, day old bread, eggs, milk, vanilla, cinnamon, and nutmeg. Courtney’s recipe calls for 6 thick slices of day old bread, but I substituted a crusty French baguette and sliced them thick.


Tasty Kitchen Blog: Apple Bourbon French Toast Casserole. Guest post by Amy Johnson of She Wears Many Hats, recipe submitted by TK member Courtney of Bake. Eat. Repeat.

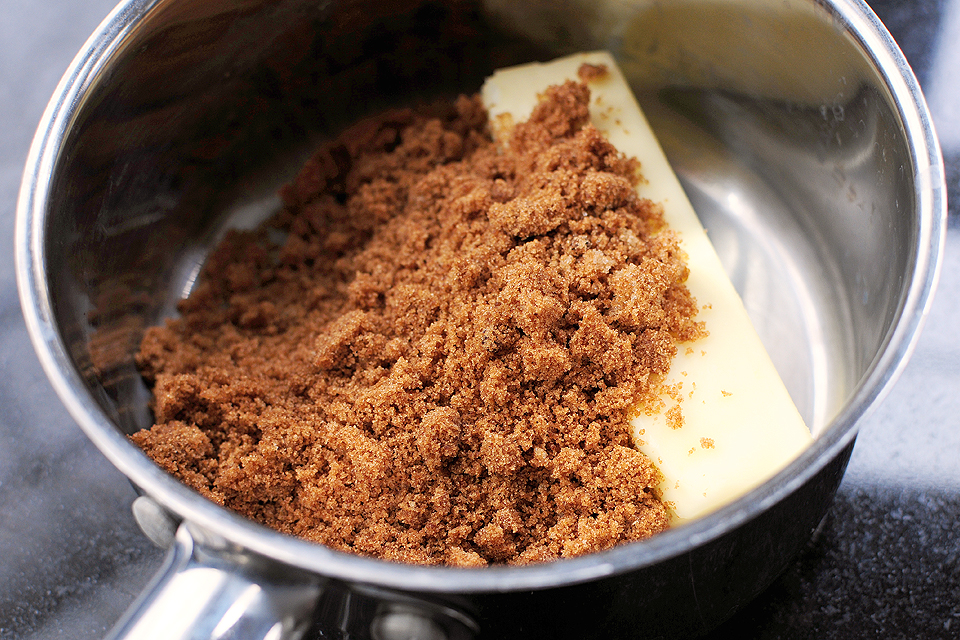
Begin by melting the butter and sugar together in a small pan.


Tasty Kitchen Blog: Apple Bourbon French Toast Casserole. Guest post by Amy Johnson of She Wears Many Hats, recipe submitted by TK member Courtney of Bake. Eat. Repeat.

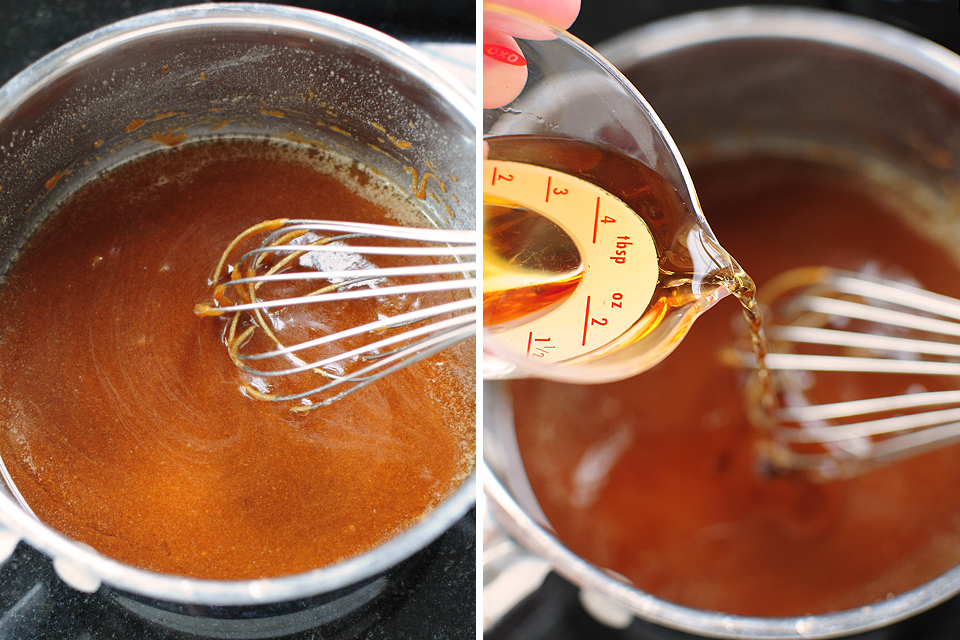
Whisk it together to combine. Whisk in the bourbon and cook until slightly thickened.


Tasty Kitchen Blog: Apple Bourbon French Toast Casserole. Guest post by Amy Johnson of She Wears Many Hats, recipe submitted by TK member Courtney of Bake. Eat. Repeat.

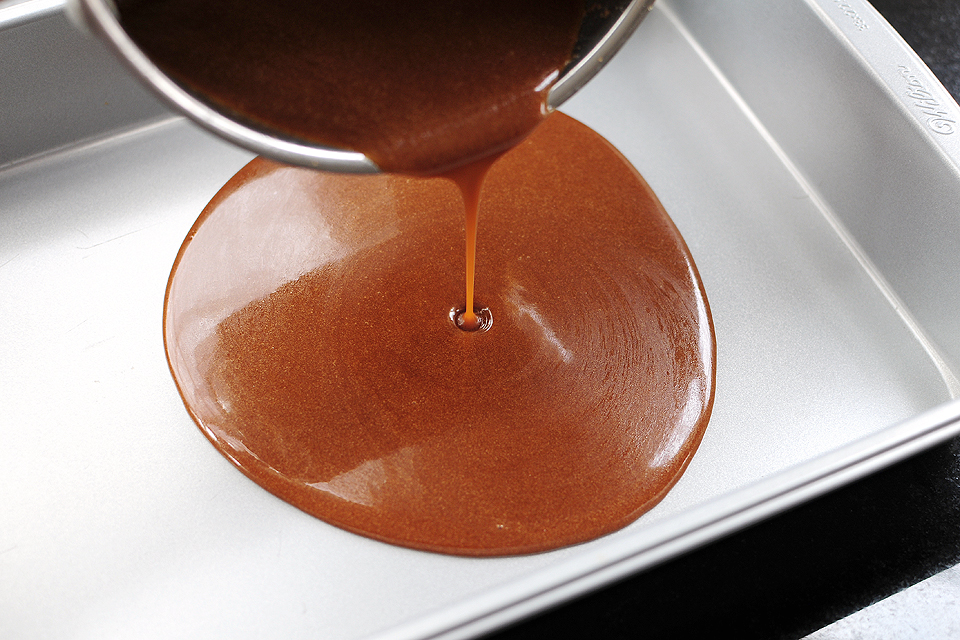
Pour the butter/bourbon mixture (otherwise known as delicious goodness) into a baking pan.


Tasty Kitchen Blog: Apple Bourbon French Toast Casserole. Guest post by Amy Johnson of She Wears Many Hats, recipe submitted by TK member Courtney of Bake. Eat. Repeat.

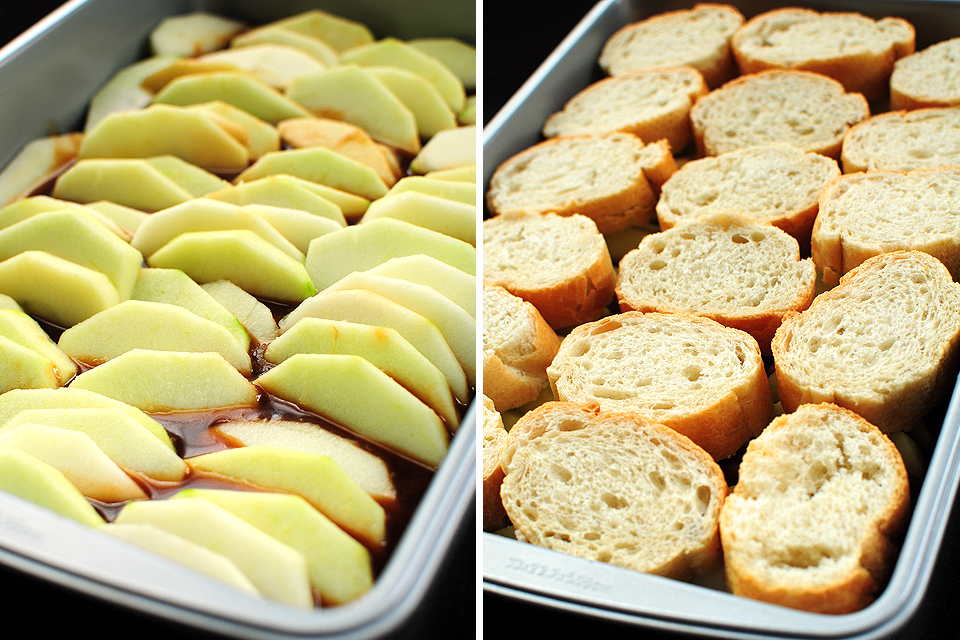
Top with sliced apples. I cut my apples pretty thin, but you can do whatever you like. Diced apples would be nice too. Add the sliced bread in a single layer on top of the apples.

Almost finished!


Tasty Kitchen Blog: Apple Bourbon French Toast Casserole. Guest post by Amy Johnson of She Wears Many Hats, recipe submitted by TK member Courtney of Bake. Eat. Repeat.

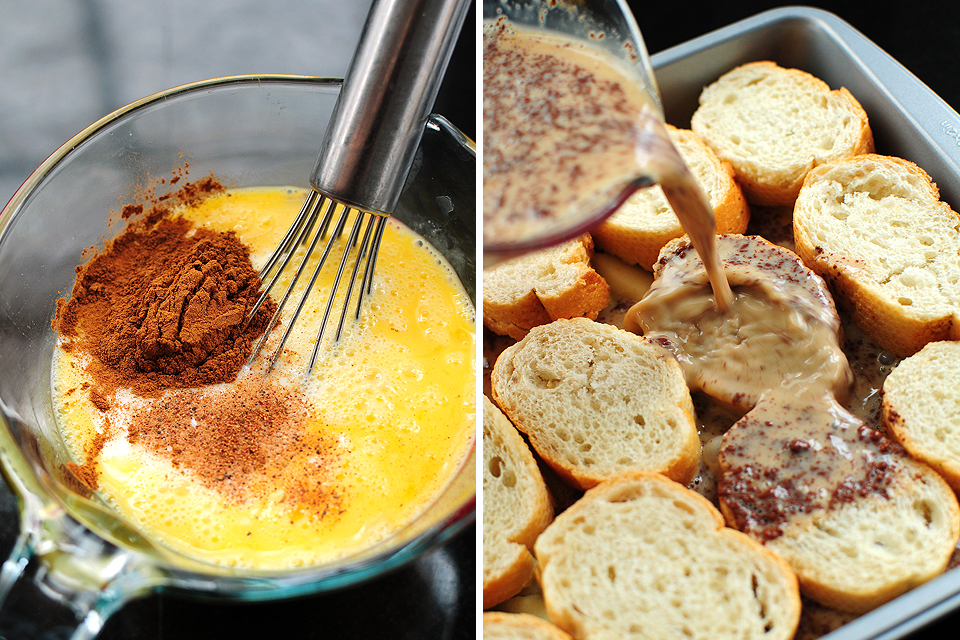
Beat together the eggs, milk, vanilla, cinnamon and nutmeg. Pour the egg mixture evenly over the bread and let it soak in.

You can either cover the dish and refrigerate it overnight. Or, if you are not making it ahead of time, dip bread slices in the egg mixture before laying them in the pan, then pour the remaining egg mixture over the casserole.


Tasty Kitchen Blog: Apple Bourbon French Toast Casserole. Guest post by Amy Johnson of She Wears Many Hats, recipe submitted by TK member Courtney of Bake. Eat. Repeat.

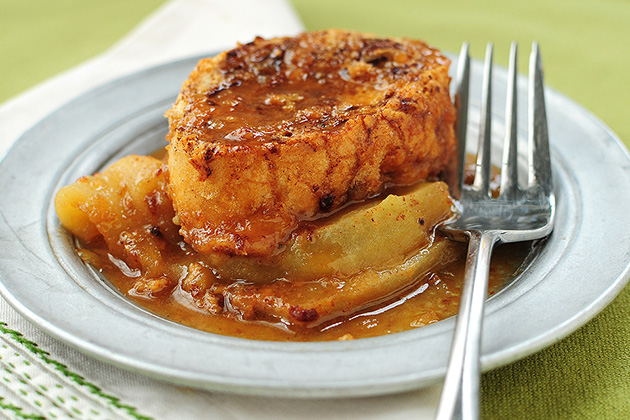
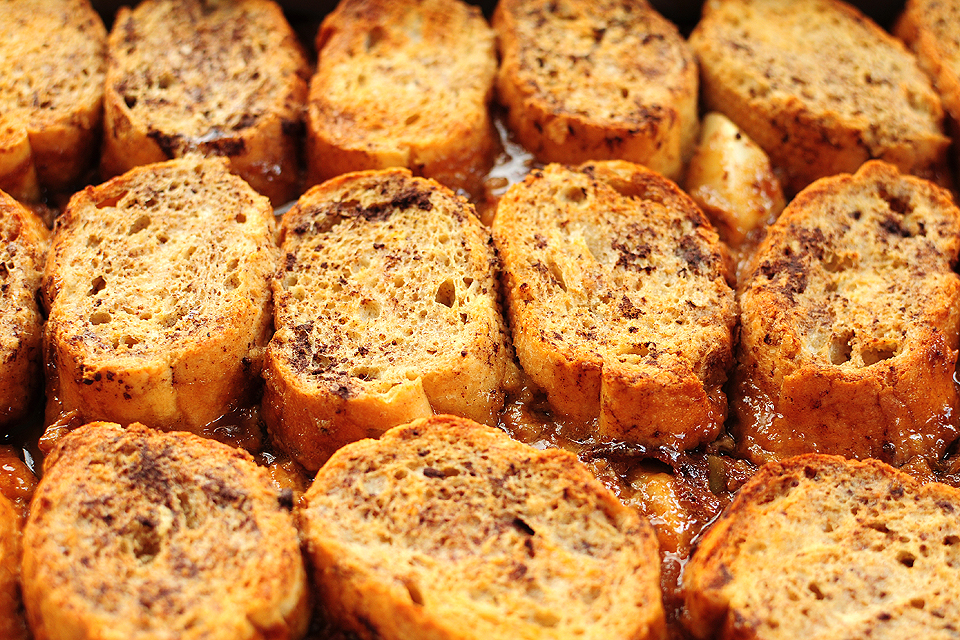
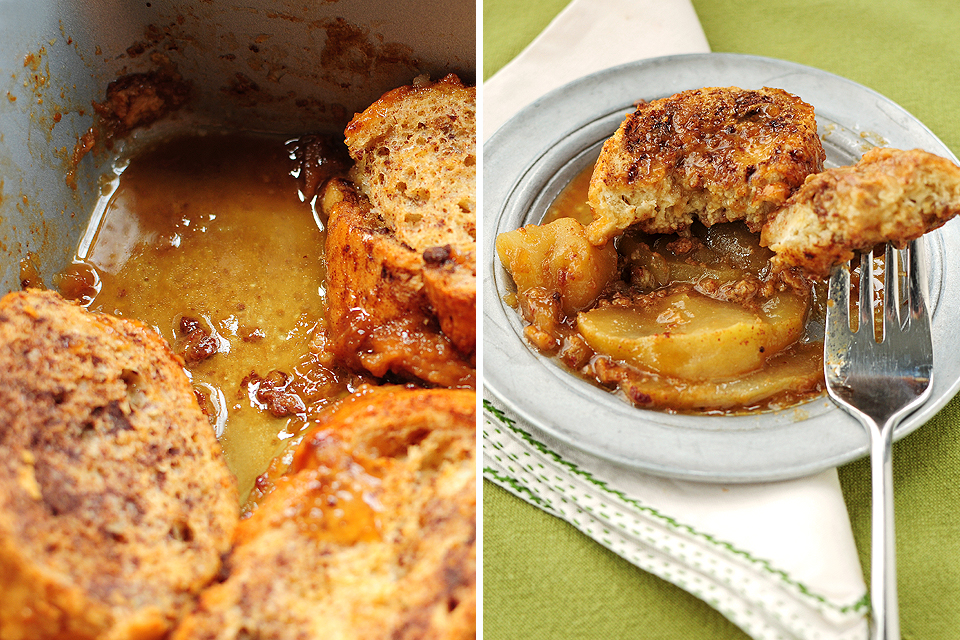
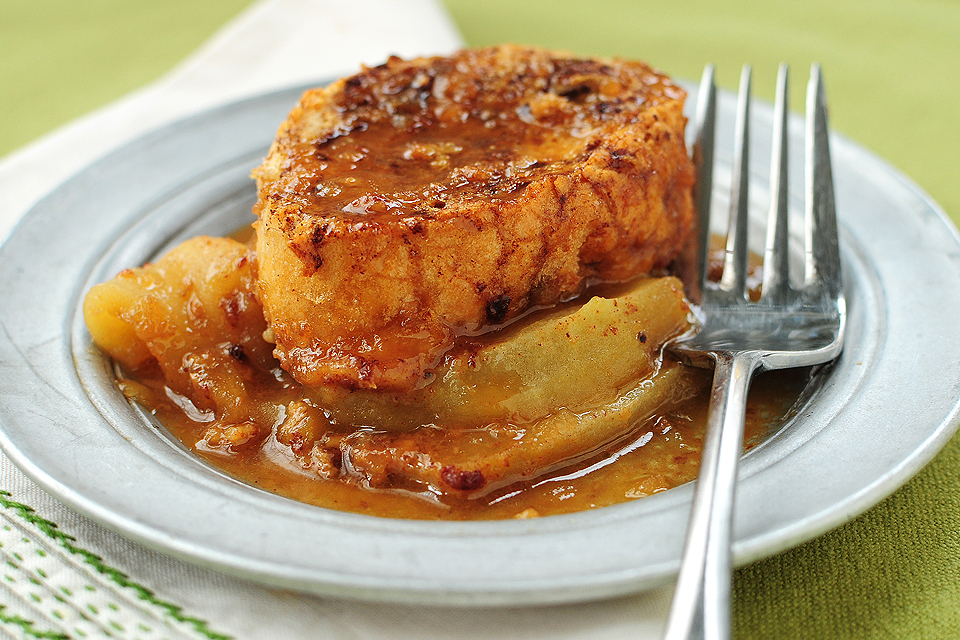
Bake it up! It turns a lovely golden brown, with a crusty top, and an ooey, gooey, sweet bottom.


Tasty Kitchen Blog: Apple Bourbon French Toast Casserole. Guest post by Amy Johnson of She Wears Many Hats, recipe submitted by TK member Courtney of Bake. Eat. Repeat.

Look at the delicious goodness at the bottom. YUM! What better way to start—or end—the day. The perfect bressert, I’d say.


Tasty Kitchen Blog: Apple Bourbon French Toast Casserole. Guest post by Amy Johnson of She Wears Many Hats, recipe submitted by TK member Courtney of Bake. Eat. Repeat.

A big thanks to Courtney for submitting this recipe. It’s going in my bressert file for ever and ever. Which pretty much is in keeping with the name of Courtney’s blog: Bake. Eat. Repeat.


Printable Recipe

Apple Bourbon French Toast Casserole

See post on Courtney’s site!
4.75 Mitt(s) 4 Rating(s)4 votes, average: 4.75 out of 54 votes, average: 4.75 out of 54 votes, average: 4.75 out of 54 votes, average: 4.75 out of 54 votes, average: 4.75 out of 5

Prep Time:

Cook Time:

Difficulty: Easy

Servings: 6

6
x

Print Options

Page size Letter 3x5 4x6
Text Size Small Medium Large
Content Include description
Include prep time, etc.
Show image

Description

Bourbon caramel coated apples and cinnamon spiked French toast make for a quick and decadent make-ahead breakfast!

Ingredients

  • ½ cups Butter
  • 1 cup Brown Sugar
  • 2 Tablespoons Bourbon
  • 3  Large Baking Apples, Cored, Peeled, And Sliced
  • 6 slices Day Old Bread, Sliced Thick
  • 4  Eggs
  • 1 cup Milk
  • 1 Tablespoon Vanilla Extract
  • 1-½ teaspoon Cinnamon
  • 1 dash Nutmeg

Preparation Instructions

1. In a small pan melt butter and sugar together. Whisk to combine. Cook until slightly thickened. Add bourbon and whisk again. Continue to cook for about 1 minute.
2. Pour butter mixture into a 9″ x13″ pan. Arrange sliced apples on top.
3. Arrange slices of bread on top of apples.
4. In a large bowl, beat together eggs, milk, vanilla, cinnamon, and nutmeg. Pour mixture over bread.
5. Cover dish and refrigerate overnight (see note below). In the morning, place casserole dish in the oven. Heat to 350ºF. Bake for 45 minutes to 1 hour, or until apple slices have softened and bread is golden brown.

Note: If you are preparing the casserole the morning you are serving it, dip bread slices in egg mixture before putting them in the pan. Pour remaining egg mixture over the top of bread slices. Bake at 350ºF for 40-45 minutes.


_______________________________________

Amy Johnson is a blogger who writes about food, travel, the home (both inside and out), and various observations and random musings about anything and everything. Visit her blog She Wears Many Hats for a dose of deliciousness, practicality, hilarity, or just plain fun. She lives in South Carolina with her husband and two children.


Profile photo of twopeasandtheirpod

Chocolate Chip Cookie Bars with a Salty Pretzel Crust

Posted by in Baking, Step-by-Step Recipes

  When it comes to snacking, I am usually a sweet kind of gal, but once in awhile I do get a mad craving for something salty. There are also times when I crave both, it just depends on the day and my mood. Laurie (Tasty Kitchen user and fellow blog contributor Simply Scratch) created […]

Profile photo of georgiapellegrini

Homemade Almond Milk

Posted by in Step-by-Step Recipes

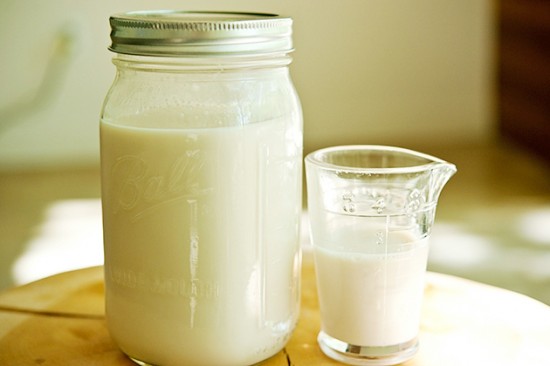
  One thing that is pretty much always in my refrigerator is almond milk. I love the nuttiness of the plain and vanilla flavors. And the chocolate almond milk? There’s just nothing like it in a tall glass of iced coffee. And even though I love making many things from scratch, it just never occurred […]

Profile photo of whatsgabycooking

Coconut Granola

Posted by in Step-by-Step Recipes

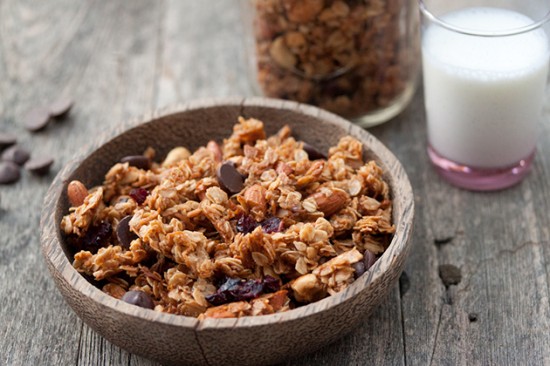
  I’m the kind of person who really likes to snack. I’m talking about a handful of something fabulous every 30 minutes or so. I keep telling myself it’s because I get grumpy if I don’t eat, but really, I just like snacking. There’s nothing wrong with that right? Granola is one of those snacks […]

Profile photo of georgiapellegrini

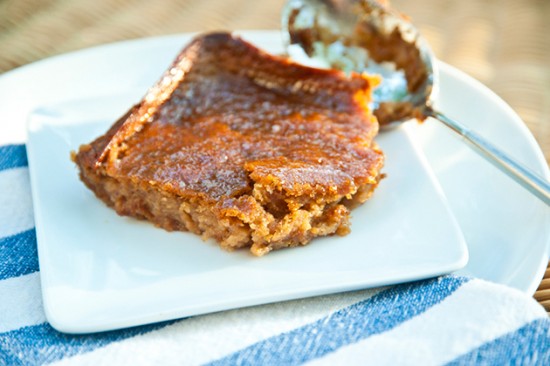
Nonnie’s Persimmon Pudding

Posted by in Step-by-Step Recipes

  There is something so comforting about recipes made by grandmothers. Why do we like them so much? I think for me it is the nostalgia that comes with a recipe from her but also those good kitchen smells and the fact that no matter how hard I try, it never comes out quite like […]