The Pioneer Woman Tasty Kitchen
Profile photo of Erika (TK)

Kitchen Talk: Homemade Ingredients

Posted by in Kitchen Talk

Tasty Kitchen Blog: Kitchen Talk (Homemade Ingredients)

We love Homemade Ingredients here at Tasty Kitchen. Love. Not only because you have full control over what goes into your food but also because the flavors you get blow store-bought versions out the water. Plus there’s the street cred. Oh, the street cred.

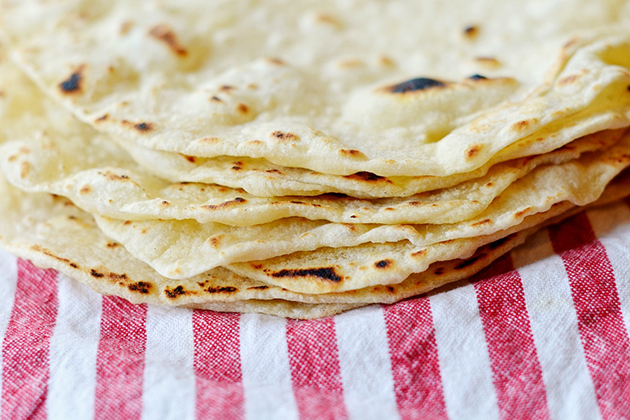
We’ve had a few favorites here at the TK Blog. Like the homemade tortillas you see above. Or refried beans to go with those tortillas. Or impress everyone with homemade ricotta. Be prepared for the double takes and Elaine Benes-esqe “Shut up!” shoves when you tell them you make your own anything.

Homemade creations also gives us reason to buy more Mason jars. Because you really can never have too many Mason jars.

We’re always on the lookout for more ways to make stuff at home, so this is where you come in! Tell us:

What ingredients do you like to make at home?

I like making the basic condiments at home. I have a shelf of homemade mayo, mustard, ketchup, barbecue sauce, and hot sauce in my fridge. When friends see that, they first blink in disbelief and then they swoon. I think they do it to humor me, but I’ll take what I can get. I’ve also been making my own Greek yogurt for years now and wish I did it more often.

How about you? Do you make some on a fairly regular basis? Or less than you wish you could? Or maybe you’re looking for a homemade version of a favorite item. Whatever it is, let us know!


Profile photo of Megan {Country Cleaver}

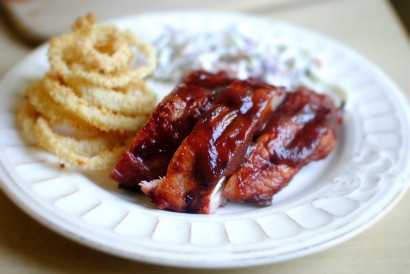
Honey Whiskey Barbecue Sauce

Posted by in Step-by-Step Recipes

Tasty Kitchen Blog: Honey Whiskey Barbecue Sauce. Guest post by Megan Keno of Wanna Be a Country Cleaver, recipe submitted by TK member Laurie of Simply Scratch.

Making things from scratch is so satisfying. The flavors are intense, the combinations are endless, and you get to say, “Yeah, I made that,” when your dinner guests’ eyes are rolling back into their heads because you just knocked their socks off. Laurie from Simply Scratch, a Tasty Kitchen member and fellow TK Blog contributor, knows from-scratch cooking. And her homemade Honey Whiskey Barbecue Sauce is one of those recipes that made my eyes roll into the back of my head. It’s true.


Tasty Kitchen Blog: Honey Whiskey Barbecue Sauce. Guest post by Megan Keno of Wanna Be a Country Cleaver, recipe submitted by TK member Laurie of Simply Scratch.

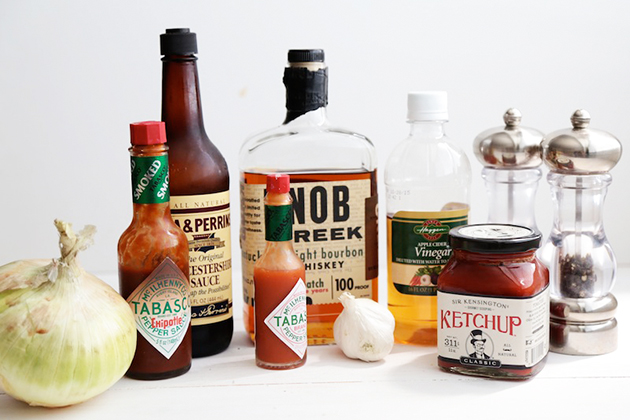
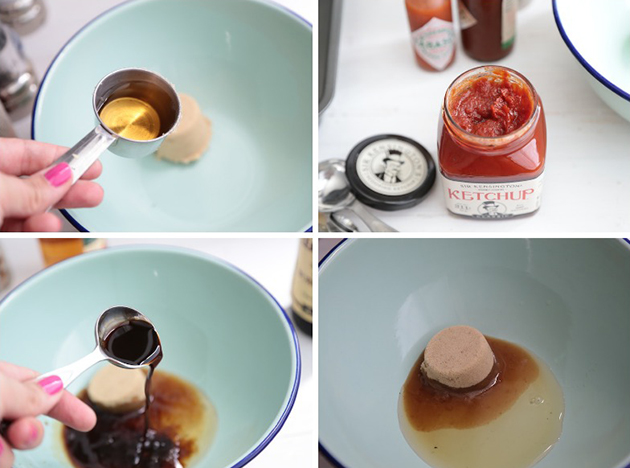
Line up all your ingredients. One of the best things about making food from scratch is that you can choose exactly which ingredients you want to use. One key thing that I chose to do was use a high-quality ketchup. It also had a monocled man named Sir Kensington on it, so I had to use it.


Tasty Kitchen Blog: Honey Whiskey Barbecue Sauce. Guest post by Megan Keno of Wanna Be a Country Cleaver, recipe submitted by TK member Laurie of Simply Scratch.

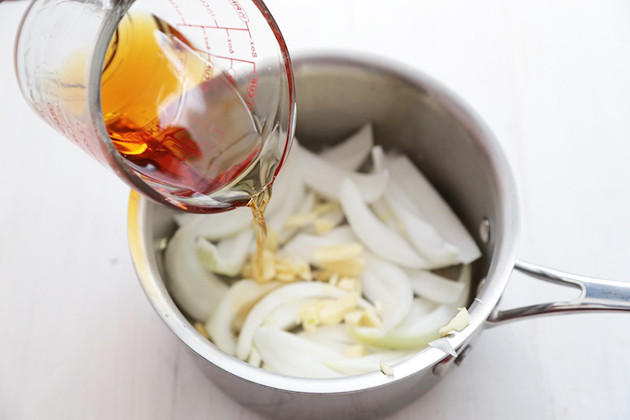
Into your sauce pan, add in sliced onion, garlic and pour the whiskey over the top. Bring it to a boil and simmer until the garlic and onions have softened, about ten minutes.


Tasty Kitchen Blog: Honey Whiskey Barbecue Sauce. Guest post by Megan Keno of Wanna Be a Country Cleaver, recipe submitted by TK member Laurie of Simply Scratch.

In a bowl, whisk together ketchup, Worcestershire sauce, sugar and cider vinegar.


Tasty Kitchen Blog: Honey Whiskey Barbecue Sauce. Guest post by Megan Keno of Wanna Be a Country Cleaver, recipe submitted by TK member Laurie of Simply Scratch.

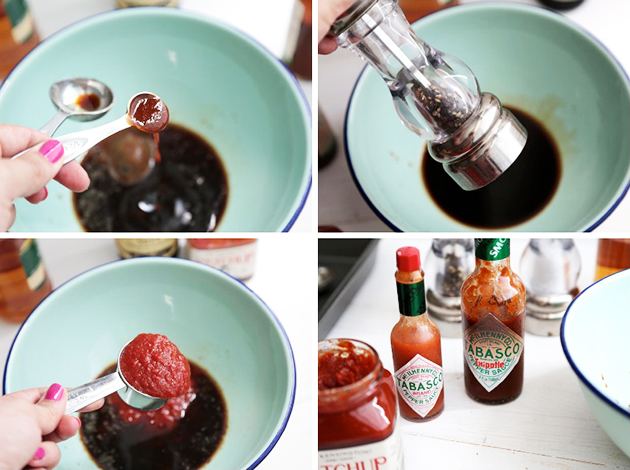
Laurie recommended Frank’s Red Hot, and I had Tabasco. Really, any hot sauce will do, so use what your tastebuds want! Finish the sauce by adding in the ketchup, salt and pepper.


Tasty Kitchen Blog: Honey Whiskey Barbecue Sauce. Guest post by Megan Keno of Wanna Be a Country Cleaver, recipe submitted by TK member Laurie of Simply Scratch.

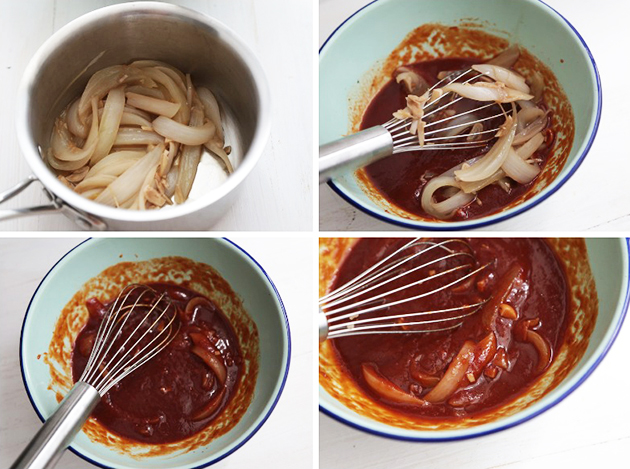
Now, add in those whiskey onions and garlic and mix them in. Pour them all back into the sauce pan and place back on the stove to simmer for 20 minutes.


Tasty Kitchen Blog: Honey Whiskey Barbecue Sauce. Guest post by Megan Keno of Wanna Be a Country Cleaver, recipe submitted by TK member Laurie of Simply Scratch.

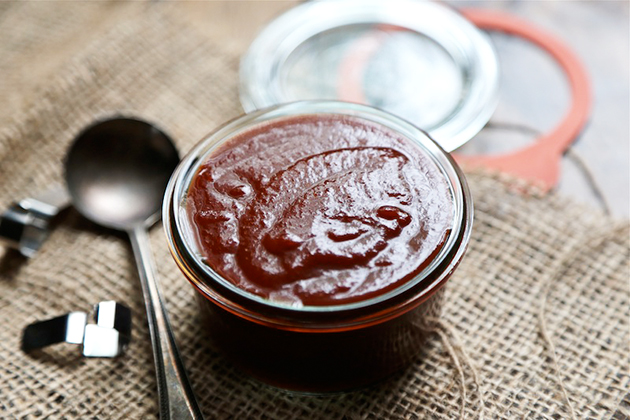
Once the sauce is simmered, pour it through a mesh strainer to remove the onions. Pour the sauce into a jar and cool. Or use it right away!

Thank you to Laurie for this addicting recipe! Be sure to check out her TK recipe box for other inspired from-scratch recipes. And visit her site Simply Scratch, where you’ll discover lots of genius recipes, like this whole list of homemade ingredients and condiments. I better get back to cooking up some of these gems.

How about you? What’s your favorite grilling must-have? Are you a sauce lover or a dry rub aficionado? Share your best grilling tips in the comments!


Printable Recipe

Honey-Whiskey Barbecue Sauce

See post on Laurie - Simply Scratch’s site!
5.00 Mitt(s) 2 Rating(s)2 votes, average: 5.00 out of 52 votes, average: 5.00 out of 52 votes, average: 5.00 out of 52 votes, average: 5.00 out of 52 votes, average: 5.00 out of 5

Prep Time:

Cook Time:

Difficulty: Easy

Servings: 1

1
x

Print Options

Page size Letter 3x5 4x6
Text Size Small Medium Large
Content Include description
Include prep time, etc.
Show image

Description

Slather it on your wings, ribs or really anything that calls for barbecue sauce. Amen.

Ingredients

  • ½ whole Sweet Onion, Sliced Vertically Into Strips
  • 4 cloves Fresh Garlic, Smashed And Peeled
  • ¾ cups Honey Whiskey Or Bourbon
  • 2 cups Homemade Ketchup (see My Recipe Box)
  • ⅓ cups Cider Vinegar
  • ¼ cups Worcestershire Sauce
  • ½ cups Dark Brown Sugar
  • 1 teaspoon Frank's Red Hot, Or Your Favorite Hot Sauce
  • ½ teaspoons Kosher Salt, Or More To Taste
  • ½ teaspoons Black Pepper, Or More To Taste

Preparation Instructions

In a sauce pan, add the sliced onions, smashed garlic and whiskey. Bring to a boil then reduce to a simmer and cook until the onions and garlic have softened, about 10 minutes.

Meanwhile combine the homemade ketchup (see my recipe box), vinegar, Worcestershire, brown sugar, hot sauce, salt and pepper. Stir well until all is combined.

Once the onions and garlic are softened, add the ketchup mixture. Stir and simmer for 20 minutes.

Pour the barbecue sauce into a mesh strainer that is set inside a large bowl. Remove and discard the garlic and onion pieces.

Use right away in any recipe calling for barbecue sauce or cool and store in an airtight jar for up to 2 weeks.


_______________________________________

Megan Keno is the writer and photographer of Country Cleaver, a food blog fueled by Nutella and images of June Cleaver—if June wore cowboy boots and flannel, that is. A self-proclaimed country bum, Megan creates from-scratch recipes that range from simple to sublime and how-to’s to build your cooking repertoire. But she couldn’t do it without the help of her trusty—and furry—sous chef, Huckleberry. He’s a world class floor cleaner.


Profile photo of Erika (TK)

Let’s Talk Chinese Takeout

Posted by in Step-by-Step Recipes

Tasty Kitchen Blog: Kitchen Talk (Chinese Takeout Favorites)

Tasty Kitchen Blog: General Tso’s Chicken Tasty Kitchen Blog: Chinese Orange Chicken Tasty Kitchen Blog: Simple Wonton Soup Tasty Kitchen Blog: Kung Pao Chicken Tasty Kitchen Blog: Hong Kong Egg Tarts

 
Natalie’s brilliant post on Sarah’s recipe for Singapore Mei Fun the other day got me thinking about homemade versions of Chinese takeout favorites. There are quite a few that we always get every time that craving hits, and I’m glad it doesn’t hit more often than it already does because I’d be in big trouble.

Homemade versions are usually a bit healthier, plus there’s the satisfaction of having made it yourself. And I get my share of cool points when my son’s friends come over for a meal.

So let’s talk Chinese takeout favorites! Tell us:

What’s your favorite Chinese takeout dish that you wish—or already can—make at home?

My absolute favorite is salt and pepper squid, and if someone shares a recipe for that, I will love you forever. I have many other favorites too, especially when we throw dim sum into the mix, but I’ll save that for another day.

Our contributors here in the Tasty Kitchen Blog seem to love Chinese takeout too, because we’ve had quite a few featured here before, as you can see from the photos above. Just click on any image and it will take you to the guest post. Feel free to get lost in there; I know I did.

Okay, now it’s your turn! What’s your favorite? Is it a noodle dish? Egg Foo Young? Fried rice? Those sweet and sticky ribs? Crab rangoons? General Tso’s Chicken? (Poor general. Everyone wants his chicken.) Share your favorite below, and as always, feel free to include a recipe if you have it!


Profile photo of Natalie | Perry's Plate

Singapore Noodles (Singapore Mei Fun)

Posted by in Step-by-Step Recipes

Tasty Kitchen Blog: Singapore Noodles (Singapore Mei Fun). Guest post by Natalie Perry of Perry's Plate, recipe submitted by TK member Sarah of The Woks of Life.

As much as I love eating out, I can’t help but mentally calculate the meal I could have prepared at home for the cost of the meal in the restaurant. That meal in my head is usually much larger and consists of higher quality food. Often it ends up tasting better and costing less. Plus, it’s almost always healthier when made at home.

That being said, I don’t miss having someone else do the work and clean up the mess when it’s all over. I suppose that’s what we pay for when we eat out. Not having a toddler clinging to my legs is sometimes worth the extra cost.

Having small children definitely helps with the temptation to eat out frequently. So does finding popular restaurant or take out recipes to prepare at home. Enter: Singapore Noodles (Singapore Mei Fun) from Tasty Kitchen member Sarah

You’ll be glad you stayed home for this. I promise.

Let’s get started!
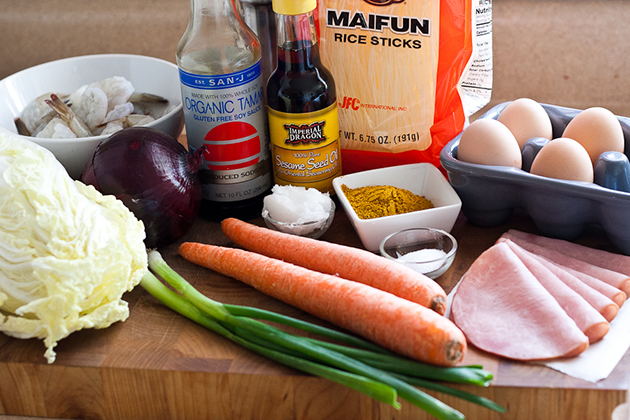


Tasty Kitchen Blog: Singapore Noodles (Singapore Mei Fun). Guest post by Natalie Perry of Perry's Plate, recipe submitted by TK member Sarah of The Woks of Life.

First you’ll need a bunch of stuff. Nothing too hard to find, though. You’ll need medium uncooked shrimp (peeled, tail-on), Napa cabbage, a red onion, soy sauce (or tamari), sesame seed oil, rice noodles (I used Maifun rice sticks), coconut oil (or any other heat-safe oil), curry powder, eggs, salt, carrots, and green onions. The recipe also calls for Chinese sausage. I don’t recall ever seeing Chinese sausage in a store in Northern Nevada and taking small children on a hunt around town is about as fun as taking them to a nice restaurant. So, I used smoked deli ham like Sarah suggested. 
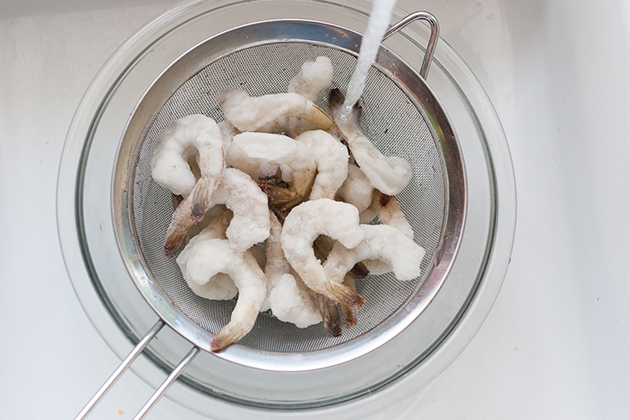


Tasty Kitchen Blog: Singapore Noodles (Singapore Mei Fun). Guest post by Natalie Perry of Perry's Plate, recipe submitted by TK member Sarah of The Woks of Life.

If your shrimp is frozen (like mine was), put them in a sieve and run tepid water over them for a minute or so until they soften. I left mine sitting in the sink for several minutes while I gathered the rest of the ingredients. 
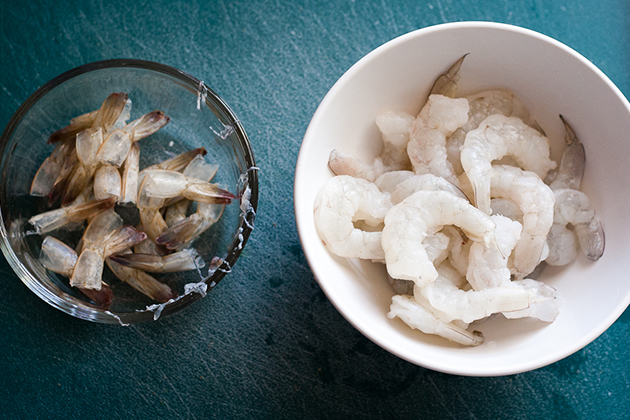


Tasty Kitchen Blog: Singapore Noodles (Singapore Mei Fun). Guest post by Natalie Perry of Perry's Plate, recipe submitted by TK member Sarah of The Woks of Life.

Once the shrimp is fully thawed, pull the tails off. Then, run the tip of your knife along the inside curve of each shrimp to remove the intestinal tract. (Yep, that’s what that is. Gross, huh?) This really doesn’t take long. 
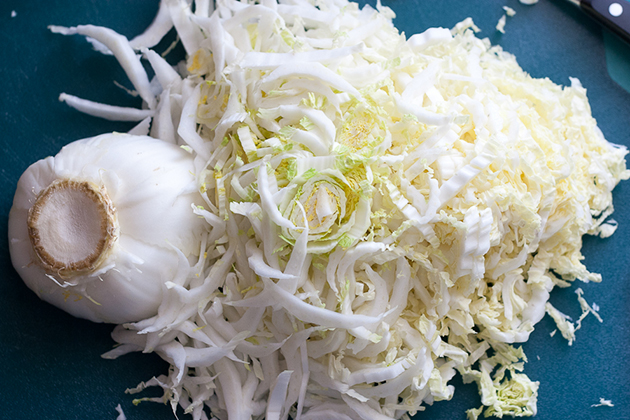


Tasty Kitchen Blog: Singapore Noodles (Singapore Mei Fun). Guest post by Natalie Perry of Perry's Plate, recipe submitted by TK member Sarah of The Woks of Life.

Now we start prepping the vegetables. This recipe is rather heavy on the chopping, but the cooking time is super quick and easy. It all balances out!

Slice the Napa cabbage into skinny ribbons.


Tasty Kitchen Blog: Singapore Noodles (Singapore Mei Fun). Guest post by Natalie Perry of Perry's Plate, recipe submitted by TK member Sarah of The Woks of Life.

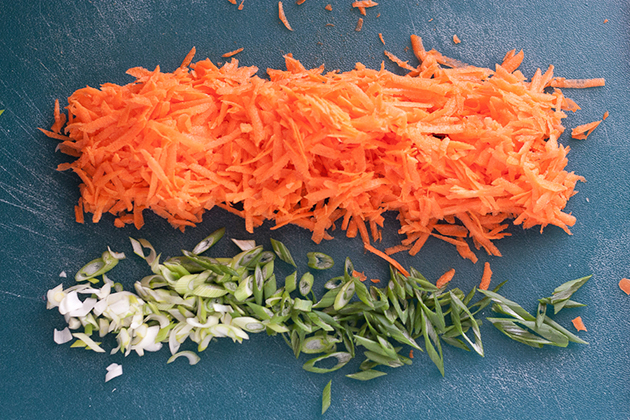
Shred the carrots and slice the green onions thinly.


Tasty Kitchen Blog: Singapore Noodles (Singapore Mei Fun). Guest post by Natalie Perry of Perry's Plate, recipe submitted by TK member Sarah of The Woks of Life.

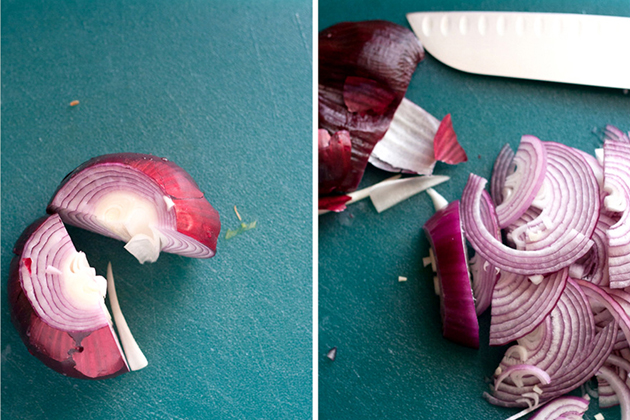
Trim, peel, and slice the red onion. 


Tasty Kitchen Blog: Singapore Noodles (Singapore Mei Fun). Guest post by Natalie Perry of Perry's Plate, recipe submitted by TK member Sarah of The Woks of Life.

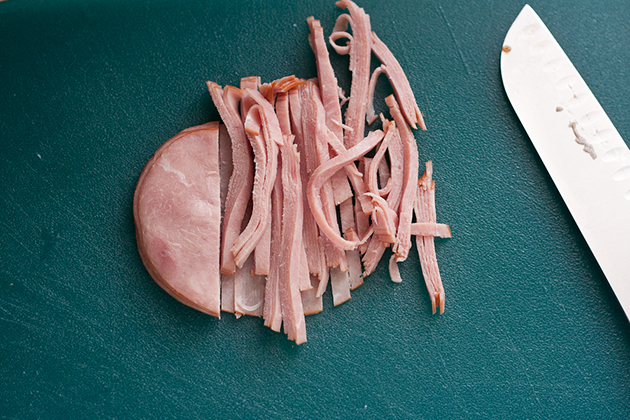
Slice up that deli ham, too. 

Chopping is over! We survived!


Tasty Kitchen Blog: Singapore Noodles (Singapore Mei Fun). Guest post by Natalie Perry of Perry's Plate, recipe submitted by TK member Sarah of The Woks of Life.

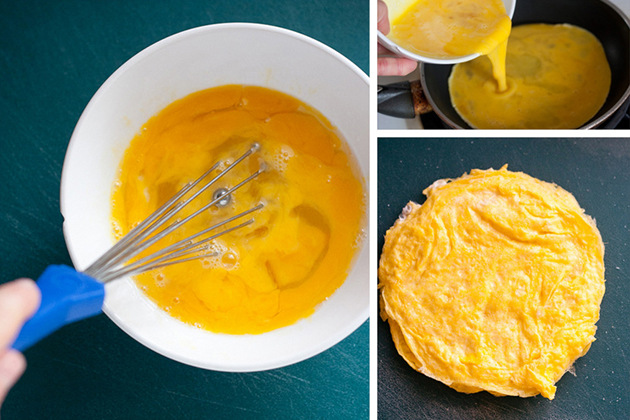
Now crack the eggs into a bowl and give them a good whisk. Pour them into a small nonstick skillet, and cook until eggs are done, flipping halfway through. You want to make an omelet-like form instead of a scramble, so don’t move them around while they cook. 

Transfer them to a cutting board and … oh. I guess we do have a little chopping left. But it’s super quick. Cut the eggs into ribbons.


Tasty Kitchen Blog: Singapore Noodles (Singapore Mei Fun). Guest post by Natalie Perry of Perry's Plate, recipe submitted by TK member Sarah of The Woks of Life.

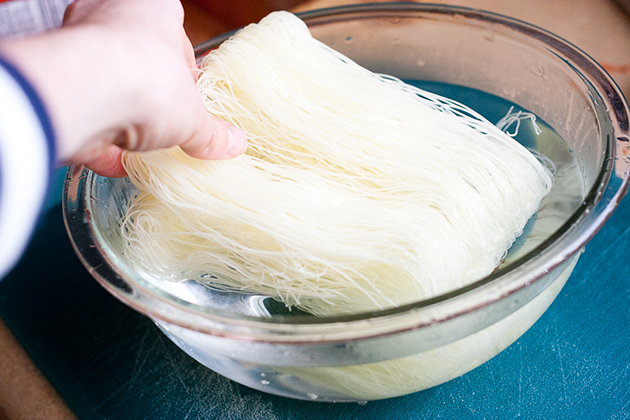
Place the rice noodles in a bowl of hot water. Let them sit for 5 minutes or until they become pliable but still too crunchy to eat. If you leave them in too long, they’ll turn to mush when you cook them. 


Tasty Kitchen Blog: Singapore Noodles (Singapore Mei Fun). Guest post by Natalie Perry of Perry's Plate, recipe submitted by TK member Sarah of The Woks of Life.

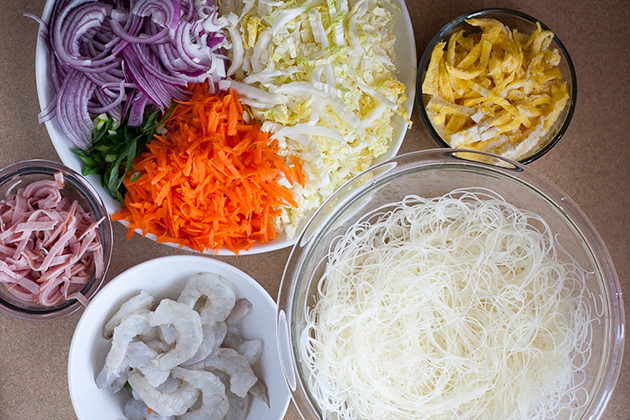
Alrighty. We’ve got our ingredients prepped and ready to go. You could actually do this the night before and keep them refrigerated until you need them. That would be handy on a busy night and you’d have dinner on the table in less than 15 minutes.

Your family will think you’re a rockstar. 


Tasty Kitchen Blog: Singapore Noodles (Singapore Mei Fun). Guest post by Natalie Perry of Perry's Plate, recipe submitted by TK member Sarah of The Woks of Life.

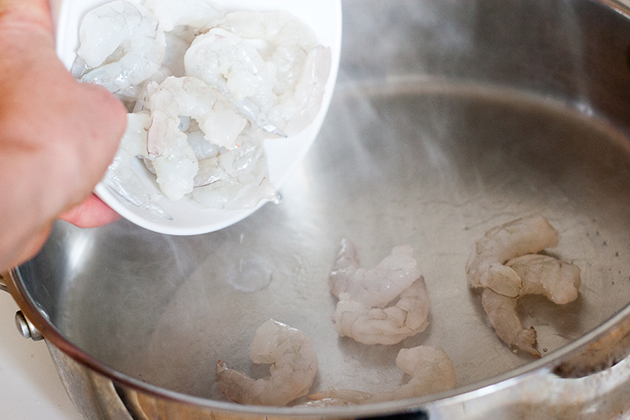
Grab your wok. Or large saute pan with high sides. Or some kind of deep skillet to keep everything in.

Bring the coconut oil to medium-high heat, then add the shrimp.


Tasty Kitchen Blog: Singapore Noodles (Singapore Mei Fun). Guest post by Natalie Perry of Perry's Plate, recipe submitted by TK member Sarah of The Woks of Life.

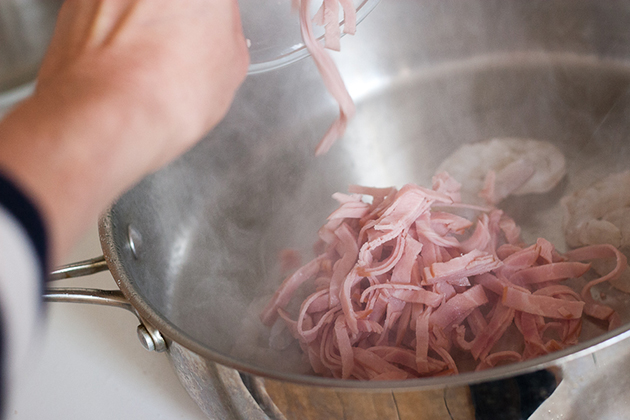
Add the ham. Stir them around and keep things moving as you add the other ingredients.


Tasty Kitchen Blog: Singapore Noodles (Singapore Mei Fun). Guest post by Natalie Perry of Perry's Plate, recipe submitted by TK member Sarah of The Woks of Life.

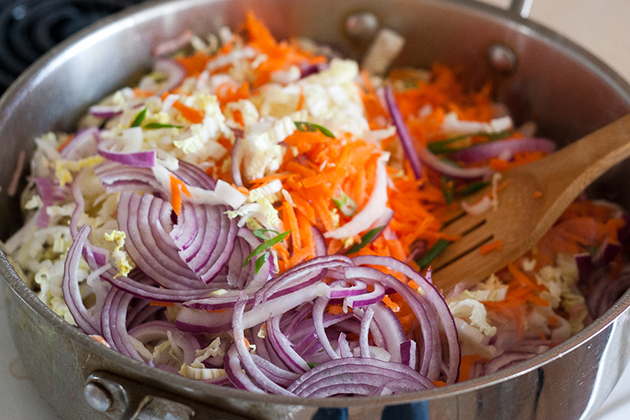
Now throw in the cabbage, red onion, and shredded carrots. 

I have to tell you. Trying to photograph a stir-fry step-by-step is an adventure. Seriously. Tossing vegetables into a screaming hot skillet and keeping them from burning while trying to get decent sort-of-in-focus photos through all the steam is wild. I like to live on the edge. 


Tasty Kitchen Blog: Singapore Noodles (Singapore Mei Fun). Guest post by Natalie Perry of Perry's Plate, recipe submitted by TK member Sarah of The Woks of Life.

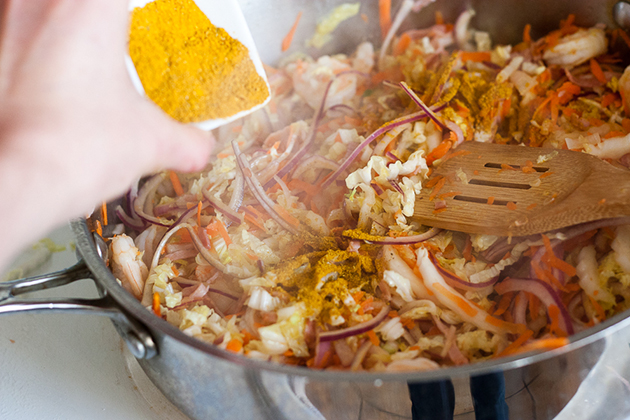
Once you get it all mixed together, add the curry. And stir again. 

There’s a reason why this is a stir-fry. 


Tasty Kitchen Blog: Singapore Noodles (Singapore Mei Fun). Guest post by Natalie Perry of Perry's Plate, recipe submitted by TK member Sarah of The Woks of Life.

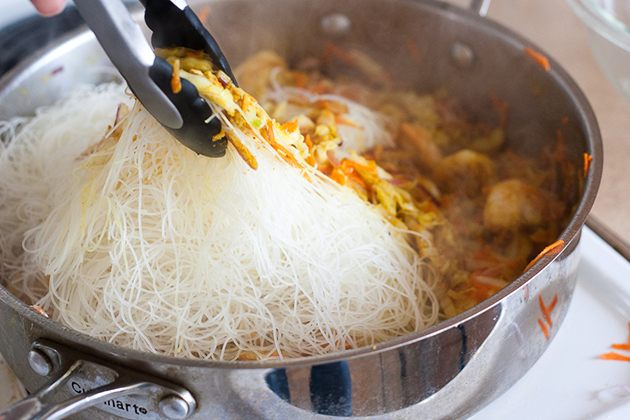
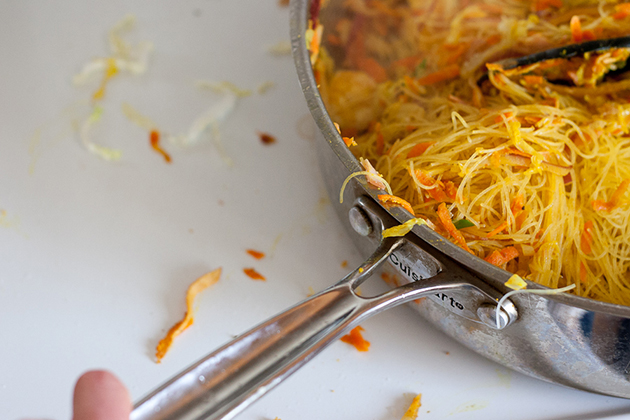
Add the rice noodles, breaking them apart as you put them in. Using your tongs, try to combine the rice noodles with the rest of the contents of the pan. 


Tasty Kitchen Blog: Singapore Noodles (Singapore Mei Fun). Guest post by Natalie Perry of Perry's Plate, recipe submitted by TK member Sarah of The Woks of Life.

If you spill, I won’t judge.


Tasty Kitchen Blog: Singapore Noodles (Singapore Mei Fun). Guest post by Natalie Perry of Perry's Plate, recipe submitted by TK member Sarah of The Woks of Life.

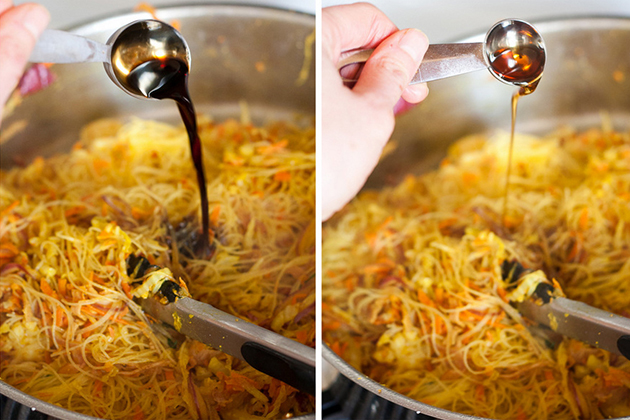
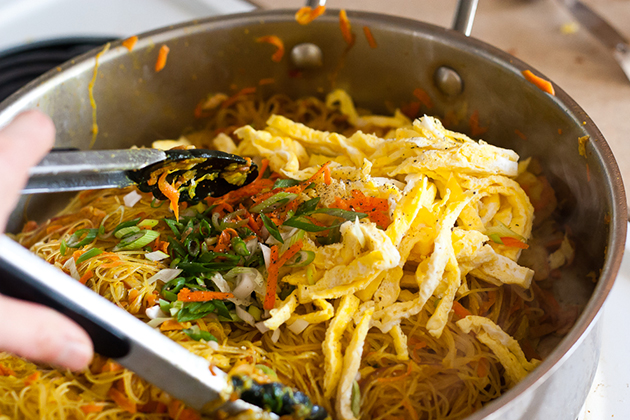
We’re almost to the finish line! Add the soy sauce and sesame oil.


Tasty Kitchen Blog: Singapore Noodles (Singapore Mei Fun). Guest post by Natalie Perry of Perry's Plate, recipe submitted by TK member Sarah of The Woks of Life.

Add the green onions, salt, pepper, and egg ribbons. Stir those in gently. 


Tasty Kitchen Blog: Singapore Noodles (Singapore Mei Fun). Guest post by Natalie Perry of Perry's Plate, recipe submitted by TK member Sarah of The Woks of Life.

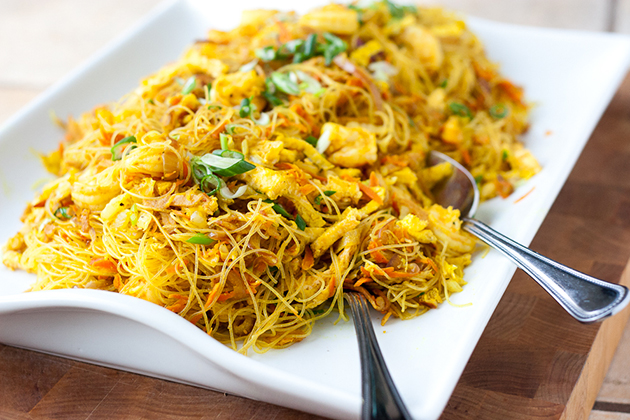
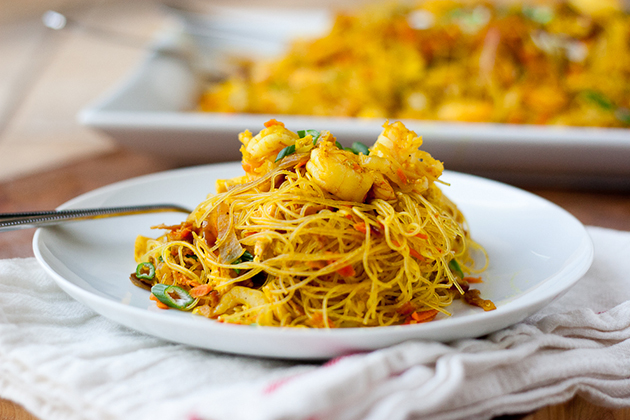
Dump it all onto a platter and serve it up!

I have to say, this exceeded my expectations. I ADORE this meal. It was fun to make, and I love the bright colors from the spices and vegetables. It’s also light, but filling. You could even replace some noodles with more vegetables to add more of those vitamin things. If you don’t like shrimp, thinly sliced chicken or beef would also be good.


Tasty Kitchen Blog: Singapore Noodles (Singapore Mei Fun). Guest post by Natalie Perry of Perry's Plate, recipe submitted by TK member Sarah of The Woks of Life.

Thank you, Sarah, for giving me another reason to make a meal at home! 

Be sure to visit Sarah’s TK recipe box and her blog, The Woks of Life (I love that name) for more Chinese recipes!
 
Notes:
1. This recipe called for dried chiles which I initially omitted because my kids freak out when food has the slightest amount of heat. However, I added them anyway at the last minute, and I’m glad I did! Three peppers gave it just the right amount of tingle.
2. I doubled this recipe to feed our family of five and ended up with a lot of food. Enough for 6 adult servings. 


Printable Recipe

Singapore Noodles (Singapore Mei Fun)

See post on Sarah @ The Woks of Life’s site!
5.00 Mitt(s) 2 Rating(s)2 votes, average: 5.00 out of 52 votes, average: 5.00 out of 52 votes, average: 5.00 out of 52 votes, average: 5.00 out of 52 votes, average: 5.00 out of 5

Prep Time:

Cook Time:

Difficulty: Easy

Servings: 2

2
x

Print Options

Page size Letter 3x5 4x6
Text Size Small Medium Large
Content Include description
Include prep time, etc.
Show image

Description

You’ll find it on every takeout menu in America but it’s actually really easy to make at home! Try my dad’s authentic recipe.

Ingredients

  • 12 whole Shrimps, Peeled, Deveined, And Butterflied
  • 2 cups Soaked Rice Noodles
  • 2 whole Eggs (optional)
  • 3 cups Shredded Napa Cabbage
  • 1 whole Carrot
  • 1 whole Scallion
  • ½ whole Red Onion
  • 3 whole Dried Red Chiles (optional)
  • ⅓ cups Thinly Sliced Roast Pork, Ham, Or Chinese Sausage
  • 1 Tablespoon Oil
  • 1-½ Tablespoon Curry Powder
  • 2 teaspoons Salt
  • 1 Tablespoon Shaoxing Wine
  • ½ teaspoons Sesame Oil
  • ½ Tablespoons Soy Sauce
  • ¼ teaspoons White Pepper

Preparation Instructions

Rinse the shrimp and pat dry. Soak the rice noodles in cold water for 20 minutes. Drain the noodles just before you’re ready cook.

If you decide to use eggs in this, beat them in a bowl and make a thin omelet by cooking eggs in a hot oiled wok or nonstick skillet. Transfer to the cutting board and cut the omelet into thin strips about 2 to 3 inches long and set aside. Julienne the napa cabbage, carrot, and scallion. Thinly slice the red onion and set aside along with the dried chili peppers. Cut the Chinese sausage (or ham or pork) into thin pieces similar to the size of the carrots.

Heat the wok on the highest setting and add oil, sausage and shrimp and stir-fry for about 10 seconds. Add the dried chili peppers, carrot, napa cabbage and onion and stir-fry for about 30 seconds and then sprinkle the curry powder evenly over the mixture.

Add the rice noodles and while doing so, make sure you rip them into manageable 7- to 8-inch lengths for easy eating later. Add the salt and wine and mix well (about 1 to 2 minutes), making sure you firmly scrape the bottom of the wok with your spatula to prevent the noodles from sticking. A hot wok is a must to prevent sticking but ensuring that you scrape the bottom of the wok as you mix is an important technique.

The noodles should be taking on the rich color of the curry powder. Add the sesame oil, soy sauce, white pepper, scallions and the cooked egg if you decided to include it. Mix thoroughly again for another minute, plate and serve immediately!


_______________________________________

Be sure to check out Natalie’s own beautiful food blog, Perrys’ Plate, where you can see her growing collection of lovely recipes. There’s always something new to see there. Go visit now!

Profile photo of Erika (TK)

Looks Delicious! S’mores Pretzel Hand Pies

Posted by in Looks Delicious!

It's Friday! Not just any Friday, too. It's the fifth and last Friday of August, the Friday before a long holiday weekend, and for many, the last Friday of their summer vacation. It's a Friday that needs something extra special, so enter chocolate and marshmallow creme and cream cheese and pretzel buns. As if we needed another reason to enjoy s'mores,

Profile photo of Erika (TK)

Share Your Breakfast Ideas

Posted by in Kitchen Talk

The first day of school is just around the corner, and some have already started (sorry!). Back in my school days, that meant my mornings were spent trying to linger in bed for as long as I could get away with, milking it for every last minute of sleep possible. Which, in turn, often meant rushing out the door without so much of a hint of breakfast. Not a crumb or…

Profile photo of Erica Lea

Pollo en Salsa al Horno (Roasted Chicken in Sauce)

Posted by in Step-by-Step Recipes

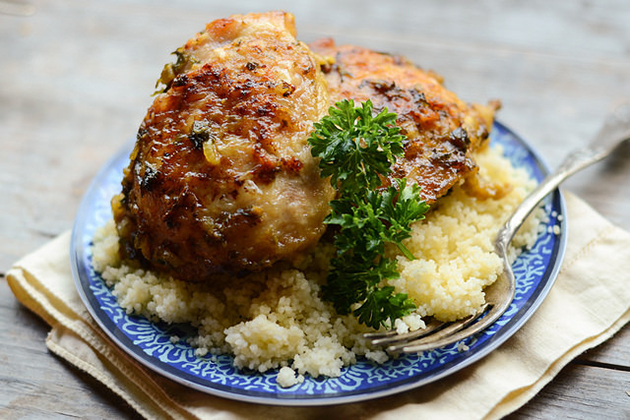
Today's recipe for Pollo en Salsa al Horno (Roasted Chicken in Sauce), brought to us by Tammy (aka San Pasqual's Kitchen here on Tasty Kitchen), was one of firsts for me. I can't remember…

Profile photo of Megan {Country Cleaver}

Cerveza-garitas for the Weekend!

Posted by in Step-by-Step Recipes

When you want a margarita, you want a margarita. And margaritas are best served with friends around! Have you seen cerveza-ritas on Mexican restaurant menus lately? I’m probably tardy to the party on this one, but after seeing them in every Mexican restaurant I’ve been to since college and then seeing TK Member