The Pioneer Woman Tasty Kitchen
Profile photo of georgiapellegrini

Turkey Swedish Meatballs

Posted by in Step-by-Step Recipes

Tasty Kitchen Blog: Turkey Swedish Meatballs. Guest post by Georgia Pellegrini, recipe submitted by TK member GottaFeedEmAll (panditsgirl).

 
I have fond memories of strolling a shopping cart around with my mother as a kid wandering through the living rooms of Ikea. It wasn’t that I loved Ikea per se, but I knew what was about to come just around the bend: the Ikea cafeteria. There, it was a Mecca for little Swedish meatballs slathered in gravy, and along with it often came a dollop of mashed potatoes and some lingonberry sauce of sorts. These little meatballs have always been in the back of my mind, one of those childhood food memories that seem to linger. This is why I was so exited to stumble upon many versions of this recipe here on Tasty Kitchen. This one, Turkey Swedish Meatballs by GottaFeedEmAll caught my eye in particular.


Tasty Kitchen Blog: Turkey Swedish Meatballs. Guest post by Georgia Pellegrini, recipe submitted by TK member GottaFeedEmAll (panditsgirl).

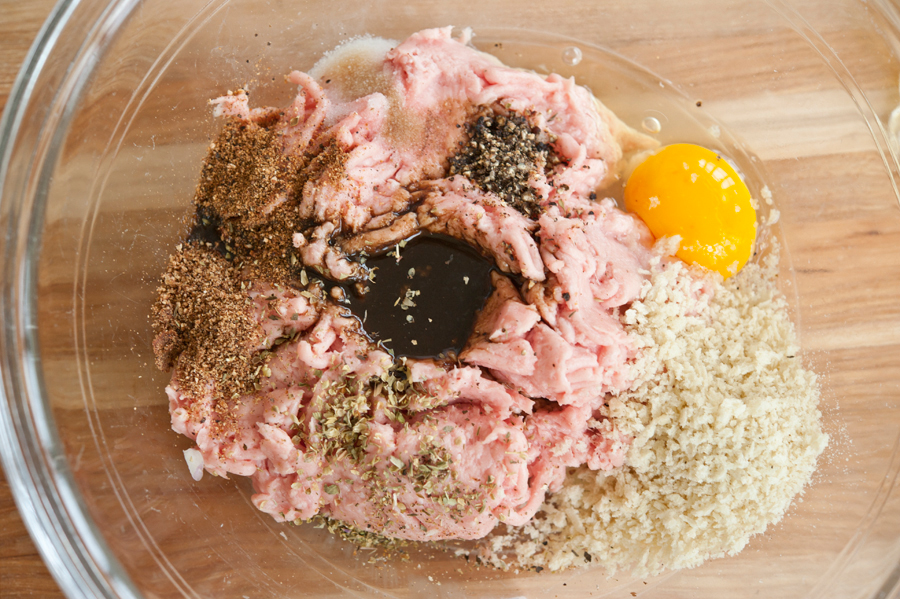
You begin by combining ground turkey with allspice, nutmeg, Worcestershire, salt, pepper, dried parsley, breadcrumbs and an egg.

I need to take a moment to give a shout out to one of my chickens for laying this egg. Isn’t it purty and bright? Good job girls!

Okay, where was I …


Tasty Kitchen Blog: Turkey Swedish Meatballs. Guest post by Georgia Pellegrini, recipe submitted by TK member GottaFeedEmAll (panditsgirl).

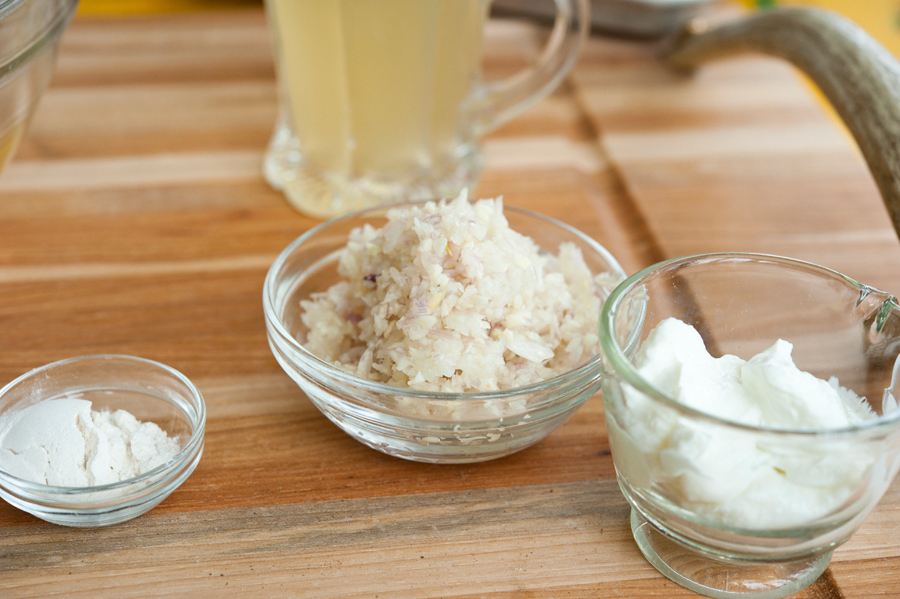
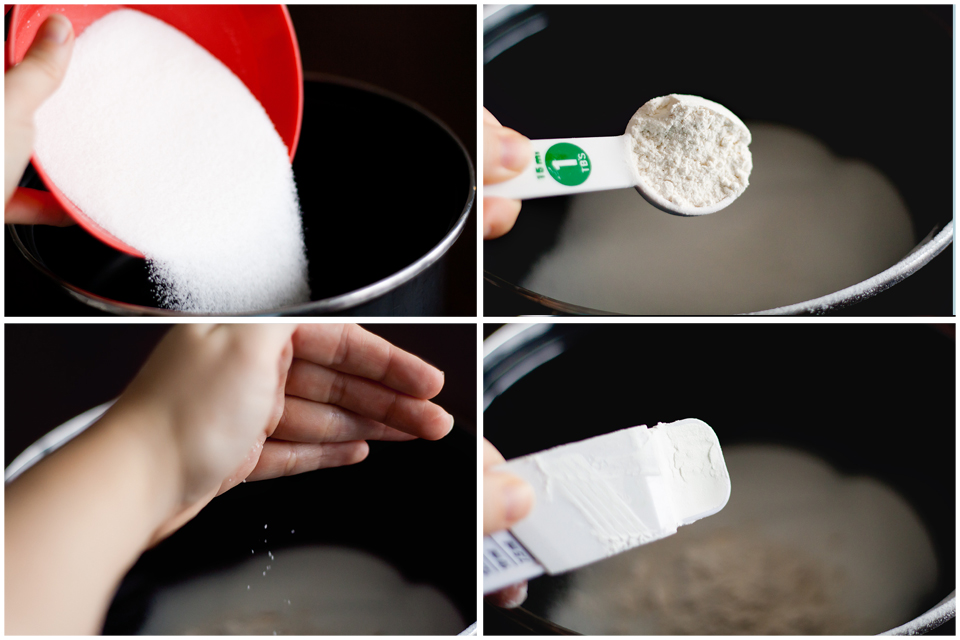
Separately, you’ll need finely diced onion and garlic (you can blend it in the food processor), along with flour and sour cream.


Tasty Kitchen Blog: Turkey Swedish Meatballs. Guest post by Georgia Pellegrini, recipe submitted by TK member GottaFeedEmAll (panditsgirl).

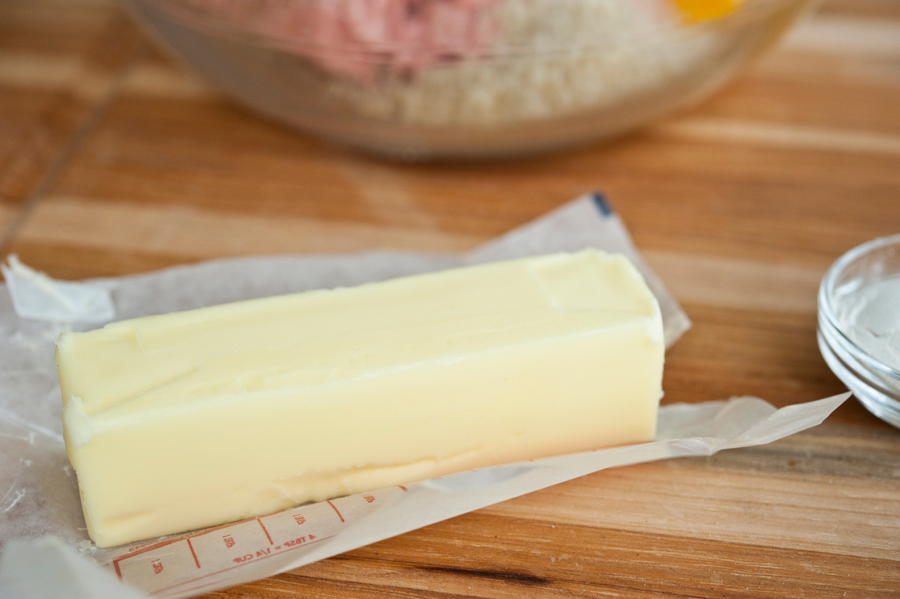
You’ll also need a healthy dose of my friend, butter. You can also use oil, but I love the flavor of butter when browning meat and vegetables.

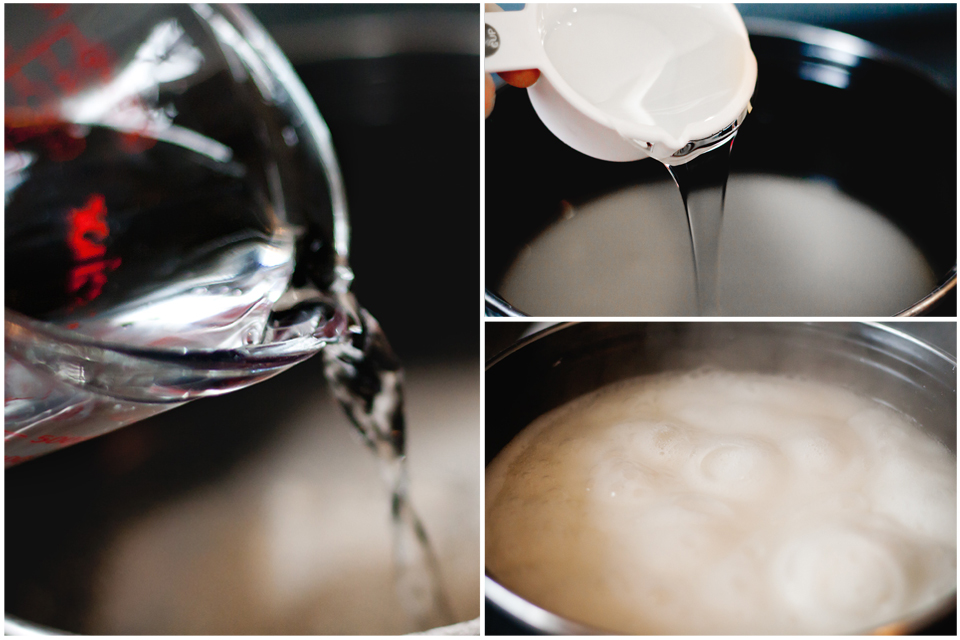
And stock! (Not pictured). You’ll also need beef stock or whatever stock you have on hand.


Tasty Kitchen Blog: Turkey Swedish Meatballs. Guest post by Georgia Pellegrini, recipe submitted by TK member GottaFeedEmAll (panditsgirl).

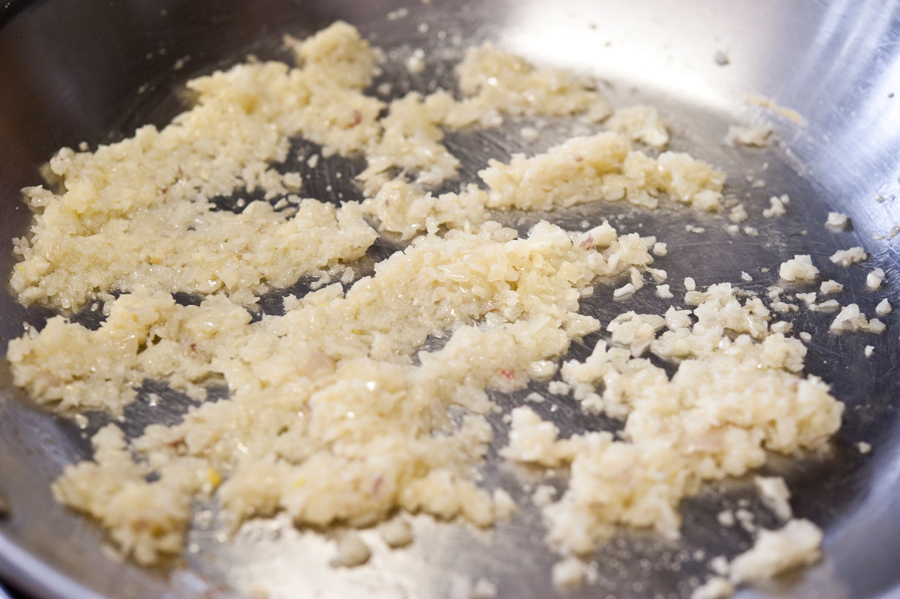
You’ll sweat the onions and garlic in a bit of butter until they’re tender and translucent.


Tasty Kitchen Blog: Turkey Swedish Meatballs. Guest post by Georgia Pellegrini, recipe submitted by TK member GottaFeedEmAll (panditsgirl).

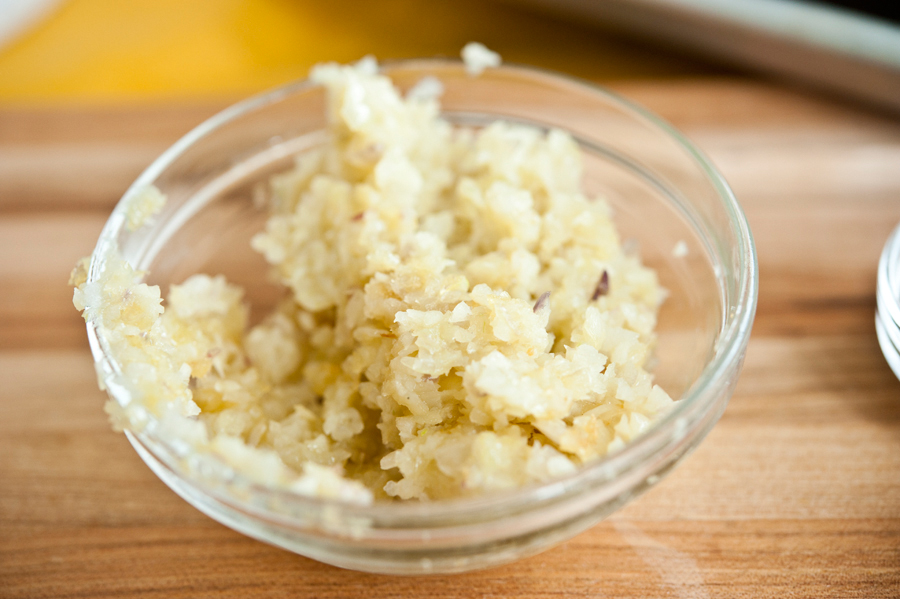
Then you’ll set them aside and let them cool for a few minutes.


Tasty Kitchen Blog: Turkey Swedish Meatballs. Guest post by Georgia Pellegrini, recipe submitted by TK member GottaFeedEmAll (panditsgirl).

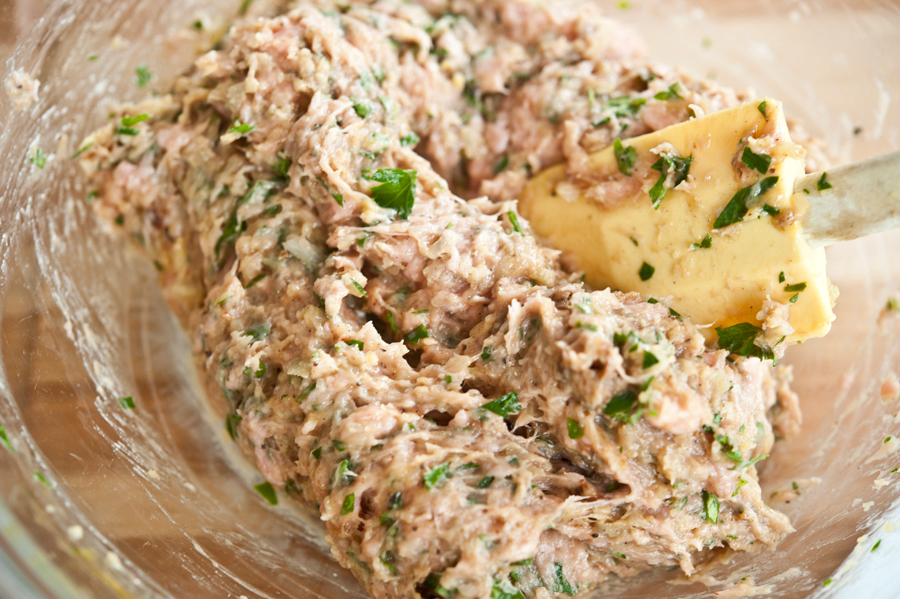
Once the onion has cooled a bit, you mix it all together. I may or may not have added some fresh parsley in there. It was a gray day and I needed some color in my life.


Tasty Kitchen Blog: Turkey Swedish Meatballs. Guest post by Georgia Pellegrini, recipe submitted by TK member GottaFeedEmAll (panditsgirl).

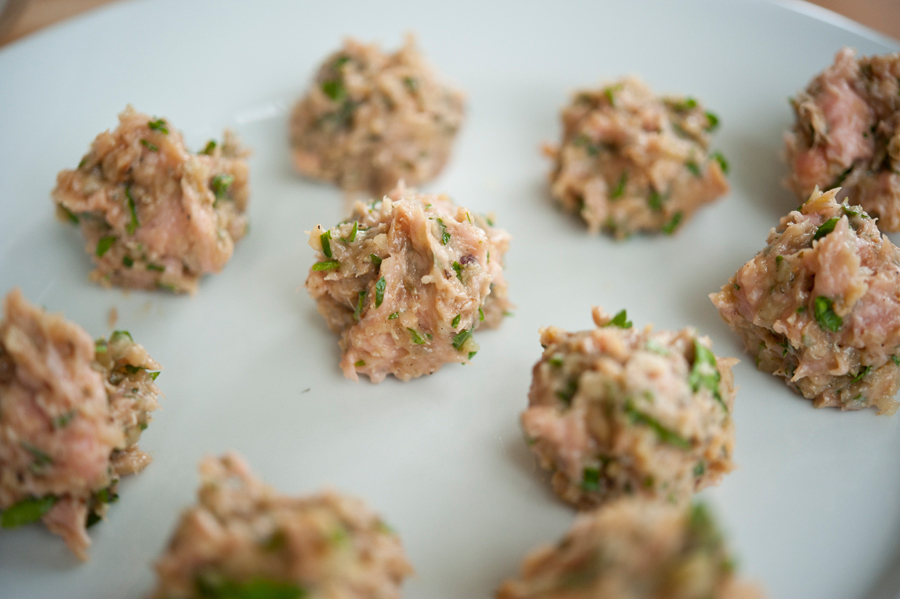
Then you roll it all into precious little balls, about 1-inch in diameter.


Tasty Kitchen Blog: Turkey Swedish Meatballs. Guest post by Georgia Pellegrini, recipe submitted by TK member GottaFeedEmAll (panditsgirl).

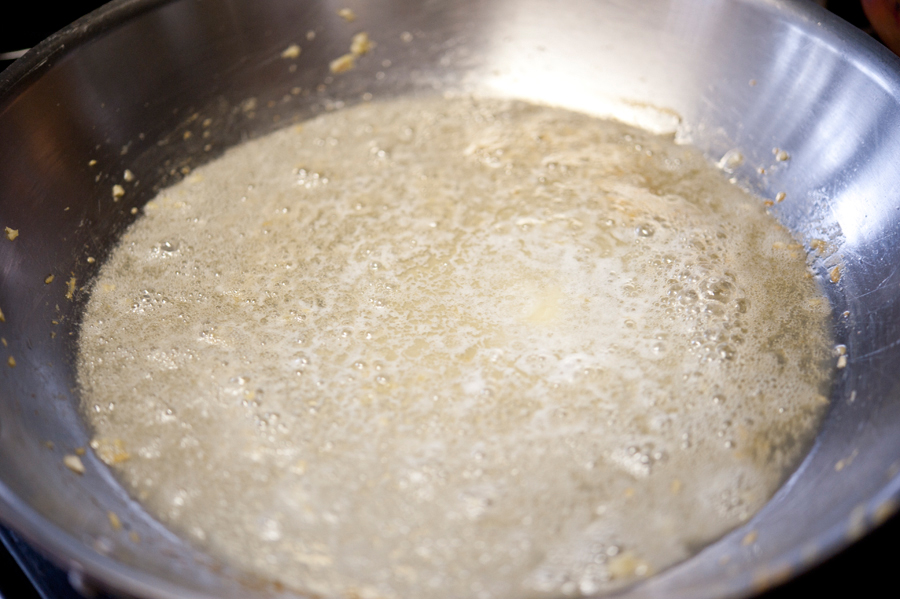
Next, I diverged from the recipe a bit, because I wanted to make this a one-pan meal, but you could also bake these as the recipe suggests. Or you could get some butter bubbling like I did. It depends on your mood, really.


Tasty Kitchen Blog: Turkey Swedish Meatballs. Guest post by Georgia Pellegrini, recipe submitted by TK member GottaFeedEmAll (panditsgirl).

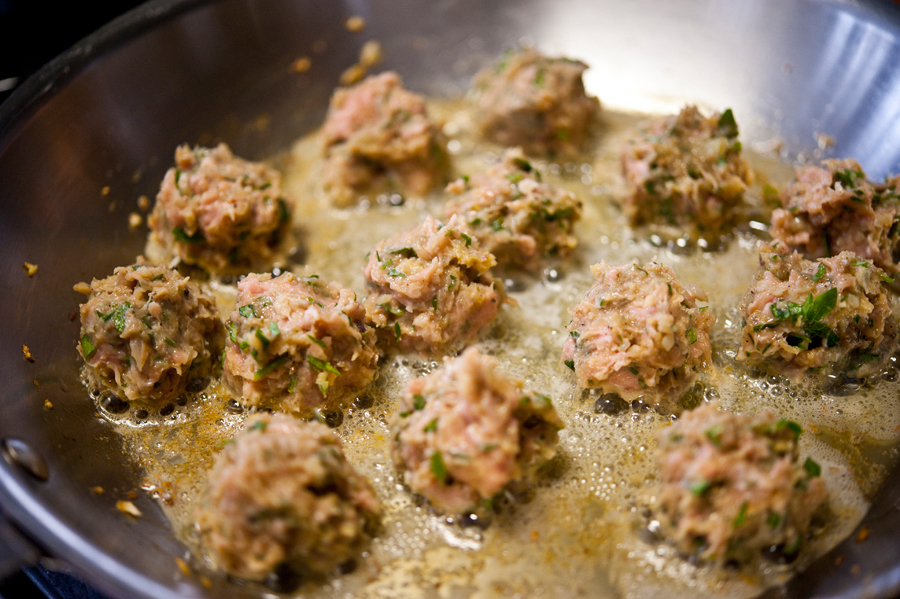
Brown these meatballs in batches, giving them a turn every so often so that they stay round. You don’t need to cook them through, since they will go back into the sauce in just a moment. Simply brown on all sides, then remove with a slotted spoon to a dish. Or like I said, you could bake them.


Tasty Kitchen Blog: Turkey Swedish Meatballs. Guest post by Georgia Pellegrini, recipe submitted by TK member GottaFeedEmAll (panditsgirl).

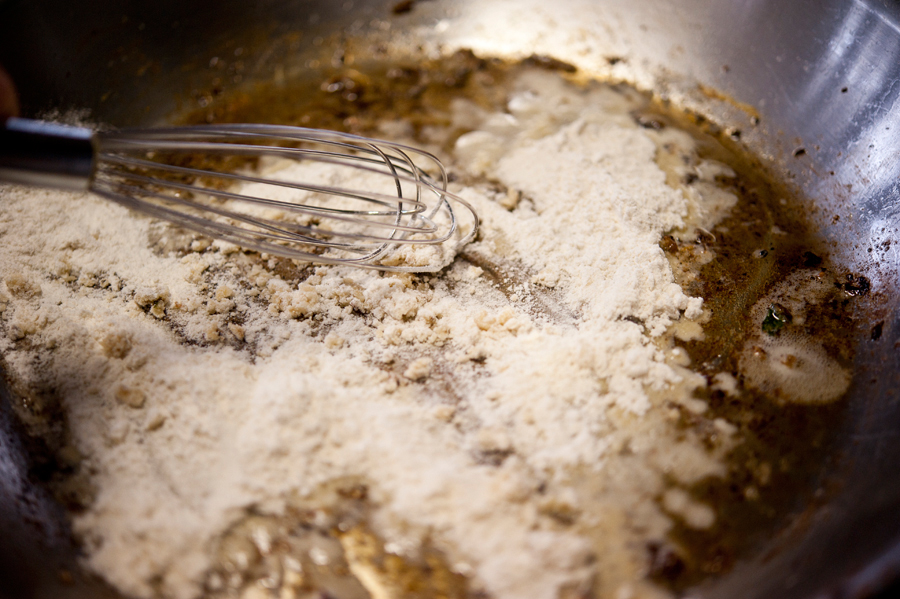
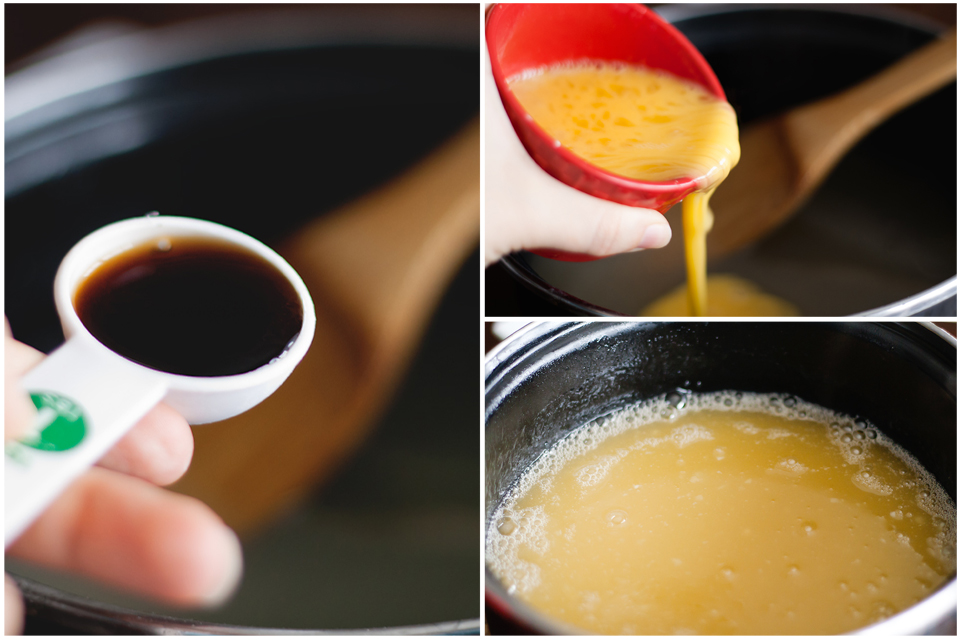
Next you make a roux. I noticed GottaFeedEmAll did something nifty by simply shaking the flour and stock together in a jar. I just tossed the flour into the pan grease though and whisked.


Tasty Kitchen Blog: Turkey Swedish Meatballs. Guest post by Georgia Pellegrini, recipe submitted by TK member GottaFeedEmAll (panditsgirl).

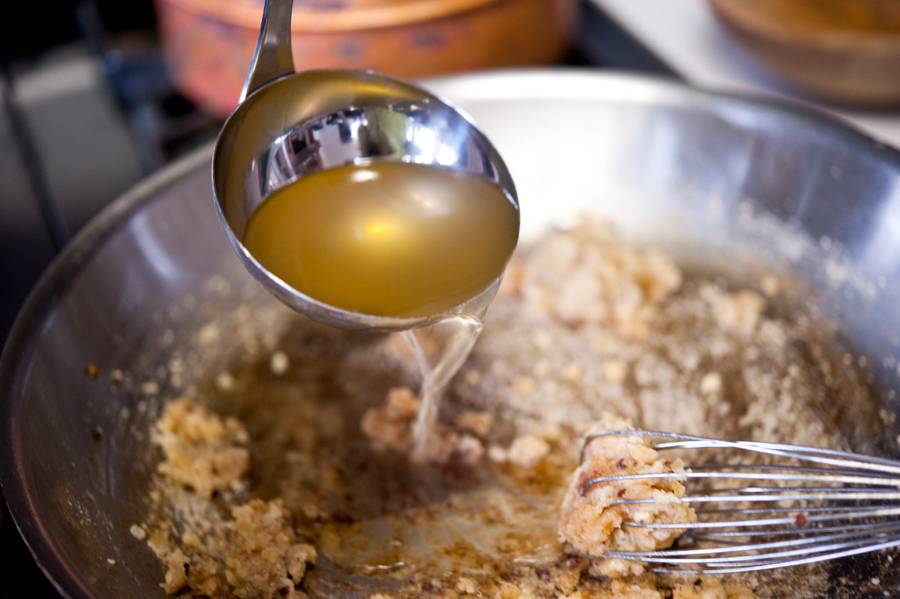
It will become brown and cook for a few minutes, and that’s when you can add the stock and continue to whisk.


Tasty Kitchen Blog: Turkey Swedish Meatballs. Guest post by Georgia Pellegrini, recipe submitted by TK member GottaFeedEmAll (panditsgirl).

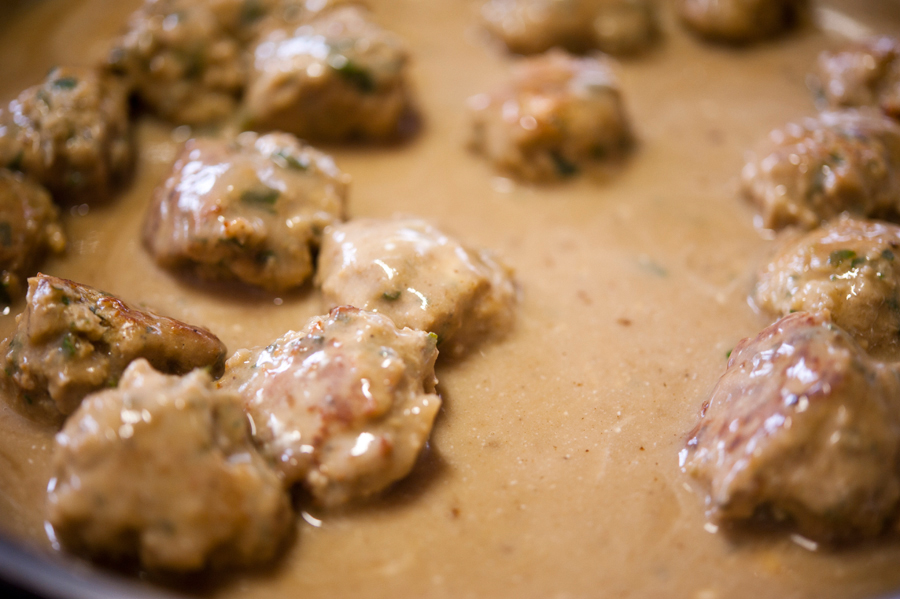
As you whisk you’ll see it begin to thicken and the lumps will disappear. That’s when you add the meatballs back in and let them simmer and cook while the sauce reduces.

I should also note that I added an additional cup of stock than what the recipes says. It could be because I didn’t use the shaker method that I felt it was too thick. So if you decide to use the pan method, you’ll need some extra stock. I also find it helps to warm the stock before adding it to the flour. Extra gravy never hurt anyone, I say.


Tasty Kitchen Blog: Turkey Swedish Meatballs. Guest post by Georgia Pellegrini, recipe submitted by TK member GottaFeedEmAll (panditsgirl).

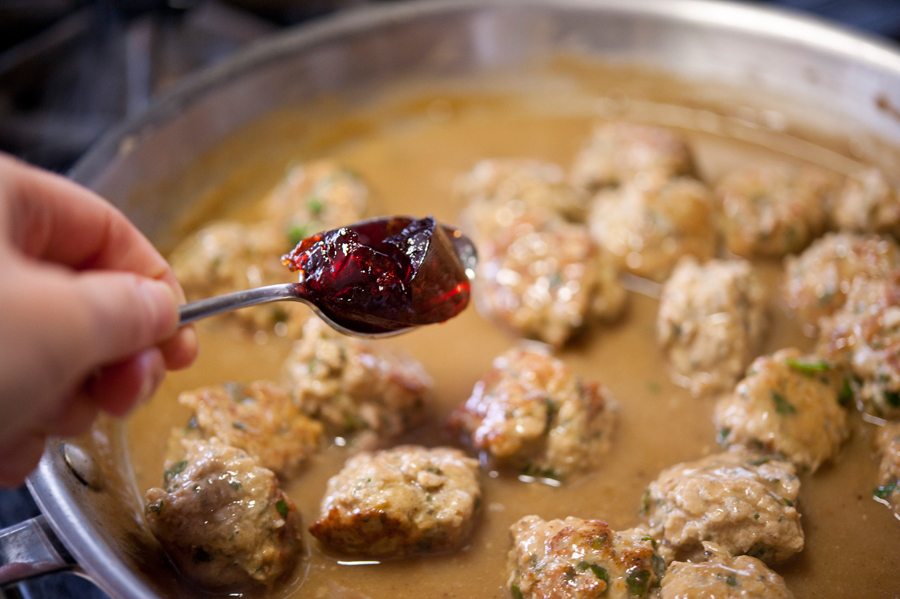
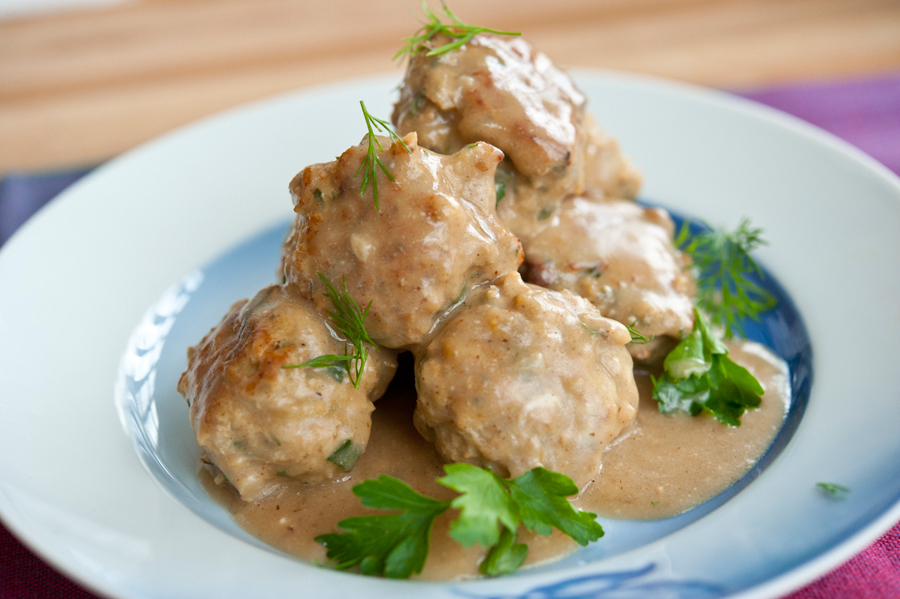
If you want to really go Ikea-style here, you could also add a bit of red currant jelly, raspberry jelly, or lingonberry sauce right into the mixture. It gives it a hint of sweetness, which I like. You could also just serve it on the side.


Tasty Kitchen Blog: Turkey Swedish Meatballs. Guest post by Georgia Pellegrini, recipe submitted by TK member GottaFeedEmAll (panditsgirl).

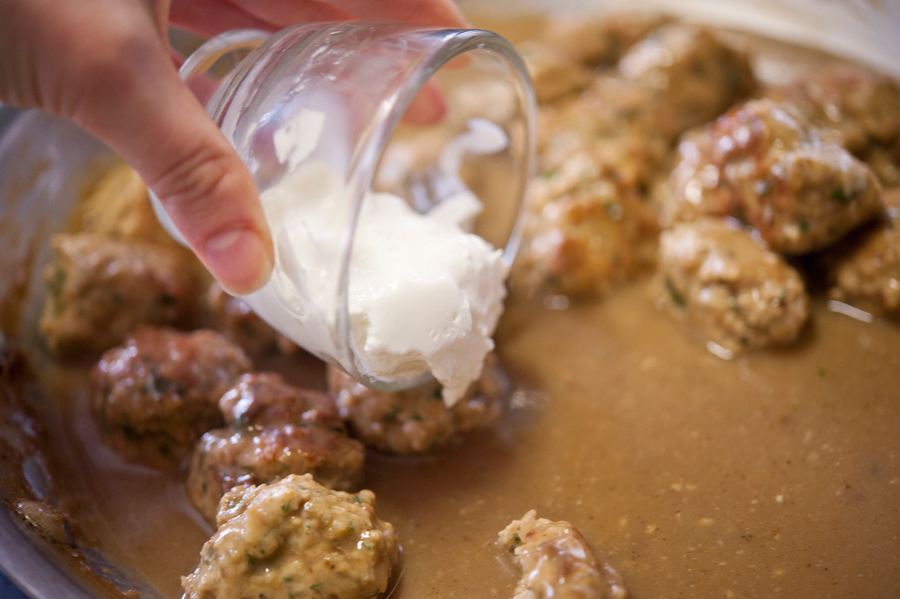
Once everything is cooked through, you turn off the heat and whisk in the sour cream. You won’t want to cook it much after that. Or if you’re not a fan of sour cream, thick plain yogurt would also be great.


Tasty Kitchen Blog: Turkey Swedish Meatballs. Guest post by Georgia Pellegrini, recipe submitted by TK member GottaFeedEmAll (panditsgirl).

It will lighten your sauce and give it a bit of a tang.


Tasty Kitchen Blog: Turkey Swedish Meatballs. Guest post by Georgia Pellegrini, recipe submitted by TK member GottaFeedEmAll (panditsgirl).

And there you have it! Ikea would be proud.

Thanks to TK member GottaFeedEmAll for the recipe and inspiration!

 
Here are some other mini meatball recipes here on TK:

Baked Turkey Teriyaki Meatballs by CookinCanuck

Family Favorite Swedish Meatballs by AngieN24

Swedish Meatballs by Mama-M

Cheesy Turkey Meatballs by MommieCooks


Printable Recipe

Turkey Swedish Meatballs

4.00 Mitt(s) 3 Rating(s)3 votes, average: 4.00 out of 53 votes, average: 4.00 out of 53 votes, average: 4.00 out of 53 votes, average: 4.00 out of 53 votes, average: 4.00 out of 5

Prep Time:

Cook Time:

Difficulty: Easy

Servings: 6

6
x

Print Options

Page size Letter 3x5 4x6
Text Size Small Medium Large
Content Include description
Include prep time, etc.
Show image

Description

I came up with this recipe as a way to lighten up the original dish. Nobody in my family even realized they were eating turkey!

Ingredients

  • FOR THE MEATBALLS:
  • 1 Tablespoon Olive Oil
  • ½ cups Minced Fresh Onion
  • 2 cloves Garlic, Minced
  • 20 ounces, weight Lean Ground Turkey
  • 1 whole Egg
  • ½ cups Dry Bread Crumbs
  • 1 Tablespoon Worcestershire Sauce
  • ½ Tablespoons Dried Parsley
  • 1 teaspoon Ground Allspice
  • ¼ teaspoons Ground Nutmeg
  • FOR THE SAUCE:
  • 14-½ ounces, fluid Low Sodium Beef Broth
  • 3 Tablespoons All-purpose Flour
  • 1 Tablespoon Worcestershire Sauce
  • ½ Tablespoons Dried Parsley
  • ¼ teaspoons Ground Black Pepper
  • ½ teaspoons Salt, Or To Taste
  • ¼ cups Light Sour Cream

Preparation Instructions

For the meatballs:

Preheat oven to 350ºF.

In a small skillet, heat olive oil over medium heat. Add onion and garlic, saute 2-3 minutes. Let cool 5 minutes.

In a medium mixing bowl, combine turkey, onions and garlic, egg, breadcrumbs, Worcestershire sauce, parsley, allspice, and nutmeg. Shape meat mixture into 1″ balls and place in a baking dish. Bake 25-30 minutes, or until cooked through.

For the sauce:

Pour beef broth and flour into a jar with a tight fitting lid. Shake vigorously until flour is dissolved.

Pour beef broth mixture into a large skillet with a lid and add Worcestershire and parsley, black pepper, and salt to taste. Heat to a boil over medium-high heat, stirring frequently. Reduce heat to medium and simmer until thickened, 2-3 minutes, stirring occasionally. Reduce heat to medium-low and stir in sour cream.

Add meatballs and cover. Simmer 10-15 minutes, stirring occasionally. Serve over egg noodles, if desired.


_______________________________________

There’s so much to say about Georgia, we don’t know where to start. Leaving Wall Street for the French Culinary Institute, followed by a stint at the Gramercy Tavern and La Chassagnette in France, her passion for food and food traditions are evident and inspiring. Visit her site at Georgia Pellegrini, where you’ll find more recipes, photos, learn all about her wonderful book Food Heroes, and enjoy her latest adventures.


Profile photo of georgiapellegrini

Twice-Baked Stuffed Butternut Squash

Posted by in Step-by-Step Recipes

Tasty Kitchen Blog: Twice-Baked Butternut Squash with Quinoa, Pecans and Parmesan. Guest post by Georgia Pellegrini, recipe submitted by TK member Jess of Inquiring Chef.

 
Seeing as superfood quinoa is all the rage these days, I was excited to try this Twice-Baked Butternut Squash with Quinoa, Pecans, and Parmesan recipe from TK member Jess. This deliciously comforting dish incorporates the season’s sweet butternut squash with cheese, pecans, and of course, the all-mighty quinoa.


Tasty Kitchen Blog: Twice-Baked Butternut Squash with Quinoa, Pecans and Parmesan. Guest post by Georgia Pellegrini, recipe submitted by TK member Jess of Inquiring Chef.

To make it, you will need: butternut squash, salt, pepper, water, uncooked quinoa, pecan halves (roughly chopped and toasted in a pan; I used almonds since I had those on hand), a shallot that has been chopped and sautéed in olive oil, dried oregano, panko breadcrumbs, unsalted butter (melted), and shredded Parmesan.


Tasty Kitchen Blog: Twice-Baked Butternut Squash with Quinoa, Pecans and Parmesan. Guest post by Georgia Pellegrini, recipe submitted by TK member Jess of Inquiring Chef.

After washing the butternut squash, cut length-wise.


Tasty Kitchen Blog: Twice-Baked Butternut Squash with Quinoa, Pecans and Parmesan. Guest post by Georgia Pellegrini, recipe submitted by TK member Jess of Inquiring Chef.

Scoop out the seeds.


Tasty Kitchen Blog: Twice-Baked Butternut Squash with Quinoa, Pecans and Parmesan. Guest post by Georgia Pellegrini, recipe submitted by TK member Jess of Inquiring Chef.

Sprinkle salt and pepper on top …


Tasty Kitchen Blog: Twice-Baked Butternut Squash with Quinoa, Pecans and Parmesan. Guest post by Georgia Pellegrini, recipe submitted by TK member Jess of Inquiring Chef.

And place the squash halves cut-side up in a large baking dish. Pour ¼ inch of water in the bottom of the pan.


Tasty Kitchen Blog: Twice-Baked Butternut Squash with Quinoa, Pecans and Parmesan. Guest post by Georgia Pellegrini, recipe submitted by TK member Jess of Inquiring Chef.

Cover tightly with foil. Bake for 30 minutes, or until tender, in an oven that’s been preheated to 450ºF.


Tasty Kitchen Blog: Twice-Baked Butternut Squash with Quinoa, Pecans and Parmesan. Guest post by Georgia Pellegrini, recipe submitted by TK member Jess of Inquiring Chef.

Meanwhile, prepare the quinoa according to the directions on the box.


Tasty Kitchen Blog: Twice-Baked Butternut Squash with Quinoa, Pecans and Parmesan. Guest post by Georgia Pellegrini, recipe submitted by TK member Jess of Inquiring Chef.

It will turn out fluffy like this.


Tasty Kitchen Blog: Twice-Baked Butternut Squash with Quinoa, Pecans and Parmesan. Guest post by Georgia Pellegrini, recipe submitted by TK member Jess of Inquiring Chef.

Scrape the flesh out of the roasted squash halves, leaving a layer of about ¼ inch.


Tasty Kitchen Blog: Twice-Baked Butternut Squash with Quinoa, Pecans and Parmesan. Guest post by Georgia Pellegrini, recipe submitted by TK member Jess of Inquiring Chef.

Then transfer the squash and cooked quinoa to a mixing bowl.


Tasty Kitchen Blog: Twice-Baked Butternut Squash with Quinoa, Pecans and Parmesan. Guest post by Georgia Pellegrini, recipe submitted by TK member Jess of Inquiring Chef.

Add oregano, toasted pecans …


Tasty Kitchen Blog: Twice-Baked Butternut Squash with Quinoa, Pecans and Parmesan. Guest post by Georgia Pellegrini, recipe submitted by TK member Jess of Inquiring Chef.

Salt …


Tasty Kitchen Blog: Twice-Baked Butternut Squash with Quinoa, Pecans and Parmesan. Guest post by Georgia Pellegrini, recipe submitted by TK member Jess of Inquiring Chef.

And half of the cheese.


Tasty Kitchen Blog: Twice-Baked Butternut Squash with Quinoa, Pecans and Parmesan. Guest post by Georgia Pellegrini, recipe submitted by TK member Jess of Inquiring Chef.

Stir it all to combine!


Tasty Kitchen Blog: Twice-Baked Butternut Squash with Quinoa, Pecans and Parmesan. Guest post by Georgia Pellegrini, recipe submitted by TK member Jess of Inquiring Chef.

In a separate bowl, combine the breadcrumbs, butter, and remaining Parmesan. The breadcrumb topping will look something like this.


Tasty Kitchen Blog: Twice-Baked Butternut Squash with Quinoa, Pecans and Parmesan. Guest post by Georgia Pellegrini, recipe submitted by TK member Jess of Inquiring Chef.

Spoon the squash mixture into the shells, making it as compact as you can.


Tasty Kitchen Blog: Twice-Baked Butternut Squash with Quinoa, Pecans and Parmesan. Guest post by Georgia Pellegrini, recipe submitted by TK member Jess of Inquiring Chef.

Sprinkle the breadcrumb mixture on top. Bake uncovered until the tops are browned, about 20-25 minutes.


Tasty Kitchen Blog: Twice-Baked Butternut Squash with Quinoa, Pecans and Parmesan. Guest post by Georgia Pellegrini, recipe submitted by TK member Jess of Inquiring Chef.

You now have a flavorful and healthy dish to serve to your family. It is absolutely delicious! For more beautiful recipes from Jess, visit her Inquiring Chef website! She’s a Kansas native currently residing in Bangkok, and her site is just bursting with flavors from all over the world.


Printable Recipe

Twice-Baked Butternut Squash with Quinoa, Pecans and Parmesan

See post on inquiringchef’s site!
5.00 Mitt(s) 2 Rating(s)2 votes, average: 5.00 out of 52 votes, average: 5.00 out of 52 votes, average: 5.00 out of 52 votes, average: 5.00 out of 52 votes, average: 5.00 out of 5

Prep Time:

Cook Time:

Difficulty: Easy

Servings: 8

8
x

Print Options

Page size Letter 3x5 4x6
Text Size Small Medium Large
Content Include description
Include prep time, etc.
Show image

Description

Stuffed butternut squash with quinoa, pecans and Parmesan cheese. A pretty side dish for a holiday meal.

Ingredients

  • 4 pounds Pounds Of Butternut Squash (4 Pounds Is Roughly 2 Regular, Or 4 Small)
  • Salt And Pepper
  • 1-⅓ cup Water
  • ⅔ cups Uncooked Quinoa
  • ⅔ cups Pecan Halves, Roughly Chopped
  • 2 teaspoons Olive Oil
  • 1 whole Small Shallot, Minced
  • ½ teaspoons Dried Oregano
  • ¼ teaspoons Salt
  • ¾ cups Panko Breadcrumbs
  • 3 Tablespoons Unsalted Butter, melted
  • 4 ounces, weight Shredded Parmesan Cheese

Preparation Instructions

Preheat the oven to 450 F. Wash the outside of the squash. Cut the squash in half lengthwise and scoop out the seeds (I use an ice cream scoop). Place the squash halves cut-side up in a large baking dish. Sprinkle the surface of the squash with salt and pepper. Pour ¼ inch of water in the bottom of the pan and cover the pan tightly with foil. Bake the squash until it is tender when pierced with a fork, 30-50 minutes depending on the size (my little ones were done in 30 minutes). Remove from the oven, discard foil and allow the squash to cool.

Reduce oven temperature to 400 F.

Meanwhile, cook the quinoa by bringing 1 and ⅓ cup water to boil in a small pot. Add the quinoa, reduce heat to a simmer and put a lid on the pot. Simmer for 15 minutes. Remove the pan from the heat.

Heat a skillet over medium heat. Toast the pecans until fragrant, about 5 minutes. Set pecans aside in a bowl. In the same skillet over medium heat, combine the olive oil and shallots. Cook, stirring frequently, until the shallots soften, about 5 minutes. Remove the skillet from the heat.

Using a spoon or an ice cream scoop, gently scrape the flesh out of the roasted squash halves, leaving a layer of about ¼ inch of squash remaining in the shell. (Leave the squash shells in the baking dish.)

In a large bowl combine the squash, cooked quinoa, pecans, shallot, oregano and salt. In another small bowl whisk together the panko breadcrumbs and butter. Add 2 tablespoons of the Parmesan cheese to the panko. Add the remaining Parmesan to the squash mixture and stir to combine all of the ingredients.

Gently spoon the squash mixture into the squash shells. Sprinkle the panko and Parmesan mixture over the top. Return squash to the oven and bake, uncovered, until the tops are golden brown, 20-25 minutes.


_______________________________________

There’s so much to say about Georgia, we don’t know where to start. Leaving Wall Street for the French Culinary Institute, followed by a stint at the Gramercy Tavern and La Chassagnette in France, her passion for food and food traditions are evident and inspiring. Visit her site at Georgia Pellegrini, where you’ll find more recipes, photos, learn all about her wonderful books Girl Hunter and Food Heroes, and enjoy her latest adventures.


Profile photo of Faith (An Edible Mosaic)

Two Quick Solutions for a Sudden Cookie Fix

Posted by in Baking, Step-by-Step Recipes

Have a cookie craving that just won’t go away? We’re bringing back this post featuring two quick 5-ingredient cookies! As a bonus, one of them is gluten-free. You know you want some. In fact, they’re so easy, why not make both? Time to get baking!

 
Tasty Kitchen Blog: Gluten Free Peanut Butter Cookies and Easy Nutella Cookies with Sea Salt

 
Let’s face it, some days you just need a quick cookie fix.

Maybe your kid is having a party at school, or maybe it’s a co-worker’s birthday at the office. Or maybe it’s just been a really long week, and you’re in the mood for a cookie or two without having to spend all day in the kitchen. Tasty Kitchen to the rescue!

I did a super quick search and found not one, but two delicious cookie recipes on Tasty Kitchen; each has just 5 ingredients and can be made in less than 30 minutes from start to finish. That’s what I call a fabulous quick cookie fix.

First up is Tasty Kitchen member Desserts by Juliette’s recipe for Gluten-Free Peanut Butter Cookies. There’s just something about a plate of peanut butter cookies and a tall glass of milk that is reminiscent of being a kid…maybe that’s why almost everyone I know is crazy about them! Juliette’s version is really lovely; it lets the flavor of peanut butter shine through, and a touch of sea salt finishes them perfectly.

Like I said, they couldn’t be easier to make, so let’s get started!


Tasty Kitchen Blog: Gluten Free Peanut Butter Cookies and Easy Nutella Cookies with Sea Salt

To make them, you’ll need: peanut butter, sugar, an egg, vanilla, and coarse sea salt. And yes, I know that is a crazy-big bottle of vanilla!

(Don’t forget to preheat your oven to 350F and line a baking sheet with parchment paper!)


Tasty Kitchen Blog: Gluten Free Peanut Butter Cookies and Easy Nutella Cookies with Sea Salt

Ok, so dump everything into a bowl …


Tasty Kitchen Blog: Gluten Free Peanut Butter Cookies and Easy Nutella Cookies with Sea Salt

And beat it up! (I used a handheld electric mixer for this; no need to dirty a stand mixer.)


Tasty Kitchen Blog: Gluten Free Peanut Butter Cookies and Easy Nutella Cookies with Sea Salt

Spoon the dough by the tablespoon onto the prepared baking sheet, leaving about 2 inches between each (I got 12 cookies on 1 half-sheet pan). Oh, and I want to mention, I find that a 1-tablespoon-sized ice cream scoop is the easiest (and fastest!) way to scoop out the dough.


Tasty Kitchen Blog: Gluten Free Peanut Butter Cookies and Easy Nutella Cookies with Sea Salt

Flatten each dough ball slightly with a fork, making a cross-hatch pattern.


Tasty Kitchen Blog: Gluten Free Peanut Butter Cookies and Easy Nutella Cookies with Sea Salt

And then sprinkle the tops with sea salt. (They’re looking pretty good already, right?)


Tasty Kitchen Blog: Gluten Free Peanut Butter Cookies and Easy Nutella Cookies with Sea Salt

Bake until the cookies are golden brown on the bottom, set along the outside, and a touch doughy in the center, because they’ll harden as they cool. (This took about 8 to 9 minutes in my oven.) Cool the cookies slightly on the tray before removing. I got exactly 28 cookies out of this recipe.


Tasty Kitchen Blog: Gluten Free Peanut Butter Cookies and Easy Nutella Cookies with Sea Salt

Such a delicious classic.

Those cookies come together so easily and you might just want to make another quick batch. If you do, Tasty Kitchen member Monique of Ambitious Kitchen has you covered with her recipe for Easy Nutella Cookies with Sea Salt. Nutella + sea salt = a very tasty combo indeed.


Tasty Kitchen Blog: Gluten Free Peanut Butter Cookies and Easy Nutella Cookies with Sea Salt

To whip them up, get out Nutella, flour, brown sugar, an egg, and coarse sea salt.

(Don’t forget to preheat your oven to 350F and line a baking sheet with parchment paper!)


Tasty Kitchen Blog: Gluten Free Peanut Butter Cookies and Easy Nutella Cookies with Sea Salt

You know the drill: dump everything into a bowl …


Tasty Kitchen Blog: Gluten Free Peanut Butter Cookies and Easy Nutella Cookies with Sea Salt

And again beat it with your handheld electric mixer. Once it’s mixed, cover the bowl and stick it in the freezer to chill for 10 minutes. Go brew a pot of coffee because in about 20 minutes, you’re going to be glad you did.


Tasty Kitchen Blog: Gluten Free Peanut Butter Cookies and Easy Nutella Cookies with Sea Salt

Roll the dough into 1-inch balls (I used my 1-tablespoon-sized ice cream scoop again), and line the balls up at least 2 inches apart on the prepared baking sheet.


Tasty Kitchen Blog: Gluten Free Peanut Butter Cookies and Easy Nutella Cookies with Sea Salt

At this point I sprinkled on the sea salt, but you could wait to do it until after the cookies are baked.


Tasty Kitchen Blog: Gluten Free Peanut Butter Cookies and Easy Nutella Cookies with Sea Salt

Pop the cookies into the oven and bake until they’re set along the outside and slightly doughy in the center (this took about 8 to 9 minutes in my oven). Remember to cool the cookies slightly on the tray before removing! I got exactly 22 cookies from this recipe.


Tasty Kitchen Blog: Gluten Free Peanut Butter Cookies and Easy Nutella Cookies with Sea Salt

Now grab a hot cup of coffee (or a cold glass of milk) and enjoy a couple of those beauties.


Tasty Kitchen Blog: Gluten Free Peanut Butter Cookies and Easy Nutella Cookies with Sea Salt

Or serve them up together! I think these two kinds of cookies complement each other in a fun, contrasting sort of way. Peanut butter and Nutella are delicious together (as anyone who has ever eaten a peanut butter and Nutella sandwich can attest to!). Plus the sea salt on both cookies pulls the two together.

But either kind of cookie is fabulous enough to stand alone if you just want to try one kind. The peanut butter cookies are perfect if you’re baking for a gluten-free crowd, and the Nutella cookies are great if you’re baking for people with peanut butter allergies! There is something for everyone.

How is that for a perfect quick cookie fix?

Now go ahead and grab that cup of coffee (or tall glass of milk). I’ll share a couple cookies with you.


Printable Recipe

Gluten Free Peanut Butter Cookies

See post on Desserts by Juliette’s site!
5.00 Mitt(s) 3 Rating(s)3 votes, average: 5.00 out of 53 votes, average: 5.00 out of 53 votes, average: 5.00 out of 53 votes, average: 5.00 out of 53 votes, average: 5.00 out of 5

Prep Time:

Cook Time:

Difficulty: Easy

Servings: 12

12
x

Print Options

Page size Letter 3x5 4x6
Text Size Small Medium Large
Content Include description
Include prep time, etc.
Show image

Description

These peanut butter cookies taste absolutely divine and you would never be able to guess that they are flourless and gluten-free. They are creamy and delicious, definitely worth trying out.

Ingredients

  • 1 cup Creamy Peanut Butter
  • 1 cup Granulated Sugar
  • 1  Egg
  • 1 teaspoon Vanilla Extract
  • Coarse Sea Salt

Preparation Instructions

1. Preheat oven to 350ºF. Line a baking sheet with parchment paper and set aside.
2. Beat peanut butter, sugar, egg, and vanilla until fully incorporated. Spoon 1 tablespoon of mixture 1 inch apart on the baking sheet. Flatten with fork, making a crosshatch pattern on the cookies. Sprinkle coarse salt over the top of the cookies
3. Bake for 10 minutes; they should still be soft to the touch when removed from oven. Let cool.


Printable Recipe

Easy Nutella Cookies with Sea Salt

See post on Monique of Ambitious Kitchen’s site!
4.80 Mitt(s) 5 Rating(s)5 votes, average: 4.80 out of 55 votes, average: 4.80 out of 55 votes, average: 4.80 out of 55 votes, average: 4.80 out of 55 votes, average: 4.80 out of 5

Prep Time:

Cook Time:

Difficulty: Easy

Servings: 12

12
x

Print Options

Page size Letter 3x5 4x6
Text Size Small Medium Large
Content Include description
Include prep time, etc.
Show image

Description

Easy, fudgy 5-ingredient Nutella Cookies with Sea Salt. In your belly in 25 minutes!

Ingredients

  • 1 cup Nutella
  • 2 Tablespoons Brown Sugar
  • 1  Egg
  • ½ cups Plus 1 Tablespoon Flour
  • Coarse Sea Salt, For Sprinkling

Preparation Instructions

Preheat oven to 350ºF.

Combine all ingredients except salt in a large bowl with electric mixer until well combined. Place dough in freezer for 10 minutes.

After 10 minutes, roll dough into approximately 1-inch balls, place on ungreased baking sheet at least 2 inches apart and bake for 8-10 minutes. Remove from oven and let cool for a few minutes until cookies are set, then very carefully transfer to a wire rack. Generously sprinkle with sea salt.


_______________________________________

Faith Gorsky is the writer, receipt developer, photographer, and food stylist behind the blog An Edible Mosaic, and the cookbook author of An Edible Mosaic: Middle Eastern Fare with Extraordinary Flair (Tuttle Publishing; November 2012). She was born, raised, and spent most of her life in Upstate New York, and she currently lives in Kuwait. When it comes to cooking, her favorite thing to do is go into the kitchen hungry, open the fridge, and start creating. She loves to travel, especially to places steeped in rich culture and history. She also enjoys reading (cookbooks mostly), vintage shopping (especially in old markets), watching movies (of all genres), and is enamored with ancient cultures (especially Rome and Egypt.


Profile photo of Amber {Sprinkled With Flour}

Vanilla Crumb Pie

Posted by in Baking, Step-by-Step Recipes

Tasty Kitchen Blog Vanilla Crumb Pie. Guest post by Amber Potter of Sprinkled with Flour, recipe submitted by TK member Tonya of 4 Little Fergusons.

 
When it’s a snow day in my area and I’m trapped in the house with too much time on my hands and nowhere to go, I invariably start drooling over recipes online. Of course, this usually leads to some form of baked good being made, which also leads to way too much of said dessert being eaten by myself in one day. There’s only so much temptation a person can stand, when trapped in the house on a cold, snowy day. Oh, well. That’s what shoveling the driveway is for, right?

This Vanilla Crumb Pie recipe, submitted by Tonya (Tk member 4littlefergusons), is described as a Snickerdoodle cookie in pie form. I was hooked right away and knew I wanted to try it. I’m so glad I did! This pie is filled with a warm, sweet, vanilla-like pudding, then topped with a delicious, buttery crumble topping. Yes, I’m serious. It is so yummy, and chances are you already have the ingredients in your pantry. Let’s get started.


Tasty Kitchen Blog Vanilla Crumb Pie. Guest post by Amber Potter of Sprinkled with Flour, recipe submitted by TK member Tonya of 4 Little Fergusons.

For the filling you’ll need sugar, flour, water, corn syrup, salt, cornstarch, eggs, vanilla, butter, baking soda and cream of tartar. You’ll need 2 whole pie crusts, either store bought or your favorite recipe. I like to use this pie crust recipe. First, prepare your crusts, place crusts in two pie pans and set aside. 


Tasty Kitchen Blog Vanilla Crumb Pie. Guest post by Amber Potter of Sprinkled with Flour, recipe submitted by TK member Tonya of 4 Little Fergusons.

In a medium bowl combine 1 cup of butter, 2 cups of flour and 1/2 cup sugar for the crumb topping.


Tasty Kitchen Blog Vanilla Crumb Pie. Guest post by Amber Potter of Sprinkled with Flour, recipe submitted by TK member Tonya of 4 Little Fergusons.

Add the baking soda and cream of tartar.


Tasty Kitchen Blog Vanilla Crumb Pie. Guest post by Amber Potter of Sprinkled with Flour, recipe submitted by TK member Tonya of 4 Little Fergusons.

Use a pastry cutter or fork to combine the ingredients, working the butter into the flour until mixture resembles coarse crumbs. Set aside.


Tasty Kitchen Blog Vanilla Crumb Pie. Guest post by Amber Potter of Sprinkled with Flour, recipe submitted by TK member Tonya of 4 Little Fergusons.

In a saucepan combine 1 cup sugar, 2 tablespoon flour, a pinch of salt and 1 tablespoon cornstarch. 


Tasty Kitchen Blog Vanilla Crumb Pie. Guest post by Amber Potter of Sprinkled with Flour, recipe submitted by TK member Tonya of 4 Little Fergusons.

Add 2 cups of water and 1 cup corn syrup. Bring to a boil then remove from heat and allow to cool for a bit.


Tasty Kitchen Blog Vanilla Crumb Pie. Guest post by Amber Potter of Sprinkled with Flour, recipe submitted by TK member Tonya of 4 Little Fergusons.

Once the mixture has cooled down, add the vanilla and eggs to the mixture and combine. Be sure your mixture isn’t still too hot. Scrambled Egg Crumb Pie doesn’t have the same ring to it.


Tasty Kitchen Blog Vanilla Crumb Pie. Guest post by Amber Potter of Sprinkled with Flour, recipe submitted by TK member Tonya of 4 Little Fergusons.

Split the mixture evenly between your two pie crusts.


Tasty Kitchen Blog Vanilla Crumb Pie. Guest post by Amber Potter of Sprinkled with Flour, recipe submitted by TK member Tonya of 4 Little Fergusons.

Spread the crumb topping evenly over the top of the pies. Bake at 350ºF for 20-30 minutes, or until the topping is golden and the center of the pie is firm. If the pie still jiggles quite a bit, cook for a bit longer until it is set.


Tasty Kitchen Blog Vanilla Crumb Pie. Guest post by Amber Potter of Sprinkled with Flour, recipe submitted by TK member Tonya of 4 Little Fergusons.

Serve warm and enjoy!


Tasty Kitchen Blog Vanilla Crumb Pie. Guest post by Amber Potter of Sprinkled with Flour, recipe submitted by TK member Tonya of 4 Little Fergusons.

 
Recipe notes: This recipe can easily be cut in half if you only want to make one pie. I actually made one pie crust but the full amount of filling to fill my deeper pie dish. It took about 50 minutes to cook until fully set baking it this way. If your crust starts to get too brown, just cover the edges with some foil.

Thank you so much Tonya for sharing this delicious recipe! You can find many more tempting recipes on Tonya’s blog, 4 Little Fergusons, where she writes about life as a midwest mom.


Printable Recipe

Vanilla Crumb Pie

See post on 4littleFergusons’s site!
5.00 Mitt(s) 7 Rating(s)7 votes, average: 5.00 out of 57 votes, average: 5.00 out of 57 votes, average: 5.00 out of 57 votes, average: 5.00 out of 57 votes, average: 5.00 out of 5

Prep Time:

Cook Time:

Difficulty: Easy

Servings: 12

12
x

Print Options

Page size Letter 3x5 4x6
Text Size Small Medium Large
Content Include description
Include prep time, etc.
Show image

Description

This pie is really simple, has simple flavors and reminds me of a mix between custard, Snickerdoodles and sugar cookies. Recipe makes 2 pies.

Ingredients

  • 2 whole Pie Crusts, Store Bought Or Your Favorite Recipe
  • FOR THE FILLING:
  • 1 cup Sugar
  • 2 cups Water
  • 2 Tablespoons Flour, Heaping
  • 1 cup Corn Syrup
  • 1 pinch Salt
  • 1 Tablespoon Cornstarch
  • 1 Tablespoon Vanilla
  • 2 whole Eggs
  • FOR THE CRUMB TOPPING:
  • 2 cups Flour
  • ½ cups Sugar
  • 1 teaspoon Baking Soda
  • 1 teaspoon Cream Of Tartar
  • 1 cup Butter

Preparation Instructions

First, prepare your crusts. I recommend that you make my Easy Push Crust, found here on Tasty Kitchen. Put crusts into 2 pie pans and set aside.

For the filling, in a saucepan, mix together the sugar, water, flour, corn syrup, salt and cornstarch. Bring to a boil over medium heat. Then immediately remove the pan from heat and allow mixture to cool a bit. Add the vanilla and eggs and mix to combine. Split the mixture evenly between your 2 crusts.

Mix together crumb topping ingredients and evenly divide between the 2 pies.

Bake at 350ºF for 20-30 minutes or until the top is golden brown and the center has firmed up a bit.

Serve warm. Delicious!


Printable Recipe

Sylvia’s Perfect Pie Crust

See post on Ree | The Pioneer Woman’s site!
4.77 Mitt(s) 26 Rating(s)26 votes, average: 4.77 out of 526 votes, average: 4.77 out of 526 votes, average: 4.77 out of 526 votes, average: 4.77 out of 526 votes, average: 4.77 out of 5

Prep Time:

Cook Time:

Difficulty: Easy

Servings: 1

1
x

Print Options

Page size Letter 3x5 4x6
Text Size Small Medium Large
Content Include description
Include prep time, etc.
Show image

Description

I really love flaky pie crust, and it’s always been a difficult quality for me to achieve, despite most people’s claims that their recipe is THE flakiest pie crust in existence. This recipe, sent to me by my friend Sylvia, is absolutely, positively a keeper.

Ingredients

  • 1-½ cup Crisco (vegetable Shortening)
  • 3 cups All-purpose Flour
  • 1 whole Egg
  • 5 Tablespoons Cold Water
  • 1 Tablespoon White Vinegar
  • 1 teaspoon Salt

Preparation Instructions

In a large bowl, with a pastry cutter, gradually work the Crisco into the flour for about 3 or 4 minutes until it resembles a coarse meal. In a small bowl, beat an egg with a fork and then pour it into the flour/shortening mixture. Add 5 tablespoons of cold water, 1 tablespoon of white vinegar and 1 teaspoon of salt. Stir together gently until all of the ingredients are incorporated.

Separate the dough into thirds. ***Note: Separating it into thirds will result in three thin crusts. If you prefer a more substantial crust, separate it in half.*** Form 3 evenly sized balls of dough and place each dough into a large Ziploc bag. Using a rolling pin, slightly flatten each ball of dough (about ½ inch thick) to make rolling easier later. Seal the bags and place them in the freezer until you need them. (If you will be using it immediately it’s still a good idea to put in the freezer for about 15 to 20 minutes to chill.)

When you are ready to use the dough to make a crust, remove from the freezer and allow to thaw for 15 minutes. On a floured surface roll the dough, starting at the center and working your way out. (Sprinkle some flour over top of the dough if it’s a bit too moist.) If the dough is sticking to the countertop use a metal spatula and carefully scrape it up and flip it over and continue rolling until it’s about ½ inch larger in diameter than your pie pan.

With a spatula, lift the dough carefully from the surface of the counter into the pie pan. Gently press the dough against the corner of the pan. Go around the pie pan pinching and tucking the dough to make a clean edge.


_______________________________________

Amber is a stay at home mom who lives in the heart of the Missouri Ozarks. It’s a long way from where she grew up, in Wales (yes, way over in the U.K.). The recipes in her blog Sprinkled with Flour include her original creations as well as her family recipes. Go check them out!


Profile photo of Natalie | Perry's Plate

Vegetarian Tamales

Posted by in Step-by-Step Recipes

  Everything you’ve heard about tamales is true, folks. Yes, these Mexican culinary wonders are a lot of work, and they take a lot of time. On the bright side, the work isn’t difficult and boy, is it worth it in the end. Eating one tamale after the other (after the other) makes you forget […]

Profile photo of Erica Lea

Via Cappuccino Muffins

Posted by in Baking, Step-by-Step Recipes

  Looking for a way to get your daily dose of caffeine? These muffins are a scrumptious alternative (or addition) to your morning cup. Today’s recipe, brought to us by nancypants, is a wonderful brew of flavors: spicy cinnamon, intense coffee, dark chocolate.       My dad, a coffee enthusiast, especially loved the frosting. “That has…

Profile photo of georgiapellegrini

Vietnamese Chicken Salad

Posted by in Step-by-Step Recipes

  I’m anticipating all of the fresh flavors that come with the warmer months. Mint! Cucumber! Lime! Peppers! I can’t wait. This recipe for Vietnamese Chicken Salad from Tasty Kitchen member LilKim12161 got me very excited about the months to come. It is full of crunch and spice and sweet and tang. You will love […]

Profile photo of Faith (An Edible Mosaic)

Vietnamese Summer Roll Salad

Posted by in Step-by-Step Recipes

  Even though I’m a winter-loving girl, I’m secretly longing for summer’s arrival. Which is pretty much blasphemy around these parts; I’m in snow-country, just about as north as a girl can go. Although spring has just arrived, I’m ready to welcome summer. In fact, I’ll take summer in any form I can get. Even […]